Switch Theme:

Magnetizing the new Tervigon/Tyrannofex kit  [RSS] Share on facebook Share on Twitter Submit to Reddit
»
Author Message
Advert


Forum adverts like this one are shown to any user who is not logged in. Join us by filling out a tiny 3 field form and you will get your own, free, dakka user account which gives a good range of benefits to you:
  • No adverts like this in the forums anymore.
  • Times and dates in your local timezone.
  • Full tracking of what you have read so you can skip to your first unread post, easily see what has changed since you last logged in, and easily see what is new at a glance.
  • Email notifications for threads you want to watch closely.
  • Being a part of the oldest wargaming community on the net.
If you are already a member then feel free to login now.


Made in us
Fresh-Faced New User


Houston, TX

Hey guys! I picked up the new Tervigon/Tyrannofex kit on Sunday. After a brief messing about with some of the bits, I determined that I could build the kit in such a way that I could have a Tervigon and a Tyrannofex at my disposal (just not at the same time).

The first step is to drill out the front limbs to accept magnets. I used some N52 3/16" x 1/16" from K&J Magnetics, so I used a 3/16" bit. The backside of the limb socket is nice and flat so it was no problem getting the bit centered and started.


Don't drill the socket all the way through, leave a bit of a lip for the magnet to rest in.


All of my Tyranids arms are magnetized with the same polarity, so I can swap talons to either side of the model. Here I've marked which side needs to go to the inside in blue sharpie. The magnet is glued in place with super glue from the back side.


Repeat these steps for the other half of the torso.

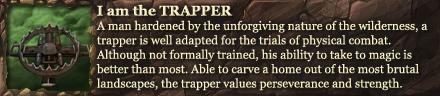
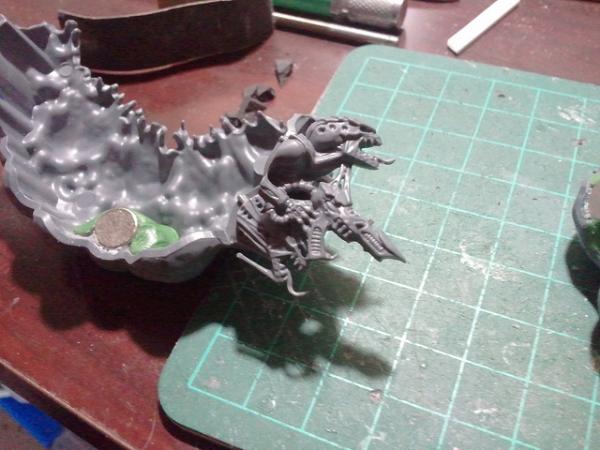
The next step is to prepare the Tervigon egg sac.

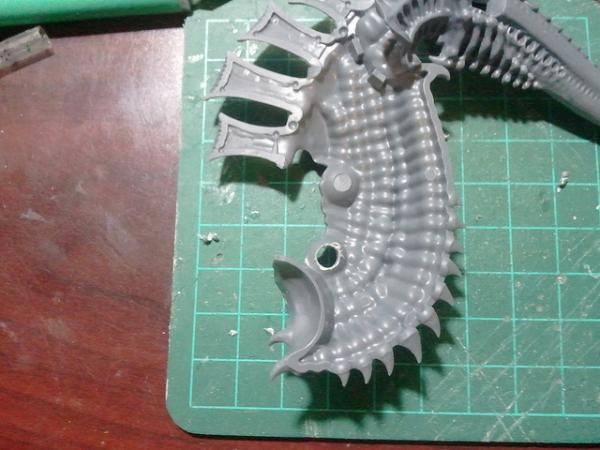
I used some larger 5/8" x 3/16" magnets for this, I think I got them at Hobby Lobby. I tacked the magnets in place with more superglue and then reinforced them with green stuff once the glue was dry. Don't try to glue them in place at the same time, unless you have very thick superglue that you can keep from flowing between the magnets or the other side of the egg sac. I just marked the magnets polarity and did them separately. The location on the egg sac shown in the pictures was perfect for the magnet diameter I used, plus it lines up with the edge of the part.


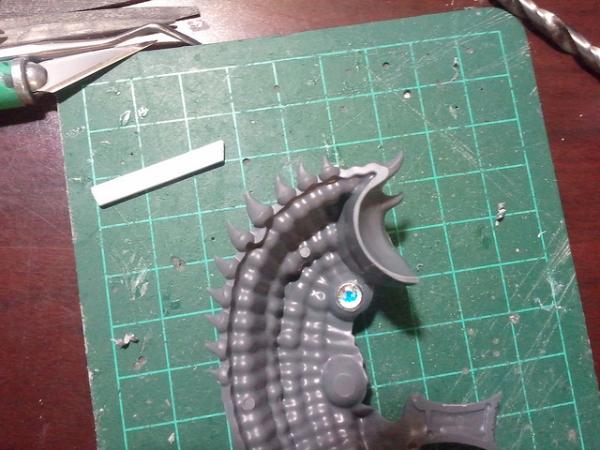
Glue the two emerging Termigants to one side of the egg sac. I chose the side with the Termigant arm.


Once dry, you can check the fit.


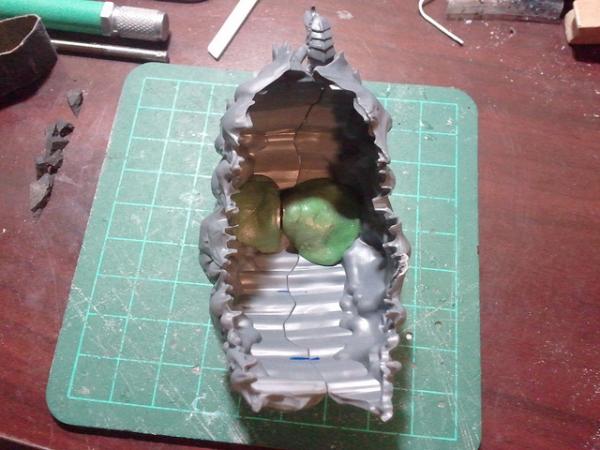
I thought about adding additional magnets, but once I had it assembled the large pair seems like more than enough.

Next, assemble the model up to Step X in the instructions. Assembly Notes: Parts 40 & 41 seem to be swapped in the assembly instructions. The same is also true with parts 46 & 47. In the image below you can see the forelimb magnet. You will probably want to base the model at this time, but even if you don't the middle legs are a bit problematic. You need to position them so that they do not interfere with adding removing the Tyrannofex guns, but still provide some support for the body. I pinned mine at the back feet to provide more support and so that the model wasn't relying on the mid-limbs for much support. Also, unless you want the bottom Termigant on the egg sac to be licking the ground, you should attach the sac when you are positioning the model on the base. This will also keep the Acid Spray gun cables from dragging on the ground as well. Also note that we are not going to attach the body spikes (parts 48-53) as they will interfere with the Tervigon egg sac. You could probably magnetize those too, but I did not.


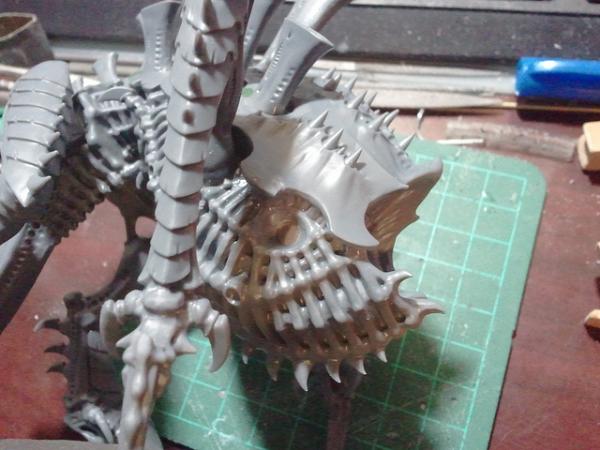
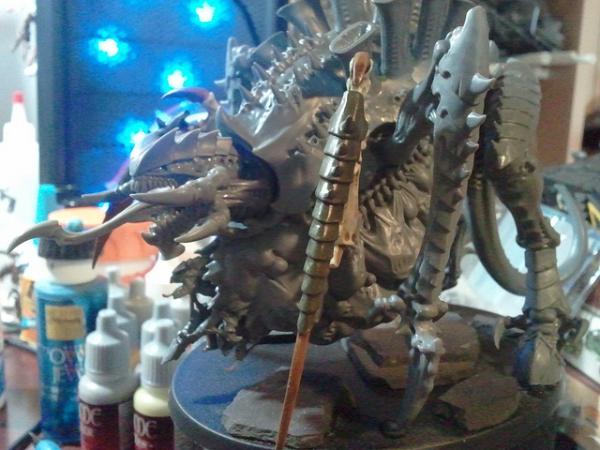
Assemble both heads as per the instructions. Add a magnet to the back of each head, making sure the polarity is the same on both and that they are centered. I used 1/8" x 1/16" from K&J.


Add another magnet to the head socket on the body, making sure the polarity is compatible with the heads. This magnet is going to look a bit high in the body socket if you have magnetized any Carnifex heads. If you get it too low, the head will either be looking up too much or wont fit. As a rough guide, the bottom of the magnet should be in-line with the bottom ears of the spiked armor plate.


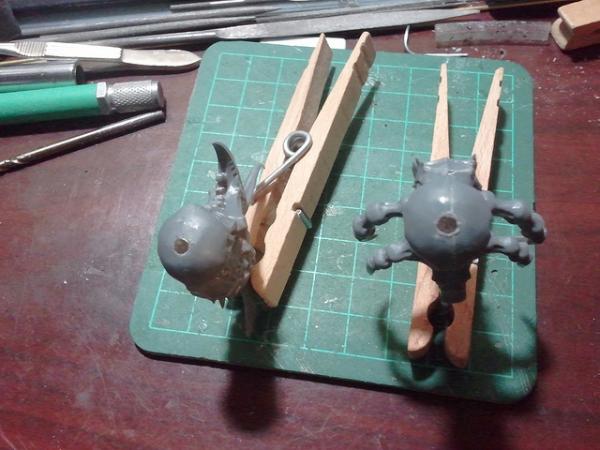
Now build all the arm options and magnetize them, paying attention to polarity once again. You can glue the gun arms to the ammo arms if you like, but you have to be careful slipping them on and off the model. I did this for the Acid Spray since it connects in several places on the gun. I just magnetized the sockets and tubes for the Rupture Cannon as well as the shoulder bits.

The Tyrannofex with Acid Spray


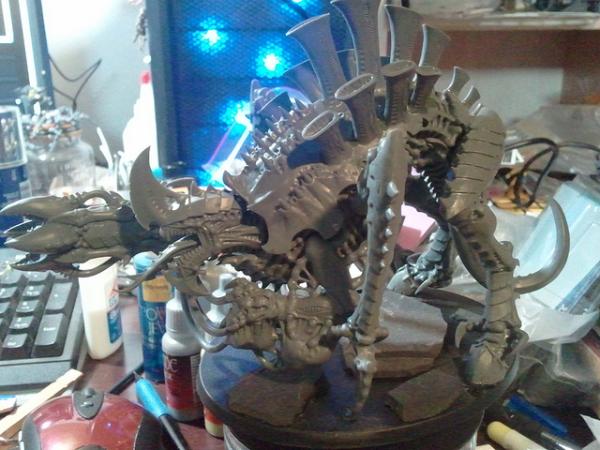
The Tervigon with Scything Talons (borrowed from a Carnifex)


C&C welcome. Time to paint!

This message was edited 5 times. Last update was at 2012/03/06 22:40:46


:3000 2nd edition
3000 pewter/lead
2500 Raven Guard
6000+ 
   
Made in gb
Ichor-Dripping Talos Monstrosity


All the links are broken :(

   
Made in us
Dakka Veteran


Marblehead MA, U.S.A.

Yea.

Current Armies: Chaos Space Marines(Building), Orks(Completed), Vanilla Marines(Near Completion), Trollbloods(Completed), Axony (Building)

"Nobody ever defended anything successfully, there is only attack and attack and attack some more."
George S. Patton

“Courage isn't having the strength to go on - it is going on when you don't have strength.”
― Napoleon Bonaparte 
   
Made in us
Fresh-Faced New User


Houston, TX

Ovion wrote:All the links are broken :(


Working on the pics, they are all Flickr links atm

This message was edited 1 time. Last update was at 2012/03/06 22:03:42


:3000 2nd edition
3000 pewter/lead
2500 Raven Guard
6000+ 
   
Made in gb
Ichor-Dripping Talos Monstrosity


I can copy the link and open them individually, but they aren't showing on here.

   
Made in us
The Hive Mind


averykess wrote:
Ovion wrote:All the links are broken :(


Working on the pics, they are all Flickr links atm

Put them in the dakka gallery. Flickr doesn't like hotlinking.

My beautiful wife wrote:Trucks = Carnifex snack, Tanks = meals.
 
   
Made in us
Fresh-Faced New User


Houston, TX

ok, crap, I think I got it...

:3000 2nd edition
3000 pewter/lead
2500 Raven Guard
6000+ 
   
Made in us
[DCM]
Dankhold Troggoth


Shadeglass Maze

Looks good! Thanks for posting this


Made in us
Long-Range Land Speeder Pilot


Colorado Springs CO USA

Nice work. So how do you connect the egg sack? I didn't see any magnets there, or do you plan to just have it resting on the base?

If not for the mediocre who would be great, and thank goodness for those who are just terrible they make even those who are mediocre look great

May the Sons of Dorn forever be vigilant  
   
Made in us
Fresh-Faced New User


Houston, TX

dalsiandon wrote:Nice work. So how do you connect the egg sack? I didn't see any magnets there, or do you plan to just have it resting on the base?


The egg sac clamps to the body. There are a bunch of little fingers on the sac that fit between the ribs of the model. It only comes off when you pry the 2 halves apart.

:3000 2nd edition
3000 pewter/lead
2500 Raven Guard
6000+ 
   
Made in us
Hungry Little Ripper


DC/MD/VA area

Very, very cool. Thanks!

http://midlifegamingcrisis.blogspot.com/ <----------> Armies: <----------> DC: 70 S+GM+B++I+Pw40k91/f-D++A++/sWD118R+T(TM)DM+


Made in us
Brainy Zoanthrope


Yeah i gotta say i have struggled with the magnets in the past i find this really helpfull. Sincerly thanks for this walk though.
   
Made in ca
Elite Tyranid Warrior


Sechelt, BC

Nice progress on the models now that the pics are up.

Do you have any side-by-side pics next to a normal carnifex kit by chance? I'm curious about the size difference for my own nefarious conversions

Dark_Gear's Spawning Vats | Follow the evolution of multiple new strains.
Dark_Gear's Webway Portal | A new Kabal rises.
Dark Machinations | Dark Gear's Tumblr. 
   
Made in ca
Krazed Killa Kan


Claremont, ON

Are the magnets strong enough to keep the weapons and talons from dropping?

2500 4000 4000 5000 5000
DE 2500 TS: 2500 2500  
   
Made in gb
Mindless Spore Mine


i love this, i was wondering weather it could be done. now i know :p


Forum Index » Painting & Modeling Tutorials
Go to: