Forum adverts like this one are shown to any user who is not logged in. Join us by filling out a tiny 3 field form and you will get your own, free, dakka user account which gives a good range of benefits to you:
No adverts like this in the forums anymore.
Times and dates in your local timezone.
Full tracking of what you have read so you can skip to your first unread post, easily see what has changed since you last logged in, and easily see what is new at a glance.
Email notifications for threads you want to watch closely.
Being a part of the oldest wargaming community on the net.
If you are already a member then feel free to login now.
2012/11/17 06:31:28
Subject: TSHFT in Seattle, how the hive fleet Physalia fairs in the competitive realm. (finally finished)
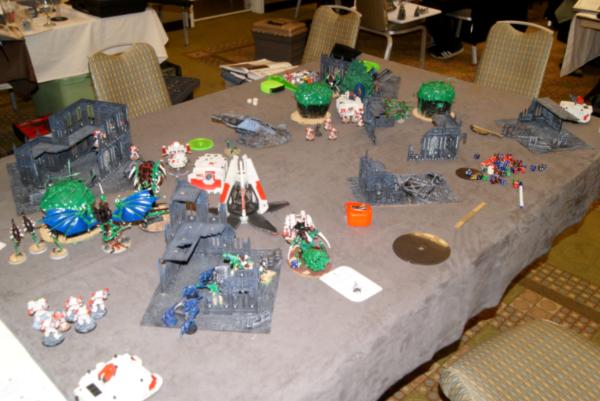
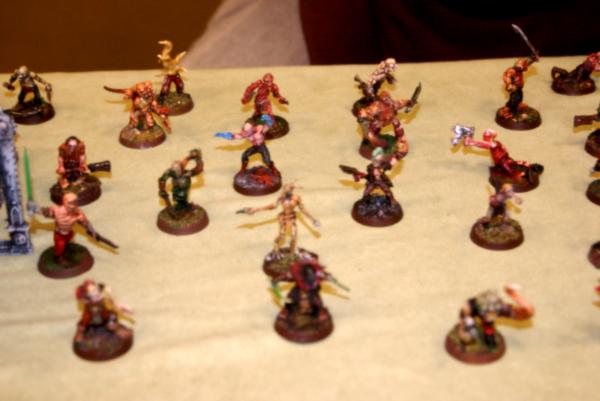
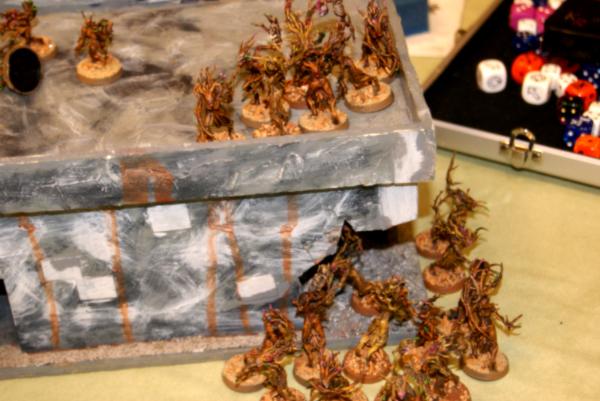
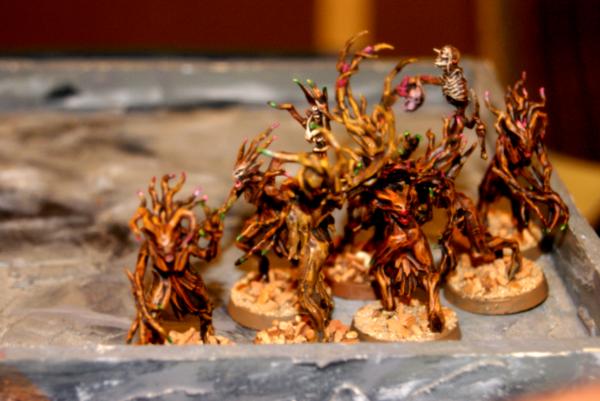
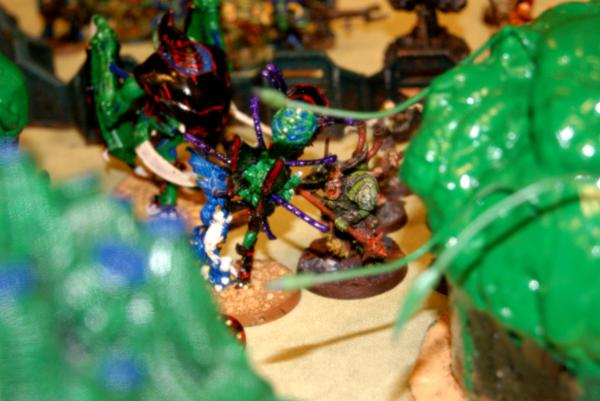
Hey guys, haven't done much on here for awhile, but I'm crazy excited about the TSHFT tournament that is coming this weekend. I've been slaving away on my tyranids army for months, attempting to hone my skills by playing against various proxy armies. (That's no wraithlord, it's a helbrute!) Well it's here, and I thought I would do my best to take pics of the amazing armies, report on how the hive fares, and get general fun feedback from the land of dakka.
Troops 640 Termagants (10) w/devourers and a death spitter spore. Termagants (10) w/devourers and a death spitter spore. Tervignon (naked) Tervignon w/toxin sacs and adrenal glands
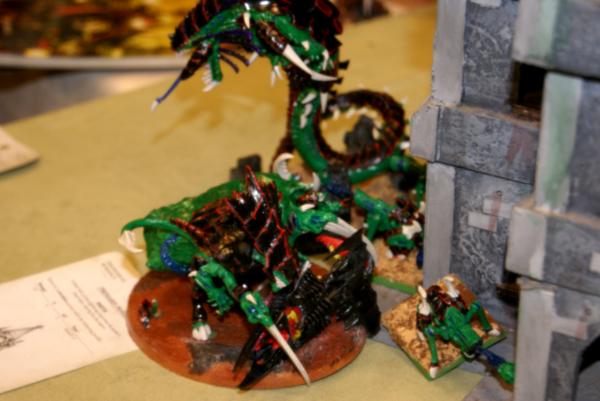
Elite: 530 Doom of Malantai in normal spore Zoanthrope brood (3) in a death spitter spore. Zoanthrope brood (2) in a death spitter spore.
Heavy: 545 Mawloc Carnifex w/2x twin linked devourers brainleech style in a death spitter spore. Biovore brood (3)
So my army is predicated on sudden arrival in turn two of most if not all of my units. I will have denied my opponent up to two full turns of shooting at me, and since I strive to go second, will often be able to place my units in the best position to take advantage of my opponent. I think of it as super late infiltrating. Each unit in the army has a specific job. HQ: Well it's pretty self explanatory, the flyrant is the quick close combat beast to take out opposing units, hit flyers, and provide those sweet, sweet rolls of 2+ for reserves. Replace his powers with biomancy, hoping for warp speed, iron arm, or endurance. Troops: Devil gaunts are purposed to taking out massed infantry such as zombies, or elite units like terminators, where volume of fire is most efficient. I try to land them near the tervignon who has the sacks and glands. Vindicators are their favorite vehicle to take out. Tervignon great big MC troops. I often outflank one of them, setting up the devilgaunts around it in support when it has the glands and such. I replace their powers with biomancy, if I get a shooty one, that's often what I outflank. Endurance, or iron arm usually goes on the guy who is out first turn. With six plus troops, I rarely found myself without enough scoring options even in the big five objective games.
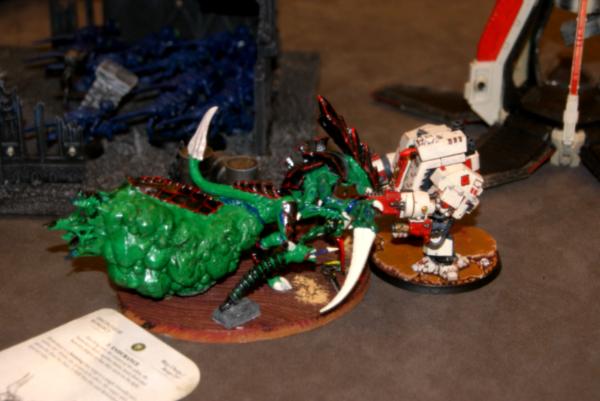
Elite: Doom of Malan'tai. Pretty self explanatory, I took the extra guns off his pod because he is usually either right in the middle of things, or has a couple of units supporting him. I try and drop him near the maximum number of troops, then get him into close combat as quickly as possible. That tends to be his safest place. Chaos challenges especially work well for him. Watch as Kharn hacks away, taking a couple wounds off a turn, only to watch his back up bloodthirsters slowly wither away making the doom stronger. Zoanthropes are my preferance over hive guard. If I need to instant death something the str 10 still works against typhus, plague marines, most bikers, and necron super guys. They also are particularly adept at taking out those nasty av 13 quantum shielded guys, and a land raider or two. Once that has happened, their blasts getting thrown into large groups of marines has made many a sad player.
Heavy: Mawloc, I actually really enjoy the mawloc, aside from an awsome model. I use him as one of my initial creatures on the board. He stands up, so makes a very enticing target, over my one tervignon and biovores. Or I can set him to one side if I'm going first as a distraction, then, either way when my turn comes I burrow him away. He arrives with the rest of my force, often only once per game. I often make the mistake of sending him after a powerful tasty target, but I should try to send him to mismatched forces more often. He usually ends up in close combat with my opponents big boys, keeping them busy for a turn or two, allowing my nastier bugs free reign. Carnifex: With double dakka, he is the backup for shooting down fliers, and does a pretty good job of eating up big strong units like plague marines. I'm pretty constantly frustrated when he gets into close combat and gets hacked up by your average sword guy. Or misses three out of his four attacks. When they do connect though. Wooo hooo. Biovores: Well, I thought I was being all kinds of original when I started bringing these guys out, only to see them appearing on a dozen lists on the inter webs. I love them, I can set them up as my starting unit out of line of sight, drop big blasts on all kinds of things, then watch them become a priority target of my opponents for the first turn or two.
That's the thoughts behind the army.
Look forward to passing on all the lists and such, cheers.
This message was edited 7 times. Last update was at 2012/12/03 06:28:12
~seapheonix
2012/11/17 17:29:46
Subject: TSHFT in Seattle, how the hive fleet Physalia fairs in the competitive realm.
I run mycetic spore tyranids and must say... they are highly competetive. Maybe, this list is not absolutely optimal, but should consume some biomass with ease
The game! All right, here we go. Mission: Crusade Deployment: Vanguard strike.
So first off I think to myself, all right, five objectives, I can handle this mission, my forces can come raining down from above, outflanking tervignon, I can have my big pods making each of the objectives dangerous, this could work out great! Then I saw that my opponent was the grand champion of the past two or three TSHFTs. Against little old un-ranked me. Undaunted we shook hands and started setting up.
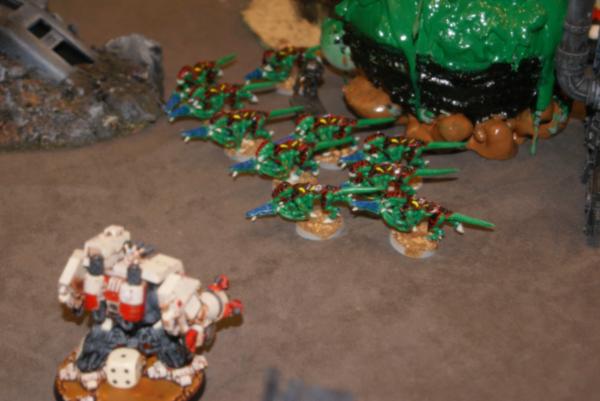
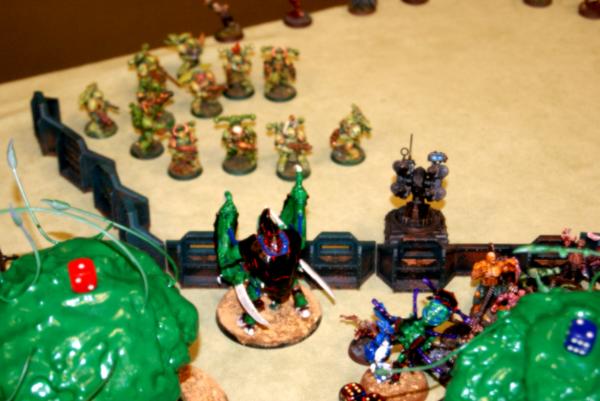
The larger portions of the TSHFT crowd have absolutely amazing conversions and paint jobs. Ben not only had worked this army, but had made up the army I played in the second round as well. Destroyer lords were placed in each of the wraith squads.
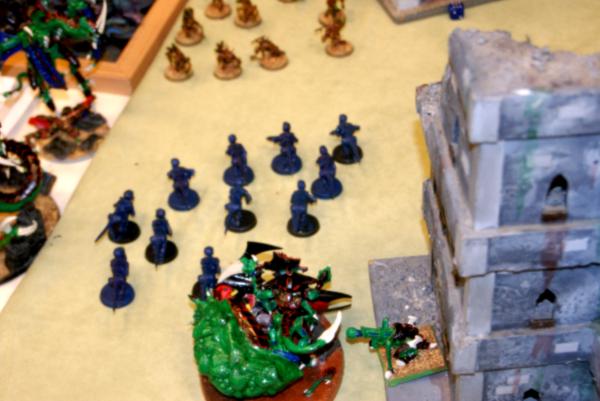
Necrons in general deployed in a massive line, largely as close to my side as they could get. One squad, covering the objective in his backfield, and one on his left flank. Scarabs and wraiths squads were set up to come sweeping across the center.
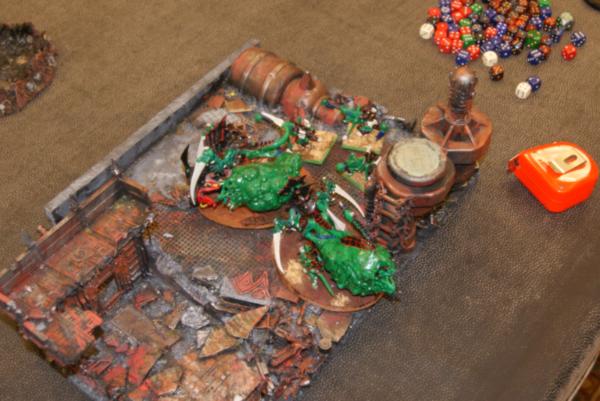
My general set up is this. A tervignon placed out of range of everything, hopefully with an objective in sight for eventual getting to. Biovores out of sight near by so they have synapse, and then my Mawloc in some kind of cover, though less important. I usually plan on him soaking up shots instead of my biovores or tervignon the first turn, then he dives.
Turn one goes as planned, necrons have nothing to shoot at, his wraiths move forward quickly, some warriors move up onto the top of a building for sight over the objectives. Tyranid turn, biovores drop three blasts onto said warriors, killing half of them. Mawloc burrows, then for some reason in an attempt to avoid giving away first blood. I decide not to spawn termagants.
Turn two: Enter the flyers! Well, vanguard strike set up, I think I was imagining that the flyers would be coming from the opposite corner. Not so much. they zipped along on my near side of the board, all three. All his flyers unloaded on my tervignon and two of the three biovores bit it (doom scythe). I failed 5 out of 6 saves on the tervignon. First blood to the necrons.
Well that kind of hurt. Necrons really are the best at the whole show up and wipe out most of my starters. Their air force, and those abyssal guys can be crazy. Not the issue here though. My second turn is always the most important one for my army. If I set up the arrival right, I can dominate most armies...However I rarely do this, except against necron air force armies. (spores work great for knocking them out.)
The first thing I bring in is the mawloc, he is the only unit in my army that can have deepstrike mishaps. He popped up and dropped a couple of wounds on a wraith squad. Outflanking tervignon came in on my left side, which was his weak side at the time. (wraiths can redeploy way to fast.) My flyrant came in, vector striking one of the flyers, and still having aim on the third in line. Carnifex dropped next to them as well. I felt like the flyers were the primary target and could do the most damage. (Never played against wraiths before this.) Zoats dropped next to his annihilation barges, and the doom was placed where he could effect wraiths, scarabs, and the warriors up on the building. Devil gaunts landed on a building near the souped up tervignon, planning on shooting the second squad of wraiths.
Most went as planned, one flyer crashed, doom scythe lost a gun, and velocity locked, and the third flyer was velocity locked.
Managed to put a wound on nearly all of the wraiths, only killed one or two.
Zoanthropes managed to knock out an annihilation barge, the others failed. Doom ate one whole wound off a wraith. Nothing for the others.
At this point I realized I had spread out across the board, not focusing on any one large threat. Ooops. I had scattered the spores around the four objectives in the middle of the field, but I probably could have loaded one side more.
Turn Three Necrons
His warriors moved down from their building, planning on shooting the doom before he could gain too many wounds. One group of wraiths moved towards the devil gaunts.
the others surrounded the poor mawloc. Most of his units fire was ineffectual, I think one wound on the doom, and that's it. His scarabs charged a couple of zoats, didn't put a single wound on. His warriors failed their charge. Wraiths ate the devil gaunts, and the other wraiths didn't have to strike a single blow. MSS and the follow up war scythe smacking killed off the mawloc real quick. (20 point upgrade, responsible for 170 points of dead bugs.) All of his fliers had zipped off the board.
My turn I for some reason continued to think the wraiths were not worth all my effort. I started taking out his troops instead. Flyrant lined up for a shooting of the available warriors, large numbers of gaunts started swarming towards those holding his backfield objective. Doom hung out near the wraiths to eat them and fire off his psychic boom boom. A couple of wraiths fall, warriors are eaten by doom, leaving the flyrant with nothing to shoot. Zoats not in close combat toasted his last annihilation barge. A final squad of devil gants had shown up on the same building, taking pot shots at the camping necron warriors. Their plan was to jump off the building when the end of the game came around.
This is about the time I got excited and stopped taking pictures.
Necron turn four: The now depleted smaller wraith squad charged in at my outflanked tervignon. Larger wraith squad went after the flyrant if he was able to knock him down. Returning fliers went after my flyrant. Four shots at the flyrant managed to not only cause three wounds I failed, but the last grounding save failed, and splat, my beautiful flyrant became one with the building he had been flying over. Not to worry, his larger wraith squad re-routed and charged the doom instead. MSS actually failed on my tervignon, and this resulted in him pulping one of the wraiths, only taking two wounds in return. The doom...not so much. Rearing up on his now ten wound powerful self, he let loose a flurry of blows! Pounding his own head in, and causing instant death due to MSS. (20 point upgrade now responsible for 260 points of dead bugs.) Zoats and scarabs happily slapped away at each other, a couple of the metal bugs died, still nobody free.
Tyranid turn four: Well that took a chunk out of my army. The carnifex was moving towards the wraiths, planning on doing some damage. Spawned gants from the close combat tervignon jumped back into battle with their momma. Spores did their thing, biovores continued to drop bombs on the wraiths. Carnifex did some good damage and decided not to charge for overwatch joy when the wraiths charged him. Tervignon once again over came MSS, and this time she and the gribblies dragged down the remaining wraith and destroyer lord, chewing on their metal hide.
Necron Turn five: Flier with five guys still zipped over and dropped them on an objective. Bloodied wraiths scuttled towards the carnifex, two of them actually died to overwatch. MSS happened once again, and the carnifex gladly punched himself in the face three times. The lord barely finished him off, only landing one blow. (20 point upgrade...450 points bugs.)
Tyranid turn five: Tervignon and gribblies started racing for objectives, one for linebreaker. Devil gants rolled a pair of ones for their move through cover and couldn't get off the roof. Biovores and a couple zoats bombed the newly dropped off warriors. Didn't kill a single one. Gribblies ran a whole 1 inch, leaving me half an inch shy of a second objective. Rolled and.....game ended.
Wrap up: Not sure how it would have gone with one more turn. I had five scoring units at that point, two of them inches away from additional objectives. The wraiths were on the far side of the board. I like to think I could have pulled it out with one more round...but ces't la vie.
Hind sight: Well....wraithstars are not to be ignored. If I replayed this game, I would have dropped just about all of my units right on the warlord led wraith squad, and I would have blown it off the board. Then turn three I would have done the same for the other wraith squad. They can only take out one unit in between. I should have vector struck the one flyer as planned, but then hit the wraiths. Flyers I can take care of later in the game, and especially in an objective mission, they have less of an impact. Mawloc shouldn't have hit the wraiths, he needs a mismatch. I should have brought him up under the guys who were camping his home objective. It either would have pulled a wraith squad back, or redirected some of his other units to go catch it.
Cheers to all, and I will get to the next report after thanksgiving.
Elite: Chaos terminators (6) Mark of slaanesh, 3 combi melta, reaper autocannon, icon of excess, lightning claw, gift of mutation
Fast attack: Heldrake
Heavy: Defiler, dirge caster Heavy: Vindicator
Fortification: Aegis Defence line, with quad-gun
Allied detachment HQ: The masque Troop: Daemonettes (12) Heavy: Seeker chariot of slaanesh (2)
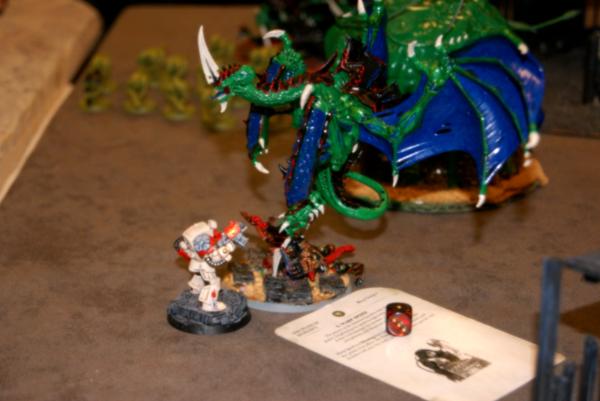
Round two, another amazingly painted army, with a great theme. My previous opponent was actually the designer and painter of this group. I thought back to the movie quote. "hosed down with pepto bismol." In reading the chaos codex, I've thought the defiler, and lucius are really powerful options. Mission: Relic Deployment: hammer and anvil.
Pre-game thoughts: I feel like the relic is custom made for the tyranids, in particular the tervignons. You put them up along the line, and first turn they can create gants, If going second, you can charge whatever unit has come out to grab first turn. everything moves forward, and those gants you created screen the relic. If you weren't lucky with a 6 inch run on the tervignon, you will easily get it turn two with probably even more gants screening. That was my basic plan, plans never last more then first contact with the enemy though. This is to be my first game against an Aegis defence line.
Set up: Flawless host set up largely behind their defense line. Vindicator and rhino with a squad of noise marines ready to leap forward for the relic. Lucius, his squad, and the terminators were set into infiltrate.
I set up my both of my tervignons this time, leaving the mawloc in reserve. The biovores all kinds of spread out to bombard the enemy. Infiltrating is a weakness of my army, I usually don't have enough of a spread of units to limit their approach.
As is my usual plan, I had second turn, I did attempt to sieze initiative, but it just didn't go.
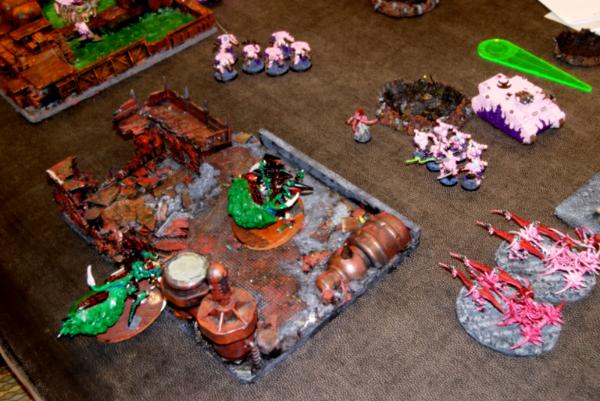
Chaos turn one: Daemons primary detachment showed up. The masque and two chariots came in. Chariots appeared behind my tervignons, and the masque dropped in directly in front of my deployment. Lucius and his squad moved forward in their rhino, then hopped out. Terminators moved up past the objective. Defiler started to claw it's way through the terrain he was in. He held the rest of his units back, waiting for my advance.
Pavane of slaanesh went off and he hit all three of my units. The near tervignon, and the biovores he pulled closer. The second tervignon he pushed away. This managed to get the biovores into range of the sound templates from Lucius and his guys. Lots of wounds with no cover saves and the biovores were off the table. First blood lost again. Melta guns from the terminators either missed, or failed to wound my terignon.
Tyranid Turn one: My turn one I birthed gants, and both of them ran out. Doh! One squad I sent towards the masque and lucius' squad. My brilliant thought was to multi charge the two with the toxin sac/adrenal gland tervignon near by. Large numbers of poisoning gants, they could do some damage. The other created squad of gants were to head after the terminators in hopes of causing a wound if I'm lucky, and keeping the termis busy for a turn hopefully. My tervignon moved towards the lucius squad hoping to support the charge as well. Gants charged first, hit by flamers, only a couple made it. Coming through terrain they were going to strike last. Well none survived to strike. So much for that plan. The tervignon failed his charge completely. What did I learn from this? Never multi charge ever again. The gants against the terminators faired a little better, they caused a couple of wounds that were saved, and while a handful of them died in response, they were in fearless range, so terminators were all tied up.
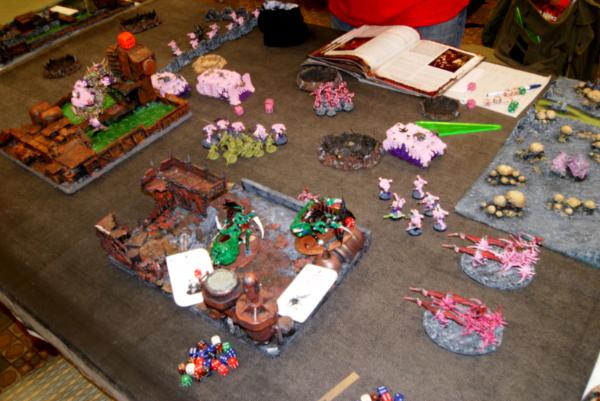
Chaos turn two: Daemonettes arrived, and his autocannon heldrake stayed in reserve. He dropped in a safe place, then forgot to run them. Lucius and his squad shifted over towards his chariots. The vindicator and rhino came out from behind his aegis defense line. Troops hoped out of the rhino and onto the relic. Vindicator had no good targets in range, so sped up.
Pavane goes off again, the near tervignon off his terrain and right in front of the chariots/lucius. Bolter fire prevented lucius and his guys from charging, but the chariots came on in. Managed to cause only one wound to the tervignon, starting a slap fight between the three that would last a couple of turns. Terminators killed off a couple of more gants. Too bad, a couple of them survived, preventing me from shooting at them during my turn.
Tyranids turn two: In come the tyranids!
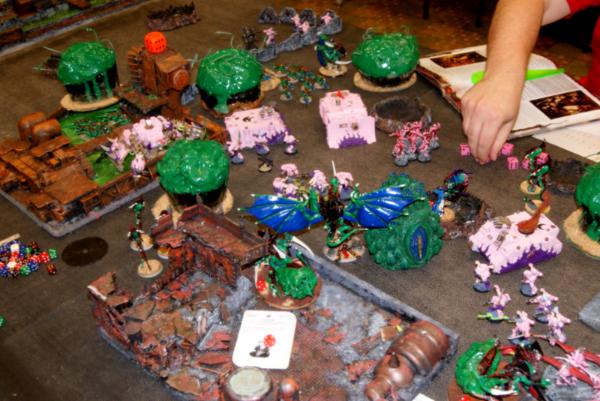
Well, everything but the mawloc. Primary target was of course the relic holding unit, then the vindicator, then the other troops. Flyrant zipped in, smacking the masque and leaving little parts of her behind him. (I love vector strike.) He was then in a position to either shoot at the troops holding the relic, the rhino, or the vindicator, possibly even the defiler. I try and give him as many targets as I possibly can. One squad of devilgaunts landed behind the vindicator. (I mentioned that they love vindicators right?) Carnifex dropped between the vindicator and the aegis defense line as well, to provide that little extra pow if need be. Devilgaunts squad two landed behind the defiler, but near enough to shoo the ADL guys as well. One squad of zoats landed close to the defiler, and the other by the lucius and his squad. Doom, dropped close enough to life leech the terminators, and the daemonettes. The still free tervignon moved towards the relic with plans to lend it's power to the assault with terminators. The quad gun fired pot shots at the doom, but either didn't wound or failed to get through his armor save. A couple daemons died. from said life leech, then took a big blow from his kaboom, and the two zoats warp blasts. Fewer died than I hoped, but that's the way it goes. Spores knocked out the infiltrated rhino and put a glance on the defiler. They also threw two pens on the vindicator, shaking and stunning it as well. This allowed me to redirect the gants to the relic holders, and the carnifex shot up the troops behind the adl. More gants shot the defiler in his soft unmentionables, zoats aimed at him and promptly missed, were denied, and one rolled a pen! Battle cannon blown off and away. As planned however, the vindicator was out of the picture, the troops had dropped the relic, and the other viable scorers were out of the picture.
Slap fight with the chariots continued as they were unable to hurt the tervignon, and he missed all of his smash attacks once more. Terminators killed off the last of the gants the tervignon once again failed to make it through cover and into the fight.
Chaos turn 3.
Heldrake came in at this point, he flew up behind his ADL, planning on shooting at my flyrant. Terminators moved to assault my free tervignon, as did lucius, separating from his squad and hoofing it on his own. Brave, brave man. The squad moved into cover and prepared to pepper my zoats with bolter fire. Daemonettes moved close and cuddly with the doom for their charge. Defiler continued to crab his way a couple inches at a time through terrain. The three marines near the relic hopped back into their rhino, afraid of the big bad bugs.
Some light shooting managed to put a wound on the tervignon, one wound on a zoat, and that's about it. The heldrake missed all of it's shots, vindicator couldn't shoot. Defiler threw a lot of firepower at the zoats, but only managed to kill one. Lucius and the termis charged in and slapped the tervignon around a little bit. He whiffed all his smash attacks at Lucius. The other tervignon finally landed a blow, turning a chariot into so many pink pick up sticks. Defiler was unable to charge the zoats. Doom and the daemonettes slapped each other a bit to no real effect. Defiler healed a hull point.
Tyranid turn 3
enter the mawloc! He appeared and ate the rhino currently hiding noise marines, pitching them out into the open and leaving the relic nice and cuddled up to his side. Flyrant flapped his way slowly forward, lining up shots on the heldrake. Gants moved up closer to the relic and prepared to open fire on the marines. Carnifex got ready to cuddle with the three marines left behind the adl.
Spores killed a couple more marines, and finished off the vindicator. Gants put the wound back on the defiler, zoats were terrible. The zoats on the far side of the board however managed to kill a couple marines. Gants wiped out the adl marines, and the carnifex fired up at the heldrake, putting one glance on it. Flyrant only managed to get one glance through as well, leaving the flyer still in the game.
In assault my terivgnon crushed the second chariot and happily started loping towards the lucius battle. Speaking of whom. He stabbed the other tervignon repeatedly and managed to put it down. This released the terminators as well. Lucius consolidated towards the remaining tervignon.
Chaos turn four: worried about the mawloc, and the gants closing in on the relic, the heldrake bypassed the flyrant, and became a skimmer, and the defiler turned his back on the zoats. He still had three troops from the first rhino, hiding behind a spore. Terminators came back towards the mawloc as well. Lucius continued after the remaining tervignon.
Defiler unloaded heavy flamer and such on my gant squad that had been pestering him, over half evaporated instantly. Heldrake caused one wound on the mawloc, saved. Terminators and noise marines were unable to wound the mawloc shooting. Nosie marines on the other side whiffed their shots at their two zoats. Doom continued to eat daemonettes.
With a cry of rage Lucius leaped at the tervignon, sword flickering, whipdeally whirling. Three wounds later he stood his chest heaving at the tremendous four wounds he had put on. Then he was promptly smashed into a cube like a car at a junk yard. Tervignon instagibbed and then walked on his way closer to the relic. Defiler charged in and crushed the few remaining gants. Terminators charged the mawloc, those that swung at the same time as it only managed to put one wound on, he then pulped two of them. The ax guys swung away causing another couple wounds, and the mawloc fell as turn four began.
Oh, and the defiler frustratingly healed another hull point. Caused four, but only one to show for it? So did the Heldrake.
Tyranids turn four: Well, with the mawloc gone I needed something else to tie up the terminators, so the flyrant became jump infantry and bounced to the other side of them prepared to shoot and charge. Devil gants once again poked around behind the defiler. My slightly trimmed down gant squad moved up with plans to take the relic. Carnifex joined them, planning on charging in with the flyrant if needed. Zoats continued to shoot at the defiler.
Shooting! The last of the daemonettes were eaten by the doom, he failed leadership by a whopping 6, then missed on all his saves. Doom consolidated towards the middle of the field where the relic lay. Zoats penned and finally wrecked the defiler, although he made a huge blockade that prevented my large gant squad from moving really. Flyrant shot at the terminators, not killing a single one. Small gant squad and the carnifex wiped out the last noise marines.
Flyrant charged in and ate one terminator. Then took a couple of wounds.
Chaos Turn 5 Heldrake shimmied around again in skimmer mode, fired at the carnifex and missed or failed to wound. Pot shotting noise marines on the far side of the board managed to take out one of my zoats, but they were half way across the board from the relic. Terminators managed to kill the flyrant having only suffered one loss. Epic failed rolling on the tyrants part. Terminators rolled a stunning 1 for consolidation and couldn't get near the relic.
Tyranid Turn 5: Carnifex shot up the terminators and charged in, doom came over so his life leech would be working, four surviving termagants picked up the relic.
At this point the game ended. Tyranids won! Yay! Nom, Nom, Nom.
I think I remembered part of that wrong actually. I think Lucius did kill the second tervignon, then the flyrant came and ate him. Flyrant had taken two wounds, then the termis charged him after he had consolidated right next to them.
This went pretty well aside from the terrible decision to charge at the beginning of the game. I think I could have focused a little bit more on Lucius to take him out of the game earlier. I was to reliant on the tervignons being able to land a blow. They apparently cannot do so. (I will be giving them scything talons in the future I think. Mine always seem to end up in close combat.) I feel like Steve could have gone for the relic on turn one to better effect. He was close enough for his rhino to move over to it, jump out and claim it, then jump back in before my rain of spores came down. Who knows though. I should have dropped the doom closer to the relic. He happily tied up all those daemonettes, but I think there were other ways I could have taken them out. Gants for instance, or a couple of spores making a wall. Well, on to the third battle.
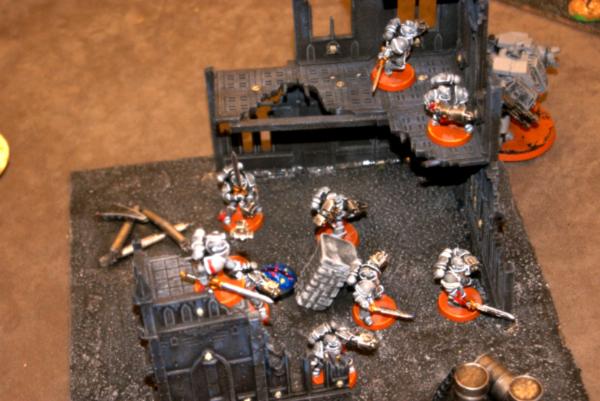
Elite: Terminator squad (5) 4x power fist, cyclose missle launcher, Land raider redeemer Elite: Ironclad dreadnought, Hunter killer missle, heavy flamer, melta gun, chainfist, ccw, Drop pod
Fast attack: Land speeder Fast attack: Land speeder
Heavy: Vindicator
Round Three:
Mission: Big guns never tire (4 objectives) Deployment: Dawn of war
Wes had a really nice balanced list here. I had been talking with one of they guys previous to the round who had talked about how well he had shifted around pressure, re-consolidated his forces, and then struck back with great timing. When I learned I was going to be playing against them I was pretty excited. Fresh off my victory against the flawless host, I figured I would do pretty well against more marines. Not sure if I got a good enough picture at some point, but I loved the scorpion mark on shoulder pads and detail. I asked if he had used a stencil to make them. "Nope, all freehand."
Continuing with my preference, I was going second. (This also gives me time to think a little bit about what I plan on doing. I've noted that I often don't set up right turn one if I'm going first.) Dawn of war, nice to have the whole long edge to deploy on finally. I've felt cramped and contained for the first two battles for some reason. (With my three units?)
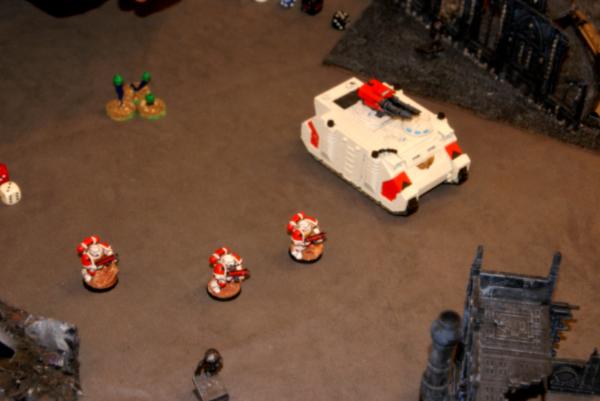
Marine set up: Wes did combat squad with all of his units, putting half into razorbacks, two of those outflanking. The two land speeders were on the left flank, along with some marines with a las cannon in the ruins. A vindicator, placed in the center, along with the multi-melta marines, one razorback with marines on the far right flank. As well as another lascannon squad in the right ruins. Objectives were placed heavily on the right flank of the board. Land raider w/terminators and khan outflanked. Dreadnought in drop pod for turn one.
Tyranid set up: I picked the ruins with the most cover, set up my tervignon, mawloc, and biovores inside. All of which was on the left flank, opposite of his lascannon marines and two land speeders. I was careful to measure that I was out of range of movement and vindicator fire. First game that started with night fighting. Up to this point, I had rolled a 1 and gotten the stealth in ruins warlord trait. This meant a 2+ in most instances for my guys first turn. Marines turn one: Drop pod with the dreadnought crashed to earth close to my ruins, well in range of my tervignon. (His primary target it seemed.) Vindicator drove really fast towards my ruins, everything else shifted a little, hoping for firing range. Land speeders moved up and snapped off a bunch of missiles that harmlessly whacked against the ruins. Yay 2+ saves. Melta gun and flamer from the dreadnought managed to do a whole lot of nothing. (Rolling 1's with melta was a theme for Wes unfortunatly. End result of turn one was absolutely nothing.
This is when I remembered I had a camera.
Tyranids turn one: Mawloc got out of dodge. Tervignon moved out of the terrain opposite the dreadnought, after spawning a massive number of gants (running dry in the process.) Gants just hung out around the objective. Biovores shifted a little for better sight lines. My blasts dropped a couple of good hits on the squad in the middle of the board, sniped out the multi melta and a marine. The final blast scattered far enough to make up some spore mines. How fun. (figured out at the end of the tourney that I was playing the biovores wrong. Using them as individual weapons instead of as a multiple barrage.)
Tervignon charged in at the dreadnought, hoping to get a couple of good smash attacks right off the bat, and steal that extra attack from him. However both of us failed to hit each other. This would be a theme for the next three or four turns.
Marines turn two: Here comes some fun now. Land raider and a razorback come in, both outflank on the same side. Left flank. Right next to my biovores and the one ruin I'm controlling. Things look bleak for the nids at this point in the game.
Land speeders, marines with las cannons, flamers on land raiders, razorback heavy bolters, the vindicator, they all target my poor termagants. Land speeders kill one apiece due to saves, las cannon fails to wound? Ouch. Bolters kill a couple more. Vindicator whiffs and annihilates the ground in front of the ruins. Then the land raider flames away half of them. Heavy bolters from the razorback knock out a few more, but there's still half a dozen or so hanging on at the end of the turn. Dreadnought smacks a wound or two off the tervignon, he slaps the ground in front of the dreadnought. (Really need those scything talons.)
Tyranid turn two:
Not so worried and dark now.
Everything comes in. First the Mawloc! He scatters well away from anything of use, popping up directly in front of the vindicator. Whoops. Tyrant sweeps in, slapping the heavy bolter razorback on his way. One pen made for no moving or shooting next turn. Three zoats landed near the land raider, two near the vindicator. Devilgaunts came down behind the vindicator. (their favorite spot.) Carnifex, doom, and the other devilgaunt squad landed near the right flank ruins. I successfully ringed the razorback and three surviving marines with spores. This ended up being wonderfully efficient. Three zoat squad destroyed the land raider, two pens, both of them were explosions. (I love how good ap 1 is now.) Nobody inside was hurt. Spores took out a couple marines on the left, and destroyed the razorback on the right, also took down the land speeder near the middle of the board. Doom ate all of the marines in the ruins on the right flank. He failed leadership by 7 I believe. Very painful. Catastrophe or whatever killed a couple more, and bam, the doom was at 10 wounds. Carnifex actually had nothing to shoot at, so he ran around towards the marines. Devilgaunts did their thing and wrecked the vindicator from behind. Outflanked tervignon had come in behind the left flank ruins, and he fired away at one of the land speeders. Life leech and stinger salvo penned twice, glanced twice. It was great until he made all of his jink saves. (Wes failed tons of 3+ saves, but made most of his 5+ saves. How does that work?) The two zoats in the middle, having nothing else to fire at launched warp blasts into the marines in the left ruin, as did the biovores. That was a lot of shooting. My termagants in the ruin on the left had planned on assaulting the damaged razorback, but failed their charge.
Assaults continued with the dreadnought causing a couple wounds, the tervignon hit this time, but rolled a 1 to pen.
Marine turn three: Revenge cried Khan as he and his terminators moved quickly towards the three zoanthropes. Weapons blazing they wiped out the three top heavy creatures, leaving themselves nothing to charge at. Looking around they watched everyone else go. There was still one razorback trying to outflank, he came in far enough away the doom couldn't target him the first turn. Tried to pick off the spore from range with heavy bolters. Marines jumped out of the shaken and stunned razorback, weapons at the ready they blasted the termagants into little squishy bits. The lascannon totting marines in the left ruin fired at the mawloc, and managed to cause four wounds. The surviving marines from the right flank fired at and charged my far right devilgants. Overwatch killed half on the way in, the others hacked up the last of my gants.
More slapping in the dreadnought/tervignon fight. Finally a hit and pen! Melta gun get's ripped off! Wait, a close combat weapon may have been better...
Tyranid turn three: Sizing it up, I decided I would go after Khan! Flyrant landed, spun around and moved towards the terminators. Tervignon not in hand to hand birthed a bunch of gants, and ran out. They moved up next to the land speeder and prepared to fire and charge. Biovores shifted really close to the marines in their ruin. Mawloc moves towards the drop pod. Carnifex moves around the ruins to shoot and charge the marines who killed my gants. Other gants stay comfy around the objective in the middle of the board. Spores continue to wreak havoc, Chewing up the sergeant with the power fist on the right flank. Doom consumes a couple more when they fail their leadership, shooting from the carnifex finishes them all off. Doom has nothing to cataclysm. Flyrant unloads at the terminators killing one, then charge into do some damage. Iron arm had given the flyrant strength 7, and made him immune to the instant death weapon of khan.
The last land speeder was glanced down to a single hp by the gants, then charged and it goes down. Biovores charged the left flank marines, Flyrant charges Khan. Biovores do surprisingly well in close combat, killing one and taking no wounds. Flyrant challenges Khan, then happily instant deaths him with a smash blow before he can touch me.
Terminators failed their leadership, but when I catch them, they just come right back to the fight. Dreadnought finally kills the tervignon, consolidates towards the center of the board with a huge 6.
Marines turn four: Dreadnought wants to move closer to the gants, preparing to heavy flamer the squad and charge.
Left flank scoring unit stays put, preparing to shoot at the mawloc again. Razorback on the right flank moves closer to take shots at the doom now. Heavy flamer manages to take out about half of the gants in the middle. Lascannon and a couple of lucky bolter shots fells the mawloc. On the right flank nothing of note occurs. Dreadnought attempts to assault, and fails. Terminators are crushed before the might of the hive tyrant. He consolidates towards the dreadnought, planning on smashing him next turn. Biovores and the couple of marines slap at each other, but no damage done.
Tyranid turn four: Time to start wrapping things up. Carnifex moves to the edge of his ruins, still controlling his objective, Doom prepares to fire at the razorback. Zoats, the tervignon, and a couple of gants move into the left ruins preparing to wipe out the lascannon and his buddies, tervignon claims the objective. Surviving termagants spread out to their objectives. Leaping closer to the dreadnought the flyrant flexes his iron arm strength and toughness of 9.
Not even bothering to fire his brainleech worms, the tyrant jumps in. (Wes agreed to have the dreadnought fight, and then concede with his lack of units.) The two met in the center of the battlefield, huge blows from the tyrant ripped an arm from the dreadnought, then detonated his power core.
Wrap up: Once Wes' forces spread out in such a thin line, I knew that I could overwhelm any one portion for objectives. With heavy units scoring as well, I had too many options to his fairly limited units. Vindicators it seems always end up around the middle of the board, and I can drop gants behind them to get rid of them. The zoats exactly did their job taking out the land raider as soon as they landed and then being the major target of the next turns fire power. Spores once again walled off a pair of objectives and allowed me to funnel him in the direction I wanted. I was once again frustrated by my monstrous creatures being unable to land more then one hit in close combat for 3 and a half turns of assault. That was 11 chances he had to hit with a smash attack, only two succeeded, and one of those was a one. Scything talons is high on the list o changes.
Heavy: Chaos predator, twin linked lascannon, 2x las cannon sponsons Heavy: Havocs (5) 4x auto cannons
Aegis defense line with quad gun
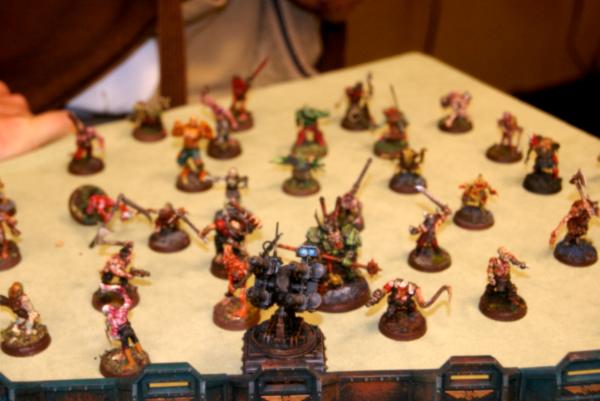
Allies HQ Herald of slaanesh, rending, pavene of slaanesh, musk Allies Troops: Daemonettes of slaanesh (20) Allies Elite: Flamers of tzeentch (9).
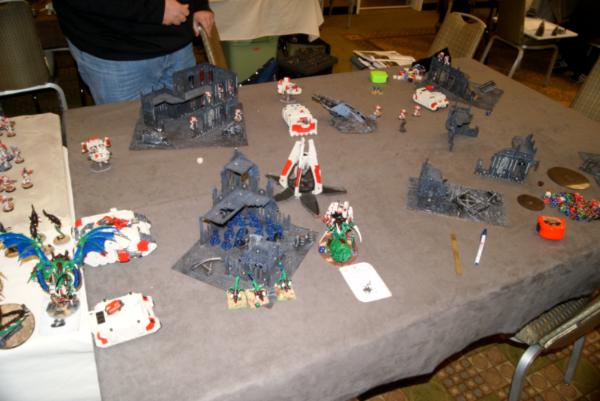
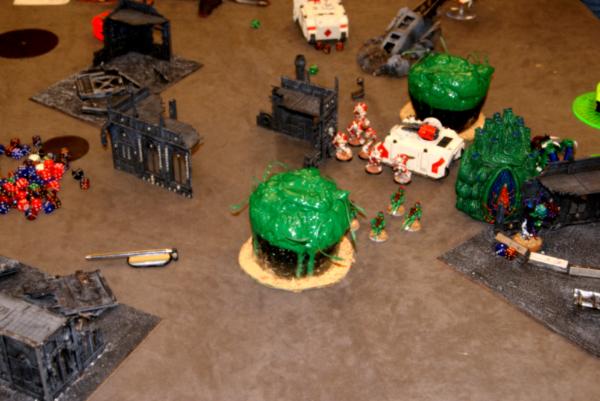
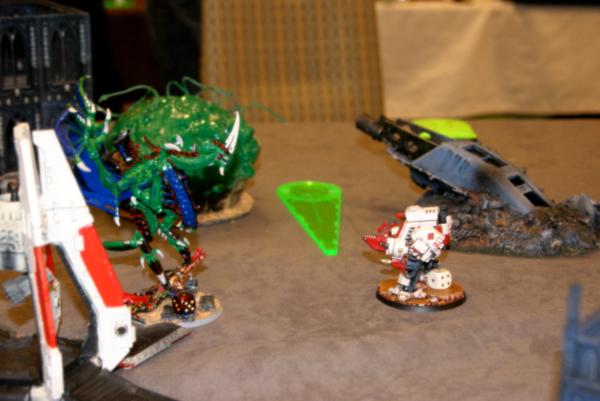
Day two I'm afraid I didn't get any of the full army pictures that I had managed of all the first day competitors. In fact, my photography as a whole was lacking as I was much more easily distracted and caught up in the games. Ah well. Enjoy. Mission: Purge the Alien Deployment: Vanguard strike
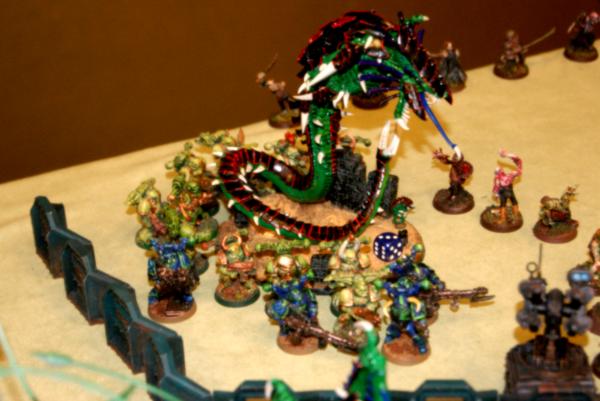
On set up here we have a couple amazing close up pics of the great zombies Nick has painted up. Amazing typhus there in the middle. I particularly love the zombie crawling forward with his gun raised.
Chaos set up: So he set up in his corner behind his aegis defense line. Havocs, plague marines, and two squads of zombies. The other big squad of zombies he set up just outside of the ADL. In reserve he had the two squads of daemons and the predator.
Tyranid set up: Easy as pie. There was a massive building all the way across the table from his zone, and this is where I set up. Biovores, mawloc, and a terignon.
I would have been okay seizing the initiative in this battle, as it's all about hitting the other guys first here. However, didn't happen so....
Chaos turn one: He got his preferred wave of daemons, and in came the flamers of tzeentch. He tried to drop them right next to my group of nids, planning on flaming them all.
He very calmly told me that if he hit them right he could wipe my forces out turn one, ending the game then and there. I thought that was hard to believe, but with ten flamers wounding on 4+ and ignoring my armor. Apparently. Lucky for me, he scattered straight back, and out of range of any flamers turn one. So, no shooting, no assaults, nothing of note.
Tyranid turn one: Worried about this scary unit that could deal out the eighteen wounds necessary to wipe out my starting units, I thought I should take them out as quickly as possible. So I birthed some gants, and ran out. Biovores shifted a little so that one of them would be out of sight. (thus unable to be wounded.) Then had the gants and the tervignon line up and shoot the flamers. I managed to take out three only. I considered charging into the unit to hold them up, but felt like I didn't have enough gants to make it through the hail of fire that would likely wash over me.
Chaos turn two: Daemonettes came in this time, still no predator though. They also tried to land nice and close to that first grouping of bugs. They also scattered, even farther then the flamers, landing right smack dab in the middle of a building. However, due to obscene luck on their part, not one of them took a wound.
Those are just some awsome models, here's a close up.
The flamers then moved forward so that they could get a good line on flaming my gants, and the tervignon. He managed to only put two wounds on the tervignon, and only half the gants were cooked.
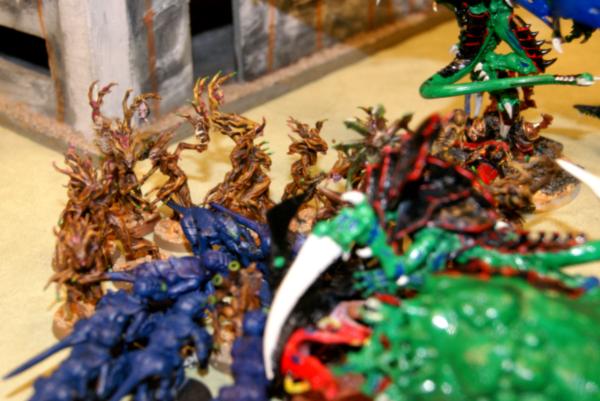
Tyranid turn two: Felt like I came out of that pretty well actually. Everything decided it wanted to come in at the same time this game. Yay. Flyrant zipped in and slapped one of the flamers out of existance as he lined himself up on the daemonettes. Mawloc popped up directly beneath the plague marines and a couple of zombies in the backfield. Doom came down directly in front of the quad gun. Zoats landed on either side of him, and the carnifex as well. Outflanking tervignon, and both of the devil gaunt squads came in closer to my set up zone. Planning on taking out those pesky daemons. The quad gun fired at the doom, like they often do. A couple of wounds, but I saved all but one of those, only to soak them up through life leech. Shooting did not go all that well. Tervignon and his gants did manage to put a handful more wounds on the flamers, cutting them down to only four. Devilgants however, between the sixty shots the could fire, only killed three daemonettes. Flyrant knocked out one or two more. Over on the right side of the table. My spores slapped some zombies to death. Yay ignoring their feel no pain. The carnifex shot the havocs into little itty bitty pieces. Doom ate some people, fired off his big blast and killed a couple of plague marines and zombies. Zoats fired off warp blasts to take out the maximum number of zombies. They just don't die do they? Gants and the original tervignon charged the flamers, who promptly rolled all ones, and failed to wound anything in over watch. Whack, boom, crunch. Two gants died, and all but one of the flamers were gone.
Chaos turn three: Predator came in and shot at the mawloc, missing all three shots. It was sad. Typhus and his retinue of some 20 zombies now, came charging over the barricade, and set up to assault both the doom, and the spore that he arrived in. Plague marines surrounded the mawloc and prepared to destroy it. Zombies that weren't in the ADL, came around the corner and set up to charge a spore, and the group of three zoats. Over on the other side of things, the daemonettes skirted around the base of the flyrant, set up to charge into the ongoing conflict with the flamers. Shooting put a couple wounds on the mawloc, and that was it. Assaults, Typhus challenged the doom, his zombies slapped at the spore. Zombies charged three zoats and a spore. Daemonettes charged the tervignon in close combat.
Daemonettes were much more successful in this game, they through a couple more wounds on the tervignon, and wiped out the gants. In return I killed off the last of the flamers. Zombies were unable to wound the zoats, they killed four in return, and both groups only put one wound apiece on their respective spores. Spores however killed three zombies on each side. Now the big moment. Typhus vs doom!
Well it just so happened that the doom had eaten his wheaties that morning and was all the way up at ten wounds. He reaches out with his super human strength, and flattens typhus with a single blow. Truly, he attacked, landed one hit, and typhus managed to roll a one. Instant death. Ouch.
The down side then. The mawloc was charged by the plague marines, and I hadn't really considered that whole poison knives thing that they have now. He was cut into scraps for chum I believe.
Tyranid turn three: Well that went great. Devilgaunts both moved into position to charge into the daemonette combat. I wanted to wrap that up as quickly as possible. Flyrant also turned around and came in so he could charge. Outflanked tervignon birthed some gants, and prepared to dive into the combat. On the other side. Carnifex got ready to shoot up the plague marines. The two zoats that were free came out a little for a better firing arc on the plague marines.
Shooting worked okay. Blasts from the zoanthropes continued to kill a couple of plague marines, as did the carnifex. There were still quite a few left though. 19 is a lot of plague marines to cut through. Flyrant, gants, tervignon and more gants all charged into the battle with the daemonettes. tyrant challenged the herald and whacked it quick. Gants dragged down the the rest of the daemonettes after they got slapped around a bit. He had focused most of his close combat attacks on a single gant squad, hoping to wipe it out. One blue guy remained at the end of the combat. Nick was sure that was going to be the deciding point in the game. However it was in my shooting phase that was the deciding point of the game. I had been attempting to move the biovores up onto the ruin they were hiding behind for better range on targets, they had rolled a two, so couldn't even move one level. Indirect fire scattered and I had a couple of biovore spores floating out there. Assault on the other side of the field continued, the zoats killed a couple more zombies. Spore slapped a few as well. Zombies rolled terrible with their much reduced attacks and didn't harm anything. Doom squished a couple more zombies, as did the spore in that battle. Maybe one wound was put on the doom, but it just didn't matter.
Chaos turn four: The predator drove into the floating spores, detonating them and keeping them from floating around and causing mayhem. This was the deciding moment in the game. Each spore counted as a separate unit, and thus, a separate kill point. Ouch. Predator then swung it's weapons around to fire at the nearest spore. (It only had line of sight to things in close combat otherwise. Plague marines moved towards the carnifex, planning on charging it as well. Other then that he was running out of units very quickly.
Predator did in fact manage to plaster the spore...two or three times over. Plague marines fired off their weaponry, including the two melta guns. Carnifex failed all of his saves. Blast! Assaults continued as expected. Doom, zoats, spores, all killed their fair share of zombies with little to no slapping back occurring.
Tyranid turn four: Time to kick it into over drive! Flyrant zipped over to the predator, landed by it's rear armor and shot the bejesus out of it. Boom, another kill point. Injured gant squads hid in a corner, while the full one and the tervignon tried to hoof it across the board. They rolled a 1 for each of their run distances, making it pointless. Biovores scaled their building finally for a better vantage point. Zoats moved so they could fire at the ten man squad of zombies back in the corner. Killed a couple of them. They were sitting a solid foot behind the ADL and he still got cover saves, even though my zoats were head and shoulders above the ADL. We were starting to run short of time, so I didn't want to bother calling an official over, I had to rely on tabling him at this point anyway, so I needed that turn five to happen. Doom killed off his unit of zombies in assault, as did the zoats on the other side. They would now be free to pour more fire power into the plague marines and three remaining zombies!
Chaos turn five: Nothing of note. He shot at spores in the hopes of getting kill points, knocked one of them out with a melta shot. The zombies in the corner continued to hide.
Tyranid turn five: Flyrant zipped over to get in on the last shooting of the game. First the spores managed to slap two plague marines. Now down to only three! Doom had moved in close enough to life leech, but they passed. He cataclysmed! and failed his psychic test. Zoats prepared to fire! Two missed completely and the third failed his psychic test. The other zoat squad couldn't see the plague marines, so they fired at the remaining zombies...killing one. There were two zombies, and three plague marines left. Flyrant shot the zombies down, plague marines survived. At this point I was sure I wasn't going to win. That much fail on the last turn, it just wasn't meant to be.
We rolled the dice to continue, and sure enough...1.
Wrap up:
Once again I failed to place the mawloc somewhere he could overwhelm an opponent. I also missed firing the biovores one turn. I was exceedingly pleased with the doom squishing typhus. I think I could have done a better job using my devil gaunt spores to wall off the daemonettes, setting me up to shoot the flamers. Then turn three, when he had been unable to charge with them, I could have brought my forces around and through, getting to shoot and charge myself. Even with the biospore kill points, I only lost by two points I believe. Kill points is definitely a mission that conceptually I have difficulty in setting up properly.
Coteaz grey knig The one list I lost! Blast! Go, go gadget memory? Oh wait found the list.
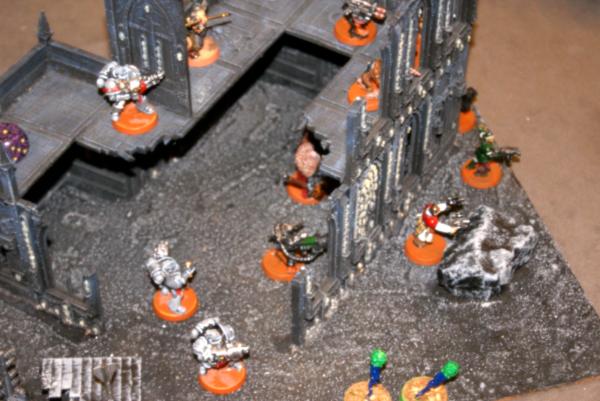
Heavy: Dreadnought, Auto-cannons, doom fist, psybolt Heavy: Land raider w/multi melta and search light.
Mission: The scourging Deployment: Hammer and anvil
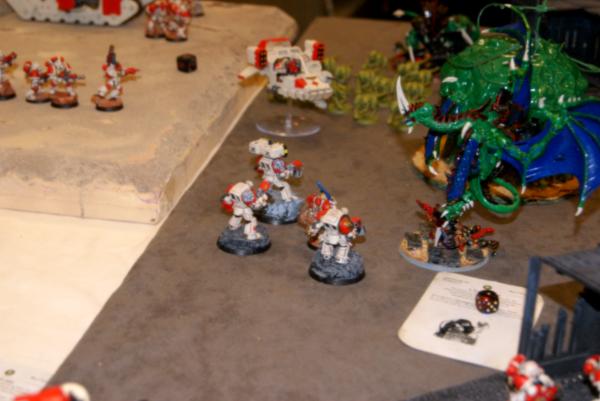
At this point in the day, I had the pleasure of gaming against Jeff. After my previous crushing loss, I was ready to have just a great fun time. Jeff and I both had fresh beverages, no plans on winning any trophies, and a whole bundle of excitement about a mission that supported fast attack. Which neither of us could take advantage of. Jeff had some great old models that he was using as various henchmen. Very cool rogue trader style kids. I loved it. Initial thoughts: Well, this mission is another great objective based one. This strike squad style list is something I was pretty worried about facing in the tourney, but at this point, I didn't think I was in the running for anything anyway.
Jeff set up first, splitting up one of his strike squads, and leaving the other whole.
The big squad went by itself in the south western ruin. While Coteaz, his squad, and the shooty half of the second strike squad were in the north west ruins. Dreadnought was out in the open between his two ruins. The land raider was to the north of coteaz. Ah, the jokaero made all of their weapons look really pretty.
Tyranid set up: I decided to keep both of the tervignons on the ground this game. I wanted as many chances to spawn little buggers as I could get. Biovores set up in cover, with a lovely peak through the windows towards his coteaz squad.
Grey knights turn one: Land raider came steaming forward with it's lovely cargo of purifiers. Dreadnought moved forward and fired at a brick wall. Everything else was out of range of effective fire. Yay good set up.
Tyranids turn one: I produced gants with both of my squads, but they all hung back. I knew that there were deepstriking terminators hiding out there somewhere, and I didn't have an urge to feed my units to the purifiers just yet.
The other tervignon made babies as well. Oh, and they both ran out. So much for as many gribblies as I could manage.
Shooting consisted of a salvo from my biovores, which managed to take out a couple of henchmen, including the guy holding a multi melta. One lob missed and created a couple of spores (same guy that lost me the last game probably.) as you can see here.
That was it for turn one.
Grey Knight turn two. The other half of the little strike squad came in, setting up near one of the back objectives. Coteaz and his guys shuffled a little to retain coherence. More ineffective shooting due to distance, and the landraider continued to flat out it's way across the middle of the board. Terminators dropped in, hoping to be right next between my tervignons. they scattered and nearly had some uh-oh's against some of my guys. They were able to kill a couple of gants, and that was it. Each strike squad cast it's warp quake deal. The one in the southern ruins failed, rolling the most beautiful 11 I have ever seen.
Tyranid turn two: Bam! Everything in. I was down right scared of coming in near coteaz, or the strike squads who were quaking. (spelled that quacking the first time. hee hee.) So I dropped most of my guys on the south west ruin. Carnifex behind the strike squad, and behind the dreadnought. Mmmm rear armor. Mawloc came in right in the midst of the strike squad, and the doom right next to him. Mawloc actually ate three guys this time. Devil gaunts and zoats formed a ring around the land raider with their spores. The other devil gaunts landing next to the terminators. My hordes of gribblies and the tervignons started moving in on the termis, planning on charging and keeping them busy. Flyrant flew over the terminators, taking a head with him as he prepared to open fire on soon to be spilled out purifiers!
Shooting phase I did a little backwards. I knew the aegis thing the dreadnoughts had, but I fired my zoats at the land raider first anyway. Thibbppp. Three zoats fail their leadership 6. The carnifex then blows up the dreadnought with fire from behind. With that taken care of, the two zoats squad pens the land raider and manages to roll a one. At least the thing won't move or shoot next turn. Doom eats some strike squad members, spores kill off another terminator. Gribblies charge because the tervignons can't make it. Biovores continue to drop blasts on the coteaz squad, killing a couple more. Gribblies tie up the terminators, lose half of them, but I have them tied up for their turn. Yay! Doom and the strike squad continue to slap each other. Another squad member dies, doom takes a couple wounds, but the guy with the sword fails his tests for activating the force sword.
Grey knights turn three: Purifiers bailed out of his land raider, started to move towards the nice squishy devil gaunts who were waiting just past a spores. Strike squad with coteaz stepped down from the ruins and started towards the carnifex. Storm raven came zipping in from off the board, lining up a mindstrike missle hit on the three zoats squad. This killed the nearest of them, and put a wound on each of the other two. Shots from the coteaz squad killed another zoat. Sniping from the strike squads at the carnifex resulted in nada. Assaults continued. the doom whittled the strike squad down a little bit more, at this point I believe there was only a couple of swordsmen left, and a hammer. Doom killed the two swordsmen, leaving only the hammer.
Terminators wiped out the termagants, the three surviving terminators started hoofing it towards my two zoats who were hanging out in the middle of the field. Purifiers declared a charge on the devil gaunts, however when the two guys in front died a horrible screaming death to burrowing worms fire, they stumbled and decided to go somewhere else. Tyranid turn three: Flyrant re-routed and headed for the other flyer, slapping a couple purifiers on the way. Carnifex moved away from the oncoming strike squad, and towards the rear armor of the storm raven as well. Devil gaunts started to head for the four point objective in the middle of the table. My tervignons moved forward out of their ruins, the one with lots of gants still got into a firing position. Mawloc came out of his ruins and started for the land raider. When in doubt...SMASH!!!! Biovores fired off a whack of explosions, taking coteazs' squad down to only four guys. The one zoat by himself now, charged up his warp lance, and promptly splattered his face all over the terrain as he suffered another perils. The other two zoats managed only one glance on the land raider. (Those things are just stubborn.) Moving devil gaunts took out two more purifiers from fire power. Spores did next to nothing as most of them flailed at the side of the land raider, or missed the flier sitting on top of them. Flyrant and carnifex caused one pen and one glance between them. AV12 fliers is tough for nids. One tervignon was in range of the terminators, and he bravely charged in. Swords spanged off his tough hide as they were unable to do anything. Then to everyone's surprise, the hammer missed completely. Even without scything talons, the big monster did well, crushing two of the grey knights, and leaving only the hammernator there. Doom was down to mano y mano with his hammernator as well after some more slapping by all had him at eight wounds. Mawloc lept onto the big land raider, his three smashing attacks auto hitting, and he...did nothing, rolled two ones and a three. I believe.
Grey knight turn four: Things were starting to look pretty perilous for the grey knights. Jeff stroked his mustache and cried "Charge!" that's just what he did. Storm raven moved forwards, fairly close to that all important 4 point objective. The strike squad in the left ruins stumbled and only moved an inch through their terrain. Coteaz and his squad moved around a little to improve their angles. More mind strike missiles from the flyer hit one of my tervignons. Jeff was sad to find that the three wounds he had taken off did not mean it was at one, but still had half it's life left. Coteaz and his boys killed off a spore that was between him and everything else. His purifiers moved up to the tervignon trying to eat their land raider and riddled it with holes. As if that wasn't enough they charged it, and poked it repeatedly with their halberds. (Not very nice if you ask me.) Mawloc fell in a pile of writhing snakiness, having done nothing back. Doom managed to kill his final opponent, a luck blow reaching in and crushing the hammer wielding grey knight. Speaking of hammernators, on the other side of the table the one remaining guy whacked the tervignon twice, but couldn't pull off the force weapon. The tervignon sat on him, crushing him to death, and moving on it's way towards the nearest objective.
Tyranid turn four: the flyer was sitting directly over three spores, I was pretty sure the one remaining hull point would get taken off. Flyrant leapt down from on high and landed next to the purifiers, they hadn't liked the small devourers, we would see what they thought of the upgraded version. Carnifex came trundling back through his ruins and got into range of the strike squad in the north east ruin with coteaz. Devil gaunts shuffled themselves towards various objectives, as did tervignons and spawned gants. Doom shuffled through the ruins, tripping on his face a couple times. (rolled a two for move through cover.) Carnifex laid waste to the five strike squad members, killing all of them in one go. Flyrant shot away five of the remaining 9 purifiers, then charged. My two zoats finally had their way, now that the land raider had one hull point, they both penned and rolled sixes. The spectacular explosion killed another purifier. The three remaining purifiers fired with futility at the tyrant with his strength nine iron arming. All three squished before they could respond. Flyrant turned around looking for his next snack. In the lower middle of the table, the flyer was smacked repeatedly by spores, and knocked spiraling from the air. Of those inside only a couple of crusaders survived. They in turn were shot by devil gants and charged. Gants took them down to only a pair of crusaders, losing half of their own in that time.
Grey knight turn five: Coteaz split off from his squad, wanting a heroes death he planned on ramming his force...sword into the flyrants back side. However he tripped on the way out of the ruins, just clearing them. His squad however moved very well, making it to one of the exposed objectives. Coteaz fired at the flyrant, but was unable to hit, or hurt him. A couple of more devil gants were killed by the crusaders.
Tyranid turn five: The second squad of devil gants moved up to the crusaders. Flyrant skipped right over coteaz and landed next to the half strike squad remaining. Tervignon and zoats came around the corner from what had been coteazs' henchmen. Doom, biovores, and the zoats dropped various blasts on the henchmen, turning them into paste. Carnifex in preparation of charging unloads his brain leech worms into coteaz...who rolls a heck of a lot of ones, eaten by the little itty bitty guys. Flyrant plays a similar roll, killing two strike squad members on the last objective. Then he charges. Three more dead grey knights. The last dregs is two crusaders...charged by another ten gants, they are swarmed under, taking a couple with them in great glory.
Wrap up: Landing three spores next to the four point objective was key. That and the three point being in my backfield. Mawloc actually did it's job really well, killed a couple guys, could have smashed the land raider, then tied up a big mean assault squad for a turn. Biovores deserve an honorable mention as well, irritatingly chewing up a couple of guys a turn, and providing a frustrating target the first turn. Looking back at the first drop, I really should have shot the dreadnought in the back before trying to lance the land raider. It was quite silly. I look forward to running scything talons on my tervignons so they will perform similar to this time in every battle.
This message was edited 15 times. Last update was at 2012/12/03 06:27:52
~seapheonix
2012/11/19 14:43:22
Subject: TSHFT in Seattle, how the hive fleet Physalia fairs in the competitive realm.
That round 1 necron list is really solid. I picked the "win all games" poll selection but seeing the army lists you faced I have a feeling you lost round 1 but won rounds 2 and 3. We will see if my predictions are correct.
Been out of the game for awhile, trying to find time to get back into it.
2012/11/19 14:59:13
Subject: TSHFT in Seattle, how the hive fleet Physalia fairs in the competitive realm.
Sadly, I agree with the above... it looks like Hive Guard would have been better here, to deal with those Wraiths in game 1. Still could see you pulling that one out if the mission is favorable.
2012/11/19 19:43:37
Subject: Re:TSHFT in Seattle, how the hive fleet Physalia fairs in the competitive realm.
Bad luck drawing Ben round 1,but that's the way it goes sometimes. Look forward to the rest, as I can live vicariously through your reports (couldn't make this tshft unfortunately).
snoogums: "Just because something is not relavant doesn't mean it goes away completely."
Iorek: "Snoogums, you're right. Your arguments are irrelevant, and they sure as heck aren't going away."
2012/11/24 02:06:55
Subject: TSHFT in Seattle, how the hive fleet Physalia fairs in the competitive realm. (Round two is up)
You would have thought I would have had more respect for the wraith units since I had been watching all your battle reports jy2. Silly tyranids, worried about flyers.
~seapheonix
2012/11/24 04:59:57
Subject: TSHFT in Seattle, how the hive fleet Physalia fairs in the competitive realm. (Round two is up)
Well worth it. Amazingly fun and well run. Zen is running another one in January that's going to be a 3 day event with team, and fantasy games as well. It's going to be in seatac, and there are packages for both entry and hotel. If I'm not swamped at work I will be there.
This message was edited 1 time. Last update was at 2012/11/24 05:20:45
~seapheonix
2012/11/29 17:21:08
Subject: Re:TSHFT in Seattle, how the hive fleet Physalia fairs in the competitive realm. (Round four is up)
Haemonculus_Jay wrote: Just a note, Spore Mines never count for anything when deciding mission objectives, that would include Killpoints. But great reports!
Is that stated somewhere? The tyranid codex calls them a unit, so it suggests that it would could toward kill points. However, it seems like a silly thing that penalizes biovores shooting in kill point games.
2012/11/29 22:20:28
Subject: TSHFT in Seattle, how the hive fleet Physalia fairs in the competitive realm. (Round four is up)
Used to be in the FAQ, but it got left of the current one. As long as the you don't miss you Don't get generate killpoints. Only if you miss does that happen.
2012/11/30 04:24:17
Subject: TSHFT in Seattle, how the hive fleet Physalia fairs in the competitive realm. (Round four is up)
Wow, great reports. Tough luck pulling Ben on the first round, especially with his TSHFT record.
If it makes you feel better, ML gave him what for in the finals.
Looking for great deals on miniatures or have a large pile you are looking to sell off? Checkout Mindtaker Miniatures.
Live in the Pacific NW? Check out http://ordofanaticus.com


 .....Bay Area Open GT 2013 - Best Tyranids
 .....LVO GT 2014 Team Tournament - Best Generals
