Switch Theme:

Dust Tactics - Snow effects comparisons pt1 [31/11/12]  [RSS] Share on facebook Share on Twitter Submit to Reddit
»
Author Message
Advert


Forum adverts like this one are shown to any user who is not logged in. Join us by filling out a tiny 3 field form and you will get your own, free, dakka user account which gives a good range of benefits to you:
  • No adverts like this in the forums anymore.
  • Times and dates in your local timezone.
  • Full tracking of what you have read so you can skip to your first unread post, easily see what has changed since you last logged in, and easily see what is new at a glance.
  • Email notifications for threads you want to watch closely.
  • Being a part of the oldest wargaming community on the net.
If you are already a member then feel free to login now.


Made in gb
Calculating Commissar


Reading, Berks

It's been a while since I last ventured into the P&M section... I really must pay more attention to these things! Inspiration seems to have dried up in terms of 40k stuff... the lacklustre Chaos releases didn't do much to help with that as I was looking forward to new chaos power armour. Aaaaaaanyway, while clearing up my office at the weekend I found all the Dust Tactics stuff that I bought last year... dear god there's a lot of it! I'll do a full inventory later and start an army page in the Articles section to go with this blog for easier tracking.

The gem of last year's haul was a revised starter set... prepainted by Dust Studios. I'm not going to post pictures of them all now, but here's the Axis Sturmpionieres so you can see the standard.


It's a really deceptive paintjob. In photos it looks really detailed, but up close it's actually pretty basic, just very well done with lots of weatheirng to cover up the lack of highlights/shading. For example the uniform under the armour isn't shaded or highlighted in any way, but the knees and elbows have a brown tint on them which makes it look like it's been carefully decorated. I'm not sure if it's a wash or weathering powders yet, but one of my aims for this blog is to try and learn how to paint like the rest of my Dust stuff to this standard as it looks great on the table.

My first task is to base up all of the Axis models. Once this is done, I'll let you in on the next stage of the infantry plan. Here's a quick shot of them all about half way through the process.


The other thing that I've been up to is swapping around some of the Axis walker arms. In the original starter sets you got a Luther, which comes armed with a flak cannon and a claw. I'm not sure what happened to it, but there used to be an axis walker that came with two of the claws (If anyone has a card for that, I'd be interested in seeing the stats), so I thought I'd experiment and see how hard it is to change the left and right arms over. The answer? Really damn simple.

Tomorrow I'll show you the arms in pieces and the final walker

This message was edited 1 time. Last update was at 2012/12/31 21:36:31


Made in gb
Calculating Commissar


Reading, Berks

As I mentioned yesterday, I wanted to swap the arms over so I could have a walker with two claws. Disassembling walker arms is far easier than I expected. The plastic pieces seem to be secured enough to keep things together, but not so secure you can't pop the pieces apart with a scalpel pr your fingernails.


In order to successfully switch arms you'll need to take the shoulder plate from one arm and move it over to the other one. Other than that, it's a simple job of just reversing the shoulder attachment to that the plug points in the opposite direction. Tada!


Made in gb
Dakka Veteran


Love me a dust blog. Looking forward to see where this goes. Are you going to add any detail to the pre-painted figures? Like washes/highlights?


Automatically Appended Next Post:
Love me a dust blog. Looking forward to see where this goes. Are you going to add any detail to the pre-painted figures? Like washes/highlights?

This message was edited 1 time. Last update was at 2012/11/24 00:14:04


Made in gb
Calculating Commissar


Reading, Berks

At the very least I will be rebasing the prepaints as they are on flat white icy bases with a crackled design. The rest of mine are going to be more urban rubble, so they may look a bit out of place.

I think the Lara model will probably end up with a complete repaint as I really don't like the colour scheme they chose for her (pics at some point in the future when I get to that stage)... I'm not sure about the others yet as they do look pretty nice as it stands. At the very most I would probably say a targetted wash in the shadows.

Yesterday I got some bits through the post to help transform the allies a bit. I'll be replacing all the american looking heads with Westwind British heads of varying types. I also picked up a copy of Secrets of the Third Reich books to see if there was anything inspiring in there. Sadly there was... I think it managed to prove that I could do better at layout of a book, or providing artwork for it. Hopefully when I get to actually read the books they may be more inspirational

   
Made in gb
Calculating Commissar


Reading, Berks

Really quick update as progress doesn't seem like much...

All of the infantry (Axis and Allied), except the models that need bent weapons fixing, are now based, waiting for a mass undercoating. More on that later.

The important thing though is that all of the allied infantry is now British infantry. All of the light infantry have the WW2 British steel helmet


and all the heavy armoured troops will be getting the British paratroop style helmet


The heads are from Westwind's separate head system range. I was a bit sceptical as the dust miniatures are much taller than the westwind bodies, but the heads look spot on. The quality of the heads isn't the greatest, but I don't plan on painting them to GD standard, so it's not a massive issue.

The next thing I need to work out is the right basecoat colours for the British and German troops. I quite like the original idea from the core set that each force is underccoated in one colour. Ideally I'd like to find a spray can for each base coat to make it easy to start from. for the British forces I want something similar to the actual ww2 uniform colour... I know the Flames of War paint range has a British armour spray, which might do the job. For the German forces I've got my eye n a specific Vallejo shade, which is going to make life tricksy. I could use the airbrush, but I've not had much luck doing undercoats that way... The paint always seems to get used up really really quick... So. If anyone has any suggestions of sprays that are German uniform colours, I'd love to know

This message was edited 2 times. Last update was at 2012/12/02 22:59:33


Made in gb
Dakka Veteran


That's a really simple but effective conversion. What paint scheme are you going for?
   
Made in gb
Calculating Commissar


Reading, Berks

Ideally I'd like the infantry to be fairly true to real Ww2 colours as I don't think they would have had much of a chance to modify things too much. A winter theme will be run throughout, so some snow cameo will be used on the longer coats

Heavy armour will have their own inquest schemes, but I'm not sure what yet

   
Made in gb
Calculating Commissar


Reading, Berks

In the mad rush up to Christmas I didn't really get much of a chance to do any more painting, but the holidays have given me some time to start getting things together a bit. Nothing actually finished, but I've at least made some progress. In order to avoid getting bored painting the same thing over and over, I randomly undercoated about 30 Axis figures, so next time I get the chance, I'll have to dig out the matching figures to finish any partial squads first. Anyway.

Battle Grenadiers


Laser Grenadiers


Markus


For the main uniform colour I'm using VMC Bronze green with watered down VMC USA Olive Drab in the shadows to give them a dirty look. As an experiment I wanted to try and avoid using GW washes on these guys, except on the metals. The brown leather in the shadows gives a nice subtle shading in person that's a little tricky to catch on camera without a full lighting setup. Once everything is finished I'll take proper photos of it all.

For the Laser troops I'm giving them black armour, though I messed up on the first batch and gave them grey body armour, so these guys are going to be an elite laser grenadiers squad. All the others will have pure black. Kommandotrupp squads are going to have grey armour, as are the Recon squads. The Battle grenadiers are going to be painted up with white-ish armour. In both cases there will be chipping added to match the prepaints, but I want to add some markings to the shoulders first, which leads me to my first question. Does anyone know where to get decent squad transfers? I know the Bolt Action plastics come with transfer sheets, but I can't see these for sale separately... only vehicle markings.

The panzerfaust and panzerschreck are painted in VMC English Uniform and belts/packs/gloves are painted with VMC Brown Leather... both shaded with very watered down VMC USA Olive Drab

Hopefully I can get a few squads finished before I have to go back to work... *fingers crossed*

I forgot to mention that the German bases will have rusty metal edges, but the Allies bases will have tarnished brass edges for no other reason that I wanted to


Automatically Appended Next Post:
Ladidadida. I was expecting longer to finish something, not an hour or so after the last post.

The Laser Grenadiers need markings on the shoulder/helmet and some weathering, but they are nearly done.


Markus on the other hand is complete. I know the fur isn't perfect, but I'm aiming for tabletop not GD


Some additions to the painting notes. Highlights on the german uniforms is a 2:1:1 mix of Bronze Green, White and water. The highlights on the black are a 2:1:1 mix of VMA Dark Sea Grey, black and water.

The bases are an experiment with the GW Northern Wastes basking kit snow. For these ones I'm just using white glue on the base with the snow scattered onto that. Some of the others will try mixing a paste of the snow and white glue before applying to the base as this apparently gives a very different texture... I'm also wondering what it would look like mixed with gloss varnish before being applied.

This message was edited 3 times. Last update was at 2012/12/28 20:31:19


Made in gb
Dakka Veteran


Really loving the bases. The snow on rusting metal works nicely. Hopefully your glossing experiments go well and reveal some kind of frosted ground situation. The troops colour schemes are working nicely. I'm really liking the white on black of the battle grenadiers. Very striking. The gorilla's fists are my favourite though.

Looking at your army is really helping me decide which way to take mine. I've narrowed it down to 2 choices. Dessert/snow. Hopefully the outcome will be as successful as yours.

Will the next update be as soon?
   
Made in us
Fighter Pilot


Great thread - much appreciated.

Thanks for showing the disassembly and rebuild.
The head-swaps are great to see.

Looking forward to more of this!
   
Made in gb
Calculating Commissar


Reading, Berks

Thanks guys.

Now the glue has had a chance to try, the snow looks... ok? It's quite transparent, so it looks like a light frost, or a very thin snowfall. I think I need to take some blank bases and try the different snow techniques to work out how to make it look deeper... so that will probably be the next thing on the agenda, then I can get back to the rest of the painting without any worries.

I'll see if I can get better photos of the bases so you can see what I mean.

   
Made in gb
Calculating Commissar


Reading, Berks

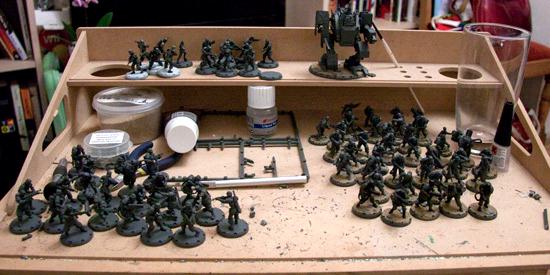
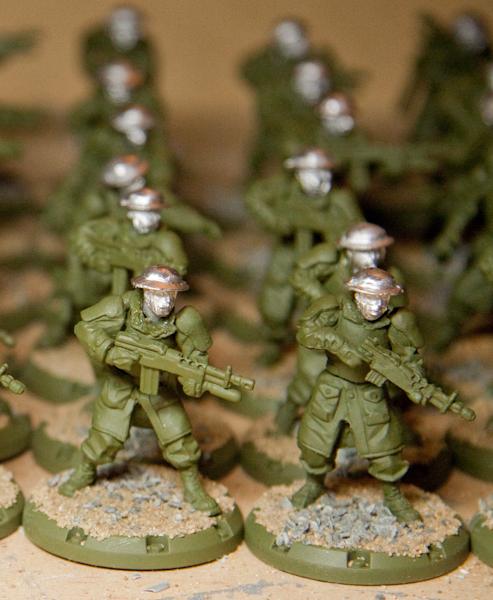
Tonight saw a couple of steps forwards and one step backwards...

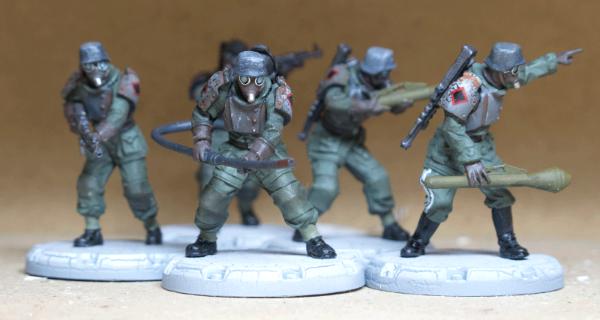
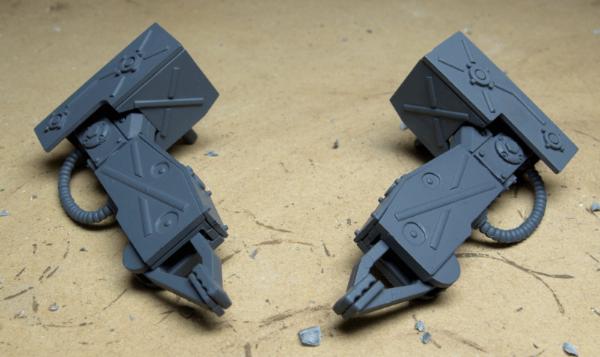
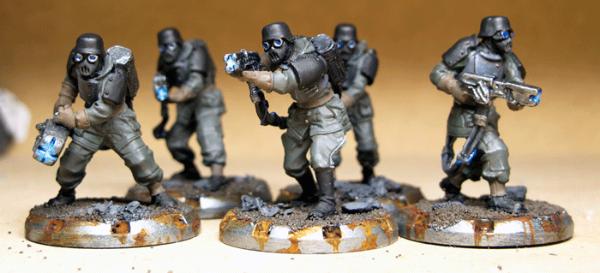
The first step forwards was improving the colours being used for the germans. Originally I had the rifles and the gasmask canisters as bare metal... this looked a bit rubbish to be honest and, looking at some ww2 historicals painting guides, wrong. I've used a different shade of green (VMC German Fieldgrey WW2) to do the canisters, rifle grips and handles. This is all being shaded with the USA Olive as well. So far, this is looking much better. When I go back and do the chipping on the armour, I'll beat up these bits as well.

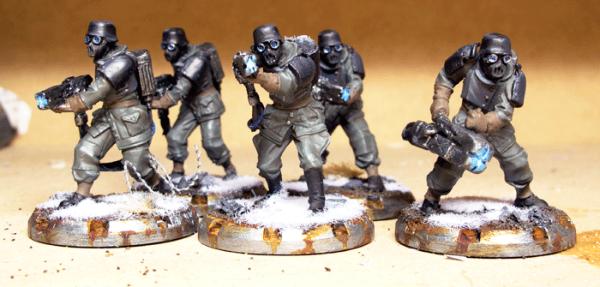
Next step forwards is part 1 of the great Snow experiment. I bought the GW winter effects pack as I want to have all of these guys fighting in a winter environment. Interestingly, or not, the pack doesn't explain how to use the snow effect. I tried looking in the Forgeworld Masterclass books too as the second one contains a few vehicles and dioramas that use snow, but that's fairly sparse on information as well. It has two different opinions; only one of which uses the GW snow and all it says is "we attached some GW snow effect with pva glue". Gee.. thanks for that :/

So. I need to see if I can work out how this GW snow reacts with different mediums; in this case, white glue (WG), MIG acrylic resin (R) and GW Ardcote gloss varnish (V). The image is a little tricky to see some of the differences; zooming in does help a bit.


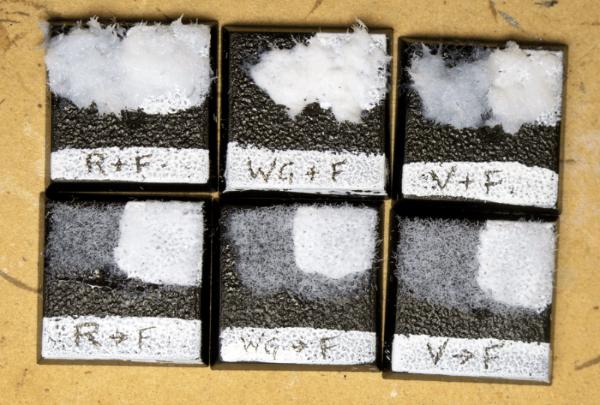
Going left to right we've got each medium either mixed (+), or used to stick the flock on (-&gt. For example top left is a mixture of the Vallejo resin and the snow flock (R+F) and bottom left is a layer of resin painted onto the base, with some flock over the top (R->F).

As you can see, in all the cases where the flock is laid over the top of the sticky medium it's fairly transparent so you can see a difference between the colours underneath. Whichever medium is chosen, you get light, fluffy looking snow that looks fresh, but thin. If you're doing this, white glue is probably your best (and cheapest) bet.

Mixing the flock with the different mediums is where we start to get some more interesting effects. In each case I've not been overly careful on quantities, but I did learn that mixing a small batch and applying it, then mixing a little bit more works better than trying to do a larger batch in one go.

Gloss varnish and the resin seem to give very similar effects. The snow is quite thick, but slightly shiny so it looks wet, as if it's slowly melting in the sun, or under foot. Mixing the snow effect with the pva glue gives a very matt, almost paper-ish looking snow, which is good for very dense, compacted snow.

I've also seen mention of using water effects for snow, but I don't have any of this... I'm not sure if I'll bother looking into that as the resin and white glue give some good effects without spending any more money.

Part 2 will look at the other regularly used snow effect, bicarbonate of soda. I suspect this will give a better, more realistic snow as the GW effect is just fine white flock. The other Forgeworld snow tip uses a powdered snow effect, so I'll try that tip when I get to the bicarb experiments.

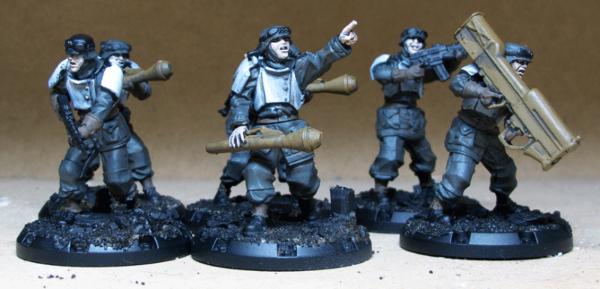
Aaaaand then there's the down side. While I was waiting for the resin to dry for the photo, I looked up british uniform colours in WW2 and started a test figure... unfortunately it's using exactly the same colour as the panzerfausts and looks *really* odd with a snow camo jacket over the top. I'll finish the test model just to make sure, but so far I'm not convinced it works all that well. We shall see...

I'm unlikely to post again before the end of tonight, so happy new year to all three of you reading

This message was edited 1 time. Last update was at 2012/12/31 21:37:03


Forum Index » Dakka P&M Blogs
Go to: