Switch Theme:

40k - Grey Knight Vindicare Assassin - Terminator Inquisitor - Conversion & Painted  [RSS] Share on facebook Share on Twitter Submit to Reddit
»
Author Message
Advert


Forum adverts like this one are shown to any user who is not logged in. Join us by filling out a tiny 3 field form and you will get your own, free, dakka user account which gives a good range of benefits to you:
  • No adverts like this in the forums anymore.
  • Times and dates in your local timezone.
  • Full tracking of what you have read so you can skip to your first unread post, easily see what has changed since you last logged in, and easily see what is new at a glance.
  • Email notifications for threads you want to watch closely.
  • Being a part of the oldest wargaming community on the net.
If you are already a member then feel free to login now.


Made in us
Regular Dakkanaut


I decided to start working on my Grey Knight army again. I am actually pretty excited about is because I am going to ally them with my Deathwing. I had a few old metal Vindicare Assassins in my bits bin. I had several of them that I used for an "Officio Assassinorum Execution Force" assassin formation for Apocalypse. **I HOPE this formation comes back in the new expansion!!, but I am sure its gone**. I thought the assassin would be a good model to start back with converting and painting.


I started this conversion by putting the assassin on a 40mm round base. I always like the assassin on a slightly larger base. I think it makes him look more menacing, and you can do more with the base. Often I find you put the assassin in odd spots when you deploy them because of infiltration, high spots on buildings, towers, etc... This oftern leads to them sitting on shaky spots and falling to a painted death and chips. The larger base also helps to stabilize them on the platforms. My entire Grey Knight army is on these resin bases, so I wanted to keep him matching.

As I was putting the model on the base, I bent and broke off the silencer on the model. It wasn't something I could attach back easily, so I decided to make my own. I used the 1/16th GF9 pinning wire and plasticard tubes to make the silencer. After I made one for the rifle, I decided the pistol needed one also. I dont know exactly why, but the metal on this guy is extraordinarily tough to drill through. I was using my power drill and still didnt make much of a dent. I even thought my bit was dull so I swapped to a new one. The holes for the silencers arent too deep, so I hope they hold in the long run.

The back of the model has always been a little too plain for my taste, so I added in the cables connecting the assassin to the rifle. I used Bass Guitar string for this. The string is great because it has a steel core that allows you to bend it to shape quite easily. I added a few extra cables to make it look like he could attach it to other weapons. I was looking through my bits box and I found some old scout sprues. They had night vision goggles that I added to the head of this assassin. They seemed more appropriate than the GI Joe style visor he had on previously. Anyone else think the assassins are modeled after GI Joe? GO JOE!!


This message was edited 2 times. Last update was at 2013/07/11 04:46:51


Made in au
Anti-Armour Swiss Guard


Newcastle, OZ

I think the standing firing his rifle pose owes more to ABC Warriors' Joe Pineapples, than to GI Joe.


I'm OVER 50 (and so far over everyone's BS, too).
Old enough to know better, young enough to not give a ****.

That is not dead which can eternal lie ...

... and yet, with strange aeons, even death may die.
 
   
Made in us
Regular Dakkanaut


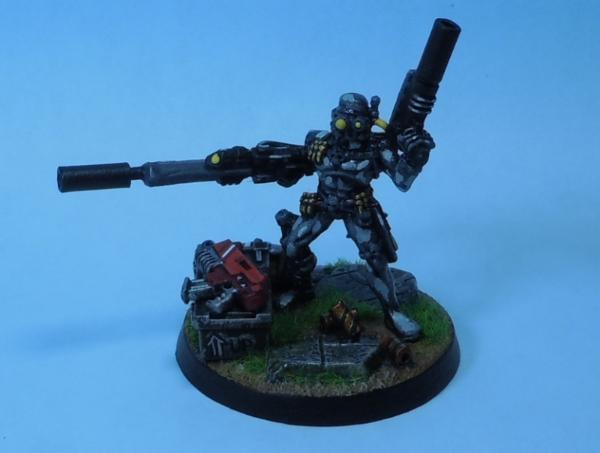
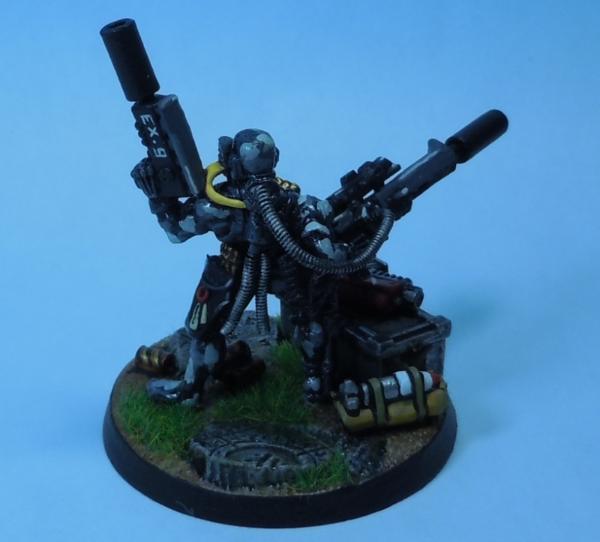
This model came together quite quickly. Modeled it the day before yesterday, and painted it last night. Took about 6ish hours to paint. Lots of greys used on this model for the paint. Mainly "Adeptus Battlegrey", "Dawnstone", and "Uthuan Grey". I used those colors to paint the camouflage over the black first. Camo was done pretty simply with blotches of each color. I then put a coat of gloss varnish on the model. The pictures don't really do justice to the varnish on the model, but it looks great in person.

Next step was the base. I added simple stuff to the base, but tried to make them look a little more unique with some freehand. While I think the empty shell casing are a little too big, I wanted them to look significant on the base. I painted a spiral on the shell case to try and represent the Turbo Penetrator Round. The crazy stats on that round make me think its a massive special round. I added some freehand to the crate to try and make it look like an ammo crate. Its hard to see, but I wrote out "Turbo Pen." on the side of the crate with a seal / certificate. The end of the crate has a this end up symbol. Once I got to the boltgun, it made me think.... why did I put a bolt gun on this base. Don't really know, but I was already committed at the time. I added some stripes to it to try and make it look a little unique.

For the additional detail on the body, I made the decision not to paint much more because the gloss varnish looks great on the model. I didn't want to take away from that aspect. Basically all I did was the lenses on the goggle, bullets, and the holster on his hip. That left me with just the guns to finish. I painted them both black to get me a good base to start, and I almost stopped there. They looked great flat solid black. More like a real pistol and rifle. I know though, that I would get question about when I was going to finish the model, etc.... so I decided to paint the guns. Really I just added some simple greys and highlights. For the pistol, I added "Ex. 9" for the name of the pistol. (Exitus Pistol). I didn't think I had enough room to write the whole name.

With that, the model is done. I will watch for missed spots and enhancements I can make to it over the next few games, but I don't expect to do much more.


Next Model
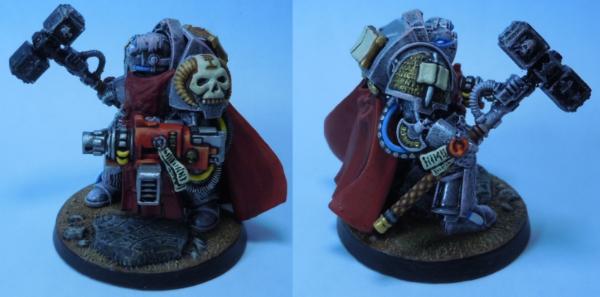
Grey Knight Inquisitor in Terminator Armor w/ Nemesis Demon Hammer & Psycannon

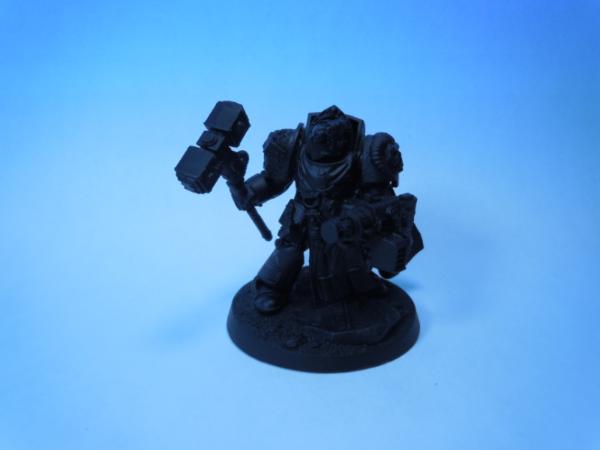
GW doesn't make a model for the Inquisitor in Terminator Armour, so I had to make my own. This model is a kit bash from DA Deathwing Knight Terminators and Grey Knight Terminators. The arms are from the Grey Knight kit, both the Demon Hammer and the Psycannon. The body is the robbed Deathwing Knight body. The head is from the Grey Knight apothecary. Finally I added the robe from the new Deathwing Terminator Kit. The model is on the same Resin Base as the vindicator. Should be a fun model to paint. I am thinking as an inquisitor, he should be white. Tough color to paint, but a white model done right on the table gets you some street credit. I suck at painting Thunder / Demon Hammers, so hopefully I wont mess it up. Tips are always appreciated for those!

This message was edited 2 times. Last update was at 2013/07/07 20:24:28


Made in gb
Courageous Space Marine Captain


Glasgow, Scotland

Inquisitors can really be any colour. In 40k fluff, Black is used as a symbol of utmost dedication to the Emperor (hence why Deathwatch uses it).

Having said that, a White Inquisitor would look boss. I suggest looking around for several well painted white minatures and ask their creators for advice, or look online for video tutorials.


Just a quick question, about the Assassin. I also have an old metal one (the one looking down the rifle) and also found that it broke easily. I still have mine and was planning to reattach via pinning but the metal is likewise, quite tough and I want to know how long did it take with your power drill and roughly how far in did you go? What drillbit size did you use? Any help would be appreciated.


Automatically Appended Next Post:
BTW, the assassin looks fantastic. Personally not a fan of the goggles but it looks cool. The spiral on the shell is boss.

This message was edited 1 time. Last update was at 2013/07/07 22:27:56


I'm celebrating 8 years on Dakka Dakka!
I started an Instagram! Follow me at Deadshot Miniatures!
DR:90+S++G+++M+B+IPw40k08#-D+++A+++/cwd363R+++T(Ot)DM+
Check out my Deathwatch story, Aftermath in the fiction section!

Credit to Castiel for banner. Thanks Cas!
 
   
Made in us
Regular Dakkanaut


Just a quick question, about the Assassin. I also have an old metal one (the one looking down the rifle) and also found that it broke easily. I still have mine and was planning to reattach via pinning but the metal is likewise, quite tough and I want to know how long did it take with your power drill and roughly how far in did you go? What drillbit size did you use? Any help would be appreciated.


Thanks for the feedback on the Assassin. I am working on the Inquisitor now, and hope to finish it tonight.

When I drilled out the barrel, I used a 1/32nd bit to drill a pilot hole. Then I did the final hole with a 1/16th. 1/16th is the largest size you could use, so you have to be pretty accurate not to drill out the sides. I used a high power hand drill, and it took several attempts because the metal heats up so fast. Its hard to put pressure on the model because of the shape. The metal will bend easier than you can drill through it. Just be patient with it and go slow. You shouldn't have any troubles.
   
Made in gb
Morphing Obliterator


Medrengard

Awesome, just awesome.

12000 pts
5000pts 
   
Made in us
Regular Dakkanaut


Work has started on my Inquisitor in Terminator Armour. He has a Nemesis Demonhammer and a Psycannon. Hes taking alot longer than I expect, but I am close to getting done. I need to add some script to the books, and I am not exactly sure what to do with the hammer end of the staff yet. I dont paint those well.

   
Made in br
Hooded Inquisitorial Interrogator


Cool conversions !!!
   
 
Forum Index » Painting & Modeling
Go to: