| Author |
Message |
 |
|
|
|
|
Advert
|
Forum adverts like this one are shown to any user who is not logged in. Join us by filling out a tiny 3 field form and you will get your own, free, dakka user account which gives a good range of benefits to you:
- No adverts like this in the forums anymore.
- Times and dates in your local timezone.
- Full tracking of what you have read so you can skip to your first unread post, easily see what has changed since you last logged in, and easily see what is new at a glance.
- Email notifications for threads you want to watch closely.
- Being a part of the oldest wargaming community on the net.
If you are already a member then feel free to login now. |
|
 |
2012/05/20 21:45:06
Subject: Deadshot's P&M Blog-Updated 10th January 2016
|
|

Courageous Space Marine Captain
|
Project No.1- Space Marine Blood Raven Vulkan He'stan Conversion
So, I have just gotten a new SM commander, and with some GK bits, I will be making a Vulkan He'stan conversion. This blog will be all encompassing all projects I do from now on and my current project will be noted in the tilte. Pics of each stage will be up an running son. I have only primed the components (minus the shoulder pads) so far, but that will go in the pics. I plan to use Vulkan not for his Chapter tactics but for the look. I like his look. I have a big fluff plan for all my Captains and Officers of my chapter, which happens to be Blood Ravens, albeit with a slightly scewed scheme from where I was 12 and said "No Scab red, right, just blood red. No Bleached bone? Yellow will do." Thankfully I have painted over the yellow with BB but the bright red remain s. Hopefully this guy will end up darker. I
Vulkan will be called "Perseus Helstrom" and will be Captain of the 4th Company. For his full fluff, I have another thread. I have the link handy so anyone that wants to read it can find it Here
So, without further ado, I present Stage 1, the bitz!
R
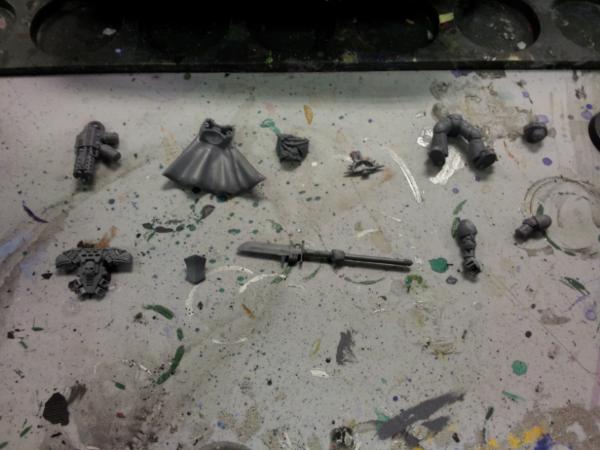
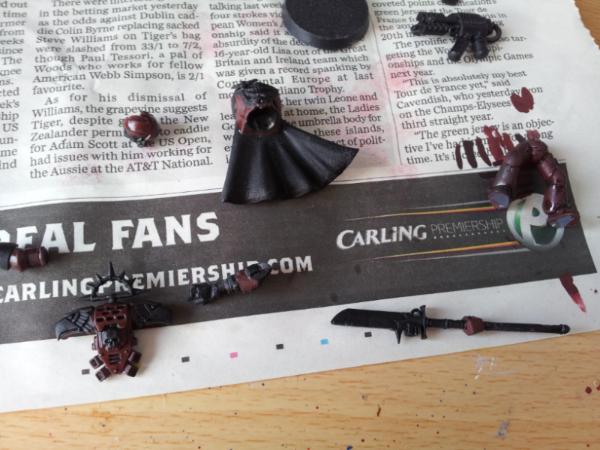
The pieces I am using. From left to right.
Top Row: Grey Knight Terminator Incinerator, Cloak/Backplate from SM commander, commander breastplate, Iron Halo from commander, commander legs, Commander head with bionic eye
Bottom Row: Commander's backpack, SM terminator tilt plate, Power armoured Grey Knight Halberd, commander's chainsword arm with the chainsword and hilt cut away, regular arm with no hand.
I still need a pair of shoulder pads. I show those when I get them.
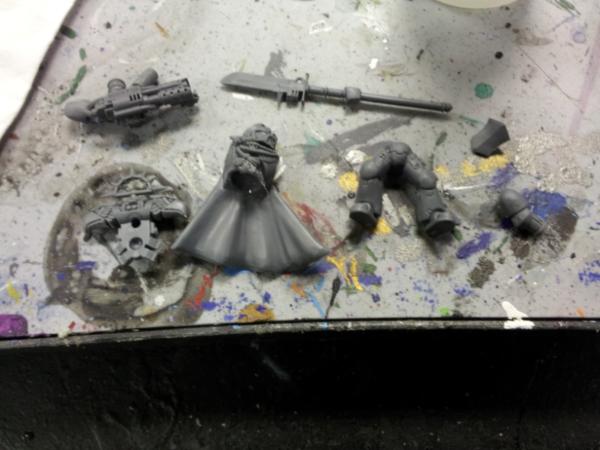
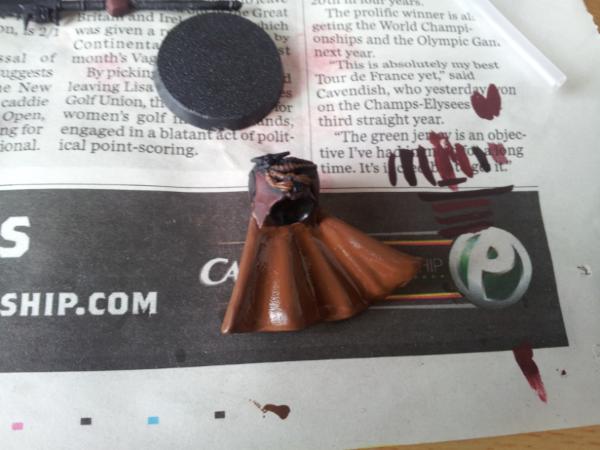
Here, the two torso pieces assembled with the helmet, and the Iron Halo on the backpack. The Incinerator is now mounted on the back of the chainsword arm, which is from the commander kit, just with the hilt and blade cut away and filed down. Unfortunately the incinerator wasn't dru before I primed so it came off but it is easily fixed. I won't bother showing them detached.
And primed! I know it doesn't look primed, but it is. The Dakka system has pretty bad graphics for photoes IMO. My camera, an 8MP on a Samsung Galaxy S2, does the pics far better, with clear resolution and sharper colours, and less flash.
That's all I have so far, I just got it primed today, bought yesterday, but hopefully, I can make this interesting, maybe get 15+ views, maybe exalted a few times. Masybe my models will score higher than 4 on when they are finished. Anyway, adios amigoes.
FUTURE MAIN PROJECTS
November 2013
Hive Fleet Behemoth Tyranid Warriors
Crimson Slaughter Chaos Raptors
December 2013
Grey Knight Terminators and Purifiers
PENDING CHRISTMAS PRESENTS
These are possible projects for next year
Blood Raven Kor'sarro Khan on bike Conversion
Blood Raven new Sternguard Veterans
Blood raven new Vanguard Veterans
Blood Raven new Tactical Squad
Blood raven Centurian Squad
Grey Knight Brotherhood Champion count-as (the Emperor's Champion)
Grey Knight Terminator Librarian
Repainting my current Terminator Librarian from my Blood Ravens (oldf and metal, so perfect for stripping  )
Chaos Space marine Black Legion Squad
Chaos Maulerfiend or Forgefiend (undecided)
Chaos Heldrake (pending priming)
Tyranid Gargoyle Brood
Tyranid Hormagaunt Brood
Tyranid Carnifex
Possibly other Nids depending on what's released
SIDE PROJECTS
Dreadfleet Flaming Scimitar (undercoated)
Dreadfleet Swordfysh (undercoated)
|
|
This message was edited 47 times. Last update was at 2016/01/10 01:55:28
|
|
|
 |
|
2012/05/21 20:32:07
Subject: Re:Deadshot's all project P&M blog. Current Project; Vulkan He'stan conversion
|
|
Courageous Space Marine Captain
|
Ok, so I am back on day 2, for post number 2! I got the basal red for my model's armour.This blog will also be partly a tutorial, so any who want to try out my techniquesand build things like I put here can. So, onto pics!
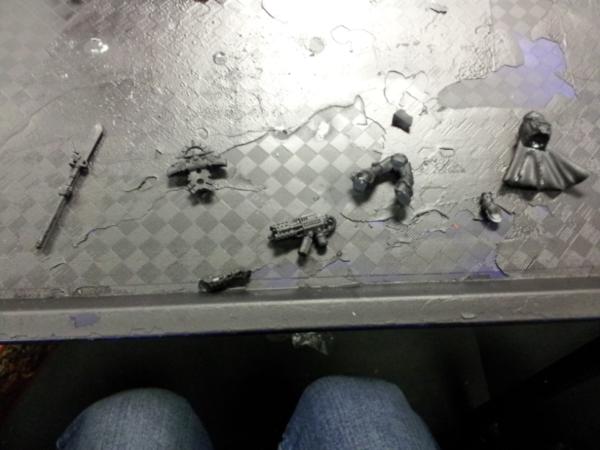
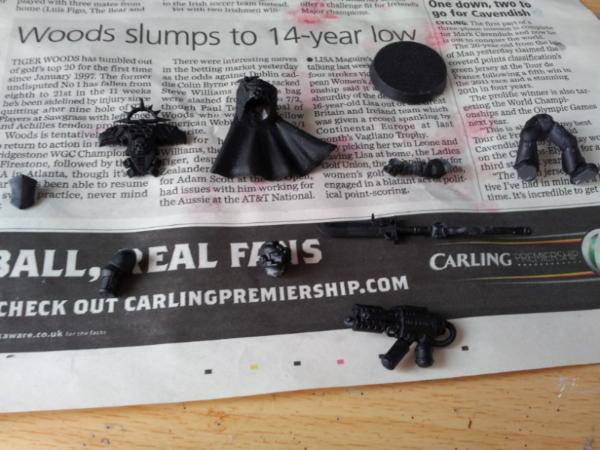
Just to show that they are indeed primed, here are the parts again. ust sprayed with GW black spray can.
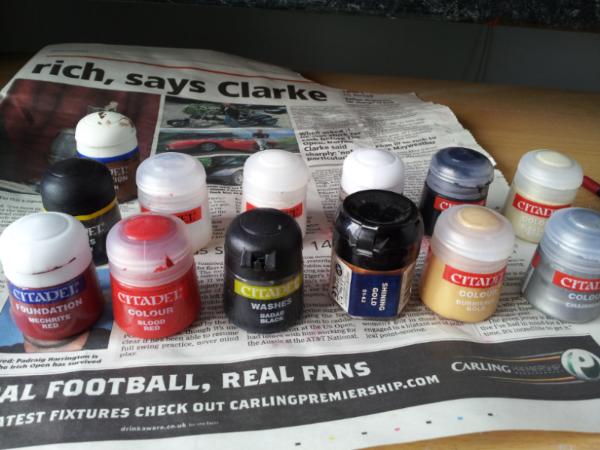
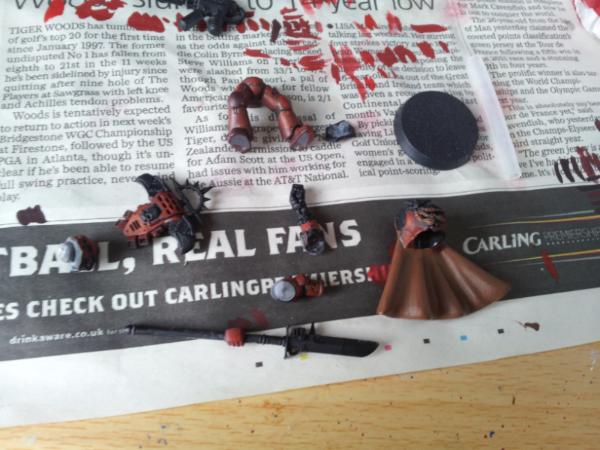
These are all the paints I plan to use, along with new "Lhemian (spelling?) Medium" from the new range, which I will get later in the week.It shall be my first paint of the new GW line.
Any, if you can't see the labels, they are, fro left to right
Top Row; Calthan Brown
Middle Row; Devlan Mud, Gloss Varnish, Skull White Dheneb Stone, Bleached Bone
Front Row; Mechrite Red, Blood Red, Badab Black, Shining Gold, Burnished Gold, Chainmail
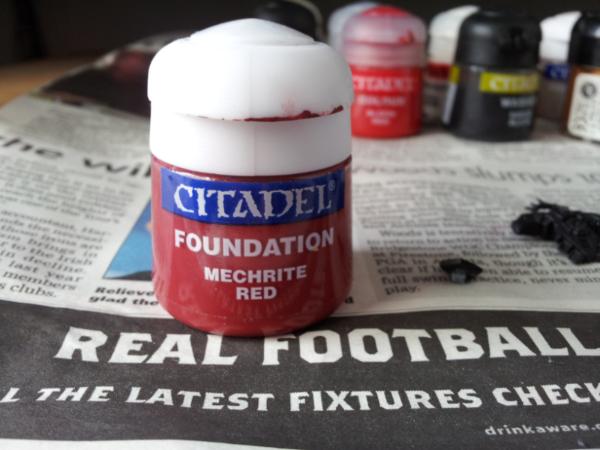
This is the first paint I used, Mechrite red. You will also need some Chaos Black
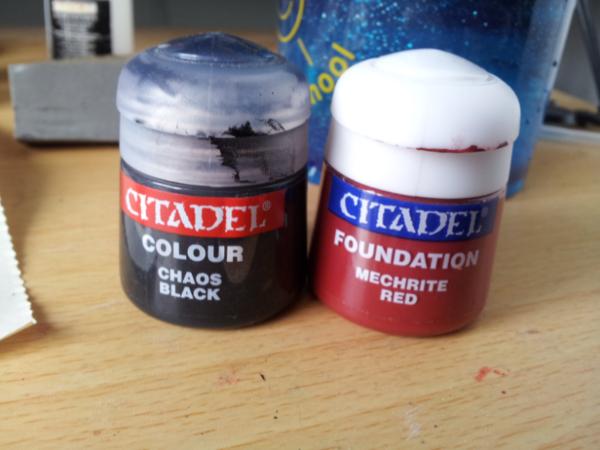
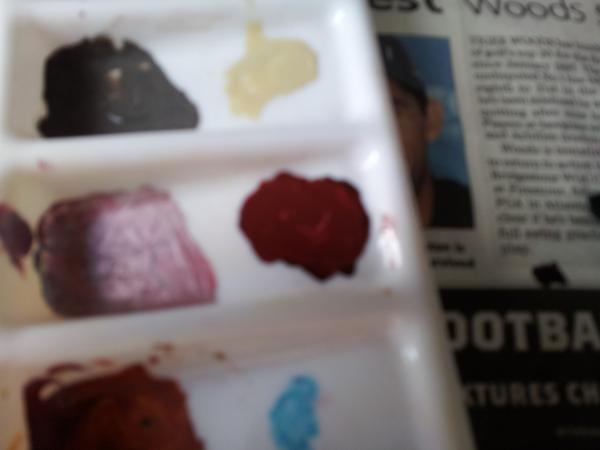
I mixed it,using 2 dollops of Mechrite, and just a speck of black, as shown below. it may not be clear but you should see the amont of Black in the centre of that red. Its too much!

The colour should look somewhat like this.
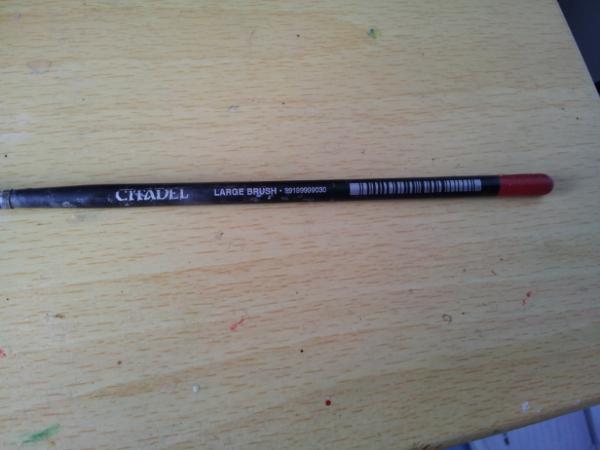
ok, now, after that, I started the painting. The amount of paint shown above? You will need quite a bit of it if you want to try it out, cause we are going to basecoat all the red armour, and it dires quick. Make sure to add a droplet of water so it applies thinly. The brush I am using is just a GW Large brush, with the red tip
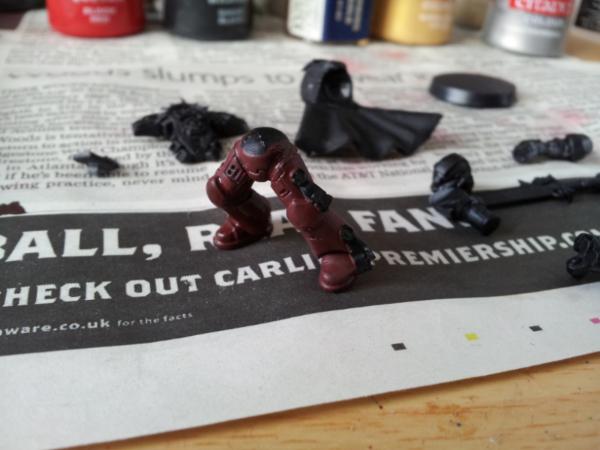
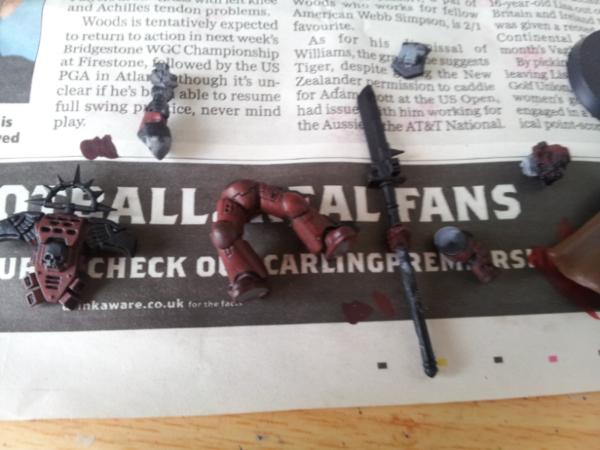
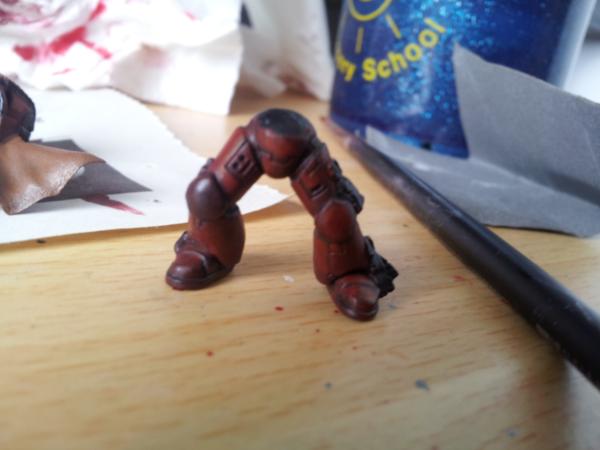
And here is how the legs look with that red/black, followed by all the rest of the parts. I always start with the legs with I am painting models, so when doing any stage I always start with the legs. I will post the pic to show how it looks and then a pic of all the components that I did that to.
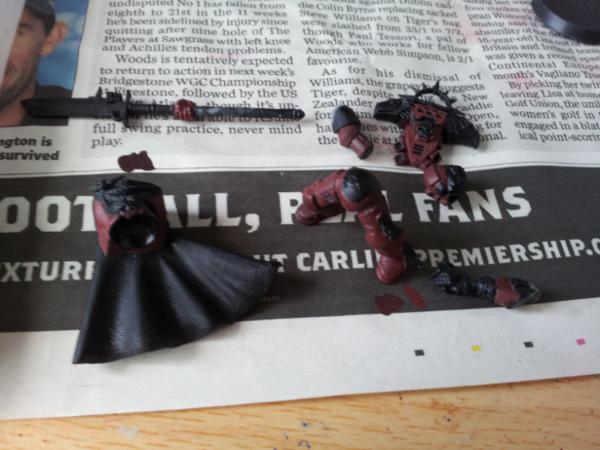
Next stage was some shading, and for that I used good old, rather smelly, Devlan mud! Now, while I hear amazing reviews about how it is liquid Jesus or whatever, personally, I have only EVER owned that half bottle. I was discussing the new paints with a guy at a store, and we got talking about DM. I said I have never used it, and I don't really see the big deal. Ogryn Flesh has gotten me what I need fine. He took this out, albeit helf-3/4 full, and just gave it to me! For free!
Anyways, models! Just the legs and the rst with the DM wash. Some pieces may not yet be dry.
And that's all I have so far, but more will follow. I hope to finish this guy by the end of the month, so wish me luck.
BTW, all of these pics are in my gallery, so if youwant to take a closer look at anything, you know where to o. Feel free to check out my other pics while you are there. I don't pride myself on being an amazing painter, but that's what 4s and 5s are for right?
|
I'm celebrating 8 years on Dakka Dakka!
I started an Instagram! Follow me at Deadshot Miniatures!
DR:90+S++G+++M+B+IPw40k08#-D+++A+++/cwd363R+++T(Ot)DM+
Check out my Deathwatch story, Aftermath in the fiction section!

Credit to Castiel for banner. Thanks Cas!
|
|
|
|
|
2012/05/21 20:41:59
Subject: Deadshot's all project P&M blog. Current Project; Vulkan He'stan conversion
|
|
Trustworthy Shas'vre
|
I wanna see the Completed Model! I've always wanted to Convert my own He'stan as i hate Metal models and i'm not a fan of his pose. Let's hope it works out!
|
|
|
|
|
2012/05/21 20:48:37
Subject: Deadshot's all project P&M blog. Current Project; Vulkan He'stan conversion
|
|
Courageous Space Marine Captain
|
well, at the rate I am going I should have him done soon. Personally I love the model, but there are 3 main reasons I am doing this.
1-I play Blood Ravens, and he is covered in Sallies things. I had the idea for this weeks ago, and the halberd, tilt plate and incinerator all cut and flied.
2-I didn't know it was going finecast
3-The model does NOT look like its artwork. The GK halberd is closer than that piece of gak !
|
I'm celebrating 8 years on Dakka Dakka!
I started an Instagram! Follow me at Deadshot Miniatures!
DR:90+S++G+++M+B+IPw40k08#-D+++A+++/cwd363R+++T(Ot)DM+
Check out my Deathwatch story, Aftermath in the fiction section!
Credit to Castiel for banner. Thanks Cas!
|
|
|
|
|
2012/05/22 18:30:17
Subject: Deadshot's all project P&M blog. Current Project; Vulkan He'stan conversion
|
|
Courageous Space Marine Captain
|
Hey, back for round 3. Dispite a lack of replies (cept you Buzzsaw, you win da cookie for first), I have taken the time so I will power on.
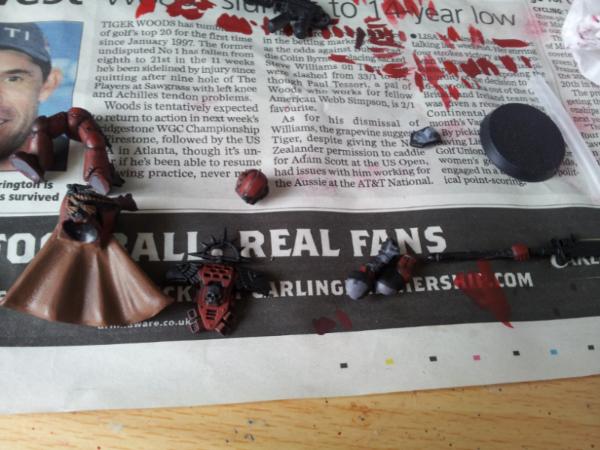
Here is the pieces with the Devlan Mud wash fully dry overnight.

The next step was to add Calthan Brown to the cloak and rope on the torso. The paint below is still a little wet but further images show it better.
Next step was a layer of hihlighting. The first hgihlight is Scab red, or should be. I don't have any, so I used a 4:1 of Mechrite red and blood red. If you wish to try this and feel it is a little too bright, use a PIN PRICK, and I mean a pin prick, or black to darken it. Any more than a pinprick will make it too dark. I used a PIN, literally!
When hgilighting, make sure to keep it very thn, and leave behind the old colour at the edges of the armour and the recesses. The right knee cap is not highlighted at all,as I plan to paint this black later and it saves time and paint.
The next stage, I regret to say, I didn't take a pic of. My paint was drying on the palet and I needed to work fast, as I needed it for the next stage as well. Thhe second highlight is 2:1 mix of Mechrite:Blood. Again, keep it thin and leave behind the previuos layer. This time I didn't go as far out toards the edges as before.
The next stage was a 1:2 of mechrite/blood. It should even sparser than before. I thankfully got a pic this time.

The final hihlight is a pure blood red. This should be kept VERY THIN if you do this, and only applied to the very top, most prominent spots. This is because Blood Ravens should have much darker armour armour than BA. So whereas BA use another portion of red in their mixes, BR don't, and don't have the final Bazing Orange highlight. Just a Blood red.
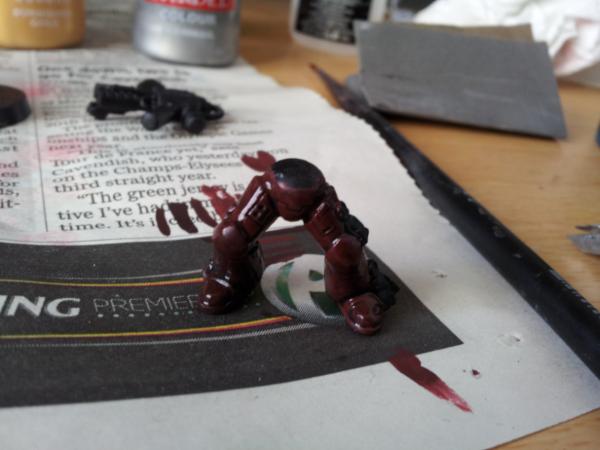
The legs
And the rest of the armour, now finished. I still need to finish the cloak, hghilight it, paint all the metal and the weapons. I have also just realised the Chainsword arm I am mounting the Incinerator on isn't the way I want it to be, so I need to cut that wrist and repostion it. Then I need to get some new Texture paints. Having.never used them myself but having seen the great effects I want to try these out. The attach to the bae and hey presto!
I also need to get some Codex Grey, or the new equivilent. I want to use this opportuniy to try out NMM for the first time on the blade. Or I could go an alternate route and try Lightning effects?
Automatically Appended Next Post:
Hi all, just a quick clarification. Moments ago I recieved a PM from someone, who wishes to remain anonymous, asking if I am following a painting tutorial by a user on Dakka named girlpainting. For the most part I am, although, as usual, and steps I can't do I modify, blend up or skip. Although I should've put that in at the start, I didn't. Apologies, and credit will be given where credit is due. Girlpainting is a seriously talented painter and gives greatly detailed painting tutorials, but skips the boring bit of watching the person paint the model. If you haven't seen any of Girlpainting's video tutorials, I seriously recommend you do.
|
|
This message was edited 3 times. Last update was at 2012/05/22 20:41:49
I'm celebrating 8 years on Dakka Dakka!
I started an Instagram! Follow me at Deadshot Miniatures!
DR:90+S++G+++M+B+IPw40k08#-D+++A+++/cwd363R+++T(Ot)DM+
Check out my Deathwatch story, Aftermath in the fiction section!
Credit to Castiel for banner. Thanks Cas!
|
|
|
|
|
2012/05/23 20:54:21
Subject: Re:Deadshot's all project P&M blog. Current Project; Vulkan He'stan conversion
|
|
Courageous Space Marine Captain
|
Hi all. t may be hot but I am here to continue with update number 4 on day 4. Here is where I left it yesterday, with the armour plates finished with their final Blood Red highlight. 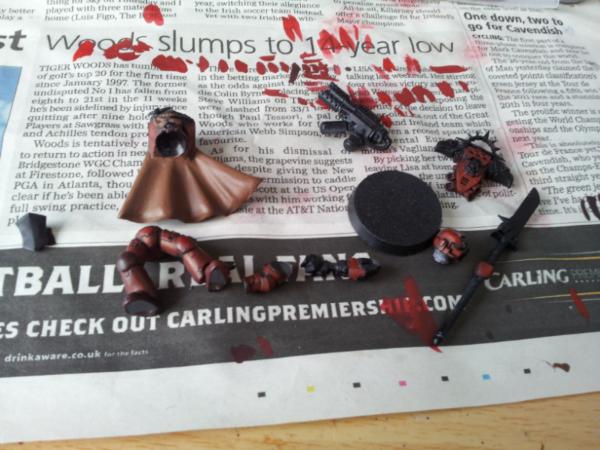 I also had the cloak basecoated in Calthan Brown. But before I show my next step, I have some news. Today I picked up my first item from the new GW paint range, the Shield 145 as I call it, which is a Technical paint known as Lahmian Medium, this 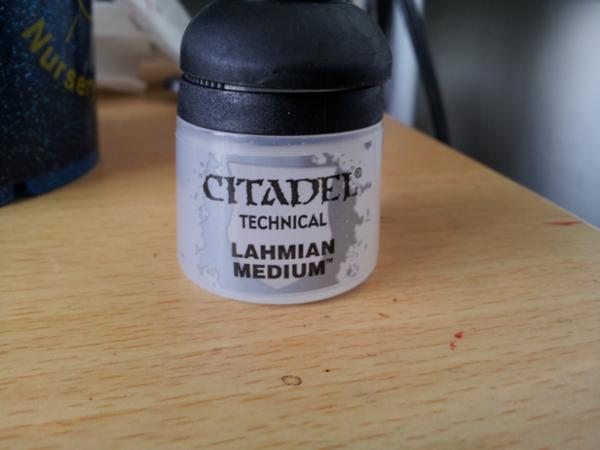 As you can see by this next image, the new pots have a special "Fin" to prop the lid open and drip it into the pot. The new, redesigned "collar is also very good, as it can help prevent spilling, ie, it can tip more before spilling out. In addition, the design means it can be poured more neatly and easily. 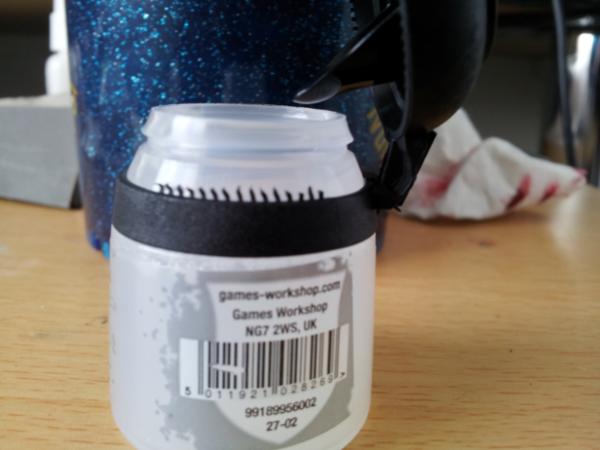 What Lahmian Medium is, is a slightly worse version of the stuf that came with the 'Eavy Metal paint kit. It is sort of the opposite of Gloss varnish/'Ardcoat, in that is a clear item to applied like a paint, but dries MATT. This allows it to seal transfers very well. Simply cover the chosen with gloss and apply the transfer as usual, but then this stuff will o over instead of more gloss. It takes away the shinyness and also hides the edges. Very important, as I plan to use a BR transfer from FW. Not being able to access FW regularly, and costing £9.50 per A4 sheet, I am not wasting a single transfer. But that's not all, order right now and it becomes a very good paint thinner! Better than water. Ever get when trying to thin your paint with water it becomes translucent and streaky? This is the same, but without that bad stuff!" It spreads the paint out to apply it easier, and leaves your model streak free! Don't believe me? Here's my test on a piece of sprue! 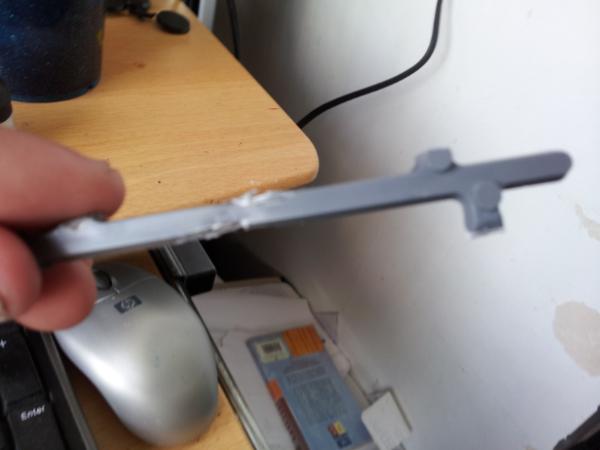  on the left, mrked by X, is Mechrite red thinned with water. As you can somewhat makle out, it is capable of seeing the sprue colour underneath. The one on the right, marked by a circle type thing, is pure Mechrite. It is quite thick, and not very good for anything other than a simple, "dip and play" type army. You can sort of make out brush strokes in it too. in the middle, the smallest bit, marked by a sort of square, is Medium thinned Mechrite. It may need a second coat, but it gives as good a coverage as out of the pot, is thin and easy to apply. Wait, there's more! It also dulls glazes! The new GW glazes dry shiny. While this may be good for some, applying this will dull it down. You retain the hue but it doesn't leave you dirty orks or beastmen looking like a disco ball! Basically, I can't recommend this stuff enough. If you haven't got it, get it! If you have the stuff from the 'Eavy metal set, put it in a bullet proof glass case, because I can only assume it is everything here and more! It is probably one of the best addtions to the product line and from now on, I will be thinning all my paints with this stuff. Now, onto the blog. Before I start painting, I need to fix the flamer arm. The arm I plan to mount it on would have made the weapon sit at an angle, so one barrel is above another. I want both to be level, and the gun horixontal. So I had to cut the wrist 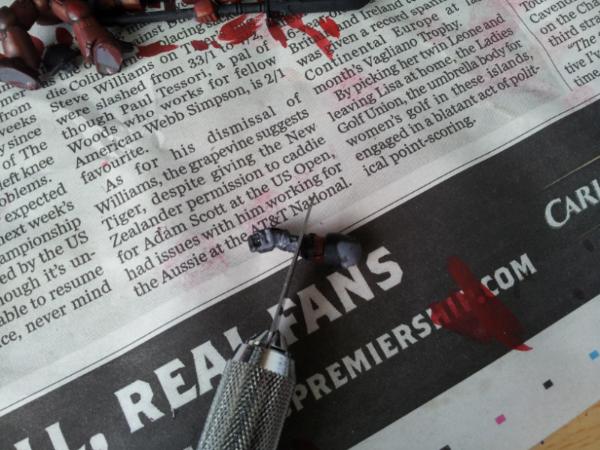 And repose it slightly so the gun will be the way I want. 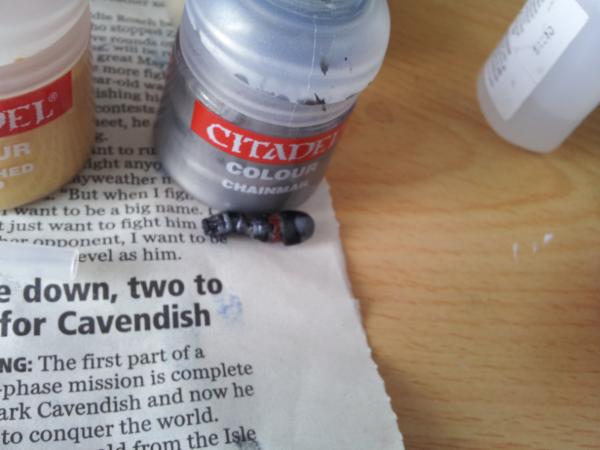 Ok, so THEN painting. The first tep was a hihlighting of the cloak. As I mentioned in my last post, I am mostly following Girlpainting's Blood Raven Captain tutorial, so I needed a 50:50 mix of calthan Brown and Dheneb stone. In Girlpainting's video there were a lot of recesses, but on mine I just left a small margin of pure Calthan Brown near the folds of the claok and the tassel at the back. The tassels themselves were simply brushed over with the mix. As I said earlier, I thinned it with Lahmian Medium. This stuf is fantastic. I got great, thin, paint with only 1 drop, and great coverage. Don't et me wrong, I still neded a second coat, but the step up from just water is fantastic. 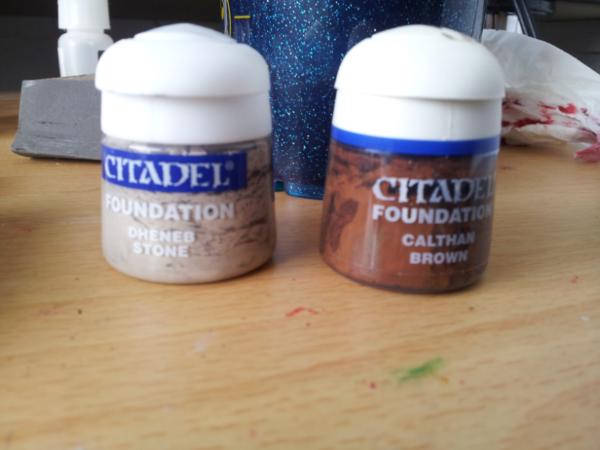 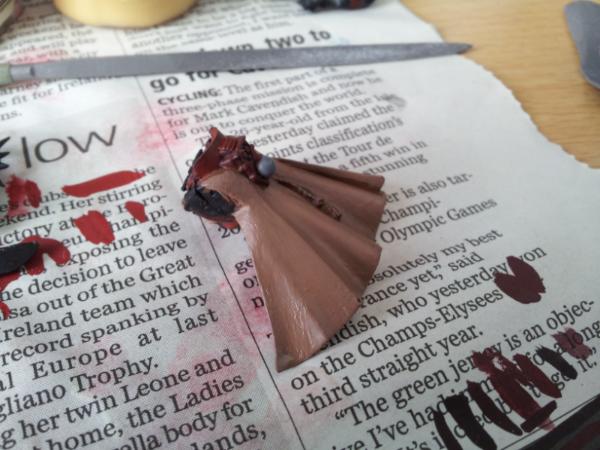 Ok, next was some gold! As per Grilpainting's video, I should have used a 50:50 of Calthan Brown and Tin bitz. However, I was later informed that any metallic brown would do, so a 2:3 mix of Chainmail and Calthan Brown was applied to the parts I neded gold. Sooooooo... 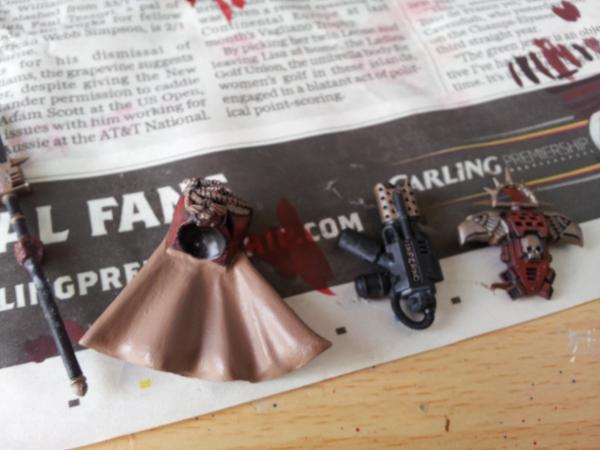 The next stage was suppossed to be the gold. I wanted to try Girlpaint's special mix of Dwarf bronze, Tin Bitz and Burnished or Shining Gold. However, as I have niether TB or DB and no room on my mixing tray, I went for straight up Gold paint, thinned with Medium of coarse as it is a little gloopy in this heat. knowing Burnished is better as a highlight over another metal, I went for Shining Gold. 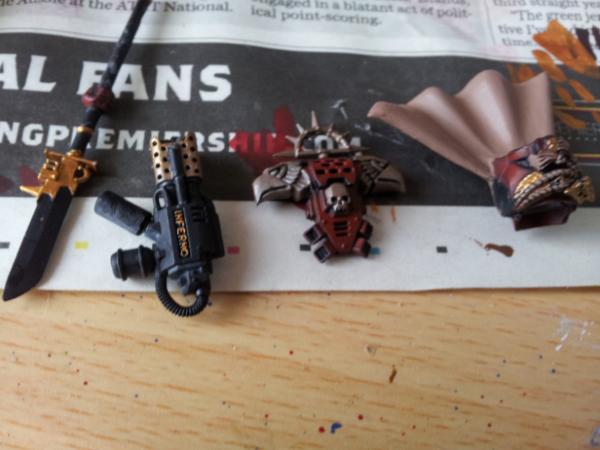 And that's all I got! Fortuantely it was a pure colour, so while Ididn't get the backpack gold, I can easily do this without remixing. I got the halberd decor, the "Inferno " on the gun and the Aquila on the chest in Shining. My next step tomorrow, though I may get none done, is to finish the backpack, wash all the gold with a tiny amount of Badab Black to bring out the detail I somewhat lost, and then highlight with a 1:1:1 of Shining Gold, Burnished Gold and a little Chainmail for shinyness, and finally a mix of Shining and Burnished. I will then wash this with Ogryn Flesh for sheen and do the rest of my parts. Probably not get any of that done, but there's always the weekend!
|
|
This message was edited 1 time. Last update was at 2012/05/23 20:56:54
I'm celebrating 8 years on Dakka Dakka!
I started an Instagram! Follow me at Deadshot Miniatures!
DR:90+S++G+++M+B+IPw40k08#-D+++A+++/cwd363R+++T(Ot)DM+
Check out my Deathwatch story, Aftermath in the fiction section!
Credit to Castiel for banner. Thanks Cas!
|
|
|
|
|
2012/05/23 21:30:49
Subject: Re:Deadshot's all project P&M blog. Current Project; Vulkan He'stan conversion
|
|

Nasty Nob on a Boar
Inside of a CRASSUS ARMOURED ASSAULT TRANSPORT
|
He's coming out well, can't wait to see him done
|
 angel of ecstasy wrote: angel of ecstasy wrote:
You take a dump, you flip through the Dark Eldar codex, the concept art for Lelith Hesperax shows up and you pee on the floor.
2000  |
|
|
|
|
2012/05/23 21:33:51
Subject: Deadshot's all project P&M blog. Current Project; Vulkan He'stan conversion
|
|
Courageous Space Marine Captain
|
Advertising works lol! Thanks for the comment TAS! With a full day this weekend he should be finished by the ned of the month which is next Thursday I believe? So plenty of time to complete my target goal.
|
I'm celebrating 8 years on Dakka Dakka!
I started an Instagram! Follow me at Deadshot Miniatures!
DR:90+S++G+++M+B+IPw40k08#-D+++A+++/cwd363R+++T(Ot)DM+
Check out my Deathwatch story, Aftermath in the fiction section!
Credit to Castiel for banner. Thanks Cas!
|
|
|
|
|
2012/05/23 21:36:24
Subject: Re:Deadshot's all project P&M blog. Current Project; Vulkan He'stan conversion
|
|
Nasty Nob on a Boar
Inside of a CRASSUS ARMOURED ASSAULT TRANSPORT
|
Yeah, your lucky I'm on that thread as much as I am
|
angel of ecstasy wrote:
You take a dump, you flip through the Dark Eldar codex, the concept art for Lelith Hesperax shows up and you pee on the floor.
2000 |
|
|
|
|
2012/05/24 22:32:59
Subject: Re:Deadshot's all project P&M blog. Current Project; Vulkan He'stan conversion
|
|
Courageous Space Marine Captain
|
Hello! So, first off, a bit of news. My local GW store is runnin a mini-Games Day type party. They have a mini scrap Daemon contest (which I won last year) and a mini-Golden Daemon. The key word here is mini. As in, it isn't full scale GD quality. Being some of my best paintwork yet, I want to enter this guy! The deadline is noon on Saturaday the 26th May. 2 days away and it is already midnight, so basically a few hours to paint the eyes, base it, and the halberd blade and build it. So here is what I got done today. First of, a little reminder of where I left off. The backpack, and a little bit of the head still needed gold. Eerything other than that and the aforementioned is complete.  Now, what I did next was finish the gold, and start the silver, as you can see by the gun, in Chainmail. 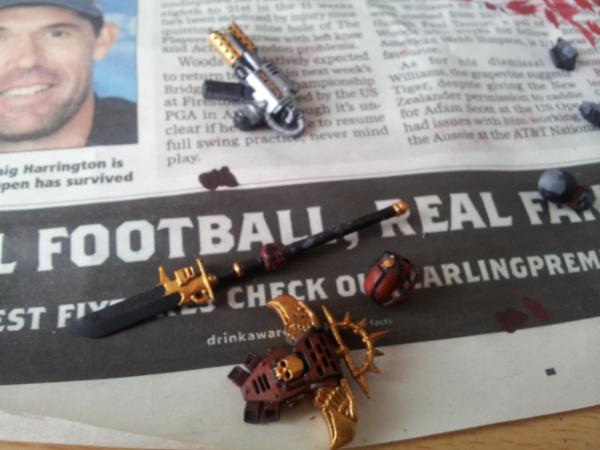 What happened next was I hihlihted all the gold in a 2:1 mix of Burnished and Shing Golds. Then I washed all the metals in Badab Black to enunciate the decals. I also ashed the cloak in Devlan Mud to shadow. 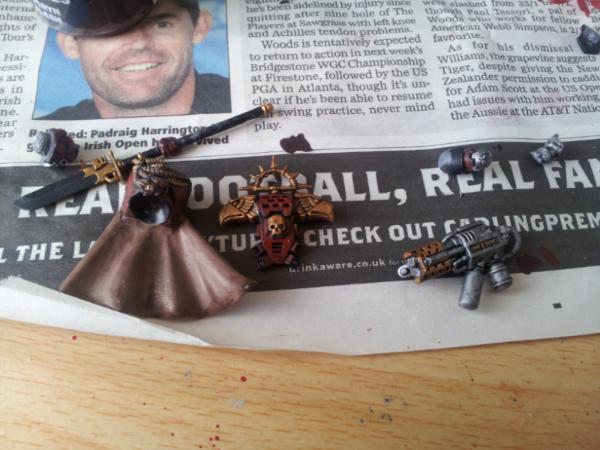 And the back to show the effect. Notice it most near the tassel and fold on the right, as well as near the shoulders at the recesses. 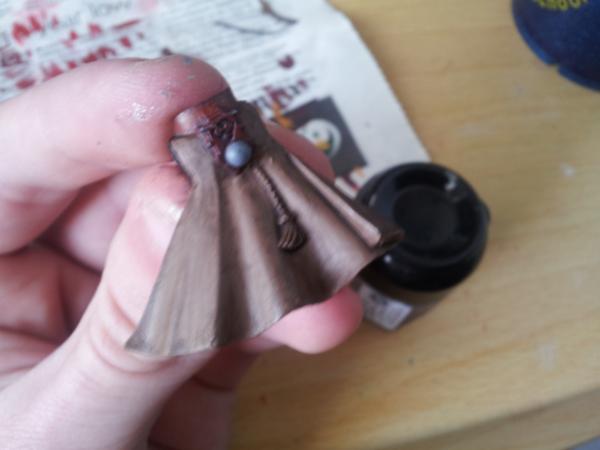 Here I have done the wash and also slightly edged highlighted all the metal with Mythril silver, to help express the edges. 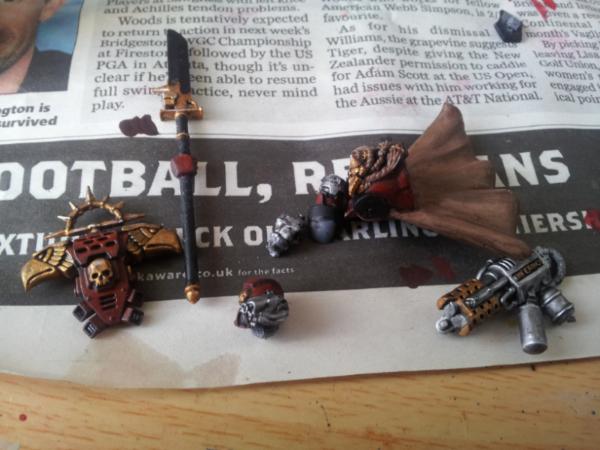 At this point my flamer arm broke again, so I ned to fix that p. Here, all the gold is washed with Ogryn Flesh for a more brilliant tone. Gryphonne Sepia works as well. 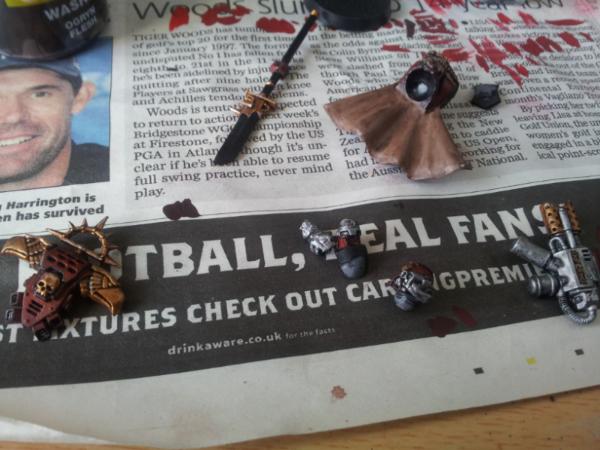 The pieces untouched until now, the shoulder pads and the Tilt Plate. I didn't bother undercoating the pads as I don't have time or a decent ase to go over black. As it was I had to use Dheneb stoe  . I basecoated the main area of the shoulders and the entire plate in Dheneb. 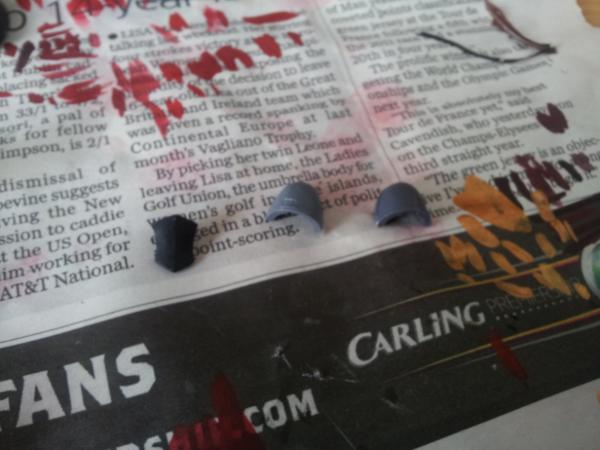 And here we are, 5 days after purchase, and aprroxiamtely 7.5 hours total painting time, nearly finished! 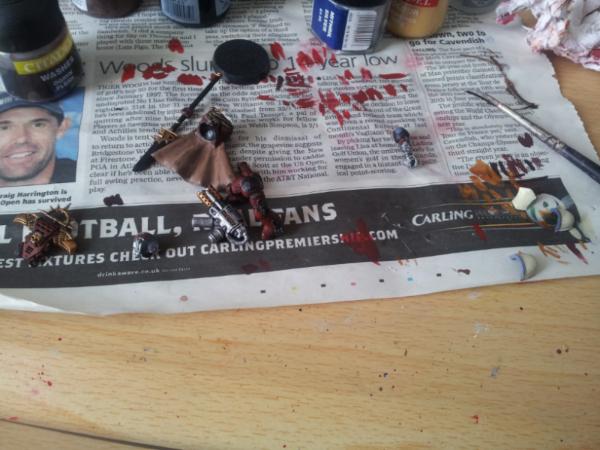 And construction is finally underway. I want to fix the arms on before I put the helmet. To do that I need the halberd blade apinted. I also need the flamer attached. The shoulder pads and Tilt plate need the arms on, and then I finally base the model. I have decided to try the new GW texture paints and have gone with the green one, Lustrian Undergrowth for it, but that'll all come tomorrow. 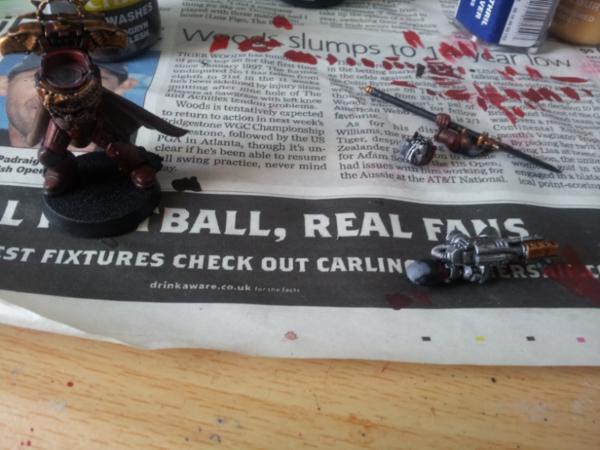
|
|
This message was edited 2 times. Last update was at 2012/05/24 22:35:10
I'm celebrating 8 years on Dakka Dakka!
I started an Instagram! Follow me at Deadshot Miniatures!
DR:90+S++G+++M+B+IPw40k08#-D+++A+++/cwd363R+++T(Ot)DM+
Check out my Deathwatch story, Aftermath in the fiction section!
Credit to Castiel for banner. Thanks Cas!
|
|
|
|
|
2012/05/26 22:27:53
Subject: Re:Deadshot's all project P&M blog. Current Project; Vulkan He'stan conversion
|
|
Courageous Space Marine Captain
|
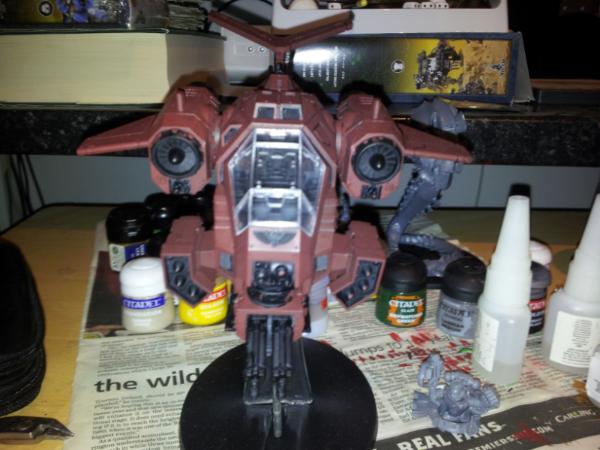
So, on Friday, I finished Perseus helstrom, who will be my 4th Company Captain (though uses the rules for Vulkan He'stan). ok, here we go. Finished in 6 days and entered into a mini-Golden Demon. Results at the end. Ok first, two new cast members! 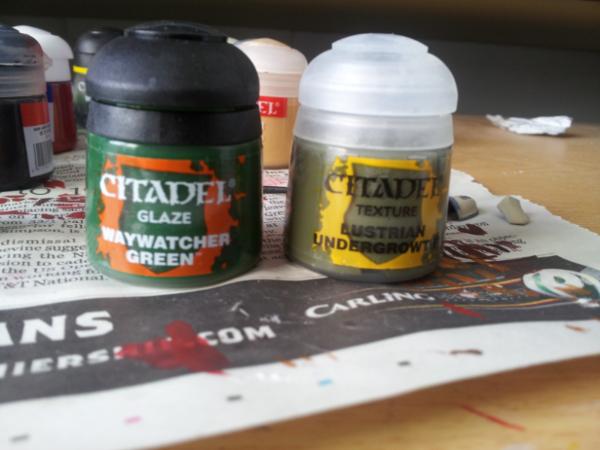 I love these bad boys! Used the green glaze to create source lighting and the Lustrian to base! They are both fantastic! Next, I spent the entire day trying to fix the flamer arm, basing (took 5 minutes with the Lustrian!) and wet blending this! 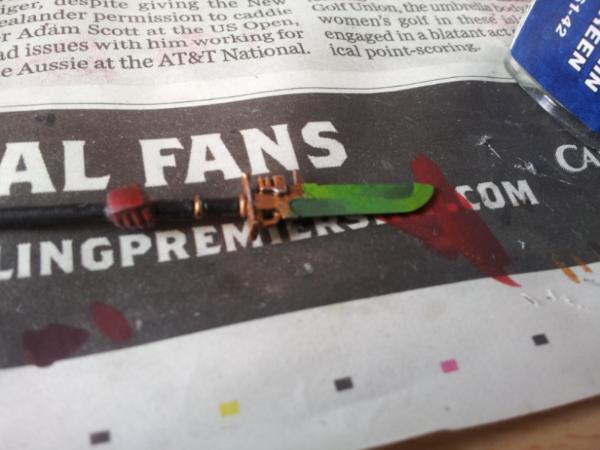 For my very first attempt, I don't think its too bad! This is one side finished and now a WB showcase! 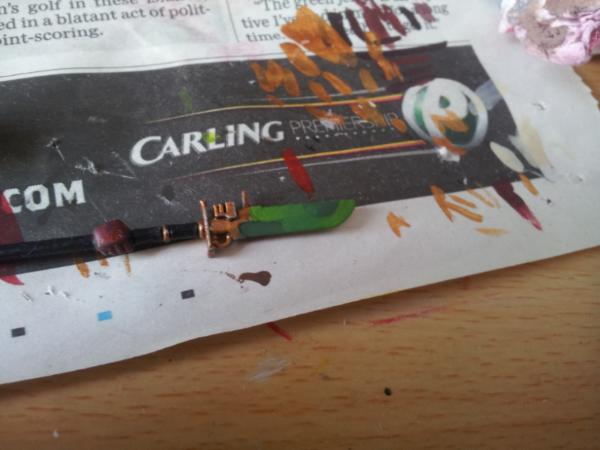 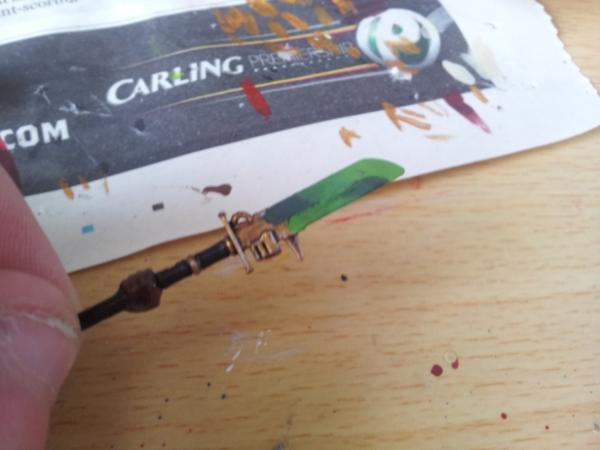 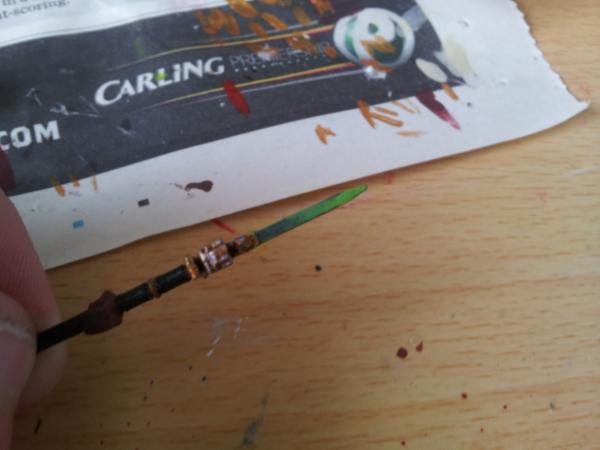 Ok, so didn't go as amazingly as it could've, but for a first attempt it is very encourafging! I ned to perfect tis technique for my Khan conversion, when I get it! Here are the colours I used. On the left is a 3:1 mix of Goblin green (new equivilent is Warboss Green) and Chaos Black (Abaddon Black). The middle is pure Goblin and the right is a 3:1 of Sunburst (Flash Gitz) Yellow and Goblin Green. I just used water for these as I wanted them to be very liquid, but didn't want to waste Lahmian Medium. For the blending based I used a 50/50 opf Goblin Green and Black, to try for something close to orkhide Shade, which I don't have and the replacement, Caliban Green, is closer to Dark Angel Green. After doing the wet blending I gave a coat of Gloss Varnish('Ardcoat from the new range, from the Techinical section). And here is the flamer arm just attached. Flamer not included. 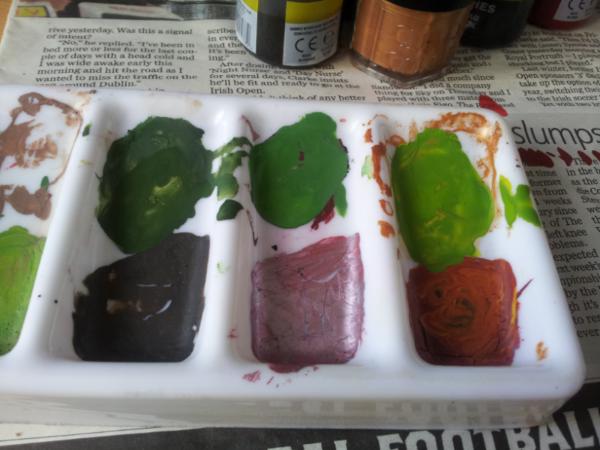 Here is the flamer arm when first attached 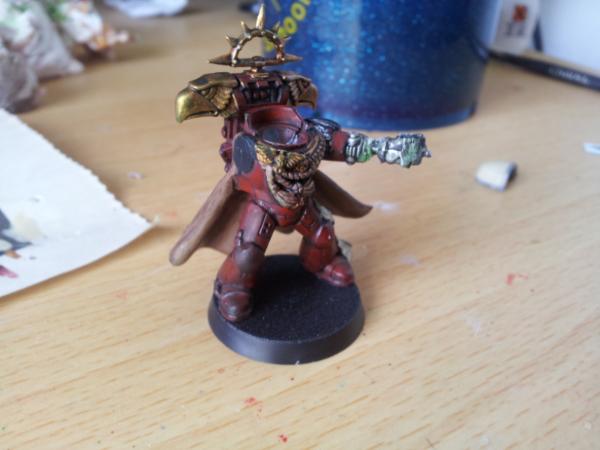 And the preattached head. For the eyes I used Goblin green as a basecoat, followed by a dothighlight of the Sunburst/Goblin mix I used int the wet blanding, the a coat of Gloss. Same for the digital weapon lenses. I put just a tiny bit of waywatcher reen on the bionics to "glow" it. 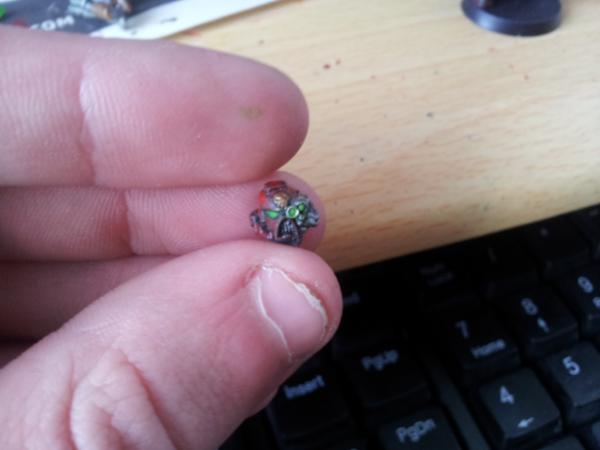 Ok, so here is the final pic I took for the night, before heading down to my Grandad's overnight. He let me finish up down there, as I only had the pads and Tilt plate and Halberd to stick on. The pad on the far right takes two transfers from the standard sheet that comes with most marine kits, taking an "I" and "V" and placing them to look lke the Roman Numeral IV, which is 4, as in Captain of the 4th. The pad on the left and the tilt plate both have transfers from the Blood Raven's Forgeworld transfer sheet. A skull, for HQ, and a Blood Raven, second smallest version (the smallest are for scouts). 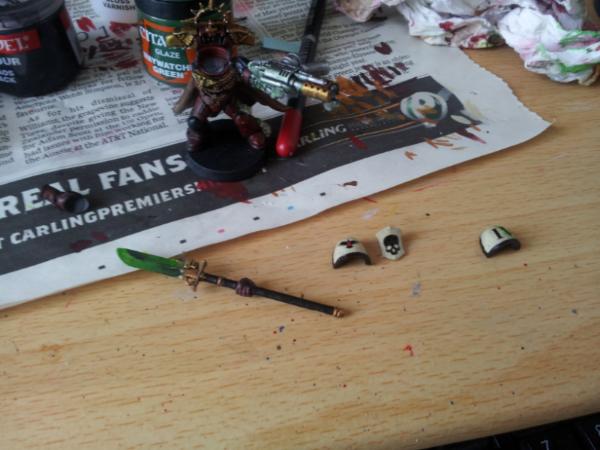 ok, so one last pic to show before the entire showcase of the endpiece. The texture of the Lustrian  As you can see this is quite like a mousse rather than a paint. Contrary to popular belief it does NOT contain grit. It clumps due to the formula. I used this stuff to base the model, then washed the coat withDevlan Mud. You will need a large brush to apply this, and DO NOT thin it in any way. Use as is, and apply evenly over the area. After the wash of DM I drybruashed the base with a 50/50 mix of Goblin green and Snakebite Leather. Finally, the end result! This images are alln the gallery so please vote! [ 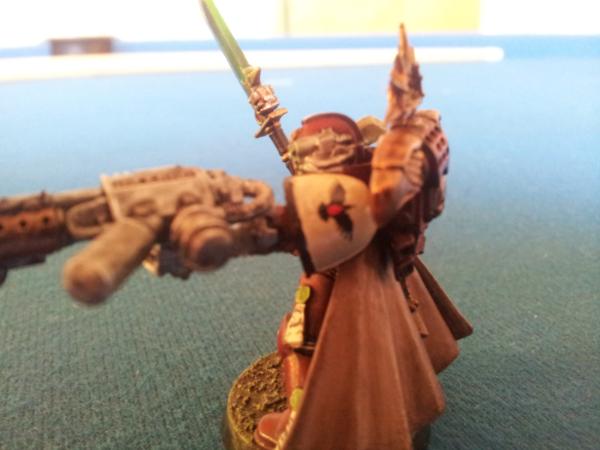 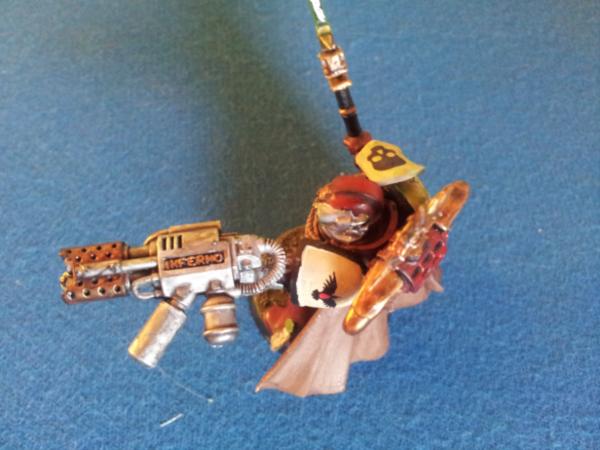 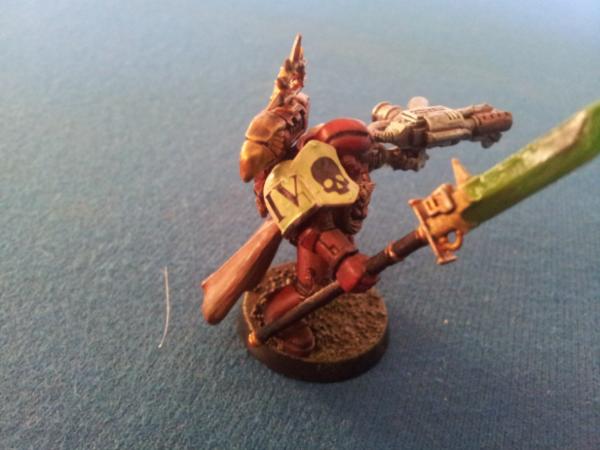 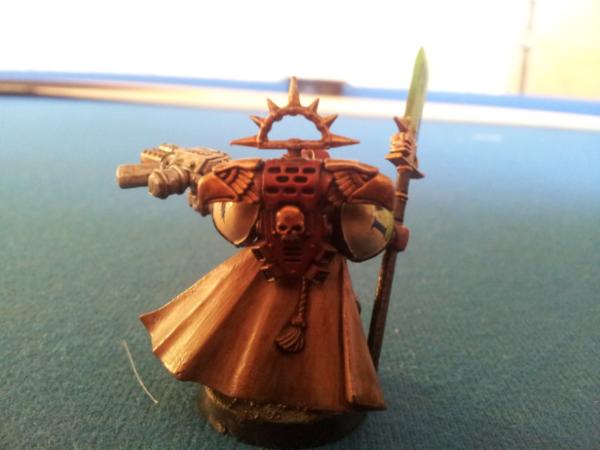 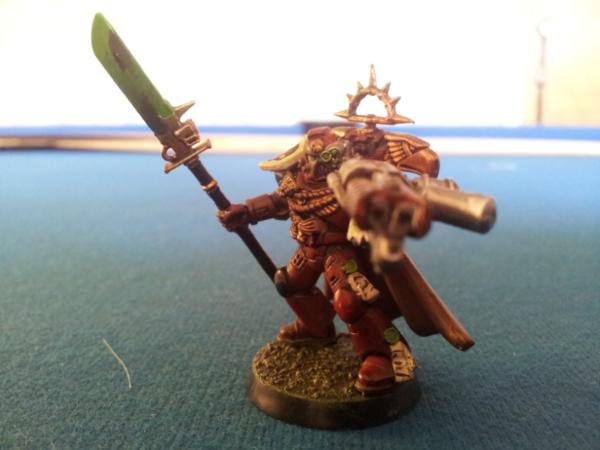 You probably won't be ale to see it, but I put green glaze over the gun, the side nearest the hadberd, and the tilt plate and shoulder pad, to give it a glow. Here is a clearer image 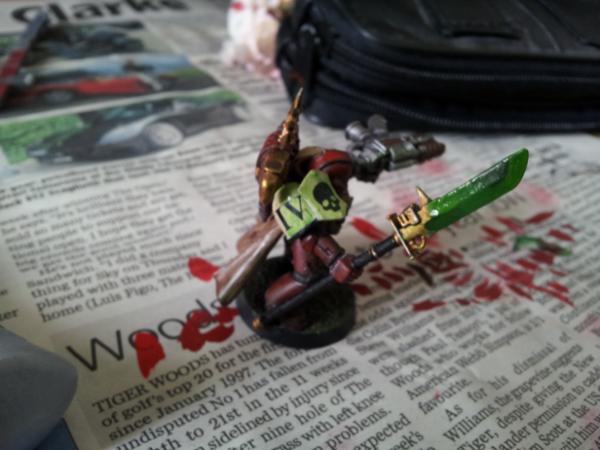 And, as mentioned, I ut my deadline from the end of the month to today! To enter a mini Golden Demon contest (I am only 15 so was entered in young bloods :( ) But first, the cake(s) served to the attendees of the GW Belfast Games Day party, which were great. First, a Games Day 2012 Ckae! 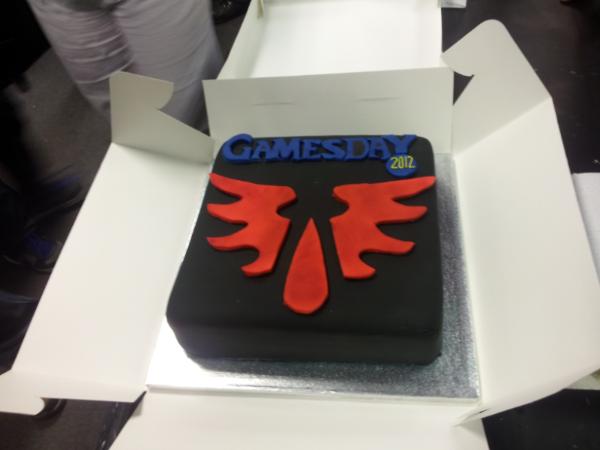 Every time the store throws a party, either for its birthday or Games Day or what, or the 25th anniversary of 40k,it has a cake. The Birthday last year had an amazing Crux Terminatus Cake, which can be found on GW Belfast's Facebookpage. The 25th annivesary had a rubbish, yet funny, space marine helmet, 3D and all! Apparently the guy who did the Crux and this was sick, so we had to get a non-hobbyist baker to do that. The second cake was made by the wife of one hobbyist and mother of one too! She doesn't play herself but in a house of 3, and two are gamers, you pick stuff up, apparently. So, here is the second cake (at this point many people screamed "Cake for the Cake God!") 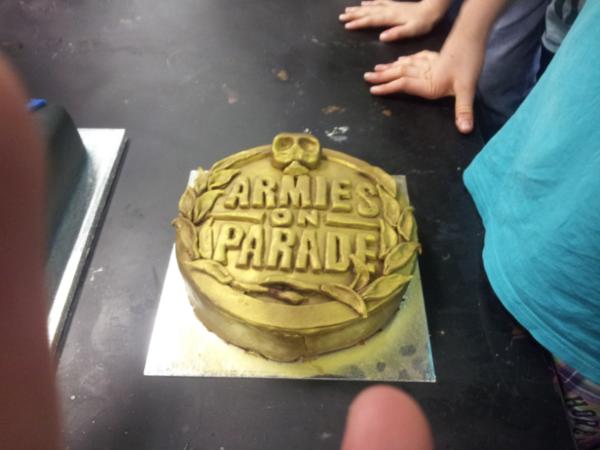 Ok, so without further ado, the entrants, and my competitors in my category, all of which were very well painted for a young bloods grouping. However, eventually there was a winner, who recieved a brand new, Tyranid Trygon/Mawloc kit. This was very intereting to me when it was announced, as I had been looking to buy a second one for a Mawloc. But before I announce the winner, here is the entrants. Ignore the two models on the right of the black pillar and the Yarrik in front. 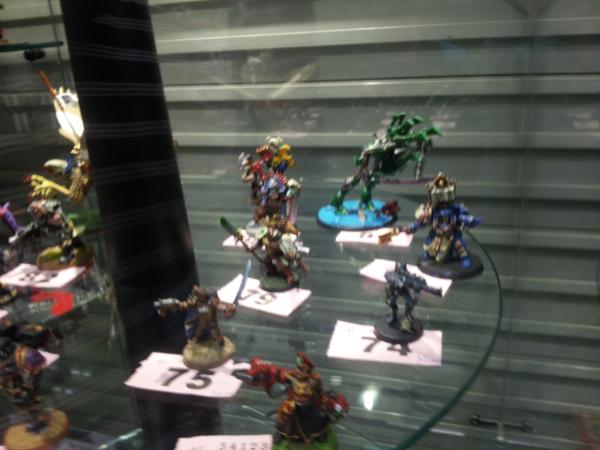 The entrants were the Lord Commissar to the left, my Vulkan centre of photo), a Vindicare to the right, an UM Libby, a Warithlord (hunched over to look at a piece of dynamite?) and Kaptain Badruk at the back. Pic 2, different angle, maybe not blurry 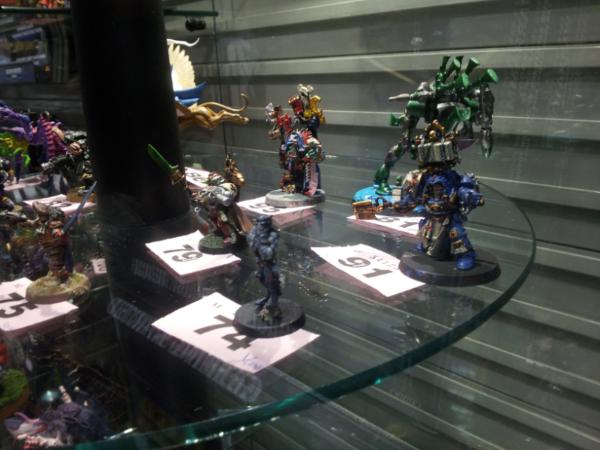 And finally, my first project has come to an end. I willend this post with a single picure, I took of the winner. That'll be me untill my next project. Bye! Second place was the Lord Comissar 3rd was the Vindicare. And the winner? 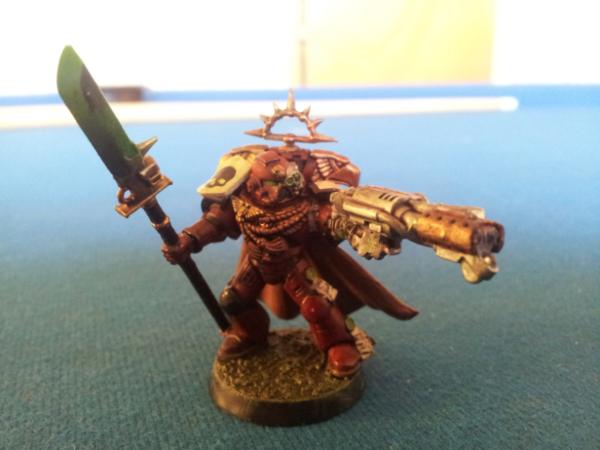 
|
|
This message was edited 1 time. Last update was at 2012/05/27 13:43:35
I'm celebrating 8 years on Dakka Dakka!
I started an Instagram! Follow me at Deadshot Miniatures!
DR:90+S++G+++M+B+IPw40k08#-D+++A+++/cwd363R+++T(Ot)DM+
Check out my Deathwatch story, Aftermath in the fiction section!
Credit to Castiel for banner. Thanks Cas!
|
|
|
|
|
2012/06/06 20:37:41
Subject: Deadshot's all project P&M blog. Current Project; June 2012 Blood Ravens Stormtalon Gunship
|
|
Courageous Space Marine Captain
|
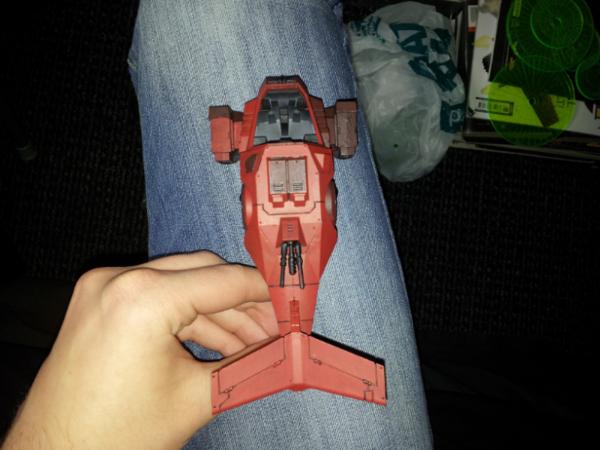
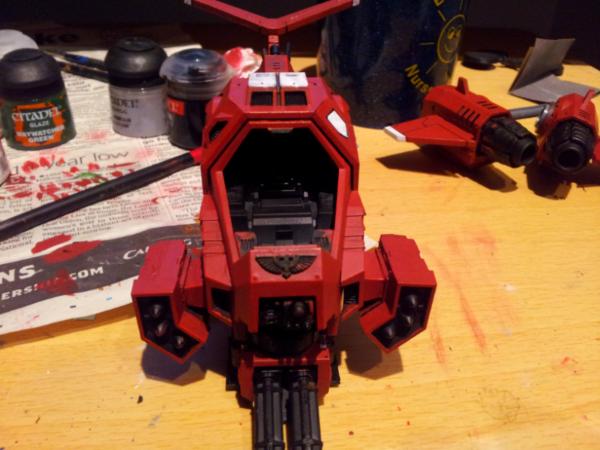
Project No.2- Space Marine Blood Ravem Stormtalon Gunship
So I am back with my June 2012 project, and I am doing a Space marine Stormtalon Gunship in the colours of the Blood Raves. It should be easier and shorter than my Vulkan aiove. He was a sort of test for my new BR colour scheme, instead of my 12yr old- recent "spray white then bright red, add detail" approach.
So, here is what I have doen so far. Asembly and some angle shots, primed in black+angled, and basecoat. seing as I was just doing an out-of-the-box building I decided to leave the building out, and just post endstages. Because i was doing a conversion before, I did WIP shots. So here ios just a block of pics!
You may not be able to make it out, but the top and bottom of the cross has been slightly widened, allowing me to move the gunship around slightly, leaning in a similar manner to the way the new GW ball topped stemsdo.
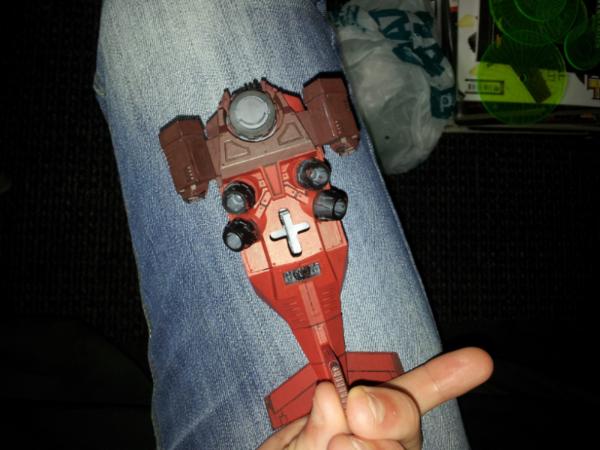
With the canopy set on. I haven't attached the control console or pilot as I want to paint the pilot and cokpit in detail. As you can determine the canopy is not glued yet. I have gone with Skyhammer missile launchers on the basis I can get a TL HB/ LC or TML on other stuff.
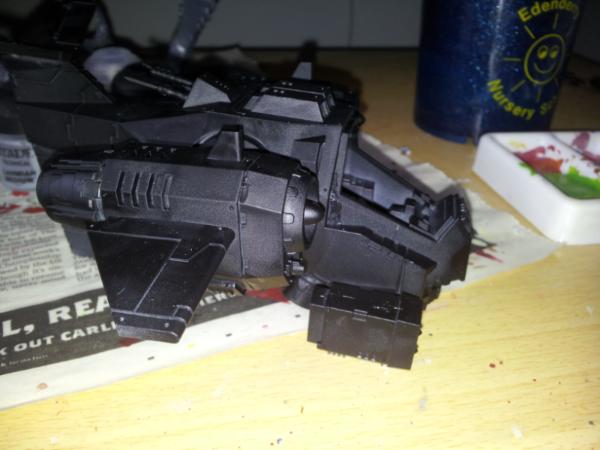
And undercoated.
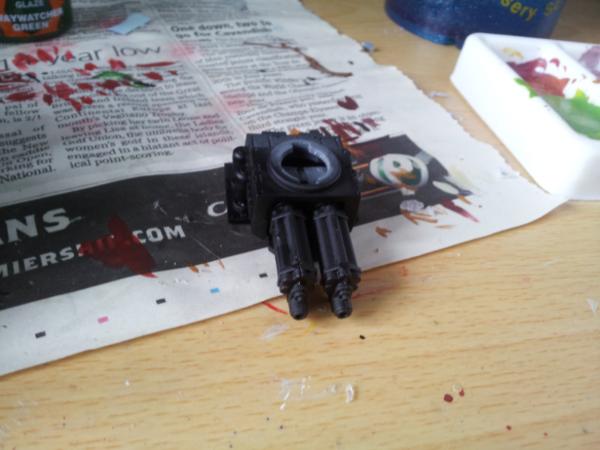
Detachable assalt cannons, which can actually aim backwards and can be attached/detached when the kit is assembled to the instructions by the letter, unlike the stormraven, who's uns don't swivel full if you attached the top vent behind the turret.
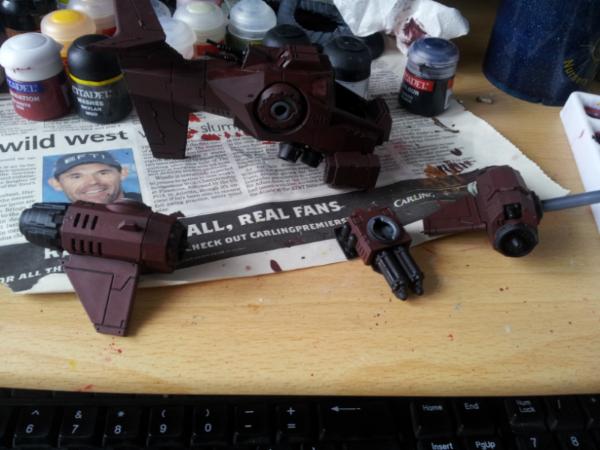
And the initial basecoat of mechrite red with a little black. A word of caution for those with no experiance with vehicles, don't thin the paint too much, something i learned the hard way. Get some medium. Do not use water. Use a tiny amount of medium.
And that's all. Oh, before i forget, there is another painting competition at the end of the month at GW Belfast, exclusively for flyers. Stormravens, Valks, Doom Scythes, you name it. There will be plenty of stormtalons entered but I can do my best right?
Automatically Appended Next Post:
Also, the engines are not glued in place or together. There is simply one engine attached to the rod that transverses the craft, and the other is unglued. They will be able to rotate when I am done too!
|
|
This message was edited 4 times. Last update was at 2012/07/12 22:36:10
I'm celebrating 8 years on Dakka Dakka!
I started an Instagram! Follow me at Deadshot Miniatures!
DR:90+S++G+++M+B+IPw40k08#-D+++A+++/cwd363R+++T(Ot)DM+
Check out my Deathwatch story, Aftermath in the fiction section!
Credit to Castiel for banner. Thanks Cas!
|
|
|
|
|
2012/06/06 20:58:35
Subject: Deadshot's all project P&M blog. Current Project; June 2012 Blood Ravens Stormtalon Gunship
|
|
Nasty Nob on a Boar
Inside of a CRASSUS ARMOURED ASSAULT TRANSPORT
|
Congrats on the win and the new SR looks ballin as gak (thats a good thing, in case thats not an expression in England)
|
angel of ecstasy wrote:
You take a dump, you flip through the Dark Eldar codex, the concept art for Lelith Hesperax shows up and you pee on the floor.
2000 |
|
|
|
|
2012/06/06 21:05:47
Subject: Deadshot's all project P&M blog. Current Project; June 2012 Blood Ravens Stormtalon Gunship
|
|
Courageous Space Marine Captain
|
Thanks and Thanks?
|
I'm celebrating 8 years on Dakka Dakka!
I started an Instagram! Follow me at Deadshot Miniatures!
DR:90+S++G+++M+B+IPw40k08#-D+++A+++/cwd363R+++T(Ot)DM+
Check out my Deathwatch story, Aftermath in the fiction section!
Credit to Castiel for banner. Thanks Cas!
|
|
|
|
|
2012/06/06 22:59:46
Subject: Deadshot's all project P&M blog. Current Project; June 2012 Blood Ravens Stormtalon Gunship
|
|
Decrepit Dakkanaut
|
Very interested in how the storm talon is going together... thanks for putting up the pics and commentary Deadshot.
|
|
|
|
|
|
2012/06/07 06:11:44
Subject: Deadshot's all project P&M blog. Current Project; June 2012 Blood Ravens Stormtalon Gunship
|
|
Courageous Space Marine Captain
|
Thanks
|
I'm celebrating 8 years on Dakka Dakka!
I started an Instagram! Follow me at Deadshot Miniatures!
DR:90+S++G+++M+B+IPw40k08#-D+++A+++/cwd363R+++T(Ot)DM+
Check out my Deathwatch story, Aftermath in the fiction section!
Credit to Castiel for banner. Thanks Cas!
|
|
|
|
|
2012/06/10 10:45:02
Subject: Re:Deadshot's all project P&M blog. Current Project; June 2012 Blood Ravens Stormtalon Gunship
|
|
Guard Heavy Weapon Crewman
Northern Ireland, Newtownards
|
Love Vulcan And So happy he won compition.
Strorm Talon looks like its coming on well with what I saw of it last.
Have fun finishing it. 
|
FOR GAUNT! FOR THE EMPORER!! FOR TANITH!!!

Join the Tanith at:
Imperial Guard. Tanith First and Only Regiment. Be a Ghost! (new members welcome)
|
|
|
|
|
2012/06/11 20:41:33
Subject: Deadshot's all project P&M blog. Current Project; June 2012 Blood Ravens Stormtalon Gunship
|
|
Courageous Space Marine Captain
|
So whle I haven't had time to post stuff for my blo hrein the last fe days, I have been getting on with my Stormtalon and have ben progressing rather slowly due to having to mix most of the paint so far, and the mix dries on my pallette before i can paint the whole model or i run out so need to keep mixing more, which is the opposite of Vulkan who I could mix a small batch and do a stage on all the parts. but enough of that, here is what I have.
So the day after I last posted here, I did my wash. Now, I know what you are thinking, washing a vehicle? but I i could pull out the pools on the flat bits and it had enough panel lins to make it worthwhile. So I did that and my Stormtalon broke, the glue wan't dry. Thankfully only an engine detached from the stick that connects the two, so it gave the bonus of being able to be painted seperately.
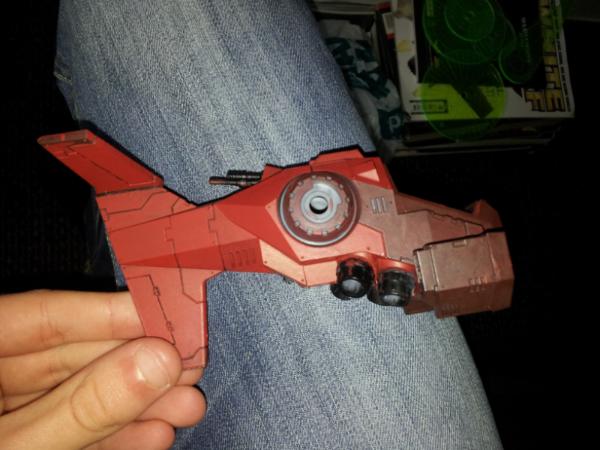
So I continued with the third stage of the armour, the layer. A simple 1:2 mix of blood and Mechrite reds, as seen used on Vulkan. I didn't follow with more highlights thouh of 50/50 and 2:1. Just an edge highlight. Because it took me so long, I needed to do it over 3 days. here is day 1.
You can really see the brightness of the Washed and layered setions. The washed is much darker.
So on day 2 I finished what i didn't on 1, except the underside o 1 wing, which I finished today. unfortuantely I didn't take pics.
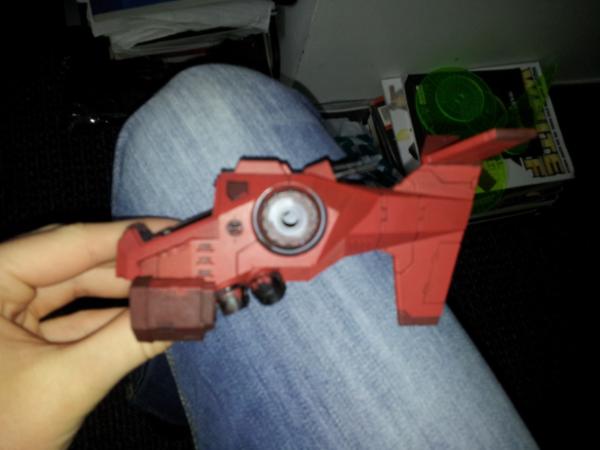
But, after finishing the layering i took a pic. Not a great one but here.
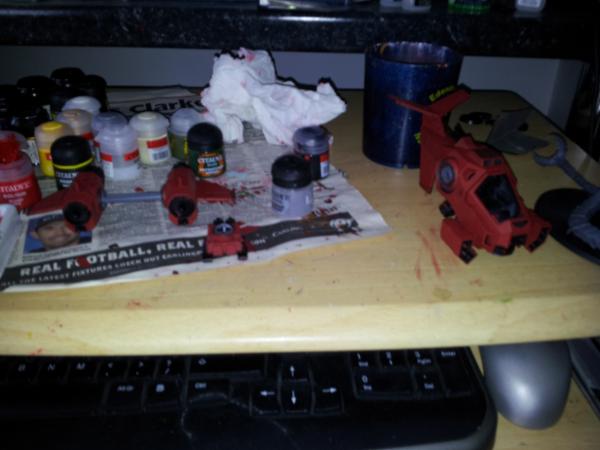
So then a little edge highlighting. I wanted it to e subtle, so it just edged the plates and made them stand out as seperate, but not noticable.
Finally what i did today was paint the panels where the Bleached bone accents will go, it skull white. i purposely left these sections unlayered so the white would pply better. The panel next to the cockpit, opposite to the exhaust, will be where the chapter symbol goes, and the top section will have a Fast Attack cross. The wing and tail tips are just accents and the Assault Cannon has little spots too.
This will allow me to start the interior cockpit and the other metals tomorrow and this week.
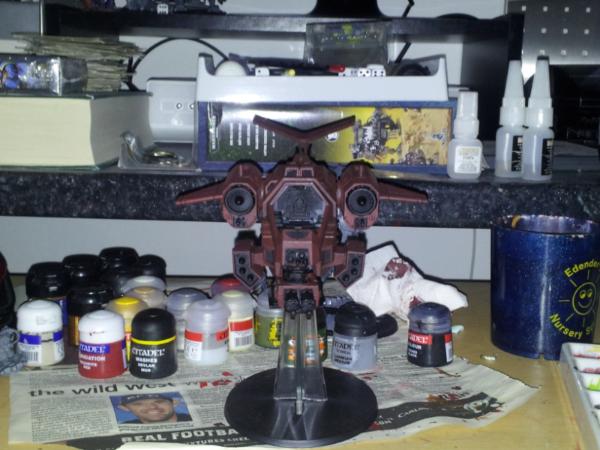
Oh, and for giggles, here is the Stormtalon Gunship without Engines. Your judgement must pass!
|
I'm celebrating 8 years on Dakka Dakka!
I started an Instagram! Follow me at Deadshot Miniatures!
DR:90+S++G+++M+B+IPw40k08#-D+++A+++/cwd363R+++T(Ot)DM+
Check out my Deathwatch story, Aftermath in the fiction section!
Credit to Castiel for banner. Thanks Cas!
|
|
|
|
|
2012/06/12 03:44:11
Subject: Deadshot's all project P&M blog. Current Project; June 2012 Blood Ravens Stormtalon Gunship
|
|
Nasty Nob on a Boar
Inside of a CRASSUS ARMOURED ASSAULT TRANSPORT
|
Looks good, keep em coming 
|
angel of ecstasy wrote:
You take a dump, you flip through the Dark Eldar codex, the concept art for Lelith Hesperax shows up and you pee on the floor.
2000 |
|
|
|
|
2012/06/12 03:53:54
Subject: Deadshot's all project P&M blog. Current Project; June 2012 Blood Ravens Stormtalon Gunship
|
|
Trustworthy Shas'vre
Cruising in my CRASSUS ARMORED ASSAULT TRANSPORT
|
Nice blog! How many coats of white did it take to get it that smooth?
|
I guarantee you that I'm not really as smart as the test says:

Test Your IQ |
|
|
|
|
2012/06/12 06:22:08
Subject: Deadshot's all project P&M blog. Current Project; June 2012 Blood Ravens Stormtalon Gunship
|
|
Courageous Space Marine Captain
|
1. But its not as smooth as.it appears in the pic.
If you're talking about the consistancy then again 1. I used Lahmian Medium from the GW Technical Paints to thin it instead of watter.
|
I'm celebrating 8 years on Dakka Dakka!
I started an Instagram! Follow me at Deadshot Miniatures!
DR:90+S++G+++M+B+IPw40k08#-D+++A+++/cwd363R+++T(Ot)DM+
Check out my Deathwatch story, Aftermath in the fiction section!
Credit to Castiel for banner. Thanks Cas!
|
|
|
|
|
2012/06/17 13:54:19
Subject: Deadshot's all project P&M blog. Current Project; June 2012 Blood Ravens Stormtalon Gunship
|
|
Courageous Space Marine Captain
|
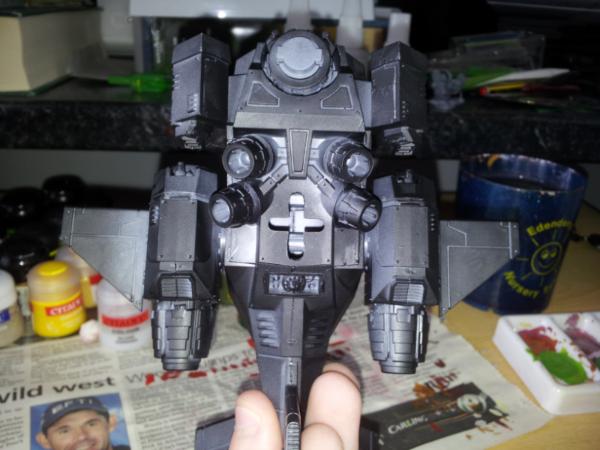
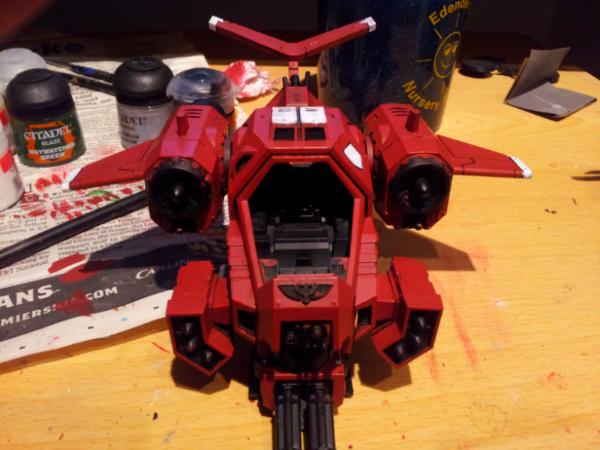
Hi! Haven't had a chance to update recently but the weekend is here and so am I. First off, KillyKaveKommando asked how I got my white so smooth. My answer was I didn't, and this image is just to prove it. You may have to turn the brightness on the screen down to see it. 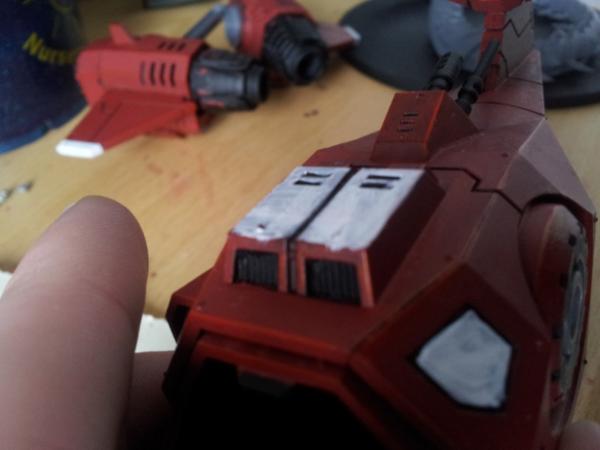 And then I finished the white and the bone layer, adding that accent colour, to avoid the inevitable question of "Why do BA have a Stormtalon?" (even though the house rules state they can). This is white before the bone, followed by 2 shots with bone, both the main section and rimming the Mechanicus symbol underneath 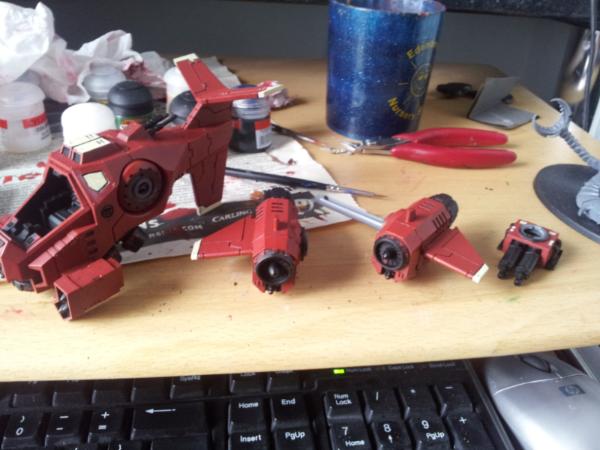 Before And after 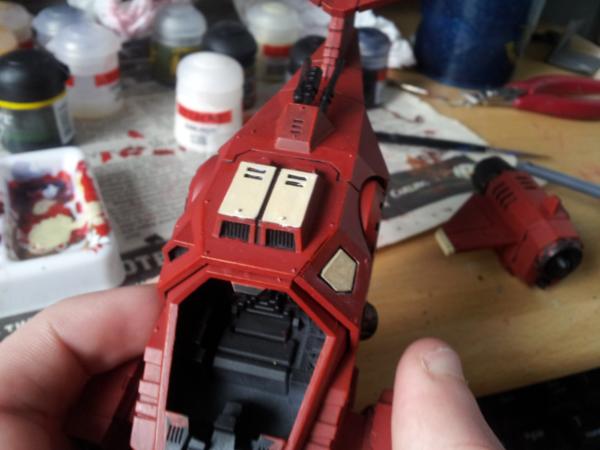 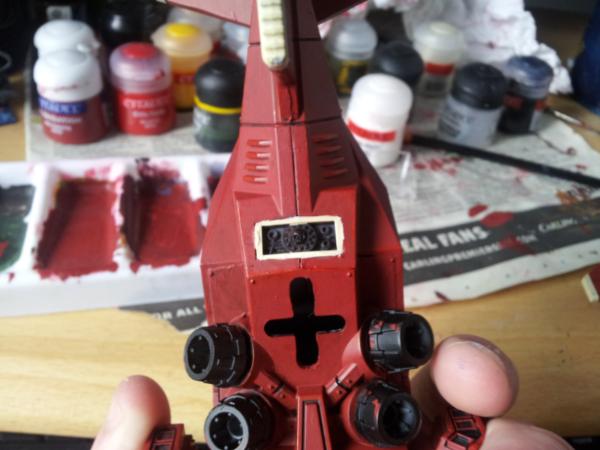 And then, the unthinkable happened. My brother came barging into my room while I was painting. I set the canopy on top of the cockpit to chase him out. And it dropped off. My mum came in later. I turned back to paint, and crack. 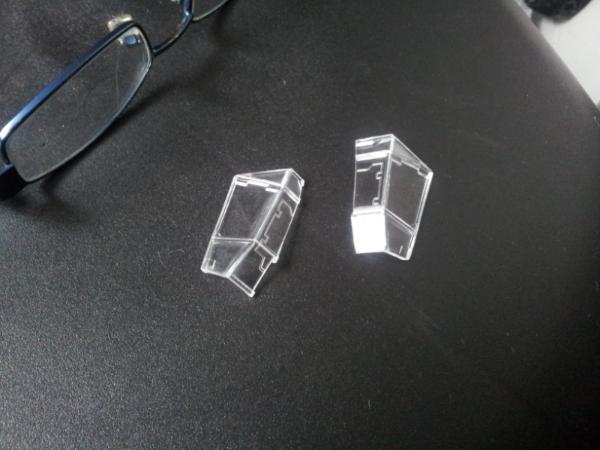 I tried...to fix it... 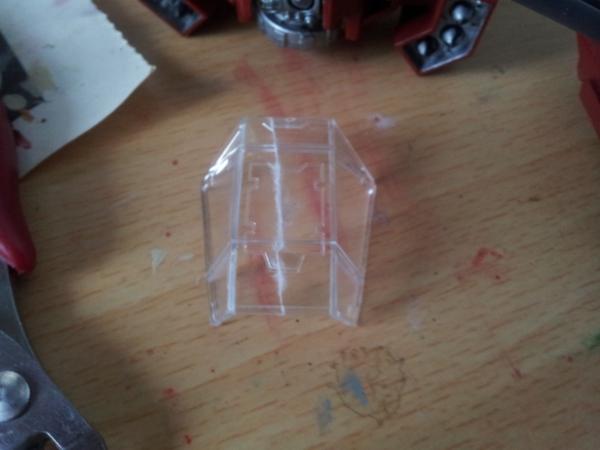 So, I forgot to take pics of my next 3 steps. I painted all of the metal areas, first in Chainmail, then a wash of Badab Black. The metals then got a drybrush, in one of 2 colours. For the assault cannons, front of the engines and the cockpit, as well as the symbol on the underside, I went with Mythril Silver to enhance it, but the thrusters and engines were Chaos Black to make it scorched. 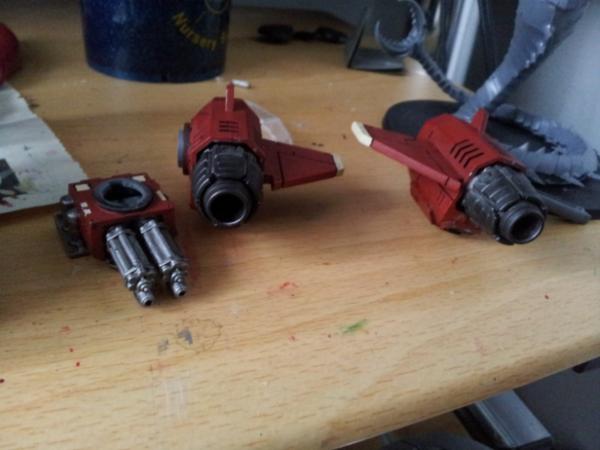 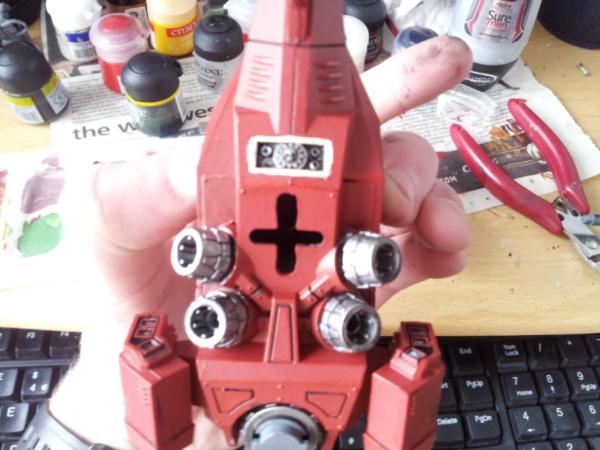 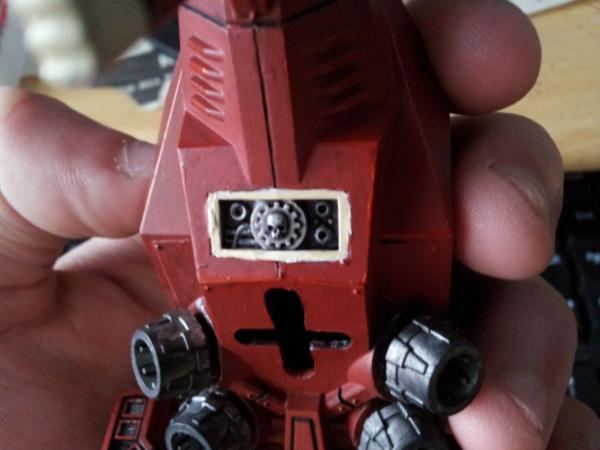 I then took some Goblin Green to all the sensors and buttons around the cockpit and For the sensors of the front, as well as the larger buttons in the pilot's seat, i put a bit of a 3:1 mix of Sunburst Yellow to Goblin Green. I then put a slight glaze of Waywatcher green over the buttons, sensors and areas around them. 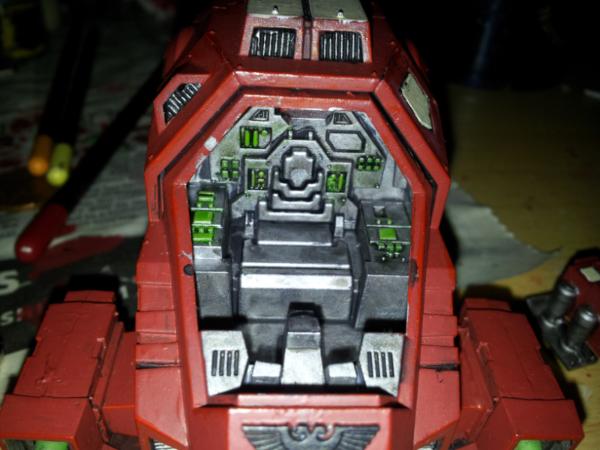 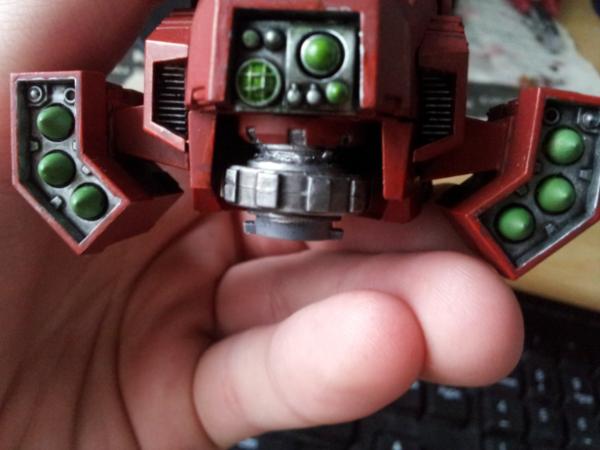 The very next step was to reattach the engines. I slottd the pipe through, glued it to the other end and left it to dry. When I was done the eniges could rotate but were still attached to the model. The turret was left unglued so I can remove and rotate it. Then I began basing, using Lustrian Undergrowth texture opaint. Some pople don't like these texture paints, prefering to use sand and PVA glue. Personally I prefer the paints, as my PVA glue isn't work and the grit brushes off easily. However, this doesn't, so its a lot better. Not only that, but because its a paint, you can wash and drybrush it, whereas with sand it can come off when painted over. So here it is based initially 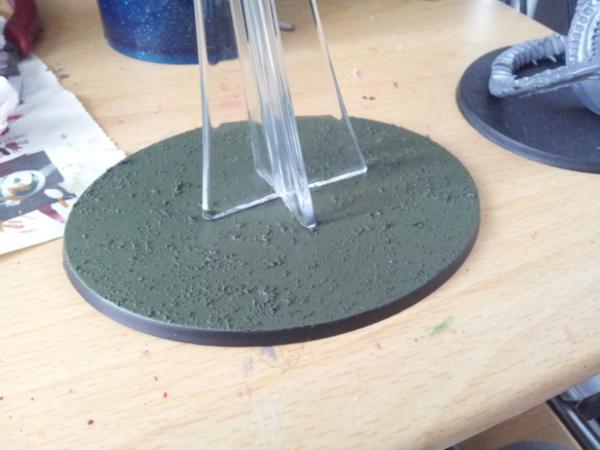 And here it is built up and placed onto the base for show overnight while I slept Then, and here is the good part of Texture paints, i washed with Devlan Mud to provide depth and stop it looking so flat 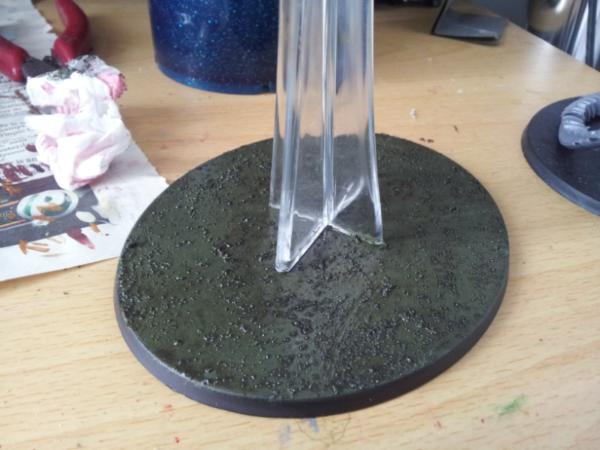 And dried 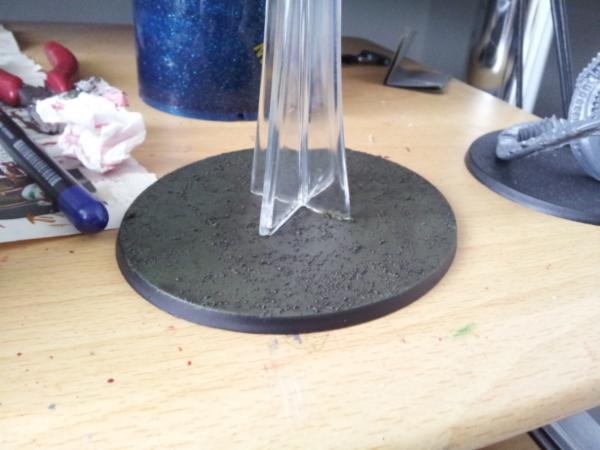 This is it wet, so it is a little shiny. I used my large drybrush to do this so i need to wait a while before doing my next step. I used a large drybrush as I don't have a wash brush. My closest is the GW large brush and it was taking forever. SDo the final touch up was to drybrush it with a 1:1 mix of Snakebite leather and Goblin Green. Any similar colour will do, just so long as you mix Goblin Green, whihc is nice, flat green, with any browny colour. I chose snakebite because I don't have another brown I do but it is calthan and I didn't want to waste it as it is my brother's. 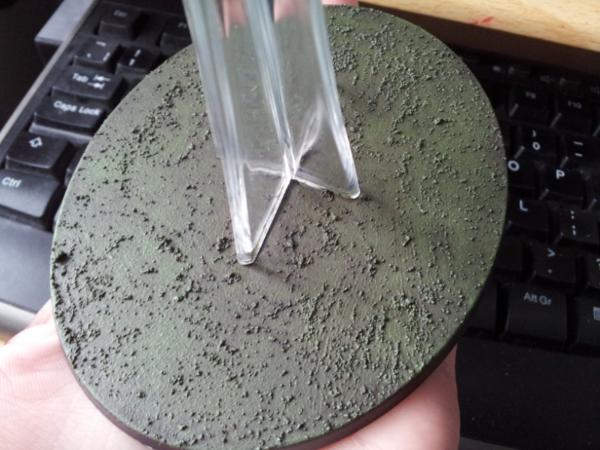 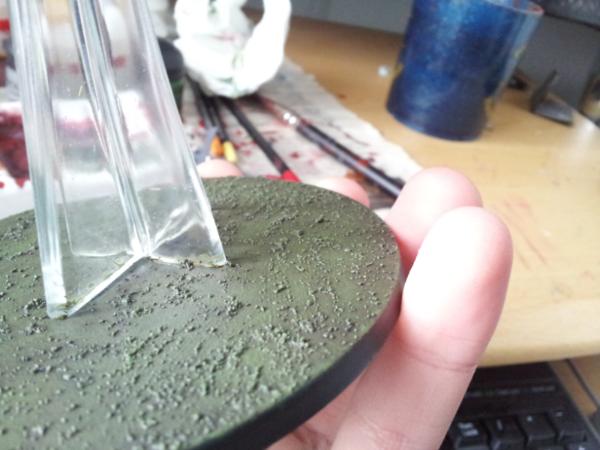 So that is the entire exterior finished and ready to recieve the pilot and control panel, which I will begin work on as soon as I get them sprayed, probably next Saturday, where I will be down at GW for an all flyer battle, so I hope this buger will not die to a Hydra instantly. I also hear rumours of a store copy of 6th Ed rules being giving out, and my gut tells me the cenario in WD and the game will be one of the first goes with the new ruleset, so keep watching for my review. It will be mostly based on the new flyer and Jump Infantry rules, as well as Hydras as the vehicular examples, as that is all that will be used. So, I planned to do a unit per month when I started, and finished Vulkan within a week, and probably this with the full month. With Vulkan taking a week, I expect i can do the pilot much quicker as I am not painting pieces seperately, nor having to stop because I didn't have the paints (I already have what I need), nor having to base him nor struggle with fine detail. I'll have 1 week to o a 5 stage layering (base, wash, layer, layer, highlight), which i can do on a more detailed 1 in a few hours, followed by a quicker go at eyes, and then a simple metal cuboid. So yeah, looking pretty good so far.Thanks to all the people who have commented and those who haven't but who have subscribed/exalted, if any of you have. In fact, thanks to all who have taken the time to look in or read through.The images you see here are all enclosed into a gallery on my rofile, and showcase images will be in another gallery so please vote on them. Thanks.
|
|
This message was edited 2 times. Last update was at 2012/06/17 14:00:14
I'm celebrating 8 years on Dakka Dakka!
I started an Instagram! Follow me at Deadshot Miniatures!
DR:90+S++G+++M+B+IPw40k08#-D+++A+++/cwd363R+++T(Ot)DM+
Check out my Deathwatch story, Aftermath in the fiction section!
Credit to Castiel for banner. Thanks Cas!
|
|
|
|
|
2012/06/17 14:46:47
Subject: Deadshot's all project P&M blog. Current Project; June 2012 Blood Ravens Stormtalon Gunship
|
|
Nasty Nob on a Boar
Inside of a CRASSUS ARMOURED ASSAULT TRANSPORT
|
Just paint over the crack and make the window blue or white and it'll look fine. Or try to find a new canopy on Ebay
|
angel of ecstasy wrote:
You take a dump, you flip through the Dark Eldar codex, the concept art for Lelith Hesperax shows up and you pee on the floor.
2000 |
|
|
|
|
2012/06/17 14:53:05
Subject: Re:Deadshot's all project P&M blog. Current Project; June 2012 Blood Ravens Stormtalon Gunship
|
|
Blood-Drenched Death Company Marine
|
Leave the crack on there and keep it clear. It looks like battle damage. Paint a nice bullet wound on the talon just above or below the crack.
Or paint it like AngrySquig suggested, just keep in mind you'd cover up your nice painted cockpit.
|
|
|
|
|
|
2012/06/17 15:35:54
Subject: Deadshot's all project P&M blog. Current Project; June 2012 Blood Ravens Stormtalon Gunship
|
|
Courageous Space Marine Captain
|
I had suggestions about both of those but I really don't want to do either. I want to see my nicely painted cockpit (thanks btw) and hopefully pilot and expensive FW transfer on his shoulder so I don't want to paint over it. I also hate battle damage so won't be doing that. I just can't stand it. How can people be acceptant of putting holes in their stuff? I could never bring myself to do it.
the main reason I am not fixing it, or even glueing it on, is because when I broke it, I put a mesage on Facebook asking ifanyone had a spare or knew a place I could get on. One person, who will remain anonymous, messaged me saying that as he had recently taken up casting of clar plastic like that, and he was my friend, he would recast me one free of charge just as soon as he could make a mould of the original. The only thing I have to do is not name him and give him the broken one, so he can melt it down. He is trying to gather as much of this plastic as possible. He plans for each of his Cron units to have a differently coloured rods in the guns.
But thank you both for making suggestions and taking the time to post and view my blog.
|
I'm celebrating 8 years on Dakka Dakka!
I started an Instagram! Follow me at Deadshot Miniatures!
DR:90+S++G+++M+B+IPw40k08#-D+++A+++/cwd363R+++T(Ot)DM+
Check out my Deathwatch story, Aftermath in the fiction section!
Credit to Castiel for banner. Thanks Cas!
|
|
|
|
|
2012/06/17 22:56:37
Subject: Deadshot's all project P&M blog. Current Project; June 2012 Blood Ravens Stormtalon Gunship
|
|
Tunneling Trygon
|
Great looking Vulkan, I love how OTT the flamer looks!
|
  Hive Fleet Aquarius 2-1-0 Hive Fleet Aquarius 2-1-0
http://www.dakkadakka.com/dakkaforum/posts/list/527774.page |
|
|
|
|
2012/06/17 23:16:33
Subject: Deadshot's all project P&M blog. Current Project; June 2012 Blood Ravens Stormtalon Gunship
|
|
Courageous Space Marine Captain
|
Thanks.
|
I'm celebrating 8 years on Dakka Dakka!
I started an Instagram! Follow me at Deadshot Miniatures!
DR:90+S++G+++M+B+IPw40k08#-D+++A+++/cwd363R+++T(Ot)DM+
Check out my Deathwatch story, Aftermath in the fiction section!
Credit to Castiel for banner. Thanks Cas!
|
|
|
|
|
2012/06/18 04:10:48
Subject: Deadshot's all project P&M blog. Current Project; June 2012 Blood Ravens Stormtalon Gunship
|
|

Lady of the Lake
|
Might be better to try and find it a new canopy or just damage that one a little more, to try to make it slightly more convincing of battle damage. Something like the main panel being sort of blown out with jagged edges. Either way if you go with the damaged canopy, should probably also make it looked a little worn around the cockpit to make it sort of fit together.
|
|
|
|
|
|
2012/06/18 06:40:06
Subject: Deadshot's all project P&M blog. Current Project; June 2012 Blood Ravens Stormtalon Gunship
|
|
Courageous Space Marine Captain
|
I am getting.a replacement, hopefully soon. But thanks for.the suggestion not_u.
|
I'm celebrating 8 years on Dakka Dakka!
I started an Instagram! Follow me at Deadshot Miniatures!
DR:90+S++G+++M+B+IPw40k08#-D+++A+++/cwd363R+++T(Ot)DM+
Check out my Deathwatch story, Aftermath in the fiction section!
Credit to Castiel for banner. Thanks Cas!
|
|
|
|
|
2012/06/18 07:13:33
Subject: Deadshot's all project P&M blog. Current Project; June 2012 Blood Ravens Stormtalon Gunship
|
|
Quick-fingered Warlord Moderatus
|
Very impressive job on the Captain. Perhaps I can learn a bit from your technique? And the Stormtalon is looking very good so far. Sorry to see the canopy. Maybe you can hide it by making it look like battle damage or something.
|
Lord Judicator Valdrakh of the Atun Dynasty (6th Ed: W:3, L:4, D:0)
 H.B.M.C. wrote: H.B.M.C. wrote:Well GW were mostly responsible for the Berlin Wall, so it's natural for some people to harbour resentment towards them.
|
|
|
|
|
|
|
|