For a
demo board I was building for Brushfire, I had to make some buildings. The theme of the board needed to replicate old northern French buildings. Combining multiple how tos and article tips, I built three buildings using the following steps. First, here is a couple licks to pictures I referenced as inspiration.
http://www.linchanvrebretagne.org/docs/images/actions/maison_des_toiles.jpg http://villagesdefrance.fr/dept/dept_images/ph29_daoulas.jpg Foamcore stone building 101 To make the walls, I first cut each sides to their respective format. Once that was done, I peeled the paper from one side of each piece. It will gives something like the following picture. This provides you with a material that is easy to use, not too thick, but still keeping some rigidity to it, thanks to the second paper side.
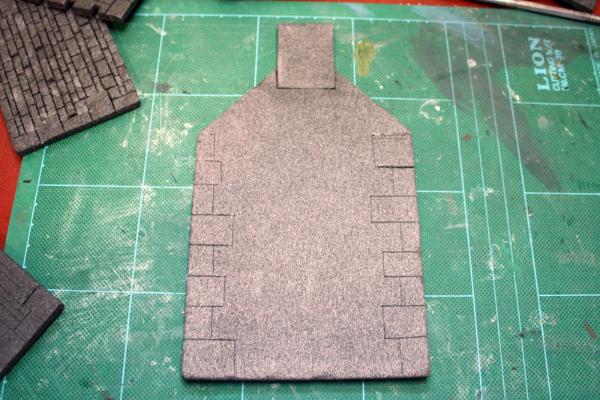
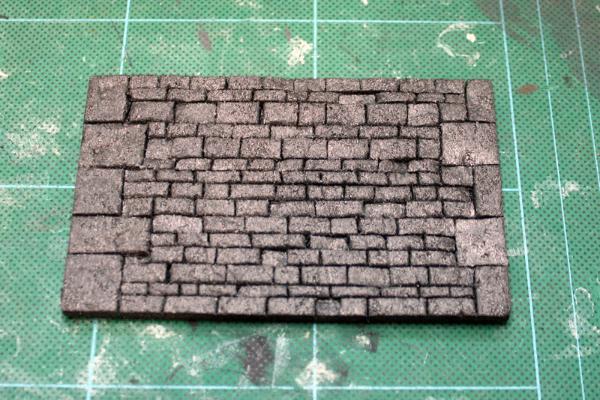
For my design, I had big stones in the corners, then smaller stones in rows filling the rest of the wall. To mark them, I used an hobby knife, and cut into the foamcore a bit, just enough to mark it, but not enough to get through all the way. The previous picture has the first cut made for the big stones, while the next picture has the horizontal lines, and also some individual stones cut in the bottom. I also took time to cut holes for doors and windows.
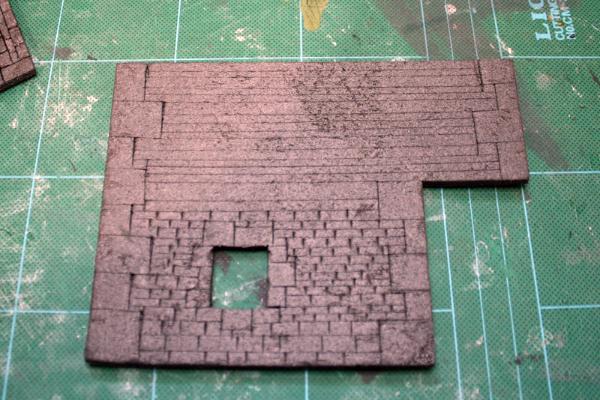
Once that was done, I used a larger tool, like a pen or a sculpting tool, to enlarge all the cuts made in the foamcore. Next step was pressing some of the stones down, either level or at an angle, to give some age to the wall. I also pressed a real stone at random onto the foam, to give it some texture.
Before gluing the wall together, I added some cardboard pieces behind the holes made for the doors and windows, to have some backing onto which I could glue those extra bits, and also to block the holes for the step after the current one. I then assembled the walls, using No More Nail glue, and also added some squared triangles on the inside to help with the gluing and aligning of the walls. On that picture, you can also see that I used some wood filler putty to hide the seams made by the glued walls.
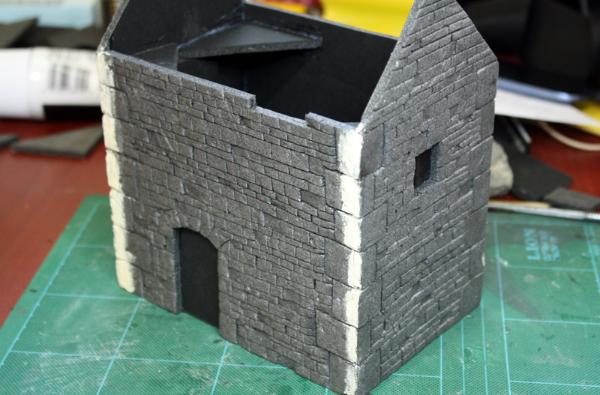
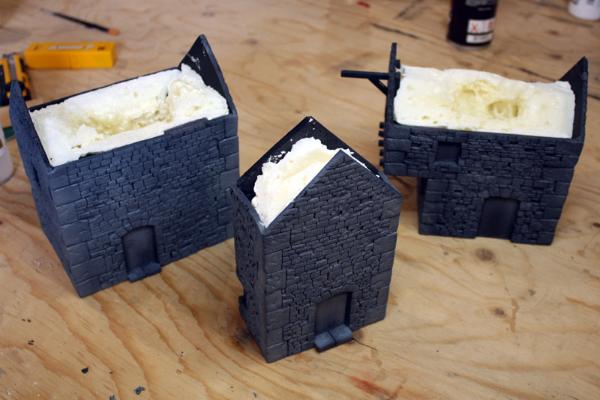
As the building had to travel, and will probably see lots of play, I wanted to give them some more solidity. For that, I put them on an old cardboard piece, and little by little, I added some expanding isolation foam into the hole. I now know to not add too much too quickly, as the pressure when it build up will warp the building, and could even break them. Let the foam coat dry completely before adding more. (We learn by our mistakes...) The buildings also received a coat of primer (Gesso) and a base coat at that time.
Now began the painting proper. To break the monotony, I painted various stones in different shades of grey and blue.
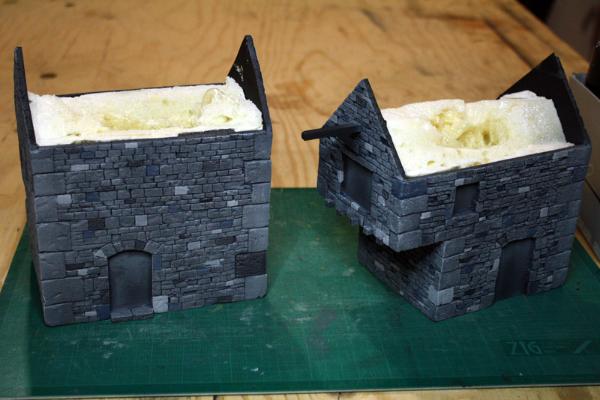
That was followed by an heavy drybrush, a coat of wash (a bit too thick, which glazed everything darker than I planned), and another drybrush.
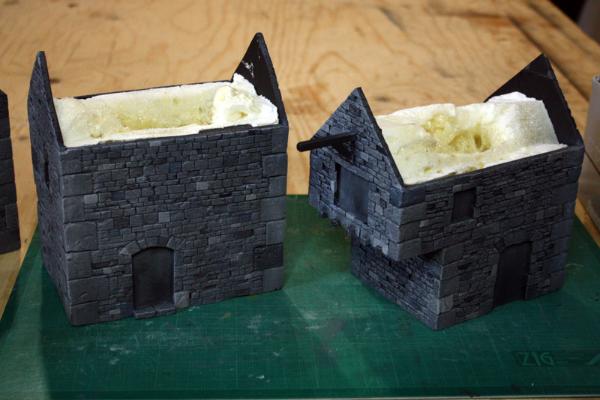
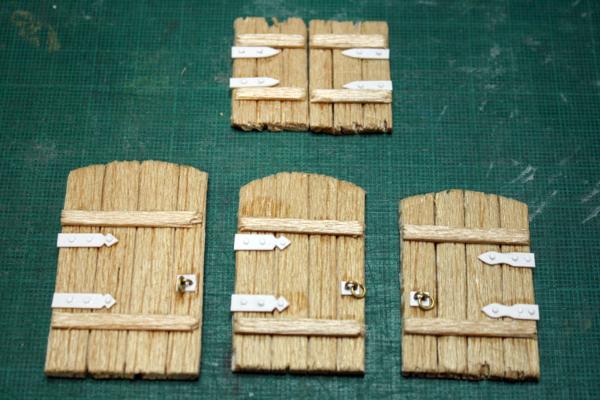
The painting of the walls done, I moved to making the doors and windows. Each window is made of small balsa sticks glued on a plasticard rectangle. It's not apparent, but the walls' holes and the windows were numbered on their back.
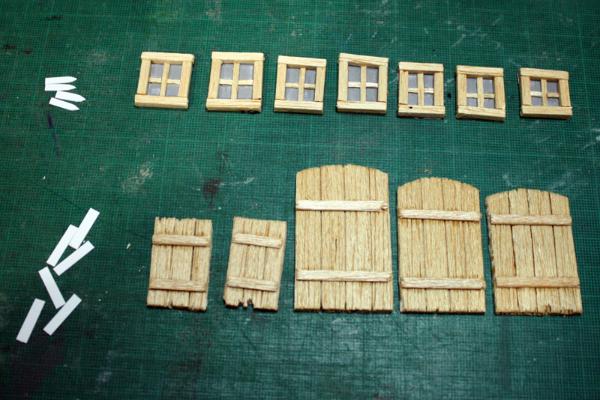
I then added details using plasticard, tiny plasticard rod and tiny brass rods. (I had a picture of those painted before gluing them to the building, but I seem to have deleted it by mistake...)
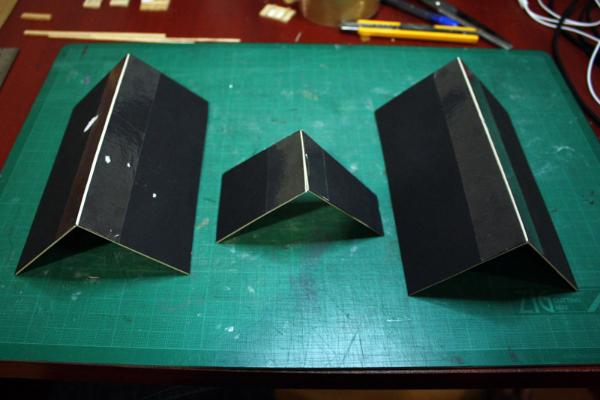
Next up was the making of the roof. For those I used some heavy cardboard (the one used in frame backing I think) to make the base roof. I used box tape to fix each side together, but that was a mistake, as glue don't adhere to it. I had to make cuts into the tape to give something for the glue to grip. Masking tape would have been a better material.
To make the tiles, I cut some thin cardboard slice, about an inch wide, then made small cuts all along it's length on one side, then glued it onto the roof, starting at the bottom, and overlapping them.
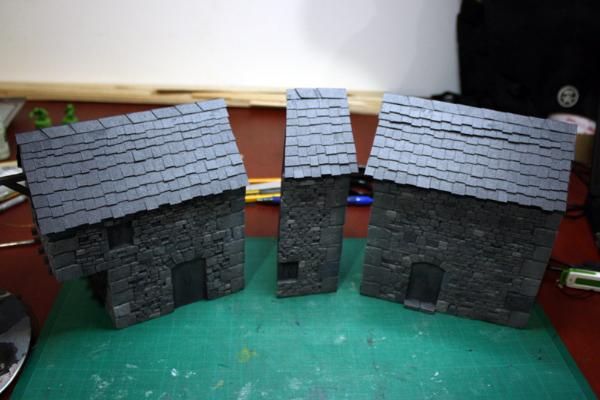
I then painted the roof with a mix of airbrushing and drybrushing. They were painted separate, so I didn't risk painting over the walls. I like the look of them, but if I had more time, I would have weathered them a lot more, as they have a "clean" look compared to the rest of the building. It was then time to glue them, again using No More Nail, and they were wrapped in rubberbands to help with the drying. During that time, I also glued the doors and windows.
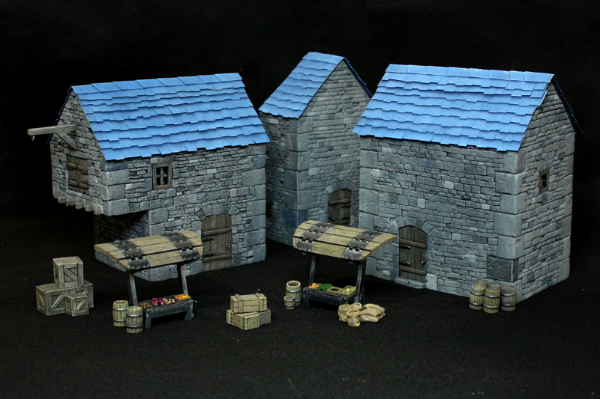
Here is the final product, with some accessories I painted to go along.
You can see the
wip of the board going with those buildings in that
thread.
Comments and questions are welcomed.


 3500
3500 