| Author |
Message |
 |
|
|
|
|
Advert
|
Forum adverts like this one are shown to any user who is not logged in. Join us by filling out a tiny 3 field form and you will get your own, free, dakka user account which gives a good range of benefits to you:
- No adverts like this in the forums anymore.
- Times and dates in your local timezone.
- Full tracking of what you have read so you can skip to your first unread post, easily see what has changed since you last logged in, and easily see what is new at a glance.
- Email notifications for threads you want to watch closely.
- Being a part of the oldest wargaming community on the net.
If you are already a member then feel free to login now. |
|
 |
2013/11/30 02:35:56
Subject: Weathering the PP Galleon
|
|

Drakhun
|
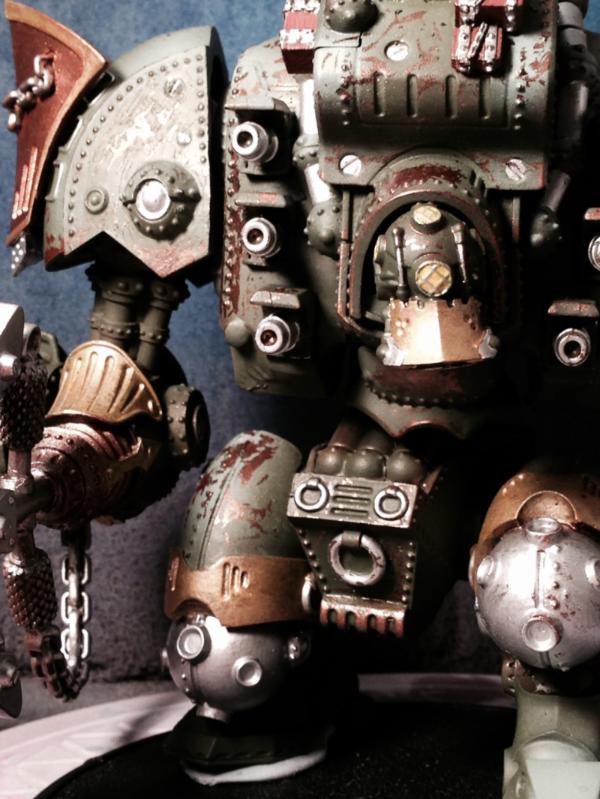
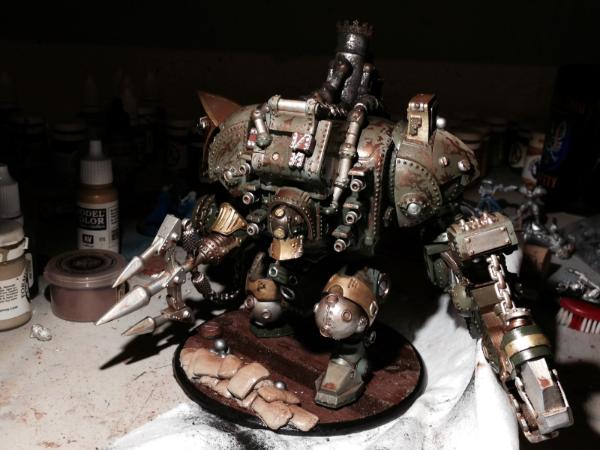
I have been working on this guy for a really long time (on and off). I finally had a few hours to sit down and mess with it.
I was able to get the rust showing through. Now to tidy up the paint job, add a bunch of weathering powder and an oil wash or 4 and put it on its base.
Let me know what you think.
|
|
|
|
 |
|
2013/11/30 02:39:26
Subject: Weathering the PP Galleon
|
|
Monstrous Master Moulder
|
This is already looking nice. I am sure it will be even better with all the weathering.
|
|
|
|
|
|
2013/11/30 10:10:04
Subject: Weathering the PP Galleon
|
|
Drakhun
|
 UnCool Villain wrote: UnCool Villain wrote:This is already looking nice. I am sure it will be even better with all the weathering.
Thanks!
|
|
|
|
|
|
2013/11/30 11:26:08
Subject: Re:Weathering the PP Galleon
|
|

Brigadier General
The new Sick Man of Europe
|
I thinking you need to paint over the brown chipping areas with metallic colours, leaving the brown at the edges.
|
DC:90+S+G++MB++I--Pww211+D++A++/fWD390R++T(F)DM+
|
|
|
|
|
2013/11/30 13:18:49
Subject: Re:Weathering the PP Galleon
|
|
Drakhun
|
 sing your life wrote: sing your life wrote:I thinking you need to paint over the brown chipping areas with metallic colours, leaving the brown at the edges.
That's not a bad idea at all. I try it on a few spots and see how it works. Now to figure out how to make it look random and not painted on.
|
|
|
|
|
|
2013/11/30 17:47:41
Subject: Weathering the PP Galleon
|
|
Longtime Dakkanaut
|
I saw this over on the PP boards as well, but I think I will reserve final comments until it is finished, right now the chipping looks a bit over done, however having done this effect on several models I can understand that much of this can be covered up by weathering and washes.
Please post pics when you are done.
|
|
|
|
|
|
2013/12/01 00:37:24
Subject: Weathering the PP Galleon
|
|
Longtime Dakkanaut
|
Lookin' good so far. I agree that the chipping might be a tad over-done, but it's also an unfinished project.
I'm excited. If you're weathing is half as good as your painting, it should be phenomenal.
|
Why is it that only those who have never fought in a battle are so eager to be in one? |
|
|
|
|
2013/12/01 12:17:15
Subject: Weathering the PP Galleon
|
|
Drakhun
|
Redfinger wrote:I saw this over on the PP boards as well, but I think I will reserve final comments until it is finished, right now the chipping looks a bit over done, however having done this effect on several models I can understand that much of this can be covered up by weathering and washes.
Please post pics when you are done.
Redfinger, I'm honored that you would even reply in one of my threads. I hope to have it done today after I take the family to church. I've already hit it with a good dose of weathering pigment, and applied the gloss coat for the wash (not shown in the pictures as I did it late last night).
fenrir1997 wrote:Lookin' good so far. I agree that the chipping might be a tad over-done, but it's also an unfinished project.
I'm excited. If you're weathing is half as good as your painting, it should be phenomenal.
Thanks!
|
|
|
|
|
|
2013/12/01 12:23:12
Subject: Re:Weathering the PP Galleon
|
|
Death-Dealing Dark Angels Devastator
|
this is looking very good man keep it up i cant stand doing weathering effects blah
|
“Never interrupt your enemy when he is making a mistake.” ― Napoleon Bonaparte
|
|
|
|
|
2013/12/02 03:32:27
Subject: Re:Weathering the PP Galleon
|
|
Drakhun
|
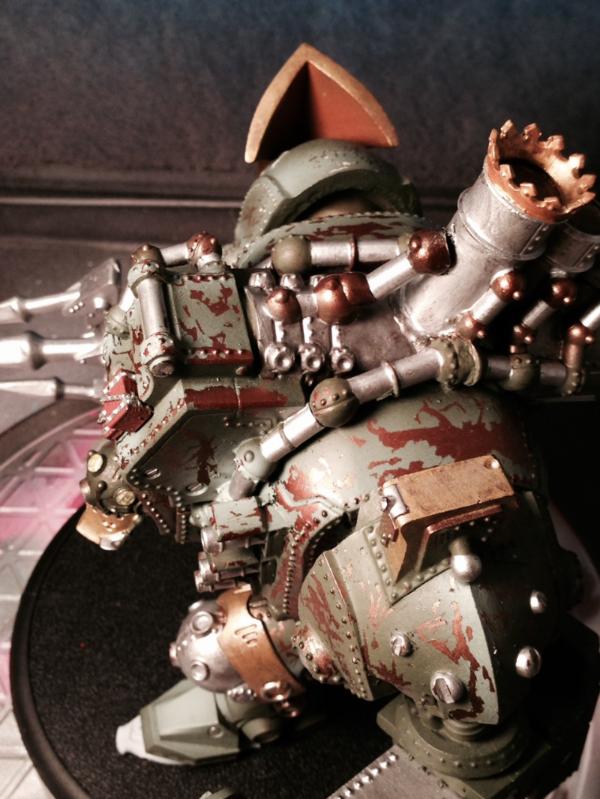
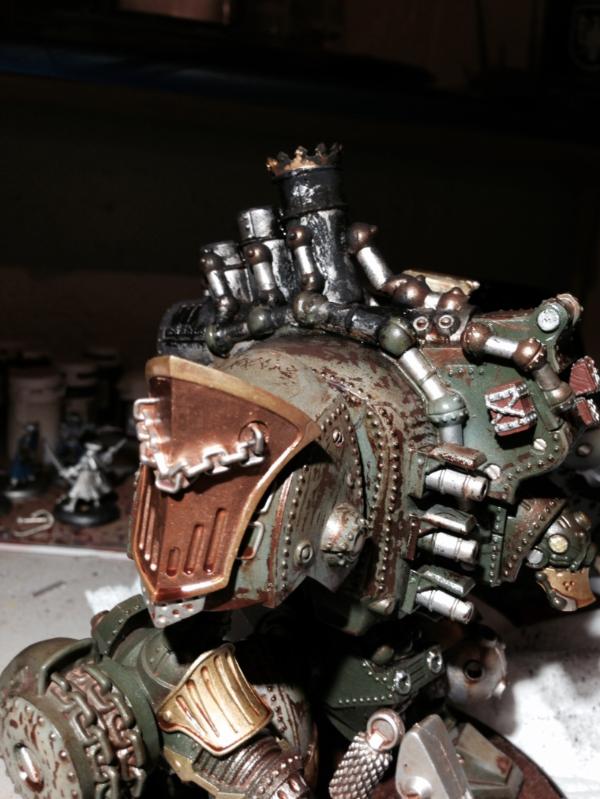
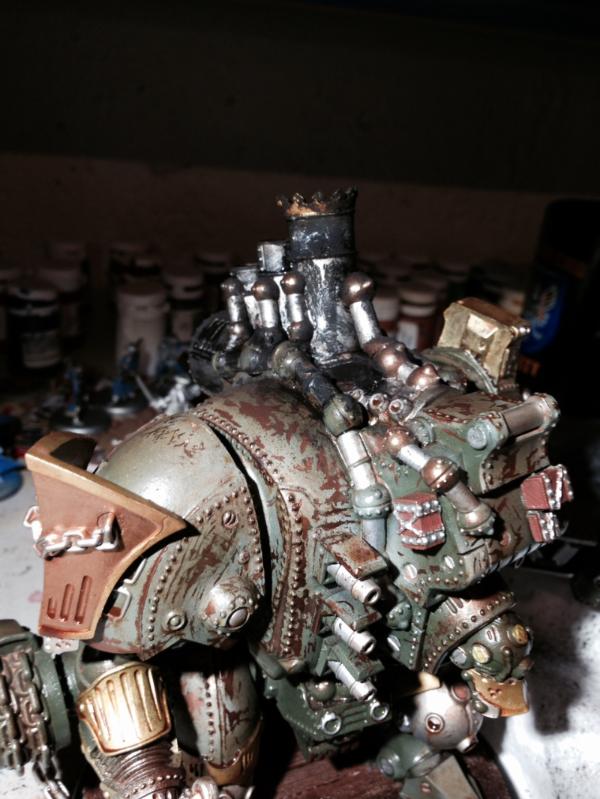
Update time.
The brown oil wash has been applied, the first dark brown weathering pigments have been applied and the first blacks on the smoke stacks and silvers to tone them down have been added. Also the Galleon has been put on its actual base.
Everything needs to dry before the next step.
Let me know what you think.

|
|
|
|
|
|
2013/12/02 04:06:35
Subject: Re:Weathering the PP Galleon
|
|
Longtime Dakkanaut
|
Hey man, looking good. I think the initial weathering and washes make a difference.
If I could offer a suggestion and show and example, I think what you might need to do is add some rust "bleeding" around and between the chips of paint. Basically what you are trying to recreate is the rust leaching through the paint.
Take a look at these 2 photo's;


This is a very easy effect to recreate. Using an orange/rust/bright color simply dab it around the chipped area, then using some Odorless Mineral Spirits, blend and soften the oil paint working it in the direction that gravity would take it. This effect goes a long way to tying all the weathering together.
A.
|
|
|
|
|
|
2013/12/02 14:18:25
Subject: Weathering the PP Galleon
|
|
Drakhun
|
Wow that is fantastic!
I'll swing by the Hobby Lobby and grab an orangish/brown when I get off work in the mornng. And give that a go. Any suggestion on what color specifically to grab?
|
|
|
|
|
|
2013/12/02 23:20:51
Subject: Weathering the PP Galleon
|
|
Longtime Dakkanaut
|
 darefsky wrote: darefsky wrote:Wow that is fantastic!
I'll swing by the Hobby Lobby and grab an orangish/brown when I get off work in the mornng. And give that a go. Any suggestion on what color specifically to grab?
I dont use a specific "orange" color. When making rust I use Windsor and Newton oils. Burnt Umber, Raw Umber, Cadmium Red, Cadmium Yellow, Ivory White, and Ultra Marine Blue. The Raw Umber is already a pretty good red rust color, I will add blues, yellows or whites to it to create the rust color I am looking for. Hope that helps.
A.
|
|
|
|
|
|
2013/12/03 00:02:54
Subject: Weathering the PP Galleon
|
|
Drakhun
|
 Redfinger wrote: Redfinger wrote: darefsky wrote:Wow that is fantastic!
I'll swing by the Hobby Lobby and grab an orangish/brown when I get off work in the mornng. And give that a go. Any suggestion on what color specifically to grab?
I dont use a specific "orange" color. When making rust I use Windsor and Newton oils. Burnt Umber, Raw Umber, Cadmium Red, Cadmium Yellow, Ivory White, and Ultra Marine Blue. The Raw Umber is already a pretty good red rust color, I will add blues, yellows or whites to it to create the rust color I am looking for. Hope that helps.
A.
That does help. Looks like it will be an early Christmas for me.
|
|
|
|
|
|
|
|
