So my local gaming group are running a little 750pt league, with a 250pt sideboard. You can only every field 750pts, but you can write up an additional 250pts to switch into your 750pts and take something else out.
At the moment we are all testing and tweaking our lists. None of us as especially good players, nor are we looking to build lists that can destroy and humiliate our opponents. We just like having a fun game, and playing with and against interesting stuff!
This is my first ever battle report, so
id appreciate any feedback. I was observing this game for my friends and recording the battle. I hope it reads ok!
Salamanders vs Tyranids at 750pts
The Lists:
Tyranids - (from memory!)
HQ -
(Proxied with the Swarmlord) Hive Tyrant with Wings, 2 x Brainleech Devourers
Elites -
Zoanthrope
2 Hive Guard with Impaler Cannons
Troops -
3 x 10 gants
3 Warriors (Devourers, 1 Barbed Strangler)
Heavy Support -
Mawloc
Salamanders (hurray for battle scribe!)
HQ -
Chapter Master
Power Weapon, The Shield Eternal
Troops -
Scout Squad (5 man) Camo Cloaks, Missile Launcher no flakk, Sniper Rifles, Scout Sergeant.
Tactical Squad (5 man) Meltagun, Sergeant with Combi weapon and Power weapon, Drop Pod
Tactical Squad (5 man) Flamer, Sergeant and Rhino.
Fast Attack -
Assault Squad (5 man) 2 flamers, Sergeant with Melta Bombs and Power Weapon. No jump packs, Drop Pod
And They Shall Know no Fear, Chapter Tactics, Combat Squads
Heavy Support -
Thunderfire Cannon
Mission: Purge the Alien! (Kill Points)
The Flyrant rolled Dominion and Psychic Scream. The Zoan picked up Catalyst which is always handy!
Warlord Traits:
Sallies: Re-roll reserves (pretty much guarantees that 2nd drop pod!)
Tyranids: 2
VP's for enemy
IC's killed in challenges by Warlord.
Herbacious T's Pre-game Thoughts: This is gonna be a tough one for the nids. Those 10 man gant units and the lonely zoan are easy KP's, especially given that almost all the action is likely to be in the Nids back garden given the Sallies Pods and Rhino. Using the Flyrant to harass the centre scouts and take out the Thunderfire cannon would be my plan. Take out their supporting fire, and hope the Warriors/Hive Guards can hold the rear for long enough for the Flyrant to get back and help!
Tyranids won the roll to deploy first.
The Mawloc is reserved for Deep Strike.
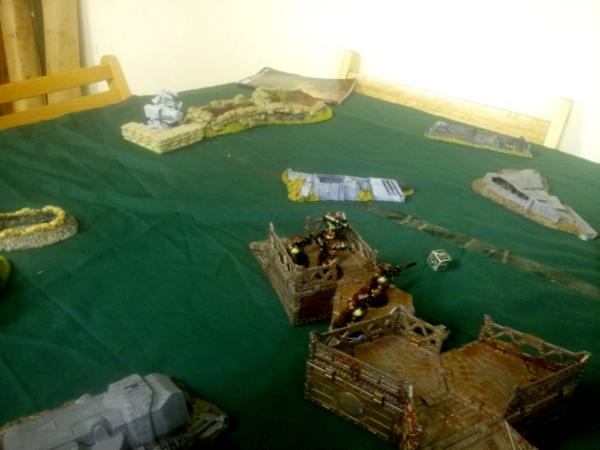
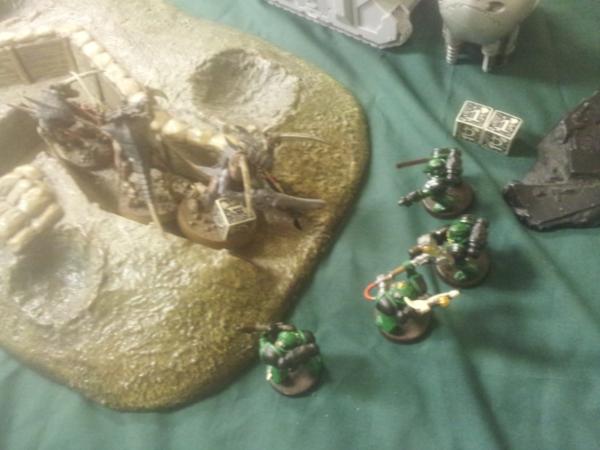
The Sallies deployed next, bolstering the centre 'ruins' to 3+ cover, and infiltrating the scouts into in, for a lovely 2+ cover save!
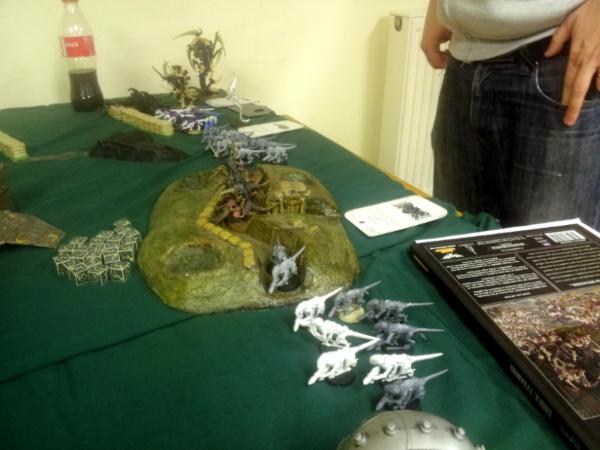
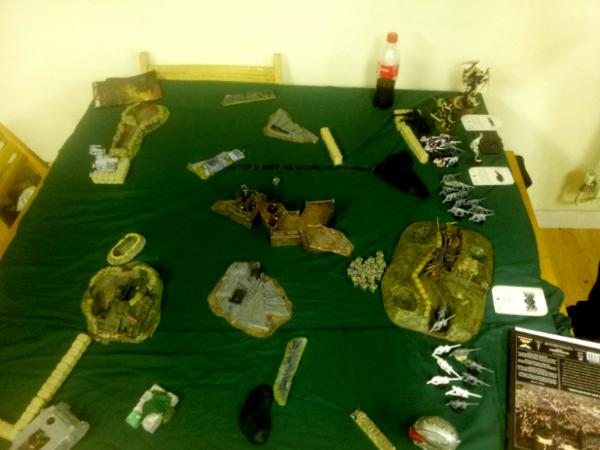
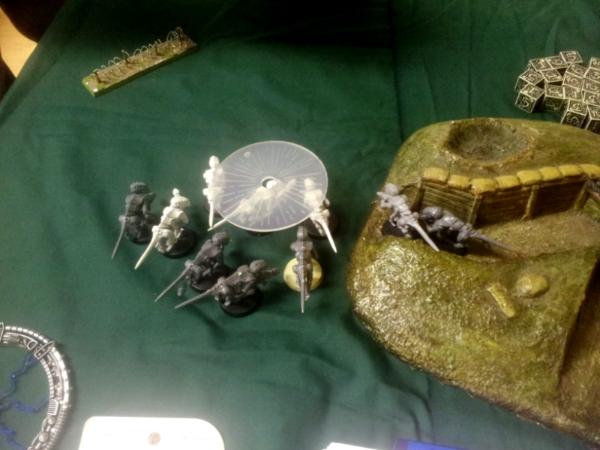
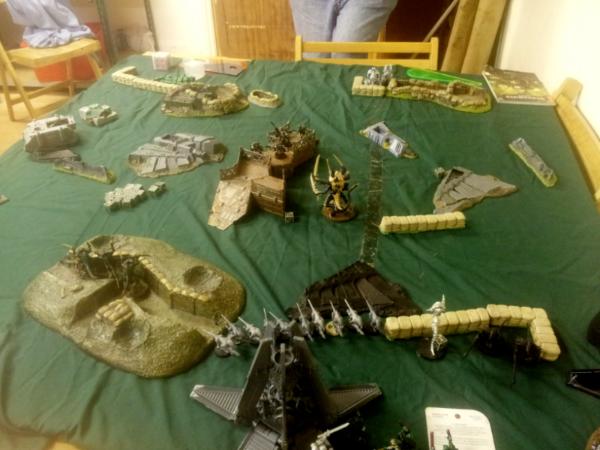
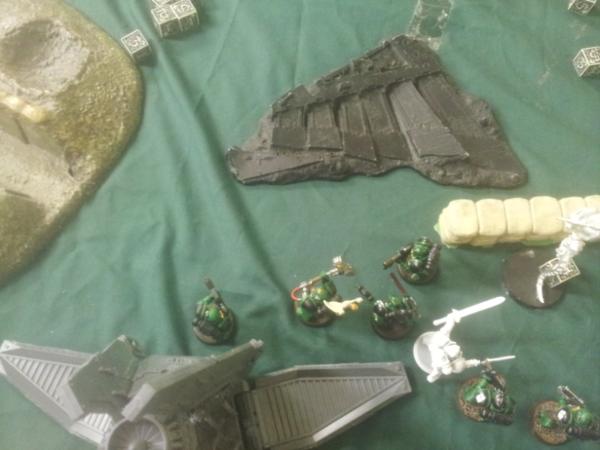
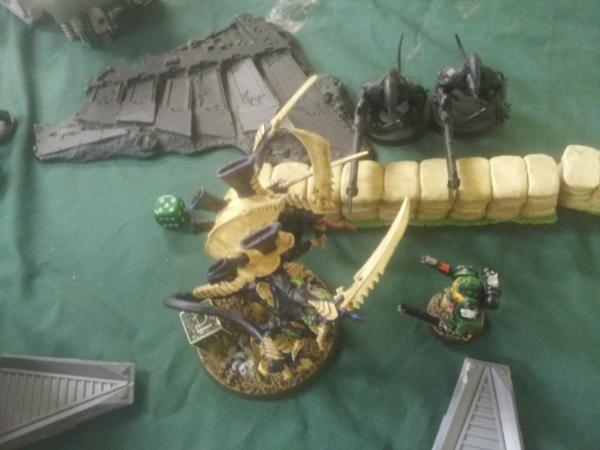
So the table looked like this:
The Sallies rhino is bottom left, with the Thunderfire Cannon top left.
Sallies roll to seize the initiative, and succeed! The nids are on the back foot already!!
Salamanders Turn 1
Reserves/Movement
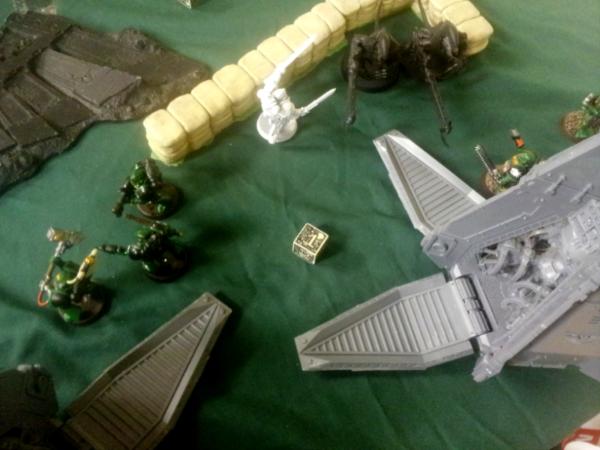
The Assault Squad pod lands bang on, and the rhino advances up the left flank, toward the Warriors. (all descriptions of flanks/direction will be from the Tyranid board edge perspective, to keep things consistent)
Shooting
The Thunderfire cannon kicks things off in style, landing 13 hits on the left-most gant squad and wiping them out for a
KP and
First Blood!!
The scouts keep the ball rolling landing 2 hits on the flyrant with their snipers, and then rending him once!
The Assault Squad then double flamers the right-most gant unit, kill 9, and a bolt pistol shot kills the survivor, wiping the unit! 2
KP's already for the Sallies! They also catch the Zoan in the burst of fire buts his powerful psychic field mean flames break around him and leave him unscathed.
Tyranids Turn 1
Movement
The Zoan starts of the Nid turn well by rolling perils on his psychic test, but still manages to cast Catalyst on himself and the Flyrant, giving them
FNP.
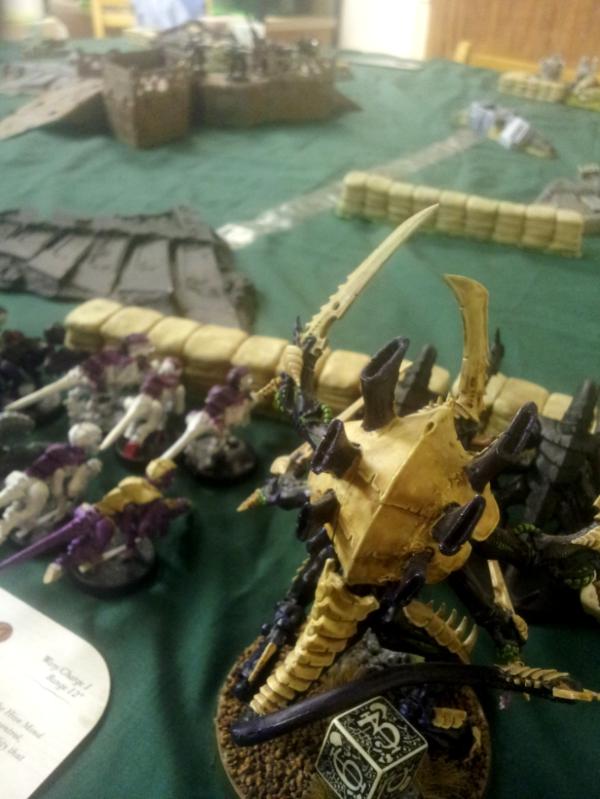
The Flyrant swoops 16" toward the Scouts. They begin the process of wetting their pants and loosening their bowels.
The surviving gant unit shuffles to get all their shots at the Assault Squad.
Shooting
The Hive Guard shoot the Assault Squad (despite me advising the Nid player to shoot the Drop Pod, he immediately forgot this) and manage a single kill.
The gants manage a few hits and wounds, but all are saved.
The warriors opt to try and glance the Rhino (for this turn we thought the Warriors had Deathspitters (S5, and therefore capable of glancing the AV11 Rhino) and cleanly miss.
The Flyrant (thanks to the new hotness of BS4) gets 12 hits and 10 wounds on the Scouts in the centre, but thanks to their 2+ cover from the bolstered ruins and their camo cloaks, only 2 go down (and not the Sarg or Missile Launcher)
Salamanders: 2
Tyranids: 0
Salamanders Turn 2
Reserves/Movement
The second drop pod arrives! And lands bang on! (the Sallies dice are on fire!)
The Assault Squad advances toward the remaining gant unit, and the Chapter Master breaks off to tackle the Zoan. The Rhino continues to advance toward the Warriors.
Shooting
The Drop Pods fail to wound the Hive Guard (to be expected, at T6 they are resilient against most small arms), as does the newly arrived Combat Squad from the second Pod.
The Chapter Master takes a pot shot at the Zoan to no effect.
The scouts cause 2 hits on the swooping flyrant (requireing 6's to hit) and then roll another 6 for a rending wound, but luckily he passes his grounding test.
The Thunderfire cannon, aware of how well it performed in Turn 1, opts to scatter well off the Warriors this turn, accomplishing jack all.
The Assault Squad continue to make mincemeat of the Tyranid troops, wiping the last gant unit with combined flamer and bolter action! Yet another
KP for the Sallies.
Assault
The Chapter Master makes the 2" charge to the Zoan by rolling just 3"! He then murders it in
CC for a
KP. This leaves the Hive Guard out of synapse!
Tyranids Turn 2
Reserves/Movement
The Mawloc comes in, but is literally dropped and loses several limbs (luckily nids have enough to make this nothing more than an inconvenience)
He then attempts to 'terror from the deep' onto the Assault Squad, but scatters onto the Combat Squad and their Drop Pod. 2 blast templates later and he manages to kill 3 of them (including the melta gun), but the drop pod survives on 2HP, resulting in the Mawloc mishapping. We roll ont he mishap table....and the Mawloc is destroyed!! Another
KP for the Sallies!!
The Flyrant cast Dominion to save the Hive Guard, who shuffled toward the Warriors. The Warriors moved toward the Assault Squad, and the Flyrant went into Jump mode and went directly for the Salamander's Chapter Master to try and salvage the Tyranid back field!
Shooting
The Hive guard shoot the wounded pod but only strip a
HP (leaving it on 1HP).
The Warriors shoot the 2 man Combat squad (going for a
KP) but due to range only kill one!
The Tyrant lands 12 hits and 10 wounds on the Chapter Master, who fails 4 saves and goes down for a
KP and
Slay the Warlord (the nid player realised shortly after doing this that he should have charged and challenged for the 2
VP's from his Warlord Trait. D'OH!)
Salamanders: 5
Tyranids: 1
Salamanders Turn 3
Movement
Things are looking bleak for the Nids at this point.
The Rhino keeps advancing, the Assault Squad move toward the warriors, and the lone surviving Sergeant from the Combat Squad squares up to the Flyrant!!
Shooting
The Sergeant lands a Krak grenade on the Flyrant, who fails his saves and is reduced to 1 Wound!! What a ballsy move by that Sarge!
The Thunderfire Cannon joins in by landing 7 hits and 5 wounds on the Hive Guard, and one goes down.
The Scouts shoot at the Flyrant hoping to continue their success and take it down, but roll two 1's to wound!
The Assault Squad cause 2 wounds on the front Warrior.
Assault
The brave Sergeant gets too bold and charges the Flyrant, where he is immediately mulched in
CC, giving the Nids their second
KP.
The Assault Squad try to charge the Warriors, and roll a double 1 for a 2" charge, failing it!
Tyranids Turn 3
Movement
The Warriors shuffle and the Tyrant moves toward the rhino.
Shooting
The lone Hive Guard fails to glance the weakend drop pod!
The Tryant shoots the rhino to death in one volley, netting them their 3rd
KP.
The Warriors shoot at the Combat Squad evacuating their wrecked rhino, killing 3 including the flamer! Some decent rolling for a change!
Assault
The Warriors fail their charge against the 2 remaining combat squad marines.
Salamanders: 5
Tyranids: 3
Salamanders Turn 4
Movement
The Assault and Combat marines cluster toward the Warriors.
Shooting
the Drop Pods put a wound on the remaining Hive Guard.
The Scouts shoot at the Flyrant. The Krak misses (as it has every turn) and the Tyrant saves the single sniper wound.
The Assault Squad fire ineffectually at the Warriors, causing 2 wounds on a 2nd Warrior.
The Combat Squad shots are all saved by the Warriors.
The Thunderfire Cannon scatters well off the Flyrant, so it evades death for another turn!
Assault
Both the Combat squad and Assault squad make it into combat with the Warriors.
2 Warriors square up to the Assault squad, and 1 against the Combat squad
Combat ends with the Assault Squad losing by 1 and falling back, but the Warriors staying locked with the Combat squad, hoping for another
KP!
Tyranids Turn 4
Movement
No momevement!! There's not much to move!
Shooting
The Hive Guard misses the Drop Pod AGAIN!! 4 Turns and they've not even managed to kill one!
The Tyrant kills all but the last Assault marines, who still has his flamer.
Assault
Hilarity ensues!! (for most of us!)
The Tyrant charges the last Assault Marine, who kills him on overwatch!! Thats another
KP and
Slay the Warlord for the Salamanders!
The Warriors take 2 wounds on the warrior who had 3.
Salamanders: 6
Tyranids: 3
Salamanders Turn 5
Movement
The flamer Assault Marines dashes for the Tyranid deployment zone, intent on being the Line Breaker.
Shooting
The Pods fail to wound the Hive Guard.
The Scouts succeed in wounding the Hive Guard once, who fails his save! Another
KP for the Salamanders, effectively ending the game, but we continue anyway.
Assault
the Warriors kill a Marine, the survivor holds.
Tyranids Turn 5
Straight to the Assault phase, as its just the Warriors left!
Assault
The Warriors kill the last marine, but are now all on a single wound!
Salamanders: 7
Tyranids: 4
Salamanders Turn 6
Movement
The Assault marine dashes behind the Drop Pods, hoping to be out of
LoS, securing
Linebreaker.
Shooting
The Thunderfire Cannon kills 2 of the Warriors, but the Drop Pods and Scouts fail to kill the lone survivor who has only a single wound!
Tyranids Turn 6
The Warrior lines up a shot at the Assault marine to try and get a
KP and deny line breaker, but the single wound he causes is saved!
Final Kill Points
Salamanders: 7 with First Blood, Line Breaker and Slay the Warlord
Tyranids: 4 with Slay the Warlord
In the end it was a very fun game to watch, but the Nids were on the back foot from Turn 1, and despite some success, the dice were vehemently against them. Roll on the rest of the League!
I hope this was an interesting report to read. As I said, it is my first, so feedback would be most welcome!


 Tzeentch Daemons 2000pts
  Kabal of the Sundering Strike 2500pts
 Eldar Corsairs 750pts
  400pts Corregidor/Nomads
 300pts Yu Jing
 blog!
blog! 1,500 Points II
  125
125


