This is how I did my bases and it was pretty inexpensive.:
PVA (white glue). 1$.
Sand (from the local playground). Free.
Flock (static grass and Tree tuffs). $4-5 depending on location and size.
Cork (1/4" from Walmart...optional). 2-3 dollars and you get a lot..
Paints (Brown wash, black wash, light grey, black). 1 dollar per bottle from craft stores...
YMMV.
Primer (Black). $2 at Home Depot.
Matte Varnish (Spray can, Home Despot). $3.
An old small paintbrush. $2 for a pack of chap brushes at a craft store.
I've done dozens of bases and a display board and still have a ton of material left over.
1. (optional if you want a rock on the base) Tear off small chunk of cork and size to base with model . Once your satisfied with the size and location, glue down with PVA. Let dry completely.
2. Prime base black (including cork "rock").
3. Heavy Dry brush grey onto the rock. The goal is to get everything grey except the deepest crevices. Let dry.
4. Wash the rock with black to deepen the details.
5. Light dry brush the rock again to pick out highlites.
6. Glue completed model to base (some people like to build the model on the base..I don't. whatever). Let dry.
7. Use paintbrush to coat a thin layer of PVA on the plastic base.
8. put sand on the base. A lot. Let dry.
9. Once dry, tip base and let loose sand pour off. Tap base to get all loose the sand off.
10. Brush brown was onto sand. Use lots. Flood it. Let dry.
11. Dry brush grey to highlite the sand.
12. Use brush to cover some area of the sand with PVA. make it random on each base.
13. Cover PVA with static grass. Let dry completely.
14. Knock loose grass off.
15. (optional) Put small dab of PVA at base of rock or other area. Stick small tuft of tree flock on glue. Let dry.
16. Paint the rim of the base with black to give it a clean finish.
17. Spray entire assembly with matte varnish to lock everything down.
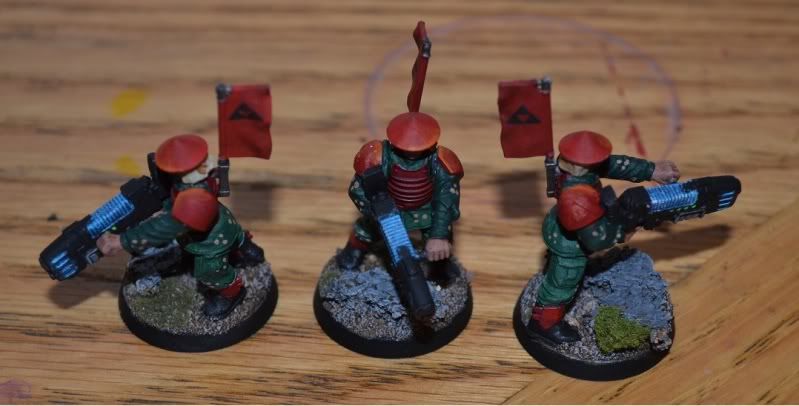
And you end up with this: