Switch Theme:

Rhino Exhaust Removal  [RSS] Share on facebook Share on Twitter Submit to Reddit
»
Author Message
Advert


Forum adverts like this one are shown to any user who is not logged in. Join us by filling out a tiny 3 field form and you will get your own, free, dakka user account which gives a good range of benefits to you:
  • No adverts like this in the forums anymore.
  • Times and dates in your local timezone.
  • Full tracking of what you have read so you can skip to your first unread post, easily see what has changed since you last logged in, and easily see what is new at a glance.
  • Email notifications for threads you want to watch closely.
  • Being a part of the oldest wargaming community on the net.
If you are already a member then feel free to login now.


Made in nz
Fresh-Faced New User


New Zealand

I've never really liked the four exhausts on the Rhino tanks. There really isn't that much room in a Rhino for an engine large enough to require four huge exhausts. They just seem a bit out of place to me so I decided to remove them.

After having a look across the net I couldn't find any posts or pictures of anyone having done this before so I thought I would make this tutorial.


1.) Start by removing the top of the exhaust that sticks up above the side of the tank. Then using a razor saw carefully cut the exhausts from the side of the Rhino.


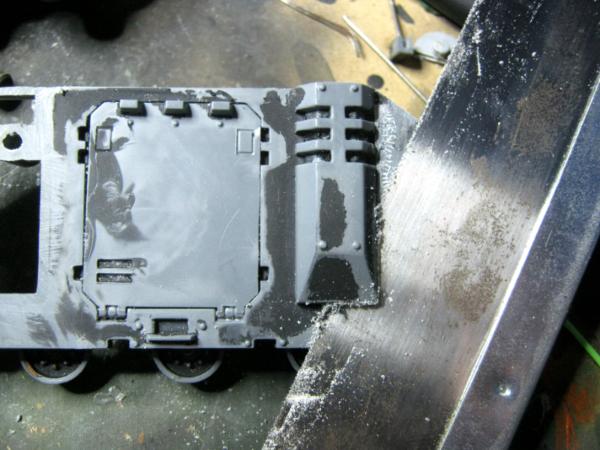
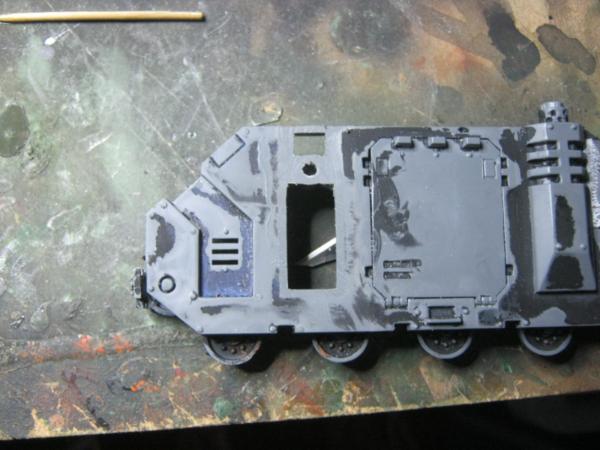
2.) File, sand, cut with a blade any plastic that is left behind until it is flush with the side. You will have three holes per exhaust tidy these up so that they are square.


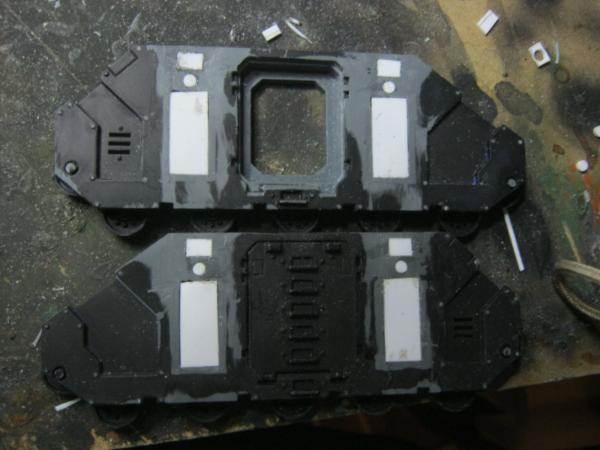
3.) Cut plasticard to fit the gaps and glue in place making sure it is as close to being flush as possible without sticking up. Its better if it sits slightly lower than slightly higher.


4.) Using Liquid Green Stuff fill any gaps and sand flat when dry. This might take several applications to fill all gaps and give a smooth finish.


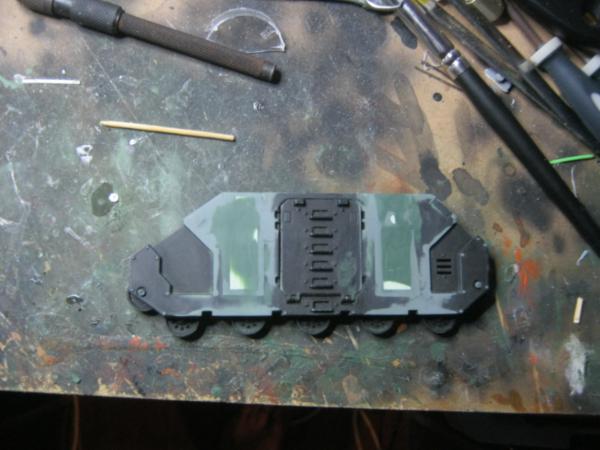
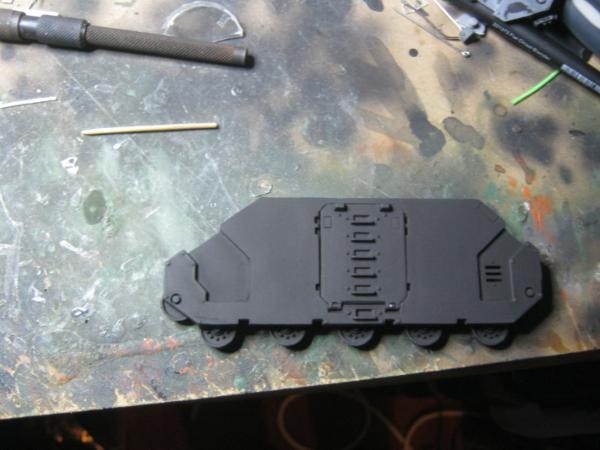
5.) Prime and your done

   
Made in us
Huge Hierodule


United States

Now it can be a tank and a pressure cooker!


Seriously though, you did a really good job removing them seamlessly. Though I question the practicality of an Imperial tank without exhaust ports, and I think it makes the side look rather plain, you did a good job with what you were trying to do.

Hydra Dominatus: My Alpha Legion Blog

Liber Daemonicum: My Daemons of Chaos Blog


Alpharius wrote:Darth Bob's is borderline psychotic and probably means... something...


Made in nz
Fresh-Faced New User


New Zealand

Thanks for your reply.

It will have an exhaust in the end but only one and not as large, coming from its diesel engine situated at the front. I'm trying to make it look more like an M113 APC..

I'm never going to play to the game I just enjoy building the models. My army is based in the near future around 2050 so today's technology is still present especially in a post apocalyptic situation where they have to use what they can.
   
Made in us
Blood Angel Terminator with Lightning Claws


North West Arkansas

Hey man, post the finished model, I mean after you're done painting it etc. I would love to see it!

Crush your enemies, see them driven before you and to hear the lamentations of the women.

Twitter @Kelly502Inf 
   
Made in us
Ultramarine Librarian with Freaky Familiar


Southern California, USA

Although I do question your choice to remove the exhaust pipes your execution was flawless. Well done!

Thought for the day: Hope is the first step on the road to disappointment.
30k Ultramarines: 2000 pts
Bolt Action Germans: ~1200 pts
AOS Stormcast: Just starting.
The Empire : ~60-70 models.
1500 pts
: My Salamanders painting blog 16 Infantry and 2 Vehicles done so far!  
   
Made in gb
Space Marine Scout with Sniper Rifle


UK Coventry

Nice clean looking sides kind of like the land raider. The vent at the back could pass for an exhaust.
Definatly post a finished picture
   
Made in gb
Pious Palatine


Cool. I actually really like the idea of all that space to do free-hand stuff with.

Could be cool for a command Rhino or something.

Thanks for sharing, and post pics when it's complete.

D
   
Made in us
Guardsman with Flashlight


Dayton Ohio

Very well done. All that flat space could be used for stowage or maybe bolt on armor.

Its better to be dead and cool than alive and uncool.  
   
 
Forum Index » Painting & Modeling Tutorials
Go to: