Switch Theme:

The Bonelords of Khorne - Khorne Bloodbound *Detailing a Job Started*  [RSS] Share on facebook Share on Twitter Submit to Reddit
»
Author Message
Advert


Forum adverts like this one are shown to any user who is not logged in. Join us by filling out a tiny 3 field form and you will get your own, free, dakka user account which gives a good range of benefits to you:
  • No adverts like this in the forums anymore.
  • Times and dates in your local timezone.
  • Full tracking of what you have read so you can skip to your first unread post, easily see what has changed since you last logged in, and easily see what is new at a glance.
  • Email notifications for threads you want to watch closely.
  • Being a part of the oldest wargaming community on the net.
If you are already a member then feel free to login now.


Made in us
Virulent Space Marine dedicated to Nurgle


Portland, OR

Hello again everyone!

Yes, I'm still alive.

Last time I posted I was going through some difficult RL issues which sucked all of my hobby mojo away.

I'm happy to say that my car has been fixed for a a couple of months now (never again will I buy a car with wide rims without making sure that the wheel wells have been modified appropriately.)

I have also been at my new job for the last three months, and I'm so incredibly happy with it. I love the company, my co-workers, and the work itself is very satisfying.

I was even able to get in a game at my FLGS Glimpses of Wonder and Warfare in Sherwood, Oregon. I was going to take pictures of the entire progress, but I was so into the game that I forgot. Sorry!

It was a 2000 point game of Blades of Khorne vs. Freeguild. The game was very close, and because I focused on the mission objectives rather than simply trying to smash face I was able to pull out the win. YAY!


Anyway, my hobby mojo is back and I'm going to be making more posts soon.

Thanks for reading!

This message was edited 1 time. Last update was at 2017/07/03 04:54:32


Made in gb
Pious Palatine


Welcome back again! It can be difficult to keep your eyes on the prize in terms of objectives rather than just going for the face smash. Well done on keeping your bloodlust in check!

EDC
   
Made in us
Virulent Space Marine dedicated to Nurgle


Portland, OR

Painting the Bonelords' Armor

I've been asked by a couple of people how I paint the bone armor of the Bonelords. This is not going to be a complete how-to on painting the Bonelords. I'm not happy with any of the ideas I have been working on, so none of them are actually done.

First, I use Vallejo Surface Primer Grey to prime the model. Once I have an even coat of primer on the model, I set it aside and allow the primer to cure. Even though the primer is dry to the touch soon after application, it's not fully cured and adhered to the plastic so I let it sit for a while. This typically doesn't extend the amount of time I'm spending on a project since I work on multiple models at a time, so it usually takes plenty of time to get back to the first model.


After the primer has dried, I add a layer of Menoth White Highlight over the entire model. This gives the base color for the bone effect. This can be done with a brush, but I use my airbrush so I can power through groups of models at a time.


Once everything is dry, I apply a heavy layer of Army Painter Soft Tone Wash from their Warpaints dropper bottle line of paints. I use my brush to make sure that no large pools of wash accumulate on the model. I don't worry about smaller pools of wash because I like the uneven result. It feels like a more natural look to me. It's amazing how much of a difference the wash makes in the overall color of the miniature. Then I let the wash dry for a good hour or so.


After the wash has dried, I drybrush over the whole model with Menoth White Highlight. When I drybrush I make sure to wipe the paint off the brush with a paper towel until no paint comes off the brush at all. This means the paint is almost completely gone and almost completely dry. The drybrush brings all of the sharp edges of the armor back to their original color so they stand out against the washed armor.


For the final drybrush I use Vallejo Model Ivory and prepare it for drybrushing in the same manner as the first layer of drybrushing. Then I apply it only to the upper most edges of the model. I also make sure to only hit the edges on the downstroke. That way the final highlight only hits the top of the edges and not the underside.


And that's it! The armor sections of the model are painted.

I especially like the very slight streaking that the drybrush creates on the armor. It gives additional texture to the armor, almost like a grain along the bone so it's not clean looking. I make sure to thoroughly dry the paint on the brush because if it's not dry enough the streaks will be thick and chalky looking.

I'll make another post covering each step of the paintjob as soon as I'm happy with the final version.

Thanks for reading!
   
Made in us
Virulent Space Marine dedicated to Nurgle


Portland, OR

Systematic Painting

Currently the Bonelords contain close to 200 models, and the majority of them are unpainted. My current plan for getting as many painting as possible is methodical by design, but it could very well get a little confusing as I go. 

Currently my proposed painting system for the Bonelords looks like this: 

1. Set up batches of models in groups of ten. Set all but one batch to the side and place the current batch on my desk. Depending on the total number of models I'm working on during this session the amount of time this takes fluctuates. 

2. Prime each model with my airbrush. This typically only takes me a couple of minutes to do because while I'm waiting for one to dry I move to the next. Using the airbrush gives me a lot of control over where the primer goes and how much ends up on the model so I don't fill in any of the detail. 

3. I mix up my basecoat and thin it down so that it will flow through my airbrush correctly. I've used pure water in the past and it works well, but using too much water causes the acrylic medium of the paint to separate from the pigment. I've started using Vallejo Airbrush Medium lately, and because it's an acrylic medium I don't have to worry about the paint separating when I thin it out. The mixing only takes a couple of minutes. 

4. I apply the basecoat to each model individually just like I apply the primer. Again, this only takes a few minutes. Usually this color is the primary color for the model as take takes care of the majority of the basecoating work for the model. It is very effective on models that are mostly one type of material, like the armor for Blood Warriors or the skin on Bloodletters. Understandably the workload reduction isn't as effective on models that have a heavy mix of materials like the Bloodreavers and Bloodbound heroes which are close to half armor and half skin. 

5. I apply a wash to the entirety of each model making sure to focus on the armor sections. This also helps to separate details from each other to make basecoating te details in later steps easier. Allowing the wash to dry properly can take a lot of time so I typically move this batch to the side and start work on the next batch of models. 

6. Once the wash is completely dry I start drybrushing both highlight colors for the armor on the first batch of models while the wash dries on the other batches. This can take a couple of minutes per model to make sure the drybrushing is getting all of the details of the armor. 

7. Using a brush and thinned down paint I basecoat the rest of the model's details. This is the most time consuming step of the entire process as I need to apply multiple coats of thinned down paint to avoid brush strokes in the finished paintjob. While these layers are drying I finish the drybrushing on another batch of models 

8. Once all of the batches have their details basecoated I return to the first batch and start washing the details one color at a time. While one color's wash is drying I move to the next batch and wash their details with the same color. Repeat until all of the details have been washed on all batches. The washes are in different sections of the models so the drying time for each section isn't as much of a worry. 

9. When the washes are completely dry on the first batch, I start to highlight the details one color at a time. When the first batch is done I move on to the next. This step is grueling but the job is almost done. 

10. MATT VARNISH!!! 

Whew! So, that's the system that I'm planning on using, but like the saying goes, “No battle plan survives contact with the enemy.” We'll see if this actually works out or not. 

Finding fast and more efficient methods of getting miniatures on the table is something that I'm putting a lot of thought into. I've played around with using masking tape and silly putty to cover sections that I'm not working on and then using my airbrush to basecoat the larger detail sections, but making sure the masking is applied correctly can take a while. I'm not sure it really saves me much time. I'll have to try it again and time it. 

Thanks for reading!

This message was edited 2 times. Last update was at 2017/07/16 06:45:58


Made in us
Virulent Space Marine dedicated to Nurgle


Portland, OR

Failure is an Option

In an effort to be more efficient during painting the Bonelords I picked up a can of Rustolum Gloss Ivory Spray Primer. My train of thought was that this would allow me to combine the steps I use to prime and basecoat the models. The time savings would only be a few minutes but that can add up over several batches, so I figured that it would be worth it.

Back when I used rattlecan primer all of the time I used a cardboard box to shield the models from wind and to have a contained area to set them up in. This let me set up around twenty smaller models so I could prime them all at once. This changed when I started using an airbrush. The spray pattern from the airbrush tends to be narrower than a rattlecan. It allows for more control but priming large groups of models is more difficult.

This time I didn't have a box large enough to use when priming the models with the spray paint so I grabbed a paint stirring stick from the Home Depot (they sell them in packs of ten for less than a dollar) and I wrapped painters tape around the stick. This let me mount four models on each side of the stick. Not as good as twenty at a time, but it was more than I've been able to prime at once with my airbrush.

It took the stick outside and shook the can for a couple of minutes. Now, the weather was fairly hot for Oregon, over 90 degrees F so that probably contributed to the result, but I tried it anyways. It was a disaster. The primer didn't attach to the model smoothly. It was as if the pigment wasn't evenly distributed in the paint medium. And the coverage was terrible. The only way that I could get good coverage on the models was to spray them several times, and that started to fill in the details of the models. At least one of the passes was too far away from the models and ended up drying part of the way to the surface leaving a slight pebbling covering parts of the models.


I'm fairly sure that I'll be able to strip the primer from the models, but I'm not trying that again any time soon. This time is would have paid to grab a plastic spoon or a trash model and trying the primer on that first.

On the successful side of this experiment the tape covered paint stick worked like a charm. The tape is strong enough to hold the plastic minis in place even when they're upside down. Determined to salvage something I prepped another painting stick with tape and models. This time I used my airbrush to prime the models, and it worked amazingly well for both the priming step and the basecoating steps. With a couple of paint sticks I'm going to be able to prime and basecoat entire batches of models, so that's nice.

Thanks for reading!
   
Made in gb
Pious Palatine


Great updates. Particularly liked the bone armour tutorial.

EDC
   
Made in gb
Agile Revenant Titan


Thanks for the tutorial it's interesting how it differs to my method for bone (and the ways in which it's similar).

For mine, I start with a basecoat of Balor Brown, drybrush Ushabti Bone over the top (trying to get the streakiness that drybrushing can cause as you're right it gives texture), and then either a drybrushed edge-highlight of Pallid Wych Flesh for sections I want brighter, and/or a rough drybrush of Mournfang Brown or Rhinox Hide to give a sort of weathered look.

I'll try the wash step that you do though I've been trying to think of ways to get my models looking grittier, so that might be a good option

Check out may pan-Eldar projects http://www.dakkadakka.com/dakkaforum/posts/list/702683.page

Also my Rogue Trader-esque spaceport factions http://www.dakkadakka.com/dakkaforum/posts/list/709686.page

Oh, and I've come up with a semi-expanded Shadow War idea and need some feedback! https://www.dakkadakka.com/dakkaforum/posts/list/726439.page

Lastly I contribute to a blog too! http://objectivesecured.blogspot.co.uk/ Check it out! It's not just me  
   
Made in us
Virulent Space Marine dedicated to Nurgle


Portland, OR

@evildrcheese - Thank you!

@ynneadwraith - You're very welcome. The technique you're using is a really solid one for bone. The only reason I went with a wash method is because I wanted to have strong shadows and contrast between the layers. I also hoped that the wash would pool a little bit and make the finish uneven. From previous experience I was sure the drybrush would brighten up the smoother areas and give the armor a slightly textured look.
   
Made in us
Virulent Space Marine dedicated to Nurgle


Portland, OR

Detailing a Job Started

I finally got down to business and did some more work on the converted Aspiring Deathbringer and Exalted Deathbringer with Impaling Spear. If you remember the first posts I did on these two conversions I mentioned that I wanted to do some Greenstuff work on both of them to complete their details.


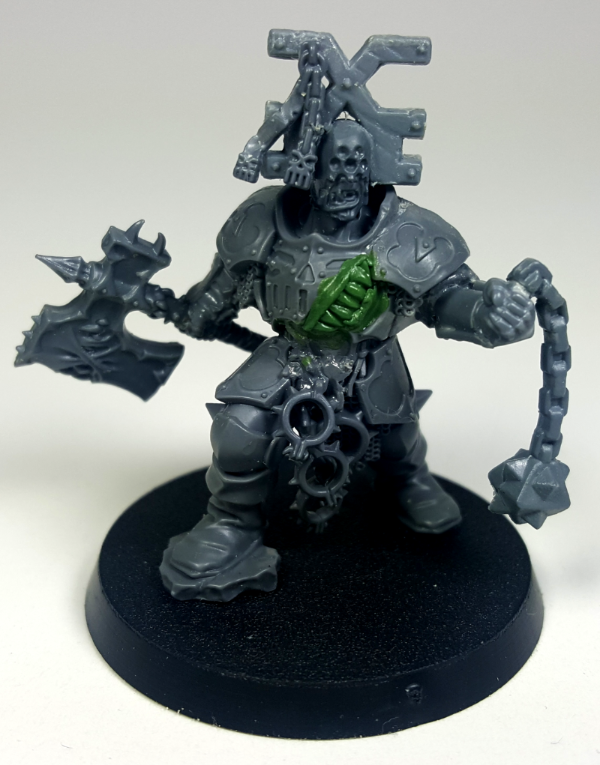
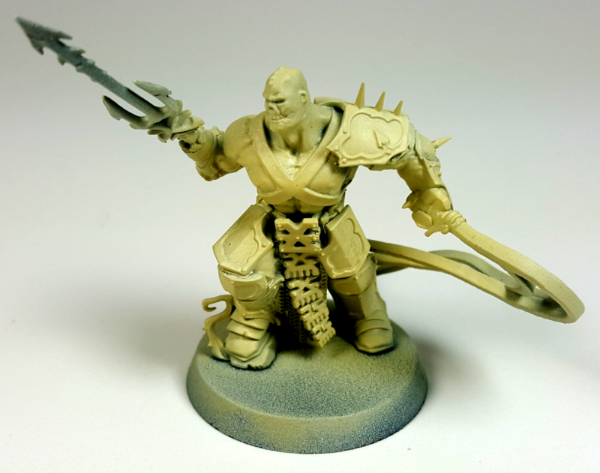
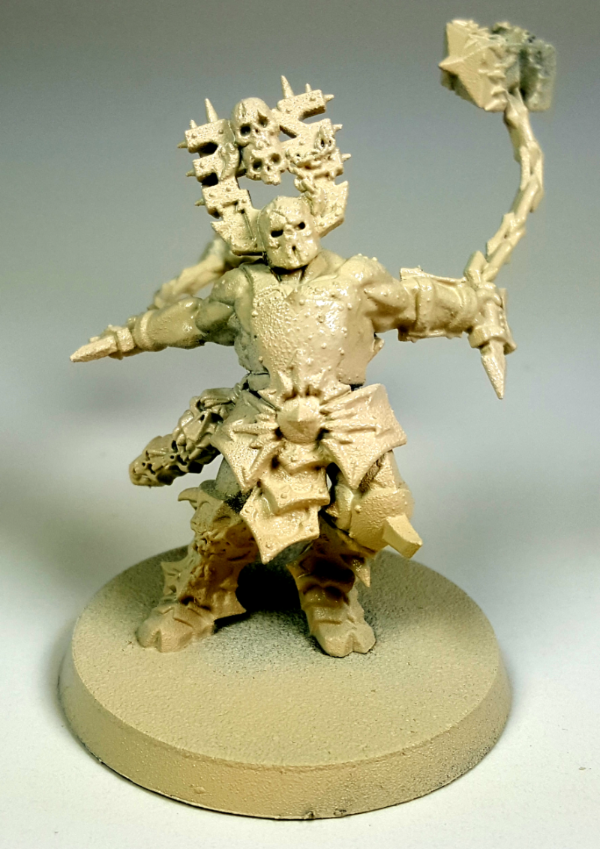
The only thing that I wanted to complete on this guy was to cover up the gap that was left in his breastplate from the conversion work.

I ended up taking a blob of Greenstuff and filling in the gap. While it was still workable I created a set of closed teeth by cutting in a zig-zag line in the Greenstuff. I used a clay shaper to tease the edges of the teeth to be more rounded and smooth. I could have added more detail to the teeth to give them more detail, and I might use the tip of a hobby blade to cut that detail into the teeth now that they are dried. To be honest I'm not sure if I trust my skills to not ruin the look I have now.

I took two short snakes of Greenstuff and laid them over the base of the teeth to create a gumline. I blended the back edges of the Greenstuff into the armor to help it look like the gums grew up out of the armor.

Using a clay shaper I placed small indentions along the gums between each tooth so it looks like the teeth actually pushed out of the gums and deformed them, like real teeth. I think I did okay with this, but I'll know for sure when I start to lay paint down.


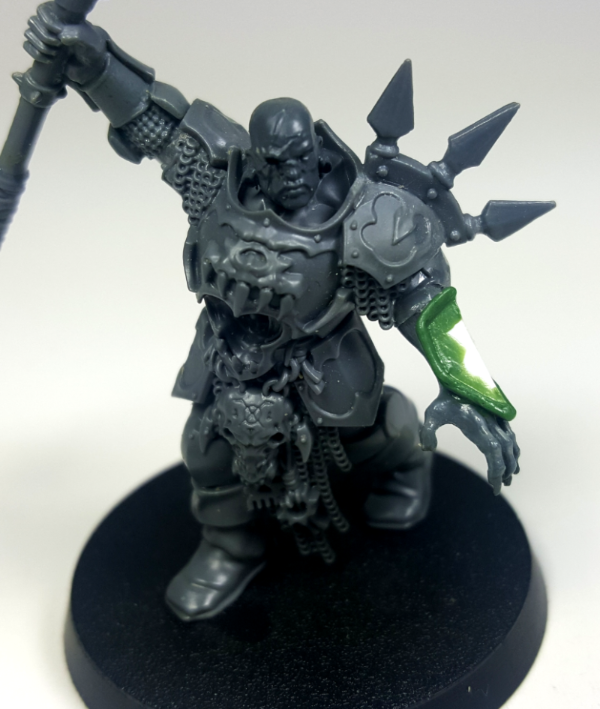
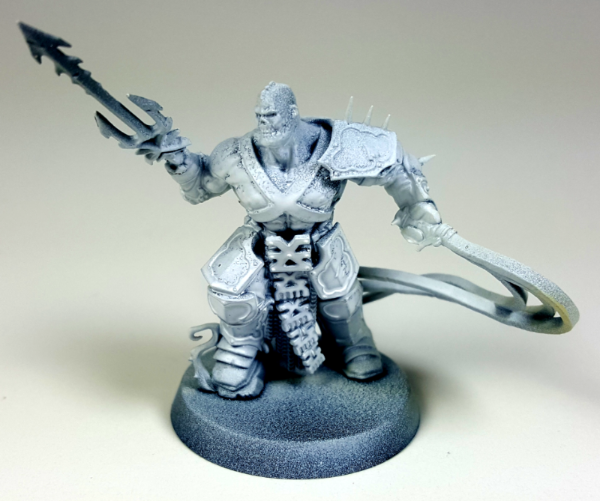
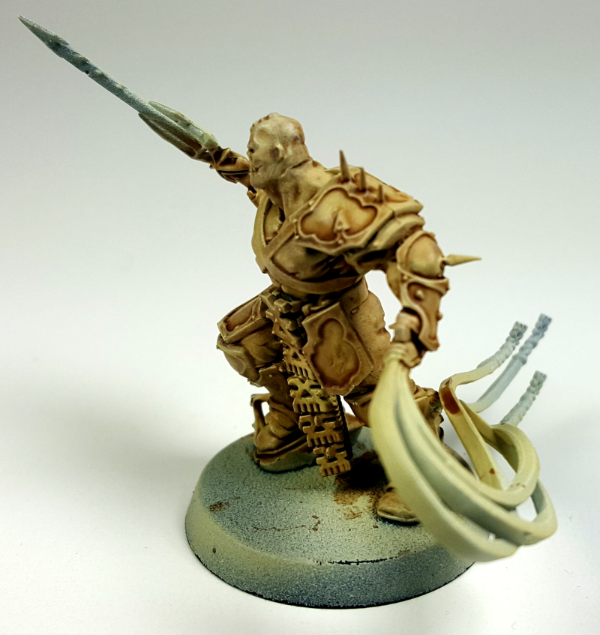
The two areas I wanted to work on this guy are the spear and the armor covering the left forearm. Sorry for the incomplete picture, I was focusing on the arm armor and not thinking about getting the whole mini in frame.


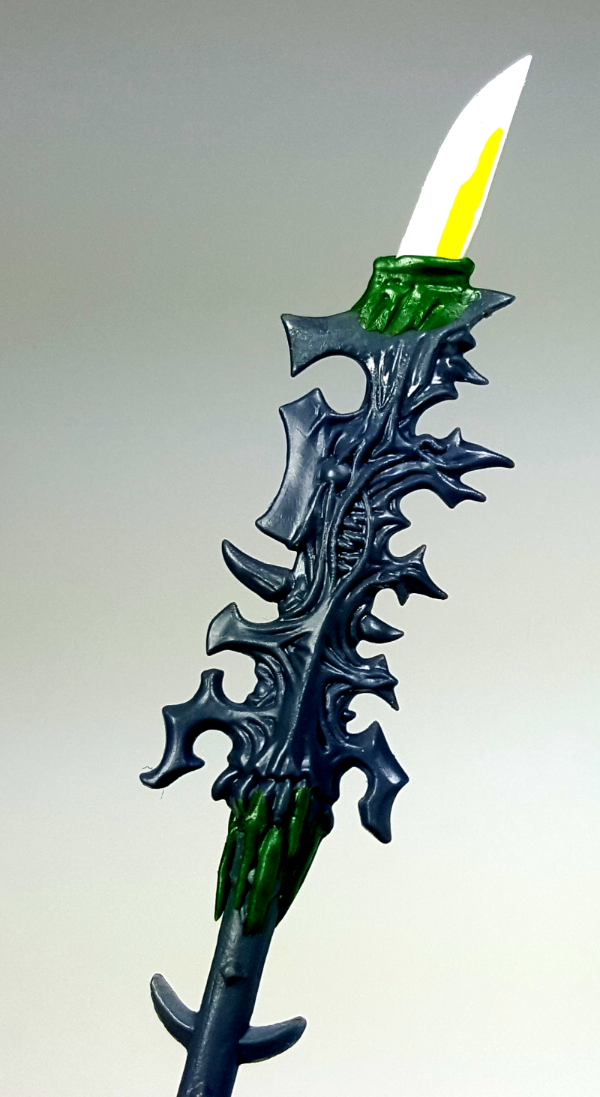
I added a short length of plasticard to create a tip for the spear so it actually looks like it can be used to stab rather than simply hack away at the foe. I placed a short snake of Greenstuff wrapped around the base of the spear tip and blended the back end down into the rest of the spear blade.

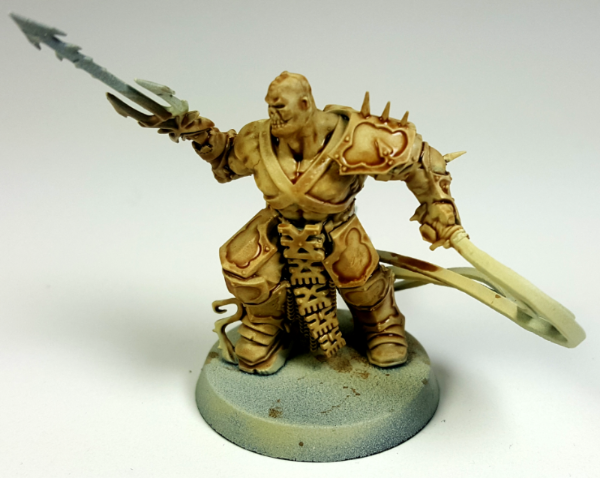
I rounded the top of the Greenstuff off with then intention of making it look like the spear tip grew up out of the body of the blade. I plan on painting the center of the blade to look like a gumline which will make the blades and teeth look like they grew up out of some strange, daemonic jawbone latched on to the end of the spear.

I think the gumline around the spear tip is still too thick and doesn't blend very well with the rest of the spear, but that's more a symptom of my developing skill with Greenstuff. I don't think I'll bother to redo it as I'm actually okay with it as a learning experience.

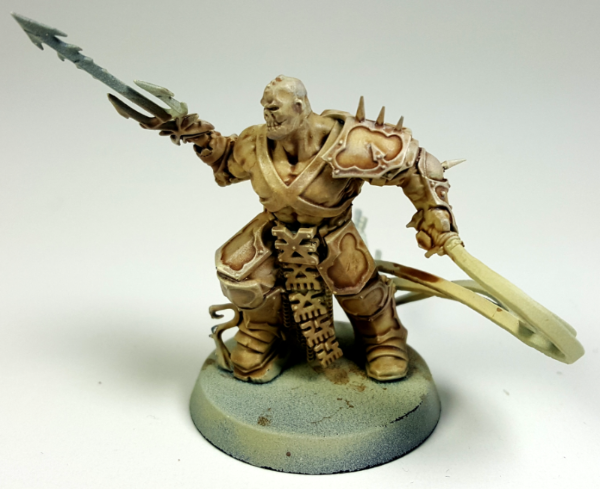
The base of the spear head was my next target. The origional piece had teeth reaching down the handle and when I did the conversion some of those teeth were cut in half, so I wanted to replace those cut down teeth and extend them farther down the spear.

I took some more short snakes of green stuff and massaged them into place around the base of the spear. I tried to vary the length of the teeth and maintain their rounded shape, but some of them ended up uneven and don't taper down to a tip that I like.

I will probably remove some of the worse offenders and redo them. I will also take this time to add some additional teeth to help fill in gaps and bad blending work. I'm not sure if I'm going to add and addition Greenstuff around the bases of the teeth to make another gumline, but who am I kidding? In for a penny, in for a pound.

This will help sell the appearance that the spear tip is some weird Khornate entity that latched on to the end of the spear like a lampray. It now lives off of the blood that is split by it's own blades and teeth. If the Deathbringer doesn't supply it with blood often enough, there's always the Deathbringer himself to hand if it gets hungry.


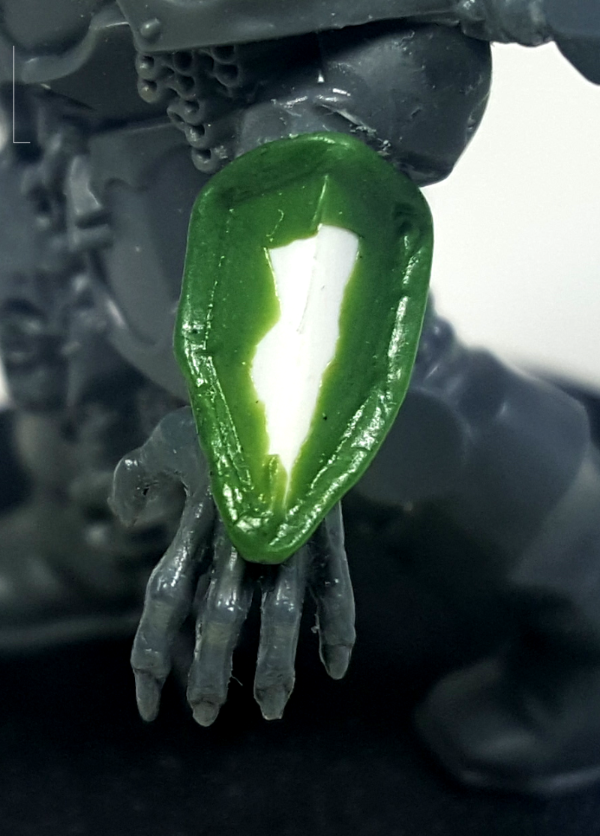
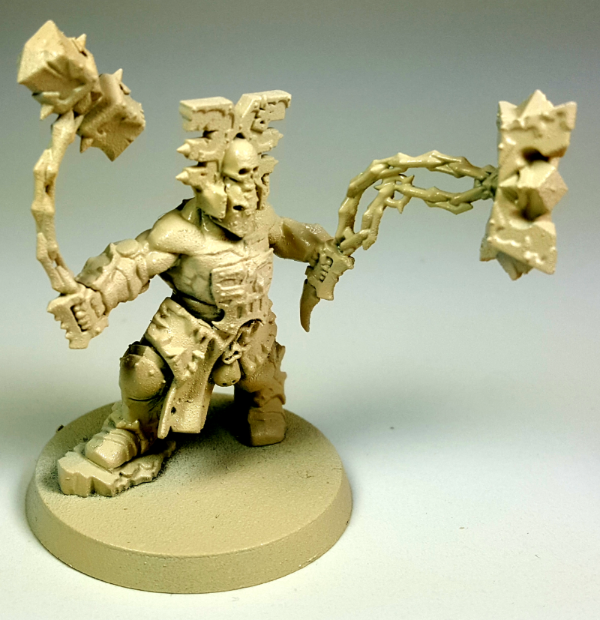
This was my first attempt at adding details to blank pasticard and honestly I'm not happy with the direction I'm going with it, but it's progress of a kind and I took the photos so I'm showing it to you anyway. I was working on rounding out the edges of the armor and blending the inner edge of the greenstuff back into the center of the armor. The problem I have is that it ended up looking uneven and softened the edges of the armor too much.

I think I will peel the Greenstuff off the armor and start over. I just picked up the Skull kit that GW just released (okay, okay I picked up three. Because SKULLS!) I'm thinking of using one of the Bloodletter skulls, cutting down the back of the skull, and blending it into the armor. This will let me add some really cool and unique detail to the armor while still developing my blending skills with Greenstuff. I'll be using a sanding tool to smooth out a couple of the rough edges of the armor to they're more uniform as well.

Well that's where they stand at the moment. Let me know what you think.

Thanks for reading!

This message was edited 2 times. Last update was at 2017/08/23 05:10:48


Forum Index » Dakka P&M Blogs
Go to: