| Author |
Message |
 |
|
|
|
|
Advert
|
Forum adverts like this one are shown to any user who is not logged in. Join us by filling out a tiny 3 field form and you will get your own, free, dakka user account which gives a good range of benefits to you:
- No adverts like this in the forums anymore.
- Times and dates in your local timezone.
- Full tracking of what you have read so you can skip to your first unread post, easily see what has changed since you last logged in, and easily see what is new at a glance.
- Email notifications for threads you want to watch closely.
- Being a part of the oldest wargaming community on the net.
If you are already a member then feel free to login now. |
|
 |
2015/03/13 14:42:18
Subject: How do you base your models?
|
|

Been Around the Block
|
Hello!
What is your prefered style of basing models and how do you do it?
I just realized that the sand I have been using to base my models is too coarse and probably have to rebase 60 orks!
Also I seem to have a problem with painting the bases as I never seem to be happy with the result, they don't look natural...
That said I like plain bases for my standard units, and then do a little bit more with it when I get to the larger bases.
I really need inspiration as I was really looking forwards to having a desert themed ork army, but I just can't seem to get it right.
How I went forward was PVA glue, sand, crackle paint, thinned down PVA glue just to be sure, I then primed my model, basecoat of Steel Legion Drab, Devalin Mud shade and Bleached Bone highlight.
Have a nice day 
|
|
|
 |
|
2015/03/13 15:48:10
Subject: How do you base your models?
|
|

Regular Dakkanaut
|
I'm doing a forest theme at the moment. I'm using the GW stirland mud. Followed by Pva and some treemendus forest scatter, herbs, leaves, clump foliage, plants and anything else I feel like! 
For a desert theme though I would highly recommend the GW agrellan earth for an Easy and interesting effec.
|
1500pt undefeated Nurgle and Khorne army.
Starting on Eldar.
|
|
|
|
|
2015/03/13 15:50:52
Subject: How do you base your models?
|
|

Ancient Space Wolves Venerable Dreadnought
I... actually don't know. Help?
|
I do Stirland mud with Steel Legion Drab and some PVA glue to simulate a swamp.
|
|
|
|
|
|
2015/03/13 15:52:47
Subject: How do you base your models?
|
|
Legendary Master of the Chapter
|
Sand and pigment powered.
Simple and can look nice depending on how you paint the sand first.
Also picked up a bunch of crackle paint to give a different basing a try.
|
 Unit1126PLL wrote: Unit1126PLL wrote: Scott-S6 wrote: Scott-S6 wrote:And yet another thread is hijacked for Unit to ask for the same advice, receive the same answers and make the same excuses.
Oh my god I'm becoming martel.
Send help!
|
|
|
|
|
2015/03/13 16:01:38
Subject: How do you base your models?
|
|
Regular Dakkanaut
|
For what it's worth, I did thin PVA, crackle paste, patches of sand over it, some debris, and painted. There are a few pics on my blog, including pics of experiments before I committed to my theme. http://bonecron.blogspot.com/2015/02/musings-on-bases.html
By the way, you applied crackle paste over sand? I find that very strange. Can you us tell more about it? Maybe take pics?


|
|
This message was edited 1 time. Last update was at 2015/03/13 16:04:10
|
|
|
|
|
2015/03/13 16:04:07
Subject: How do you base your models?
|
|
Dark Angels Librarian with Book of Secrets
|
Modge Podge, some cheap sand (think sand blasting size), and then some brown or red washes depending on what theme I want, maybe some orange flock.
|
 ~1.5k ~1.5k
Successful Trades: Ashrog (1), Iron35 (1), Rathryan (3), Leth (1), Eshm (1), Zeke48 (1), Gorkamorka12345 (1),
Melevolence (2), Ascalam (1), Swanny318, (1) ScootyPuffJunior, (1) LValx (1), Jim Solo (1), xSoulgrinderx (1), Reese (1), Pretre (1) |
|
|
|
|
2015/03/13 16:06:54
Subject: Re:How do you base your models?
|
|

Road-Raging Blood Angel Biker
|
i found those diorama scenery making sets on sale and bought one of each,
i mix sand + grass, sometimes add some rocks
|
|
|
|
|
|
2015/03/13 16:14:02
Subject: Re:How do you base your models?
|
|
Morphing Obliterator
|
Slate and barbecue ash fixed with superglue. Then add some scrap bits for detail, depending on the size of the base.
|
 12000 pts 12000 pts
 5000pts 5000pts |
|
|
|
|
2015/03/13 16:30:59
Subject: How do you base your models?
|
|
Tough-as-Nails Ork Boy
|
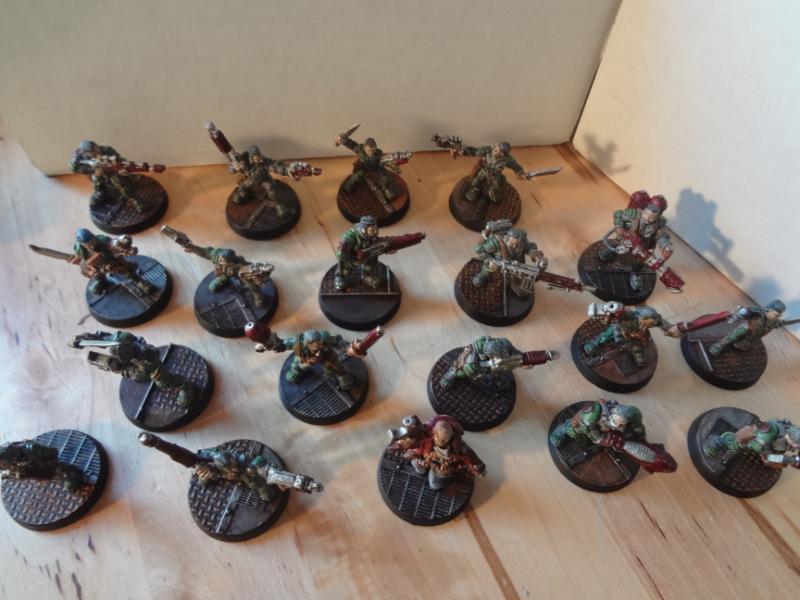
A mixture of different grains of flock, mixed with about 30% play sand, brush on watered down pva, lay flat in tub, dump flock over all the bases. Wait a day, clean them up, spray with hardware store black spraypaint, layer with airbrushed gray, watered down army painter dark tone, and lighter gray. Paint ring brownish grey. If its an hq unit, it might get a skull or someting.
Simpele and quick. No sense in making a prettier base than the model itself.
|
|
|
|
|
2015/03/13 16:38:29
Subject: How do you base your models?
|
|
Longtime Dakkanaut
|
I use various colored basing materials depending on the army. I would never use just one "grain" size of sand / flock. Rather a mix of mostly small, some medium and a little large.
The great thing is I make up my mix and then put it on the base with slightly watered down PVA glue. And then it is DONE. It is already the color I want it to be.
For table top ready it looks MORE than enough. I never understood the people who waste time basing their model with sand, then priming the sand, then painting the sand with 4 different colors. I wouldn't base at all if that was the only option.
PS - I've used a variety of 'Woodland Scenics' products for my basing. They have a lot of colors and a lot of sizes of sand/gravel/rocks and flock. Here are some links if interested:
http://woodlandscenics.woodlandscenics.com/show/category/BallastAndCoal?tsort=default&perPage=1900&view=grid
http://woodlandscenics.woodlandscenics.com/show/category/GroundCover
|
|
This message was edited 2 times. Last update was at 2015/03/13 16:50:09
|
|
|
|
|
2015/03/13 16:43:17
Subject: How do you base your models?
|
|
Brigadier General
|
Kern wrote:Hello!
What is your prefered style of basing models and how do you do it?
I just realized that the sand I have been using to base my models is too coarse and probably have to rebase 60 orks!
Also I seem to have a problem with painting the bases as I never seem to be happy with the result, they don't look natural...
What's wrong with coarse sand? There are gravely rocky deserts, and true-scale sand would be almost too fine to notice the texture. I wouldn't necesarily rebase just yet.
As for my basing I have 3 main favorite options right now.
-The first and most basic is just glue down a few small chips or rocks then watery superglue over the base and dip in sand.
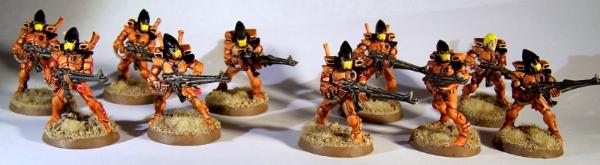
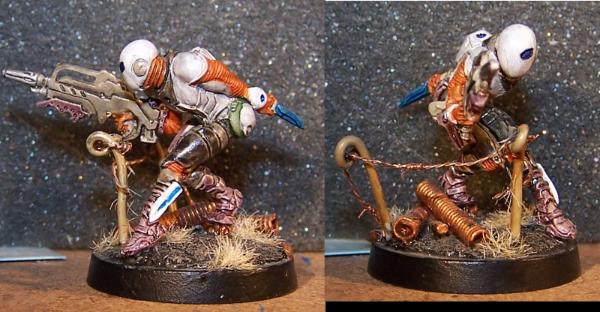
-For my Chaos figures I put down a layer of pre-mixed concrete patch which has a great rough texture to it. Then I press some bits of bark into it and then paint it as rock. Looks like this
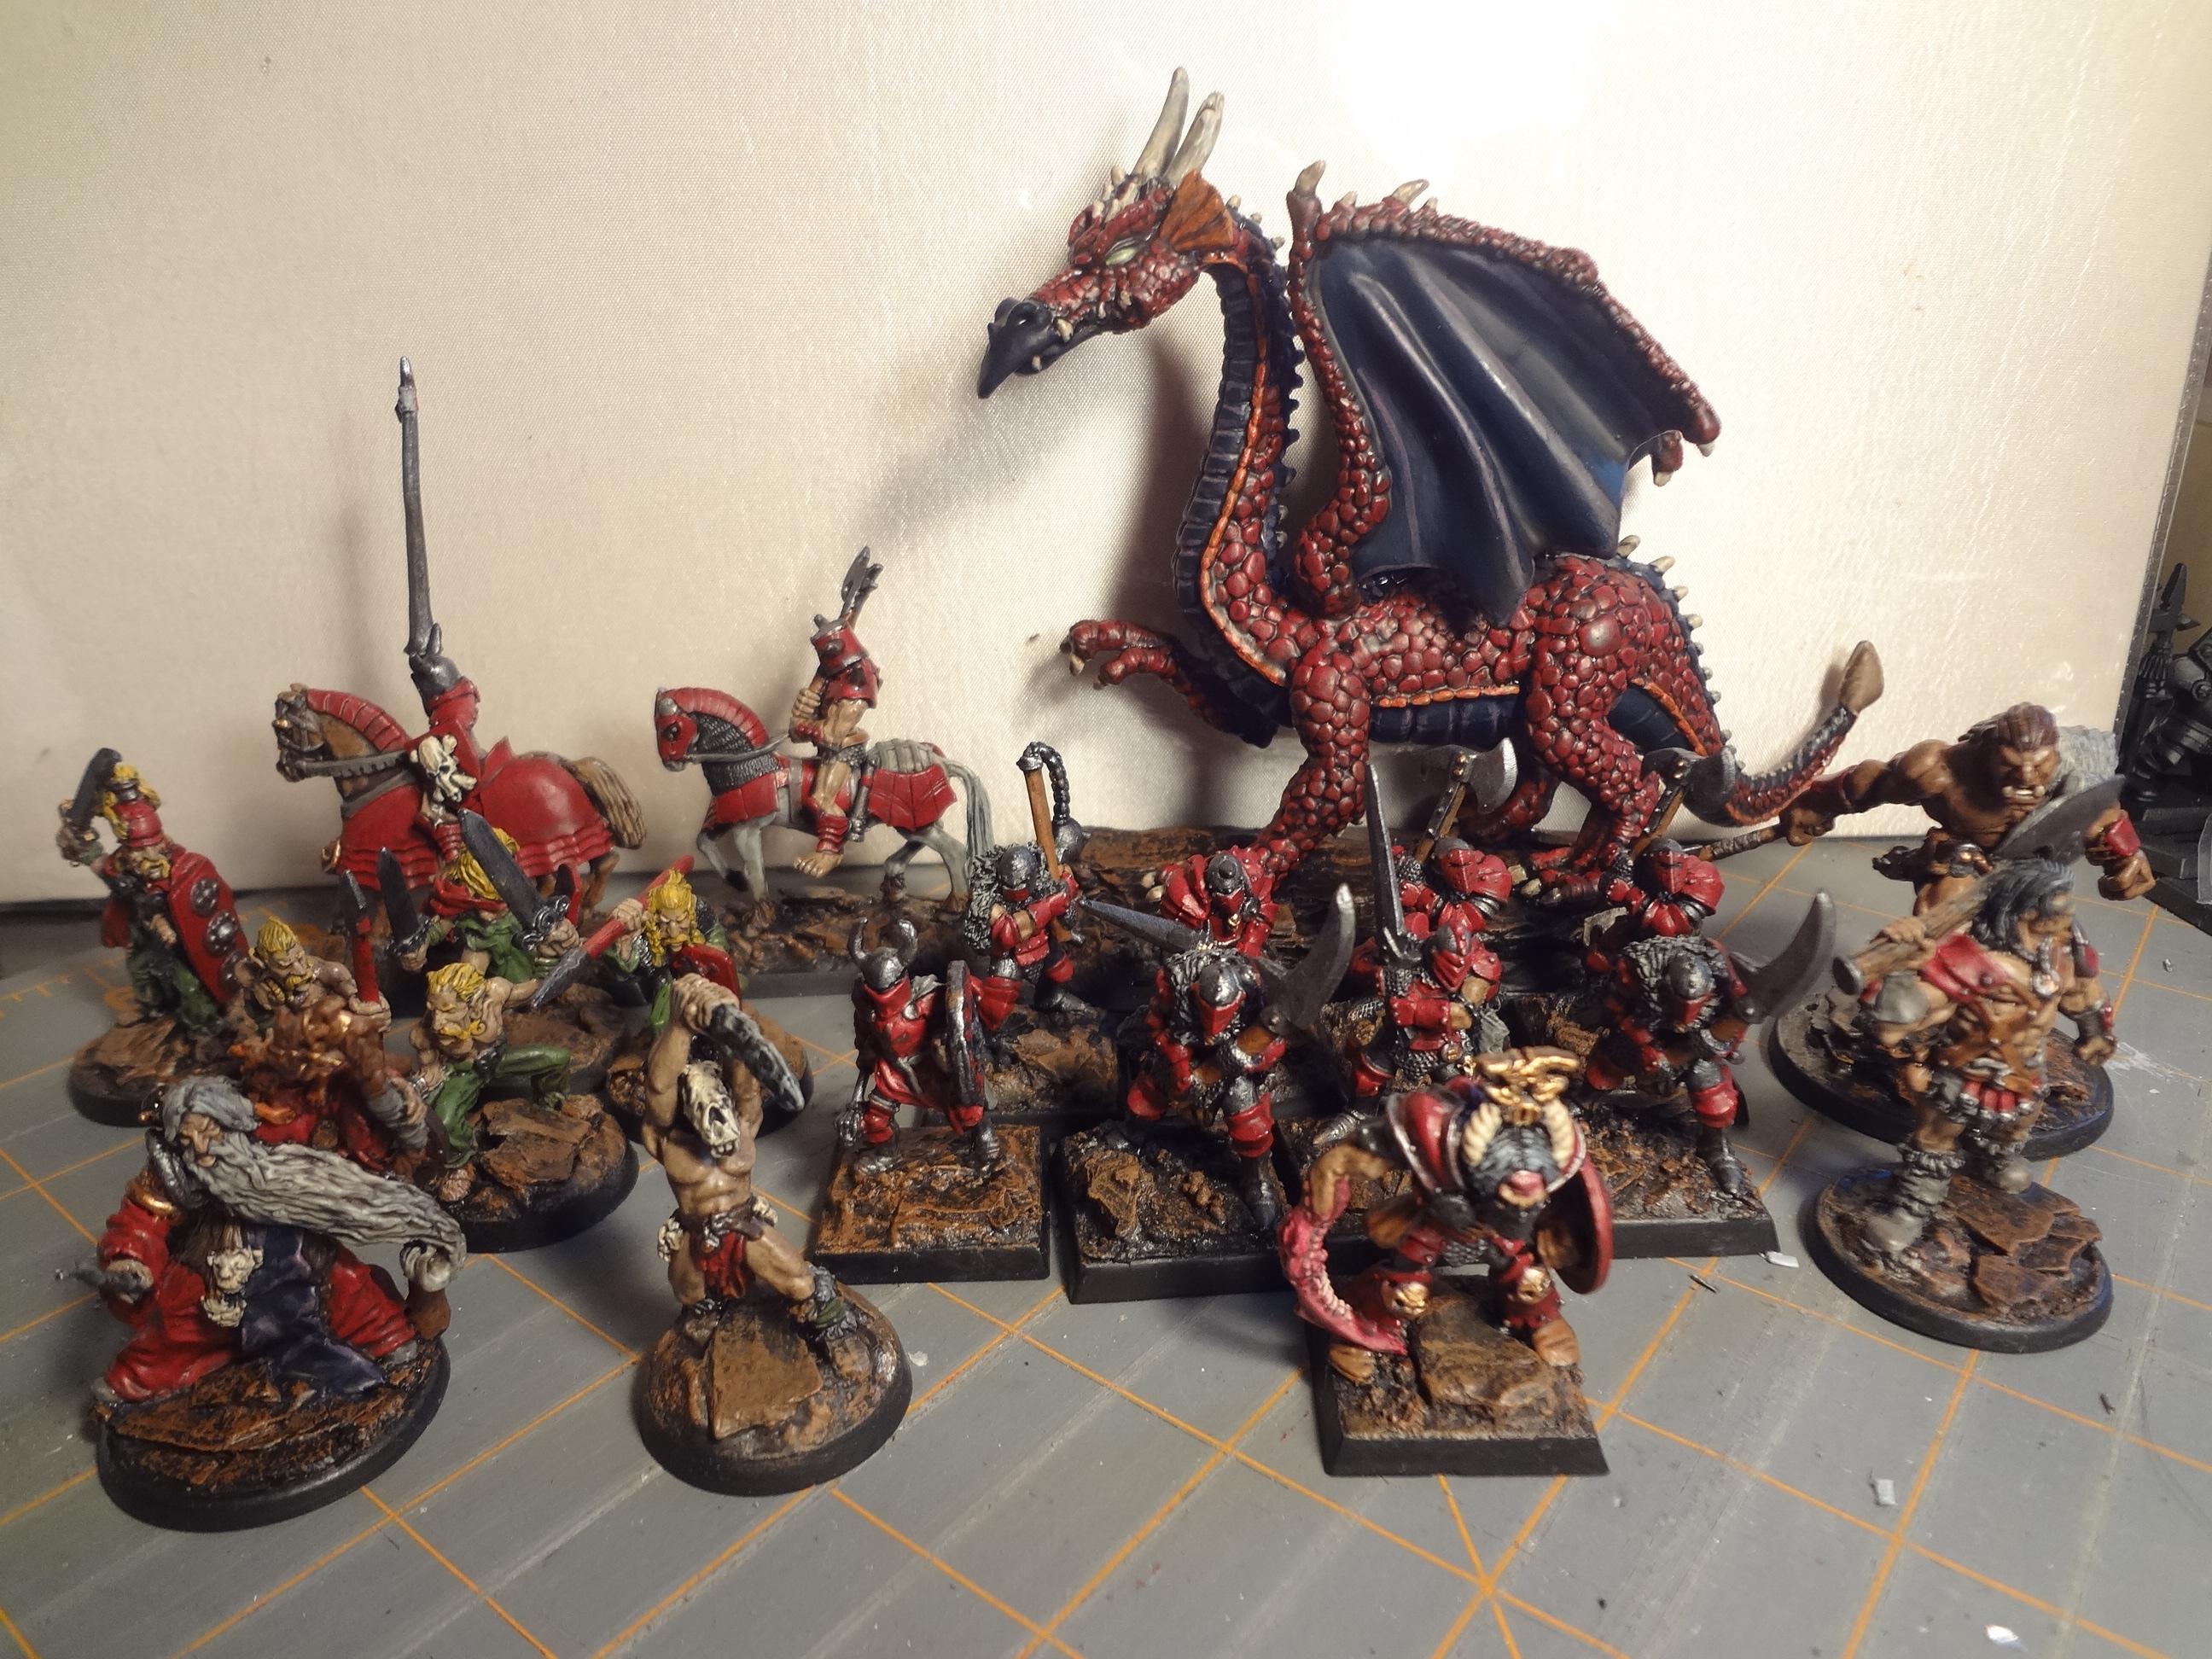
-I've also started using the "Champ Industries" plastic scenic bases more often. The number of styles is limited, but they are really crisp and well done with on filling or sanding needed. Being plastic, it's really easy to mod them, and glue additional bits to them. At 30 cents each, it's also a great bargain.
These guys are all on the Champ "industrial" style bases.
|
|
|
|
|
|
2015/03/13 17:51:14
Subject: How do you base your models?
|
|
Tough-as-Nails Ork Boy
|
Super Newb wrote:
For table top ready it looks MORE than enough. I never understood the people who waste time basing their model with sand, then priming the sand, then painting the sand with 4 different colors. I wouldn't base at all if that was the only option.
Because I dont have all one color or type of sand, flock and gravel. Also, because Im going for a broken concrete and trashed warzone kind of look, I throw lots of sprue shavings and bits in the basing mixture to add interesting shapes.
|
|
|
|
|
2015/03/13 17:53:03
Subject: How do you base your models?
|
|
Legendary Master of the Chapter
|
Speaking of broken concrete. Linoleum is very useful for that and cheap as dirt and has really nice looking breaks.
|
Unit1126PLL wrote: Scott-S6 wrote:And yet another thread is hijacked for Unit to ask for the same advice, receive the same answers and make the same excuses.
Oh my god I'm becoming martel.
Send help!
|
|
|
|
|
2015/03/13 17:59:15
Subject: How do you base your models?
|
|
Brigadier General
|
Gragga Da Krumpa wrote:
Because I dont have all one color or type of sand, flock and gravel. Also, because Im going for a broken concrete and trashed warzone kind of look, I throw lots of sprue shavings and bits in the basing mixture to add interesting shapes.
I've found an irregular sand mix is great for whatever use you're needing (rubble, desert, gravel, etc). My main mix is coarse construction sand from the hardware store but it's also got some tiny rock chips and other stuff mixed in.
|
|
|
|
|
|
2015/03/13 20:21:19
Subject: How do you base your models?
|
|
Longtime Dakkanaut
|
Gragga Da Krumpa wrote:Super Newb wrote:
For table top ready it looks MORE than enough. I never understood the people who waste time basing their model with sand, then priming the sand, then painting the sand with 4 different colors. I wouldn't base at all if that was the only option.
Because I dont have all one color or type of sand, flock and gravel. Also, because Im going for a broken concrete and trashed warzone kind of look, I throw lots of sprue shavings and bits in the basing mixture to add interesting shapes.
I wasn't talking to you. Obviously. Broken concrete is something you have to make yourself (or buy a resin base of). Which means it needs painting. But people, other people, the people I was actually referring to, who just have a bunch of sand on their bases, well that to me is silly. Better to pay a few bucks (especially if you can split up purchases with gaming friends) for some Woodland Scenics stuff and save dozens of hours of time.
|
|
|
|
|
2015/03/13 20:39:56
Subject: How do you base your models?
|
|
Brigadier General
|
Super Newb wrote:
I wasn't talking to you. Obviously. Broken concrete is something you have to make yourself (or buy a resin base of). Which means it needs painting. But people, other people, the people I was actually referring to, who just have a bunch of sand on their bases, well that to me is silly. Better to pay a few bucks (especially if you can split up purchases with gaming friends) for some Woodland Scenics stuff and save dozens of hours of time.
Meh, I think plain sand can look just fine. It all depends on the desired effect. I've done some forces with just sand or just magic mud a paste I make from paint and lots of sheetrock paint texture), It's a fine way to quickly base your minis and all it takes is a heavy wash (or watery paint depending on your point of view) and a drybrush. A nice fast way to get basic infantary (like, say 80 guardsmen) ready to go.
Not to say I don't see the benefit of a contrasting bit of foliage or a couple pebbles (most of my basing are like this), but it's hard enough to get folks to paint their minis much less convincing them to do multi-step basing. Also, I've never seen where woodland scenics is faster than superglue (the watery kind)-sand-paint-drybrush.
|
|
|
|
|
|
2015/03/13 21:07:11
Subject: How do you base your models?
|
|
Longtime Dakkanaut
|
 Eilif wrote: Eilif wrote:but it's hard enough to get folks to paint their minis much less convincing them to do multi-step basing.
Indeed!
Also, I've never seen where woodland scenics is faster than superglue (the watery kind)-sand-paint-drybrush.
Well, if a person is just doing an almost entirely sandy / gravel-y base to approximate walking on the ground, it is faster.
Pre-colored basing material way:
Step 1 - Get mix of whatever color sand / gravel / flock in whatever mix of sizes you prefer.
Step 2 - Glue your mix to base. Done.
Not pre-colored basing way
Step 1 - Get whatever mix of sizes of sand / gravel you prefer.
Step 2 - Glue to base. NOT done.
Step 3 - Prime
Step 4 - Paint. Repeat Step 4 if using multiple colors
Step 5A - (Optional) - Apply a wash. Repeat Step 5A if using multiple washes
Step 5B - (Optional) - Drybrush. Repeat Step 5B if doing multiple drybrush colors.
Now clearly much more can be done with painting. The bases can look much more detailed. If you are going for something special that isn't just sand / gravel / basic ground to walk on you gotta paint the base. However, if you are just going for a basic base, gluing basing material that is already the color (or mix of colors) you want is a ton faster.
And don't forget you can mix basing material together. If you want it to look like your dudes are walking on ground that is mostly brown with specks of green or lighter brown or bigger grey stones, you can do that with a mix of colored basing products. Apply in one step and you are done.
|
|
|
|
|
2015/03/13 22:28:10
Subject: How do you base your models?
|
|
Brigadier General
|
Good Point. That makes sense.
But you don't need to get woodland scenics to do it. I did up an arab caravan with sand and some contrasting colored pebbles. I recommend putting the pebbles down first and not mixing the two materials, but that doesn't really add much/any time to the process.
|
|
|
|
|
|
2015/03/13 22:40:08
Subject: How do you base your models?
|
|
Longtime Dakkanaut
|
Eilif wrote:Good Point. That makes sense.
But you don't need to get woodland scenics to do it. I did up an arab caravan with sand and some contrasting colored pebbles. I recommend putting the pebbles down first and not mixing the two materials, but that doesn't really add much/any time to the process.
Also a very good point. 
|
|
|
|
|
2015/03/13 22:47:53
Subject: How do you base your models?
|
|
Fixture of Dakka
|
Woodland Scenics is very nice because the sand size is very consistent between batches. This isn't very important in the context of one or unit, but let's say you use a mix of 25% coarse, 25% medium, 50% fine ballast for 30 space marines. If you come back and make 10 more space marines three years later, you can purchase the same ballast sizes, and it will be a very good match. It's also not dusty at all.
Also, for lazy tabletop standard units where you don't paint the sand, they offer some good mixes that look nice unpainted.
On the other hand, if you want to save money, go to your garden supply place, and buy a bag that will last you for 1000 models for $10. They usually even have sand in all sorts of different colors.
|
|
|
|
|
2015/03/14 08:12:04
Subject: Re:How do you base your models?
|
|
Been Around the Block
|
Woah, didn't expect so many replies, thank you all for sharing!
For what it's worth, I did thin PVA, crackle paste, patches of sand over it, some debris, and painted. There are a few pics on my blog, including pics of experiments before I committed to my theme. http://bonecron.blogspot.com/2015/02/musings-on-bases.html
By the way, you applied crackle paste over sand? I find that very strange. Can you us tell more about it? Maybe take pics?
- Bocete, thats how I was planning to do my second go at the base, but then I thought I had used too coarse of sand and never got that far! They look very nice
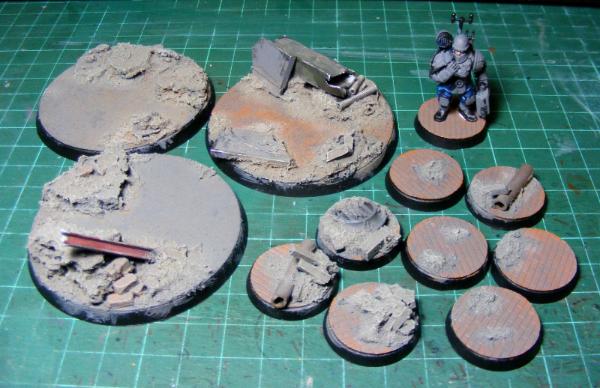
As far as the crackle paint over the sand I think I got some mixed results, some came out very nice where it actually looked like the ground split up, and others didn't show too much. Also I'm not sure how to bring the cracks forth after painting them as the cracks tend to blend in with the paint and not looking like dried up dirt.
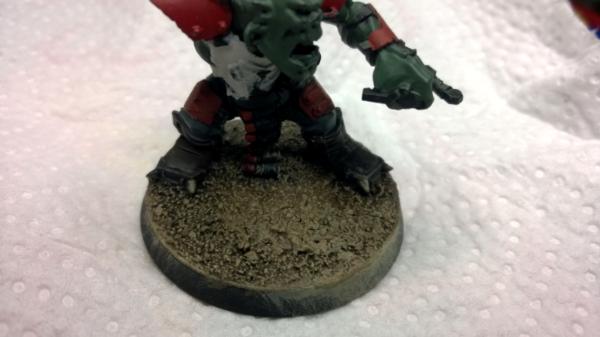 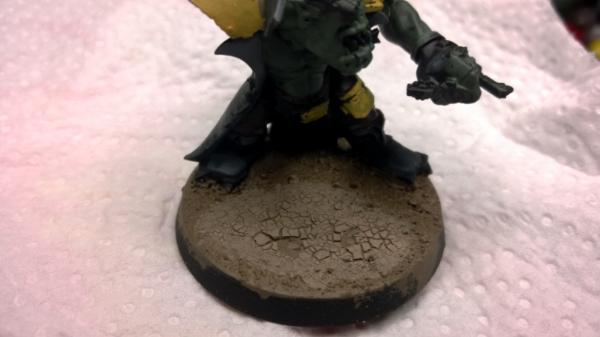 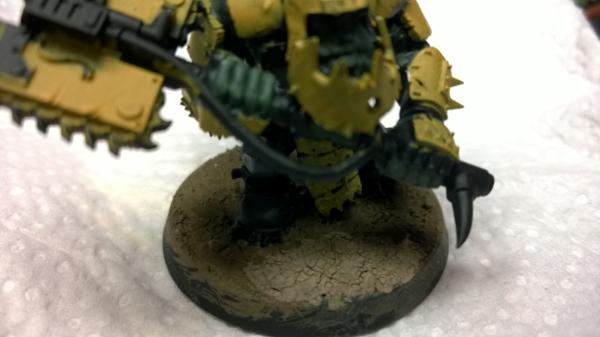
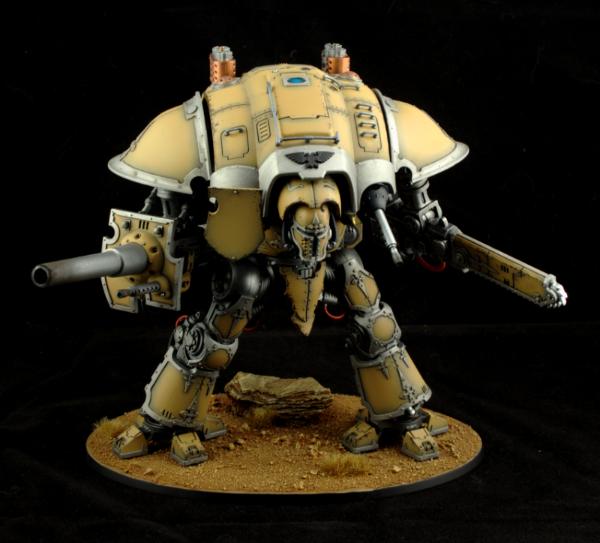
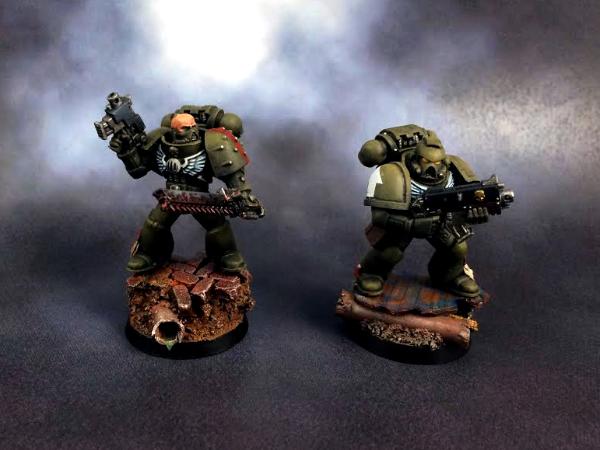
Now these pictures aren't great, but you can see what I was going for. The first pic is an example of where the cracks have blended with the paint, the second one has not been painted yet, I would love to leave it like that, but I think it's too bright and the 3rd is just another example. After reading the replies I think I should thin down the wash I put on, so the constrast isn't so huge.
|
|
|
|
|
2015/03/14 08:47:27
Subject: Re:How do you base your models?
|
|
Avatar of the Bloody-Handed God
Inside your mind, corrupting the pathways
|
|
|
|
|
|
|
2015/03/14 15:29:32
Subject: Re:How do you base your models?
|
|
Colonel
This Is Where the Fish Lives
|
I have a bunch of different methods and which one I use depends on what I am looking to do. I had a client ask for a desert-themed base, I used a gravel mix for the sand and the "rock" was a piece of bark mulch. I painted the ground VGC Beasty Brown and give it a drybrush with VGC Leather Brown and VGC Bonewhite. The rock was VMA Burnt Umber with the same colors dry brushed on it. I used Army Painter shrubs for the plants.
I did some urban bases for my Raptors and I used pieces of cork and various bits of styrene tubes and sheets along with some model bricks:
I'm working on some Space Wolves right now and I used resin bases from Secret Weapon Miniatures. The stone was accomplished by priming the bases white. I then dabbed various colors of oil paint (umber, grey, brown-black, green, sienna) in a random pattern on the stoney areas and proceeded to mix all of the paints together. While the paint was still wet, I took an old t-shirt and wiped a majority of the oil paint away, leaving the mixed colors in the nooks and crannies. I dipped a rag in some white spirit to wipe away even more paint to let more of the white basecoat show through on the more prominent edges. The rest of the base was painted with VMA Grey Primer and then drybrushed with GW Dawnstone and VGC Wolf Grey. I then made a pigment wash and applied it to the grey areas to simulate dirt.

|
 d-usa wrote: d-usa wrote:"When the Internet sends its people, they're not sending their best. They're not sending you. They're not sending you. They're sending posters that have lots of problems, and they're bringing those problems with us. They're bringing strawmen. They're bringing spam. They're trolls. And some, I assume, are good people."
|
|
|
|
|
2015/03/14 16:07:35
Subject: Re:How do you base your models?
|
|
Regular Dakkanaut
|
Kern wrote:Woah, didn't expect so many replies, thank you all for sharing!
For what it's worth, I did thin PVA, crackle paste, patches of sand over it, some debris, and painted. There are a few pics on my blog, including pics of experiments before I committed to my theme. http://bonecron.blogspot.com/2015/02/musings-on-bases.html
By the way, you applied crackle paste over sand? I find that very strange. Can you us tell more about it? Maybe take pics?
- Bocete, thats how I was planning to do my second go at the base, but then I thought I had used too coarse of sand and never got that far! They look very nice
As far as the crackle paint over the sand I think I got some mixed results, some came out very nice where it actually looked like the ground split up, and others didn't show too much. Also I'm not sure how to bring the cracks forth after painting them as the cracks tend to blend in with the paint and not looking like dried up dirt.
Now these pictures aren't great, but you can see what I was going for. The first pic is an example of where the cracks have blended with the paint, the second one has not been painted yet, I would love to leave it like that, but I think it's too bright and the 3rd is just another example. After reading the replies I think I should thin down the wash I put on, so the constrast isn't so huge.
I dunno, I wash and heavily drybrush Tallarn Sand and it's fine. The drybrush doesn't get into cracks, and I can control the drybrush to leave parts of the base browner, implying wetter.
If you want larger cracks in the paste, there are two things you can do:
* Make the layer beneath crackle paste more slippery, less binding to the paste. This lets the paste move around while drying, the paste will gradually converge around some points while leaving larger cracks in between.
* Apply more paste. Similarly, the more paste there is, the thicker the layer, the more strongly will the paste try to stay together while drying and shrinking.
I think that your sandy background is a major reason why you have a hard time creating cracks. I apply a coat of PVA underneath the paste (and let it dry first) because without it the plastic is too slippery and the cracks end up being too big. You can try applying more paste but this will only get you so far. The paste is a liquid and the grains of sand keep it from moving about.
You could try to drown the sand in PVA. This way the surface of this sandy layer would be more level, and definitely not as grippy. Or you could apply a mich thicker layer of the pastewhere you want to aplify cracking.
By the way, I find consistency with the paste to be difficult to achieve. Even though I make bases in huge batches, there are always a few that don't take well. The cracks end up too big, or small, or just unnatural. I have about a dozen that I won't end up using. That oval base above was the second crackle attempt on that base, the first was kinda bad and I stripped both the paste and the PVA and tried again.
|
|
This message was edited 2 times. Last update was at 2015/03/14 16:10:20
|
|
|
|
|
2015/03/14 17:10:33
Subject: Re:How do you base your models?
|
|
Mysterious Techpriest
|
Here's my method, if it helps anyone
circular disc of plasticard, textured if needed.
Add some random bits of shaped plasticard, broken cork and the odd bit of model and terrain. Maybe some putty to bulk out areas
Vallejo Grey Pumice spread about and filling gaps.
Spray black, paint over concrete / rubble areas with Tamiya texture paint: pavement effect
paint random bits or flooring as you wish
highlight rubble with a drybrush
wash it all a few times with watered down greys and browns, enjoy.
|
|
|
|
|
|
|
|
 ~2800 points