I'm a budget guy. Three kids, an expensive hobby, but good times. I'm not really cheap, but I like to avoid uneccesary costs.
Such as a wargaming mat.
After about twelve hours of work over two days, I present: The Desert Battlefield!
Making my game mat!
After checking out some tutorials and using some of my own abilities, I decided to make myself a desert terrain mat to throw down on the table for gaming.
Supplies:
($15) 1 x 4x15 Canvas Cover (for painting walls)
($4.50 Ea) 4 x Tubes of Silicone Brown Exterior Caulk
($3) 1 x Bag of Kitty Litter (Cheap, unscented, non-clumping)
($5) 1 x Bag of Sandbox Sand
And an arse load of cheap ass Micheals paint.
All of these items save the cat litter and paint came from Home Depot.
So to start I laid out the canvas cover and measured off about 6" from each edge (just to have a little wiggle room and not right against the edge of canvas).
Then I started with the caulk, spreading it out with a large pallette knife and trying to maximize my space. I started at first with a single strip, sand it, and then try and caulk from there. But it was very difficult as sand is hard to control.
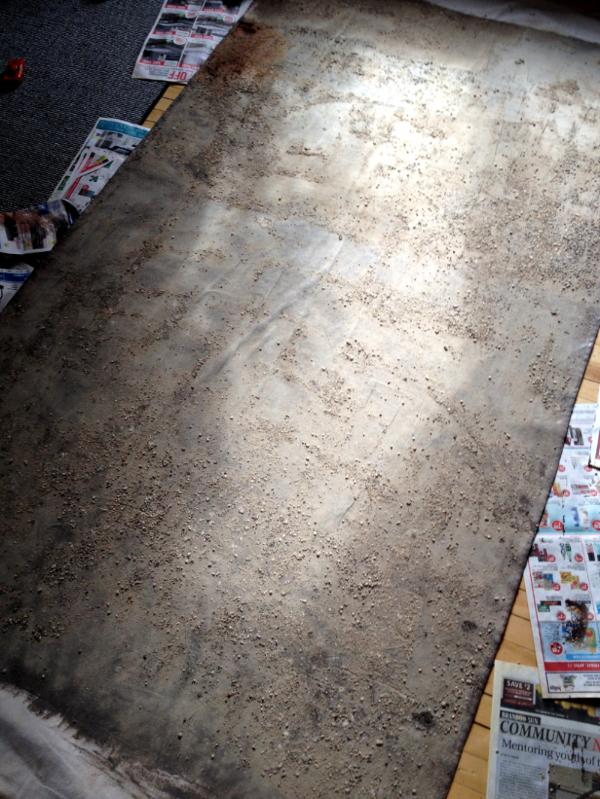
After I covered the entire canvas with the caulk, I poured a thick layer of sand/kitty litter over the entire area. Using a cheap large paint brush, I spread it out and tried to ensure that the entire area was covered.
Finishing that, I used the caulk tube as a rolling pin and proceeded to roll over the entire canvas (with quite a bit of pressure) to reallllllly get that sand and litter into the caulking.
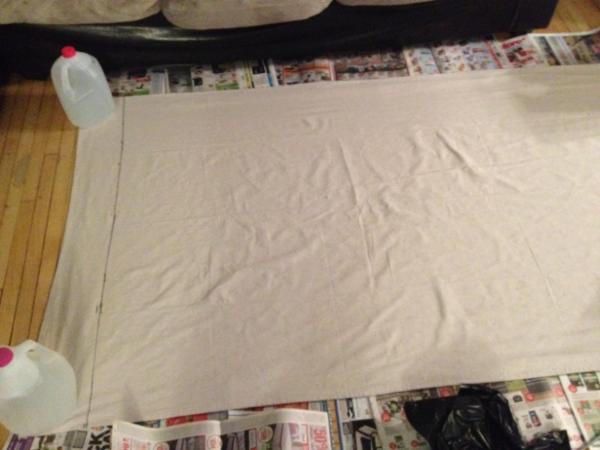
First was to lay out my canvas, measuring out 6" from either side to give some wiggle/admin room.

Cheap unclumped Kitty Litter

Playground Sand from Home Depot

The Caulk

Chhhheeeaap brush pack
So, to being I started making a corner with the sand and caulk, but found that doing it that way got sand in the way of my caulk spread as I proceeded. So I decided then just to cover the entire Mat in caulk before I sanded it.

After the caulk was laid out, I poured the Sand out on top of it covering it entirely. After the sand was on, I used a caulk tube as a rolling pin to crush the sand into the caulk to get it to stick. This went on for awhile, so maybe a real rolling pin would have helped. In any case, once I was satisfied that the sand and litter was set; I waited overnight for everything to dry.

So, here was the part that had me on edge the most. Did the sand stick? Was there going to be enough? Is it going to look good?
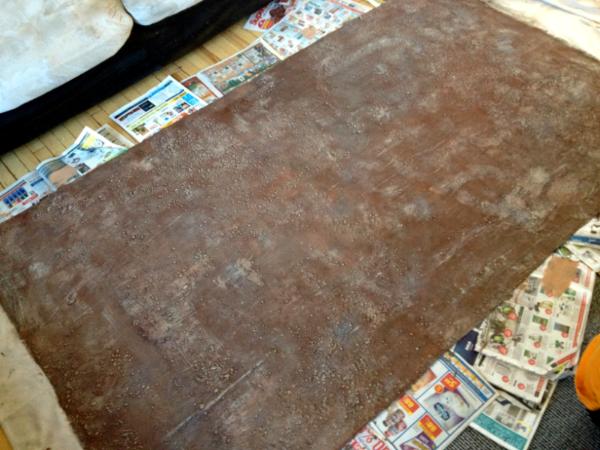
After lifting the canvas and shaking it out, it turned out actually pretty decent. Using that big momma brush seen above, I started to brush away piles of loose sand and litter to clear out space that would just come off during the painting. Having that rolling around while trying to get pain on would only cause a headache. And if it isn't sticking, then there's no need to keep it.
After shaken off and brushed away, I started painting. Just a flat coat of brown Micheals paint with a bit of water added to get it to sink into the sand. This part was super simple, pretty quick, and painless. Just paint - paint - paint. Dab dab dab.

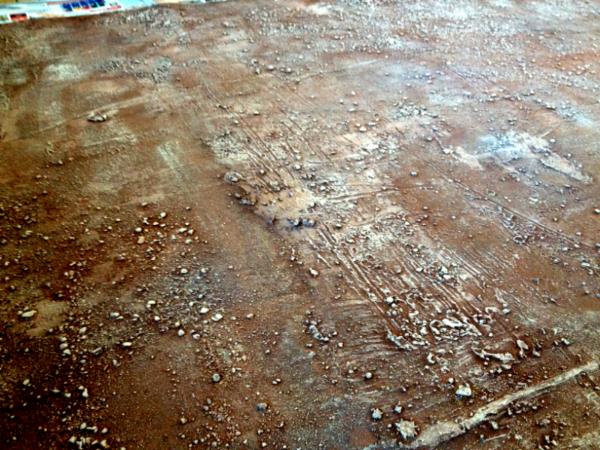
After letting that dry for awhile I applied a golden brown to some of the piles of rocks to get some contrast in. Then I threw on a little of gray spray paint in some areas just for fun.

Again, letting it dry. I applied more watery brown with some mixes of light brown in to get int he crevices and clean up some of the golden brown splotches.
And finally, with a tan colour and big brush I dry brushed the entire board. Mainly aiming for raised edges, nice piles of rocks, ridges, craters, and and deformities in the caulking to give it a rocky natural feel.


Overall, pretty painless and quick. With the extra material I have, it should be just as cheap to make another one if I choose.
The only thing left to do now is to see how well it rolls up after I'm satisfied it's dry enough. I'll probably wait until tomorrow afternoon after I give it a shake tonight to knock any last loose pieces of sand off.
Thoughts:
Sand - The playground sand is realllllly fine, with larger chunks hanging around. I could have cut back on the amount of sand mixed with the kitty litter as the majority of the sand just rolled off the canvas anyways. I'm not quite sure though if it would make a big difference. That initial layer of fine sand sticks to the caulking and still provides an interesting texture.
The cat litter portion is great to give some big rock formations and mix it up in size. No regrets there.
Caulking - As Silicone Exterior caulking dries fast, I think this is one of the reasons why my sand didn't stick as well as it probably should have as by the time I returned to the beginning to lay down sand, it was drying up. If you attempt this, I suggest you have a friend or girlfriend to lay down sand as you caulk. As well, the Caulking is very thin. The trials I saw online were acrylic and ceramic caulking, which I think might be thicker. With a thicker caulking, it'd be heavier but you'd gather more texture. Plus with a plastic bag you can actually create some interesting textures in the caulk. Anywhooo. If I had bought an extra two tubes, maybe I could have made it thicker. Tough to tell.
Paint - Bought wayyyyy to much paint for what I needed. Considering I just used three versions of brown, I now have an ass load of brown paint.
First layer of paint seems to work best as a watered down paint to get between the sand and texture. The rest is simple.
Overall, the last stress test will be its rollability tomorrow. And hopefully this week, I can have someone over or go to their house to give her a spin. I'm excited, as it matches my army bases well.
Automatically Appended Next Post: Trying out some models on the mat.


Overall it's still flexible. Pretty happy with overall result


 Imperial Fists, 3000 pts
 Evil Sunz Orks, 2500 pts
 Tyranids, 1000 pts
 Death Guard (30K), 2500 pts

 - 670 pts ||
  - 354 pts ||
  - 46 pts ||
