So last Saturday, I had a rare chance to play against xenos list.
I've had surfeit with having countless games with same
IoM lists, so it was a welcome refreshment.
Furthermore, it was a Tau army which I have not played against since this February.
The Tau list however, was tougher than I expected.
Not only did it patch all the competitive detachment known up to date, but it also sported a void shield generator.
Such heinous combination was not what I expected for light, casual games.
After all, why would competitive and ever ingenious Tau engineers ever dare to use "worse" technology of the hated
IoM?
However, I was also curious about how well my latest army roster would perform against such powerful list.
A few weeks ago, I wrote an Iron Hand Anvil Strike Force roster with minimum number of allies.
So far, I played with this list only twice. And against the same roster, which was Pure Khorne assault army of multiple blodthirsters with myriads of hounds and bloodcrushers.
These two games resulted in 1 Win and 1 Loss and both lists were, I daresay, quite fluffy.
But against a very competitive Tau army, the game would be on a totally different league.
Iron Hands list
1) Primary Detachment : Anvil Strike Force(Chapter Tactics : Iron Hands)
Core : Armoured Task Force
- Techmarine(Servo-harness, Bike, The Gorgon’s Chain) : 155pts
- Thunderfire Cannon(Drop Pod) : 35pts
- Predator(Twin-linked Lascannon, 2xLascannon Sponson) : 140pts
- Predator(Twin-linked Lascannon, 2xLascannon Sponson) : 140pts
- Vindicator Squadron
[1xVindicator : Siege Shield & Storm Bolter (Warlord),
1xVindicator : Dozer Blade,
1xVindicator : Dozer Blade & Storm Bolter] : 390pts
Auxiliary : Mechanised Infantry
- Centurion Devastator Squad(3xGrav Cannon & Grav
Amp, 3xHurricane Bolter, 1xCenturion Veteran Sergeant : Omniscope, 2xCenturion, Land Raider) : 510pts
Auxiliary : Recon Outriders
- Land Speeder(2xHeavy Bolter) : 50pts
Auxiliary : Honoured Ancients
- Dreadnought(Twin-linked Lascannon, Drop Pod) : 150pts
Auxiliary : Honoured Ancients
- Ironclad Dreadnought(2xHeavy Flamer, Seismic Hammer, Power Fist, Ironclad Assault Launcher, Drop Pod) : 190pts
2) Officio Assassinorum Detachment
Elite
- Culexus Assassin : 140pts
Total : 2,000pts
The first draft of my roster had a contemptor dreadnought instead of the Culexus and a land speeder, to write a list with only a single unmixed detachment.
However, I also wanted the list to have minimum defence against psychics. So I compromised and included lone Culexus. Other than that, every unit belongs to Anvil Strike Force.
Tau list
1) Hunter Contingent
Core : Hunter Cadre
- Tau Commander(Puretide Engram Neurochip, Multi-Spectirum Sensor Suite, Command and Control Node, AKA the Buffmander)
- 5 Fire Warriors
- 5 Fire Warriors
- 5 Fire Warriors
- Crisis Battlesuit
- Crisis Battlesuit
- Riptide(Ion Accelerator)
- 5 Pathfinders
- Stormsurge(Pulse Driver Cannon, Shield Generator)
Auxiliary : Firebase Support Cadre
- Broadside Battlesuit(Heavy Rail Rifle)
- Broadside Battlesuit(Twin-linked High-Yield Missile Pod, Twin-linked Smart Missile, Missile Drone)
- Riptide(Ion Accelerator)
2) Combined Arms Detachment
HQ
- Ethereal (Warlord)
Core
- Crisis Battlesuit(2xFusion Blaster)
- Crisis Battlesuit(2xFusion Blaster)
Fortification
- Void Shield Generator(3xVoid Shield)
3) Drone-Net VX1-0
- 4 Marker Drones
- 4 Marker Drones
- 4 Marker Drones
- 4 Marker Drones
4) Piranha Firestream Wing
- Piranha(2xGun Drone, Fusion Blaster)
- Piranha(2xGun Drone, Fusion Blaster)
- Piranha(2xGun Drone, Fusion Blaster)
- Piranha(2xGun Drone, Fusion Blaster)
So there you go. Stormsurge, two riptides, piranhas spamming BS3 drones, buffmander and all the other goodies.
That includes ludicrously cheap Void Shield Generator.
At first glance, I wondered how many turns my army can endure against a list with heavy firepower.
Fortunately, the game turned out to be more exciting than I expected.
Me and the Tau player played the second mission of the Maelstroms of War, Contact Lost.
Both players draw single objective card at the first turn. But after that, the number of cards a player draws is equal to the number of objective he/she controls.
This meant simply clustering around void shield generator will do little good for the Tau player. To earn points, he should advance more aggressively rather than using static gunline tactics.
To exploit this to my advantage, I placed my 3 objectives at the middle of the board. Combined with a single objective my opponent place there were 4 objectives in midfield.
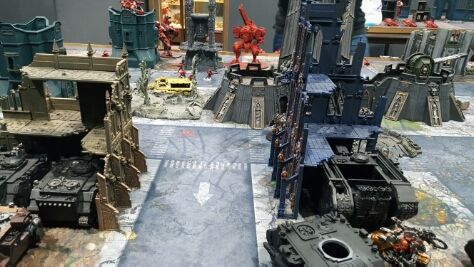
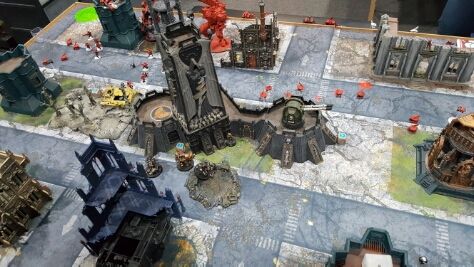
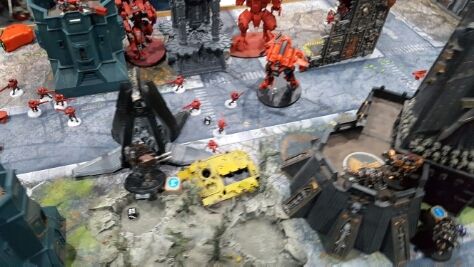
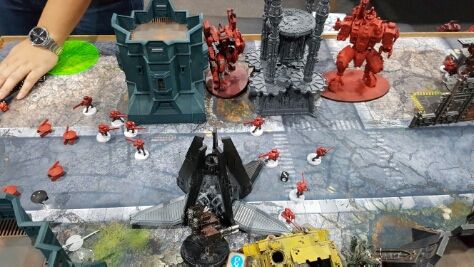
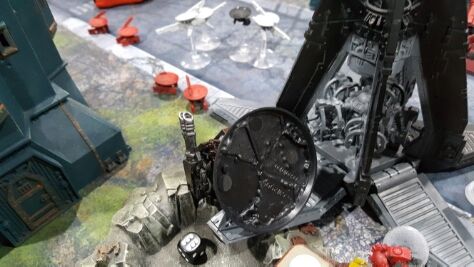
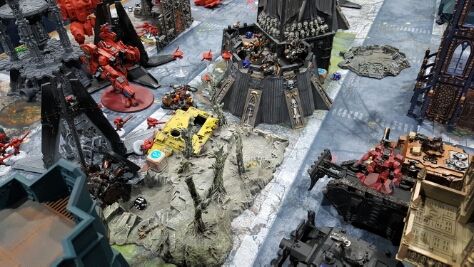
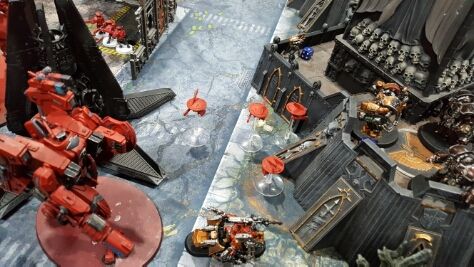
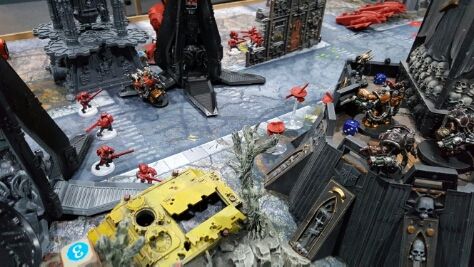
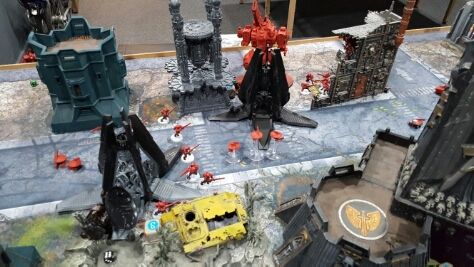
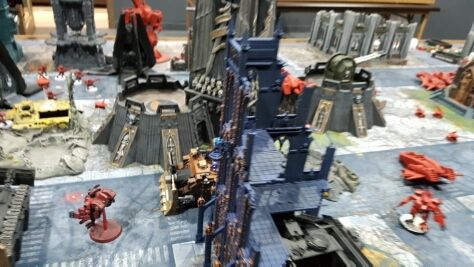
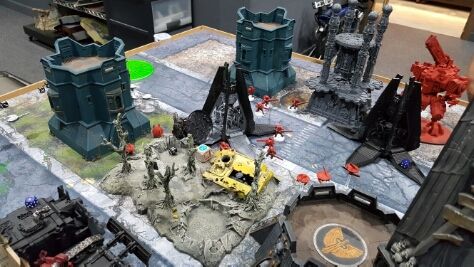
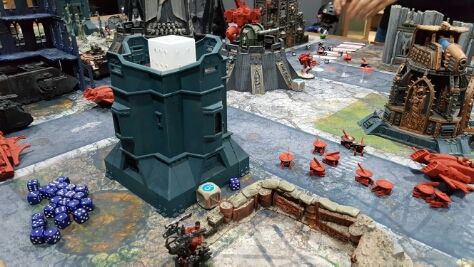
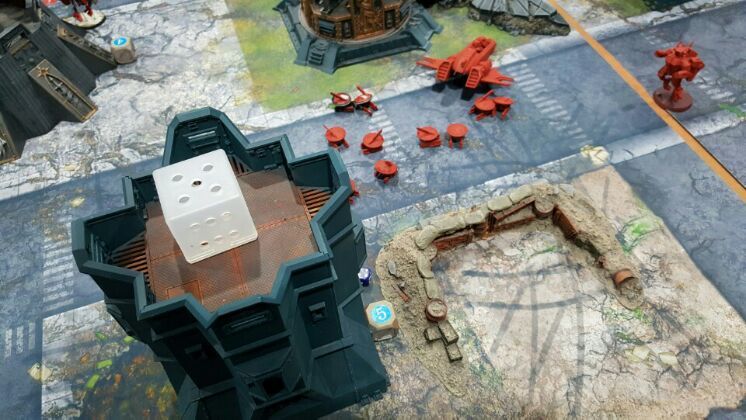
The pictures below show how we deployed.
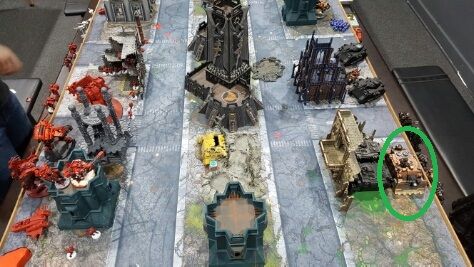
The half-painted vindicator inside the green circle is my warlord.
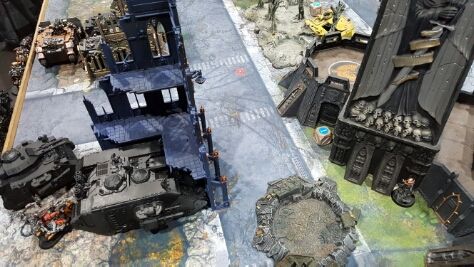
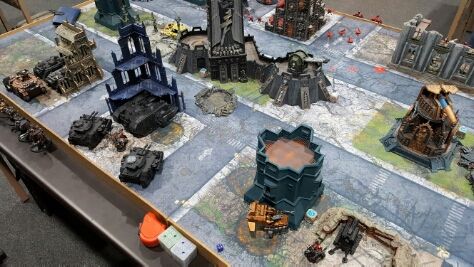
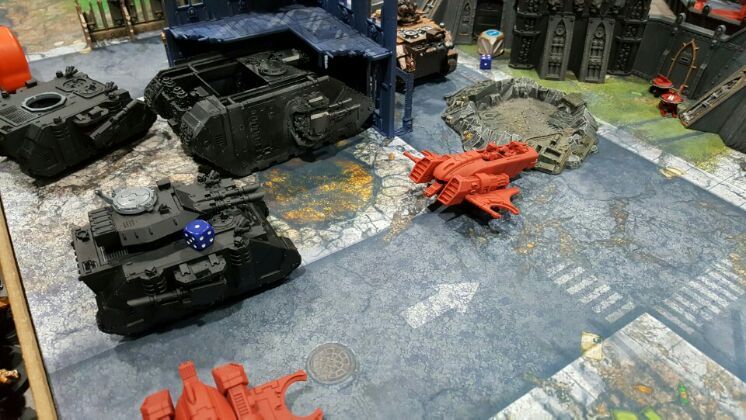
Vindicator Squadron, predators and the land raider is hidden behind ruins. Both of my techmarines used Bolster Defence to improve their cover save by 1 point.
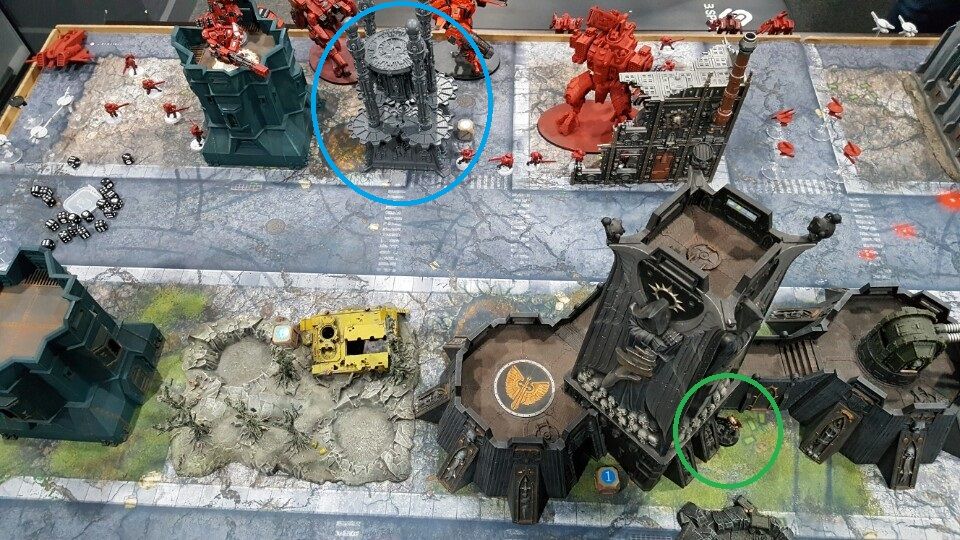
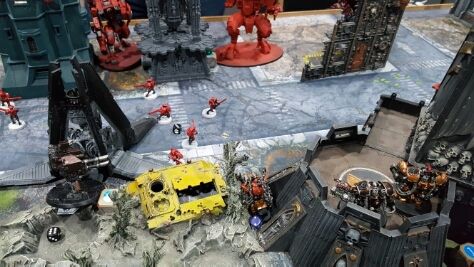
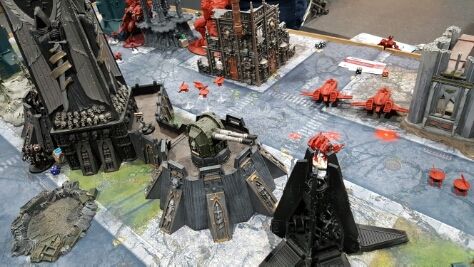
The building inside the blue circle is the Void Shield Generators. The Tau army clustered heaviest firepower platforms(Riptides, Stormsurge) around the Generator.
Inside the green circle is my Culexus, which infiltrated.
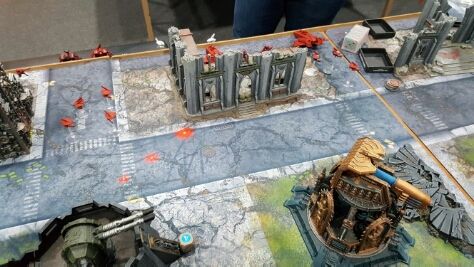
The Tau left. Pathfinders, Piranhas and marker drones are deployed here.
I picked the deployment zone first, but the Tau player deployed first.
Therefore I tried my best to hide vindicators and land raider from Tau line of sight.
The Tau player had put the ethereal, a single marker drone unit, and all one-man units of Crisis Suits into reserves.
After deployment I roll to Seize the Initiative but fail. The Tau begins the first turn.
Turn 1

Marker drones and pathfinders point markerlights, aiming for the barely visible parts of a predator and a land raider.
Using the Coordinated Firepower command benefit and the Buffmander, two riptides and a stormsurge focus their firepower to the lone predator.
With three powerful battlesuits ignoring cover, re-rolling hits with tank hunter, the predator is easily destroyed. Tau player gets First Blood.
Pulse Driver Cannon scatters a bit into techmarine, chipping off a wound.
Meanwhile, stormsurge uses three markers on the land raider to fire 3 Strength D missiles. Two hits, and one of them shows a 6.
Leaving a wrecked land raider behind, the embarked centurions move forward to hide behind the building in the centre.
Piranhas leave the battlefield after detaching 8 gun drones, so as to replenish another batch of drones.
Tau player earns 1pt.

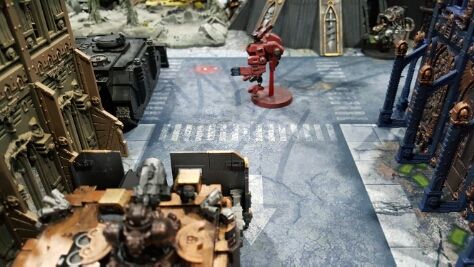
In Iron Hands turn, both dreadnoughts deep strike. The Ironclad dreadnought secure an objective at the right side of midfield, while lascannon dreadnought lands close to Tau gunline.
Land Speeder also grabs objective hidden next to Plasma Obilerator(which we only used as impassable terrain).
Remaining lone las-predator and the vindicator squadron removes all the shields from the generator.
Following the breach of shields, two centurions which climbed above the battlement destroys a single riptide.
Meanwhile, thunderfire cannon at the the far right removes four pathfinders, leaving only a single member on the ruin.
Although the Culexsus moved closer to tau forces, I kept forgetting using its shooting attack in all psychic phases of the game.
At the end of shooting phase, the warlord vindicator uses its warlord trait. A vindicator from its unit shot againt, this time at the buffmander's unit deployed on the bastion's battlement.
The buffmander and the broadside suit go to ground, but both fail their cover saves and are removed.
With one lucky shot, the Iron Hands earn 1pt. for removing a character.
Techmarine regains a lost wound via It Will Not Die.
Turn 2
Two crisis suits arrive, but the other two suffer mishap and are placed into ongoing reserve.
Ethereal and all four piranhas arrive from Tau table edge, bringing in 8 fresh gun drones.
Gun drones sneak behind and shoots at the dreanought's rear armour. It fails all cover saves an is wrecked.
A lucky crisis suit lands in the midst of Iron Hands vehicles, and fires both fusion blasters at vindicator squadron.
The tau rolls badly and the nearest vindicator only suffers a glancing hit.
It took another coordinated shooting from stormsurge and a riptide to wreck a vindicator and immobilise another.
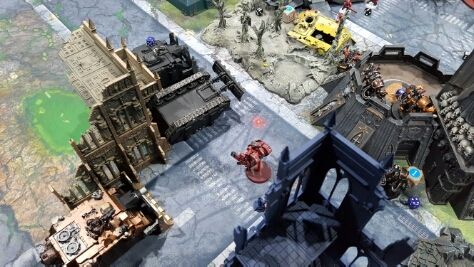
Iron Hands advance a bit forward, their vehicles obliterating regenerate shields and chipping off 2 hull points from the generator.
Centurions shoot remaining riptide but fail to kill it.
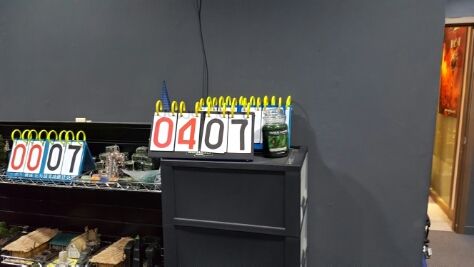
However, Iron Hands earn 4 points for claiming twice more objectives than the tau and for controlling another numbered objective.

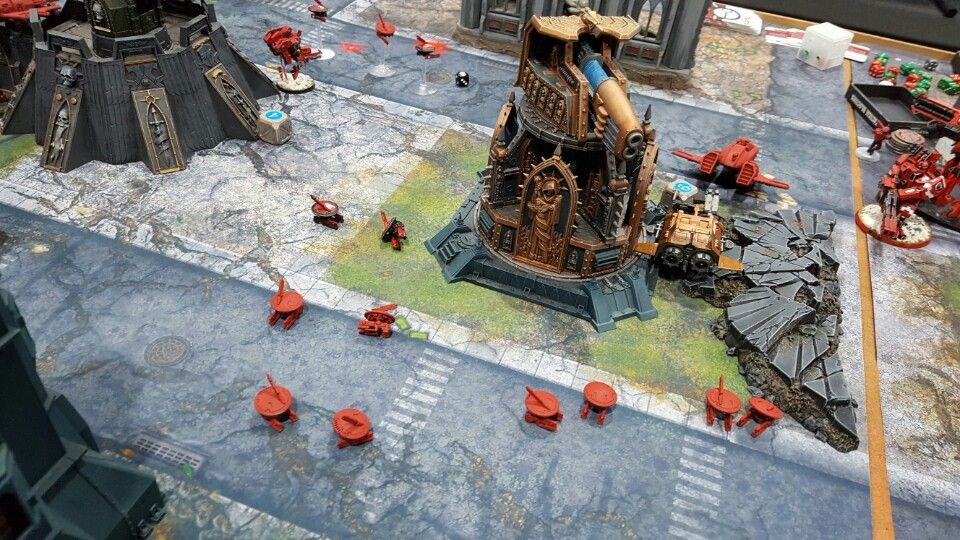
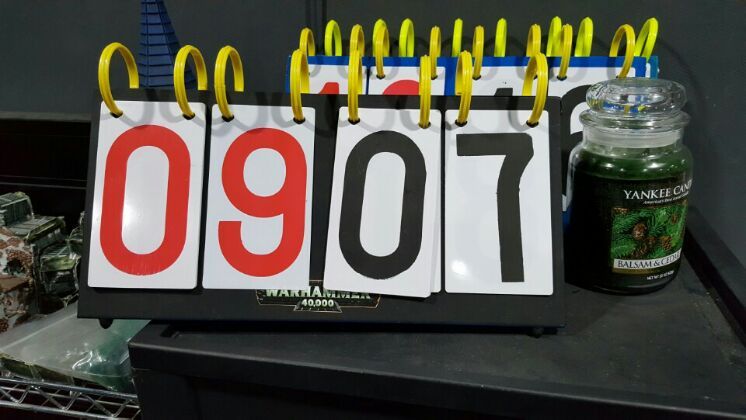
Scores at the end of turn 2. Red numbers show Tau player's scores, while the black numbers are Iron Hands player's scores.
Turn 3
Another Crisis battlesuits deep strikes, while the last one suffers mishap and is put to ongoing reserves again.
The piranhas however advance towards objectives in midfield rather than entering ongoing reserves.
With last remaining destroyer missile buffed to Strength D, the stormsurge destroys the Ironclad dreadnough with a roll of 6.
Pulse Drive Cannon hits to centurions, but they all pass their cover saves as they had no markers pointed at them.
With the buff from the ethereal, fire warriors shoot more than 40 pulse rounds to lone techmarine, but he miraculously shrugs off all shots unscathed.
In the Irond Hands' turn, the thunderfire cannon's empty drop pod lands right next to the objective which the stormsurge was controlling.
The warlord vindicator leaves the squadron to claim nearby objectives, closest to the centre of the board.
Three centurions, all of them now on the same battlement, focus their fire on the stormsuge and inflicts 4 wounds.
The warlord vindicator uses its warlord trait to shoot marker drone unit, but the shot scatters too wide and hits none.
Now being very close to Tau units, the Culexus and the techmarine declares charges.
Culexus attempts to charge marker drones but rolls snake eyes and fails.
Techmarine however successfully removes a riptide in Close combat.
With Iron Hands preventing Tau units from claiming objectives, the sons of Gorgon still leads the game so far.
Turn 4
More than 50 pulse rounds and S5 rockets(from stormsurge) are unleashed and remove both the techmarine and the Culexus.
The last Crisis battlesuit arrives and destroys the warlord vindicator with the help of other crisis suits.
Missile Broadside wreck a drop pod which landed near the stormsurge.
Drones and piranhas destroyed land speeder, and slowly the Tau forces were turning the tide of battle to their advantage.
Having suffered serious casualties and lost nearly all objectives, the Iron Hands fail to score any points.
Turn 5
Now claiming four objectives, the Tau player draws four cards.
Ensuing barrage from Stormsurge and gun drones destroy thunderfire cannon battery.
The Iron Hands draw no cards as no objectives were controlled.
The lone predator immobilises nearby Piranha, and the Iron Hands players rolls a
D6 to see whether or not the game continues.
The dice shows 2, and the game ends in Tau victory as they earn whopping 4 points for linebreaker and Behind the Enemy Lines.
In the end it was a tough game, but also a close one. That lucky shot using warlord vindicator's trait in the first turn allowed me to remove the buffmander, and it was crucial to Iron Hands vehicles' survival. Buffmander sharing ignores cover, tank hunter and re-rolls to hit was outright brutal. And so was piranhas spamming free drones, although the mission force the piranhas to advance towards midfield rather than entering ongoing reserves.
Losing a land raider and ironclad dreadnought to single Strength D missiles was painful, but I was glad to see my list actually holding up and outscoring the Tau army for the first four turns. Overall, it was an unexpectedly refreshing and exciting game. Thank you all for reading.


 blog!
blog! 1,500 Points II
  125
125

