Forum adverts like this one are shown to any user who is not logged in. Join us by filling out a tiny 3 field form and you will get your own, free, dakka user account which gives a good range of benefits to you:
No adverts like this in the forums anymore.
Times and dates in your local timezone.
Full tracking of what you have read so you can skip to your first unread post, easily see what has changed since you last logged in, and easily see what is new at a glance.
Email notifications for threads you want to watch closely.
Being a part of the oldest wargaming community on the net.
If you are already a member then feel free to login now.
I will do one large post at first because it won’t let me do multiple posts without appending them to the main post. I will then start to break out the information into separate posts within the thread with links to the post and an Index to make navigation easier. I wasn't sure for the best place for this yet. It really isn't Painting and Modeling and doesn't quite fit into Game Design. For now, I guess General Discussion works.
The discussion of 3D Printing pros, cons, and questions has derailed a few threads so thought it would be good to have a place to discuss it. I've also been in discussions with various people whom I share with reguarly so it is useful information to everyone.
INTRO TO 3D PRINTING
3D Printing is not a new technology. For almost 40 years it was only available to larger manufacturers. With the expiration of certain patents over the last 10 years, the 3D Printing community has evolved, grown, and become much cheaper. This has opened the door for home users and small scale manufacturing. There is a vast amount of information available from both manufacturers and hobbyists, but trying to wade through the sales pitches and technical terms can seem daunting. Just like computers and electronic hardware, things that sound great on paper don’t always translate to “better” (ie: 10um or micron z-resolution doesn’t always mean better resolution than 25um z-resolution). And like all new technologies and hobbies, learning about 3D Printing is no different than learning any other new skill.
MY BACKGROUND
Spoiler:
I do not consider myself an expert, but I have been working with 3D Printers since 2013, starting with Stratasys 3D Printers. My experiences is mostly with the small-scale, manufacturing aspect and prototyping for various game companies..
Most of my experiences and techniques have been learned by watching others, testing different methods, and then choosing the one that works for me. While there isn’t technically a “wrong way”, there are multiple things that make some methods better than others. You can have two users with the same 3D printer brand and it can function slightly different depending on the software, hardware, modifications, the digital file, environment (temperature, weather, humidity), and their post process method (includes cleaning and curing) which can get similar but still different results. A lot of what I’ve learned has not been from hobbyists but from professional manufacturers in the jewelry and dental industries which have been using these printers longer than the hobby/gaming industry.
Hopefully the mistakes I have made and the lessons I have learned can be of benefit to others. I will do my best to be thorough and accurate.
FULL DISCLOSURE: There may be some affiliate links to Amazon. This is for two reasons, one it creates a small official Amazon link that isn’t using a TinyURL so it is clear they are going to Amazon. The other reason is that it helps generate a small amount of return to me, at no cost to the buyer. So if it is something you would purchase regularly, then it helps give me a small kickback. You are not obligated to use them but I wanted to be upfront about it.
The main post I will try to use as an easy to use reference to the various topics so that hopefully information doesn’t get buried or lost between discussions. If you have suggestions on how to better organize or present the information, please suggest them. Like most, I learn from doing, making mistakes, and adapting, so I’m always open to learning more. Almost everything that I reference in these posts will be things I have used, tested or have experience with. I have no problem adding other suggestions for products, youtube videos, channels, information, and techniques. I will do my best to include multiple sources, not just Amazon, as I realize some things are easier and harder to get in the US than other countries.
I will start this with text but will also be updating the posts to include pictures examples which will be useful to understand things better.
TABLE OF CONTENTS
TYPES OF 3D PRINTERS
WHAT IS PRINTER RESOLUTION?
WHAT IS THE BEST PRINTER FOR $###?
WHAT IS THE BEST PLACE TO BUY FROM?
WHERE CAN I GET FILES TO PRINT WITH?
3D PRINTER RESOURCES
WHAT IS POST PROCESSING
TIPS AND TRICKS
I will briefly describe the different types of 3D Printers as terms can sometimes be confusing.
FFF/FDM - Fused Filament Fabrication is the most known 3D Printing technology that utilizes a heated nozzle to extrude a filament (PLA, ABS, Nylon, etc) to print. FDM is the term trademarked by Stratasys which is why some people use it still describe filament printers as they were one of the original pioneers. Meanwhile, FFF was used by the RepRap community. However FFF and FDM really the same thing and the term is used interchangeably.
SLS - Selective Laser Sintering. This is the most common method with places like Shapeways that they use to do their printing. Production and manufacturing have used them to get stronger prototypes but can be an expensive process. Formlabs developed the Fuse 1 as one of the first lower cost ($9999) SLS printer.
Here is where it can start to get confusing.
SLA - Stereolithography or SLA resin 3d printing utilizes a light, often a laser, to cure the resin. The printing method is similar to FFF/FDM printer in terms of the travel path of the laser in how it cures the resin.
DLP - DLP (Digital Light Processing) Projector-based stereolithography resin 3D printer. Instead of using a laser to cure and build your print, it projects the whole layer, curing/printing a complete layer at a time. The process that is used is defined as Stereolithography but the apparatus or tools to do it is called DLP. There has often been confusion from even 3D Printer manufacturers who label their method as SLA or DLP when it is the other, due to language translations.
MSLA - Masked SLA, also known as LCD DLP resin 3d Printing. It uses a method similar to DLP but instead of a DLP Projector to project the image, it uses an LED or LCD array with a photomask to shape the light image to print a layer at a time.
WHAT IS PRINTER RESOLUTION?
Printer resolution can be confusing at first because normally in graphics, the higher the resolution the better the look. Printer resolution for 3D Printing doesn’t directly translate into how a finished product looks because the method of printing, sculpt, software, materials and how it was finished impacts it.
3D Printing resolution is usually defined by how many microns (µm) it prints. It can also refer to the layer height, but the layer height specifically refers to the Z-resolution only. A human hair is roughly 100µm in size, while a red blood cell is about 7µm. When a printer says it can print with 100µm, it means each layer is roughly 100µm or the size of a hair in layer height.
3D Printing uses 3 axis to print, X, Y, and Z even though you can print something at 50um, which usually means 50microns from the X, Y, and Z axis. However that isn’t always true, some companies only measure the Z-Axis for the technical specs, which can be misleading. You can print XY resolution at 50um and the Z-resolution would be done at 25um. You could also print XYZ at 25um or even 10um. Traditionally the higher the resolution (meaning the lower the number) the longer a print can take but also generally be better looking, meaningless layer lines.
All 3D Prints have layer lines. The type of 3d printer technology used can impact how bad or how good those layer lines look.
Layer lines are most evident with FFF/FDM printers because ideally, you are pushing 1.75mm of the filament through a 1.75mmx0.40mm, which is roughly 40(there are smaller nozzles) but you are melting and pushing plastic to flatten it and build your layers. Certain filaments look better visually, at least until you paint them or have them in your hands but they photograph and video beautifully raw. They will require the most post-processing (ie: sanding if you want a smoother finish)
SLA uses a circle laser roughly 70micron (Moia SLA) 140micron (Form 2) in diameter used to UV cure your resin. It lets you create finer layer heights with higher accuracy. DLP/MSLA uses a projector or LCD/LED to project an image to cure a layer. They will provide the best finish, often not needing to be sanded at all, other than support cleanup.
Even if you use a $200,000 3D Printer at the highest resolution 5-10µm for XYZ resolution it will still have layer lines. Depending on the machine, software, model and material that those lines can be more visible to the naked eye. In most cases, they are however not visible unless you use a jewelers loupe. Once you primer it, base coat the color, the lines vanish completely.
WHAT IS THE BEST PRINTER FOR $###?
There is no “best printer” for the money. At first, it may seem hard to differentiate when you look at technical stats and translate to how that becomes ROI (Return on Investment). The term “best” is subjective for each user because many things factor into it. Some are fine doing post-processing work of sanding, others are not, some want cheap resin, some may not. The software used to slice your models, the digital models, how it was sculpted, how it is orientated, the materials use and weather affect the end result.
My suggestion is to figure out how much you want to invest as your ceiling. Then look at the options available. I always suggest people find a digital model, use that as your test model and find someone to print a sample for you. It is very hard to discern what you will be happy with until you have an actual sample of what you intend to use it for in your hands. Photos can be deceptive and getting samples directly from the company unless it was built from a digital file you chose can be deceptive. The samples that companies send out tend to be designed specifically and optimize to work on their printers so that sample doesn’t always translate to the results you will get as a user. Some companies charge a flat rate of $50-100 while others can do it for less, there are always options to find someone from Facebook groups to official forums.
Trust me when I say it will save you a long line of headaches and frustration to get a sample done. It is better to invest slightly to get a sample so you know you can be happy with the results, then invest hundreds and find out it isn’t what you expected.
WHAT IS THE BEST PLACE TO BUY FROM?
There are many places and options to choose from when purchasing a 3D Printer as well as supplies. You will want to explore them all, the pros and cons and choose the option that is best for you. Some printer companies only sell direct and do not use distributors or sell through other channels. There are good as well as bad experiences in choosing to purchase from places like AliExpress or Bangood.
When I determine where I purchase a printer from, I have to look at ease of access from a business aspect. I am in the United States, that means having to get parts from China or UK/EU could mean weeks to months of downtime. I try to find a vendor available for me locally, whether that would be in the US or abroad. Most 3D printer companies have resellers in your home country or region.
For Example, I chose Reify Solus 3D Printer for one of my first 3D Printers because the support was great, had good forum responses to questions and emails, located in the US. I chose it over the B9 Creations 3D Printer even though they are comparable but it was centered in UK/EU at that time. There are some options for the US presently.
When I inquire about questions I use my “Sales Inquire” as a test which is often a gauge of how well tech support can be. The basic questions I’m asking in my inquiries start with:
Here is what I would like to use the printer for, what printer do you suggest that will work?
How much does your printer cost?
How is tech support handled? Is it free, is there a pro-support, email, phone?
What is the largest print volume of the printer?
What materials does it use to print?
If I provide a sample STL, can I get a test sample printed from it?
After the answers, I will always ask more. I look at how fast did I get a response. Was it within 12-24 hours? Was it in broken English? Did a language barrier effect understanding and communication? Was it knowledgeable? Most responses were fairly quick, but there were quite a few that took weeks or didn’t respond at all, and those were initially what I had thought were going to be my first choices based on technical specs. However as a business, even as a user, I can’t have questions not be answered in a timely manner.
Here are some popular places to look at pricing other than direct from the manufacturer themselves. There are sometimes sales which can get $50-200 or more on some printers, sometimes posted on their social networks and even Amazon Sales. There are many options but I will try to keep them in the $100-$10K range.
Depending on the printer slicer you use to prepare your file for printing, you likely need a digital file to begin with. Many of these can be obtained for free, while others are sold for a price, and of course you can pay someone to digitally sculpt you a model. For the most part, you need an .STL which stores information about your 3d model. You can also use an .OBJ which is similar to an STL and are interchangeable with software. Not all STL/OBJs are designed for 3d Printing.
A lot of 3d files are designed and rigged for games and other 3d programs where they will render or create a final piece in a digital format. They can be created with a mesh which doesn’t translate to print.
There are a lot of options that are available for free, not just for gaming miniatures and terrains but for everyday things. There are prints for cable management, storage options, car or house accessories. I needed a back for a remote control once that the company wanted to charge me $19.99 for a replacement back, it would have been cheaper to buy a Universal Remote for $9 but I found a free file that someone already created.
There are also options to purchase the files directly. Not all files are created equal so research a bit of what the file ends up being. Some are designed with FFF/FDM printing in mind, while others are designed also with SLA/DLP printing. Pricing can be as low as $1 to as high as $30. Keep in mind that a digital file can usually be easily resized, so if you buy something like a 32mm miniature, you could resize it to 150mm for a trophy or display painting or diorama. If you get a vehicle designed for 28mm gaming scale, it could be scaled down to work with 15mm gaming.
You have gotten a printer, printed something and now it is time to post process it. No matter what printer you get you will have some sort of post process, which is to clean up the model, clean up supports, clean the model of resin if applicable, sanding, etc.
FFF/FDM POST PROCESSING
If you have supports, you need to remove the supports but then you will have some cleanup to do. In some cases like with terrain, the print or layer lines add to the aesthetic of the piece and don’t require a lot of post-processing. You will use a combination of wet sanding techniques and utilizing a Primer + Filler.
This is a good reference which goes over post-processing a 3d print, Mister Handy Scale Model Build:
SLA/DLP/MSLA POST PROCESSING
You will still have supports to remove, some supports are easier to remove than others. However, you usually have a lot less, if any at all, sanding that needs to be done compared to a similar piece in FFF/FDM printing. You need to ask yourself how valuable your time is and what is considered acceptable finish.
I usually will clean things up and do a light primer coat. That helps me identify any errors that I mean have to do the further cleanup.
I use a 2-Stage IPA Bath, I do not use soap and water which there is a reason (learned this from jewelers). I have a container that is called "CLEAN" and the other is "DIRTY" IPA. They both started out clean, but I use paint, coffee filters to strain out resin and impurities. The clean container only gets clean IPA while the dirty one gets recycled IPA. When I take a print off of the print plate, it goes into the dirty bath first and sits anywhere from 1-5 minutes. It will depend on how contaminated that dirty IPA is as well as what resin I used and which printer. Then I move that piece to the clean IPA.
After the IPA bath I fire up the air compressor. You can use an airbrush compressor or even cans of air used for cleaning dust out CPU, but that can get expensive. I have a pancake compressor which I use to blow off the prints. I don't let them air dry because there can still be residue stuck in crevices and gaps. Alcohol air dries almost instantly so the air compressor leaves nothing stuck. If you see wet looking places, those are places still with resin stuck to the model and can cause an issue curing or make it tacky. Go through the IPA bath process again then blow dry, should leave you with a clean model. Water doesn't dry with just air and usually requires heat element, so an air compressor just blows it around and scrubbing can damage the finish on the model until it is post cured. Also water doesn't really have a benefit to the resin, it just moves it instead of cleaning/dissolving it.
I let it sit out for about 30 minutes to be on the safe side before I start working with it. In most cases this is the best time to trim supports. The supports tend to be softer, easier to cut or pullaway cleanly (depending on your slicer software). Then depending on the resin, I will cure it with the UV lamp. The time varies. You technically can't overcure a model, but overcuring can make it brittle. There is a level that is your sweet point. Then it is ready to primer and paint. Even if you don't want to paint a piece, you shouldl always primer it. This will help keep it from continuing to be UV cured if it is outside or around where sunlight can hit it.
TIPS AND TRICKS
A lot of these supplies are consumables that end up being used as part of SLA/DLP/MLSA resin 3D Printing. Some are useful to use even for FFF/FDM Printing.
Cookie Pan: A cookie or baking pan is great to keep your work area tidy, clean and provides an easily moved surface. I purchase these usually after I’ve gotten my printer so I know how much of a work area I need. You may find it cheaper at places like Walmart, sometimes you can get a set of 3. You can get the thin foil ones but honestly, it is worth it to spend $5-9 for a strong sturdy surface. You can even use it to anneal PLA prints but it is where I set my cleaning equipment.
For my resin printers I have both my tupperware containers or items that hold my IPA (Isopropyl Alcohol) so nothing spilled on my work areas and if something does, it is a nice and easy to clean up. If I spill resin, it cleans up easy. I usually put a layer of paper towels, so after a print has been cleaned, sits there to dry before moving to clean up and curing.
UV CURING STATION
You'll want a method to post curing, some of the cheaper options are to simply get a UV Nail Dryer. You can also get a UV LED Light Strip to make your own UV Cure Box. I have utilized both methods and haven’t seen any real benefits of one over the other yet.
Some other useful videos:
UV Cure Box for under $30 - DIY,
DIY 3D Print Cure Station,
DIY UV LED Resin Curing Bucket,
SUPPLIES
GLOVES If you are working with resin, I can’t stress enough that you will want to use gloves. In the beginning, it can seem messy. After a couple weeks you develop a process to where there is hardly any mess. I could use my hands and not get any resin drippage anywhere but even then I still use gloves. I buy them in bulk, there are places like Harbor Freight or Costco you may find them cheaper, it usually ends up being a wash so I tend to get them from Amazon. A case tends to last me for 3-6 months, the wife uses them when she henna’s her hair.
Blue Nitrile Disposable Gloves, Medium, Case of 1000 - (https://amzn.to/2DmVNBx), $59.99-74.99
PAPER TOWELS You can’t avoid these if you are using SLA/DLP/MSLA printing. You can’t avoid them even if you are using FFF/FDM because it is useful for cleaning the printer bed and other work surfaces. Although you go through them slower with FFF printers. I get a large pack of Bounty because they work the best at soaking up messes. If you go cheap, you’ll go through them faster. Costco has the best prices locally for them. One set tends to last me for 3-6 months if not longer.
IPA, 91% ISOPROPYL ALCOHOL Sometimes you may find it cheaper by buying the 16oz/32oz containers at Walmart. But they tend to only have 91%. I switched to 99% which isn’t completely necessary, it just changes the reusability and amount of time needing to soak to clean. The cheapest I can get 99% is 4 Gallons for $74.70 ($0.15/oz) but you can also get 91% at roughly $0.09/oz as long as you get 4-9 pack of the 32oz packs from Walmart. It ends up being a wash if you strain and reuse as you get more use from the 99%.
For those not in the US or dealing with other things that make IPA expensive or impossible to get for them, there is also Monocure 3D ResinAway. In the US though it ends up more expensive than IPA but for others I’ve heard it is cheaper. I have a 2L that I will be testing with to compare with IPA.
3D PRINTERS
These are all printers I have tested at one time, have used, as well as continue to use. They all have pros and cons and everyone's experiences will vary even with the same printer due to different individual printer settings, slicer software and STLS used.
Monoprice Select Mini 3D Printer - $189.99, https://amzn.to/2W8JLDa FFF/FDM 3D Printer, Build Volume 120x120x120mm
Creality CR-10 Mini - $349.99, https://amzn.to/2MnuTfH FFF/FDM 3D Printer, Build Volume 300x220x300mm
Reify Solus 3D Printer - $3449
DLP Resin 3D Printer, Build Volume 48x27x80 @ 24XY Resolution, 80x45x80 @ 41XY Resolution, Z-Resolution 5-100um
Formlabs Form 2 - $3350
SLA Resin 3D Printer, Build Volume 145x145x175
OTHER RESOURCES
Anycubic Photo DLP 3D Printer Review
Unboxing And Testing The Anycubic Photon 3D Printer
I still need to cover slicer software and setting up 3d models but this is a good starting point and served as a good distraction after my surgery. Although I'm still under the influence of medications so it looks fine but I may change my mind when I read this later. LOL!
I've been very curious about using 3d printers for low-scale production. I've seen some of your other posts, and it looks like you've entertained that as well. Hopefully at some point this thread can go into more details about what you've found (if you've looked at it) in comparing costs.
I know the "conventional" method of employing 3d printers in minis production tends to be to print the master, from which a mold is made and then models cast from that (seems like lowest barrier to entry there is silicone mold and resin casting). 3d printers seem to be advancing to the point where the costs might not be that much more for just doing an "on demand" print and selling those straight off. I don't have any math to back any of that up at this point though.
I knew I forgot something. I had planned to put Traditional Miniature Making, so others could see that process compared to hobby printing as well as small scale manufacturing.
I actually do small scale manufacturing or as the State defines it (since that created an interesting issue with my business license) micro-manufacturing. The majority of what we used to do for resin casting for small scale manufacturing was replaced with 3D Printing. The printers can essentially run 24/7, while you can only do 'casting' as many physical hours somewhere is working with resin, mixing, pouring, demoulding. Granted it is faster to cast but more labor intensive. The total costs end up fairly comparable. It is still easier to do larger pieces casting than printing because of the time to print though. Anything 15mm to 32mm and even busts as well as 150mm boutique for displays we print. Anything we do 1/10th to 1/12th scale we use traditional casting.
We print a lot of prototypes for various Kickstarters used for demo kits, sending out review kits, toy prototyping as well as small production runs for a few Kickstarters. I dived head first into that foray and got a bit overwhelmed but I am working through it and will be back on track.
Awesome. I was thinking the ability to start a print then go home and let it do its thing for 6 hours or so would lean towards a closer 24/7 (or at least, more than 8 hours of "traditional labor") thing. I suppose there's also the advantage of not having to store molds, so you need a little less space.
Eventually, I hope to produce my own game as well.
Have you looked at the Gizmo 3d printer (https://www.gizmo3dprinters.com.au/)? It's a DLP that uses top-down and has some interesting sounding software to do "continuous" printing (or at least variable layer cure times depending on the model). I almost backed that KS, but honestly just don't have the space to really set up shop at the time (and almost never use my Moonray lately...).
This message was edited 1 time. Last update was at 2019/01/22 04:36:34
Yes, that is one of the main benefits is it works while you don't. In the beginning, I kept a log of print jobs, how long they took so when I knew I had an X time slot then I knew what to fill into it. While I slept something printed, while I was working my main salary job something was printing. You are correct not having to worry about inventory space is big or storing moulds as well meant I could stay in a smaller space. Even if you simply used it to just prototype your own stuff and do masters it is a money saver. Often a 3d master can cost anywhere from $75-300 for a good quality master so when you do a few of them, it pays for the printer itself after a few uses.
I did look into them. For me, the bad part was that I'm in the US and they are in Australia which makes the supply lines harder. I sent them in inquiry and within a few hours received a reply back from them answering my questions which was nice. The sample print that I received from it was ok, not as highly detailed compared to what I was used to. That could have been the file or the person doing the printer. It wasn't bad but I did expect better quality in terms of detail.
I'll be updating eventually with pictures of samples that I've gotten from the various companies. I will also be doing my own comparisons using the same model. It is often hard to tell without seeing the same model. I've almost got the lighting right and camera settings dialed in so I can take in closer pictures. Still, some work needs to be done but the goal is to get all of the comparisons the same angle and settings.
Really useful analysis, thanks. The comparisons would be awesome. As you say, the online videos tend to be geared toward sales pitches and don't necessarily help one understand downsides.
You've mentioned gloves for working with resin, but what is your experience with needing face masks or respirators?
Please excuse any spelling errors. I use a tablet frequently and software keyboards are a pain!
I know the "conventional" method of employing 3d printers in minis production tends to be to print the master, from which a mold is made and then models cast from that (seems like lowest barrier to entry there is silicone mold and resin casting). 3d printers seem to be advancing to the point where the costs might not be that much more for just doing an "on demand" print and selling those straight off. I don't have any math to back any of that up at this point though.
Impact! Minatures is doing just that with some of their Chibi minis (so a bit bigger & chunkier than 'standard' stuff), selling directly 3D printed stuff as a final product both for KS and retail
it works out better for them to make spincast resin minis for their better selling stuff, but for the lower selling stuff the direct 3D print means faster turn around and not having to invest in a minimum order that hangs around in inventory
I can recommend he Phrozen Shuffle, which is a ~$800 printer that, like it's price, is right between the Photon and the upcoming Prusa SL1. This is what I'm doing prototyping on. I cannot recommend the Photon, despite how cheap it is, unless you have a lot of time to deal with its issues. The Shuffle is working quite well but I do plan to upgrade to something closer to the Solus. I've been looking into the mUVe 3D setup, which apparently can be configured with a 4K projector and a larger build plate.
A specific advantage of MSLA, or LCD 3D printers is that because the entire build plate is exposed at the same time, packing a plate full of models takes no more time to print than a single model. So try to fill your plate with models if you have a good printer that can handle it.
These use resins specifically designed for lower powered machines. Printers like the solus can use that and the more difficult to cure high powered resins that often behave more like ABS plastic when cured. The low powered resins are getting closer to being more plastic-like but they're not fully there.
99% Isopropyl Alcohol can sometimes be hard to find. I discovered that Denatured Alcohol works the same, it's basically ethyl alcohol with something added to make it undrinkable.
Get yourself multiple pairs of tongs, even though you have gloves, using tongs means you're not soaking your gloved hands in dirty solutions to grab prints and tracking it everywhere.
On that note, try using pickle containers for your cleaning baths. They come with a built in strainer so you can more easily retrieve your model after soaking.
Also get a 405nm UV flashlight, this will allow you weld together prints using the same resin, do spot cures, and neutralize any spills in your work area.
When setting up your supports on your prints, if you have the options to use a skate style support base, Use it, it'll have a built in overhang that you can use to help separate your model from the base after it's done printing.
Resins smell, and no one really knows if those fumes are toxic or not. Be on the safe side and pickup a 4" ventilation and carbon filtering system and suck the air out of the printer, or keep the printer in an enclosure and process the air in there.
I went with the bucket UV curing station, works just fine.
This message was edited 1 time. Last update was at 2019/01/22 10:40:48
Flinty wrote: Really useful analysis, thanks. The comparisons would be awesome. As you say, the online videos tend to be geared toward sales pitches and don't necessarily help one understand downsides.
You've mentioned gloves for working with resin, but what is your experience with needing face masks or respirators?
I just got a Photon the other week there so I can chime in on that. The resin stinks pretty badly, and I wouldn't want to be stuck breathing its fumes in an enclosed space, but I doubt you'd be doing much more damage to yourself working with it in a well ventilated room than you would stepping outside and taking a couple of lungfuls of city air. I actually only found it to be troubling when the machine was running since the Photon forces the air in the print chamber down through a fan with gak quality carbon filter into the electronics bay, which in turn exhausts out the bottom with another fan, basically just spreading the fumes around the room more effectively. I'm currently printing some mods on my Ender 3 FDM printer that should sort that issue out though(a piece that both blocks the print chamber off from the electronics bay and provides a mounting point for a small thermistat-controlled fan heater for consistent temps in Scottish winters, and replacing the top panel with an assembly to mount a fan and heating duct so it can be exhausted out the window once its finished a print - a little electrical tape around the rim of the door so the magnet forces it to "seal" when closed and it should be pretty isolated).
One thing to bear in mind is that you will generate a lot of small bits of waste like alcohol- & resin-soaked paper towels as part of the cleanup(note that you don't actually have to run a full clean of the printer every time you take a model out, with a printed cover for the resin vat you can leave the resin in there for extended periods of time providing you carefully stir it before running a print) - you cannot just throw this away like normal rubbish. If you don't want to track it all out to whatever your local hazardous waste disposal facility is, you have to cure all that resin thoroughly before it can be thrown out in regular bins(it's pretty inert once cured).
I intend to solve the problem by buying one of those big serving trays with a clear plastic cover - all the waste goes in it, then it gets shoved in a window for 24 hours to let the daylight at it.
"Your society's broken, so who should we blame? Should we blame the rich, powerful people who caused it? No, lets blame the people with no power and no money and those immigrants who don't even have the vote. Yea, it must be their fething fault." - Iain M Banks
-----
"The language of modern British politics is meant to sound benign. But words do not mean what they seem to mean. 'Reform' actually means 'cut' or 'end'. 'Flexibility' really means 'exploit'. 'Prudence' really means 'don't invest'. And 'efficient'? That means whatever you want it to mean, usually 'cut'. All really mean 'keep wages low for the masses, taxes low for the rich, profits high for the corporations, and accept the decline in public services and amenities this will cause'." - Robin McAlpine from Common Weal
...but I doubt you'd be doing much more damage to yourself working with it in a well ventilated room than you would stepping outside and taking a couple of lungfuls of city air.
This is an easy mistake to make. The dose makes the poison, even city air, as bad as it can be, is pretty diffuse overall. The problem with these 3D printers is that they're sitting near you outputting fumes and potentially toxins right next to you giving you a higher dose. It's like sitting near a running car's exhaust, which is worse due to concentration.
General Safety tips would be a good topic. Generally, since you do only have one set of lungs, you would want to wear a wear respirator and make sure it is properly rated for the materials you use. Each resin company should have their own safety and data sheets. DO NOT simply get a dust face mask for sanding. Cheaper resins smell and are more toxic, more expensive resins can be safer. There aren't enough long term use data cases to determine if long term exposure is harmful. The air toxicity is no more toxic than a lot of everyday things, even the IPA smell itself is technically at a higher toxic level (again varies with resin). The resin is highly dangerous but that is when unnaturally exposed which is by drinking it, immersion, skin contact.
Your environment will effect it. If you work in an office or a well-ventilated room you will be fine. The easiest way to compare would probably to ask: "Do you feel safe to use a can of spray paint to prime miniatures in the room"? I will say if you have ever gone to an EnvisionTEC office or a Formlabs office in the USA, the printers are located on multiple desks that are doing printing there. They have passed safety inspections with them in those environments.
If there is really an issue, it is simple to build enclosures. You can build them as inexpensively as $20 to as complicated as you want. Ikea Lack tables are a boon to hack. If you are using a FDM/FFF printer you'll want an enclosure to print ABS as well as to make your prints more consistent. The resin is also affected by temperatures so they can benefit from an enclosure as well.
This message was edited 1 time. Last update was at 2019/01/22 16:56:10
This was a really interesting bit of info and I really appreciate it.
I've used 3D printers a few times for work and on a professional level and for the work I do I find they don't have enough merit. I still think they have a long way to go before I can use them effectively. That being said I also know that there is a lot available on the market these days which are probably more advanced than the ones I'm used to from the past two years. Unfortunately in my line of work budgeting for newer machines barely gets a look in. I can't wait to see how people continue to use them and how the tech upgrades though. I just hope that eventually it will reach a point that they provide enough definition for my work.
I just ordered this printer last week, now it's an amazon lightning deal and even more affordable if you order it quick bummed I missed this sale but oh well
Probably the best detail budget printer out there right now. I'm planning to use mine to eventually offer print on demand minis for my games in various sizes, once I get things up and running.
even without the sale, it's great for printing minis or terrain, and less than $500
This message was edited 1 time. Last update was at 2019/02/01 14:35:05
Actually tempted to order a 2nd one with this deal so I will be able to print twice as much stuff... but I want to get my first printer set up and get it running and learn how it all works first, and I'm sure there will be other deals in the future.
I think Amazon is trying to clear out their stock, because there is a new version of the printer coming out in the next month or so... but it will be brand new and more expensive, and supposedly there's just a couple of minor tweaks. So this printer is still the best deal for the detail miniatures need, IMO
If you have Facebook here's a group where you can ask questions, lots of really helpful people there Don't even have my printer yet and already learned a lot from them
Desubot wrote: Iv had a few successes with the anycubic but im hitting a LOT of failed prints.
i think im not leveling my bed right :/ but a lot of my prints are failing at the support and getting stuck on the Teflon.
Its really cool when it works though
For levelling, the best method I've found is:
*Make double-triple sure the ball joint is loose.
*Place a piece of normal printer paper over the screen.
*Lower the build plate down onto the paper until you can't push it and can only barely pull it(do this EXTREMELY carefully, don't want to crack the screen).
*Gently but firmly hold both sides of the plate with one hand and tighten the grub screw on the ball joint.
*Raise the build plate back up a bit, and then do the "normal" levelling thing where you move it down until you feel a bit of resistance when you move the paper, and set the new level there.
Doing it that way ensures the build plate is 100% flat relative to the screen, but once you've done it there shouldn't be any need to relevel for quite a while.
Also, you might need to check the tightness of your FEP sheet - grab one of the free audio apps on your phone that lets you measure the frequency of a drum and VERY CAREFULLY tap the FEP sheet in the middle, you want it to be around 250-350Hz.
EDIT: Oh, and more supports. Always add more than you think you need, and then some more besides. And probably a few more even after that. Also, if you're not already, run the file through PhotonFileValidator(it's on the community github page) to check for unsupported islands or other issues.
This message was edited 1 time. Last update was at 2019/02/01 22:51:38
"Your society's broken, so who should we blame? Should we blame the rich, powerful people who caused it? No, lets blame the people with no power and no money and those immigrants who don't even have the vote. Yea, it must be their fething fault." - Iain M Banks
-----
"The language of modern British politics is meant to sound benign. But words do not mean what they seem to mean. 'Reform' actually means 'cut' or 'end'. 'Flexibility' really means 'exploit'. 'Prudence' really means 'don't invest'. And 'efficient'? That means whatever you want it to mean, usually 'cut'. All really mean 'keep wages low for the masses, taxes low for the rich, profits high for the corporations, and accept the decline in public services and amenities this will cause'." - Robin McAlpine from Common Weal
Desubot wrote: Iv had a few successes with the anycubic but im hitting a LOT of failed prints.
i think im not leveling my bed right :/ but a lot of my prints are failing at the support and getting stuck on the Teflon.
Its really cool when it works though
For levelling, the best method I've found is:
*Make double-triple sure the ball joint is loose. *Place a piece of normal printer paper over the screen. *Lower the build plate down onto the paper until you can't push it and can only barely pull it(do this EXTREMELY carefully, don't want to crack the screen). *Gently but firmly hold both sides of the plate with one hand and tighten the grub screw on the ball joint. *Raise the build plate back up a bit, and then do the "normal" levelling thing where you move it down until you feel a bit of resistance when you move the paper, and set the new level there.
Doing it that way ensures the build plate is 100% flat relative to the screen, but once you've done it there shouldn't be any need to relevel for quite a while.
Also, you might need to check the tightness of your FEP sheet - grab one of the free audio apps on your phone that lets you measure the frequency of a drum and VERY CAREFULLY tap the FEP sheet in the middle, you want it to be around 250-350Hz.
EDIT: Oh, and more supports. Always add more than you think you need, and then some more besides. And probably a few more even after that. Also, if you're not already, run the file through PhotonFileValidator(it's on the community github page) to check for unsupported islands or other issues.
Yeah iv done the paper method. though not the second releveling.
i did not know the fep sheet had a specific tightness. ususally i just wrench it down hand tight with the alan drive provided. il have to keep that in mind.
i ususaly do the auto supports at the medium high desity as well hand add to areas it missed.
will have to try these things out.
what kind of scrapers you guys use. iv been using the one provided and its pretty chowdered now. i feel like its going to damage the fep (during the times the print sticks to it and wont lift off the last few times).
This message was edited 1 time. Last update was at 2019/02/01 23:13:40
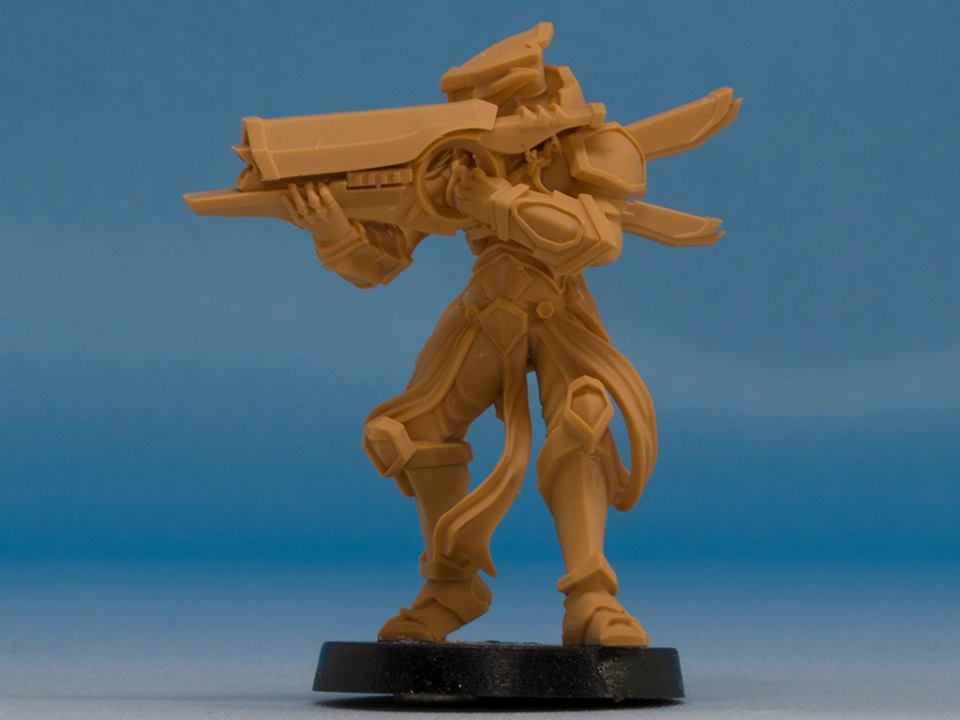
Printed on a sub £200 ender 3, and a novice printer (me). Done as a size test. Just cleaned the supports off.
This message was edited 1 time. Last update was at 2019/02/06 01:14:59
Its hard to be awesome, when your playing with little plastic men. Welcome to Fantasy 40k
If you think your important, in the great scheme of things. Do the water test.
Put your hands in a bucket of warm water,
then pull them out fast. The size of the hole shows how important you are.
I think we should roll some dice, to see if we should roll some dice, To decide if all this dice rolling is good for the game.
Apologies for the slight necro, but I figure this is related and doesn't warrant starting a new thread.
I'm in a position to buy an entry level printer, and I've decided that it warrants the investment.
However, I've reached a bit of an impasse as to which one to look at.
The main issue is I'm able to buy an XYZ Davinci Jr Pro (which appear to be in the £4-500 bracket) for around the same cost as one of the more typical first printers like an Ender 3. Logically, that strikes me as a no brainer, except the Davinci doesn't have a heated bed like some of the others, and my knowledge isn't sufficient yet to assess how important it is or how easy (or even possible) it would be to add in the future.
Interested to hear from the more experienced, my main interest initially is for terrain and widgets, as opposed to minis, but obviously room to expand is also a consideration should my needs and wants evolve.
We find comfort among those who agree with us - growth among those who don't. - Frank Howard Clark
The wise man doubts often, and changes his mind; the fool is obstinate, and doubts not; he knows all things but his own ignorance.
The correct statement of individual rights is that everyone has the right to an opinion, but crucially, that opinion can be roundly ignored and even made fun of, particularly if it is demonstrably nonsense!” Professor Brian Cox
I don't really consider this a necro, in my opinion, this should be a living thread. I was and have been planning to do some updates but unfortunately, have not had the ability as of yet.
Why did you decide on XYZ Davinci Jr Pro over say Ender 3? Or rather what was the reasoning you focused on that model vs Ender 3 or CR10?
The short answer is you don't need a heated bed if you are just printing PLA. If you want to use other materials like PETG, ABS, Flex, etc then you would want a heated bed.
The longer answer is, the need for a heated bed can be subjective because it depends on your environment, humidity, etc. Some people have better results and consistency with the heated bed due to their environmental conditions. My experience in the NW US is that a heated bed will give better results because it allows for more consistent and slower cooling. When prints cool too fast you can have adhesion issues as well as curling on thin pieces and edges which ultimately leads to bed adhesion issues. You can create a cheap enclosure which uses ambient heat to stave those issues in lew of a heated bed by using ambient heat and to ensure no breezes but having a heated bed usually means more consistent and successful prints.
My recommendation is to find facebook support groups for the printer(s) you are interested in and look at the discussions. Don't get discouraged by what seems like a lot of issues, as that is the reason the groups exist, it doesn't mean there are a lot of issues just that is what gets talked about. What you are looking for is issues, how quickly help directed them to resolve their issues, and what you can expect. Most common issues already have been discovered and have solutions.
Frankly, the main reason that made me first look at the Davinci was simply the discount on offer. But then I read a few reviews that seemed pretty positive and I found the idea of an enclosed print area and the overall compact size appealing. The reservation was, and remains, the lack of adaptability without a level of technical ability beyond that which I'm comfortable with. Not just the heated bed but other possible mods/upgrades that seem a lot more straightforward on other models.
I'm not sure about other materials, but I'm fairly sure I want to retain the option, the printer is likely going to be situated in my boiler room, which is well insulated, dry, but largely unheated (one small radiator on minimum heat) so likely to hover around 14-18C depending on environmental conditions. But the inability to experiment with materials on my first machine seems like a major check in the "against" column for the DaVinci.
However, I'm very much in the discovery process and learning what I need/want vs what I'm willing to spend/can afford, so I've largely answered that question out of courtesy because you've taken the trouble to reply and for anyone else coming along later who might follow a similar path. The reality is my thinking has moved on since I wrote that post and I'm now seriously looking at the Anycubic i3 Mega. The increased build area, heated bed and adaptability seem like a reasonable trade off for the lack of an enclosed area.
We find comfort among those who agree with us - growth among those who don't. - Frank Howard Clark
The wise man doubts often, and changes his mind; the fool is obstinate, and doubts not; he knows all things but his own ignorance.
The correct statement of individual rights is that everyone has the right to an opinion, but crucially, that opinion can be roundly ignored and even made fun of, particularly if it is demonstrably nonsense!” Professor Brian Cox


 Cadre Coronal Afterglow w1;d0;l0


 Mordant 92nd 'Acid Dogs'
 The Lost and Damned
 Inquisition