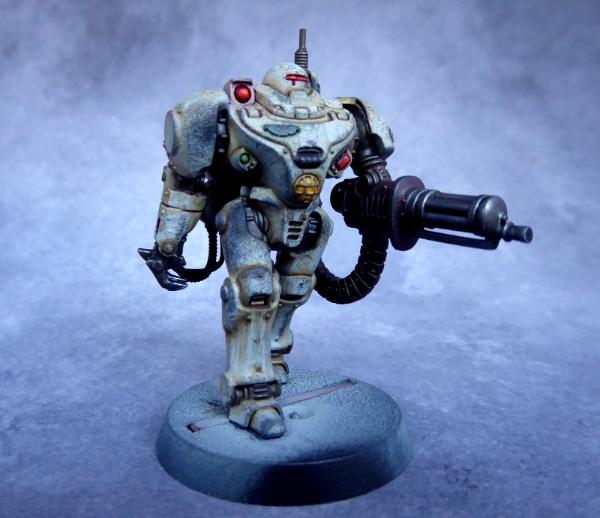
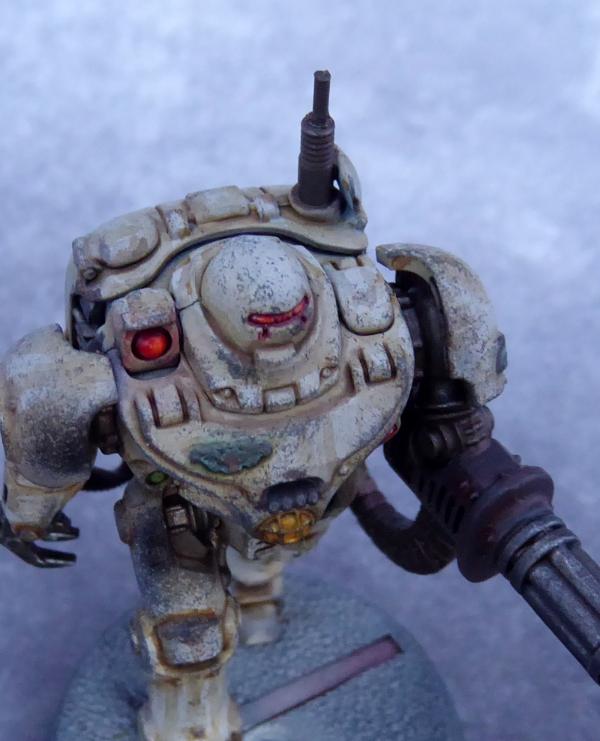
I can offer up some some tips, starting with chipping because it's probably the most varied kind of weathering. There's really three ways to get paint chipping and each has its merits. Which one I personally use depends on the look I'm trying to achieve.
Method 1: masking fluid/liquid mask

This is using a liquid, usually liquid latex, applied to an existing layer of paint to protect it from another layer of paint. For a paint chipping effect, it's usually applied with a piece of torn foam or sponge to keep it somewhat random. You paint the color you want "exposed" by the chipping, sponge some liquid mask where you want it, let it dry, paint the next layer on top, remove the dried liquid mask with your finger or a piece of poster tack.
This is the effect you're after:
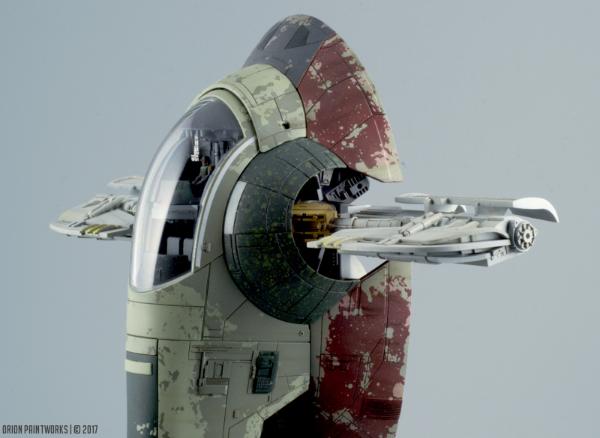
The "skirt" has a couple of layers. I started with the medium grey, sponged on some Vallejo liquid mask, painted the light pink layer, sponged on some more liquid mask where I want the pink to show through, painted the hull red on, then removed it all. The green "fender" chipping was also done in a similar way, except I put the liquid mask on an old toothbrush and then flicked it on the light green to give it a speckled look before painting the dark green over top of it. I find the liquid mask method works the best if you need large areas of random chipping and you don't really care about being precise. It's also relatively fast, hard to screw up, and gives good results.
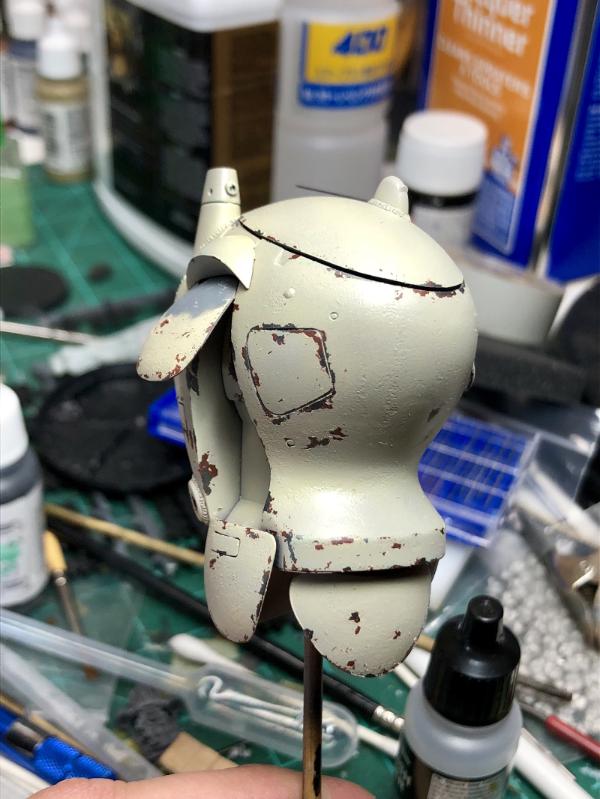
Method 2: hairspray/chipping fluid
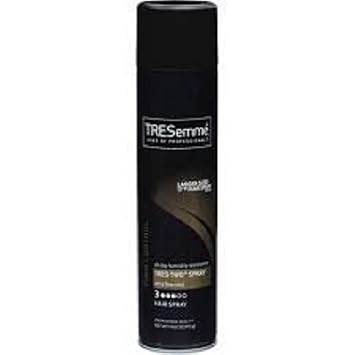
(Not the best picture, but it's TRESemme Tres Two Ultra Fine Mist)
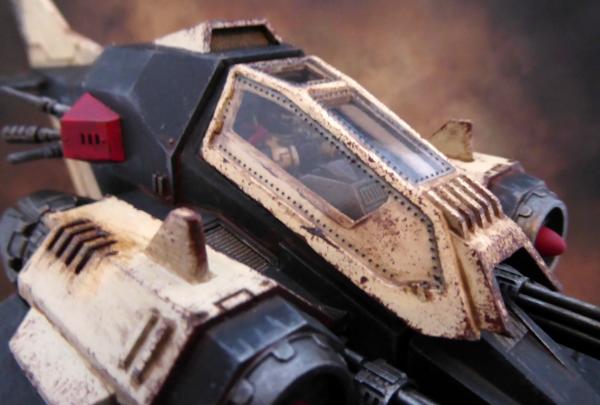
This method is popular with armor modelers and probably gives the most realistic chipping because in my opinion, there's no beating actual paint chipping! Some modeling companies make chipping fluid which work just like hairspray except they have no scent, however, I think that the Tresemme Ultra Fine Mist is the best option. Plus, it can be found at the grocery store. With this method, you paint the underlying color (usually a rust color or metallic), spray the hairspray over it and as soon as it's dry, paint the outer color. When that's dry to the touch, you get the area you want to chip wet with a little bit of clean water, let the water soak through the outer layer of paint for a couple of seconds and "activate" the hairspray, then a variety of tools (an old toothbrush, stiff bristle brush, or even toothpicks) carefully work the surface to make scratches. The end result should look something like this:
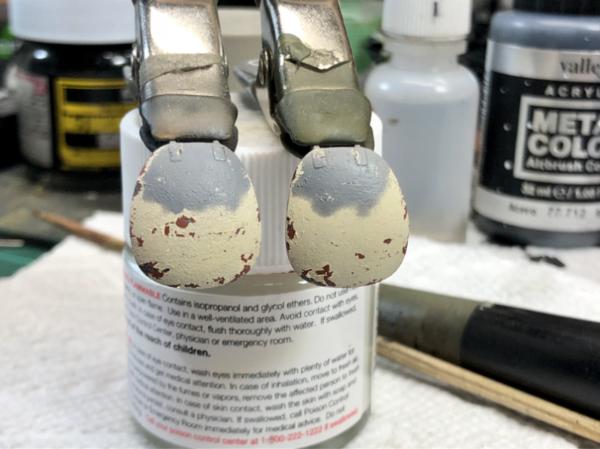
Those particular pieces have a base coat of a dark steel color (to show the armor being made of cast steel), a layer of "primer," which in this case is red oxide, then the two camo colors on top of that; pretty much how an actual piece of metal armor would be painted. I painted the steel color, sprayed on two light coats of hairspray, then the red oxide color, they another coat of hairspray, then the camo colors, and then chipped it. This makes the chipping a little unwieldy (and I did it as test with these parts), so I would recommend dividing each layer by a clear coat to keep the all of the layers of hairspray from reactivating as you move up, which is what I'm doing here:
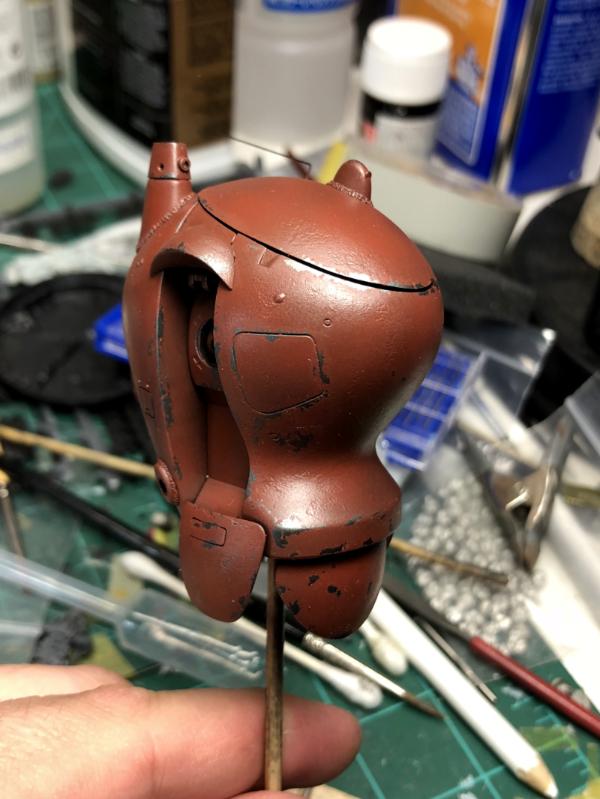
A third layer of battleship grey will be added for the upper surfaces for a countershading camouflage effects and similarly chipped with hairspray.
Method 3: sponge chipping

Sponge chipping is probably the easiest technique but it can be difficult to master. The keep is to take it slow and add a little bit at a time because it's way easier to add more if you want it than it is to remove it if you've gone overboard. Personally, it's my least favorite way to do chipping but that doesn't mean there's no place for it or that I don't do it. I think it works best in combination with other weathering effects, including other chipping effects because it looks different than the other two methods. I really like to do it when painting multi-color camouflage to show areas where the camo colors have been chipped away to reveal the main body color, like on this Renault
FT I did:
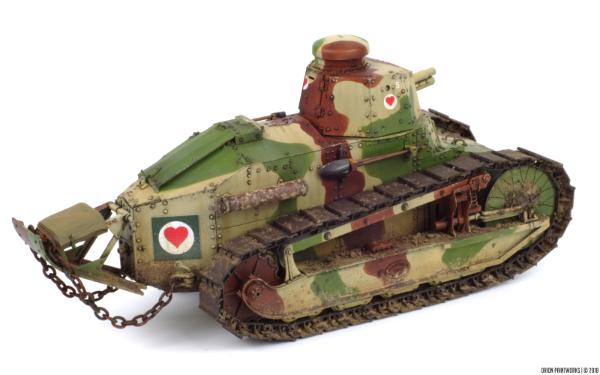
If you go to the picture in my gallery and zoom in (it's a large picture), you can see where the brown and green have been chipped away on leading edges (like the return roller support, drive sprocket, and engine cover on the rear) to show the light brown base color. This was done after the camo colors were painted, using the base light brown color and a piece of torn sponge to simulate where paint had been rubbed off. I then went back with a smaller piece of sponge used a dark brown-black to add ever more chipping to show wear and tear down to the base metal (that had since darkened with oxide from being exposed to the atmosphere). This method tends to be the most common with wargamers because it takes the least amount of work to do (theoretically) and doesn't really require any special tools or techniques.
SirWeeble wrote:There are a whole bunch of purpose-made weathering supplies, but a solid 90% of them aren't needed and can be created with other supplies/techniques.
While technically correct, I don't agree with the sentiment. To me, it comes down to ease of use and time spent doing it. Yeah,
I could ground a bunch of pastel sticks down to make a pigment powder, but it's a better use of my time and effort to buy a bottle of pigment from Vallejo, Mig Productions, or AK Interactive in the exact color I want and in a handy jar. Same goes with washes and other stuff because I'd just rather pay for the convenience of having exactly what I want in an easy to use package. I'm painting something in a cool dark grey? Awesome, I'll grab my bottle of Ammo of Mig blue-black panel line wash and go to town without having to mix two colors together and hope that I get it right every time.


 Heresy World Eaters/Emperors Children