| Author |
Message |
 |
|
|
|
|
Advert
|
Forum adverts like this one are shown to any user who is not logged in. Join us by filling out a tiny 3 field form and you will get your own, free, dakka user account which gives a good range of benefits to you:
- No adverts like this in the forums anymore.
- Times and dates in your local timezone.
- Full tracking of what you have read so you can skip to your first unread post, easily see what has changed since you last logged in, and easily see what is new at a glance.
- Email notifications for threads you want to watch closely.
- Being a part of the oldest wargaming community on the net.
If you are already a member then feel free to login now. |
|
 |
2019/08/28 09:07:30
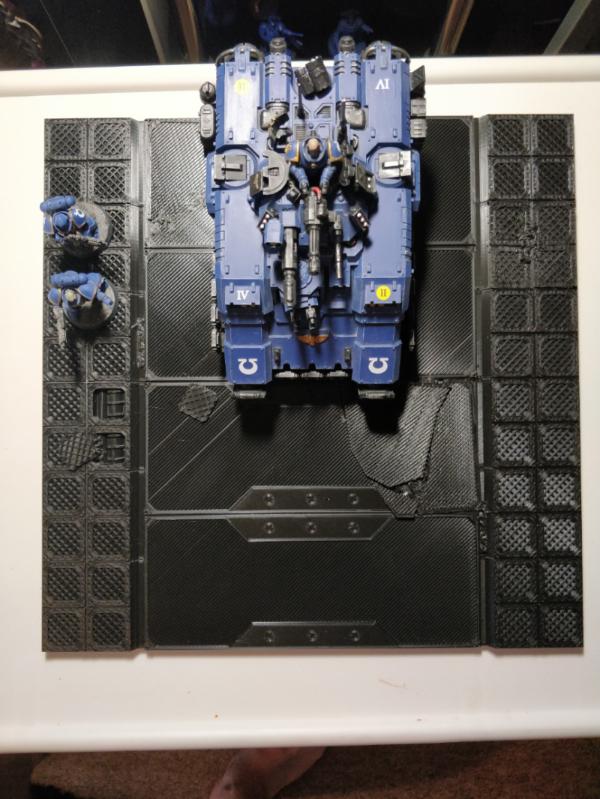
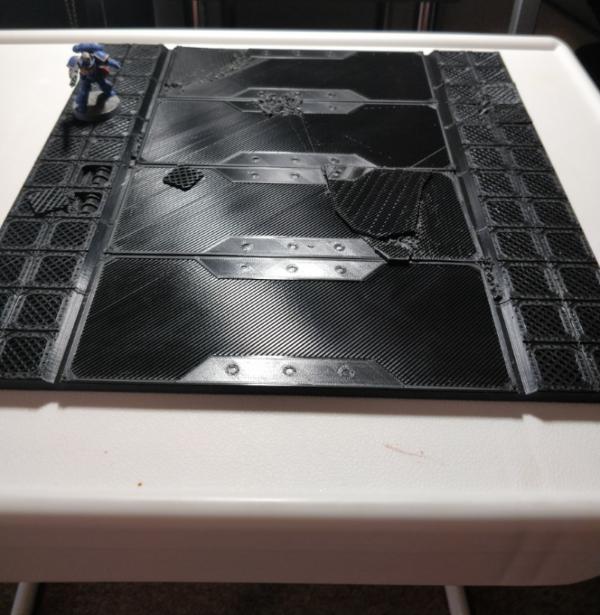
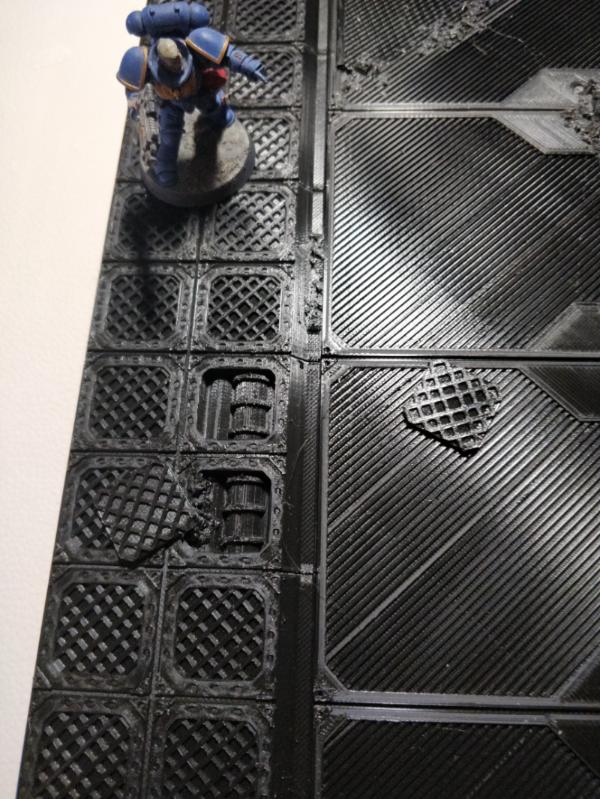
Subject: My 3d Printed board
|
|

Fresh-Faced New User
|
|
|
|
 |
|
2019/08/28 19:22:59
Subject: My 3d Printed board
|
|
Leader of the Sept
|
That looks pretty cool. Regarding other things in the floor, you could try some recessed to slot in plastic and or some other smoother material.formsimple.flst concrete.sections.rather than the textured bits you have there. Or conduits or drainage grilles.
Project Mobius on Kickstarter did a nice line of floor tiles with swappable central features to help with variation.
|
Please excuse any spelling errors. I use a tablet frequently and software keyboards are a pain!
 Terranwing - w3;d1;l1 Terranwing - w3;d1;l1
 51st Dunedinw2;d0;l0 51st Dunedinw2;d0;l0
 Cadre Coronal Afterglow w1;d0;l0 Cadre Coronal Afterglow w1;d0;l0 |
|
|
|
|
2019/08/28 19:57:26
Subject: My 3d Printed board
|
|

Powerful Phoenix Lord
|
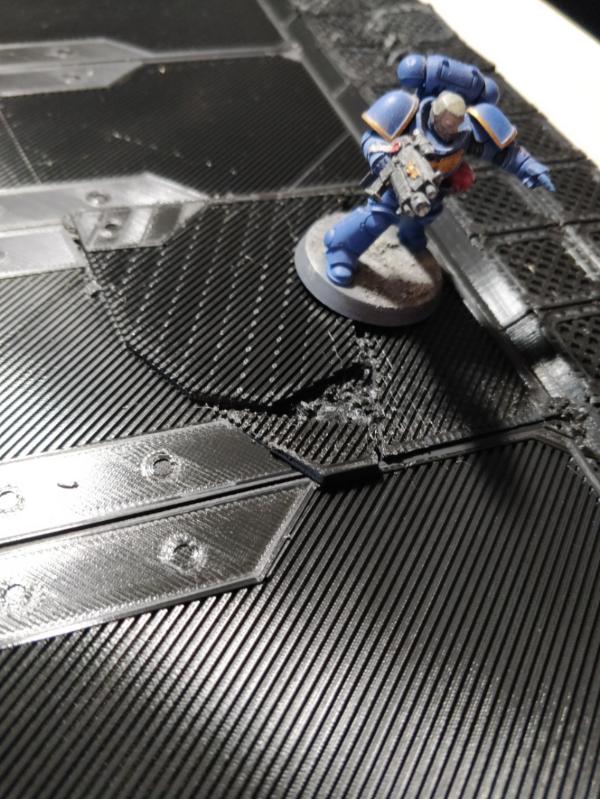
Is it filled/braced sturdily? I did some 3D printed flat-bed hover vans for a buddy a while ago and damn near punched through the flat-bed with my finger. I'd be concerned about a heavy model or accident putting a hole in it!
Smart to use the textured design though to help hide the 3D printing lines.
|
|
|
|
|
2019/08/28 20:01:28
Subject: My 3d Printed board
|
|
Courageous Questing Knight
|
Absolutely fantastic! I had 3D printed some 3x3 street tiles and did the rubber mold and polyurethane casting and I was able to crank out the twenty more tiles i needed in the same amount of time it would have taken me to print 1 or 2 tiles.
|
|
|
|
|
|
2019/08/28 20:28:33
Subject: My 3d Printed board
|
|
Fresh-Faced New User
|
 Flinty wrote: Flinty wrote:That looks pretty cool. Regarding other things in the floor, you could try some recessed to slot in plastic and or some other smoother material.formsimple.flst concrete.sections.rather than the textured bits you have there. Or conduits or drainage grilles.
Project Mobius on Kickstarter did a nice line of floor tiles with swappable central features to help with variation.
Thanks for the ideas. I'll see what I can design with that in mind. I'm happy to create a large number of different tiles though, so if they look better as fully contained designs I will just do a bunch of different ones like that. Automatically Appended Next Post:  Elbows wrote: Elbows wrote:Is it filled/braced sturdily? I did some 3D printed flat-bed hover vans for a buddy a while ago and damn near punched through the flat-bed with my finger. I'd be concerned about a heavy model or accident putting a hole in it!
Smart to use the textured design though to help hide the 3D printing lines.
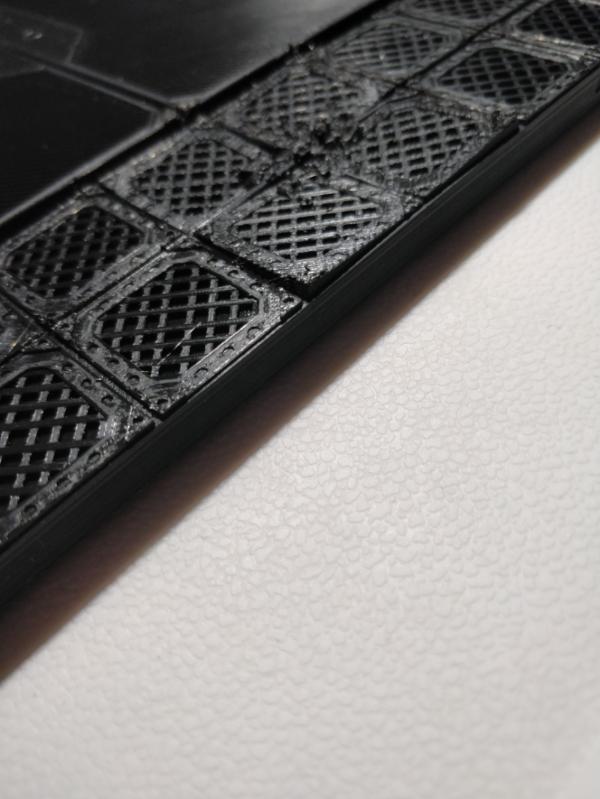
It is filled 25% infill, but the 3d print is just to get a silicone mold made so it is the resin that has to be strong. I'm going to use some liquid green stuff to smooth over any major print flaws and lines, and possibly do a bit of old school modellling to get it as good as possible before making the mould. Automatically Appended Next Post:  MDSW wrote: MDSW wrote:Absolutely fantastic! I had 3D printed some 3x3 street tiles and did the rubber mold and polyurethane casting and I was able to crank out the twenty more tiles i needed in the same amount of time it would have taken me to print 1 or 2 tiles.
How thick did you make your resin tiles? I'm just curious about the strength.
|
|
This message was edited 2 times. Last update was at 2019/08/28 20:35:23
|
|
|
|
|
2019/08/28 20:59:01
Subject: My 3d Printed board
|
|

Inspiring SDF-1 Bridge Officer
|
That looks really nice 
|
|
|
|
|
2019/08/29 12:55:02
Subject: My 3d Printed board
|
|
Courageous Questing Knight
|
The biggest floor tile was 10" x 8" (not of a 3D printed piece, but from some other dungeon floor tiles I grouped together to make a bigger piece) and is probably no more than 1/4" thick. Not sure if you have a normal supplier of the polyurethane, but this stuff is so strong and I love it: https://specialtyresin.com/product/model-pro-white/
This has a really quick cure time, so you can de-mold in about 10-15 minutes, but they do have slower time resin. They also have stuff that stays just a bit flexible.
|
|
This message was edited 1 time. Last update was at 2019/08/29 12:58:02
|
|
|
|
|
2019/08/31 09:46:12
Subject: My 3d Printed board
|
|
Fresh-Faced New User
|
MDSW wrote:The biggest floor tile was 10" x 8" (not of a 3D printed piece, but from some other dungeon floor tiles I grouped together to make a bigger piece) and is probably no more than 1/4" thick. Not sure if you have a normal supplier of the polyurethane, but this stuff is so strong and I love it: https://specialtyresin.com/product/model-pro-white/
This has a really quick cure time, so you can de-mold in about 10-15 minutes, but they do have slower time resin. They also have stuff that stays just a bit flexible.
Thanks for the link. The thickness I'm aiming at is 10mm, so a bit over 1/4", so hopefully the resin I use will be strong enough to avoid it snapping too easily. I'm also designing holes and removable rods to attach the tiles so they stay together. It will take 24 tiles to make a 6x4 board and I intend to do maybe 30 to 35 different ones to give me lots of options when putting a board together. This one was more of a practice one and, having seen how easy it is to clean up and to make smooth surfaces, I'm going to change the road surface to something a little more flat, like sheets of metal, with rivets and seams for visual interest. Anyway, lots of plans and lots of work.
|
|
|
|
|
|
|