Inquisitor Abed was not reckless by nature. He generally liked to think before acting and preferred to be in control of all the facts before coming to a decision. Because of this it was surprising when he decided to take a small force to Vetala, a small town on Cabeiri IV which had seen a lot of fighting during the Tyranid invasion.
The war was won, or at least as good as. The Tyranid fleet was essentially wiped out and the remaining Tyranid survivors on the planet’s surface were in the process of being mopped up.
A distress call had been received from Vetala. There were many areas on the planet sending distress calls which went unanswered. What made this call different is that it was signed by Inquisitor Edison, an old friend of Abed’s who had joined the fighting on Cabeiri IV from the start.
Data on the area surrounding Vetala was sketchy. It was not known how large the Tyranid presence was there, or even how many Imperial survivors there were in the town. The message from Edison was enough for Abed though, he gathered all the forces he could in the short time he had, requisitioned a few Valkyries and flew to the source of the distress call.
When Abed and his force arrived it quickly became apparent that there was no sign left of Inquisitor Edison or any other survivors. Before Inquisitor Abed could resign himself to the fact he had lost his friend though the first wave of Tyranids attacked.
The attackers were made up of Hive Crones and Gargoyles, who seemed to instinctively know that Abed and his troops would need their Valkyries to escape. Before fighting off the onslaught all the Valkyries were reduced to irreparable wreckage.
Abed quickly called for backup, knowing that his colleagues would not fail to send enough support to crush all the Tyranids in the vicinity. He also knew that mustering the forces would take time, and the Tyranids would not give up their attacks in the meantime. Abed and his forces quickly went to work on building fortifications and hunkering down until the necessary reinforcements arrived.
I’ve been a fan of seemingly futile last stands for a long time. Possibly partly fuelled by reading the Last Stand at Glazer’s Creek battle report in White Dwarf 222. That classic battle report is Imperial Guard vs Orks. I decided that my re-enactment would be between an Inquisitor’s retinue and a whole load of Tyranids.
Some of you may have seen the more recent White Dwarf June 2018 article, Last Stand at Glazier’s Creek Part 2. While this battle report didn’t capture the same magic as the original it did include some updated 8th Edition rules for this scenario, which I’m mostly going to use here.
The Rules:
The battle takes place over the course of between 3 and 5 assaults. In time honoured fashion I decided that this battle will be 4 assaults. The defenders win if they have any models left on the table at the end of the final assault. Otherwise the Tyranids win.
The Tyranid player’s force in each assault is determined by rolling 3 times on the Synapse table and 6 times on the Other Tyranids table. The tables:
Tyranid Synapse:
1 – Power rating of 4 or less
2 – Power rating of 5 or less
3 – Power rating of 5 or less
4 – Power rating of 6 or less
5 – Power rating of 6 or less
6- Power rating of 7 or less
Other Tyranids:
1 – Power rating of 4 or less
2 – Power rating of 5 or less
3 – Power rating of 6 or less
4 – Power rating of 7 or less
5 – Power rating of 8 or less
6 – Power rating of 10 or less
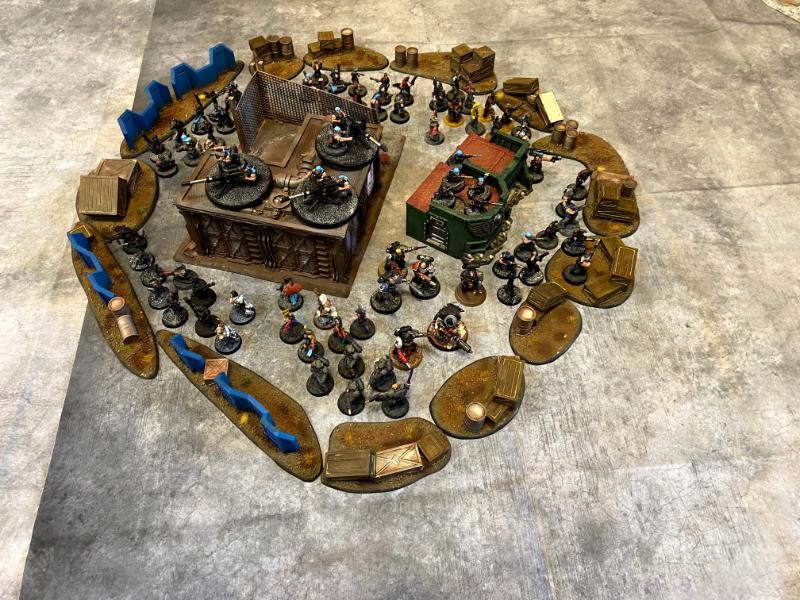
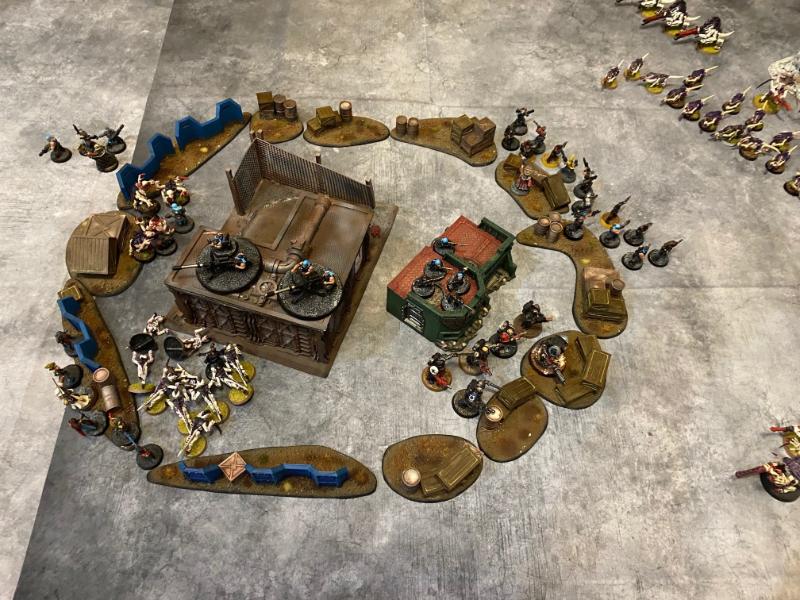
The Defender sets up the table. Their deployment zone is 12 inches from the centre of the 6’ x 4’ table. So basically the Defender should put as much scenery as they need in their deployment zone and leave the rest of the board relatively sparse so they can shoot the Tyranids unhindered.
The Tyranid deployment zone is within 12 inches of each of the four corners. Each corner is designated a number between 1 and 4. Roll a die for each unit, on a 1-4 place that unit in its corner. On a 5 or 6 the Tyranid player can choose in which corner to deploy.
The Tyranid player takes the first turn in every assault.
Each assault ends when the Tyranid player has lost more than 50% of their models. Remaining models are counted at the end of each player turn. If the Defender loses all their models then the Tyranid player wins the game.
At the end of each assault roll a
D6 for each model that the Defender has as a casualty:
1-2: Dead, can no longer take part in the battle
3-4: Goes into the Field Hospital. At the end of the next assault roll again on this table.
5-6: Full recovery, can take part in the next assault as normal
The Defender never takes Morale tests. The Tyranid player does as normal.
If any Tyranid model comes within 1 inch of the Field Hospital the models come out and are set up within 6 inches as one unit. They can fight as normal but subtract 1 from all their to hit rolls.
The Defenders for this battle:
Ordo Xenos Inquisitor - psyker with force sword and needle pistol
Catachan Company Commander with powerfist and plasma pistol
Primaris Psyker
4 Catachan infantry squads with plasma guns and Bolters for the sergeants
Militarum Tempestus squad with 2 plasma guns
Astropath
5 Ratlings
Catachan Veteran squad with shotguns and 3 melta guns
5 Crusaders
Heavy Weapon Squad with 3 autocannons
Deathwatch squad - 5 veterans with combi meltas and 1 Terminator with assault cannon
Power Level 50.
The Defenders can essentially be any army you want, within reason. As long as the Power Level is 50.
No deep striking, infiltrating, or other deployment rules allowed for the Defenders.
 The First Assault
The Tyranid force in my first assault was made up of:
3 Tyranid Warriors with a Venom Cannon
1 Malanthrope
3 Tyranid Warriors with a Venom Cannon
30 Termagants with Fleshborers
10 Genestealers
10 Hormagaunts
10 Genestealers
Deathleaper
20 Gargoyles
Total model count for Tyranids: 88
The Tyranid army will retreat once there are 43 or less Tyranid models on the battlefield.
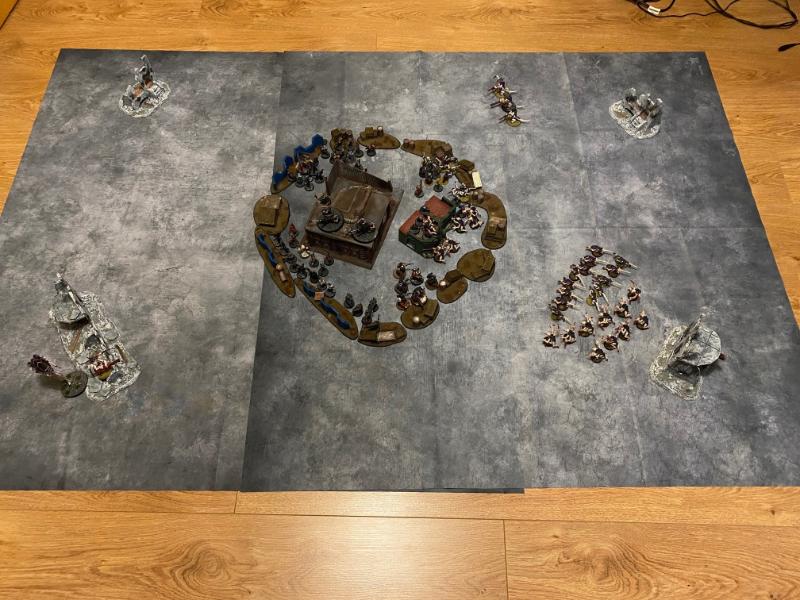
Assault 1
“Tyranids sir, fassands of ‘em.”
“Thousands? Are you sure?”
“Actually sir, I didn’t actually count them.”
The first assault went more or less as expected. The Tyranids surged forth as fast as they could, mostly choosing to close the distance as quickly as possible. In Turn 2 a Genestealer squad gobbled up a 10 man Infantry Squad with relative ease and then piled into my squad of Ratlings. Luckily for the Ratlings though by the end of the Tyranid Turn 2 they only had 41 models left on the field so made a hasty retreat.
5 Guardsmen (including a Sergeant with a bolter) sadly didn’t survive their injuries, with a further 4 having to go to the Field Hospital. The rest of the Imperial army consolidated the defences and made ready for the second assault.
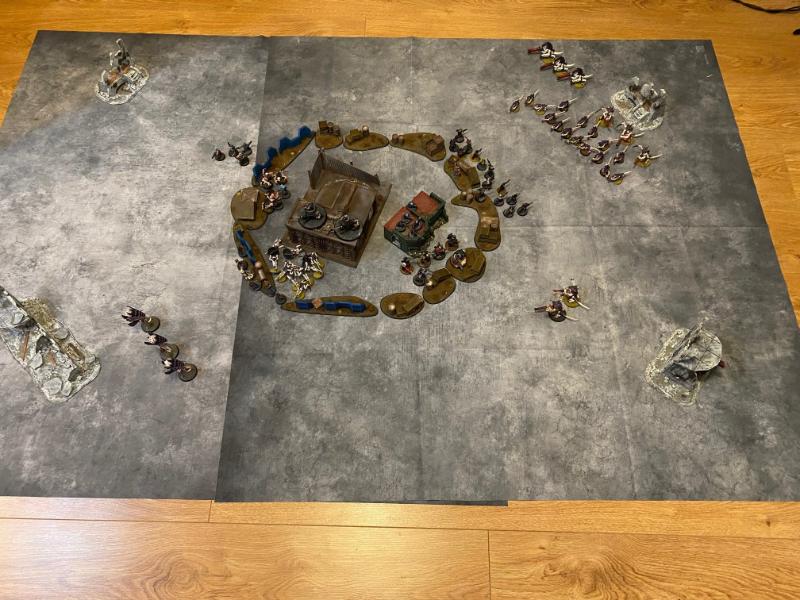
 Assault 2
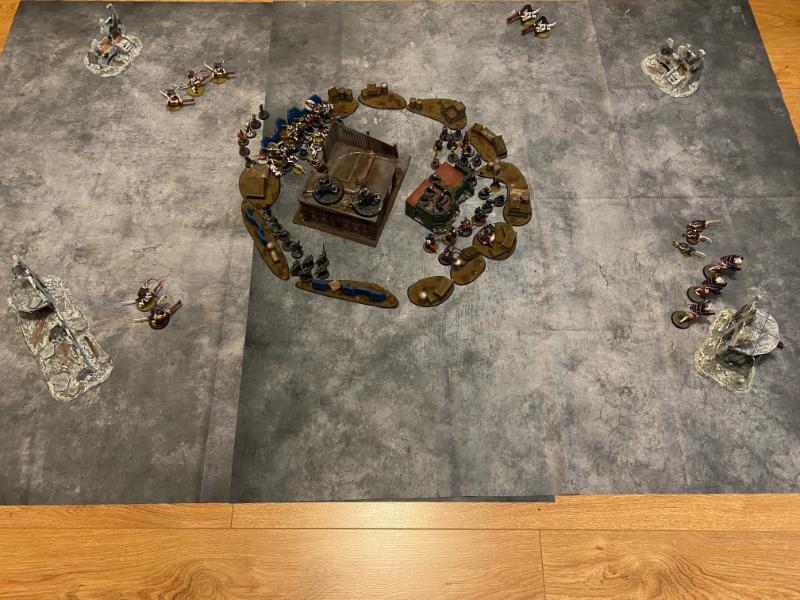
The Tyranid force for the second assault:
3 Zoanthropes
3 Tyranid Warriors with Venom Cannon
3 Tyranid Warriors with Venom Cannon
5 Genestealers
3 Hive Guard with Shock Cannons
5 Genestealers
20 Termagants with Fleshborers
30 Hormagaunts
5 Genestealers
77 models in total. The Tyanids will retreat when they number 38 models or less
 “Shall I wait to shoot until I see the whites of their eyes?”
“No you idiot, fire at will!”
This time the Defenders concentrated their initial volleys on the Genestealers, after seeing how effective they were when up close in the first assault. The tactic worked, even killing the last 3 Genestealers on Overwatch as they tried to charge into combat.
The squad of Hormogaunts did make it into combat though, greedily charging both an Infantry Squad and the Imperial Guard Veterans. Inquisitor Abed with his bodyguard of Crusaders even had to get stuck in and counter charge the Hormagaunts, fighting off the assault by the end of the Defenders’ second turn.
7 more Guardsmen and Veterans were put in body bags, with the ranks in the Field Hospital swelling to 6. Luckily a plasma gunner who was in the Field Hospital after Assault 1 managed to recover and rejoin the fight in time for the 3rd Assault.
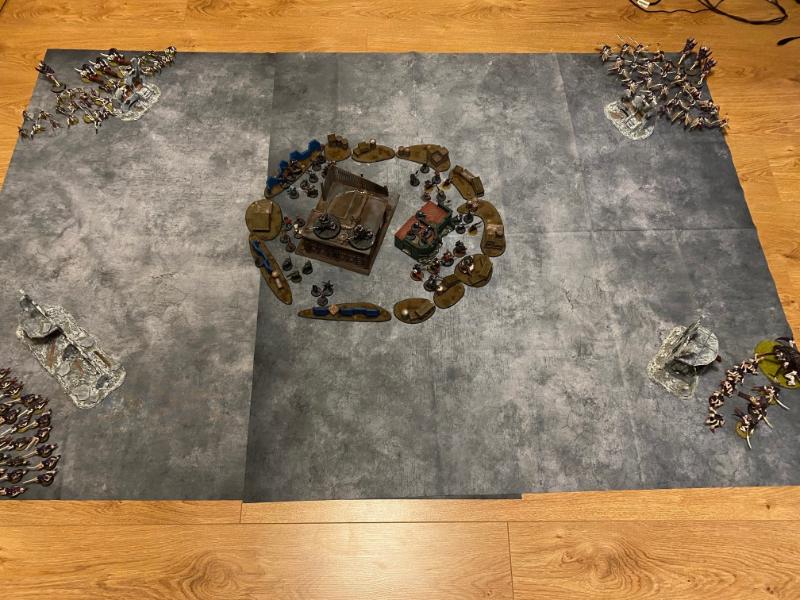
 Assault 3
The Tyranid force:
3 Tyranid Warriors with a Venom Cannon
3 Zoanthropes
3 Tyranid Warriors with a Venom Cannon
3 Hive Guard with Shock Cannons
5 Genestealers
20 Hormogaunts
5 Genestealers
30 Termagants
20 Gargoyles
92 models total. Once 45 models or fewer are left the Tyranids retreat.
The right flank of the Defenders held quite well, in large part thanks to the 6 Deathwatch Veterans, who have been mowing down gribblies in all 3 Assaults so far like it’s going out of fashion. Especially the Terminator with Assault Cannon.
The left flank was less sturdy, being charged by Gargoyles, Genestealers and Hormogaunts. They fought bravely though, and still managed to end the Tyranid assault by the end of the Defenders’ Turn 2. In large part thanks to the Guardsmen on the right flank jumping over the barricades and rapid firing on the Termagaunts, reducing the Tyranids’ model count.
7 more Guardsmen ended up in body bags, including a Heavy Weapon Team. The numbers in the Field Hospital are now 11. Thankfully as the next Assault is the final one the Tyranid player will have to chomp their way through these guys too if they want to secure victory.
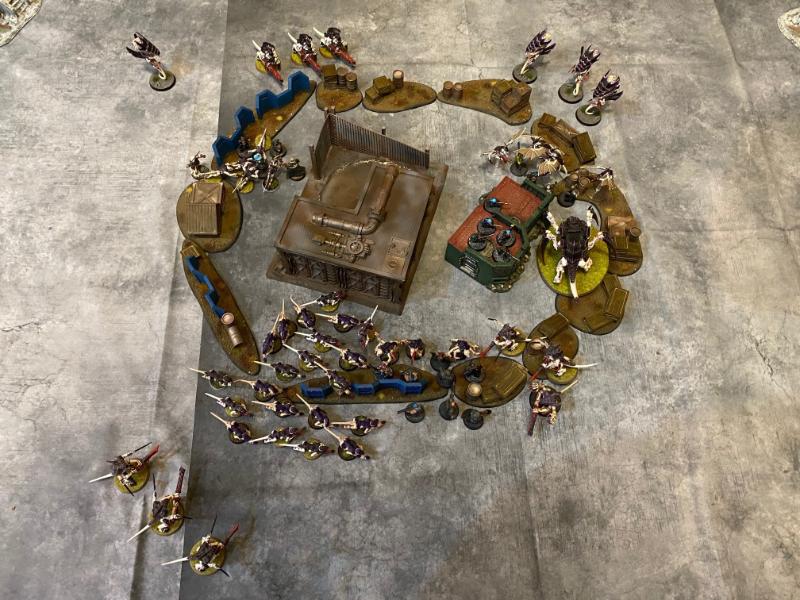
The 4th and Final Assault
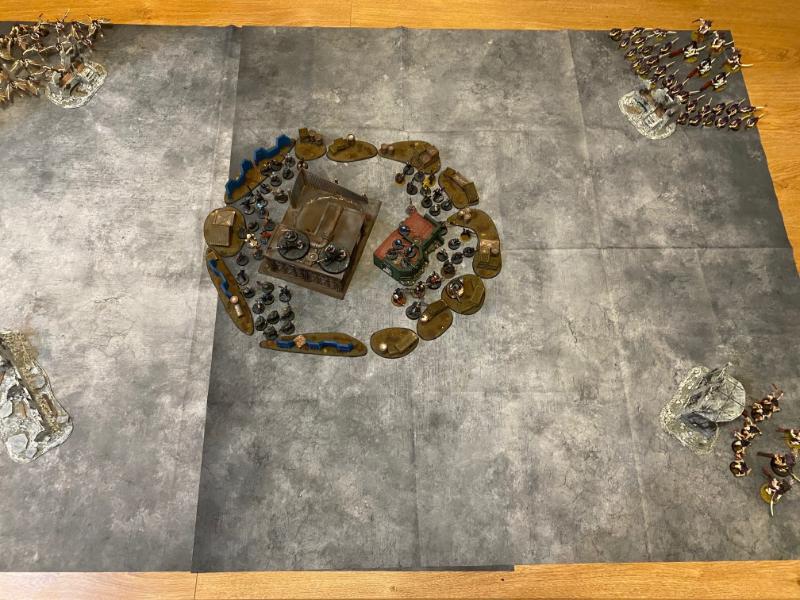
Since this is the final assault the Tyranids get extra forces. Rather than just rolling 3 times for Synapse creatures and 6 times for Others they get 2 additional rolls, which can be used on either table. I decided to take 1 extra Synapse and 1 Other.
The final Tyranid force:
3 Tyranid Warriors with a Venom Cannon
Neurothrope
3 Tyranid Warriors with a Venom Cannon
3 Zoanthropes
3 Hive Guard
5 Genestealers
30 Hormagaunts
5 Genestealers
30 Termagants
20 Gargoyles
1 Screamer-Killer
103 models total. For the Defenders to win this Final Assault they will need to reduce the Tyranid army to 51 models or less. For the Tyranids to win they will have to destroy all the Defenders, including those in the Field Hospital.
 “That’s it man. Game over man! Game over!” – Overseer Hicks, leader of the XFV27441 Protection Detail (Militarum Tempestus Squad) whilst looking out the window of the Field Hospital. Not the first time during the Cabeiri IV campaign that he had said this.
The final assault started pretty ominously, with the Tyranids entering close combat relatively unscathed. The Screamer-Killer headed straight to the 6 man Deathwatch squad and proceeded to make minced meat out of them over the course of a couple of turns.
The Termagants activated the Field Hospital as they were mopping up a couple of squads. This brought some much needed men (and women) into the fight, who were promptly charged by what was left of the Genestealers.
Things didn’t look great for the Defenders, though some good results in combat against the Hormagaunts and Gargoyles meant the Imperium was able to win the day. The Primaris Psyker especially was adept at swotting away Hormagaunts like they were flies.
By the end of the game the Imperium had 21 models left standing. Not as narrow a victory as it could have been, though this was mainly made up of stragglers and characters, the only squad to finish the game intact were the Ratlings.
I enjoyed the scenario overall. I got pretty much what I wanted out of it, and the way the Defenders’ casualties work it means that each Assault is more tense than the previous one. I think substituting Orks for Tyranids worked well, though when units were set up without Synapse support it really hurt them. There were a couple of Assaults where failed morale checks made a lot of difference.
As Inquisitor Abed fought off the last of the Hormagaunts he knew the day was won. Inquisitor Chang had despatched enough forces to overwhelm what was left of the enemy and those in his charge who were still standing would live to fight another day.
Abed looked at his Valkyries (Crusaders) around him, who had all been felled by the large swarm of Hormagaunts. He knew that a couple of them would recover from their injuries. He also knew that some would not.
Abed felt the loss of all the enlisted Guardsmen (and women), some of which had been with him since before the war on Cabeiri IV had begun. However his current thoughts were on the 6 man Deathwatch Kill Team who had tried, and failed, to take down the monstruous Carnifex. Inquisitor Abed did not relish the thought of explaining the loss of whichever of them had suffered mortal wounds to their commanding officers.
Most of all Abed knew that this had all come about because he had decided to chase a message from a colleague who was dead before Abed’s men even arrived on the scene. Inquisitor Chang would understand, there was no question of that, though Abed knew he couldn’t divulge this secret to anyone else lest it be used against him.


