Switch Theme:

Printing through the microscope  [RSS] Share on facebook Share on Twitter Submit to Reddit
»
Author Message
Advert


Forum adverts like this one are shown to any user who is not logged in. Join us by filling out a tiny 3 field form and you will get your own, free, dakka user account which gives a good range of benefits to you:
  • No adverts like this in the forums anymore.
  • Times and dates in your local timezone.
  • Full tracking of what you have read so you can skip to your first unread post, easily see what has changed since you last logged in, and easily see what is new at a glance.
  • Email notifications for threads you want to watch closely.
  • Being a part of the oldest wargaming community on the net.
If you are already a member then feel free to login now.


Made in gb
Leader of the Sept


Hi all

I got the new Van Saar book, House of Artifice, and started fiddling with potential gangs. I realised that las carbines were likely to feature more prominently than ever before, and that you get very few in a box, and GW doesn't make it easy to get lots of the same kind of weapon through FW either. Rather than paying £25 for 4, I picked up some proxy weapon STLs for £2. I bought the rulebook to assuage my guilt.

But that isn't important. What is important is that I tried printing exactly the same build plate at 50 micron layer height and 30 micron layer height. Same supports, same orientations same everything except layer height. I mainly did it to see if I could tell the difference with my eyes. I can't really. But then I remembered that we got my boy a microscope for his birthday... teehee, Science! (kinda sorta mostly just photos).

So I have taken some photos from the microscope of bare resin and with primer. I think the pictures are fascinating, even if they probably don't actually help me work out if it matters if I print at 50 or 30 microns

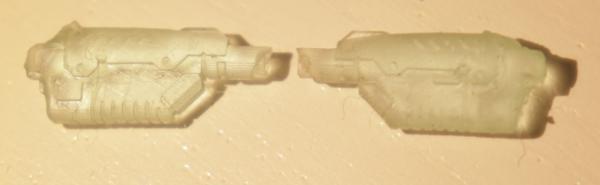
So. The bits I have looked at, printed on an Anycubic Mono using Elegoo clear blue water washable resin. The 50 micron using the Anycubic default settings and the 30 micron one with slightly reduced exposure times (if anyone cares):


And with some primer on (I have taken photos from 2 specific locations marked on this photo):


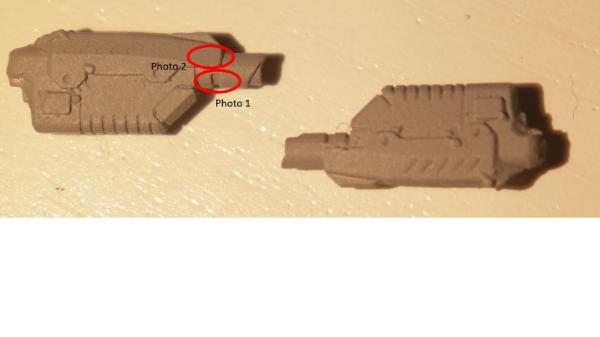
I started looking at the wee notch at the back end of the muzzle assembly (photo 1 marked above). Left hand side bare resin, right hand side with primer on. I think the top one might be the 30 micron and the bottom one 50, but even with a microscope I can't really tell properly.


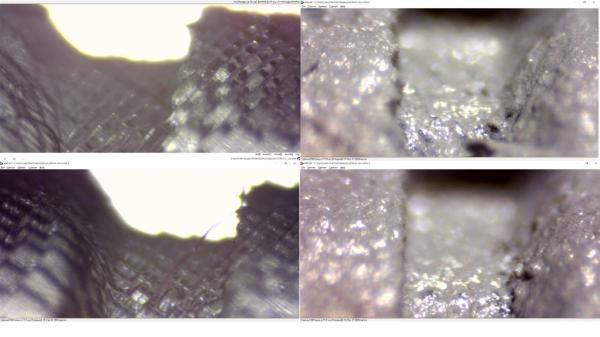
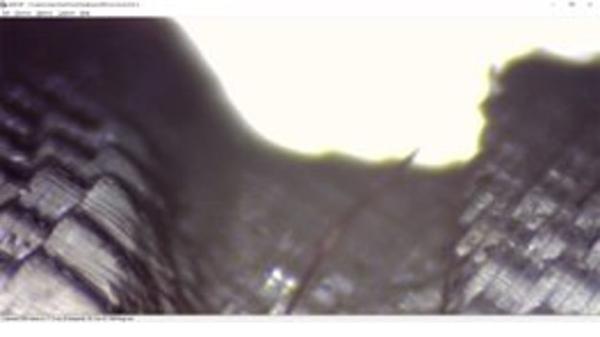
A larger shot of the upper photo of bare resin, with a slightly different point of focus:


And a slightly different point of focus of the lower photo of bare resin:


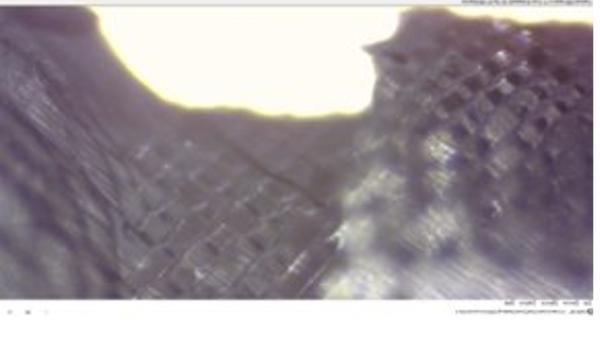
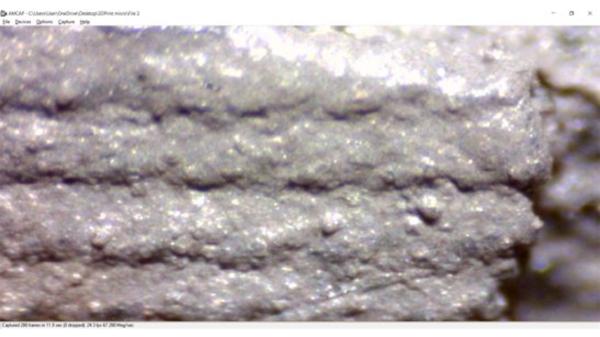
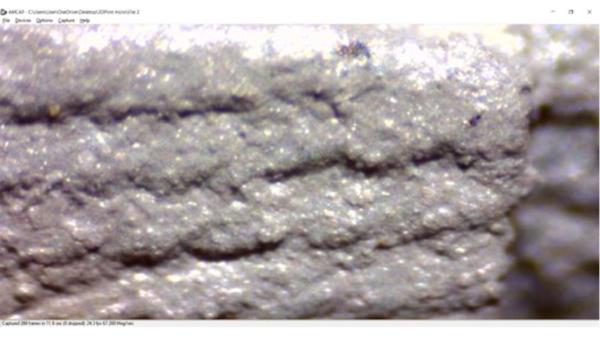
And here is the location 2 photos. I have no idea which is which, and I don't have any of these in bare resin:

Print "1"


Print "2"


The translucent resin is really cool to look through with a backlight and a fore light. You can see all the resiny structures, layers and random bits of dust and tiny hairs

I can recommend it if you happen to have the kit lying about.

This message was edited 2 times. Last update was at 2021/03/02 23:35:57


Please excuse any spelling errors. I use a tablet frequently and software keyboards are a pain!

Terranwing - w3;d1;l1
51st Dunedinw2;d0;l0
Cadre Coronal Afterglow w1;d0;l0 
   
Made in gb
Decrepit Dakkanaut


UK

Ok so after seeing this I had to do it too, only I don't have a microscope so I got the camera out instead

These are all of a Hippocampus model cast on a Phrozen mini 4K and at 0.02 layer height.

I did a series of shots from 1:1 on the macro lens (this just means that the image reflected on the sensor by the lens is exactly the same size as it is in reality) to 20:1 (twenty times life size!)

First the 1:1 to 5:1 set in 1 step increments. This is fairly simple using the Canon MPE 65mm macro on a DSLR (Canon 7D in this case). I tried to aim each time for the eye region, though by 5:1 it becomes very hard to hold and see where you are (this was a quick series of shots so I wasn't using a tripod, which would make things a little easier!).

I also used Canon's twinflash with the setup because it has guide lights, otherwise by 5:1 its pretty much black through the viewfinder indoors so basically impossible to focus with. I didn't use any fancy diffusion attachments on the flash, so that made the highlights/reflections a little worse.

Spoiler:

1:1


2:1


3:1


4:1


5:1


At this point I did get lost so neither shot is of the eye region. I've actually no idea where I was in the first, with the second I was out by the nose


After that we've the series that goes further. I got these by putting a teleconverter onto the lens. First using a 2xTC to double it to 10:1 and then again using another 2XTV to double it all once more to 20:1. At this point focusing is exceptionally hard. I'm not even holding the camera at this stage, just resting it on the surface and nudging the subject into focus.

Spoiler:

10:1


20:1


A Blog in Miniature

3D Printing, hobbying and model fun! 
   
Made in us
Courageous Questing Knight


Texas

While the naked eye may be hard to discern the small changes in layer height, the ultra-close ups sure bring it into focus. The close-up gritty texture is super interesting.

Good job guys, but I am a bit unclear on the proper comparisons. I have always advocated that when printing at the really thin layers on a super detailed mini having AA turned on very much smooths out the surface to actually begin to smooth some of the super details that are not desired. However, in looking at the ultra-close ups, maybe I can see it would be better to have it at a really low setting. While the naked eye may not be able to tell, the surface might be a tad smoother, which would help when painting.

It would be great to see a side-by-side shot of not only a .02 layer compared against a .04 layer for example, but each layer version with AA turned on and one without.

This message was edited 1 time. Last update was at 2021/03/03 14:00:06


My Novella Collection is available on Amazon - Action/Fantasy/Sci-Fi - https://www.amazon.com/Three-Roads-Dreamt-Michael-Leonard/dp/1505716993/


Made in gb
Decrepit Dakkanaut


UK

I would think a rougher surface would be better for painting since it gives more angles to adhere to the paint. Heck that's part of what makes GW's greyseer primer a bit different in that it tries to dry with a slightly smoother top layer so that contrast paints will flow more freely over the surface (and also part why they need sealing with varnish because they do rub off more easily)

A Blog in Miniature

3D Printing, hobbying and model fun! 
   
Made in gb
Leader of the Sept


You dont want a totally smooth surface, but equally, obvious lines in the surface means that things like drybrushing will.pick up the surface detail that you dont necessarily want.

If I remember I will do the same run with some AA and report back

I was particularly taken with how the primer slightly fills the gaps, but has some little bubbly bits on the surface and in the gaps.

Please excuse any spelling errors. I use a tablet frequently and software keyboards are a pain!

Terranwing - w3;d1;l1
51st Dunedinw2;d0;l0
Cadre Coronal Afterglow w1;d0;l0 
   
 
Forum Index » 3D Printing and Digital Modeling
Go to: