| Author |
Message |
 |
|
|
|
|
Advert
|
Forum adverts like this one are shown to any user who is not logged in. Join us by filling out a tiny 3 field form and you will get your own, free, dakka user account which gives a good range of benefits to you:
- No adverts like this in the forums anymore.
- Times and dates in your local timezone.
- Full tracking of what you have read so you can skip to your first unread post, easily see what has changed since you last logged in, and easily see what is new at a glance.
- Email notifications for threads you want to watch closely.
- Being a part of the oldest wargaming community on the net.
If you are already a member then feel free to login now. |
|
 |
2024/11/18 17:15:26
Subject: GreenScorpion's Workshop
|
|

Regular Dakkanaut
|
I have been working with miniatures for a few years and while I am far from being great at any part of it, I have been working on lots of different things.
Lately I started to have a bit more time and less budget for things, so I have been working on building the last few things I have and converting several types of buildings, terrain, artillery and so on.
My time for the moment is split between my family farm (doing some construction work at the moment to expand the house at the farm) and our home, so I have decided to divide this thread into mostly 2 aspects the progress at the farm and the progress at home. The difference will be mostly in terms of the actual things I am doing and the materials (stuff on the farm will tend to include waste from construction work and the likes).
Since this is the first post I decided to start with the progress I have been making on the last couple of weeks.
Farm progress
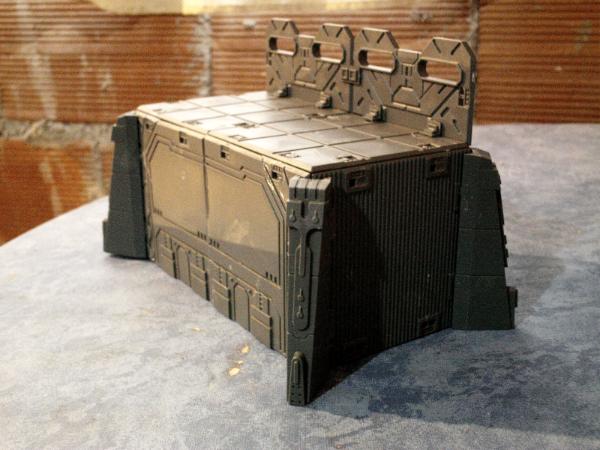
The current project at the farm is related with building modular fortress sections from Mantic's terrain crate sets ( https://www.manticgames.com/terrain-crate/sci-fi/military-compound/ and https://www.manticgames.com/terrain-crate/sci-fi-terrain-crate/battlezones-sci-fi-terrain-crate/landing-zone/).
Basically the intention is merely to build individual sections of walls/buildings which I can combine to make something bigger, nothing too complex or large, making it easier for me to paint also.
A few examples of the pieces I have built:
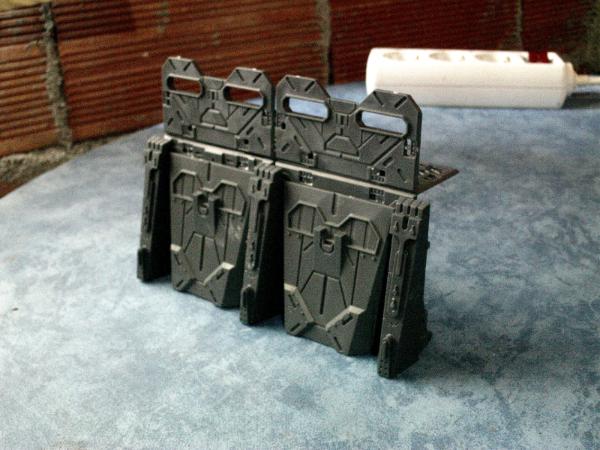

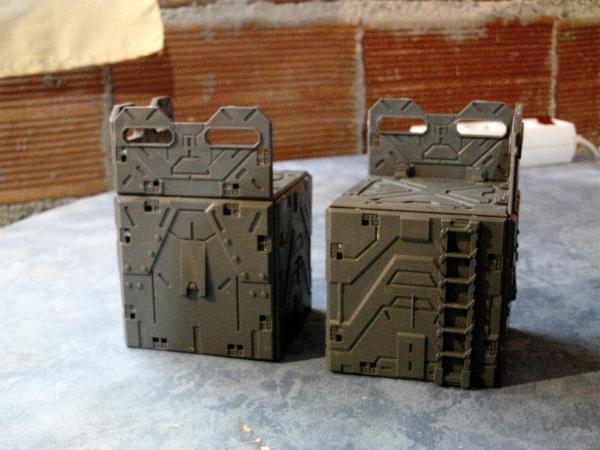
There are a few more examples on my gallery along with the full set of things I have built with the 2 boxes.
I had purchased another compound set before Mantic's 3rd edition of deadzone, so I had a rough idea of what I wanted to do based on the parts coming with the set.
Below is a very blurry picture of the full fortress I built with that set:
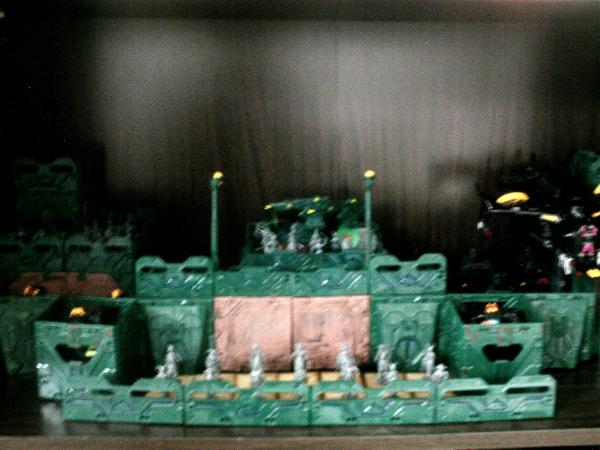
Since I still have a few decorative bits from the 2 boxes left I will be making a few cardboard buildings and using those bits, so I can consider the 2 boxes completely spent.
Home progress
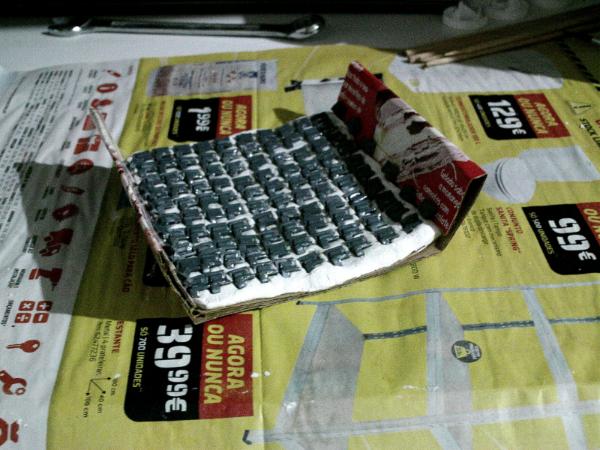
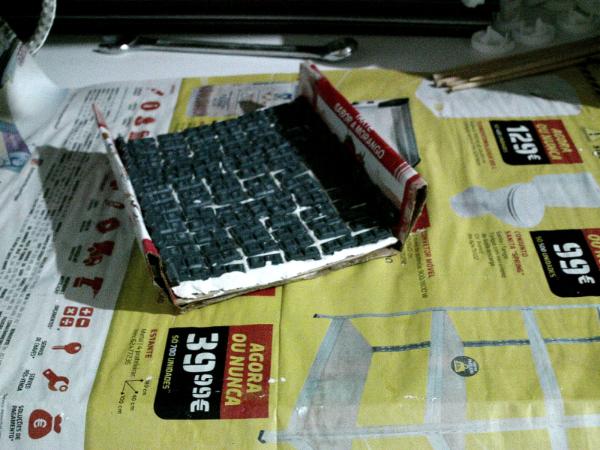
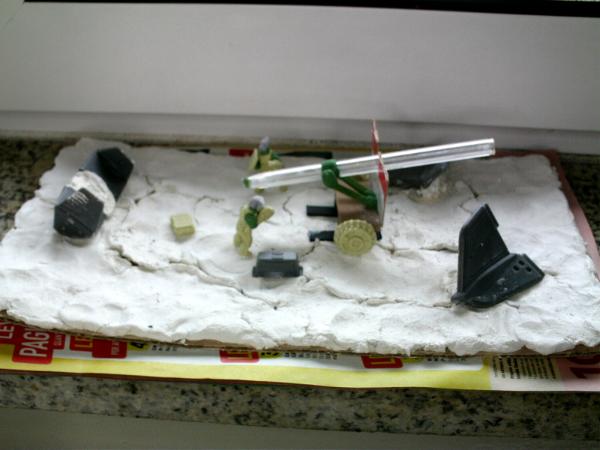
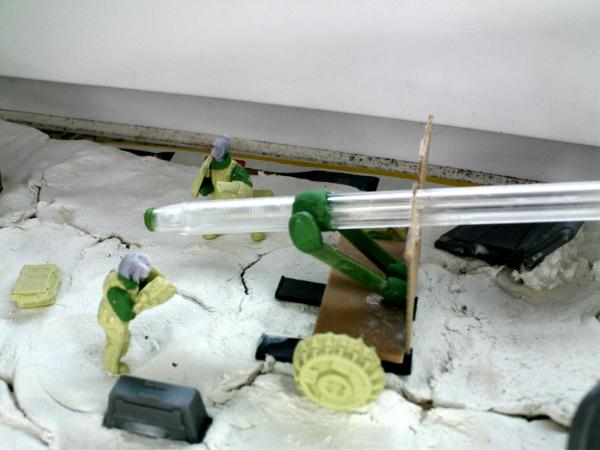
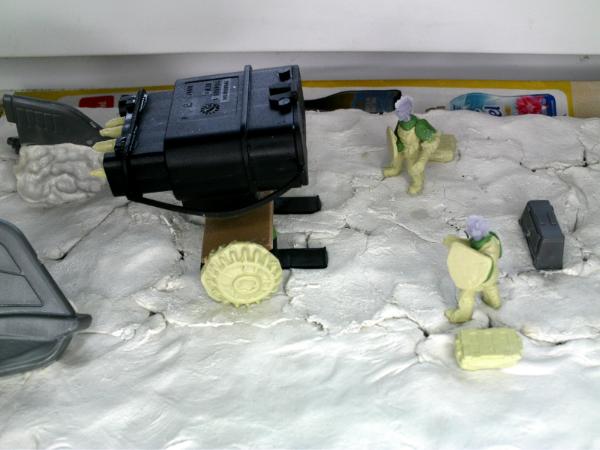
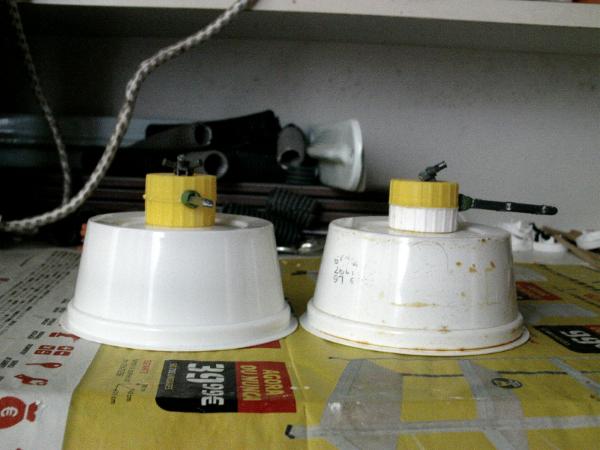
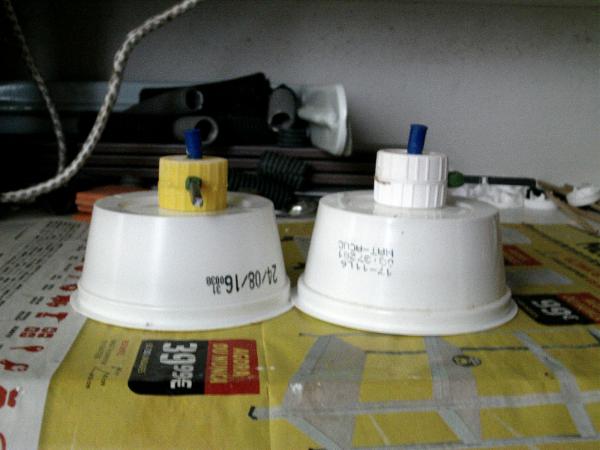
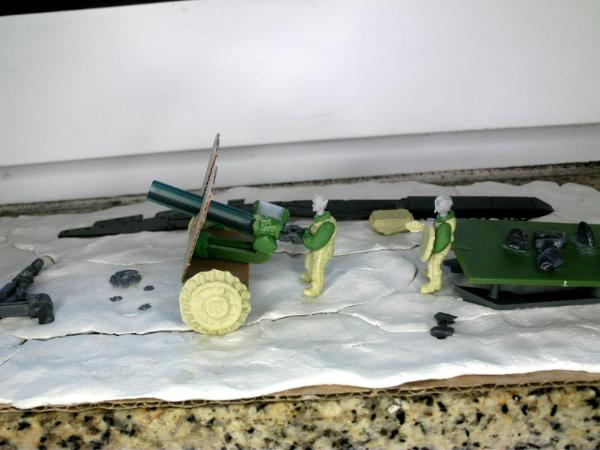
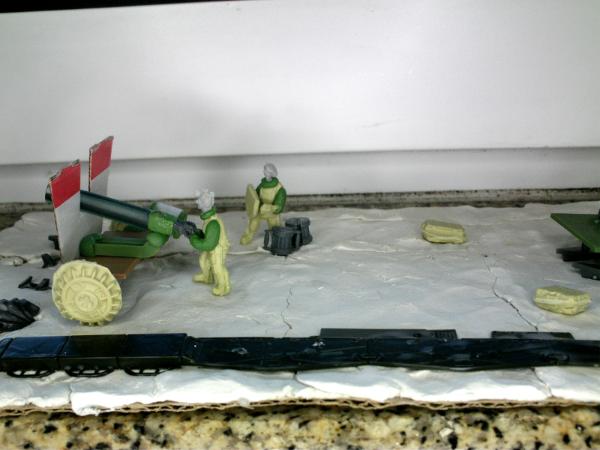
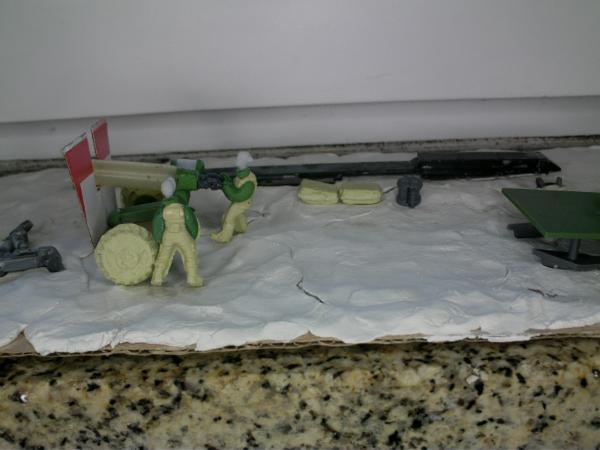
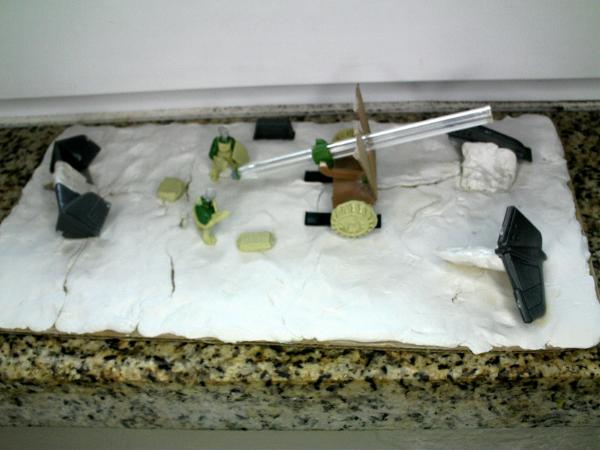
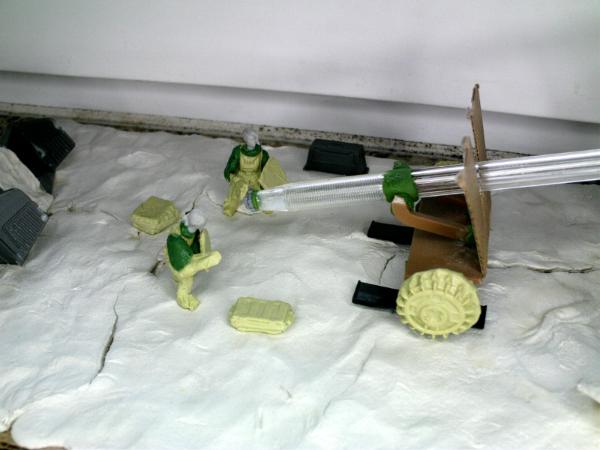
The current project at home is a set of heavy weapons with a large base decorated with spare bits from Mantic's Hornets (I built the plague version so I had spare parts from the regular version).
Other than the spare parts and a few bits for the crew, it is mostly repurposed garbage and some air drying clay (which cracks open nicely when it shrinks giving me some nice terrain features in the process).
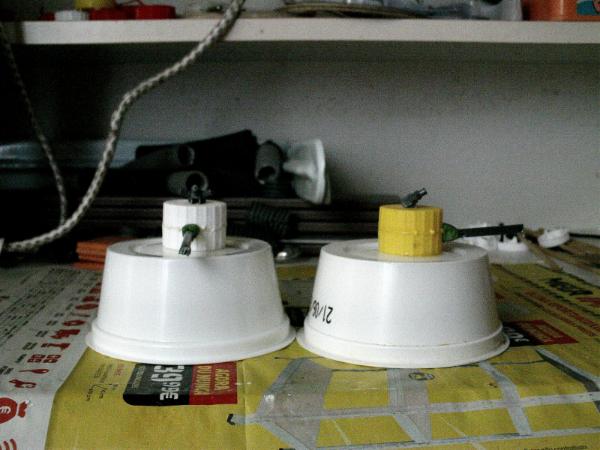
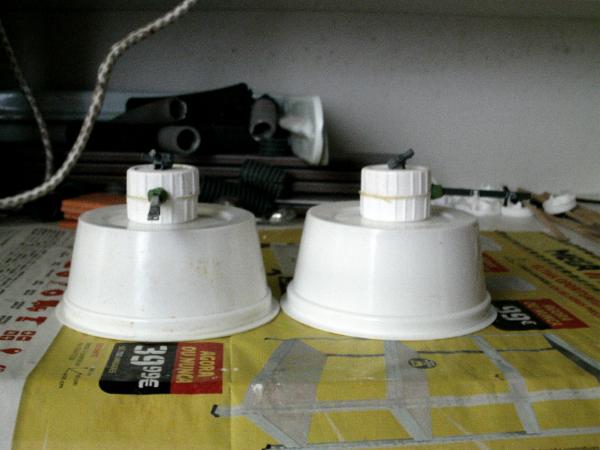
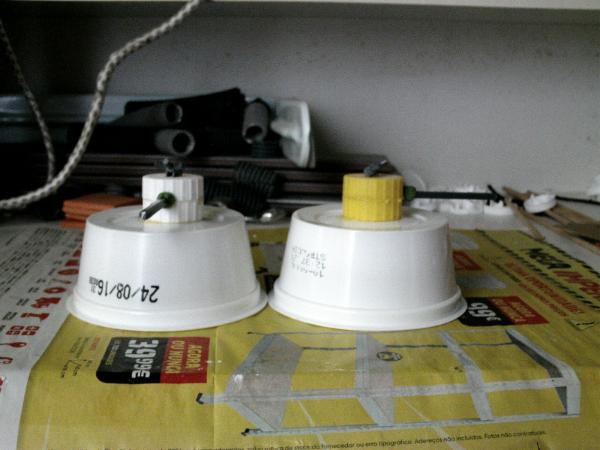
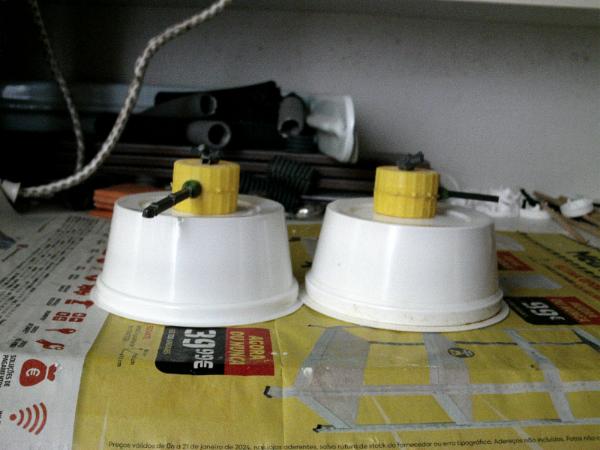
I have currently finished 2 of the 4 I have planned (3 artillery cannons and a multi-missile launcher), below are some pics of the current status:
This is all for today, hopefully more will follow soon.
|
|
|
|
 |
|
2024/11/21 17:56:17
Subject: GreenScorpion's Workshop
|
|
Regular Dakkanaut
|
Farm Progress Update
I have been working on a few more buildings over the past few days to spend some of the last bits of my Terrain Crate boxes from Mantic.
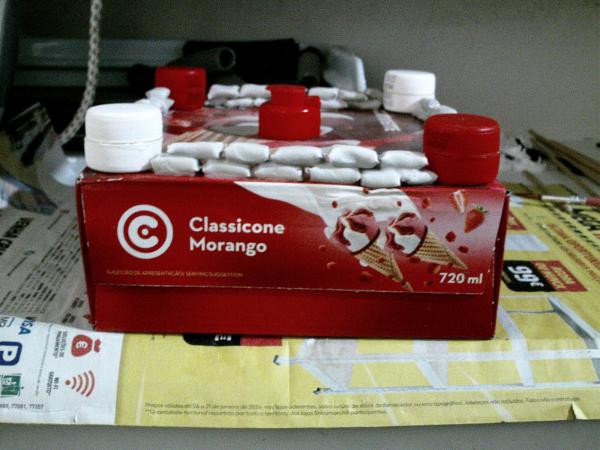
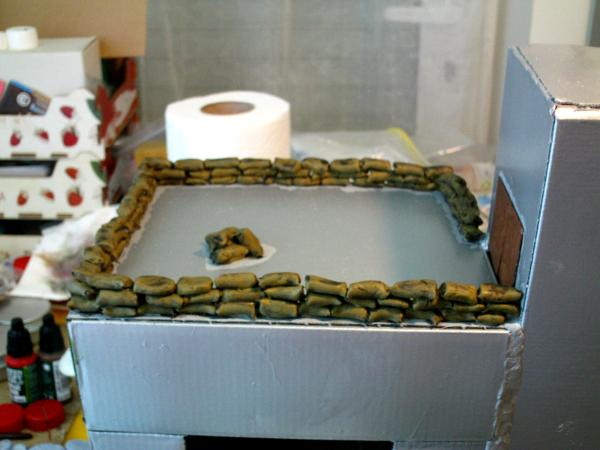
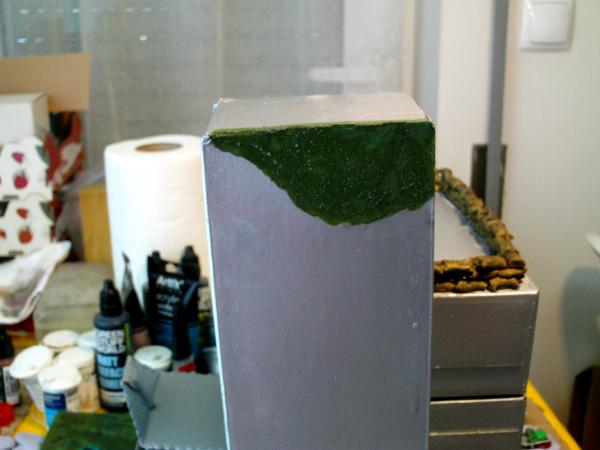
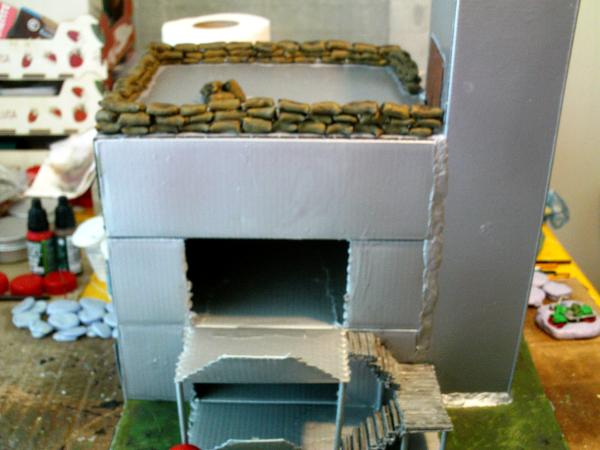
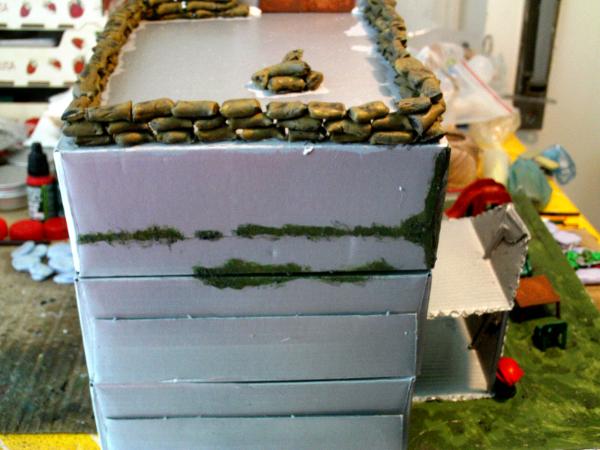
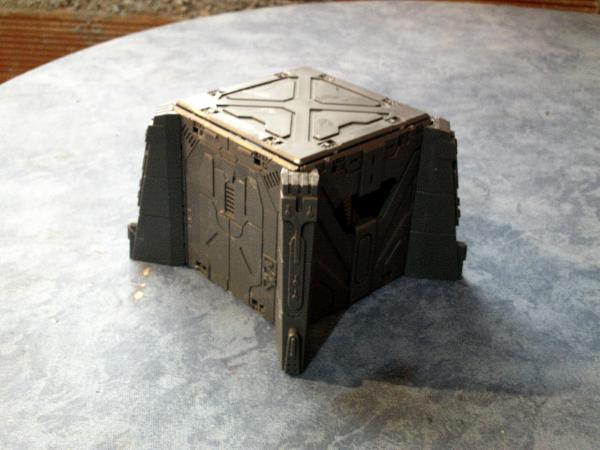
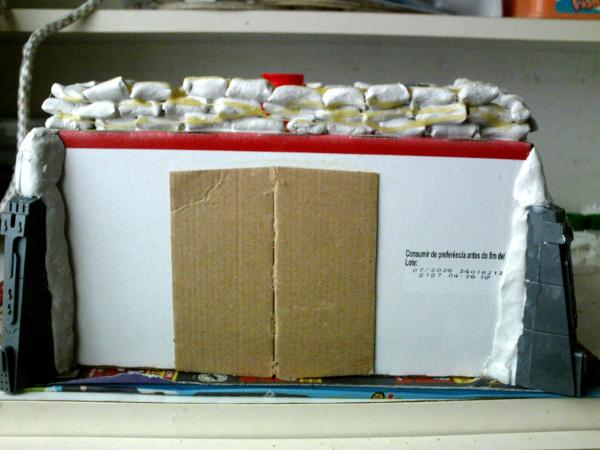
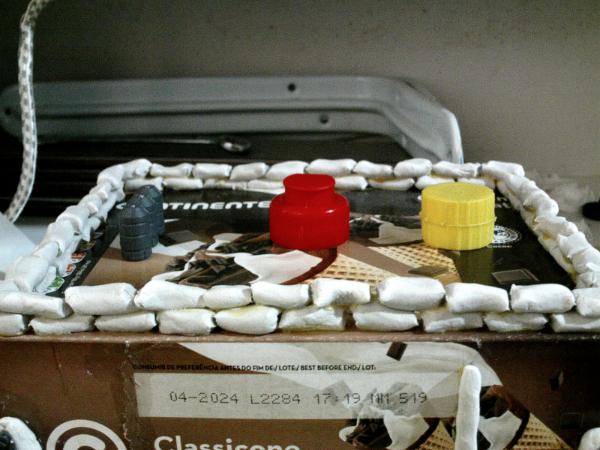
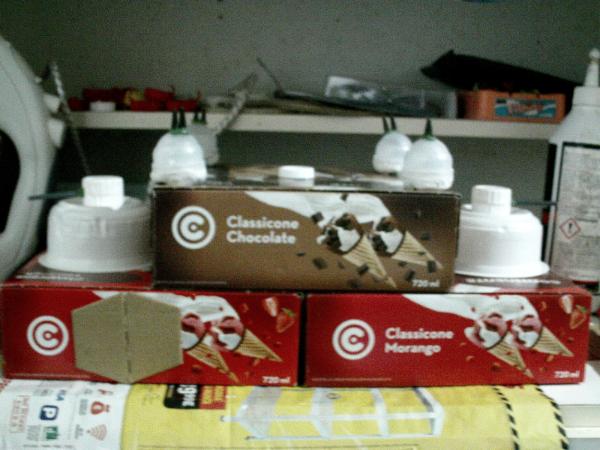
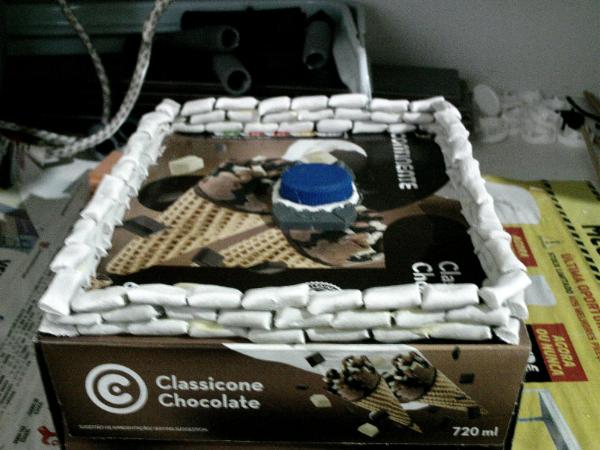
The first one is basically just a bunker/fortified building with a flat top that I can use to place infantry soldiers or small turrets. It is made from a cardboard box, some of the spare bits, along with some garbage and air drying clay for the sandbags and other additions.
The weather forced me to add some extra glue after the initial build, but most of the extra bits of glue that look bad will be removed before I paint it.
Still not sure at the moment if I will leave the building with relatively smooth walls or add some sand over the walls to add texture as I have done in the past with some bridges and mini bunkers.
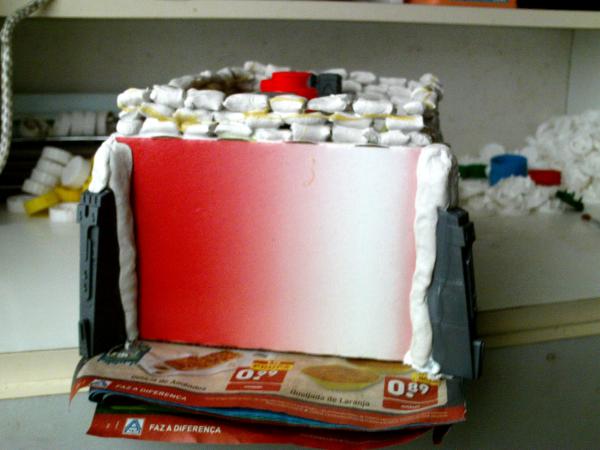
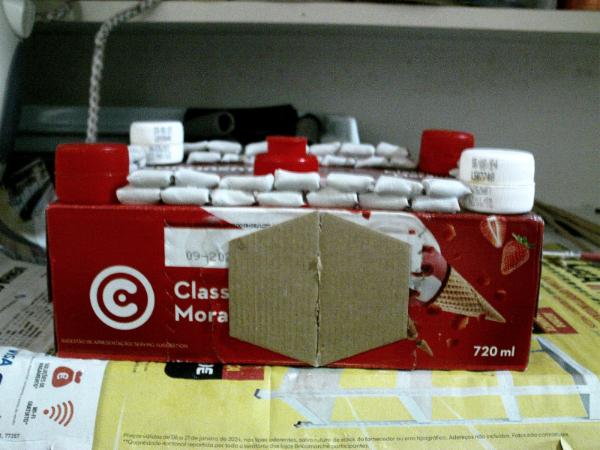
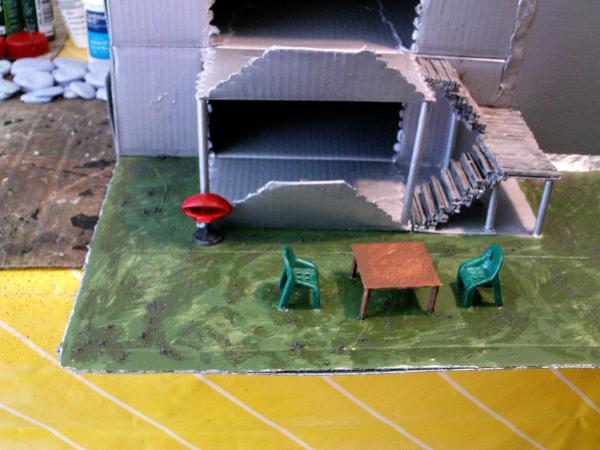
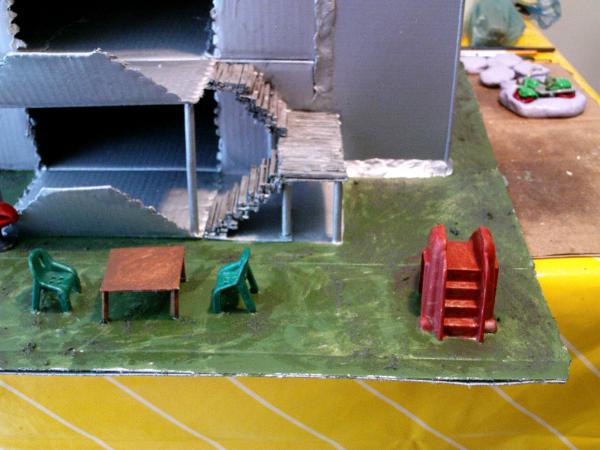
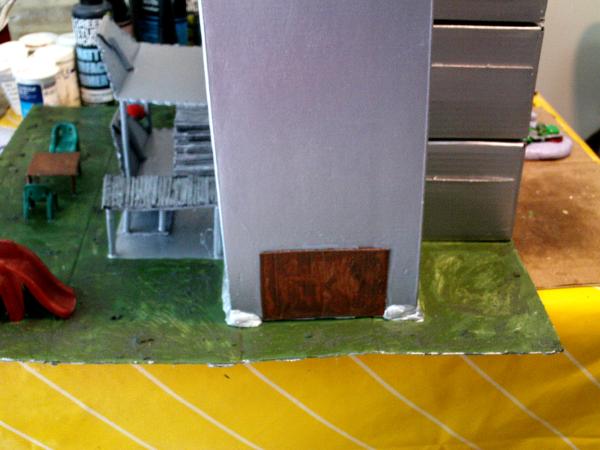
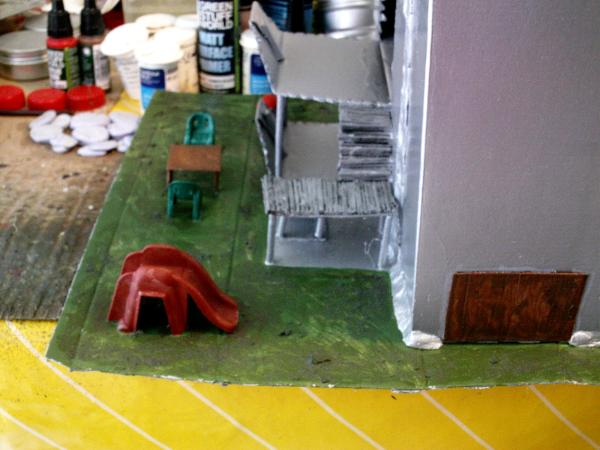
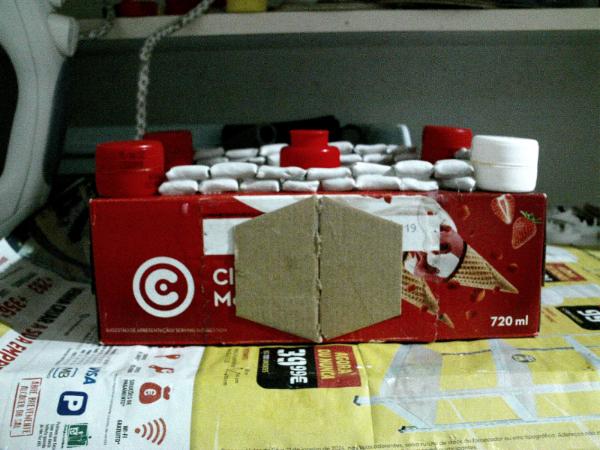
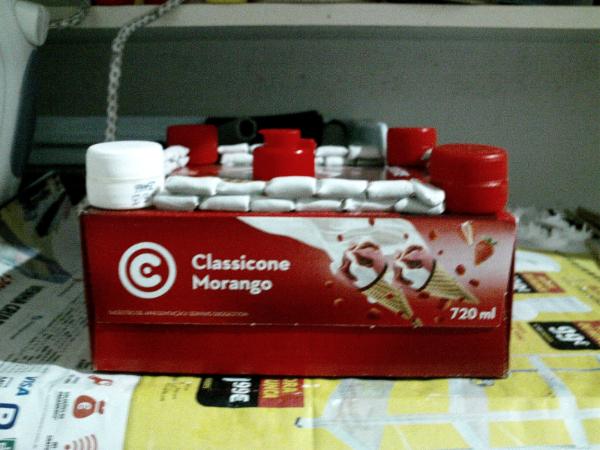
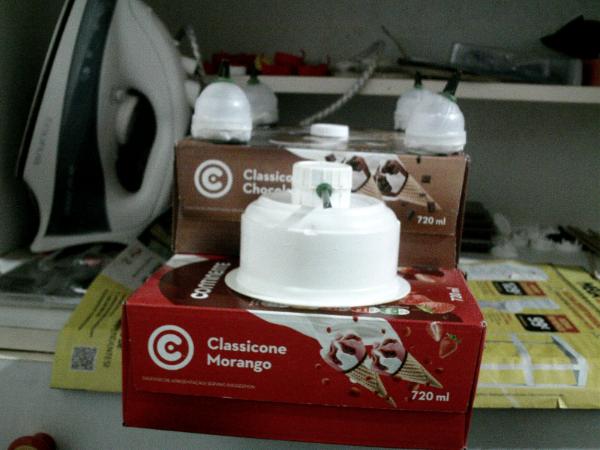
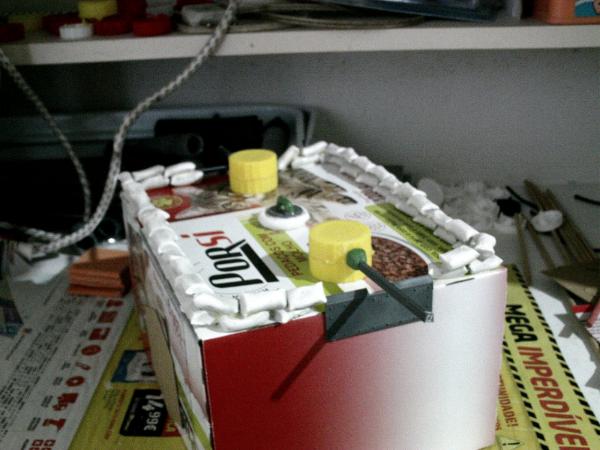
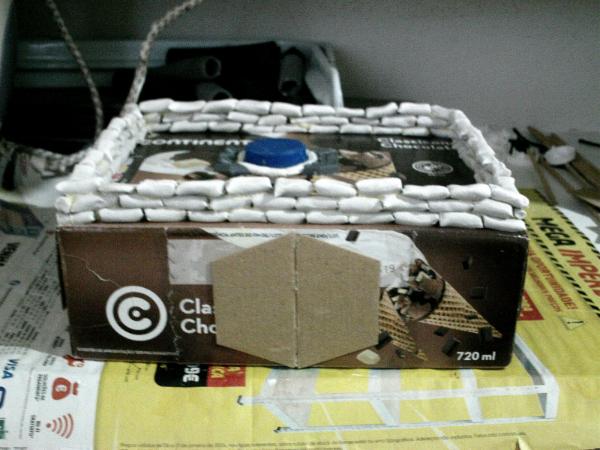
The second building is somewhat similar to the first, but uses a shorter and slightly wider box. It provides a wider space for miniatures on top so I might be able to place larger infantry and perhaps even some HWT. It has a closed hatch like the first building as an access point from the interior to the top of the building.
I might use some bottle caps to make open hatches in the future but for that I will need to bring additional material to the farm, including the body parts to build the soldier moving through the hatch.

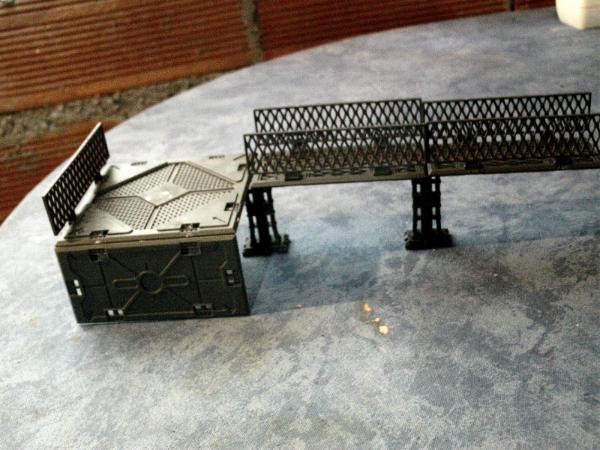
Currently on the workshop are two short bridges/walkways which I am building as paved paths in order to spend some more of the spare bits.
After those are completed I should move on to some more cardboard buildings to spend the last few bits from Mantic's sets.
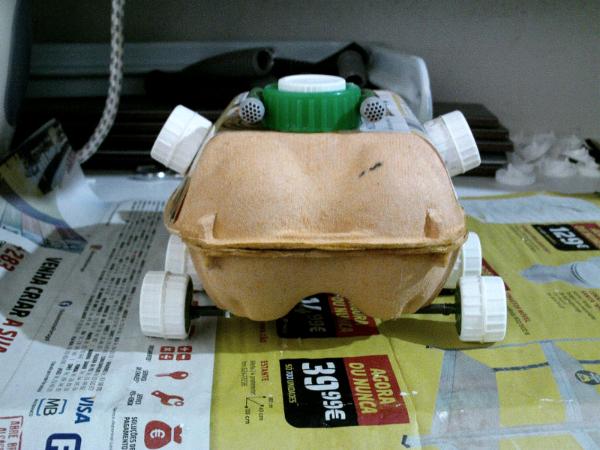
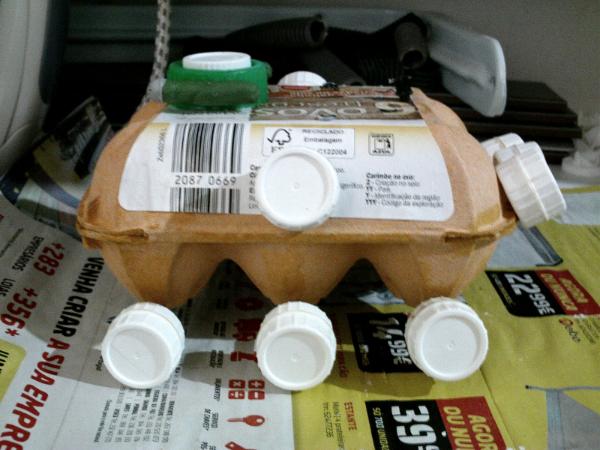
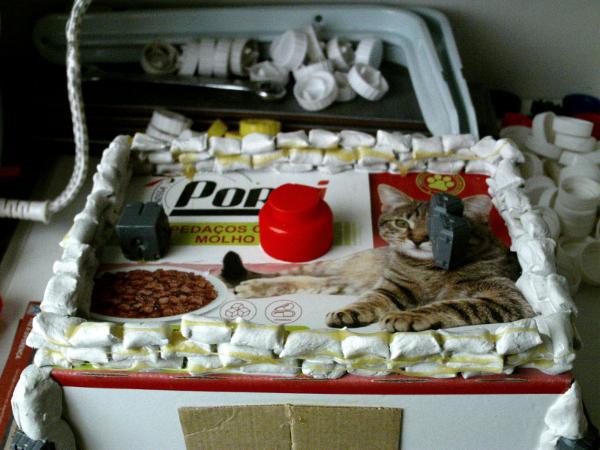
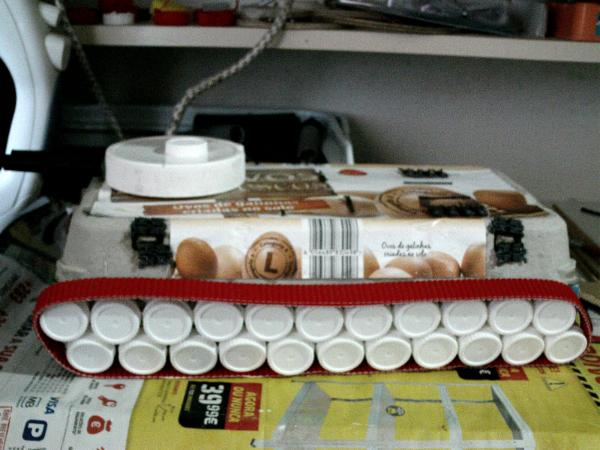
Some of the bottle caps seen on the back of some of the pictures will be used for decoration on terrain or as wheels for vehicles (thinking about starting with some armoured transports next week based on cardboard boxes for eggs), while others will be the internal wheels for vehicles with tracks.
|
|
|
|
|
|
2024/11/25 16:54:49
Subject: GreenScorpion's Workshop
|
|
Regular Dakkanaut
|
|
|
|
|
|
|
2024/11/29 17:14:19
Subject: GreenScorpion's Workshop
|
|
Regular Dakkanaut
|
|
|
|
|
|
|
2024/11/29 21:30:11
Subject: GreenScorpion's Workshop
|
|

Ragin' Ork Dreadnought
Deep in the Outer Boroughs of NYC
|
Good looking stuff so far. Keep it up.
|
|
|
|
|
|
2024/12/02 17:31:47
Subject: GreenScorpion's Workshop
|
|
Regular Dakkanaut
|
Thank you Warboss_Waaazag!
I have a few more updates today, some related with progress on the Farm and some from the progress at home.
Farm Progress Update
I have worked on another fortified building made from a cardboard box, which can be combined with the previous ones to create a defensive line (might need to create some wall sections in between but that is easy enough).
Next on the queue is a tracked vehicle which I should start with today (the base of the chassis will be another egg box).
Home Progress Update
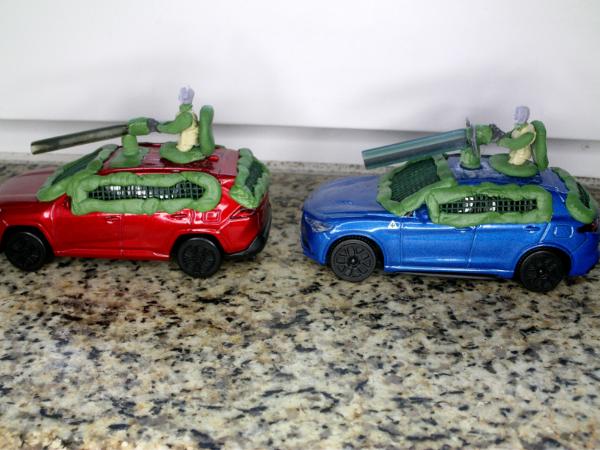
I worked on a few converted cars (1/43 scale) to serve as mobile light vehicles with a slightly post apocalyptic look. I have made a few similar cars before and once painted they look decent enough to resemble something from Mad Max or similar settings.

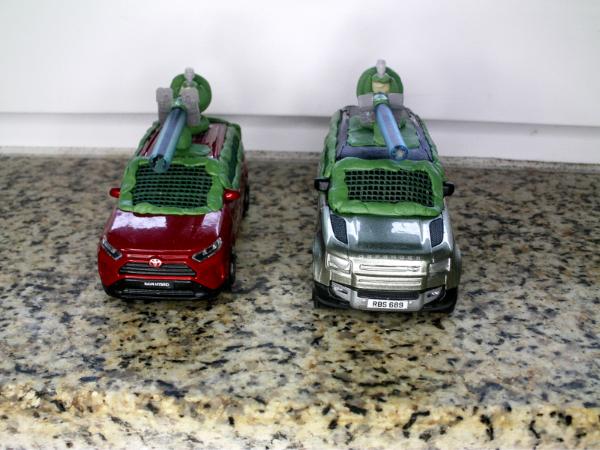
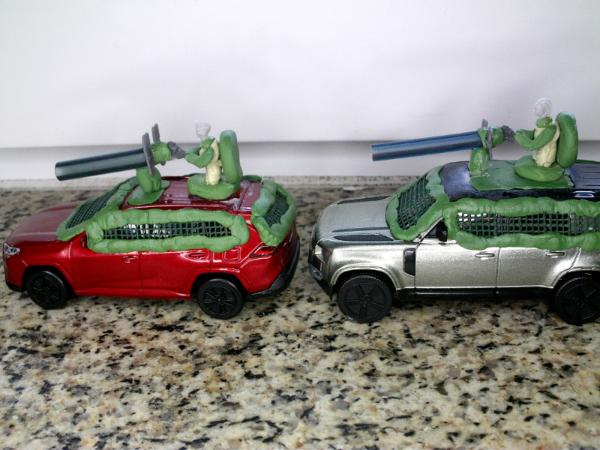
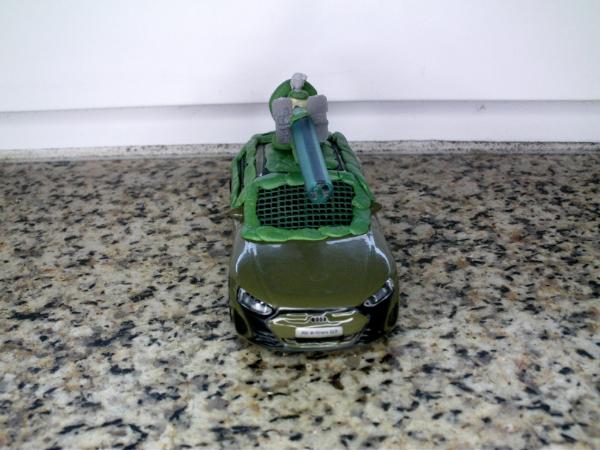
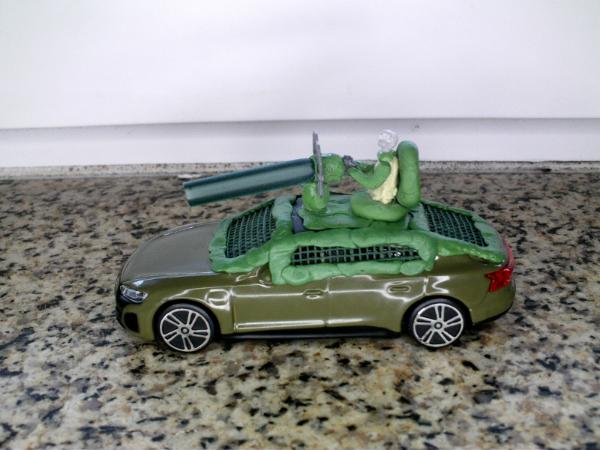
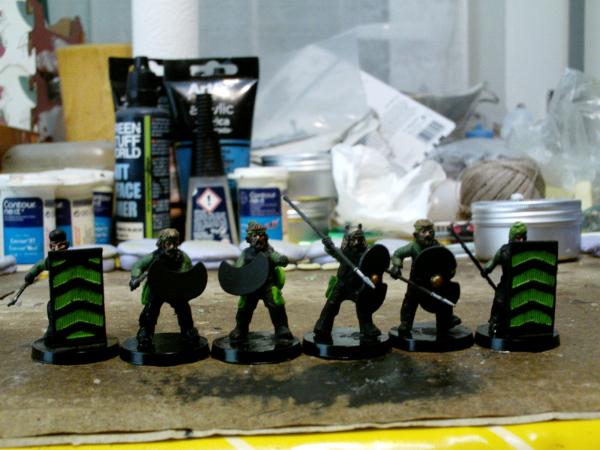
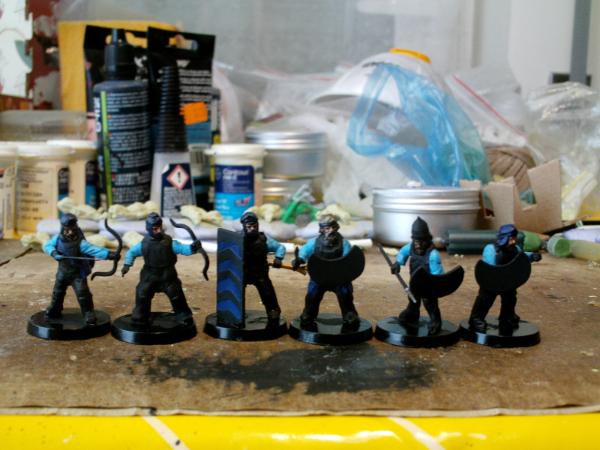
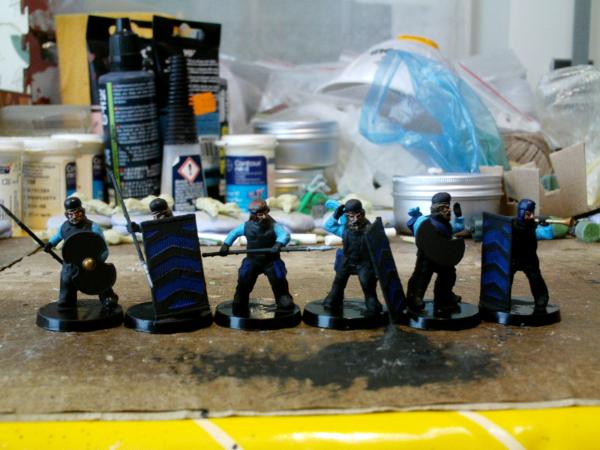
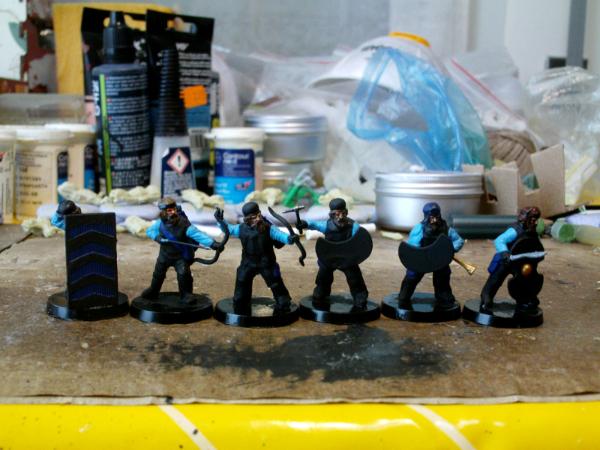
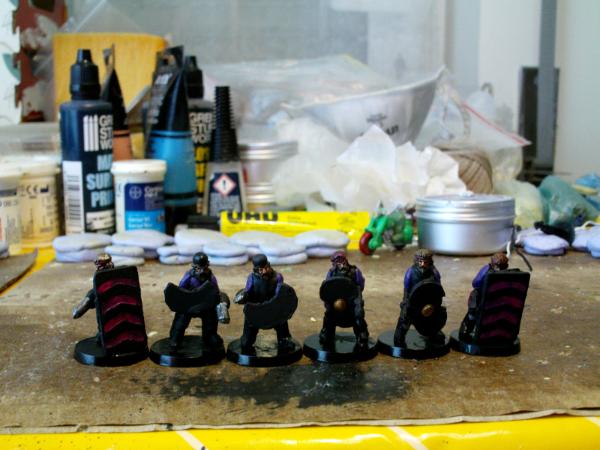
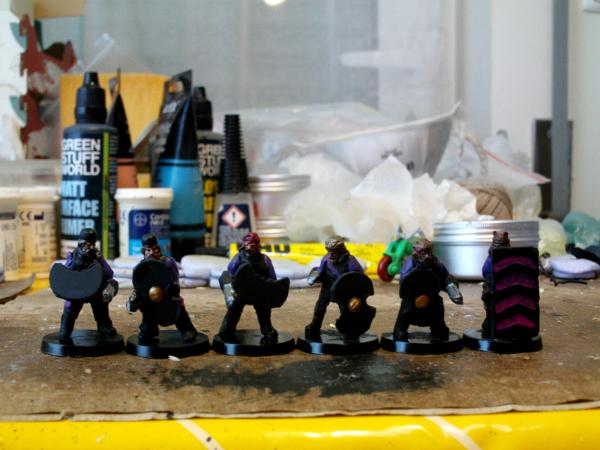
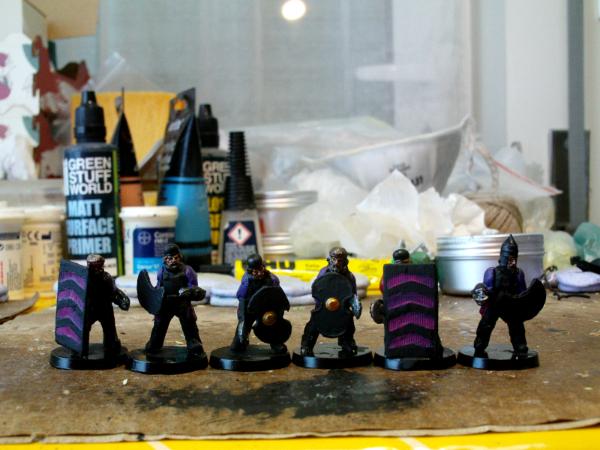
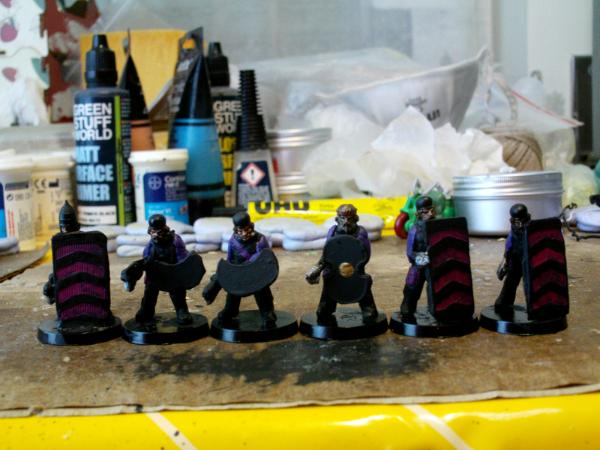
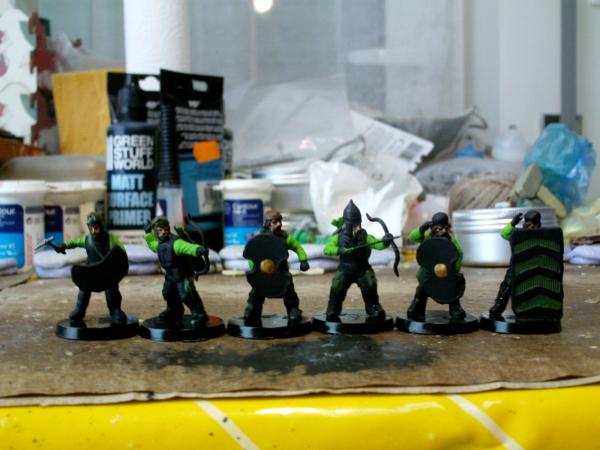
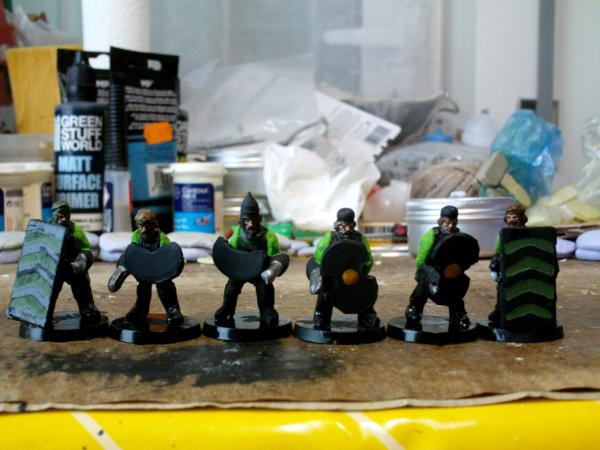
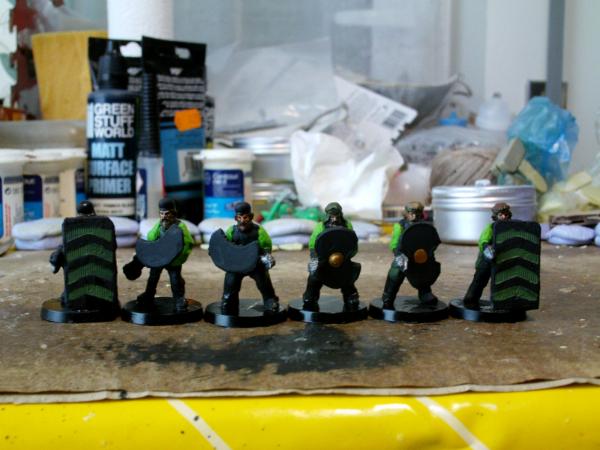
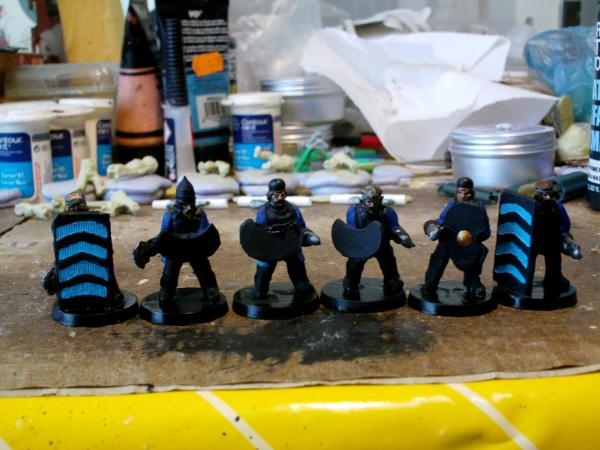
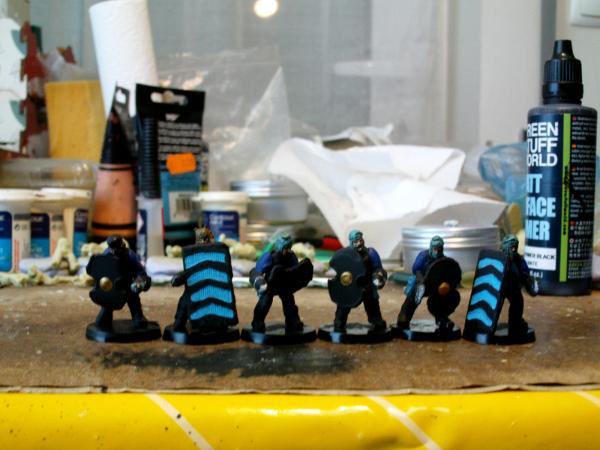
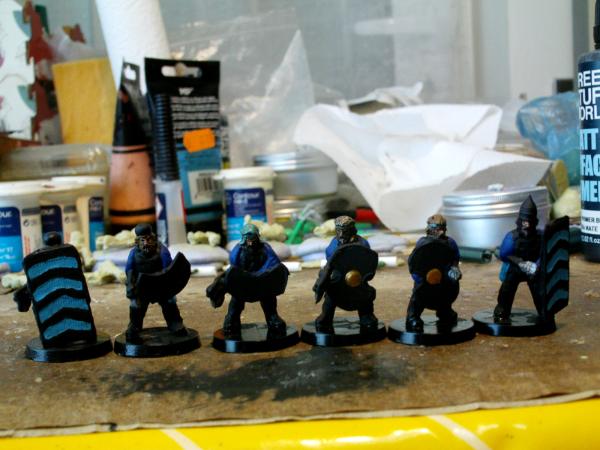
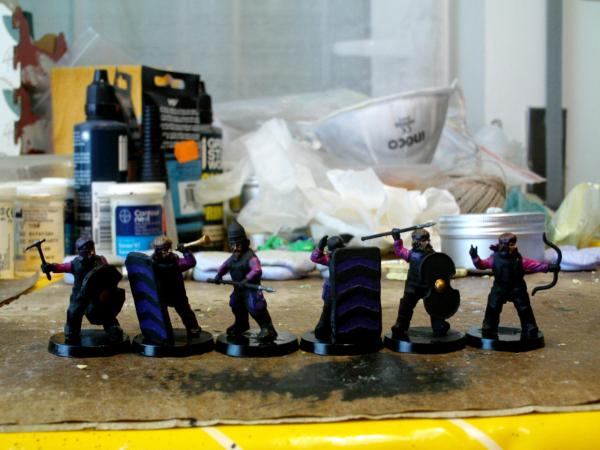
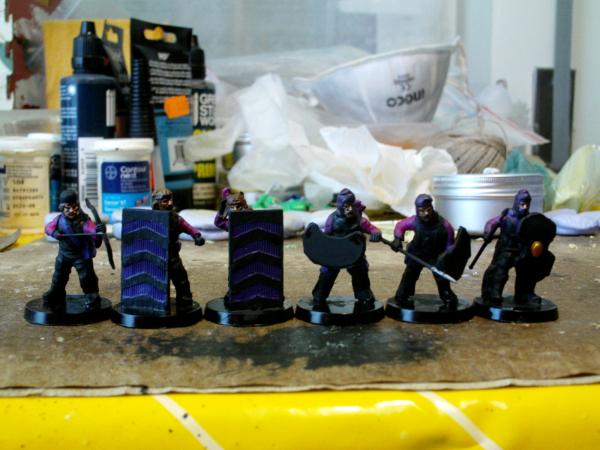
I also had some time to paint another batch of infantry over the weekend, which consists of 30 conversions based on Wargames Atlantic Persians and Stargrave Crew bodies.
Now at 180 out of the 480 conversions of this kind. Should have time to paint another 120 before the year ends (30 per weekend).
This batch has an inverted version of the main 2 colours I used on the previous batch.
The next thing on the workbench at home is a series of Heavy Weapon Teams which should allow me to spend the spare ammo drums for the autocannons from the Cadian HWT I have built some years ago. The end result should look similar to the artillery emplacements I have shown before but with different sets of parts as debris.
|
|
|
|
|
|
2024/12/06 18:00:56
Subject: GreenScorpion's Workshop
|
|
Regular Dakkanaut
|
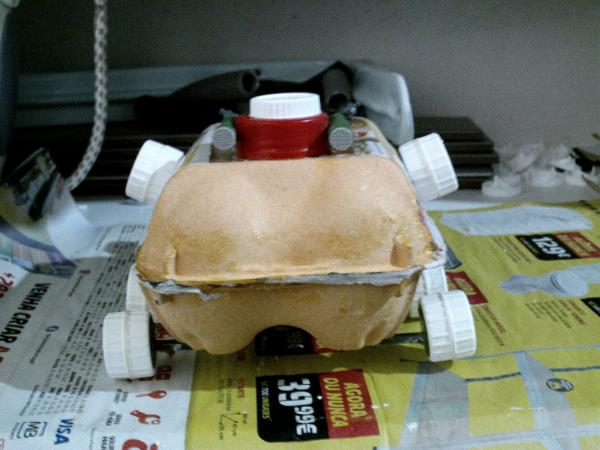
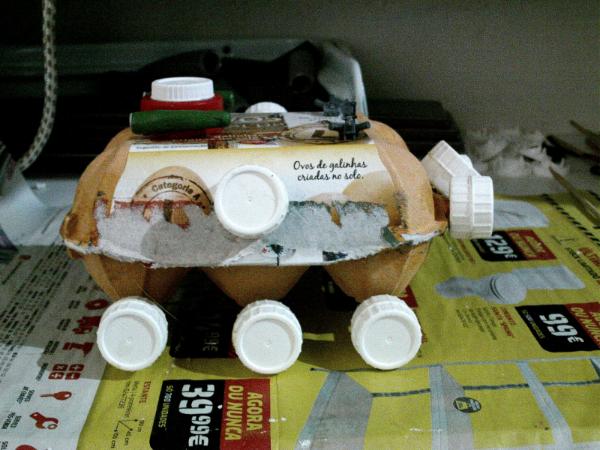
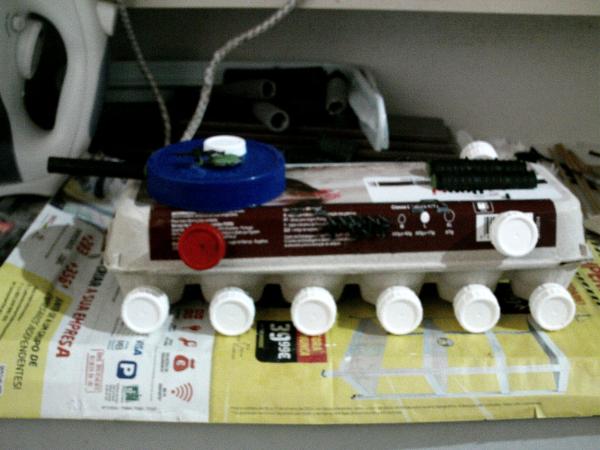
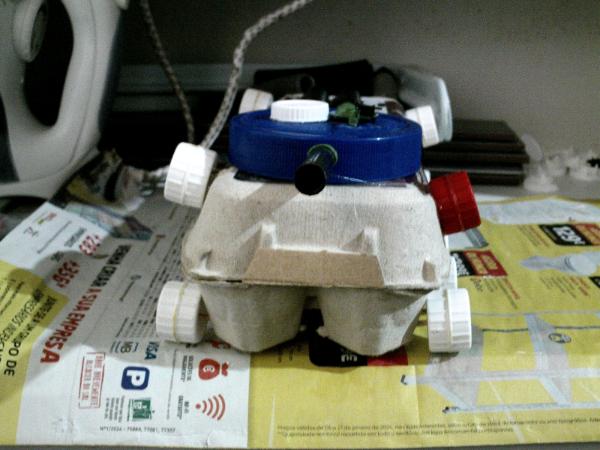
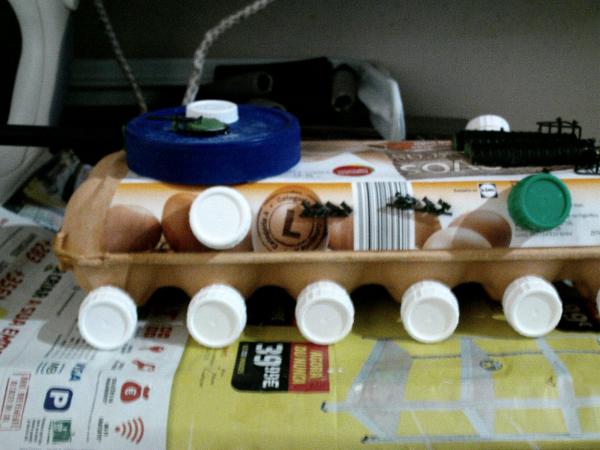
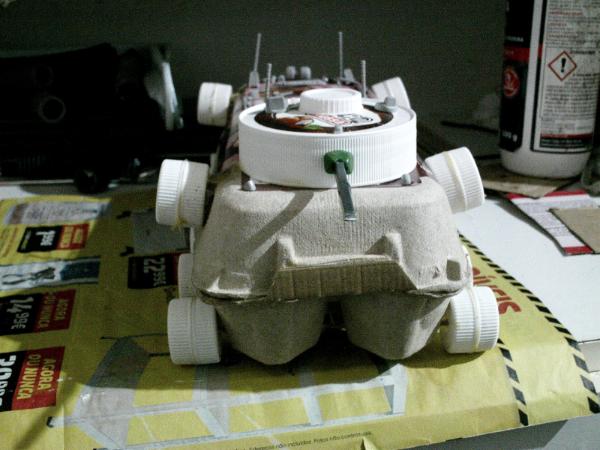
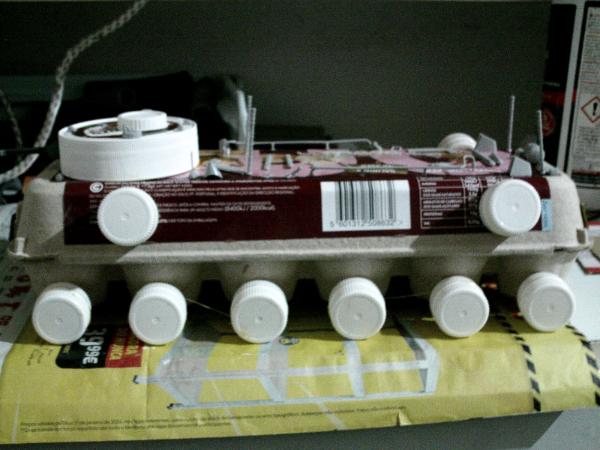
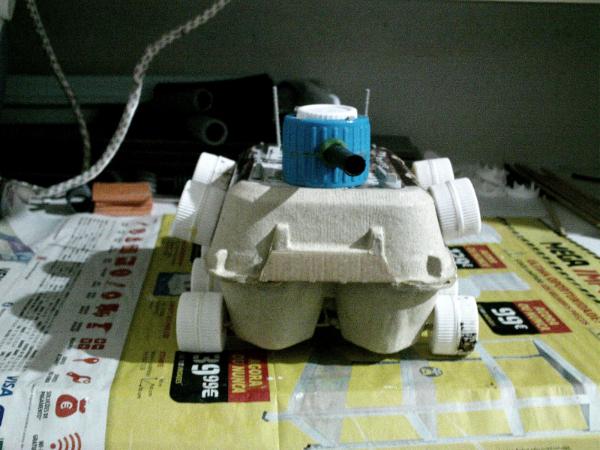
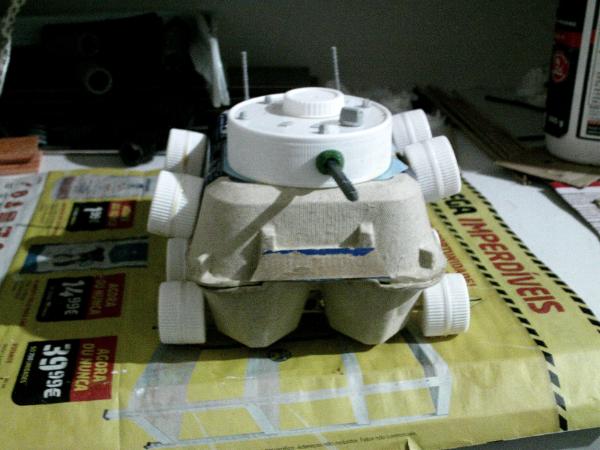
A few Farm related updates for today (more egg box based vehicles).
Farm Progress Update
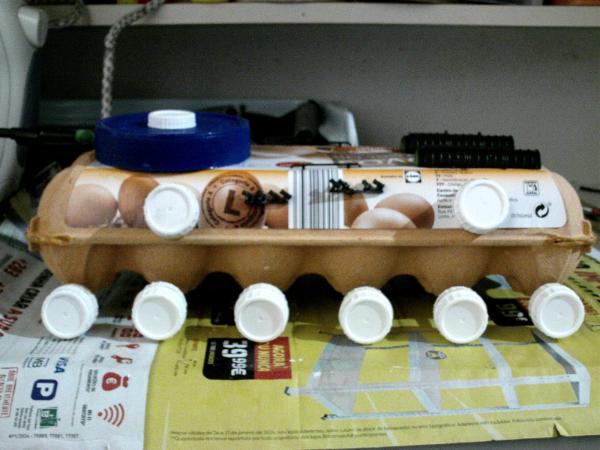
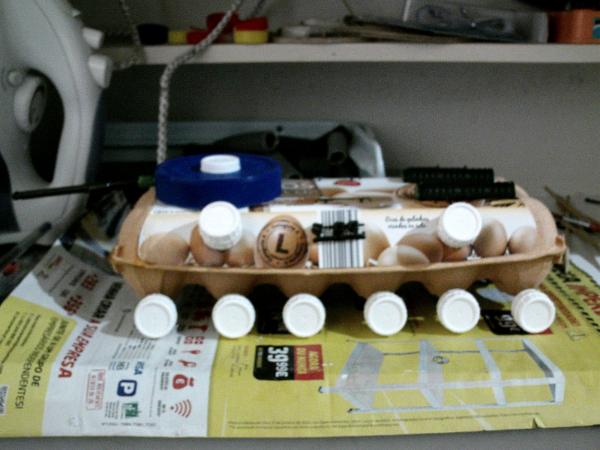
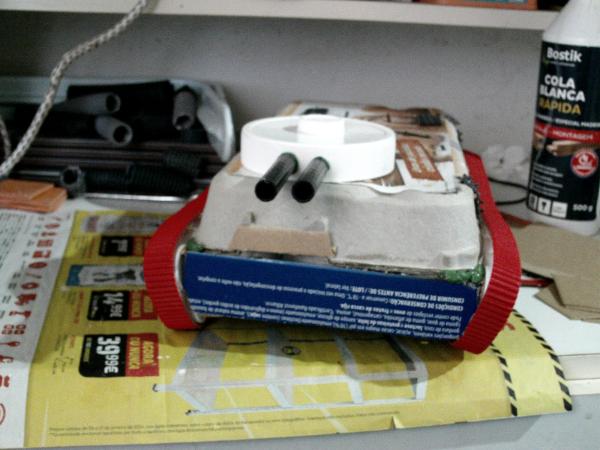
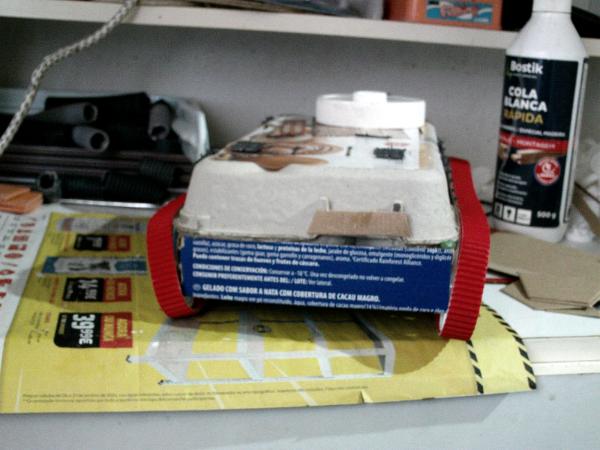
As I had mentioned previously I worked on a large tracked vehicle mostly made out of pieces of cardboard and some plastic bottle caps.
I added a few bits from some historical tank kits to have some gear on the chassis.
In case anyone is wondering the chassis is around 30cm long and 15cm wide without counting the tracks.
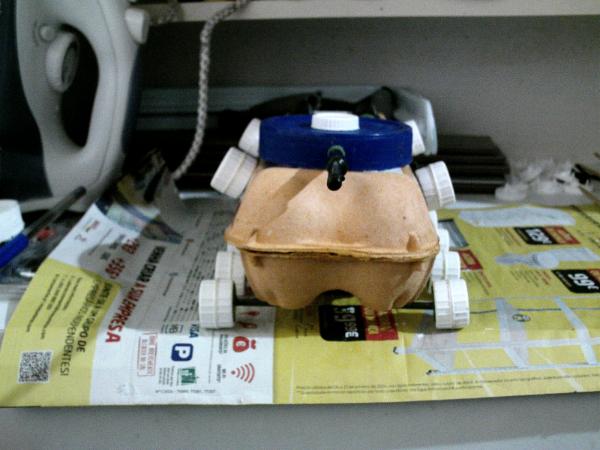
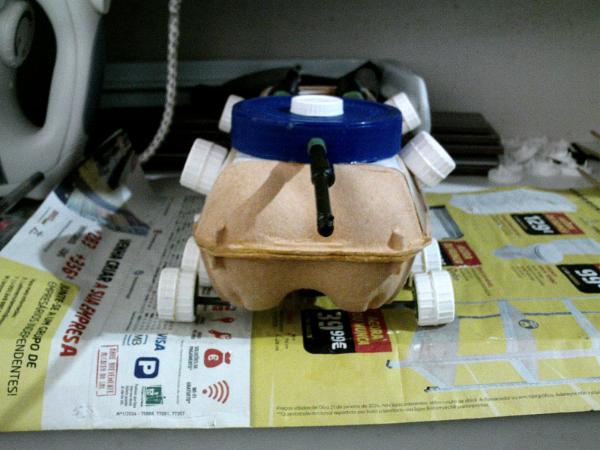
I have also worked on a couple more armoured vehicles with wheels which are similar to the ones I had shown here before.

Currently on the build queue is a larger fortified building made from cardboard boxes which should be equipped with a few automated turrets for defence (basically a set of weapon emplacements on a single building).
|
|
|
|
|
|
2024/12/09 16:48:44
Subject: GreenScorpion's Workshop
|
|
Regular Dakkanaut
|
Today's update is a short one as I have cut myself on a thumb with a bit of glass, so I didn't manage to do everything I had planned for the weekend (thumbs are more important then I usually realize in my hobby activities).
Home Progress Update
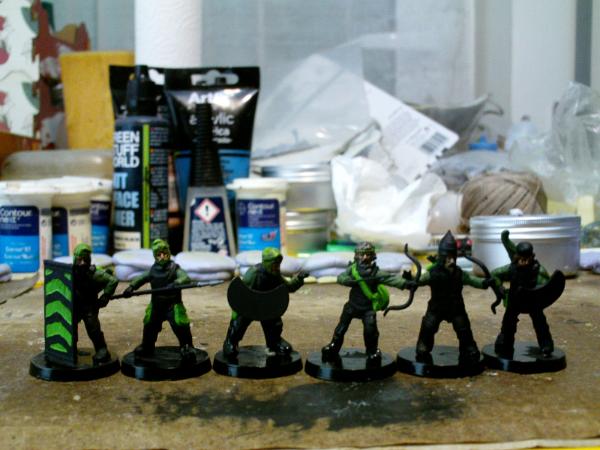
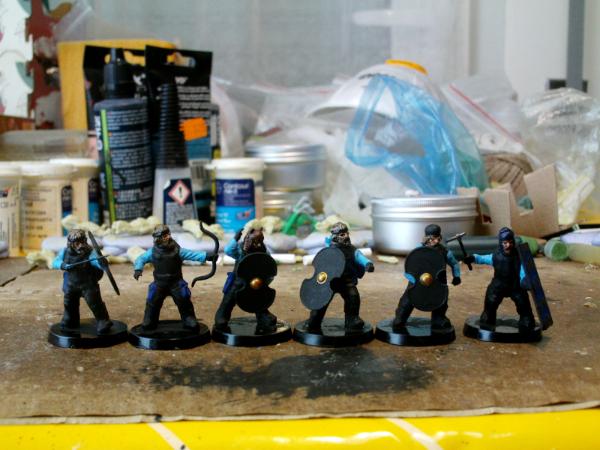
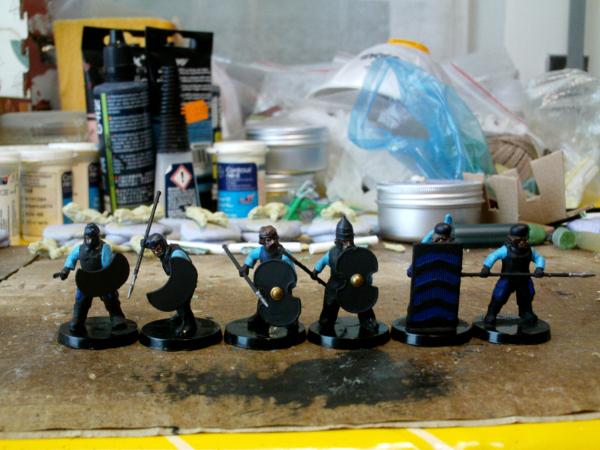
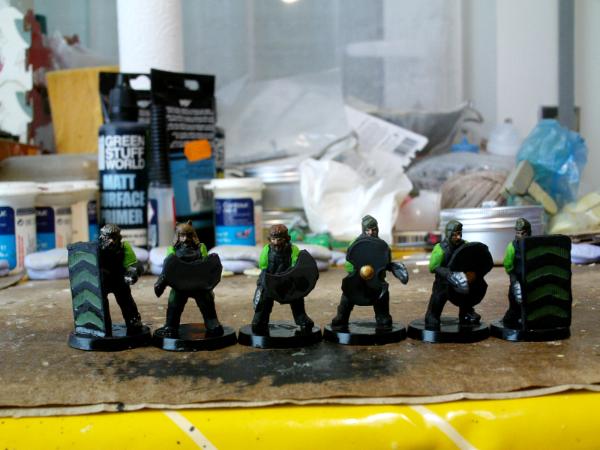
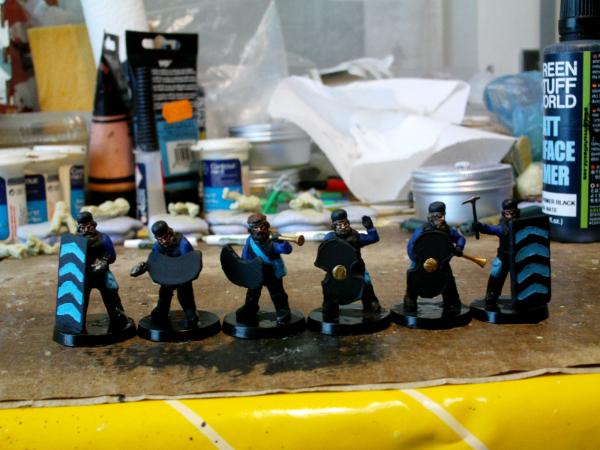
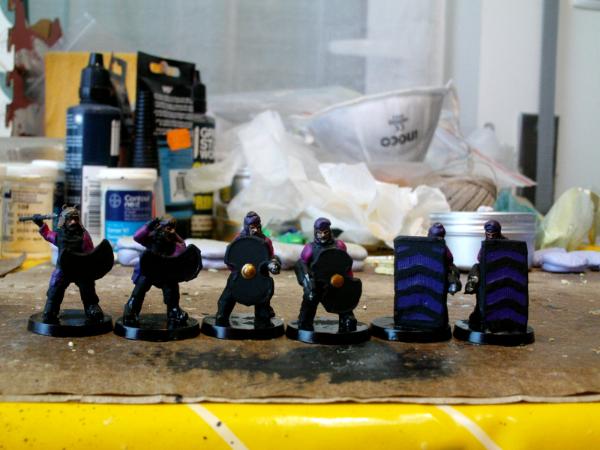
Despite some issues while holding miniatures while painting them, I managed to paint another batch of infantry over the weekend, which consists of 30 conversions based on Wargames Atlantic Persians and Stargrave Crew bodies. The scheme is similar to the one used in the previous batches, but with the 2 main colours changed as I like to have each batch in different colours (painting hundreds of miniatures all in the same set of colours would be rather boring).
 Farm notes
Should make some more progress today on the building I am working on at the moment on the farm. If all things go well I might finish it and start preparing some vehicles for tomorrow and the rest of the week.
I also spray painted a few small branches that I am planning to use as trees which should have some crows/ravens for decoration (including 2 nests). No pictures right now, but I might take some pictures once the birds are in place. The branches were glued to a bit of wood which resembles a small rocky slope, so I might paint the base in grey to make it look like the trees grew out of the spaces between the rocks along the slope.
|
|
|
|
|
|
2024/12/11 17:45:10
Subject: GreenScorpion's Workshop
|
|
Ragin' Ork Dreadnought
Deep in the Outer Boroughs of NYC
|
Ugh, thumb cuts suck. I lucked out with an index finger cut, but it still makes doing stuff challenging. Never realized how much I use my left pointer as stable platform for fiddling with parts. Swift healing to you!
I love your use of egg cartons for tank bodies. I'm looking forward to seeing those painted up.
|
|
|
|
|
|
2024/12/11 18:07:39
Subject: GreenScorpion's Workshop
|
|
Regular Dakkanaut
|
 Warboss_Waaazag wrote: Warboss_Waaazag wrote:Ugh, thumb cuts suck. I lucked out with an index finger cut, but it still makes doing stuff challenging. Never realized how much I use my left pointer as stable platform for fiddling with parts. Swift healing to you!
I love your use of egg cartons for tank bodies. I'm looking forward to seeing those painted up.
Thank you! My thumb is healing nicely and since Monday it is no longer hurting, so I should be 100% in a few more days.
I have built a few things out of cardboard, plastic packages and a few other things over the last couple years, including some old toys that were broken or in poor state (rodents did some damage to some of the stuff on the farm over the years). It feels good to reuse what I would otherwise no longer use in any capacity and would be thrown out for recycling or general waste depending on the material.
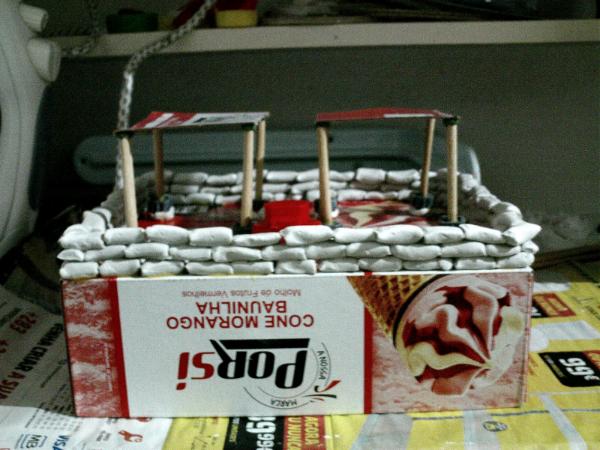
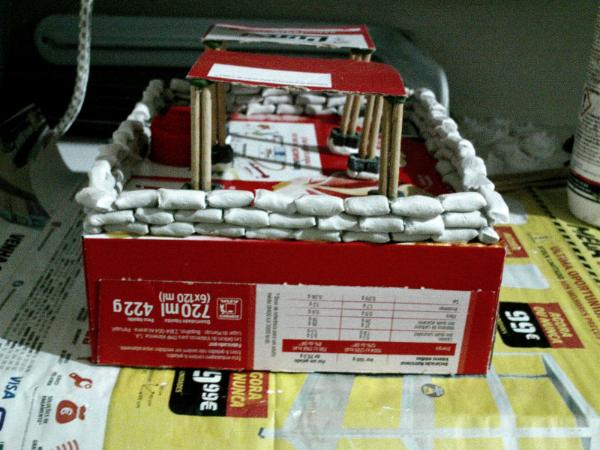
For reference here is the fortress made with matches which I mentioned on your thread. It took me over a decade from start to finish but in terms of actual hobby time spent on it I would say it took about 18 months of 30-60 minute sessions to get it done.
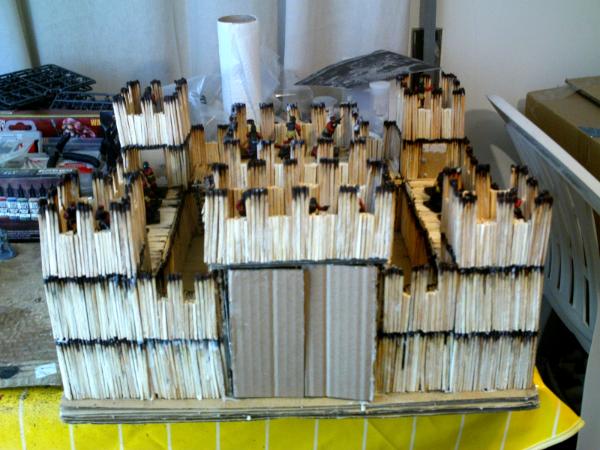
Still need to get it painted though, it is currently on my paint queue, but hopefully I should start painting it very soon as I am progressing through stuff I built in 2022 at the moment.
|
|
|
|
|
|
2024/12/11 18:11:44
Subject: GreenScorpion's Workshop
|
|
Ragin' Ork Dreadnought
Deep in the Outer Boroughs of NYC
|
I'm impressed that you used burnt matches for this project.
|
|
|
|
|
|
2024/12/11 18:29:51
Subject: GreenScorpion's Workshop
|
|
Regular Dakkanaut
|
To be honest it was one of those times when the idea seemed great at the time and then I just continued because I wanted to see it done (it was a nice experience and I enjoyed doing it, it simply is very time consuming, inefficient and frustrating from time to time).
I doubt I would ever make anything of that size with just matches again, but I have made some small huts for snipers after that with matches, but that was several dozens of matches in total not thousands so it was manageable.
|
|
|
|
|
|
2024/12/11 19:03:24
Subject: GreenScorpion's Workshop
|
|

Boom! Leman Russ Commander
|
very inspiring trash terrain and scratch builds you've got there! I like them a lot! The fortress is mighty nice!
|
40k: Necrons/Imperial Guard/ Space marines
Bolt Action: Germany/ USA
Project Z.
"The Dakka Dive Bar is the only place you'll hear what's really going on in the underhive. Sure you might not find a good amasec but they grill a mean groxburger. Just watch for ratlings being thrown through windows and you'll be alright." Ciaphas Cain, probably. |
|
|
|
|
2024/12/12 11:48:29
Subject: GreenScorpion's Workshop
|
|
Regular Dakkanaut
|
Thank you! There are more pictures of the fortress in my gallery in case you want to have a look.
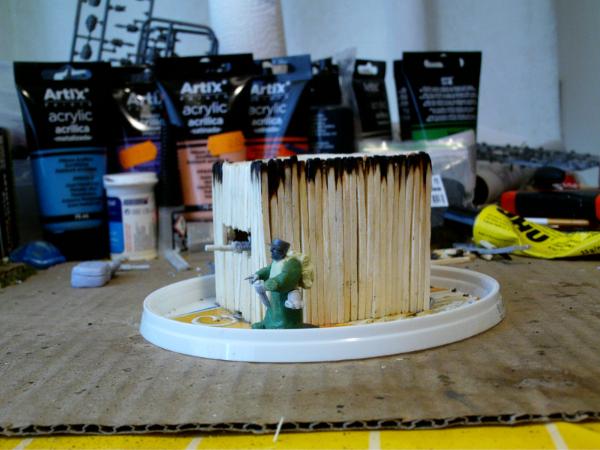
In case anyone is interested, I have searched for the pictures of my sniper huts and uploaded them on my gallery, here are a few pics (including a WIP pic to show the interior layers):

Now onto the updates of things I have been working on lately.
Farm Progress Update
I have built the large fortified building I had mentioned earlier, it has 2 main cannons on the sides and 4 anti-air turrets on the top and could be used as a strong defensive position as part of a wall or something similar. The gap in the middle will likely be covered when the building gets a coat of sand and glue to add some texture before painting.
I also spray painted the mini tree I have mentioned earlier for my crows/ravens nests (a kit 3d printed by greenstuff world). After the pic I had the chance to spray a bit of green on the leaves, but it is still drying. I still need to plan the logistic on how to get my paints from home to the farm so I can do the brush based painting and add the actual miniatures into it. The base is made of wood but it looks like a rock outcrop so that is what I will paint it as.
I also made a few more vehicles out of egg boxes. These should be the last ones for now, but I have a might armoured force right now, so that is ok.


Finally, I worked on a few defensive positions and fortifications, including 3 weapon emplacements, 3 towers with sandbags on top and some steps on the side to allow soldiers to climb (made from handles from the leman russ kits), as well as 2 small barriers which can be used by infantry to take cover from enemy fire.
That is all for today, next on the queue are a few more buildings to spend a few more spare parts from kits I bought over the years.
|
|
|
|
|
|
2024/12/12 11:59:40
Subject: GreenScorpion's Workshop
|
|
Boom! Leman Russ Commander
|
nice work, inspiring again when I come back to making hobby stuff I might look at these photos for ideas!
I gave a look to the gallery and was wondering whether the middle tower was glued on a base or removable?
|
|
This message was edited 1 time. Last update was at 2024/12/12 12:01:39
40k: Necrons/Imperial Guard/ Space marines
Bolt Action: Germany/ USA
Project Z.
"The Dakka Dive Bar is the only place you'll hear what's really going on in the underhive. Sure you might not find a good amasec but they grill a mean groxburger. Just watch for ratlings being thrown through windows and you'll be alright." Ciaphas Cain, probably. |
|
|
|
|
2024/12/12 12:56:25
Subject: GreenScorpion's Workshop
|
|
Regular Dakkanaut
|
 Maréchal des Logis Walter wrote: Maréchal des Logis Walter wrote:nice work, inspiring again when I come back to making hobby stuff I might look at these photos for ideas!
I gave a look to the gallery and was wondering whether the middle tower was glued on a base or removable?
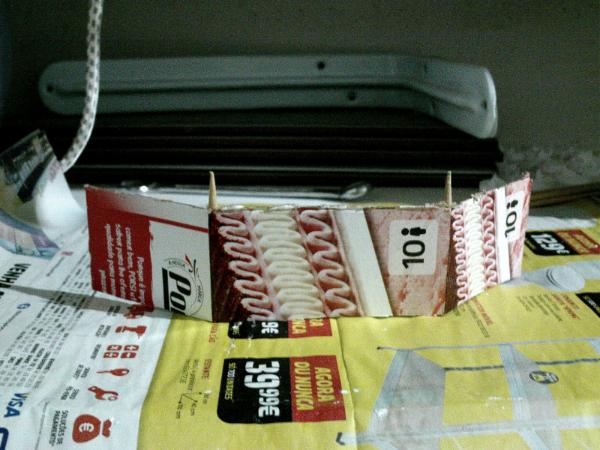
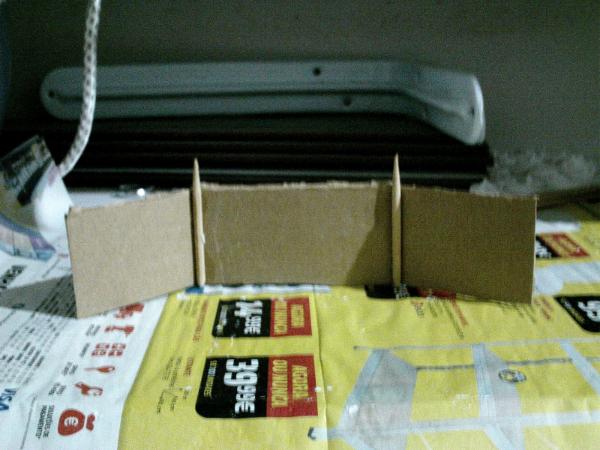
Thanks! The middle tower is glued to the same cardboard base I used for the entire fortress. When I started with it I wasn't really thinking about using it as terrain for miniatures, so I didn't really plan to make it configurable. However, the way I build it means it is a full building with a base made of matches on the bottom, so if I had managed to make it a separate thing at the time it would work as a relatively durable building on its own.
The way I started the construction was rather simple, but it only worked well with the cardboard base for the initial layer, so the matches were attached to something.
I made a drawing of the overall shape of the central tower and the rest of the fortress based on the rough dimensions of the matches and then I glued the first layer of matches directly onto the cardboard, filling the shapes made by the pencil.
Then I added another layer of matches which are in a different orientation, giving strength to the structure, before I started raising the walls.
You can see hints of my process on the WIP picture of the sniper hut, which was built using roughly the same method.
If you want to make separate buildings my recommendation would be to create a good base with the correct size of the building in mind, something sturdy like cardboard or perhaps plasticard (not sure how pva glue works when glueing the matches and the plasticard together but it should work).
If you build in layers similar to what I did you can make the buildings quite tall without falling apart (well assuming you let each layer dry well before proceeding). Since the towers and walls are hollow, it is pretty light for its size and you can add supports on the corners to get 90º angles that look better than what I did with no supports on the inside.
If you end up wanting to build something similar let me know and I can make a more in depth guide on how I planned it and built it.
|
|
|
|
|
|
2024/12/12 14:26:12
Subject: GreenScorpion's Workshop
|
|
Boom! Leman Russ Commander
|
i'll keep that in mind jsut in case, though that won't be tomorrow, i've got no hobby time as of late apart from browsing dakka!
|
40k: Necrons/Imperial Guard/ Space marines
Bolt Action: Germany/ USA
Project Z.
"The Dakka Dive Bar is the only place you'll hear what's really going on in the underhive. Sure you might not find a good amasec but they grill a mean groxburger. Just watch for ratlings being thrown through windows and you'll be alright." Ciaphas Cain, probably. |
|
|
|
|
2024/12/12 17:18:16
Subject: Re:GreenScorpion's Workshop
|
|
Morally-Flexible Malleus Hearing Whispers
|
I can't do any hobby stuff until March, so im living vicariously through you.
|
 BorderCountess wrote: BorderCountess wrote:Just because you're doing something right doesn't necessarily mean you know what you're doing...
"Vulkan: There will be no Rad or Phosphex in my legion. We shall fight wars humanely. Some things should be left in the dark age."
"Ferrus: Oh cool, when are you going to stop burning people to death?"
"Vulkan: I do not understand the question."
– A conversation between the X and XVIII Primarchs
|
|
|
|
|
2024/12/12 17:27:40
Subject: GreenScorpion's Workshop
|
|
Boom! Leman Russ Commander
|
feel you bro!
|
40k: Necrons/Imperial Guard/ Space marines
Bolt Action: Germany/ USA
Project Z.
"The Dakka Dive Bar is the only place you'll hear what's really going on in the underhive. Sure you might not find a good amasec but they grill a mean groxburger. Just watch for ratlings being thrown through windows and you'll be alright." Ciaphas Cain, probably. |
|
|
|
|
2024/12/13 17:06:29
Subject: GreenScorpion's Workshop
|
|
Regular Dakkanaut
|
Maréchal des Logis Walter wrote:i'll keep that in mind jsut in case, though that won't be tomorrow, i've got no hobby time as of late apart from browsing dakka!
Don't worry, if you do have a chance to try out some of the things I have posted do let me know!
Lathe Biosas wrote:I can't do any hobby stuff until March, so im living vicariously through you.
Thank you!
I have a few more updates from the farm today.
Farm Progress Update
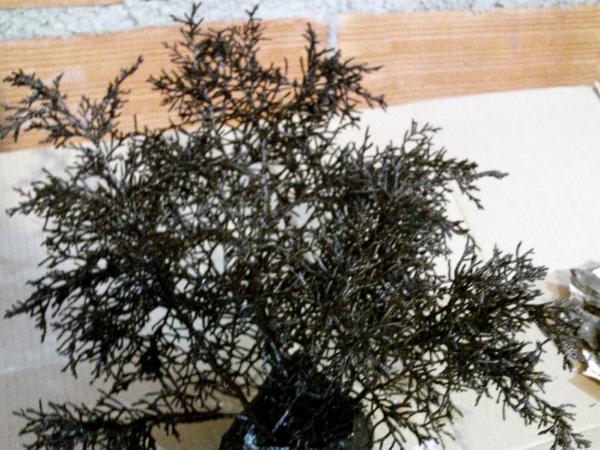
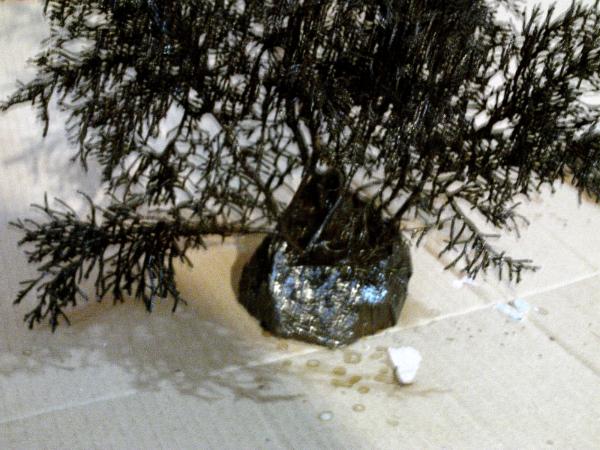
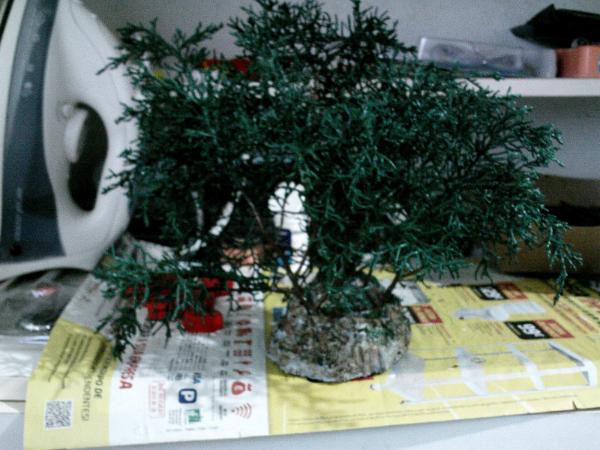
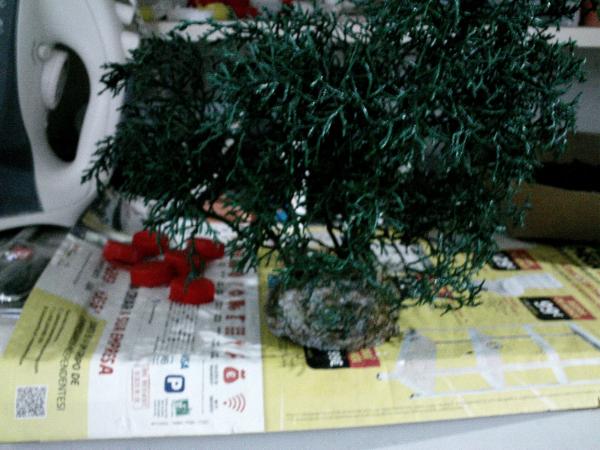
I didn't show the initial look of the small tree I have been working on for the crows/ravens, so I looked for a before pic:
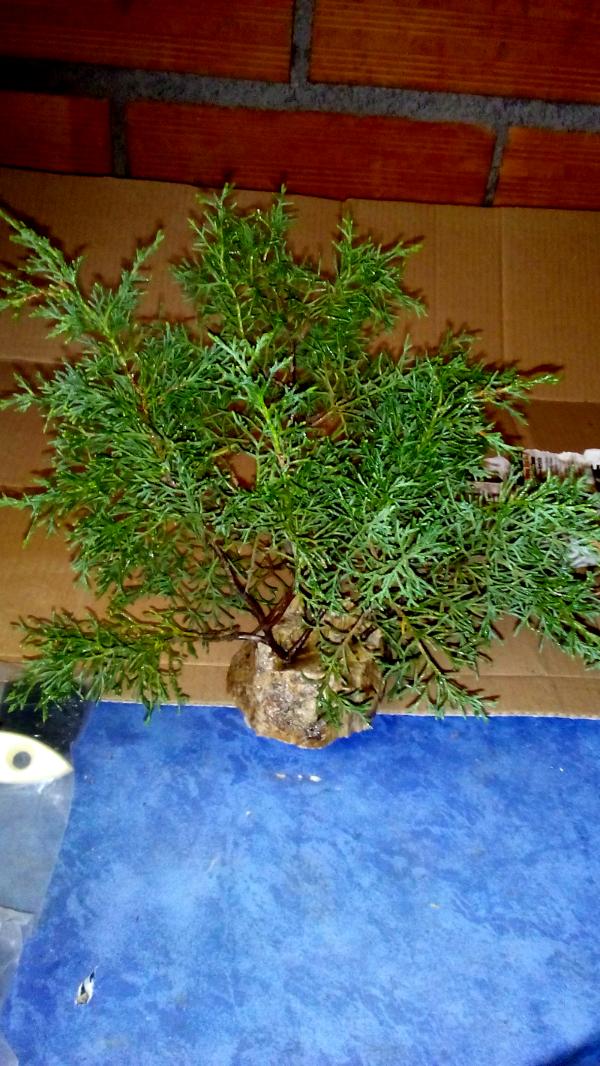
As you can see it is basically 3 different branches glued to a wooden base which will form a rock outcrop after painted.
Yesterday I managed to paint it with a green spray can over the leaves, so right now it looks like this:
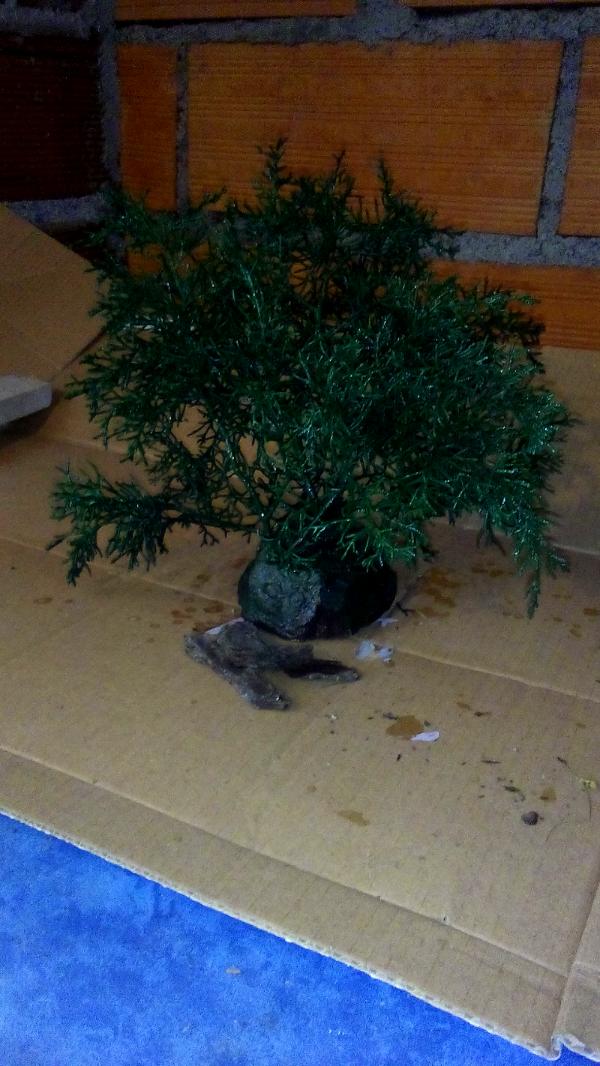
Next steps will be to paint the different areas that need corrections or to be covered in other colours (like some grey for the rock outcrop on the base) but that will be with brushes and I still need to think about the logistics for that sort of stuff since I will be painting on both the farm and the house, so things need to be carried from one side to the other. The crows/ravens and the nests will likely be painted at home and then just brought to the farm to be glued in place so that is mostly covered.
I also worked on a couple more fortified buildings, one with one cannon on each and another one with a large hatch which is made from some spare bits from the leman russ kit (the version with the plasma cannon).
Next in the queue should be a few more mini-bunkers with weapons on top and next week I should start making a few terrain related experiments which should broaden the horizons of what I can do if successful.
|
|
|
|
|
|
2024/12/16 16:53:31
Subject: GreenScorpion's Workshop
|
|
Regular Dakkanaut
|
|
|
|
|
|
|
2024/12/20 16:13:47
Subject: GreenScorpion's Workshop
|
|
Regular Dakkanaut
|
I have made some progress over the last few days so it is time for another update.
Farm Progress Update
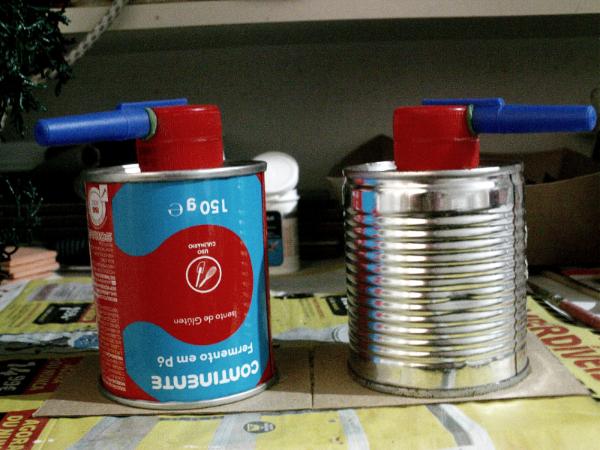
I started the week by working on a couple weapon emplacements made with cans and a few other pieces of garbage.
I then continued to work on the small tree for the crows/ravens, adding some colours and shades. Only thing missing at the moment is adding the actual nests and birds (more on that below).
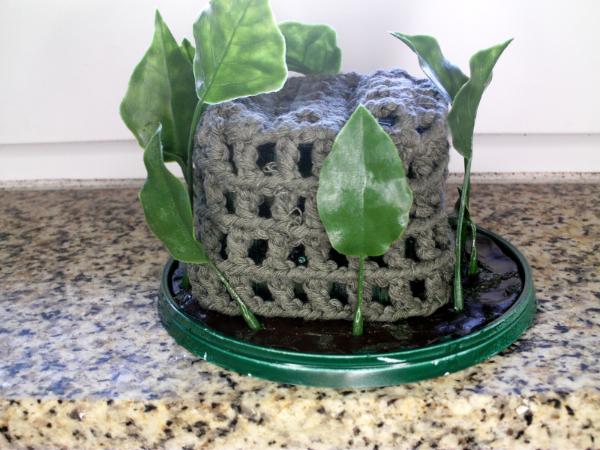
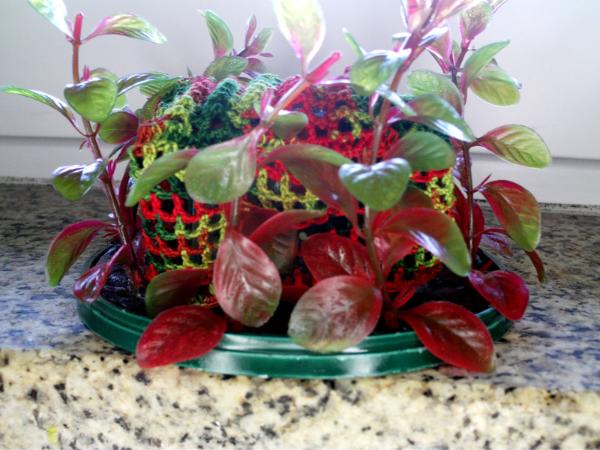
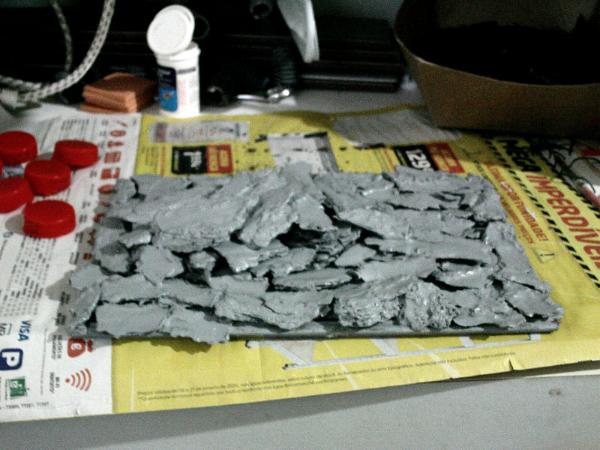
I also made some experiments with tree bark to make a rock outcrop which can be used as terrain for all sorts of purposes (thinking about potentially adding some skull trophies or something similar on the tallest part of the terrain).
It was initially painted with grey spray paint, before I added all of the other colours and details with a brush.
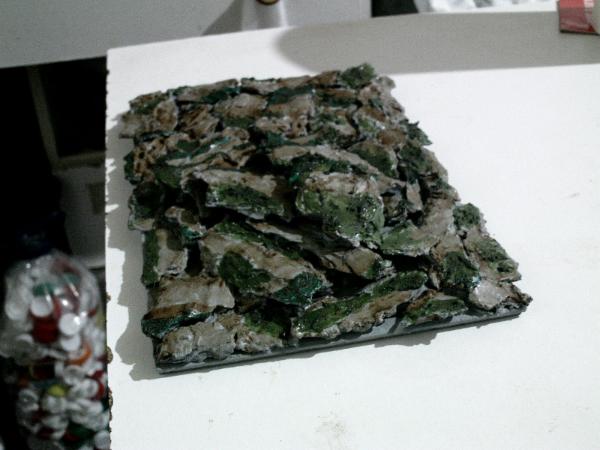
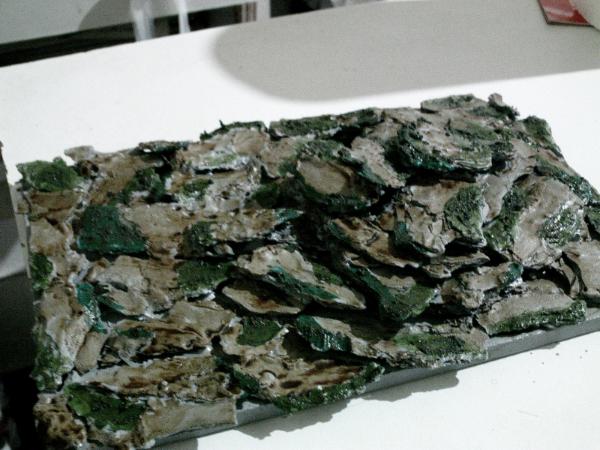
Probably more experiments to follow soon.
Home Progress Update
Today I managed to spend some time painting at home, so I finished up the crows/ravens and the nests which will need to be transported to the farm in order to finish the tree diorama.
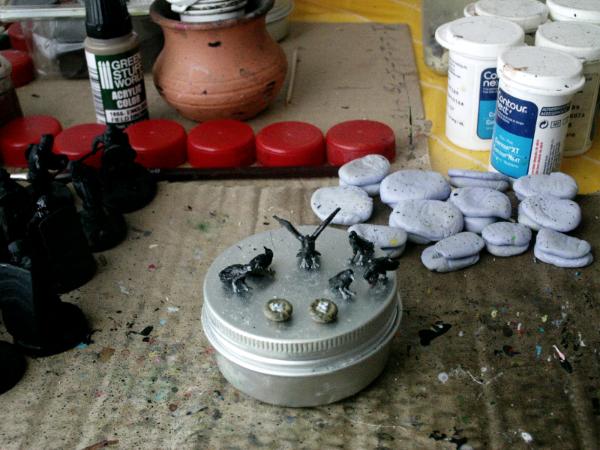
The birds are certainly among the smallest things I have painted so far but I am pretty happy with how they turned out.
Next on the queue are more miniatures to paint and a few more conversions that I need to finish up in order to spend the last few bits I have lying around.
I might start 2025 with no bits on my bit box or anywhere else which is certainly interesting (time to order a few new things in the new year perhaps...).
|
|
|
|
|
|
2024/12/20 16:19:23
Subject: GreenScorpion's Workshop
|
|
Ragin' Ork Dreadnought
Deep in the Outer Boroughs of NYC
|
Ooo, nice, steady progress is what I like to see, GreenScorpion! That tree looks great. I always encourage experimentation with projects. We'll never know what a thing looks like until we put it together and see. Great job!
|
|
|
|
|
|
2024/12/21 09:54:15
Subject: GreenScorpion's Workshop
|
|
Boom! Leman Russ Commander
|
My my my, keep it up!
|
40k: Necrons/Imperial Guard/ Space marines
Bolt Action: Germany/ USA
Project Z.
"The Dakka Dive Bar is the only place you'll hear what's really going on in the underhive. Sure you might not find a good amasec but they grill a mean groxburger. Just watch for ratlings being thrown through windows and you'll be alright." Ciaphas Cain, probably. |
|
|
|
|
2024/12/21 15:04:06
Subject: GreenScorpion's Workshop
|
|
Regular Dakkanaut
|
Warboss_Waaazag wrote:Ooo, nice, steady progress is what I like to see, GreenScorpion! That tree looks great. I always encourage experimentation with projects. We'll never know what a thing looks like until we put it together and see. Great job!
Thank you! I like to keep myself busy and since I am running out of bits it is the perfect time to start experimenting with new materials or painting techniques.
Maréchal des Logis Walter wrote:My my my, keep it up!
Thank you! I intend to do so 
|
|
|
|
|
|
2024/12/23 14:11:30
Subject: Re:GreenScorpion's Workshop
|
|
Regular Dakkanaut
|
Today I only have updates from home as I haven't been on the farm, but I managed to finish a few more conversions and did some painting.
Home Progress Update
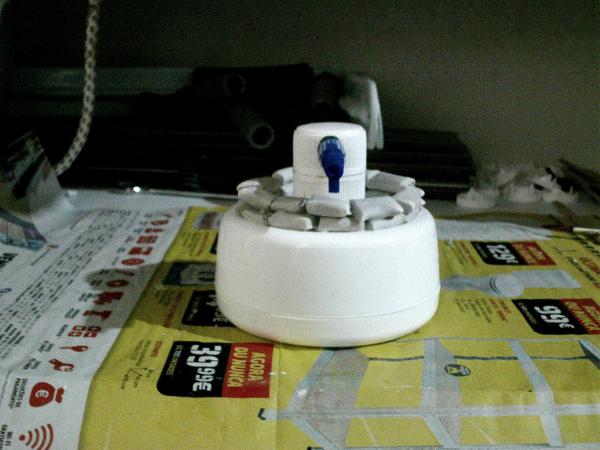
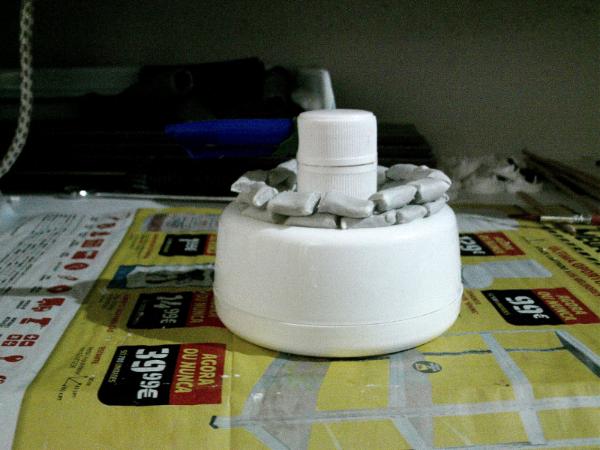
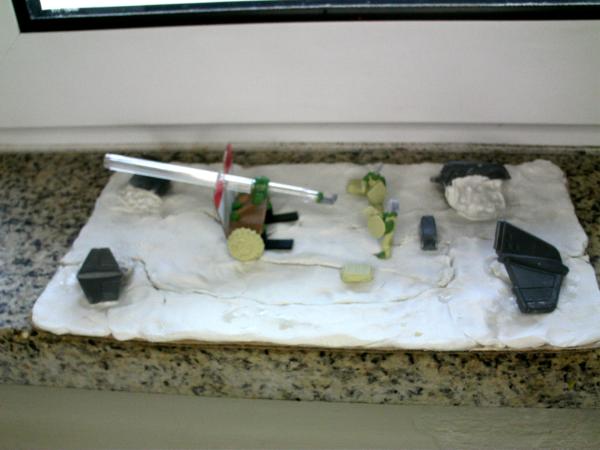
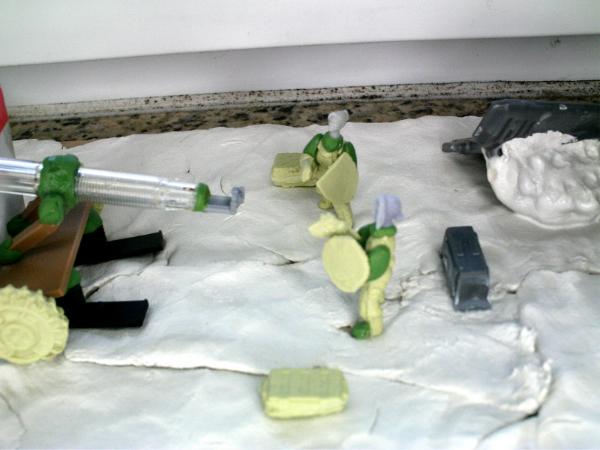
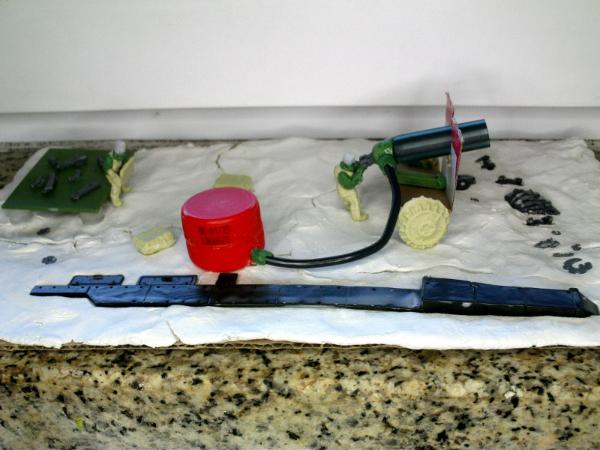
First is the last one of the HWT with large bases that I was working on. This one is meant to represent a large energy weapon so I added some wire and bottle caps to create a battery.
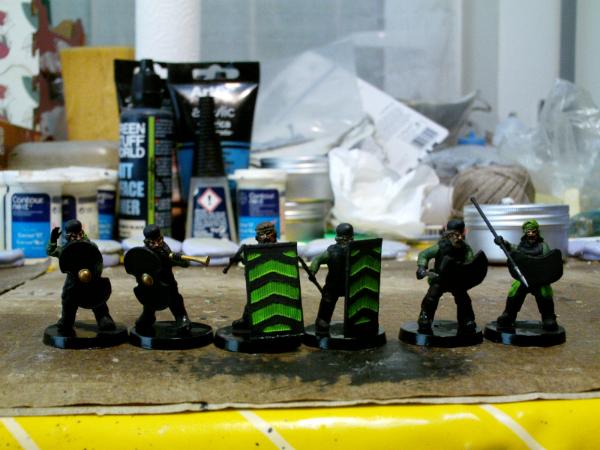
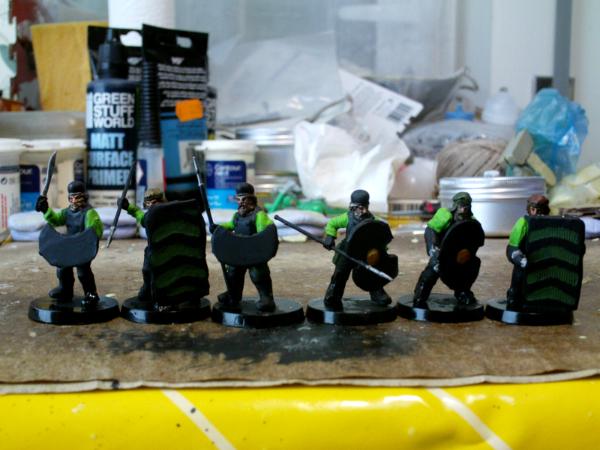
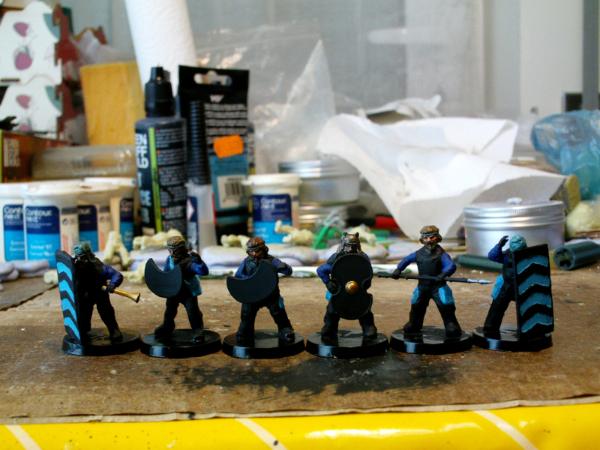
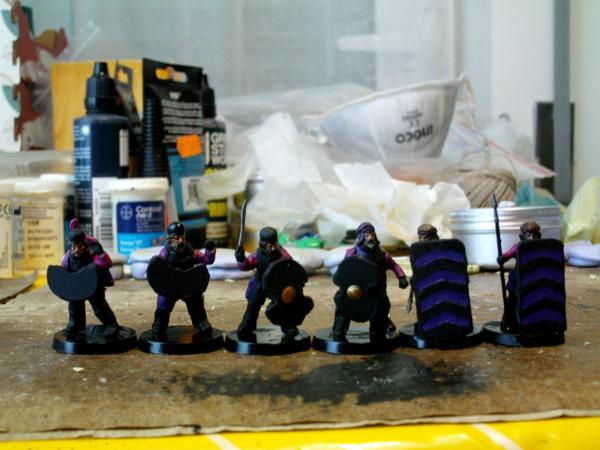
Next is another batch of converted persians. I have now painted slightly more than half of the total amount of this particular set of conversions, so slowly getting there.

After I finished the HWT with the large "scenic" bases, I started to work on 3 missile launchers intended to spend a few spare parts from anvil industry rpg launchers I got in the distant year of 2018 (basically it was the bottom part of the rpg launcher without the arm in case you wanted to have the weapon carried on the back or something similar).
The barrel and shield of the launcher are made out of cardboard (paper straws have to be good for something, right?) and the lower part is the resin bit that connects with the arm made with greenstuff.
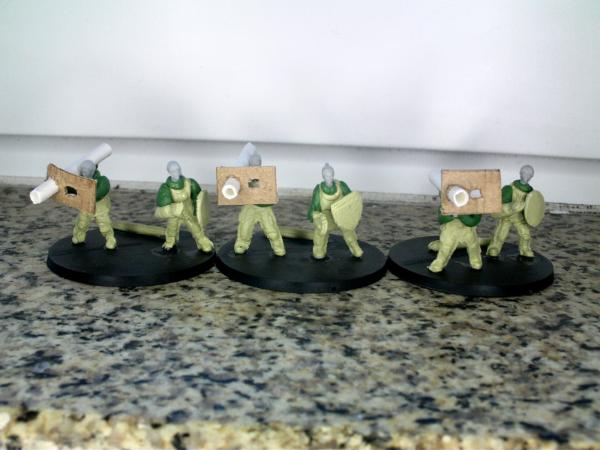
In order to spend the 4 spare bases I got from one of mantic's plague forces back in 2020 I made for conversions, also spending the last 4 heads I had available.
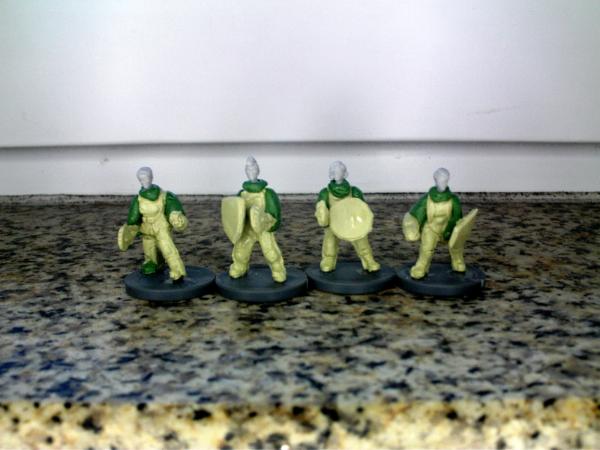
I did remember that I am not exactly all out of bits though, as I ordered some basing sets from greenstuff world a month or so ago and those have a few 3d printed animals and plants for decoration, so I still have some things to spend, just have no bits for human soldiers, for vehicles or buildings.
The basing sets are meant to be used in a few diorama related experiments which might prove useful before I do some more work on my terrain or before I start basing my army (no basing done so far but I do have some ideas on how to do it once I reach that stage).
|
|
|
|
|
|
2024/12/26 15:13:30
Subject: GreenScorpion's Workshop
|
|
Regular Dakkanaut
|
|
|
|
|
|
|
2024/12/26 21:42:18
Subject: GreenScorpion's Workshop
|
|
Ragin' Ork Dreadnought
Deep in the Outer Boroughs of NYC
|
Good progress, GreenScorpion! Keep it up.
|
|
|
|
|
|
2024/12/29 18:11:37
Subject: GreenScorpion's Workshop
|
|
Regular Dakkanaut
|
Thank you!
I have been making some progress on painting, but I wanted to make today's post something a little different and turn it into a bit of a review based on some of my latest experiments.
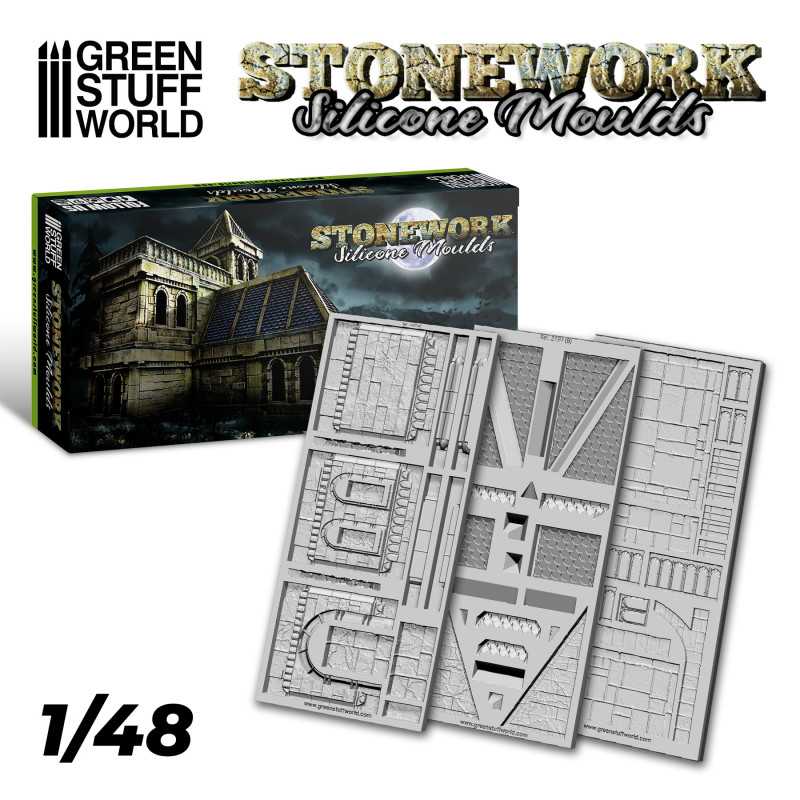
I got some silicone moulds some time ago from Green Stuff World and their acrylic resin to make some terrain parts and I have been experimenting with both the resin and the moulds to check the full potential of both things. The sets I got are the sci-fi and the stonework/medieval fantasy set (pictures from the store below for reference).
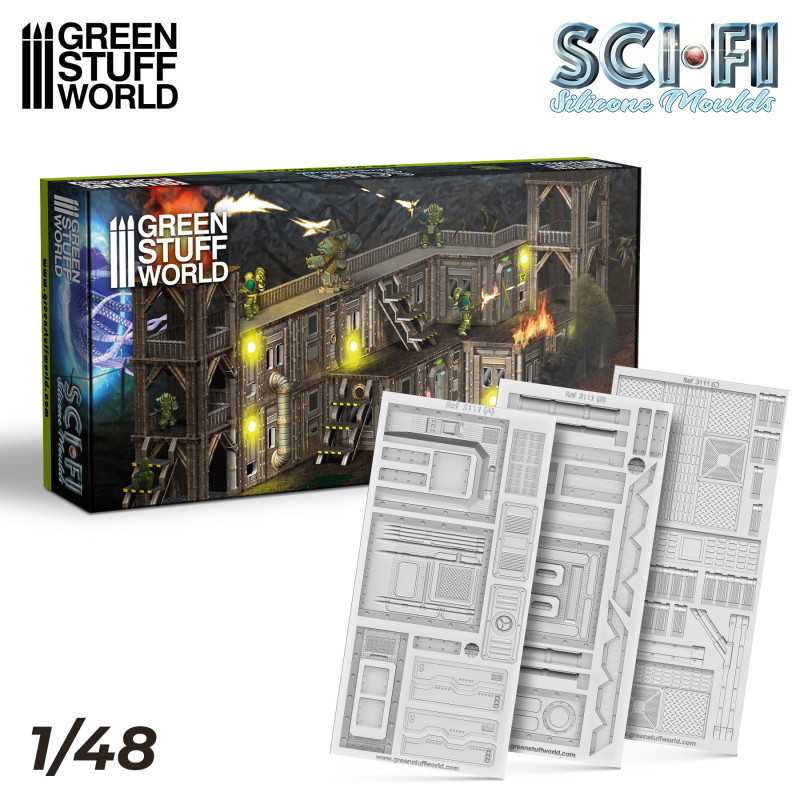
I have only tried the sci-fi moulds but overall they are great, there is little wasted space in the moulds so even a spill of resin can be optimized by just making sure it goes to the space of the next part and so far all parts came out with lots of detail and without having any difficulty in separating the parts from the actual moulds. The moulds are quite flexible so the removal of parts is usually quite simple which is great.
Although the examples from the store are more oriented towards building sci-fi buildings that can be part of a base or fortification, it does seem to be more suited to be used in making the interior rooms of a space ship, with bulk doors and other items that make it quite fitting for that purpose.
The moulds are one sided so for things to look good from all angles it would be required to make several pieces to glue back to back which is ok since most parts are somewhat symmetric and putting 2 of the same piece back to back would work on most cases (like with the bulk door).
The acrylic resin is quite easy to work with, based on the few days of usage during my experiments and I had no trouble with parts after they dried out.
I was a bit surprised when I realized that the description mentioning it has a ceramic like finish was truly a good description of how it looks and feels when the resin dries completely.
Even the sound it makes when you tap the pieces with your fingernails is quite close to the sound a clay tile would make and the resistance of the final piece seems similar to ceramic items. It likely breaks in the same way and being ceramic like means you can't bend it like many kinds of resin so it is best suited for things that don't need to be bent into position or otherwise moved in ways that only work with some flexibility. Considering I will be using it for building parts it is quite fine for my purposes.
Overall when the moulds and the resin are used in combination you can make some nice building parts, but given the properties of the resin I think building something completely out of this would be risky. I plan to use the moulds to add details into larger buildings made of other materials, like cardboard for example, so the base structure would be made from other materials and there would be less risk of parts breaking while I work on them.
With that said the resulting pieces are quite sturdy so if you are not clumsy like me it can certainly work for making a full building.
I might get some pics of the results once I have the time to clip off the excess material I left on some of the parts during casting (not a big amount of waste so far, but I do need to do some clean up).
|
|
|
|
|
|
2024/12/29 18:45:27
Subject: Re:GreenScorpion's Workshop
|
|

Long-Range Ultramarine Land Speeder Pilot
|
That does look like a fun project. Do you think plaster would work in them?
I have worked with Hirst Arts silicon molds and dental plaster.
Dental plaster is just plaster of Paris with finely ground concrete mixed in.
It's really strong.
|
|
|
|
|
|
|