| Author |
Message |
 |
|
|
|
|
Advert
|
Forum adverts like this one are shown to any user who is not logged in. Join us by filling out a tiny 3 field form and you will get your own, free, dakka user account which gives a good range of benefits to you:
- No adverts like this in the forums anymore.
- Times and dates in your local timezone.
- Full tracking of what you have read so you can skip to your first unread post, easily see what has changed since you last logged in, and easily see what is new at a glance.
- Email notifications for threads you want to watch closely.
- Being a part of the oldest wargaming community on the net.
If you are already a member then feel free to login now. |
|
 |
2016/12/08 17:49:27
Subject: Making Bases – Dead heads and other body parts
|
|

Focused Dark Angels Land Raider Pilot
|
Making Bases – Dead heads and other body parts
Sometimes I order bits off eBay or from other dealers. When I do, I always add some heads to the order. Usually there are plenty of Orc heads but I order all sorts of head bits. I keep them around to put them on my bases. I first cut them so that they will appear half buried.
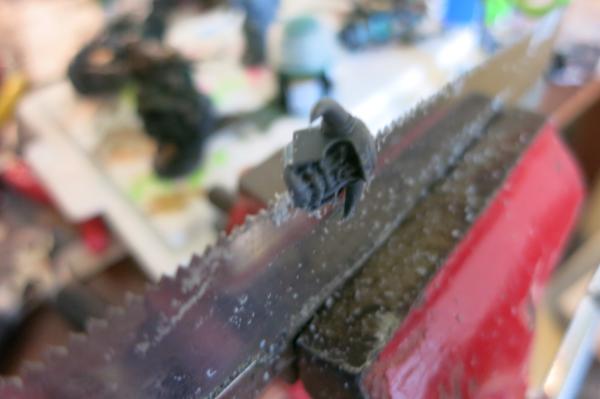
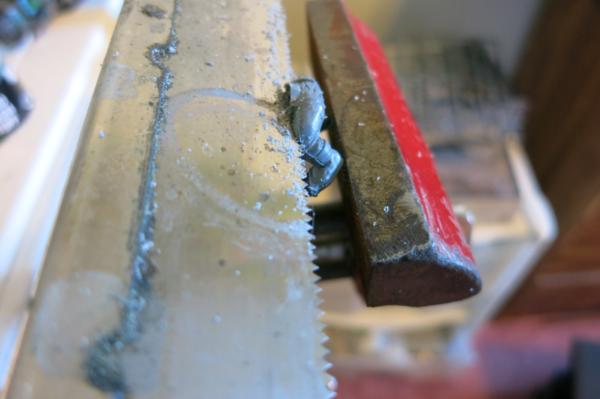
Cutting an Orc Head
Note in the above picture the saw is in the vice. It is easier to put the saw blade in the vice and pull the head across the blade than it is to put the head in the vice and try to move the saw. This keeps the head from getting squished by the vice and I can put fingers from one hand on one side of the head with the fingers from the other hand on the other side and pull the head across the saw blade. It actually goes fairly fast and by holding the head with the fingers on the side, the fingers don’t get cut.
Sometimes I will run the cut head on a file to smooth it down.
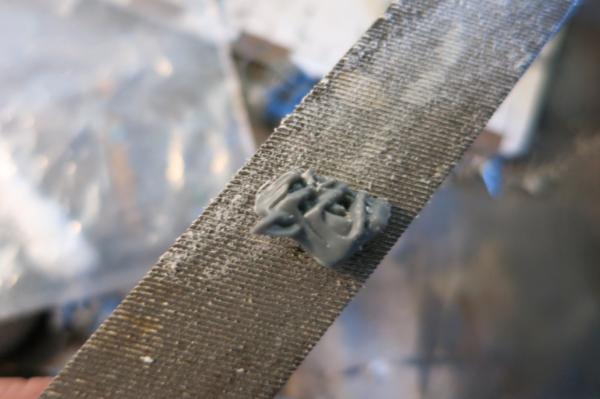
Cut Orc Head on File
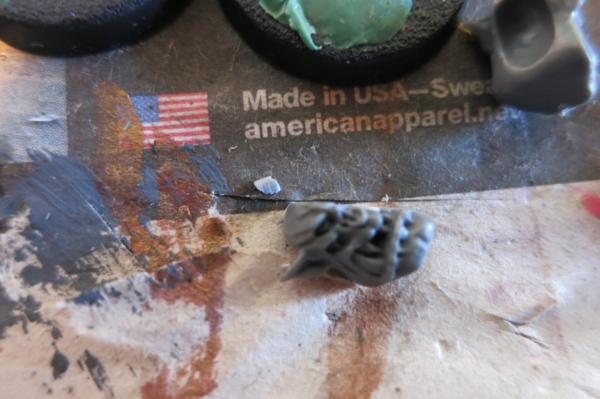
Cut Orc Head
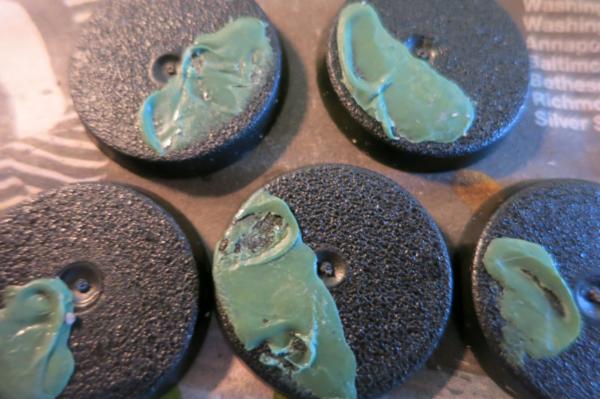
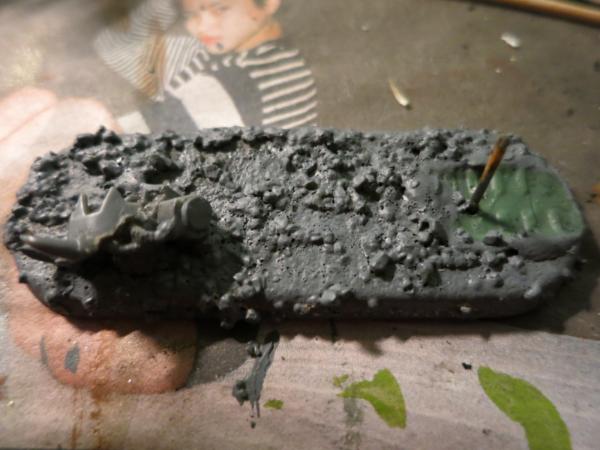
Then I glue the head cut side down on the base and then cover the base with gesso mix which causes the head to appear to be half buried.
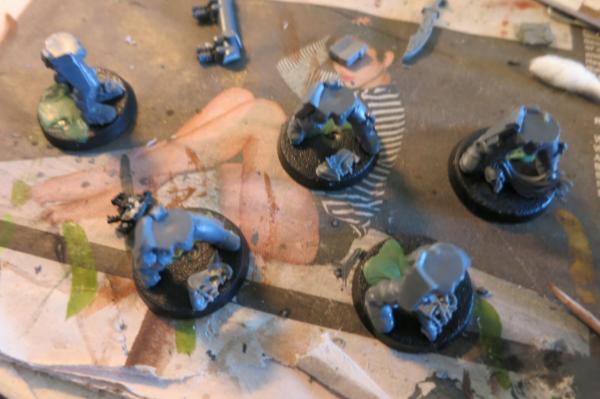
Dead Heads and Body Parts Glued to Bases
|
|
This message was edited 1 time. Last update was at 2016/12/08 17:50:34
|
|
|
 |
|
2016/12/09 13:19:27
Subject: Making Bases – Footprints
|
|
Focused Dark Angels Land Raider Pilot
|
Making Bases – Footprints
Sometimes I put footprints on my bases. It is fairly easy.
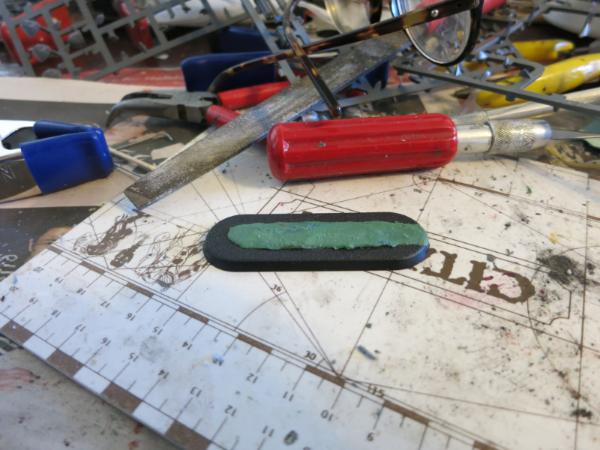
Make green stuff. Green stuff is regularly available online and at hobby shops including Games Workshop. Just search green stuff online. Green stuff includes yellow 'filler' and blue 'hardener.’ Use about one part blue stuff to about one part yellow stuff; mix until green. Avoid leaving yellow or blue lumps. Don’t make up too much. Make up more later if needed.
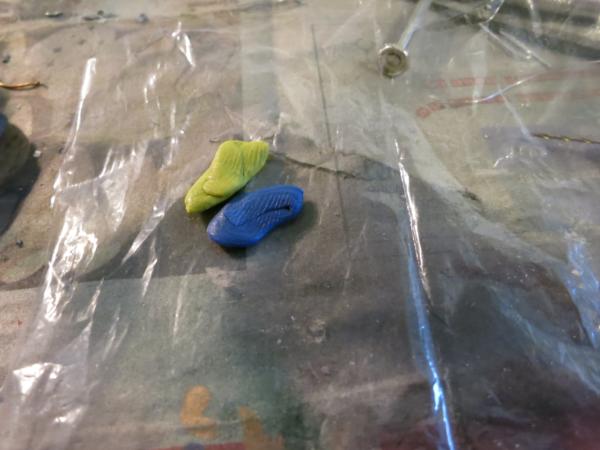
Lumps of Yellow Filler and Blue Hardener
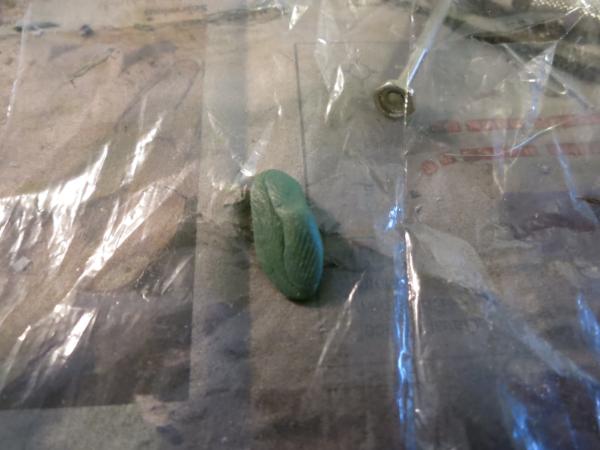
Lump of Green Stuff
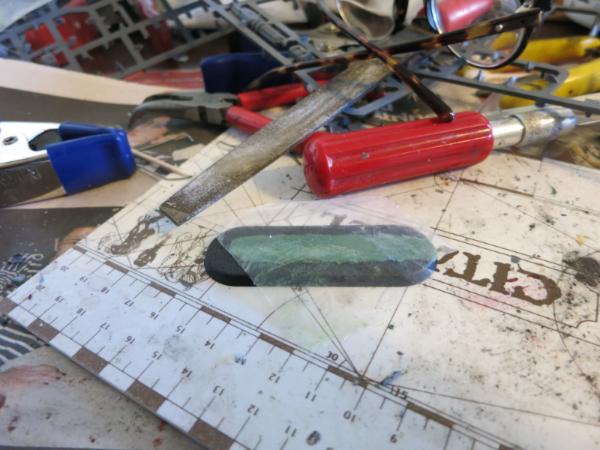
Spread the green stuff on top of part of the base. Keep it thin
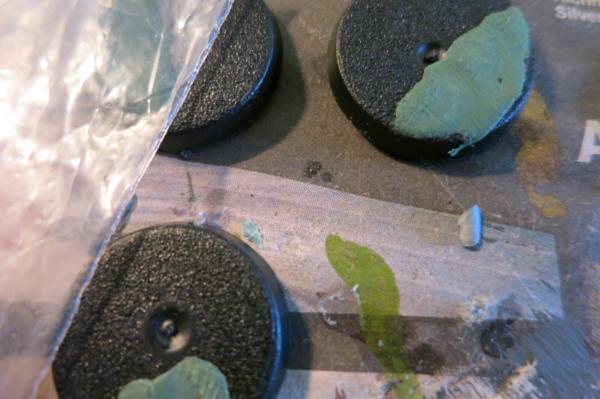
Green Stuff Spread on Bases
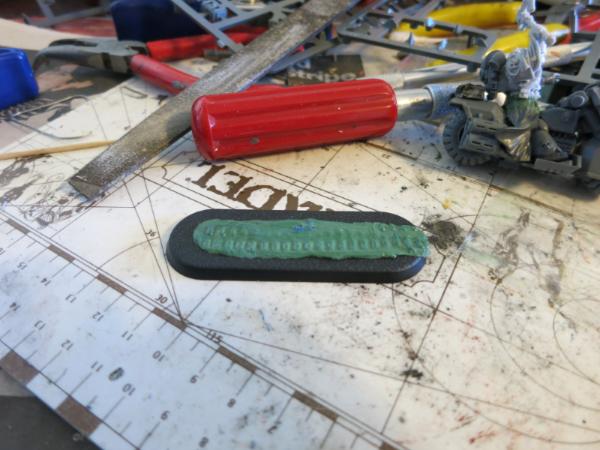
Cover the green stuff with a sheet of polyethylene plastic resin (which is a fancy way of saying a cut up piece of a clear plastic sandwich bag). Take the model that you plan to mount and, using the bottom of their feet, press footprints into the green stuff.
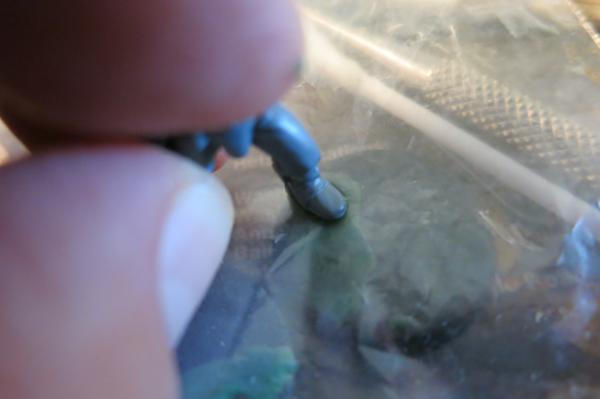
Placing Footprints on Base
Remove the plastic sheet and there are the footprints.
Footprints on Bases
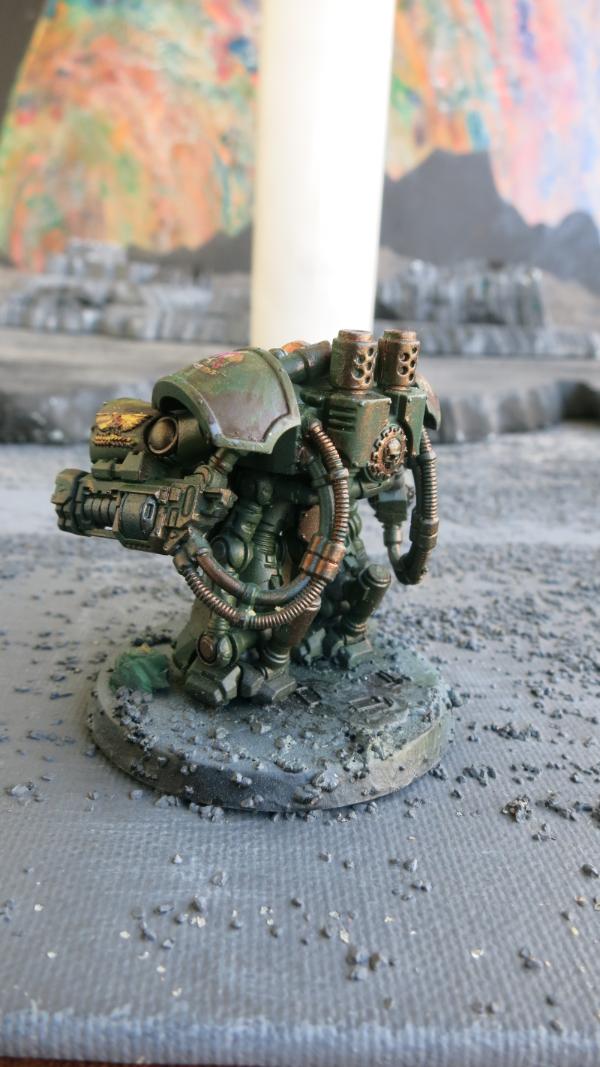
Centurion Footprints
|
|
|
|
|
2016/12/11 21:17:32
Subject: Bases – Mounting an Infantry Model
|
|
Focused Dark Angels Land Raider Pilot
|
Bases – Mounting an Infantry Model
If you use the gesso mix on a base, the infantry model should be raised up so that the model appears to be on the surface rather than sunk into the surface of the base.
Find a Sheet of Plastic. I think my sheet is about 1mm thick.
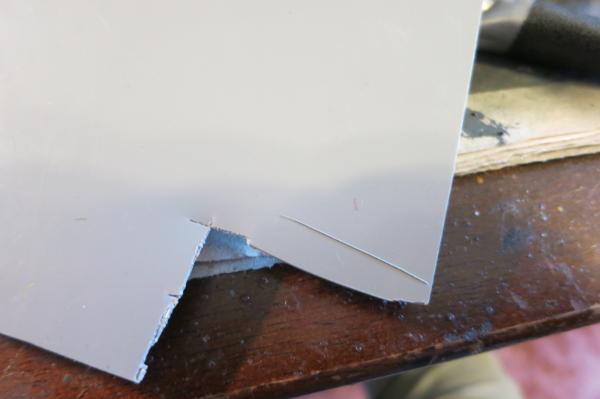
Plastic Sheet
Cut out a piece of plastic that is slightly smaller than bottom of the infantry model’s feet. Don’t worry about getting it the exact right shape.
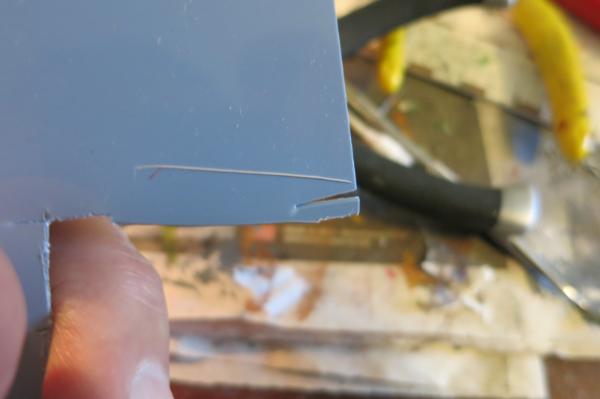
Cut-Up Plastic Sheet
Glue the small plastic piece to the bottom of the model’s feet.
Plastic Piece Glued on Bottom of Model’s Feet
Glue the Model to the Base.
These bases with footprints, dead heads, and the infantry models feet are ready for the gesso mix.
Infantry Model on Base with Dead Head
Notice when you gob on the gesso mix that model will be on standing on the surface of the base but the head will appear to be partially buried.
Infantry Model on Base with Skull
Infantry Model with Dead Orc Head
|
|
|
|
|
2016/12/12 12:37:05
Subject: Bases – Bike Tracks
|
|
Focused Dark Angels Land Raider Pilot
|
Bases – Bike Tracks
Make green stuff. Green stuff is regularly available on line and at hobby shops. Just search green stuff. Green stuff includes yellow 'filler' and blue 'hardener.’ Use about one part blue stuff to about one part yellow stuff; mix until green. Avoid leaving yellow or blue lumps. Don’t make up too much. Make up more later if needed.
Spread the green stuff on the base.

Green Stuff on Bike Base
Green Stuff Spread on Bike Base
Cover the base with a polyethylene plastic sheet (cut up sandwich bag).
Base Covered with Polyethylene Plastic Sheet
Roll the wheels of a motorcycle over the sheet. It works best if the motorcycle wheels can freely spin. Repeat several times to make the bike prints deep enough but be careful that the second and third times match the first imprint.

Rolling Bike Wheel over Base
Base with Bike Tracks
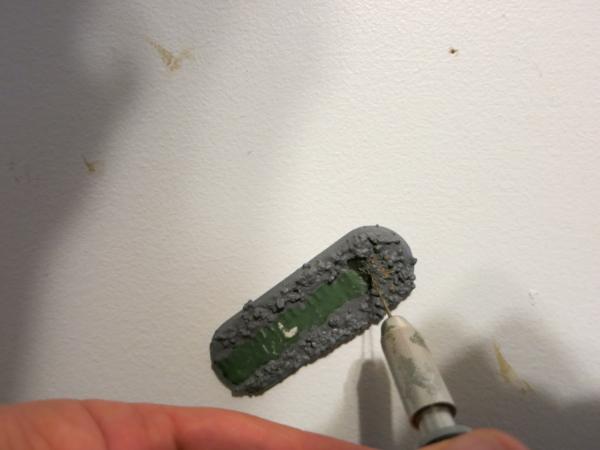
Glob on Gray Gesso mixed with Railroad Ballast on the Base. See prior entries for recipe on the Gray Gesso. Avoid covering the footprint or bike tracks.
Glob on the Gesso Mix
Glob on the Gesso Mix
Let the base dry.
Mount the Bike
Tracks on Base of Biker
|
|
|
|
|
2016/12/13 12:39:58
Subject: Mounting Bikes on Bases
|
|
Focused Dark Angels Land Raider Pilot
|
Mounting Bikes on Bases
Mounted Biker
Note that this biker has only one wheel touching its base. This makes the model more dramatic.
To mount the biker, get a piece of piano wire about 1mm thick. Piano wire is very stiff and hard to work with. Using pliers, bend about a quarter of an inch length to form a right angle.
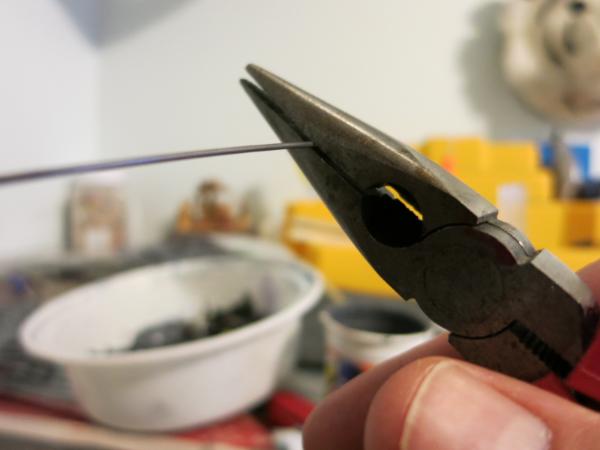
Pliers on Piano Wire
I find that my pliers are about the perfect width so I put an end of the wire into the pliers and bend it over.
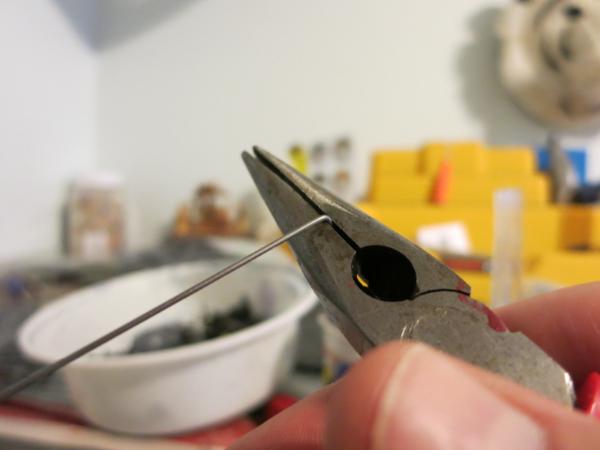
Bending the Wire with the Pliers
When it is done, the wire should look like this.
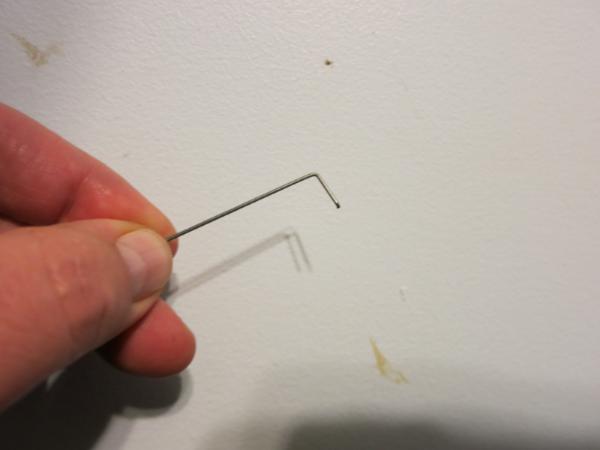
Right Angle on Piece of Piano Wire.
DO NOT TRY TO CUT THE WIRE. Piano wire is hard and will ruin your wire cutters if you try to cut it. Instead, break the piano wire by clamping the pliers on the wire just below the below the bent angle and then bend the wire, wiggling the wire back and forth until it snaps. When finished the wire should look like this.
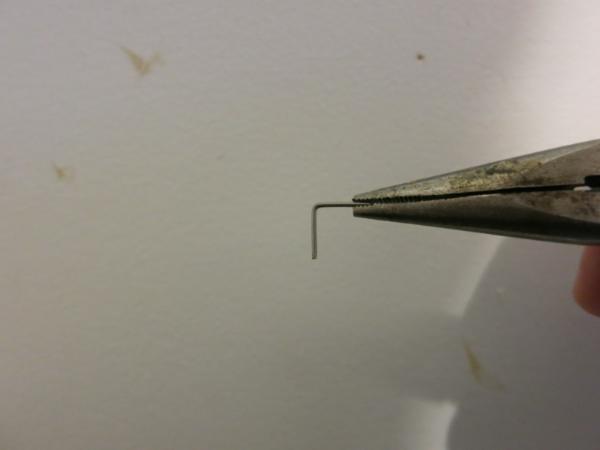
Short Piece of Piano Wire with Right Angle
Sometimes it will not break off cleanly and leave a small burr at the end. I will take a file and file that burr so that the end of the wire is straight.
Drill a hole in the Base where you want to attach the tire of the bike.
 \ \
Drilling the Hole in the Base
I like the hole to be at one end at about the center point of the radius made by the circle at the end of the biker bases. See picture.
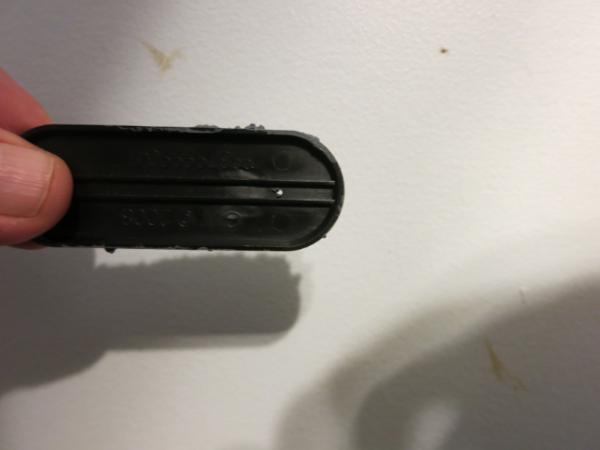
Hole in the End of the Base
Place the piece of bent piano wire through the hole so that one end is upright.
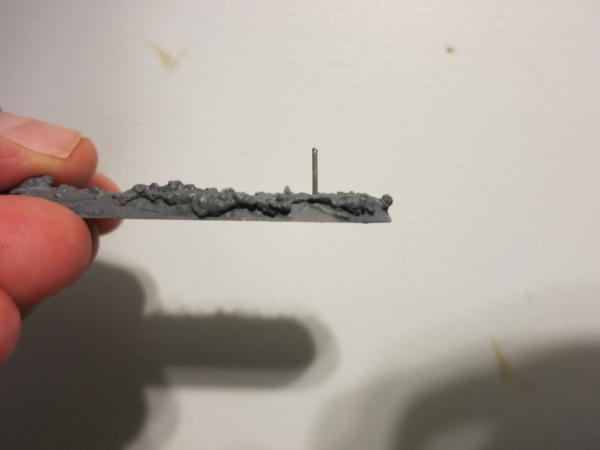
Piano Wire in Hole of the Base
The other end should be flush with the bottom of the base and facing towards the middle. See picture.

Piano Wire on Bottom of the Base
Note the little burr on the end of the wire. Here is it harmless because the wire is still flush with the bottom surface of the base. If the burr interferes with wire lying flush, it must be filed down so the wire is flush with the bottom surface of the base.
Using Super Glue, glue the flush portion of the wire to the base.
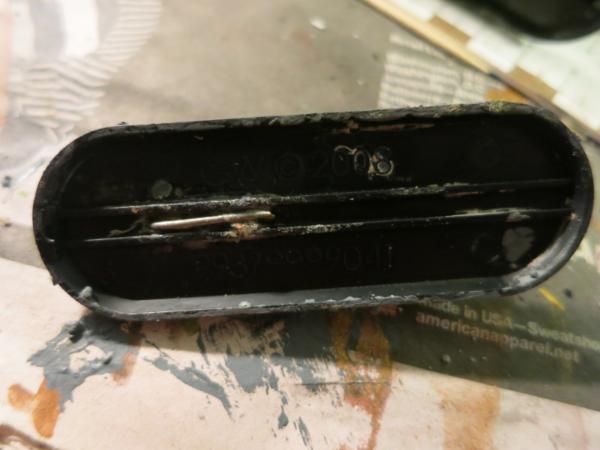
Close-Up of the Glued Wire
Bike Base with Piano Wire Mounting
Notice that the bike tracks, dead head, and gesso mixture are already placed before the bike is mounted. Don’t worry about a little rust on the piano wire.
Drill a hole in the front or back tire of the biker model so that the upright wire can fit it. This is a tricky part since the hole must be drilled at such an angle that the bike is held correctly into position. Still, it is fairly easy drilling and one can experiment by drilling several holes until the bike is mounted correctly. It is easier to rework the hole in the tire than try to modify the bend in the wire. When correct, glue the bike to the wire. This should hold the bike in the correct position.

Bike Mounted on Wire
Notice that the wheel must be glued to its axle on the bike so that the wheel no longer freely spins. In fact, it is often easier to mount the bike with wheel unglued so that it freely spins, move the bike to the correct position, and then glue the wheel so it is frozen in place so that the bike is locked into the correct position. Do this after the base has been prepared.
|
|
This message was edited 2 times. Last update was at 2016/12/13 12:49:15
|
|
|
|
|
2016/12/14 12:38:16
Subject: Re:6th Biker Troop - “Schrödinger's Apocalyptic Raiders”
|
|
Focused Dark Angels Land Raider Pilot
|
Building a Fun Bike Base – Putting It All Together
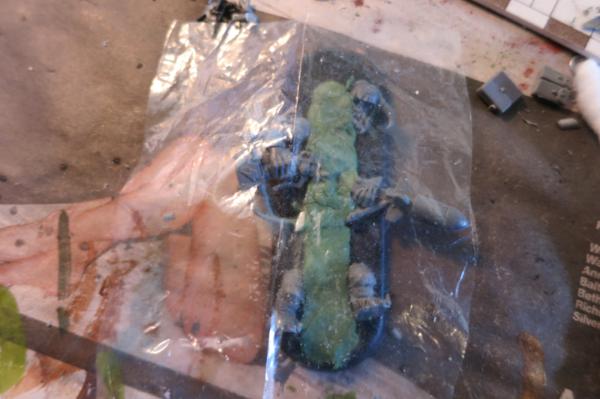
This is the last of a series of articles on building a base. This will put it all together for a fun example – a bike base with a runned-over Ork with missile launcher.
Step 1: Cut up an Ork with Missile launcher and glue him to the Base. Note that there is a gap down the middle and although the missile launcher itself is not actually cut, I bent it so it looks like it was run over.
Cut-Up Ork
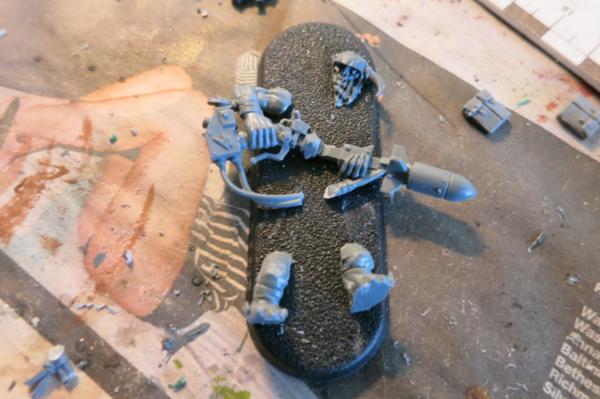
Ork with Missile Launcher Glued to Base
Step 2: Place a Streak of Green Stuff down the Middle of the Ork.
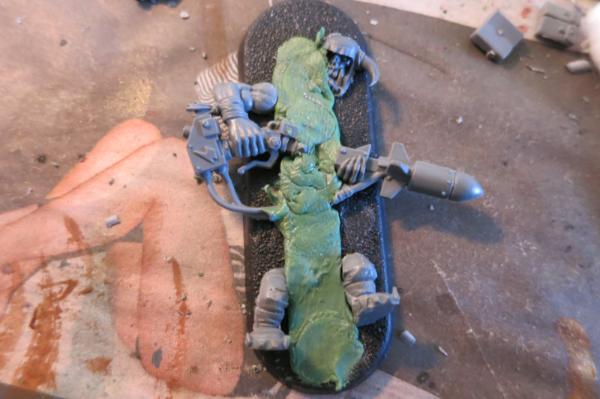
Green Stuff on Ork
Step 3: Cover the base with a polyethylene plastic sheet (cut up sandwich bag).
Ork under Sheet
Step 4: Run a wheel over the green stuff to create bike tracks.
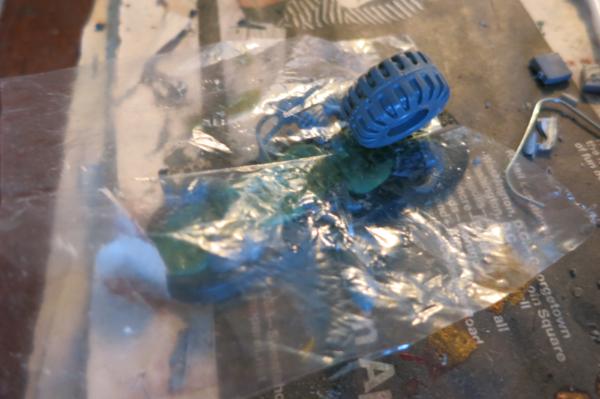
Wheel over Base Making Tracks
Step 5: Remove the plastic sheet and admire the view.

Ork with Track down Middle
Step 6: Cover Edges with Gesso Mix and let dry. Using piano wire, mount the bike on the base. Paint and enjoy.
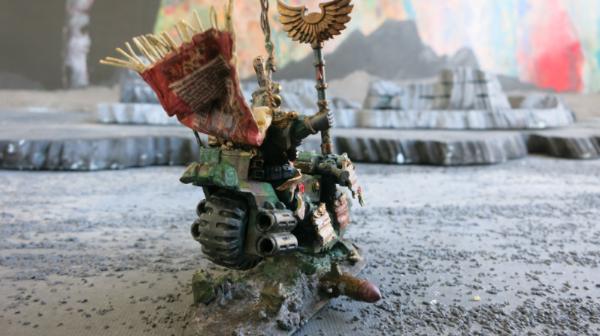
Correct Deployment of Ork with Missile Launcher

Interrogator- Chaplain on Bike Applying Hammer of Wrath to Ork
|
|
|
|
|
2016/12/15 12:38:14
Subject: Building the Biker Chaplain
|
|
Focused Dark Angels Land Raider Pilot
|
Building the Biker Chaplain
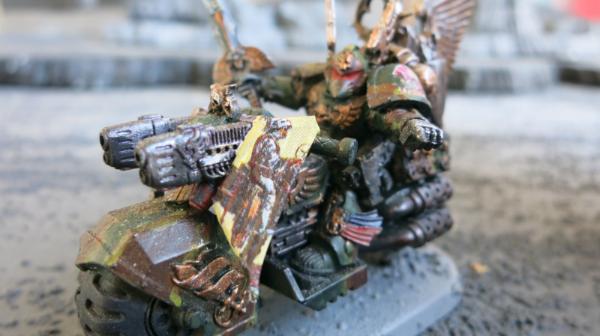
The base with the run-over Ork with missile launcher was for a biker chaplain I built to display at the Capital Palette painting contest at the 2016 NOVA Open. I did display him but realized that the model was probably not completive for a model painting contest. So I have rebuilt him again and now use him as a Dark Angel Interrogator-Chaplain for the army that I play.
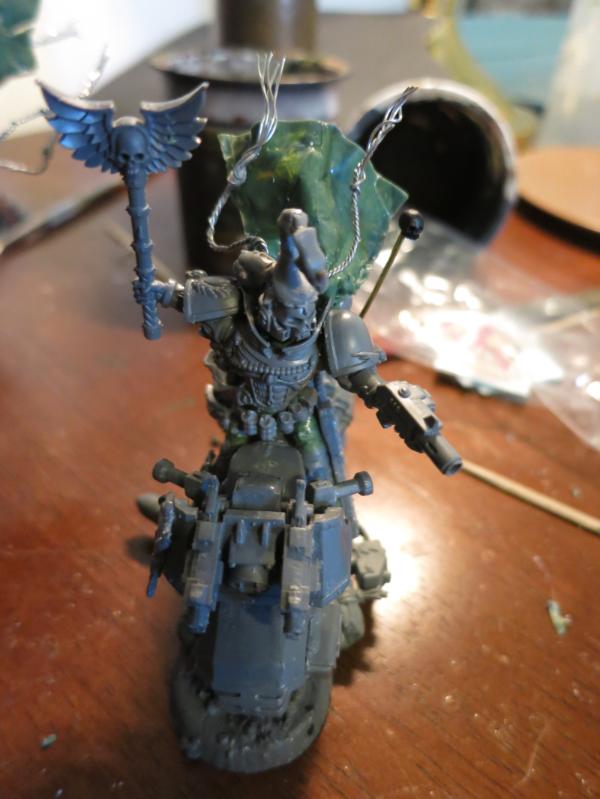
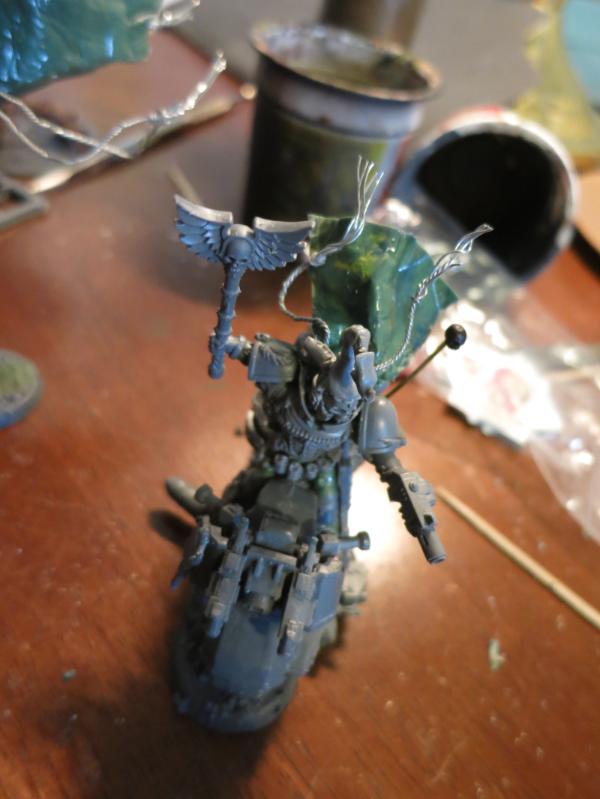
The Un-Painted Biker Chaplain
I gave him an Inferno Pistol because it looks so good. That is one fun thing about a display as opposed to a playing model. You can outfit them for appearance rather than conform to the rules or worry about points. When I made him an Interrogator-Chaplain, I had to replace the pistol with a grav-pistol which is not quite as dramatic looking. Both are costly and I may replace them with a regular bolt pistol.
The Pre-Painted Biker Chaplain
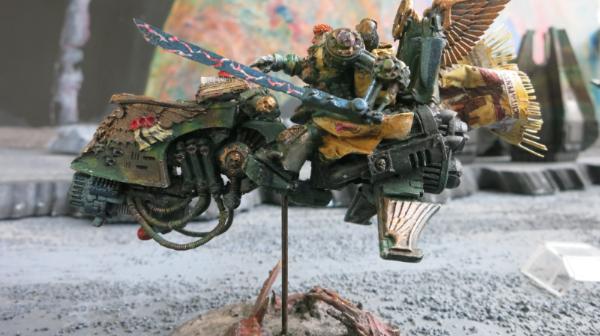
This view shows the green stuff cape and the floral wire cords. The other customizing is more subtle. Notice the green stuff on his left (your right) leg. The leg actually took extensive rebuilding with green stuff since he was a jump pack marine with his leg in the wrong position for a bike.
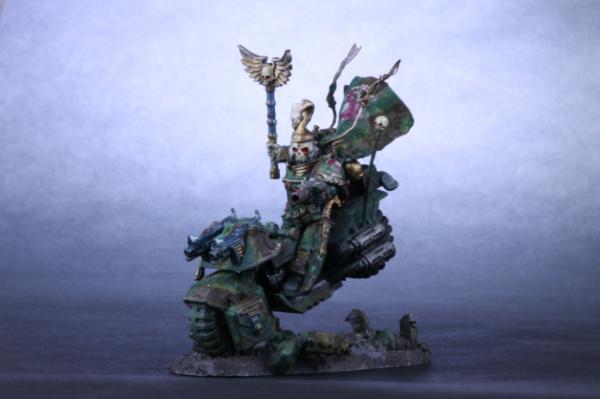
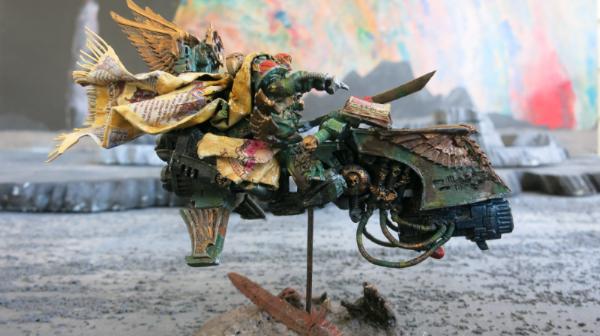
Chaplain on Bike Applying Hammer of Wrath to Ork with Missile Launcher
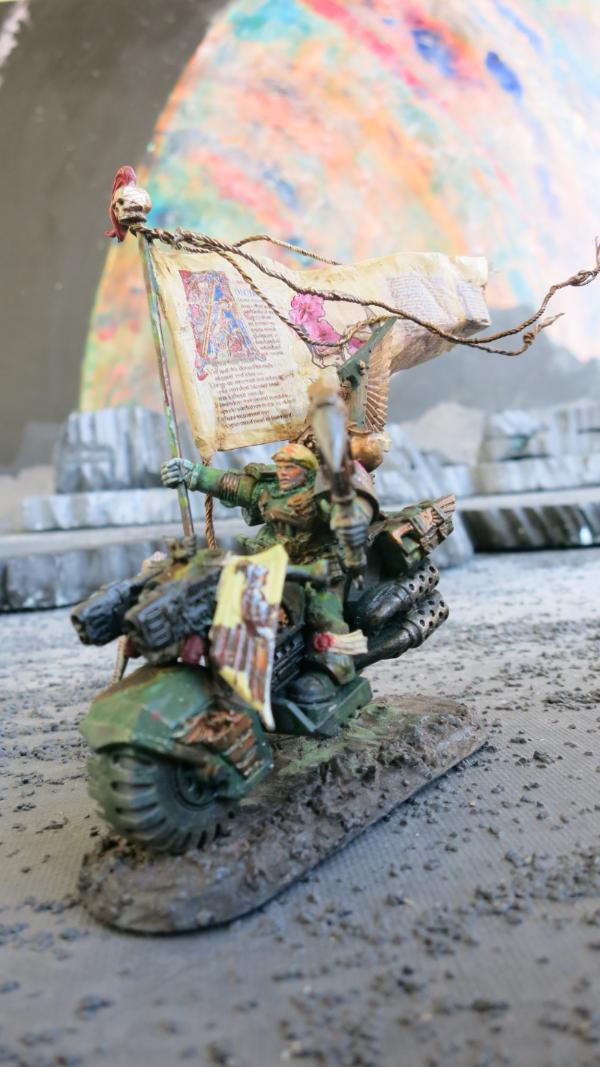
This how the chaplain appeared at the NOVA Open. I did not take this picture. It does show the Orc body and the dramatic angel of the bike. Since the NOVA Open, I have touched him up by removing the inferno pistol and the old cape. I like the new cape better but I used decals on it. For competitive paining, I should paint the details rather than use decals.
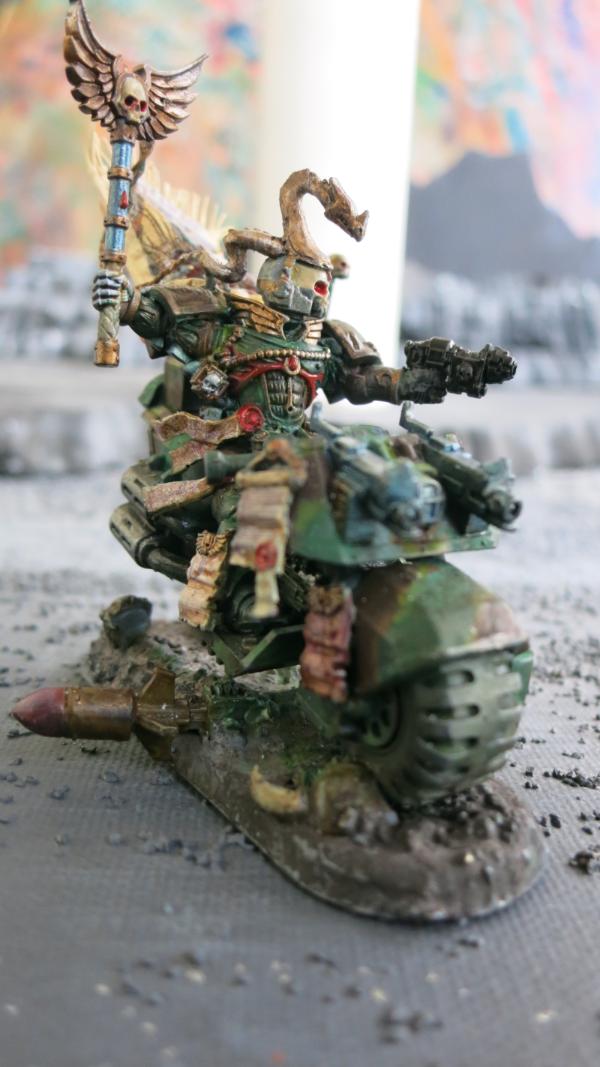
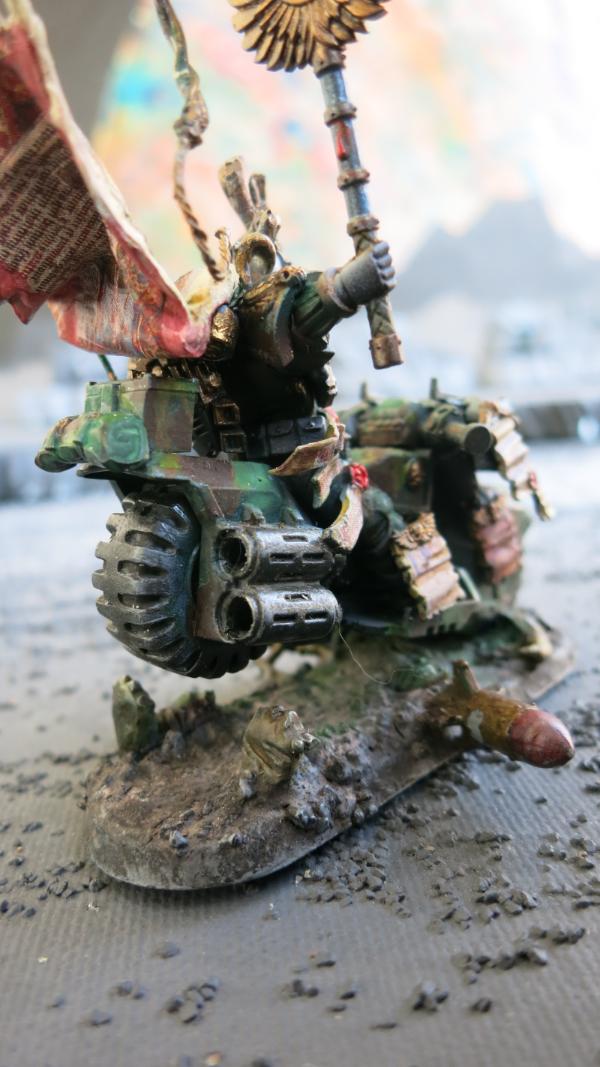
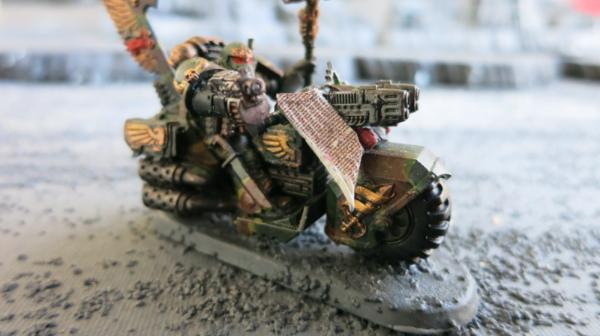
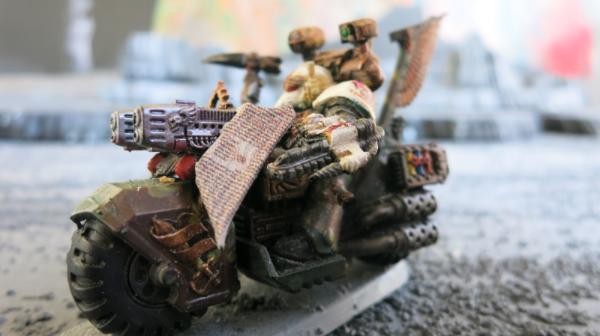
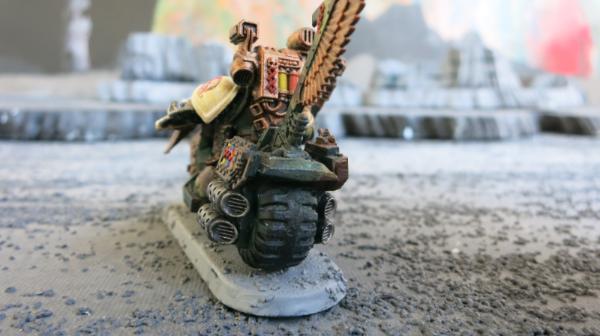
Interrogator-Chaplain on Bike – Right View
This shows a nice view of the Ork missile launcher. I use washes and pigments on the bases so the missile is dull rather than bright.

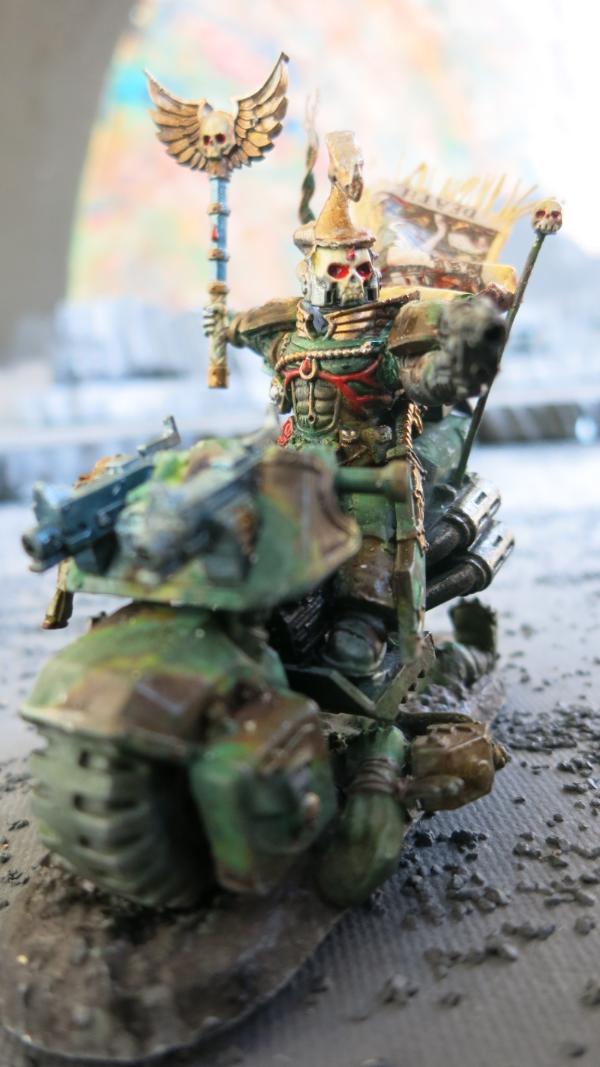
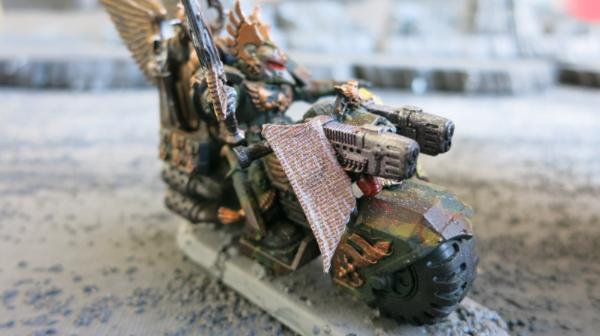
Interrogator-Chaplain – Front View
Interrogator-Chaplain – Left Side View
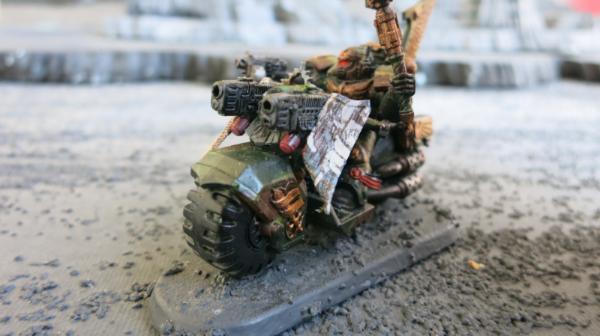
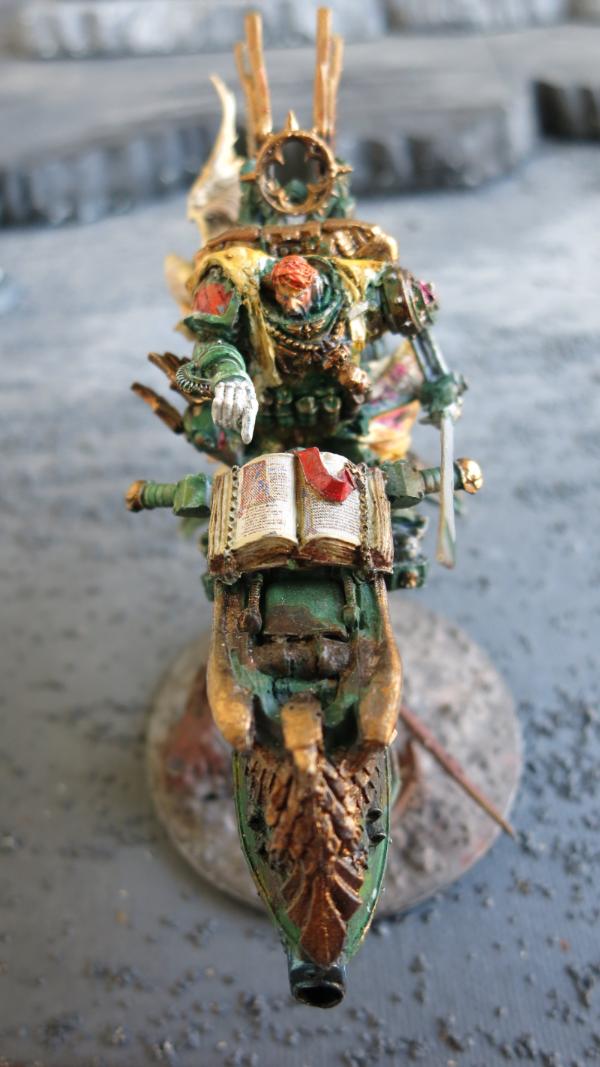
Interrogator-Chaplain – Rear View
This shows the Ork with Missile Launcher correctly deployed.
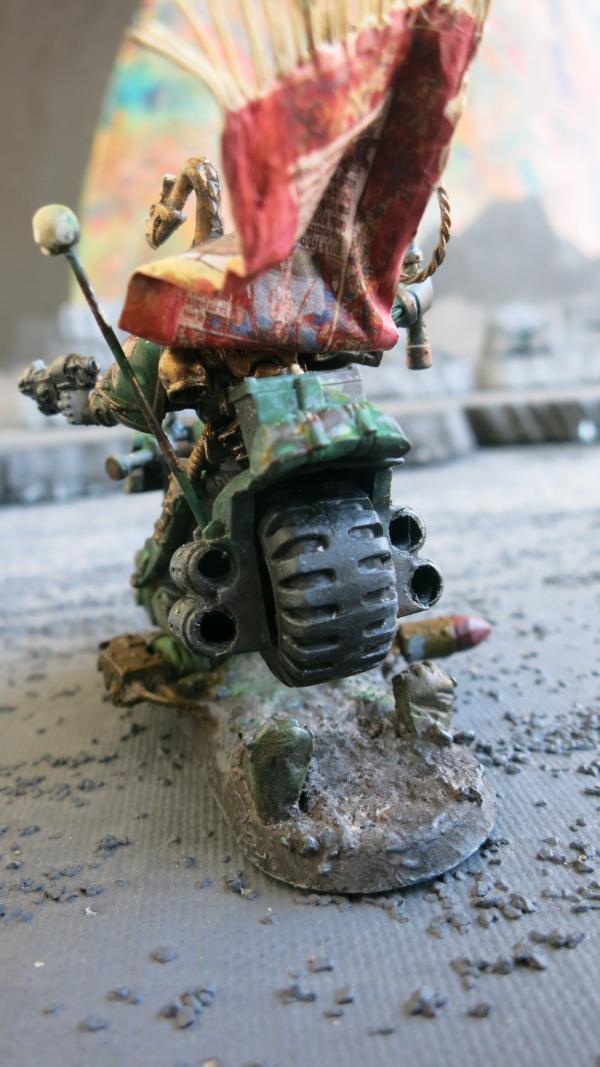
Interrogator-Chaplain on Bike Applying Hammer of Wrath to Ork
This view shows the Medieval Bible Manuscript Decal on the Underside of the Cape.
|
|
|
|
|
2016/12/16 17:05:55
Subject: Building Ravenwing Standard Bearer
|
|
Focused Dark Angels Land Raider Pilot
|
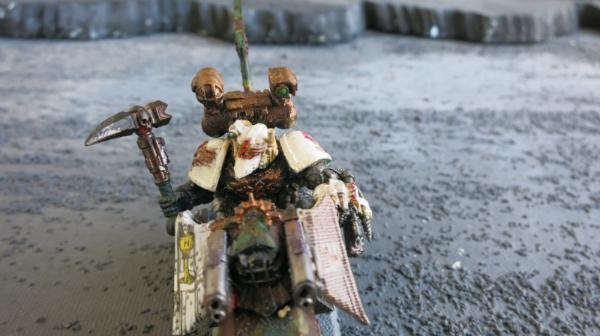
Building Ravenwing Standard Bearer
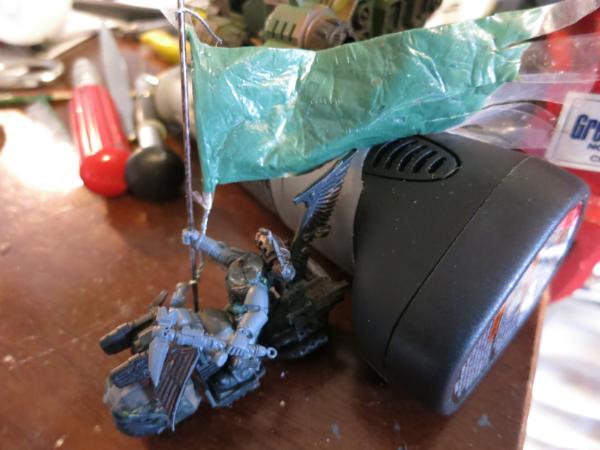
I am rebuilding some of my bikes. I stripped some down and have totally redone them. Others I am just adjusting a few details. One thing I do is remove the upright seat back. I find that the seat back put my torsos too far forward and has the faces of my models looking down instead of up. I am also using black, gray, and white base coats to lighten up the tops. Finally, I am building caps and flags from green stuff because they are better than those that come with the models. This may seem egotistic, but I have found a technique, which I have already shared on this blog, that shows how to make banners and capes out of green stuff. http://www.dakkadakka.com/dakkaforum/posts/list/671876.page#8288936
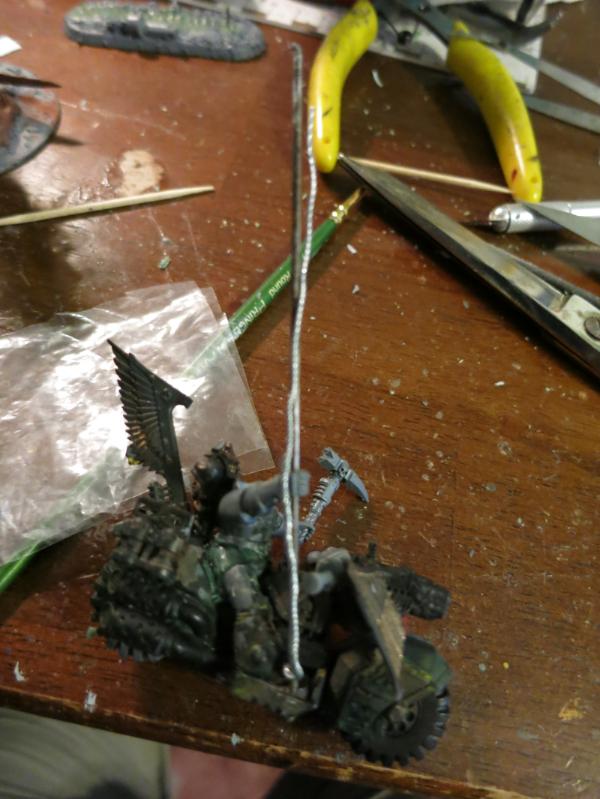
Using these techniques I rebuilt my Ravenwing Standard Bearer. I started with a Black Knight that I stripped and rebuilt. I replaced his head which I painted separately and added later. I cut off the seat back and raised up his torso so that he will have a more dramatic pose. For his right flag bearing arm I used the Ravenwing Banner Arm but I cut off the pole and replaced it with brass wire. I have learned to replace plastics poles and antennas with wire because they break fairly easily. I drilled out the pole in his hand so I have a hole with his fingers around the hole. I also drilled a hole on the footpad of the bike so that the pole is supported. I have also added a length of twisted floral wire to the wire pole. This floral wire will actually hold the flag away from the pole.

Stripped Ravenwing Black Knight with Wire Flagpole and Floral Wire Cord
I put two or three strands of floral wire in a vice and just twist it together until I have a cord.
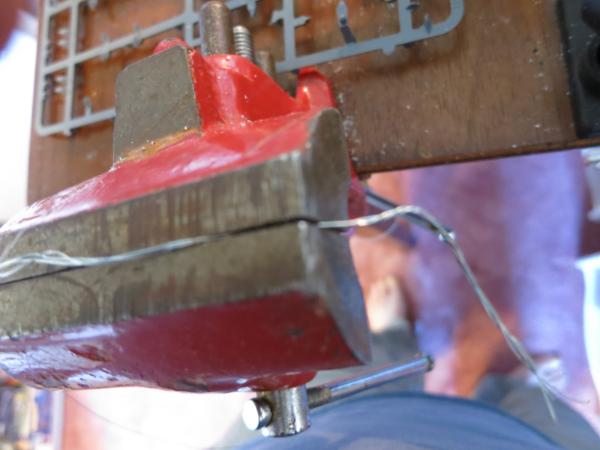
Floral Wire Twisted in Vice
When I am finished, I have a floral wire cord the length of the pole.
Floral Wire Cord on Flagpole
The flagpole is fairly big so that I can have a fairly large flag. In fact, my flag will be fairly big and dramatic but this flag will be a showpiece for my whole arm and the flag is easy to make showy.
I plan to use decals to decorate the flag. I plan the flags dimensions by laying out my decals and using this to determine the size of the flag.
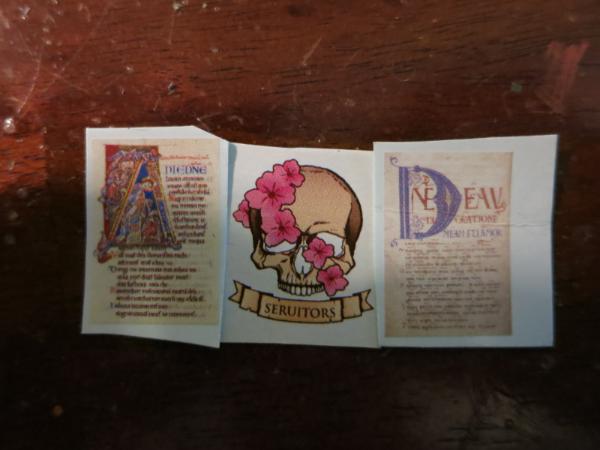
One Possible Flag Arrangement
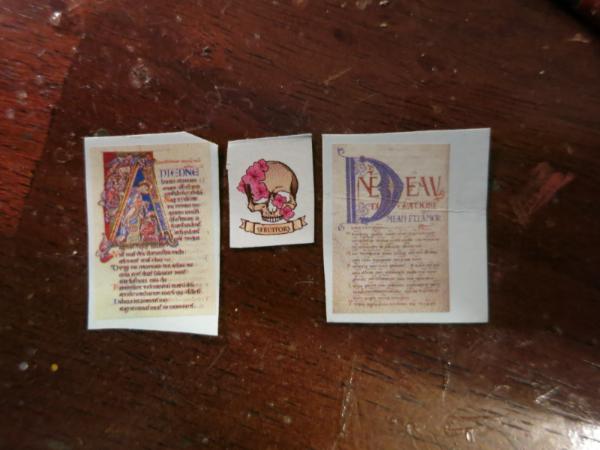
Another Possible Flag Arrangement
Now is the time to play around with the decals before I paint the flag. The middle decal is the unit icon that I designed for my army. The outside decals are medieval manuscripts I found on line and had Fallout Hobbies make decals of these manuscripts for me. I like the work they do and have ordered three sets of decals including the skull icon, the medieval manuscripts, and tarot cards. Their link is http://www.fallouthobbies.com/. I recommend them and encourage you to utilize their service. I am not getting any commission from this for this endorsement but I am endorsing them so they keep this service so I can utilize in the future. I love custom decals.
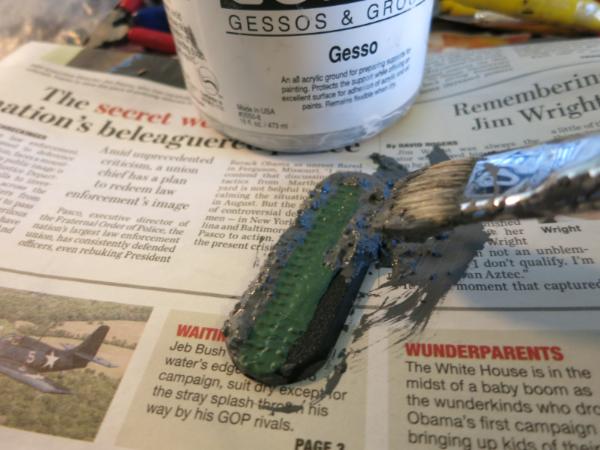
I then built the flag using techniques that I wrote about in an earlier post. The flag is created between two sheets of polyurethane (sandwich bag) sheets. Notice on the left I press the green stuff around the floral wire. I have also generally shaped the flag although I will cut it with scissors to get it best shaped.
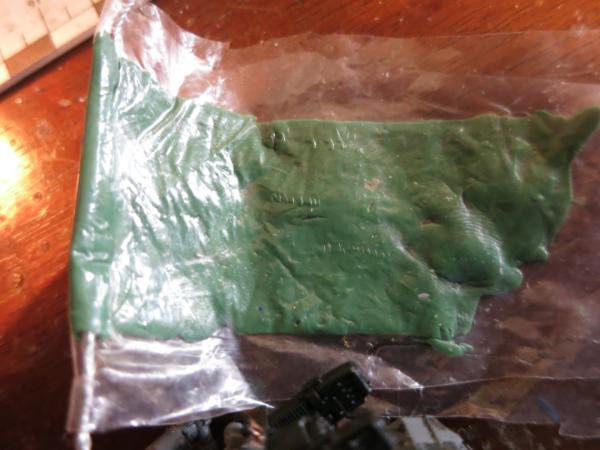
The Green Stuff Flag
I then trimmed the flag with scissors to shape it. I leave the trailing end somewhat rough to give it a more dramatic look. Notice that the green flag is fairly big compared to the bike but so what. This is going to be a dramatic figure and will look good with the rest of the army.
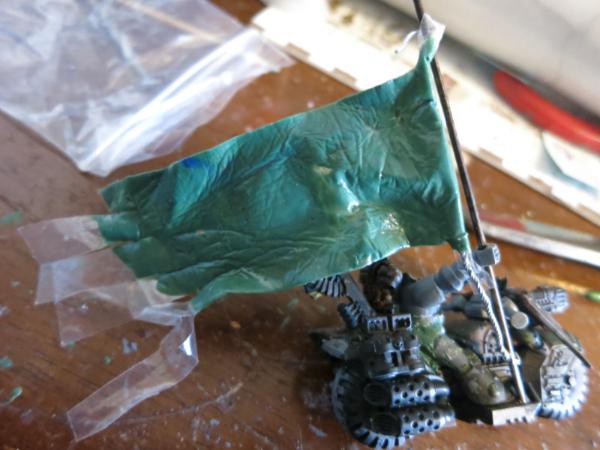
The Green Stuff Flag with Black Knight
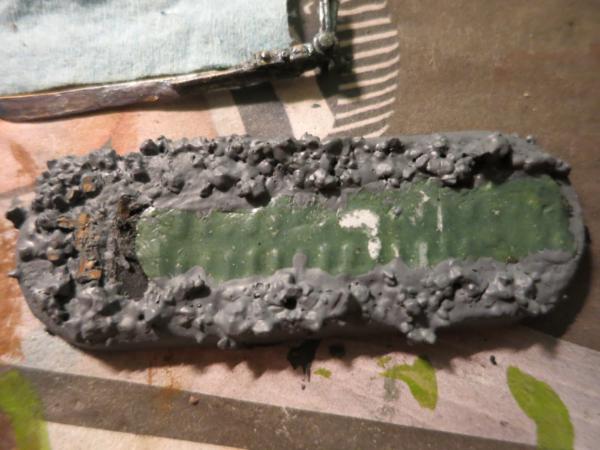
I twisted the flag into a dramatic shape. I used some stuff on my desk to hold the shape while the green stuff hardens.
Letting the Green Stuff Set
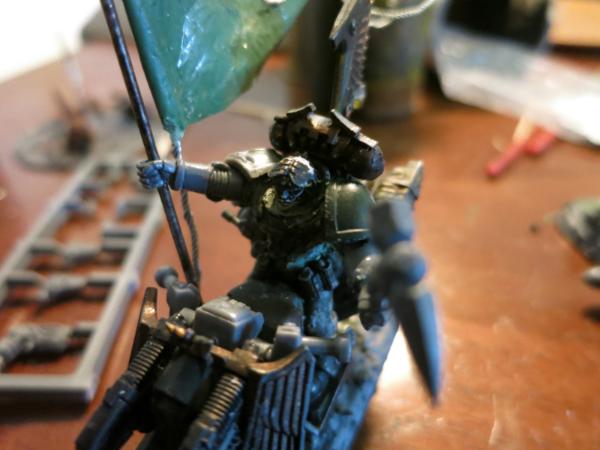
Head on the Ravenwing Black Knight Flag Bearer
Finally, I put three more strands of twisted floral cord to make the model more dramatic.
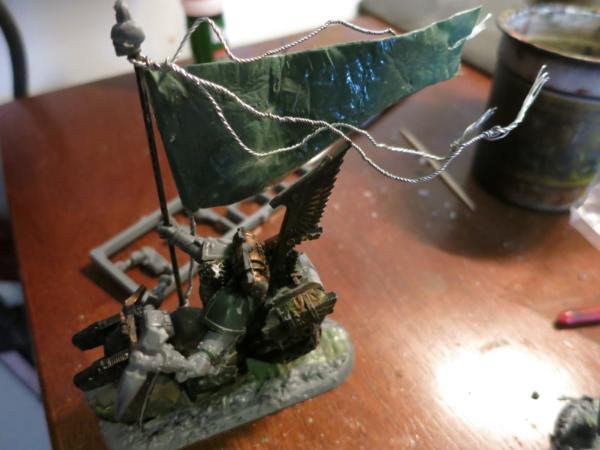
Three Cords on Black Knight Flag Bearer
Then I painted up the model and added the decals.
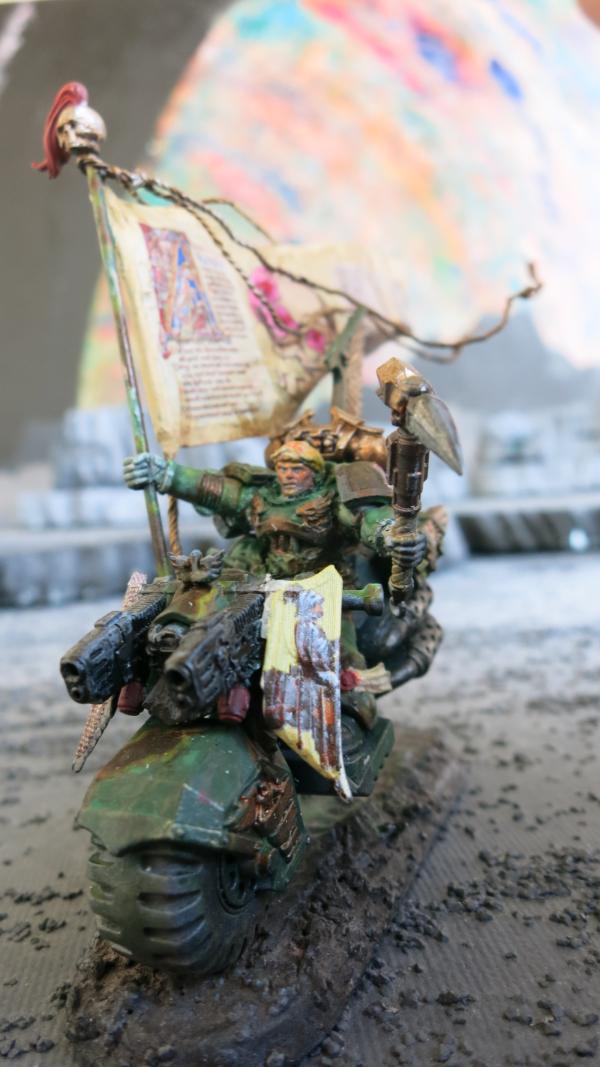
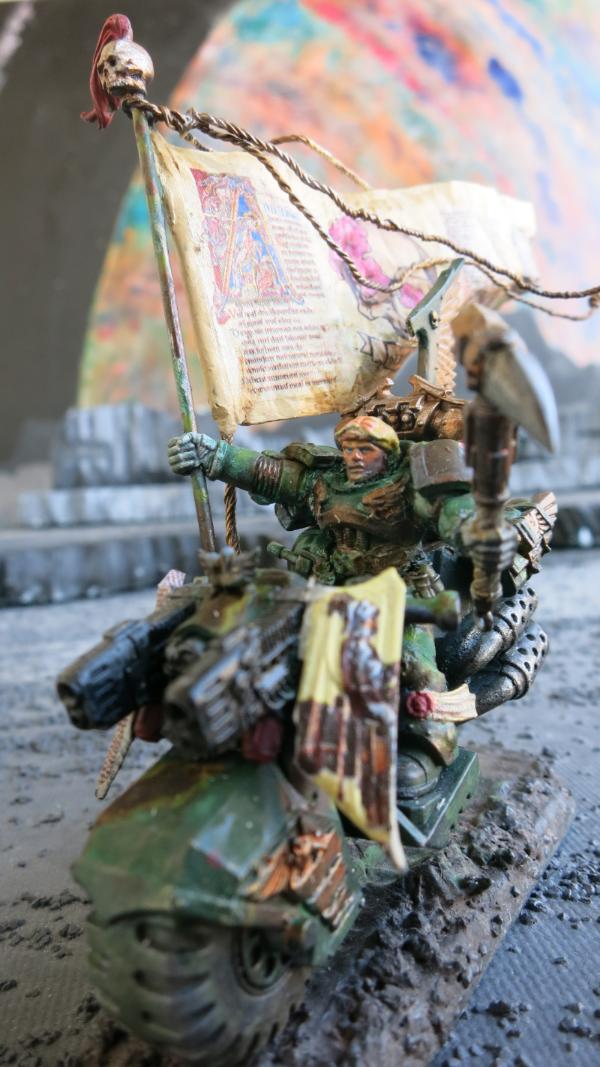
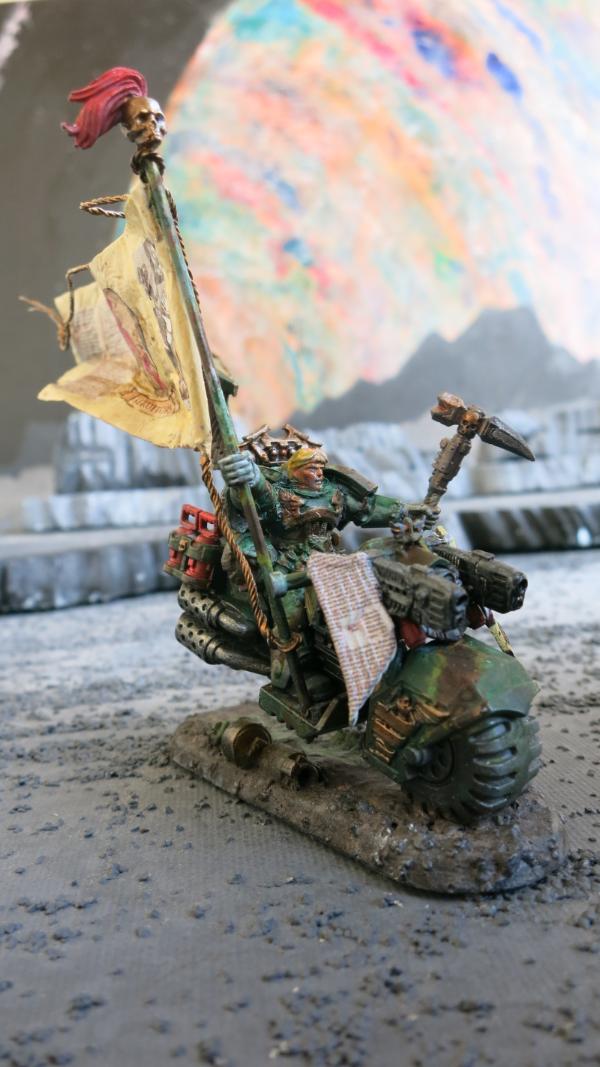
Ravenwing Black Knight with Flag
Ravenwing Black Knight with Flag – Right View
Ravenwing Black Knight with Flag – Left View
Ravenwing Black Knight with Flag – Closeup View
|
|
|
|
|
2016/12/18 14:52:00
Subject: Reworking the Black Knights – New Decals
|
|
Focused Dark Angels Land Raider Pilot
|
Reworking the Black Knights – New Decals
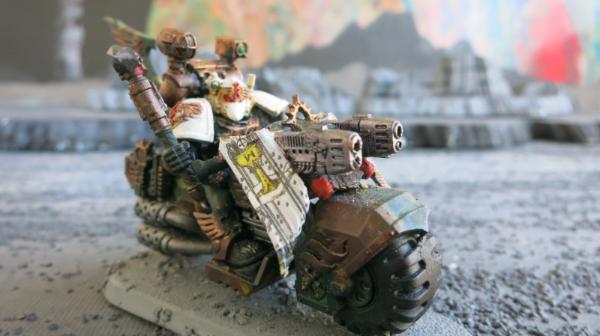
I placed decals of Medieval Manuscripts and Tarot Cards on the fairing of the bikes on my Black Knights. I had to repaint the fairings white and add a lot of Micro Sol to the decals to get the decals into the crevices in the fairing.
Black Knight with Manuscript Decal on Fairing
Black Knight with Death Tarot Card on Fairing
|
|
|
|
|
2016/12/18 15:11:40
Subject: 6th Biker Troop - “Schrödinger's Apocalyptic Raiders”
|
|

Pious Palatine
|
Cool. Always nice to see the steps players take to create effects of basing and modelling.
Thanks for the showcase.
EDC
|
|
|
|
|
2016/12/19 17:06:32
Subject: 6th Biker Troop - “Schrödinger's Apocalyptic Raiders”
|
|
Focused Dark Angels Land Raider Pilot
|
 evildrcheese wrote: evildrcheese wrote:Cool. Always nice to see the steps players take to create effects of basing and modelling.
Thanks for the showcase.
EDC
Thank you Evil Dr. Cheese for your comments. I do like showing the steps because some of them are easier to do than they look.
|
|
|
|
|
2016/12/20 12:32:35
Subject: Reworking the Company Champion – New Decals
|
|
Focused Dark Angels Land Raider Pilot
|
Reworking the Company Champion – New Decals
I placed decals of Medieval Manuscripts and Tarot Cards on the fairing of the bikes on my Black Knights. I had to repaint the fairings white and slop on a lot of Micro Sol to the decals to get them into the crevices in the fairing.
Ravenwing Company Champion with Manuscript Decal Fairing
Ravenwing Company Champion with Knight Tarot on Fairing
|
|
|
|
|
2016/12/20 12:49:46
Subject: Re:6th Biker Troop - “Schrödinger's Apocalyptic Raiders”
|
|
Utilizing Careful Highlighting
|
lovely bases, great tutorials as well
I love seeing epic bases 
|
|
|
|
|
|
2016/12/21 14:18:29
Subject: Re:6th Biker Troop - “Schrödinger's Apocalyptic Raiders”
|
|
Focused Dark Angels Land Raider Pilot
|
Thank you Guildenstern for your encouragement.
I love epic bases too but I wouldn’t really call my bases epic. My bases are more simple and uniform. They are designed to match each other and blend into playing field or background. I keep my bases dull and simple in part so that they will not distract the eye from looking at the upper parts of the model. Still a few subtle details like footprints and buried heads and equipment give a little personality to the base.
On the other hand, I have been looking at your models and some of your bases are epic. Your epic bases really helps the model look real. Your bases and models are fun to look at.
|
|
|
|
|
2016/12/22 13:43:09
Subject: Reworking the Ravenwing Apothecary _ New Decal
|
|
Focused Dark Angels Land Raider Pilot
|
Reworking the Ravenwing Apothecary _ New Decals
I both repainted the fairing and portions of the Apothecary with a gold tinted off white.
Ravenwing Apothecary with Decals on Fairing
Ravenwing Apothecary with Medieval Manuscript Decal on Fairing
Ravening Apothecary with Tarot Ace of Cups Decal on Fairing
Ravenwing Apothecary – Rear View
This view shows the gold and white mixture of paint on the shoulder pad.
|
|
|
|
|
2016/12/23 14:52:02
Subject: Sternguard
|
|
Focused Dark Angels Land Raider Pilot
|
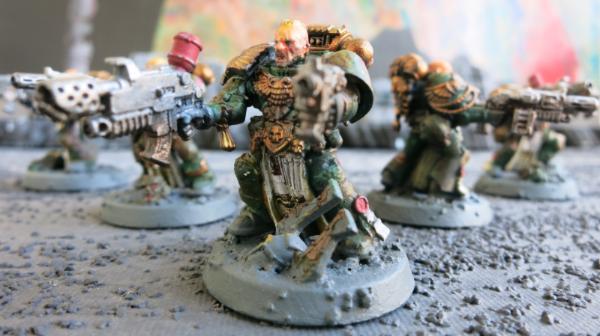
Sternguard
Sternguard are supposed to be a top unit in 40K. I played some this summer and for me they are not great. I think they are too complicated for my playing style. I like my units a little more simple. I am tending toward long range shootie units like thunderfire cannon which you place in back and shoot at what you can. Or I like Ravenwing. Move towards the enemy as fast as you can. Shoot in range and then assault. Hit and run and shoot or assault same or another target.
With Sternguard, I have to do too much thinking. They are a Goldilocks unit. They can be too close to the enemy or too far. Some units they will kill and some will kill them. Use the right ammunition or in many cases, the bolter or the combi-weapon depending on the situation.
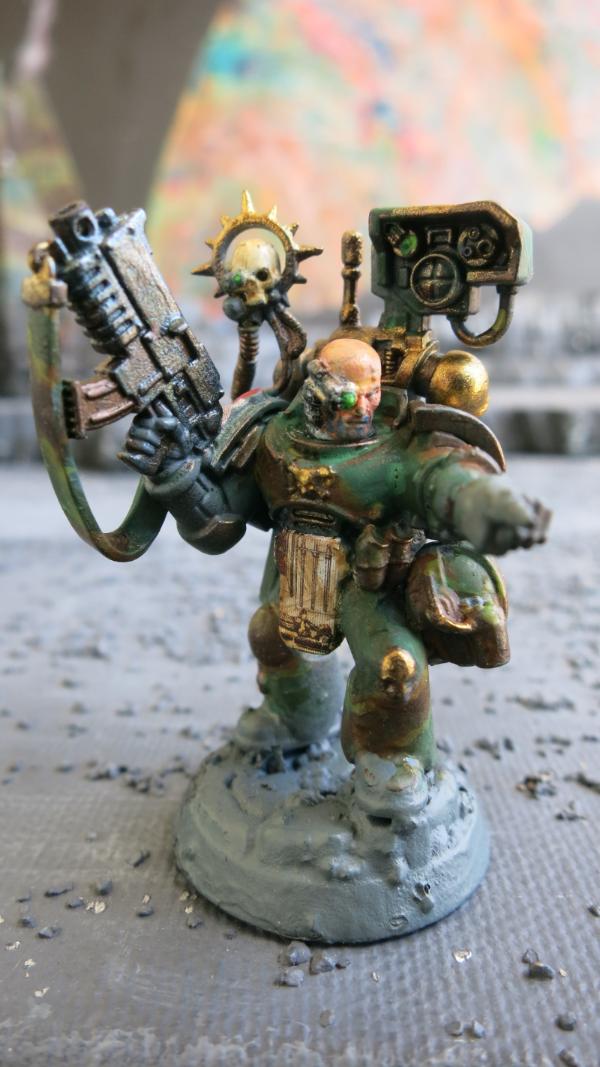
Still, I like the models. Here is the first.
First Sternguard Veteran
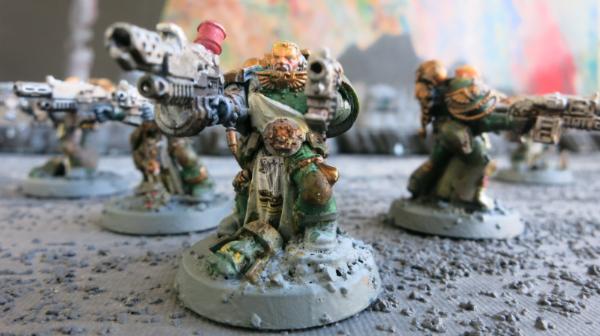
First Sternguard Veteran – Another View
|
|
|
|
|
2016/12/24 22:06:19
Subject: Second Sternguard Veteran – Scarface
|
|
Focused Dark Angels Land Raider Pilot
|
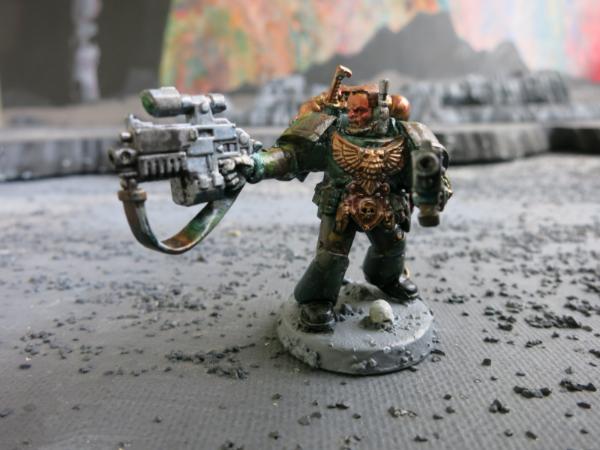
Second Sternguard Veteran – Scarface
Second Veteran - Scarface
Second Veteran with Combi-Flamer
Second Veteran – Close-Up
|
|
|
|
|
2016/12/26 16:50:54
Subject: Re:6th Biker Troop - “Schrödinger's Apocalyptic Raiders”
|
|
Focused Dark Angels Land Raider Pilot
|
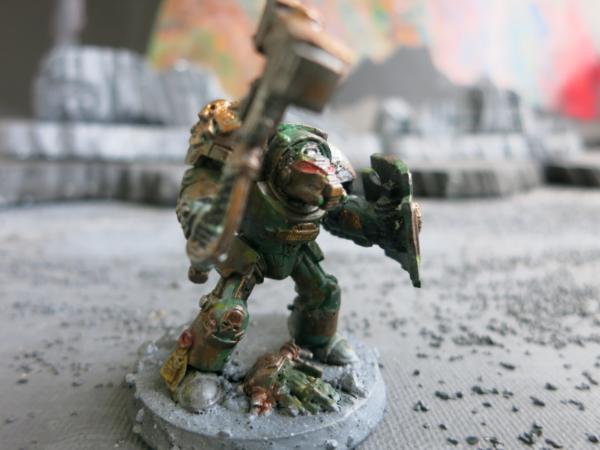
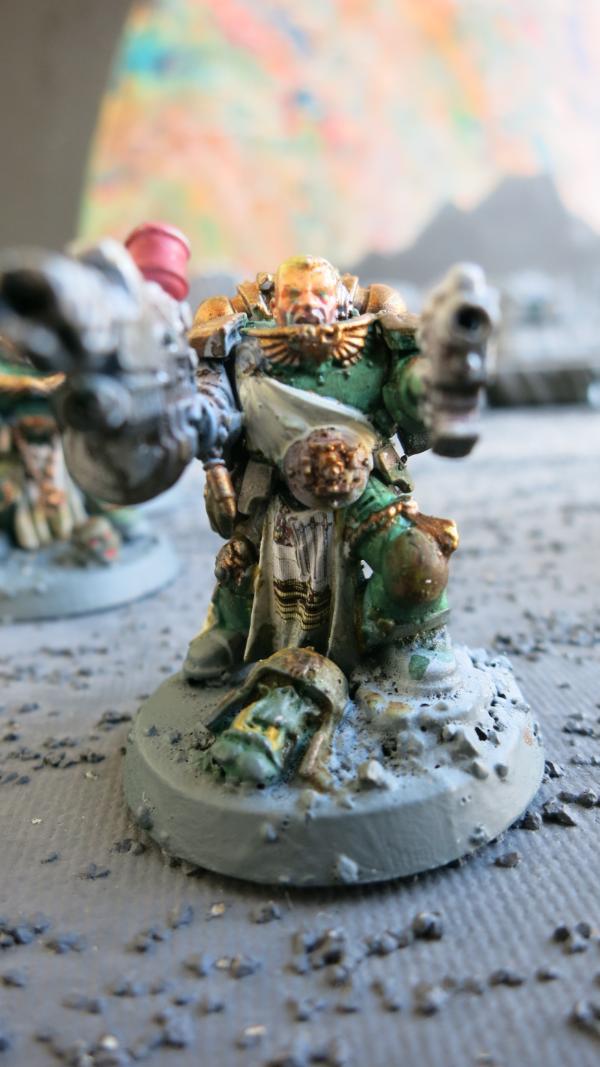
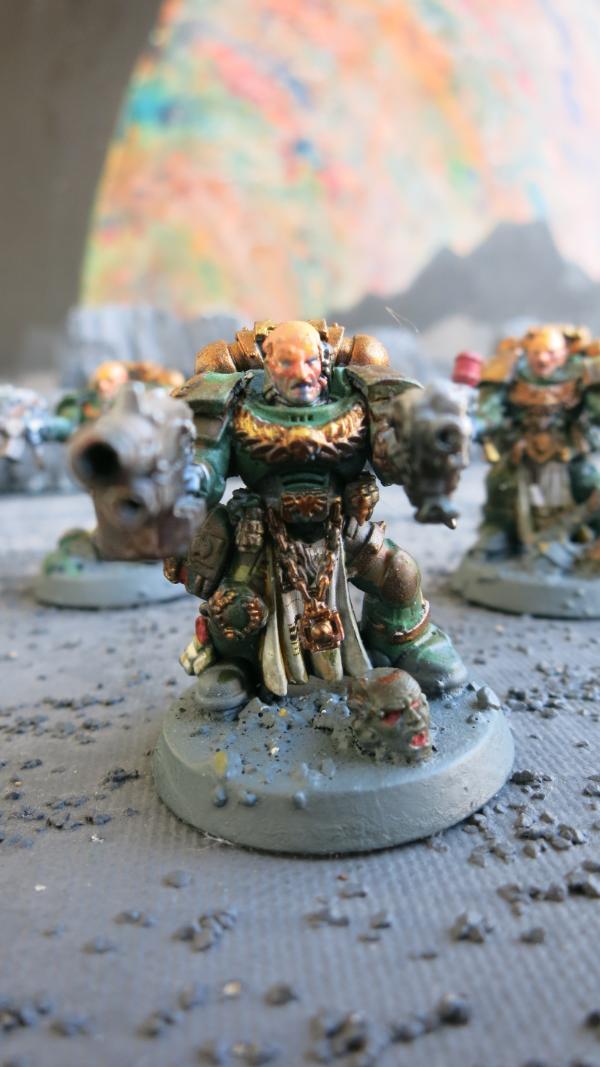
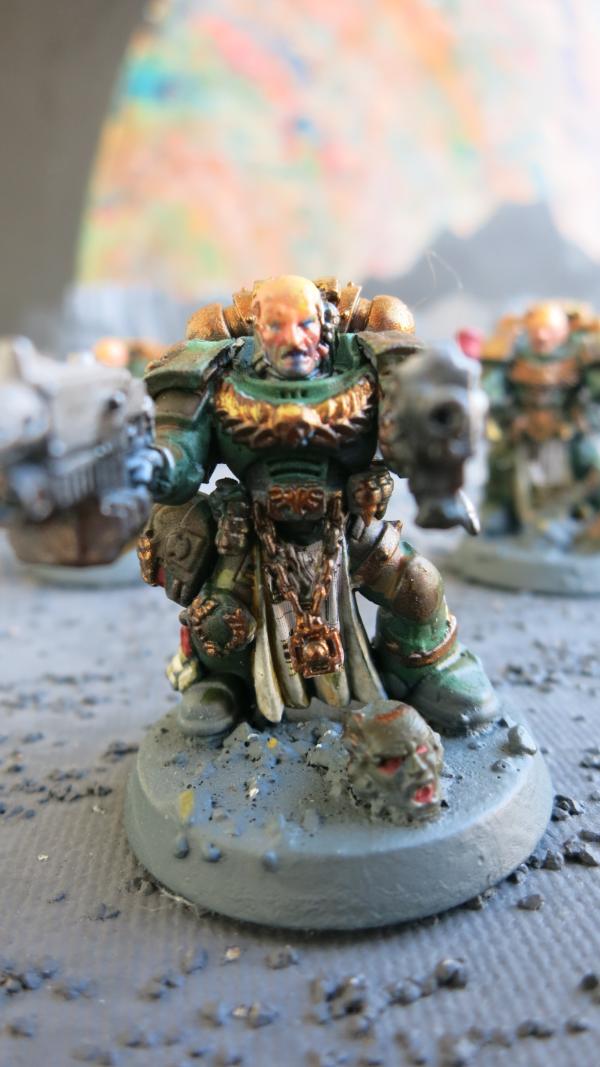
Third Sternguard Veteran
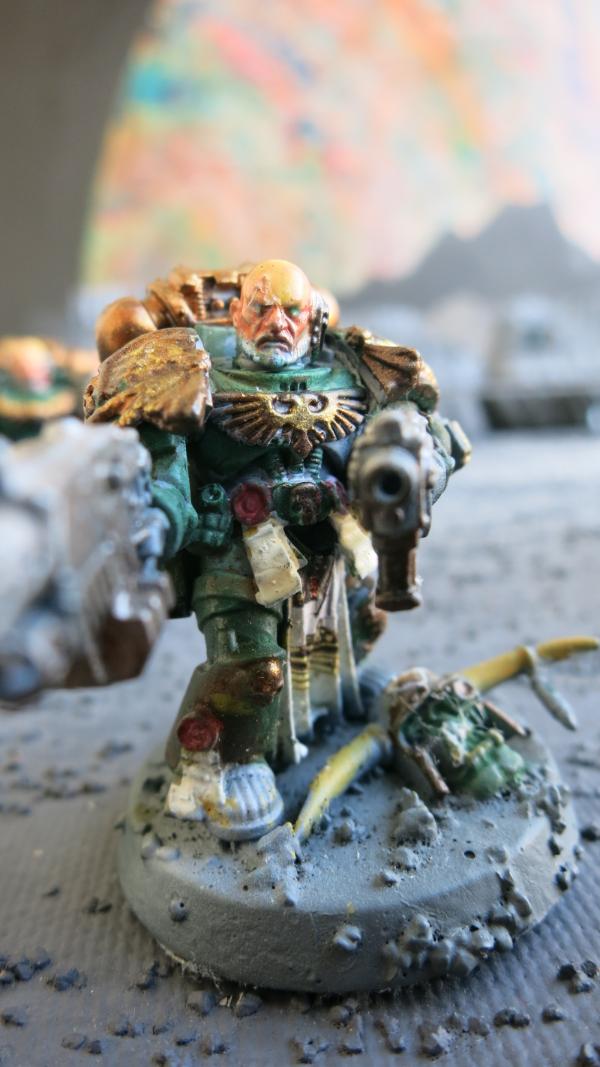
Third Sternguard Veteran – The Old Man
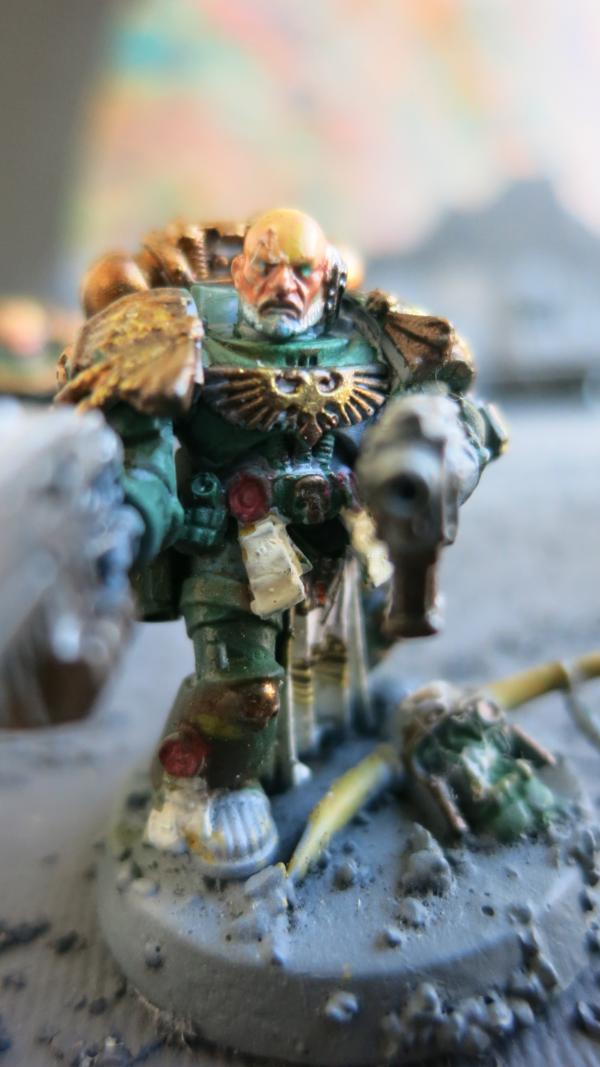
Third Sternguard Veteran – Close-Up
I can see a few things I could fix up on this veteran. For example, I need to put some of my medieval manuscripts writing on the ribbons on the purity seals. Of course, the models are a smaller than the photos so some of the details I spot in the photo are not really noticeable on the model itself.
|
|
|
|
|
2017/01/01 16:40:36
Subject: Fourth Sternguard Veteran – The Chaos Fighter
|
|
Focused Dark Angels Land Raider Pilot
|
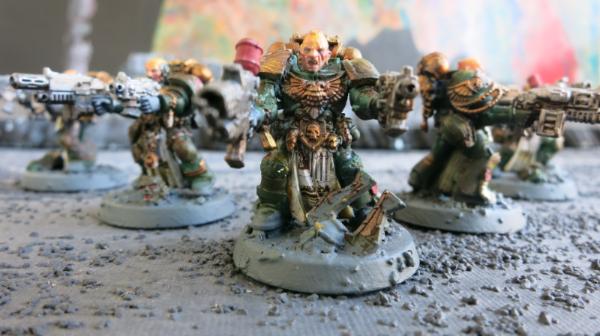
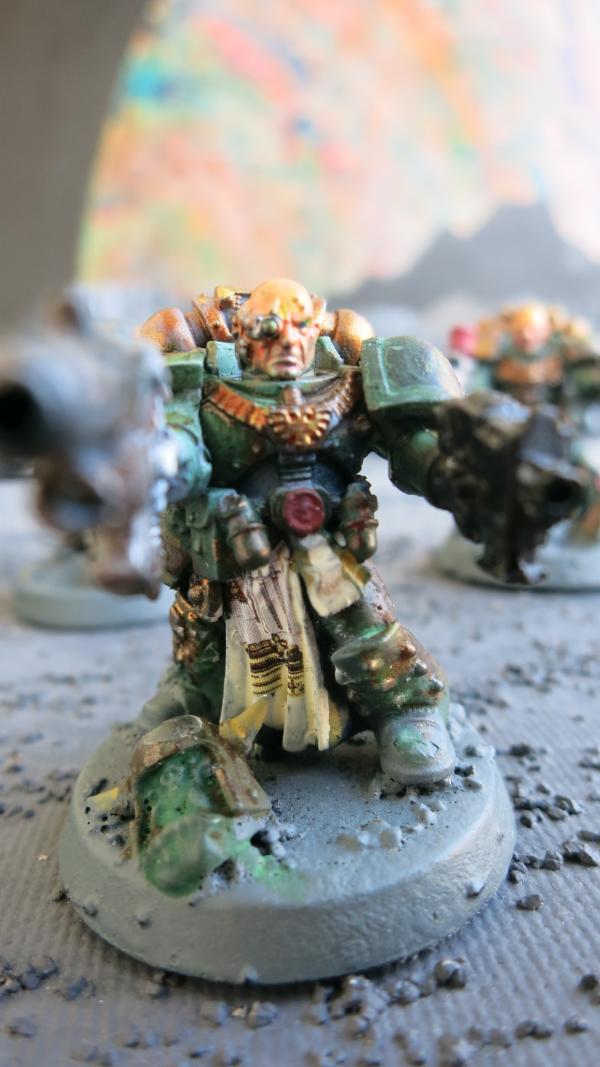
Fourth Sternguard Veteran – The Chaos Fighter
Fourth Veteran – Exterminating Chaos Traitor Marines
Fourth Veteran Administering Purifying Rituals to Traitors and Tyrants
|
|
|
|
|
2017/01/03 12:42:24
Subject: The Fifth Sternguard
|
|
Focused Dark Angels Land Raider Pilot
|
The Fifth Sternguard
The Last Sternguard Veteran
|
|
|
|
|
2017/01/06 13:46:43
Subject: Pseudo-Sammael AKA Captain Cat Schrödinger
|
|
Focused Dark Angels Land Raider Pilot
|
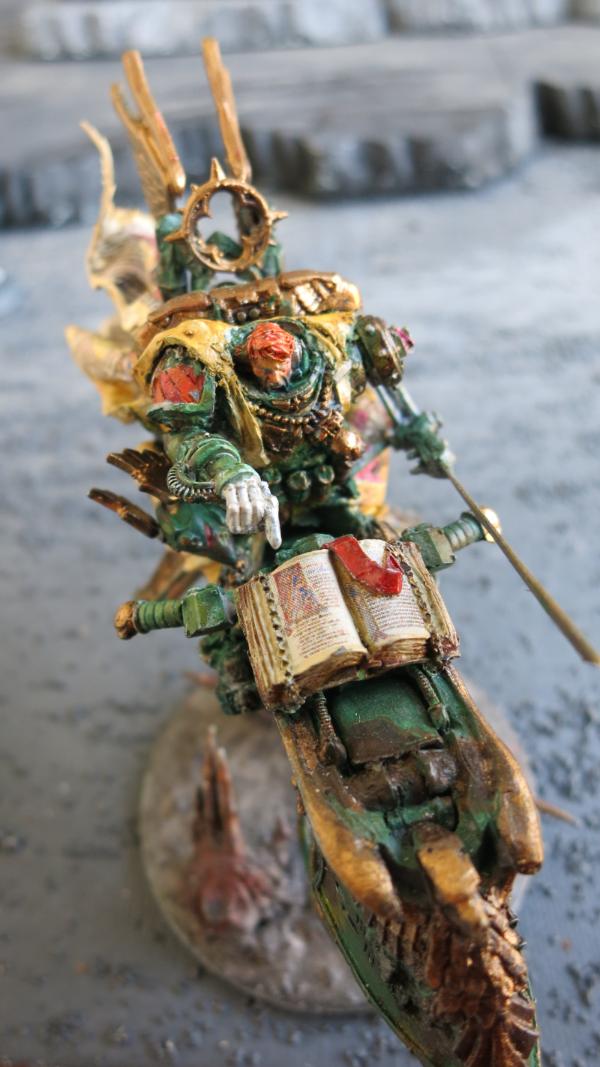
Pseudo-Sammael AKA Captain Cat Schrödinger
The name of this blog is 6th Bike Troop – “Schrödinger’s Apocalyptic Raiders.” Captain Schrödinger is the commander of the 6th Bike Troop but he is played as Sammael in the Dark Angel’s codex. The model for Schrödinger is modified from the Games Workshop Sammael making it a Pseudo-Sammael.
Captain Cat Schrödinger
This is my most rebuilt model. I am still working on him. I am not happy with the angle on his right arm, the one with the pointing finger. I am considering rebuilding it so that the arm and hand are straighter.
Captain Cat Schrödinger – Top View
I made the right hand from the Ravenwing Flag Holder bit. I cut off the flagpole and drilled out the remaining flagpole bits that his thumb and fingers were holding. I then trimmed off his index finger and glued in a piece of wire. The wire was cut from a paper clip. I added green stuff to the wire to make a pointing finger. In this picture the hand has only a chalky white base coat but I need to dull it down and add some shadow with a green or black shade such as Citadel Nuln Oil. The book pages are from a medieval manuscript decal that I had made by Fallout Hobbies.
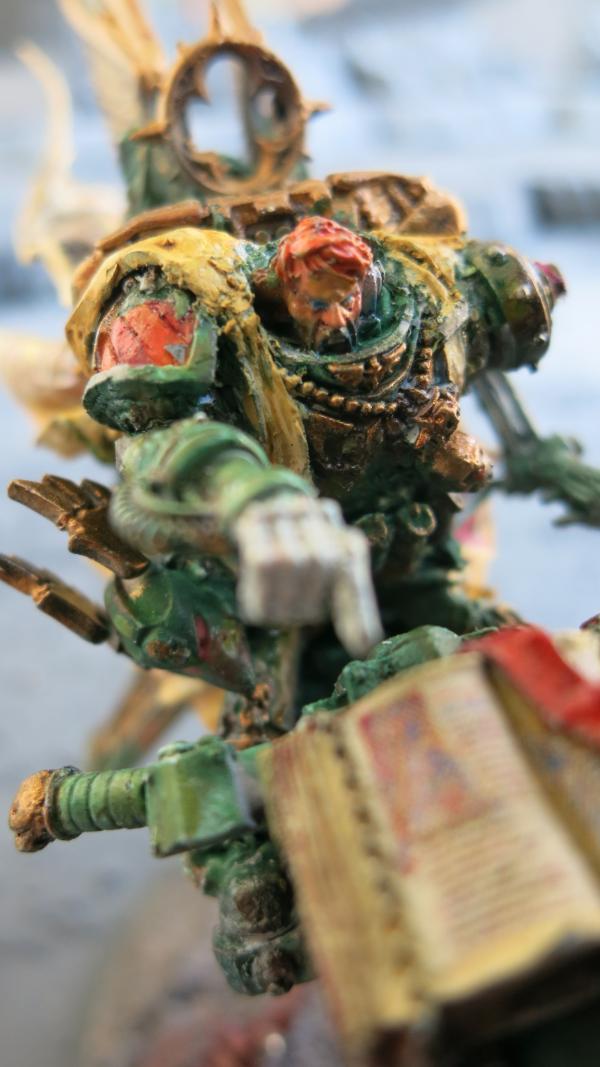
Captain Cat Schrödinger – Close-Up
I take close-up pictures of some of my models but they are hard to focus and only parts of the model are in focus. It also shows the flaws. Notice on the shoulder pad is a small gray triangle in the corner. This is a piece of stray plastic. I found it and removed it after viewing the close-up but I wouldn’t have notice this without the picture. I am tempted to replace the shoulder pad if I can do it without damaging the cape. I have a shoulder pad from some other models that would made a good replacement. Also, I need to trim the edges of the cape since they are ragged.
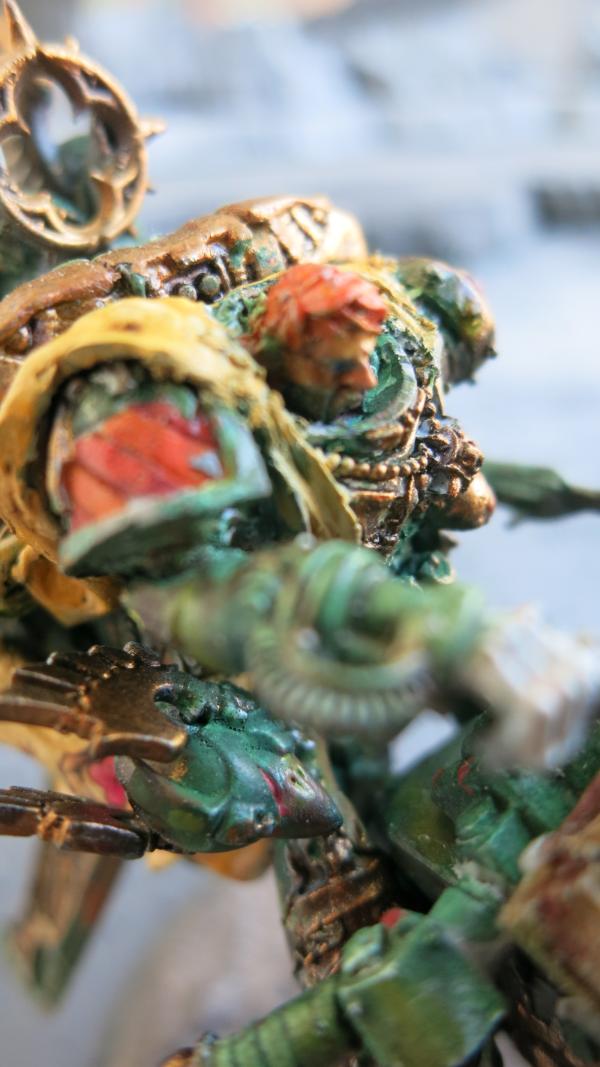
Captain Cat Schrödinger – Really Close-Up
This picture shows the problems with close-up views. Notice that the only things in focus are the helmet and the backpack. You can see green paint on the backpack that is hardly noticeable when the model is viewed normally.
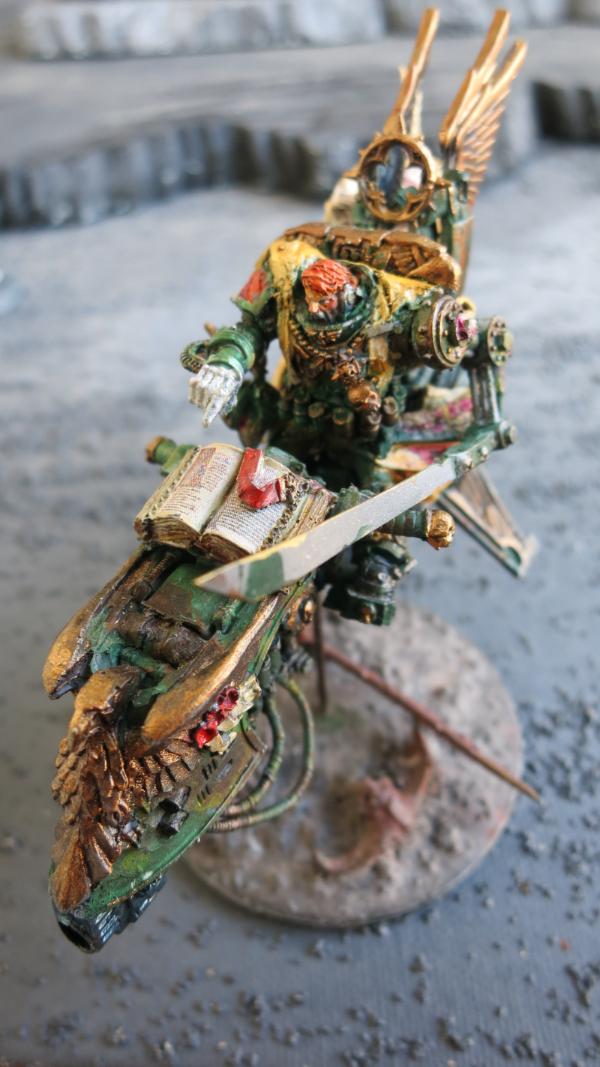
Captain Cat Schrödinger – Left Front View
In this picture, I have not finished painting the sword blade and I still have the relics of a decal I tried to put on his left shoulder. I have since removed the decal and painted the sword but that is for the next bunch of pictures.
Captain Cat Schrödinger
|
|
|
|
|
2017/02/20 16:31:16
Subject: The Daemon Slayer
|
|
Focused Dark Angels Land Raider Pilot
|
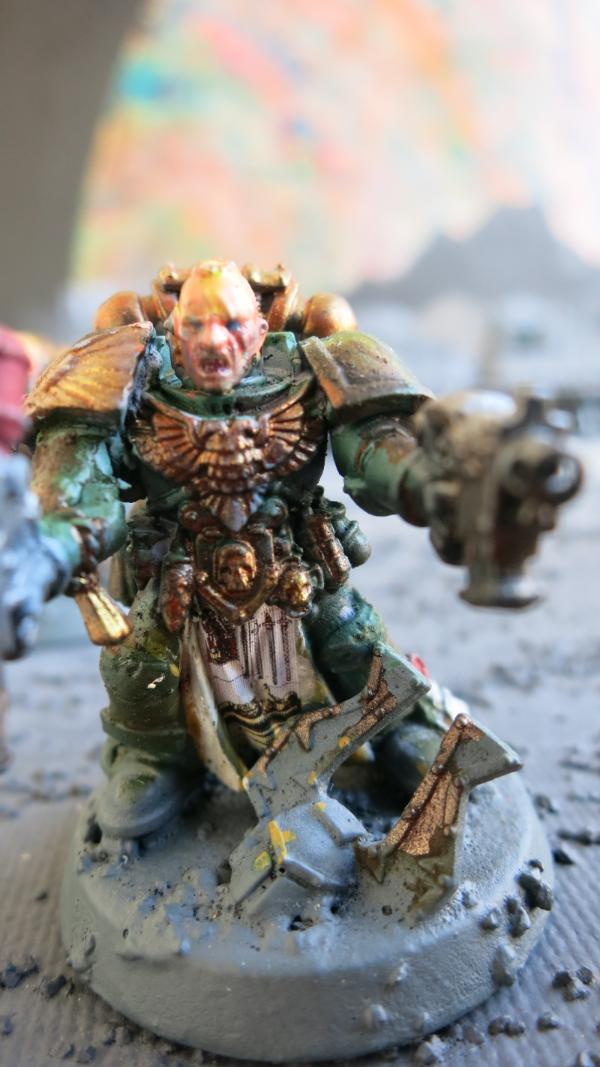
Pseudo-Sammael Continued
I painted Cat Schrödinger’s sword which is called the Daemon Slayer although its true name is for this is the day of the Lord God of hosts, a day of vengeance, that he may avenge him of his adversaries: and the sword shall devour, and it shall be satiate and made drunk with their blood. Jeremiah 46: 9 – 10.

The Daemon Slayer
I was able to get a more precise lighting streak by painting the lighting first and then painting in the dark background on the sword. I am not sure I like the colors of the lighting. I somewhat wish I had used blue and white rather than orange and white.

Daemon Slayer – Rear View

Daemon Slayer – Front View
In this view I had a reflection problem with the light so some of the details are lost. I also note that I need to remove some scrapes of decal that are still remaining on the shoulder.
Cat Schrödinger
|
|
|
|
|
2017/03/04 01:51:34
Subject: Repainted Devastator Sergeant
|
|
Focused Dark Angels Land Raider Pilot
|
Repainted Devastator Sergeant
Several posts ago I mentioned that I had trouble with the white spray primer which beaded up on the Devastator Sergeant. I had made the mistake of painting over the beaded primer but the results were poor.
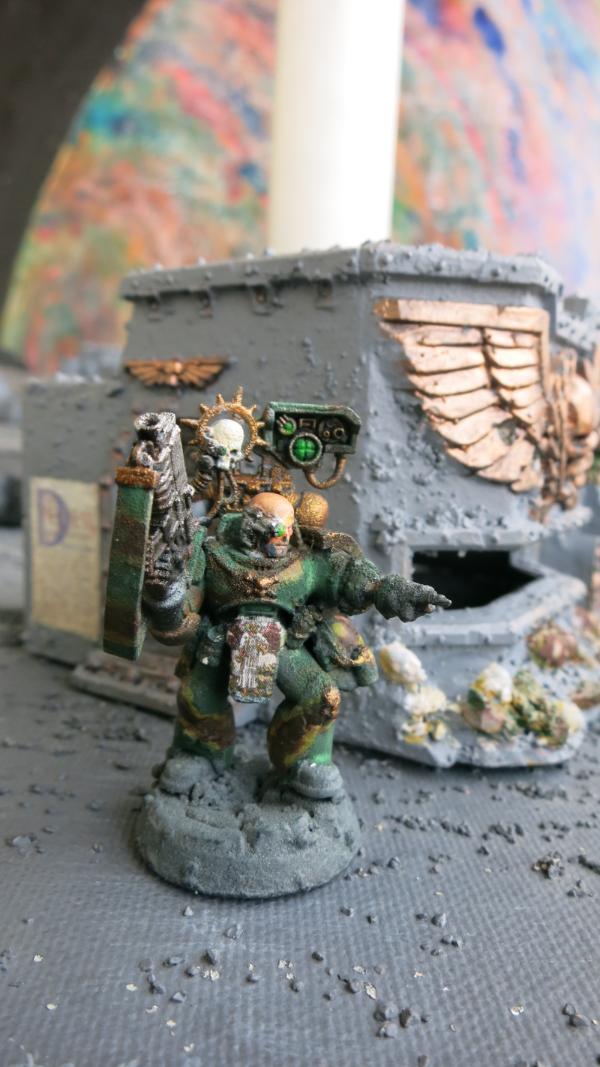
Devastator Sergeant with Beaded Primer
I finally stripped off the paint, sanded off the primer, and repainted him. Fortunately, I had painted his head separately so I didn’t have to strip and repaint his head. I really like the new paint job.
Repainted Devastator Sergeant

Repainted Devastator Sergeant – Left View

Repainted Devastator Sergeant – Rear View
Repainted Devastator Sergeant – Right View
In some of these close-up views you can still see a little beading that I wasn’t able to remove but this model looks so much better now.

Close-up Repainted Devastator Sergeant
|
|
This message was edited 1 time. Last update was at 2017/03/04 01:52:19
|
|
|
|
|
2017/03/16 20:00:28
Subject: Interrogator-Chaplain in Terminator Armor
|
|
Focused Dark Angels Land Raider Pilot
|
Interrogator-Chaplain in Terminator Armor - Unnecessary Model 1
I am creating a Deathwing Strike Force. This will be fun to use with my Ravenwing. The Ravenwing is fast and goes all over the board. It is great at getting in and out of assaults with hit and run. I find it can hit and run to slide pass a first unit to hit a second unit hidden by the first. Sometimes, however, it would be fun to use the Ravenwing to bring in a deep strike assault unit such as the Deathwing Knights.
Interrogator-Chaplain in Terminator Armor without highlights, decals, whites, or highlights
The Deathwing Strike force seems to be an answer. If the Ravenwing is on the table, the Deathwing can come in from Deep Strike Reserves when needed regardless of the Reserve Roll. As a minimum, the Deathwing Strike Force requires at least 1 headquarter and 2 elites. The relevant rule part of the rule states, “All units in this Detachment must have the Deathwing special rule or be Dedicated Vehicles.” The Command Benefit, Summoned to War, reads, “All units in this Detachment must begin the game in Deep Strike Reserve.”

Interrogator-Chaplain in Terminator Armor with White Decals Base
This works for models that have the Deathwing special rule and have either a jump pack or terminator armor. The question is, however, what about units that have the Deathwing special rule but are not wearing a jump pack or terminator armor, as for example, a Interrogator-Chaplain without any upgrade so that he is in power armor or even better, a Interrogator-Chaplain on a Bike? What is their status?

Front View of Terminator Interrogator-Chaplain with White Added
Until a few weeks ago, this was an open question? There were three possible answers. The first is only units that have the deep strike rule can deep strike and units with Deathwing special rule but are not in terminator armor or have a jump pack can’t deep strike so they never come in. I have looked on the internet and this seemed to be the majority opinion. The second option is that the since all units in the Detachment must begin the game in Deep Strike Reserve, this rule itself imposes Deep Strike rules on all units in this detachment regardless of their prior status. This is my position but it was the minority. A third position is that those units without the deep strike rule begin in reserve but enter as normal reserves. There was no support for this position in the rules as written since it says that all units must start in Deep Strike Reserves.
Close-up of Terminator Interrogator-Chaplain with White Added
So in spite of my interpretation of the rules, I built two interrogator-chaplains, one in terminator armor and one in a jump pack so that I wouldn’t have to open up a game with an argument on whether I could use my bike interrogator-chaplain who have the Deathwing special rule as my headquarters for the Deathwing Strike Force.
Interrogator Chaplain in Terminator Armor with Decals Added
Then the FAQ came out.
|
|
|
|
|
2017/03/18 14:26:09
Subject: Interrogator Chaplain in Terminator Armor – Unnecessary Model 2
|
|
Focused Dark Angels Land Raider Pilot
|
Interrogator Chaplain in Terminator Armor – Unnecessary Model 2
While I was building the Terminator Interrogator Chaplain, Games Workshop finally clarified the situation with an FAQ. I mentioned that there were three possible solutions to the rules, two which seemed to follow the rules as written. I had written, however, “A third position is that those units without the deep strike rule begin in reserve but enter as normal reserves. There was no support for this position in the rule since it says that all units must start in Deep Strike Reserves.”

Interrogator Chaplain in Terminator Armor with Mace of Redemption
So much for the rules as written. The FAQ follows the third position so I can now bring in my Interrogator-Chaplain on a bike as a normal reserve character. I probably will do so since he would be more flexible. Although not in terminator armor, he can join either the Ravenwing command squad or Deathwing Knights as needed.

Interrogator Chaplain in Terminator Armor – Back View
Still an Interrogator Chaplain in Terminator Armor is neat looking. The back view shows the decals which I have had fun adding.

Interrogator Chaplain in Terminator Armor – Top Back View
Now I don’t need this model but he was fun to build.

Interrogator Chaplain in Terminator Armor – Side View
|
|
|
|
|
2017/03/19 10:41:04
Subject: 6th Biker Troop - “Schrödinger's Apocalyptic Raiders”
|
|
Savage Khorne Berserker Biker
|
Nice interrogator chaplain!
|
|
|
|
|
|
2017/03/22 23:25:11
Subject: 6th Biker Troop - “Schrödinger's Apocalyptic Raiders”
|
|
Focused Dark Angels Land Raider Pilot
|
Thank you. I agree that the terminator chaplain is one of Game Workshops more attractive model even though it is a fairly old design.
|
|
This message was edited 2 times. Last update was at 2017/03/22 23:31:44
|
|
|
|
|
2017/03/23 15:04:34
Subject: Re:6th Biker Troop - “Schrödinger's Apocalyptic Raiders”
|
|
Focused Dark Angels Land Raider Pilot
|
Interrogator-Chaplain with Jump Pack – Another Unnecessary Model
Another model that I have built was a Interrogator-Chaplain with a Jump Pack. Jump Pack models can deep strike so I could bring him in with the terminators and he would still have some flexibility to join other units as needed.

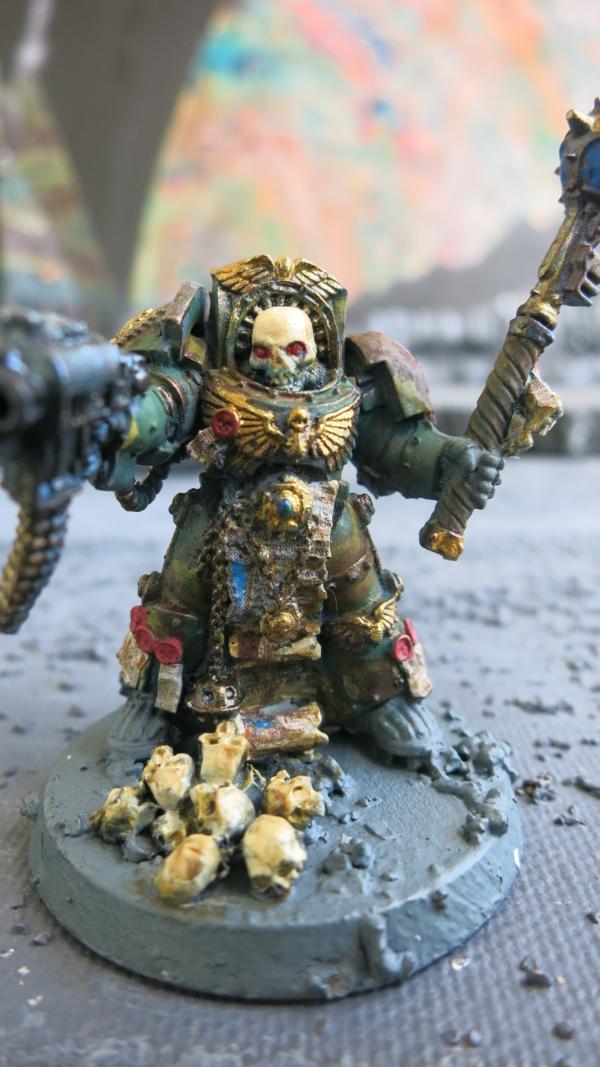
Interrogator-Chaplain with Jump Pack
This was a time consuming model to make. I started out with the Dark Angels Interrogator-Chaplain. I had made my Bike Interrogator-Chaplain from the Blood Angels Chaplain with Jump Pack but had not used the jump pack, so I added the jump pack to the Interrogator-Chaplain. I also removed the powerfist and replaced it with a bolt gun bit.
Unfinished Interrogator-Chaplain with Jump Pack
Also notice that I with this arrangement, I couldn't use the cape that came with the interrogator-chaplain but that is okay since they are reasonably easy to make out of green stuff.

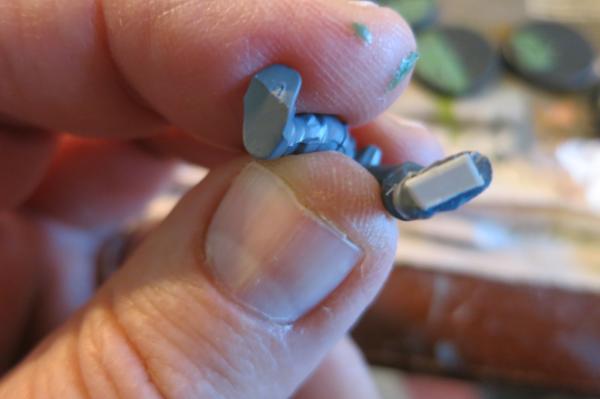
Green Stuff Capes
I actually made two capes, one for the Interrogator-Chaplain with Jump Wings and one for Terminator Interrogator-Chaplain. Later, I decided that the cape didn't really work for the Terminator Interrogator-Chaplain so I set it aside.
|
|
|
|
|
2017/03/26 13:08:53
Subject: Mounting the Interrogator-Chaplain with Jump Pack
|
|
Focused Dark Angels Land Raider Pilot
|
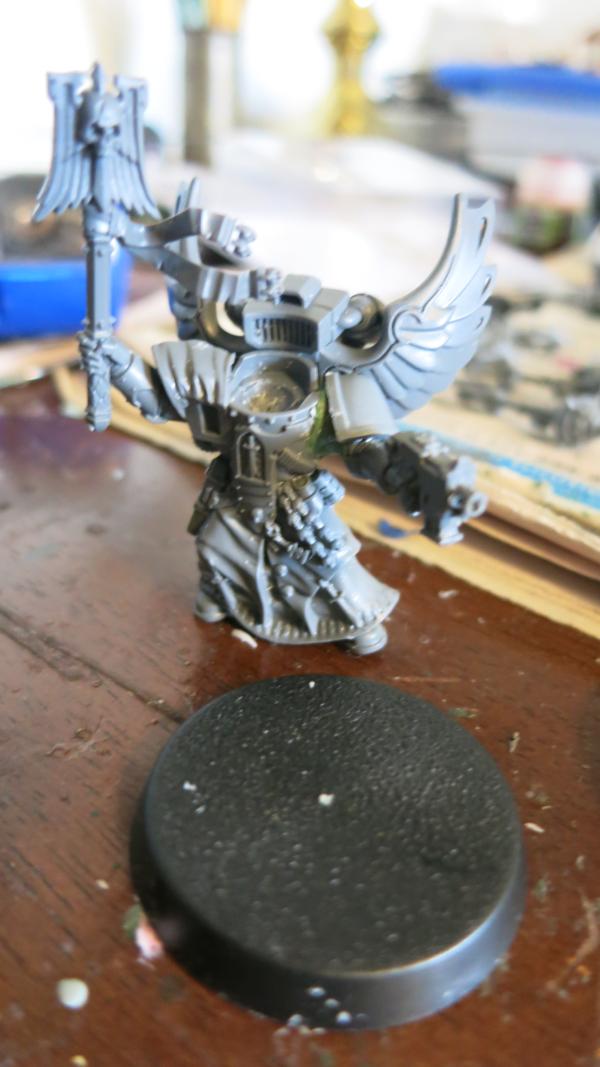
Mounting the Interrogator-Chaplain with Jump Pack

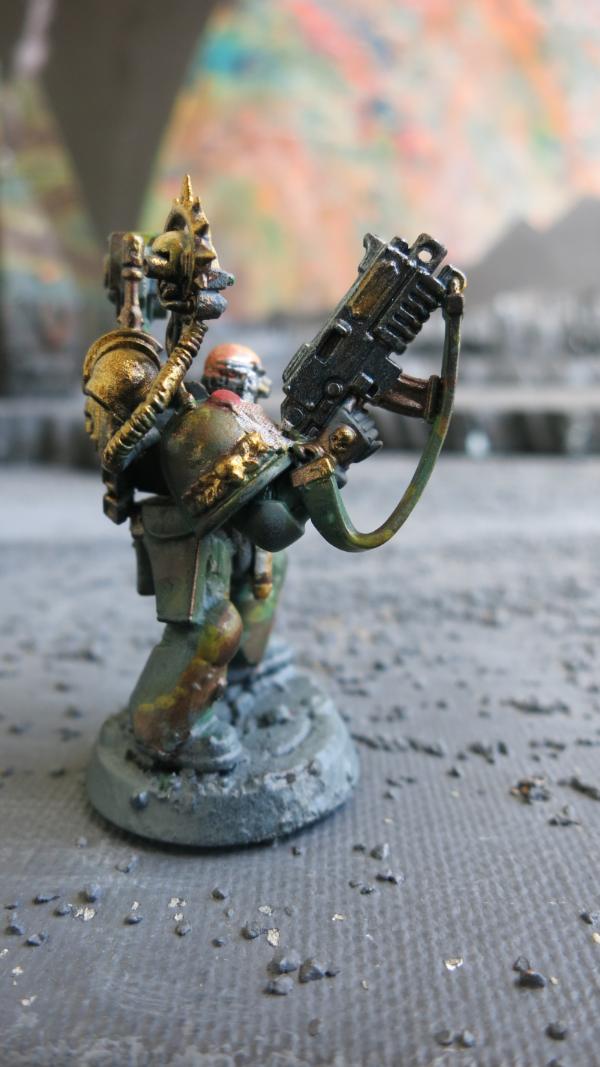
Interrogator-Chaplain with Jump Pack – Side View with Bolt Pistol
I wanted my jump pack models to be above the base. I had experimented with different arrangements but I found a piano wire is the best. To keep the wire mount perpendicular to the base, however, requires some creative bending.

Bending the Piano Wire with Pliers
I bent the piano wire with pliers. The wire is really stiff.

The Three Bends in the Wire.
I put three bends in it so that I had a small three-sided rectangle with a portion of the wire perpendicular to the rectangle.
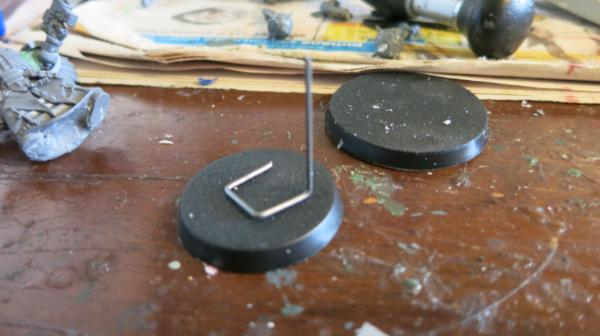
Shaped Piano Wire on Base
I broke off the end of the wire so that the small rectangle could sit flat under the base with the upright portion side up perpendicular to the base.

Hole in Base
I drilled a hole in the base.

Rectangle portion of piano wire glued on base.
I glued the rectangular portion of the piano wire to the bottom of the base with the upright portion going through the hole.

Base with upright piano wire
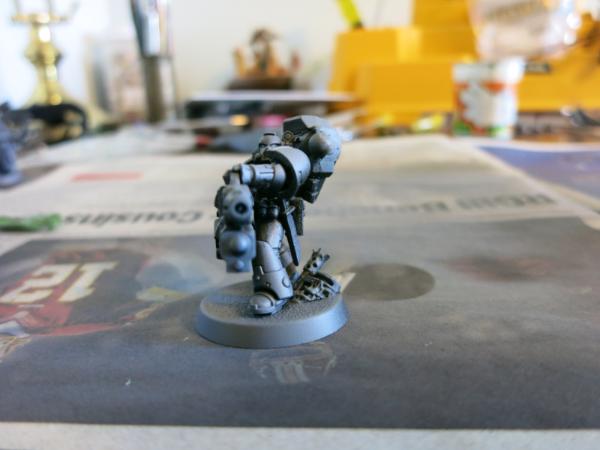
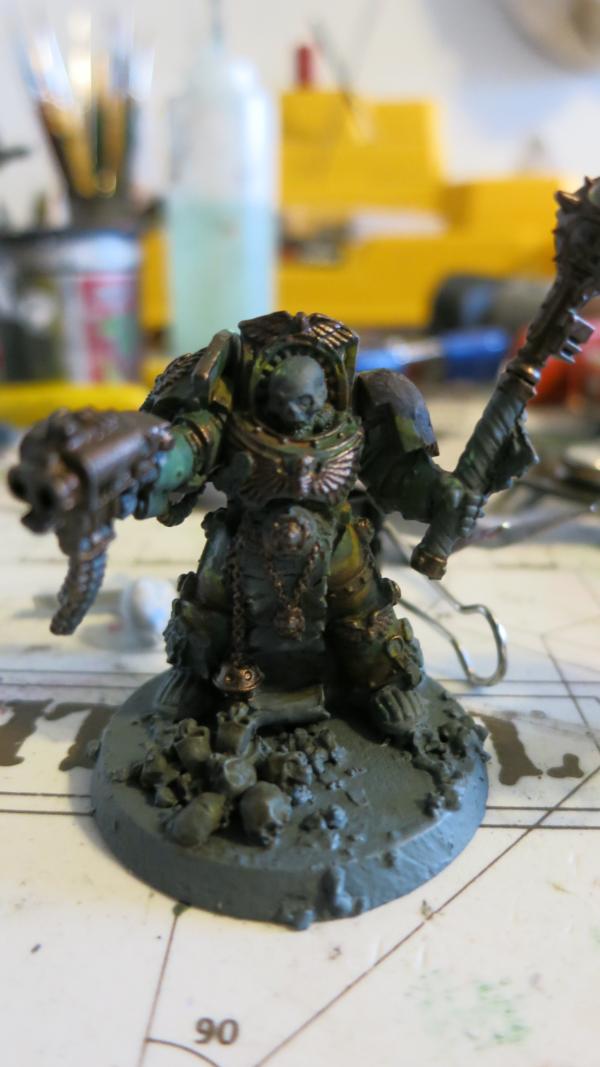
Then I mounted the Interrogator-Chaplain on the Base

Partially Painted Interrogator-Chaplain on Base
I had ordered the pack of skulls from Games Workshop which had some piles of skulls. I cut up one of the small piles and added to the base as well as a single skull or two from the kit. I also added a Chaos space marine pack. I have a Gesso mix with some railroad modeling ballast that I painted over the base.
|
|
|
|
|
2017/03/29 11:59:21
Subject: Preparing the Interrogator-Chaplain with Jump Pack for Decaling
|
|
Focused Dark Angels Land Raider Pilot
|
Preparing the Interrogator-Chaplain with Jump Pack for Decaling
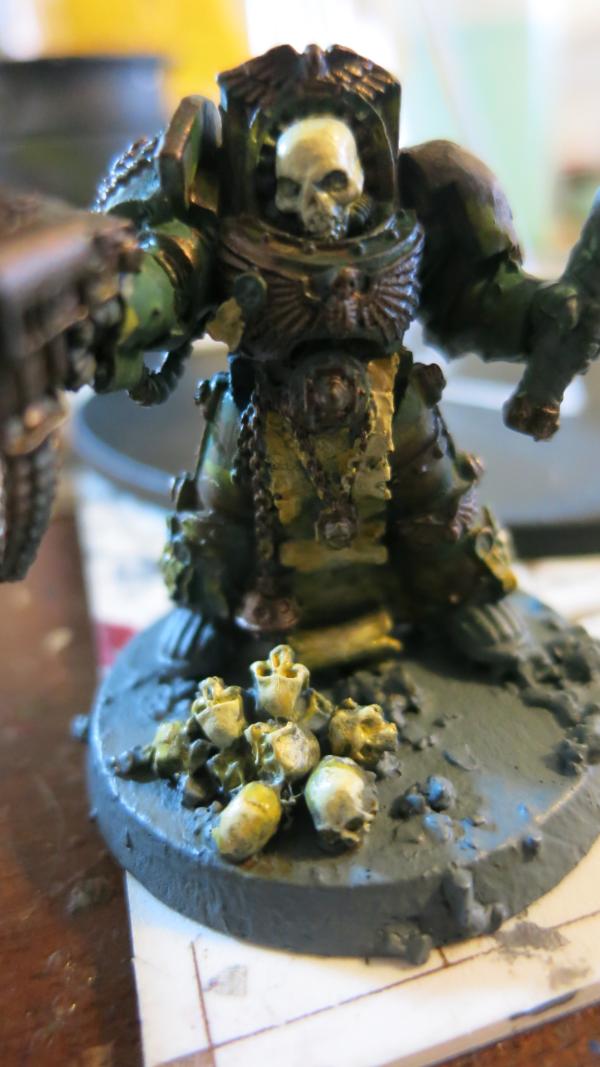
I had fun making this model. The most challenging part was putting on decals. Most of this model is covered by a fabric robe and hood. The decals make it look like the fabric is embroidered like a medieval tapestry. The first step was painting all the fabric with an off white paint. I mixed the paint using white, yellow ochre, and some metallic gold mixed together.

White Base for Decals on Front of Model
I also painted the bits such as his keys that will be dangling over the fabric with a dark shade of the color that I intended to paint the bits. For most of those bits, that color was Vallejo Game Color Tinny Tin or bronze which is a great base for any metal finish. When a shiny metal paint, whether silver, iron, or gold is painted over the highlights, the tinny tin appears like shadowy recesses in the metal, giving the metal depth.

White Base for Decals on the Back on the Model
Notice that the cape has not been attached. I will decal portions of the cape separately and then glue and with green stuff, mold it onto the model and then repaint the joint and put on additional decals.

White Base on Cape for Model
I will put most of the decals on the cape and model before I put the cape on the model. I will have to blend the portion of the cape on the right shoulder of the model with the cape using green stuff and additional paint. It actually worked and I was able to cover that with a decal that help hid the seams.
|
|
|
|
|
|
|


