| Author |
Message |
 |
|
|
|
|
Advert
|
Forum adverts like this one are shown to any user who is not logged in. Join us by filling out a tiny 3 field form and you will get your own, free, dakka user account which gives a good range of benefits to you:
- No adverts like this in the forums anymore.
- Times and dates in your local timezone.
- Full tracking of what you have read so you can skip to your first unread post, easily see what has changed since you last logged in, and easily see what is new at a glance.
- Email notifications for threads you want to watch closely.
- Being a part of the oldest wargaming community on the net.
If you are already a member then feel free to login now. |
|
 |
2016/03/06 21:22:59
Subject: Re:Philmorgan75's workshop blog - Legion of the Dead
|
|

Regular Dakkanaut
|
Been away for awhile but I have been busy honest!!
Spent a lot of money over the past few months and I want to show you the progress I've made:
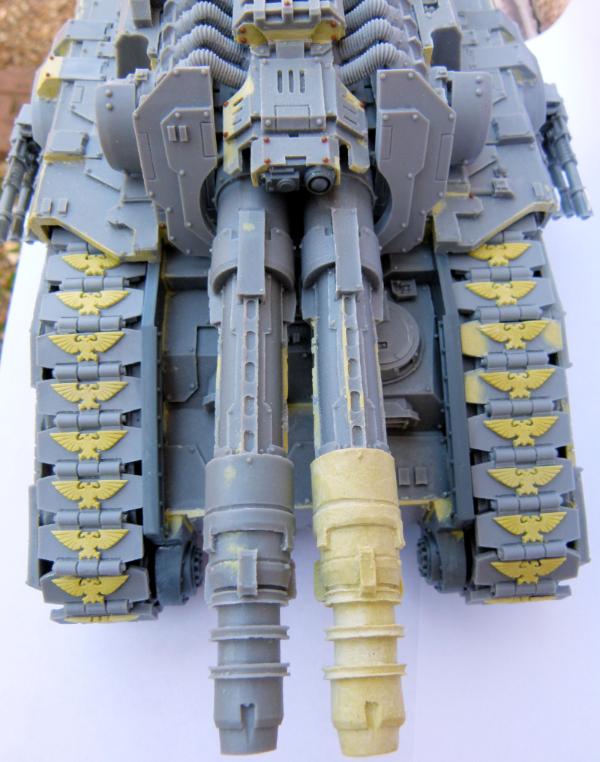
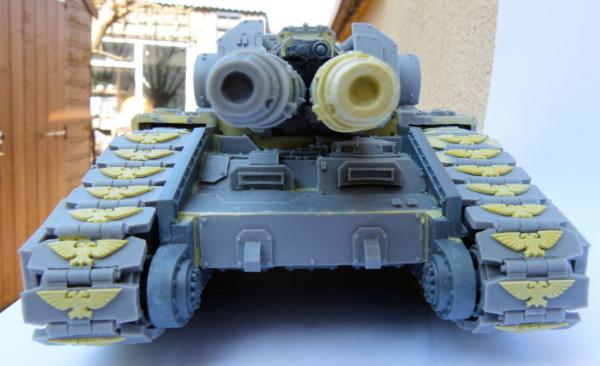
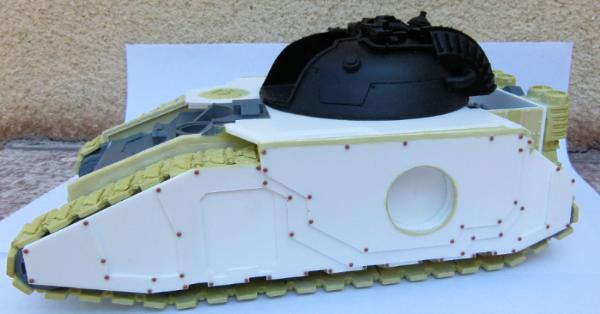
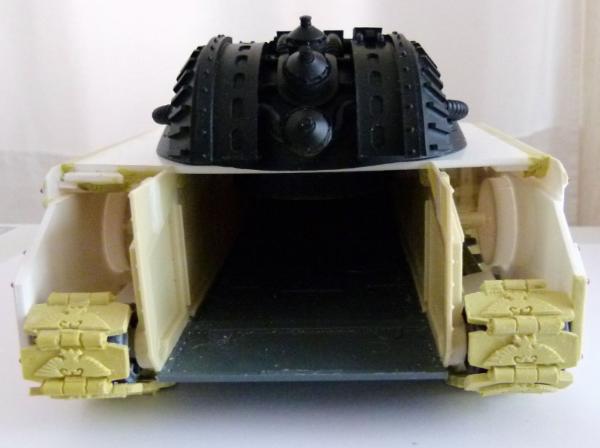
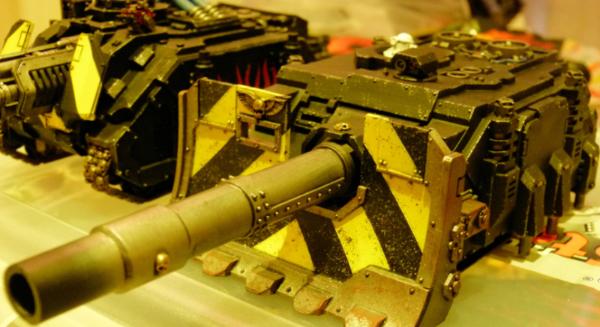
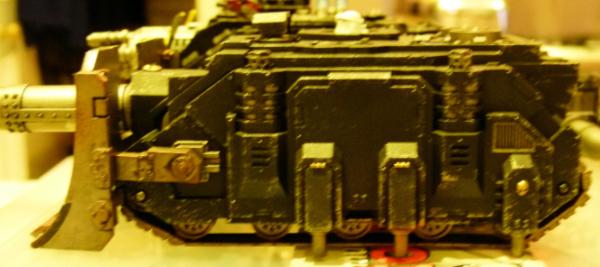
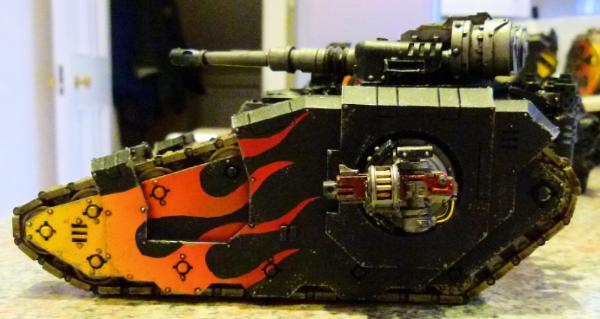
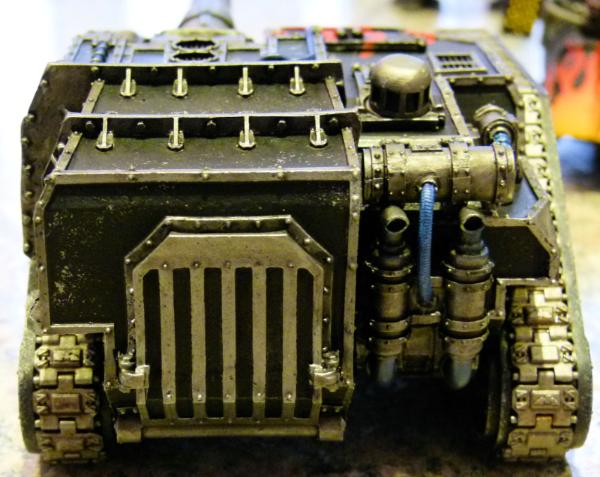
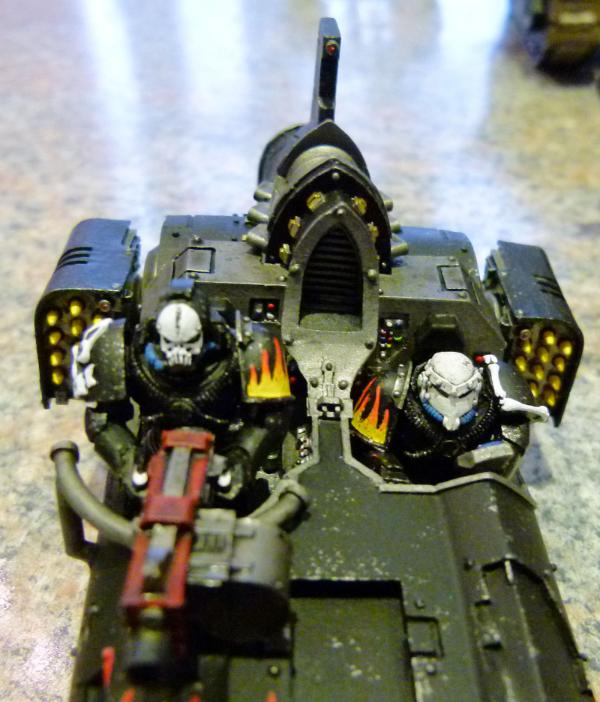
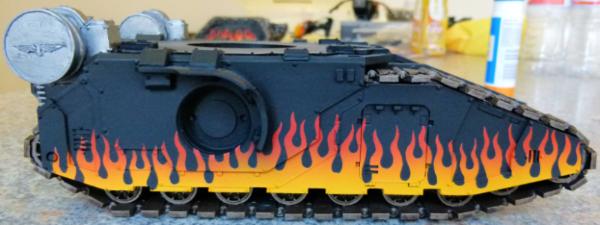
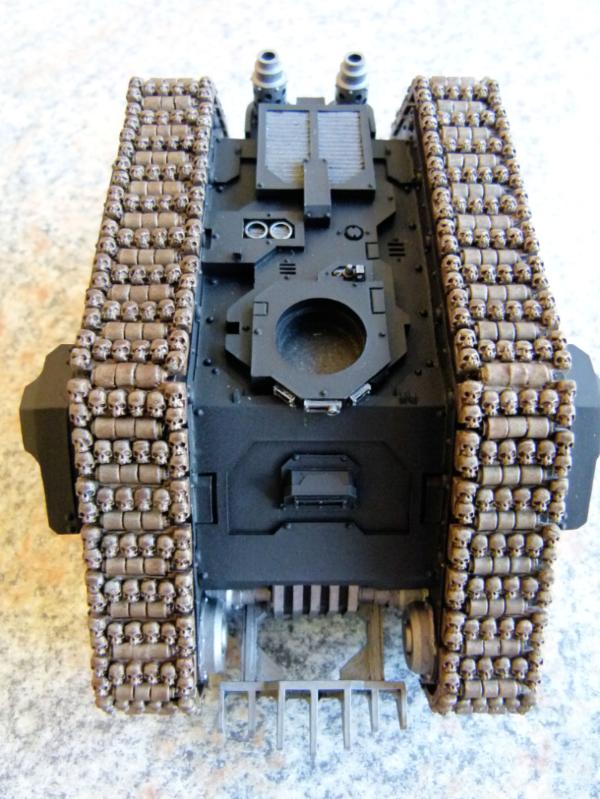
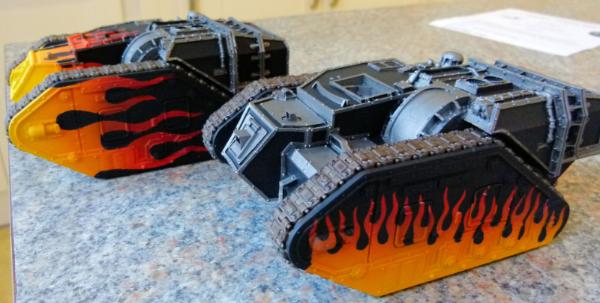
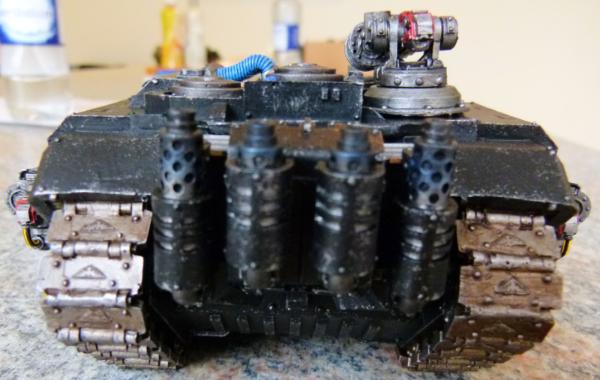
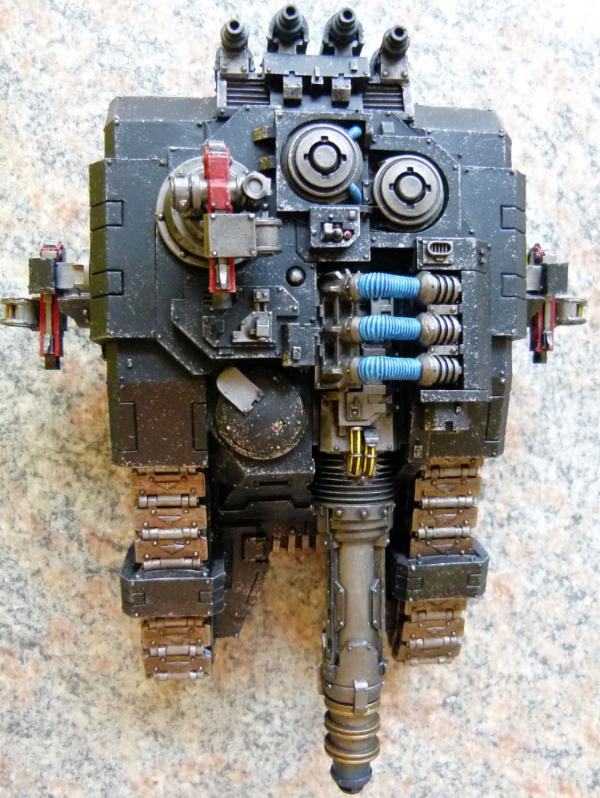
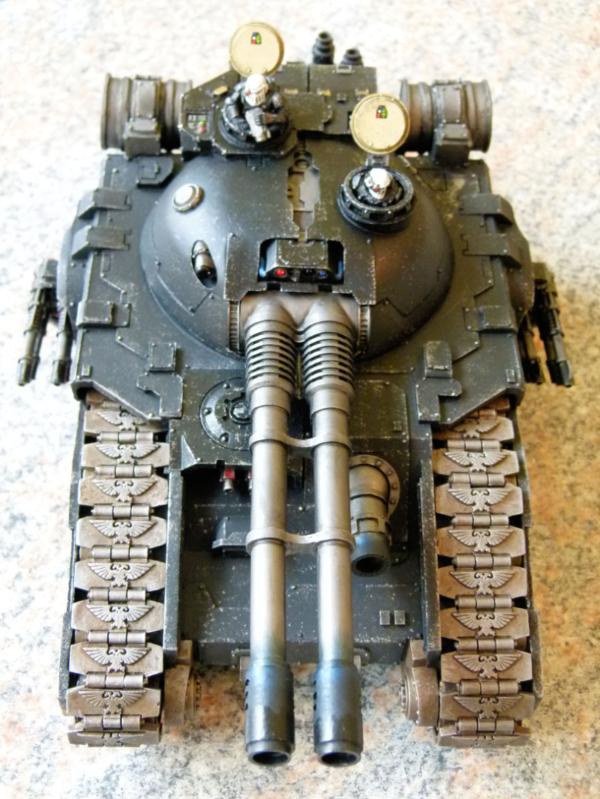
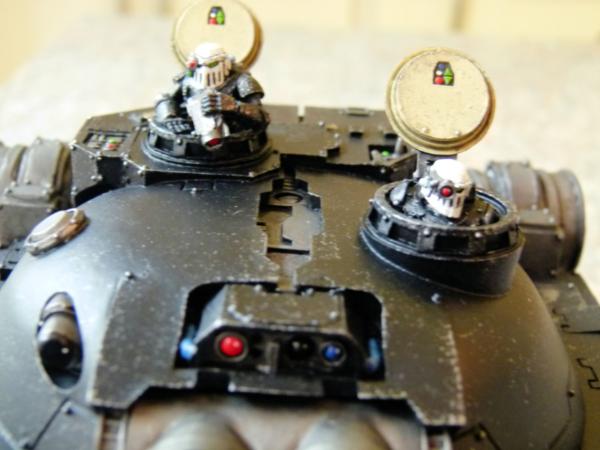
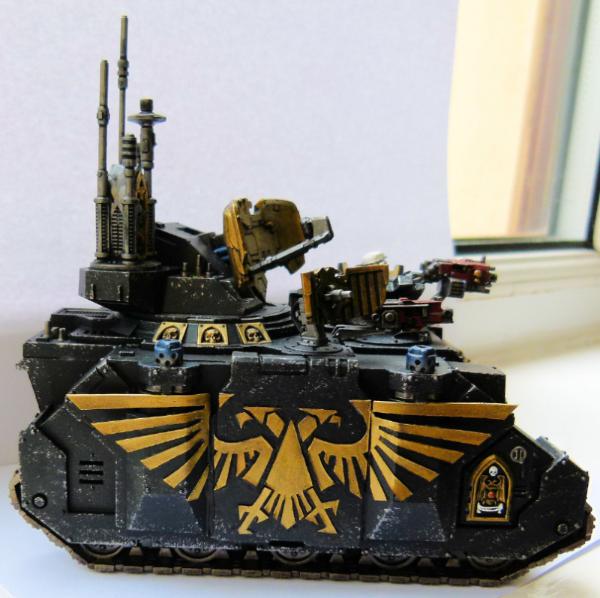
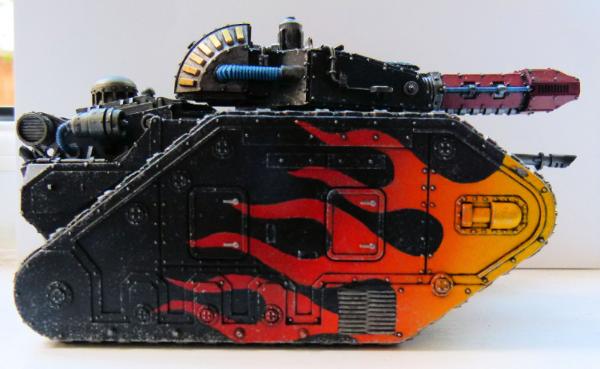
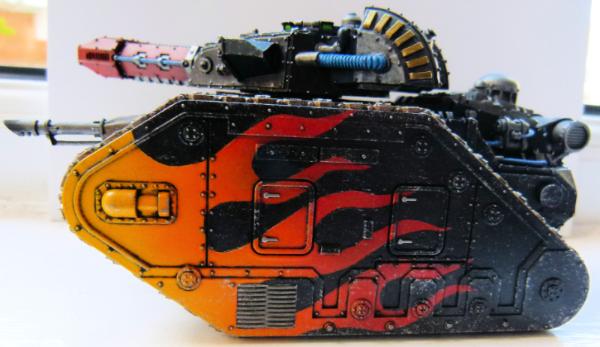
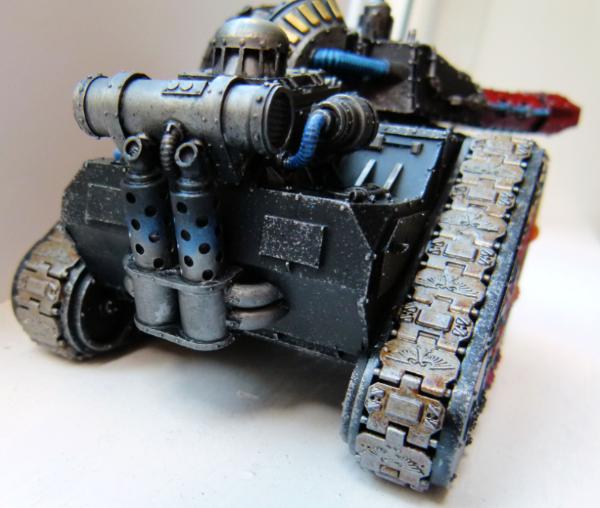
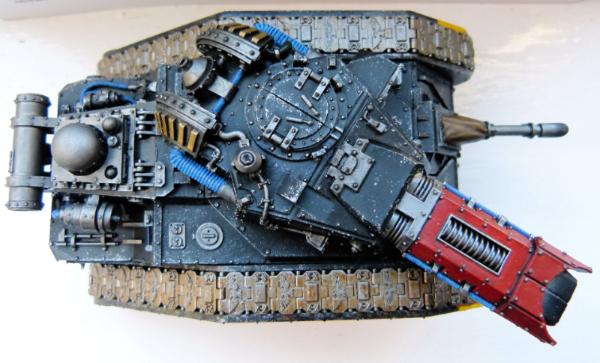
Stormhammer
As with all vehicle builds, there has been a lot of different processes to get to this undercoated stage. I planned on having fancy tracks with Imperial Eagles or skulls covering them, but in the end, I went with some Blood and Skulls ones instead. I'm not sure whether Space Marines are allowed to use Stormhammer, but I loved the look of the kit and needed to have one to go with my Legion. With their close ties to the Mechanicum, I'm sure one would be made available to my legion.
The only thing I wasn't happy with was the turret that came with the kit and the fuel tank. The turret looked far too light, so I swopped it with a Macharius Vanquisher one instead - a more fitting twin barrel weapon.
This shows the normal turret that comes with the kit.
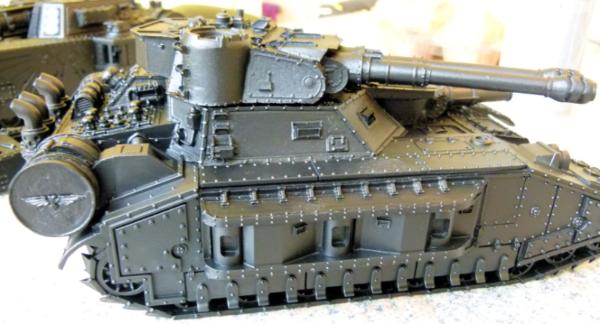
I thought the Arkurian Shadowsword fuel tank was far more fitting and after a small conversion, I got some mounted. The sponsons have been magnetised to allow various different weapons.
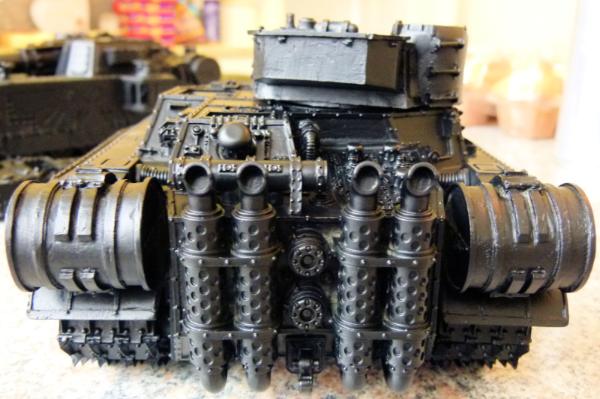
The engine and exhausts are amazing on this vehicle! I hope my painting skills will do them some justice!
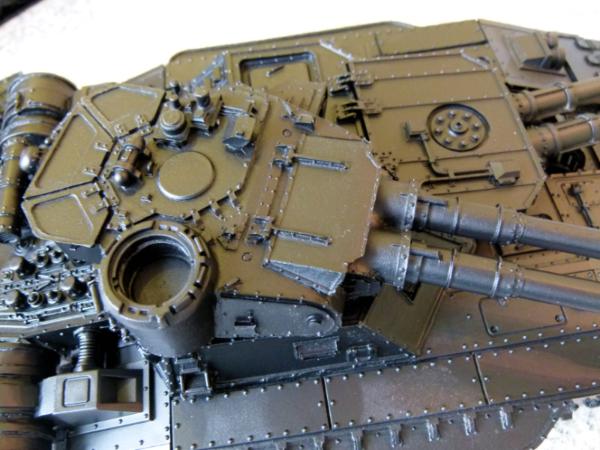
I made a small conversion on the cupola of the Macharius Vanquisher turret, removing the Imperial Guard periscopes with the usual Space Marine one. A mk III Space Marine Tank Commander will be added in the future.
This has now been added to my (very large) "to be airbrushed flames on" box!
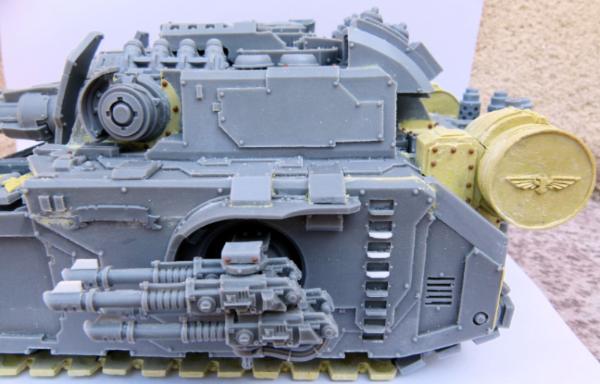
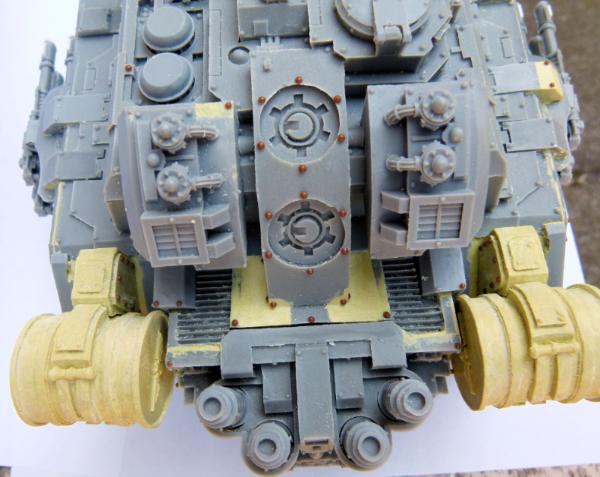
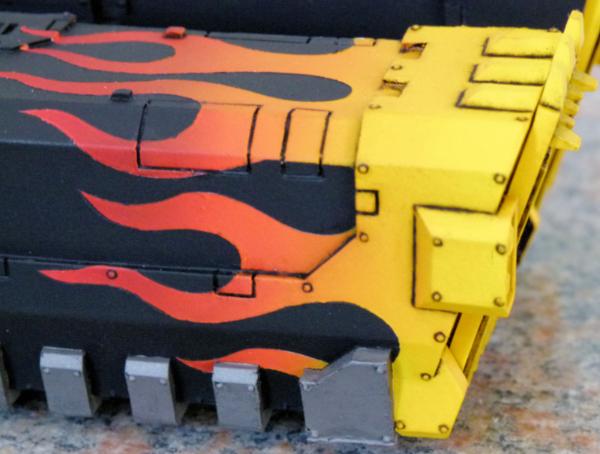
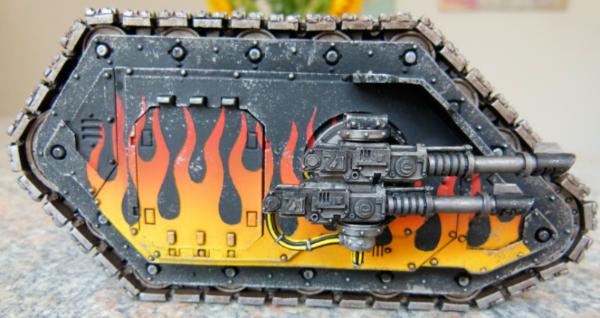
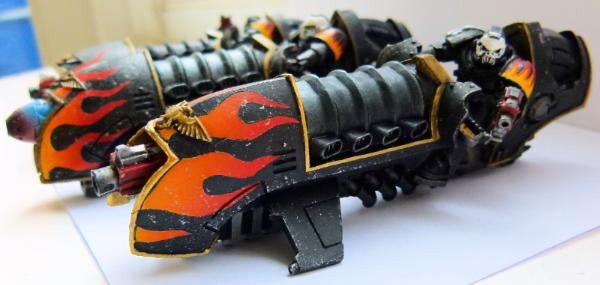
Arkurian Shadowsword
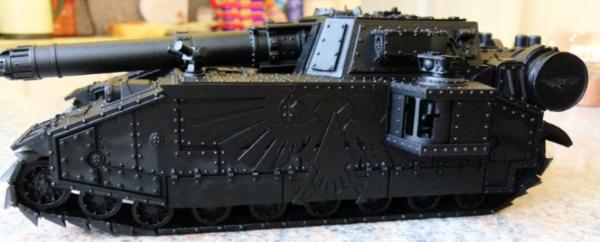
As with the above Stormhammer, I always wanted one of these to get my hands on for their fuel tanks. I think GW should have made these fuel tanks rather than the one's on the plastic baneblade kits. The cannon is a bit wonky as it's not been stuck on, to ease with painting. I added a large plasticard Imperial Eagle on both sides, which combined with the planned airbrushed flames around the bottom will make it stand out,
Again, the FW exhausts are so much cooler than the plastic versions!!
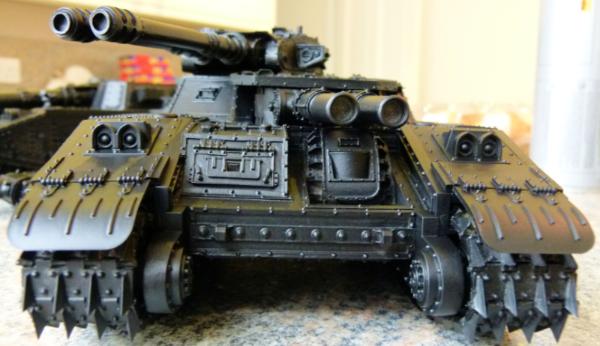
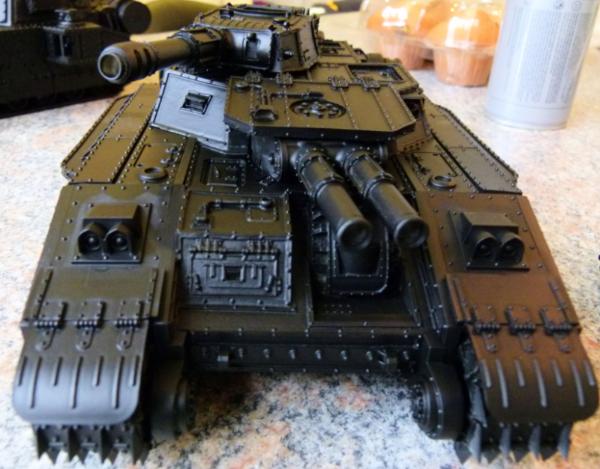
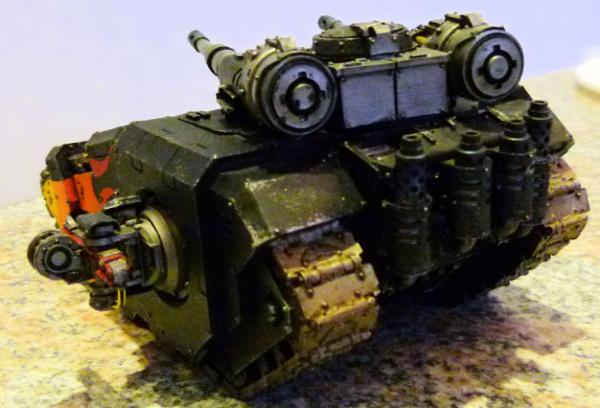
Fellblade
I know I've made my own fellblade versions in the past, but I needed to get an official FW one as well. It wasn't a bad kit to put together. I'm contemplating adding Imperial Eagles to each tank tread to make it stand out from other people's fellblades.
As with my 2 other superheavies, I made a small conversion and added these fuel tanks instead of the plastic ones.
I'm in the process of building a Land Raider Proteus, Cerberus and Sicarian Venator, so I'll be back soon.
Regards, Phil.
|
|
This message was edited 1 time. Last update was at 2016/03/06 22:14:59
|
|
|
 |
|
2016/04/24 22:11:05
Subject: Re:Philmorgan75's workshop blog - Legion of the Dead
|
|
Regular Dakkanaut
|
Made a bit of progress on some vehicles:
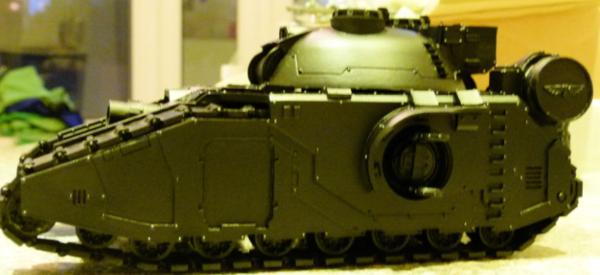
Caestus Assault Ram
As you all know, I love my flames!! I have so many vehicles on the go at the moment that I have only got this to the base colours. I need to put a black pin oil wash on the vehicle and then a small amount of weathering. The front doors are hinged and I am contemplating adding some hazard stripes around door entrance to stop the Terminators from banging their heads!!!!
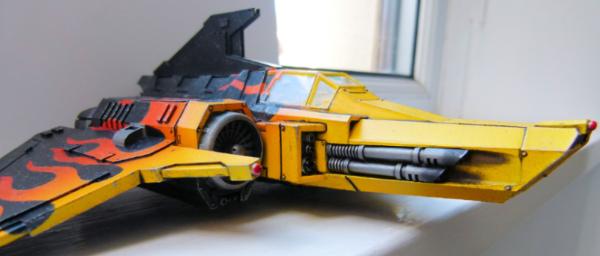
Storm Talon
I have made and painted a number of Dark Talons, but this is my first Storm Talon. The canopy was a pain to paint as the rest of the flames were airbrushed but I had to do the canopy by hand and it was difficult to match the colours. This will be rolled out against horde enemies.
Here's a top view of the flames. The autocannons are magnetised so can be swopped with missiles, heavy bolters and lascannons if required. I have another Storm Talon and 3 other Dark Talons to be painted!!
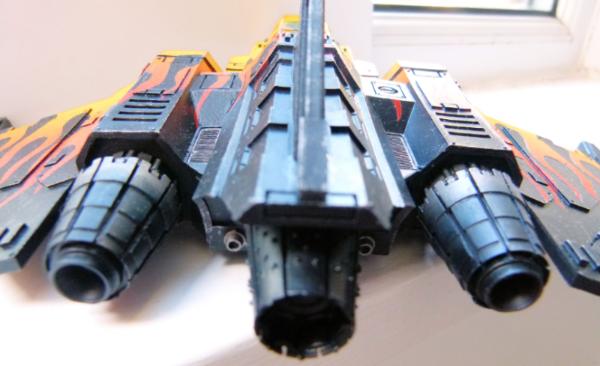
Fire Raptor Squadron
I have been painting the Fire Raptor on the left for best part of a year now. I'm so glad I finally finished it to free up my painting station for all of the other vehicles.

I have magnetised the heavy bolters so I can swop them for the autocannons when needed.
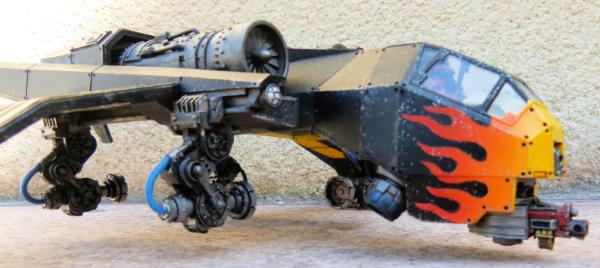
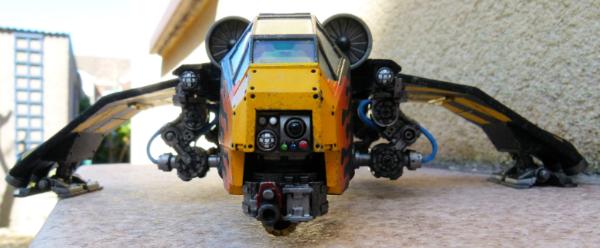
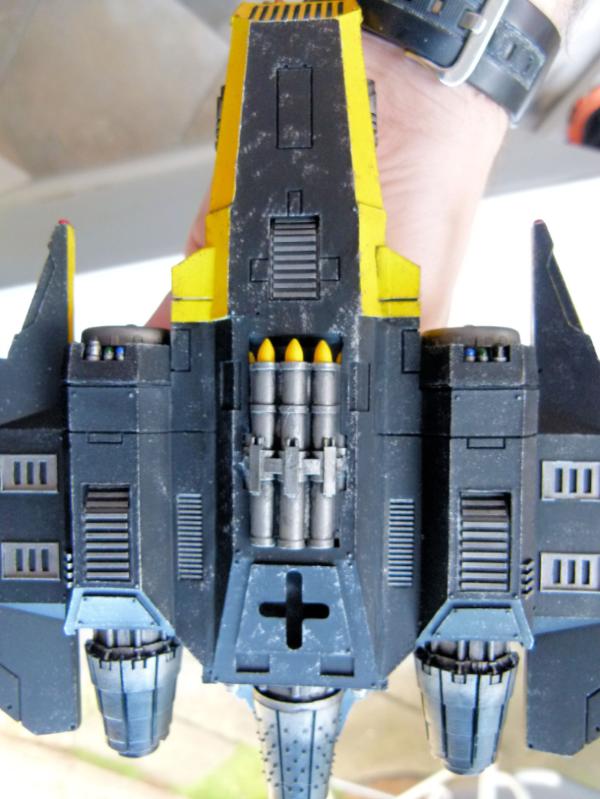
Attack Fighter
I added the black oil pin wash this morning and just need to sponge some weathering around the edges to finish this conversion. I plan on adding some Storm Raven engines to hang under the Valkyrie wings to make this aircraft a very fast beast.
Javelins
I finished the Lascannons version on the right last year and just need to paint the buttons in the cockpit on the missile launcher version on the left to finish this one. The rest of the parts are all ready painted, just need gluing to finish this one.
Dreadnought Drop Pod
I've airbrushed flames on 2 of the doors and hazard stripes on the inside of 3 of them. Unfortunately, I forgot to airbrush orange and yellow to complete the flames on the third door so it will be added to the list when I break out the airbrush again.
Laser Destroyer
Small amount of work on this to complete my Laser Destroyer. I need to weather the gun shield and that should be it. In hindsight, I should have added the exhausts before airbrushing the flames on the sides BUT I have found this really hard to do and takes a lot of masking to pull it off.
I've made a small mould and going forward, I'll be making more rhino's with these tank treads.

Top view of the Laser Destroyer and my Sabre Tank Destroyer.
Sabre Tank Destroyer
I've been in this hobby since 1987 and always wanted to make the Sabre Tank Destroyer and Land Raider Spartan that were in the early 100 White Dwarf magazines.
I added the Hunter/Stalker side armour specifically for the braces as I thought the recoil from the main weapon would be immense and although I love 40k, there needs to be a bit of realism!!!
I have made some more progress on my Fellblade, Basilisk, Medusa, Land Raider Proteus and Sicarans - I'll show some pictures tomorrow..
Regards, Phil.
|
|
|
|
|
|
2016/05/05 22:02:59
Subject: Re:Philmorgan75's workshop blog - Legion of the Dead
|
|
Regular Dakkanaut
|
Some more progress on my Legion:
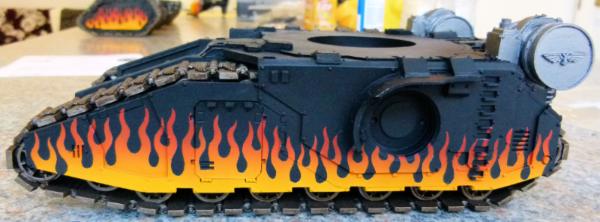
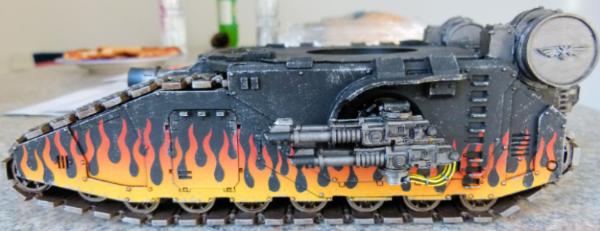
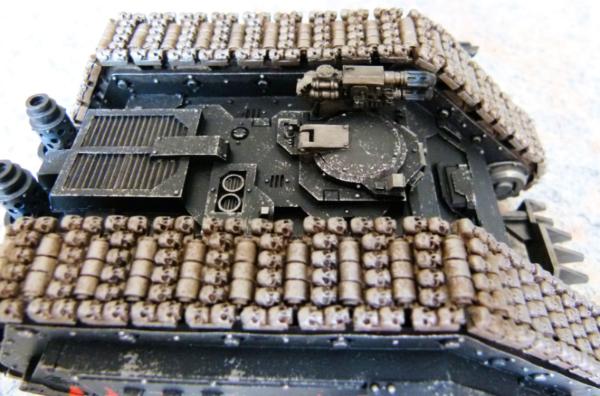
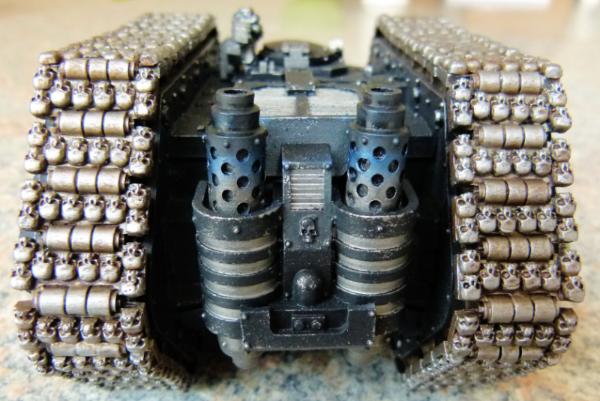
Legion of the Dead Sicaran Battle Tank
I have always loved the Sicaran Battle Tank since Forgeworld brought them out and I was planning on making a conversion out of plasti card but in the end I decided to throw some money and get one! It's a great kit with chunky bits of resin. The construction was fairly quick and simple. I went with the usual flames at the front with some weathering to knock back the bright colours.
I tried to break up the tank tracks by adding some FW Brass Etch Imperial Eagles on every other track - It would have been every track but the cost was prohibitive!!!
This shows the left side of the tank. I went with Heavy Bolter sponsons for a) the points cost and b) this is a dakka tank and Heavy Bolters fire more bullets than lascannons! The sponsons have been magnetised for swopping in the future.
This final shot shows the completed rear. This moves me on to my second Sicaran ........
Legion of the Dead Sicaran Venator
I will add some more shots of this in the future. I go through building splurges followed by months of painting. I batch paint vehicles so although it takes a long time to get to the end, a lot of vehicles get completed at the same time.
This is a beautiful model and I highly recommend it to anyone.
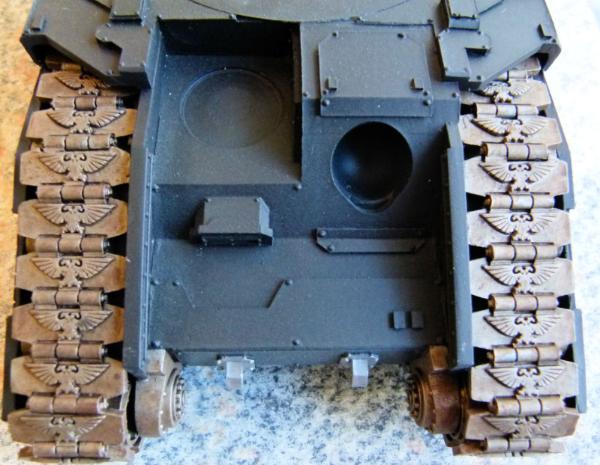
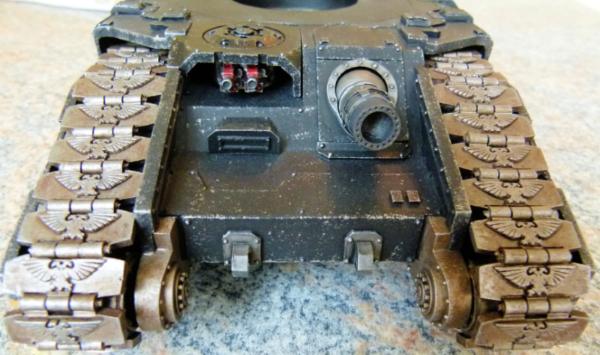
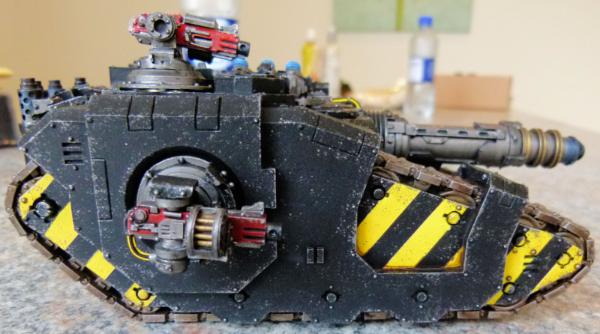
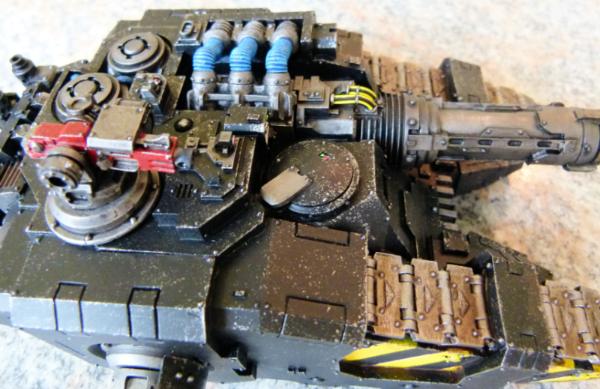
Legion of the Dead Cerberus

This is the business end of the Cerberus! I wanted to go with hazard stripes on this tank and painted everything separately. Unfortunately, there are 2 extra pieces joining the hazard stripe shield to the top of the tank but I couldn't get them to fit after everything was painted so I opted to leave them off. The tracks were a bitch to do and I've used more FW Etched Brass Imperial Eagles to prove where my legions loyalty lies.
This is the top view. This is a huge chunk of resin and I really don't know where I am going to store all of these finished vehicles!

I need to have flames on my vehicles, but I went with only the hatches on this one.
The rear shows my now new way of painting heat on weapons and exhausts, Tamiya burnt blue steel weathering and mig black smoke pigments - messy but quick and easy to do!
Legion of the Dead Basilisk

When I saw these released from FW, I had to have one (even though I have the normal Legion Basilisk)! Masking the flames on this one was a pain BUT I think the results speak for themselves!
Here's the top view. I've tried to match the flames over the hatches as well. The weapon has been magnetised so I can swop it with a Medusa. I have a second Solar Auxillia Basilisk/Medusa almost completed - I'll post more in the future.

Here's the front view. Although the black oil pin wash is a pain to do, it really makes the vehicles "pop". You can see the small FW Imperial Eagle Brass Etch I've added to every other track as well in this shot.
... and the rear!
Legion of the Dead Deredeo
I was toying with having flames going all the way up the legs but after I magnetised everything, I decided to stick to black on this one. I got some Plasma cannonades when I visited Warhammer World last year, so I need to get another Deredeo to use the plasma weapons!

I need to finish the helmet and this model will be finished.

The rear. To get the ammo belts to fit the weapons I had to give up on the magnets. This has made me want to get a Leviathan!
Javelin with Missile Launchers

This is my second Javelin and I much prefer these to the normal Land Speeders.
This is a close up of the crew. I had some Night Lord and Iron Hands helmets already painted, so I went with these rather than my usual Mk III versions.

And finally, a side shot.
Work in progress
To finish off this update, I include some WIP's of other vehicles I'm working on:
Fellblade:
Land Raider Proteus:
Solar Auxillia Medusa:
I hope to have some more updates soon.
Regards, Phil.
|
|
|
|
|
|
2016/05/07 22:11:29
Subject: Re:Philmorgan75's workshop blog - Legion of the Dead
|
|
Regular Dakkanaut
|
Caestus Assault Ram
Thought I'd show everyone some progress I've been making on my Caestus.
For anyone that wants to know how I black oil pin wash my models, I thought I'd show you. Having laid down the base colours of black, silver and airbrushing the flames, I laid a quick layer of matt varnish over them. I mixed up some black oil paint and odourless white spirit and then added as neatly as possible around all the lines.
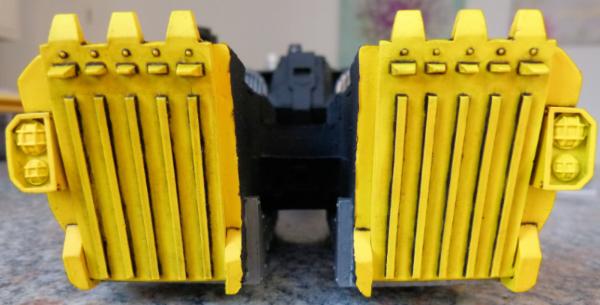
Once the oil is almost dry, a clean brush, a tissue, some elbow grease and some more odourless white spirit and the excess oil is removed leaving perfect black lines.
Here's a shot of the top after the oil wash.....
.... and after the excess being cleaned up.
And finally, a shot of the front right side.
The Caestus is currently drying off and I will wash all the metals tomorrow, followed by the missiles and then a small amount of weathering and this model should be finished.
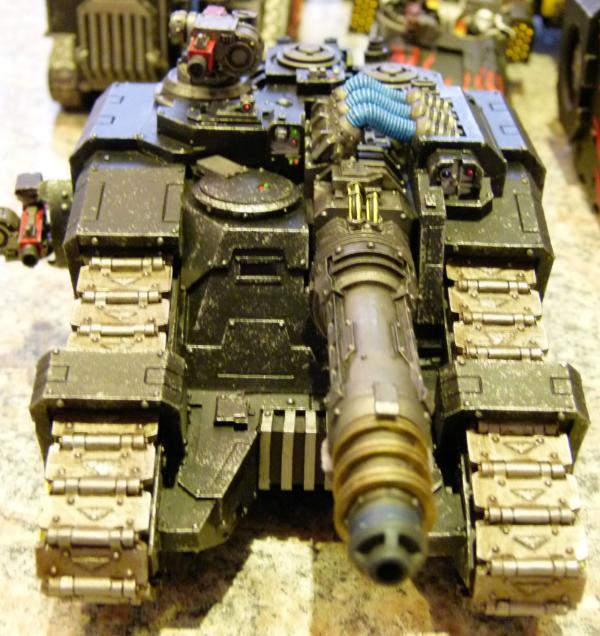
Fellblade
I built a FW Fellblade a couple of months ago. It's a brilliant (but expensive!!) kit but I wanted to personalise it. You can see the Arkurian fuel tank I added to the rear in this shot.
I thought the treads looked boring, so I added an Imperial Eagle to each one.
Here's the almost completed front. I need to sponge a small amount of rust pigment and this view will be done.
Here's a couple of shots of the work I've done on the sides.....
Basecoated black.
Airbrushed flames and then a thin brush, black paint and a steady hand to clean up the airbrush overflow.
Black Oil washed, weathered and sponson completed.
The fellblade is coming along nicely now. I need to paint the turret and cannon and then a small amount of rust weathering and it will be completed. I got a Falchion and a Typhon for my birthday which I will not build until I finish the 10+ other vehicles I've already base coated first.
Legion Sicaran Venator
As promised, some shots of my finished Venator....
I went for hazard stripes on this one as opposed to my normal flames. I think it came out really well. The sponsons are magnetised as normal.
A top shot showing the FW Brass Etch Imperial Eagle on each track.

The left side....
.... a slightly blurred rear......
.... and finally a top view.
Off to bed now, so more updates in the future.
Regards, Phil.
|
|
|
|
|
|
2016/05/21 18:23:46
Subject: Re:Philmorgan75's workshop blog - Legion of the Dead (Skulls and flames!)
|
|
Regular Dakkanaut
|
Managed to finish a couple of vehicles recently....
Legion of the Dead Fellblade
This was finished this morning by adding the completed crew. This really has been a labour of love making this. I've made some minor conversions (like the Imperial Eagles on each tread) but kept my usual embelishments of skulls etc off this one. I ended up repainting the cannons as I didn't like the heat effect and even now, it's not perfect BUT I have so many projects on the go that I can't give this vehicle any more attention.
This shows the crew in a bit more detail. I toyed with added some heavy weapons that the crew could fire, but I thought that in the end no sane enemy would be alive in range of the crew weapons!!
I love airbrushing flames on the sides of large vehicles as it's moderately easy to do BUT looks really effective. When I pluck up the courage, I'll sponge some rust onto small parts of all of my vehicles.
This shows the other side....
..... and a close up of the sponson weapons.
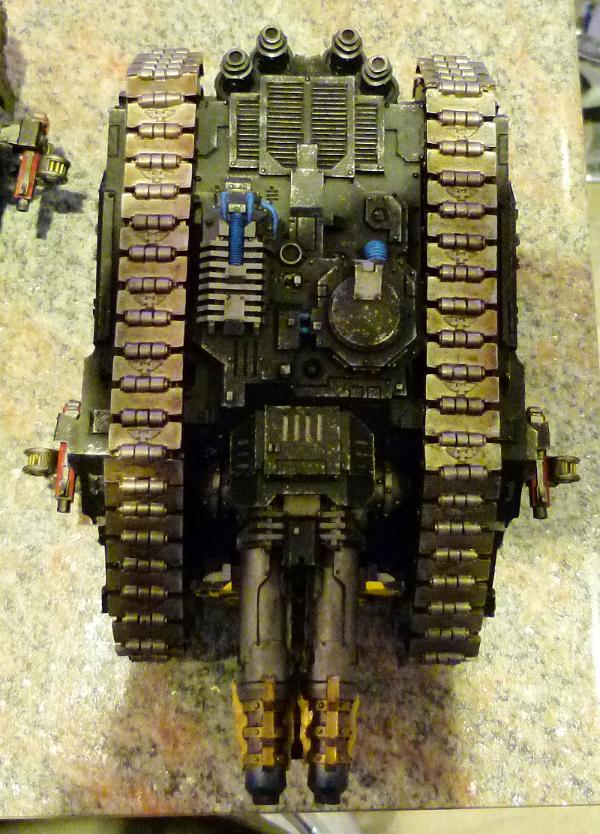
Legion of the Dead Land Raider Proteus
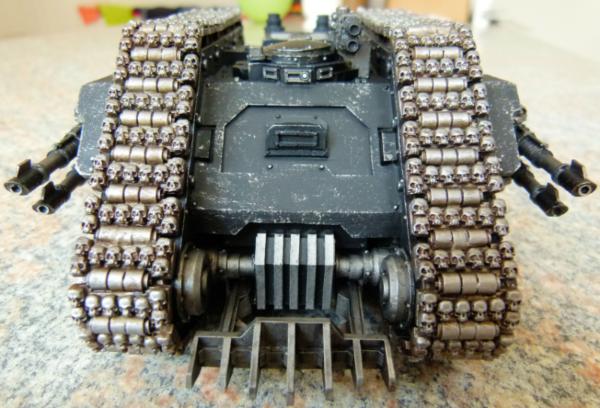
I found the tracks to be very boring, so I decided to spice them up a bit with some skulls! I made a small mould of 8 skulls and then spent hours waiting for milliput to set and then sticking them onto each tread. Time consuming but I think really effective!!
This shows a top view. You can see the mulitmelta with heat effects (via pigments).
This shows the completed right side ....

.... left side .....
... and the rear. The exhausts were completed with the same pigments I use to mimic all my heat effects. This has now gone into one of the multiple boxes under my bed with all of the other completed vehicles I have!!!!
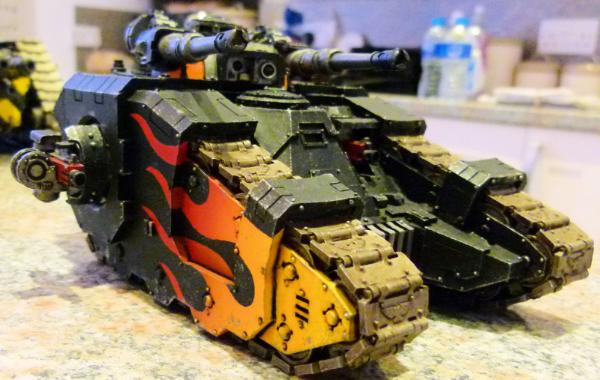
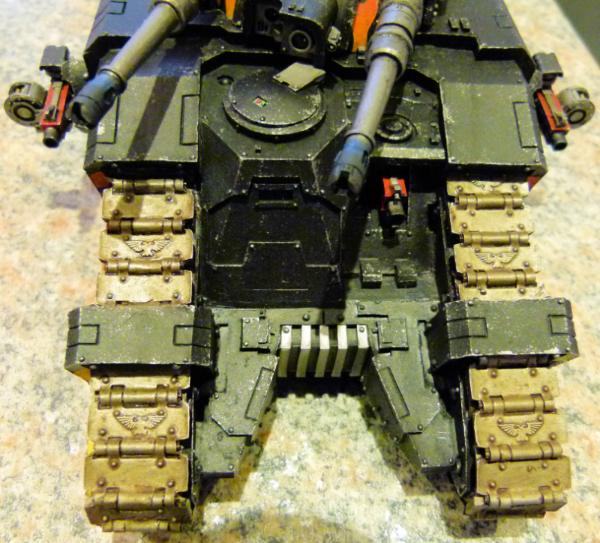
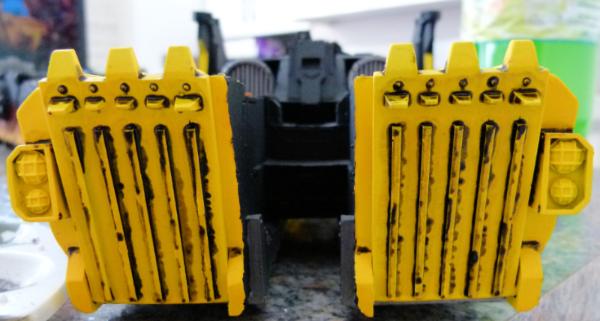
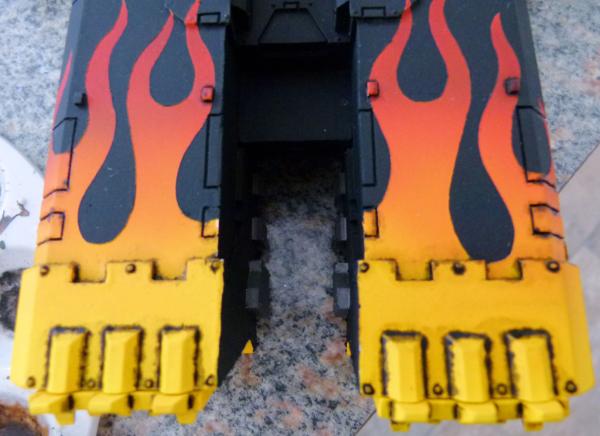
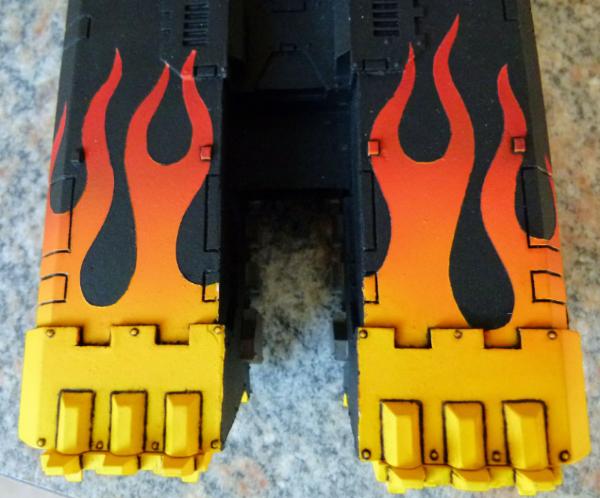
Legion of the Dead Caestus Assault Ram

I have been wanting one of these vehicles for a long time. I had planned on building one out of plasticard but in the end, I couldn't afford to lose the time. I would love to have a squadron of these, but at the cost I paid, probably not! I still want a Thunderhawk (don't tell my wife!!!!!)
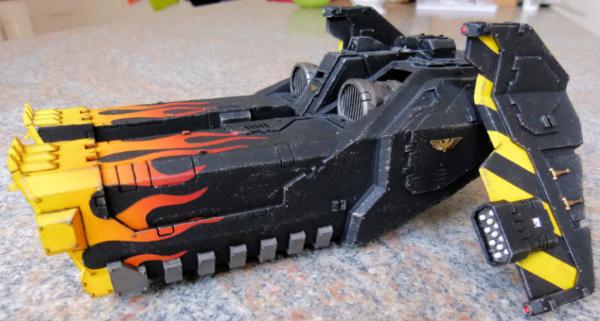
I love airbrushing flames and hazard stripes, so I was in heaven painting this!!
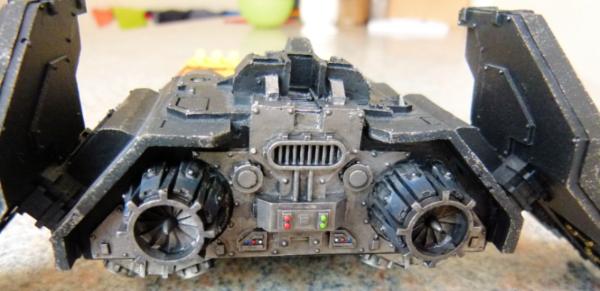
Fairly simple paint job on the rear. Could do with some black pigment on the turbines to really finish this off.
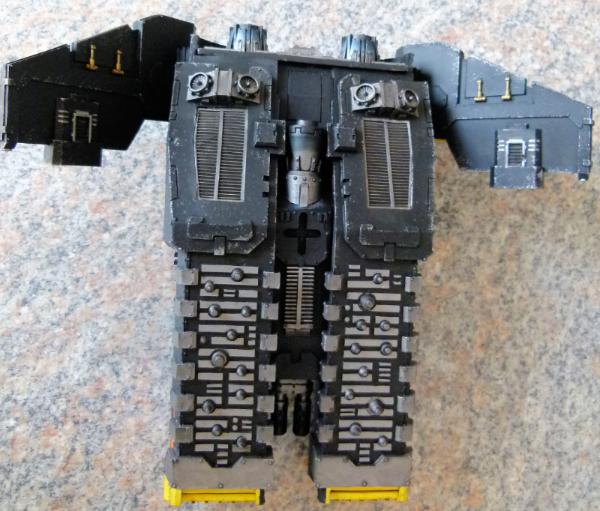
Finally, a shot of the underneath.
Work in Progress

I just finished the radar dish off my Warhammer World Command Rhino this afternoon.
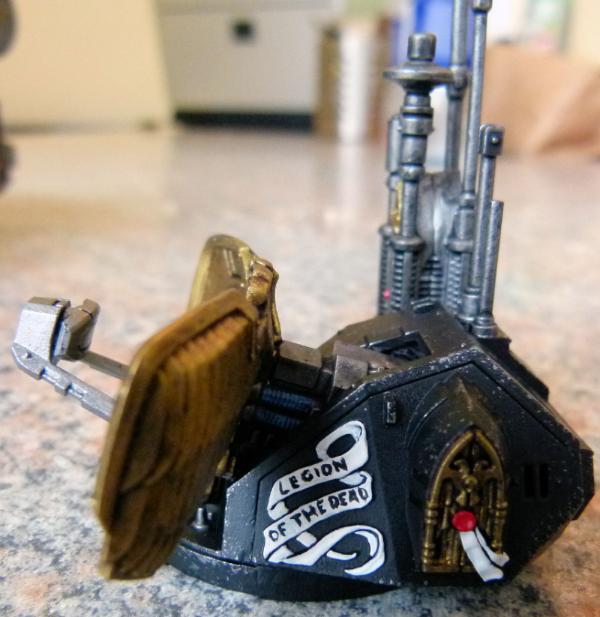
Side view. I did my best with hand painting Legion of the Dead on the scroll - I'm fairly happy with the results.
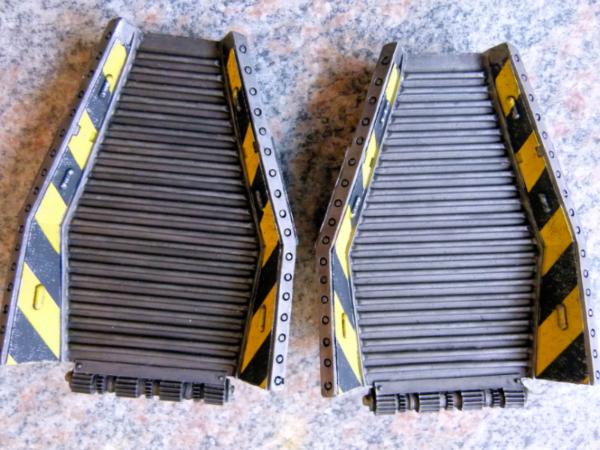
Finished 2 out of the 3 Dreadnought Drop Pod doors.
I have 2 scimatars almost finished on my kitchen table and a recon squad needing their helmets, silenced bolters and backpacks painted to finish. Once finished, I'll need to break out the masking tape and starting airbrush prep for the multiple vehicles I have undercoated (including a Stormhammer, Stormblade, Spartan, multiple Rhinos, a Leman Russ, a Storm Talon, A Sky Talon and 3 Dark Talons). I want to get all of these painted during the summer months and then over autumn/winter I'll be building my Warhound, Falchion and Typhon.
Any questions, please feel free to ask. I do feel kinda lonely writing this blog as no one seems to comment or ask any questions :(
Regards, Phil.
|
|
|
|
|
|
2016/06/13 16:08:48
Subject: Re:Philmorgan75's workshop blog - Legion of the Dead
|
|
Regular Dakkanaut
|
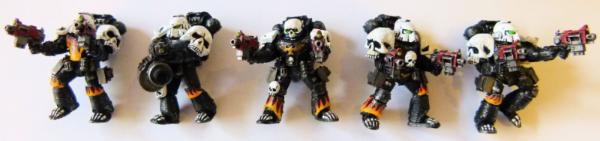
I finished some troops off for a change....
Recon Squad

I added some flames to some legs and shoulder pads to show which Legion they belong to...
The Comms officer I particularly enjoyed painting.

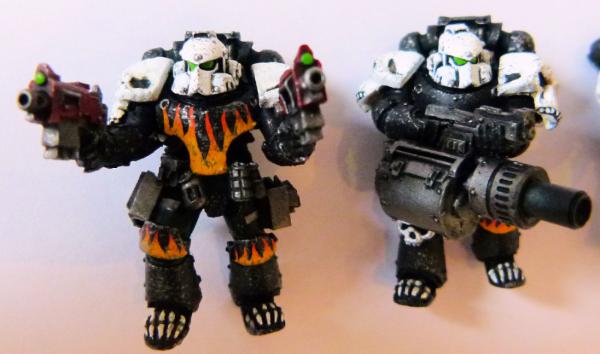
 Recon Squad 2
I really liked the FW Raven Guard Mor Deythan squad, so I picked up a squad and with small conversions, made them into my second recon squad....
I removed the Raven Guard iconography from the legs and shoulder pads and added some flames.

I just need to add some black soot to the end of the barrels to finish these.

Just to differentiate, I added a Skull helmet to one of the squad...
... and a painted skull on another.
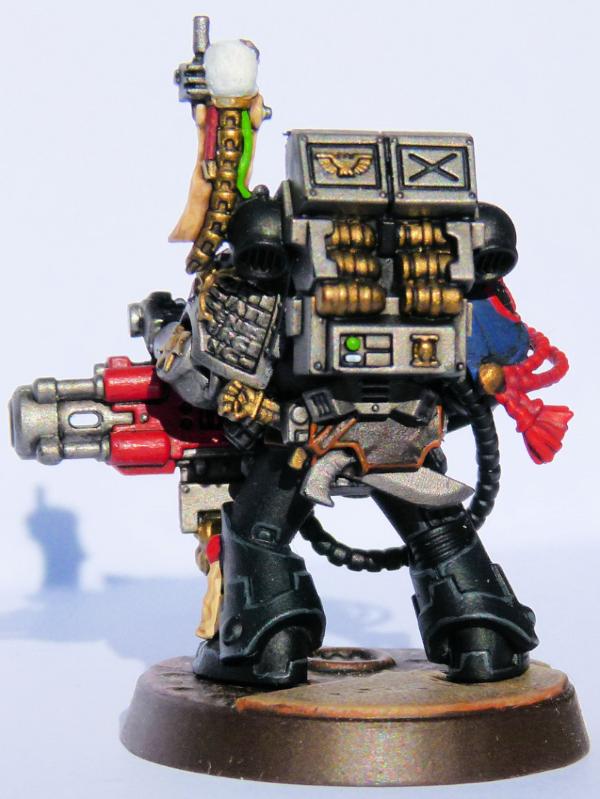
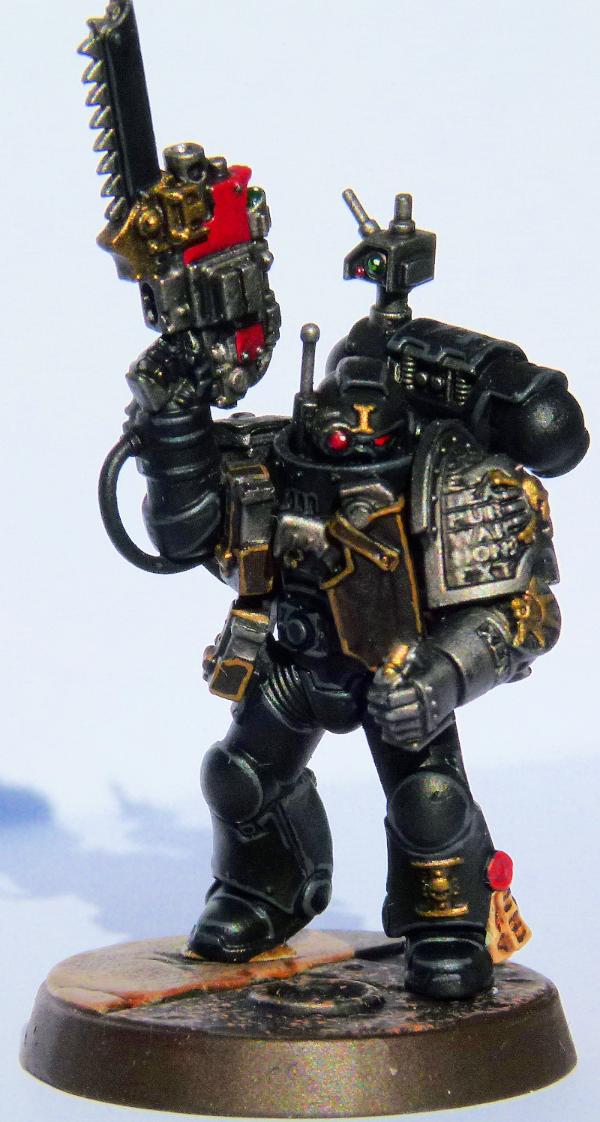
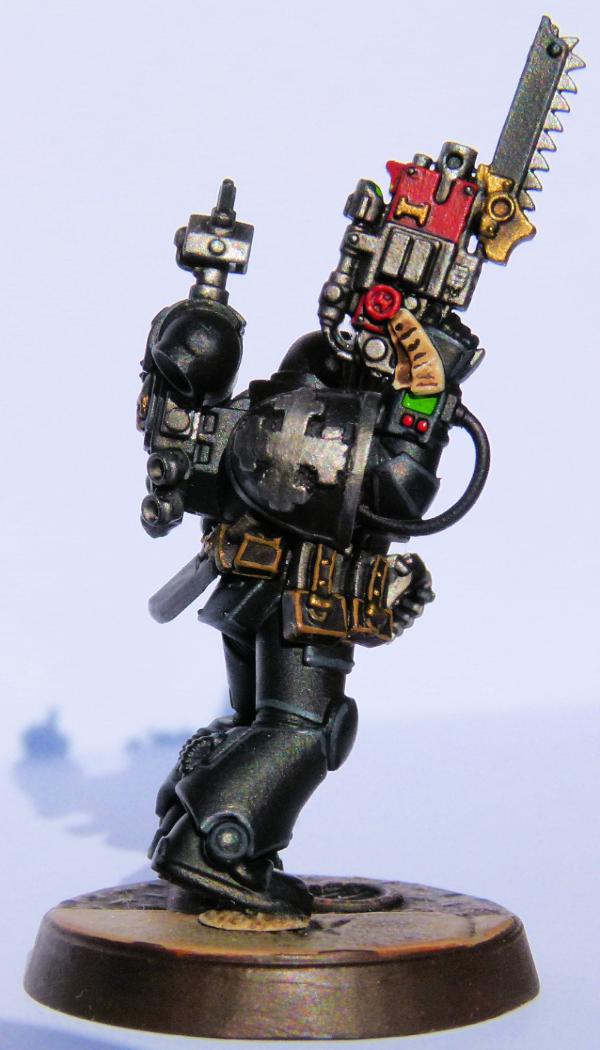
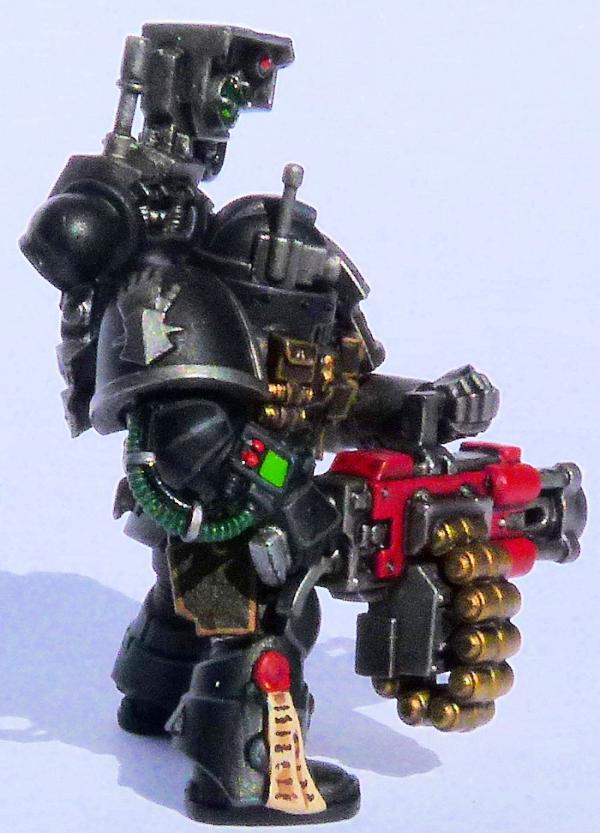
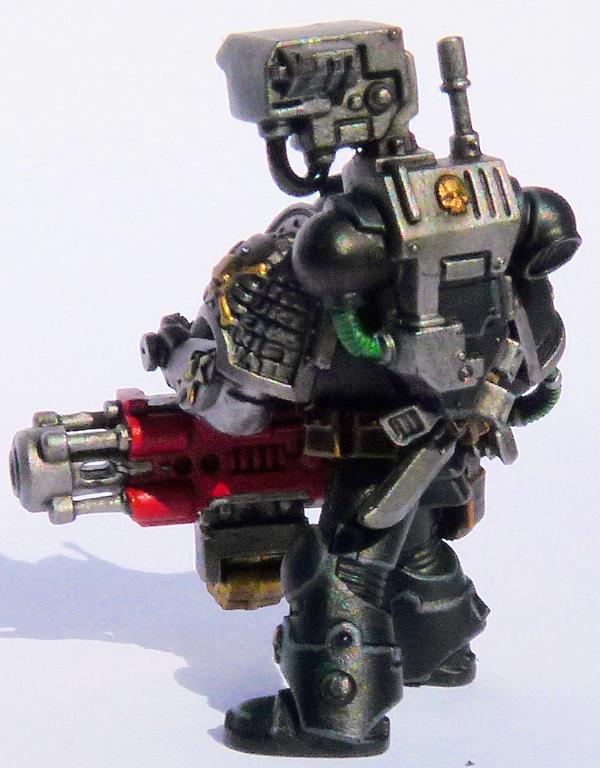
Techmarine IV
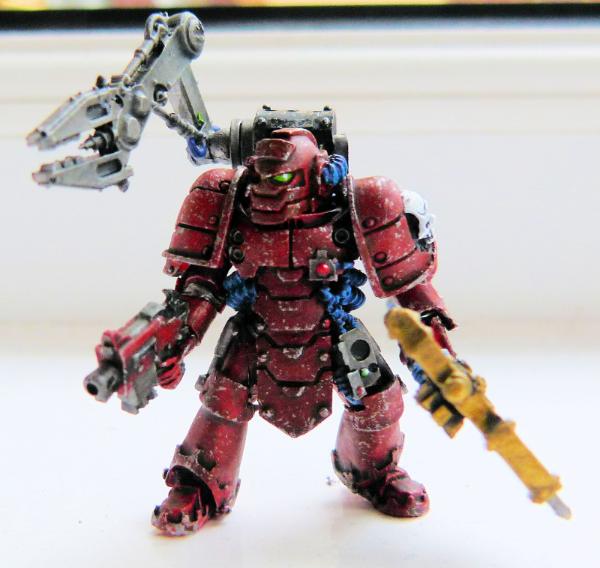
This was a quick paint job to get it off my work bench.

The Adeptus Mechanicus icons on the shoulder pad and the helmet look brilliant, and I'll definitely be using more of these in the future. I magnetised the servo arm and left arma nd poweraxe, for ease of storage.
WIP vehicles
I've started to block in the main colours on the Warhammer World Command Rhino. This is picture is 2 weeks old and I have now got as far as painting the tracks with a wash. All I need to do is some weathering and this vehicle will be finished.

I've almost finished the main armaments for the Stormhammer and the Arkurian Shadowsword. A small amount of blue on the volcano cannon and these will be finished.
I just need to find 2 suitable arms for my Scimatar pilots and I will have completed another squad. Once this is done, I'll start masking off some flames on my remaining vehicles so I can break out the airbrush. Till next time, Phil.
|
|
|
|
|
|
2016/07/10 12:09:35
Subject: Re:Philmorgan75's workshop blog - Legion of the Dead
|
|
Regular Dakkanaut
|
Update time:
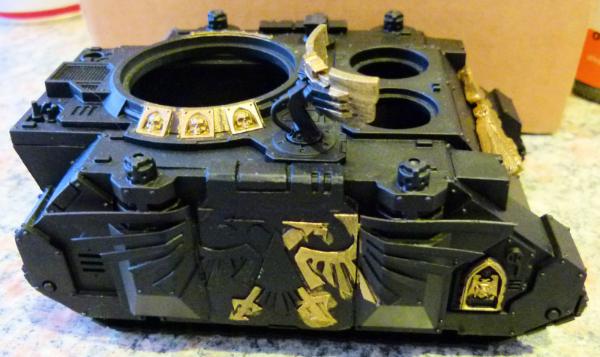
Command Rhino
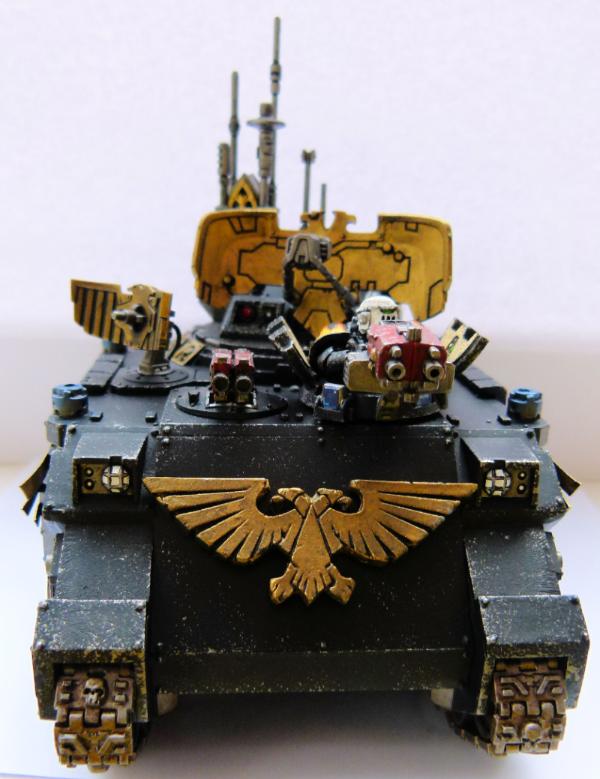
I managed to finish off my Warhammer World Command Rhino. Just to reinforce this is an Imperial vehicle, I added a Battlegear Imperial Eagle to the front glacis. A skull and brass etch imperial eagle were added to alternate tracks to show a bit of variety between my vehicles.
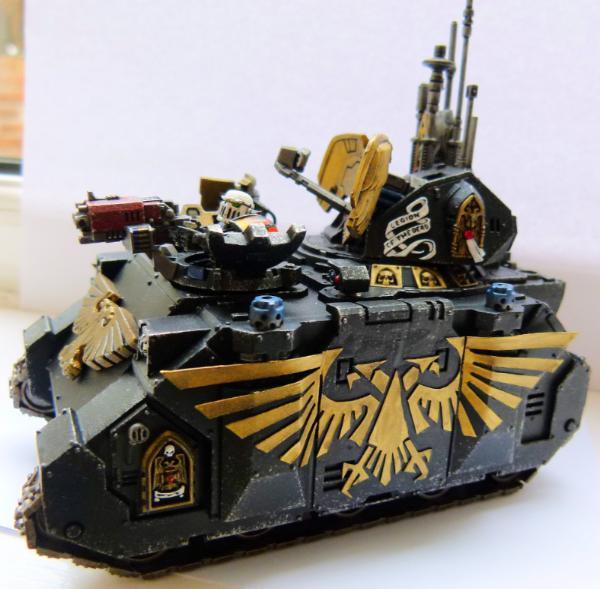
I added a thin plasticard Imperial Eagle across both sides. I originally planned on airbrushing some flames along the bottom of the sides to give the impression the eagle is rising out of the flames (like a phoenix) BUT I had put my airbrush away and didn't want to go through all the masking off and faff required to do the flames, so for the first time in ages, I present a vehicle without any flames!!
I love the Imperial Eagle radars and will probably try and use them again in the future.
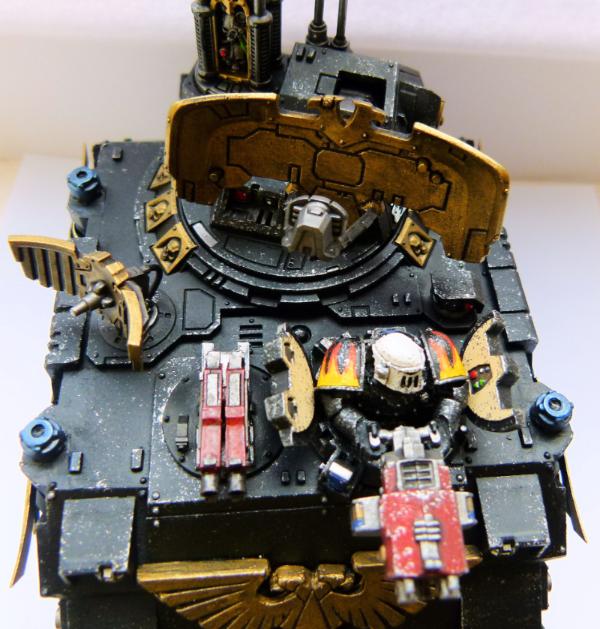
Obligatory Mk III tank commander. I haven't stuck the cupola down so I can swop the weapons if required.
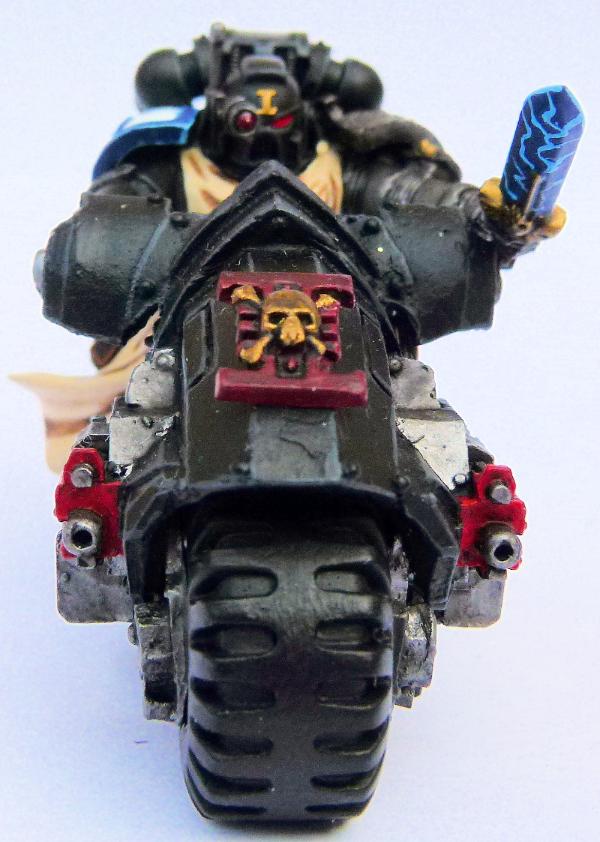
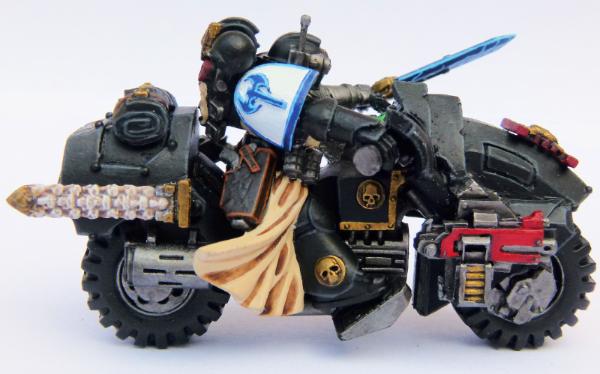
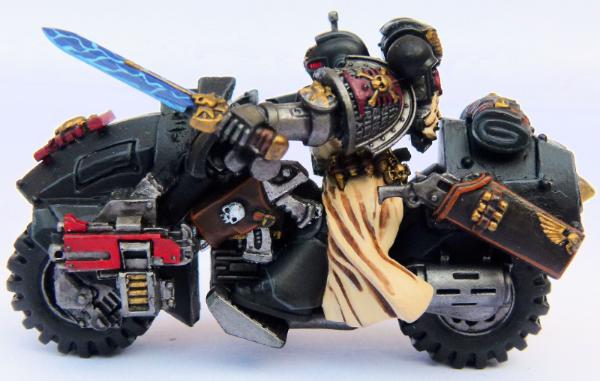
Scimatar Squad
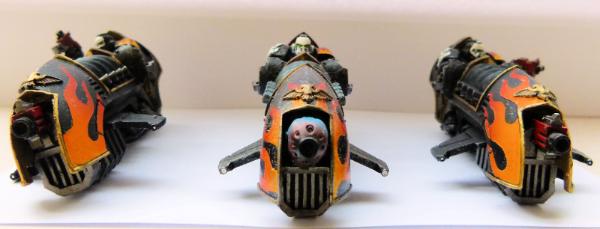
I managed to finish 2 more jetbikes to finish my Scimater Squad.
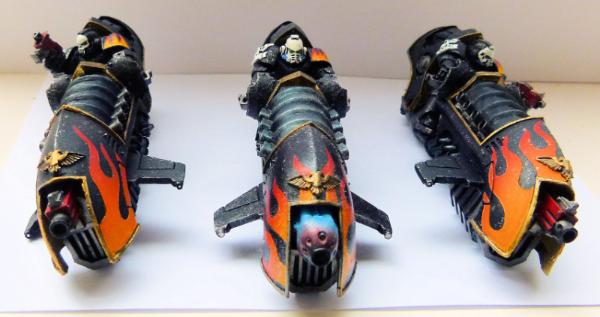
The airbrushed flames were deliberately sprayed differently on each jetbike.
Just to add a bit of variety, I added a FW Nightlord helmet and as I managed to lose a full set of arms for the 2 jetbike riders. I armed 2 of them with bolt pistols. As you probably guessed, as soon as I super glued the bolt pistol arms on, guess what I found? The missing arms!!!

Here's the other FW Nightlord helmet.

I won a job lot of Legion of the Damned metal shoulder pads on ebay previously and decided to add them to each of the troopers right shoulder. Suitable slogans were used to bring fear to all heretics!
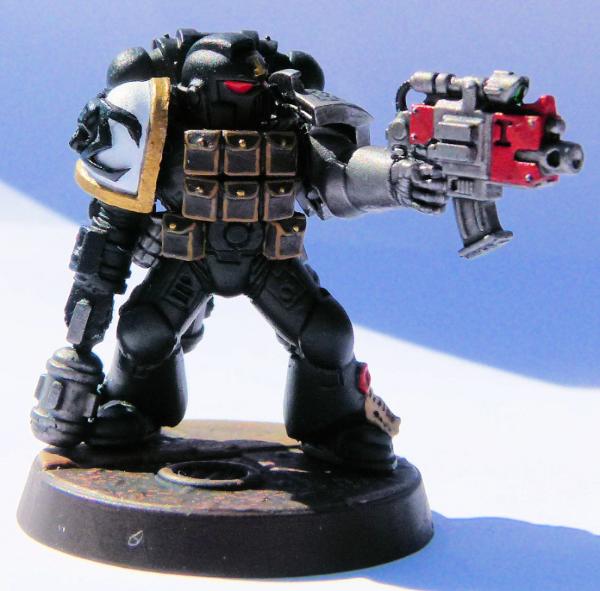
Breacher Squad
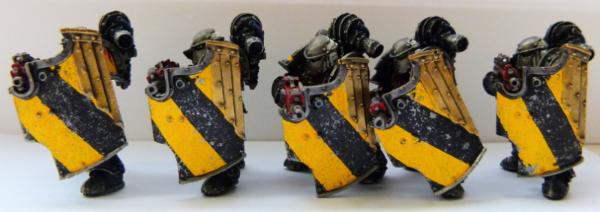
Just for a change, I've started to paint some of my back catalogue of infantry and the Breachers were the first squad to get my attention. I originally wanted to have flames all over the shields, but in the end, I went with hand painted hazard stripes instead. I love these models and will certainly get some more.
Top view. I toyed with hand painting skulls over the front of the helmets, but as I didn't think my painting skills were up to it, I decided to go with boltgun metal instead.
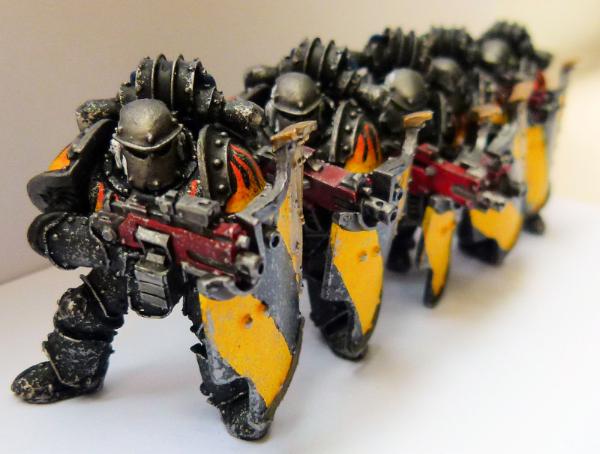
Imagine a company of Breachers boarding a ship!!
I managed to lose 2 Bolt guns whilst painting, so I added different ones to show a bit of variety between the troopers.
I have just finished my Cataphractii and Destroyer squad. I'll put some pictures up later.
Till next time, Phil.
|
|
|
|
|
|
2016/07/16 16:49:22
Subject: Re:Philmorgan75's workshop blog - Legion of the Dead
|
|
Regular Dakkanaut
|
More updates:
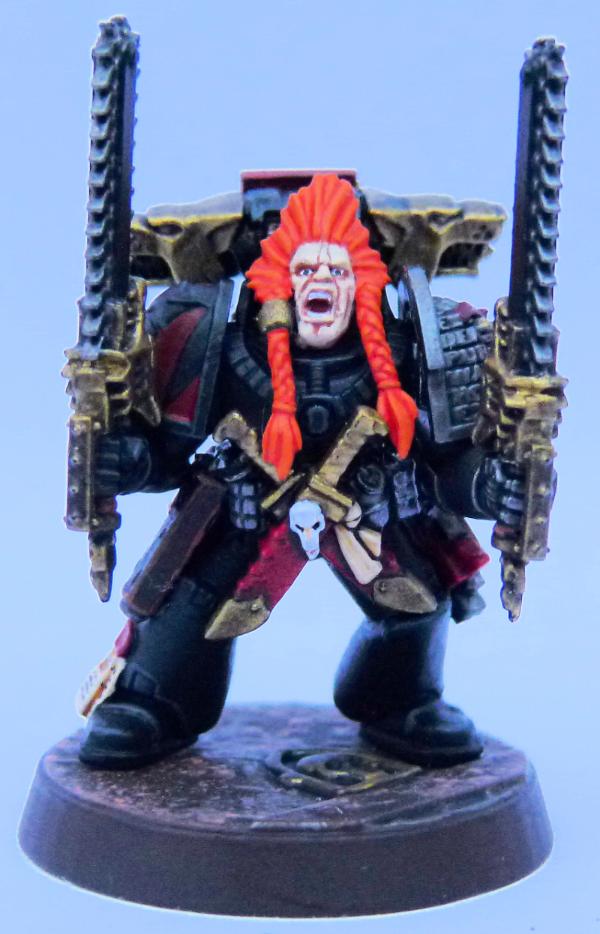
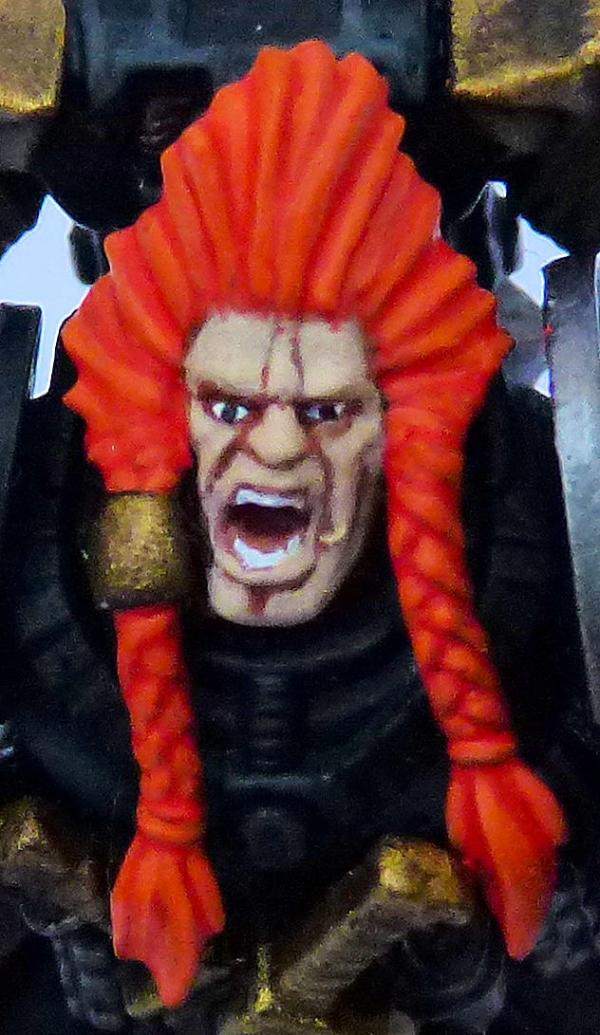
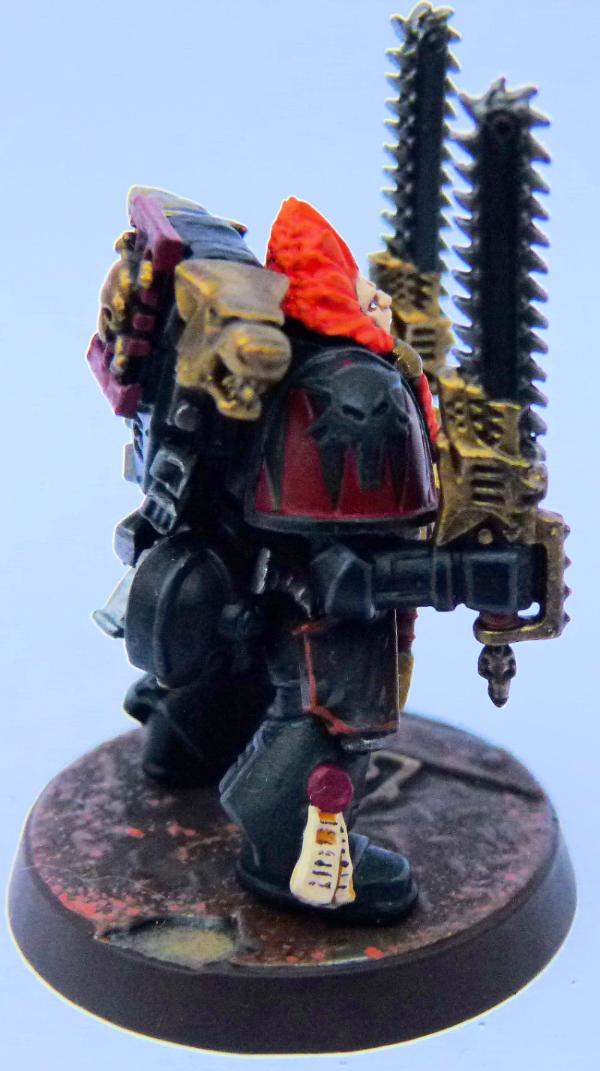
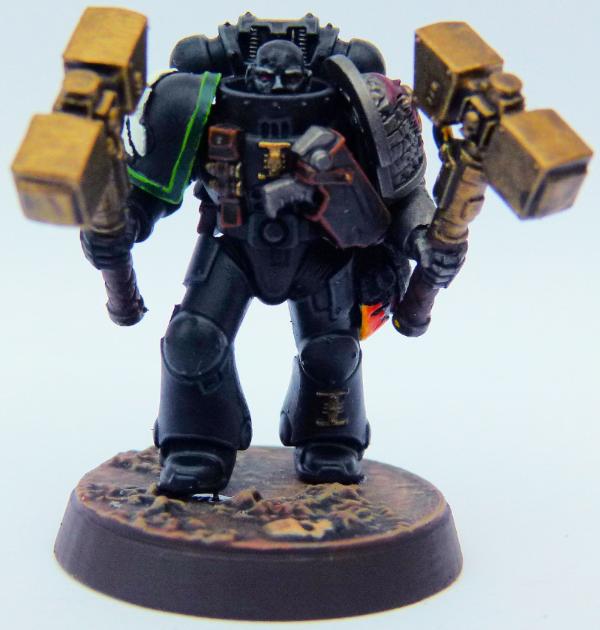
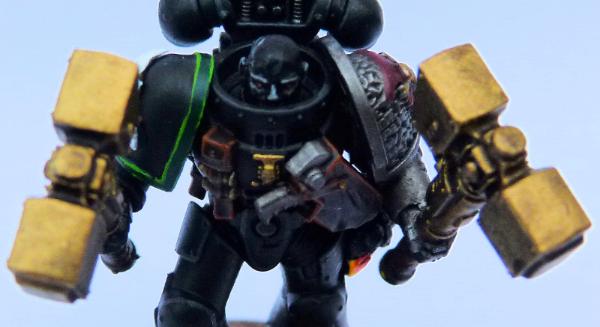
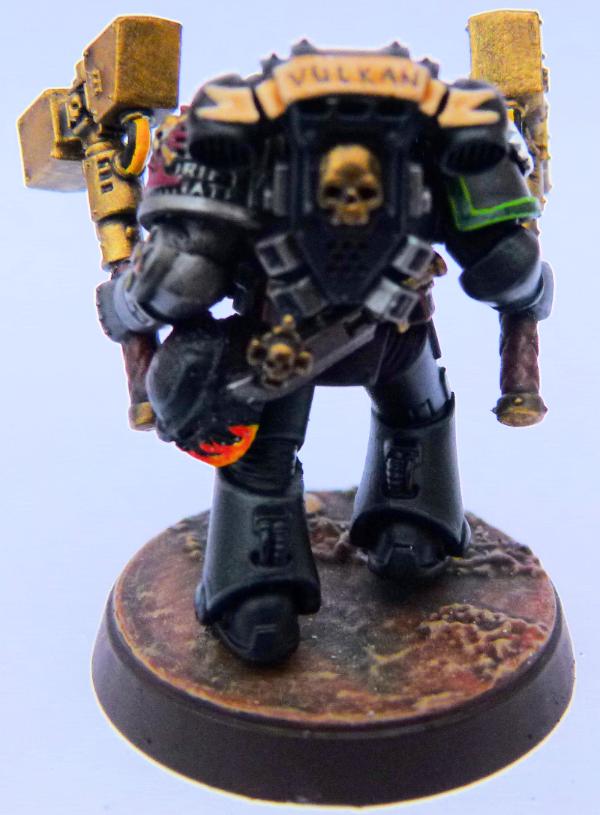
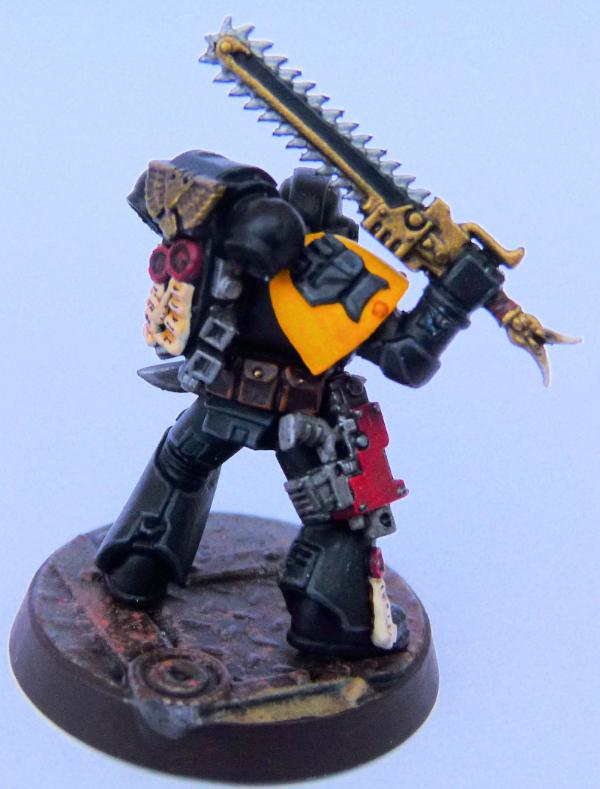
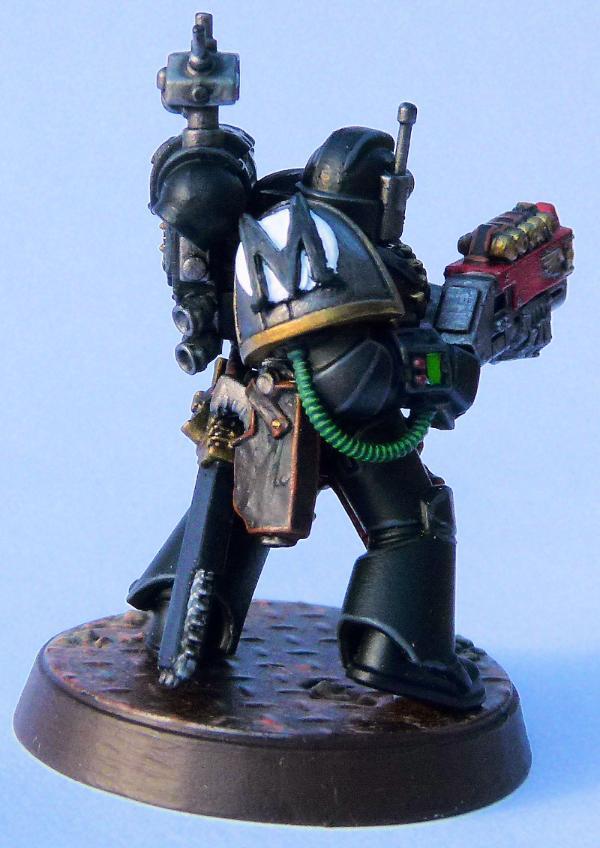
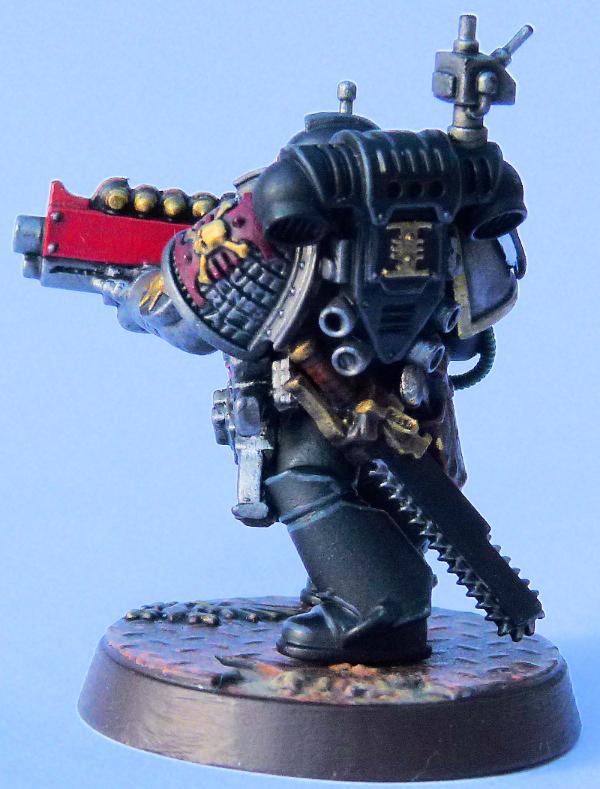
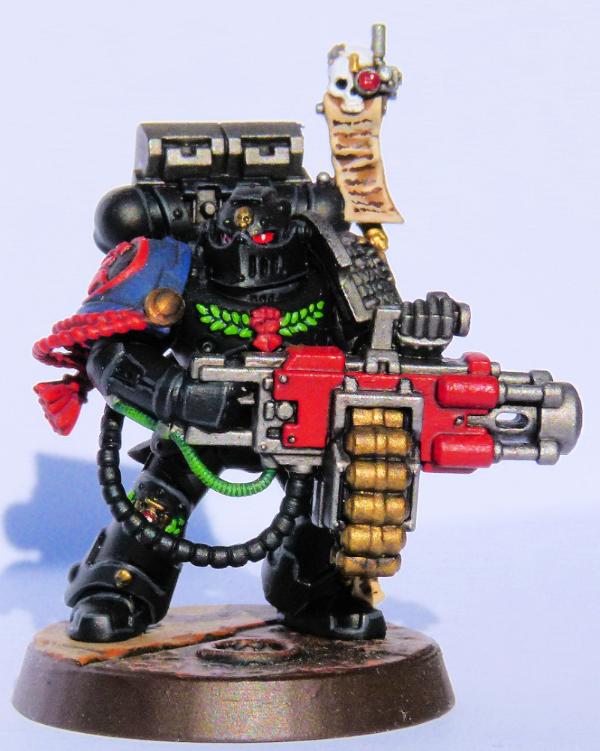
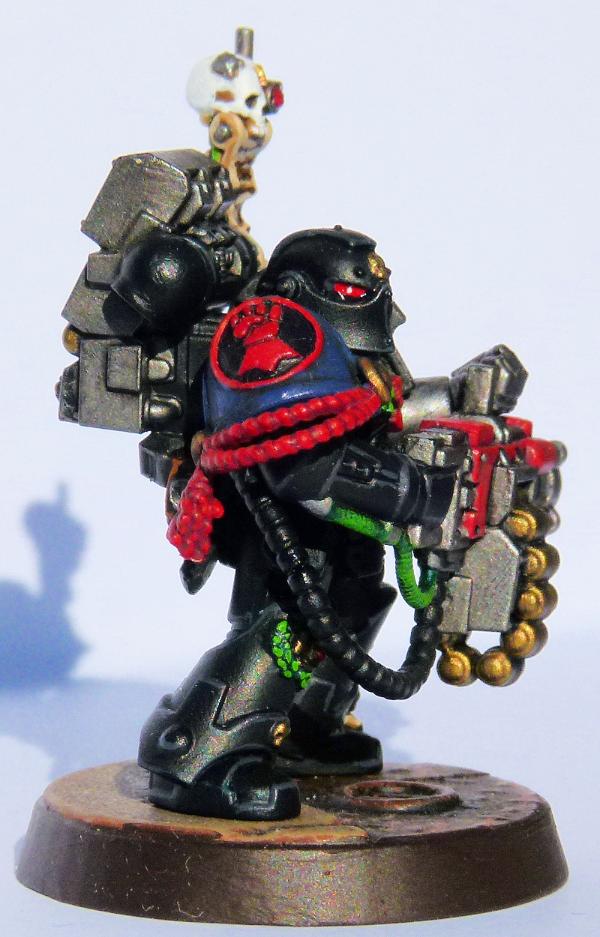
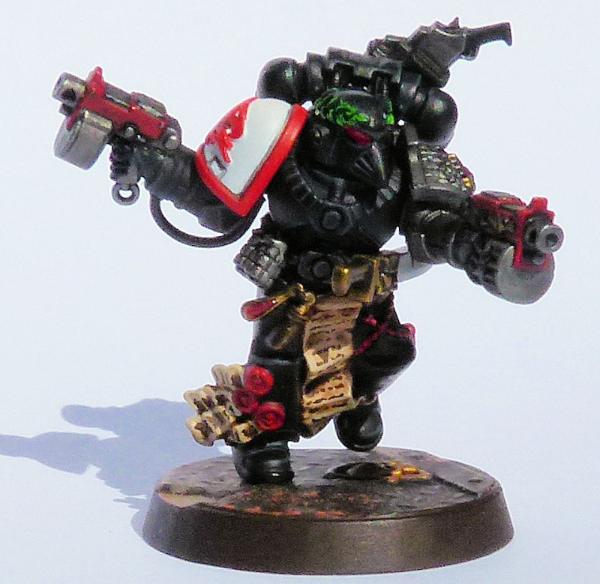
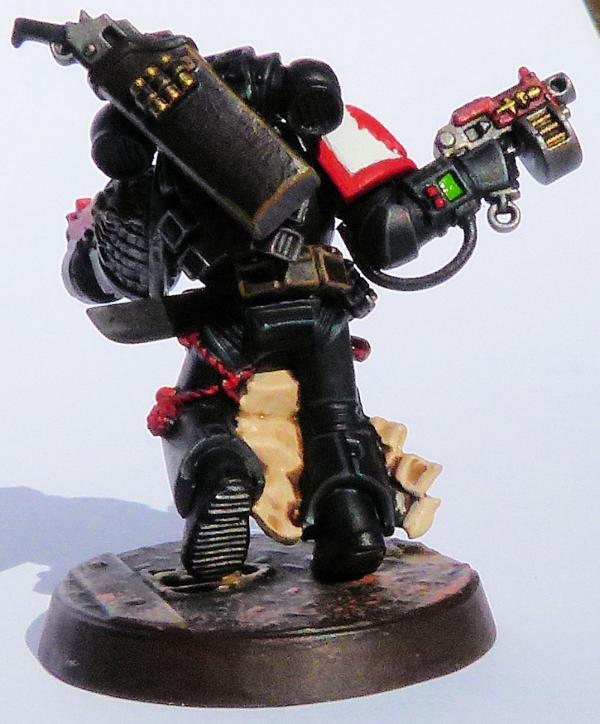
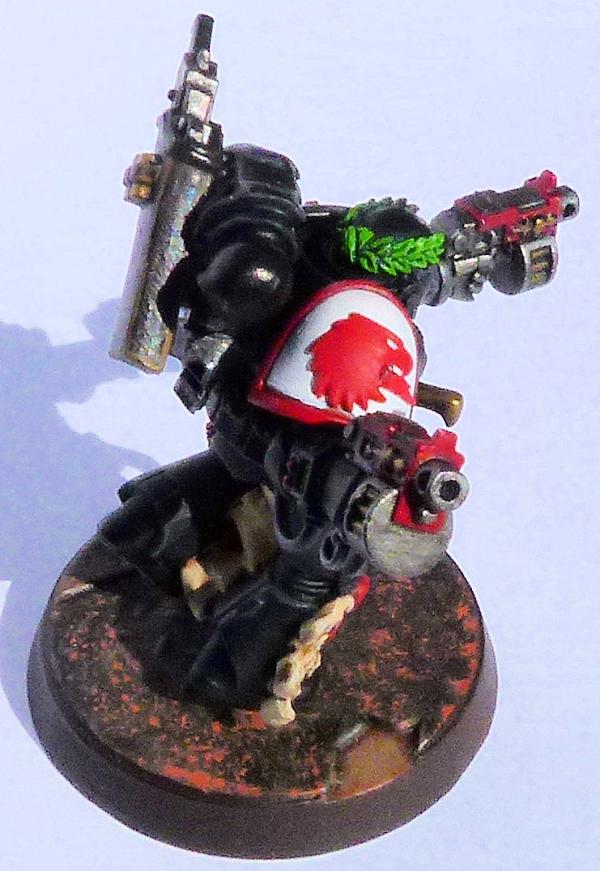
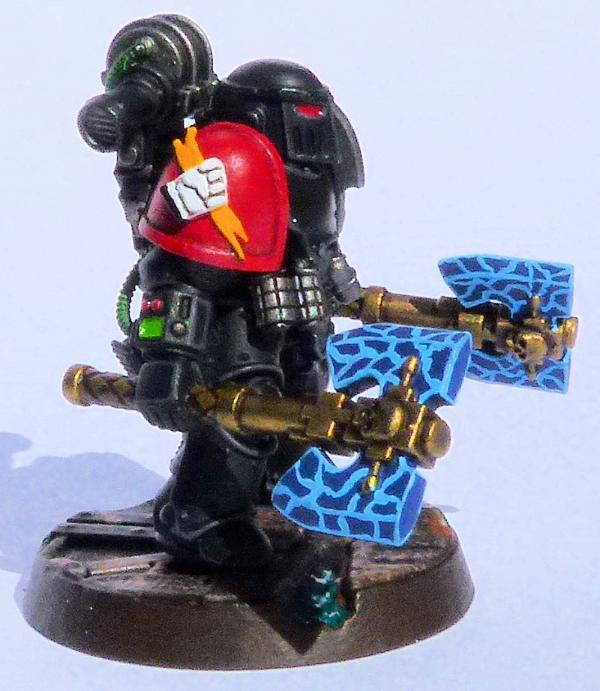
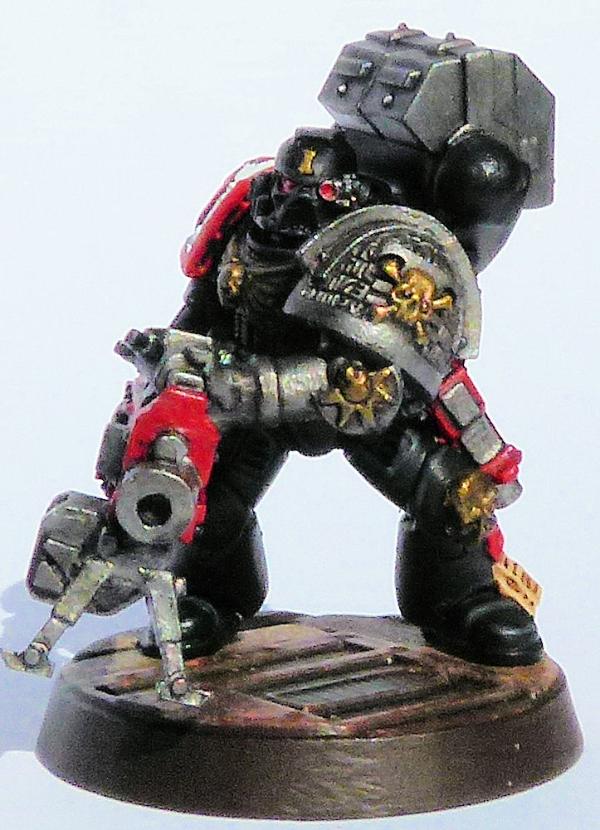
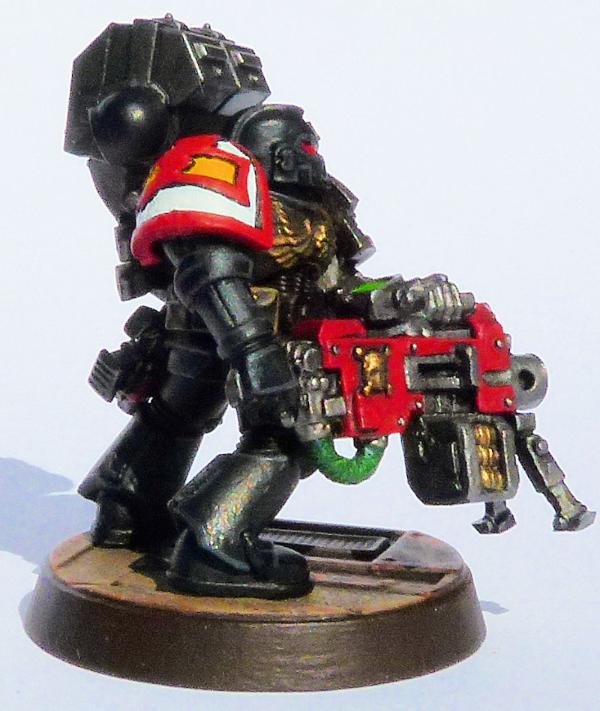
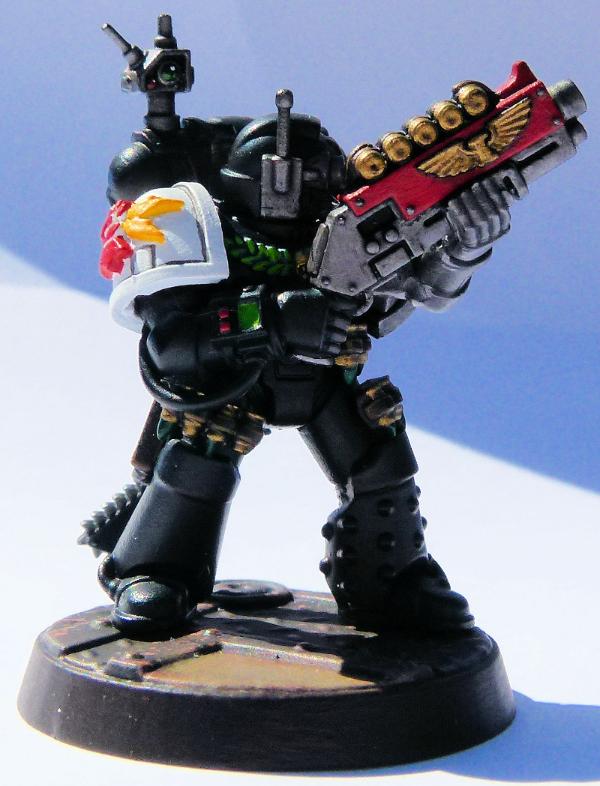
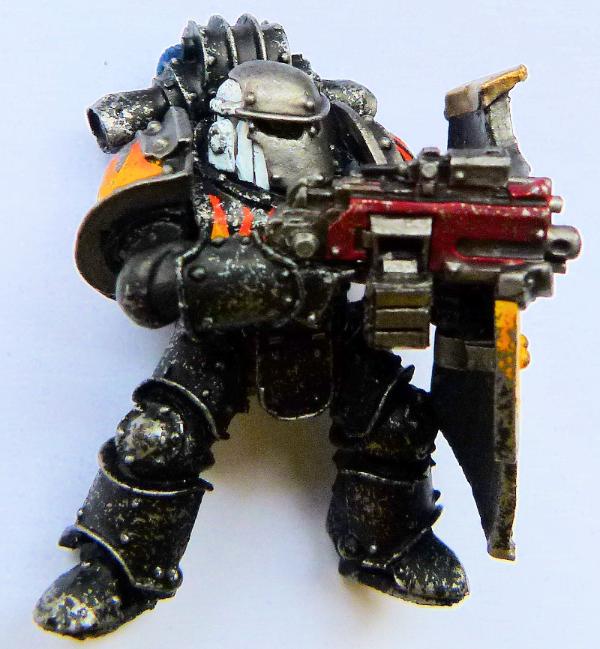
Justaerin Terminators
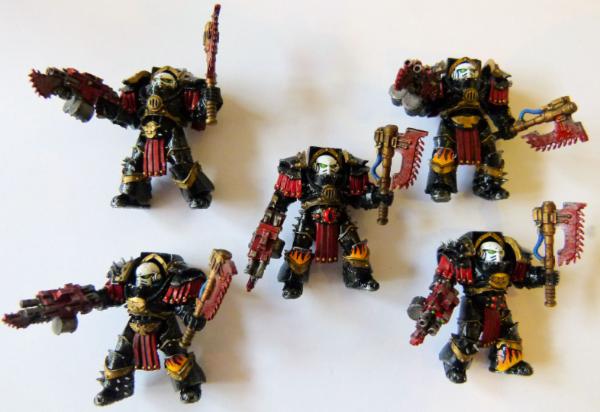
Decided to go with black, red, gold and flames on these terminators. I removed all the Sons of Horus iconography and replaced them with FW etched brass Imperial Eagles. I added gloss varnish over all the black armour as I wanted a "polished" look. I really like the helmet shape on these terminators.
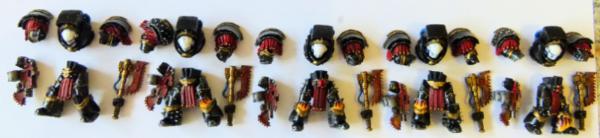
I decided to magnetise all the parts (bar the helmets) to give me unlimited options.
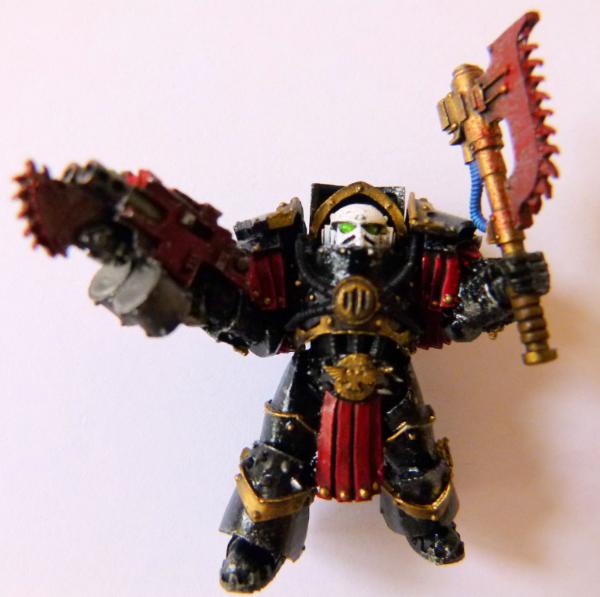

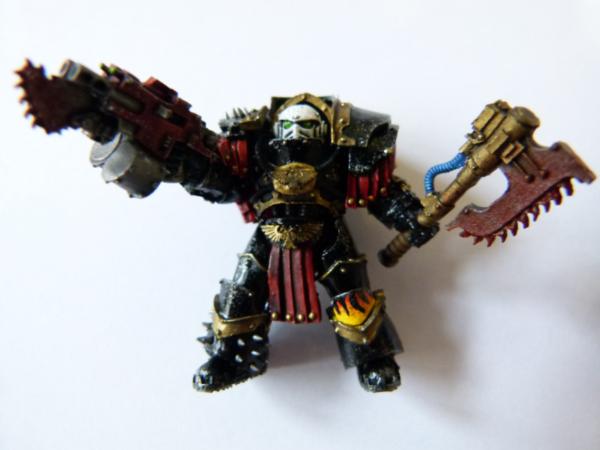

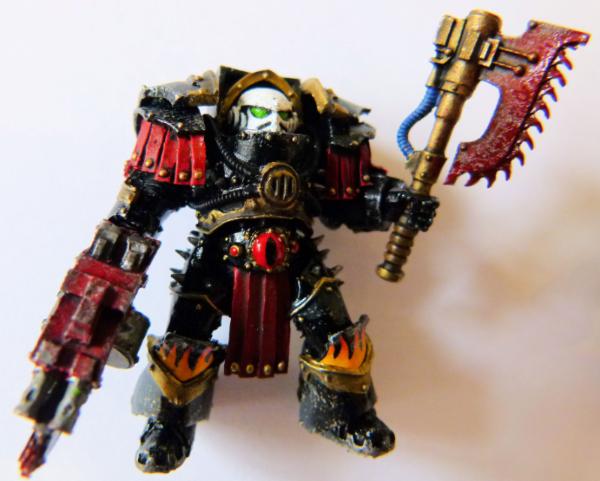
I'm really happy with how the blood splatter turned out on the chain axes. I added a bit of gloss varnish to give a fresh blood look!
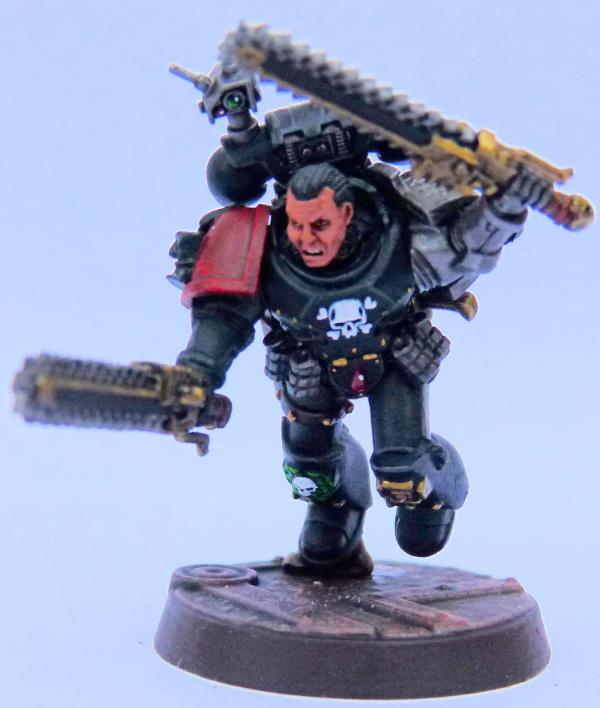
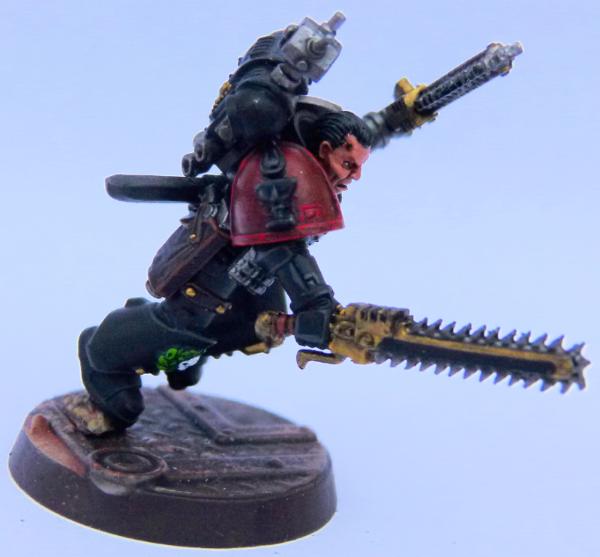
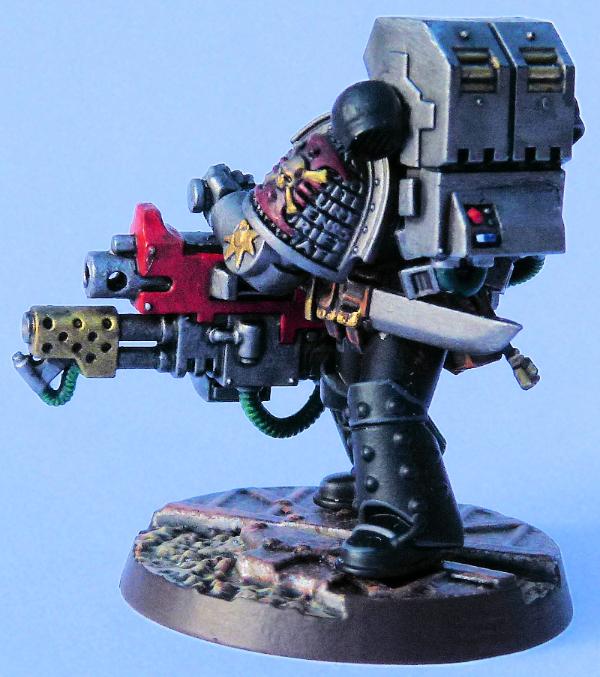
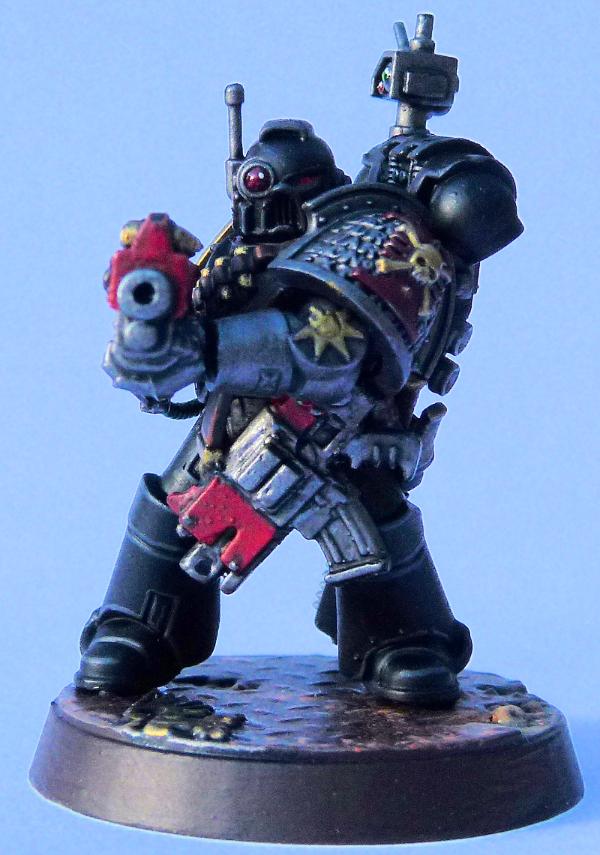
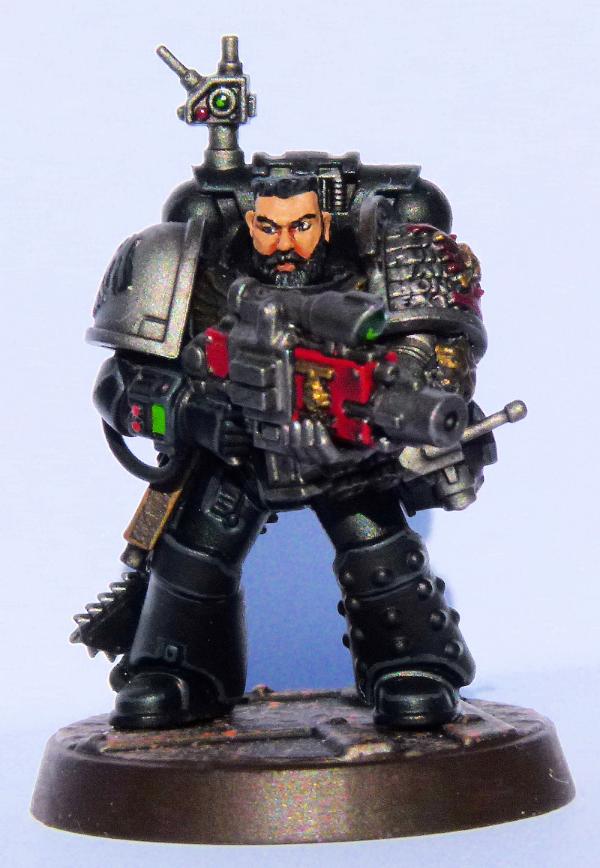
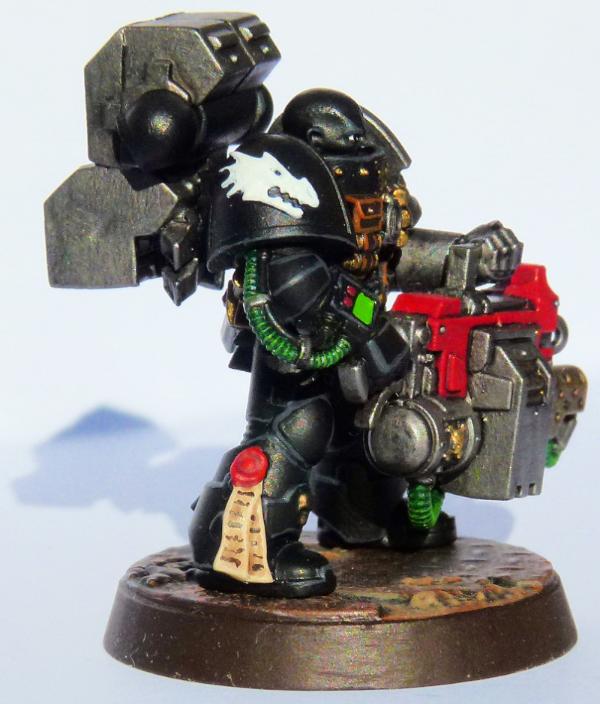
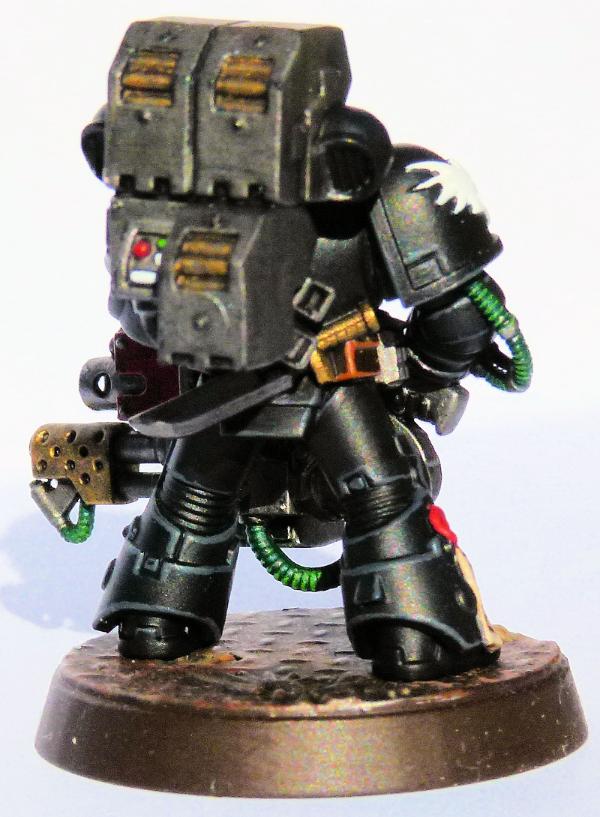
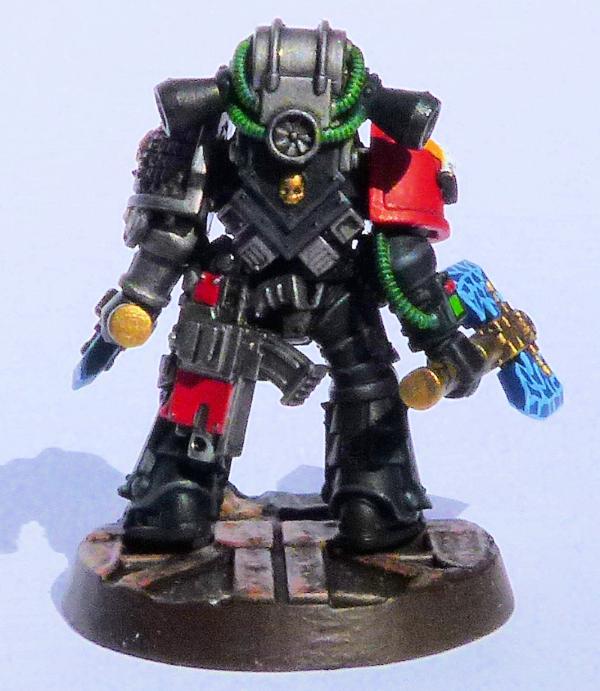
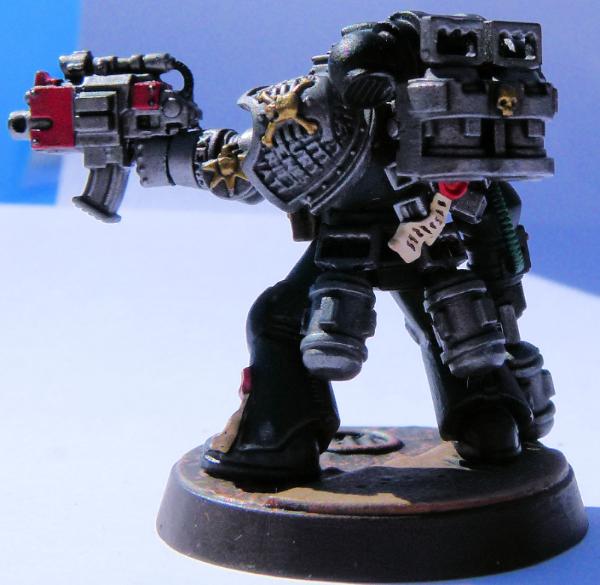
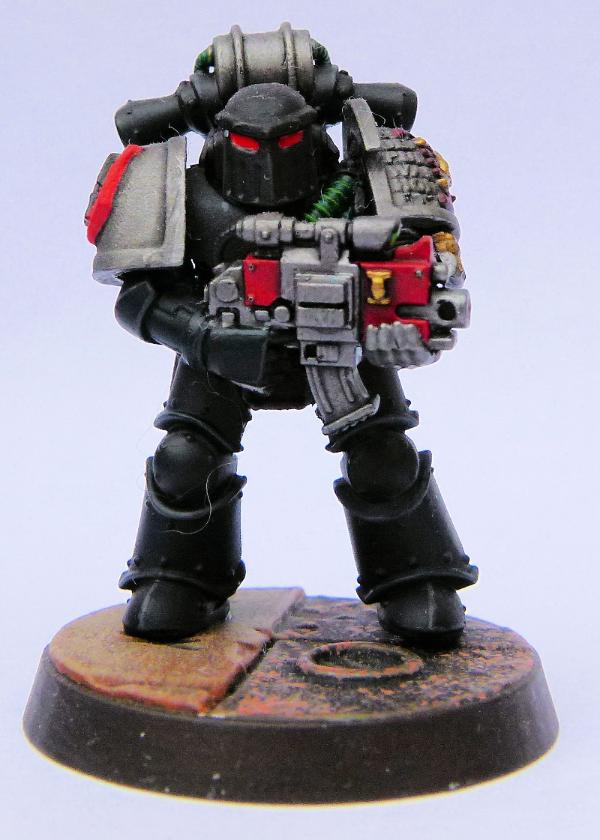
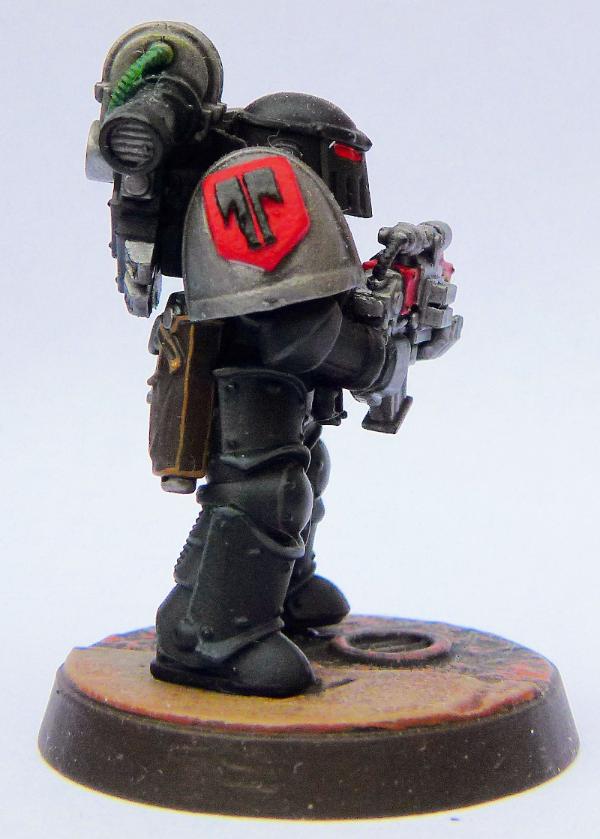
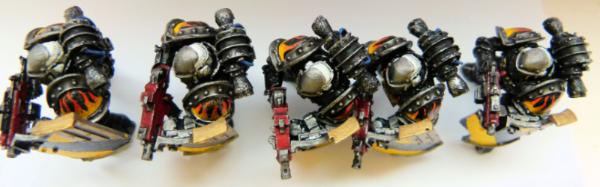
Destroyer Squad
I loved converting this squad. I used a lot of Legion of the Damned parts to personalise them, skull helmet for the Sergeant, skull shoulder pads and bone toes for everyone
 FW
FW did a great job on the Destroyer helmets.

And finally some crew for a previous Basilisk....

Till next time, Phil.
|
|
|
|
|
|
2016/09/12 19:44:48
Subject: Re:Philmorgan75's workshop blog - Legion of the Dead
|
|
Regular Dakkanaut
|
Sept 16 Update
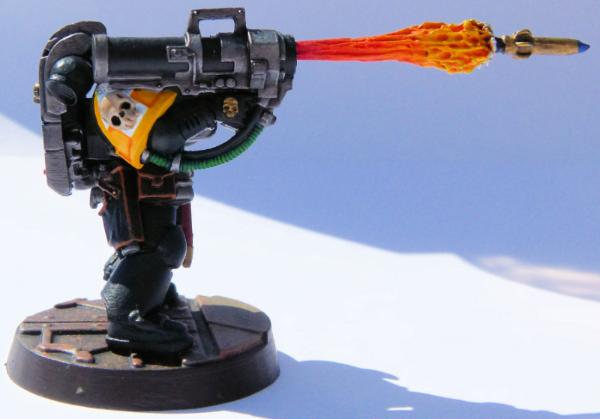
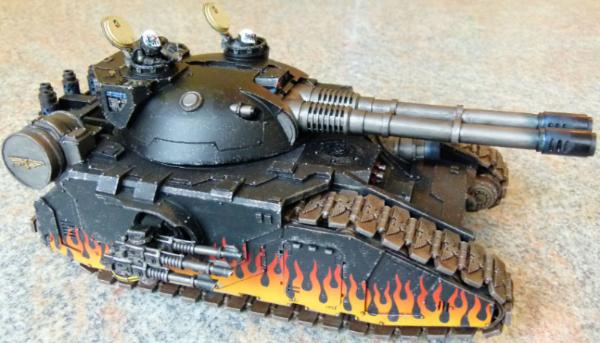
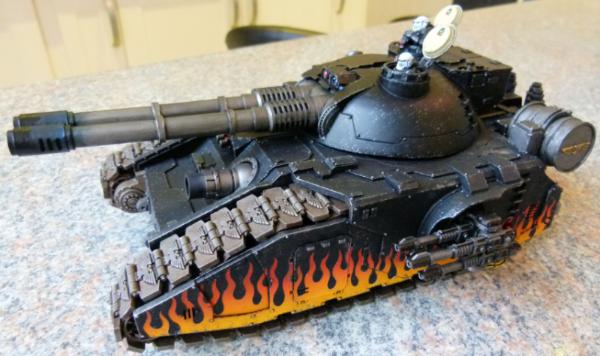
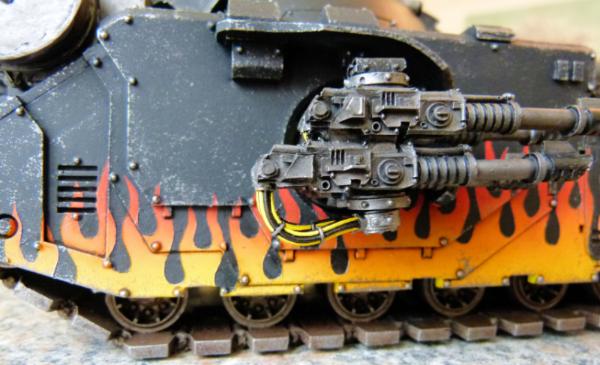
Leman Russ Incinerator
Finally finished my Leman Russ Incinerator. I'm still using a self made black oil wash to outline parts, but have ordered some Tamiya Black Panel Liner from Hong Kong on ebay so I'm looking forward to trying this on a number of vehicles in the near future.
This shows the completed right side....
..left side...
..rear....
..and plan.
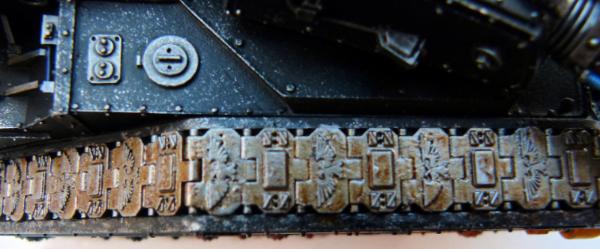
To continue with my never ending quest to improve tank treads, I added FW Etched Brass Imperial Eagles on every other tread - a definite improvement I think!
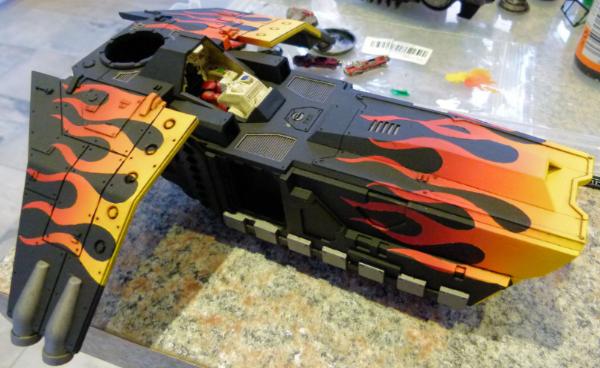
Sky Talon
I really fancied a FW Sky Talon but didn't like the idea of it being crewed by Imperial Guard so I did a small conversion. After sawing off the original cockpit, I added a Storm Talon cockpit instead. A bit of plasti card and milliput and a small drill in each armour plate was used to match the rest of the resin kit.
Here's the front view. There is a fully painted Tech Marine in the cockpit - honest!!
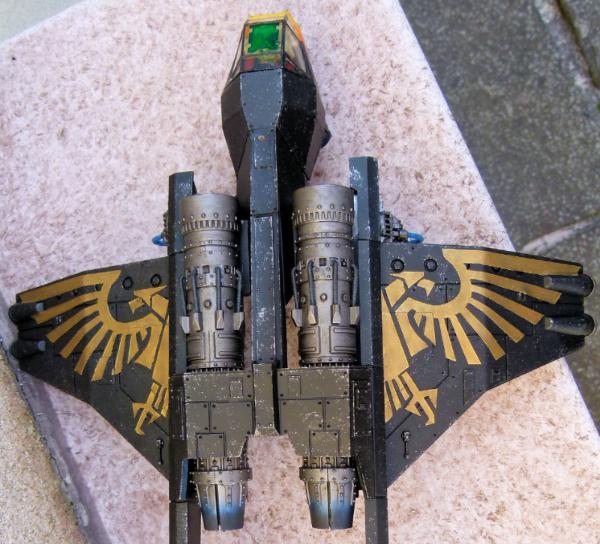
This shows the plan view. I added a plasti card imperial eagle over the Valkyrie wings.
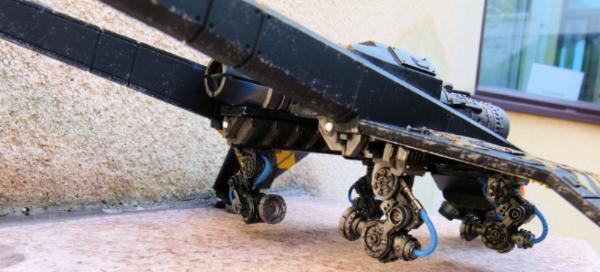
This shot shows the clamps that can be used to carry vehicles. I've ordered an Elysian Tauros Assault Vehicle and I will attempt to convert it to be crewed by SM Scouts. More to come in the future.
This shows the underside of the Sky Talon. I thought some hazard stripes would look cool here. I think they came out really well.
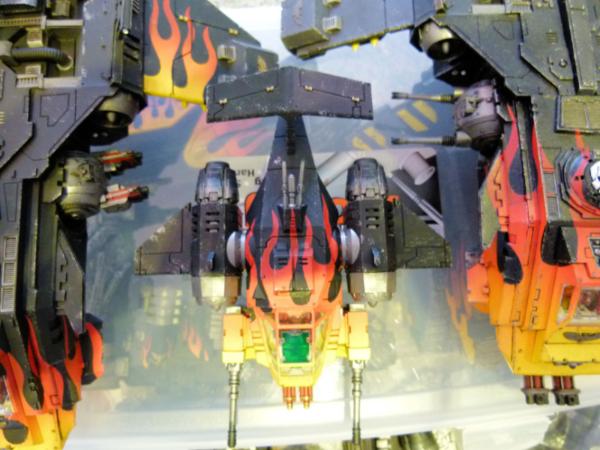
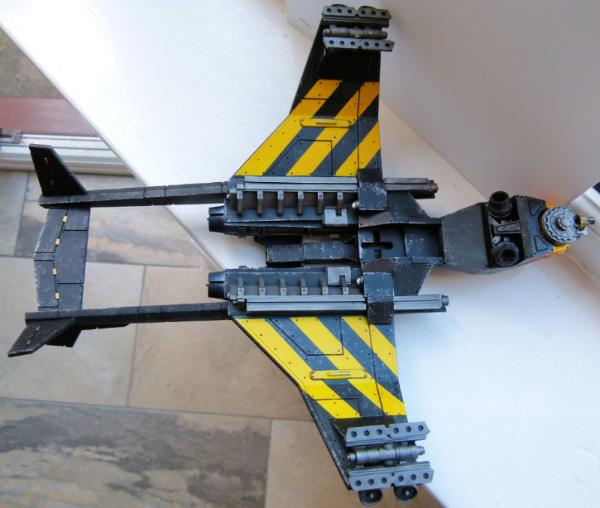
Assault Cannon Dark Talon

I wanted a Dark Talon armed with weapons that would kill loads of xenos, so I got a few Baal Predator Assault Cannons from bitz suppliers and added them.
This shots (in focus!) shows the flames I airbrushed over the whole of the front and wings of the Dark Talon.
The barrels had some black smoke pigment added to recreate gunpowder residue. You can see on this shot that I managed to remove the usual embossed wings on the wings - there was a lot of sanding involved and then a thin layer of plasti card to create the ultra smooth look. I added some rivets and this wing was finished.
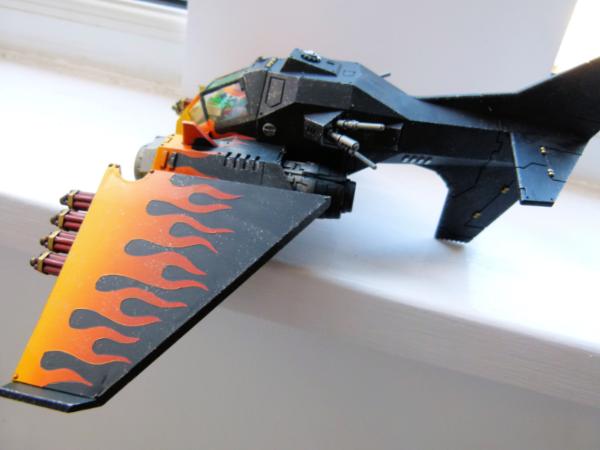
I really enjoyed this paint job. I want to add a Heavy Bolter version of the Dark Talon and a Lascannon one too!!
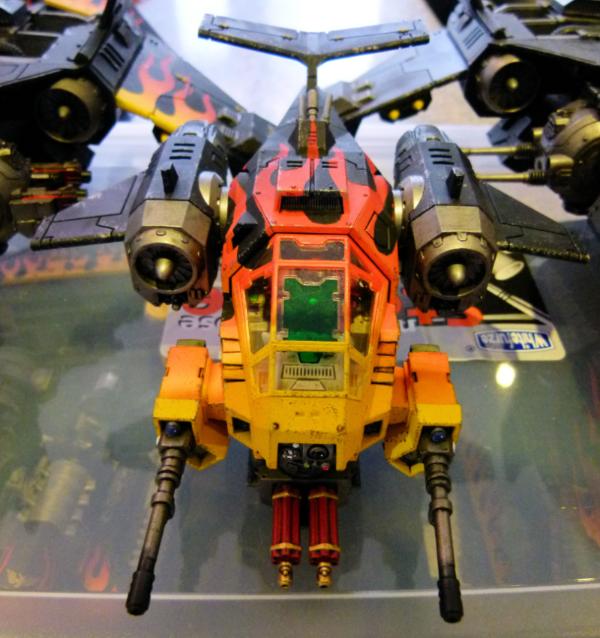
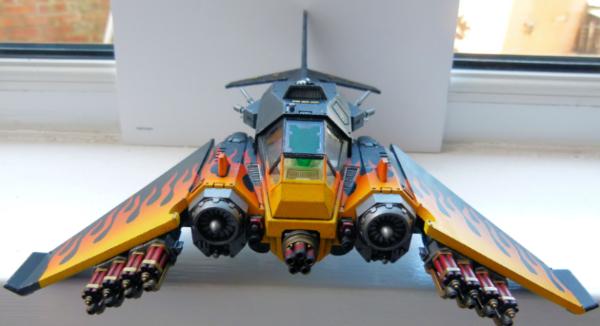
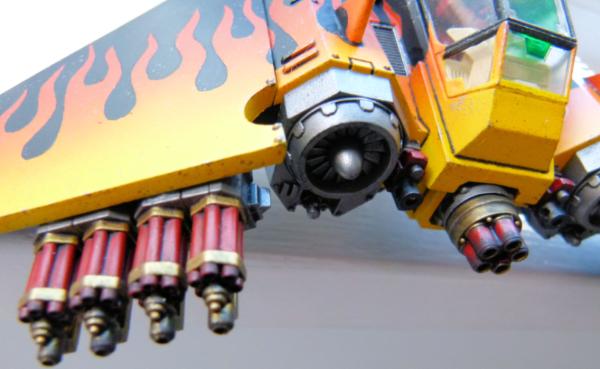
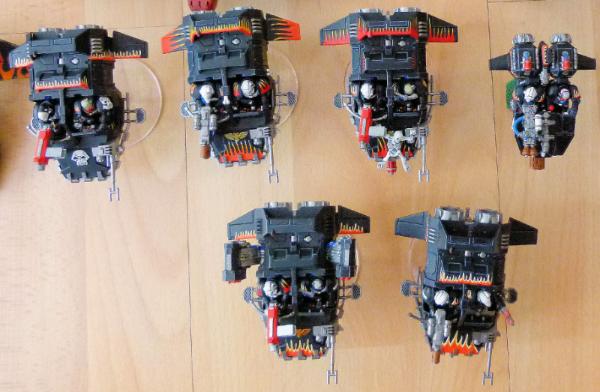
Xiphon Interceptor

This was such a cool looking model. I had to have it as soon as I could afford it!
I went with the usual flames over the front, cockpit and wings.
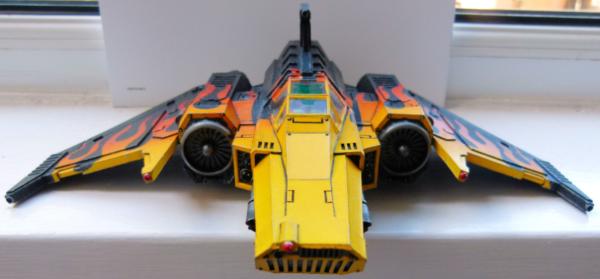
This shows a front view. The Xiphon is really sleek and was a cool model to put together.
I wanted to add a realistic scorch effect around where the hot las cannon blasts, so I added some black smoke pigments. I'm really happy with how this turned out.
I used some Tamiya Burnt blue steel pigment and then some black smoke pigment to give the engines some heat damage....
.... and the underside.
I really want to get a Corvus Darkstar, but I have to many projects started/half completed that I will have to wait.
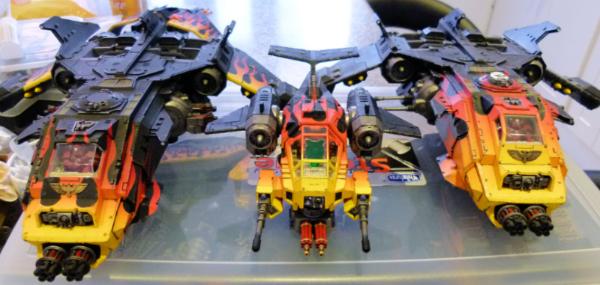
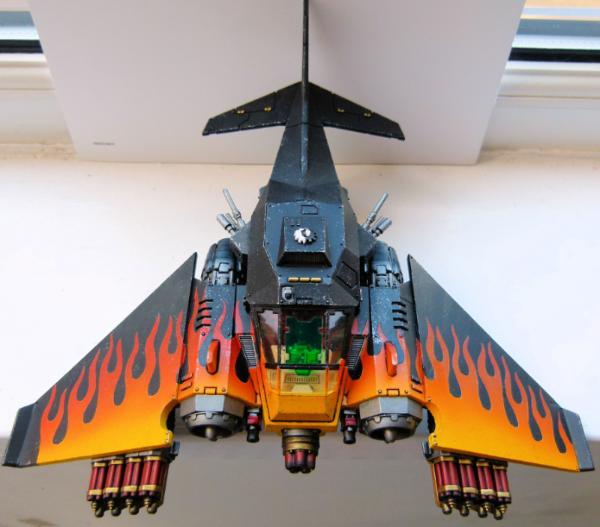
Legion of the Dead Aircraft Wing
I thought it would be cool to have a group shot of all my completed aircraft/transport vehicles .....
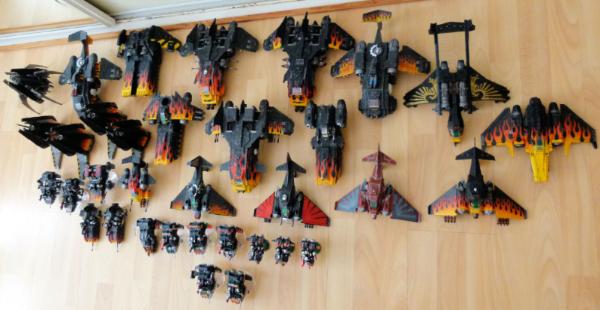

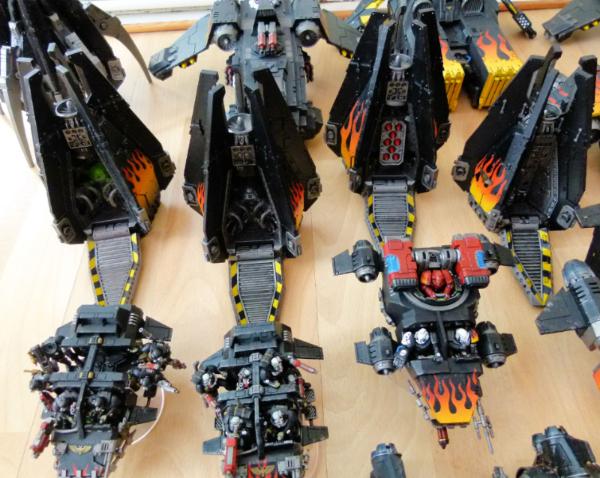
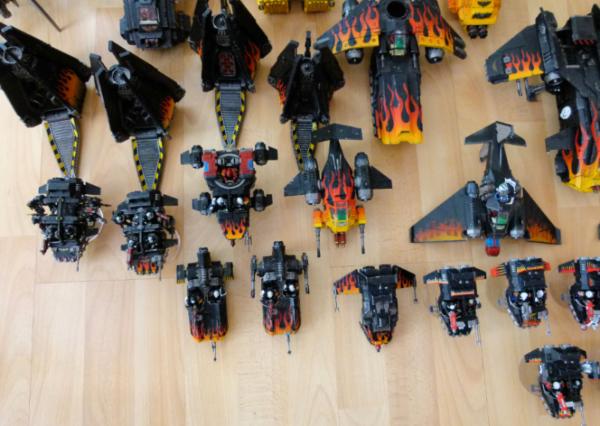
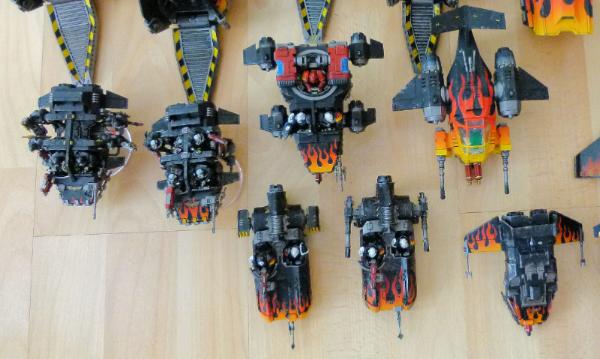
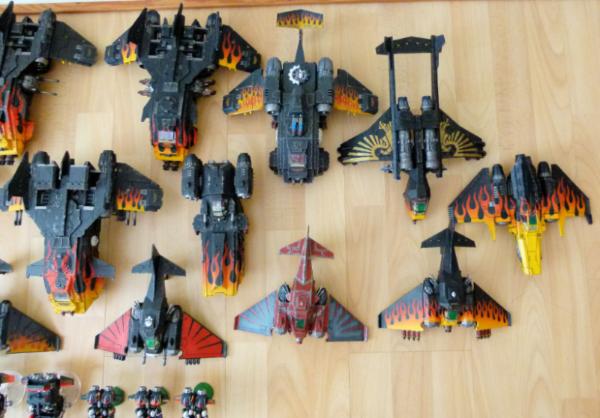

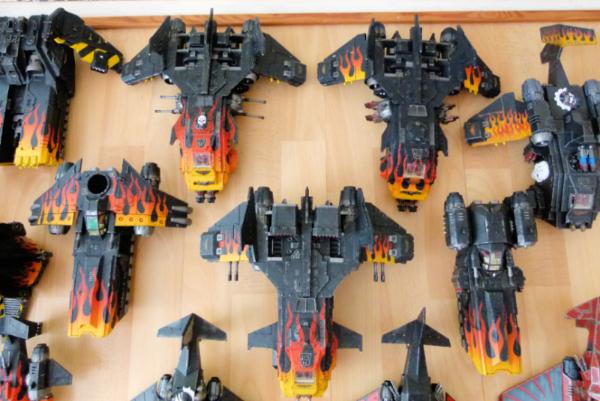
Hope you enjoy!!!!!
|
|
|
|
|
|
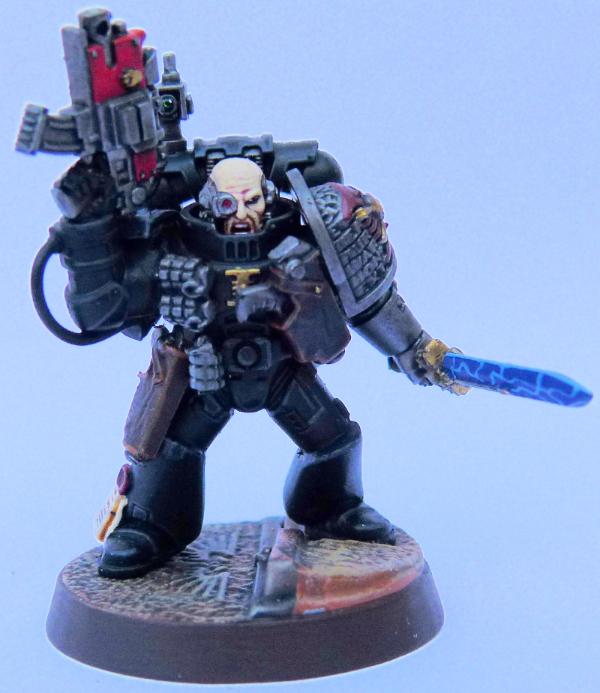
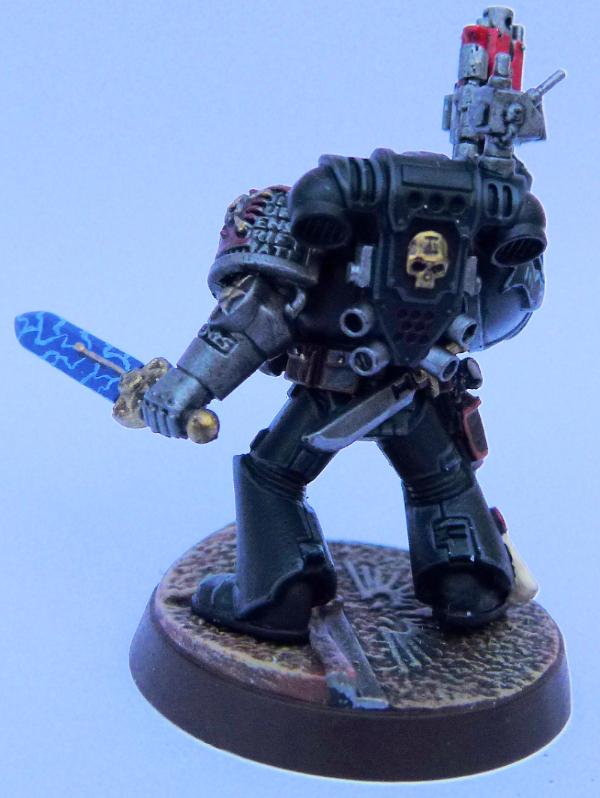
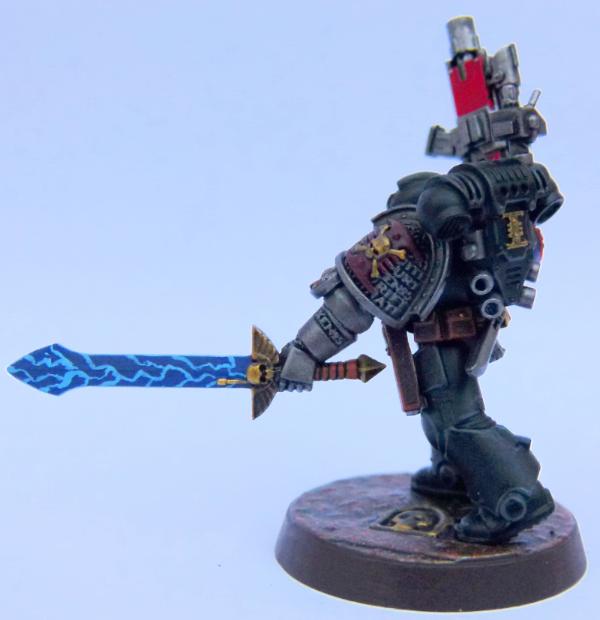
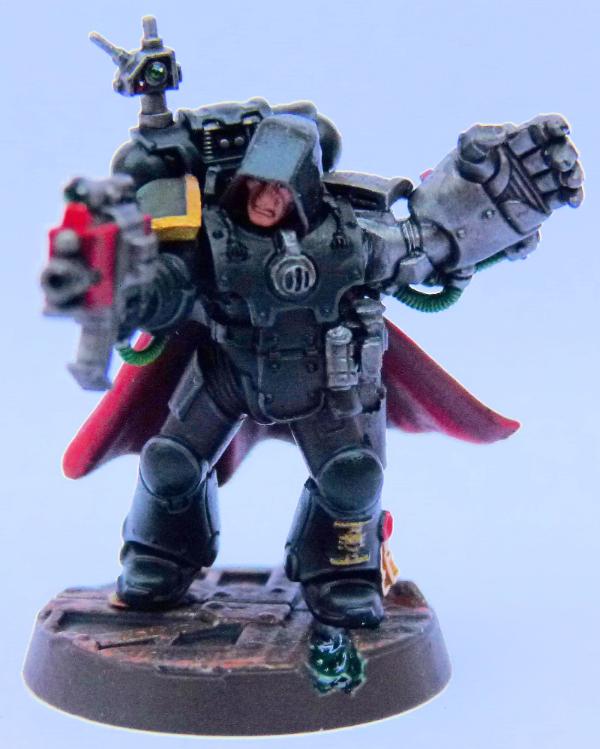
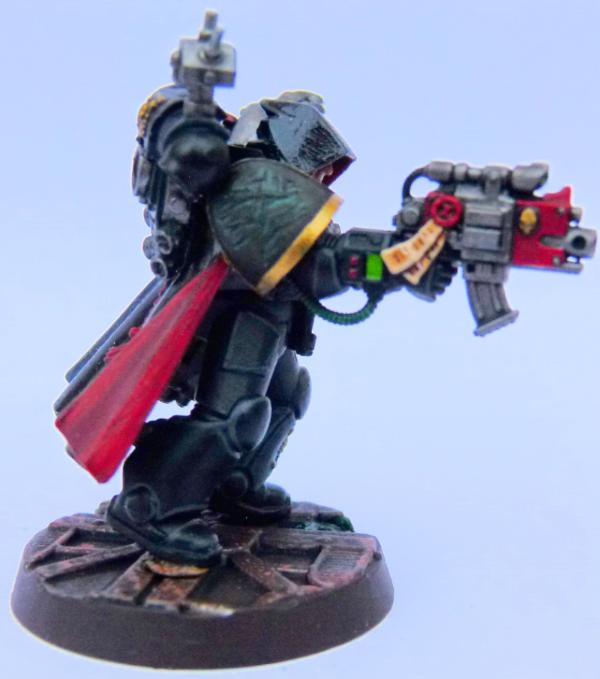
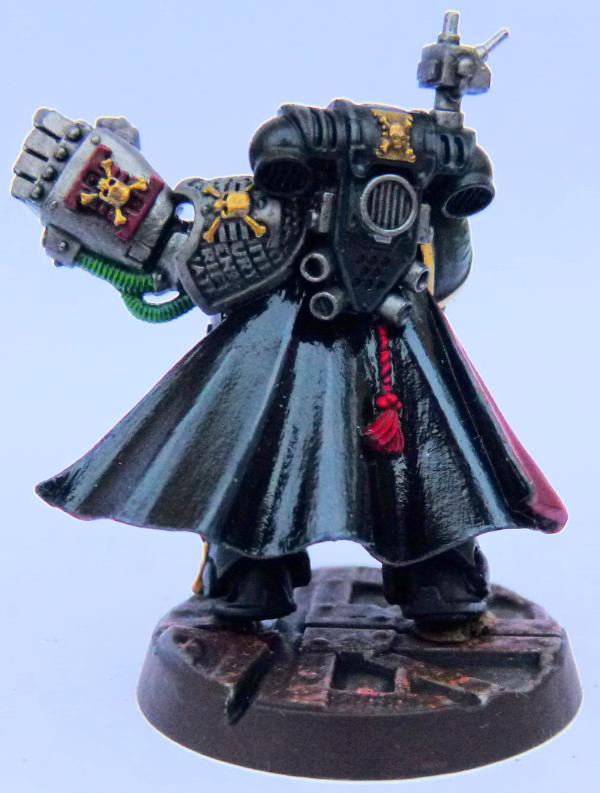
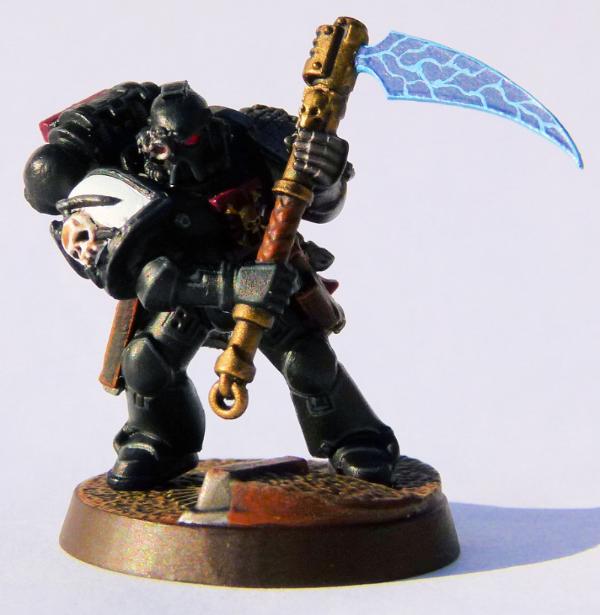
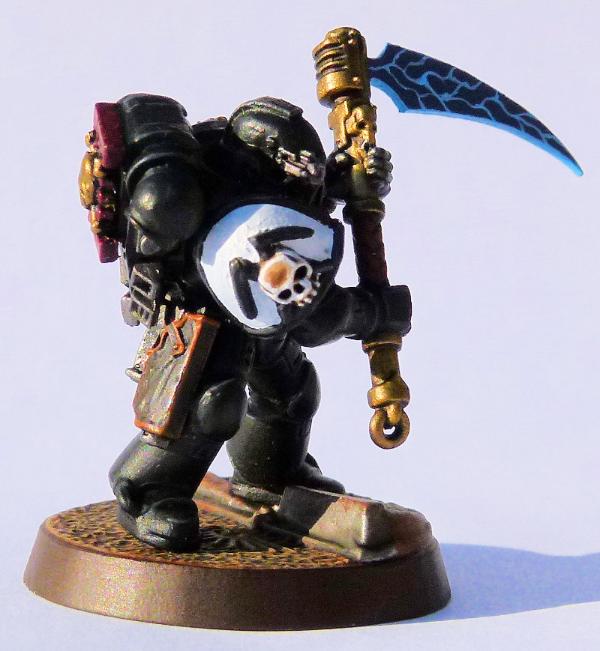
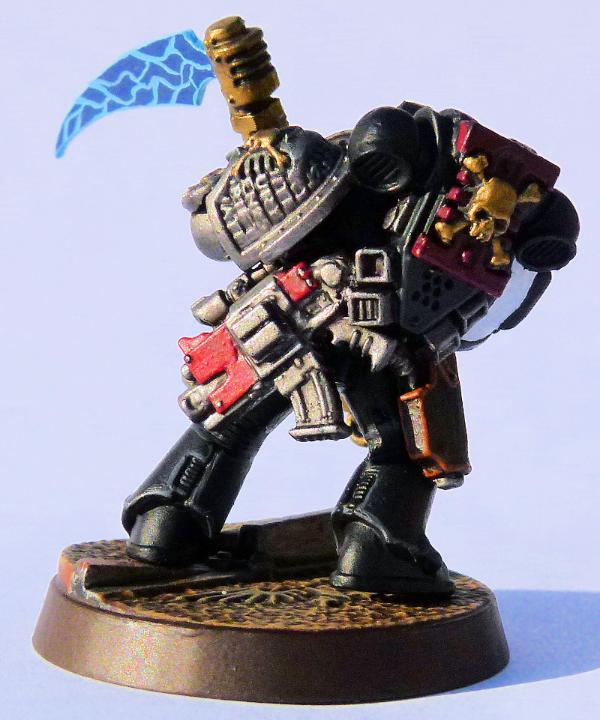
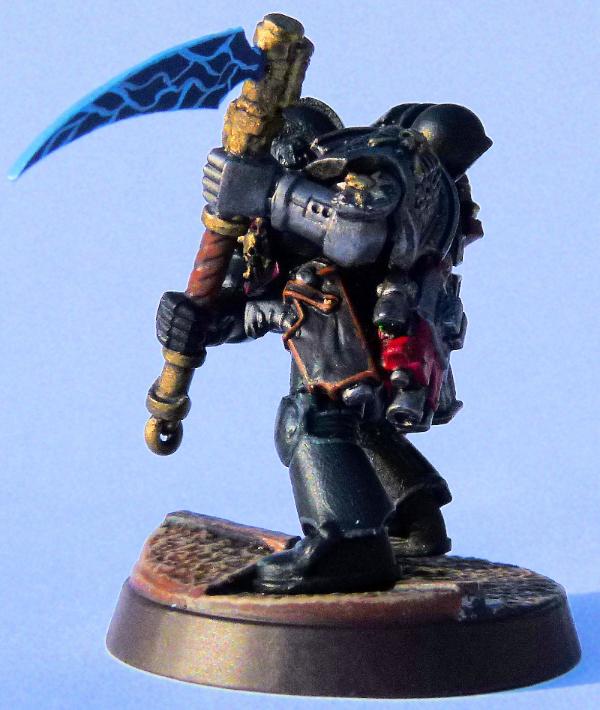
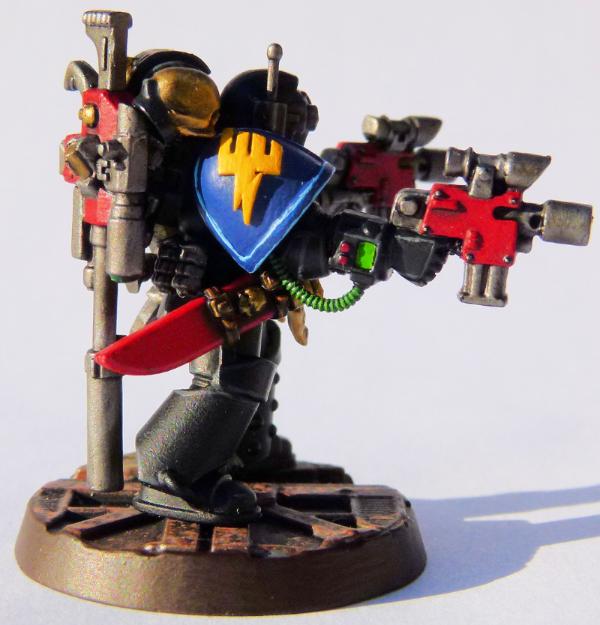
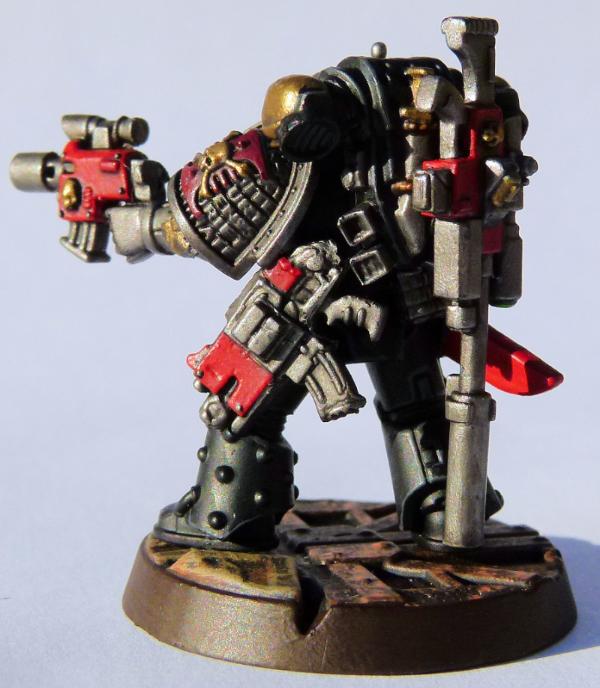
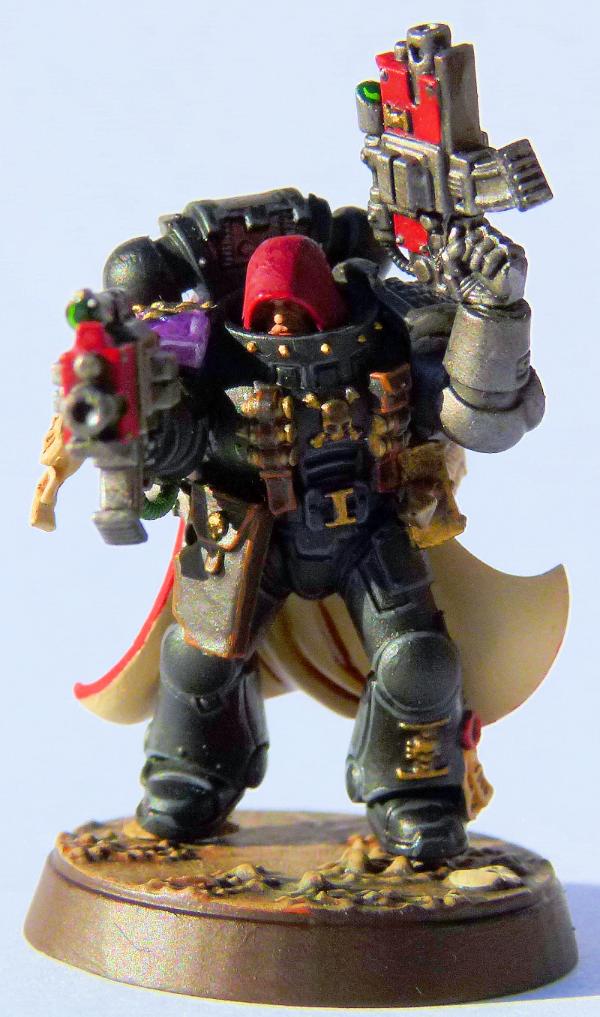
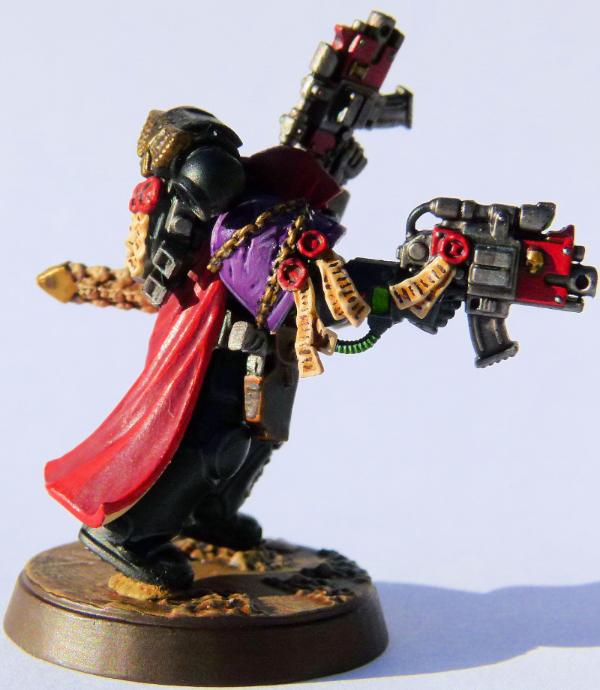
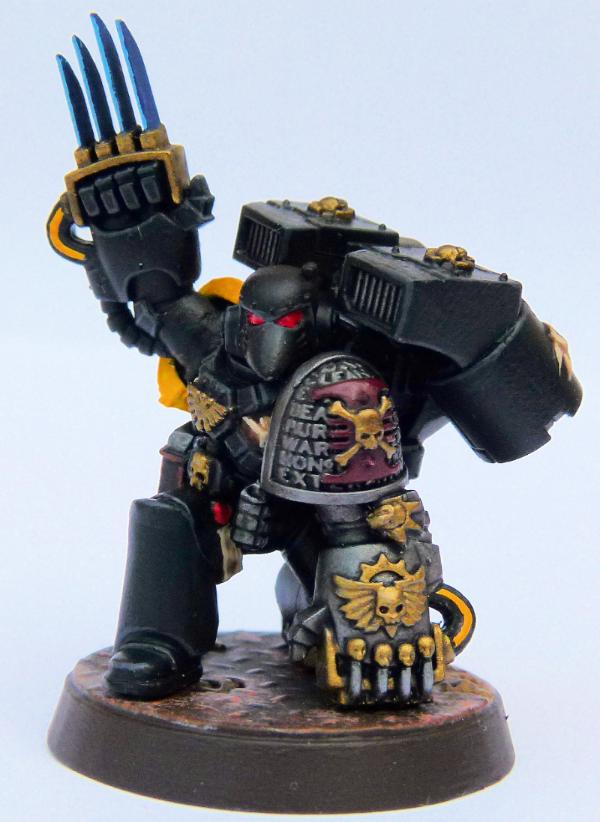
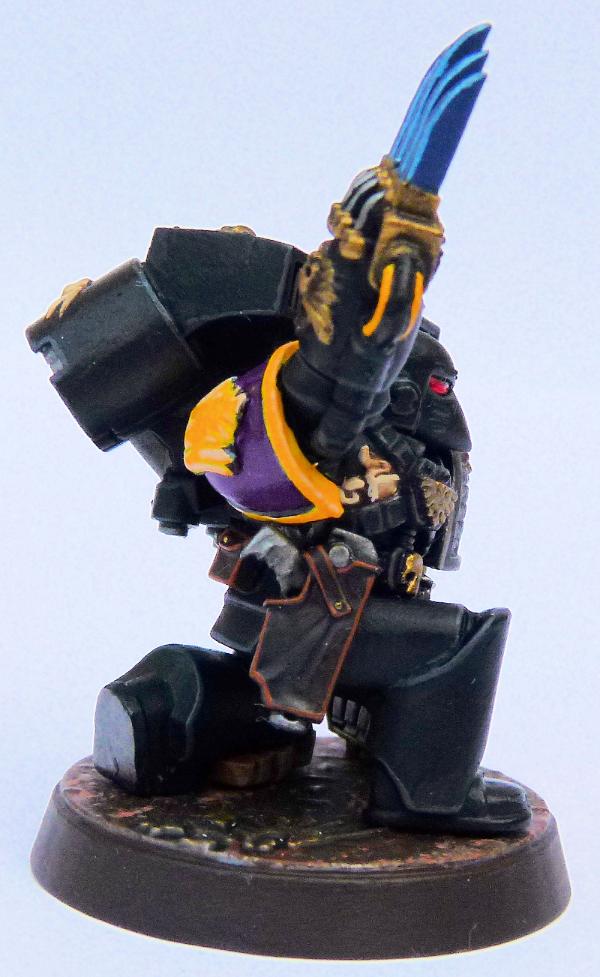
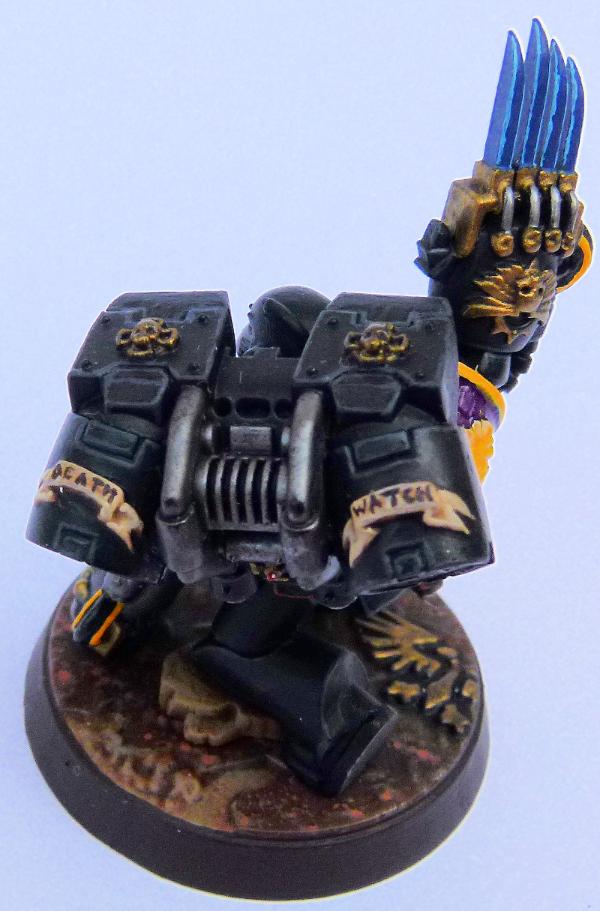
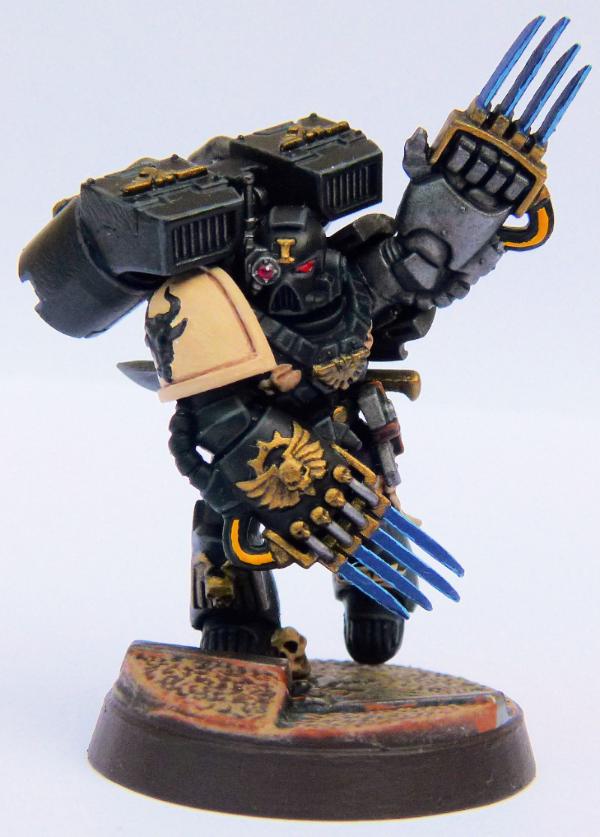
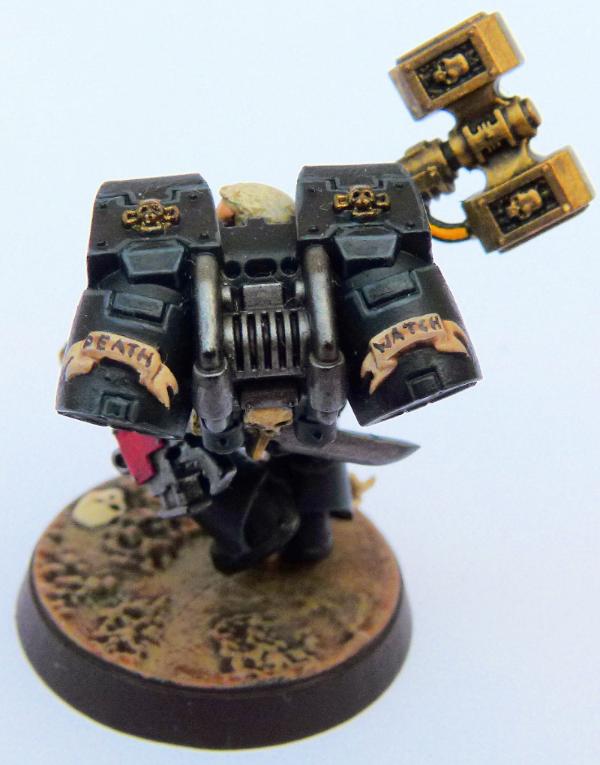
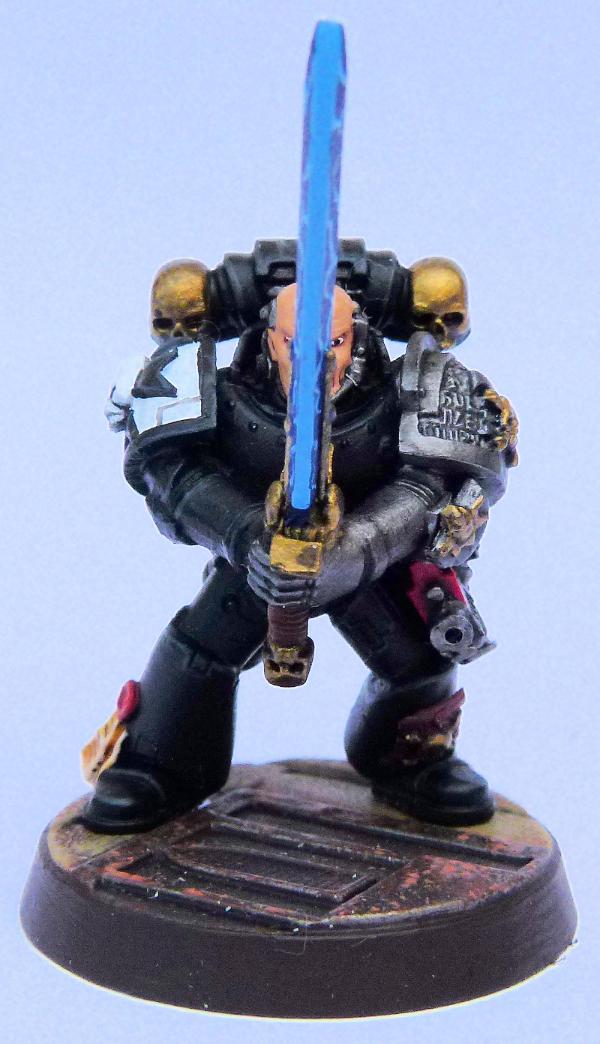
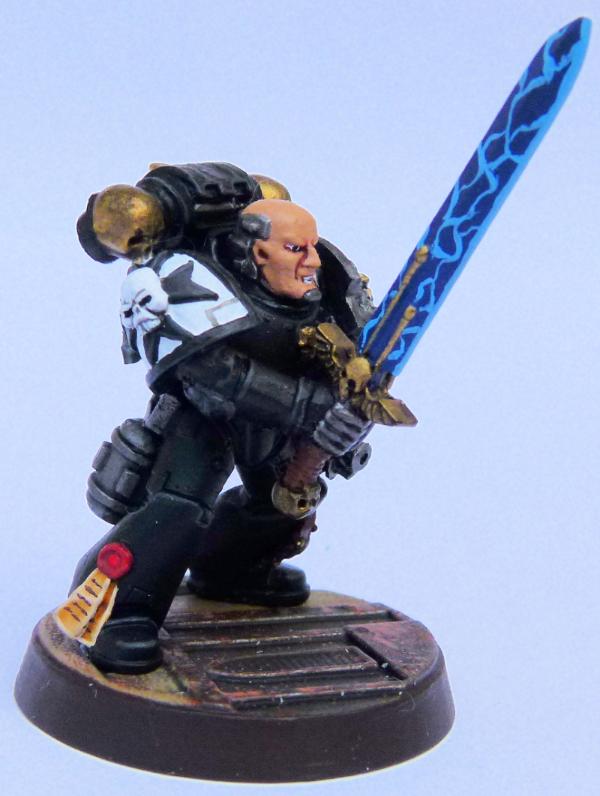
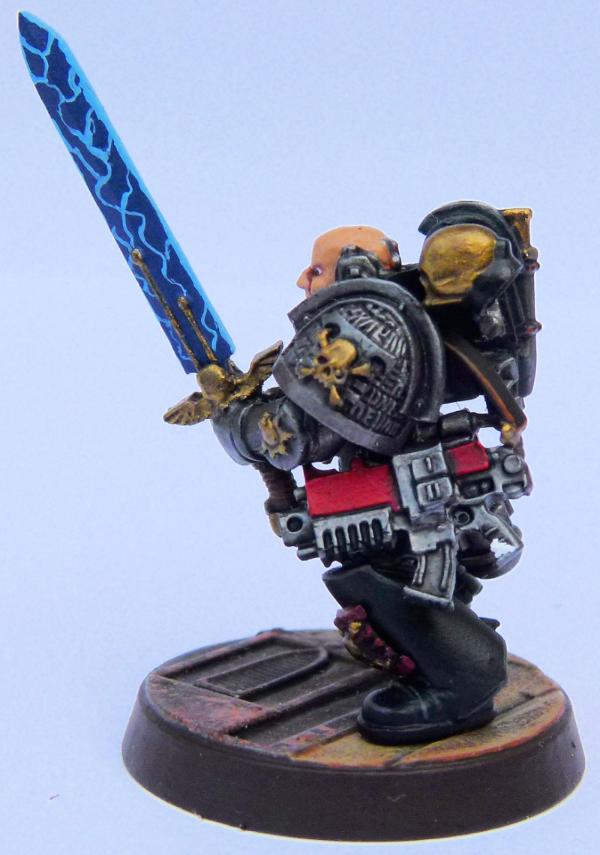
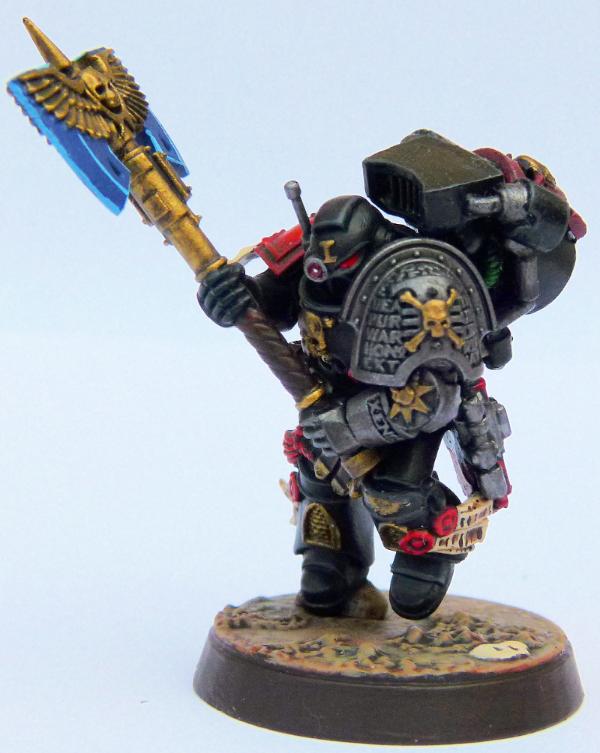
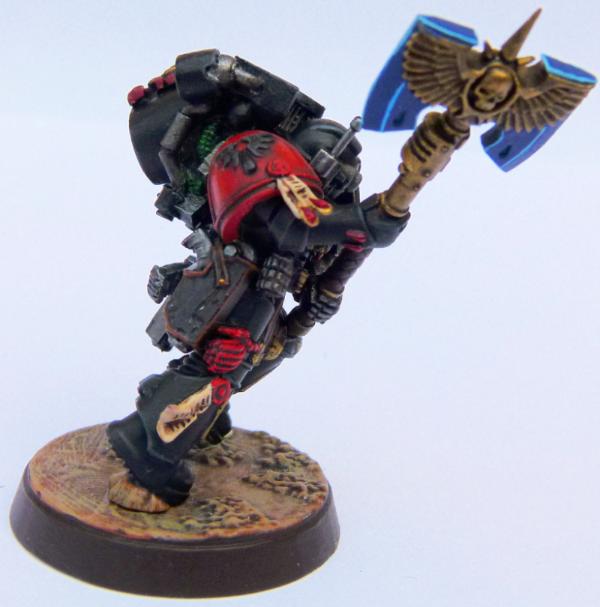
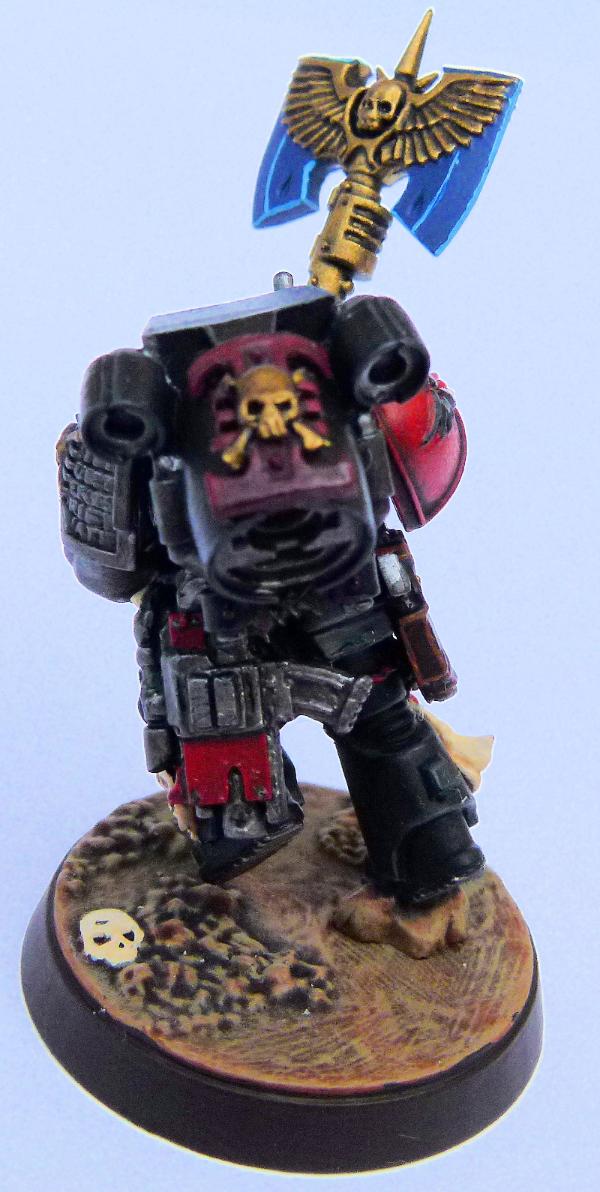
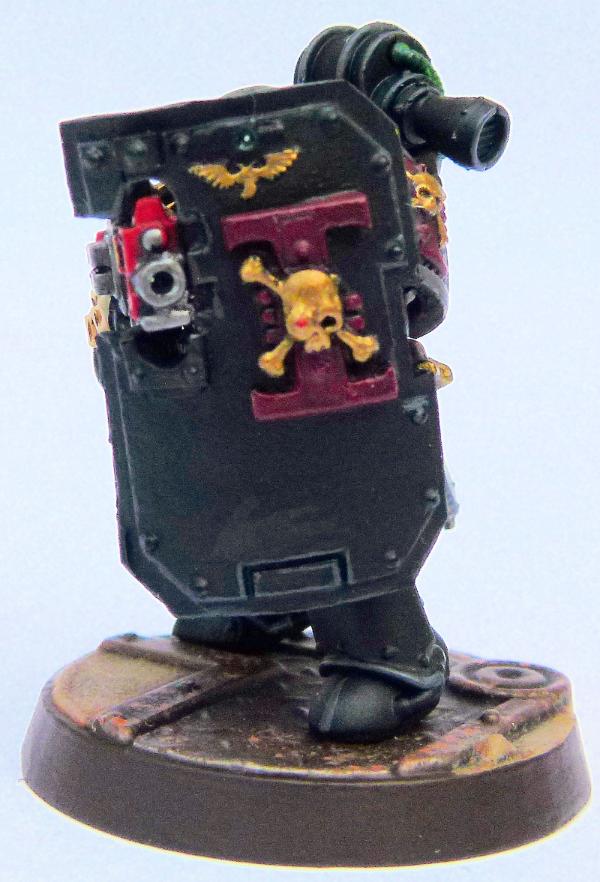
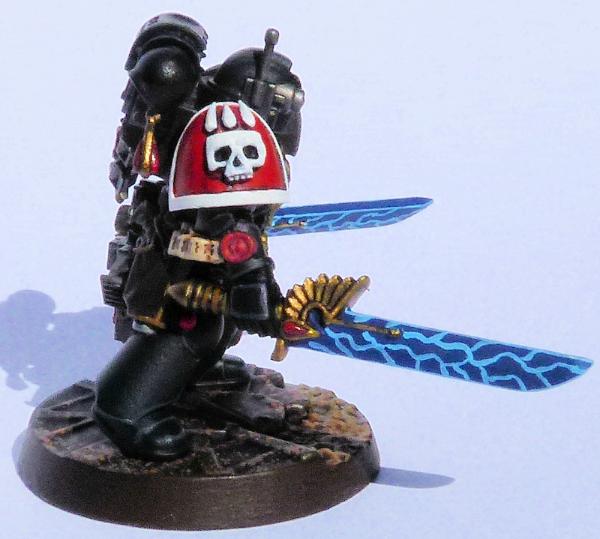
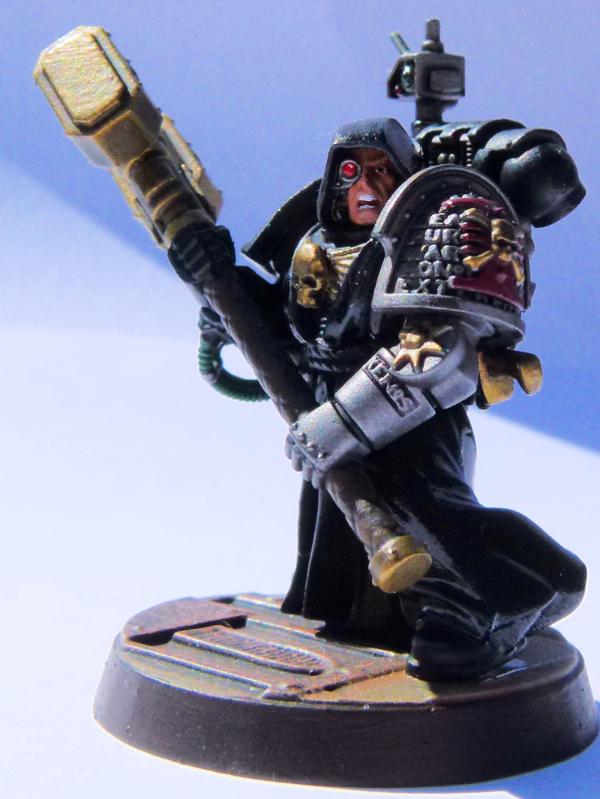
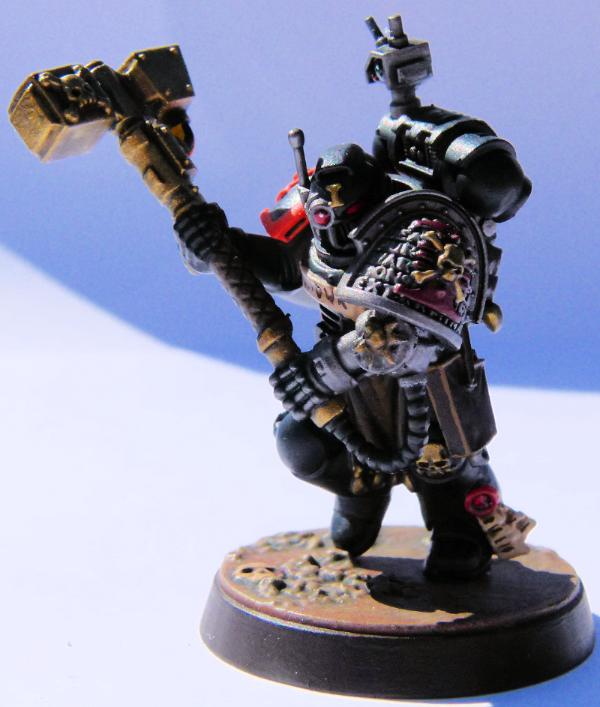
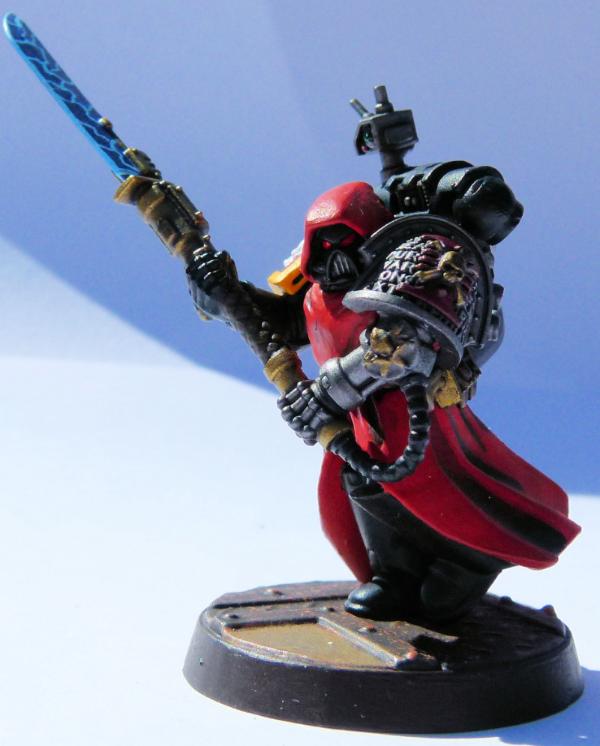
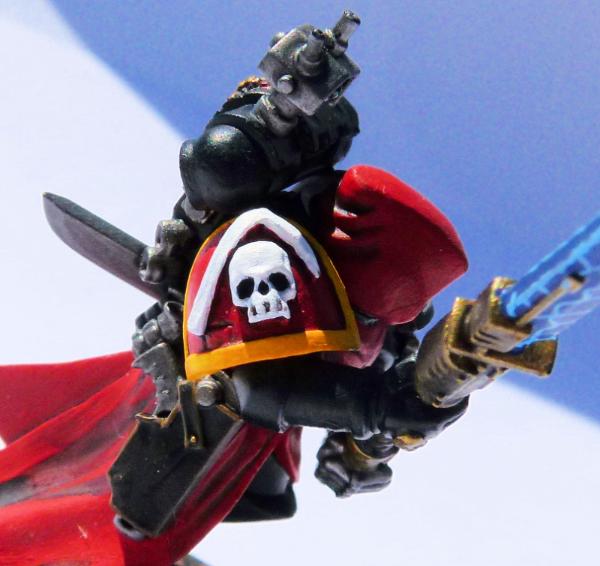
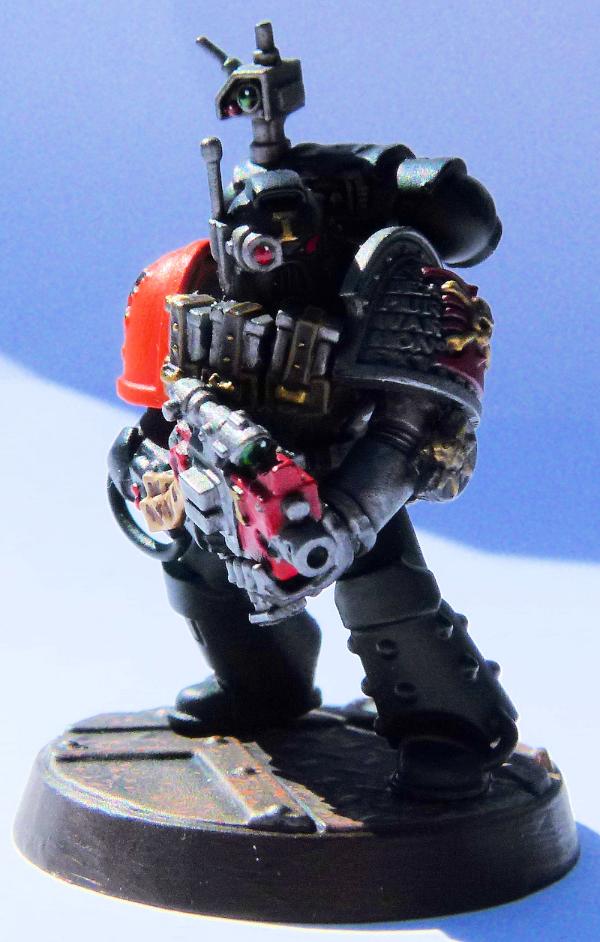
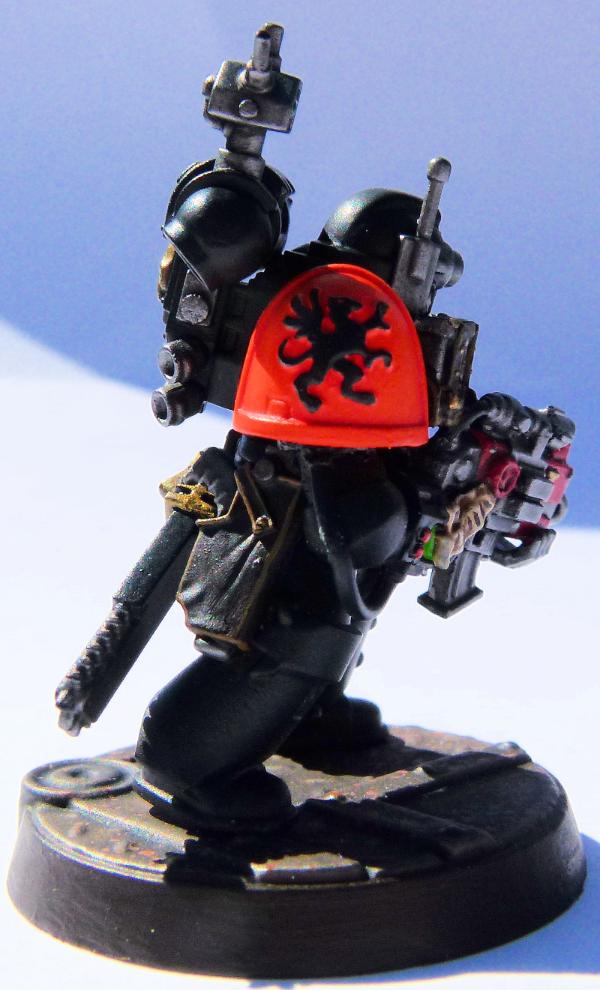
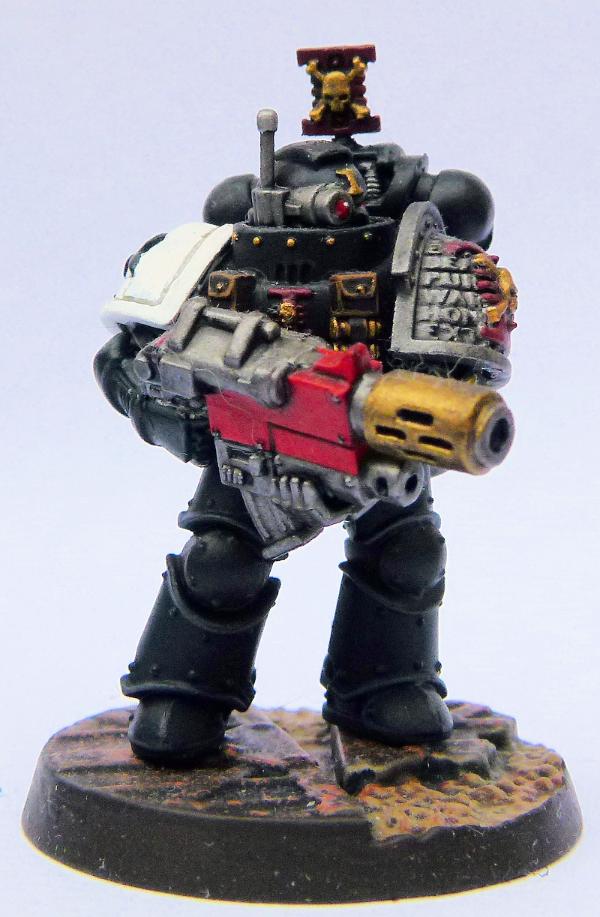
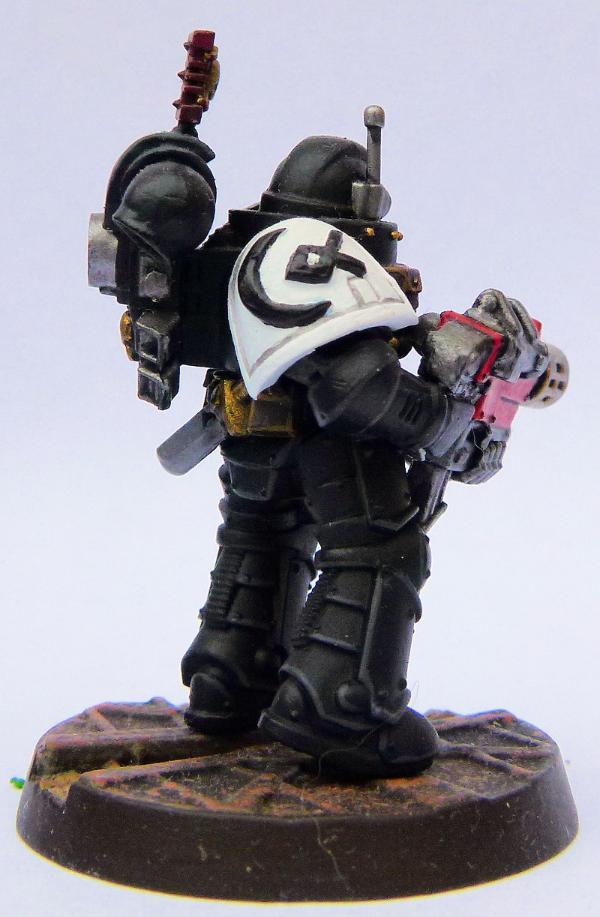
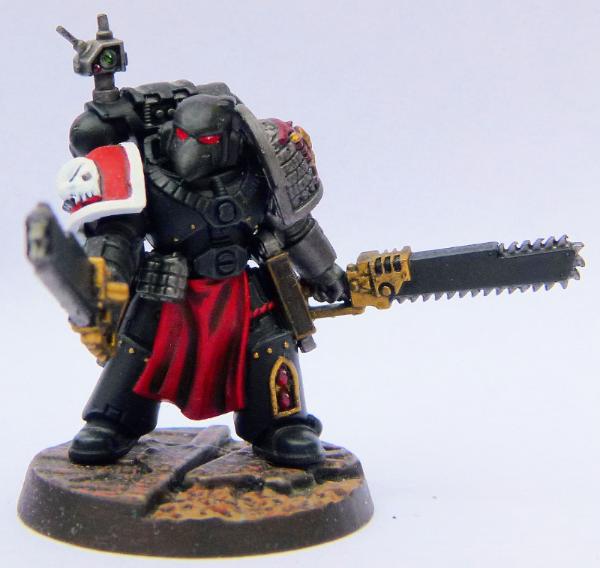
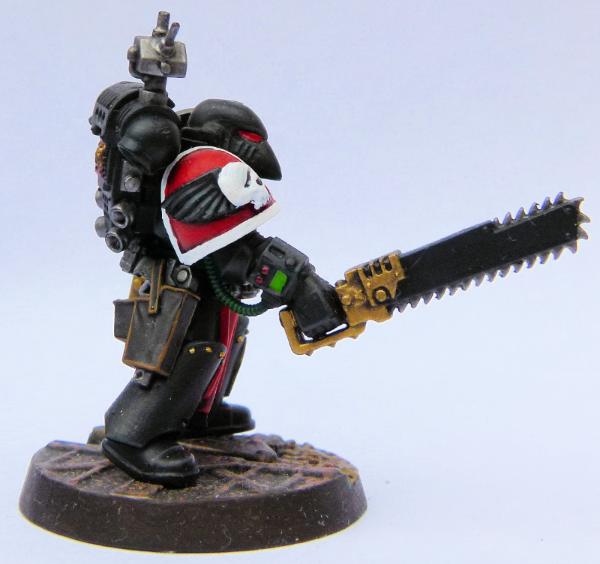
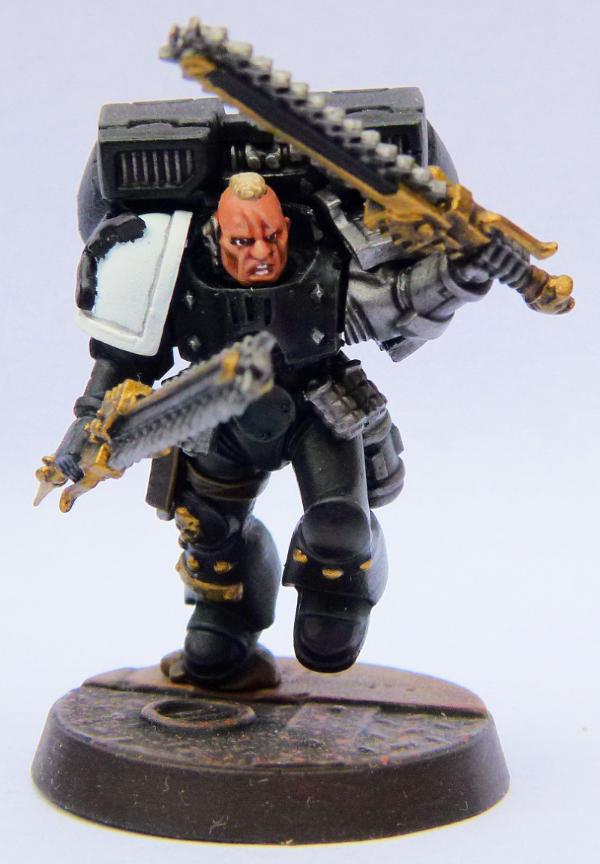
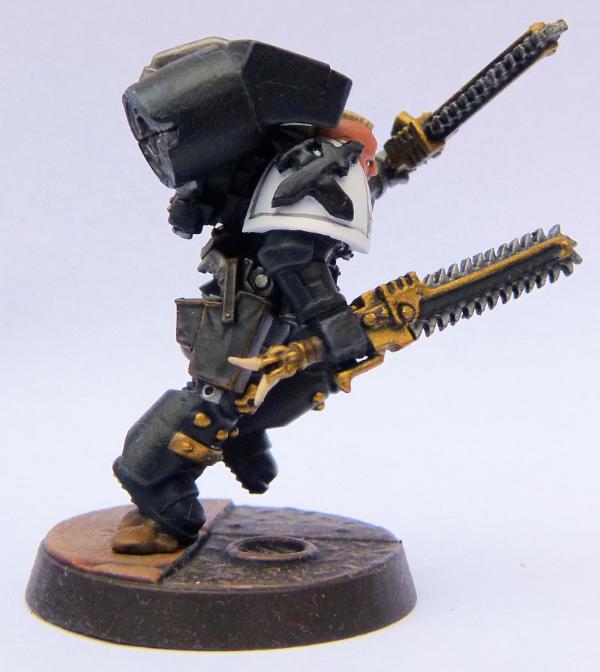
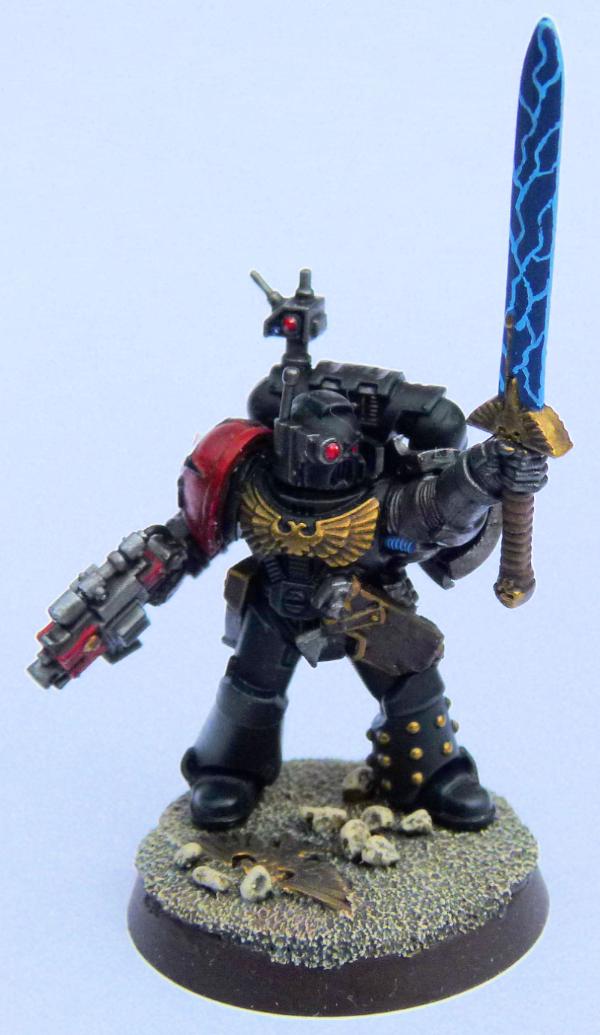
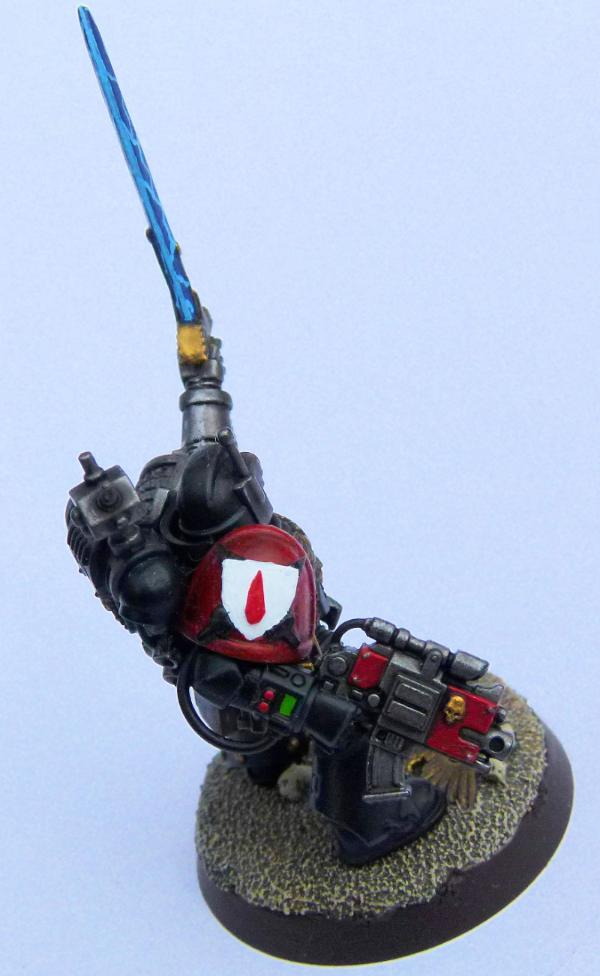
2016/12/22 19:45:33
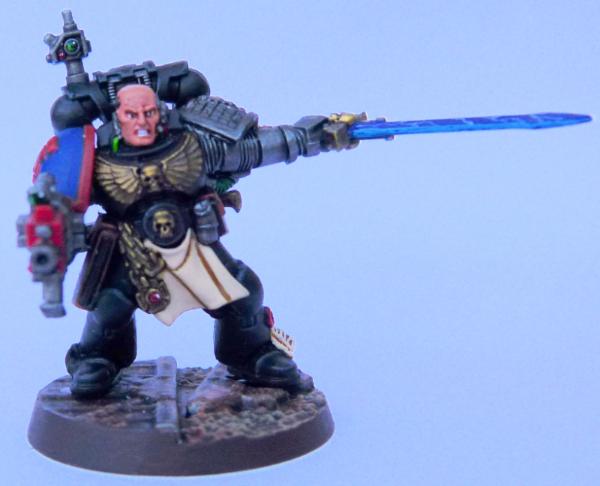
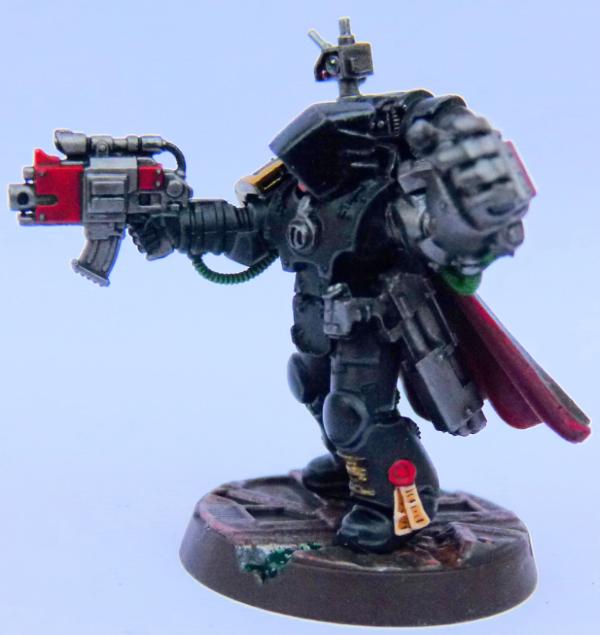
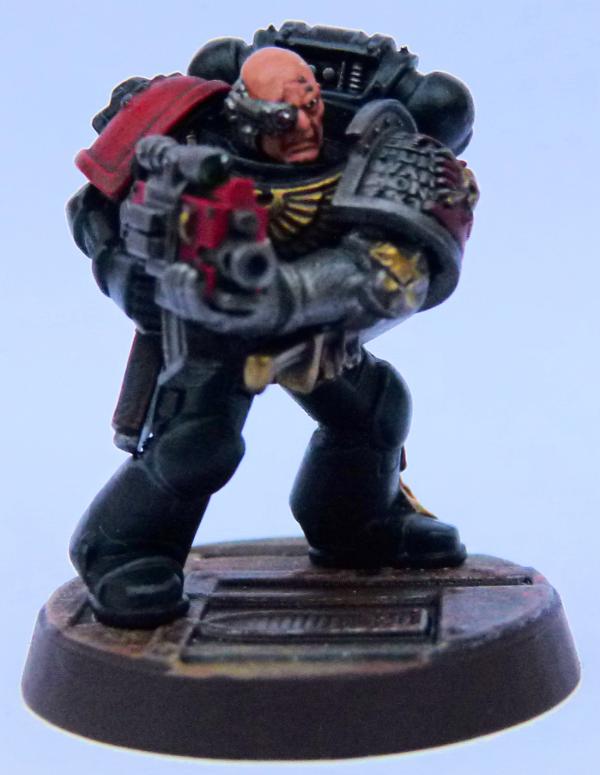
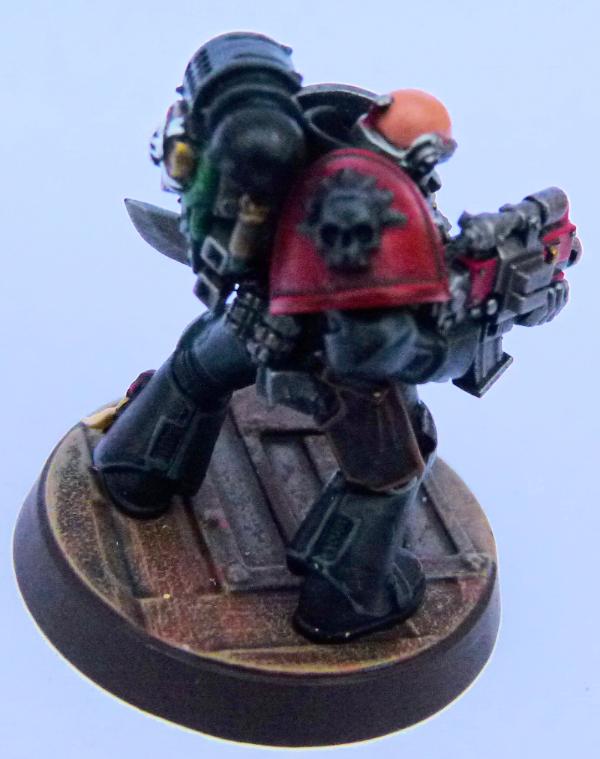
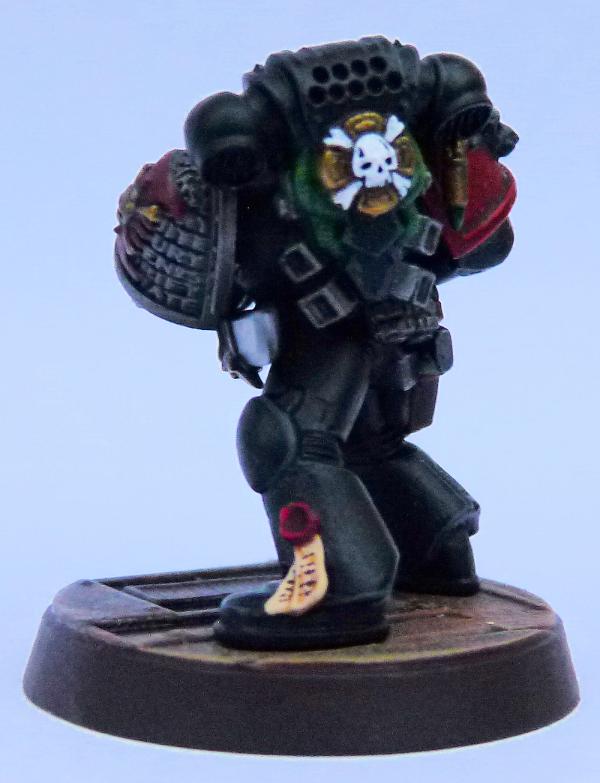
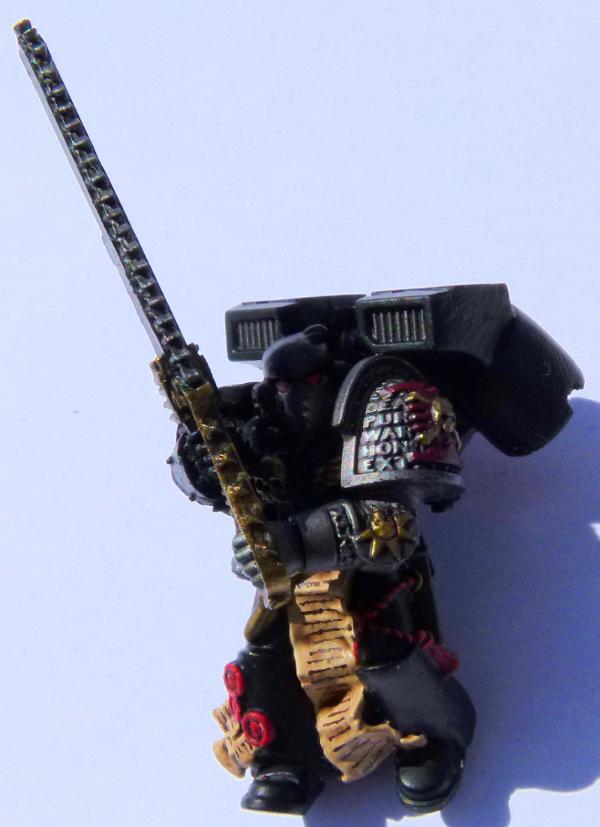
Subject: Re:Philmorgan75's workshop blog - Legion of the Dead & Deathwatch Army
|
|
Regular Dakkanaut
|
|
|
|
|
|
|
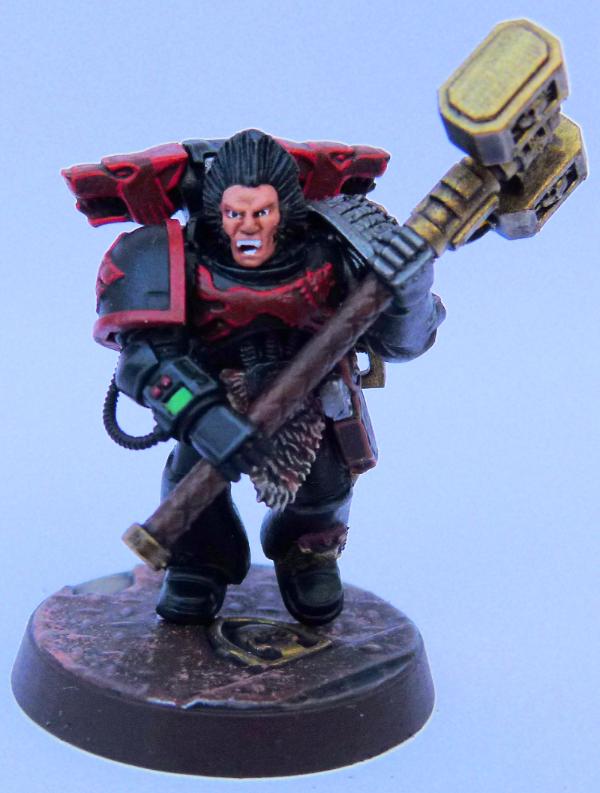
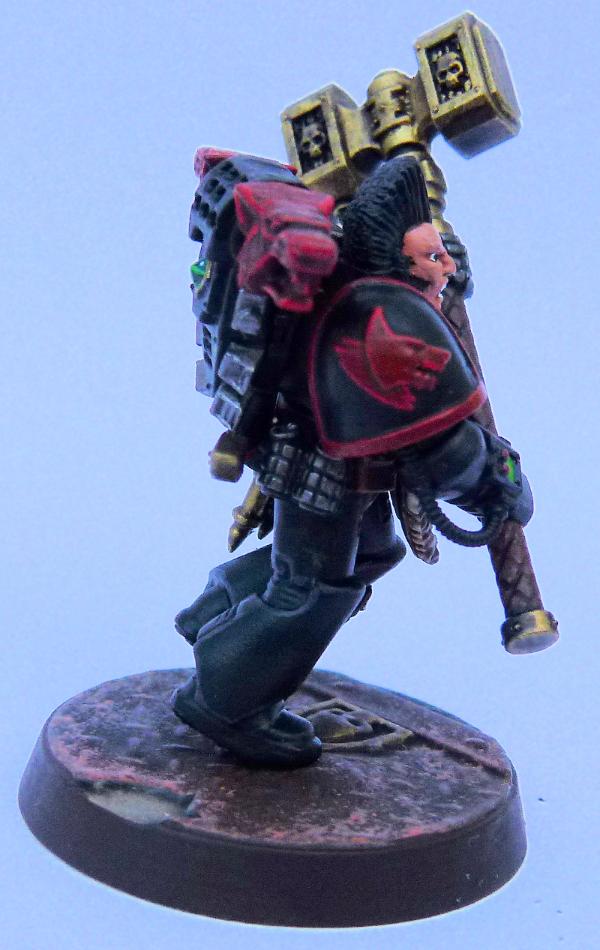
2016/12/23 23:25:40
Subject: Re:Philmorgan75's workshop blog - Legion of the Dead
|
|
Regular Dakkanaut
|
|
|
|
|
|
|
2017/01/02 19:22:31
Subject: Re:Philmorgan75's workshop blog - Legion of the Dead
|
|
Regular Dakkanaut
|
|
|
|
|
|
|
2017/01/19 20:54:43
Subject: Philmorgan75's workshop blog - Legion of the Dead
|
|

Auspicious Aspiring Champion of Chaos
|
Awesome work with the miliput on those am statues. Wish they were available for purchase.
|
I collect:
Grand alliance death (whole alliance)
Stormcast eternals
Slaves to Darkness - currently Nurgle but may expand to undivided.
|
|
|
|
|
2017/01/25 21:50:38
Subject: Re:Philmorgan75's workshop blog - Legion of the Dead
|
|
Regular Dakkanaut
|
|
|
|
|
|
|
2017/01/25 22:28:41
Subject: Re:Philmorgan75's workshop blog - Legion of the Dead
|
|

Longtime Dakkanaut
|
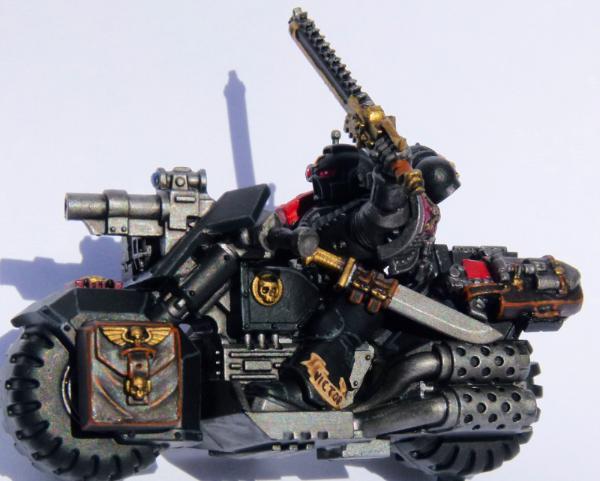
Amazing output mate ! How do you store all those vehicles ???
|
|
|
|
|
|
2017/01/26 21:23:43
Subject: Re:Philmorgan75's workshop blog - Legion of the Dead
|
|
Regular Dakkanaut
|
 Big H wrote: Big H wrote:Amazing output mate ! How do you store all those vehicles ???
Lots of big boxes under the bed!!!!
|
|
|
|
|
|
2017/01/26 22:11:42
Subject: Re:Philmorgan75's workshop blog - Legion of the Dead
|
|
Regular Dakkanaut
|
|
|
|
|
|
|
2017/01/27 15:07:30
Subject: Re:Philmorgan75's workshop blog - Legion of the Dead
|
|
Longtime Dakkanaut
|
Are the beds 4 feet off the floor at your house ??? 
|
|
|
|
|
|
2017/02/06 19:26:54
Subject: Re:Philmorgan75's workshop blog - Legion of the Dead
|
|
Regular Dakkanaut
|
|
|
|
|
|
|
2017/02/06 21:52:37
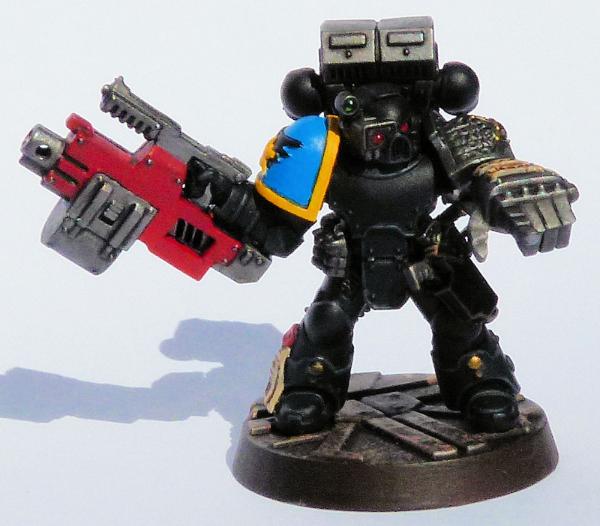
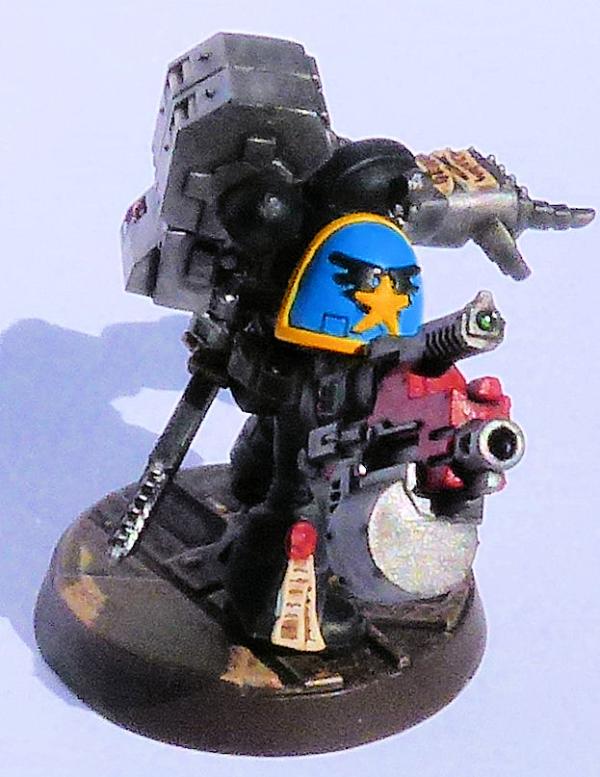
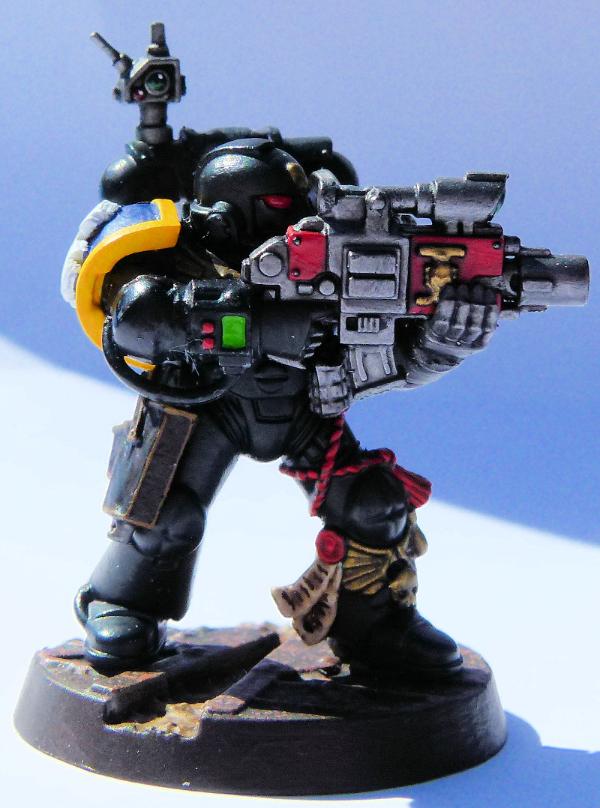
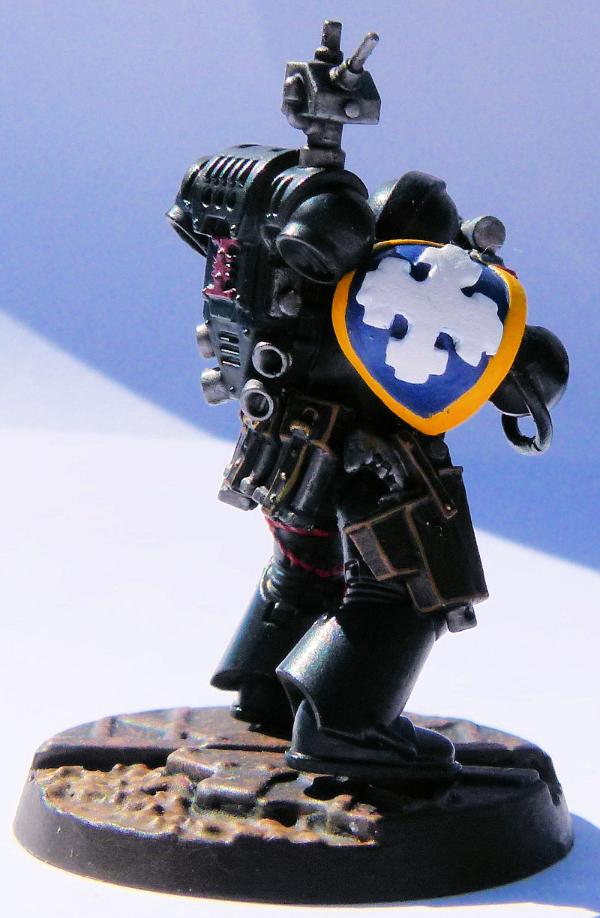
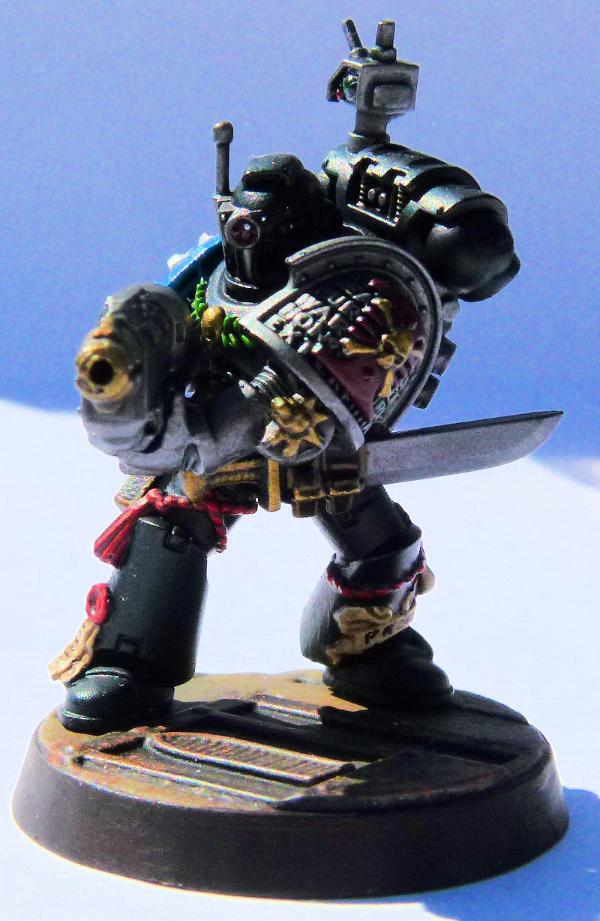
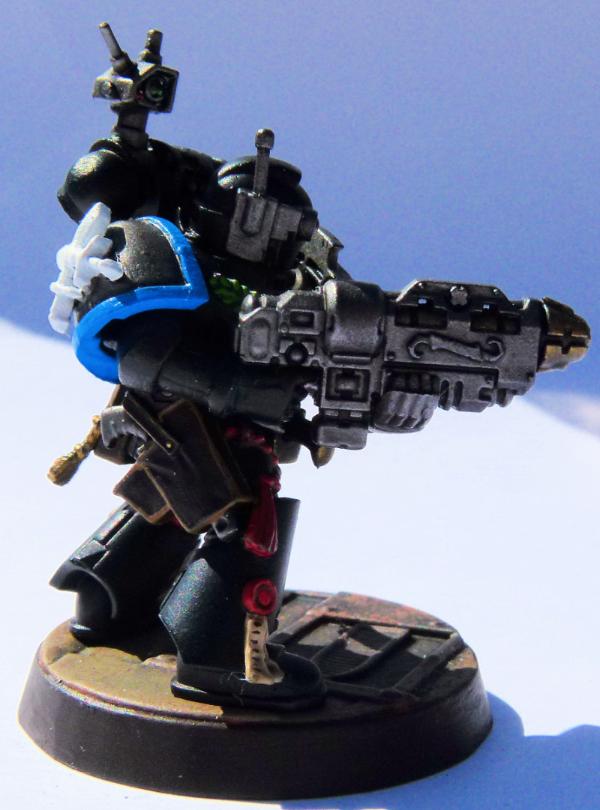
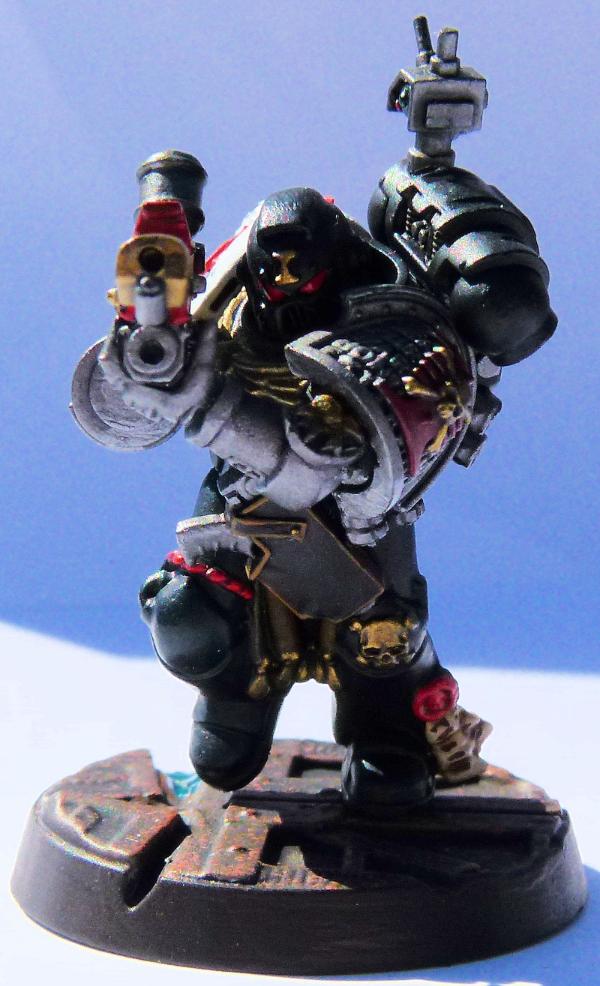
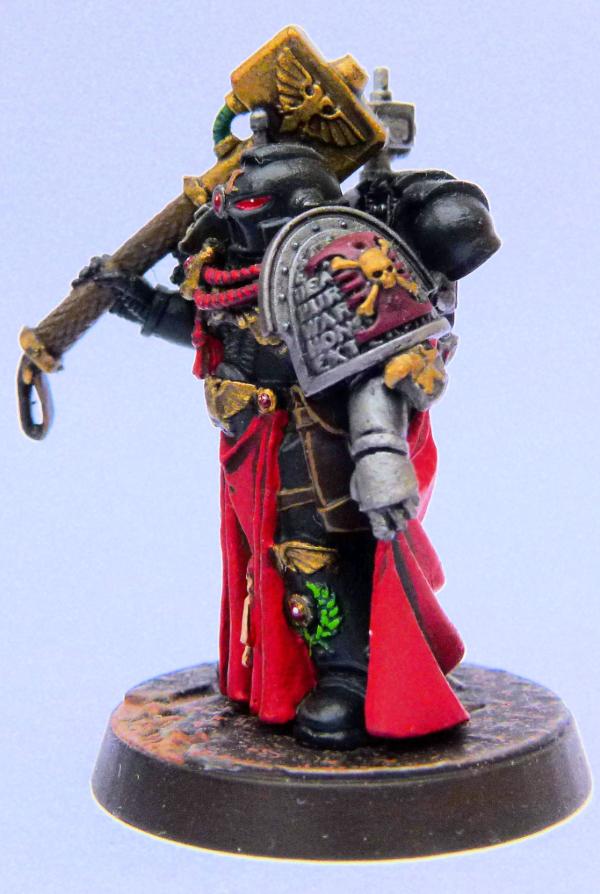
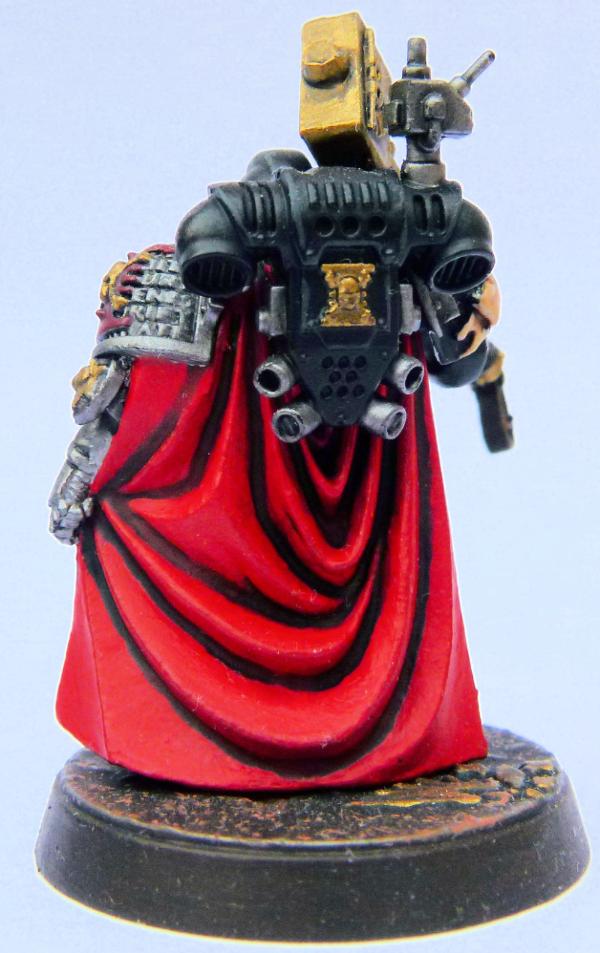
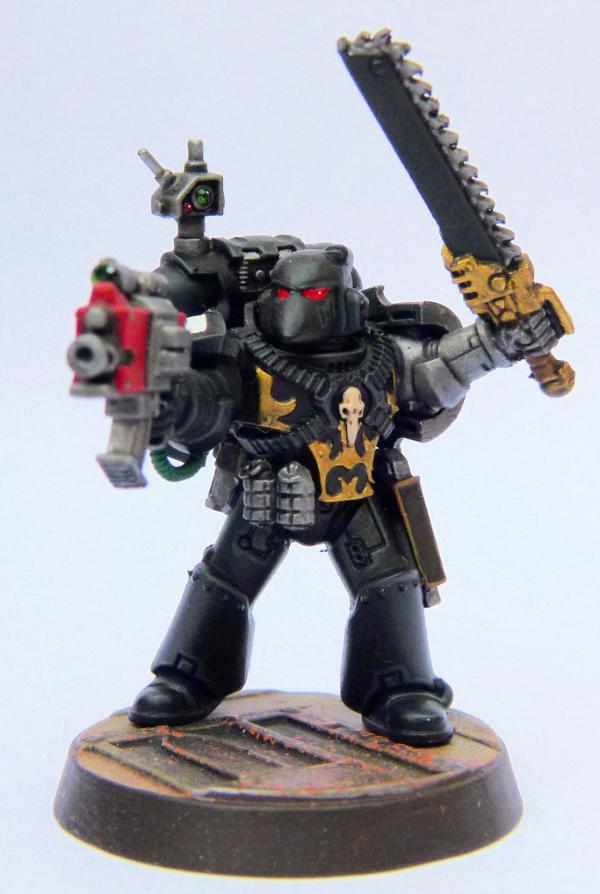
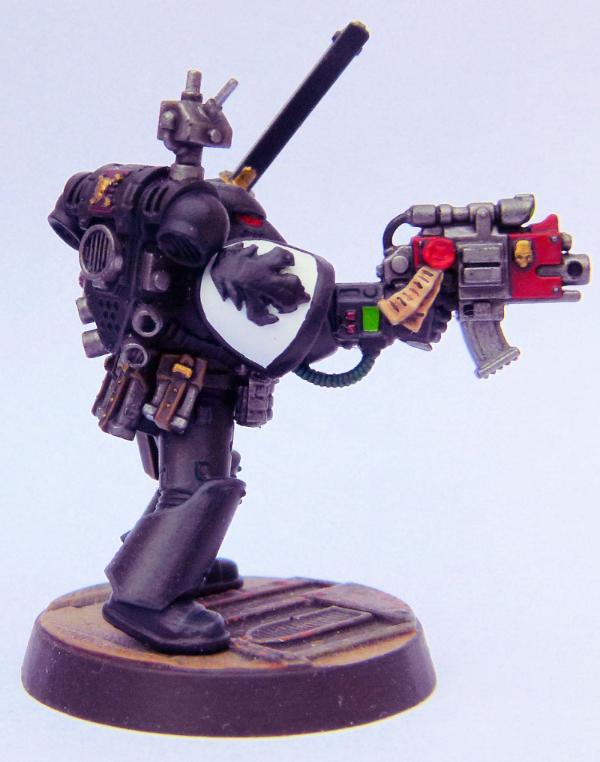
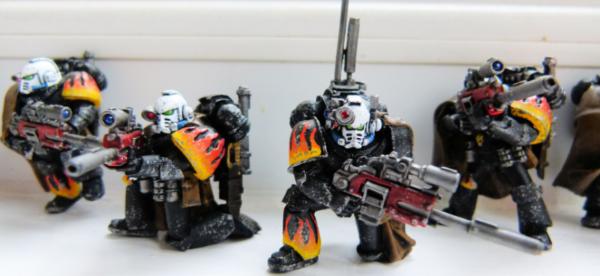
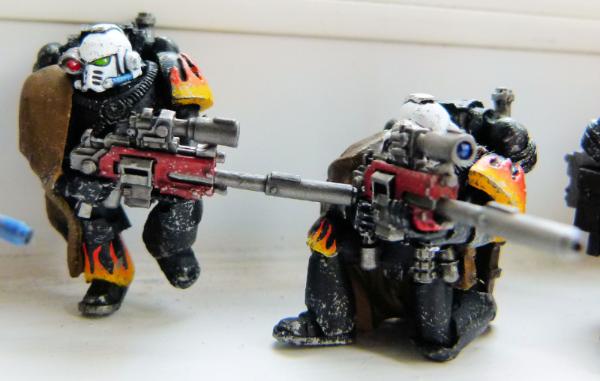
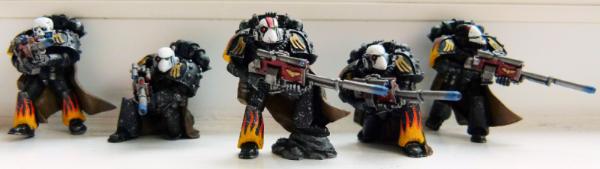
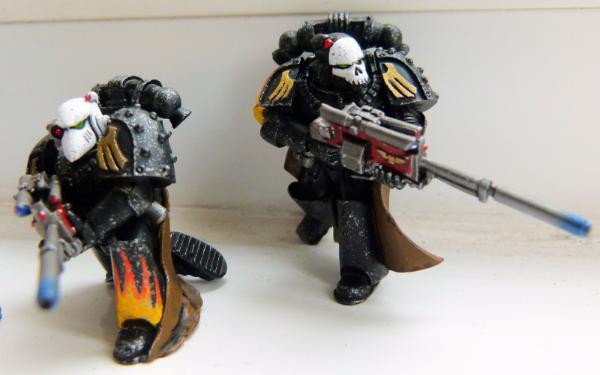
Subject: Philmorgan75's workshop blog - Legion of the Dead
|
|
Pious Palatine
|
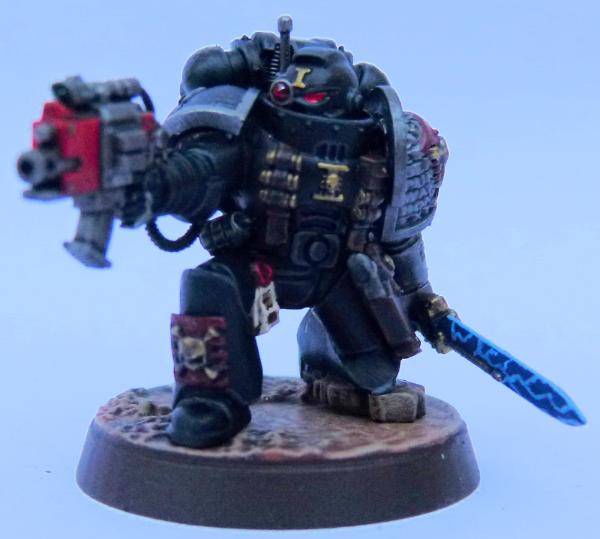
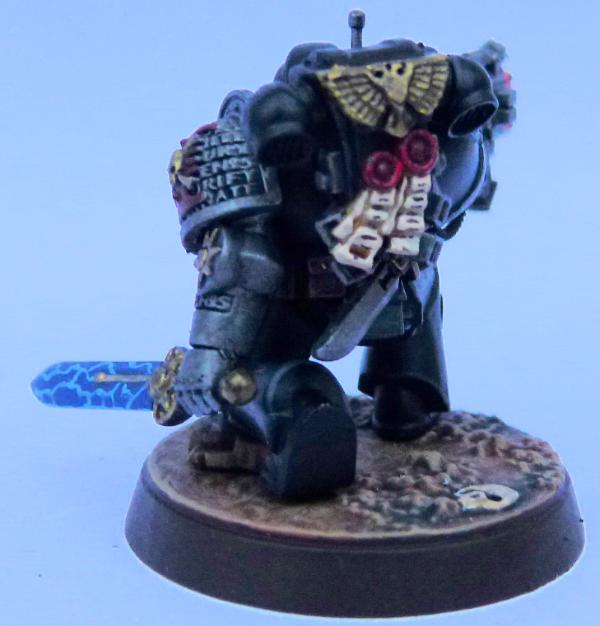
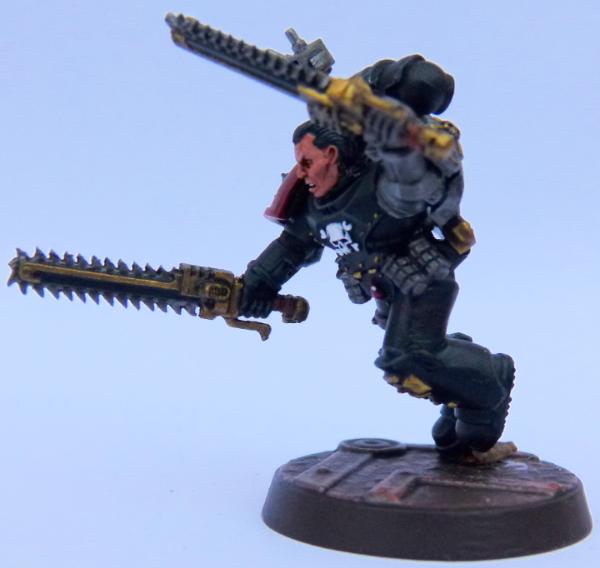
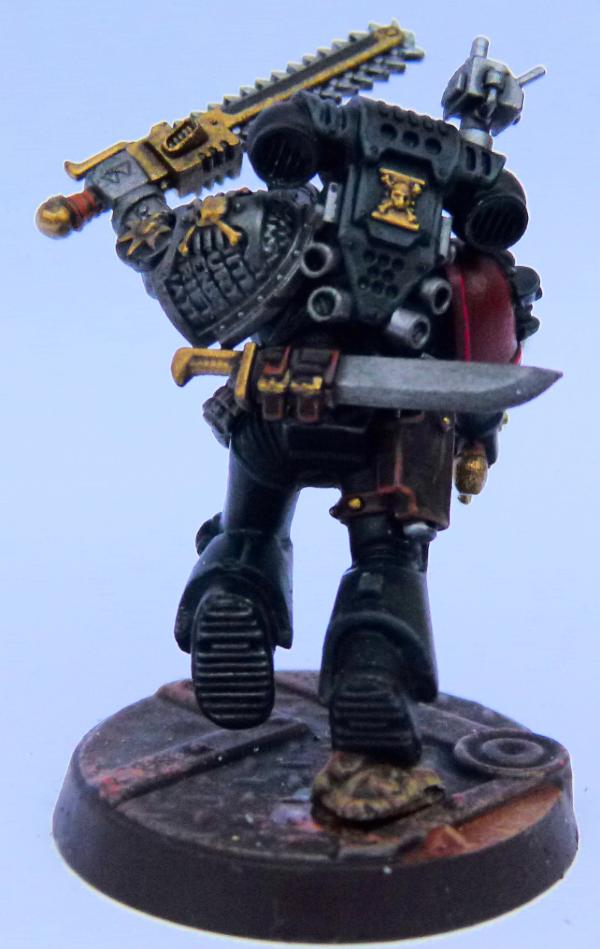
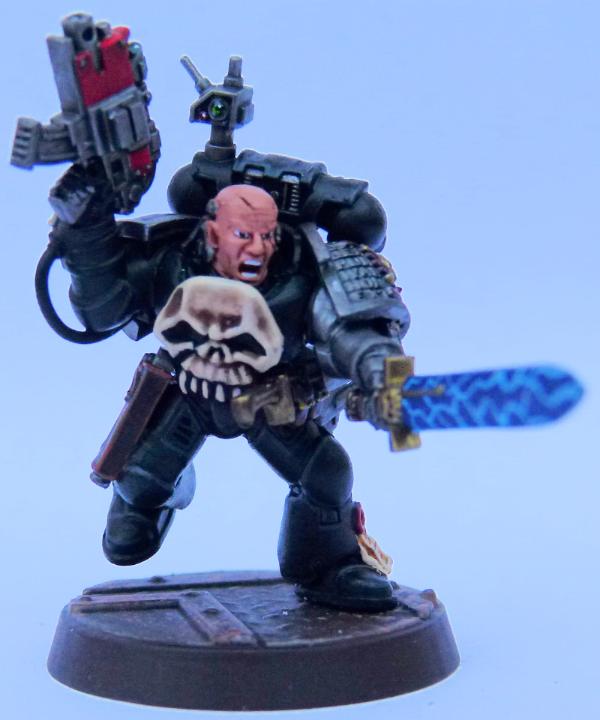
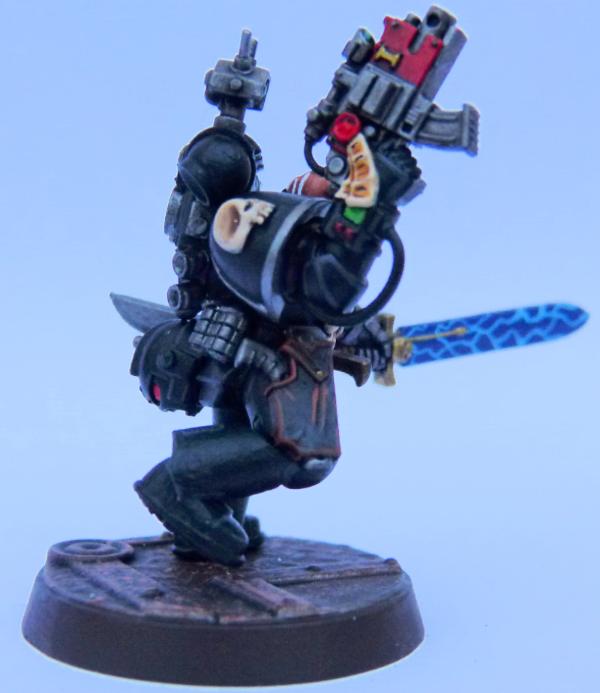
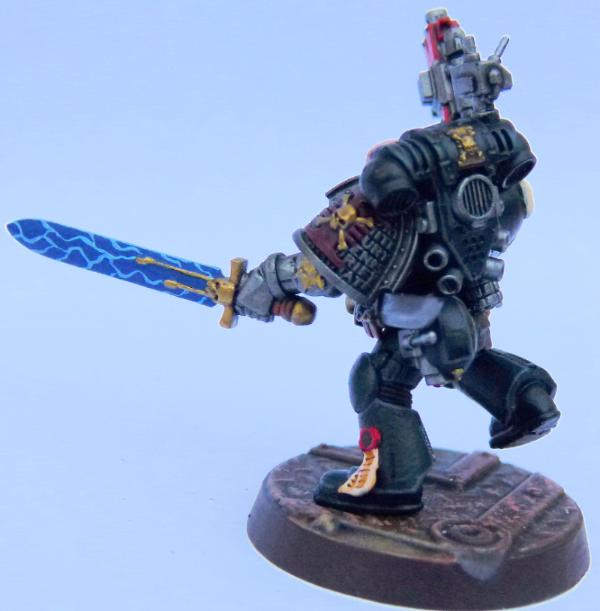
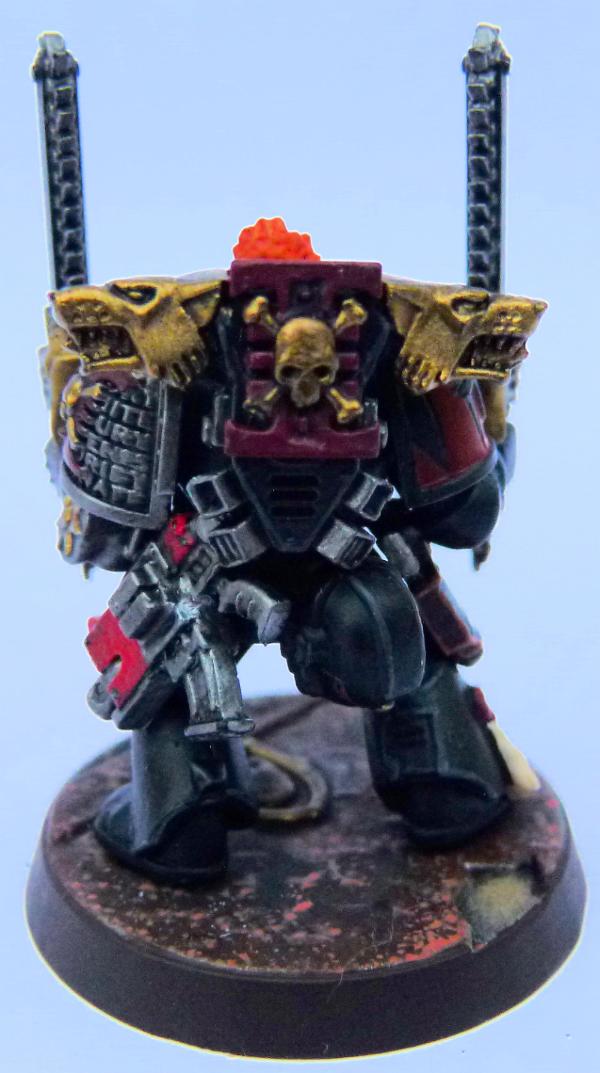
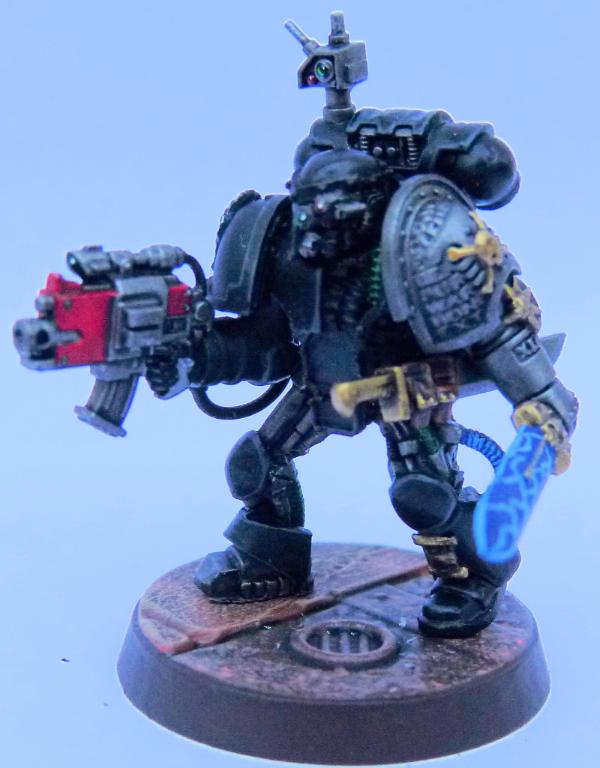
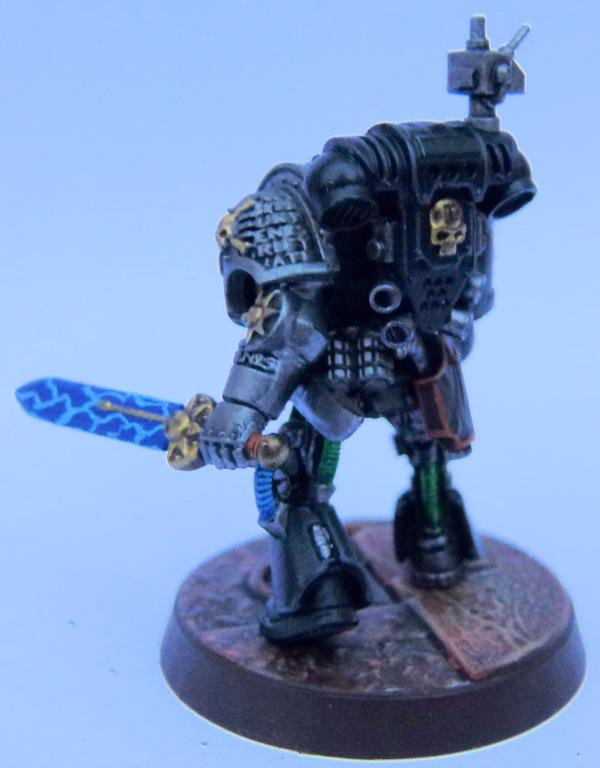
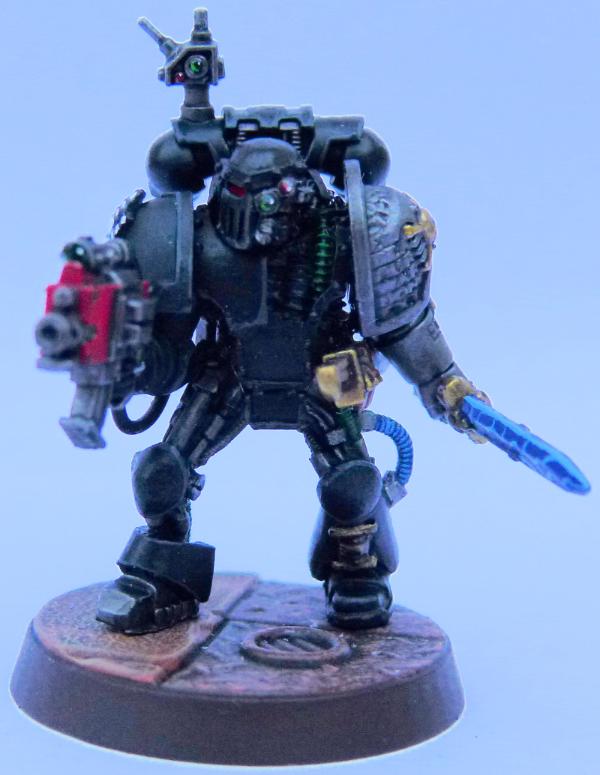
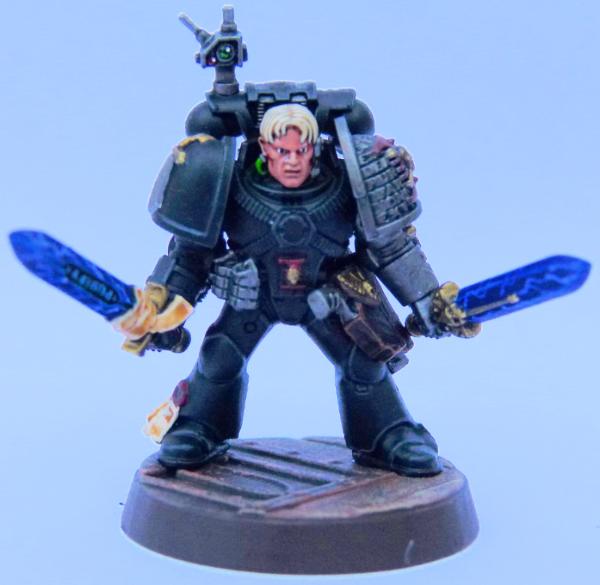
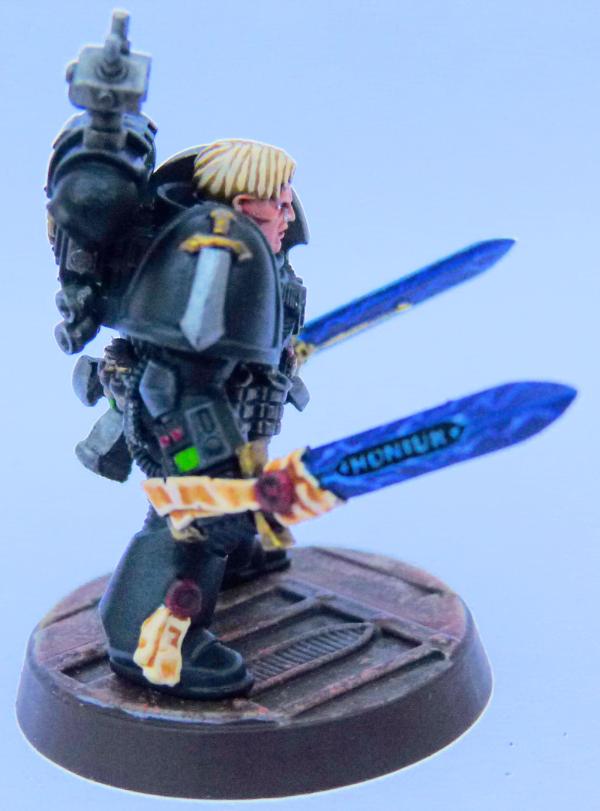
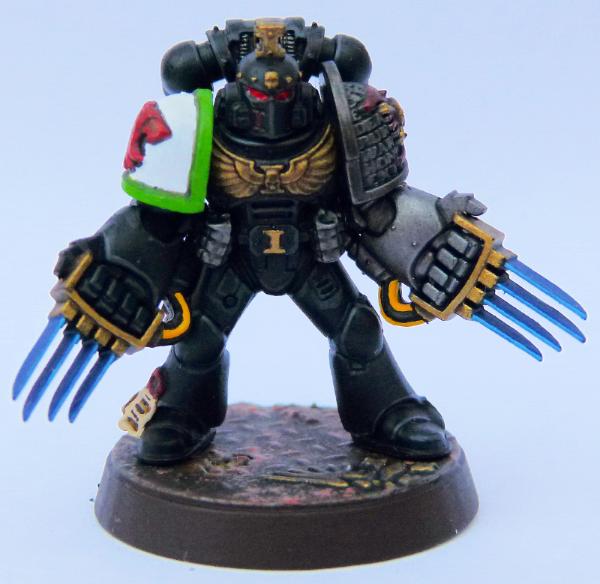
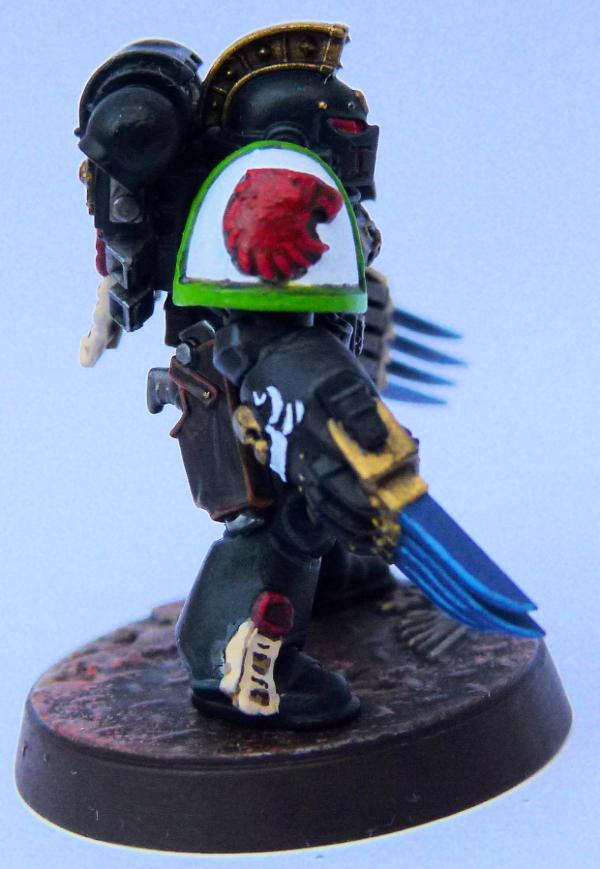
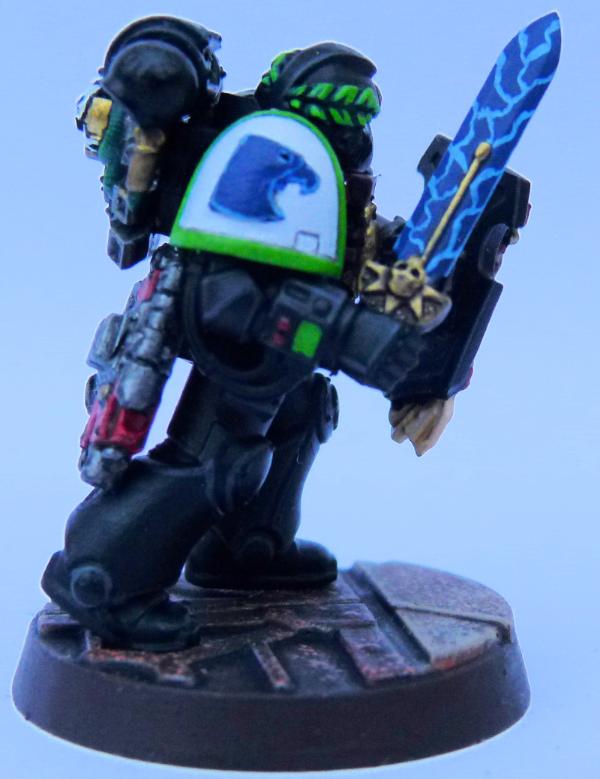
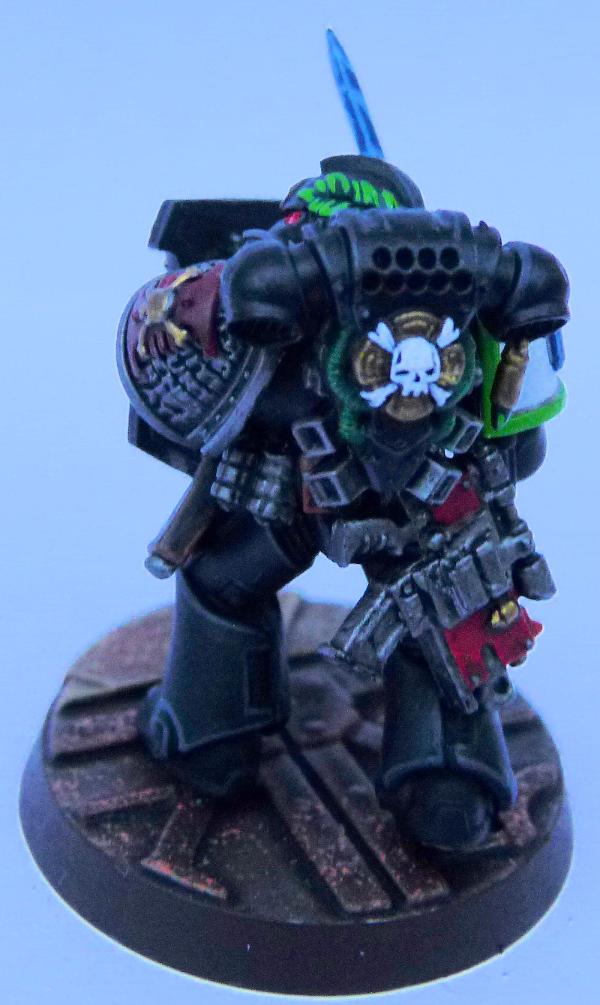
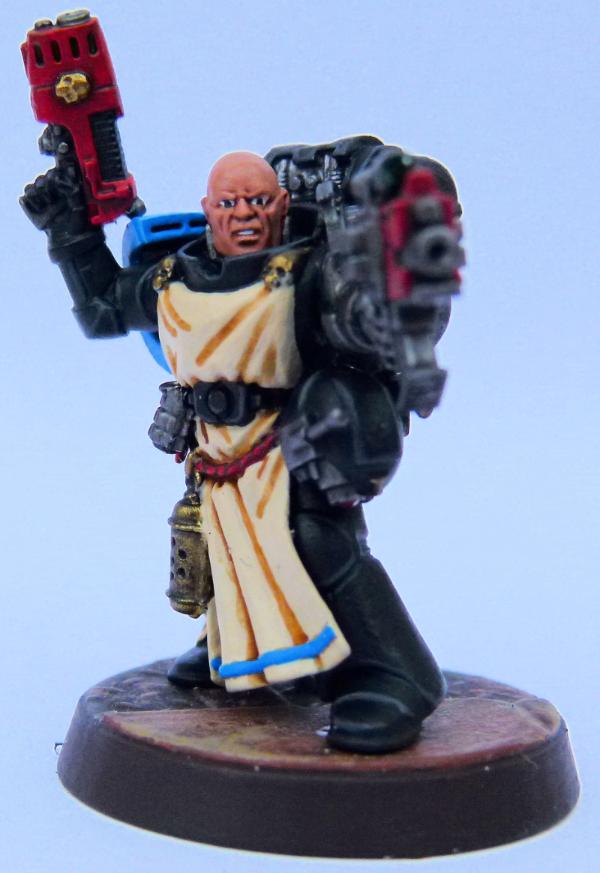
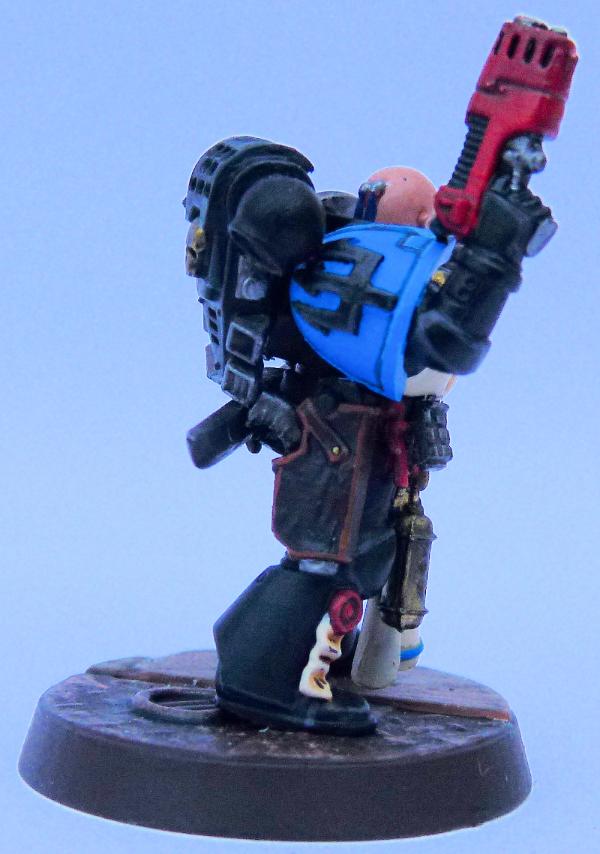
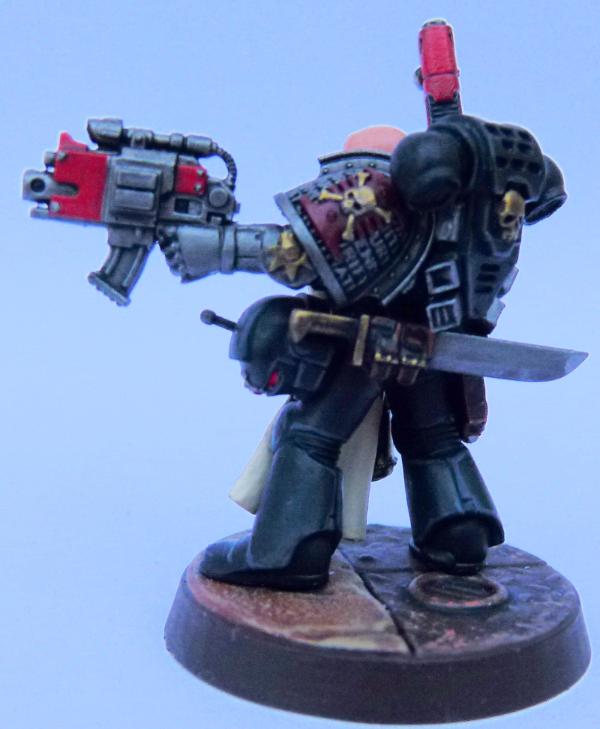
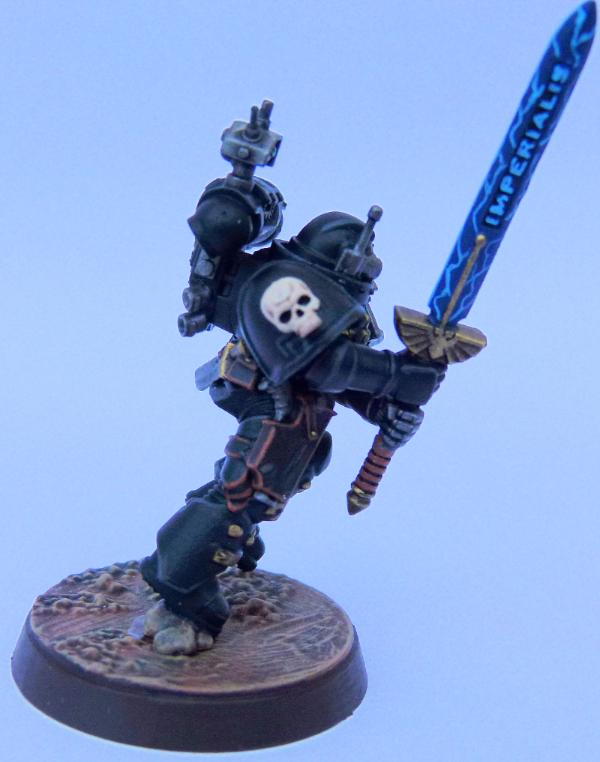
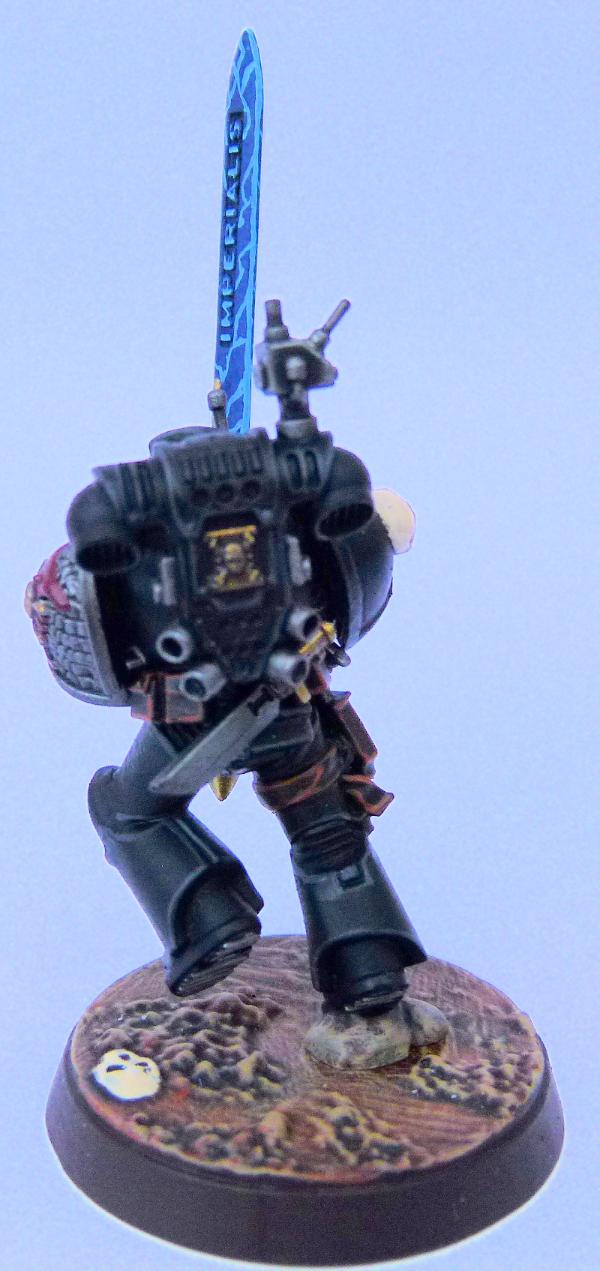
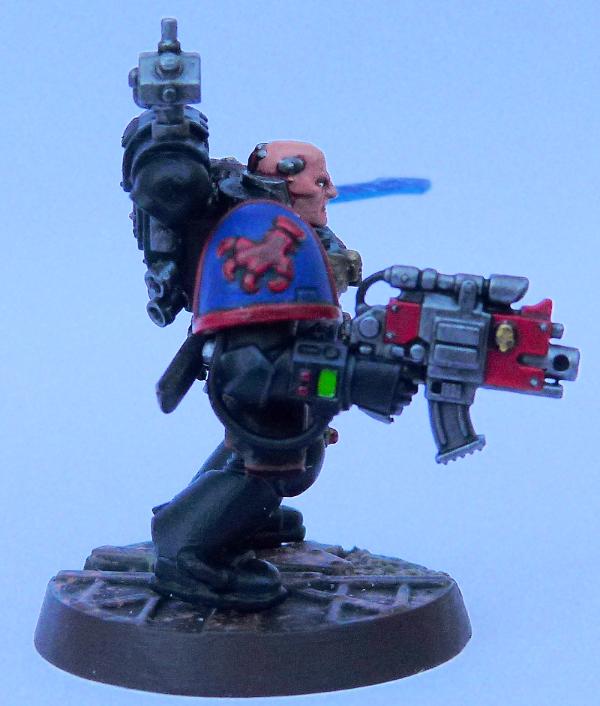
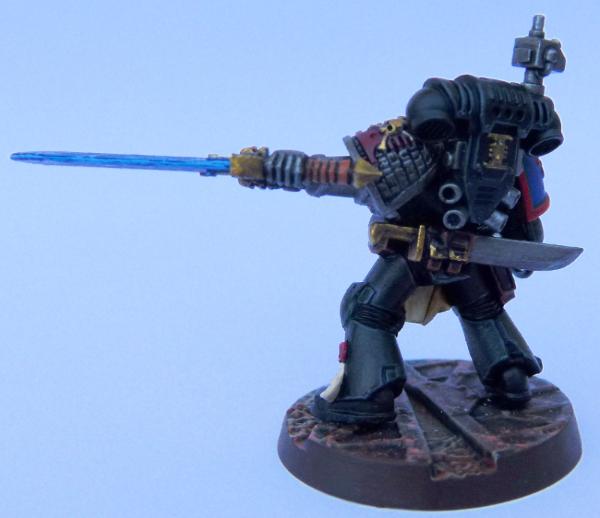
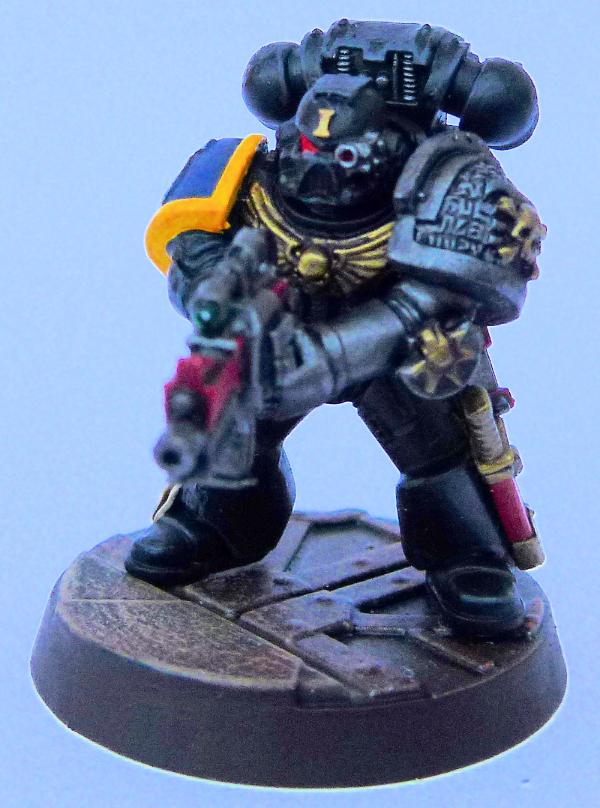
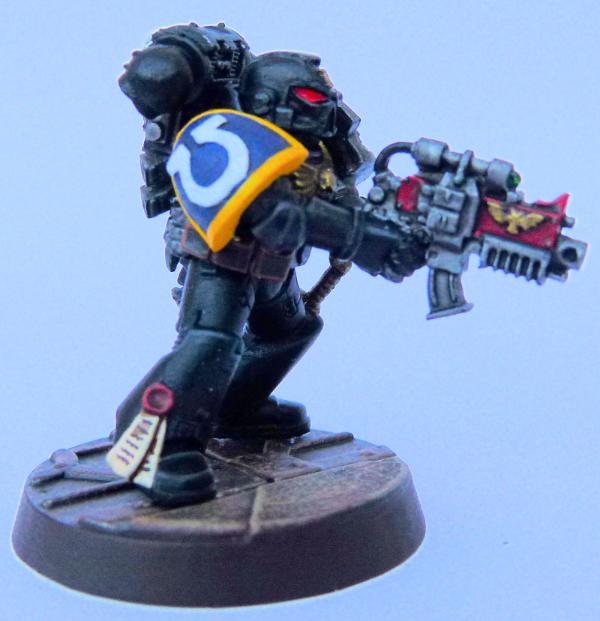
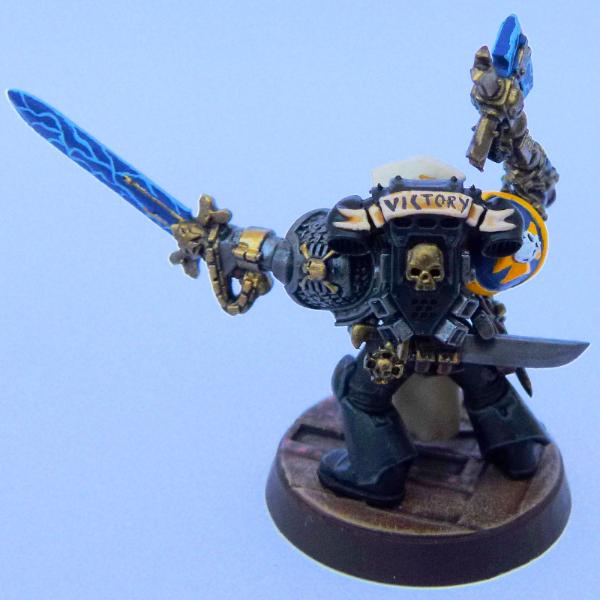
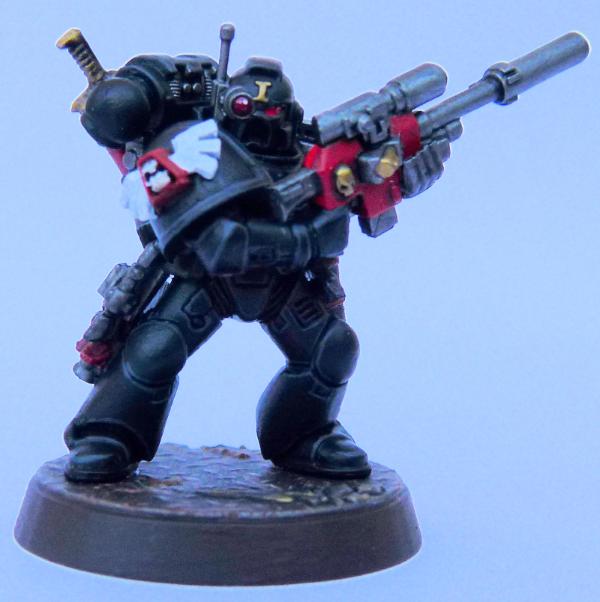
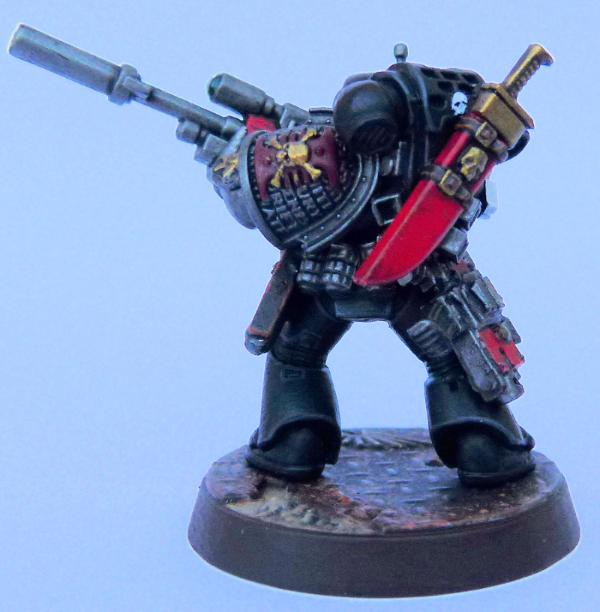
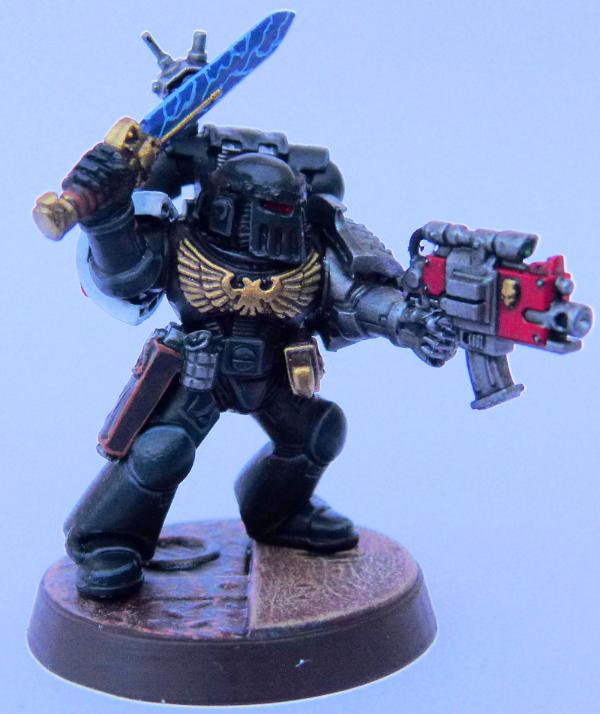
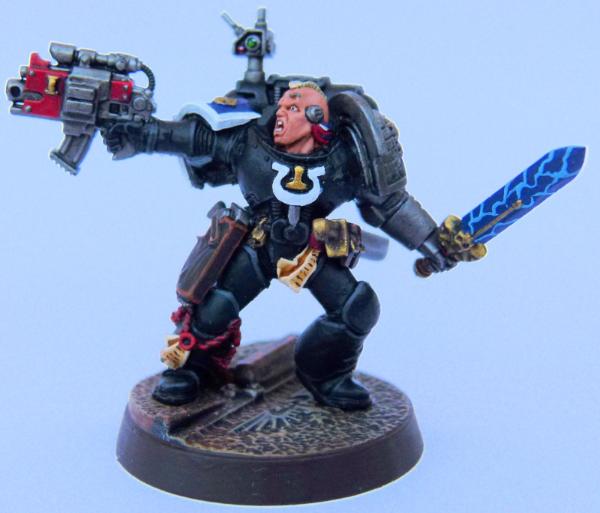
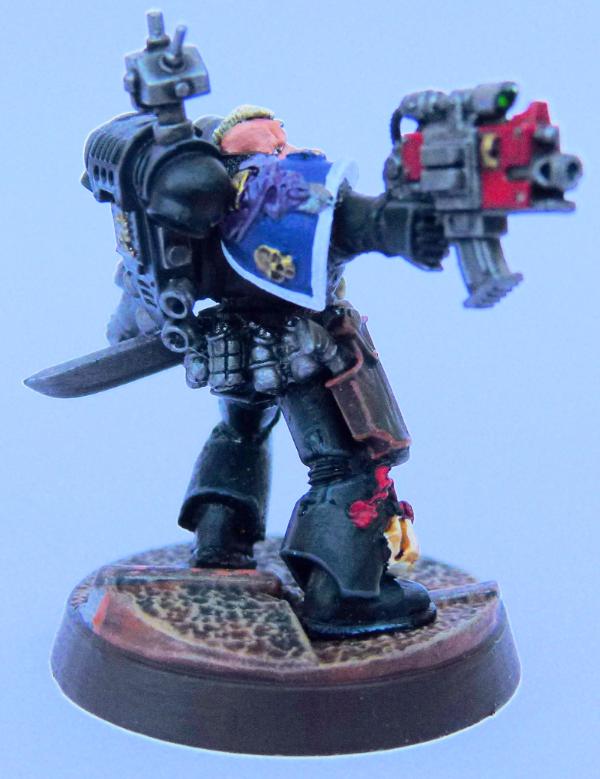
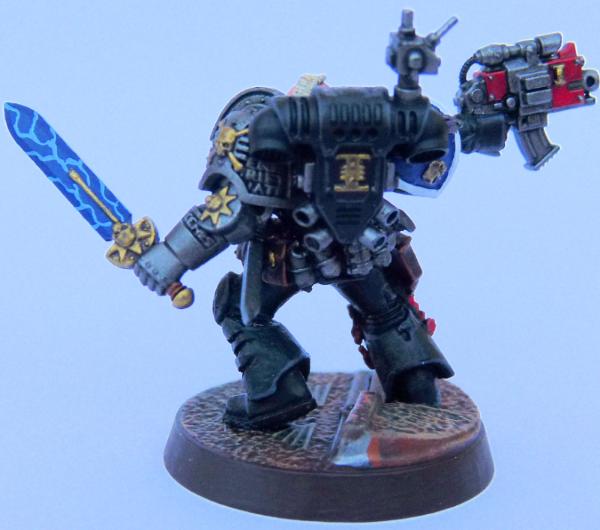
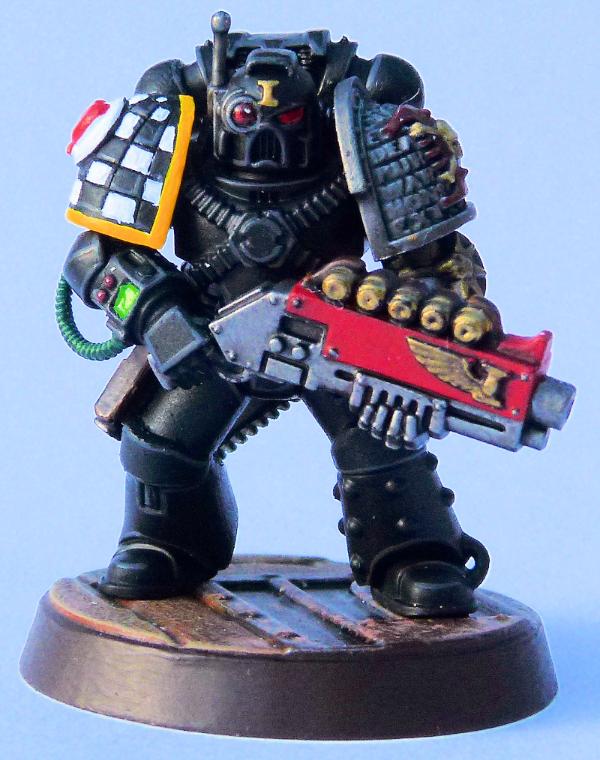
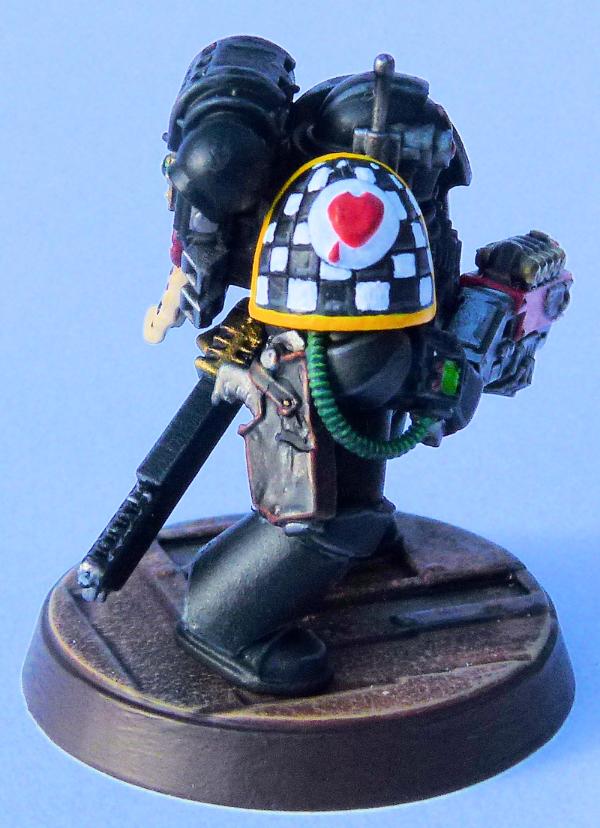
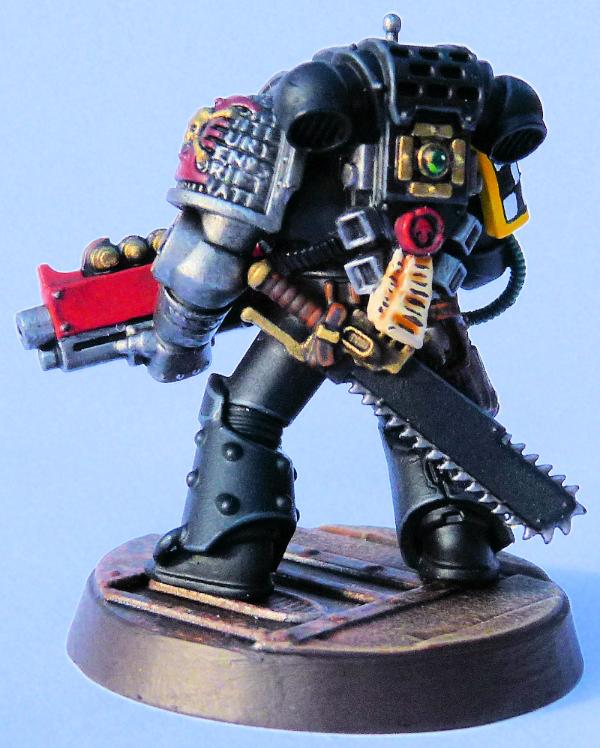
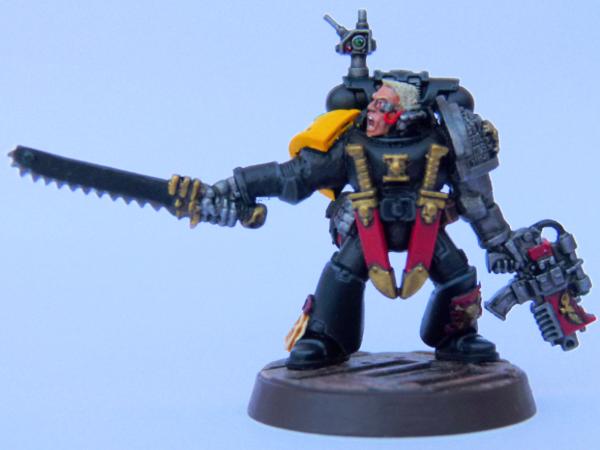
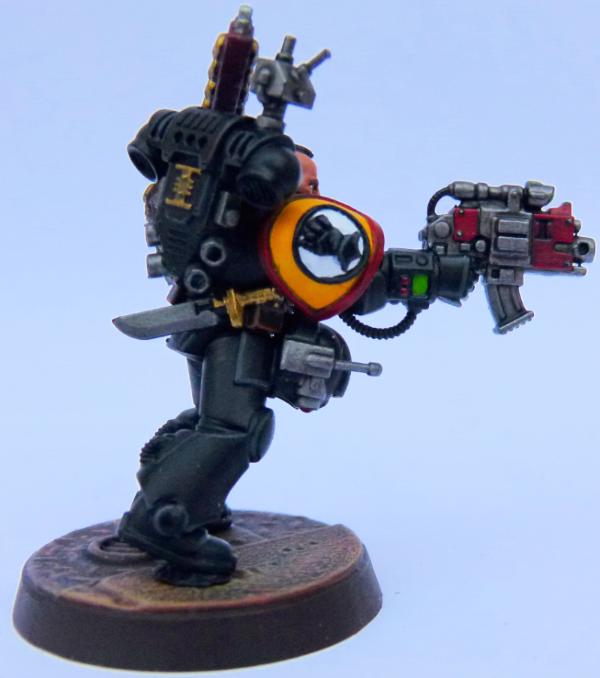
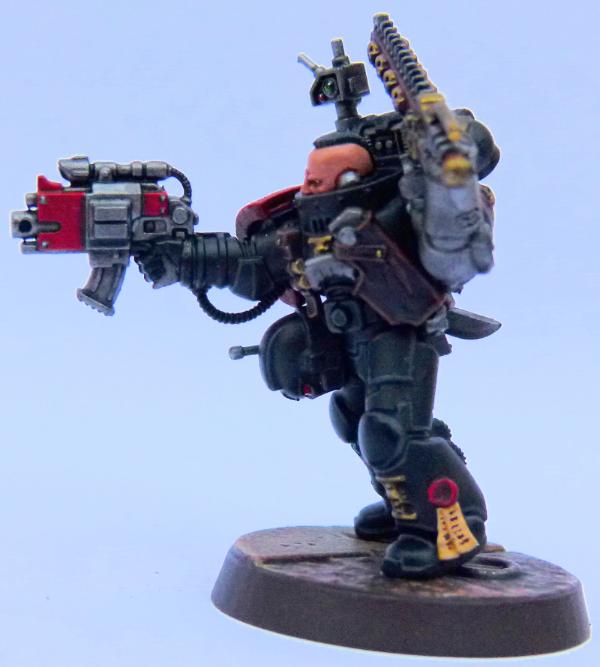
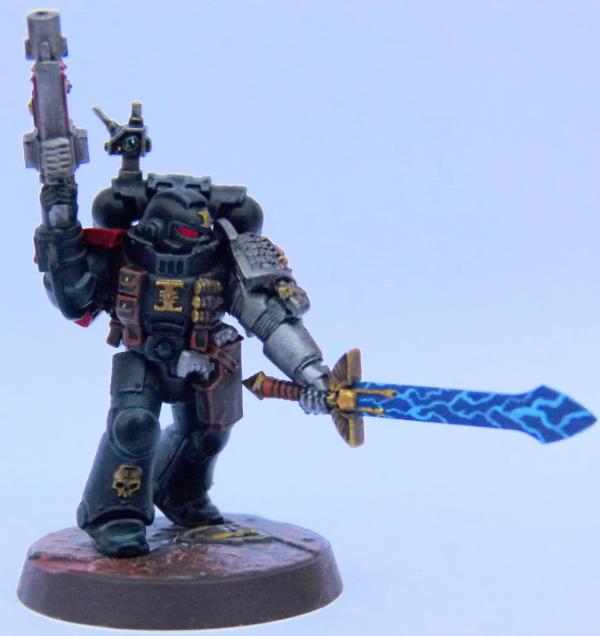
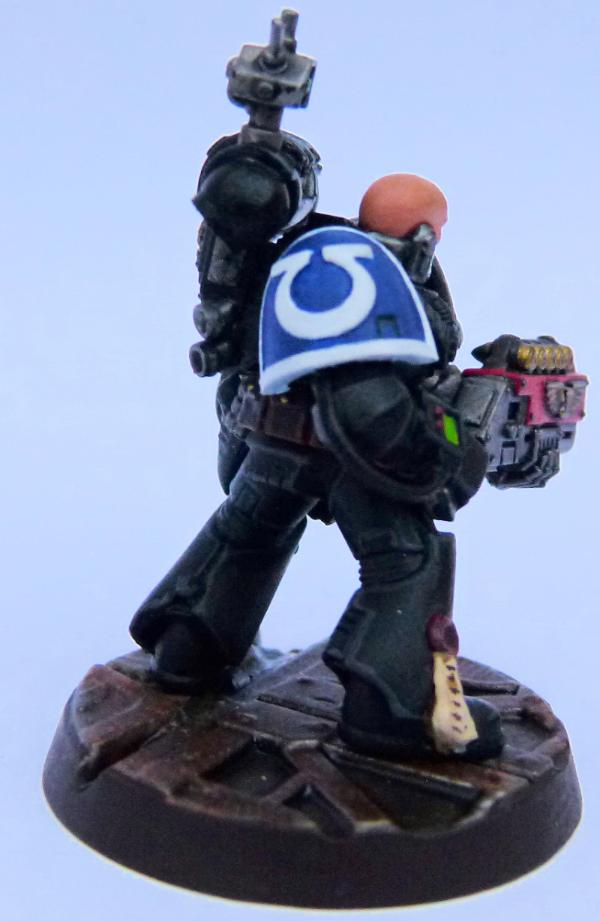
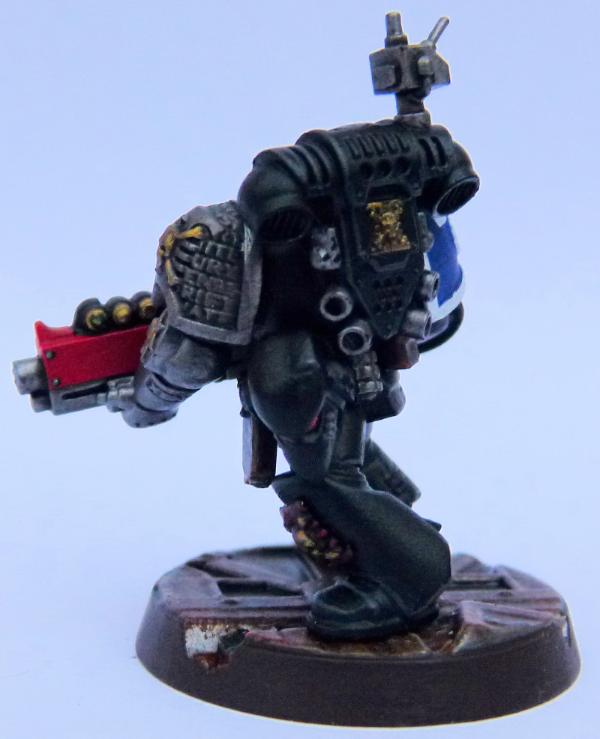
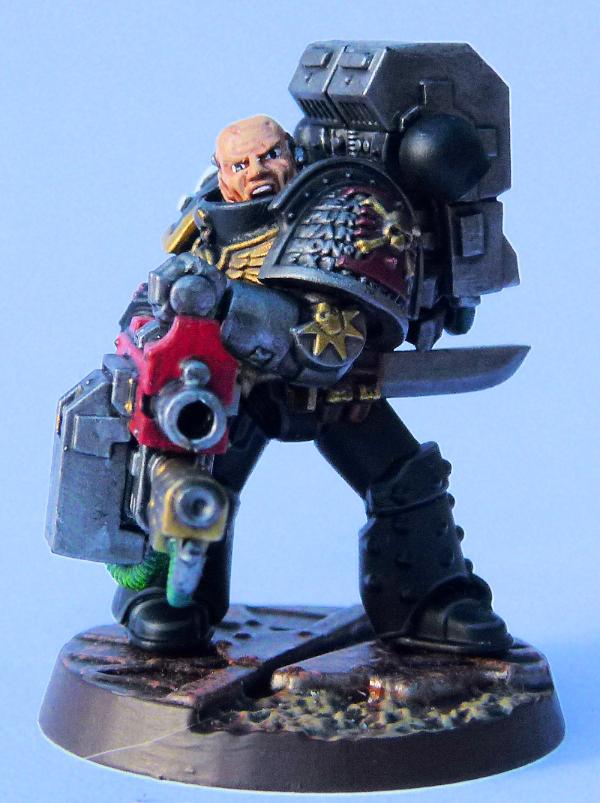
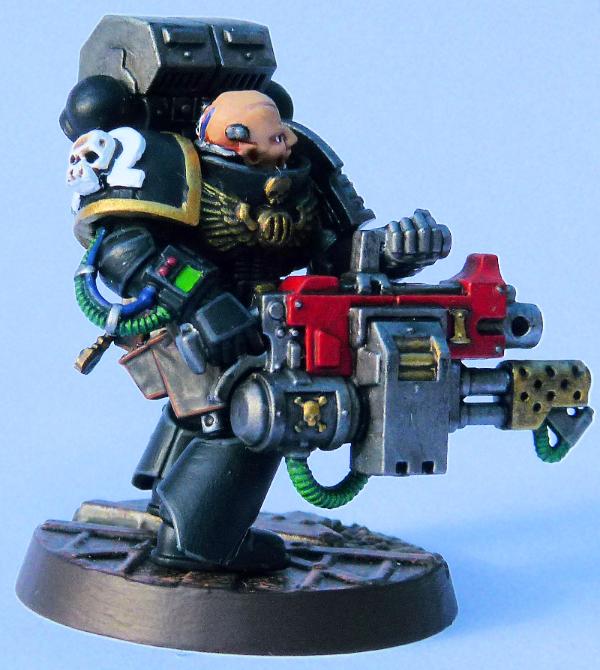
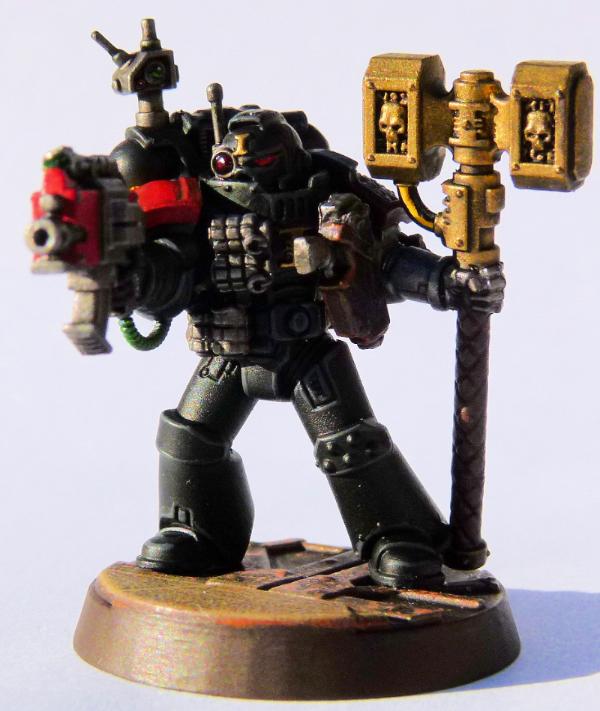
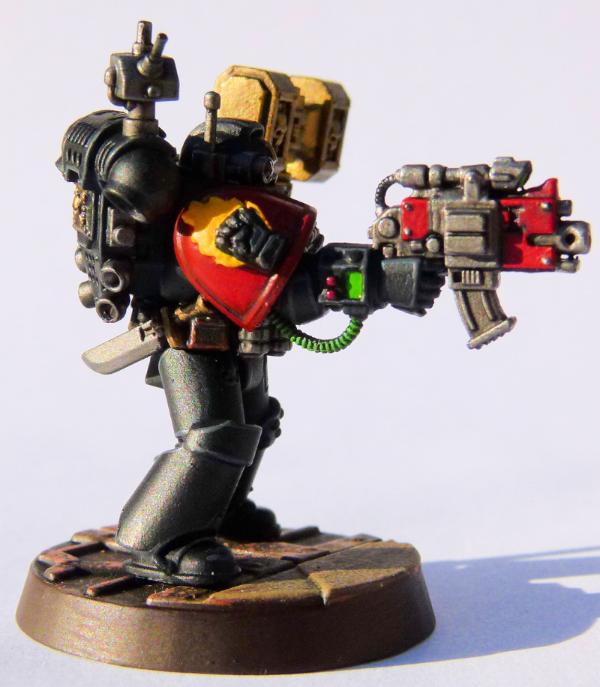
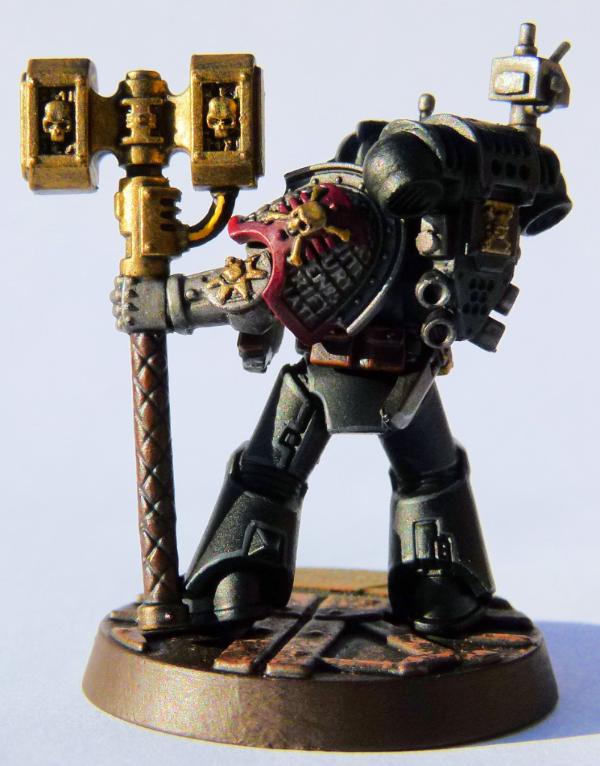
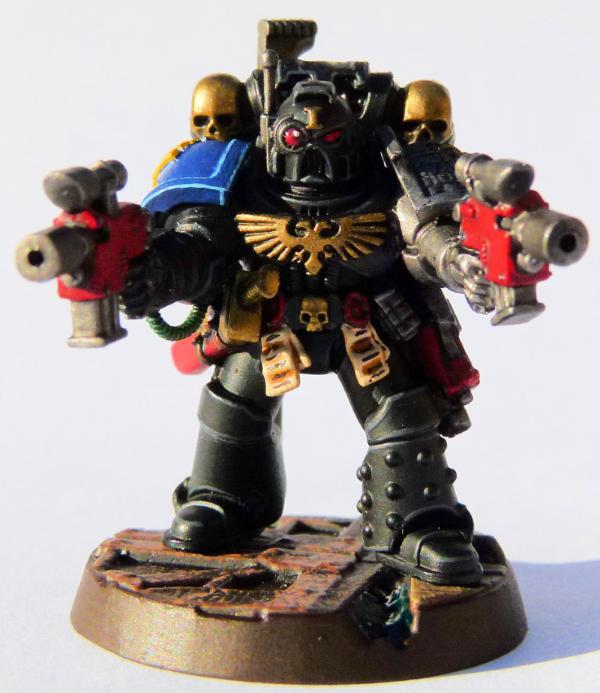
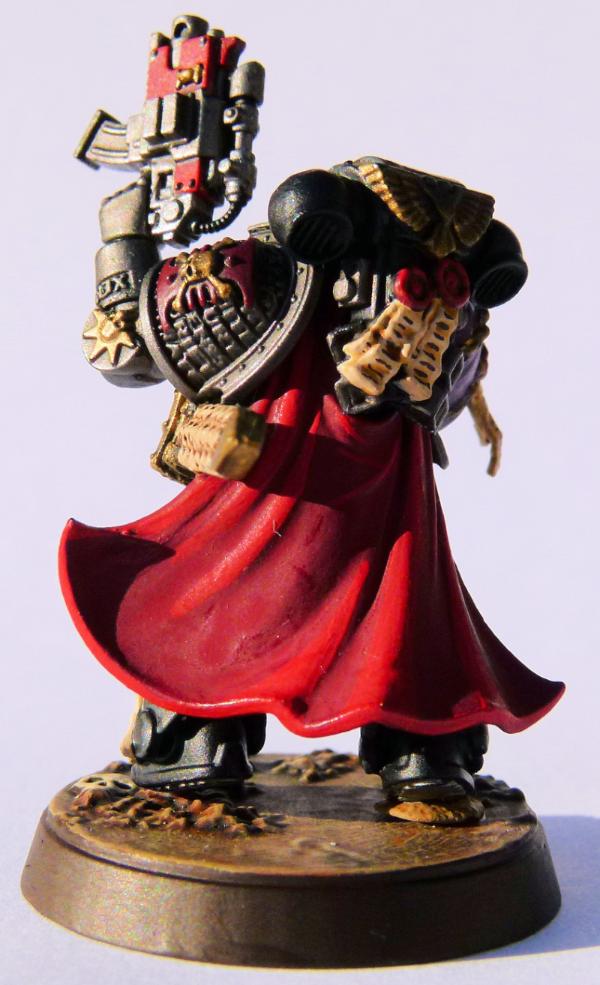
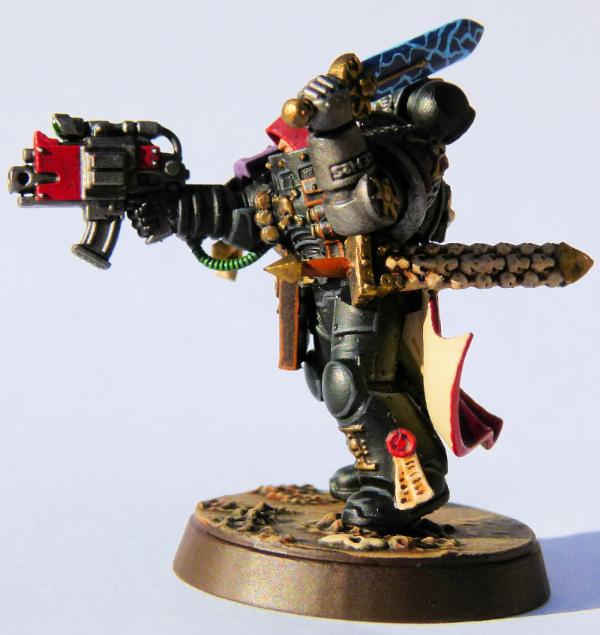
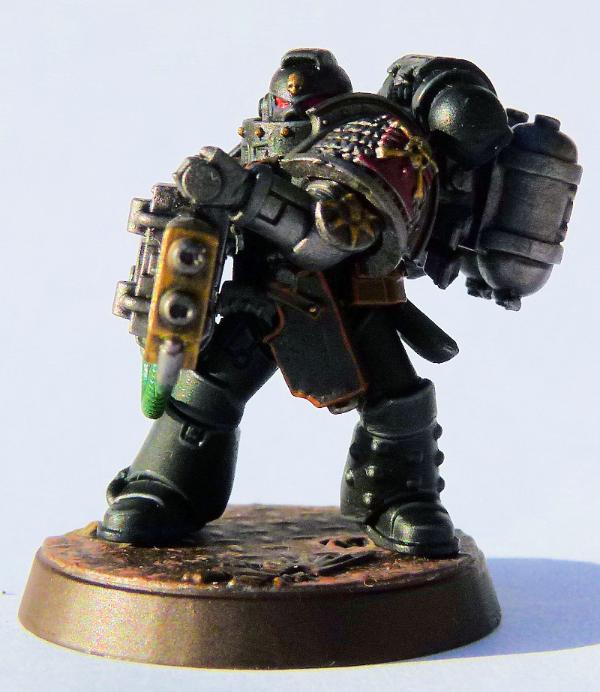
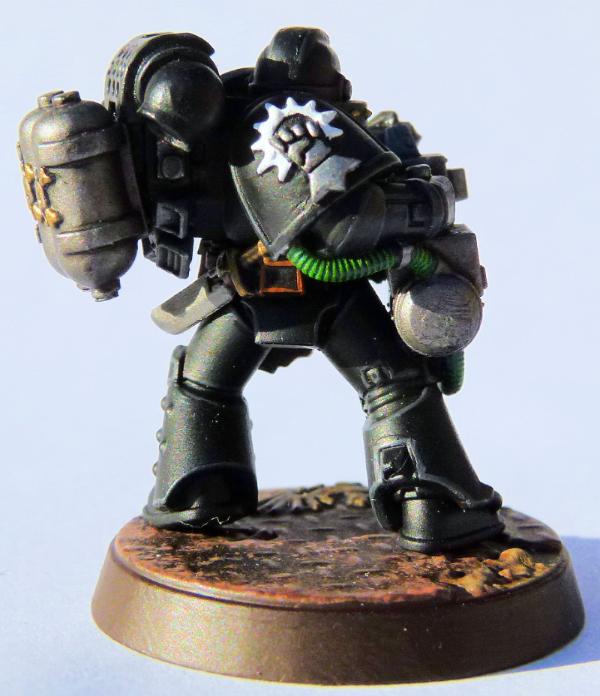
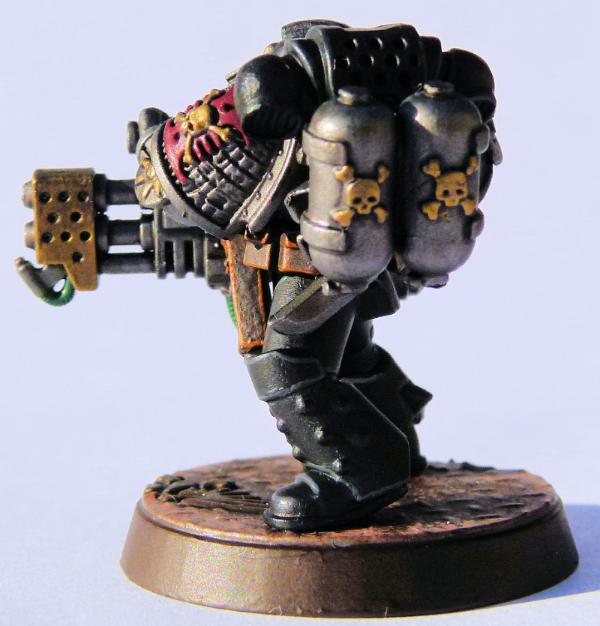
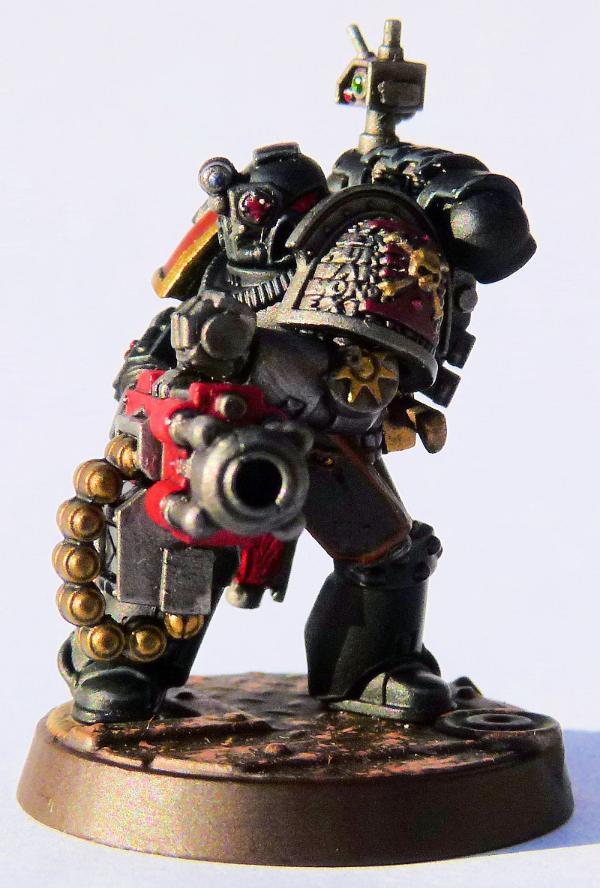
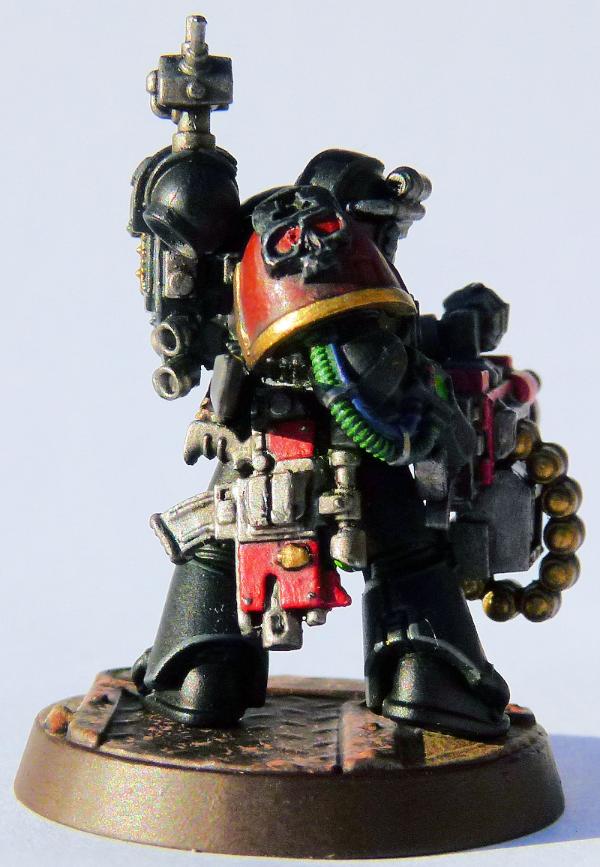
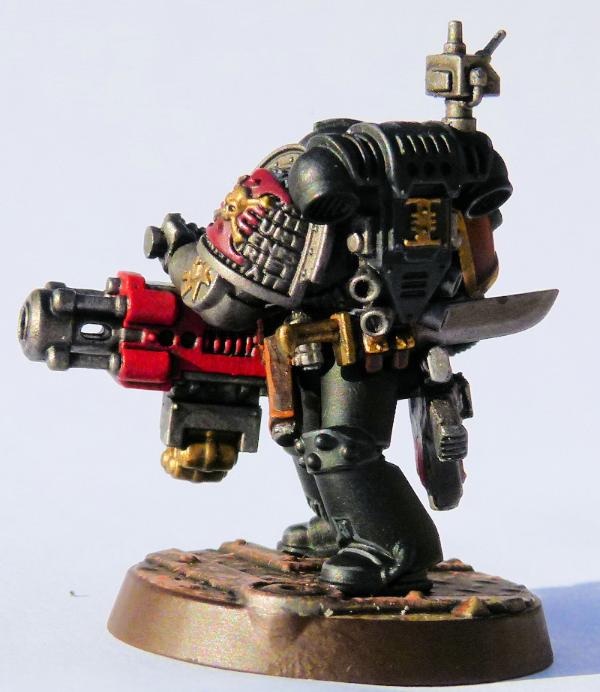
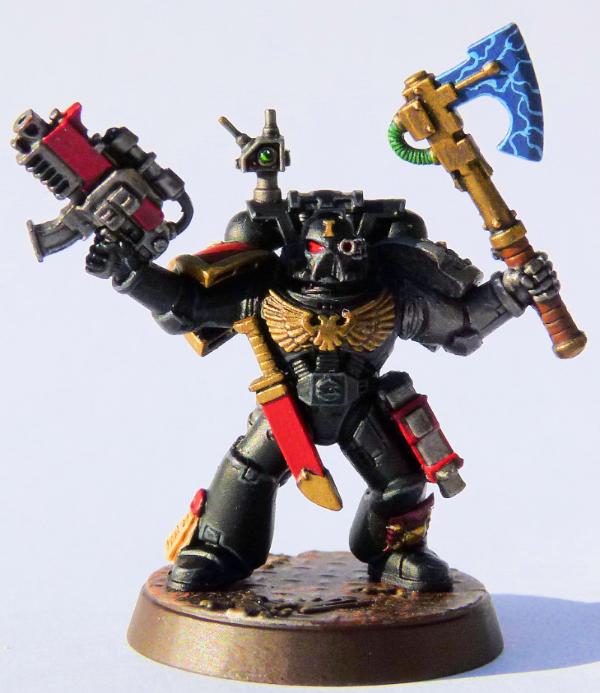
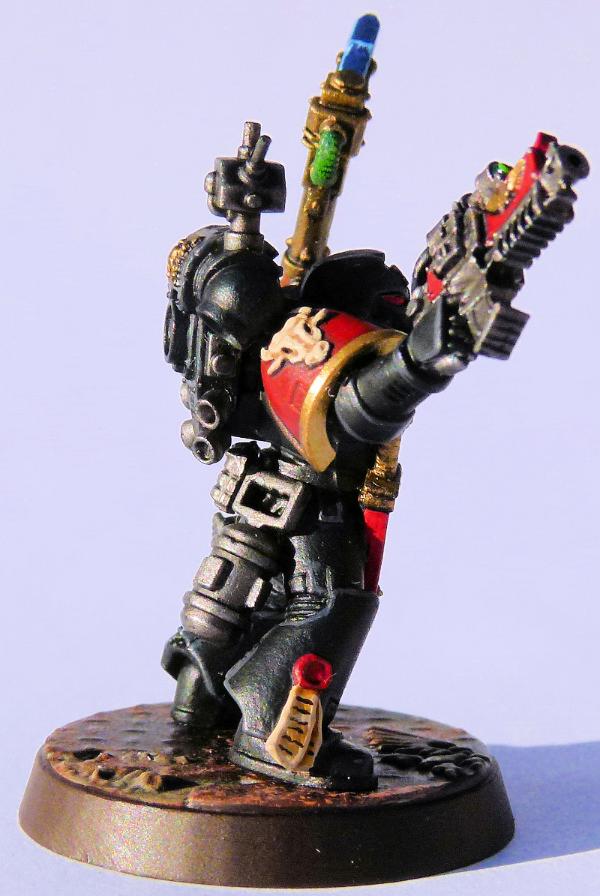
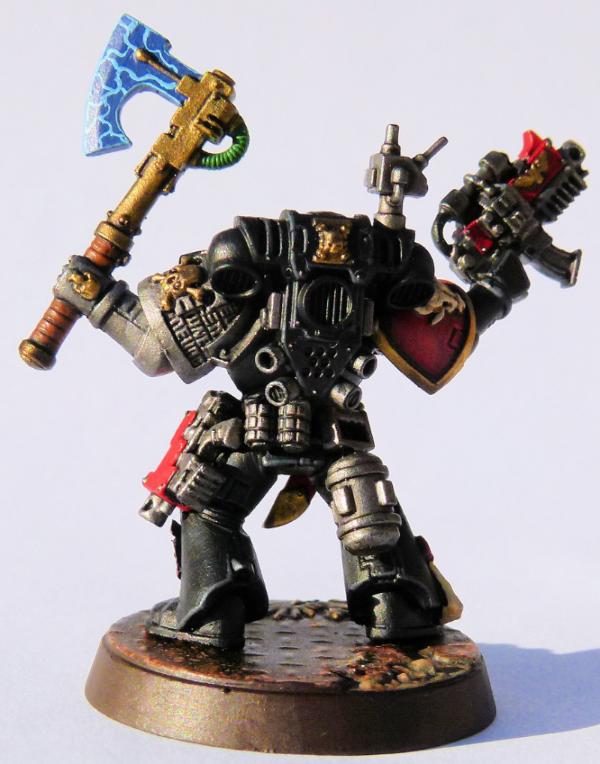
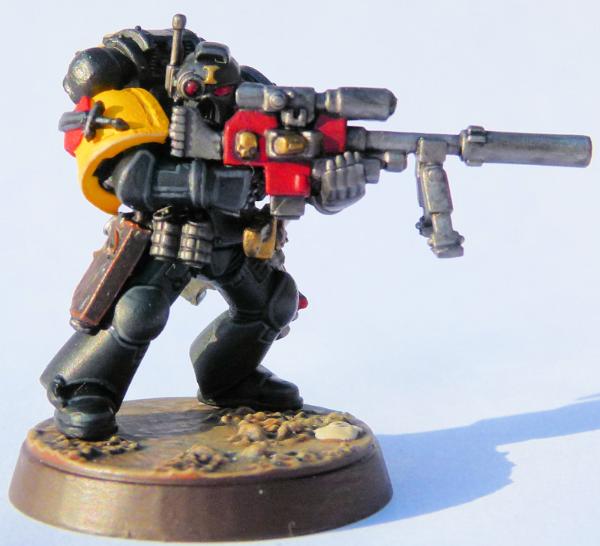
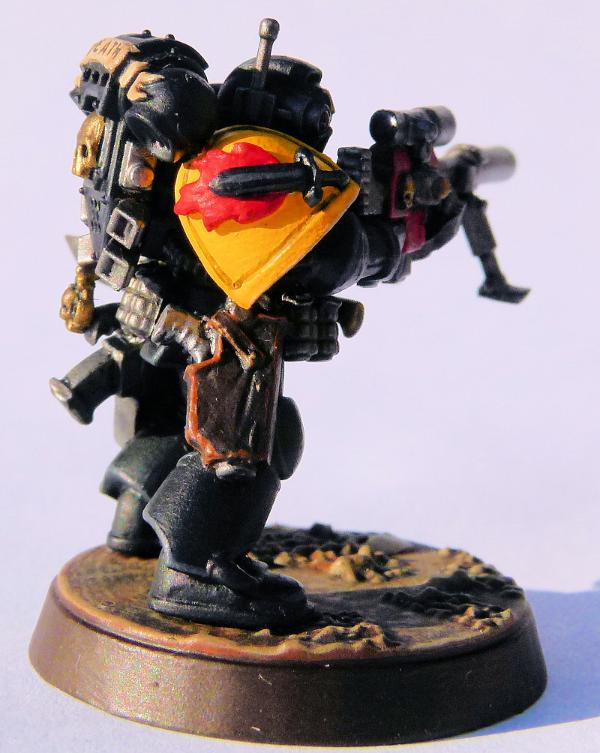
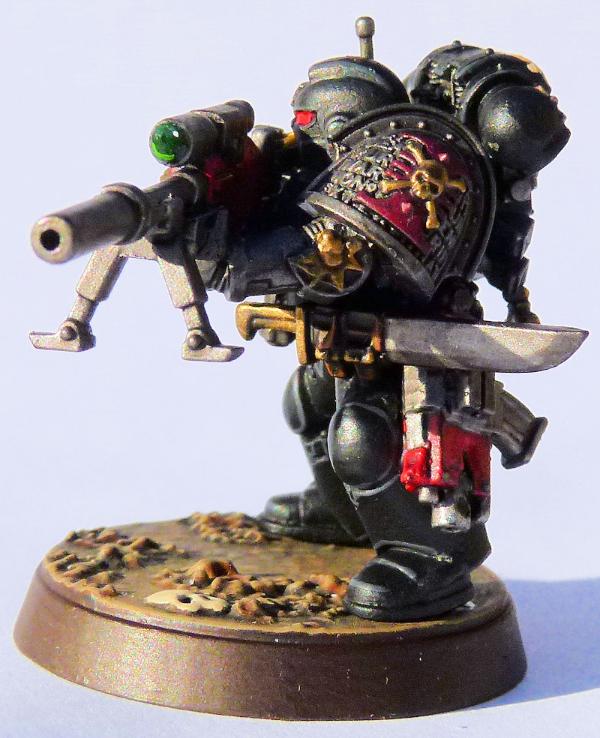
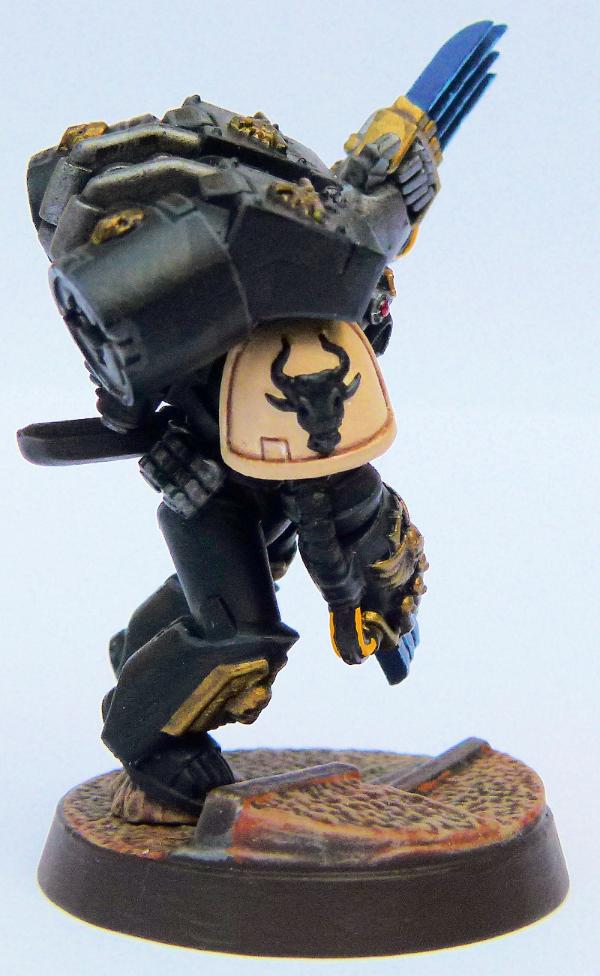
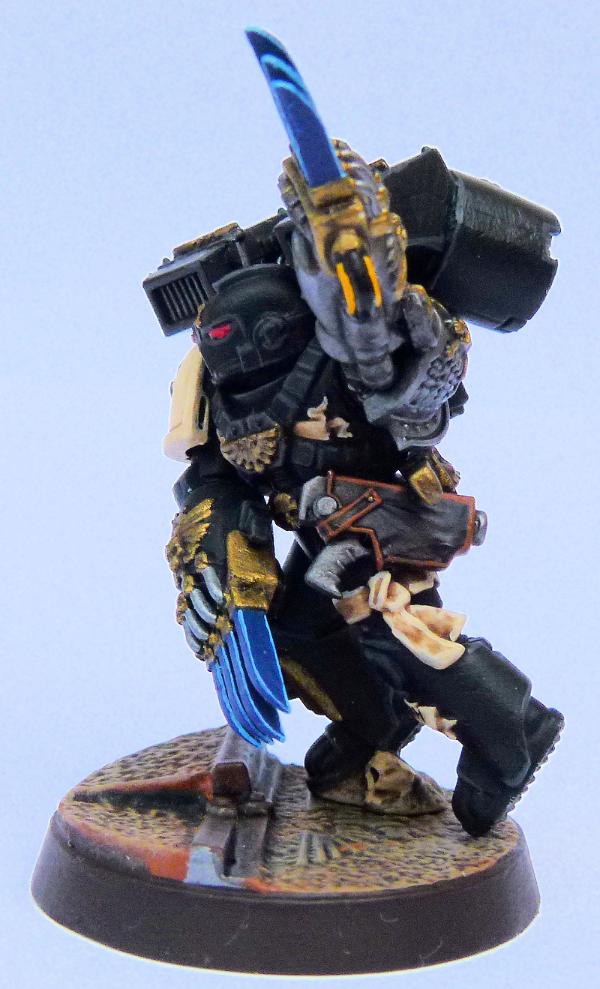
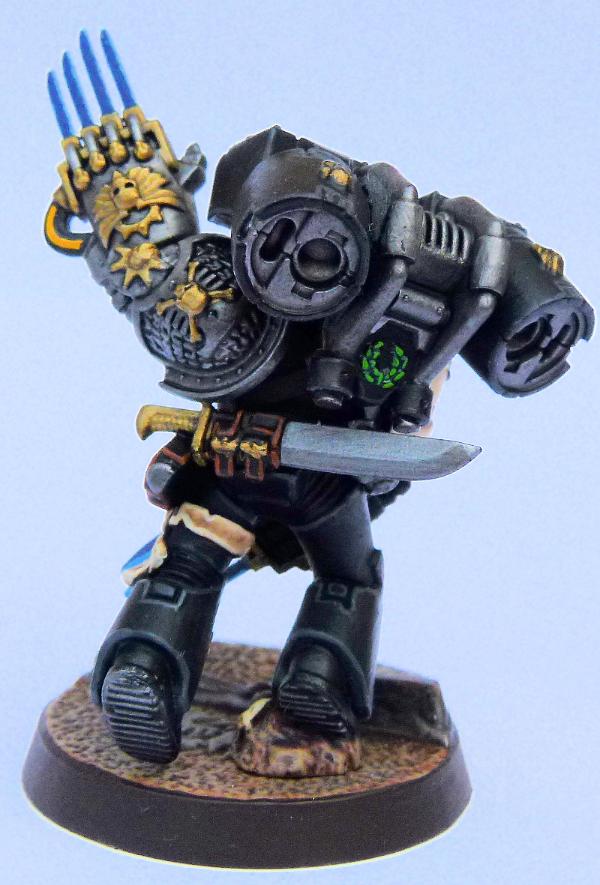
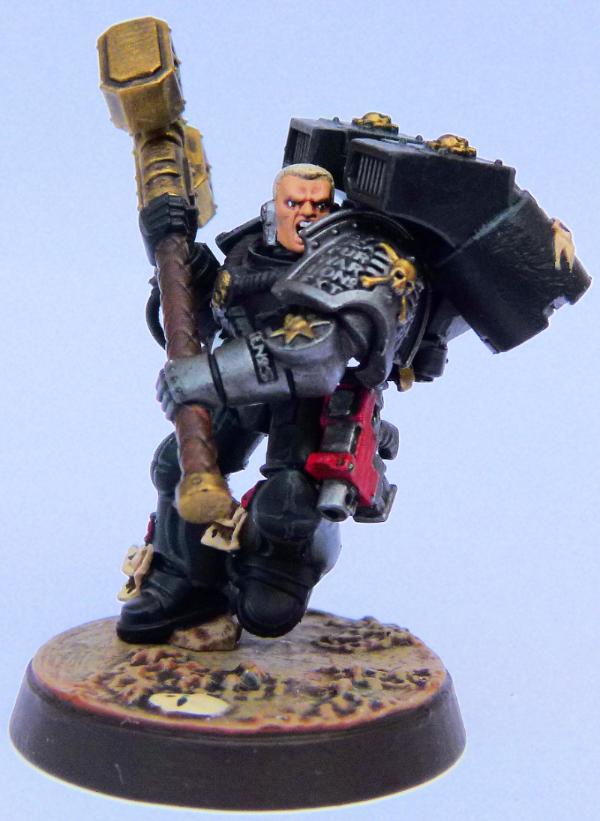
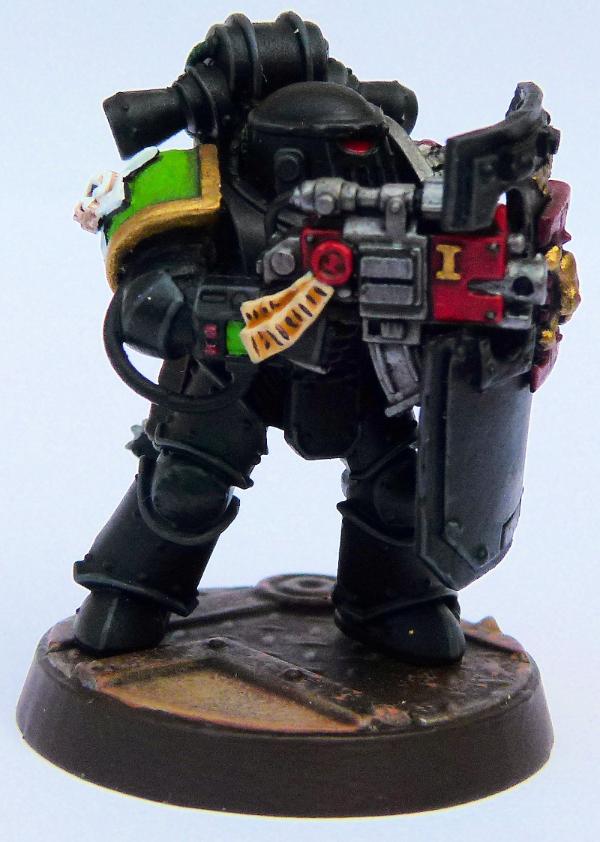
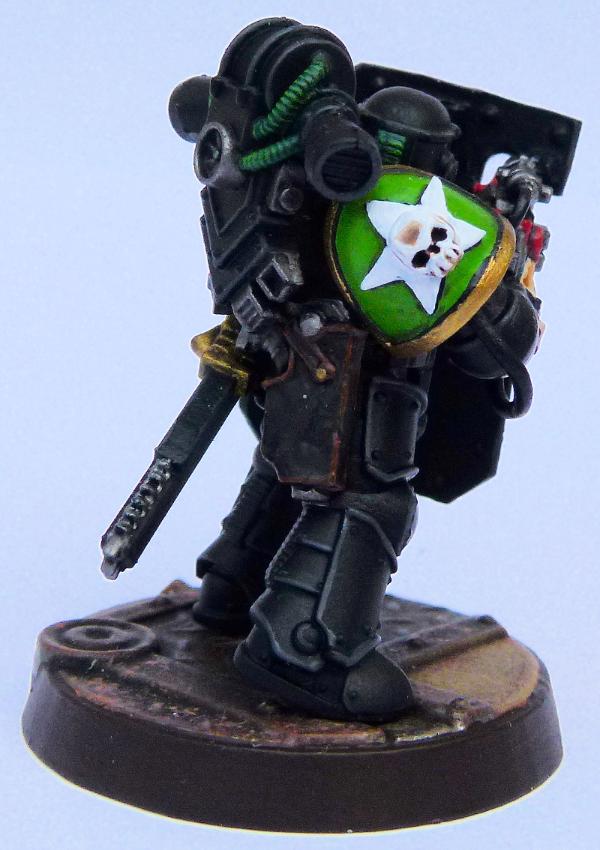
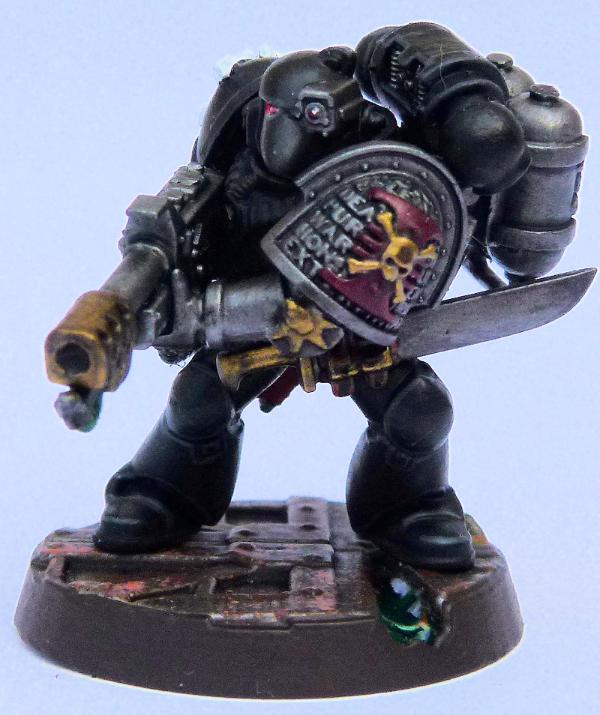
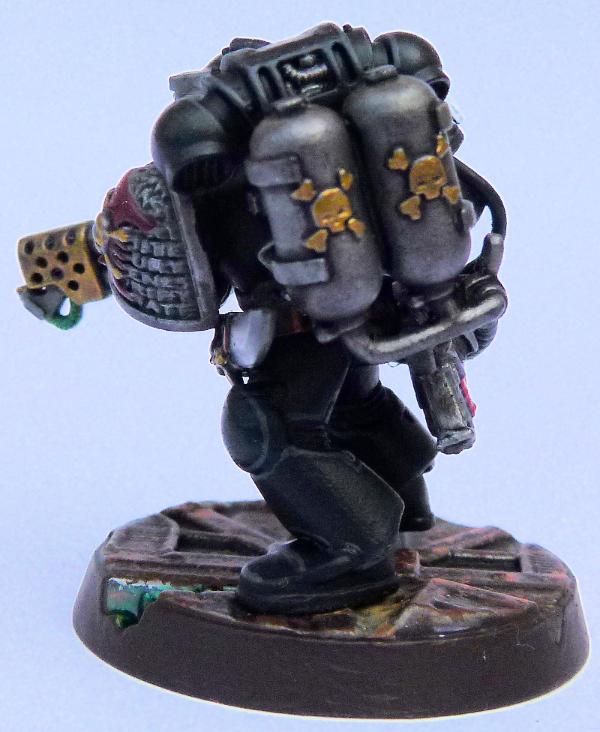
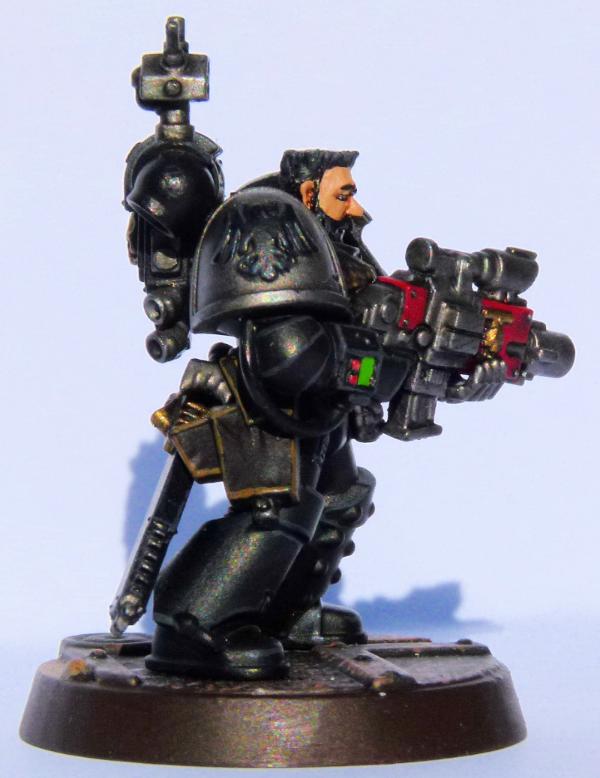
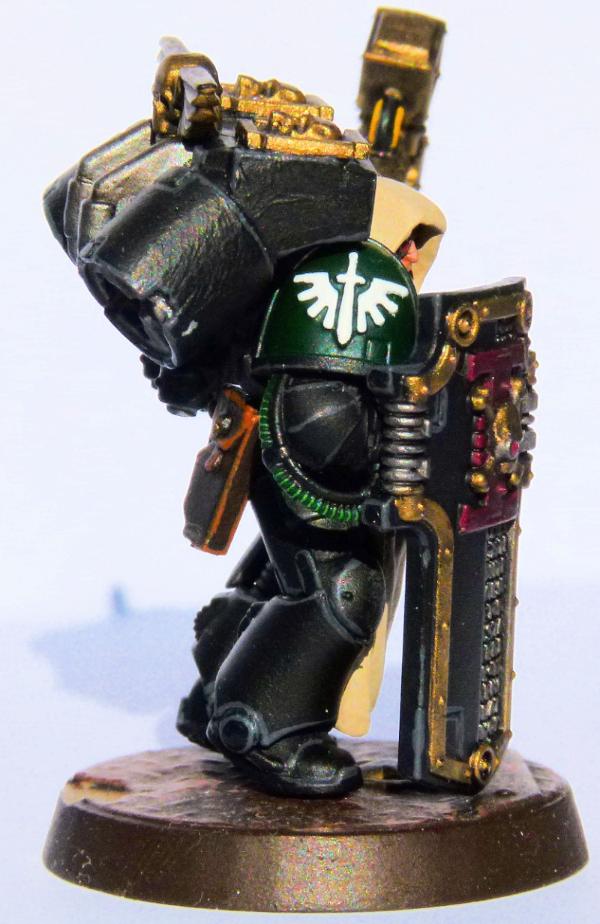
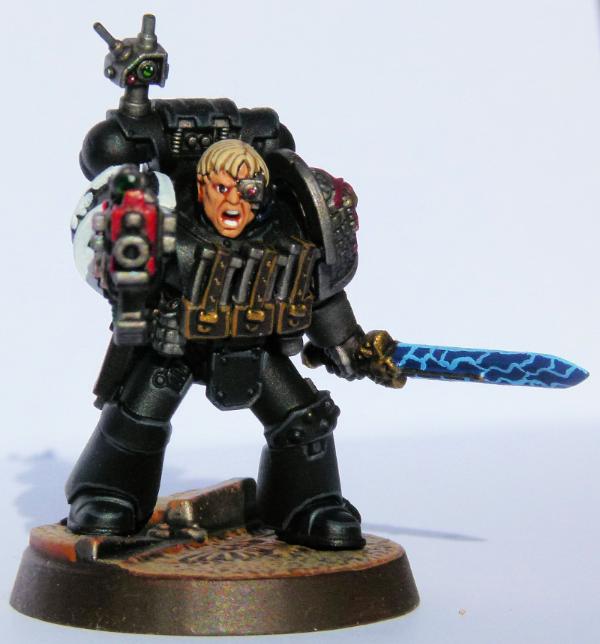
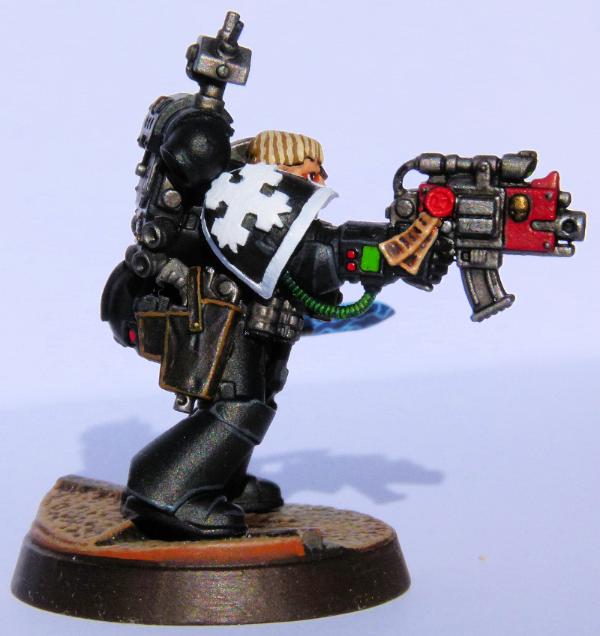
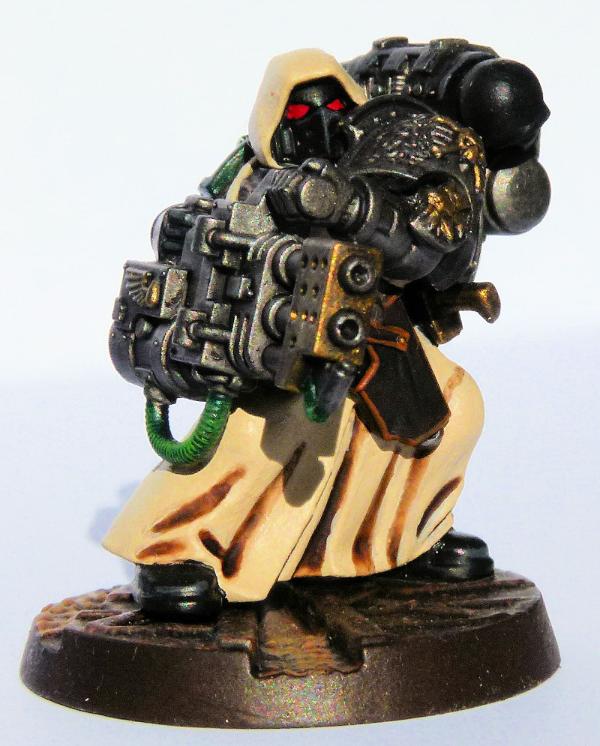
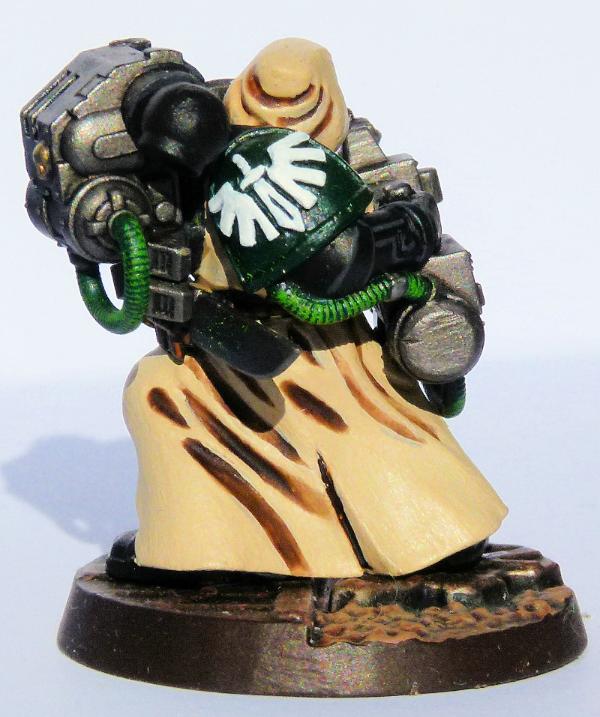
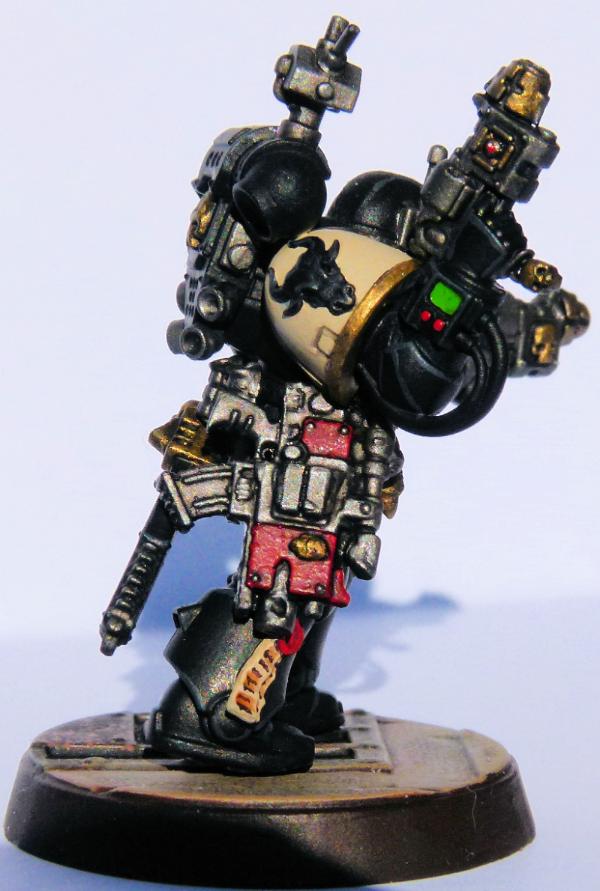
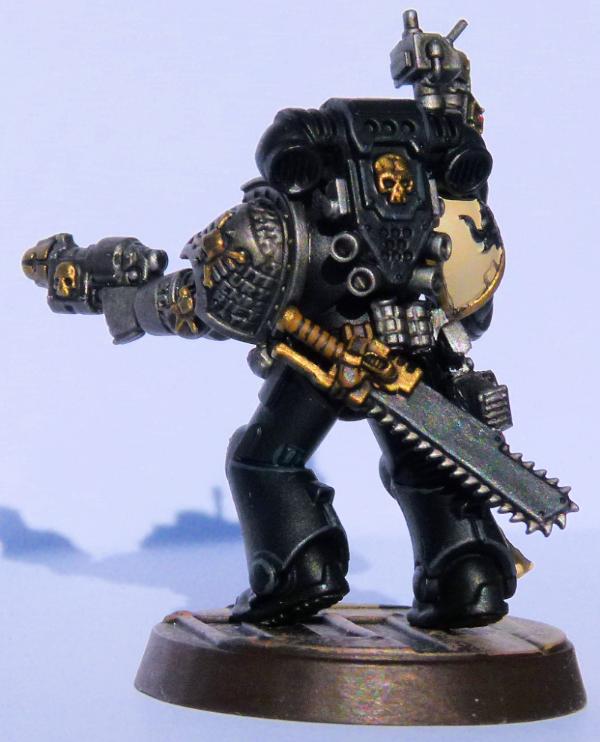
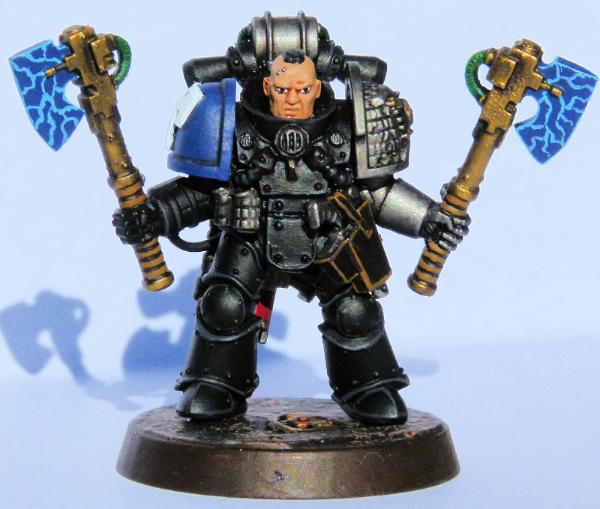
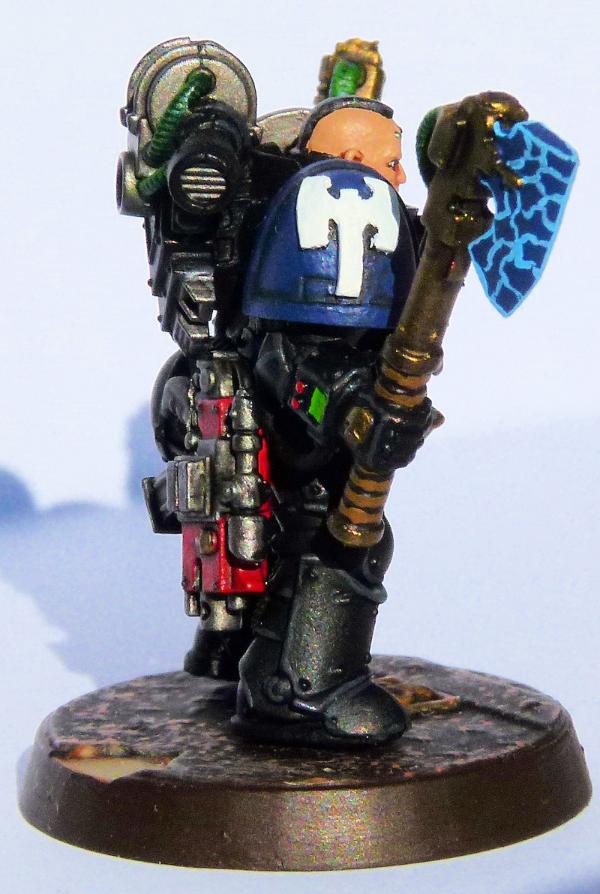
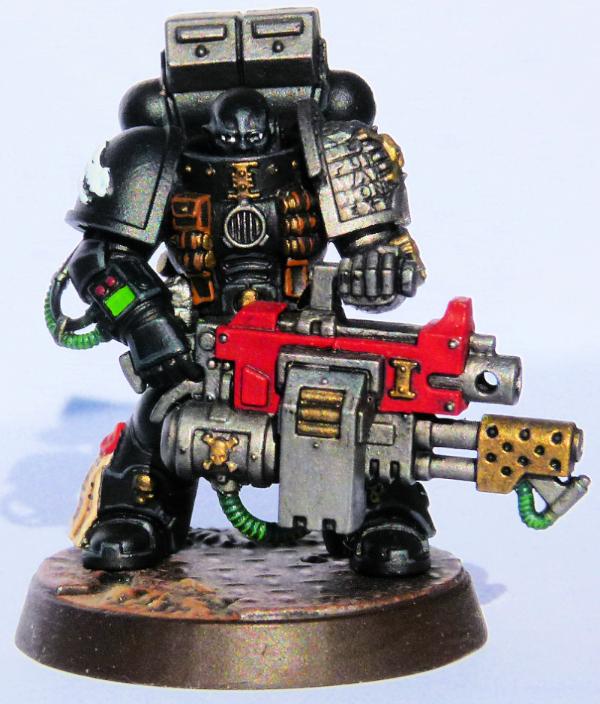
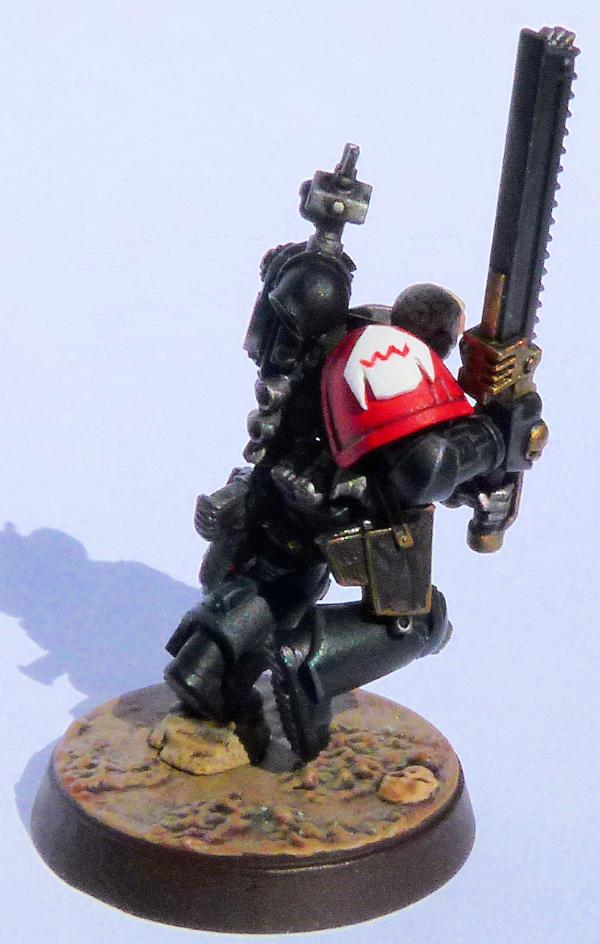
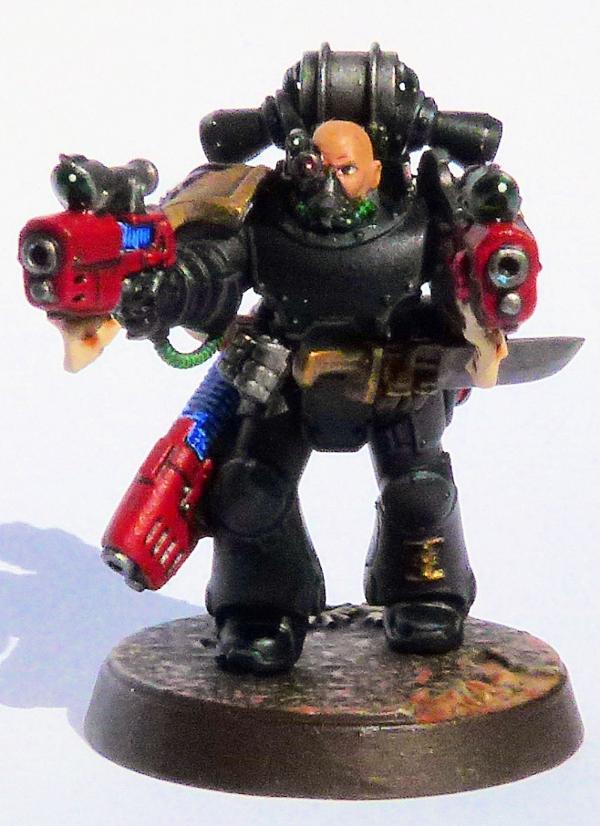
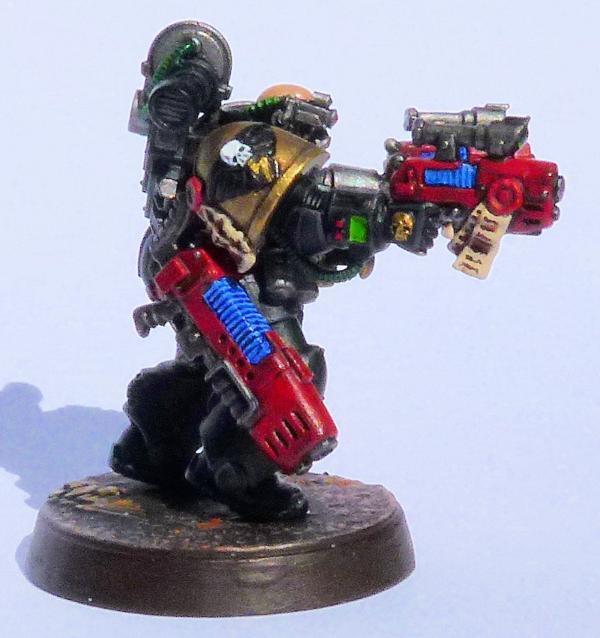
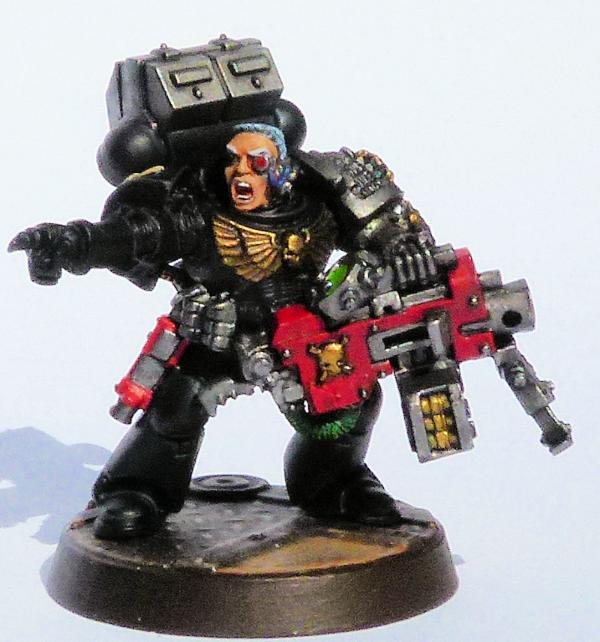
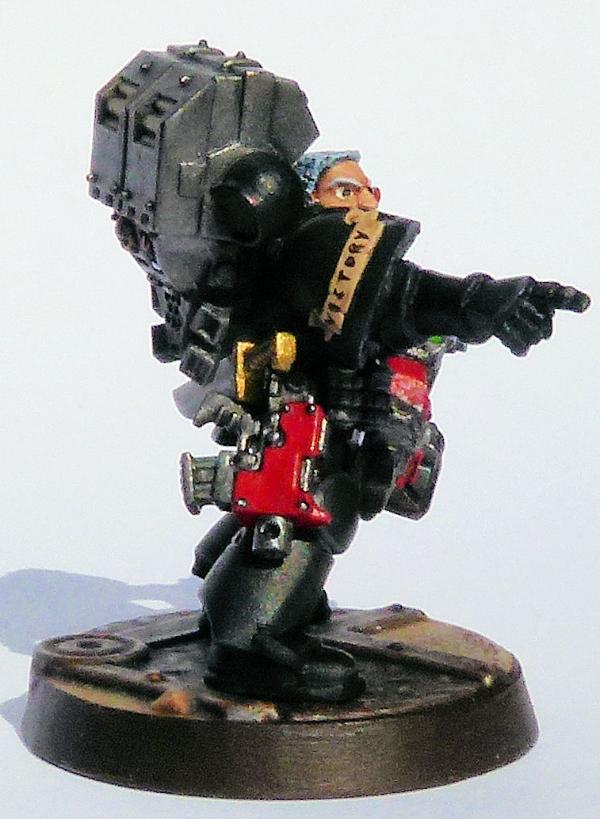
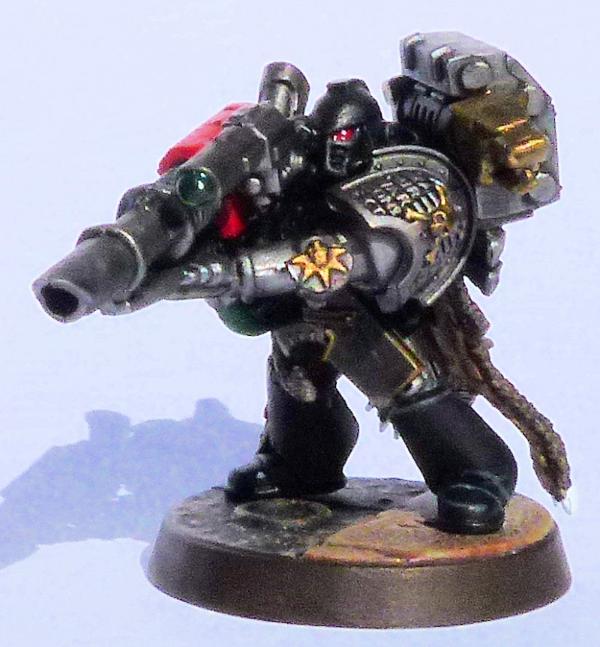
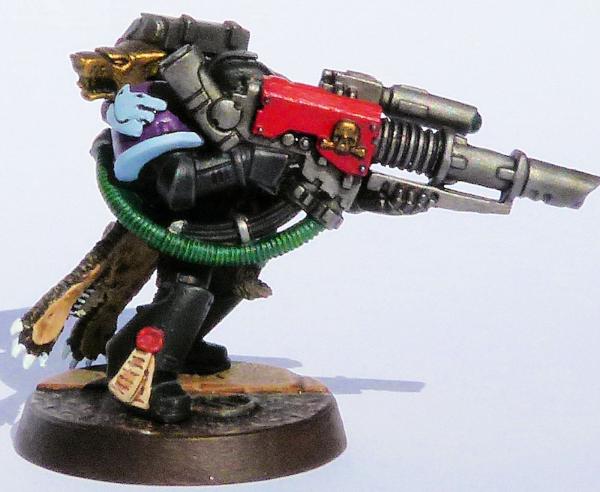
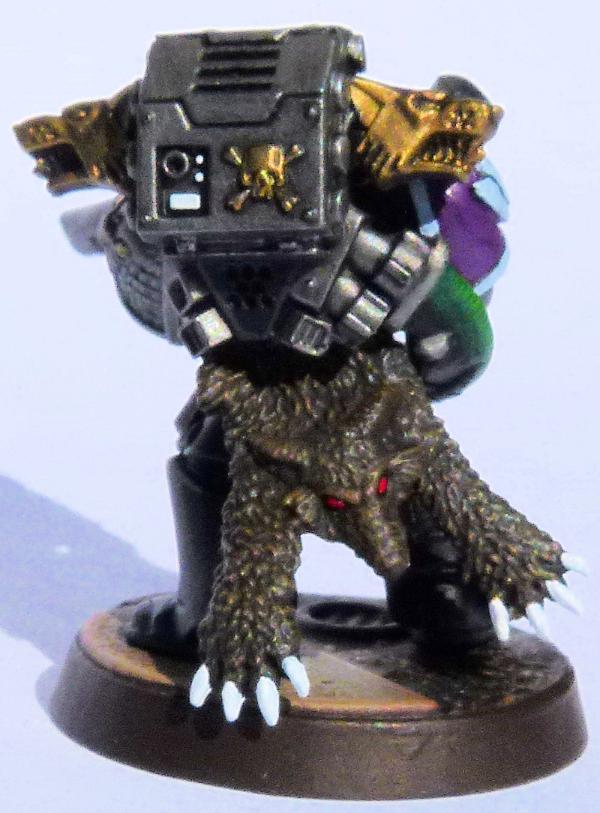
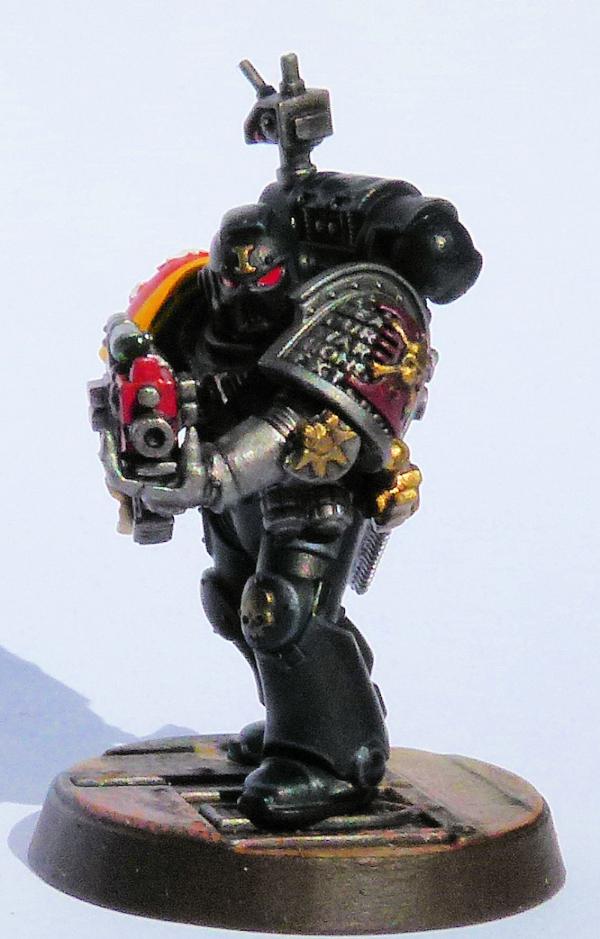
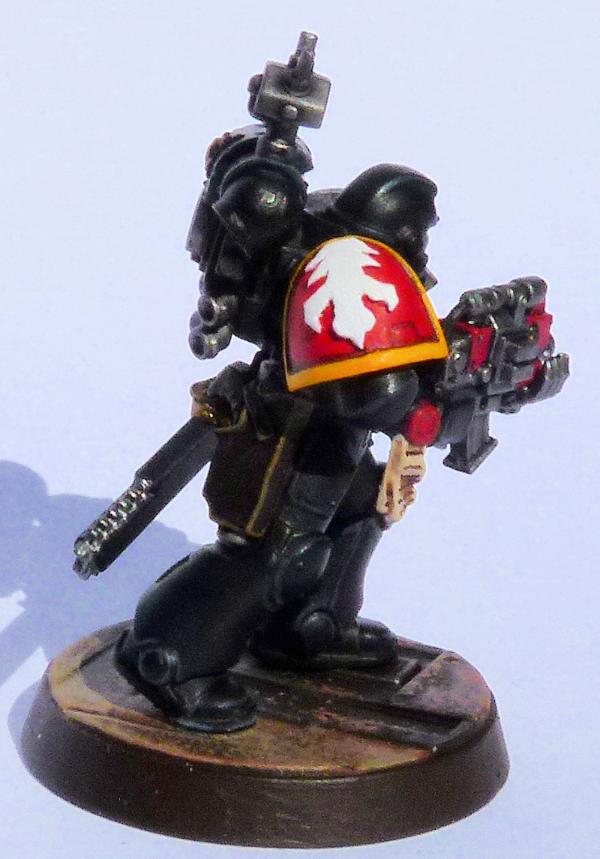
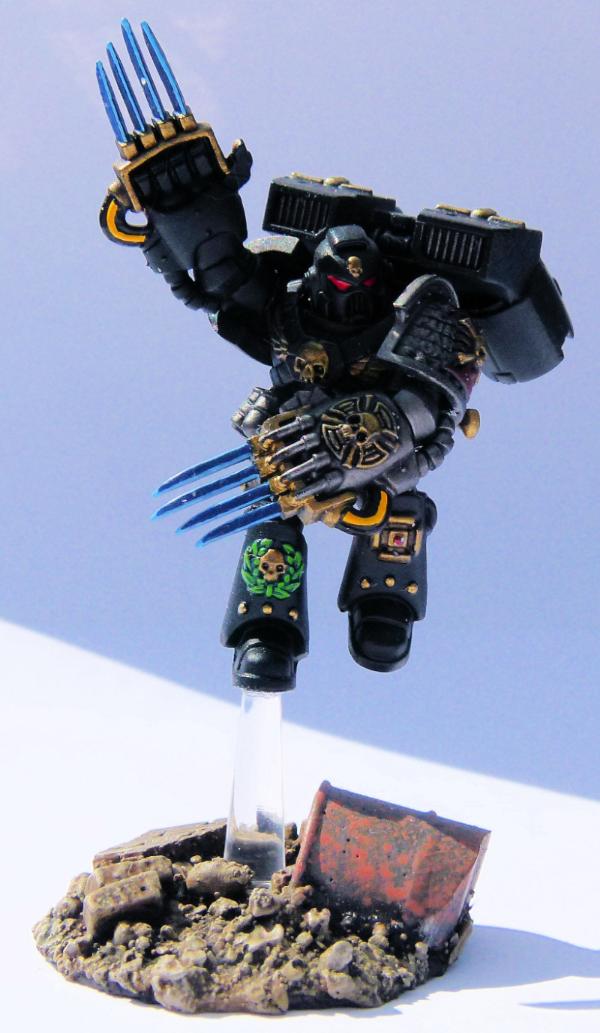
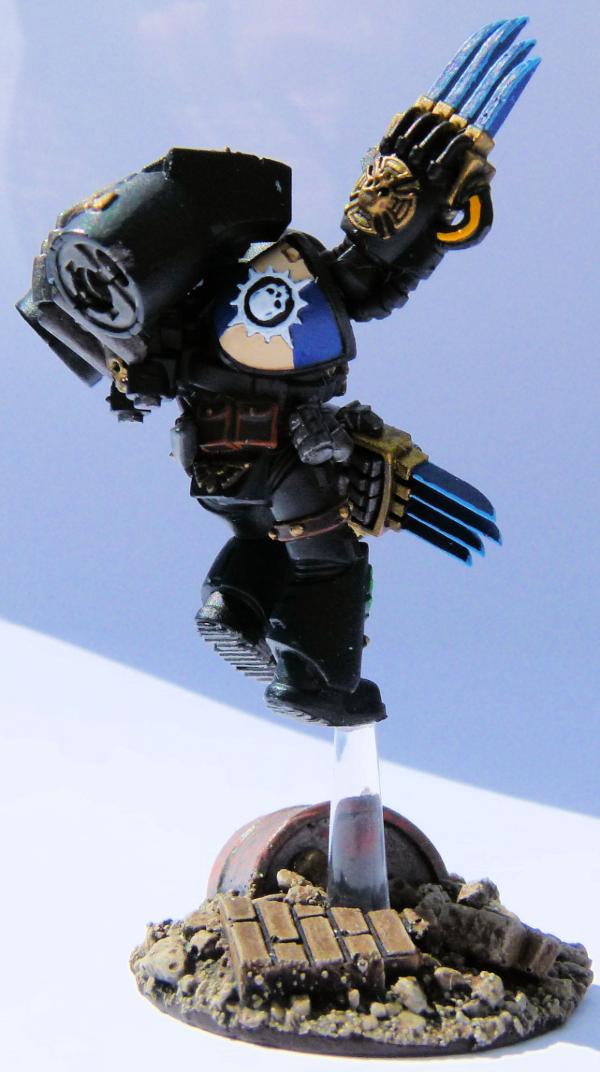
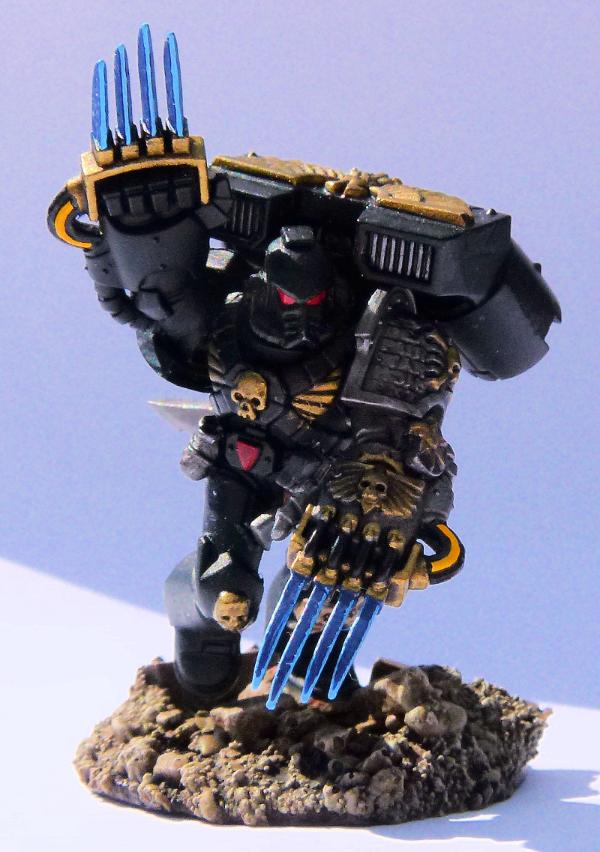
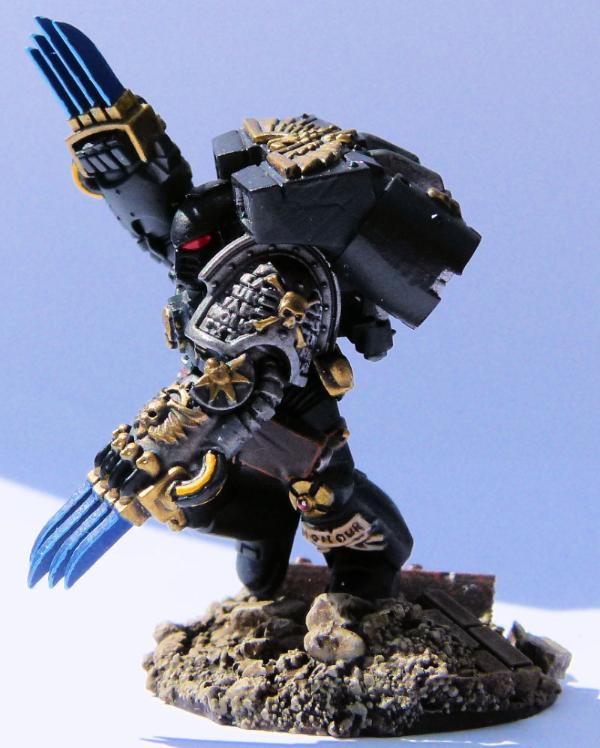
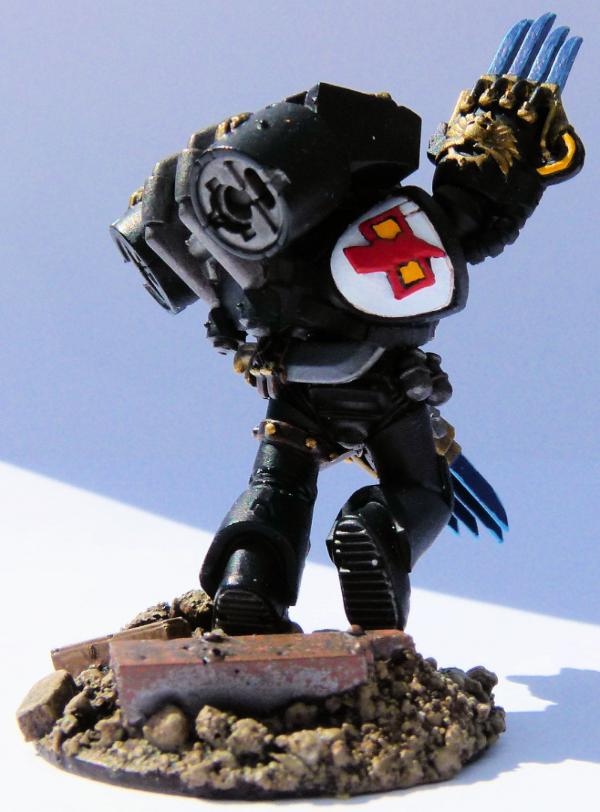
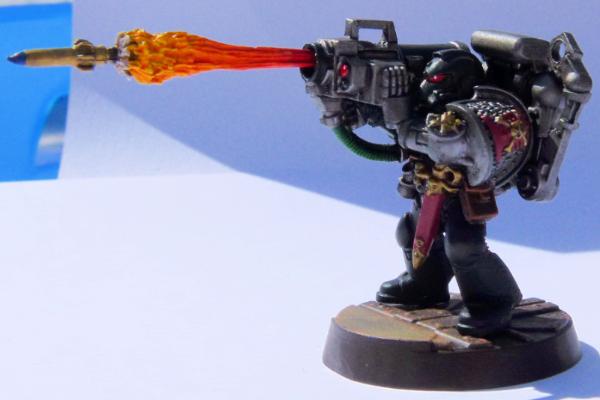
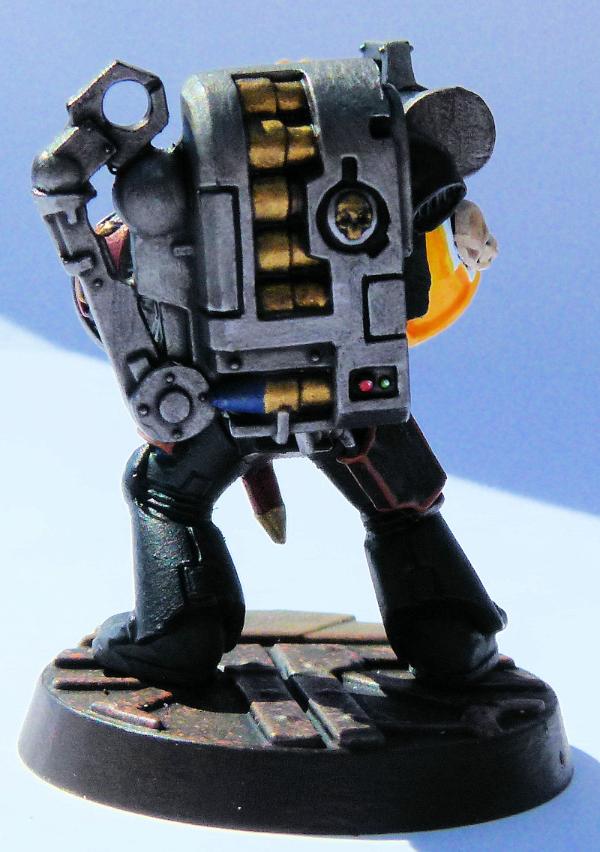
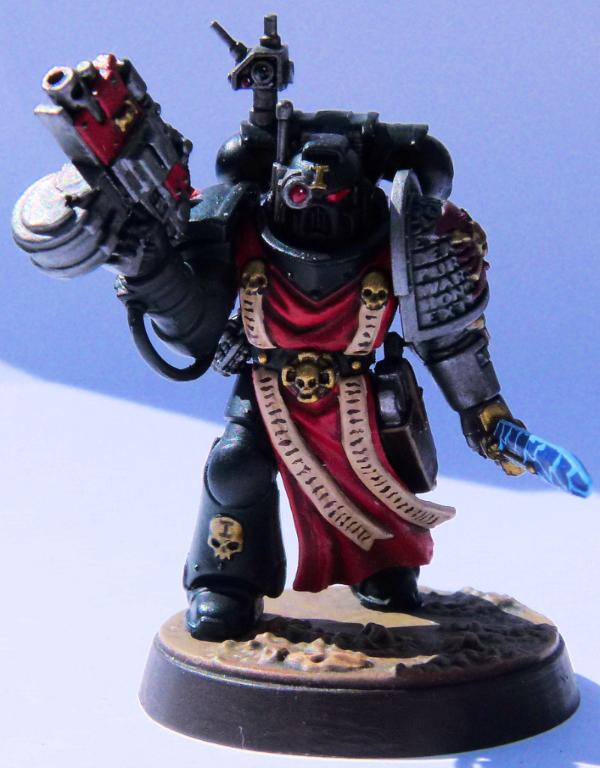
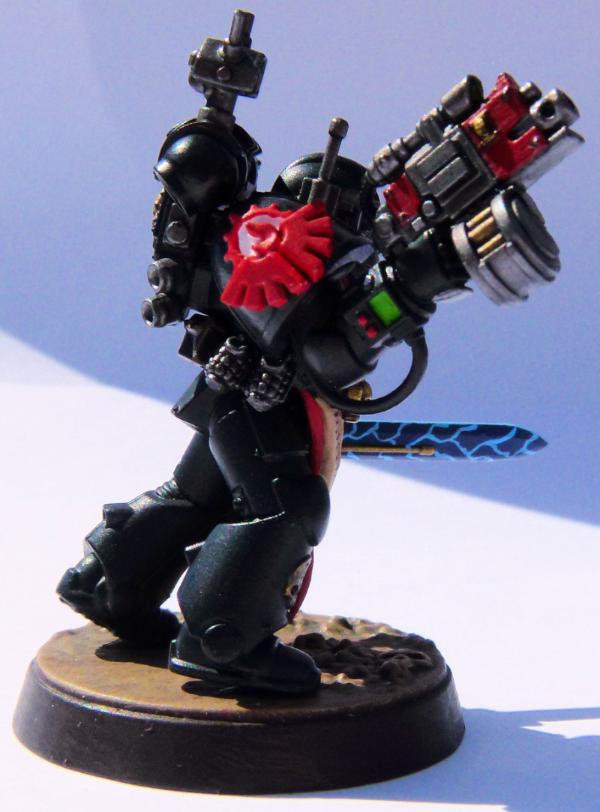
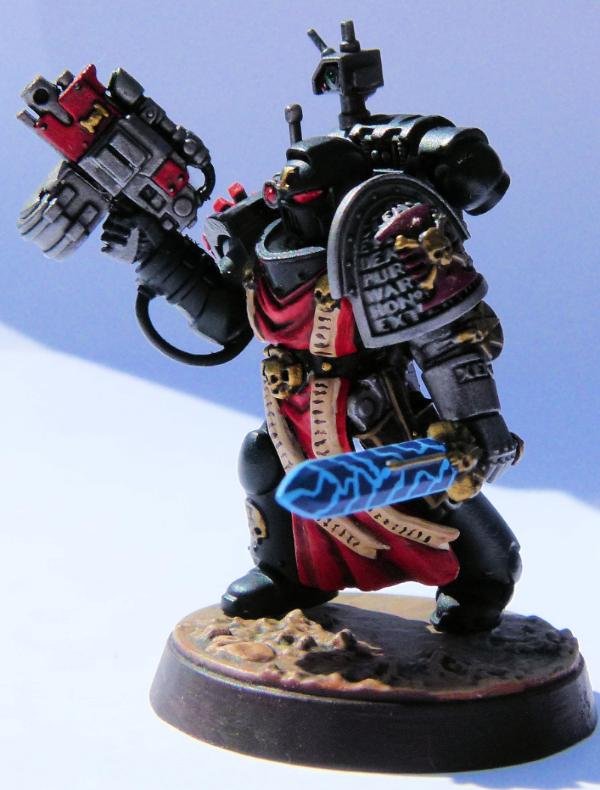
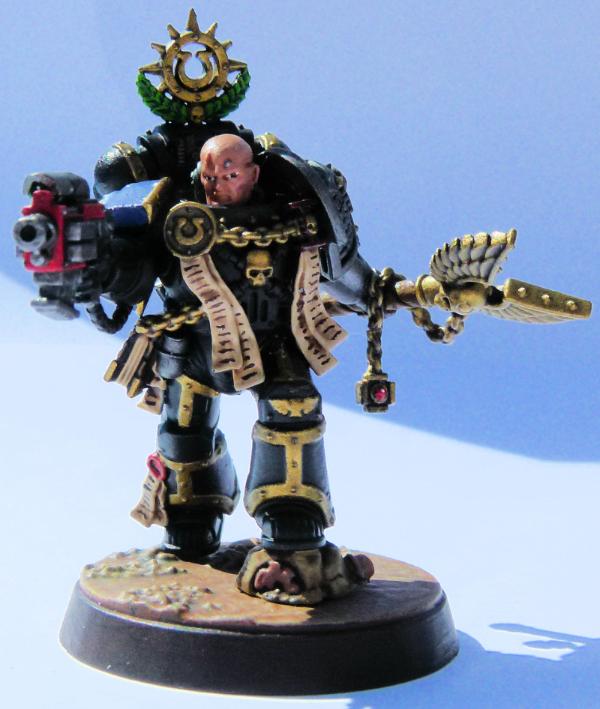
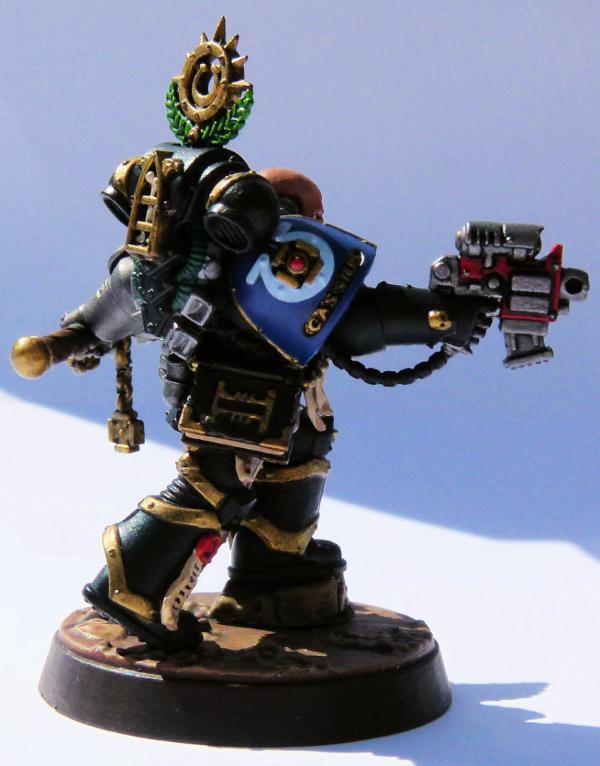
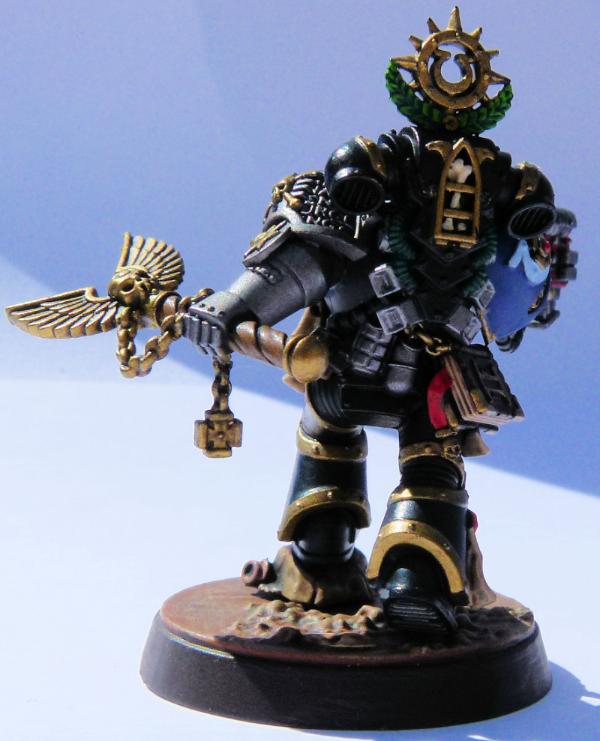
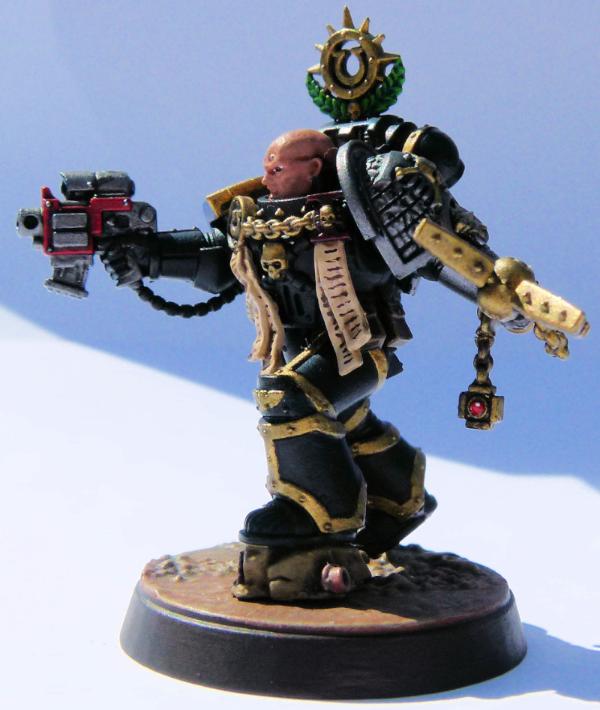
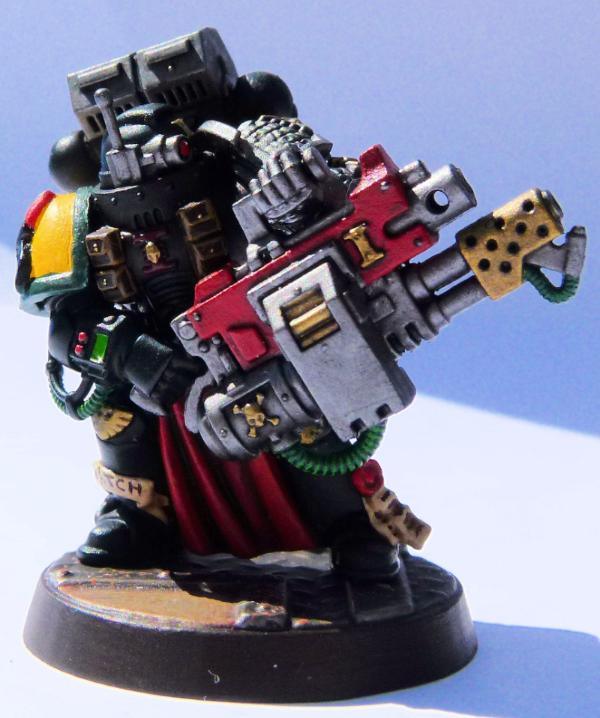
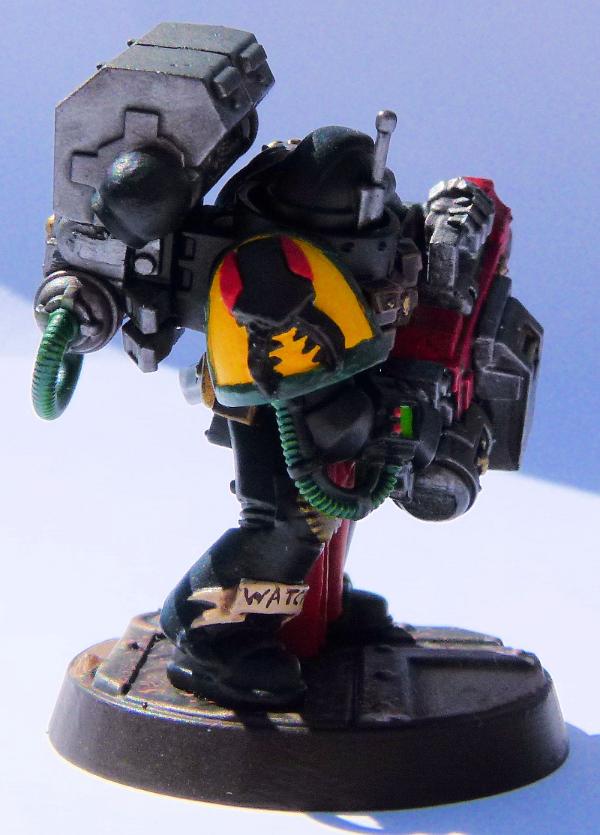
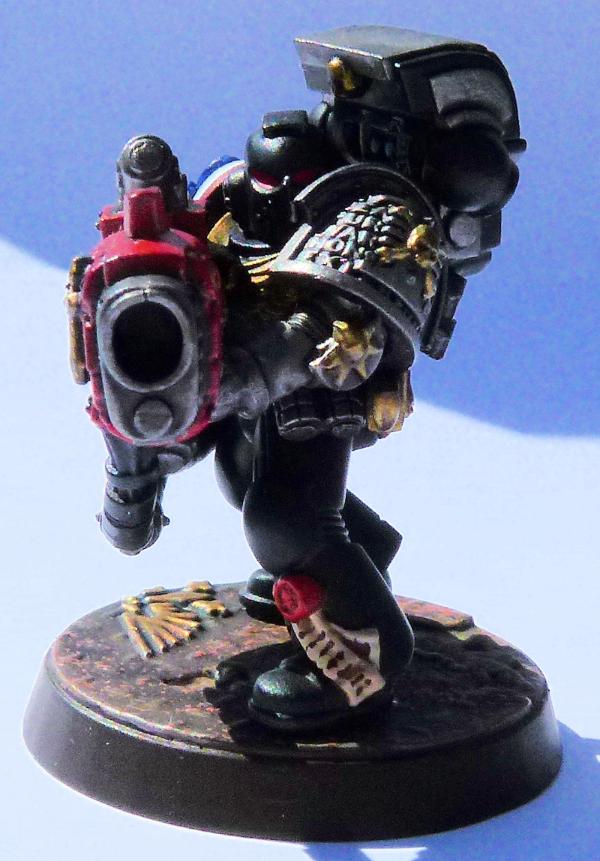
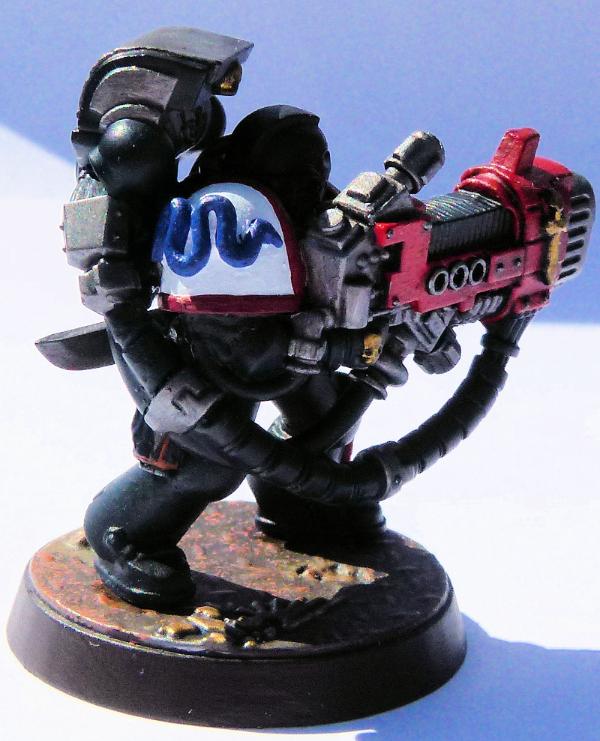
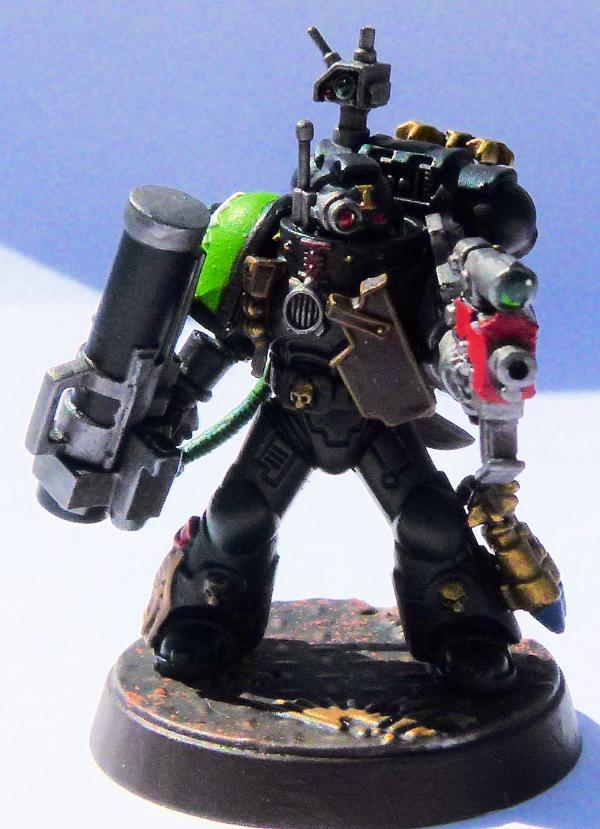
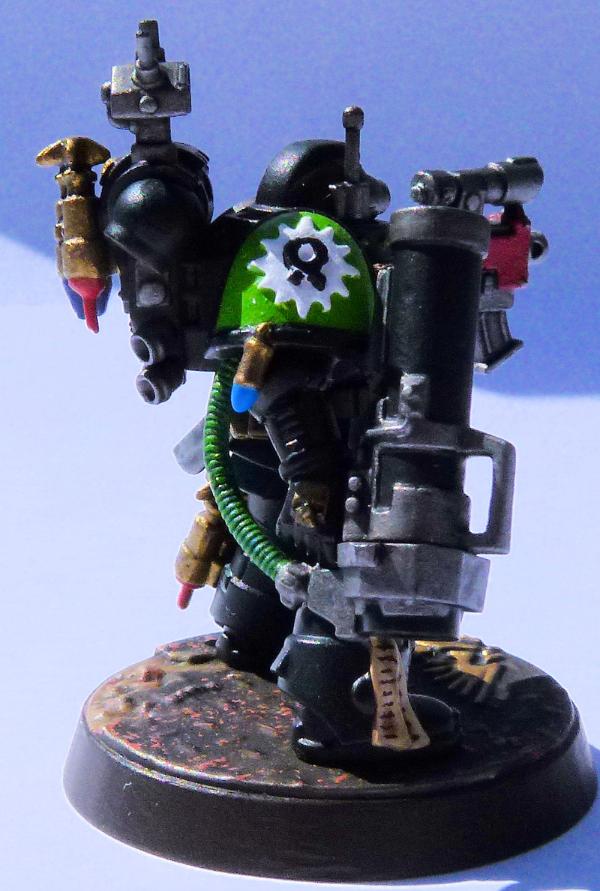
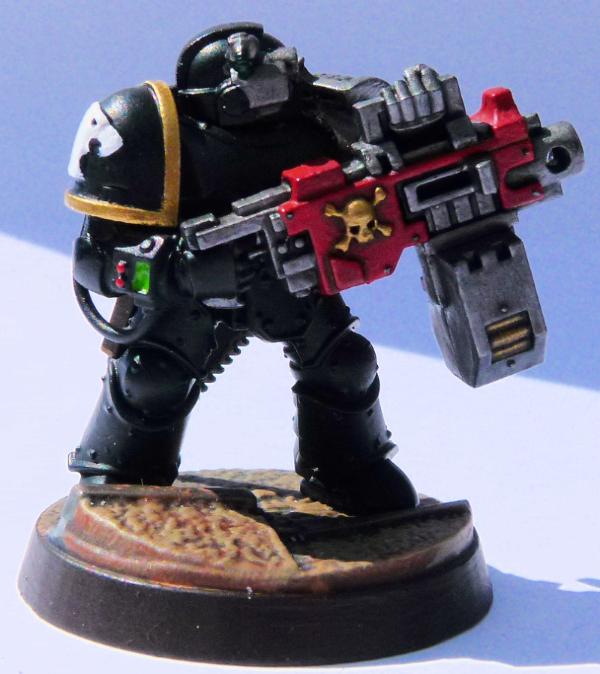
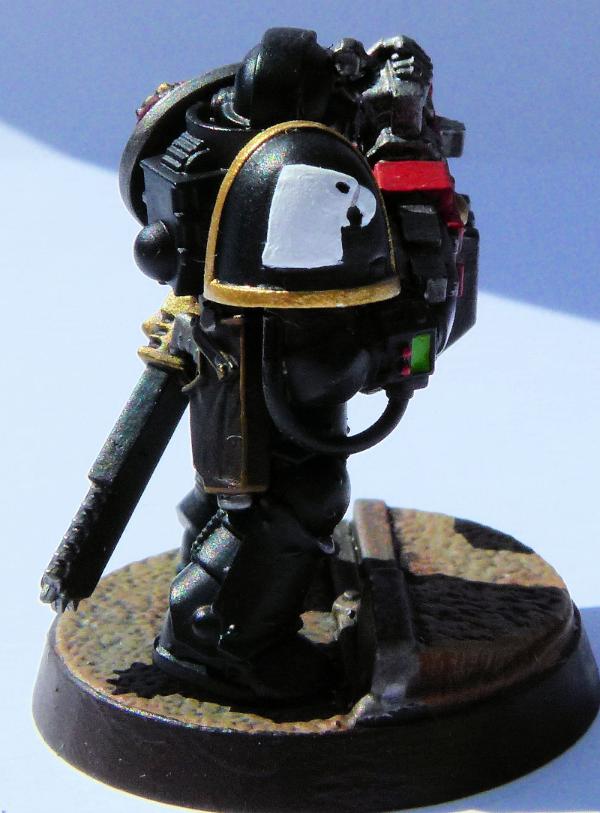
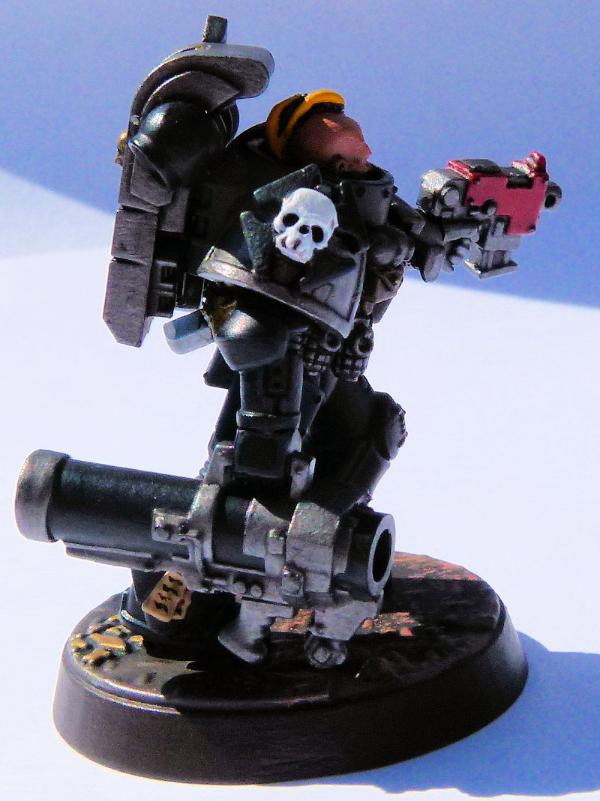
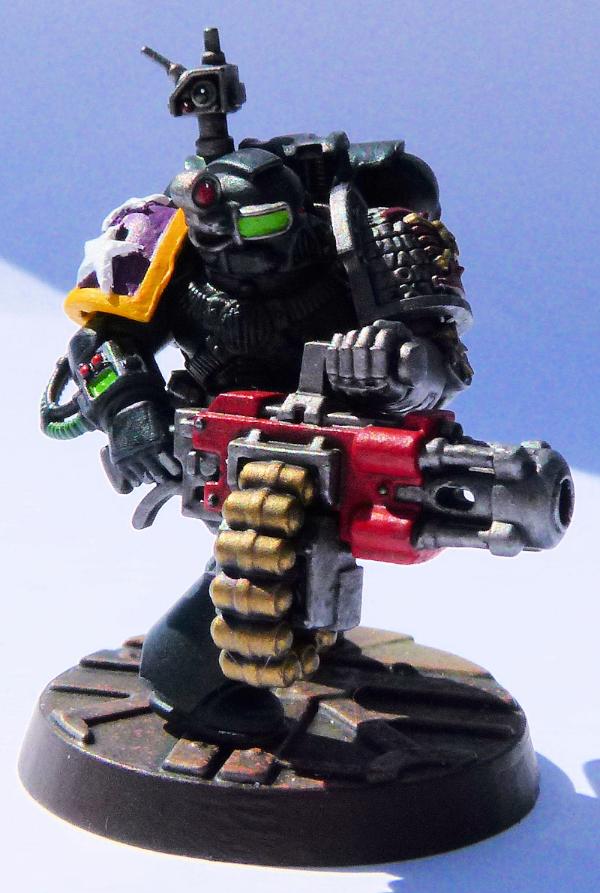
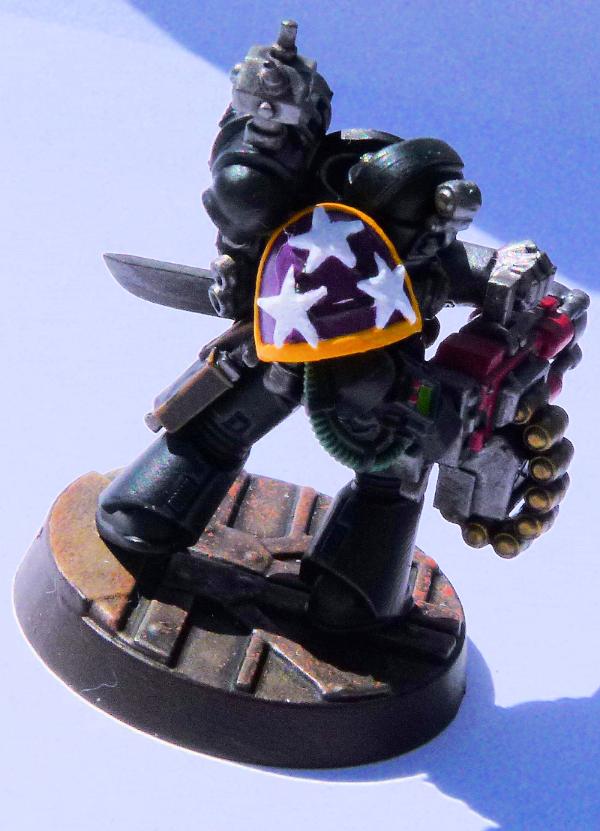
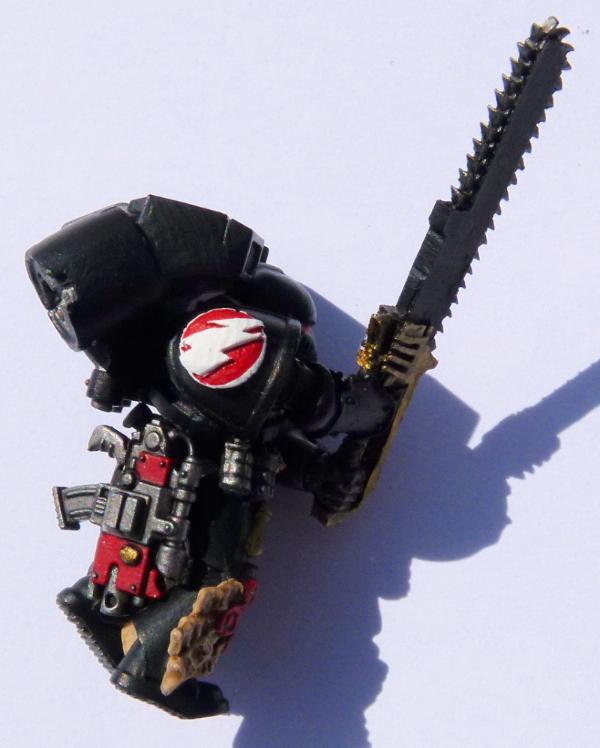
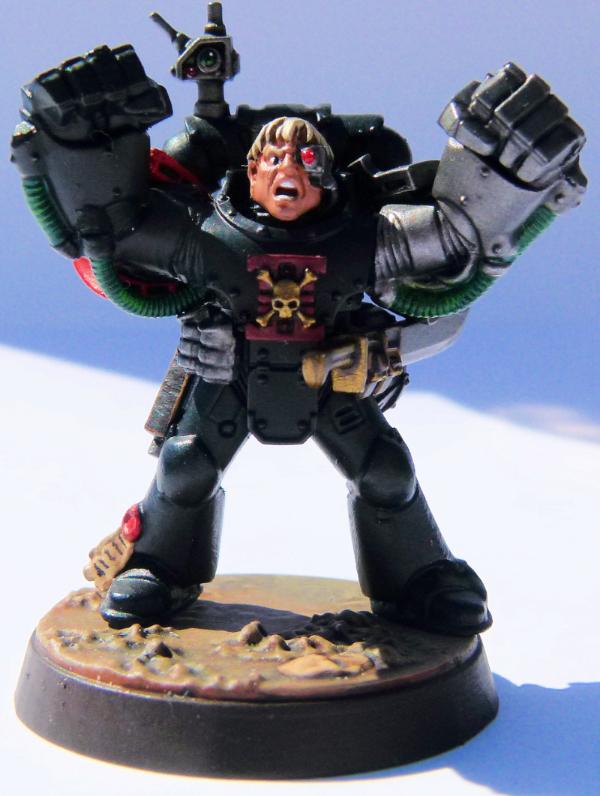
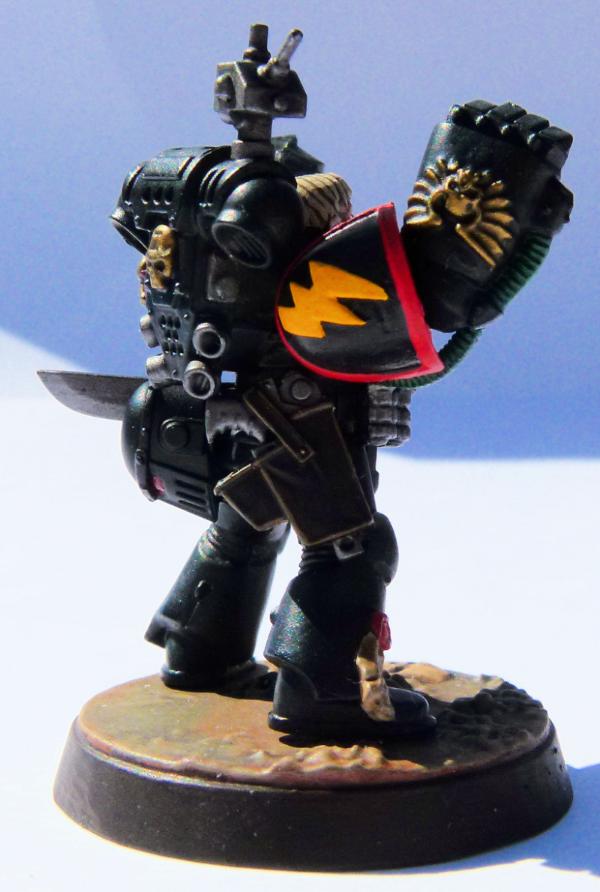
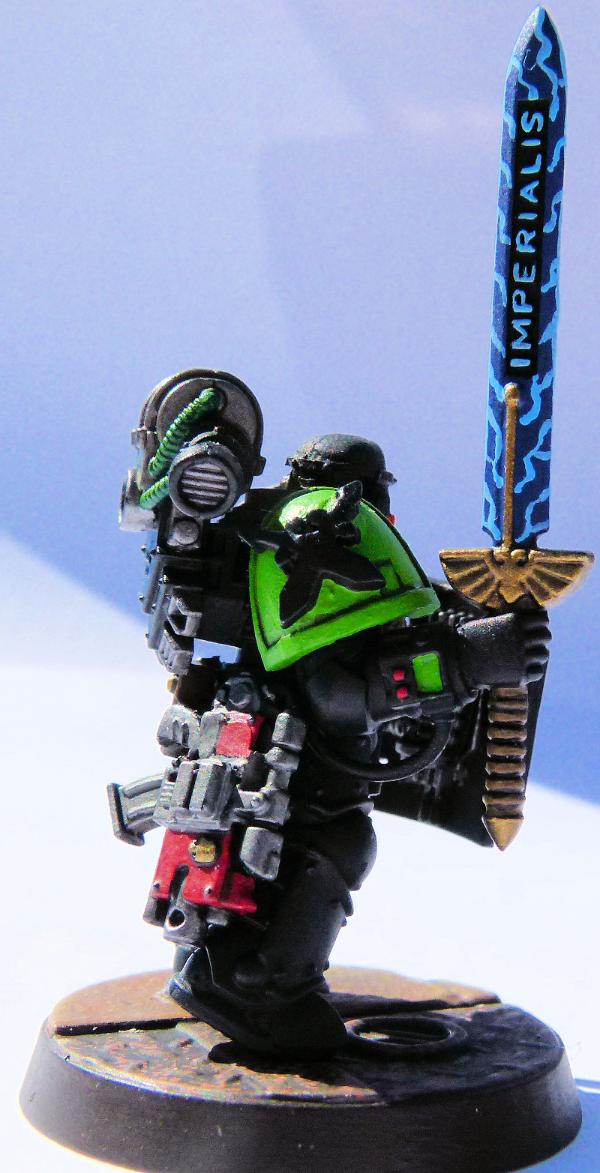
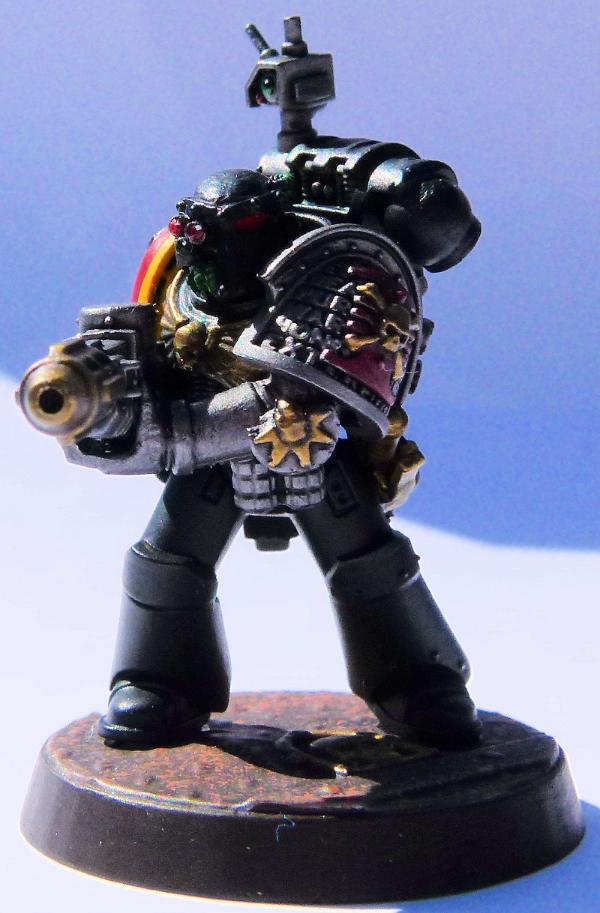
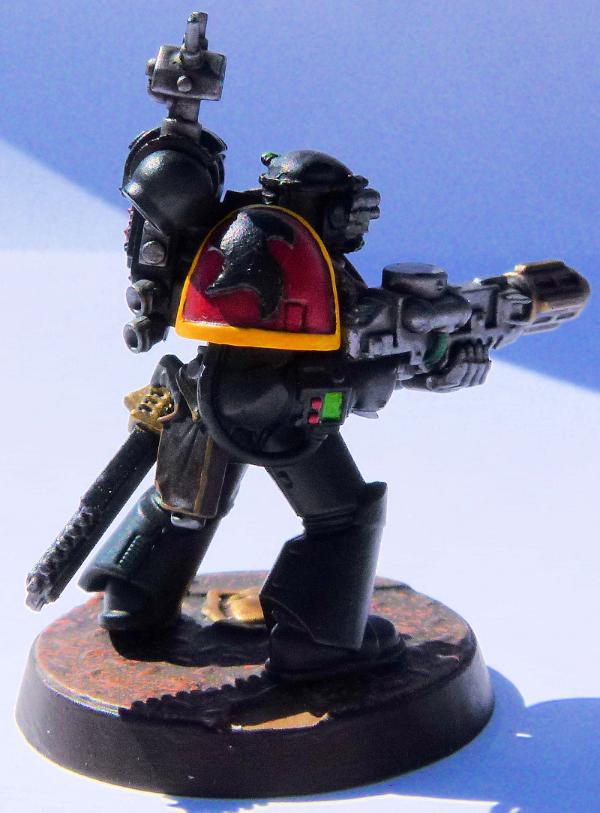
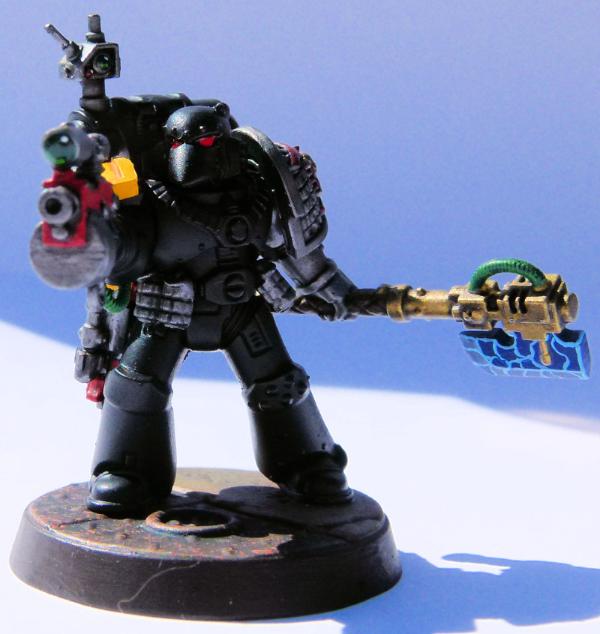
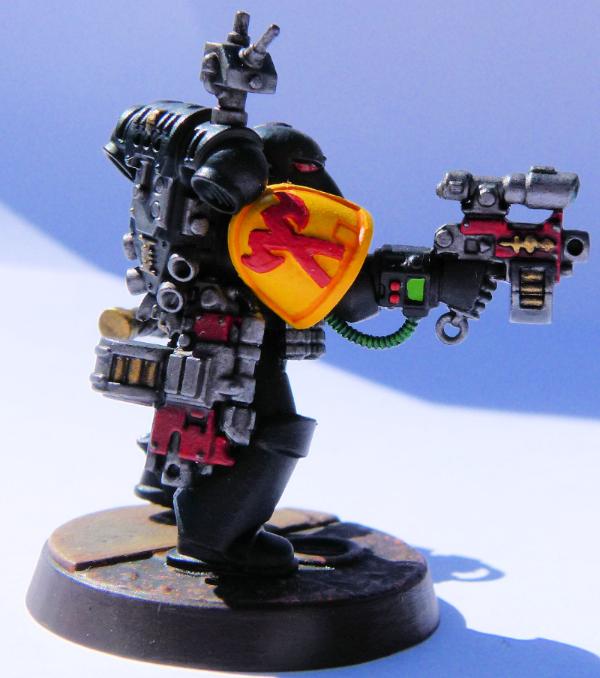
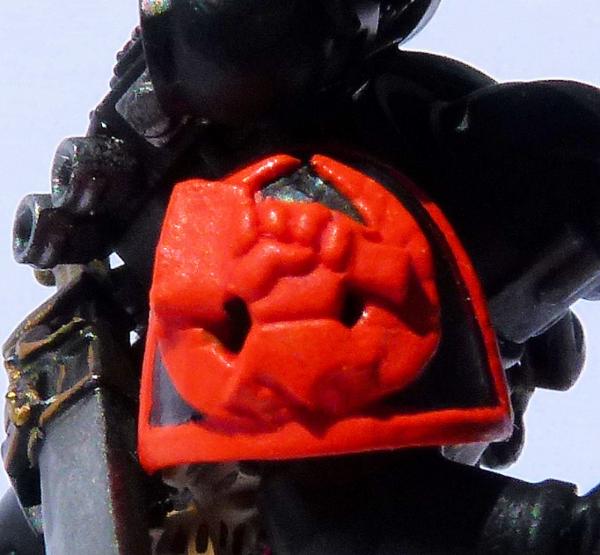
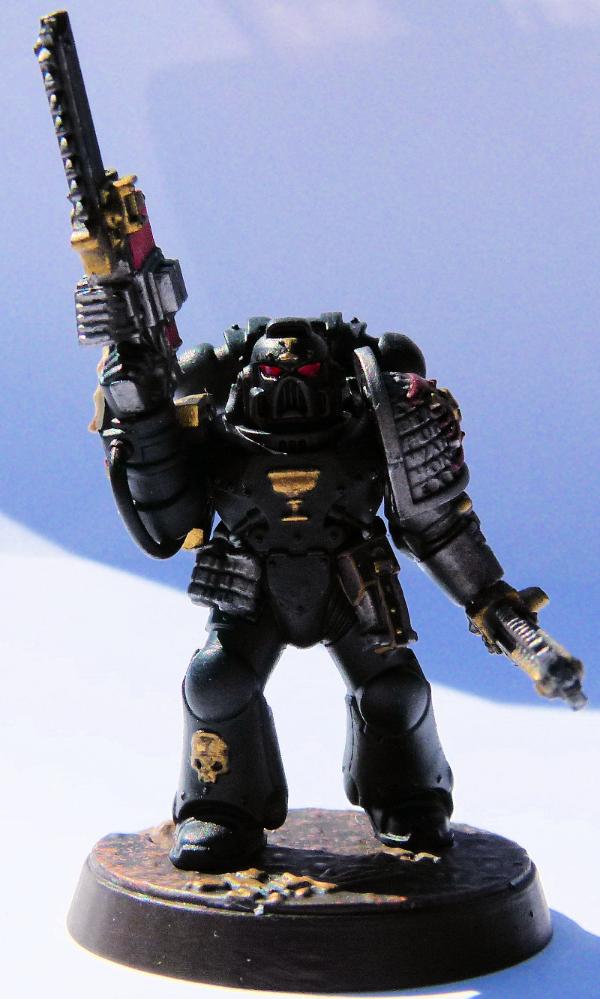
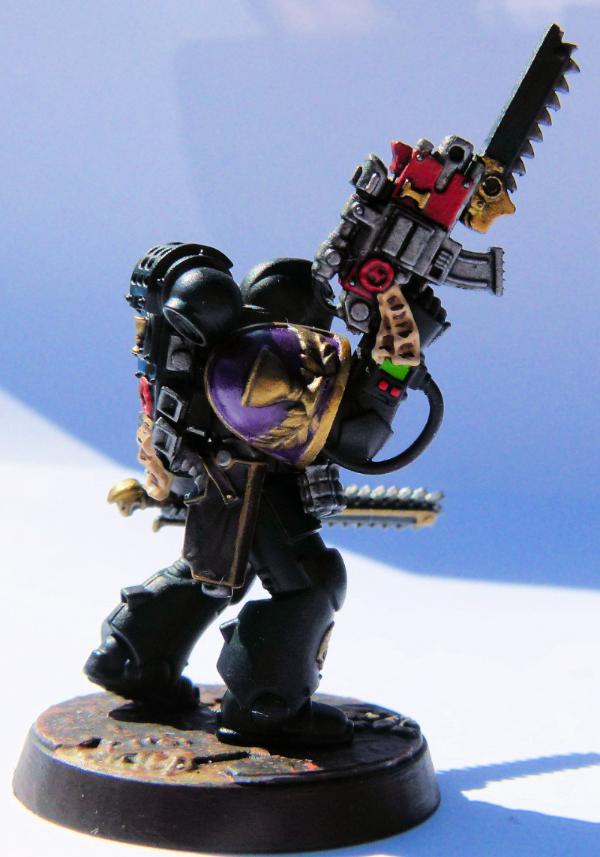
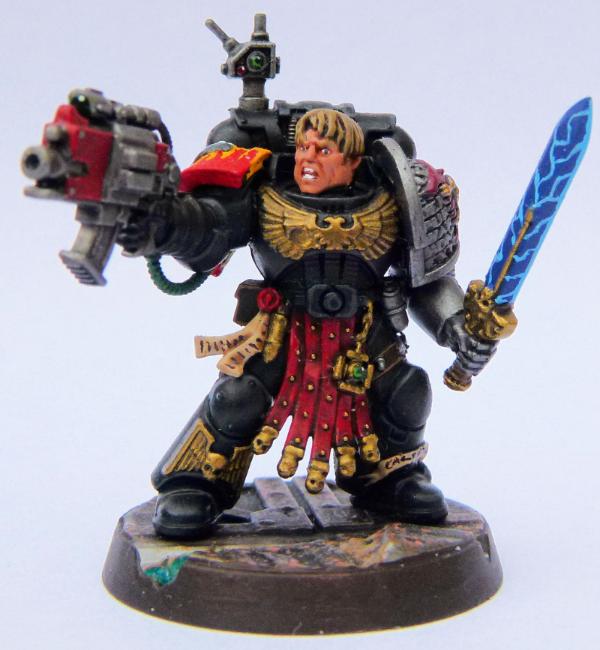
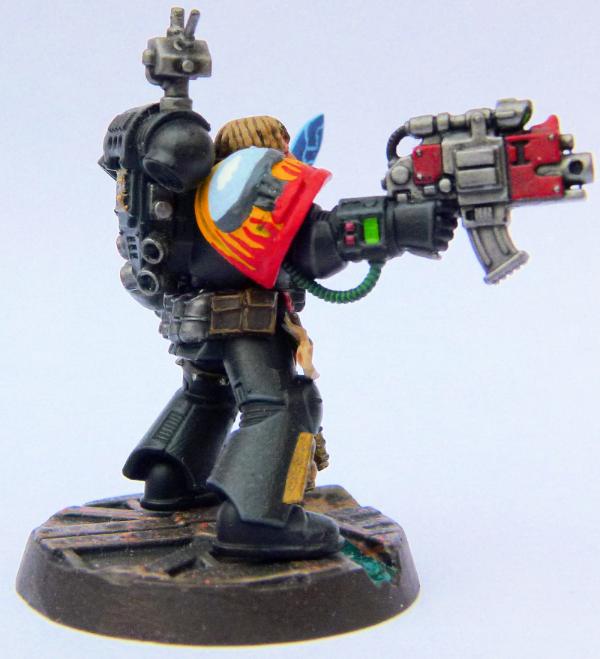
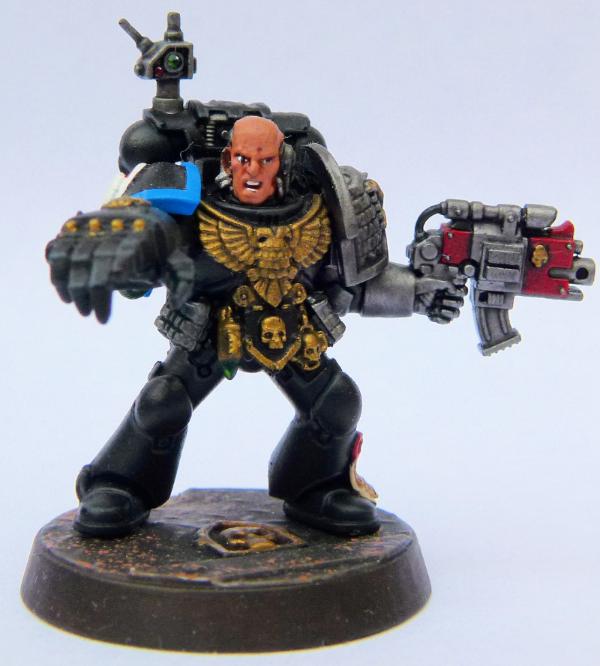
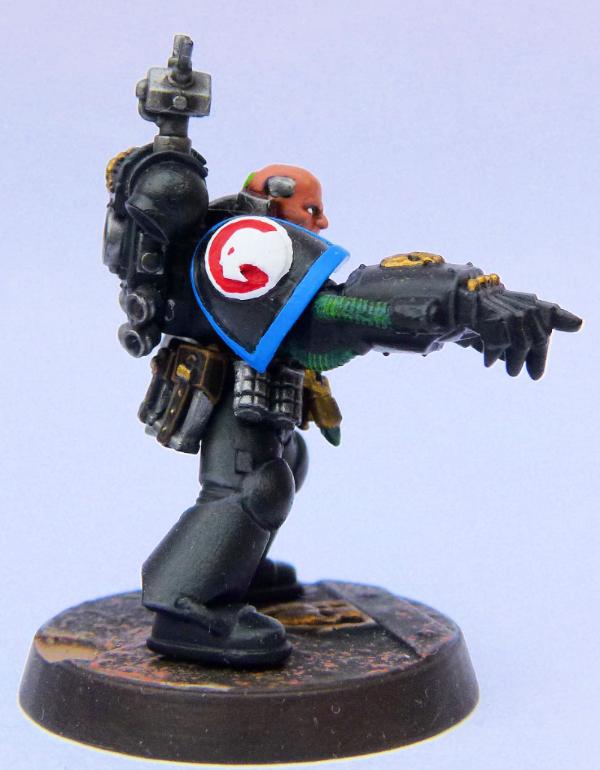
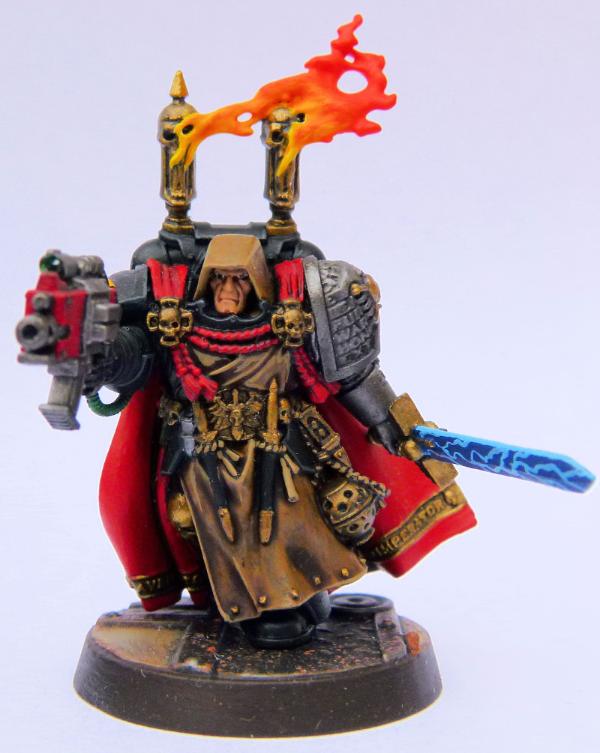
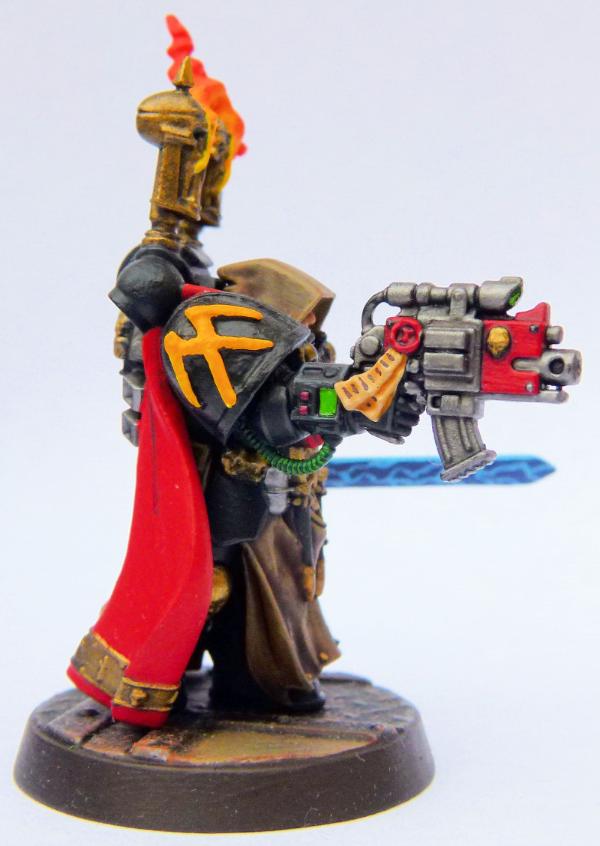
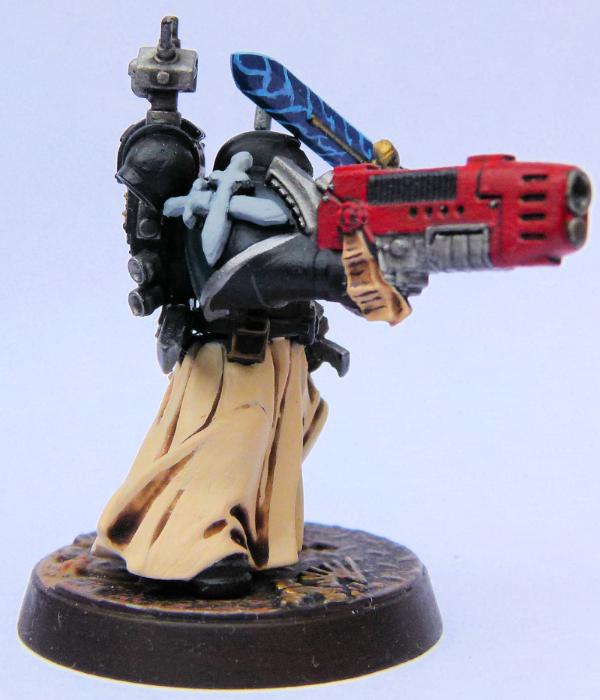
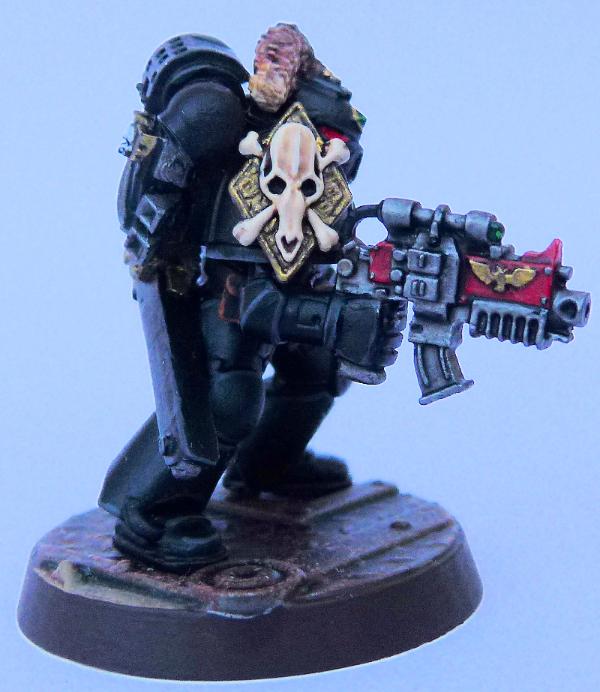
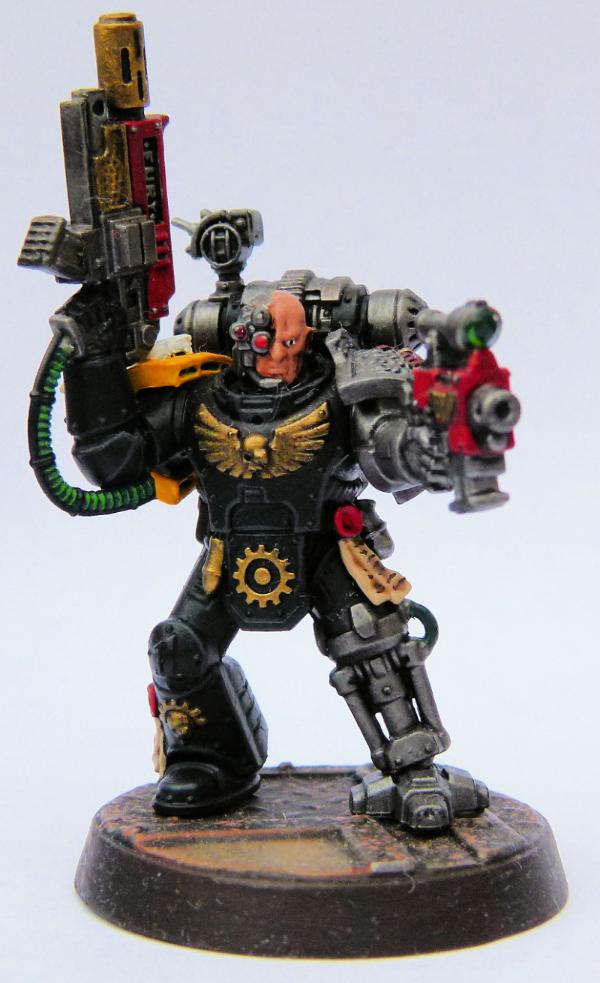
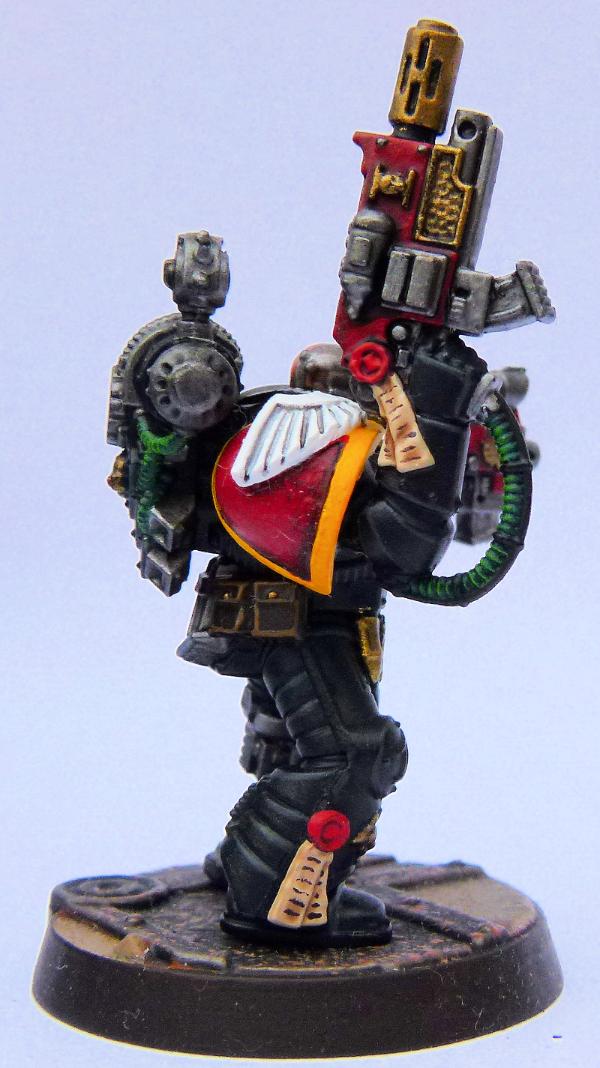
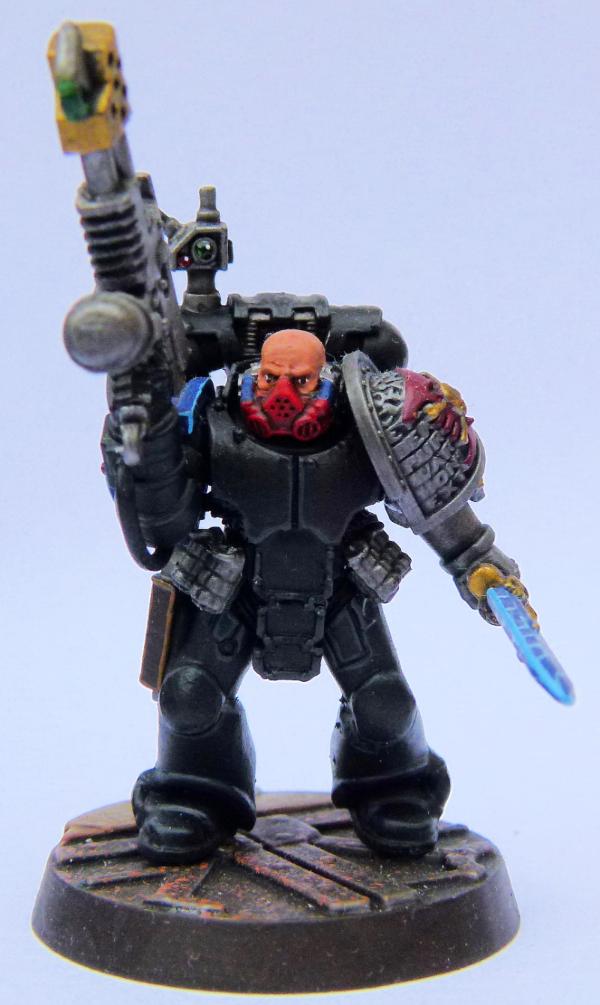
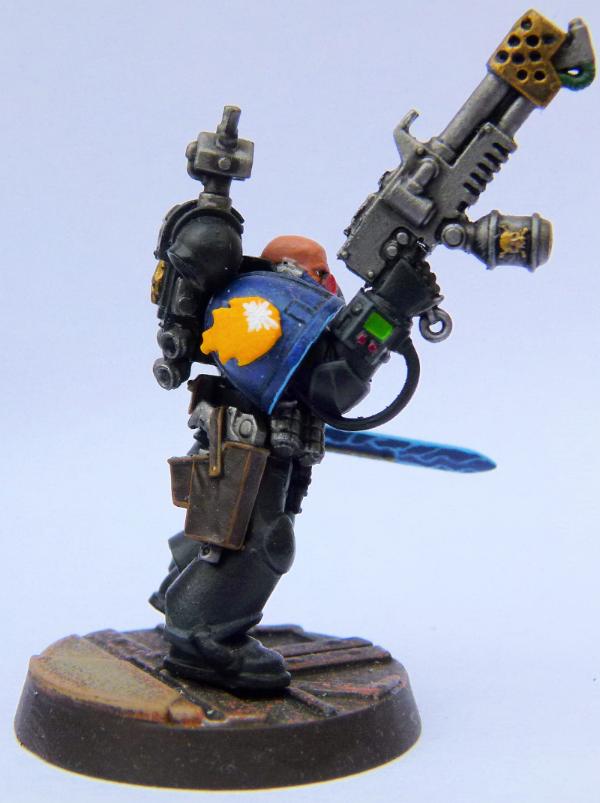
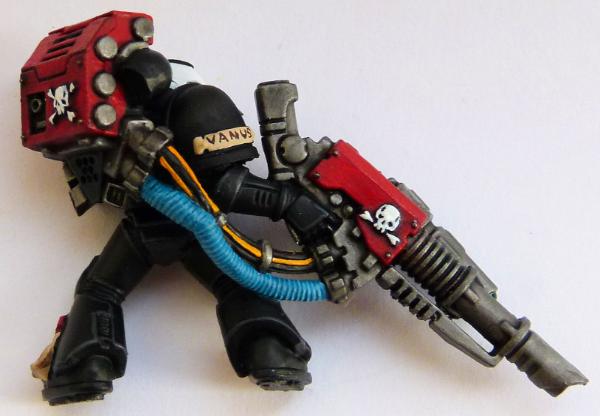
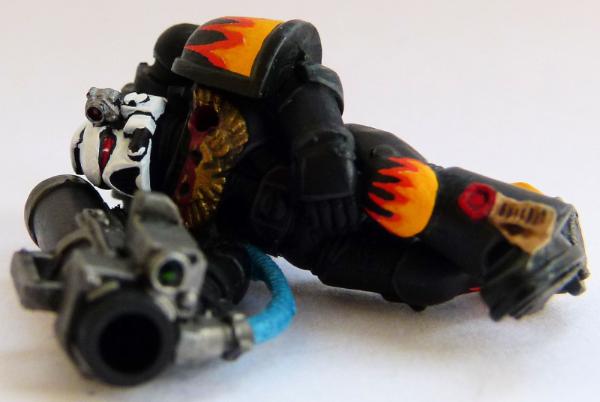
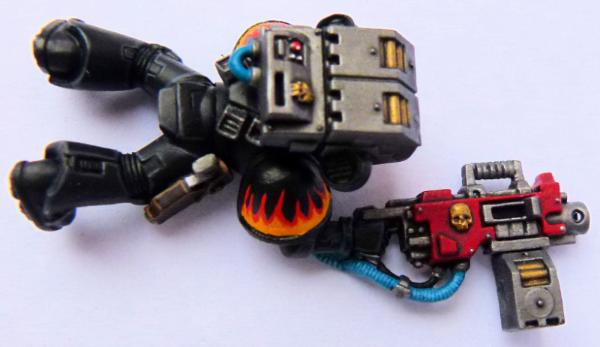
Wow! Loving all the Deathwatch marines. Kudos for all the awesome customer shoulder pads, they look brilliant.
EDC
|
|
|
|
|
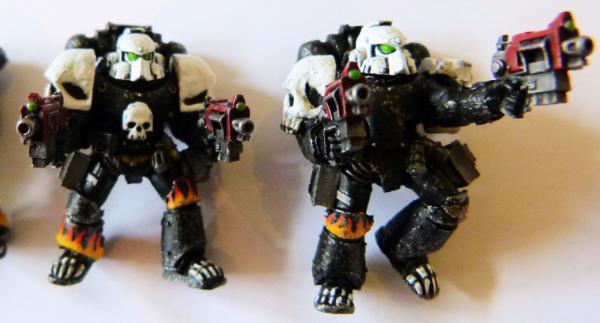
2017/03/25 20:13:47
Subject: Re:Philmorgan75's workshop blog - Legion of the Dead
|
|
Regular Dakkanaut
|
New Deathwatch Shoulder Pads ready to use....
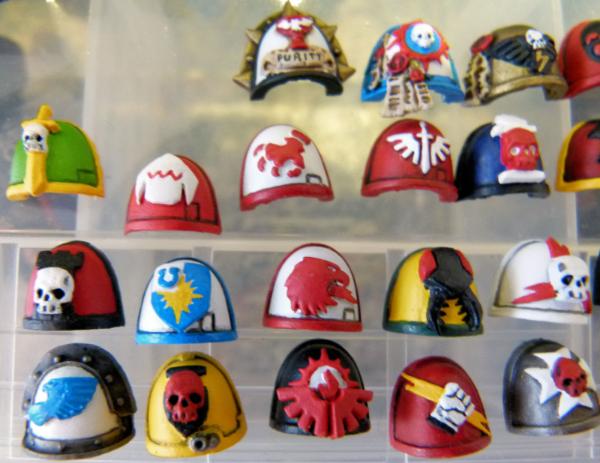
Top Row: Absolvers, Metamarines, Doom Warriors
Second Row: Warmongers, Flesh Eaters, Crimson Talons, Angels Redeemed, Nightwatch
Third Row: Crimson Castellans, Praetors of Orpheus, Storm Hawks, Mantis Warriors, Storm Lords
Bottom Row: Eagle Warriors, Emperor's Shield, Consecrators, Rampagers, Dark Brotherhood
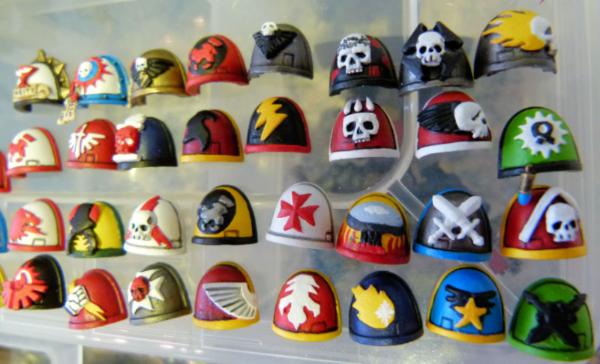
Top Row: Absolvers, Metamarines, Doom Warriors, Red Talons, Doom Eagles, Angels Penitent, Iron Champions, Imperial Harbingers
Second Row: Crimson Talons, Angels Redeemed, Nightwatch, Blackwing, Storm Callers, Carmine Blades, Angels of Fury, Aurora Chapter
Third Row: Storm Hawks, Mantis Warriors, Storm Lords, Iron Talons, Hospitaliers, Firehawks, Astral Knights, Heralds of Vengeance
Bottom Row: Consecrators, Rampagers, Dark Brotherhood, Emperor's Hawks, Imperial Talons, Marines Errant, Heralds of Ultramar, Emperor's Warbringers
38 painted Chapter Shoulder pads ready to be used on the next tranche of veterans!!!!
|
|
|
|
|
|
2017/03/28 20:13:20
Subject: Re:Philmorgan75's workshop blog - Legion of the Dead
|
|
Regular Dakkanaut
|
|
|
|
|
|
|
2017/04/10 18:25:02
Subject: Re:Philmorgan75's workshop blog - Legion of the Dead
|
|
Regular Dakkanaut
|
|
|
|
|
|
|
2017/06/03 21:20:42
Subject: Re:Philmorgan75's workshop blog - Legion of the Dead
|
|
Regular Dakkanaut
|
|
|
|
|
|
|
2017/06/04 08:11:24
Subject: Re:Philmorgan75's workshop blog - Legion of the Dead
|
|
Regular Dakkanaut
|
|
|
|
|
|
|
2017/10/29 16:20:28
Subject: Re:Philmorgan75's workshop blog - Legion of the Dead
|
|
Regular Dakkanaut
|
|
|
|
|
|
|
2017/10/30 19:02:52
Subject: Re:Philmorgan75's workshop blog - Legion of the Dead
|
|
Regular Dakkanaut
|
Dead Devastator Squad
Here's the group shot of all the dead Devastator squad I completed today:
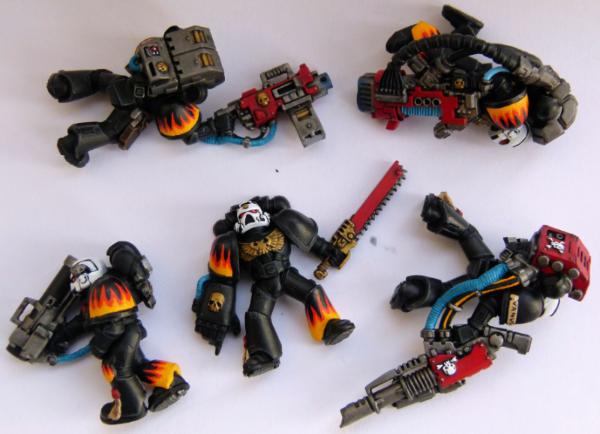
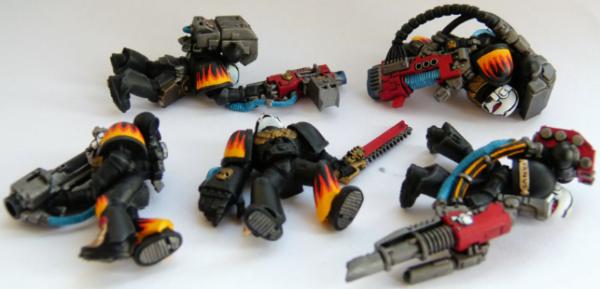
Individual shots:
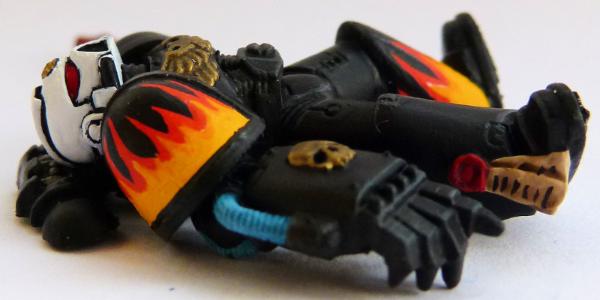
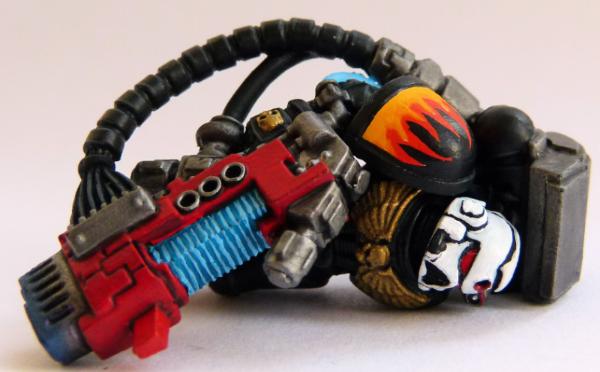
I used milliput to ensure I sculpted grips on the feet of all of the Space Marines.
Dead Heretics
Here's a shot of some 40mm bases I've recently finished:
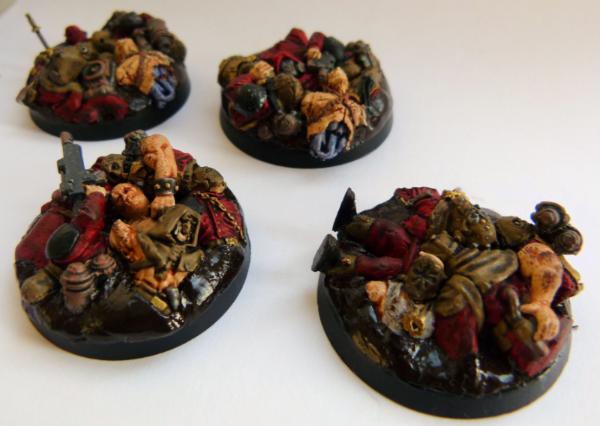
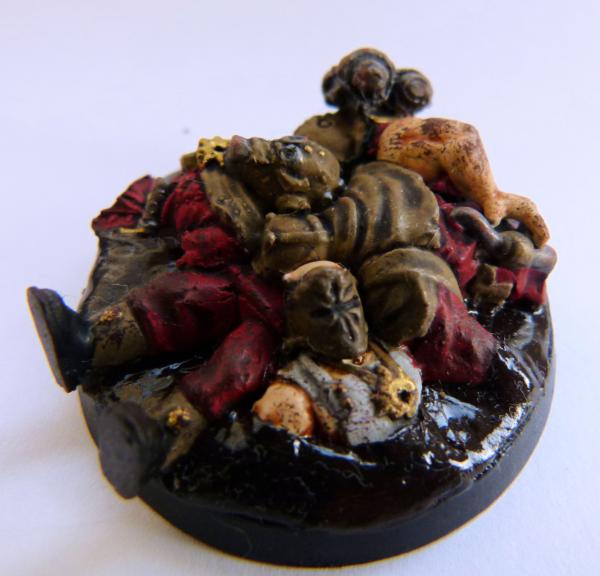
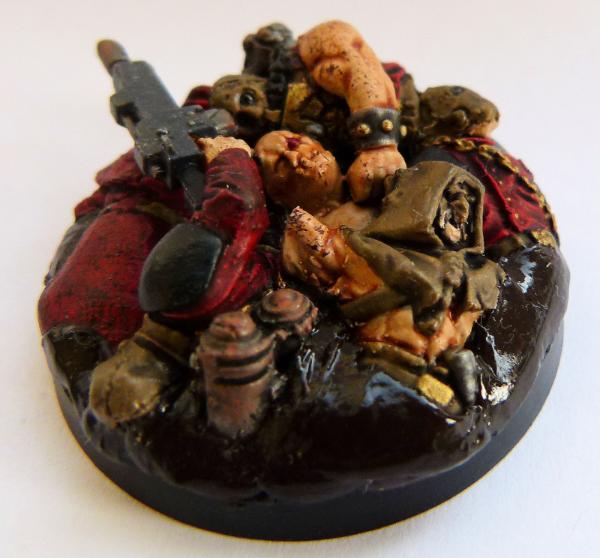
I had great fun making these from a mixture of Dark Vengeance, FW resin renegades, GW Cadian and Catachan parts and lots of milliput. My plan is (when I decide which model is going to be standing on the base) to dremel out where their feet will be placed to look like they have crushed the dead heretics underfoot!!!!
I also finished making a couple of dead heretics to be strewn on other bases:
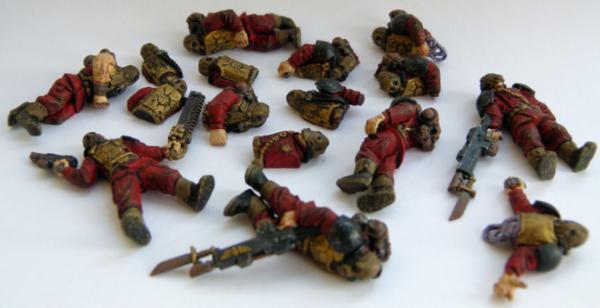

I particularly like the entrails on these heretics! Let me know if you want any further shots.
Dead Tyranids
Some road kill I've completed over the past 2 years:

Hope you enjoy!!
|
|
|
|
|
|
2018/06/02 13:23:24
Subject: Re:Philmorgan75's workshop blog - Legion of the Dead
|
|
Regular Dakkanaut
|
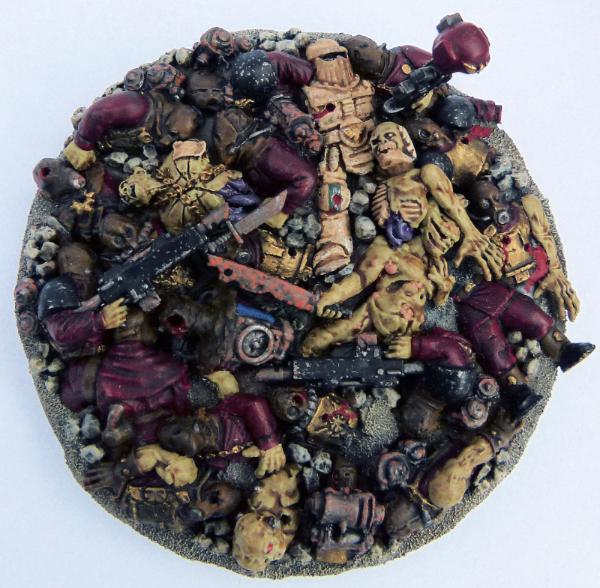
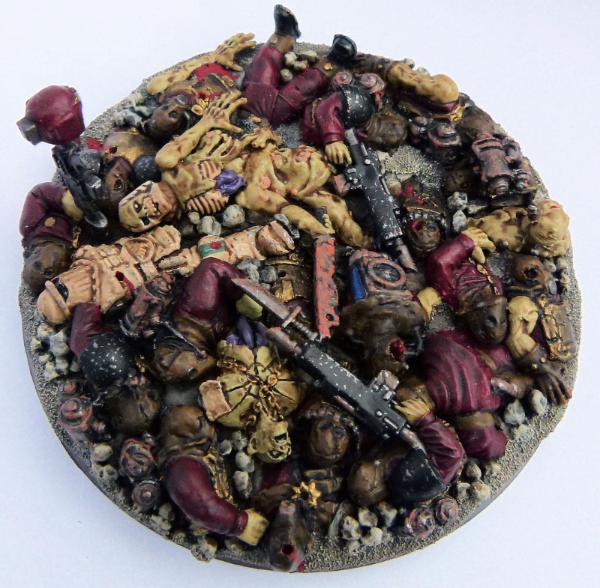
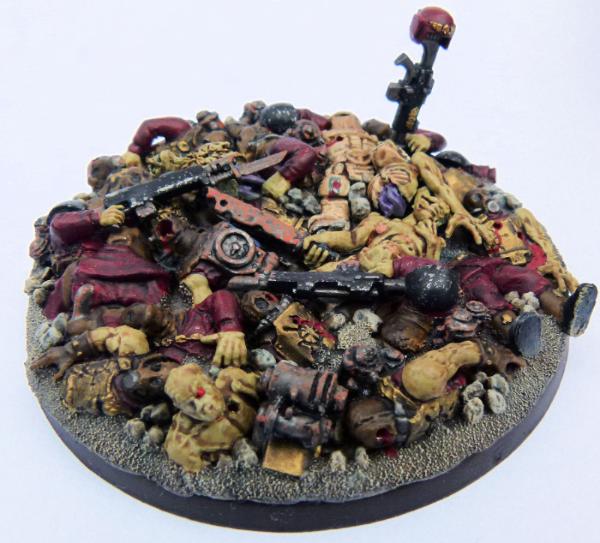
Thought I'd share a few bases I've been working on recently:
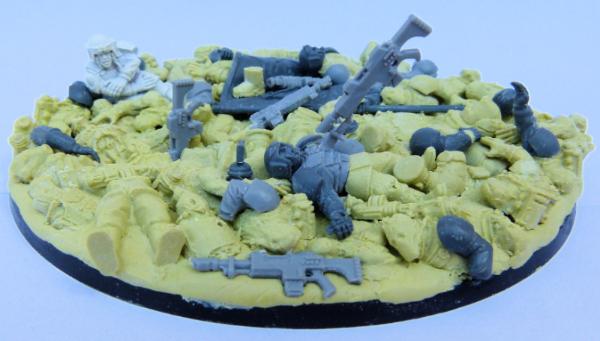
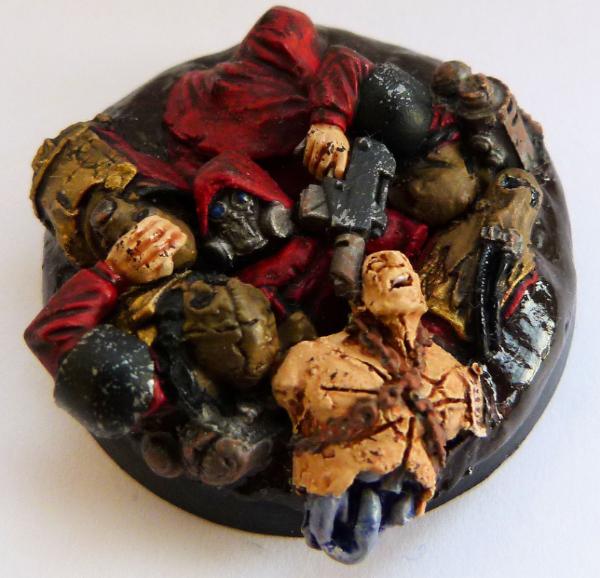
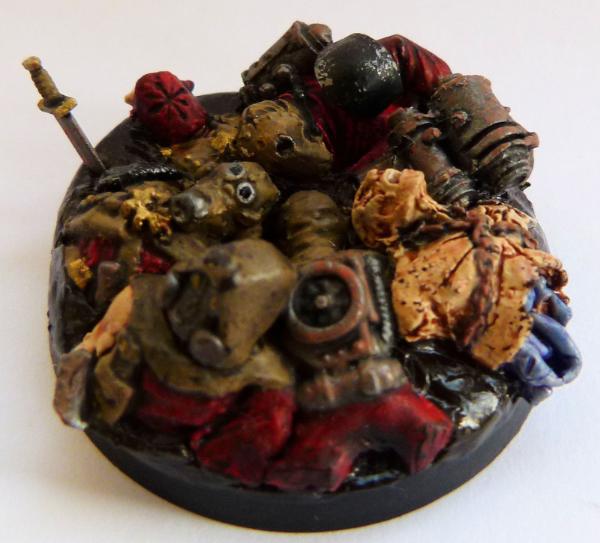
Overtime, I have made a few moulds of Imperial guard and FW Chaos Renegades and having read a lot of Siege of Vraks, I wanted to see if I could show a battlefield littered with dead bodies. I chose a large flyer base and after making numerous copies of different bodies, legs etc, I created this.....
The lone surviving Cadian is in the top left hand corner looking forlornly at all death he is surrounded by and praising the Emperor for letting him survive! I enjoy little things for example the lone boot on the flag and the Cadian that has been baynotted to death in the foreground.
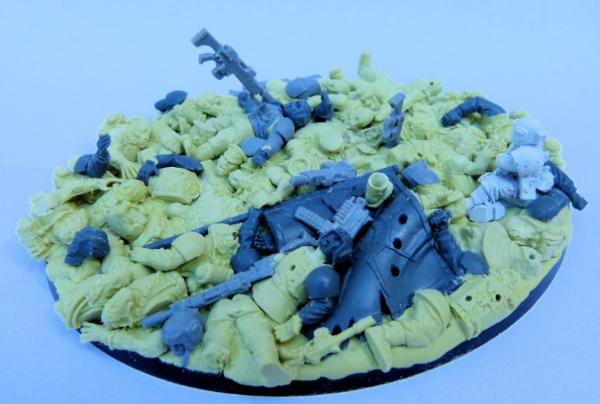
I'm really looking to House Cawdor for Necromunda as they look perfect for Chaos renegades - more scum to be trampled upon on future bases!
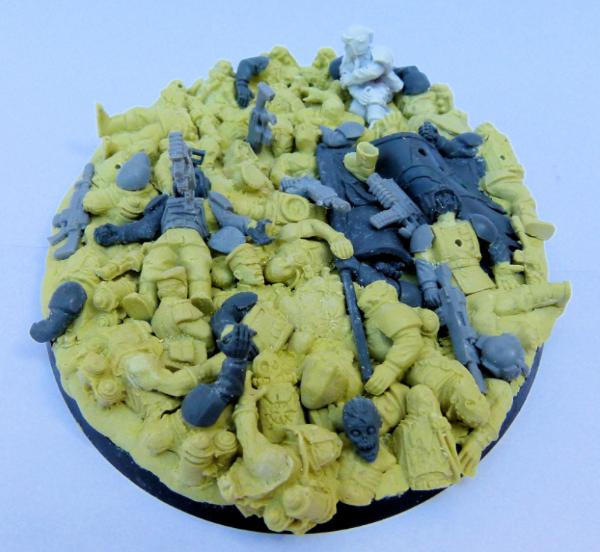

This should be a lot of fun painting up using similar colour scheme to my landspeeder base:
I'll post some more pictures in the near future.
|
|
|
|
|
|
2018/06/02 14:24:57
Subject: Re:Philmorgan75's workshop blog - Legion of the Dead
|
|
Regular Dakkanaut
|
|
|
This message was edited 2 times. Last update was at 2018/06/02 14:56:58
|
|
|
|
|
2018/06/02 14:54:51
Subject: Re:Philmorgan75's workshop blog - Legion of the Dead
|
|
Regular Dakkanaut
|
|
|
This message was edited 2 times. Last update was at 2018/06/02 16:18:43
|
|
|
|
|
|
|