| Author |
Message |
 |
|
|
|
|
Advert
|
Forum adverts like this one are shown to any user who is not logged in. Join us by filling out a tiny 3 field form and you will get your own, free, dakka user account which gives a good range of benefits to you:
- No adverts like this in the forums anymore.
- Times and dates in your local timezone.
- Full tracking of what you have read so you can skip to your first unread post, easily see what has changed since you last logged in, and easily see what is new at a glance.
- Email notifications for threads you want to watch closely.
- Being a part of the oldest wargaming community on the net.
If you are already a member then feel free to login now. |
|
 |
2014/11/03 00:29:51
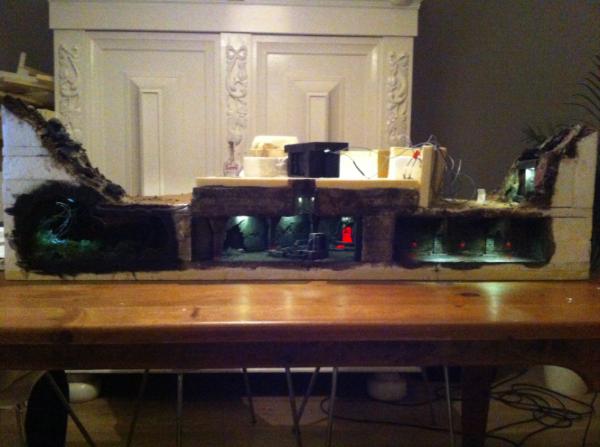
Subject: WIP - A typical Fenrisean summer temple fortress and city ruins with a river, bridge and lights
|
|

Longtime Dakkanaut
|
Subbed. Your work is awesome.
|
|
|
|
 |
|
2014/11/03 17:37:17
Subject: WIP - A typical Fenrisean summer temple fortress and city ruins with a river, bridge and lights
|
|
Furious Fire Dragon
|
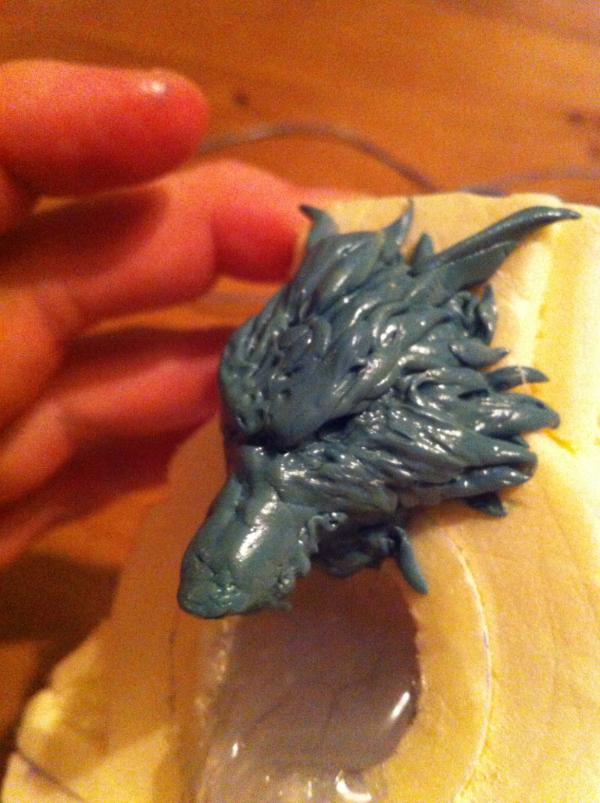
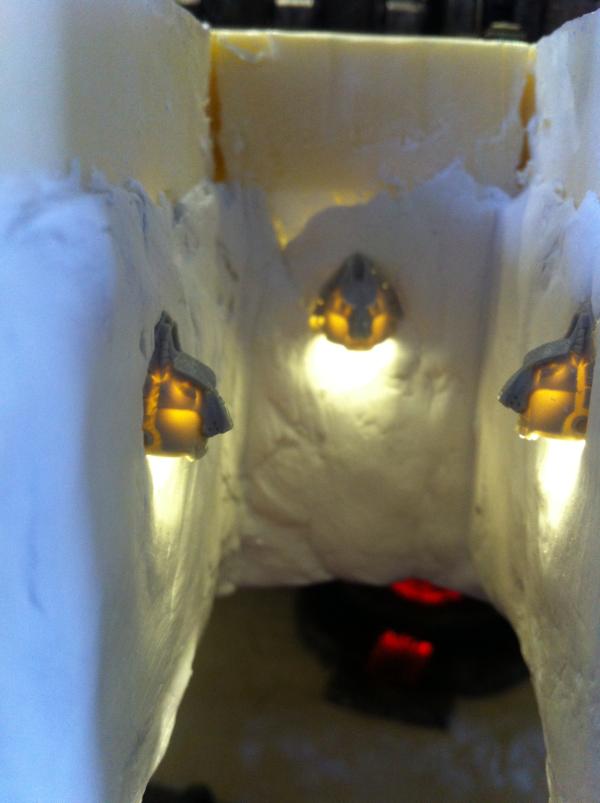
Did you make molds for those wolf heads? You've called them "Tomb cave mountain ornaments" in your gallery. they're brilliant. I could see them being very popular for SW players to scatter around their table or even make objective markers out of.
|
|
|
|
|
|
2014/11/03 18:51:11
Subject: WIP - A typical Fenrisean summer temple fortress and city ruins with a river, bridge and lights
|
|

Stealthy Grot Snipa
|
I think i need to ban myself from this thread.... i just started to amazon for cheap foam board.... i spend enough time on my 40k hobby that i really really cant get into scenery... but the more i look the more ideas i have! damn your inspirational work! stop being so inspiring!  perhaps post some really crap scenery to un-inspire me?
I agree about the crashed plane as a bridge! that would be unbelievably epiic! definitely have moss growing into it from below and the stream for sure! would allow you to play so many inspired missions. maybe the space wolves are attempting to rescue a relic it was carrying? or maybe it was shot down just bwfore it could reach the hangar and his unit could start there? so many possibilities.
hmm how good are your electronic skills? as i see you use leds to great effect, but with a little extra work you could really make them unbelievable. i myself am an electronics engineer and am working in a few more ways to include more into my hobby.
examples would be for you: it would be reasonably easy to not only make that magma glow, but it could pulse, with a mix of red and yellow leds give the effect of the surface below flowing. That would only require a couple transistors and a couple more resistors than what youd currently be using for just red. another easy thing would be having the lights at the gate flicker every once in awhile. like how old street lamps do.
anyway! i need to get back on topic before i get too excited! excellent work mate keep it up 
|
Favourite Game: When your Warboss on bike wrecks 3 vehicles simply by HoW - especially when his bike is a custom monowheel.
|
|
|
|
|
2014/11/05 00:44:34
Subject: Re:WIP - A typical Fenrisean summer temple fortress and city ruins with a river, bridge and lights
|
|

Speedy Swiftclaw Biker
|
|
|
This message was edited 2 times. Last update was at 2014/11/05 13:22:55
|
|
|
|
|
2014/11/05 08:10:30
Subject: WIP - A typical Fenrisean summer temple fortress and city ruins with a river, bridge and lights
|
|

Longtime Dakkanaut
|
Excellent.
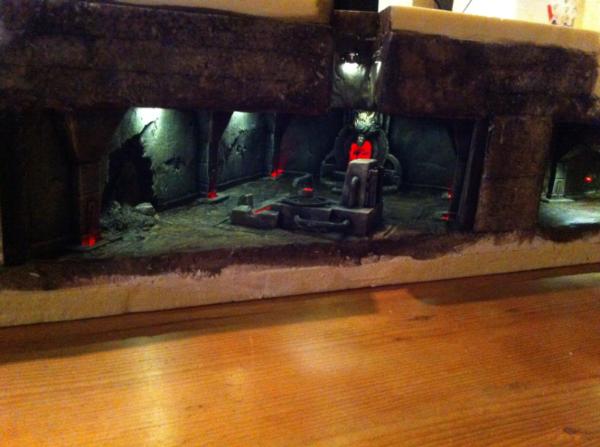
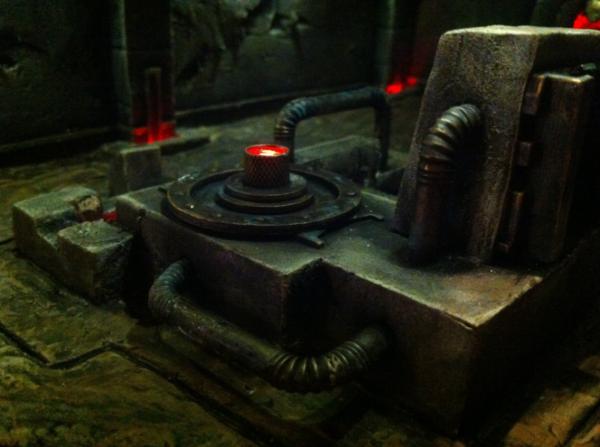
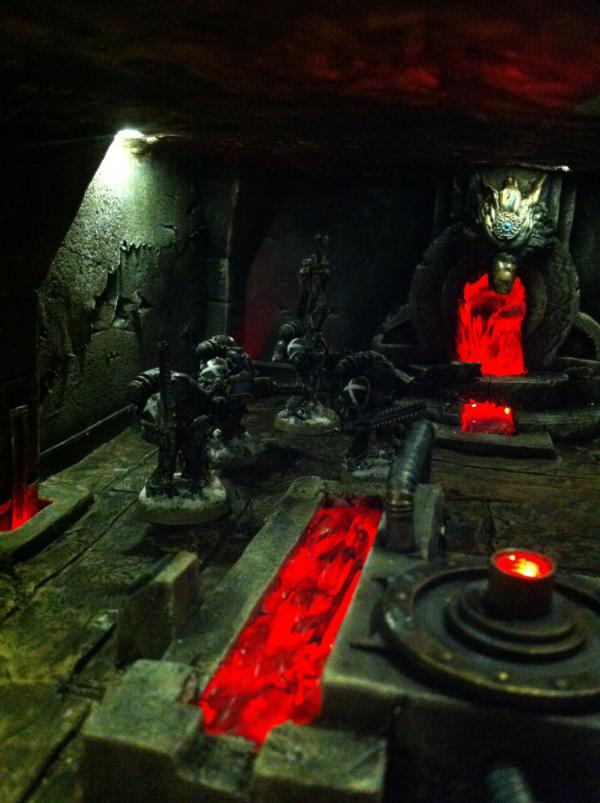
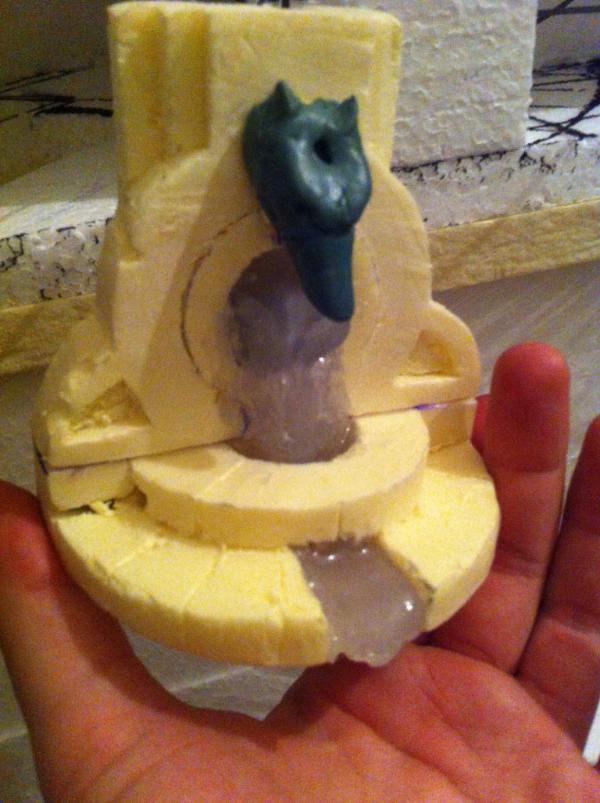
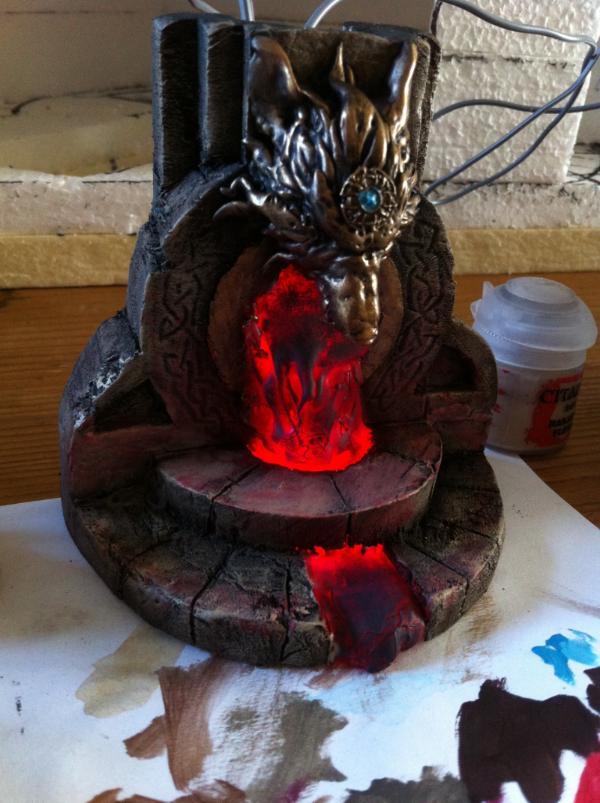
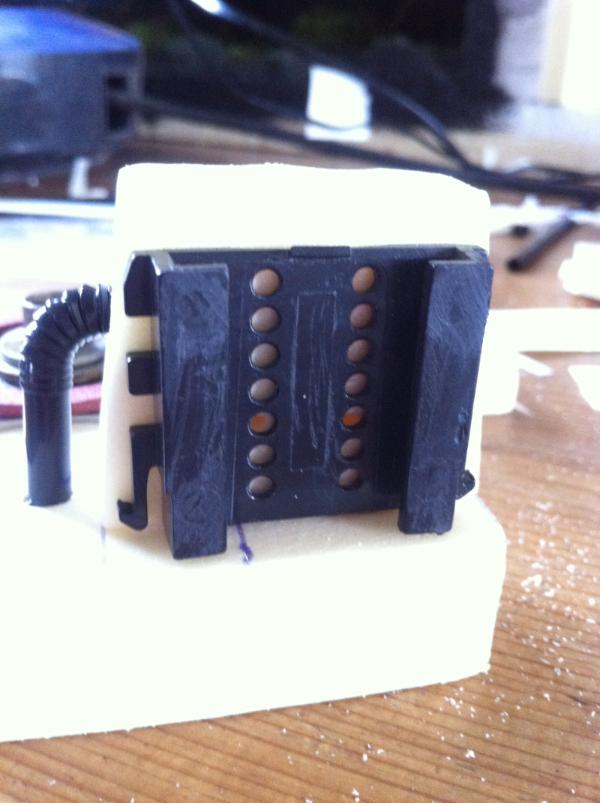
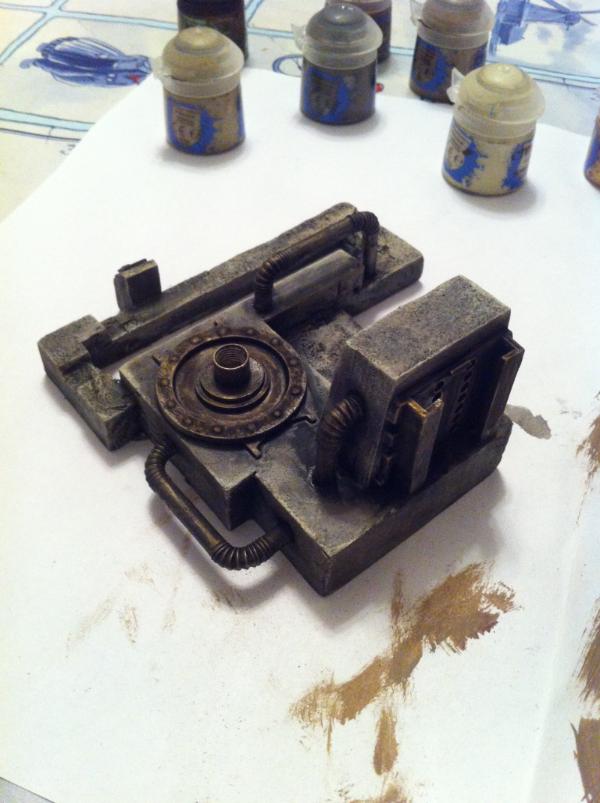
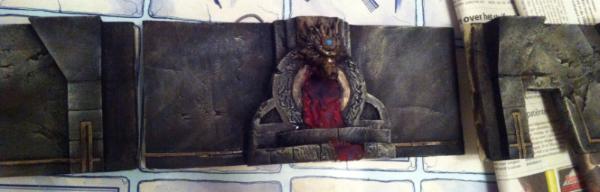
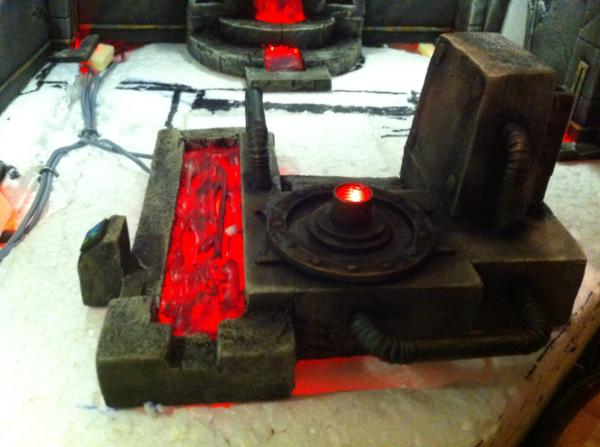
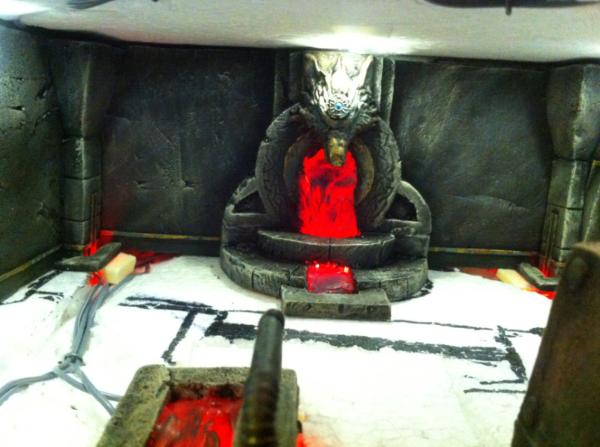
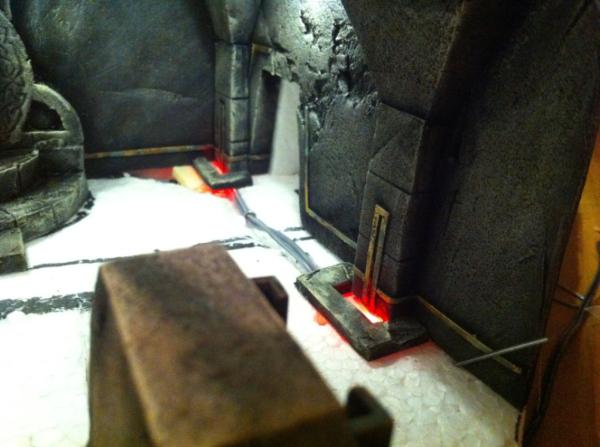
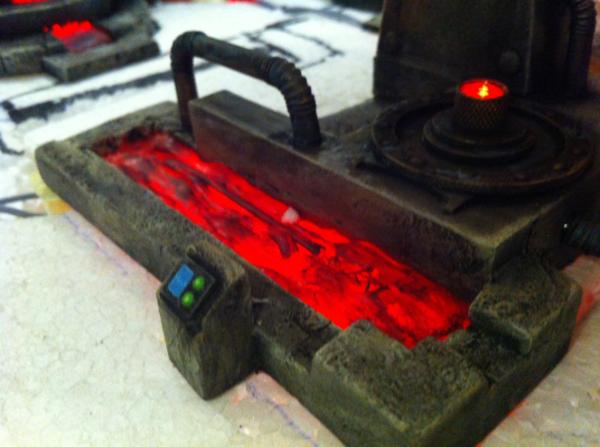
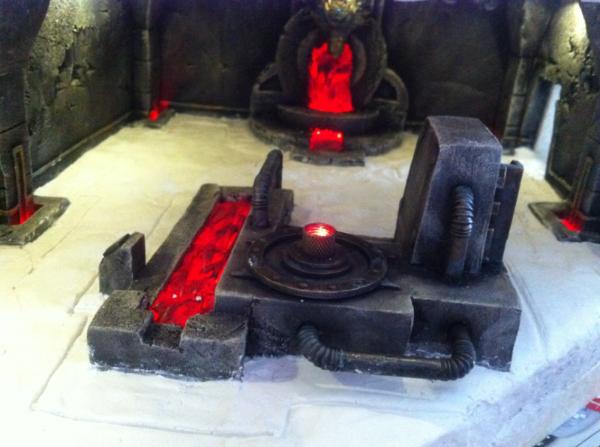
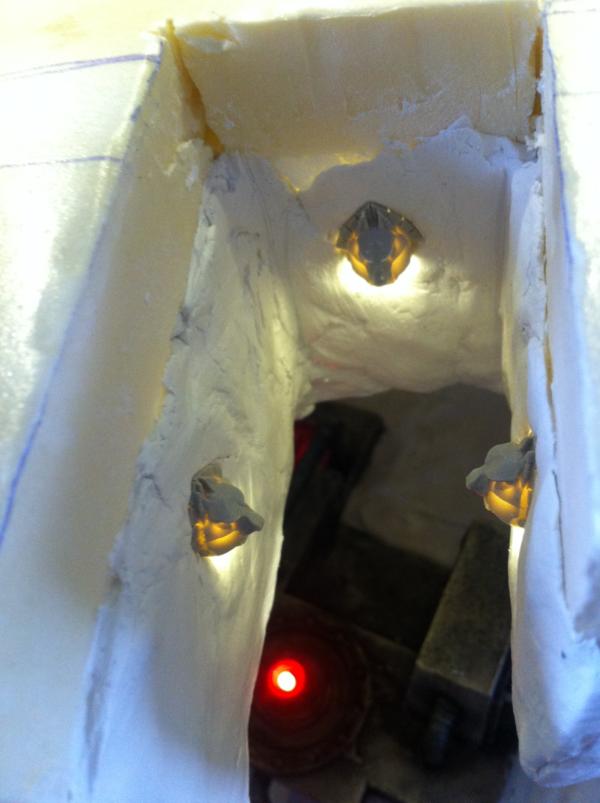
It's really good in general, but your forge suffers from the "Yoghurt Pot Syndrome", where people just recognize an everyday household item and the effect is ruined.
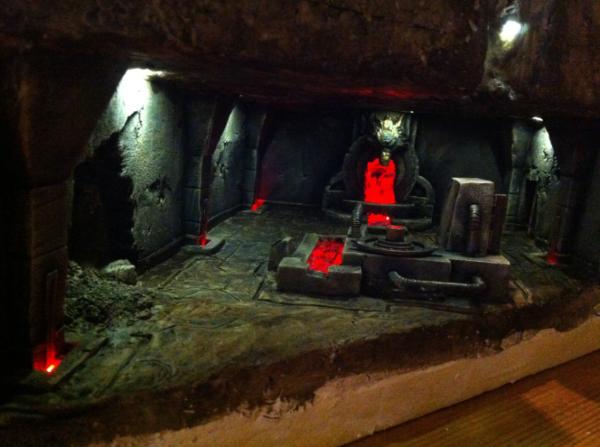
I would change the straw pipes by something more professional (think plasticard rod bent with heatgun + thin plasticard detail maybe), and add some texture to the centerpiece, which looks like my airbrush hose connector at the moment.
Other than that the atmosphere is badass and your camera looks like my phone camera, i.e. does not do justice to your work 
I've had better luck with my GF's digital camera - somewhat more recent, in the €200-300 band IIRC, it does better on tiny things and low light.
If pictures are important to you (i.e. you need to show your work), I would advise a cheap tripod so that you can just get any picture you need no matter the light level too.
|
|
This message was edited 1 time. Last update was at 2014/11/05 08:10:59
|
|
|
|
|
2014/11/05 10:24:10
Subject: Re:WIP - A typical Fenrisean summer temple fortress and city ruins with a river, bridge and lights
|
|
Speedy Swiftclaw Biker
|
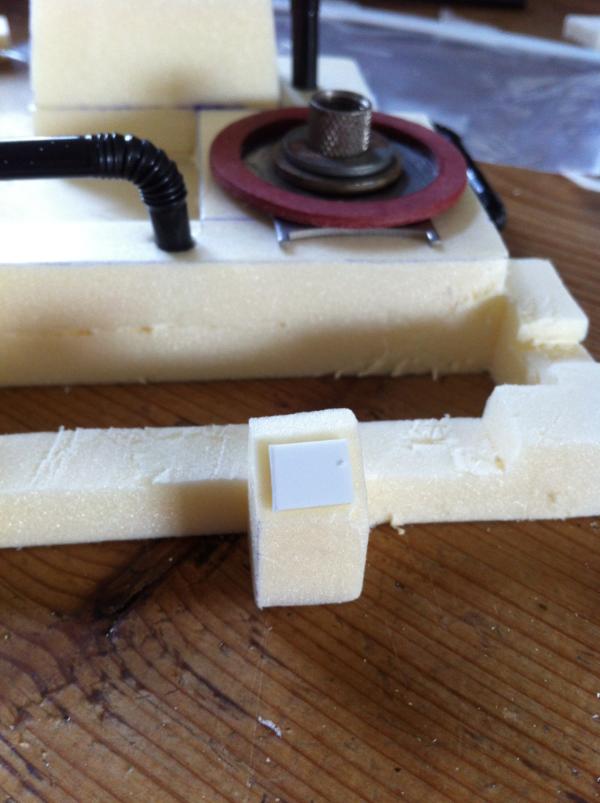
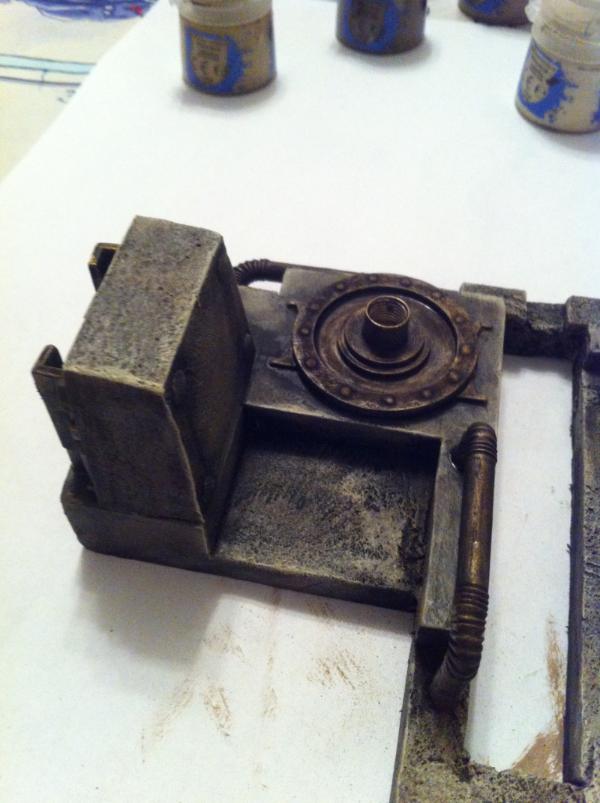
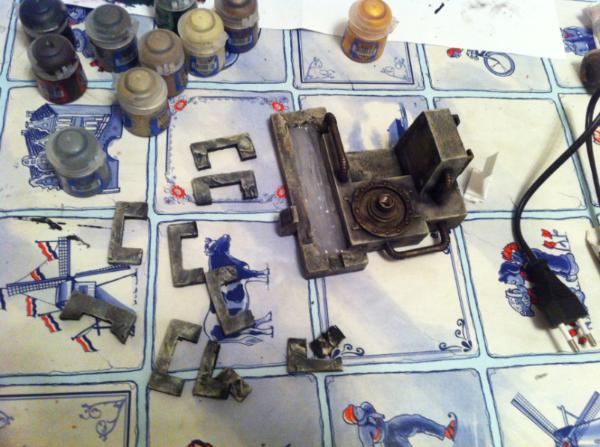
Yes, Thank you Morgoth! Good suggestions and I will go work on it as soon as possible! - I will look for a different piece to use as pipes.. - I had already planned to add some smokey effects that come from the forge compressor piece (which is actually a bicycle ventil glued on to some metal rings) to add the texture and detail. WIP images on the progress will follow quickly in adjacent posts. Thanks for you concern about the "bad" camera: Yes that is a phone camera  . I have a pro cannon camera with pro lenses though, but this was at 12 o' clock in the evening and I had no intention to go pro on my WIP images at that time. Just was interested in sharing the work with you guys as soon as possible, but If you guys need better quality images to give comments I will gladly make them and post them. . After the board is done my uncle Marc Jacobs, who is a professional photographer, will take pictures of the entire board for my portfolio. I'm also looking into creating a promo movie of the entire set when I'm done. But first I need to finish the boards  "Duurtlang" as we would say in Holland. So don't worry, this is just to involve you guys in the design and building process and to give you a quick inside view on the progress.
|
|
This message was edited 5 times. Last update was at 2014/11/05 13:23:23
|
|
|
|
|
2014/11/05 13:32:13
Subject: WIP - A typical Fenrisean summer temple fortress and city ruins with a river, bridge and lights
|
|
Longtime Dakkanaut
|
Awesome, can't wait for the pictures when it's finished then
|
|
|
|
|
2014/11/05 14:40:20
Subject: Re:WIP - A typical Fenrisean summer temple fortress and city ruins with a river, bridge and lights
|
|
Speedy Swiftclaw Biker
|
|
|
This message was edited 5 times. Last update was at 2014/11/05 15:16:16
|
|
|
|
|
2014/11/05 16:45:17
Subject: WIP - A typical Fenrisean summer temple fortress and city ruins with a river, bridge and lights
|
|
Longtime Dakkanaut
|
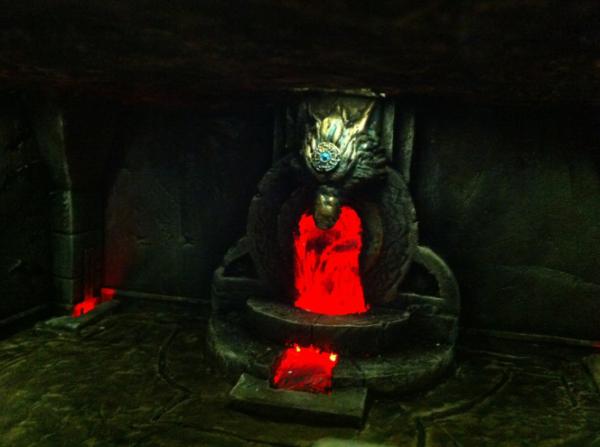
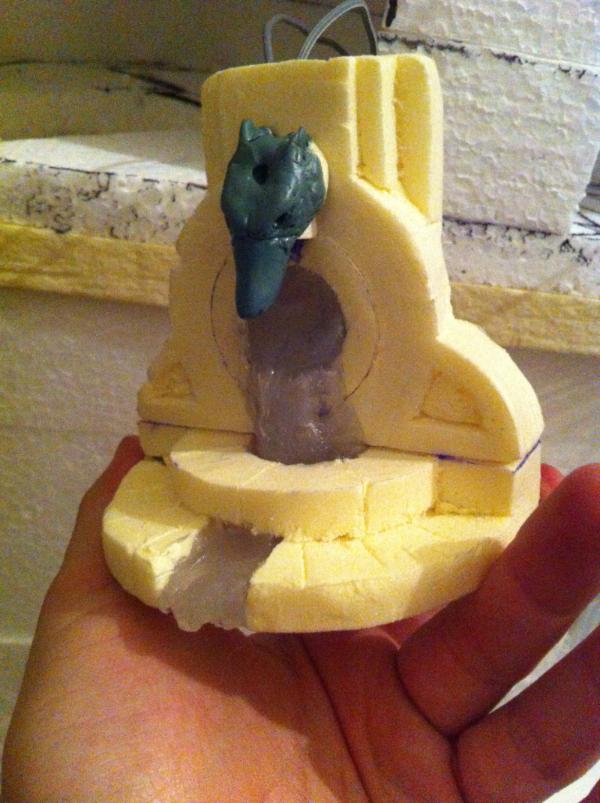
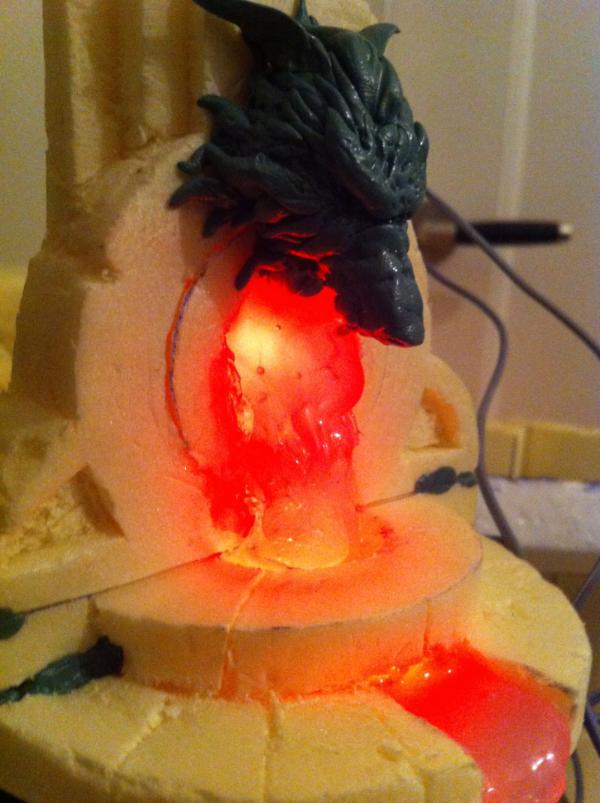
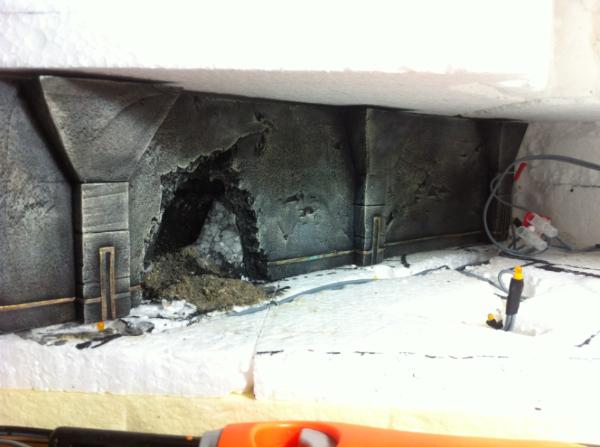
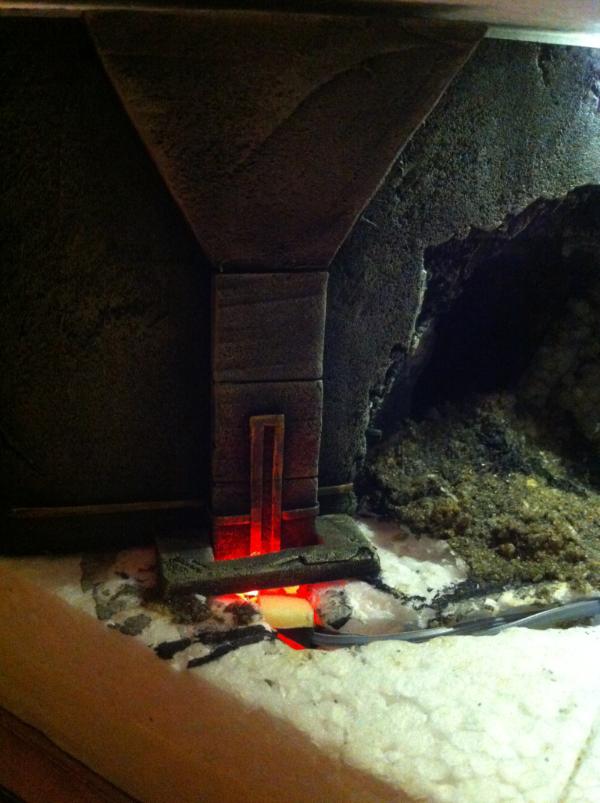
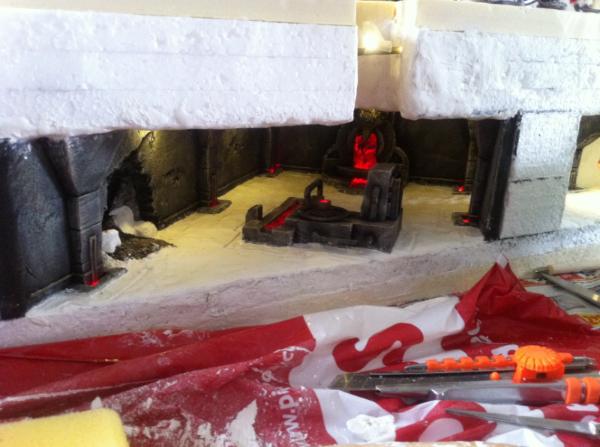
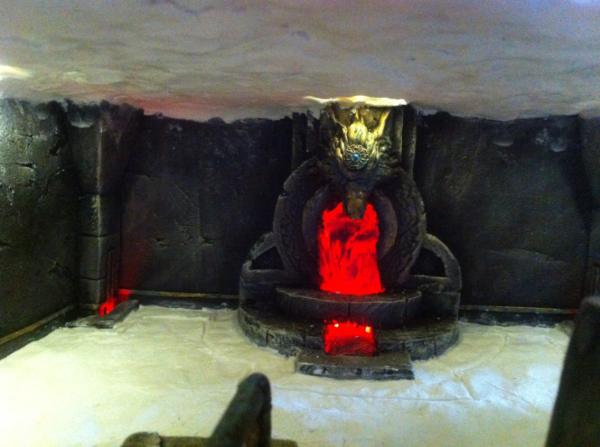
About your issues with the order of painting and the hot glue, I believe you did it in the right order, you may want to check liquid masking film and stuff like that to make your painting easier, if it works for airbrush it should work for this
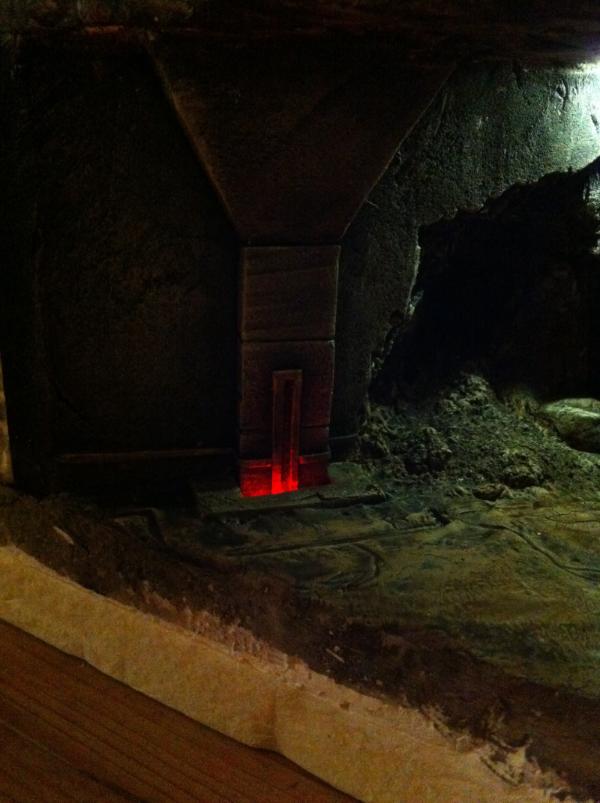
Or you can consider building the piece of multiple parts and have your lava flow built separately, attaching the second flight of stairs afterwards and masking the joints.
If you ever build another lava fountain that is
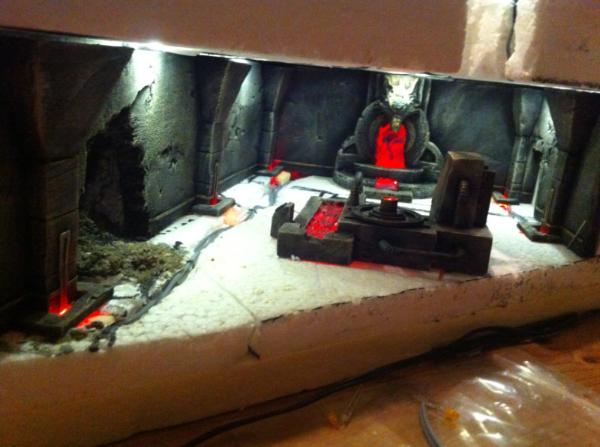
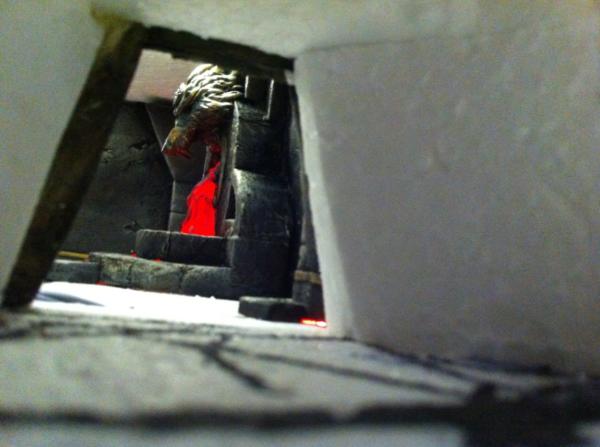
When I look at the piece, it must have been really tricky to get the hot glue in there without overflowing in all the wrong spots.
|
|
This message was edited 1 time. Last update was at 2014/11/05 16:48:31
|
|
|
|
|
2014/11/05 17:27:35
Subject: WIP - A typical Fenrisean summer temple fortress and city ruins with a river, bridge and lights
|
|
Speedy Swiftclaw Biker
|
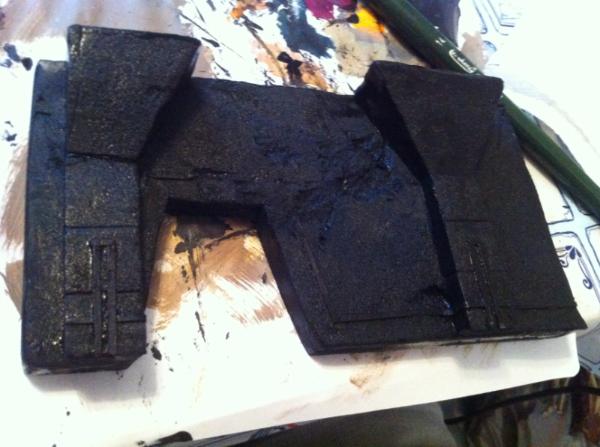
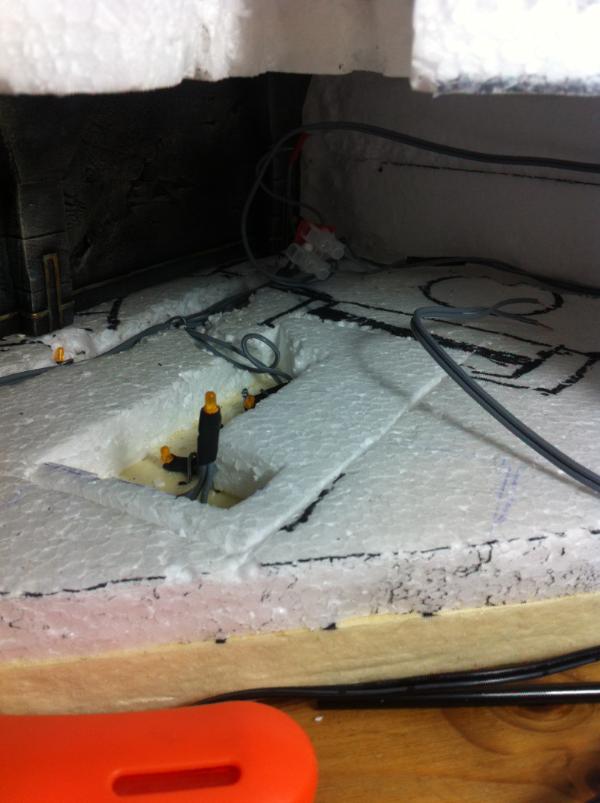
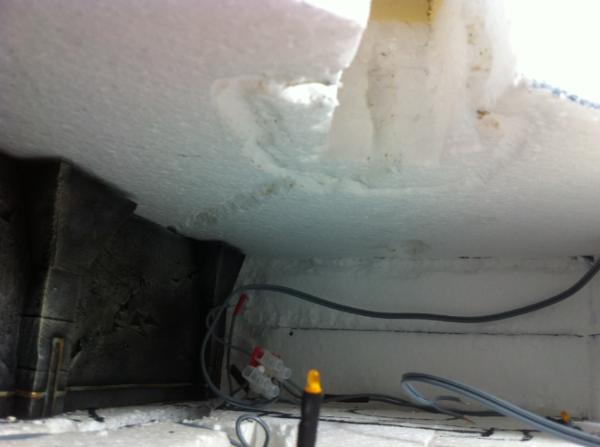
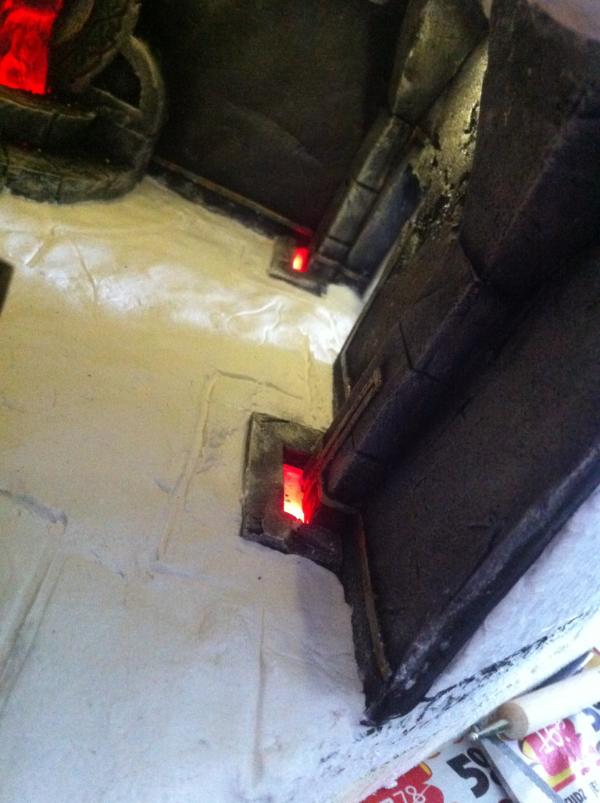
Jup! That was a real tricky part especially because i've already spend allot of time cutting the basic shapes out of the foam.
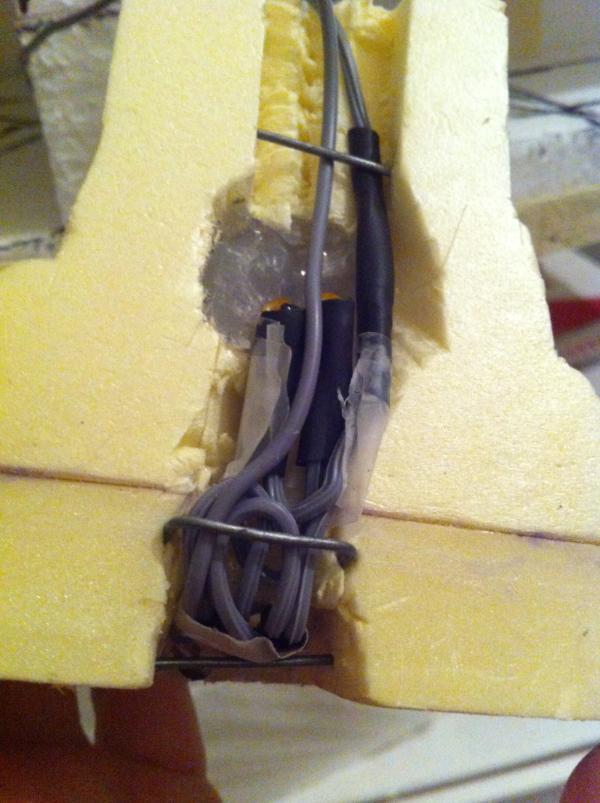
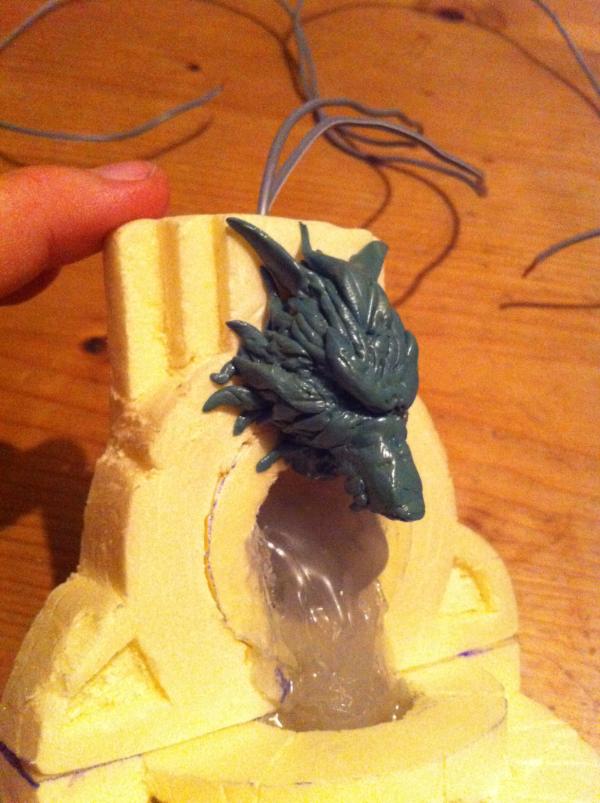
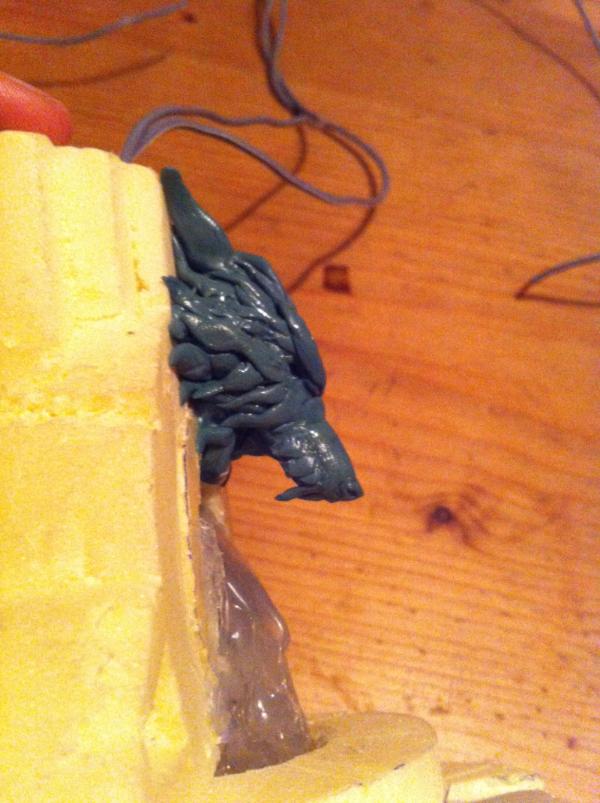
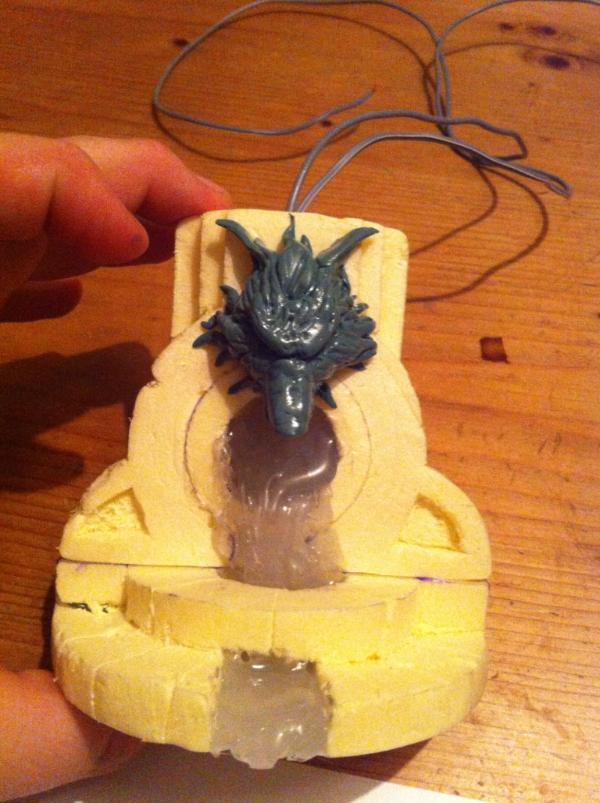
As soon as i'm home from work I'll post the next post on the walls, the lightning works and the clay works.
|
|
|
|
|
|
2014/11/05 17:54:12
Subject: WIP - A typical Fenrisean summer temple fortress and city ruins with a river, bridge and lights
|
|
Jealous that Horus is Warmaster
|
When you finish the board you should do a video battle report
of its first game that would be epic.
Also for another diorama you could do a wolf den with a wolf facing off kraken or other beast made from a trynid.
You could make a chamber for breaking in thunder wolfs zone mortalis door scratches on the walls frescos of russ defeating wolfs rows of saddles.
|
|
|
|
|
2014/11/05 18:31:12
Subject: WIP - A typical Fenrisean summer temple fortress and city ruins with a river, bridge and lights
|
|
Speedy Swiftclaw Biker
|
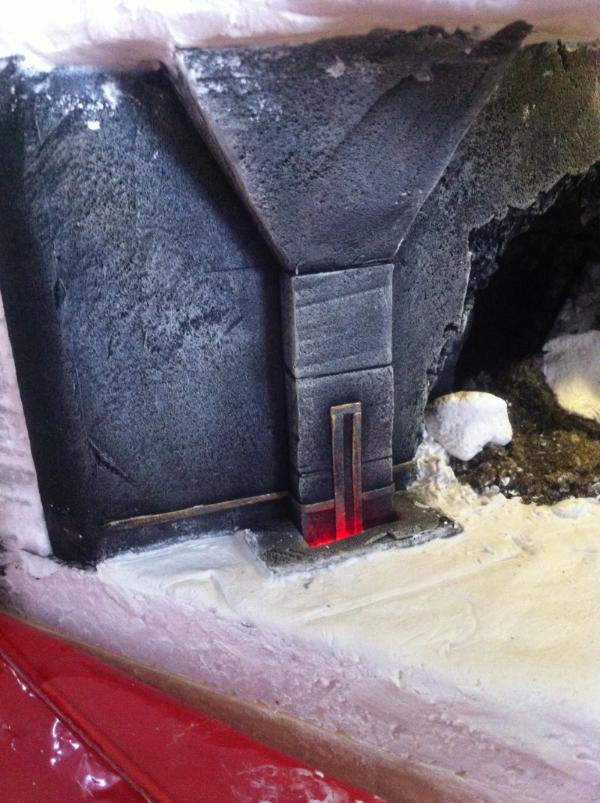
@e.earnshaw: Wowzers dude! Again that is just soooo epical... the door and the claw marks are just sooo spot on! And the fresco's with the russ fighting the kraken. My imagination is running wild right now!
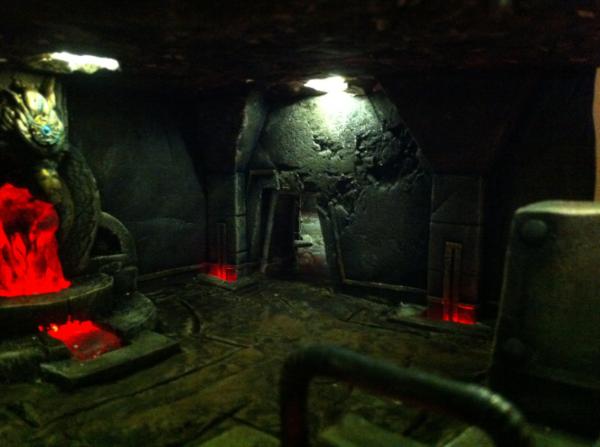
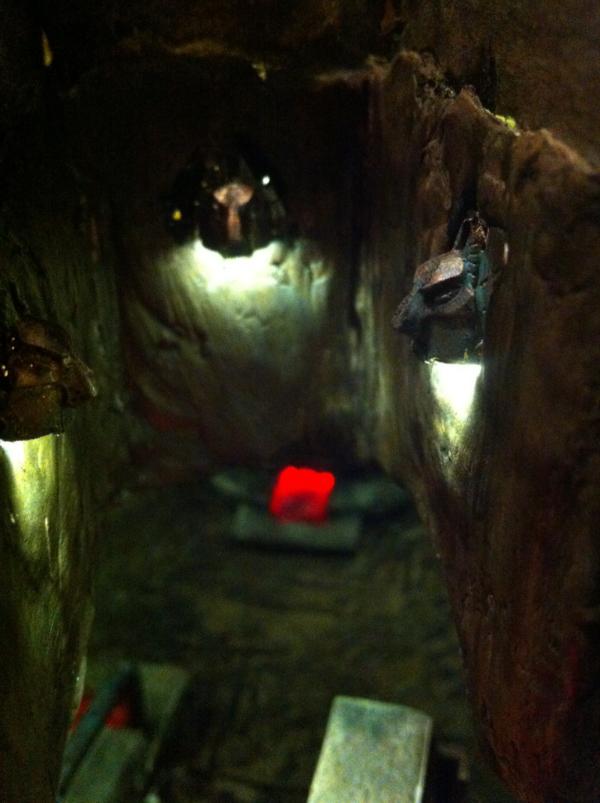
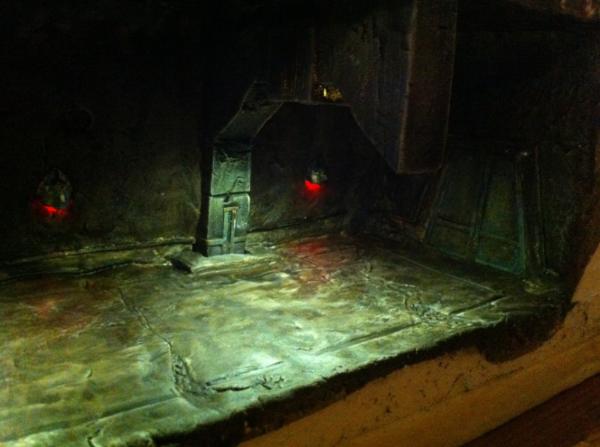
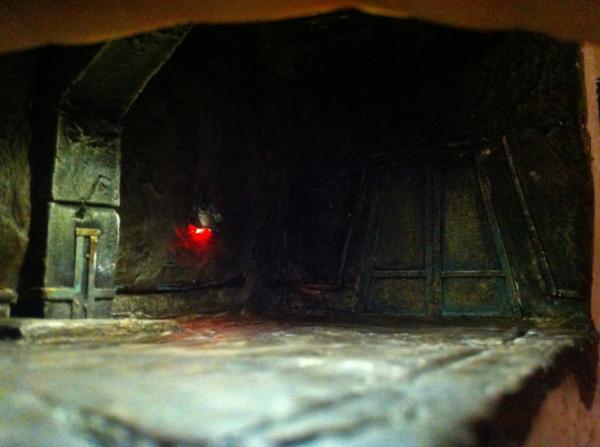
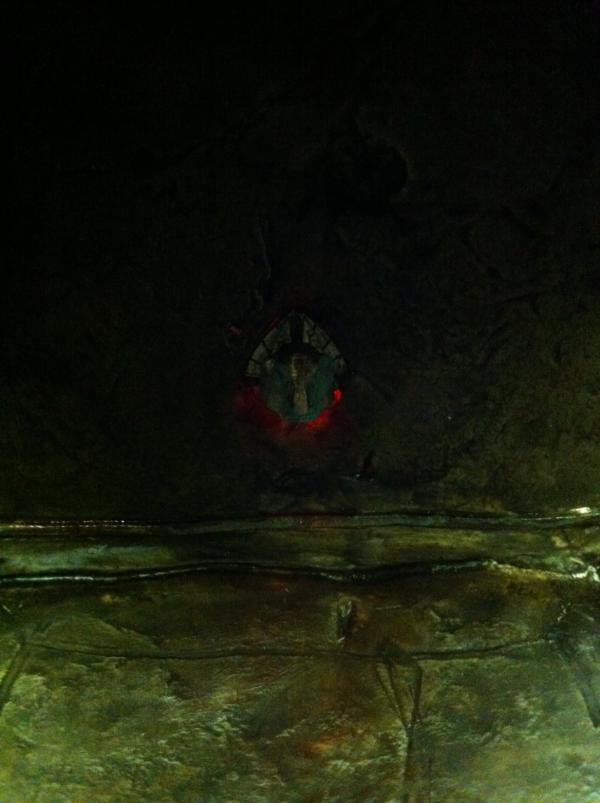
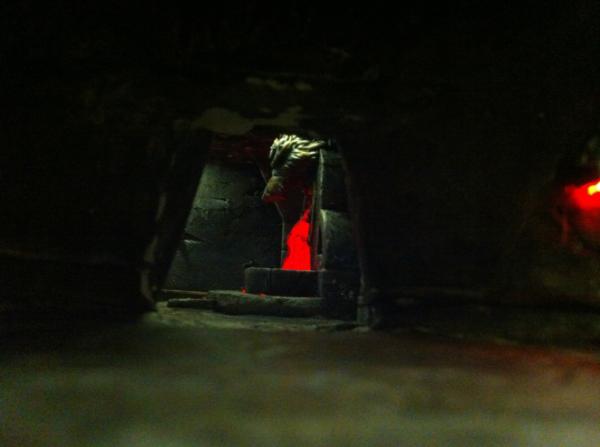
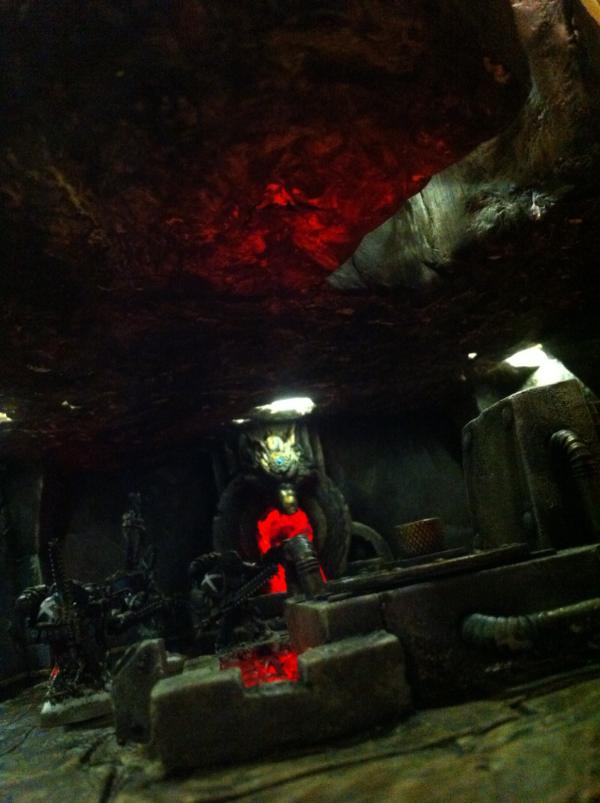
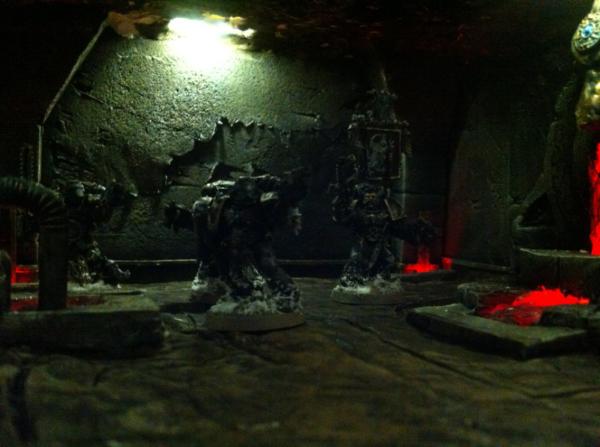
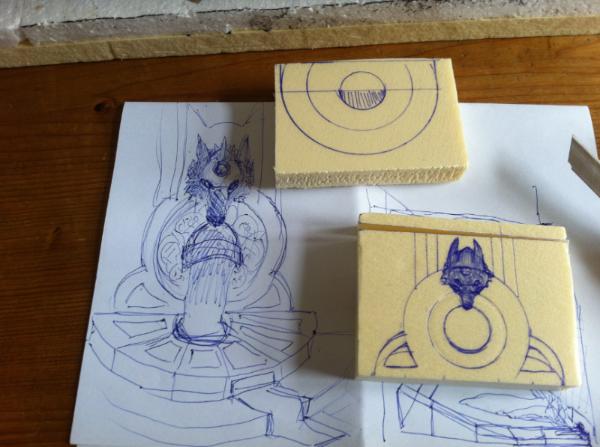
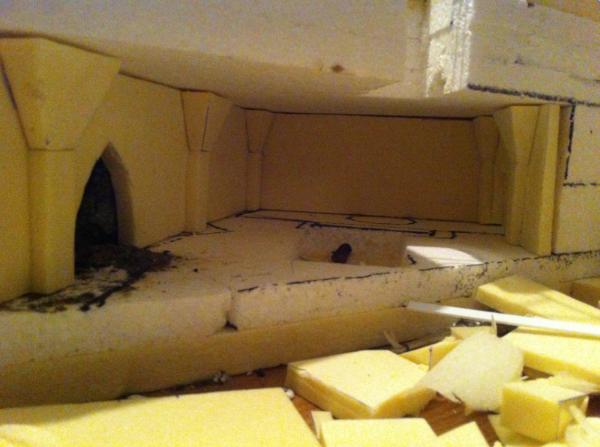
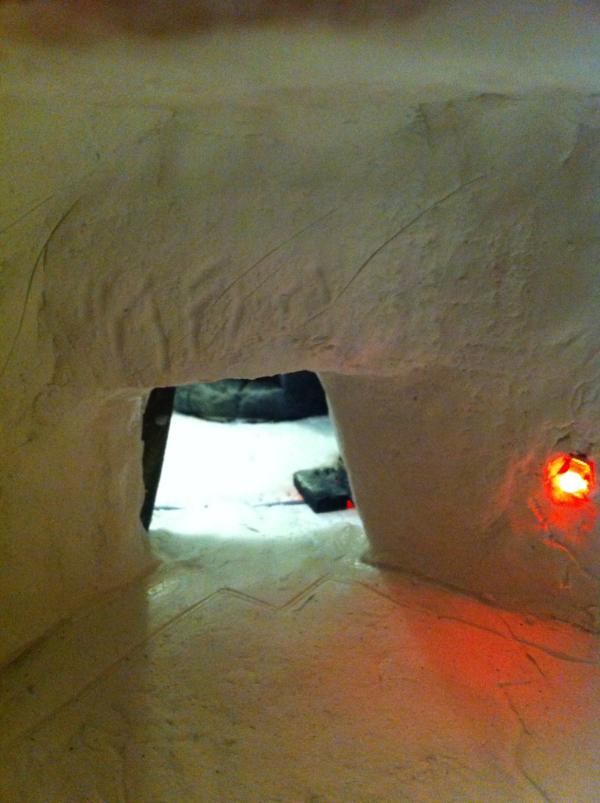
I picture the mountain with a high entrance point, on the other side (back side) you will enter into a hall with a ceiling that represents the wolven starsystem made out of fiber glass lights. Maybe with some help from a electrician it could blink like real star lights. On eighter side of that hall you can take stairs down to the bottom hall where a big two part door with reliefs of the cracken fight is blocking entrance to a hidden room... Two blazing fire discs on either side of the door. With scratch marks all over the place (might be the lost 13th chapter that was locked away here long ago or battle scars from actual fights with krakens). Maybe one of the side hills can have a cave that contains a kraken invasion made out of tyranits...
This will definitly be a nice upgrade on my original idea... I'm so glad I've started posting my work here on dakka. You guys really add flavour to my work!
Edit: that kraken idea is finally my excuse to buy tyranit models without the need to make a balanced army at first
|
|
This message was edited 2 times. Last update was at 2014/11/05 18:35:11
|
|
|
|
|
2014/11/05 21:02:05
Subject: Re:WIP - A typical Fenrisean summer temple fortress and city ruins with a river, bridge and lights
|
|
Speedy Swiftclaw Biker
|
|
|
|
|
|
|
2014/11/05 21:19:21
Subject: [WIP][Commission] - Ancient Temple Fortress on Fenris battle board part 1 of 3
|
|
Fixture of Dakka
Chicago, Illinois
|
Your stuff looks awesome and no one cares about bendy straws.
|
If I lose it is because I had bad luck, if you win it is because you cheated. |
|
|
|
|
2014/11/05 23:58:15
Subject: [WIP][Commission] - Ancient Temple Fortress on Fenris battle board part 1 of 3
|
|
Longtime Dakkanaut
|
You sure this isn't the Aett? It's pretty awesome...
Pretty sure no one is fretting over slight mistakes as you are going ham with this project and the results quite clearly speak for themselves.
|
|
|
|
|
|
2014/11/06 06:37:49
Subject: [WIP][Commission] - Ancient Temple Fortress on Fenris battle board part 1 of 3
|
|

Perfect Shot Dark Angels Predator Pilot
|
I second that. The bendy straws look fine. I didn't pick it up until it was mentioned.
|
|
|
|
|
|
2014/11/06 06:55:41
Subject: [WIP][Commission] - Ancient Temple Fortress on Fenris battle board part 1 of 3
|
|
Implacable Skitarii
|
So I've got to ask... What are you charging for such a masterpiece?
|
|
|
|
|
2014/11/06 09:40:17
Subject: [WIP][Commission] - Ancient Temple Fortress on Fenris battle board part 1 of 3
|
|
Longtime Dakkanaut
|
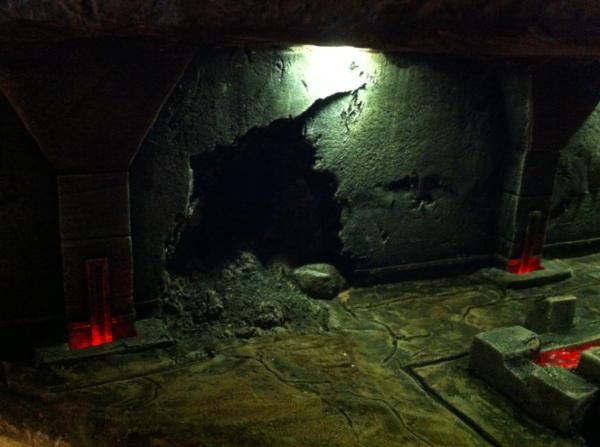
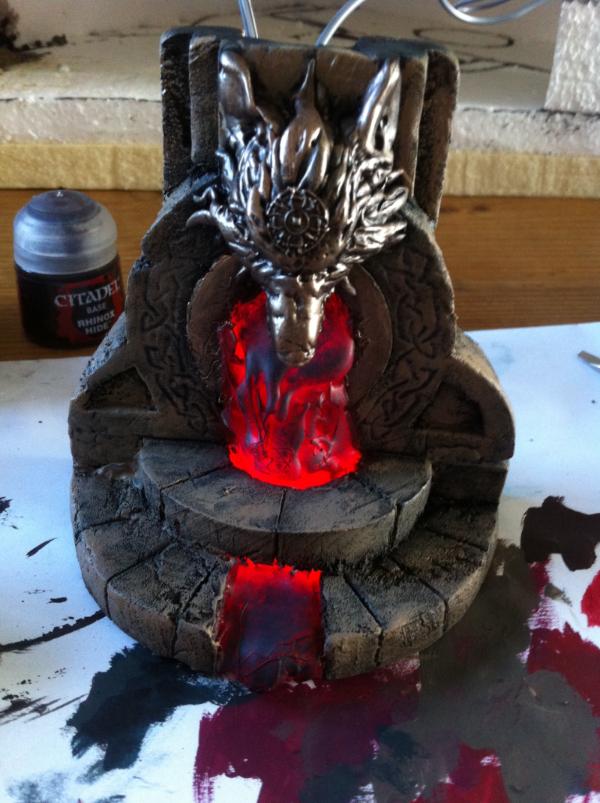
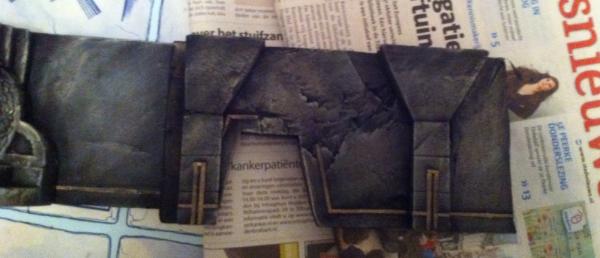
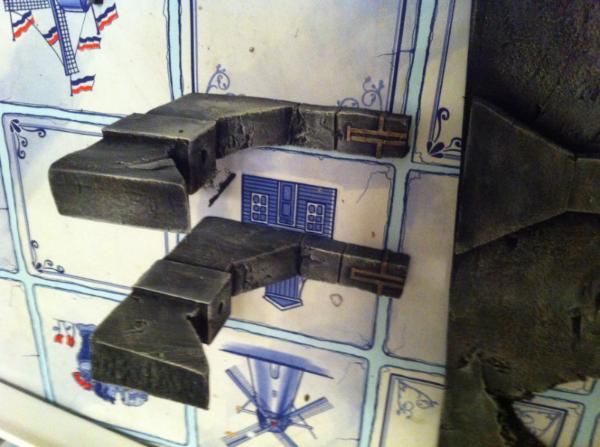
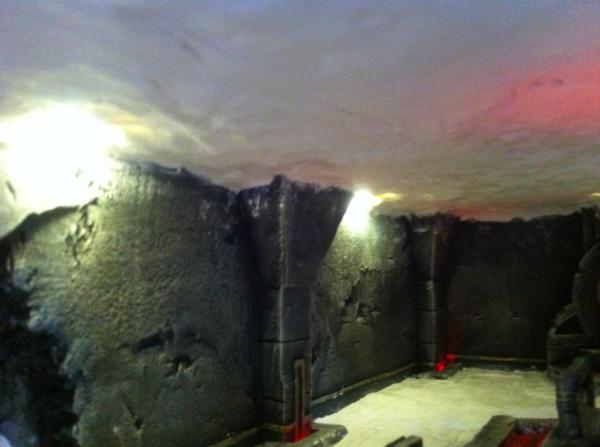
Remco, I've seen and used a nice trick to give texture to foam pieces: just make a ball of aluminum foil and roll it across the surface, it gives excellent rock texture and I'm sure you can get a lot of other effects with other materials.
Are you using something else, like rough sandpaper or just the foam's texture ? because your stone seems to have a finer grain texture or no texture in some spots.
The thing is, you're so good at painting and weathering it's hard to figure out whether you created the texture or revealed it. I'd still go for "mostly painted on".
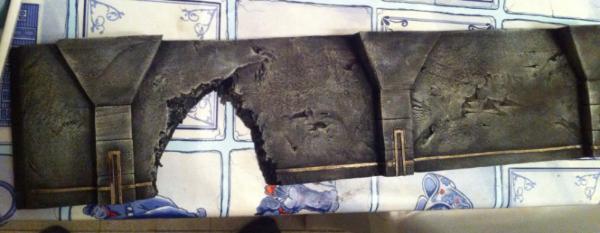
The areas with rock damage on the other hand are just amazing. How did you get that "missing layer of stone" effect ?
 Kavish wrote: Kavish wrote:
I second that. The bendy straws look fine. I didn't pick it up until it was mentioned.
In general, people who do not notice defects tend to be happier.
Good for you !
And people who do notice tend to be a lot better at anything they do.
Good for me !
Automatically Appended Next Post:
Look back one page, search for "euro".
|
|
This message was edited 2 times. Last update was at 2014/11/06 09:49:09
|
|
|
|
|
2014/11/06 13:41:47
Subject: Re:[WIP][Commission] - Ancient Temple Fortress on Fenris battle board part 1 of 3
|
|
Speedy Swiftclaw Biker
|
Hi guys. Thanks for all the support and kind words. It is really what motivates me to go on and work harder to improve my skills. But please stay nice and constructive to one and another... One final thing about the straws: I also thought they came out pretty ok myself, but I also get Morgoth's point how small it might look compared to all the other things I've done. And I appreciate your support from all of you guys, Compliments And Comments! And since I'm quite an perfectionist I really want to push myself to the limits and at least try if I could make it better by making pipes without the straws. If I can't the straws will stay and I'm glad I tried and know that this was the best I could do at this moment. If I can improve then I'm glad Morgoth mentioned it and I got a chance to improve it... even though it might seem just such a small thing. So I would like to encourage and invite everyone to post there feelings, thoughts, comment's or suggestions about my work, no matter how small or insignificant people might think it to be or how much others might disagree with you. I can always decide to what to do with it right? In the end I (and I hope through me, you guys too) will learn so much more in the proces for I have a real chance to improve my work to a level I can't achieve without you guys. So in a way this is actually a group-effort-ish project where I do all the work and you guys can enjoy the ride! (I say enjoy allot right?! Gotta stop saying that. Although it sounds so true to me... must have fun doing the things you do right... aaah here we go again... back on toppic--> ) @Stormwall: what's an "Aett"? Please enlighten me with your knowledge. @CountCyrus: like Morgoth stated I wrote it a page ago. You can read back to the previous post for the numbers and motivation.... but it mostly comes down to the wishes of the client. Currently it seems like I'll be spending around the 1000 hours (where 350 already spend on this board already with still at least 100 to go) and since some crazy creative people have contributed epic ideas / improvements like the downed plain and tyranit diorama in the 3th board the cost went up from around 700 euro's to 1000 euro's for the 3 boards... so... (Don't say it was e.earnshaw.. Don't say it was e.earnshaw.. DOOOOH I just thought it out loud.. ) Calculated on the 1000 hours I make 4 euro's per hour on this project.. So let me ask you guys this... What would you think is a faire price for a board of this detail, complexity and number of hours work? Is around 2000 euro's allot?
|
|
This message was edited 1 time. Last update was at 2014/11/07 08:45:24
|
|
|
|
|
2014/11/06 13:47:50
Subject: Re:WIP - A typical Fenrisean summer temple fortress and city ruins with a river, bridge and lights
|
|
[DCM]
.
|
Here it is!
 Remco_Tuerlings wrote: Remco_Tuerlings wrote:Wow thanks for all the nice words you guys! (It's really motivating to here you all like my work.)
@Gohkm: Oh thats a though question to answer:
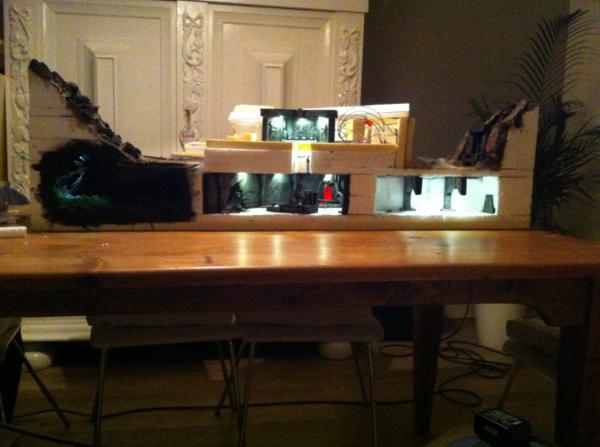
Normally I would ask for around the 300 euro per board which would have no real complex work on it or electric components, just a modest landscape with some natural features. And a board is 125cm by 60cm (Roughly 4 by 2 foot). But it really depends on how complex, detailed and finished the client wants the build to be... It's mostly hand craft work so it's quite time consuming and I'm doing this in my spare time more or less as a overgrown hobby. The board i'm working on currently has € 434,75 worth of materials when its done. And I already spend over the 250 hours work on it with still some what of a 100 to 150 hours to go (and that would be part 1 of 3). But the more work I have to spend on a single project the cheaper my hourly rate will be of course. I estimate this entire project will probably cost around the 4K in euros (where 750 euros will be material cost and the rest will be payment for around the 1000 hours of labor). So yeah.. there you have it.
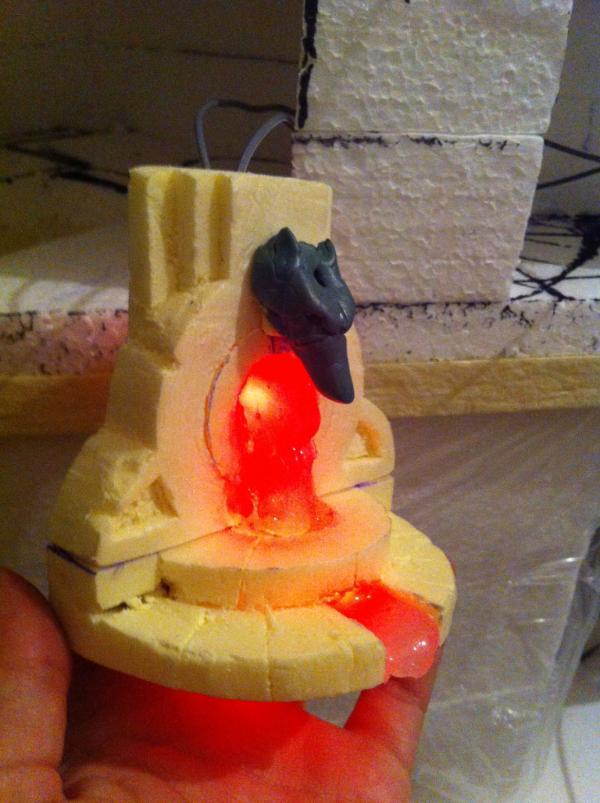
For the weekend update you guys have to wait a couple more days because I want to finish the diorama's first and post the entire proces pictures from begin to the end as a single post. It will be an nice update I can ensure you that. Because I've experimented with different lava / fiery forge elements and found a really good way to do the lava thingy.
So please excuse me for letting you guys wait a bit longer! And I hope to finish them soon so I can share my findings with you guys.
A bargain for the quality work shown so far!
|
|
|
|
|
2014/11/06 14:00:11
Subject: Re:[WIP][Commission] - Ancient Temple Fortress on Fenris battle board part 1 of 3
|
|
Longtime Dakkanaut
|
Remco_Tuerlings wrote:What would you think is a faire price for a board of this detail, complexity and number of hours work? Is around 2000 euro's allot?
If you work 1000 hours, it should be at least 20000 euros.
It would still not be fair, but at least you'd get paid as much as a cashier or a guy from the cleaning crew.
Unfortunately, unless you talk to the right customers, it's more about what the market will bear, which in the case of art depends on your fame.
I know quite a few artisans who have as much skill in their domain as 500+ a day consultants and still work for 50 bucks / 8 hours, so ... good luck.
I would say, ask another artisan who is better than you and has a lot more experience in the market, like Mike from Terranscapes.
|
|
|
|
|
2014/11/06 16:30:23
Subject: [WIP][Commission] - Ancient Temple Fortress on Fenris battle board part 1 of 3
|
|
Rampaging Furioso Blood Angel Dreadnought
|
Please move to the states, I'll marry you if it's a green card issue.
|
|
|
|
|
|
2014/11/06 17:02:33
Subject: [WIP][Commission] - Ancient Temple Fortress on Fenris battle board part 1 of 3
|
|
Jealous that Horus is Warmaster
|
In the river you could have a kraken made from a trynid maw lock fighting a lone wolf bits of space wolf amour lodged in its teeth and weapons representing the dead pack he is from.
You could have wolfs hunting on top of the mountain their pray a beast made from an ogres kingdoms beast and/or have ogre yetis as doppel gangers
|
|
|
|
|
2014/11/07 03:58:46
Subject: [WIP][Commission] - Ancient Temple Fortress on Fenris battle board part 1 of 3
|
|
Old Sourpuss
|
This is so dang beautiful. You're doing Russ and the Allfather's work
|
|
This message was edited 1 time. Last update was at 2014/11/07 03:58:51
DR:80+S++G+M+B+I+Pwmhd11#++D++A++++/sWD-R++++T(S)DM+
 
Ask me about Brushfire or Endless: Fantasy Tactics |
|
|
|
|
2014/11/07 15:29:47
Subject: Re:[WIP][Commission] - Ancient Temple Fortress on Fenris battle board part 1 of 3
|
|
Speedy Swiftclaw Biker
|
@Alpharius and Morgoth: Thanks for you opinions. I will also try to ask Richard from battleboards.co. uk and Mike from Terranscapes who are both inspiring people and I hope that one day I may become as good as they are.
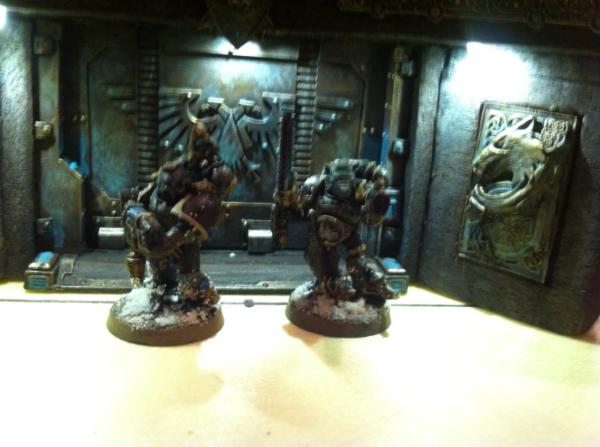
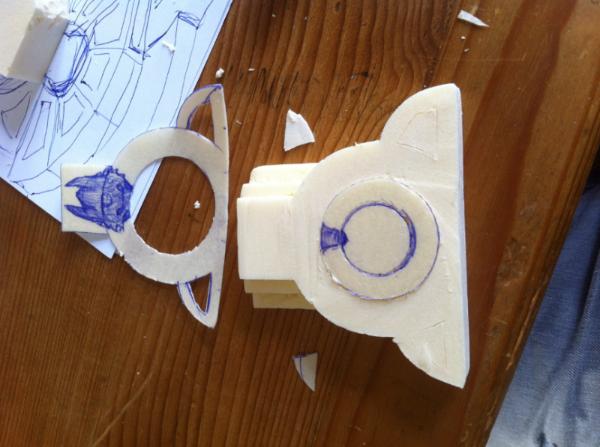
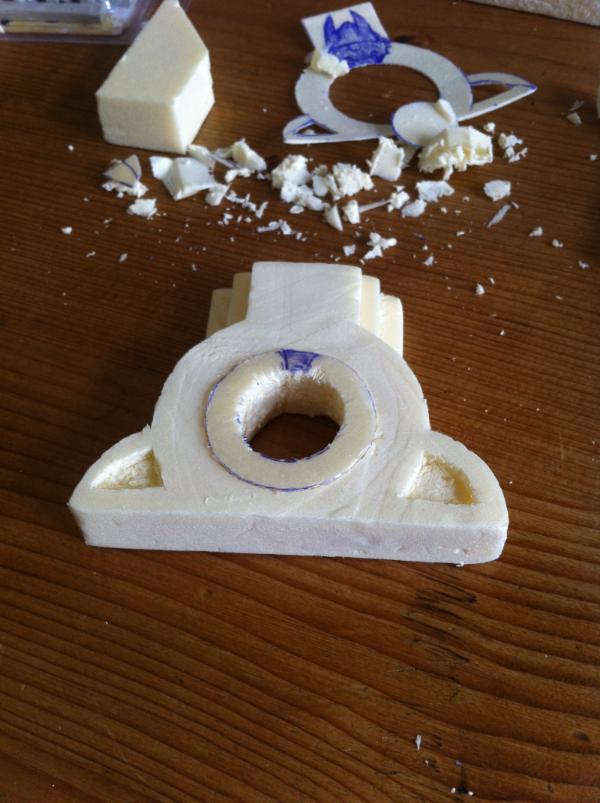
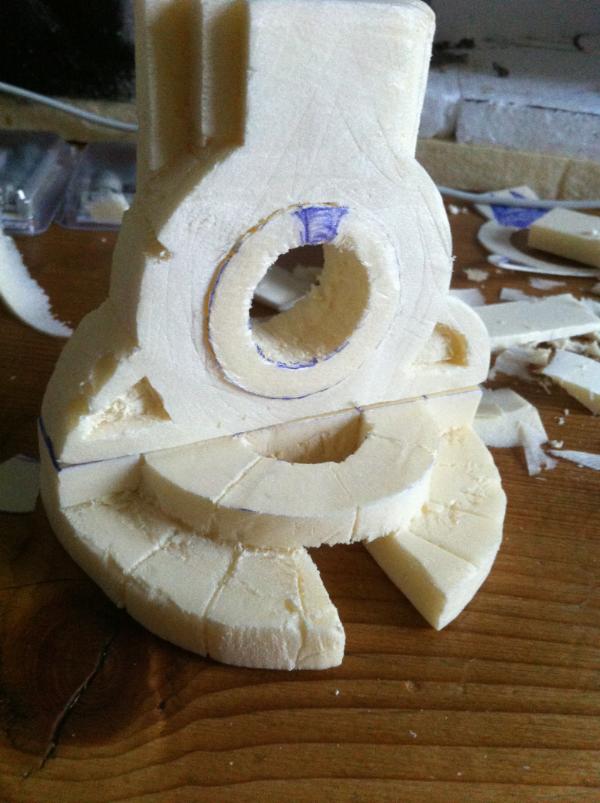
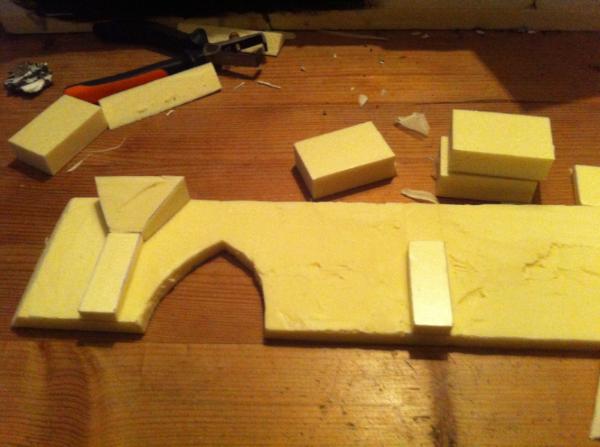
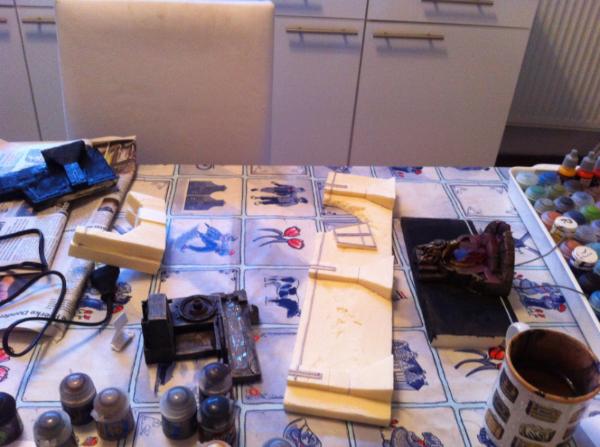
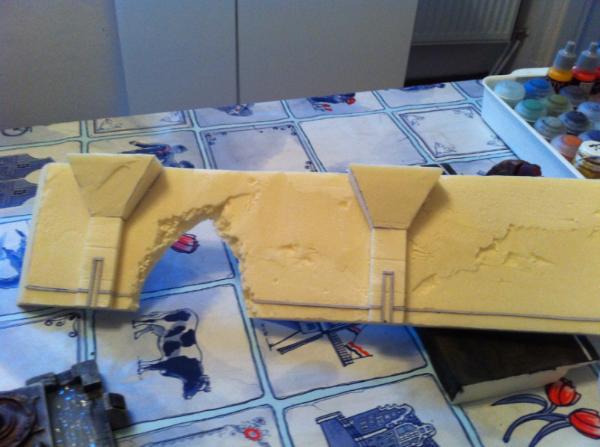
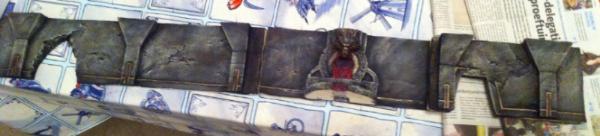
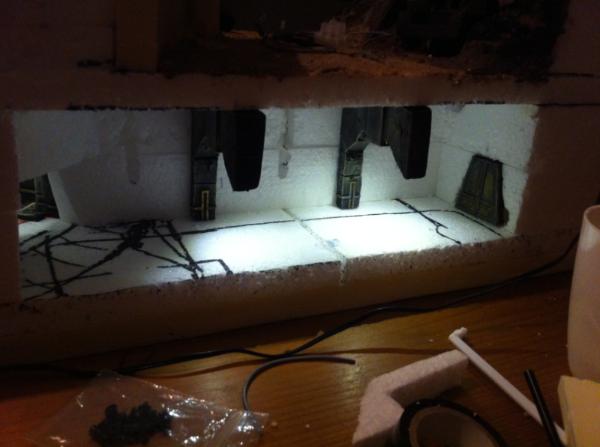
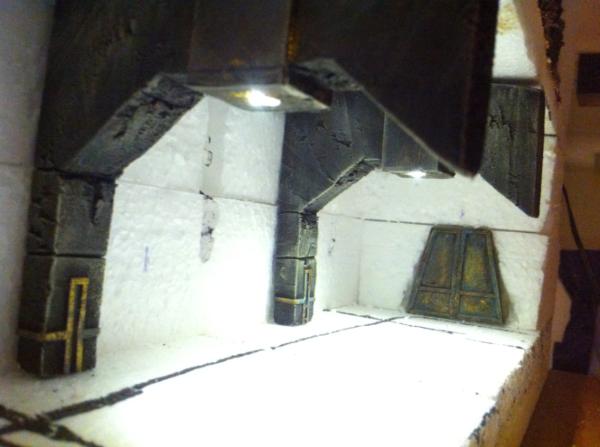
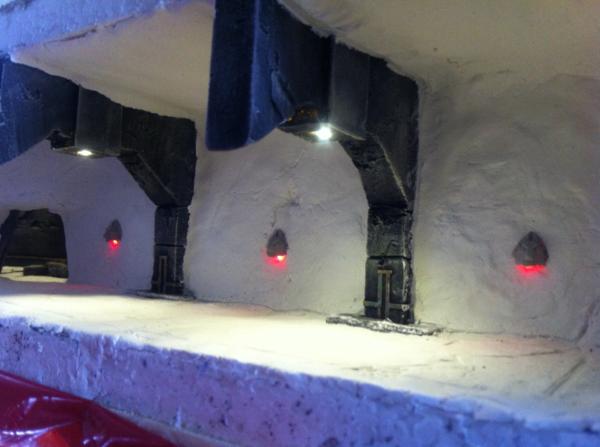
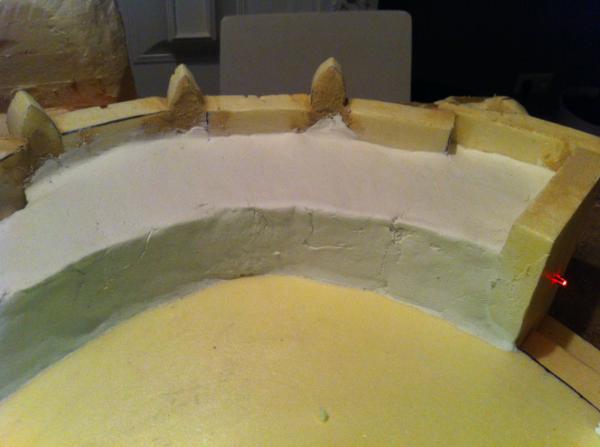
@Morgoth: About the foam walls structure; I firstly cut the foam in to the right size blocks or shapes. Then I use the knife to cut the bigger cracks, dents and missing plasterwork by gently cutting just skin deep with my knife alongside the surface of the wall. This is the base for the texture. Then I use a variety of different hard cut short brushes to (gently) stamp a real structure in it. Then I move on to painting the walls using the created texture to my advantage and enhancing it with my painting and weathering skills. I also use allot of real reference photo's to try to get the real effect on how walls, rocks and plaster works age. And try to imitate that with paint. I recommend every one to experiment with the High density foam... its more expensive then normal foam but it lends itself so good to do concrete or rocky surfaces. And it can hold much details too. The trims on the walls I did where just really thin strips from the lit of a deep-freeze-pizza box. came out quite well after painting. Could also imagine using the cardboard technique when you have printed out a relief detail, glue it on to the pizza box cardboard and then cut it out.
@Gunzhard: hahahaha.
@e.earnshaw: Ill think I'll pass on these idea's my friend, but keep spilling them! But I already ordered for another 250euro's worth of extra props * for these boards because of your awesome idea's (* Forge world Skin wolves, Dread Maw for the russ memorial cave scene in the 3th board back side diorama and the Storm Eagle gunship for the bridge part in the second board). I think this will be enough for now... Unless you have an epical idea I can't refuse?!
@Alfndrate; haha thanks man.. it certainly feels that way!
Well almost weekend you guys! So I hope to make some better pictures tomorrow and to bring you guys a new update as soon as possible!
Have a great weekend! Cheers
|
|
This message was edited 1 time. Last update was at 2014/11/07 22:31:40
|
|
|
|
|
2014/11/07 16:03:39
Subject: [WIP][Commission] - Ancient Temple Fortress on Fenris battle board part 1 of 3
|
|
Jealous that Horus is Warmaster
|
oh it would be cool but not doable in the time phrase to use forge world leman russ when he comes out.
|
|
|
|
|
2014/11/07 16:19:03
Subject: [WIP][Commission] - Ancient Temple Fortress on Fenris battle board part 1 of 3
|
|
Speedy Swiftclaw Biker
|
Thats a model I definitly will be buying! You have any idea when it is going to come out?
|
|
This message was edited 1 time. Last update was at 2014/11/07 16:20:48
|
|
|
|
|
2014/11/07 21:31:45
Subject: [WIP][Commission] - Ancient Temple Fortress on Fenris battle board part 1 of 3
|
|
Sneaky Sniper Drone
|
Wow, this is just stunning.
With the hours and love you've put into this I'd say you've earned every penny of that commission!
Love it!
|
|
|
|
|
|
2014/11/07 22:15:04
Subject: [WIP][Commission] - Ancient Temple Fortress on Fenris battle board part 1 of 3
|
|

Xenohunter with First Contact
|
This is getting better and better! Great progress. Keep up the great work
|
|
|
|
|
2014/11/08 08:04:29
Subject: [WIP][Commission] - Ancient Temple Fortress on Fenris battle board part 1 of 3
|
|
Avatar of the Bloody-Handed God
Inside your mind, corrupting the pathways
|
Truely excellent work and fantastic to see the wip and thought process being what you are doing.
|
|
|
|
|
|
|
|