Forum adverts like this one are shown to any user who is not logged in. Join us by filling out a tiny 3 field form and you will get your own, free, dakka user account which gives a good range of benefits to you:
No adverts like this in the forums anymore.
Times and dates in your local timezone.
Full tracking of what you have read so you can skip to your first unread post, easily see what has changed since you last logged in, and easily see what is new at a glance.
Email notifications for threads you want to watch closely.
Being a part of the oldest wargaming community on the net.
If you are already a member then feel free to login now.
So I watched an amazing video by Les at awesome paint jobs. He was using inks through the airbrush and it created an amazing effect. What he does not mention is if and how much he thinned the ink.
Does anyone have any experience with it? I'd imagine they should be thinned some and I'll play with the psi. I'm gonna shoot this through my Krome if that helps at all.
I airbrush illustrations with Liquitex acrylic inks. They shoot fine right out of the bottle, but do well to be mixed with a splash of airbrushing medium to reduce the tip dry and extend the ink ; 100% black is about as dark and decent coverage as 50% black is really. No need to use them pure all the time.
'Ain't nothing crazy about me but my brain. Right brain? Riight! No not you right brain! Right left brain? Right!... Okay then lets do this!!
HairySticks wrote: I airbrush illustrations with Liquitex acrylic inks. They shoot fine right out of the bottle, but do well to be mixed with a splash of airbrushing medium to reduce the tip dry and extend the ink ; 100% black is about as dark and decent coverage as 50% black is really. No need to use them pure all the time.
Sweet, thanks! I'm gonna try it with red ink. If this works it should be pretty fantastic.
I did my infinity models by applying the base colors with the airbrush including highlighting then cutting my ink to 50% strength using a 3:1 water : future floor finish & then cutting the entire mix with a bit of isopropyl alcohol as a flow aide (which evaporates as it's sprayed so it keeps the ink about the same consistency as if I didn't add it but helps reduce clogs). I've done with black, arthshade, sepia, & with purple & all have turned out really well. Just be careful with the overspraying & definitely do cut your ink, if you don't instead of it flowing into the crevasses it will simply tend to pool.
Maxlvlpainting wrote: Something to thicken the ink works best for me actually. Out of the bottle they are too flowy and will tend to blow around instead of sticking.
Turn your pressure down and or work on your trigger control, you're spraying too much paint. ... or be more patient between coats.
This message was edited 1 time. Last update was at 2015/01/21 23:18:49
'Ain't nothing crazy about me but my brain. Right brain? Riight! No not you right brain! Right left brain? Right!... Okay then lets do this!!
darefsky wrote: So I watched an amazing video by Les at awesome paint jobs. He was using inks through the airbrush and it created an amazing effect. What he does not mention is if and how much he thinned the ink.
Does anyone have any experience with it? I'd imagine they should be thinned some and I'll play with the psi. I'm gonna shoot this through my Krome if that helps at all.
It depends on what effect you're trying to do. If I use it inks (or washes) through my airbrush, I use them as a filter to shift the underlying colors more towards a direction I want. Most of the time I thin them down at about a 10:1 water/ink ratio, to the point where a single coat leaves almost no color, allowing me to slowly build up the color (this method also works really well for shadows). I also add a drop or two of matte medium to it as well.
d-usa wrote: "When the Internet sends its people, they're not sending their best. They're not sending you. They're not sending you. They're sending posters that have lots of problems, and they're bringing those problems with us. They're bringing strawmen. They're bringing spam. They're trolls. And some, I assume, are good people."
I've done the same thing when using Minitaire Ghost Tints; start from black and work the highlights up in greyscale and then use a candy to add color.
d-usa wrote: "When the Internet sends its people, they're not sending their best. They're not sending you. They're not sending you. They're sending posters that have lots of problems, and they're bringing those problems with us. They're bringing strawmen. They're bringing spam. They're trolls. And some, I assume, are good people."
I use Dahler Rowney (sp?) acrylic inks. They work quite well in an airbrush (they specifically say they work with airbrush), and they come in both translucent and opaque.
There's actually a decent video on SWM's blog where they're featured.
The biggest problem with using inks, as others have said, is that they flow a little too much (therefore settling into recesses).
This message was edited 1 time. Last update was at 2015/01/22 02:12:53
Dial the pressure way back...and with inks, it actually pays to have that 0.2 needle.
Inks are what I use for fine detail - and provided that you don't run the pressure too high (like over 10 PSI) and aren't using a big needle (like over 0.25) than you can do very, very fine work with them.
However, since they are so much more fluid than any paint right out of the bottle, you can very easily apply too much too fast and have issues with the air pressure blowing them around or laying down so much that it pools up on you.
Even if you thin regular paints down to the same consistency as inks - the inks still flow much better. They don't have any pigment particles in the regular sense of things that will create frictional losses in your brush that require higher pressures.
Also, I normally won't use any sort of drying retarder with them at all. In fact, I want them to dry a bit faster than my regular paints...otherwise, you can get into issues where it will bead up because of impatience in laying down the colors (especially with a translucent color...it can take a bit before you even see a change in tone with some of those). Many I use straight up - or with a bit of alcohol to dry faster.
Adding a regular airbrush thinner, will generally increase the viscosity of the inks - which isn't a bad thing, just a thing to keep in mind. They make special ink extenders that maintain the ultra low viscosity of inks if you are interested in getting more mileage from them.
ScootyPuffJunior wrote:He's probably using them with no thinner.
I've done the same thing when using Minitaire Ghost Tints; start from black and work the highlights up in greyscale and then use a candy to add color.
Sweet, I'm gonna do a test piece. I'm thinking the Krome is going to be better suited for this than the Patriot 105. I'm thinking somewhere around 10psi?
Talys wrote:I use Dahler Rowney (sp?) acrylic inks. They work quite well in an airbrush (they specifically say they work with airbrush), and they come in both translucent and opaque.
There's actually a decent video on SWM's blog where they're featured.
The biggest problem with using inks, as others have said, is that they flow a little too much (therefore settling into recesses).
Cool! I'll check out the videos, thanks.
Automatically Appended Next Post:
Sean_OBrien wrote: Dial the pressure way back...and with inks, it actually pays to have that 0.2 needle.
Inks are what I use for fine detail - and provided that you don't run the pressure too high (like over 10 PSI) and aren't using a big needle (like over 0.25) than you can do very, very fine work with them.
However, since they are so much more fluid than any paint right out of the bottle, you can very easily apply too much too fast and have issues with the air pressure blowing them around or laying down so much that it pools up on you.
Even if you thin regular paints down to the same consistency as inks - the inks still flow much better. They don't have any pigment particles in the regular sense of things that will create frictional losses in your brush that require higher pressures.
Also, I normally won't use any sort of drying retarder with them at all. In fact, I want them to dry a bit faster than my regular paints...otherwise, you can get into issues where it will bead up because of impatience in laying down the colors (especially with a translucent color...it can take a bit before you even see a change in tone with some of those). Many I use straight up - or with a bit of alcohol to dry faster.
Adding a regular airbrush thinner, will generally increase the viscosity of the inks - which isn't a bad thing, just a thing to keep in mind. They make special ink extenders that maintain the ultra low viscosity of inks if you are interested in getting more mileage from them.
We must have been typing at the same time. Glad to see my idea on the psi and needle size were about right. Anything special I need to do to clean the brush after inks or do they act like any other acrylic paint?
This message was edited 1 time. Last update was at 2015/01/22 02:57:00
I actually start at around 5 PSI and go up from there...depending on which inks I am using, and what I am doing with them. Unless you are actually using calibrated gauges though, it can be hard to get an accurate reading at that low of pressure (especially if you are using an on the compressor diaphragm controlled regulator...). An inline MAC valve helps that a good bit...though you loose the ability to know what your pressure actually is while spraying.
Because of the way I work, I really like (almost need) to have a high level of repeatability. With my Iwata regulators, they are accurate +/- 5 PSI on a 100 PSI range - with the accuracy improving with pressure towards the 75% of the maximum range. My Badger regulator gives me +/- 3 PSI on a 60 PSI range - again, more accurate nearer the 75% mark. It was a bit frustrating when dealing with the high side regulators, as often a small enough turn of the knob to register pressure was enough to put me past the pressure that I wanted to use. The Badger was better - but still, lacking in many respects. It isn't so much they are bad - it is just a function of the design.
In the end, I went with separate gauges and regulators so I wasn't tied to a specific "bundle". This has allowed me to dial in past results with minimal effort to get the same outcome. I place static pressure gauges after the MAC valves off the manifold. Line pressure is regulated back at the main to drop it down below the high pressure reading of the low pressure gauges to avoid pegging the gauges.
No real special concerns with acrylic inks. Alcohol clean up for regular ink inks. Since most inks lack a real pigment particle - they have less gunk to clean up...however, the colorant used can stain things...so, that can be a bit more of a mess on your hands.
Maxlvlpainting wrote: Something to thicken the ink works best for me actually. Out of the bottle they are too flowy and will tend to blow around instead of sticking.
Turn your pressure down and or work on your trigger control, you're spraying too much paint. ... or be more patient between coats.
Or just mix in something with some body to it and turn it into easy mode. Inks usually have both flow and retarder premixed which just makes it more annoying than anything else.
Good luck spraying up close or trying to airbrush small details using water.
Normally no drying retarder...that would be a mess trying to use a technical pen with an ink that takes a while to dry. Even airbrush specific inks are designed to dry fast - again, illustrators who are on the clock don't have time to watch the paint dry.
The bigger question though, would be why would you want to bother with inks...if you are going to take the thing that makes them different away? Thickening isn't a bad thing on its own - but it should not be the go to technique for using inks. You can get the same colors out of regular paints (or translucent paints if you are going for a toning process)...and not have to bother with thickening them.
Even barring detail work - back your pressure down - and you can do pretty fine toning work for changing colors just a little bit, or adding just a little bit of shade/highlight. If you are blowing ink around, having it pool up or bead off - the issue isn't with the ink being too thin...it is too much ink/pressure.
With regular inks - you will need to be even more careful about touching the figure with your hands. They don't like oils at all - and it can lead to all sorts of issues.
Just seems like trying to fit a square peg in a round hole if you are always going to thicken your inks. That isn't what they are designed for, so you won't get the best results from them.
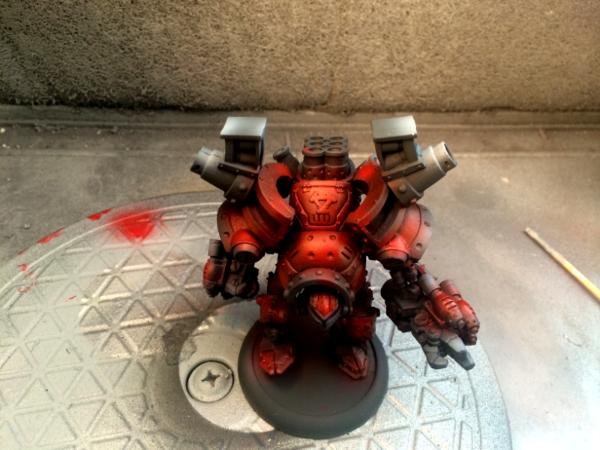
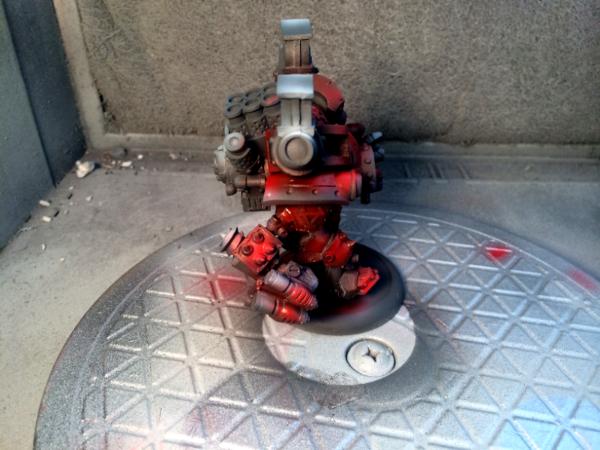
I was able to try it out. and man it looks amazing. I will have to set up my light booth once the model dries a bit to really get a good picture of the depth of the red from light to dark using the ink.
Sean, btw you were spot on, I did thin the ink about 2:1 and shot at 10psi through the 0.2mm on the Krome, No spidering and the ink stayed where it was supposed to.
You should also find a lot more control for doing fine details as well as the ability to play with it a bit for effect (sometimes I will shoot an ink at high pressure from the front of a vehicle towards the back for streaking from going fast...).
Which inks/thinner did you end up using?
If you decide to get into them more - an illustration brush like the Sotar becomes useful to have. It may not seem like much, but the balance is set up for the fine work more so than a GP brush.
Maxlvlpainting wrote: Something to thicken the ink works best for me actually. Out of the bottle they are too flowy and will tend to blow around instead of sticking.
Turn your pressure down and or work on your trigger control, you're spraying too much paint. ... or be more patient between coats.
Or just mix in something with some body to it and turn it into easy mode. Inks usually have both flow and retarder premixed which just makes it more annoying than anything else.
Good luck spraying up close or trying to airbrush small details using water.
I can only re-itterate what I said before.
I can spray water without runs. You have to go light enough that it wont run, and then wait for it to dry and do it again. its long, slow, tedious even. But your comment tells me that you need to work on trigger control and patience somewhat.
If you cant draw a line of comparable width to your nozzle with an airbrush on some paper without runs or spidering, then something isnt quite right. And should be looked into - might be technical problem with equipment or paint setup, might be technical ability with the trigger - You only need to pull back a really tiny amount its hardly as if you moved. They really are incredibly sensitive instruments, theres a huge range of spray beteween of and on.
'Ain't nothing crazy about me but my brain. Right brain? Riight! No not you right brain! Right left brain? Right!... Okay then lets do this!!
Sean_OBrien wrote: You should also find a lot more control for doing fine details as well as the ability to play with it a bit for effect (sometimes I will shoot an ink at high pressure from the front of a vehicle towards the back for streaking from going fast...).
Which inks/thinner did you end up using?
If you decide to get into them more - an illustration brush like the Sotar becomes useful to have. It may not seem like much, but the balance is set up for the fine work more so than a GP brush.
I used P3 ink, I have a few different colors that I had acquired a while back and the vallejo inks I ordered are a few weeks out (on back order). I used Vallejo Airbrush Thinner with it. I didn't have any issues with tip dry.
I think I will experiment more with it. I really like what I have seen so far.
Why a Sotar 20/20 over the Krome? Is there really that much of a difference for fine detail?
Using a Sotar is much more like using a pen or other writing tool. The Krome is balanced to be a bit further from your work for doing things like pin stripes and skulls on gas tanks...
Shouldn't have any real issues with tip dry using inks - they flow like butter. Was just curious because you said you thinned them out. Most my airbrush thinner is thicker than the inks I use. Full strength inks will build color faster than if you extend them out - but if you goof...it takes more to correct it.
If you can, pick up a bottle of regular ink (even something like a simple black india ink). Play around with that a bit and see how you like it. For detail work, I really like inks (and oils...thinned down to near nothingness...). It isn't a popular set up for a lot of mini painters though, mostly because I think they either haven't tried - or haven't learned to do it properly.
OK, that makes sense out of the Sotar.
I thinned it because the P3 ink looked pretty thick (just about what I would thin my paint to before airbrushing) and figured that was a bit too thick for how I wanted to build up color without obscuring what was underneath.
I have to be in the city tomorrow, I'll swing by the Hobby Lobby and grab some real inks to play with. Any brand in particular I should get or more importantly avoid?
Most hobby "inks" aren't really inks - but clear paints. They assume that you will be using a brush as opposed to a pen or airbrush, so a regular ink would cause them all sorts of troubles as people complain that they can't control them.
In terms of brands - I can't really think of an ink brand to avoid. They are such a specialized tool - that most the companies who make them, don't bother with making a crap product. I normally use Ph Martins - because I can get them easiest.
Also, I went ahead and hooked up a Krome and Sotar. Filled both with an ink and gave it a go just to make sure my brain wasn't playing tricks on me. It is mostly the balance - plus my Sotar 2020-1. This one has the little bump on top for the color cup as opposed to a larger cup to obscure my line of sight. The Krome was fitted with the 0.21 tip and needle. I went ahead and checked my pressures to see where both brushes would give me the same flow for the same trigger position. The Krome was about 3 PSI higher than the Sotar even though the Sotar has the smaller needle. Seems as though the flow on the Sotar is better suited for the detail work as well.
Again, it isn't a necessity - but if you find yourself reaching for inks more often, consider putting it on the wish list to get an illustration brush.
Sean. Thanks for doing that. I think I am going to play with it a bit more and see what other cool things I can do with inks before figuring out how to sell the idea of a 3rd airbrush to the wife.
Sean_OBrien wrote: Just tell her that you can do her nails with the new airbrush...small sacrifices and all that.
I'll try that one.... it will fly about as far a lead balloon. I'm just gonna wait for her to buy some shiny new toy for her hobby room and then it will be all good.