Forum adverts like this one are shown to any user who is not logged in. Join us by filling out a tiny 3 field form and you will get your own, free, dakka user account which gives a good range of benefits to you:
No adverts like this in the forums anymore.
Times and dates in your local timezone.
Full tracking of what you have read so you can skip to your first unread post, easily see what has changed since you last logged in, and easily see what is new at a glance.
Email notifications for threads you want to watch closely.
Being a part of the oldest wargaming community on the net.
If you are already a member then feel free to login now.
2015/10/23 18:13:58
Subject: New SM army, now with more AnvilMiniature, and 10% more puppetswar.ru!
I am a modeler just getting into 40K, and I suppose it was only a matter of time before I started building my own army. Meet "The Old Guard", a SM Chapter that is identical to Iron Hands, just with a minor change in fluff and a new paintjob.
All the fluff is still tentative, but its something like an offshoot of Iron Hands, just with more respect for humanity. The Iron Hands supported them by donating suits, equipment, and bionic tech, but wouldn't accept them into the chapter because they love PT and humanity as a whole. They accept applicants from almost any world, but with the sole proviso that they are all ex-military. Join the Old Guard, get new limbs, get a chance to serve humanity again in combat!
An example of the paint. US army OD green, with ugly yellow Cav colors. If it looks odd, you have a good eye! Thats actually a Chaos predator. Some of the markings had to be filed off.
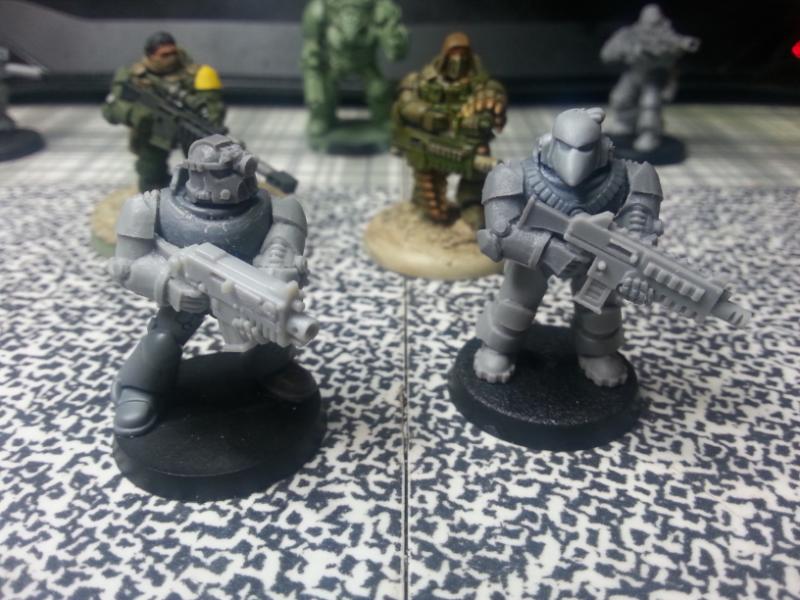
Airbrush primed Terminators. I've been having a hell of a time learning airbrush. This is GW colors mixed with windex, and the assault guns are Anvil autocannons mixed with taurox prime gun barrels. Not sure where the oversized chainfist came from. (other than my FLGS bits box).
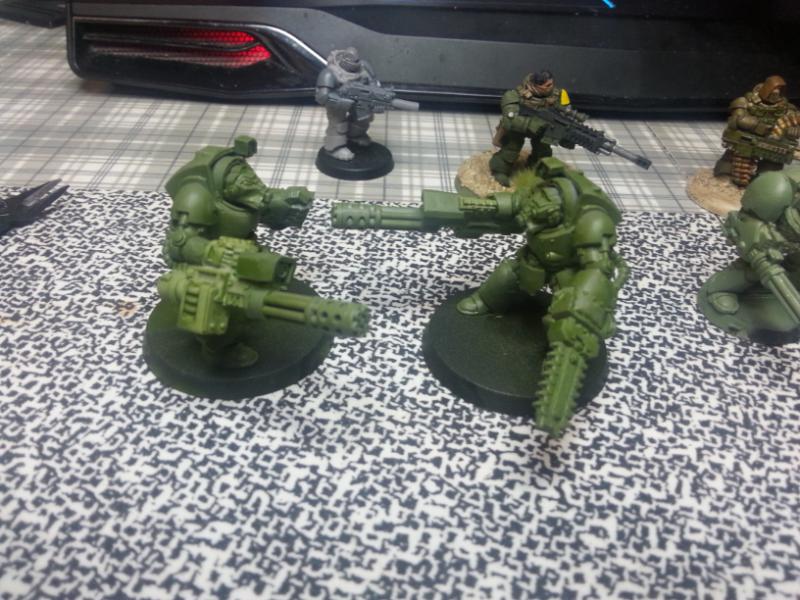
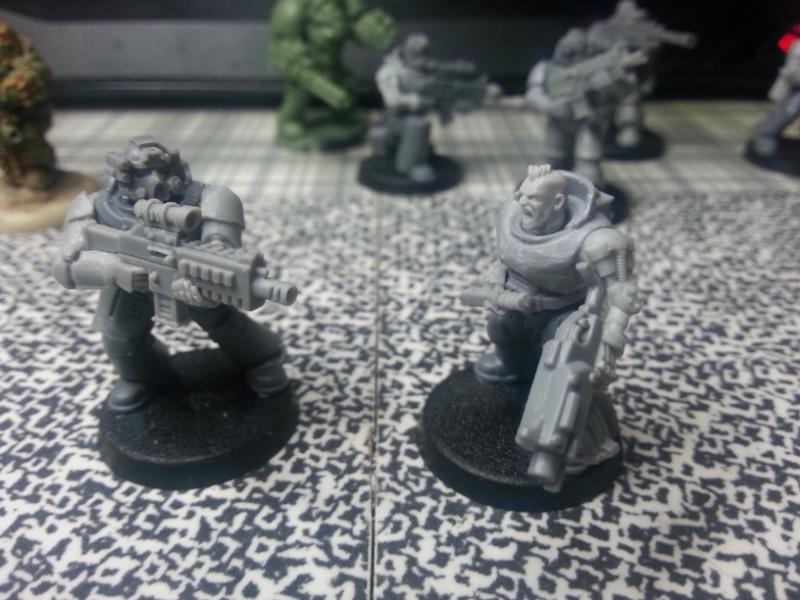
Meet the marines. Lots of outdated gear, like anvil and early pattern bolters with a stock. The iconography was removed for a number of reasons. One, I like to think these guys serve humanity, not just the emperor, and I couldn't get the image of a drill sergeant screaming, "WHAT THE HOLY feth IS THAT ON YOUR UNIFORM, PRIVATE? DO YOU THINK THAT MOTO gak WILL SAVE YOU IN COMBAT?!? TAKE THAT gak OFF BEFORE I SMOKE YOU UNTIL I GET TIRED."
The head is from puppetswar. Took three weeks to get to the states from poland, but everything is really well made. Well, almost. the Cav shoulderpads are backwards...
Scouts. I am trying to keep them armored, just unpowered. No backpacks for them. Sniper and bolter are from anvil.
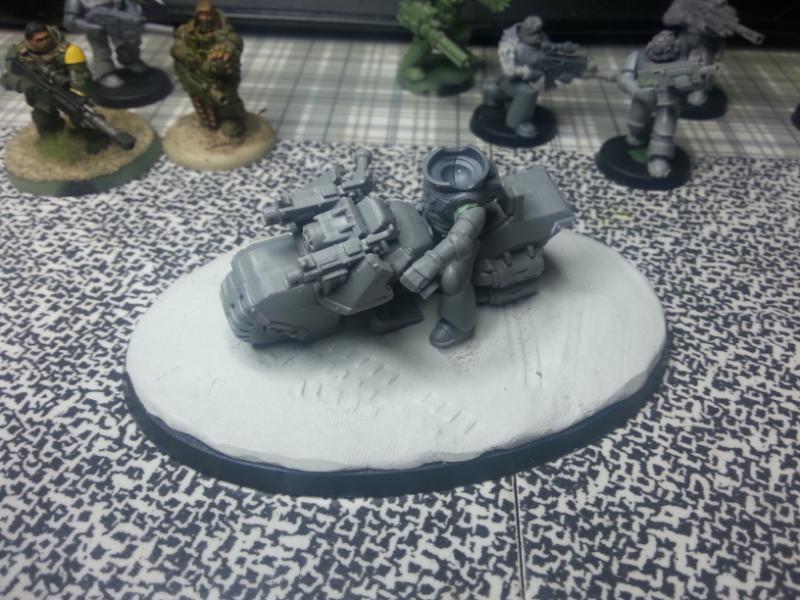
And the real reason people play Iron Hands....Chapter Master Smash...something or other. Instead of the standard "Speeding along on my bike" you see most, this guy will have skidded to a stop, and brought his combiweapon to bear. The white stuff is this awful epoxy I bought before I discovered greenstuff, and thank baby jesus all of it is gone now.
Alright, here we go. I sorta forgot that blogs have to be updated, so we are missing some content. I think the first topic will be.....
The Techmarine that we looked at! He is too skinny, but the base turned out great. Bricks are greenstuff and plastic castoffs, done up with mephiston red, steel, Typhus corrosion, and a dark wash.
This guy looks much better. He is a forgeworld techmarine, with the anvilindustry bolter, axe, and servo-harness. Base is bent plasticard.
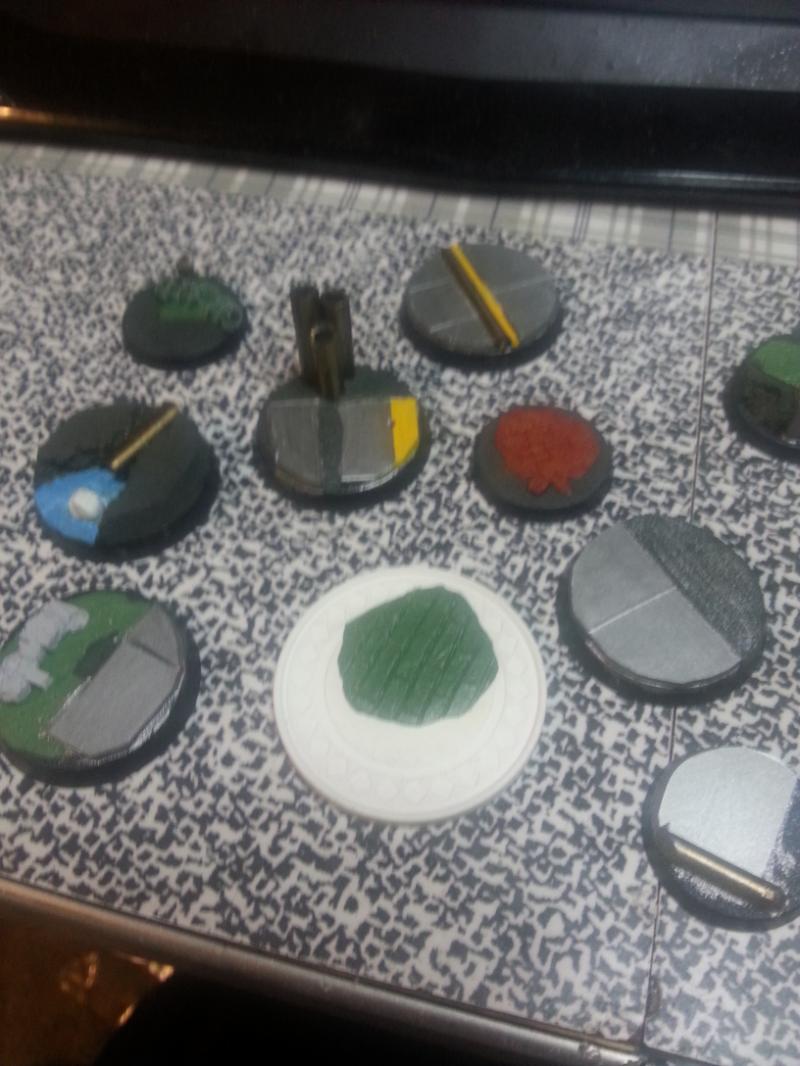
Plasticard and greenstuff seems to solve all basing problems, too. These are all that combination.
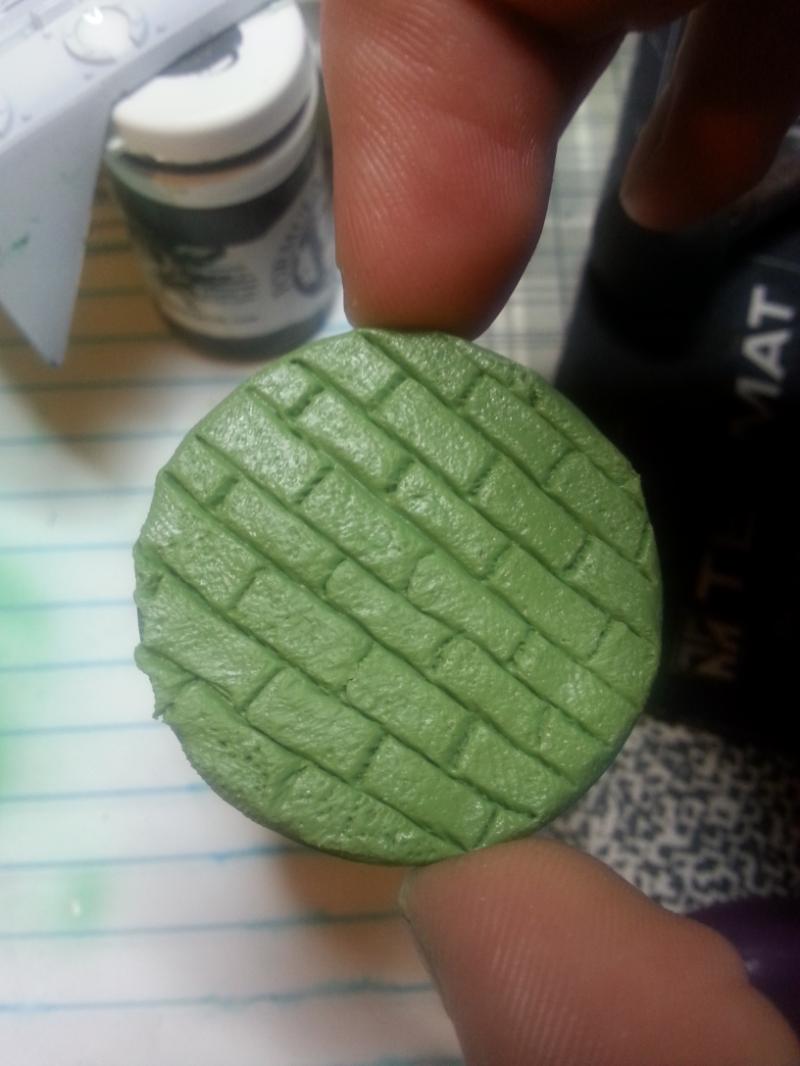
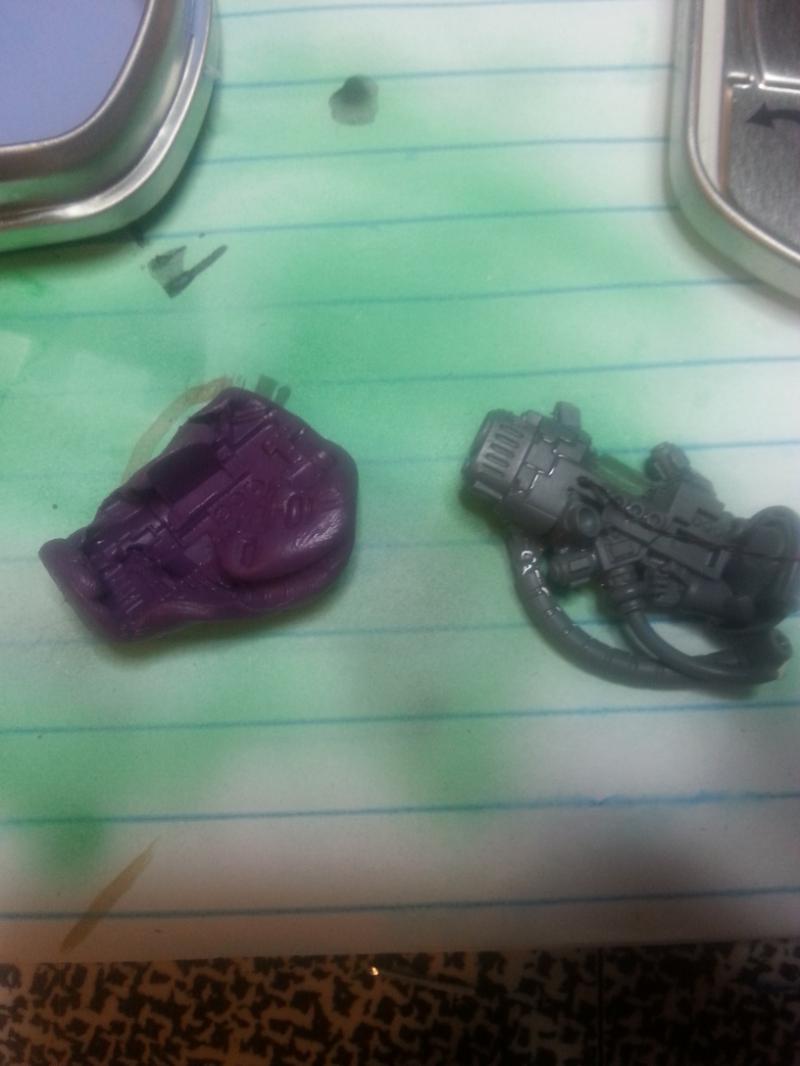
So the bricks work like this. you slop on the greenstuff, then use a tool to line it, as shown. The fingerprint marks disappear and get that awesome cobblestone effect by using one of the stiff toothbrushes from a weapons kit, and just brushing lightly. So easy. I tried it with a softer brush, and the effect changes. Best part, is the greenstuff doesnt seem to want to stick to nylon bristles. My lines aren't very straight because I was using Tullamore Dew, and while that makes modelling easier, it makes it a touch messier. Also, poker chips are the same size as terminator bases, much cheaper!
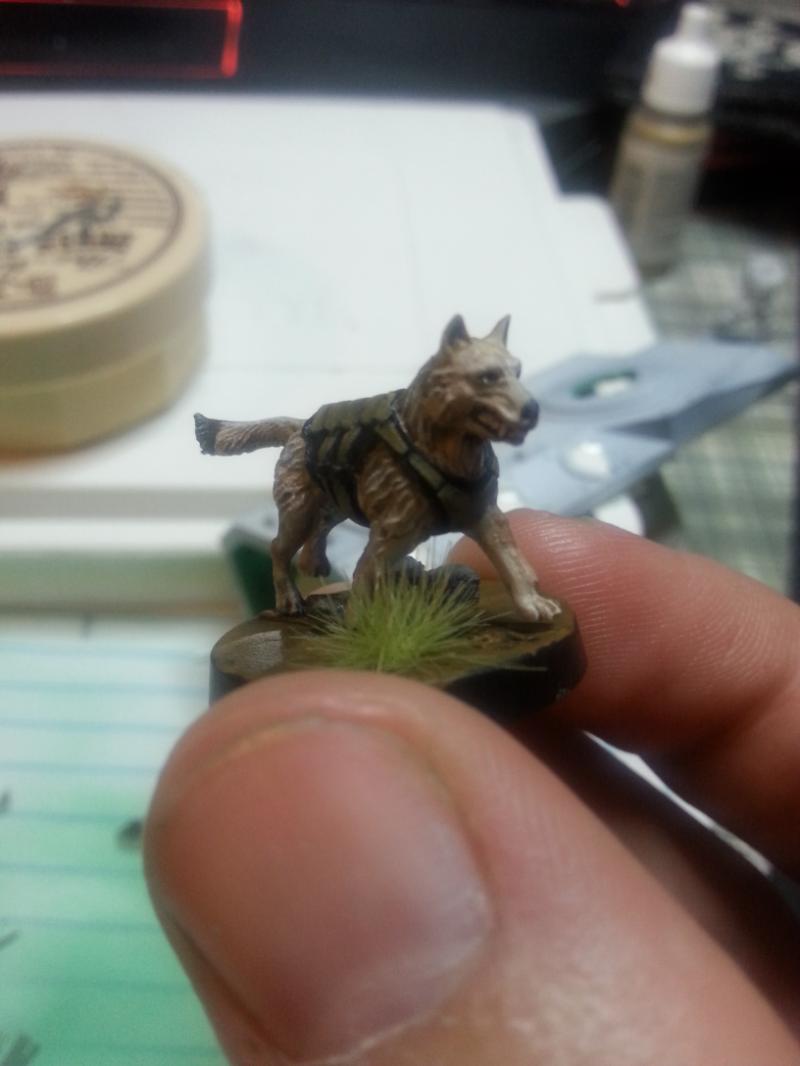
A note on painting tutorials...I found out that http://www.reapermini.com/TheCraft/1 is a great tut on fur. They have a bunch of easy to look at images, so its worth a glance. They also work! The working dog here is gonna be a "counts as" IG banner. I mean, who sees battalion colors in combat, right? I did remember seeing company mascots and working dogs in the field, though, and they did give me that morale boost, too. He is an Anvil Industry StimHound, for the record. Hilariously, the sprue came with a torn off ARM as a basing bit!
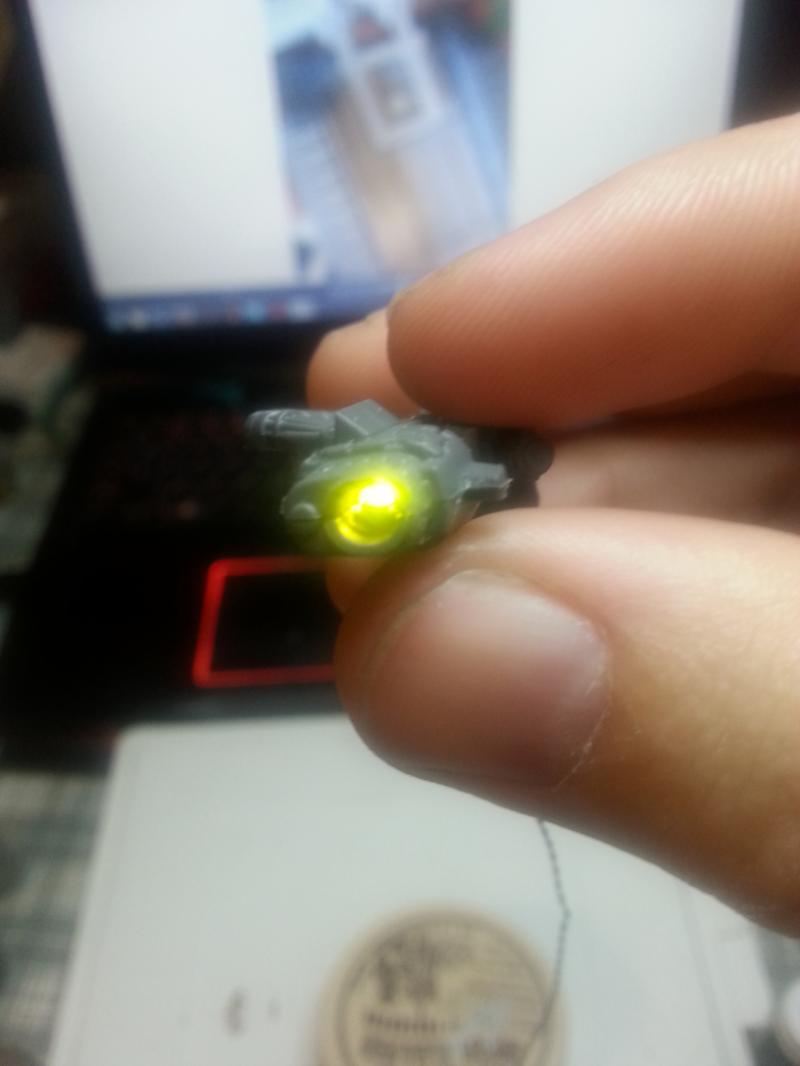
I picked up a bunch of http://www.modeltrainsoftware.com/single-light-kit.html LED model kits, and dude, customer service was on point. I broke one LED, and another was busted in the box, so they replaced both of them, even after I told them one was my fault. They also CALLED ME and offered help getting them seated!
One kit went into a devastator marine. I filed off the glowing bits, then used a silicone putty mix and straight epoxy to replace the cut off sections with clear stuff, and installed one of the lights. Its not done yet, but shows promise. The LEDs are white, but they are super low heat, so a dab of paint can change the color to whatever you want. Yellow becomes slightly green!
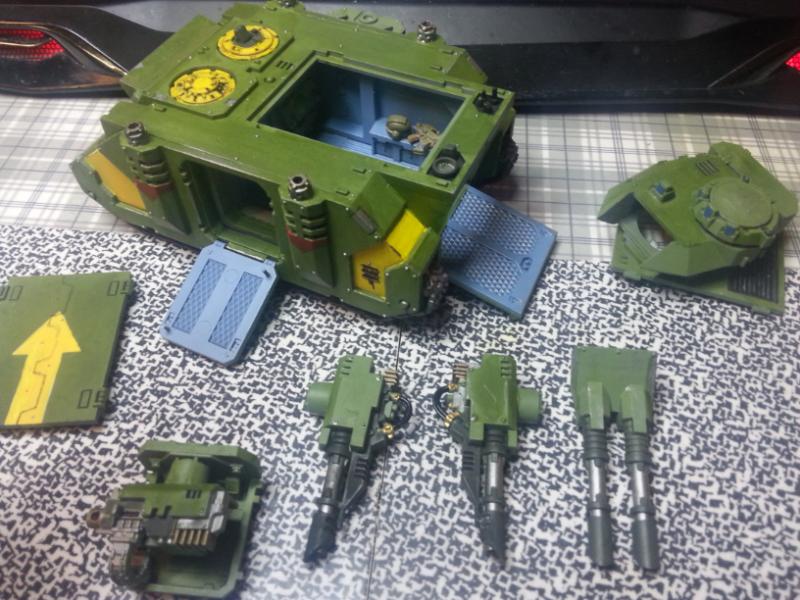
Time for TANKS! I do not know why she asked me for this, but these are magneted side sponsons on a leman russ. I used cheap two part epoxy mix, and it took me an hour to carve the channels out. This was a terrible waste of time. I should have used that awesome silicone putty stuff. Would have saved a bunch of time.
Next, my significant other decided to let me at one of her chimeras, so This is my first attempt at interiors. The paint is supposed to be ugly....M1A1 SEPS and M113s have some really ugly paint on the inside. It was a 50/50 mix of windex and craft store seafoam green. Got that tidbit from here, and it worked great. Takes forever to dry, though.
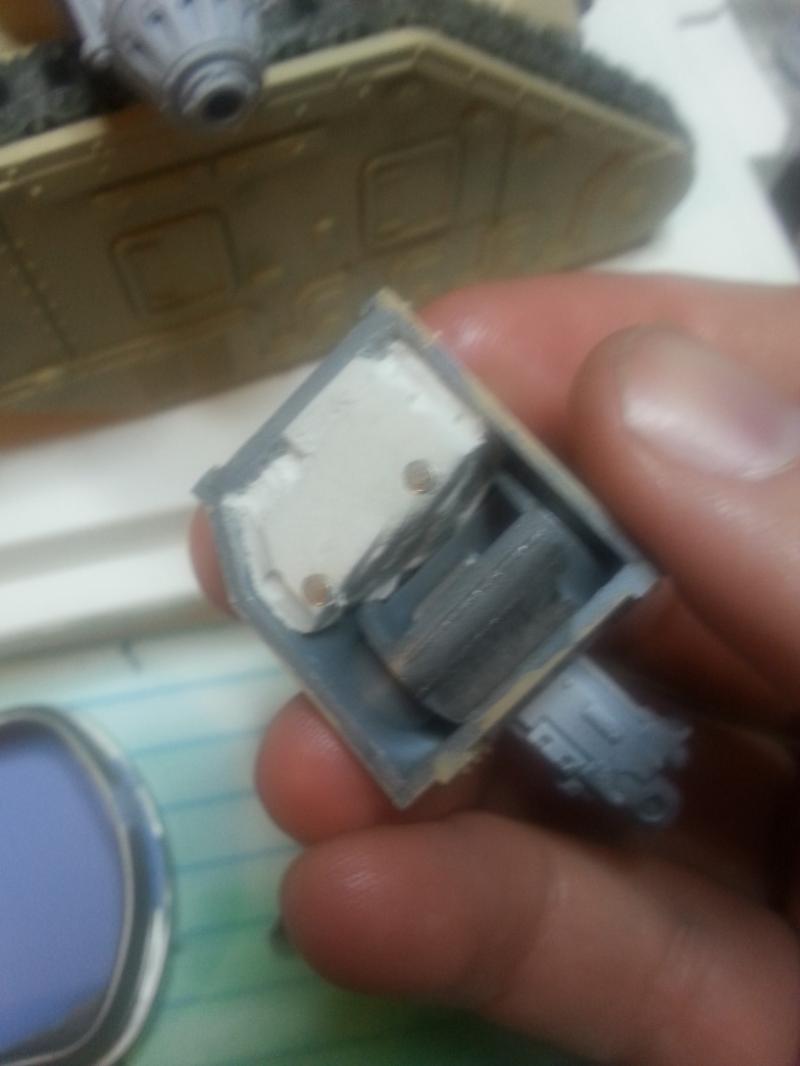
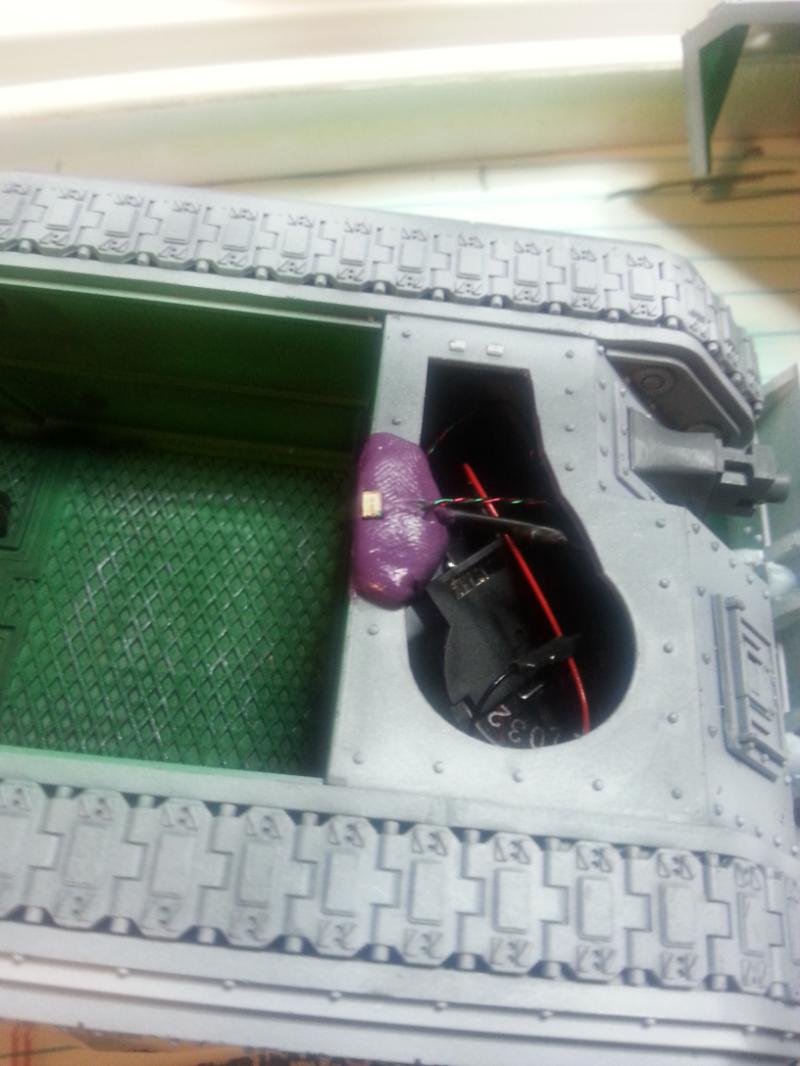
This is a chimera, too, so in goes some interior lighting. The LEDs are held in place with that same silicone putty, so the boards have some shock protection. The switch is on the bottom, drilled out with a stepper bit by hand. No accidental activation, and if you flip the model, it doesnt look slowed. (like that devastator base.) Its way easier to hide electronics in vehicles!
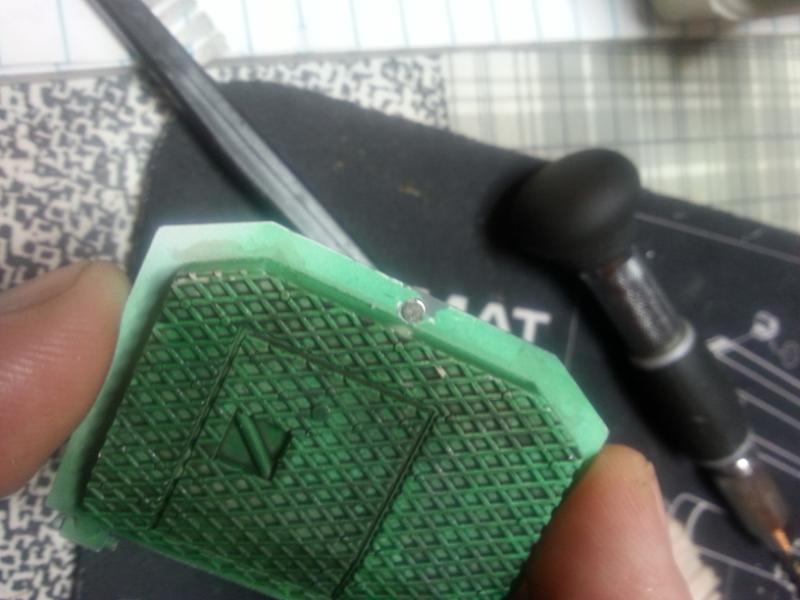
Magnets on the back hatch...
Electronics...
and cleverly disguised switch!
Point of note, though. We got some dozer blades that in defiance of all sanity had been perforated to make them look shot up. I broke them off, sealed up the holes, then used that silicone putty to make a mold. It did not work well. I found out later that the putty can put out gas for a while after it cures, so if you try to fill your shiney new mold with epoxy too soon, (anything before three days, nearabouts) the epoxy ends up looking like termites went at it. Sadly, it still looked better than the glue encrusted original. Pourable silicone two part stuff works tons better.
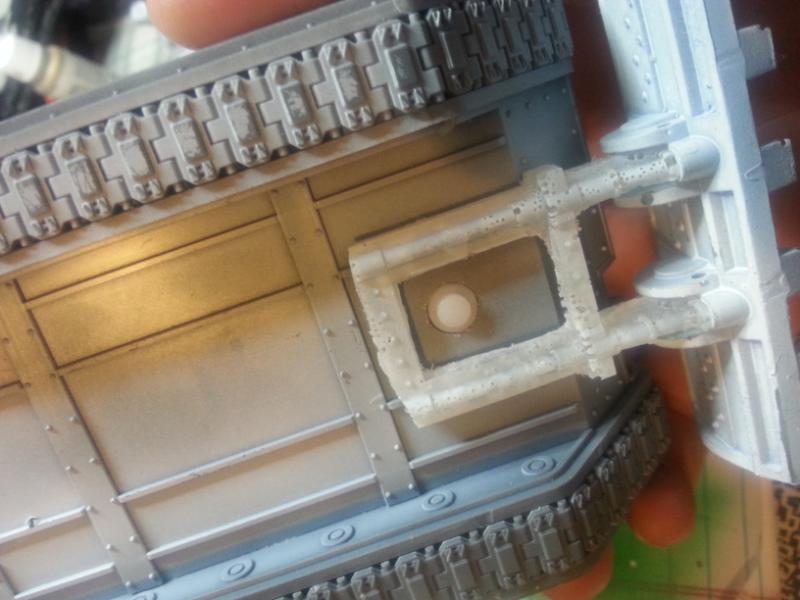
Last thing accomplished was the armored portholes. My darling has decided that chimeras should look like Russian/British/IDF/whatever APCs, so I faked armored glass by propping the top up, taping over the bottom, and pouring a bit of Micro Kristal Klear into the hollows. It shrinks, but dries clear. Instant bullet proof glass. This is taken from the top.
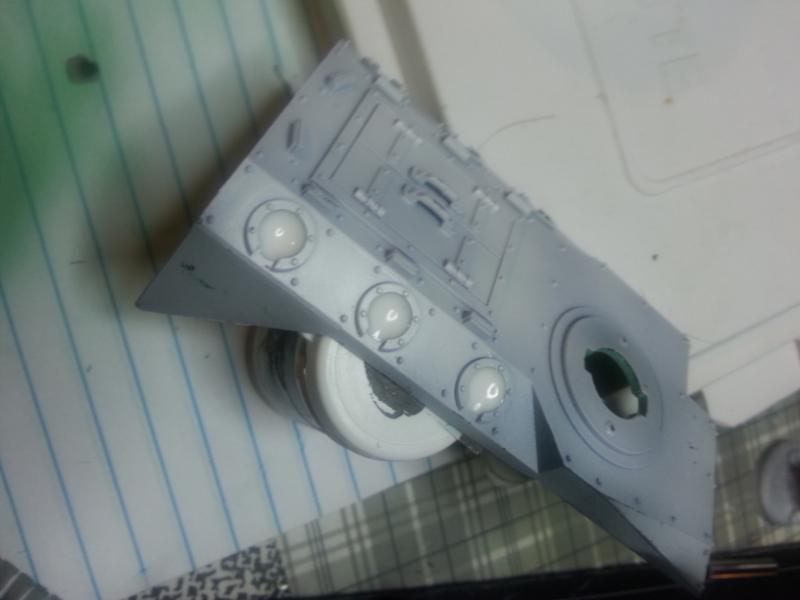
And thats a HK missile installed like a Sager, and liquid greenstuff to make the turret look casted instead of welded.
This message was edited 1 time. Last update was at 2015/12/03 00:37:57
2015/10/23 18:21:30
Subject: New SM army, now with more AnvilMiniature, and 10% more puppetswar.ru!
Marines are looking good. Big fan of the Anvil and Puppetswar stuff myself. PW has come a long ways, I had ordered some of their bitz like 2 yrs ago and was underwhelmed by the lack of resin quality. Current stuff seems way better.
CaptainStabby wrote: Marines are looking good. Big fan of the Anvil and Puppetswar stuff myself. PW has come a long ways, I had ordered some of their bitz like 2 yrs ago and was underwhelmed by the lack of resin quality. Current stuff seems way better.
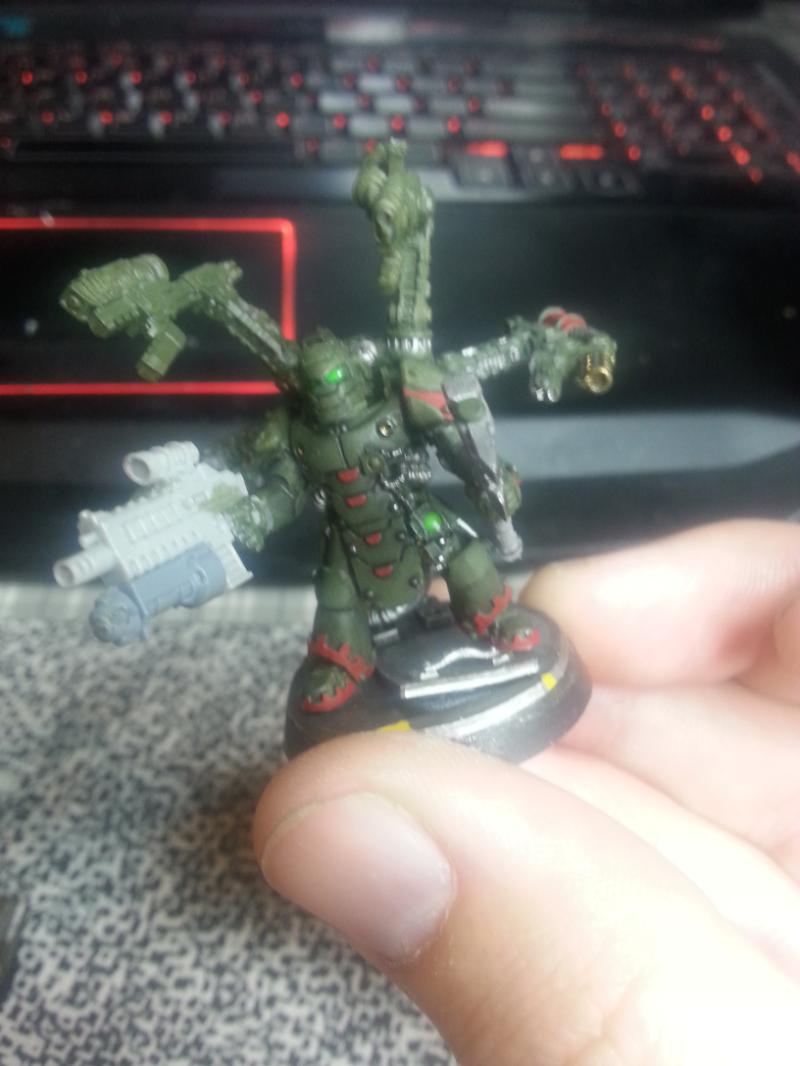
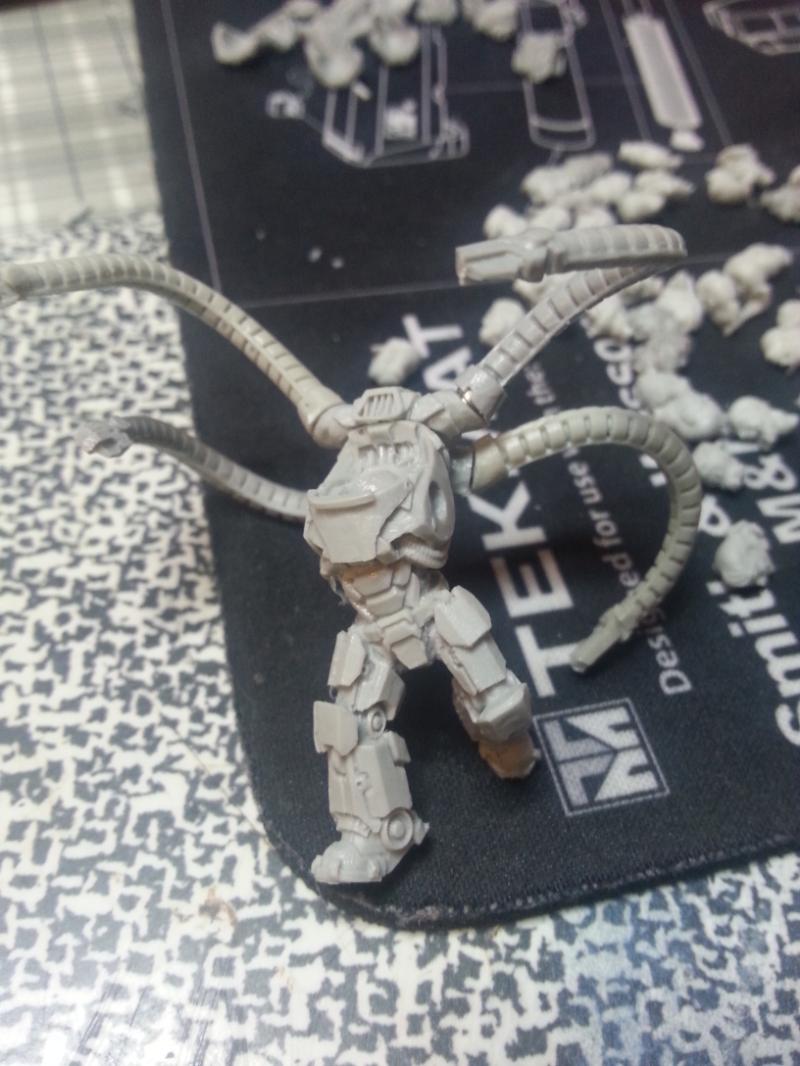
Well, I got this guy. He will eventually be my Master of the Forge, and he had issues.
His right knee and right ankle had hollow spots, bubbles, and his pistol had a big gaping hole in it. All the heads I just bought had some serious flash and sprue, but nothing that I couldn't clean up with a knife. I stuffed said voids full of greenstuff, and I will see how they turn out tomorrow.
On the other hand, the arms, shoulders, back, and tentacles all had perfect hollows for 2mm magnets, so thats something.
2015/10/24 05:19:15
Subject: New SM army, now with more AnvilMiniature, and 10% more puppetswar.ru!
Ew, yeah, to be fair I haven't ever bothered with any of their full model kits, just shoulderpads and weapons and such. That's unfortunate he's a bit dodgy, the doc oc arms do look dope. Hopefully he's salageable
CaptainStabby wrote: Ew, yeah, to be fair I haven't ever bothered with any of their full model kits, just shoulderpads and weapons and such. That's unfortunate he's a bit dodgy, the doc oc arms do look dope. Hopefully he's salageable
Ill tell you if he is tomorrow. I still gotta weld a flamer to one of those things, and give him a head.
2015/10/24 07:09:16
Subject: New SM army, now with more AnvilMiniature, and 10% more puppetswar.ru!
Alright, here we go. I sorta forgot that blogs have to be updated, so we are missing some content. I think the first topic will be.....
The Techmarine that we looked at! He is too skinny, but the base turned out great. Bricks are greenstuff and plastic castoffs, done up with mephiston red, steel, Typhus corrosion, and a dark wash.
This guy looks much better. He is a forgeworld techmarine, with the anvilindustry bolter, axe, and servo-harness. Base is bent plasticard.
Plasticard and greenstuff seems to solve all basing problems, too. These are all that combination.
So the bricks work like this. you slop on the greenstuff, then use a tool to line it, as shown. The fingerprint marks disappear and get that awesome cobblestone effect by using one of the stiff toothbrushes from a weapons kit, and just brushing lightly. So easy. I tried it with a softer brush, and the effect changes. Best part, is the greenstuff doesnt seem to want to stick to nylon bristles. My lines aren't very straight because I was using Tullamore Dew, and while that makes modelling easier, it makes it a touch messier. Also, poker chips are the same size as terminator bases, much cheaper!
A note on painting tutorials...I found out that http://www.reapermini.com/TheCraft/1 is a great tut on fur. They have a bunch of easy to look at images, so its worth a glance. They also work! The working dog here is gonna be a "counts as" IG banner. I mean, who sees battalion colors in combat, right? I did remember seeing company mascots and working dogs in the field, though, and they did give me that morale boost, too. He is an Anvil Industry StimHound, for the record. Hilariously, the sprue came with a torn off ARM as a basing bit!
I picked up a bunch of http://www.modeltrainsoftware.com/single-light-kit.html LED model kits, and dude, customer service was on point. I broke one LED, and another was busted in the box, so they replaced both of them, even after I told them one was my fault. They also CALLED ME and offered help getting them seated!
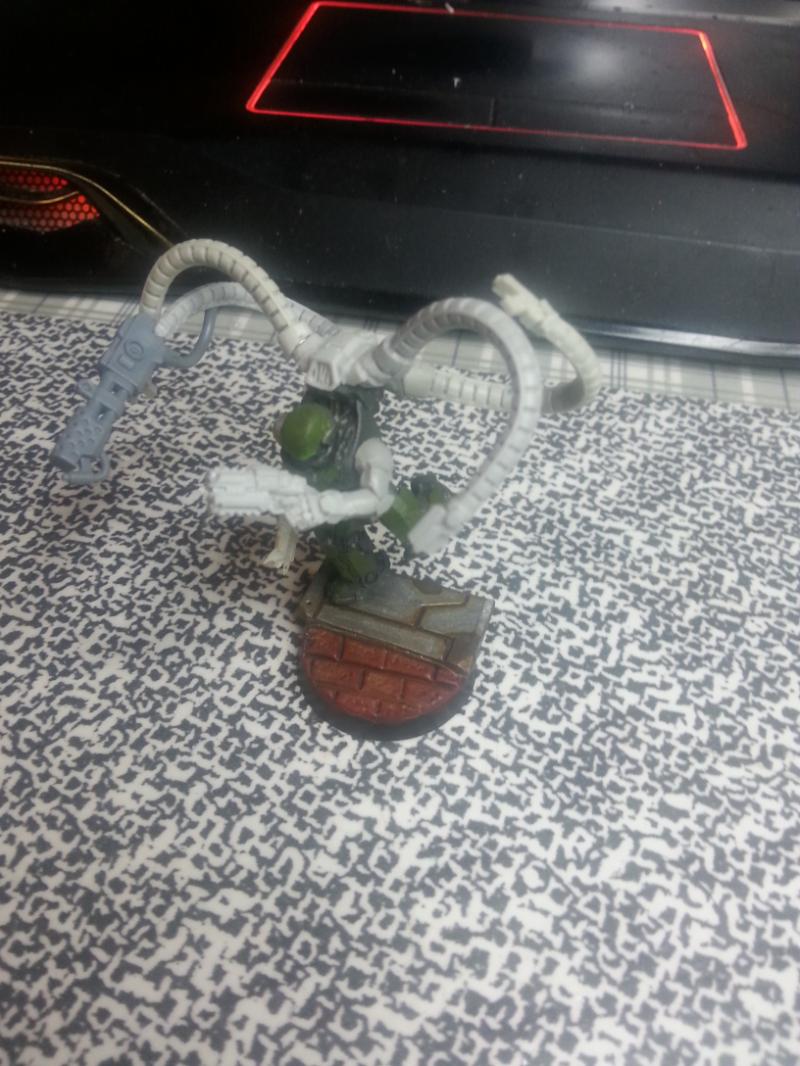
One kit went into a devastator marine. I filed off the glowing bits, then used a silicone putty mix and straight epoxy to replace the cut off sections with clear stuff, and installed one of the lights. Its not done yet, but shows promise. The LEDs are white, but they are super low heat, so a dab of paint can change the color to whatever you want. Yellow becomes slightly green!
Time for TANKS! I do not know why she asked me for this, but these are magneted side sponsons on a leman russ. I used cheap two part epoxy mix, and it took me an hour to carve the channels out. This was a terrible waste of time. I should have used that awesome silicone putty stuff. Would have saved a bunch of time.
Next, my significant other decided to let me at one of her chimeras, so This is my first attempt at interiors. The paint is supposed to be ugly....M1A1 SEPS and M113s have some really ugly paint on the inside. It was a 50/50 mix of windex and craft store seafoam green. Got that tidbit from here, and it worked great. Takes forever to dry, though.
This is a chimera, too, so in goes some interior lighting. The LEDs are held in place with that same silicone putty, so the boards have some shock protection. The switch is on the bottom, drilled out with a stepper bit by hand. No accidental activation, and if you flip the model, it doesnt look slowed. (like that devastator base.) Its way easier to hide electronics in vehicles!
Magnets on the back hatch...
Electronics...
and cleverly disguised switch!
Point of note, though. We got some dozer blades that in defiance of all sanity had been perforated to make them look shot up. I broke them off, sealed up the holes, then used that silicone putty to make a mold. It did not work well. I found out later that the putty can put out gas for a while after it cures, so if you try to fill your shiney new mold with epoxy too soon, (anything before three days, nearabouts) the epoxy ends up looking like termites went at it. Sadly, it still looked better than the glue encrusted original. Pourable silicone two part stuff works tons better.
Last thing accomplished was the armored portholes. My darling has decided that chimeras should look like Russian/British/IDF/whatever APCs, so I faked armored glass by propping the top up, taping over the bottom, and pouring a bit of Micro Kristal Klear into the hollows. It shrinks, but dries clear. Instant bullet proof glass. This is taken from the top.
And thats a HK missile installed like a Sager, and liquid greenstuff to make the turret look casted instead of welded.