| Author |
Message |
 |
|
|
|
|
Advert
|
Forum adverts like this one are shown to any user who is not logged in. Join us by filling out a tiny 3 field form and you will get your own, free, dakka user account which gives a good range of benefits to you:
- No adverts like this in the forums anymore.
- Times and dates in your local timezone.
- Full tracking of what you have read so you can skip to your first unread post, easily see what has changed since you last logged in, and easily see what is new at a glance.
- Email notifications for threads you want to watch closely.
- Being a part of the oldest wargaming community on the net.
If you are already a member then feel free to login now. |
|
 |
2023/09/17 13:14:44
Subject: The yellow-black pattern or How The Hell Do You Paint Iron Warriors
|
|

Fresh-Faced New User
|
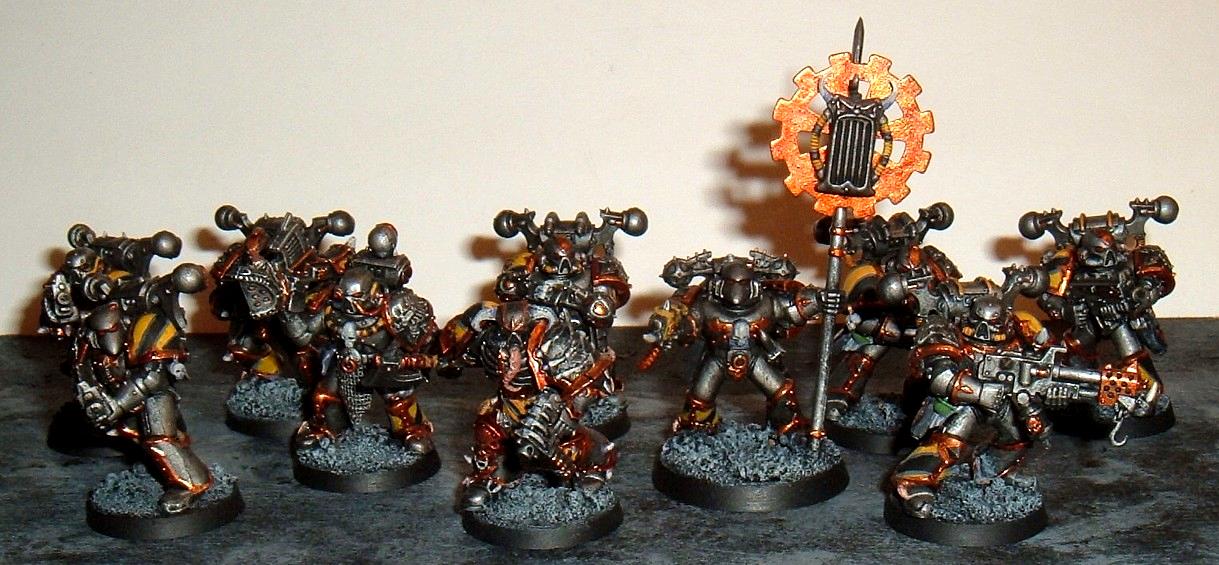
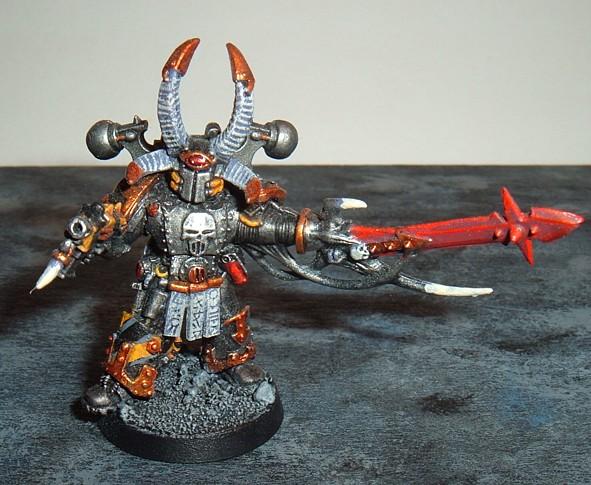
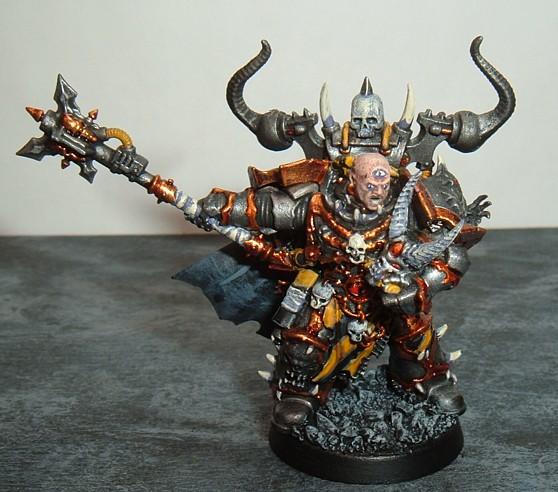
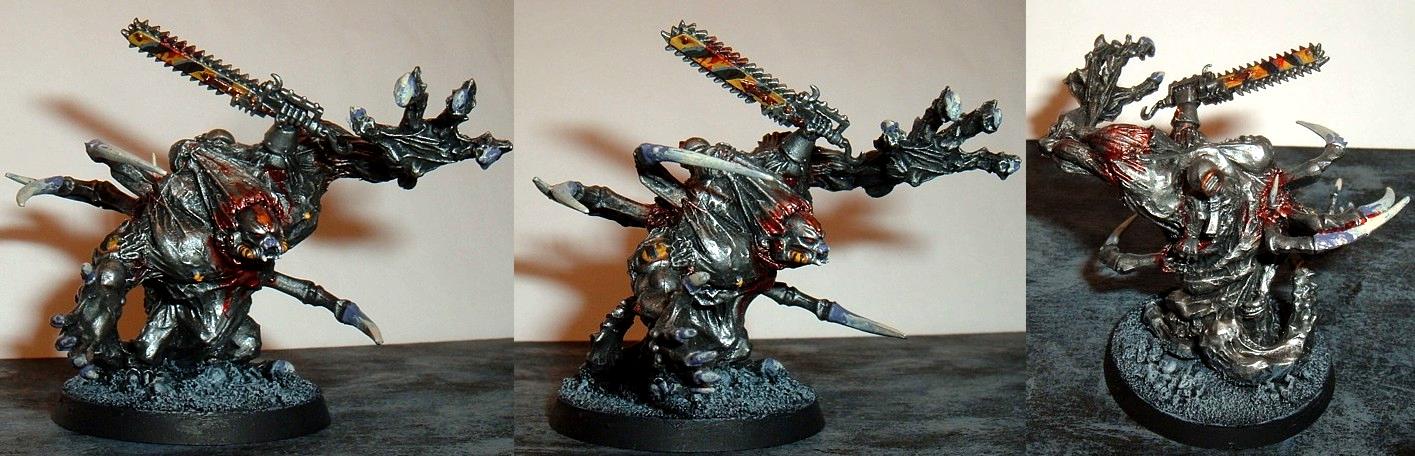
As a big, BIG IW fan since before i started collecting, I obviously went for CSM to paint them. Thing is, I can't paint 'em. Metallic is obvious, gun-black is too, but how the hell does one make good-looking lines on their pauldrons and under their knees? Is there nothing I can do except switching to WB or NL? (although I amagine lightning for the NL will be its own hell)
|
|
|
 |
|
2023/09/17 13:56:26
Subject: The yellow-black pattern or How The Hell Do You Paint Iron Warriors
|
|

Raging-on-the-Inside Blood Angel Sergeant
|
I use pin stripe tape to do the hazard lines on my Iron Warriors. You'll want to start with a yellow base coat, although Citadel "Averland Sunset" does cover alright over black. It's more of a desaturated yellow. It's what I use on my Iron Warriors.
|
|
This message was edited 1 time. Last update was at 2023/09/17 13:56:38
|
|
|
|
|
2023/09/17 16:17:50
Subject: The yellow-black pattern or How The Hell Do You Paint Iron Warriors
|
|
The Marine Standing Behind Marneus Calgar
|
Unless you have a good steady hand, masking off the stripes for clean lines is the way to go. I’ve only done larger stuff, not infantry scale, but it worked well for me. I use the same technique for putting the racing stripes on my Eldar.
How to paint hazard/warning stripes is a fairly common thing for non-GW minis, not just Iron Warriors, There should be plenty of tutorials/products out there to help
|
|
|
|
|
|
2023/09/17 18:06:01
Subject: Re:The yellow-black pattern or How The Hell Do You Paint Iron Warriors
|
|
Regular Dakkanaut
|
Yellow basecoat first, then varnish, then mask with latex masking fluid or masking tape, then paint black, varnish
Alternatively, if you're unsure about freehanding, you can invest in some cheap Gouache. These watercolors are opaque, so they're just as good at covering as acrylics. You can use a wet brush to rub off mistakes, then when you feel it's ready to set, use aerosol varnish so it won't come off. 
|
"Cold is the Emperor's way of telling us to burn more heretics." |
|
|
|
|
2023/09/17 19:17:21
Subject: The yellow-black pattern or How The Hell Do You Paint Iron Warriors
|
|
Shadowy Grot Kommittee Memba
The Great State of New Jersey
|
1. Paint Yellow
2. Use modeling tape (basically masking tape made in smaller sizes - Tamiya and Mr. Hoobby makes the stuff I'm familiar with, Aizu also makes it. Not sure if there are any western brands that might be more accessible) to tape out your stripe pattern - the areas you cover will stay yellow, the exposed areas will be black. Ideally you want to have these stripes as close to parallel as possible and equal width - my advice is to tape it out fully from end to end (covering all the yellow) and then remove every other piece to ensure its accurate.
3. Paint it black.
4, Remove tape.
|
|
|
|
|
|
2023/09/18 22:47:37
Subject: Re:The yellow-black pattern or How The Hell Do You Paint Iron Warriors
|
|
Utilizing Careful Highlighting
|
I'm probably the only person here who does this free hand (ie, no masking):
I paint the area with Averland Sunset with a Reikland Flesh wash, then I paint it Yriel Yellow. After that, I do the stripes in Codex (Eshin?) Grey and then pure black down the middle of the stripes so it has a barely visible grey edge.
Your mileage may vary...
|
|
|
|
|
|
2023/09/19 09:45:36
Subject: Re:The yellow-black pattern or How The Hell Do You Paint Iron Warriors
|
|
Liche Priest Hierophant
|
 KidCthulhu wrote: KidCthulhu wrote:I'm probably the only person here who does this free hand (ie, no masking):
Not quite the only one. 
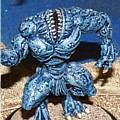
I agree with Nevelon that ideally you have steady hands if you want to freehand this stuff. I don't, which is why my early attempts at painting stripes looked something like this:
That said, I found that it took fairly little practice to get reasonably straight lines, like this:
It may not feel great to go through a squad or two before you get decent results, but once you know how to paint straight(ish) lines, you can always go back to touch up the early models.
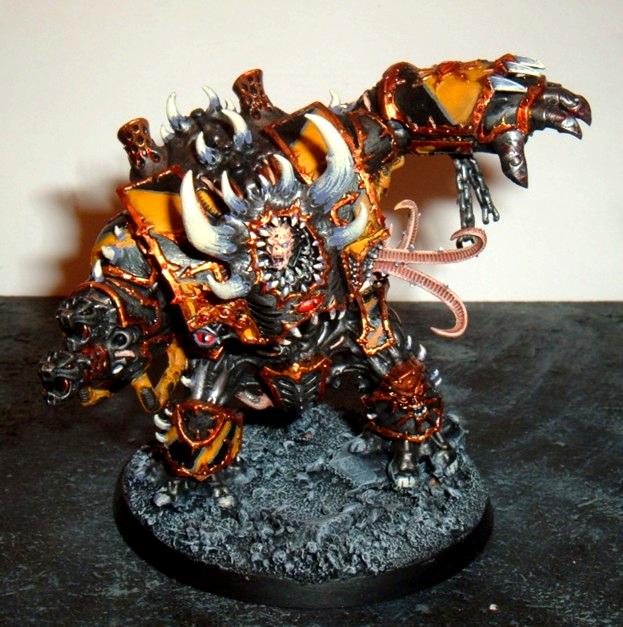
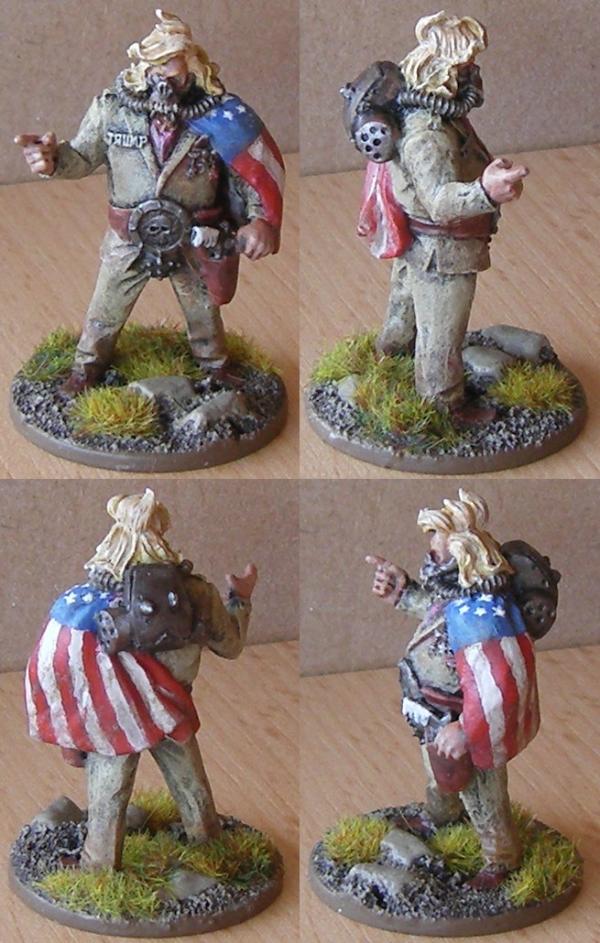
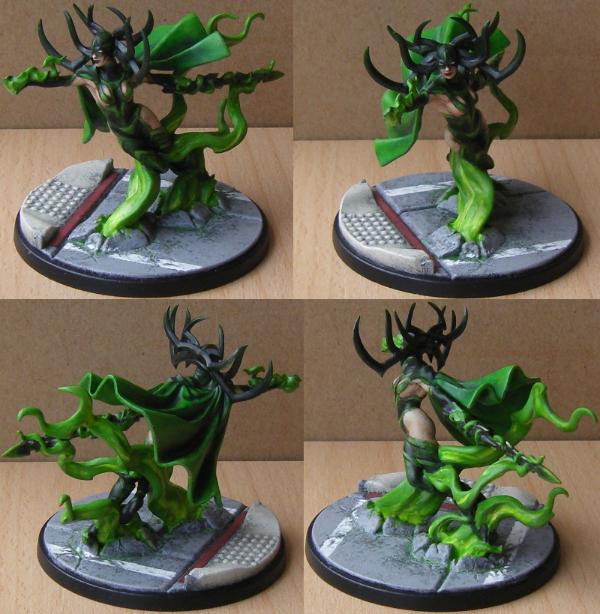
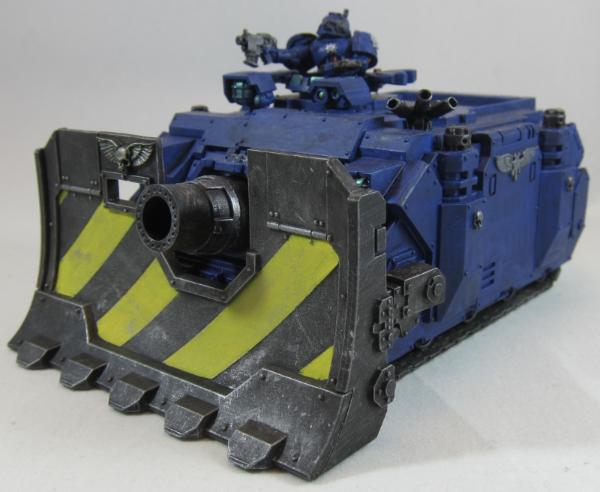
For actual black and yellow hazard stripes, I like to go with this look:
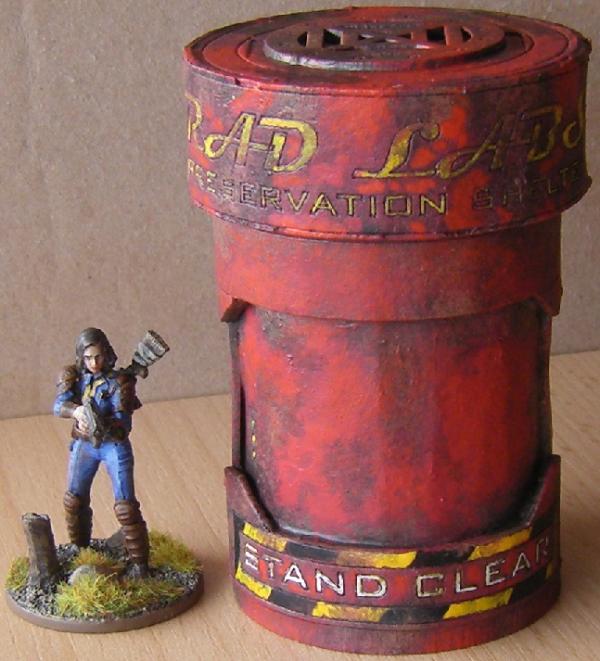
That's obviously larger than a Marine, but at least it makes the effect easier to see. If I want to go for a dirty or worn look, I start with a dark brown base. Then I paint a yellow stripe smaller than the eventual width. Once that core is done, I use that as a guide to put a straight yellow line on both sides to get the full width of the yellow stripe and fill in any bits in between that still show the brown base. Get all your yellow stripes done like this and it's easy to fill in the black stripes. Maybe leave a tiny brown strip between your black and yellow to separate them. Most importantly, in my experience, you want to follow the edges of your stripe when applying paint, so as to get the smoothest, straightest lines possible.
With regard to the weathering, I try to incorporate that during the yellow stage by omitting or not entirely covering the odd spot of brown. After the hazard stripes are done, a little stippled brown on top of that provides a nice, worn look.
For cleaner, more vivid yellow stripes, I'd start with the same brown base but put an orange layer on top of it before applying yellow.
|
Nehekhara lives! Sort of!
Why is the rum always gone? |
|
|
|
|
2023/09/19 10:22:07
Subject: The yellow-black pattern or How The Hell Do You Paint Iron Warriors
|
|
The Marine Standing Behind Marneus Calgar
|
You weirdos with your “steady hands” and “freehand skills”
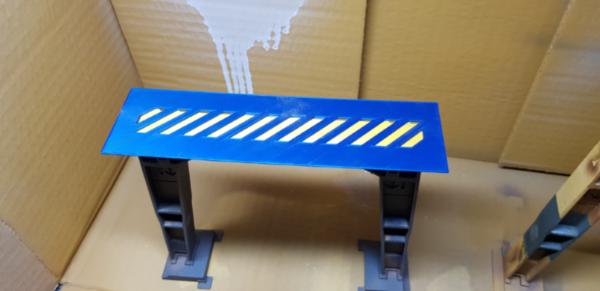
Tape!
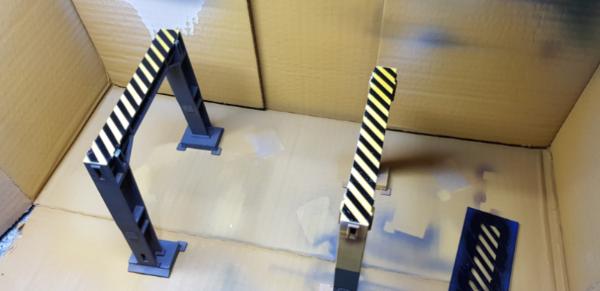
This is me trying to line things up:

It’s not good.
This is putting them all down and removing every-other strip. (Actually just resuing a spacer strip of tape)
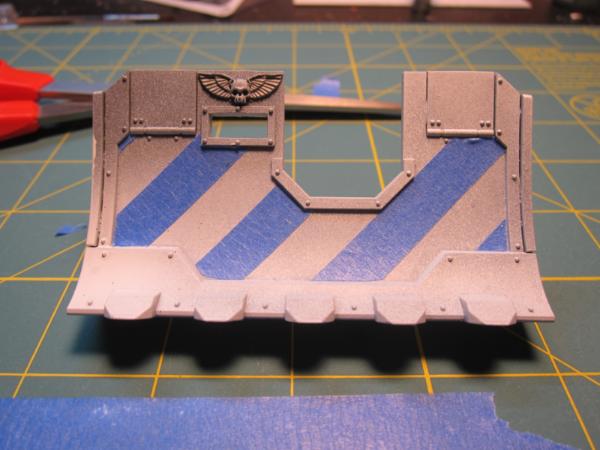
Results:
I didn’t have fancy modeling tape, so used painter’s tape from the hardware store cut to width. Do make sure you press down the edges good, or you could get paint seeping under the tape. I needed to do a bit of cleanup.
|
|
|
|
|
|
2023/09/19 11:54:32
Subject: The yellow-black pattern or How The Hell Do You Paint Iron Warriors
|
|

Leader of the Sept
|
|
Please excuse any spelling errors. I use a tablet frequently and software keyboards are a pain!
 Terranwing - w3;d1;l1 Terranwing - w3;d1;l1
 51st Dunedinw2;d0;l0 51st Dunedinw2;d0;l0
 Cadre Coronal Afterglow w1;d0;l0 Cadre Coronal Afterglow w1;d0;l0 |
|
|
|
|
2023/09/19 17:34:21
Subject: The yellow-black pattern or How The Hell Do You Paint Iron Warriors
|
|
Shadowy Grot Kommittee Memba
The Great State of New Jersey
|
If you print it thin enough a curved surface shouldnt be too hard, but you're talking 2-3 layers max.
|
|
|
|
|
|
|
|
 Ultramarines, 3rd Co. and friends, 16k+
  4k
4k  4k Points
 Competition Index