tme0003’s Dreadclaw Plans Tut ver. 1.0 As the title implies, you have found or stumbled upon my Dreadcalw plans. If you enjoy building, or don’t feel like paying $170 for a forgeworld one, you can make your own with some time and patience for around $25-$30 if you have the tools, and around $60 if you need to buy everything (excluding casting materials that is). I saved my original plans and saved them as a PDF file that is attached at the bottom of the tutorial for your downloading pleasure. Read trough the tutorial and if you feel game, download the plans and get to it! I’ll take you through step by step. So here’s what we have:
Table of Contents I. Materials
II. General Tips
III. The Build
A. The Body
B. The Bottom Hatch
C. The Main Thruster
D. Side Panel Trim
E. Intake Vents
F. Retro Thrusters
G. Legs
H. Painting
I. Casting with Silicon and Resin
J. Conclusion and Tut Cleanup
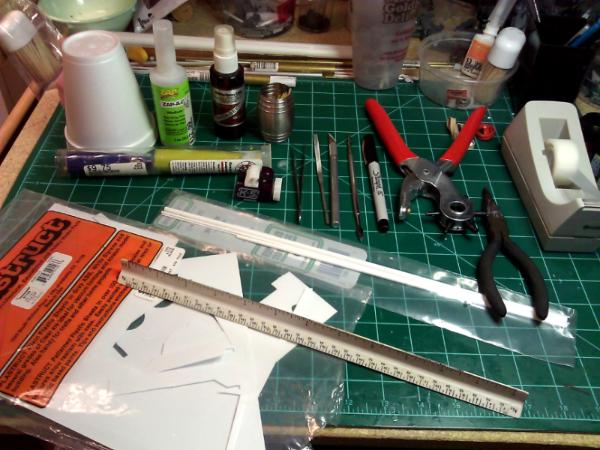
I. Tools/Materials Used -Xacto Knife
-Zap-a-Gap Glue
-Zip Kicker Glue Accelerator
-Rat Tail Files
-Tube Cutter
-Tape
-Fine Tip Permanent Marker
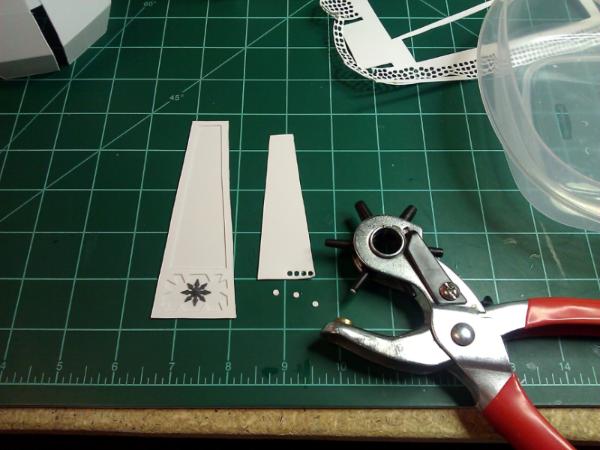
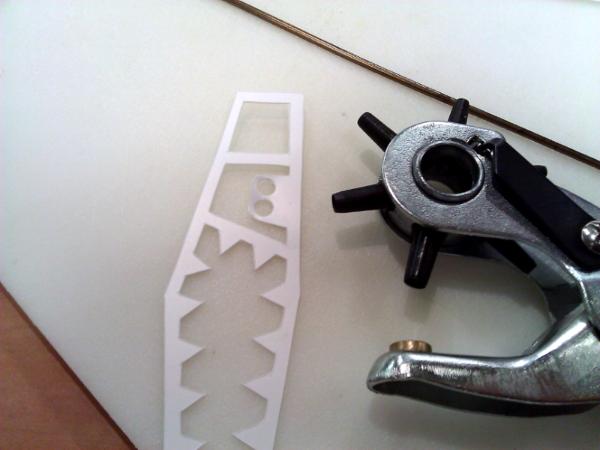
-Leather Punch
-12 oz cup
-Greenstuff
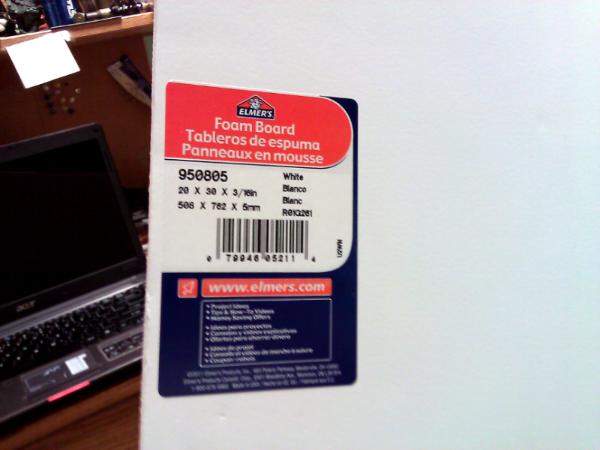
- 3/16 inch (5mm) Foam Board
- 0.020”/0.5mm Plastruct Sheets
-0.030”/0.8mm Plastruct Sheets
- Evergreen Styrene “Variety Tube Pack”
- Evergreen Styrene ½” Tube
-Polytek PlatSil 71-10 RTV Silicon
-Polytek Easy Flo 60 Liquid Resin
 II. General Tips READ THE WHOLE TUTORIAL FIRST!!!!
 Don’t get too excited and jump the gun. This way you can get a feel for the whole process, tools and materials needed, and will give you a chance to ask anything that isn’t clear.
Comments on Materials: Of course these are just the materials I used to give you an idea what you will need. If you are at all experienced yourself you can of course change them according to your likes. However, I have a few notes on why I chose what I did. The biggest thing I would point out is to use Plastruct Sheets instead of Evergreen Sheets of styrene. The Evergreen sheets only come in 6x12 while the Plastruct comes in 7x12. This will allow you fit all of the base panels on one sheet and keep them connected, a huge time and frustration saver. I also recommend two separate thicknesses of the styrene. The thicker sheets are sturdier and work great for the “base” parts and will hold up well while the thinner sheets are easier to cut/bend/manipulate and are better for the detail work; you also usually get more of the thinner sheets in each pack.
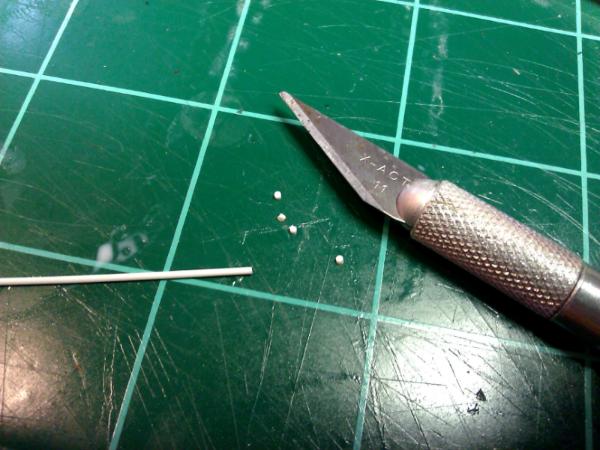
For making rivets you use the leather punch just start clipping them out of some scratch pieces of .5mm sheets. If you are using the small rod just lay it flat and cut off very small pieces from the end to make little wafers.

For attaching your rivets I like put a big dot of glue on some scrap styrene, then pick up the rivet I some tweezers, dip it onto the top of the glue, and then place it on the model; I also keep a toothpick handy to press it flat on the model and out of the tweezers. Or you can dab some glue on the end of the toothpick, then smear a little on the model, and drop the rivet in place.
For your green stuff work just have a bowl of water around to dip your fingers and tools it, that’ll be all the lubricant you need for the green stuff work we’ll be doing. The work is also very minimal and doesn’t require any real sculpting know how.
Also, if you’re kinda new to this you may want to do a practice run with each part first. An easy, fast and cheap way to do this is to use poster board. Do all the steps the same, but just with poster board, it’s around a dollar a sheet, can be taped together instead of glued and comes out with about the same look; a great way to learn without using up your nice materials.
Lastly, all my plans are hand drawn with only a pencil, ruler, protractor and some math. That being said they won't be exactly perfect, you may have to do little work, and more importantly, thinking of your own for a few bit pieces and to make some corners match up, but 95% of the work is in the plans. However I did my best to clean them up and make any edits they needed (although my editing method involved white out and a xerox machine so take it for what it's worth).
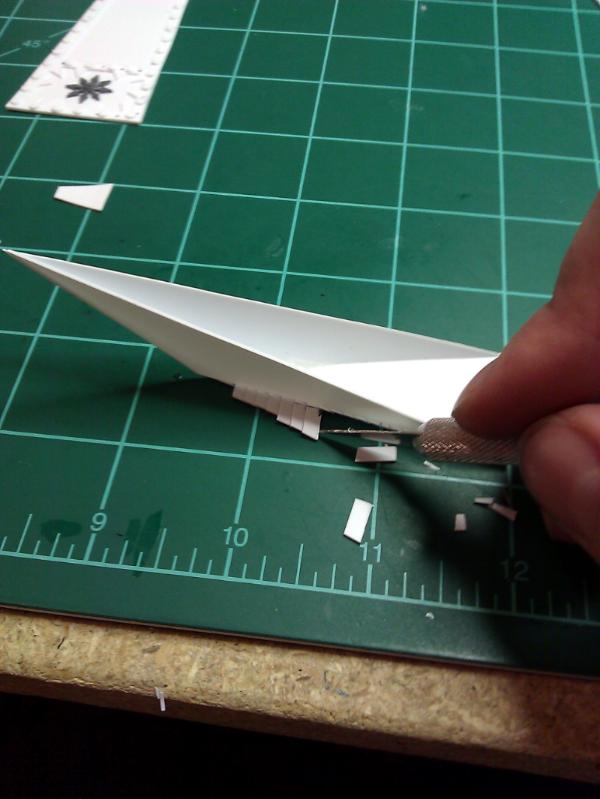
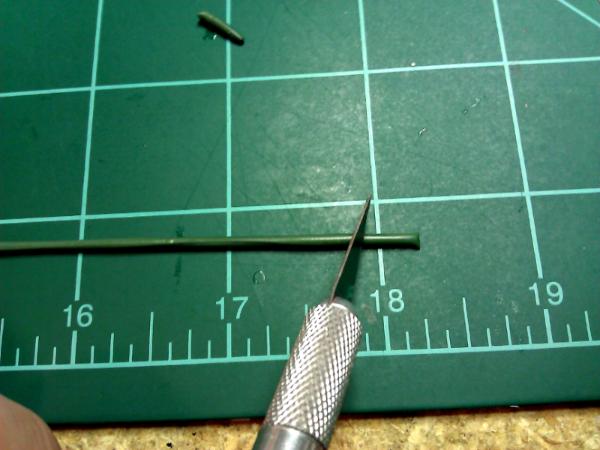
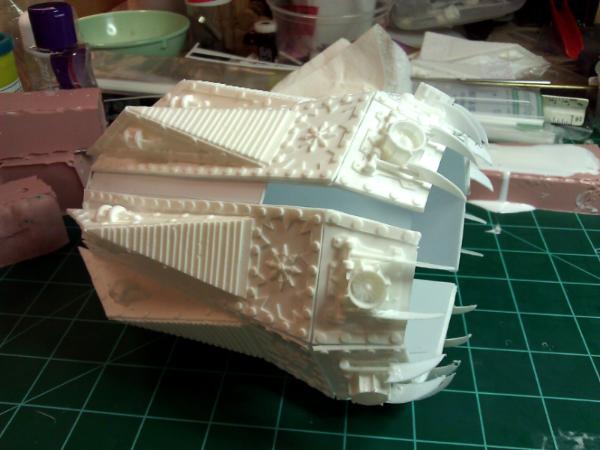
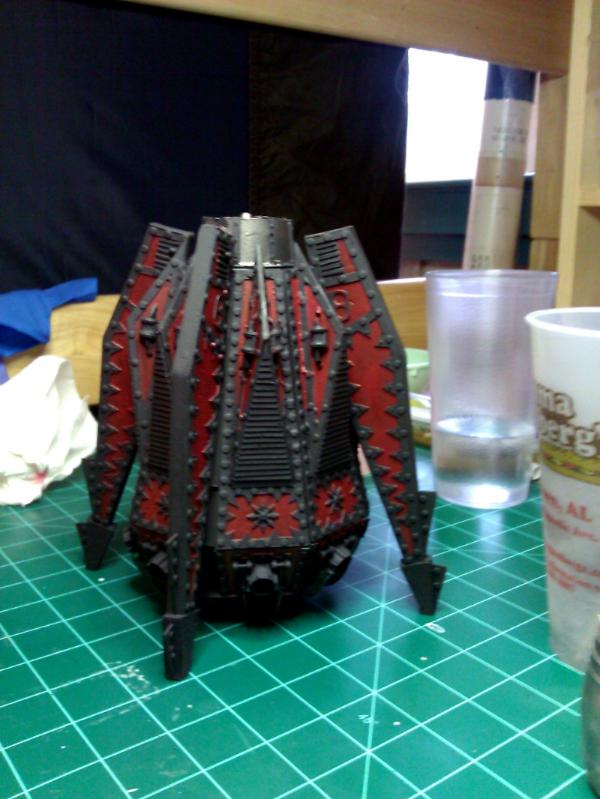
III. The Build A. The Body So let’s get started! First of course you’ll need to print off the sheets. On the bottom of each page you will see a 1 inch line marked, measure that the ensure your printer has printed the plans in the correct scale. Once you’ve done that grab page one and a sheet of .8mm Plastruct. So how my “plans” are supposed to work (and how I used them while drawing them) would be to print out the page and tape it down on top of your sheet of styrene you want to cut the pieces out of. I would recommend taping all the sides down as well as taping over each line you will cut. The tape will give the paper more stability and keep if from shifting or wandering while you cut, and tape is much cheaper than the styrene sheets.
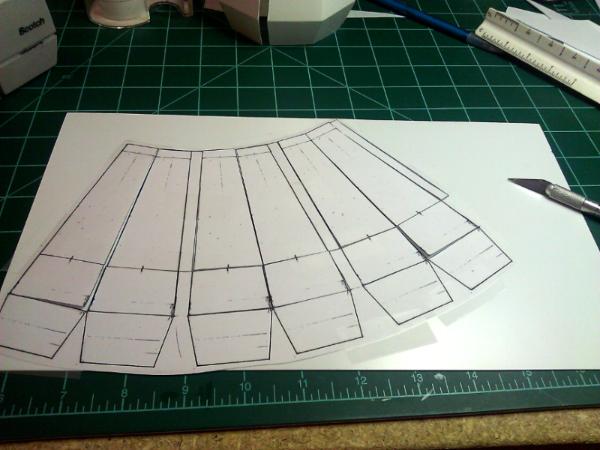
So once that’s done cut all the
INTERIOR lines first, otherwise your picture will slip right off the sheet. Also on the lines marked as such, just score (meaning make a shallow cut that does not go all the way through the plastruct) those lines to keep them attached, trust me it’ll make things easier ahead.
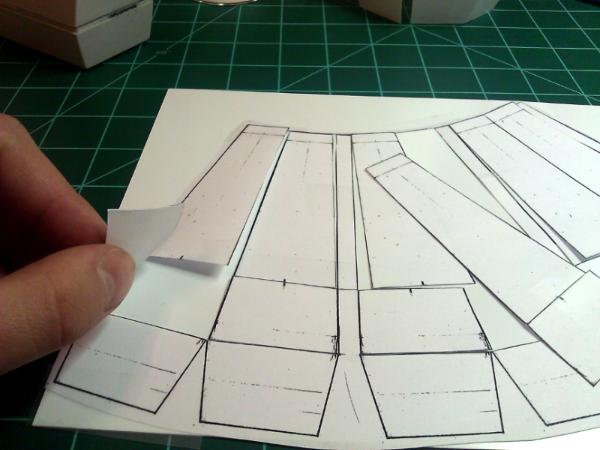
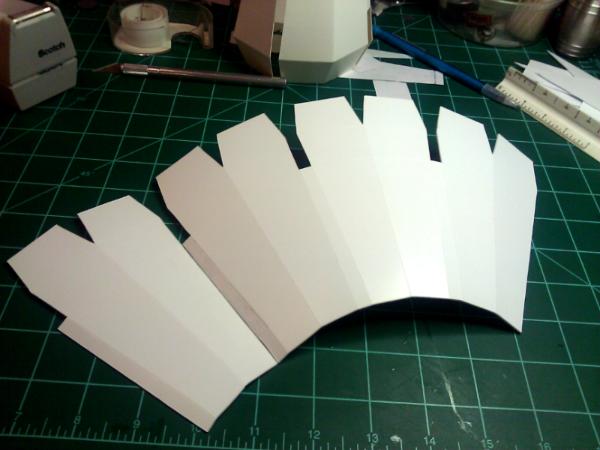
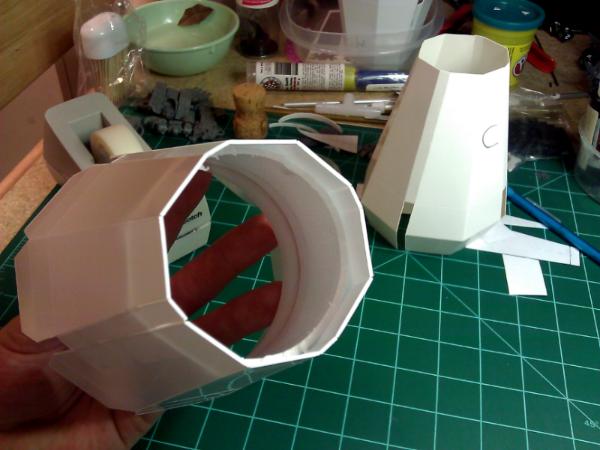
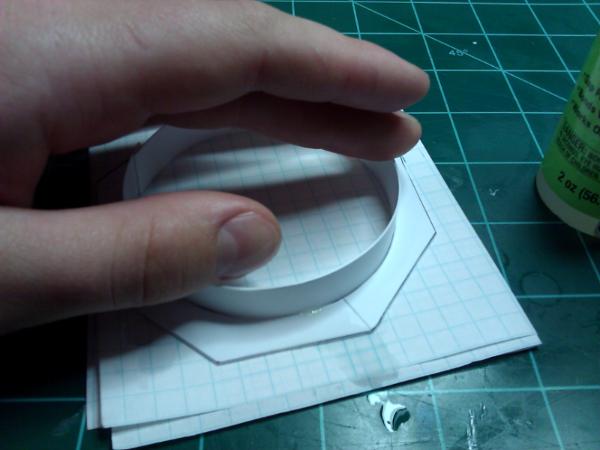
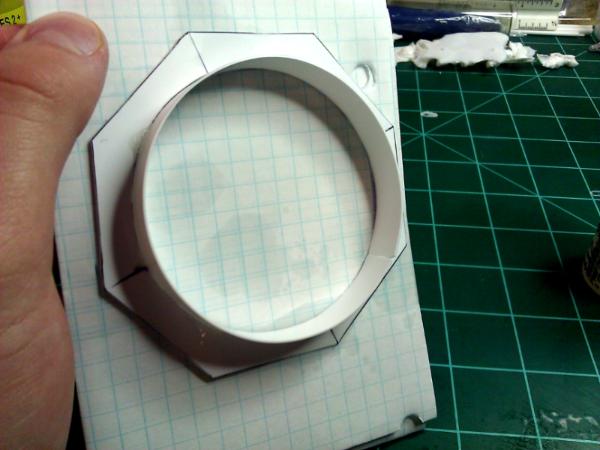
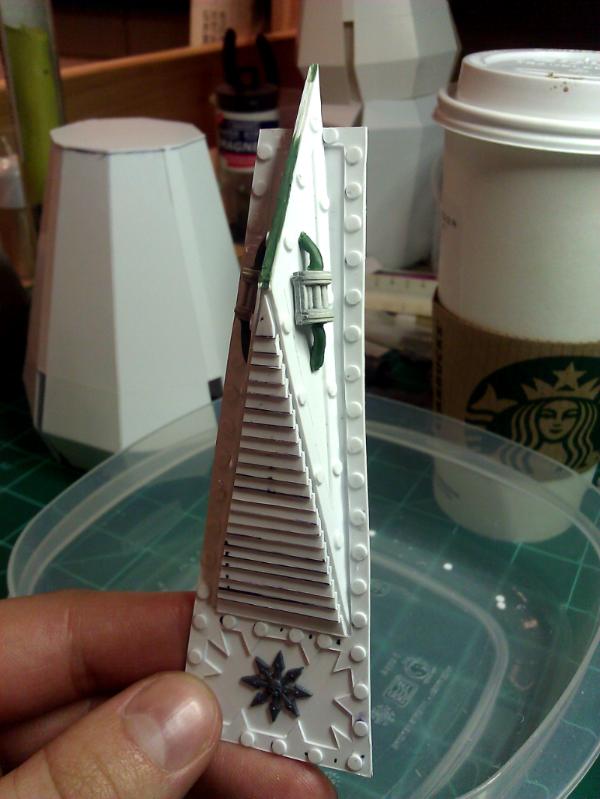
So once you have all the panels cut out from pages 1 and 2 bend along your score lines to start giving them a curve, but be careful not to bend them too much so the break and separate. Take the two loose panels and put them tight against one side of the other three and put a piece of tape over both of them on the outside to help hold them together, than bend them around and tape the other side to form a complete circle.
This is where you’ll need that 12 oz cup. Slide it into the interior of the Dreadclaw body to give is a more perfect symmetry and circular aspect, if the bottom of the cup sticks through the top a bit, cut it down and stick in back in.

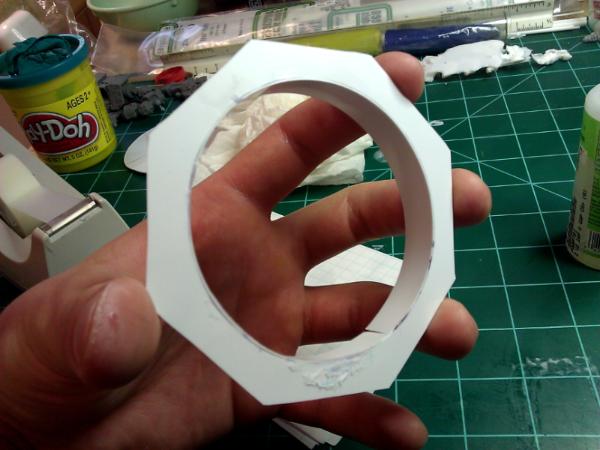
Now you use my template for the top, or create your own. Mine should be pretty close but everyone’s will be a bit different. To make your own simply flip it over on a sheet of styrene, and take that tin tipped marker and trace around it to make your own. Cut it out and glue it on. Once it dries it will hold the shape of your
DC body.
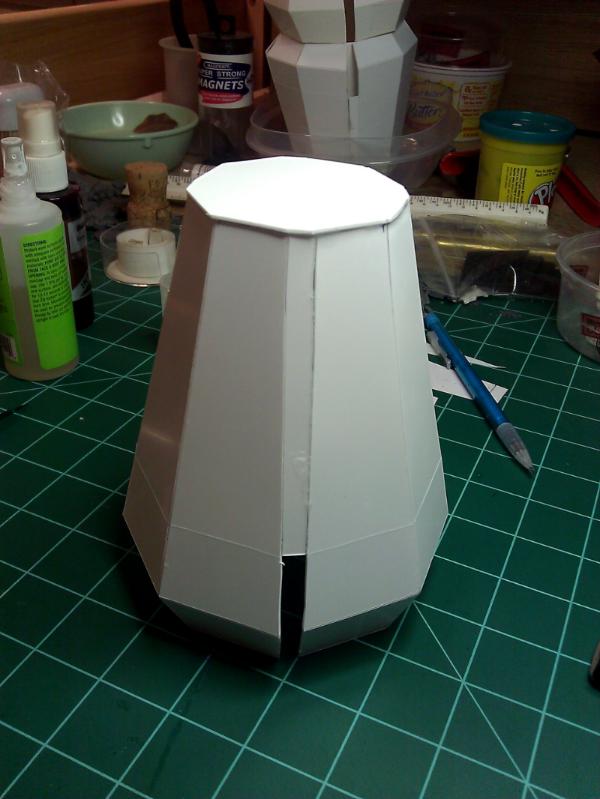
Flip it over and fold the little tab pieces together and glue them in their respective pairs.
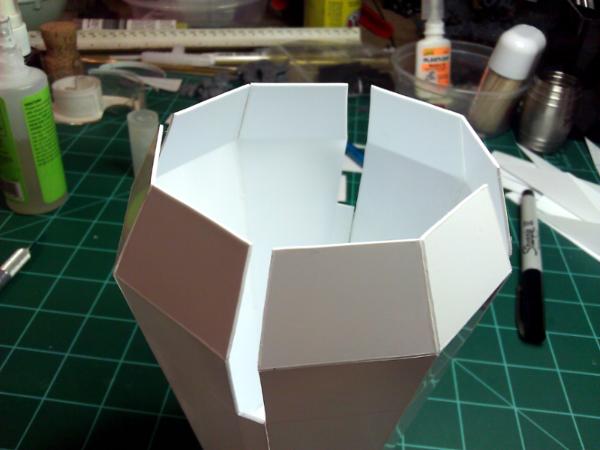
You may also want to do some gluing on the interior of the model at this point to give it some extra strength, or use
GS, or fill it with something else of your liking. I just added dots of glue at a couple of the joints and mine had held together fine to date, it just depends how paranoid you are I suppose.
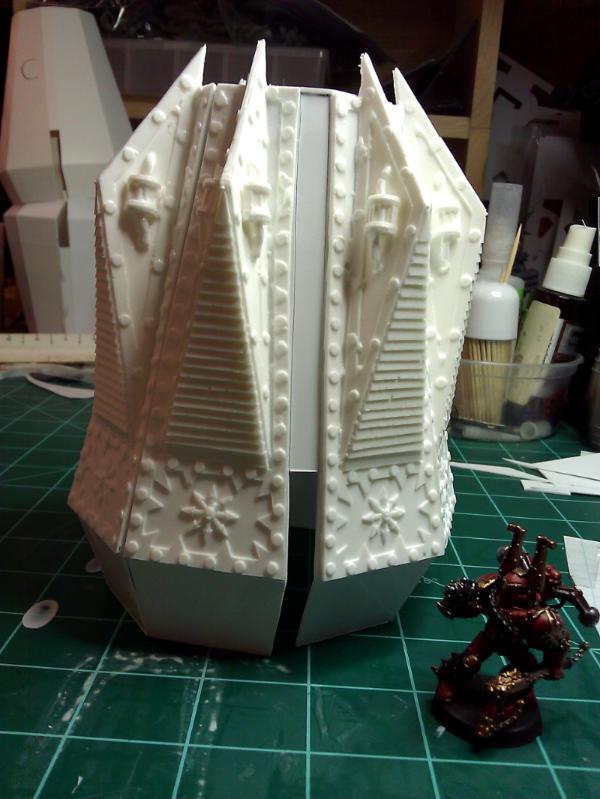
Now I did not do it in this order the first time I built, but I ran into some issues later so learn from my mistakes. We’re going to go ahead and cut out the pieces for the main thruster and bottom hatch. If you do the side panels first, all the little claw bit will get in your way and make it much harder to attach the top and bottom.
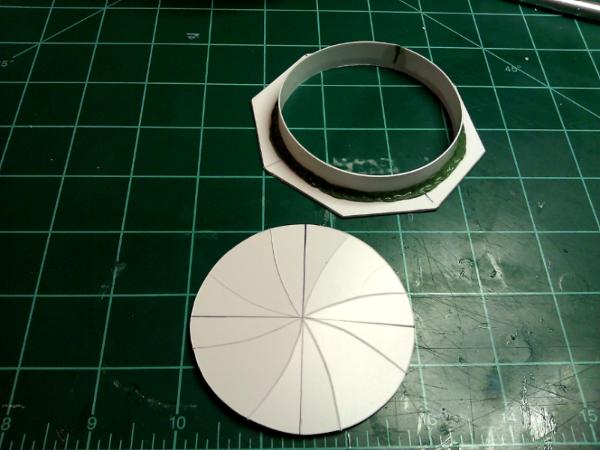
B. The Bottom Hatch We’ll start with the bottom hatch. Use the .5mm styrene. Cut out the entire octagon piece first, fit it over the bottom of your Dreadclaw body and file/shave it down until it fits nicely. You'll notice three separate rings draw on the plans, this is so you can choose the opening size of your liking depending on how much of the octagon exterior you had to cut off.
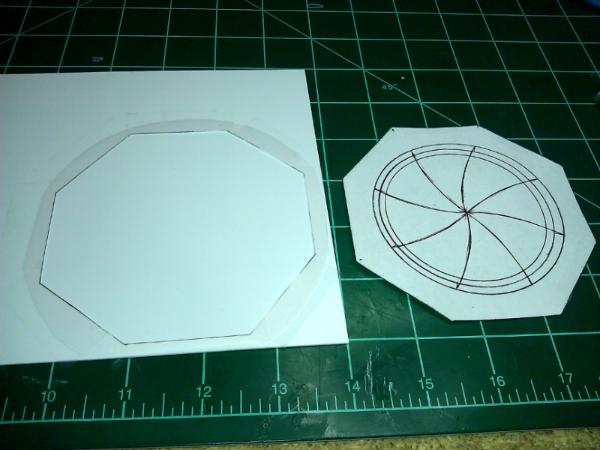
Tape the plans back onto your octagon and score the ‘pizza slice’ marks into your interior circle first, then cut out the circle and set it aside, then cut out the spacer.
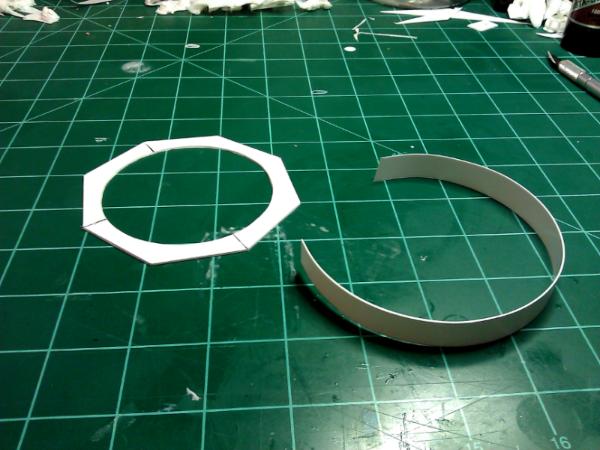
Take the spacer and pinch it between your fingers and slide it down the length while you pull to help put a curve in it. After you do that a couple times wrap it around a pen or something to tighten the curve.
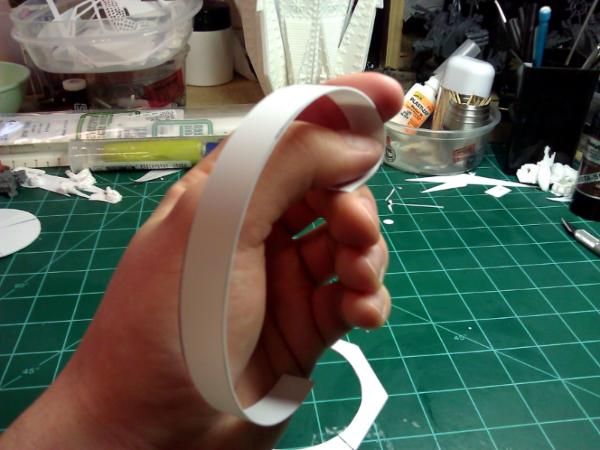
Now double fold a piece of paper. Place the octagon on it and put your spacer bar inside it and let it unroll to hold against the interior edges.
Now this is where the glue accelerator comes in handy. Put a dab of glue at the start spot and hit with the accelerator and work your way around the outside, being sure to press it flat and firm to the interior curve. You’ll have a little extra length on your spacer, cut it off and glue the two ends together. Now this is why we did it on top of paper, some of the glue will seep through and the paper pulls off a lot easier than the top of your work mat. If have any high spots from glue just file them down until it looks nice and smooth.
You may also want to take a bit of
GS, roll it into some rope and use it to reinforce the attachment of your spacer to the octagon as the glue accelerator weakens the glue. It doesn't have to be smooth or pretty as no one will see it.
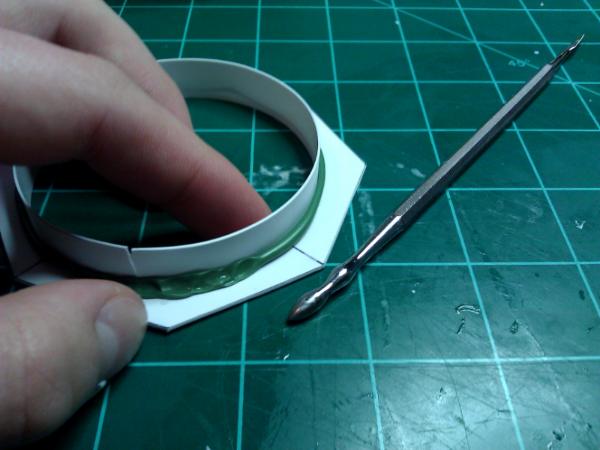
Now take your bottom hatch and place it flat and glue it (pizza facing you) to spacer. Be sure to press down in the center of the 'pizza pan' to keep it flat while gluing.
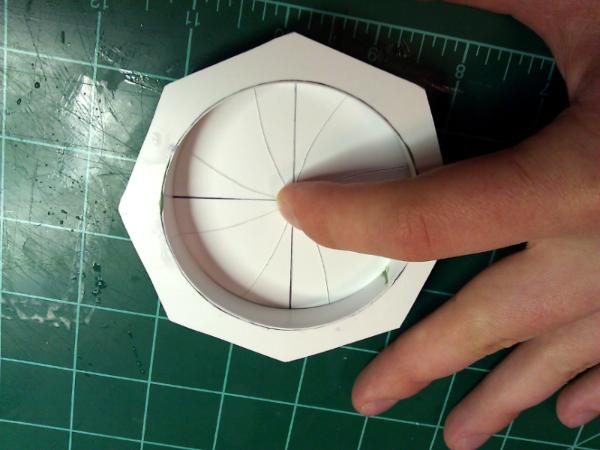
Now take piece of tubing that looks the appropriate size, cut a bunch of short bits, space them to your liking and glue them on. I found it helped me space them better by starting with one on each corner, then putting ones in-between them.
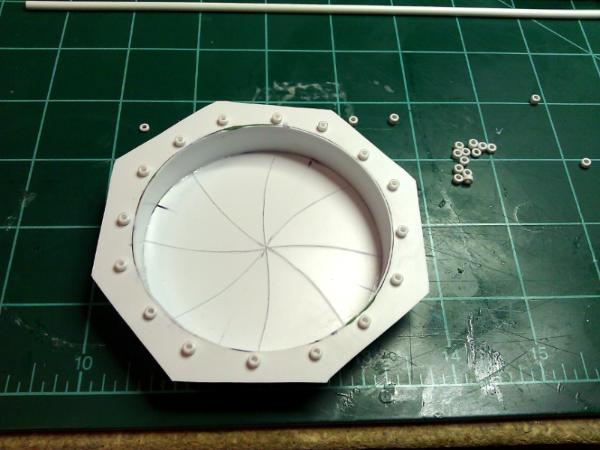
Once you've got it built position it over that big bottom hole, try to make the lines match up as best and evenly as you can and glue it down. Then trim and file the edges.
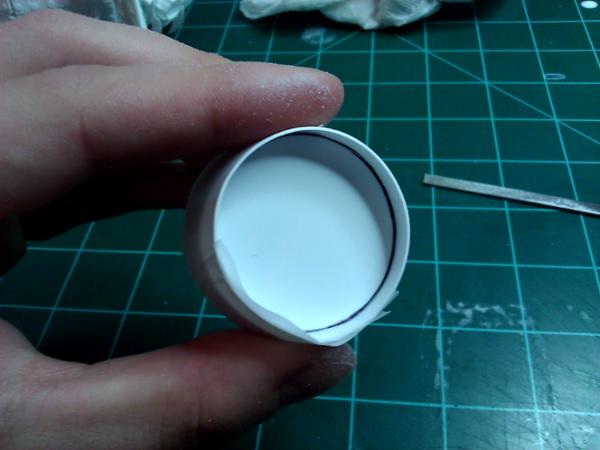
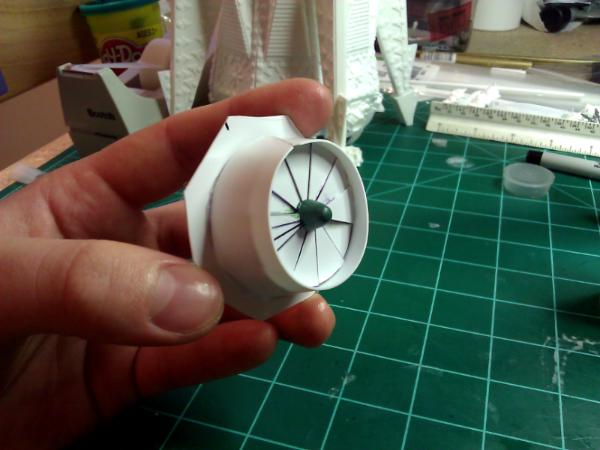
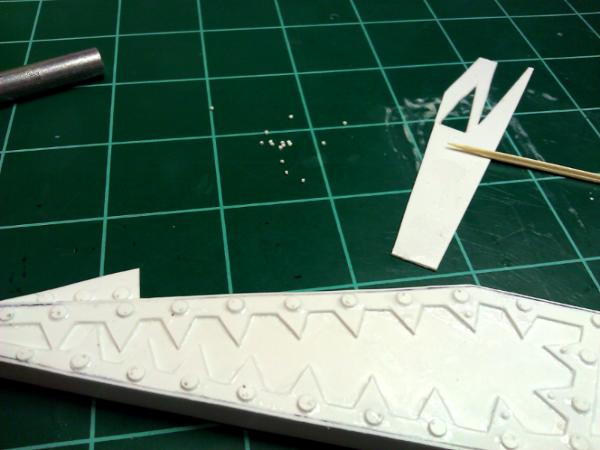
C. The Main Thruster Now for the Main thruster. Again cut out all your pieces from your thinner, .5mm, styrene. Cut out the curved thruster body first and only score where the left side interior lines are. Once it’s cut out put a curl into it the same as the pervious piece. Once it has the general shape, tape the exterior to hold it there, you’ll probably have to cut/break off where the first score line was to get the ends to fit together with a flat bottom. Cut out the fan platform and use your file to round off the edges.

Now cut out the fan blades, you’ll probably have to cut an extra one or two out from what the plans provide, just take one that is cut out, trace the exterior onto some plastruct, and cut the extra out.
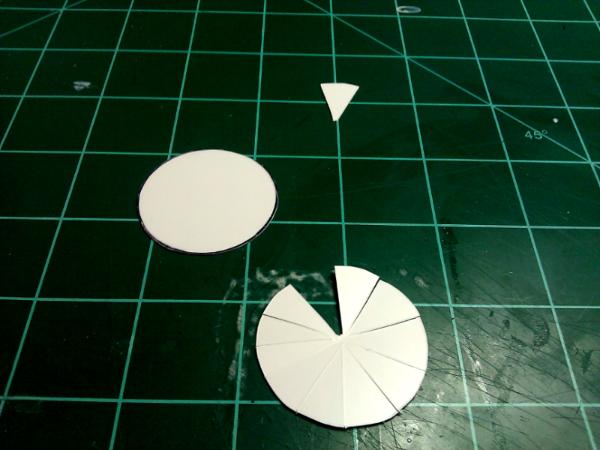
Once that’s done, start to glue them to the platform, overlapping the edges just a little bit. Keep the rounded edges of the ‘pizza slices’ flush with the outside edge of the platform, don’t worry if they don’t come exactly together in the middle as we will model green stuff over it. Finishing all the overlap work (if you want to make a mold you’ll have to fill any gaps between the first and last blade with green stuff).
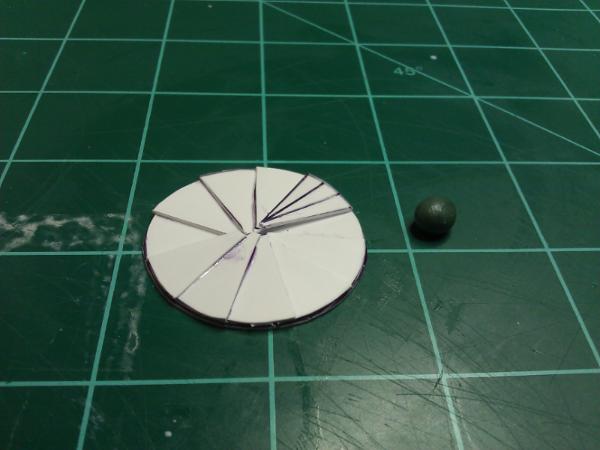
You'll also need to mold a little nub piece in the center. Roll a small ball of
GS, press it into the center then use your thumb and forefinger to pinch it and pull it up a into a cone shape and then round off the top and flatten the edges.
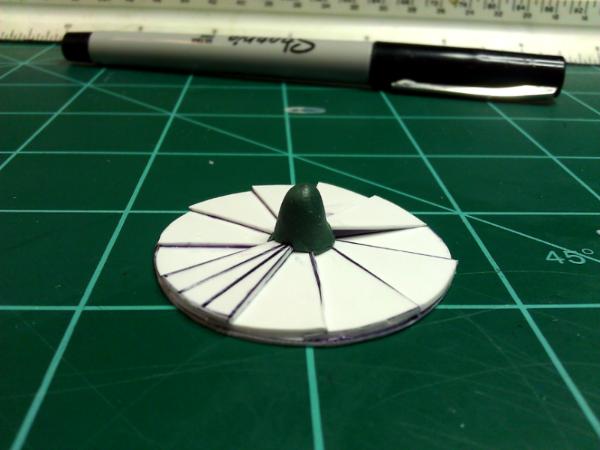
Once that’s done, insert it into the bottom of the thruster body and push it up until it fits snugly into the thruster body coil. This will probably take several tries, time, patience, a few

, to finally get the ‘sweet spot’ where it fits snug figured out.
Once you do, get it into position and glue it there (glue on the underside), glue accelerator is your friend here to just get the first two or three spots glued to hold it in place. Once that is assembled glue the thruster to the octagon base. You’ll probably have a small gap to fill and flatten with green stuff.
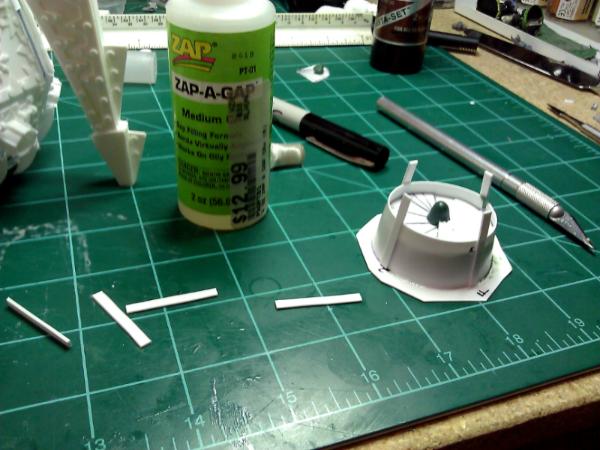
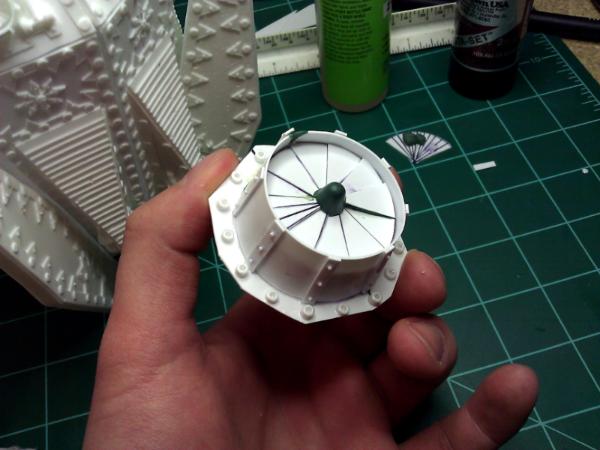
Now cut out the rocket thruster ribs, space the equally apart 8 different ways (starting with 4 helps with spacing) and glue them up the sides and attach your rivets. I used the same small pipe from the bottom hatch to had some small detailing around the base of the thruster. Then glue the whole assembly onto the dreadclaw.
 D. Side Panels
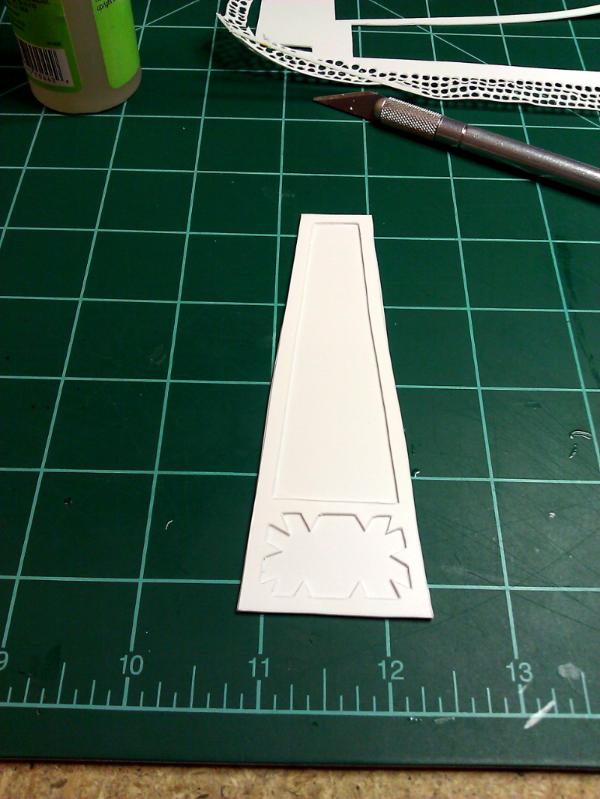
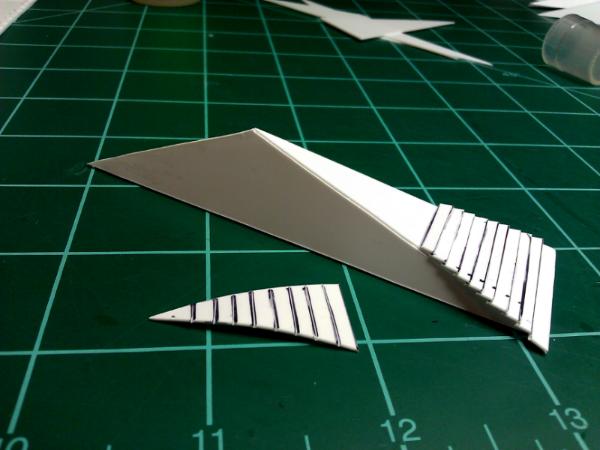
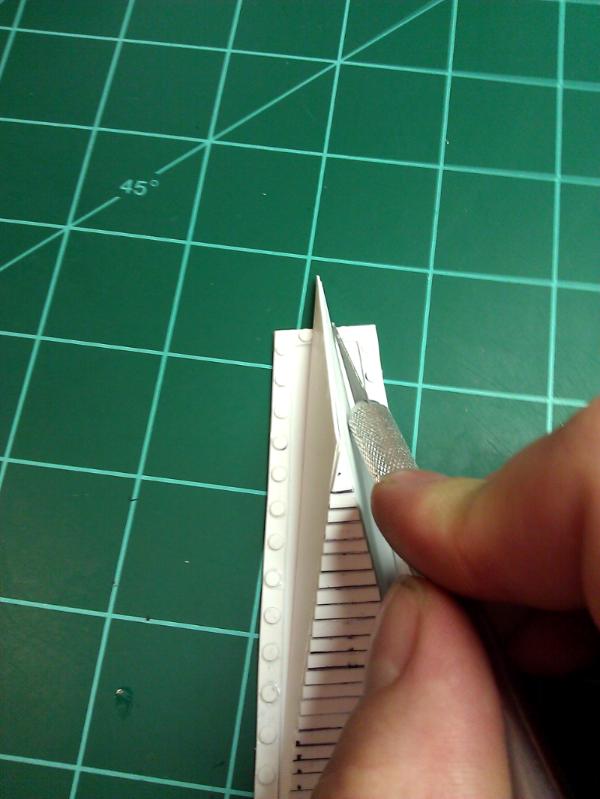
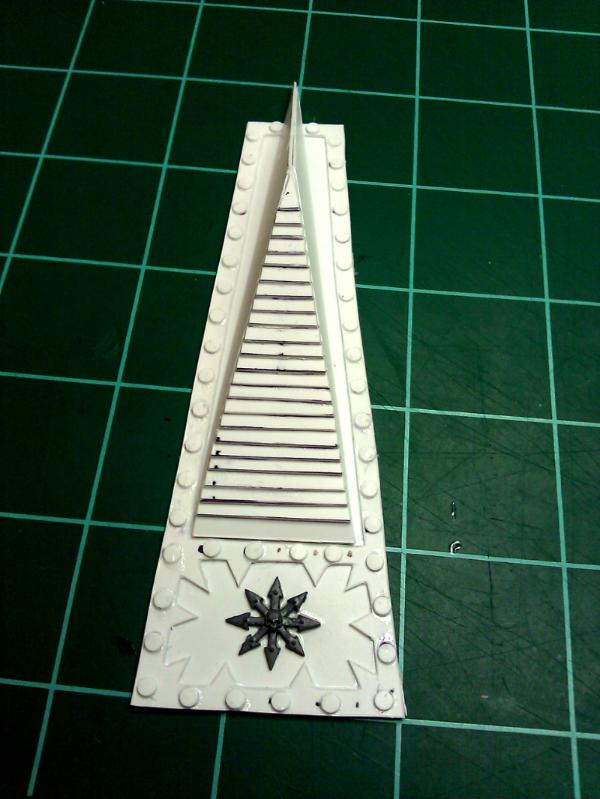
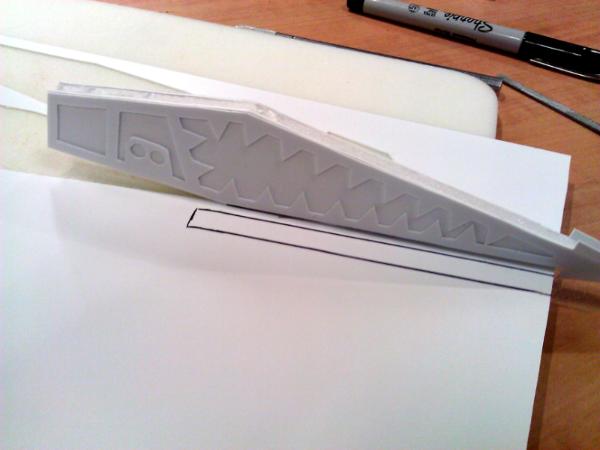
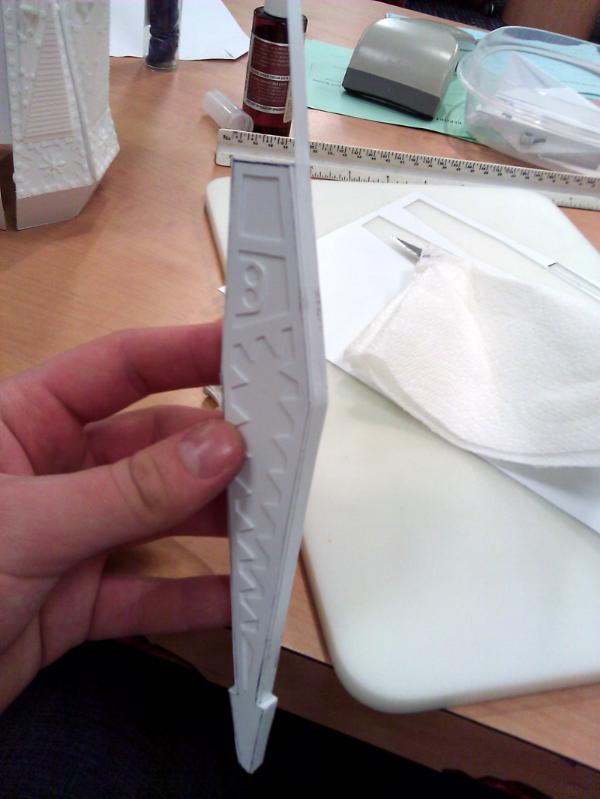
 Use your thin, 0.5mm sheets, and use the template and cut around the
EXTERIOR first this time. Cut all the way through. This will be the base to glue your trim on. Now retape it down and cut out all the trim,
inside lines first then the outside lines. Glue it to the base you cut out a minuet ago.
Now take your leather punch (or one of the very small solid rods outta your tube pack) and make all your rivets. I actually took a ruler and measured the space between them on mine but you can always just eyeball it.
As for the Chaos Star in the center of the panel I had a bit laying around, probably from a chaos defiler, and glued it on. You can always try to draw and cut your own, but with small bits it’s pretty tough. If you only have one, or a few (not enough to do all 8) you can use
GS to do a negative mold and make some more. If you don’t know how to do a
GS negative mold it’s pretty simple. 1) Make a little box outta styrene, letgos, etc… that is deep enough for your bit 2)Mix up some green stuff 3) put the green stuff into the box 4) apply a lubricant to the surface of the green stuff ( I use astroglide, it’s water-based so it air dries which means no cleaning and lasts a long time) 5) press your bit into the
GS box 6) let it dry, remove the bit you now have your negative mold 7) mix up more
GS, lube the surface of the mold and mash in more
GS, once it dries you have a copy of your bit.
 E. Intake Vents
 Cut them out from .5mm sheets, score the interior lines. Fold them into little triangles and glue the ends together. Now take your ruler and measure some thin lines, I think I used 1/8 marks. Cut them out into thin strips, making them longer than front of the vent face (this makes them easier to handle and place to glue them on). Now just start gluing them in place, being sure to stagger them on top of one another a bit so they stagger. I just used some scrap pieces to cut all my strips.
Once you’re done, flip it over and use your knife to trim off the excess.
Now use your template again to cut the trim for the vents, glue them on and glue your rivets on as well. Now take your vent and place it into the Side Panel. Mark where the peak of the vent lays on top of the trim, then cut that section out, and your vent should fit into place. Glue it in.
Now we need to make the turbines... Again I had a small bit that looked somewhat like a turbine that I used, but you could make something like this out of some of your tubing and sheet styrene. You could take smaller tube out of you pack cut it the appropriate length, then cut it in half. Cut some thin strips of styrne, space them and the outside of your half tube, trim the down so they are flush with the top and bottom, cut a flat disc, cut it in half and glue it to the top and bottom. It should be about the same effect, or be a bit creative on your own

. Then roll out some
GS and make your power cables for them. You can also see it put a bit of
GS on the top edge of the vent to help make it flat.
Now you just have to repeat this step 8 times (or mold and cast if you can) and glue all of them in place over your body.
 F. Retro Thrusters
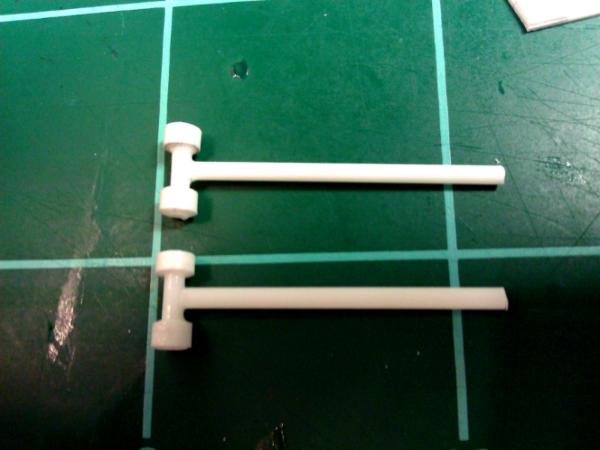
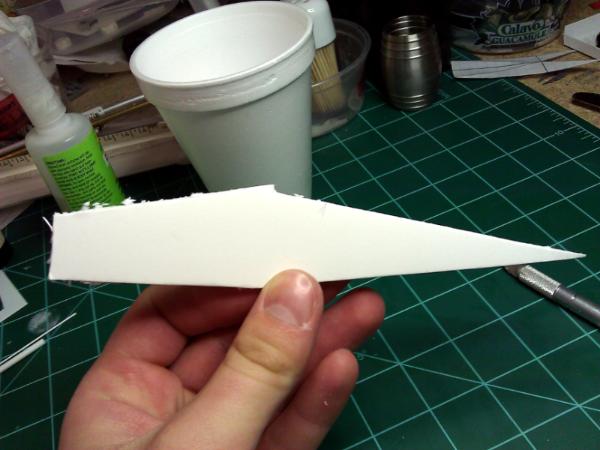
 Take the plans and cut your pieces out of the .5mm sheets. Attach the two side bars first, the take the ‘rampart’ looking piece and attach it. Punch out some rivets and attach them, you can also cut out a little triangle piece to put in the center of the ‘crown.’ Now take your 1/2 inch tube, cut it to a length that seems appropriate.
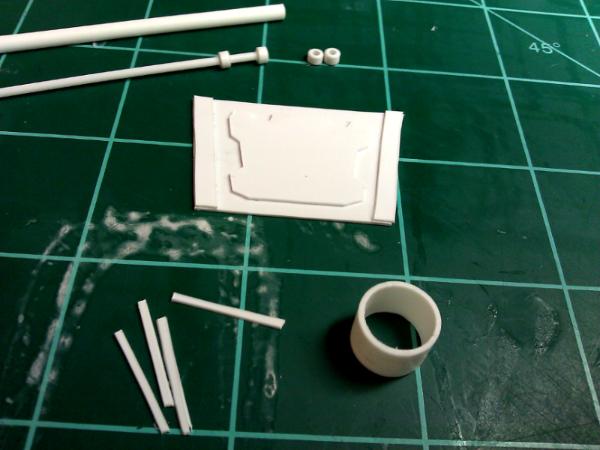
Now cut out some thin strips again, making them longer than the length of the tube. Once you have 8 that look uniform enough to you start the glue them around the tube, glue them with the thin edge of the styrene (the thickness edge) so they stick out farther. It may help to mark your tube and start with 4, them place the other 4 on each midpoint. Once they’ve all been glued on, cut off the extra and file them down until they’re flush.
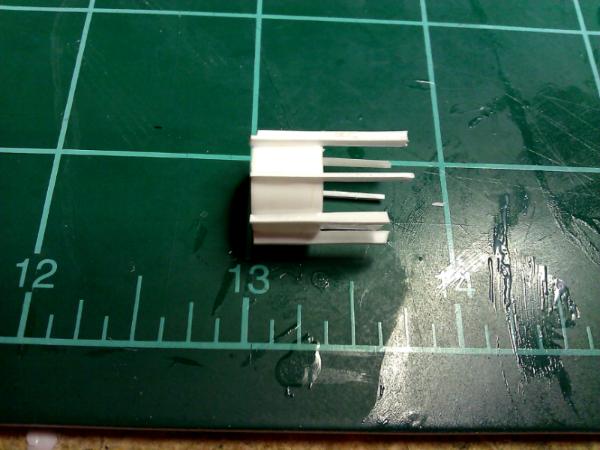
Glue your retro thruster into the center of the ‘rampart.’ Now go to your tube bag, grab two smaller ones that will fit into each other. Cut off 4 short ‘collars’ out of the larger tube. Then take the smaller tube and cut the longer bits. Slide the ‘collars’ onto the end to make two little ‘dumbbells.’

Get the smaller tube again and cut two very long lengths (give yourself lots of extra). Take the long lengths and cut a little ‘v’ notch into the top. This will help you glue it to the ‘dumbbell.’ Once you’ve got those made, lay them on the ‘rampart.’
Now just freehand a little ‘sickle’ blade on some scrap sheet styrene, you may want to use your thicker sheet (.8mm) if you plan to cast with silicon and resin as it will make this part sturdier. Cut it out and make sure it looks the way you want. If it is to your liking this will be your template. Trace around it to make yourself two more, cut them out.
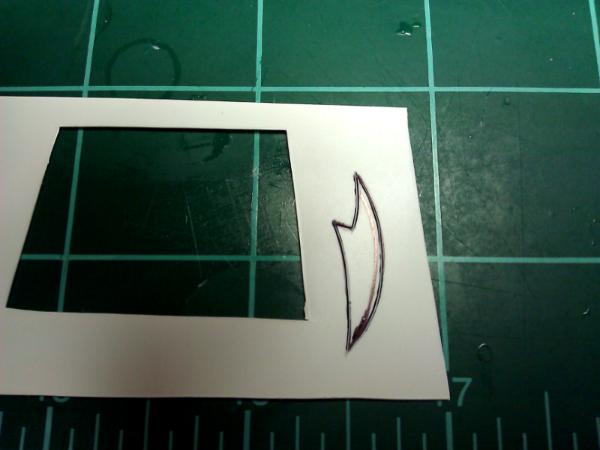
Now go back to the ‘T’ bars and mark off how long you want them to be, cut them, cut a ‘v’ notch, and glue on ‘sickle’ blades. Then glue the ‘T’ bars to the rampart. You can add some little rivets with your thin solid tube.
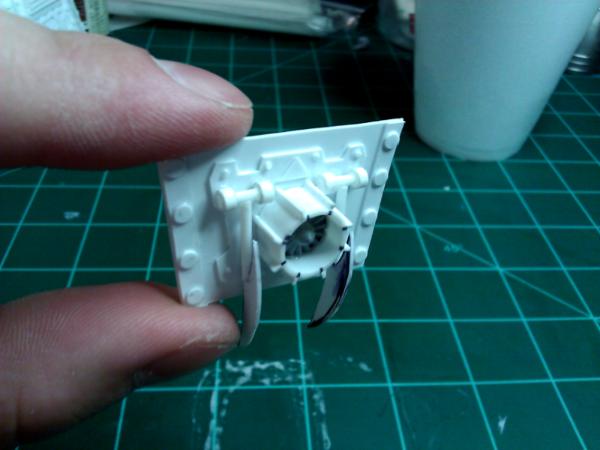
Again repeat 8 times, glue them all in place below the panels.
 G. Legs
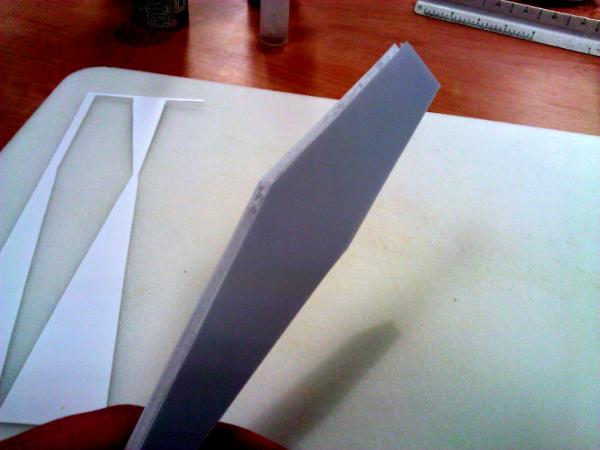
 Take the right side cutout for the leg, tape it to some 3/16 in (5mm) in foam board and the cut it out. Using foam board gives you the thickness you need in one solid piece instead of making a hollow one out of plastruct. I know some folks have said they use different glues when working with it, but I just used my Zap-a-gap medium
CA+.
Anyways, once the have the foam cut out, either do another print out or just trace your foam board and then cut two thin (.5mm) styrene plates to glue over it the outside edge of the foam board.
Then cut out the trim portion twice and do the same thing, don’t forget to take your large hole punch and punch out the two holes in the ‘attachment bracket.’ Also, you only need the one trim template. To do the other side, just glue it on reversed to get the same thing on the other side.

Once you have all the trim cut out and put on you’ll need to cover up the exposed foam areas. Press one foam area flat on the styrene, trace the edges, cut them out and glue them on. Again you may want to cut out the exterior of the lines to give yourself a little extra room, you can always shave and sand them down to get them flush.
Once you have all those on, I did one more thinner strip that the entire length of the outward facing flat edge to give a bit more design.
Then just go along and attach all your rivets. I did a combination of large and small rivets on mine, but you can go all big or small, or mixed, again take some creative initiative.
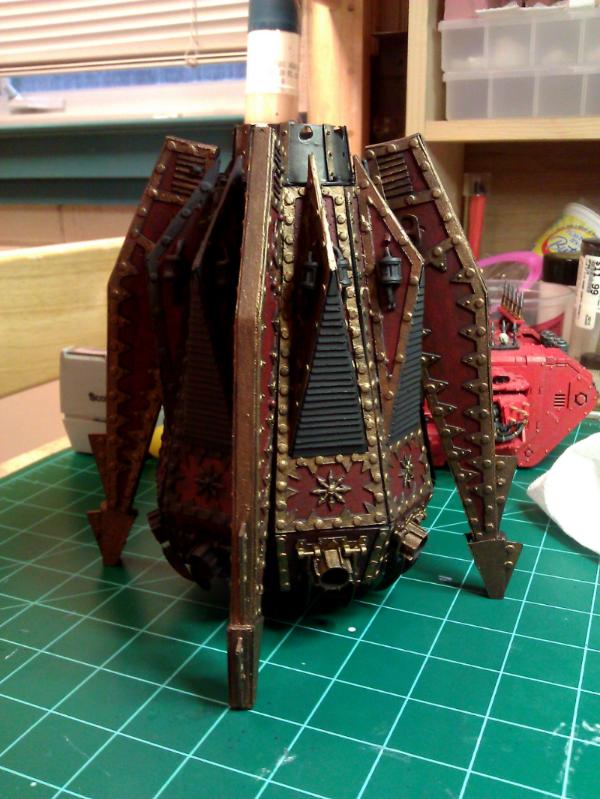
 H. Painting
 A few tips for painting, do it before you attach the legs! I didn’t as it was the orginal build and it was a huge pain. However you can learn from my mistakes. Other than that I’m by no means a master painter so I can’t give you any better tips than that. However, if you are interested in how I painted World Eater’s themed one, here are the steps.
1) Base coat everything black.
2) Paint the silver areas with a 50/50 mix of Boltgun metal and chaos black
3) pant all red areas red gore (try to leave some thin lines of black along the edges)
4) paint 2nd layer of red areas 50/50 mix of Red gore and blood red
5) wash all painted areas in badab black
6) drybrush high silver areas with boltgun metal
7) apply 3rd coat to red areas of 50/50 red gore and blood red thinned (watered down to help it spread thinly and lightly, you can apply a 4th coat the same way for a brighter color, I used 3)
8) paint brass areas with mix of 50/50 tin bitz and dwarf bronze
9) paint brass areas with 2nd layer of dwarf bronze
10) wash brass areas with devlan mud wash
11) drybrush brass areas lightly with shining gold
12) Outline bottom hatch pizza slices with mix of fortress grey and chaos black
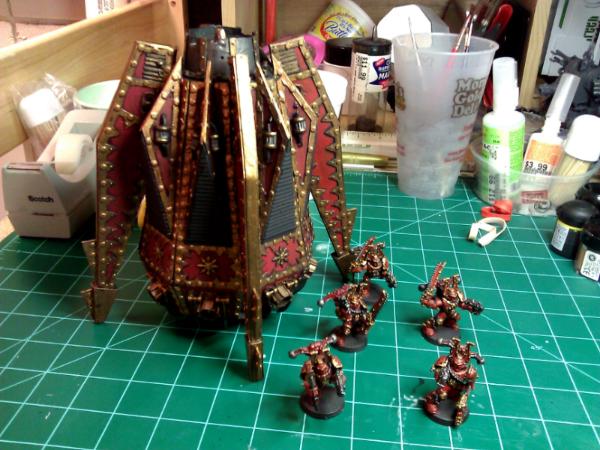
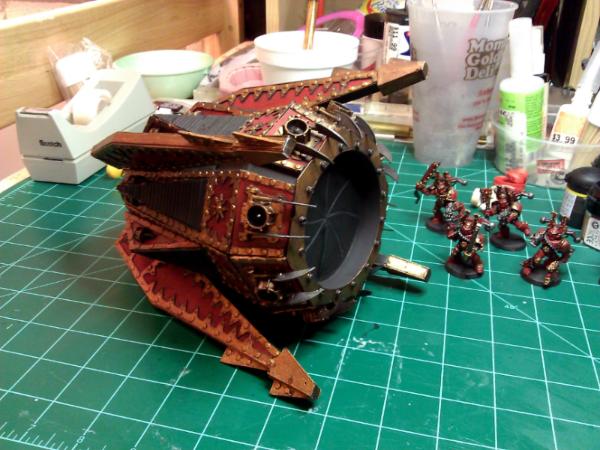
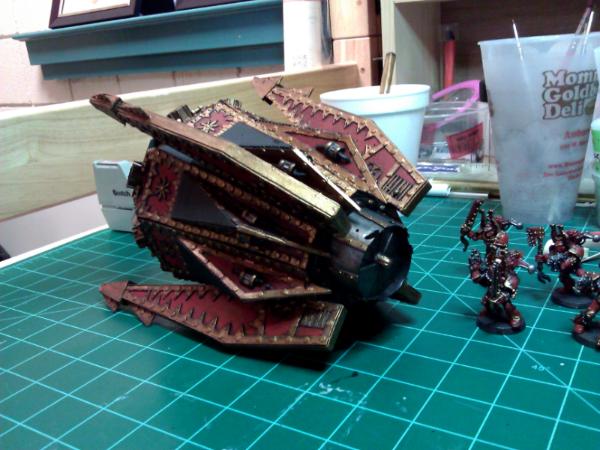
 The Finished Product
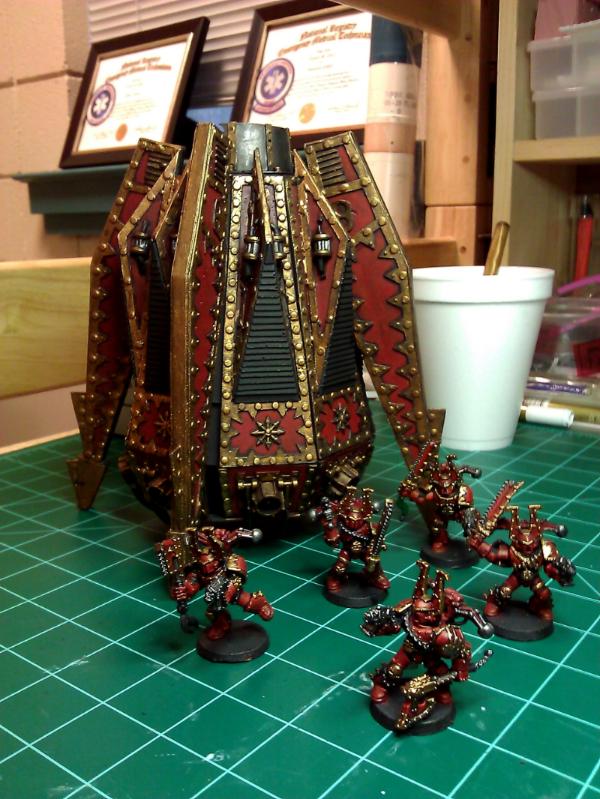
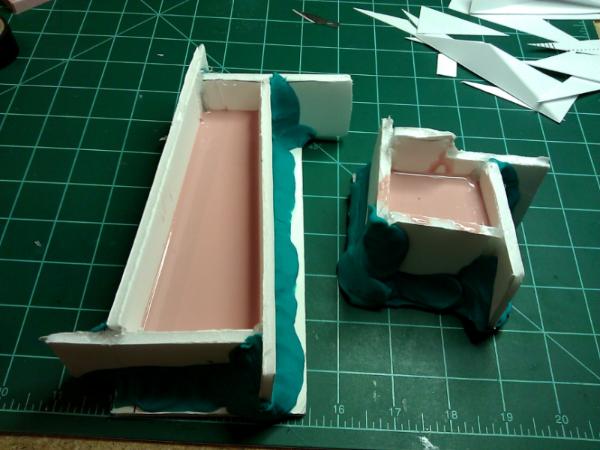
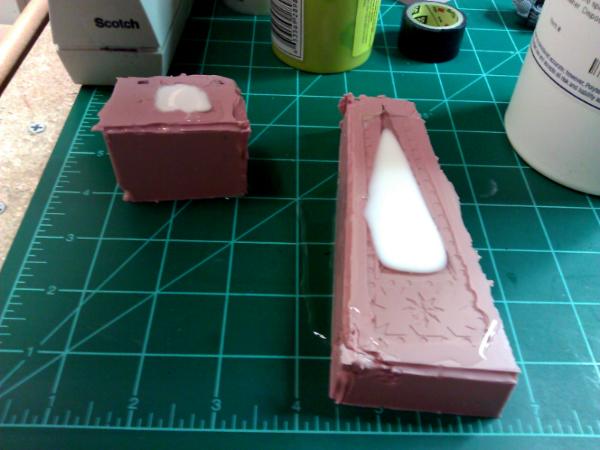
 I. Casting with Silicon and Resin
 If you plan on making more than one, and have the financial means (I’ve put around $300 into all my mold materials), molding and casting is a great time saver and will allow you to make however many you want. This way you won’t try your patients to the breaking point either as you can work very diligently on one piece to make it perfect, knowing that you only have to make the one and can cast the other 7. If you’re new to resin casting there are some really good tutorials around here, so check those out. Some suggestions of my own would be to use foam board and hot glue to make all your mold boxes; it’s cheap and leak proof if you’re careful with the super glue not to miss a spot. Also, do smaller molds, they are easier to pour with air bubbles in the silicon or resin, and demold will be easier. I also have nothing but good things to say about Polytek PlatSIl 71-10 RTV Silicon and Polytek Easy Flo 60 which are the silicons and resins I used to do all my mold making and casting. I would highly recommend them.
 J. Conclusion and Tut Cleanup
 So this is my best attempt to instruct you on the process I used to build my dreadclaw. I’m sure I missed some things as I’m only going from
WIP pictures and memory, but if anything seems wrong or unclear please post up on here and I’ll try to straiten it out or clarify. Also, I would like to try and keep the plans exclusive to dakka for our members, as this is the community that has helped me the most, it’s the one I want to give to in return. Finally if you don’t feel you have the patience or the means to do this yourself, I do take orders and will cast up and construct for you on request. If you’re interested shoot me a
PM and we can talk turkey. Best of luck and again if you need any help feel free to hit me up. Also keep up with my blog to what else I'm up to. Next on my plate is a Hell Talon and Hell Blade scratchbuild.
And of course the part you've all been waiting for! Haha, and to think that I almost forgot to attach the plans.
 Dreadclaw Plans
 Click the link, it should say "Download: tme0003DCBPv2.PDF (10.97
MB)" toward the top, click the Green Download Bar to save it to your computer.


 10,000+ Points Chaos Undivided & Daemons


 "Whilst we stand, we fight. Whilst we fight, we prevail. Nothing shall stay our wrath"
  Guilliman and the Ultramarines are like Manchester United, everyone hates them because they are so awesome!

 2,801p
 'ardboy Nob and his 'ardboyz

 2-3
2-3 

 -Cadian 812th (rotting in a cupboard)
 -Dark Angels 3rd Company (in disfavour, eBay?)
 -Irun'Mahn (pretty and deserve love; why aren't I giving them it?)
 -Draigo 'n' his Merry Band (to be continued) -
 Klan WurldWaagh
  1500
1500
 1500
1500
 Soon!
Soon! 
