adamsouza wrote:Just curious, how do you make those rivets ?
I cracked open a used water filter,
this one specifically, from a humidifier. In my case I have a well so legitimately use these. I recommend checking Target or Walmart for them since when I last got one at Target they were $5. One of these filters contains enough beads for a lifetime of riveting. Note that there is some variation on the bead sizes; while this is not a problem for Orks it could be for Imperials. With good lighting and on top of a paper towel, you eventually get good at eyeballing the largest beads which are fairly uniform but you'd want to practice with Orks. .
Ailaros wrote:Neat!Where did you get your plasticard tubing from?
I have 2 sizes I used for this. One of them was 1/16" "tubing", which is actually
a metal wire with some plastic around it. I used it to make small pistons by cutting the plastic sheath off and leaving the exposed wire as one end, with the coated end as the other.
For the 1/8th" tubing, either
Hobbylinc or
Tower Hobbies, whichever was cheaper at the time. I used 3/32" solid flourescent left over from various Necron projects along with this tubing to make the larger pistons on the legs.
Ailaros wrote:Also, for future reference, they make plasticard rods. They're much easier to make rivets out of than anything with meta. Just round the end with a hobby knife or bit of sand paper and then chop off the end. If you do it too fast, the rivets might come out of unequal length, but that's hardly a problem for an ork conversion.
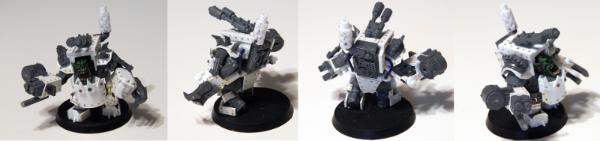
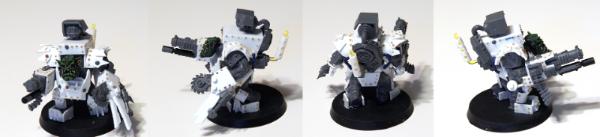
I'm familiar with this method; you can see some of those types of rivets on the
PK's. I didn't round the ends though, that sounds absolutely
exhausting and like the un-funnest thing ever; each one of these Meganobz used like 50 or 60 rivets each.
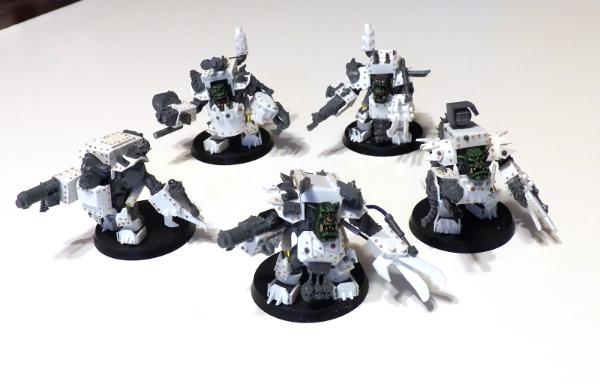
Here are the rivets I've used in the past, in the order I preferred them:
1.) Retail rivets. These look very nice but get expensive fast. I still have some of these left over but I probably won't order more of them because of the expense. My source for these is
Tichy Train Group #8076.
2.) Cutting rods for rivets. While a lot of these will fly off, this definitely is an option because they are very fast to apply.
3.) Punching styrene card with a
leather punch. This will generally produce the same size rivets as the above and is super, super fast. The only downside is the very finest holes (2mm) don't act as a cutting tool (there is no hole in the pokey bit) so the rivets it punches are a little large. Still not bad especially for larger vehicles.
4.) The aforementioned water filter beads. I use a 1/64" pin vise to drill indents where I want the rivets until the model is "indent riveted". Once that's done, I used a
finely tipped plastic cement applicator* to fill in about 10 of the indents, and then dropped a bead onto it. The weight of the bead generally self-centered. I repeated until done - you don't want to apply the glue to too wide an area at a time since it does take a little bit to do this. All in all doing the rivets probably took about 20 to 30 minutes per model once I got my technique down.
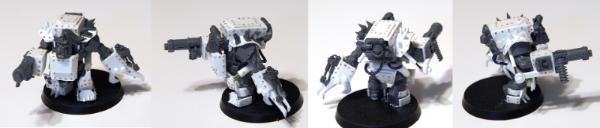
*That being said, my method in 4 is a little flawed. I used the plastic cement since it was the finest applicator I had on hand - i discovered my thin
CA had thickened over time - I was impatient, and it worked "OK". However since it's not really a glue, per se, the adhesion to the beads themselves is a little poor, and so they will fall off if you rub too hard (that's what she said). Doing the rivets in this method means you will want this to be the absolute last step before priming. After painting, I suspect they will be good enough; but if I could do this over again and have the right tools from the beginning, you should use
a really thin CA super glue with a
glue tip.


 10000
10000
 2700
2700
 4000
4000
 3800
3800
 3000
3000 


 asking me where i get it from or you go on the list.
  and also from here

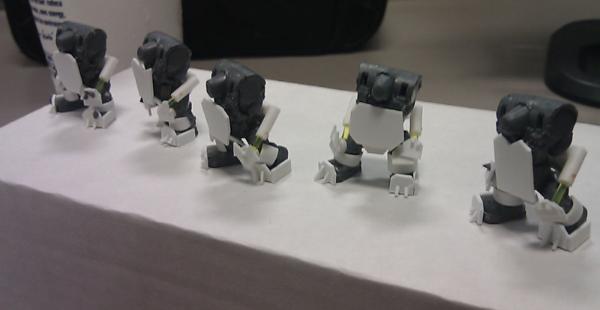
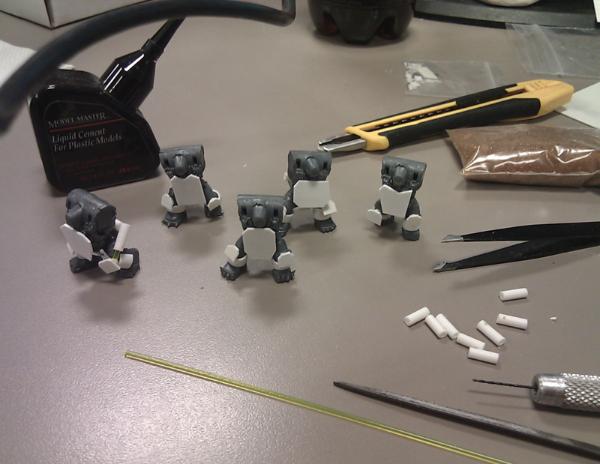
 Waaagh an' a 'alf