Background:
I always wanted a swarm army - but the biggest drawback was the time needed to paint them. Then the glorious dipping method came out. However, the typical dipping method was still too much work - it required either repeatedly flinging a model to get the dip off (or attaching each model to drill and spinning the dip off). I was too lazy for the first method and not technically skilled enough to jury-rig my electric drill for the second method. So I had a major dilemma which stopped me from my dream of a Tyranid swarm army.
Then one day I was mixing a delicious glass of Ovaltine with my "Aerolatte Milk Frother" and had an idea.... So now I present "Mezmaron's Easy Dipping Method" for your enjoyment.
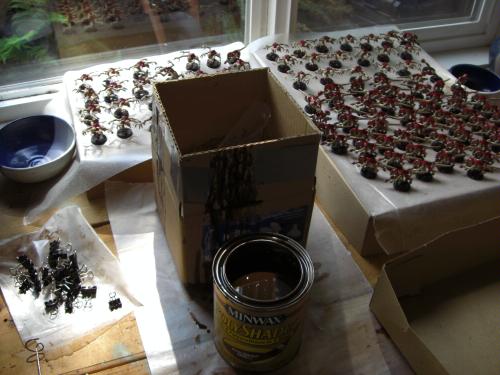
Materials:
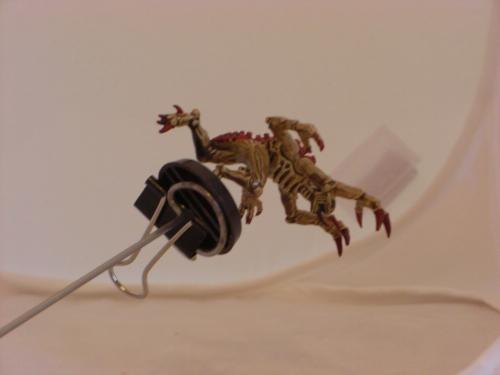
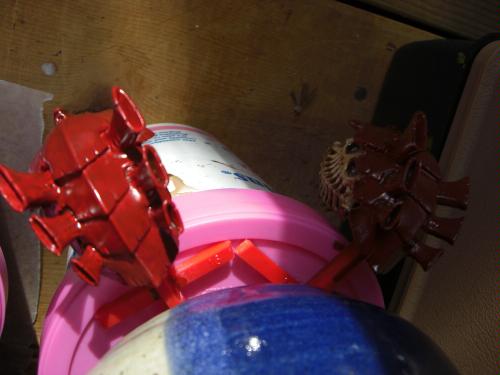
1) Milk Frother (the "Spinner") - used to spin the models after dipping. I removed the rings on the end of it. No more making any delicious frothed beverages with this sucker!

2) Wax Paper - used to set dipped models upon to dry.

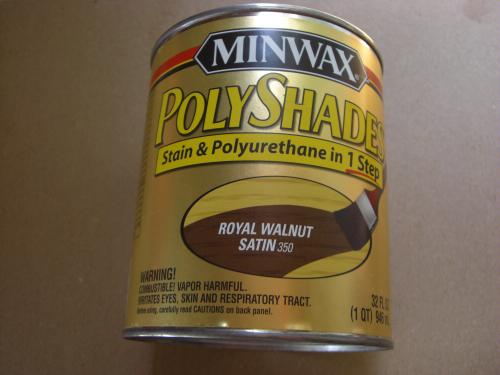
3) MinWax PolyShade - the dipping media.
4) Binder Clips - used to clip the model to the spinner.
5) Cardboard Box - used to spin the models within.
Method:
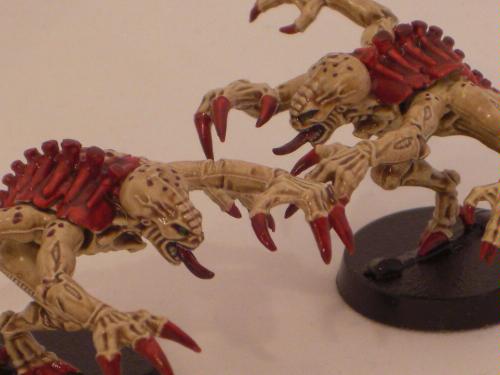
Basically, base, glue, and prime your model as normal. Remember to remove all molding lines (they show up even more once dipped). I painted each model very quickly, with simple colors. First, I primed all the models using GW White primer. Then I painted each model entirely in Vallejo Game Color "Bone White" (this was faster than selectively painting them). Then I added Vallejo Game Color "Gory Red" over the areas that needed it. The eyes were painted with a generic black, then dotted with Vallejo Game Color "Scorpy Green". For Citadel equivalents, I basically used Bleached Bone, Red Gore, and Scorpion Green (now out of print).
I added the "dots" on the Gene-stealers with a brown Sharpie Permanent Ultra Fine Tip marker. I found that was much faster than painting on the dots, (like 15 seconds each model)....
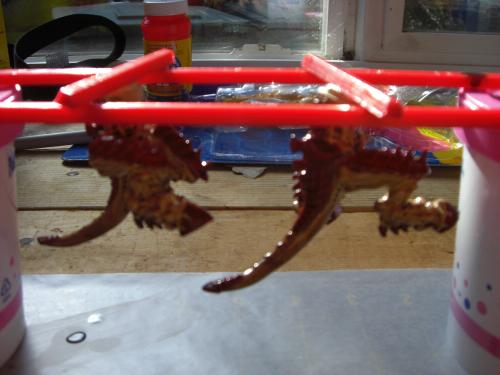
Once dry, simply clip the model's base to the spinner, dip the model in the Poly-Shade, then un-clip the model and place on the waxed paper. All 96 models took about 80 minutes to dip. They took about 24 hours to completely dry.
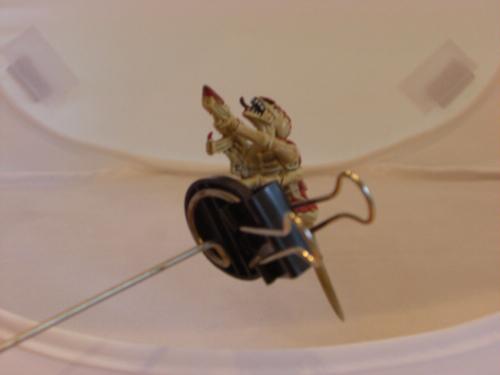
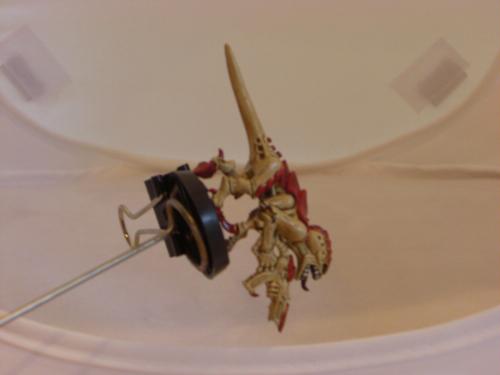
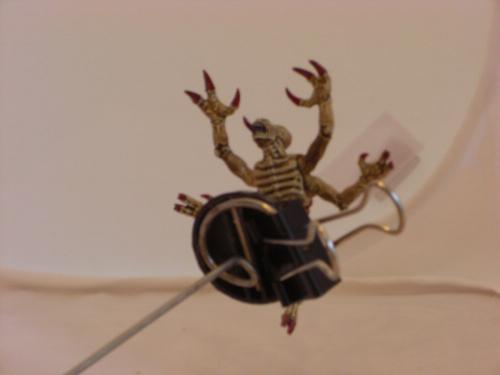
Here are some pictures as an example of how I attached the models to the frother.
Before Pictures:
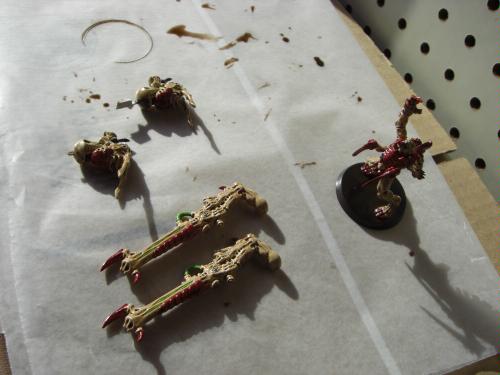
Here are the model prior to dipping.
Here is a sample Genestealer prior to dipping.
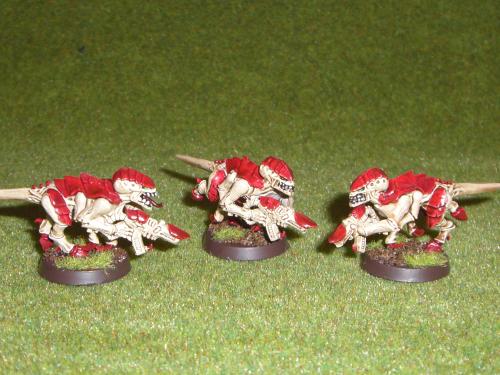
Here is a sample Gaunt prior to dipping.
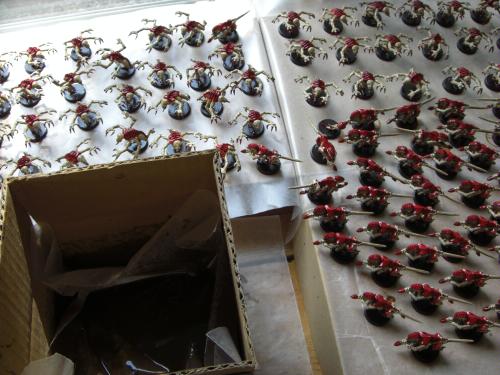
After Pictures:
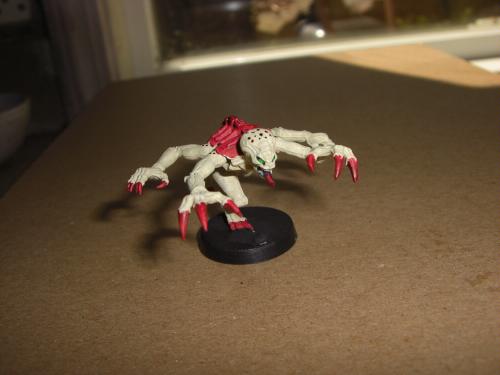
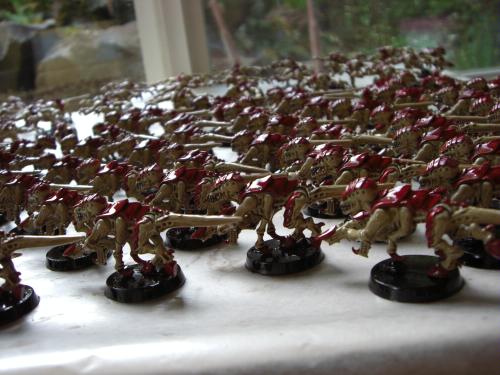
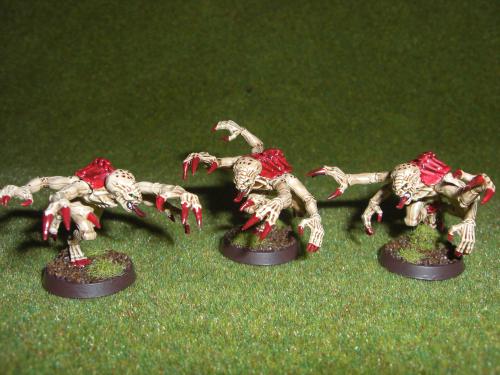
Here are the Genestealers after dipping.
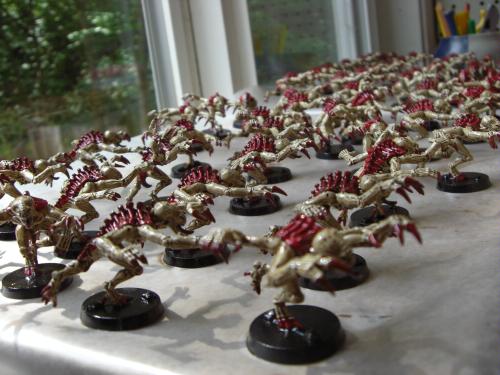
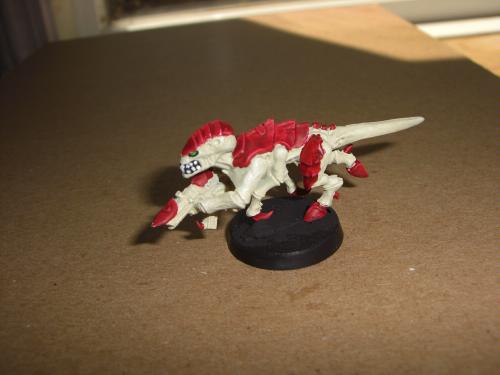
Here are the Gaunts after dipping.
Here is the mess left after dipping - actually not too bad....
Addendum I - More Stuff
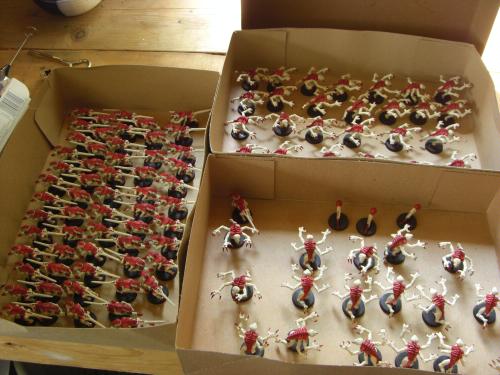
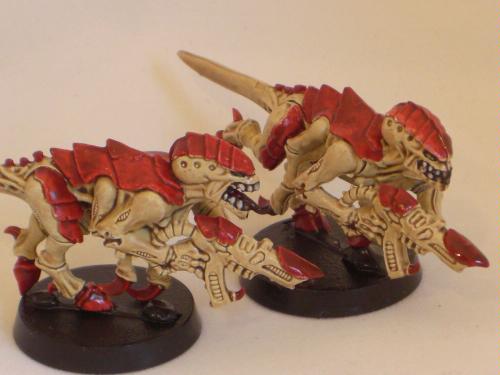
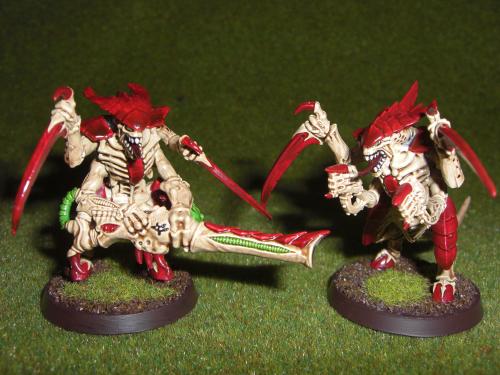
For round two, I dipped a Broodlord and 12 Warriors. I dipped and used the spinner for both. These were slightly more difficult to spin, as their size and weight (especially the metal Broodlord) reduced the speed. However, I just spun them extra long. I also added a few more Gene-stealers and 16 Spinegaunts.
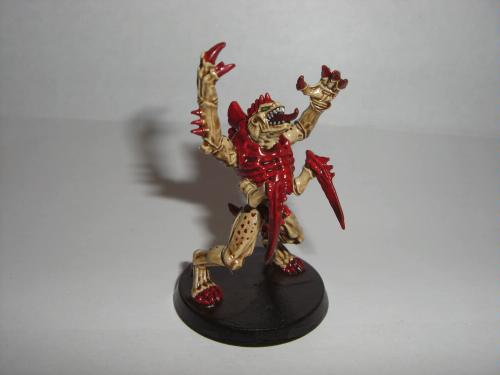
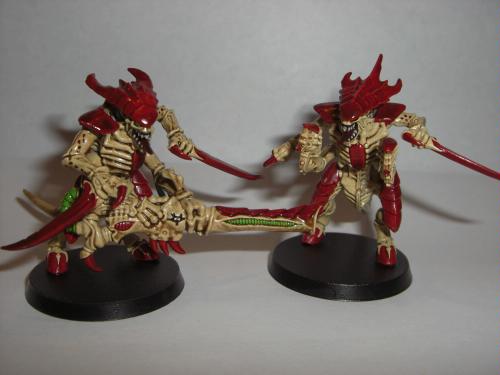
Addendum II - Carnifex Time!
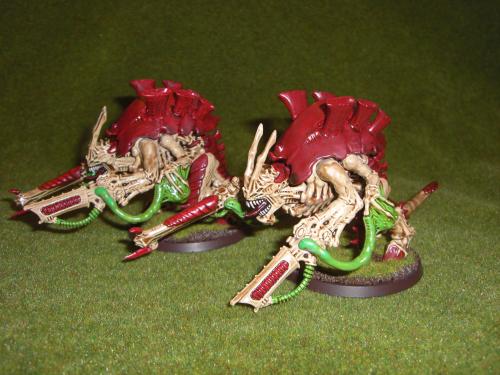
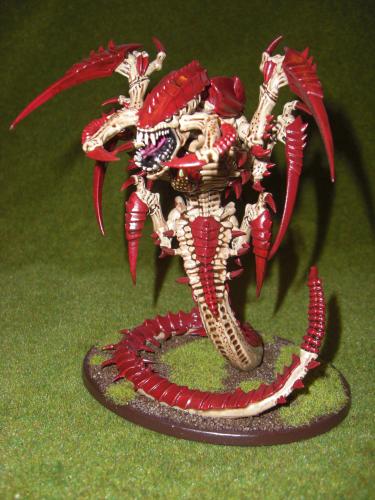
I also decided to dip two Carnifexes to give some firepower to my army. I approach the Carnifex similar to the other models, but tackled it in pieces. I attached some plastic to the pieces, and dipped them holding onto the plastic. Instead of spinning, I then used compressed air to blow off the excess. I then let them hang by the plastic until they dried. I also brew hard on them to reduce the dip, (be careful you don't pass out if you use this method - between the fumes and all the blowing, you can get lightheaded). Once dry, I assembled! The reason I tackled in pieces is because I wanted to originally magnetize them. I think you can also full construct and pre-paint the Carnifex, and paint on the dip - just be sure to use a brush you can toss. I may even suggest that approach looking back....

Supergluing the Carnifex presented some problems. First, the glue gave a white haze to some of the the application area. This happens sometimes when I superglue, but because I dipped before, it is more noticeable (see the carapace above the arms). Second, from holding the arms in place, some paint rubbed off. I needed to touch up these areas - that is why the green is more bright on the tubes entering the barbed strangler. I'll need to fix that.
Hints and Tips:
1) Wear gloves! The PolyShade is hard to get off your hands - like tree sap.
2) Be a Cylon - have a plan (in case a model falls in the PolyShade can) - didn't happen to me luckily. UPDATE - yes it did - to a Spinegaunt. I needed to fish him out with some wire....
3) Dipping really shows molding lines, so be extra sure they are removed during assembly.
4) Be sure you really mix the dip before dipping - the pigment will settle. On small models, not much of a problem, but on large models it will be.
Completed Army / Next Steps:
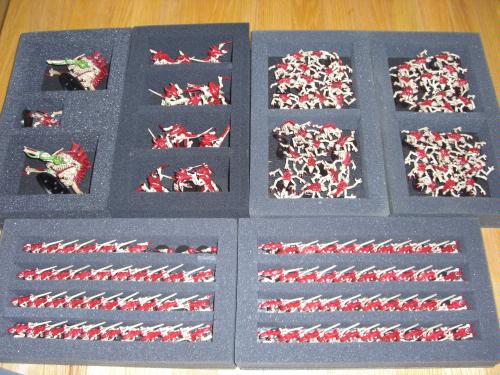
Here are all 143 models ready for storage in my Army Transport - they actually can all fit in one carrier! You can zoom in and see some more details on the models. You can see that I still need to base the models - that is next. I'll post more pictures when that is complete. It takes me along time to get stuff done, so that may not be for awhile....
I hope this was helpful. Please let me know if you have any questions about my method, or would like further information!
2012 Update
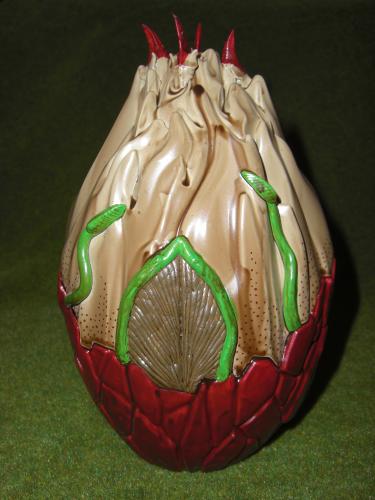
Since this article was originally published, I based the models and added some new units using a similar method. I added a Mycetic Spore (using a "Dragons Universe" toy, with some green stuff), a Doom of Malan'tai, and a Trygon Prime. I completed each in the same method, except that I used "The Army Painter" spray primer, and painted on 'the dip' using old brushes.
A few tips:
1) Use The Army Painter primer spray! Much easier and faster than base coating in one base color! Well worth the cost.
2) Be sure to check for brush bristles that come off and stick to model after dipping - they are difficult to get off once dry.
3) On flat surfaces, you really need to watch how much dip you add. As you can see, the Spore has a number of noticeable streaks.

Hope you enjoy the new pictures. As always, please let me know if you have any questions about my method, or would like further information! PM is best for a quick response. Thanks! Mez
