I have been in the
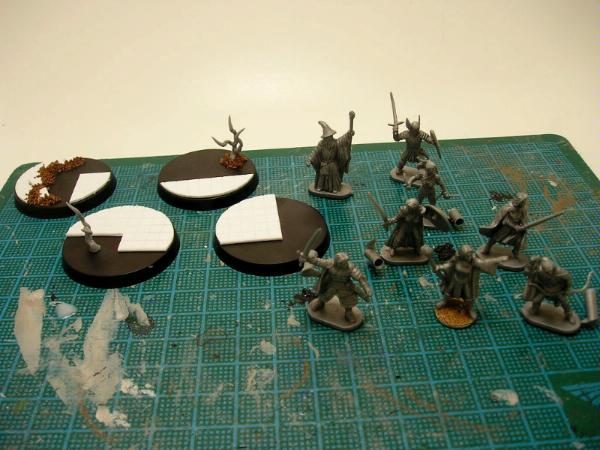
40k hobby since back in the late days of rogue trader and early 2nd edition. For the majority of that time, I subscribed to the mindset that green flocked bases were the standard. I felt that the battlefield was chosen by the faster army and so, the 'crisp grassy glade' made perfect sense. But, times change and I received enough harassment from my fellow gamers that I finally began to see the light. For the life of me, I have failed to master the simple gravel and static grass basing technique that most use, but I have managed to create a few unique and simple techniques that add a bit of flavor to my armies. Here I will tutorial the 'lost city' bases that I put on my Harlequin Eldar army.
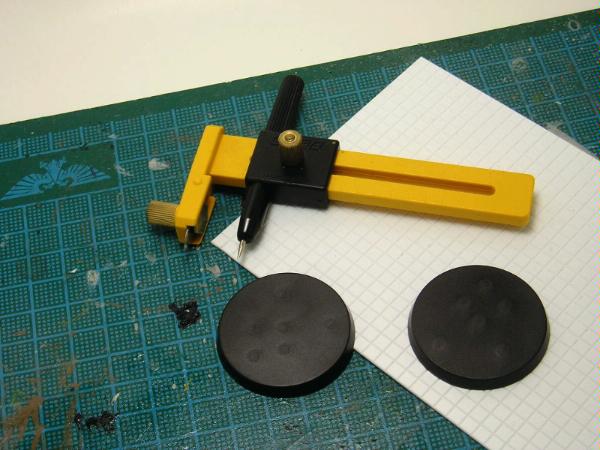
Here is a quick run through of my basing technique. Luckily I needed to make the bases for my recent shining spears, so I will be making 40mm bases in the tutorial. The concept is identical for 25mm and 60mm bases (and fingers crossed valkerie bases when our new codex comes out

) just adjust your cutter accordingly.
In this tutorial I used,
-a circle cutter
-hobby knife (I use one with a retractable, snap-off blade)
-Plastic Cement
-PVA Glue
-Super Glue
-Fine Grade Modeling Ballast
-Matte Varnish
-Flock
-Tiled Plastic Card (mine was 3/16" tiles, by either plastruct or evergreen)
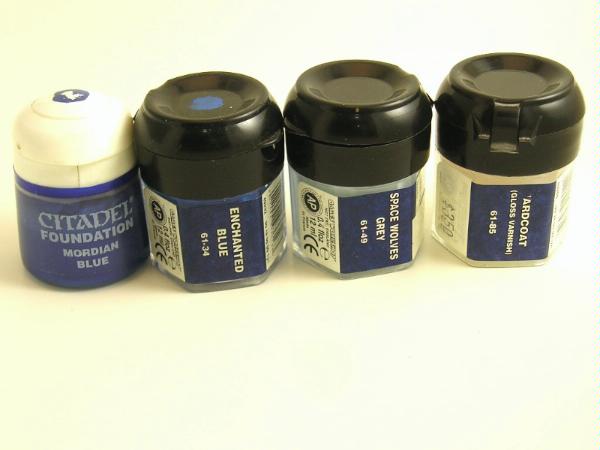
-Citadel paints (Khemri Brown, Dheneb Stone, Space Wolves Grey)
Optional
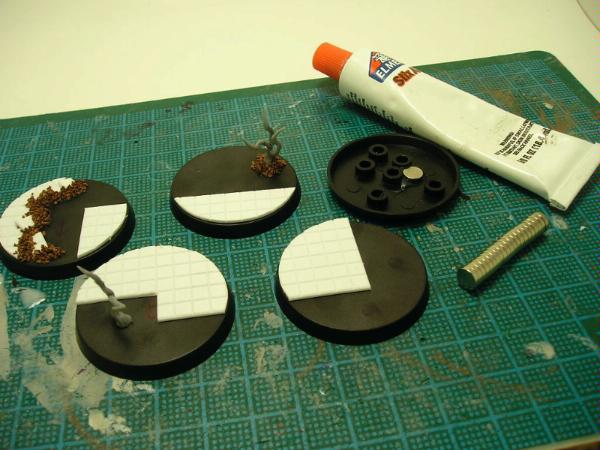
-Rare earth magnets (mine are 6mm x 1.5mm thick, from K & J Magnetics)
-Elmers Stick-All epoxy glue
 Step 1
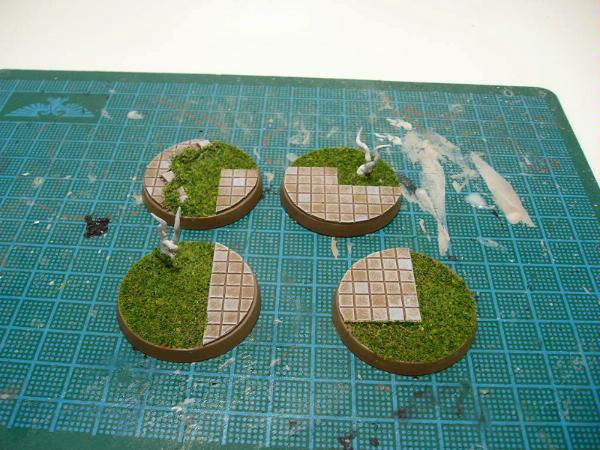
Set your circle cutter to the radius of your base. Make sure to make it the raduis of the top, not the bottom (i.e. not 40mm). A slightly larger or smaller cirlce can be fixed a bit, but it is easier if your circles are the exact size. Flip your plastic card over (texture down) and start cutting circles out of it. I tend to get 2 - 3 finished bases out of each circle I cut. With the circle cutter it is better to do several light passes with the blade. Pressing to hard will flex the tool and change the radius of your cut.
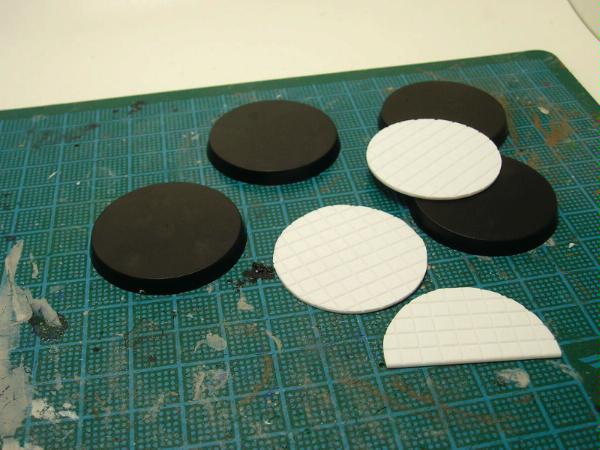 Step 2
Using your hobby knife, score between the groves of the tiles and break them down into the shapes you want to use on your bases. I keep these shapes fairly simple. Either straight lines or right angles for the undamaged sections. For the damaged sections you can do the same, or use up some of the waste from cutting your original circles (the concave pieces left over on your plastic card sheet). Glue these pieces down with plastic cement. You can then add on a few 'broken' tiles.
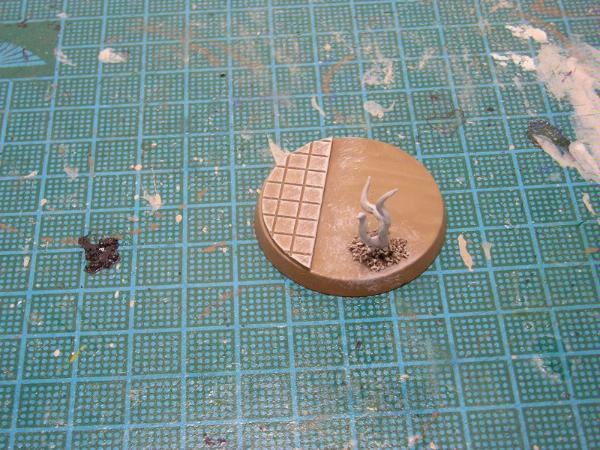
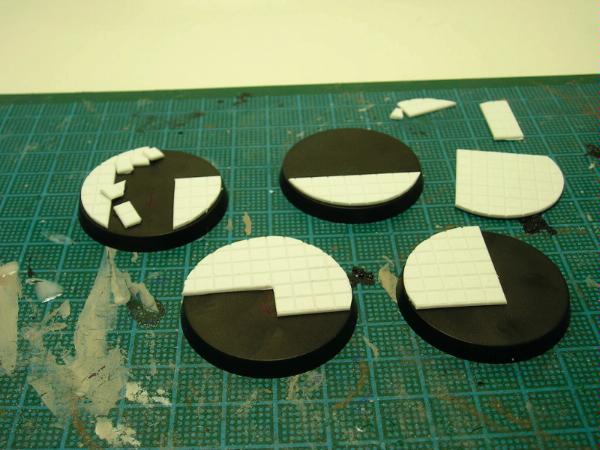 Step 3
Depending on what the bases are being used for, I find that a few extra details can add a lot. For the 'lost city' feel I like to use an assortment of extras from the wood elf glade guard box. It comes with several small tree sprouts and rune stones. I like to trim the base off of one or two of the sprouts and build larger branches. Be sure to clip or shave off any of the little wood elf sprites that are hidden in the bits (or maybe not, that's all up to you).
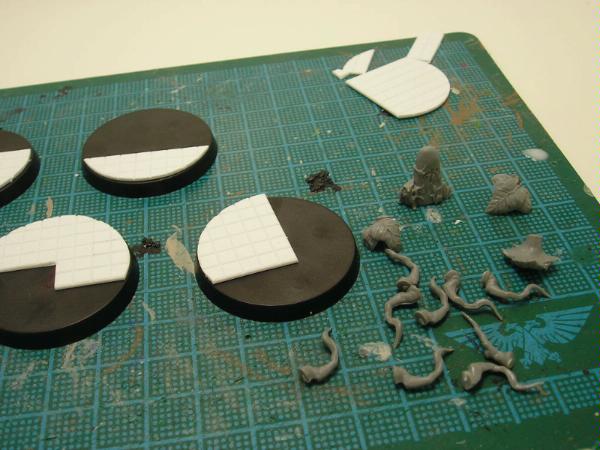 Step 4
After all the ground details are in place, apply super glue along the damaged edges of the tile and dip the base into the modeling ballast. You can also apply ballast to any areas that you want a cleaner transition for the flock (around trees for example). You can also make small hills in the base by gluing ballast to a large open area.
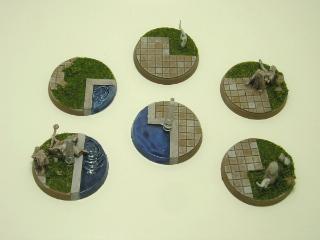
I wanted something a bit more ornate for my seer councils bases. I wanted to add statues, but felt that the bases would get over crowded if I tried to add larger scale models. So I opted to go the other direction with the statues. Caesar Miniatures makes several great lines of 1:72 scale miniatures. I happened to have a set of their fantasy adventurers laying around. I just cut them in half where ever it seemed the 'statue' would be weakest and then roughed up the edges.
 Step 5 (optional)
All of my armies are built with magnetic bases for the purpose of transportation. I got tired of delicate weapon arms and spiky bits constantly breaking off, so now all my models are transported upright in large trading card boxes (about 18"x 24"x 5"), standing upright and happy! It also works well for magnetic display boards. Anyway, I was at a stopping point for the night and it was a good time to do this step (which also helps out in the painting process.
Attach a rare earth magnet to the bottom of each base. 1 is usually strong enough for anything on a 40mm base, unless it is the size & weight of an
IG ogryn. I prefer to use elmers brand 'stick all'. It tends to wrap around the magnet just enough to hold onto it and isn't expensive.
A few tips.
-Place the magnet touching something upright if possible (i.e. between two pegs on the 40mm or 60mm bases, or alongside the slot on a slotta base.
-Try to get the magnet as centered as possible. If placed on the outer edge of a base, lighter models can occasionally attract or repel each other on the game table. (fun to see, but not good for game play.)

-place your magnet/glue over writing on the base, or if it is blank, score the base a few times with your hobby knife. This give the epoxy a better surface to bond to and you are less likely to 'leave' the magnet in your transport case when you pick up your model.
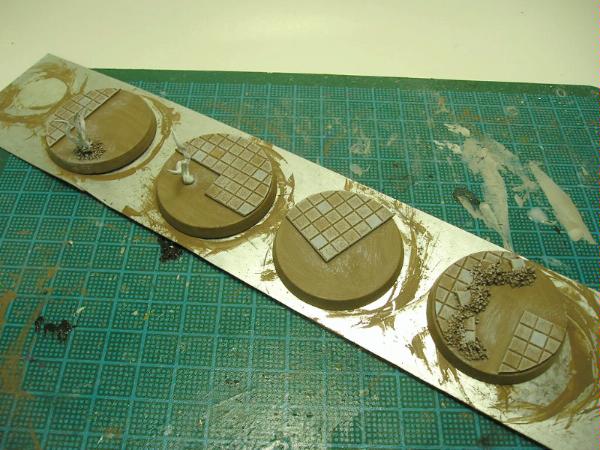
 Step 6
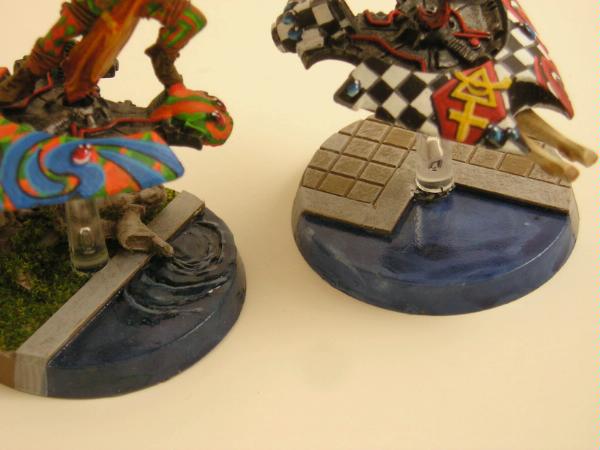
I prime the bases in grey, this tends to keep the paint job a bit lighter and gives the feeling of an untouched city. Base coat the bases in Khemri Brown and allow them to fully dry.
 Step 7
Drybrush the bases in Dheneb Stone and then again in Space Wolves Grey. I like to drybrush from the center of the base outwards so that the highlights are on the 'real edges' and not the edges created by the base (no hard line around the exterior of the base).
If you have branches on your bases, I drybrush them as well and then finish with a final highlight of pure white.
 Step 8
Go back and hit individual tiles with Space Wolves Grey and Khemri Brown. Not to many, just 2-3 in each color. Keep the paint thin. I find it helps to immediately dab my thumb over tiles that I paint with Khemri Brown (it removes some of the darker color and breaks up the solid pattern).
That's it for painting, be sure to matte seal the bases before the next step.
 Step 9
Apply elmers glue to any grassy area as well as the ballast. Dip the base into your chosen flock and knock off the excess. Allow the glue to dry. Your all finished. All that's left is to attach your mini.
That's the basic idea, obviously you can dress it up or dumb it down from there.


Hope this tutorial helps you out.


 1500 vs
  1500 -40k
 2500 -fantasy


 4000 all painted


 "In the embrace of great Nurgle, I am no longer afraid, for with his pestilential favour I have become that which I once most feared: Death."
  around 2000pts