bleedge wrote:Hey guys,
I have a small starter force of imperial guard and i just picked up a basilisk. This will be my first attempt to paint a tank, so i need some general tips. Also, what colors should i do it in? i was figuring white and green like the rest of my army but im not sure how to do them (Patterns?).
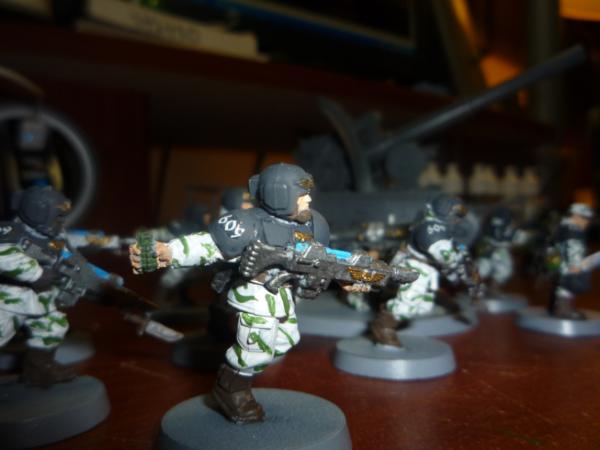
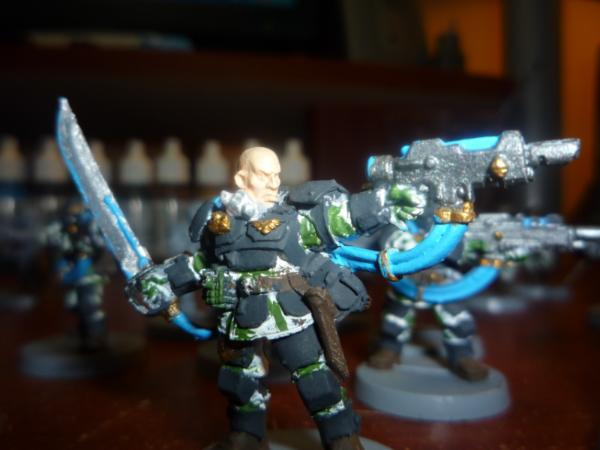
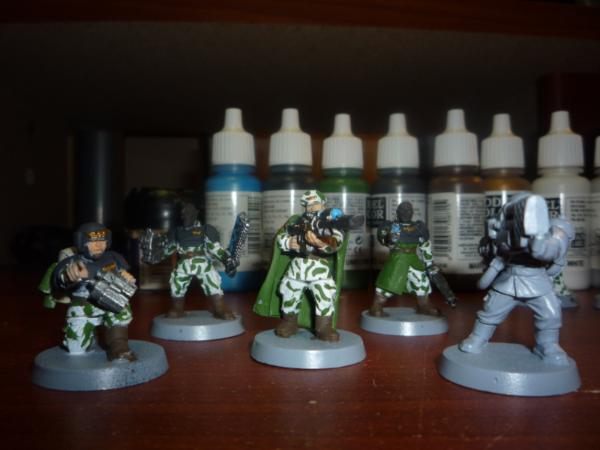
P.S. i know I'm not the greatest painter in the world, so good old fashioned painting tips would be appreciated as well
Thanks guys
Ok, Paints...
The Best way to paint a Bailisk is to spray paint it on the sprue with Testors Military colors for the major coating, and then hand paint the details and use a template for the camo scheme. After they dry, you cut off the parts with your hobby clippers and X acto knife, and then hand paint the cut marks with the
GW paints.
You have a choice, but I recommend that you prime the model Grey or white. If you try priming it black, your model is going to come out Grey when you try to spray paint white on it.
Depending on your shade of greens, you can find the same exact colors in your hobby shop.
GW paints convert over to Testors quite easily, and somewhere, awhile back, someone has here on Dakka a great conversion cheart of paints of the major colors from Testors,
GW, Privateer, and Vallaios, but I can't find it right now...
Your scheme isn't really going to be an issue, but if you don't do a little homework in taking your bottle down to the local hobby or model shop, your not going to get a very good quality match. ( Personal example, I took the
GW color Catachan Green, Dark Angels green, and had to go down to at least three different shops to get the correct one. Apperently, betweeen the different versions of Dark Angel green, the textures, colors, and all around cover value of the paint spread have changed, and not for the better.) When you pick the spray paints, make sure you pick FLAT, as opposed to Gloss coat, which is for model cars and really makes military models look bad.
As for white, your better off going for an off white color, shich as ghostly pail, or off white, or adding in a little fortress grey to your skull white, or egven just getting a real light almost white grey color. For one, straight white is a bad color to just leave on a model, as in it is just like looking at a white piece of paper, and the details of the armor are lost. trying to paint the little things in like paint scrapes, dents, bullet holes, etc. and all other general details will get lost on a completely white canvas ( I/E your bailisk) metal colored paints do not look good on completly white. Testors had something like German Arctic, or something like that. ( Going off of memory, but long story short, take your white in, and try to find a color that is one tone darker, that way when you spray it on the model, it picks up on it, and you can see the details stand out a little better then an extreme color of Flat White.
After you figure out the correct color, pick up a couple of cans of your testors and clean the model up with soap and water, and let completly dry. You try to paint a model with wet or water still on it, and it will run, and leave nasty looking splotches on it, so make sure it is completely dry.
After shaking up the cans for a good few minutes, and making sure that the paint comes out evenly by testing it out on a piece of newspaper, or on the box lid, and in the even that it is still runny, shake it up a little more. You'll be able to hear the ball bearing rattle around inside the can and it won't stick when it is sufficiently shaken up.
Light even strokes, about a foot or so off of the model, and cover it until it is sufficiently colored. Light, because if you try to with one thick coat, you lose the model under a thick goo coat, instead of colors. when it drys, the thick will run, leaving goo lines dripping down the model.
After the sprues have been colored, you leave them alone, and let them dry for a couple of days or so. 2 or 3 should do it. Painting or handleing a half dry sprue will leave finger prints, mess up the paint, and generally not go well for the piece, especially when you are using an oil based spray paint, and painting the details with a brush with water based paint.
As for the details, however you want to go, you can paint them all black, and then paint on off colors, so to bring them out of the model. This goes especially for your metals, as I said before, when the metals do not stand off of white very well.
Ok, Flash and lines...
The tanks have two that you will have to worry about, both are easy, but you have to TAKE YOUR TIME.
Sprue attachments, You use your hobby cutters, and cut off the model bit at the attachment, and then take your X acto blade, and LIGHTLY run it along the flush of the model, slightly shaving off the sprue bit. You can use files, sure, but if you don't be careful, the file digs into the model even worse then a slipping X acto blade will into your hand. ( HINT HINT!!!)
Gentle and steady, and the shave the plastic. after that, you take your
GW or whatever paint and paint over the seperation points.
Mould lines, or flash lines- Variation on a theme, but in the event you will be using some nice fine grane needle files, or fine grain sand paper, and after the fact, you can either cut into your models, or use the putty to add in your battle damage, or your war wounds. You can dig around in the model with the X acto knife, as well, but you have to make sure that you TAKE YOUR TIME. (Remember, once you cut it you don't get it back.)
After the models have been painted, you end up finishing off the details, you then go to assembling it. First thing first, you are not in a hurry, and Glue is not your friend.
I use zap a gap, or Testors, or even sometimes, a two ply epoxy, whatever type you use, you have to -
First, have all the parts that you want to put together all ready to go, and second, test fit them WITHOUT the glue.
Only after that, will you add in a little glue. A little glue goes a long way, so be easy with it. If you get any on your hands, get it off and leave the model along until your fingers are cleaned up.
If not, your paint job gets finger prints on it.
After the parts are joined, leave the model to dry for a day or three, depending on your glue. after the fact, you can get out the selant, and spray paint over the model with the light touches, and be sparing with it as well.
As for cloth, You have several options.
1. You can use a small square of thin leadsheet that they sell in model shops. You put it on, form it to your models, and spray paint it like everything else, or paintit, and then put it on the model.
2. Tissue paper can be used, but when you paint the elmers glue onto it, you are making in effect paper meche, and after it drys, you can then paint it. ( I don't recommend it unless you know what you are doing with this one.)
3. Verdun has several real life options such as cammo netting that look great without a lot of hassle
4. Cheese cloth, which is white, can be touched up and painted, or use a markerpen, and color it in.
5. Guaze from your first aid kit, in the event that you did not cut yourself with the X acto blade.
And finally, a good whitewashed look is to use 1 part paint to 2 parts water and water it down, leaving you with "whitewash" that you can spread on the tank for the offhanded amature paintjob look- after the main paint job with the spraypaints has been finished. At that point, do the details after the whitewash job, so that your black primer on them doesn't run in the whitewash.
Hope this helps, sorry it seems long winded.


 5000 points
  Imperial Navy Strike force: 3000 points, all made from styrene sheet and cardboard cracker boxes...oh yea.

 )
)


 Cadre Coronal Afterglow w1;d0;l0