Hi all,
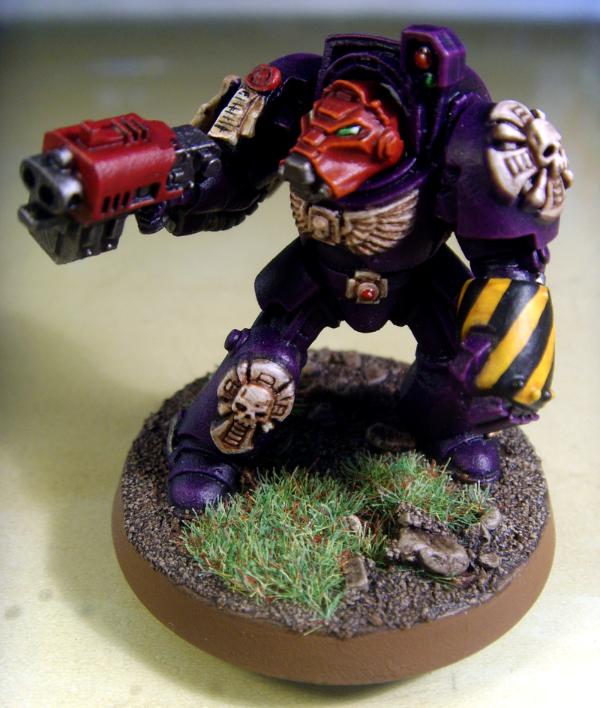
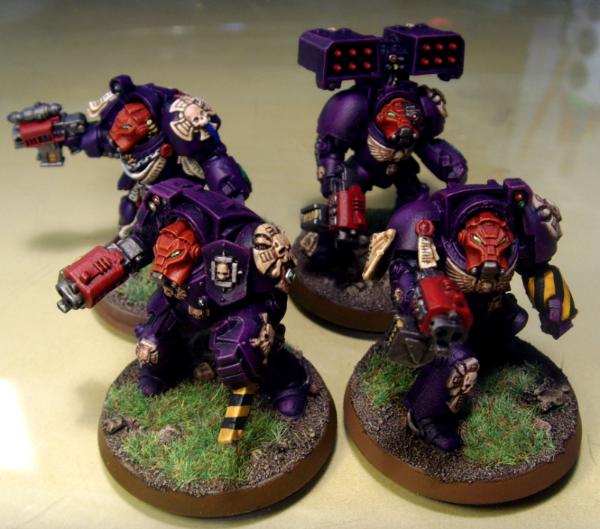
This is the basing I currently use for my Space Marine force. It's a very simple and easy base style to do but it works very well for giving your models a very nice, neutral base type that will go well on many boards.
It is also a tutorial for the bases that participants in "The Huge Space Marine Chapter Conclave" group charity event can use for uniformity.
http://www.dakkadakka.com/dakkaforum/posts/list/333851.page
(All images can be zoomed in on for a better look if desired)
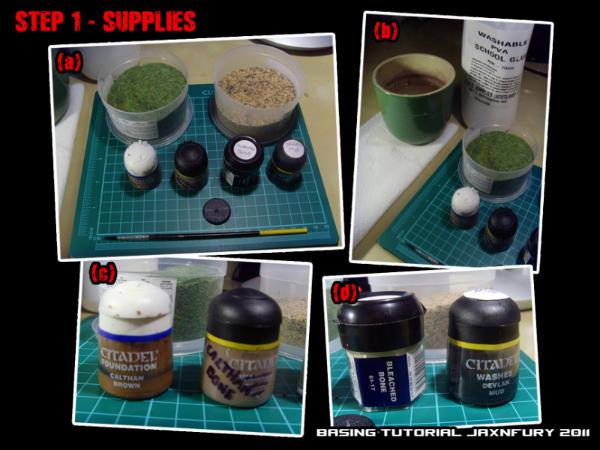
Step 1 - Supplies
(a) & (b) - You will need; Static Grass, Gravel/Sand Mixture, Paintbrush(s), Base(s), PVA(White) Glue, Water, Paper Towel, Paint Palette
(c) - Paints used for this are; Calthan Brown, Calthan Bone (50/50 mix of Calthan Brown & Bleached Bone, optional)
(d) - Bleached Bone, Devlan Mud wash (essential)
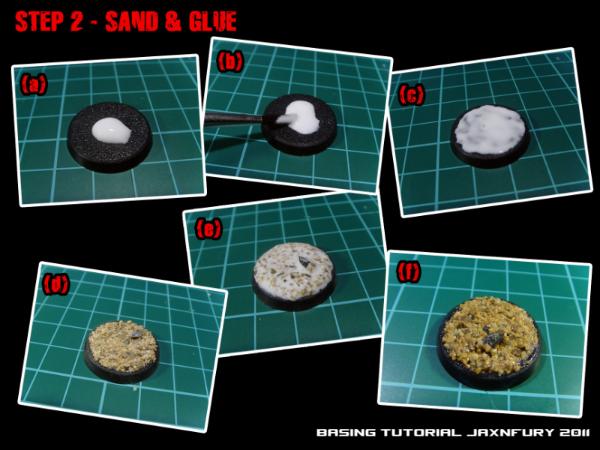
Step 2 - Sand & Glue
(a) - Place a a decent blob of PVA glue on your chosen base, enough to cover and not be too thin when spread out.
(b) & (c) - Spread the PVA out to the edges of the base with an old paintbrush, taking care not to spill glue over the edges.
(d) - Dunk the base into your sand/gravel mixture. I like to place it in the tub, then scoop up the sand and pour it over the base while making digger sounds (sounds optional). Make sure the whole base is covered then pull it out and give it a couple of LIGHT taps to shake off the really loose bits.
(e) - The sand/gravel won't be especially secure with just the PVA holding it on to the base at the bottom. Due to this I like to make up a 50/50 mix of Water-to-PVA then using a paintbrush "wash" the sand with it. Be careful not to push the sand about too much as it will be loose still. When you are happy, place it somewhere warm and leave it to dry for a few hours, or ideally, overnight.
(f) - Once all the PVA is dry the sand will be incredible secure as you have essentially sealed it onto the base. The PVA also helps to fill in some of the smallest gaps and give a more natural mud/earth look once it is painted.
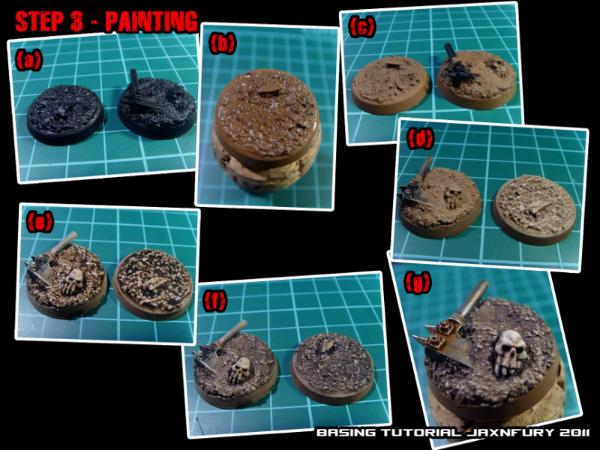
Step 3 - Painting
(a) - Give the base(s) a quick spray of black primer as this not only helps the acrylic paint adhere better, it also affects the overall tone.
(b) - Paint your base(s) using a decent amount of Calthan Brown. Make sure you water the Calthan Brown down a little though as it is a thick paint and if you paint straight from the pot you will lose detail.
(c) - Once dry it should all be evenly covered. Nice. Looks like chocolate digestives. Doesn't taste like them though.
Next up is some drybrushing. I won't go into detail about drybrushing, if you don't know what it is or don't feel confident doing it - go have a look at the many drybrushing tutorials around as it is a very important technique to know how to do right.
(d) - Give your base a nice, light, drybrush using the Calthan Bone (again optional but looks better in the end). Once the first drybrush is... dry(?) do another drybrush sweep this time using the Bleached Bone making sure that you apply it lighter than the Calthan Bone stage. Left base has been done with Calthan Bone and the right shows the next stage, the Bleached bone applied.
(e) - Give the whole top of the base a heavy wash of 50/50 Devlan Mud-to-Water mix, don't worry if it spills over the edges.
(f) - Once the wash is dry the base is transformed into a very nicely blended mud/dirt base. The wash pulls down the bleached bone and makes the highlights a lot more natural.
(g) - Go round the rim of the base with a coat of Calthan Brown to fix the overspill marks from the drybrushing and wash. Paint any details on your base, even pick out some bigger rocks/stone if you have them.
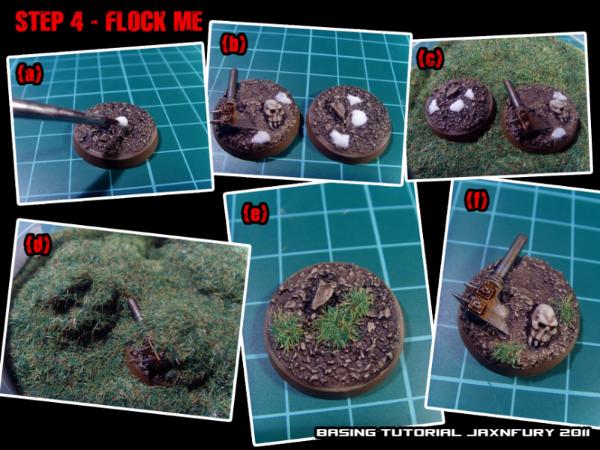
Step 4 - Flock Me - Almost There!
In order to break up all that dirt we are going to stick some key bits of grass in and tie the whole base together.
(a) - Paint small dabs of PVA glue onto the base.
(b) - You can do any amount of grass you like but I prefer very small key patches that stand out more than a whole base covered in grass. You also spent so long painting the base up nicely - why hide it under a load of green?
(c) - Chuck the base(s) into your static grass. The static grass pictured here is actually a 50/50 mix of
GW Glade Grass/Scorched Grass to look more natural but either type on their own is fine.
(d) - Pile up the grass onto your bases and give the piles a few light presses to work the grass into the glue.
(e) & (f) - Once dry the grass should be secure. A few taps and a little brush to get the excess grass off works wonders but don't go at it too rough.
Tutorial Complete - Enjoy your bases!

Let me know what you guys think.


 2000+ pts
 2000+ pts


 4000pts


 .
.


 Have a nice day.
  1,500 Points.
 500 Points.
  -Building in Progress-