| Author |
Message |
 |
|
|
|
|
Advert
|
Forum adverts like this one are shown to any user who is not logged in. Join us by filling out a tiny 3 field form and you will get your own, free, dakka user account which gives a good range of benefits to you:
- No adverts like this in the forums anymore.
- Times and dates in your local timezone.
- Full tracking of what you have read so you can skip to your first unread post, easily see what has changed since you last logged in, and easily see what is new at a glance.
- Email notifications for threads you want to watch closely.
- Being a part of the oldest wargaming community on the net.
If you are already a member then feel free to login now. |
|
 |
2016/10/05 06:20:11
Subject: multi-level city terrain, marine v nid bases (10/3, making a bio-containment unit)
|
|

Tough Tyrant Guard
|
Wow.... this thread is awesome, not sure how I have missed it for this long 
Great work in here and some awesome ideas and great use of day to day stuff.
Definitely going to be following this moving forward, loving your work!
|
|
|
|
 |
|
2016/10/05 21:56:10
Subject: Re: multi-level city terrain, marine v nid bases (10/3, making a bio-containment unit)
|
|

Dakka Veteran
|
Thanks!
Few things today;
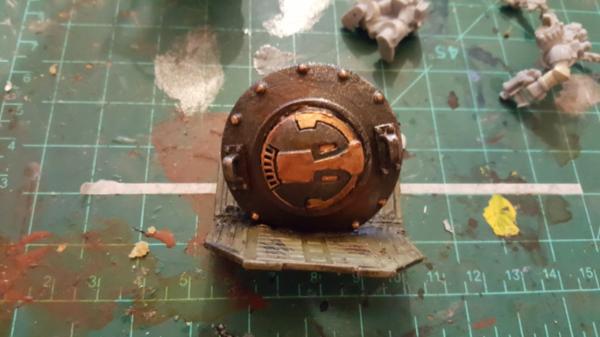
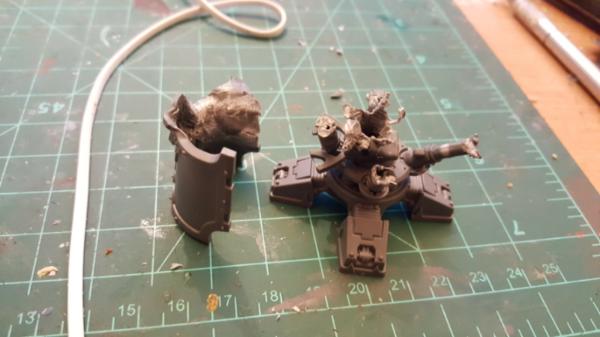
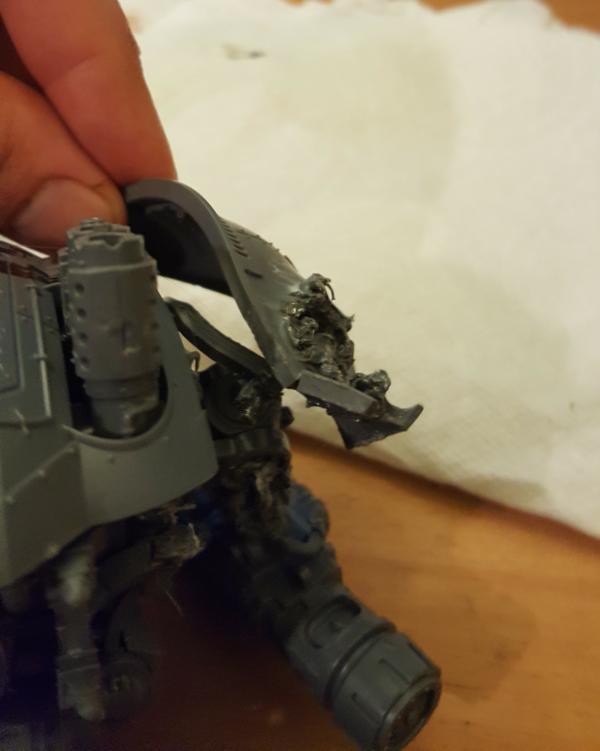
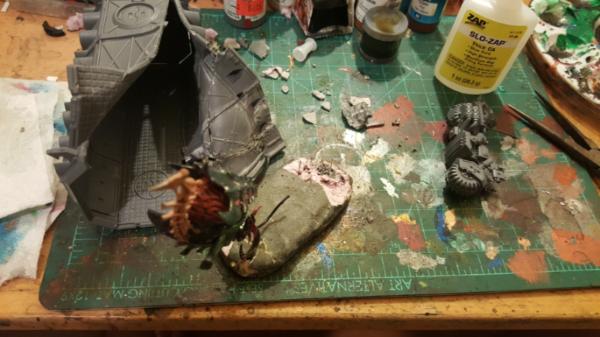
First up is deisning the coverplate of the bio-containment unit. More specifically, designing how it was blown off. The idea being that the neurothrope bursts out the door which is blown off which such speed it cuts the librarian guarding the neuromancer in half and also blows open the crate. So thats waht this is:
all ready for priming!
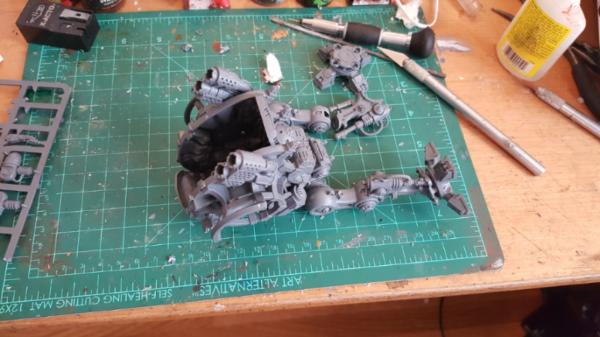
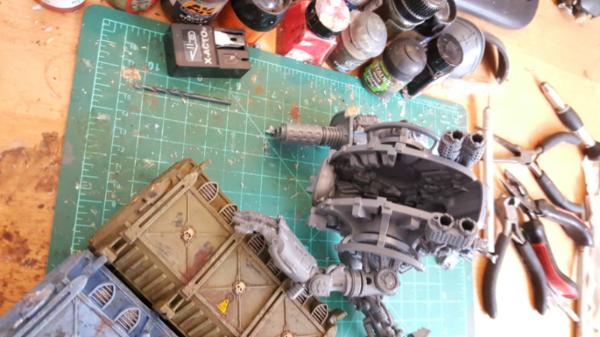
And we also have the beginnings of my crashed knight. Figuring out pose and how his left hand/arm will be crashed against a crate and so forth. This is one where the lack of leg poseability bit me in the butt, but i made do by basically accepting it and working with the result. So the left leg, which is more extended, is basically posed as is, just further back on the hip than normal. I plan on cutting and reposing the toes and fixing cables as needed but thats it.
The right leg is where it gets tricky, as there is no easy way to repose, so i think im just going to cut it off. The idea being the right leg got blown off mid stride and that's what caused the knight to brace itself with its arms.
|
|
This message was edited 1 time. Last update was at 2016/10/05 21:56:25
|
|
|
|
|
2016/10/06 22:19:04
Subject: Re: multi-level city terrain, marine v nid bases (10/6, crashing a knight)
|
|
Dakka Veteran
|
More work posing!
First up we have more final looks for the legs:
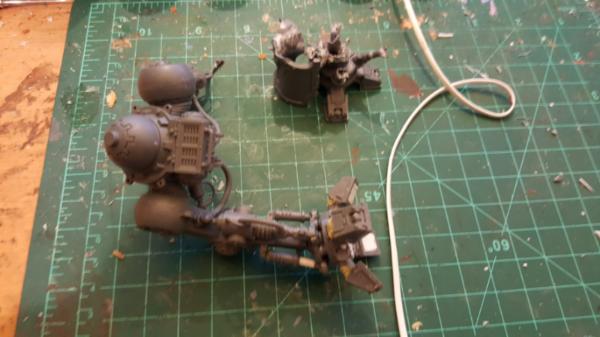
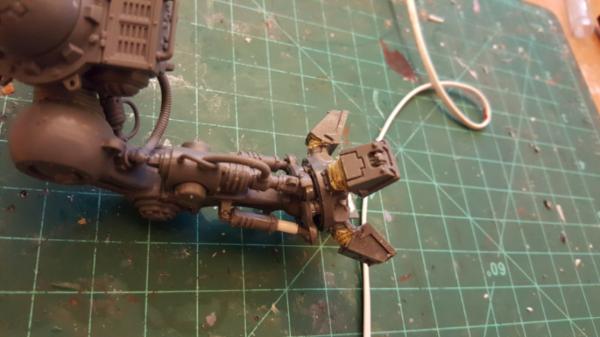
I had to make a new piston out of scratch due to bits stealing for the garage, but yeah. I also went ahead and cut and bent in the toes. The green stuff filling is a bit crude, im finding the green stuff I use just.. isnt as good as GW's. Its some other 2 part which gets really chalky and crumbly, doesnt quite hold together (milliput I guess is what it's called? I didnt realize there was such a variety..) .
http://www.bananaking.net/cento/workshop/conv_green.htm#whitestuff
But, to be honest, the distance away you'll be looking at it and how dark it'll be it'll be good enough.
Blowing up the leg was fun. Basically the idea is that upon walking out the knight was struck from behind by a flyrant, which crippled it, and thent he swarmlord leapt to the top to finish the job by scissoring the driver.
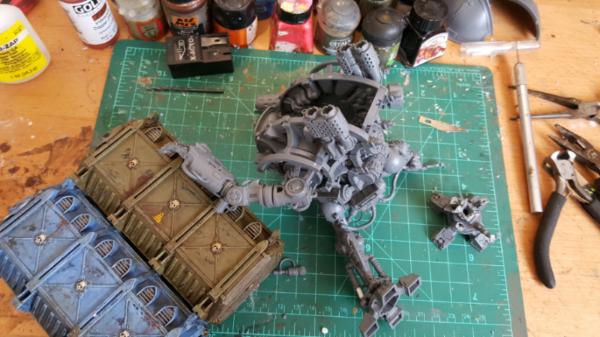
We also have some work figuring out where the hands go:
this is where its getting tricky as the left hand position greatly determies the twist of the knight overall, but is itself determind by how crumpled the crate ends up being. Ugh
Im also trying to figure out the cut for all this to make it a base.
It's not going very well. I have one chance at this and i dont even know the angle needed given how much I have to hold together, let alone how big a theoretical plastic primarch + swarmlord is. Ugh.
|
|
|
|
|
|
2016/10/07 20:53:41
Subject: Re: multi-level city terrain, marine v nid bases (10/7: painting a bio container)
|
|
Dakka Veteran
|
|
|
|
|
|
|
2016/10/09 05:19:04
Subject: Re: multi-level city terrain, marine v nid bases (10/8: painting a librarian cut in half)
|
|
Dakka Veteran
|
|
|
|
|
|
|
2016/10/10 21:54:01
Subject: Re: multi-level city terrain, marine v nid bases (10/10: painting wrecked knight legs/arm)
|
|
Dakka Veteran
|
|
|
|
|
|
|
2016/10/10 22:58:52
Subject: multi-level city terrain, marine v nid bases (10/10: painting wrecked knight legs/arm)
|
|

Regular Dakkanaut
|
Loving the colour tones on those busted knight parts,,, very nicely done
|
|
|
|
|
2016/10/11 17:52:17
Subject: Re: multi-level city terrain, marine v nid bases (10/11: barracks design, knight broken arm)
|
|
Dakka Veteran
|
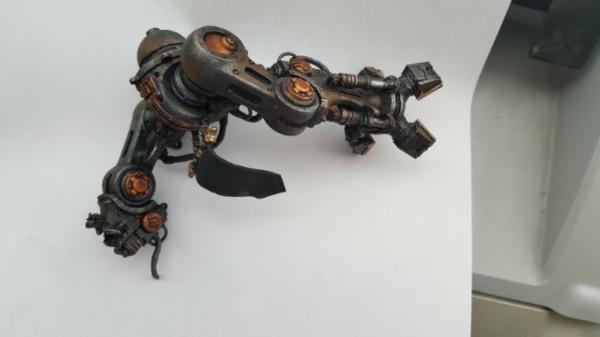
Thanks! Worked on some of the leg armour plates too, pretty exciting!

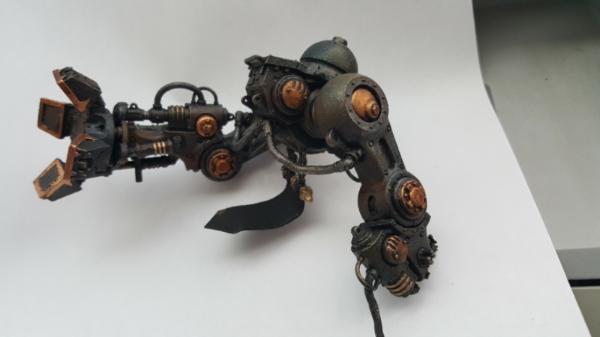
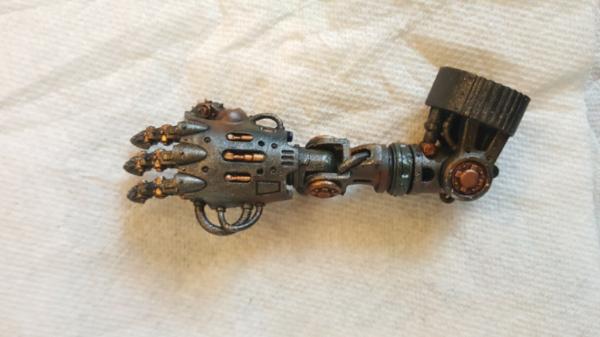
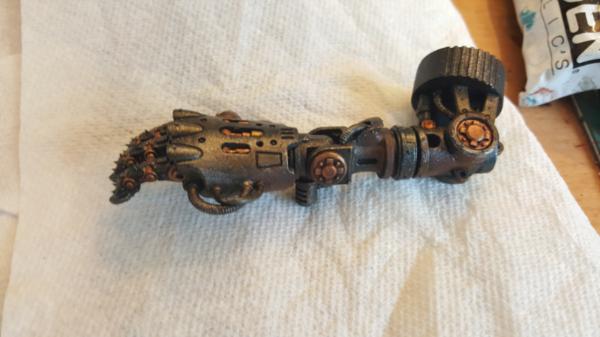
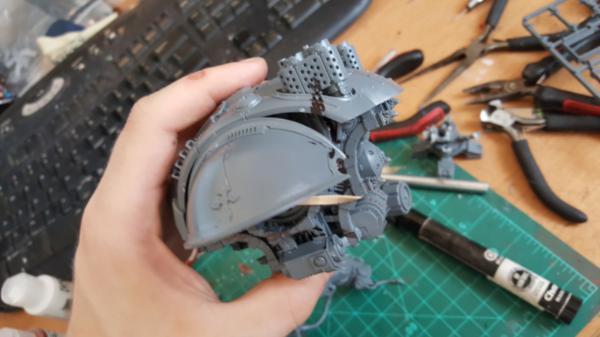
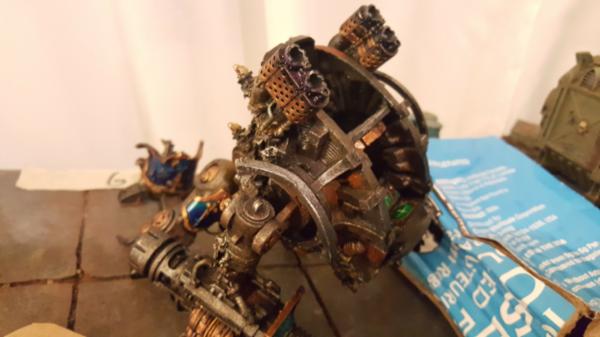
Then it was time to work on the right arm/shoulder keepign the knight upright. The base idea is the right shoulder gets blown off and is what strikes the bio container, freeing the neurothrope. Also it means more of the under structure gets exposed which is the prettiest part of knights. So we need to make a convining melted twisted arm thats still "intact" but not really functional. Hello soldering iron time!
I really like that the melted bits twist around, happy with how that turned out.
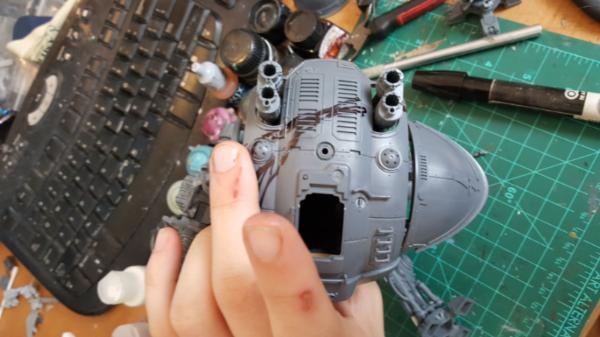
Hm, this area feels a bit too clean though, the explosion isnt big enough, something to think about:
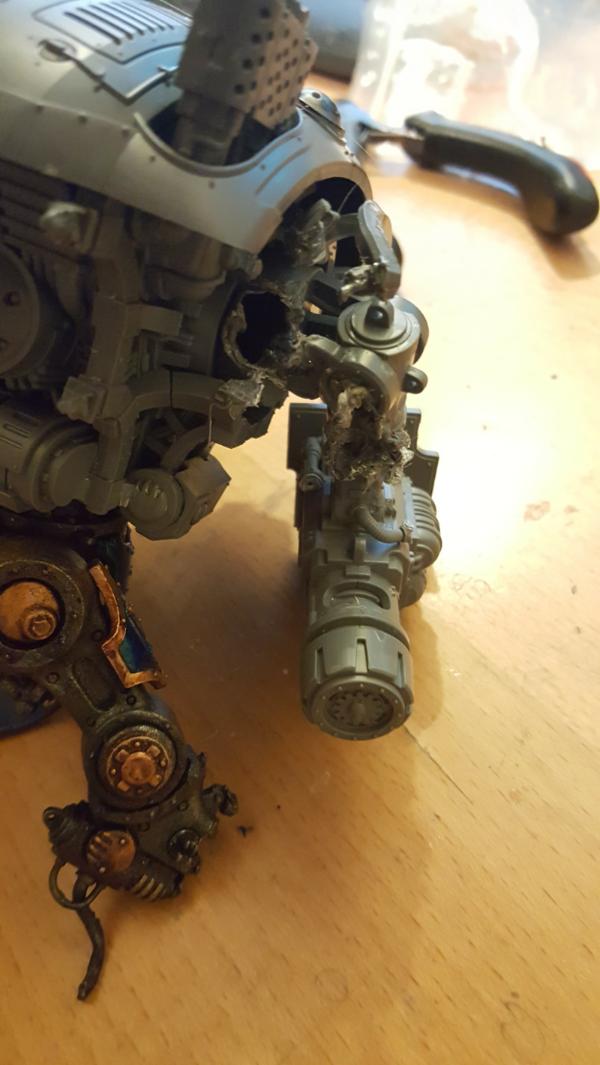
Testing out it being supported:
The shoulder hole:
I also had a apostrophe about the other tile design. I've been struggling a lot with what to pair with the garage. Original it was to be the flak tower I modelled but thats just wayyy too bulky, no way that would comfortably fit with the garage. Next was a more subdued oil/gas refinery and containment area with walkways connecting the garage to a radar dish. But then as far as base design goes its wierd. We have this supply depot tile we're making in front which leads to.. just a garage? Do I need a gate embedded in the walls to simulated "more base"? I dunno, it was gelling.
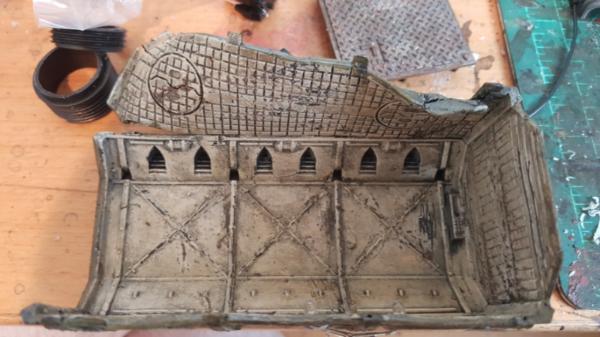
Finally though I just had this idea Which i think will work nicely. It allows for marble stairs for at least some of my pretty veterans, but also makes sense. Welcome to my new base design!
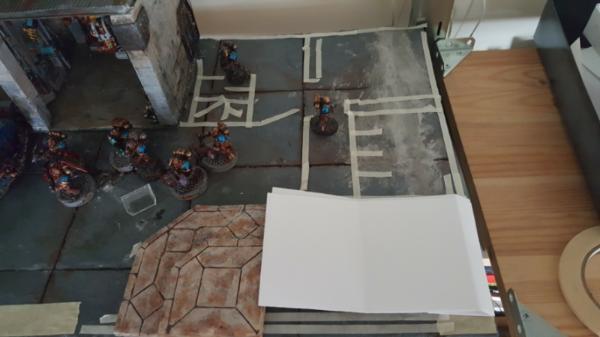
So first the white area is a small church. I figure i make something of a more traditional classic gothic church, Very imperial, very old, something that he marines would keep around as part of emperor worship. It'll only be about 4 inches wide but thats enough and makes sense if you see the marines schedule (no free time! lol). The marble steps outside would probably have to be remade, but thats okay. Ill just be left with a smaller marble steps that handles 5 vetereans and these bigger variety that handle 10.
THen we have the marine barracks, I figure I can comfortably fit in 2 stories with a third half story thats above the garage. The stories will be tall but thats okay, bottom floor is designed as you see, stairway, the back corner is the medical area, and the area adjacent to the church is a firiing range. The goal with this design i sto have both back walls be cutaways, so you can leave them off and see/play with the entire innards of the base, so the only "ianccessable" area is the stairway, but everywhere else could be something thats usable. Hence the more open design.
The second floor then is the main kitchen/sleeping area and I plan on being just one big open room, again for above.
Finally the half third floor, with radar dish on top, will be the captains quarters and general war room.
tyhere's a lot to do, but i think the idea is solid and gives me a third terrain type (barracks roof/lots of pipes/concrete/etc) from which to make bases for snipers/devastators/etc. Then we also get a nice visual of the flyrant landing on the church steeple and yeah, should be fun. More importantly though it all seems to fit okay and actually seems like a small but functioning barracks. on the second floor I think i can get upwards of 18 beds reasonably stacked and sized to marines and that seems about right for a base this size.
20ish marines, 40 if need be in 2 shifts. Not bad.
|
|
This message was edited 2 times. Last update was at 2016/10/11 17:55:48
|
|
|
|
|
2016/10/12 21:54:27
Subject: Re: multi-level city terrain, marine v nid bases (10/12: painting exploded knight bits )
|
|
Dakka Veteran
|
|
|
|
|
|
|
2016/10/13 22:19:03
Subject: Re: multi-level city terrain, marine v nid bases (10/13: wrecked knight posing, interior work)
|
|
Dakka Veteran
|
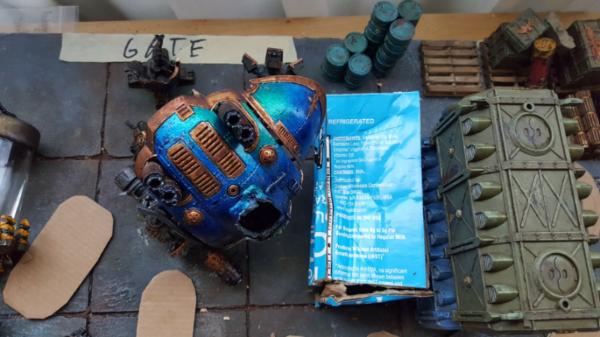
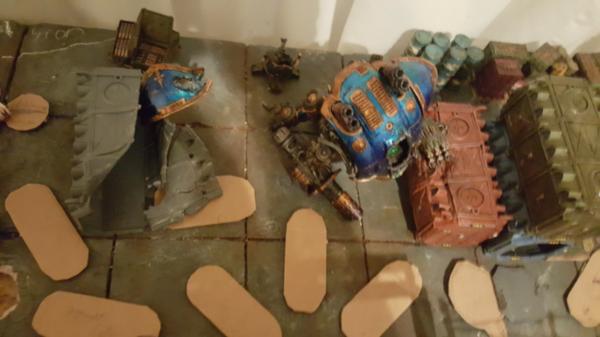
So now that I have my crushable proxy and arms done I can check to see how my pose is working out for realz and start to create pin points for the legs and so forth.
The answer is.. seems to be working well! The crate will end up a little off from the others but given the amount of force it takes to crumple one of these i thinki thats okay haha.
I'm also trying to work out the interior and figure out amongst my bit piles what to do, I need a chair, console and backing at minimum. The question is how much to care abou tthe side walls and whether ot close them off or not or have gears or something. Dunno. I also, again, have to consider the cut through all this and keep that in mind. Maybe its better to wait until after I cut it in half? ugh.
|
|
|
|
|
|
2016/10/14 21:32:33
Subject: Re: multi-level city terrain, marine v nid bases (10/14: knight extra wrecked, modelled interior)
|
|
Dakka Veteran
|
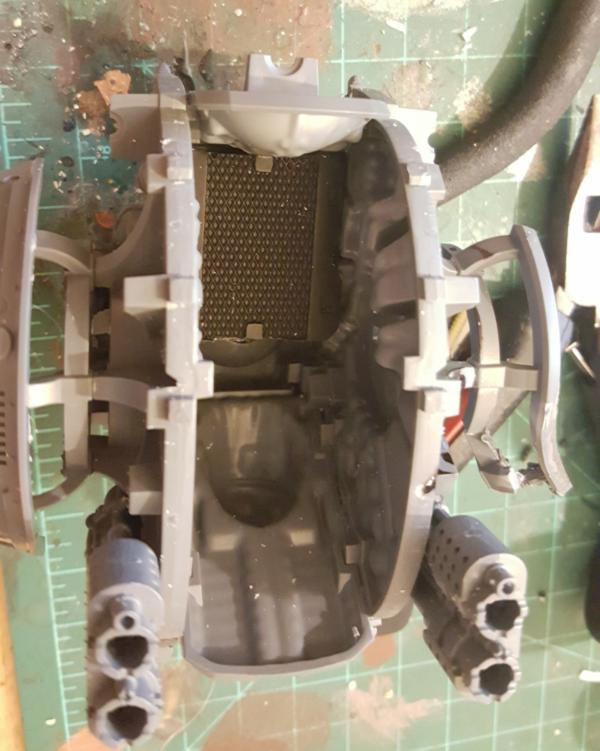
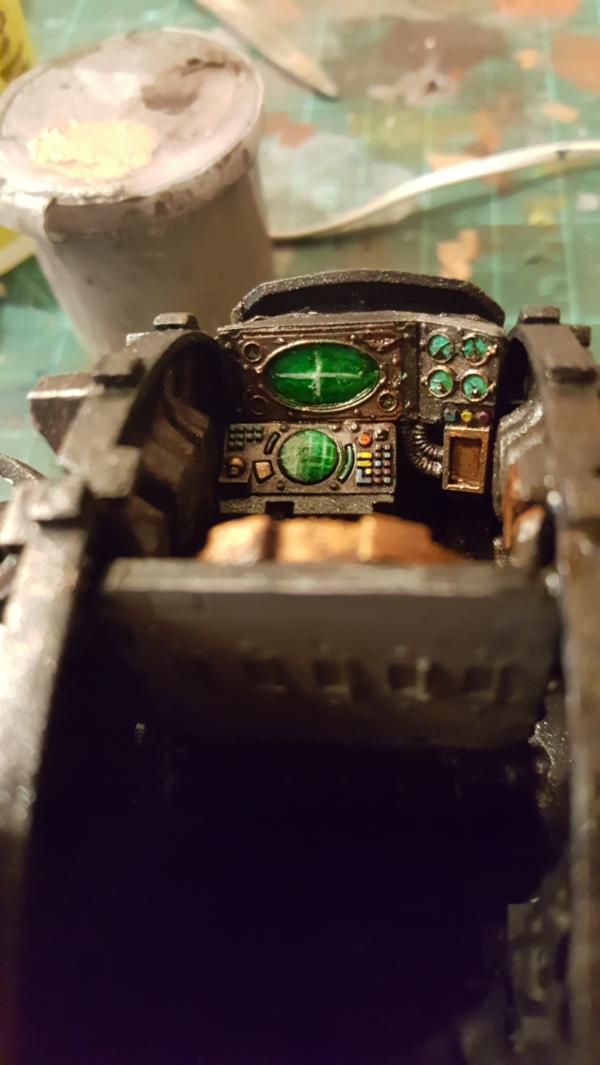
More work on the interior. I decided not to add sidewalls and just let it be more bare in there, you wont really see the lumps/curves from casting and lets me make the console bigger, which is cool.
Nice big console, all the buttons!
basic chair:
and a backplate behind the chair, this turned out fun:
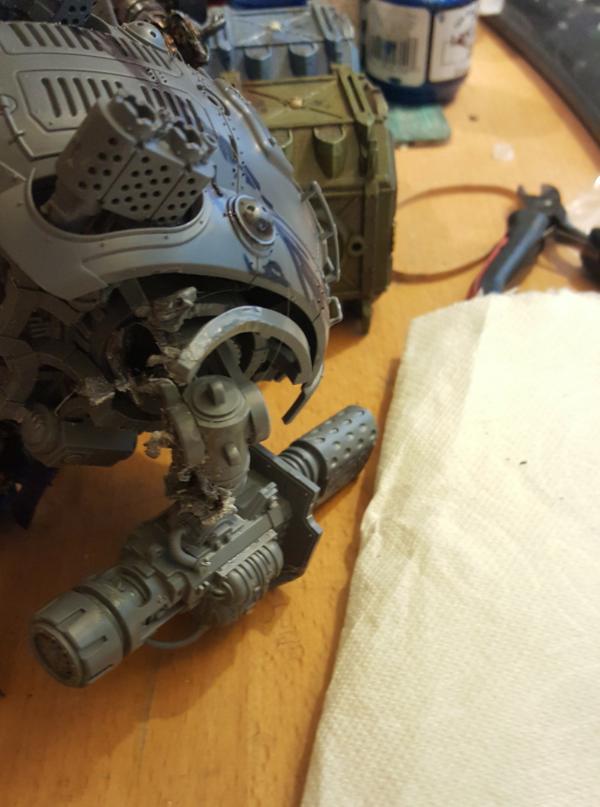
I also decided to wreck the knight some more, my explosion wasnt big enough! it now feels much weightier and more crippled.
|
|
|
|
|
|
2016/10/14 22:09:05
Subject: multi-level city terrain, marine v nid bases (10/14: knight extra wrecked, modelled interior)
|
|
Crushing Black Templar Crusader Pilot
|
Madness! But brillliant
|
  
Relapse wrote:
Baron, don't forget to talk about the SEALs and Marines you habitually beat up on 2 and 3 at a time, as you PM'd me about.
|
|
|
|
|
2016/10/17 18:08:40
Subject: Re: multi-level city terrain, marine v nid bases (10/17: knight cockpit, torso painted)
|
|
Dakka Veteran
|
So, the knight. I've been struggling a lot with how to cut the torso to make the knight base. I did all this work painting/posing the arms and pinnin them down just to more precisely figure out the cut, but even still i didnt have anything 100%. Given that I only get 1 shot at it... I was nervous.
But then came the real problem realization. I dont and wont for a while, know how BIG to make the base. I know how big a swarmlord is, sure, but I dont know how big the (rumoured) plastic primarch will be,a nd I wouldnt be surprised if the 2 of them together took up the WHOLE top of the knight, at which point why am I cutting it?
So I realized 2 things. First there are 2 main things to account for:
the primarh cant be permenently pinned as it should be playable
for painting competitions I want the full setup (kinight + primarch + swarmlord), BUT painting competitions dont really have a height maximum for scenic stuff.
Thus my realization: just have the ENTIRE knight torso be the base. Then I just need another hip which I embed into something heavy and cut the exploded arm so it slides in properly. The left/hand arm I can have leaning on something specific to the base and voila, im done. It's big, but thats fine, and WAY less risk in cutting. Then when I want to play with the primarch seperatly he just is pinned in without glue or magnetized and just has his own base thats more normal. This is a bit of a reversal from my general base tendencies but you're only ever going to see him all together on the board, all together in whatever painting competition I can try this in, or on the table briefly, so its okay to not be par tof a knight for that third case because its relatively rare.
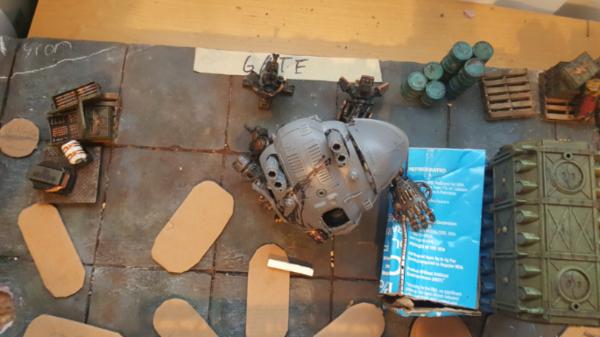
So these parts will just always be on the ground:
and the torso just slots right in:
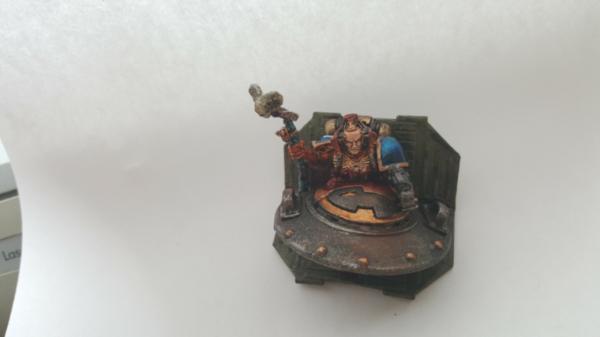
Much better. also its painted! Now I can paint up the shoulder/cover and attach the left arm!
Also the cockpit is done:
|
|
This message was edited 1 time. Last update was at 2016/10/17 18:10:17
|
|
|
|
|
2016/10/18 18:52:11
Subject: Re: multi-level city terrain, marine v nid bases (10/18: crashed knight painted!)
|
|
Dakka Veteran
|
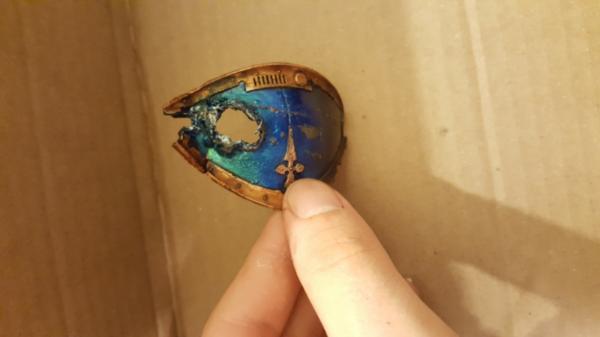
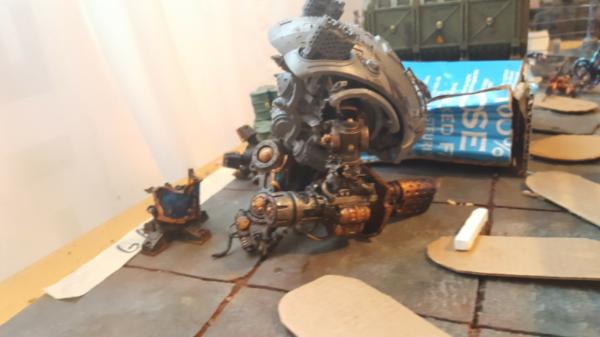
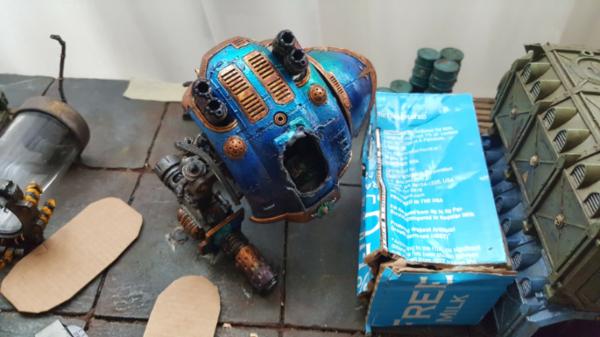
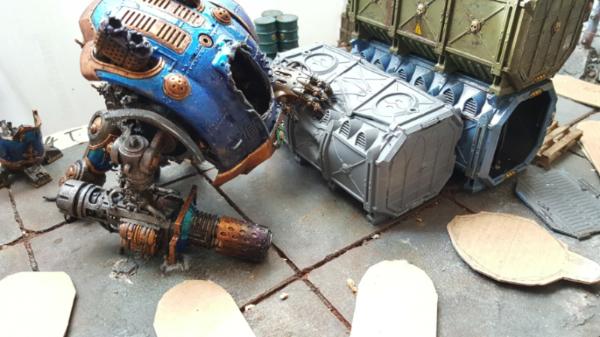
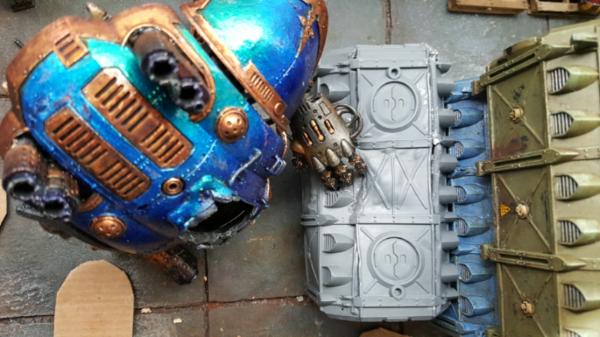
It lives! Now to get the arm on! once i .. get MY DARN CRATES IN. ARGH ARGH. still waiting....
anyhoo, super pleased with the results though, the blue worked great on such a large surface.
|
|
|
|
|
|
2016/10/19 18:06:37
Subject: Re: multi-level city terrain, marine v nid bases (10/19: making a working spotlight)
|
|
Dakka Veteran
|
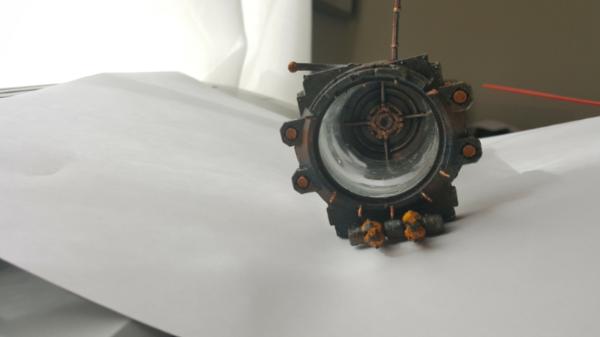
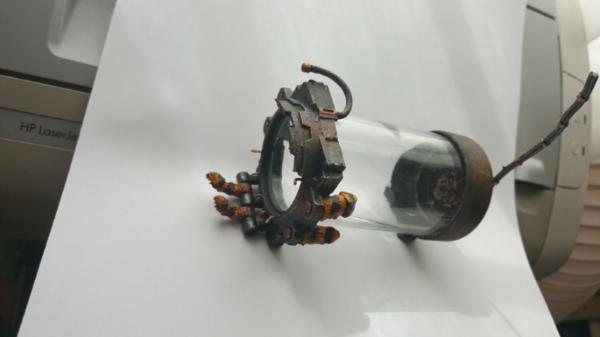
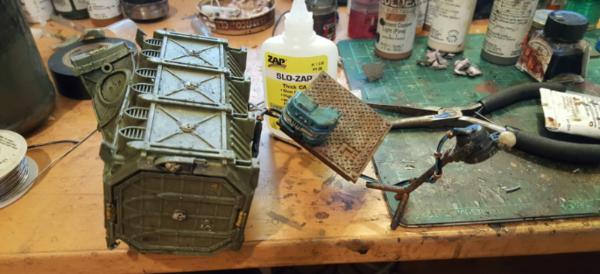
So still waiting on my second crate set to come in, so I figured id make a spotlight for my metal platform, also might as well put an LED in there too. I may not have it light up, but it would be good to atl east have the option to.
FIrst step was cutting out the "glass" in the existing spotlight bit, this proved tricky as it's pretty thick, so i ended up drilling it out. This meant I had to remake the bars which I did with wire and i think it works reasonably well.
I then inserted some frosted plastic to have a real lens

And added my lightbulb! all pretty straightforward. The coloring is my normal dark metal just to have it be there and pretty but not something to pay TOO close attention too. I want this spotlight to be more of that "filler" detail that you appreciate but dont need to look at tooo closely. Otherwise u'll see the shrink wrap coming out the back 
One thing not pictured is i added some tinfoil to behind the LED in an attempt to make this thing as bright as possible. One thing i've been nociting is that in full light the LEDs can get lost. Which thats not bad, it just means I want to do everything possible to put out as much light, so I can then filter it down later as needed when I see it all together.
|
|
|
|
|
|
2016/10/20 22:01:18
Subject: Re: multi-level city terrain, marine v nid bases (10/20: crumpling an armored crate)
|
|
Dakka Veteran
|
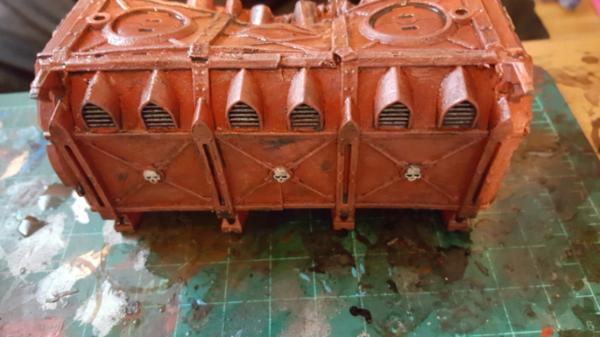
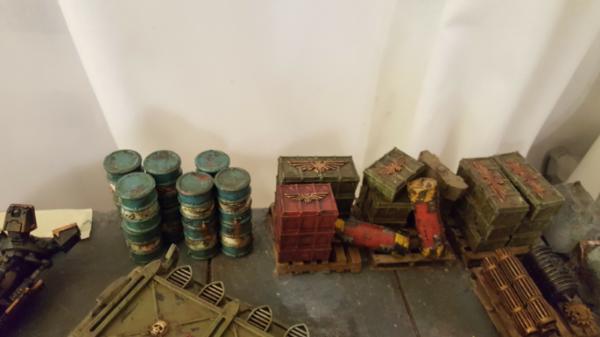
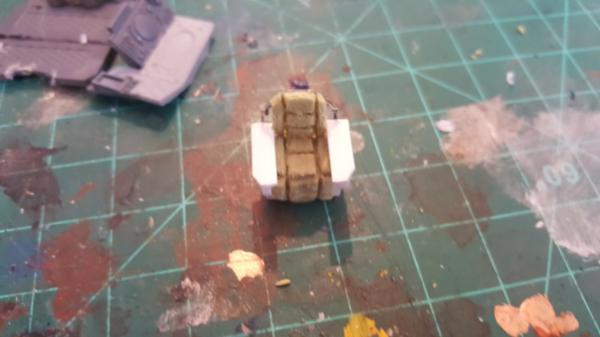
So my armoured crates FINALLY came in, yay! time to break one!
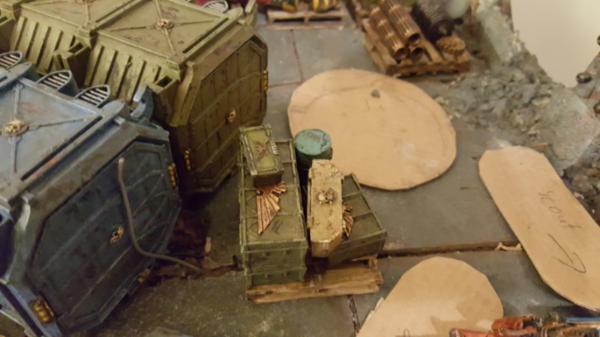
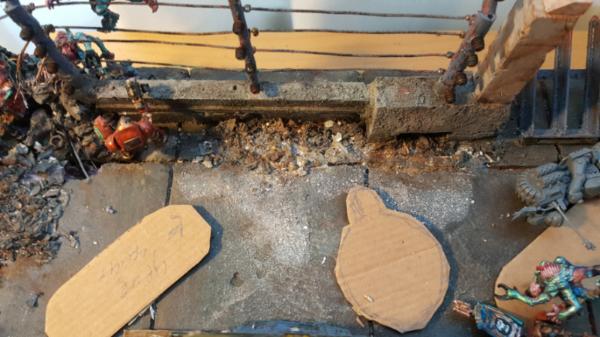
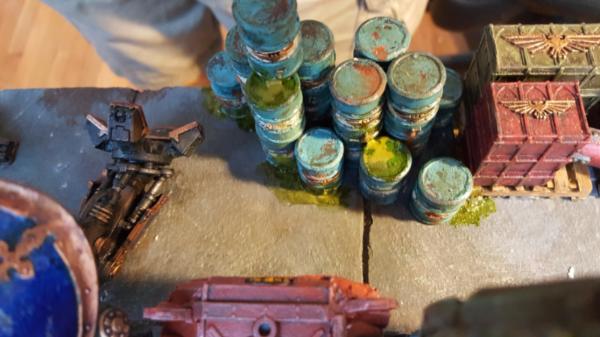
First up it's time to pose out my remaining ammo crates and bits and get a final detritus layout:

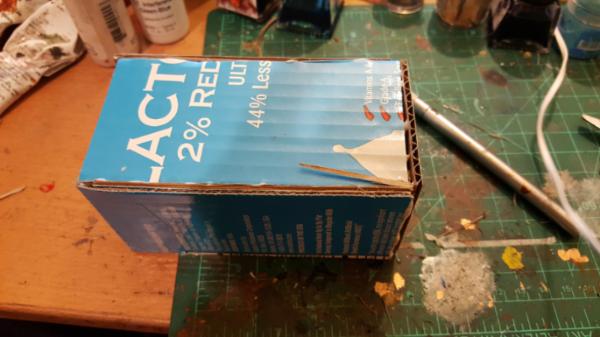
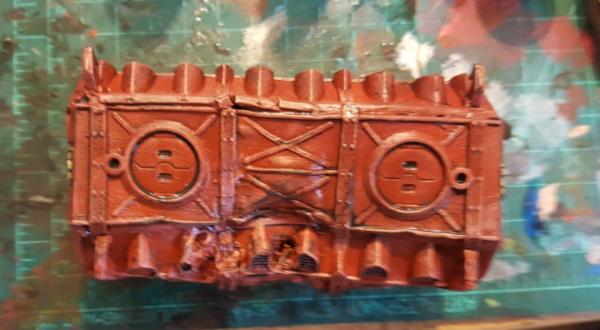
Okay now that thats done its crumple time!
So we've learned from the oven experience: no ovens. The problem is that the soldering iron isnt really good at heating large areas. So my new solution: boiling salt water!
i get to more easily control which side is bending and how long to keep it in there. For the crumpled crate, since the corner is what's crumpling, I figure'd id do it on a per-side bases. So I started with the verticle side crumpling and then glued on the roof and started bending it down. It worked.. reasonably well?
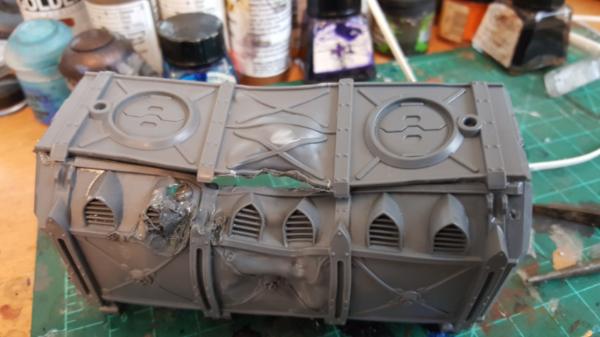

Even then though getting that joint to line up will take some more work. As the verticle side crumpled it also crumpled in the horizotnal axis so the roof plate no longer lines up. Bleh, tricky.
Still, with finageling and lots of soldering "welding" I managed to get them aligned and crumpled. Putting the back on took some work too and I had to crack the plastic to get it all to fit.
|
|
|
|
|
|
2016/10/21 15:51:48
Subject: Re: multi-level city terrain, marine v nid bases (10/20: crumpling an armored crate)
|
|

Regular Dakkanaut
|
Looks really great ! The ideas and painting are awesome . I will definitely follow this thread.
|
|
|
|
|
|
2016/10/21 21:25:46
Subject: Re: multi-level city terrain, marine v nid bases (10/20: crumpled container painted! )
|
|
Dakka Veteran
|
|
|
|
|
|
|
2016/10/22 20:04:24
Subject: Re: multi-level city terrain, marine v nid bases (10/21: exploding an armoured container p1 )
|
|
Dakka Veteran
|
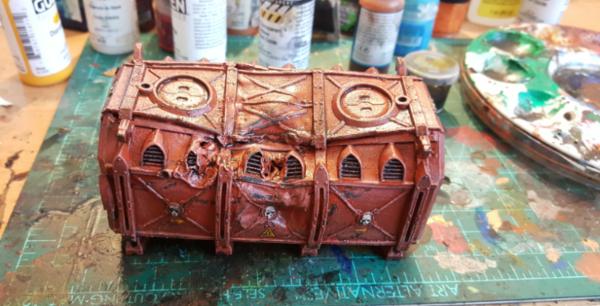
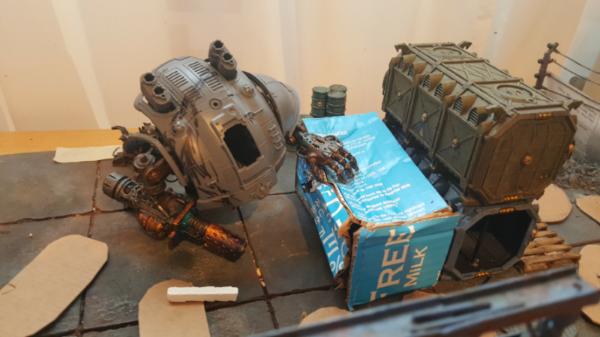
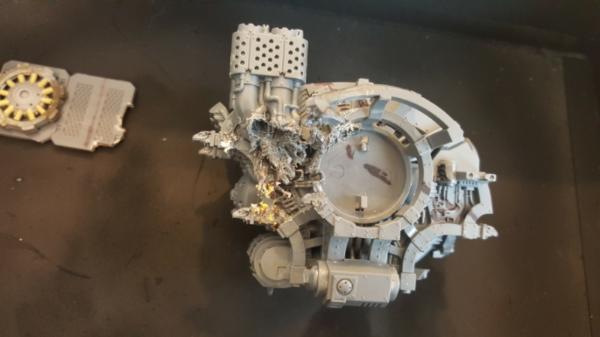
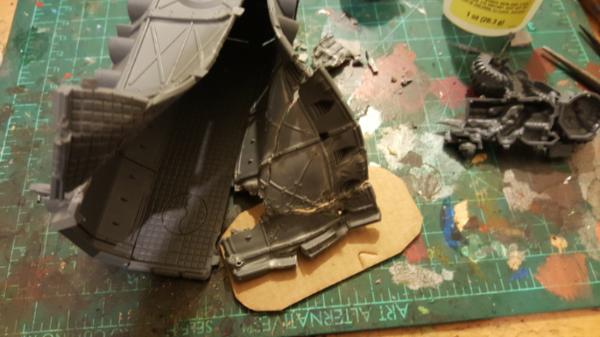
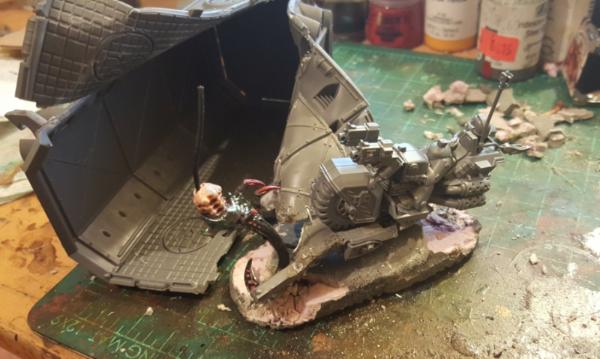
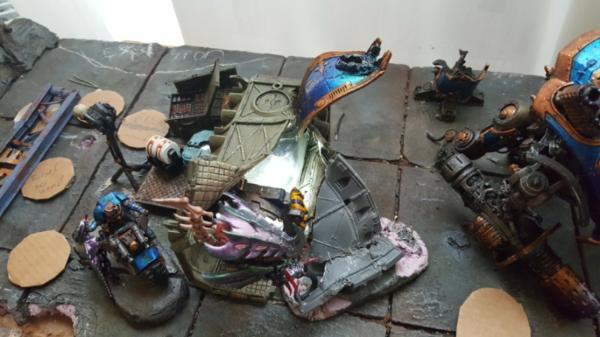
So next up we have the armoured container for the bio-containment unit. This one we explode and I also wanted to have the neurothrope vs khan base involved in that explosion, so we need to have wahtever warped metal I have line up between them.
Turned out that was tricky.
First up was bending it at all. The plan of attack was to glue firmly the left side of the container pretty well,m as that would warp all together. Then the back cover and right side would be more lightly glued, as I would need to potentially take off both in order to get the container in there/paint the insides.
But i still wanted them glued down somewhat to make bending more reliable and easier. Then I once again got my pot of boiling salt water and dipped the exploded end in there and sloowllly bent.
Fun fact, holding something over boiling steam hurts, ugh, lot of boiling vapor.
FIrst results were not bad:
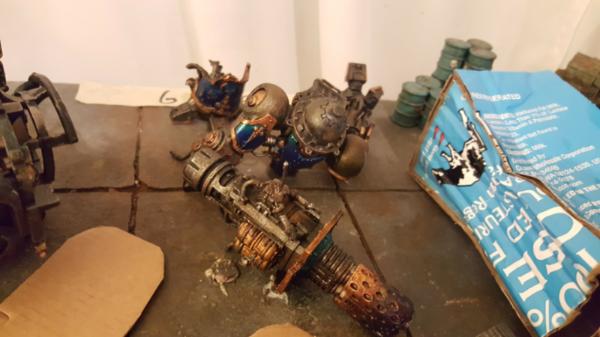
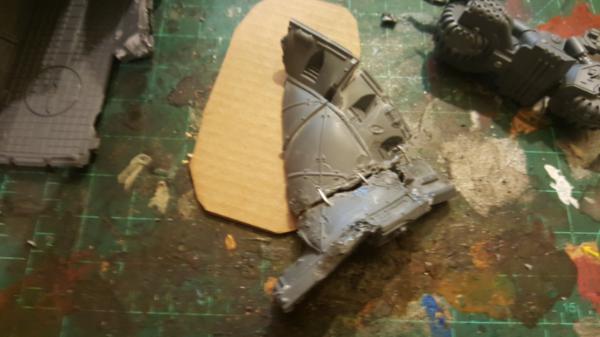
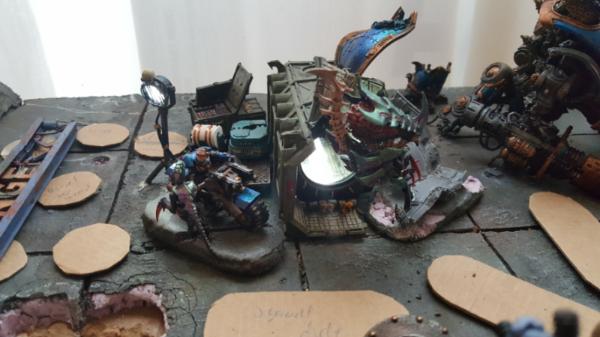
but then it came to actually figuring out hwot he base works. What I really want is something like this:
with the bike/khan going up the ramp to face the newly escaped neurothrope. Problem is is that the bend of the curve is the wrong way, so thats.. ugh. Furthermore that piece of plastic cracked in 2 places so jsut keeping it together was tough. I tried superglue.. nada, I tried "welding" it with plastic to remake it into 1 solid piece.. nada. Not fun.
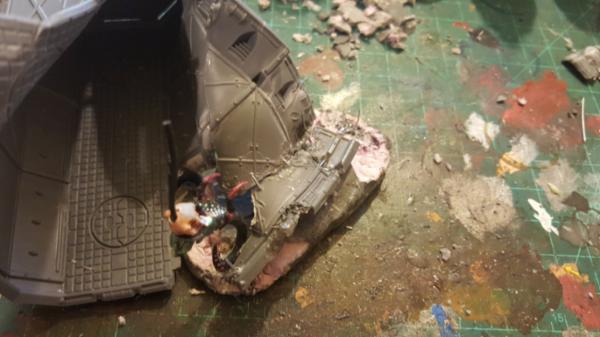
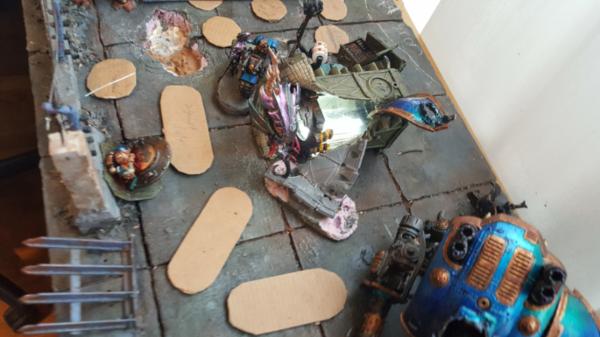
I thought "screw it" maybe I just flip it around and say F it all.

The bike is now on a ramp but.. ugh, the neurothrope is turning around? and its kinda impacting my knight diorama since its tall thing (knight) next to tall thing (neurothrope). Dunno, kinda stuck right now.
|
|
|
|
|
|
2016/10/24 22:22:45
Subject: Re: multi-level city terrain, marine v nid bases (10/24: exploding an armoured container p2)
|
|
Dakka Veteran
|
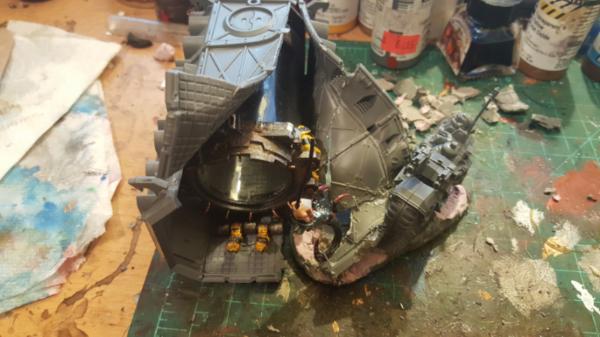
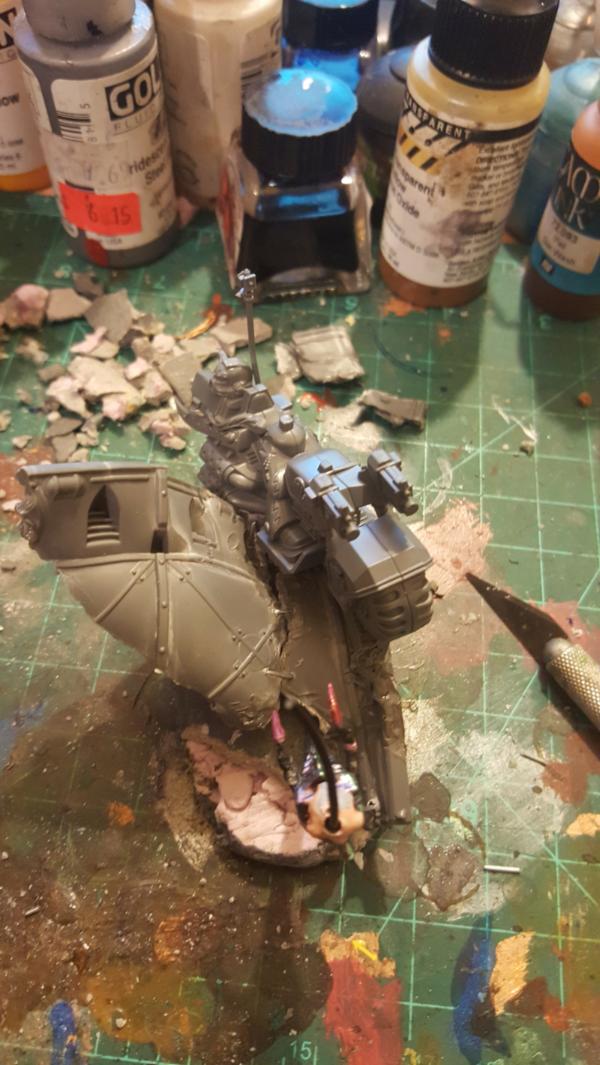
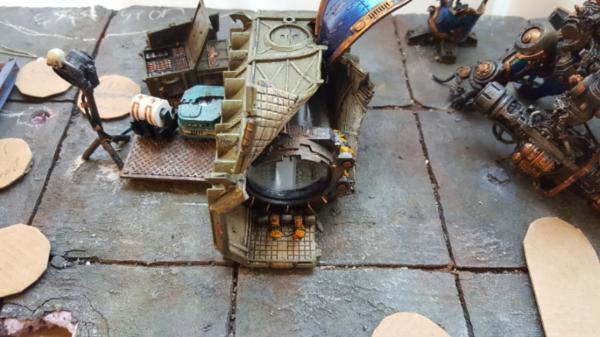
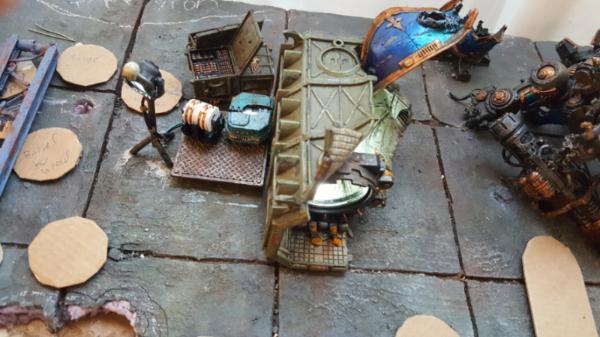
So, in the end, I just oculdnt accept the bike/neurothrope facing the wrong way. So I went back to the drawing board with this. THe first thing I did was pin the damn ramp to itself, to make posing all this easier.
I can cover it up with green stuff but man did that make this a smoother process.
Next up I dug out the other end of the base and bent a few more things around and managed to get it ramp like.
It took some pins of the plastic into the tile (not permenent ones, still gotta paint all this) but it does work and lines up better. AND the bike works! Phew, toughie.

Still working on a final bike pose but hey, i have options.
|
|
This message was edited 1 time. Last update was at 2016/10/24 22:23:10
|
|
|
|
|
2016/10/25 05:13:42
Subject: multi-level city terrain, marine v nid bases (10/24: exploding an armoured container p2)
|
|
Tough Tyrant Guard
|
You've been busy!
Stunning work on the knight and the container it has stumbled onto, is really effective, and I'm liking what you are up to with the exploded container... thoroughly enjoying reading through your updates as there is some awesome work and fantastic ideas in here!
|
|
|
|
|
|
2016/10/25 05:41:06
Subject: multi-level city terrain, marine v nid bases (10/24: exploding an armoured container p2)
|
|
Pious Palatine
|
Looking good. The wrecked nice on the damaged container look super cool. The way you've done the damage looks perfect.
EDC
|
|
|
|
|
2016/10/25 17:55:26
Subject: Re: multi-level city terrain, marine v nid bases (10/24: exploding an armoured container p2)
|
|
Dakka Veteran
|
Thanks all! It's taken a while but the results are coming in! I'm pretty happy.
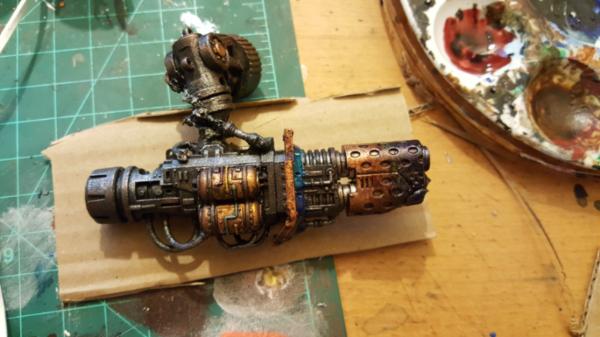
Now I just need to stop thinking of new things that would look cool. Sigh. As you'll see later today once I upload everything I got a little distracted making things glow... Automatically Appended Next Post: Okay so, today is an example of when your mind goes "wouldnt it be cool if" and the rest of you goes "crap, now I have to do it"
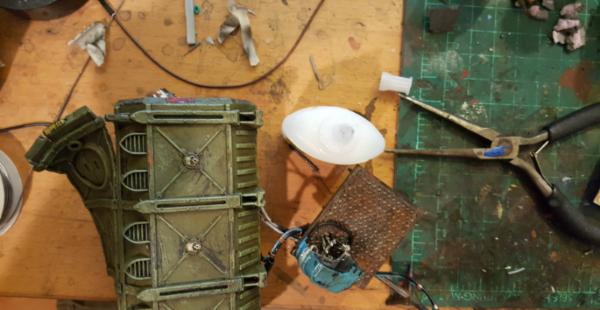
So the idea was to make the bio-containment unit light up. I figured a nice glow effect would really sell any remaining liquid in it and also help highlight some of the details in there. I also had 3 LEDs left and it's 2 per loop so I figured id hook up my spotlight as well and get it all working.
Sigh.
First up was making the light strip. I had 3 LEDs but, as with the garage lights, I want to diffuse them a bit. I also wanted to try adding a reflector behind the light to see if I can brighten it more/lose less light. Its always easier to tint something on top than it is to make it brighter, so I figured id start bright and work from there.
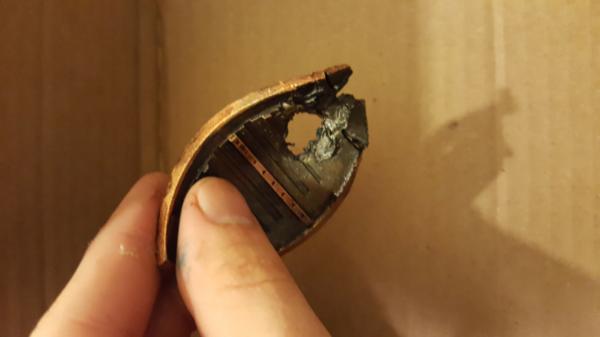
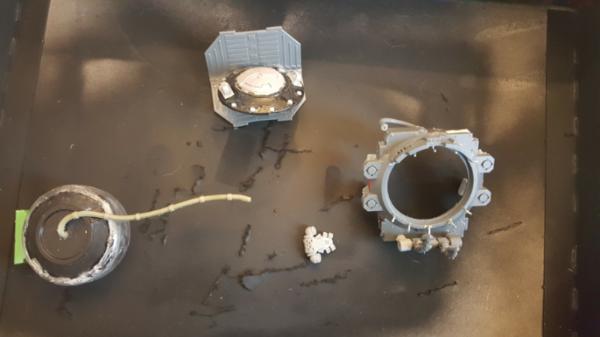
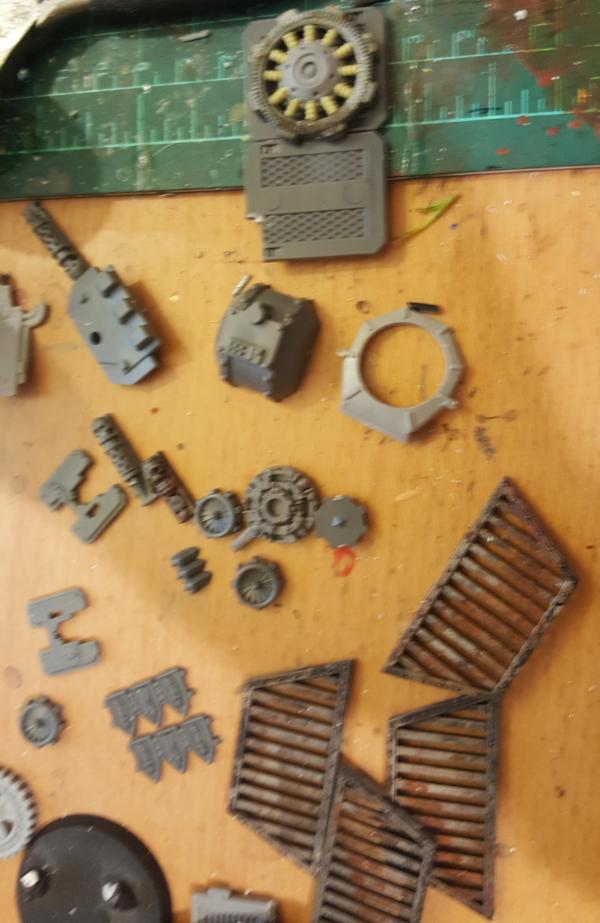
Next I eed a container for the batteries. The LEDS under the bio container I can easily bury, but the battery holder needs to be exposed so I can more easily swap it out, that implies some kind of box.
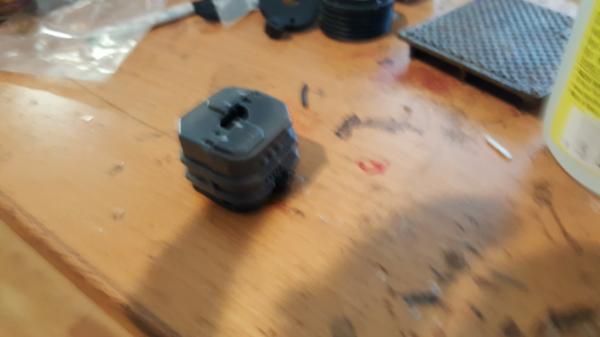
First up I figured i'd start with 2032 penny battery holders and maybe wrap it in a pipe or something:
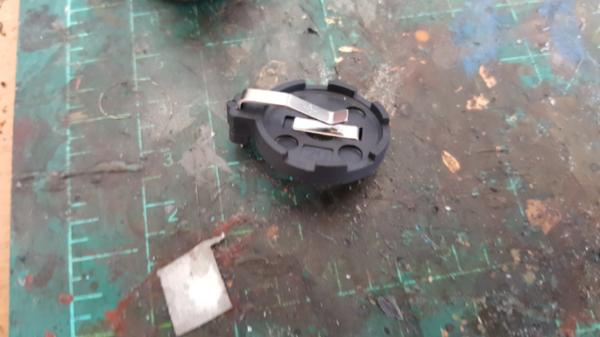
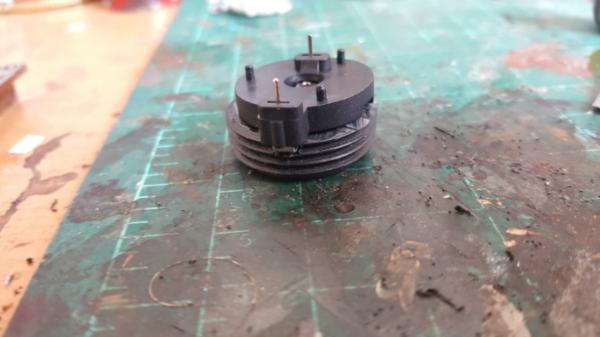
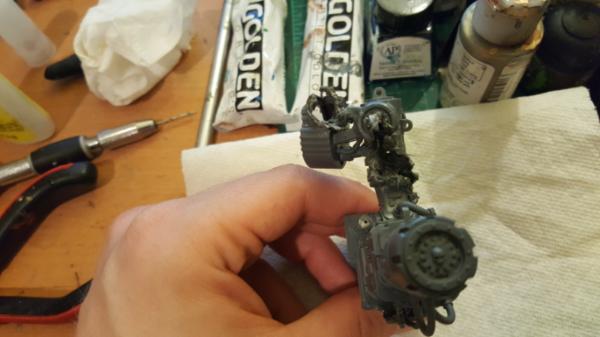
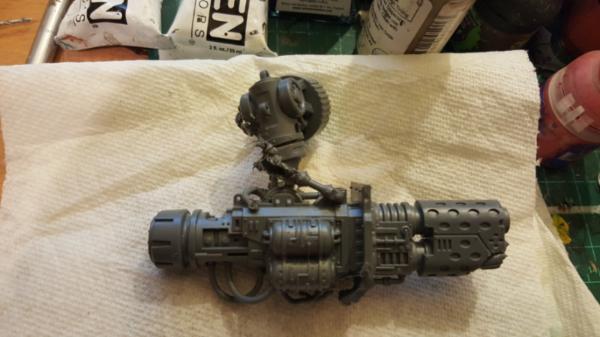
but after an hour or so of fiddling I couldnt really think of something that would make it easy to remove the batterys, and be sturdy, and be relatively fixed. So I scrapped the holders and realized I had a lot of knight bits. Digging around I discovered that the "ammo" covers for one of the random knight guns perfectly holds penny batteries.
So thats where I ended things for the day, figuring that out and also painting up the interior of the container. I wanted it to be bright so you'd get more light bouncing around and it would be more contrast to the darker container.
|
|
This message was edited 1 time. Last update was at 2016/10/25 23:17:42
|
|
|
|
|
2016/10/26 18:04:12
Subject: Re: multi-level city terrain, marine v nid bases (10/25: exploding an armoured container p3: lights)
|
|
Regular Dakkanaut
|
WOW great updates . The damaged container looks great.
I'm curious how the bio container will look like in the end .
|
|
|
|
|
|
2016/10/26 22:18:09
Subject: Re: multi-level city terrain, marine v nid bases (10/26: making a circuit, painting on a string)
|
|
Dakka Veteran
|
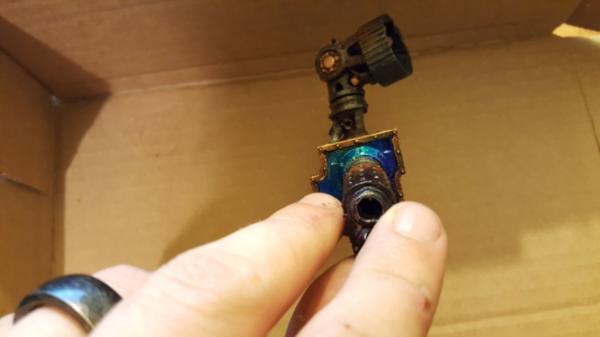
So here's a fun challenge. Paint something while its on a string. its really wierd.
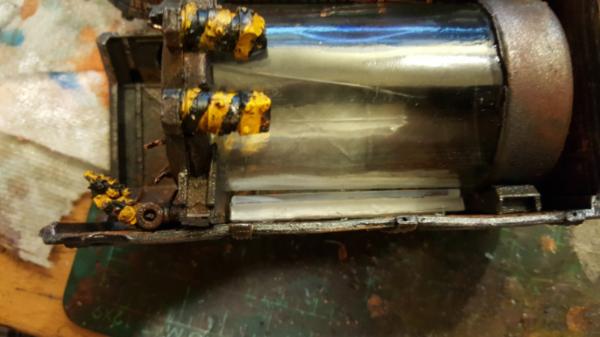
Here was the problem: I had to set up the circuit first before I painted the battery holder. As I knew Id be fiddling with it a lot as I made the circuit and so it would almost certainly start to rub off the paint. But then i have to paint/do touchups on all 3 things (battery holder/spotlight/exploded container) all at once. I did it, it jsut.. was very awkward. Especially since as I was soldering wires I wanted at least some to have my copper tube spacers on there too....
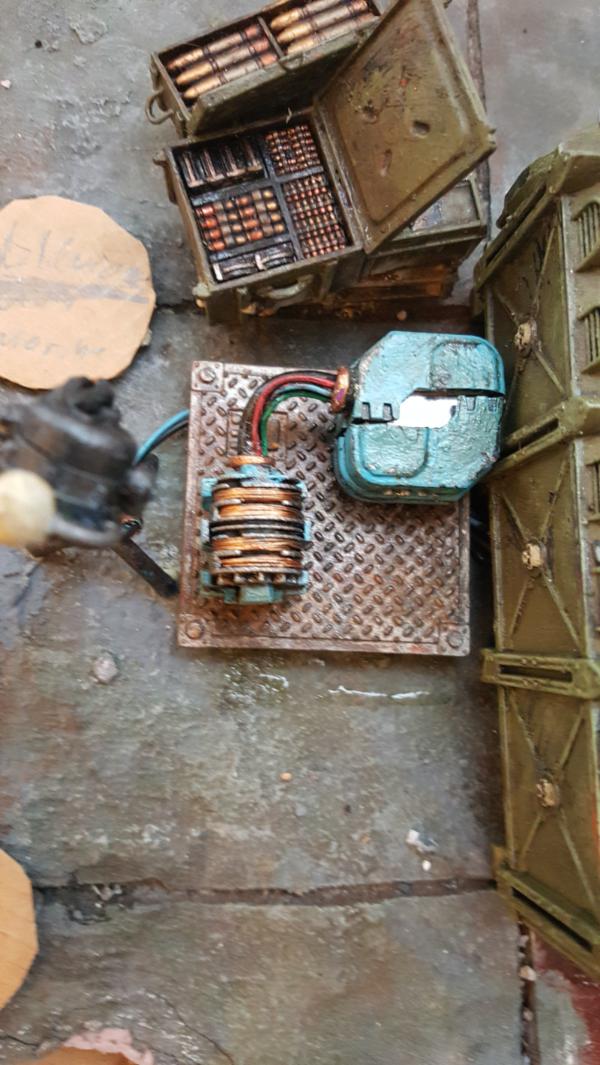
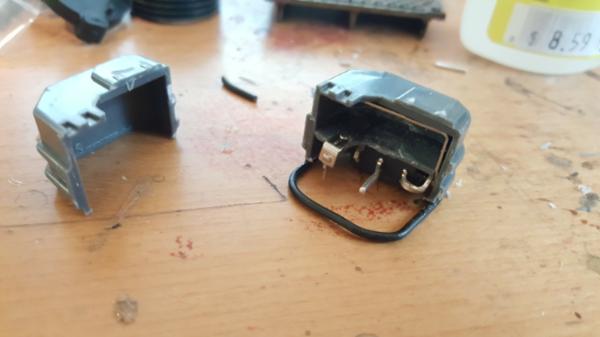
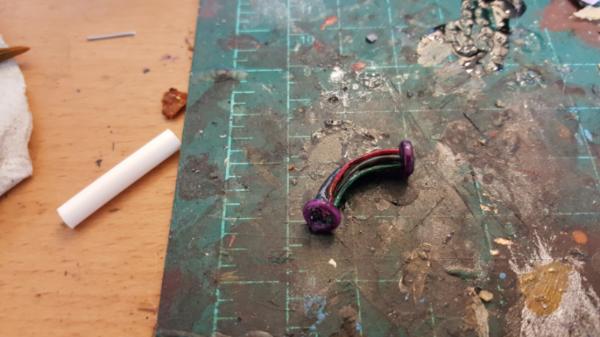
Anyways first up was the circuit:
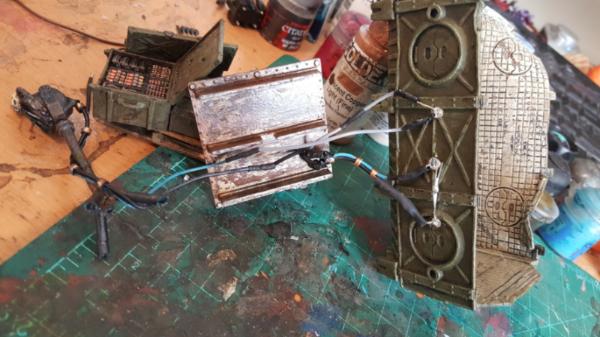
You can see the idea of the battery holder. I havent figured out what to do about the square gap when they are both closed but it looks so nice im not too worried, I can figure that out later:
Finally painted up and blue. I figured blue because all my fuel sources so far are blue so it seemed to line up.
Next up to make sure it lights and glue it all down.
|
|
|
|
|
|
2016/10/27 20:12:39
Subject: Re: multi-level city terrain, marine v nid bases (10/26: making a circuit, painting on a string)
|
|

Regular Dakkanaut
|
The damaged container is a very cool idea, and perfect realization. Waiting to see where it all goes!
|
|
|
|
|
|
2016/10/28 16:53:45
Subject: Re: multi-level city terrain, marine v nid bases (10/26: making a circuit, painting on a string)
|
|
Dakka Veteran
|
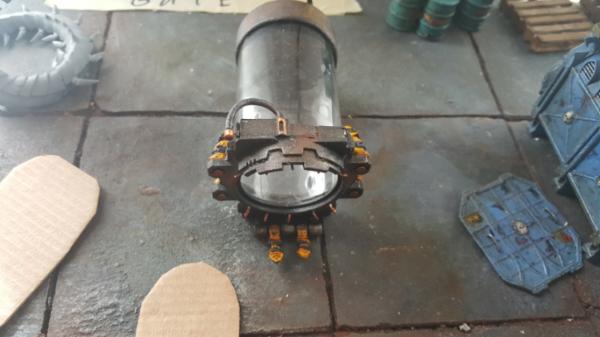
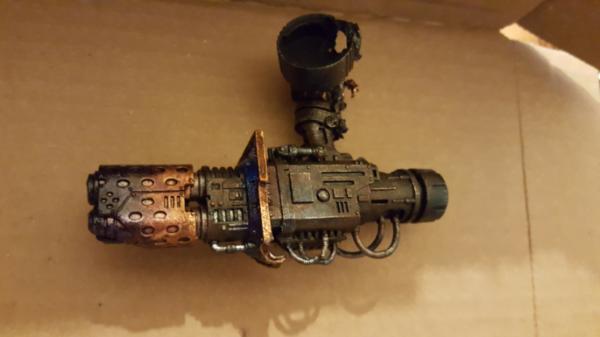
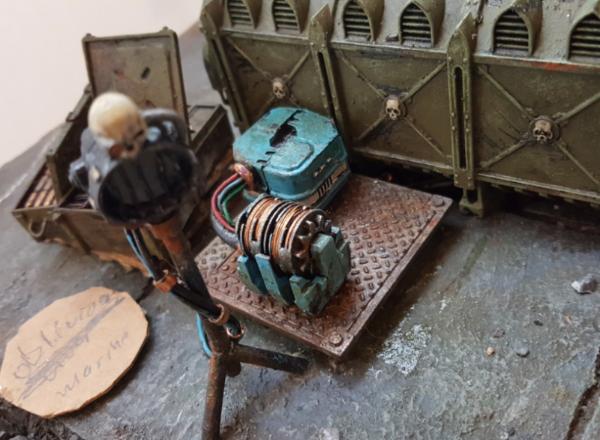
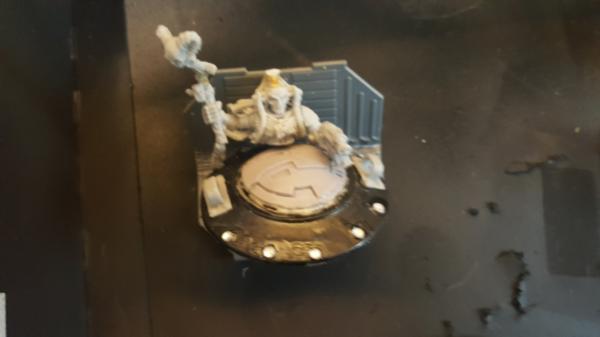
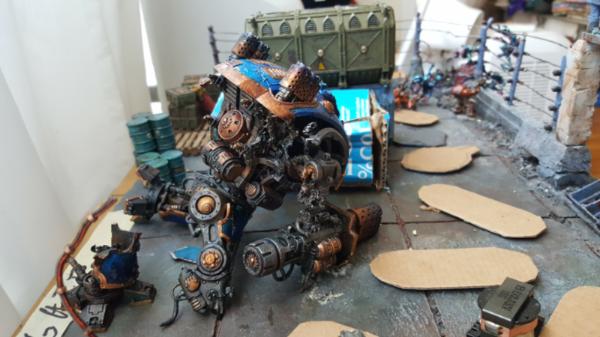
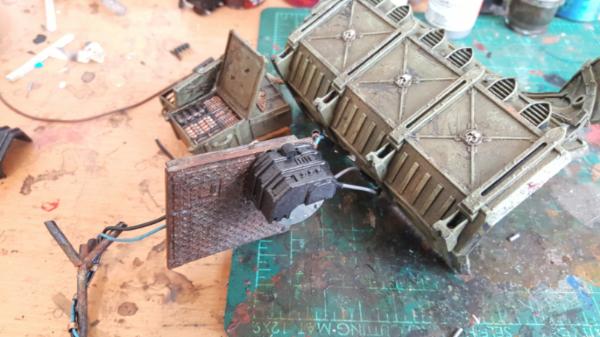
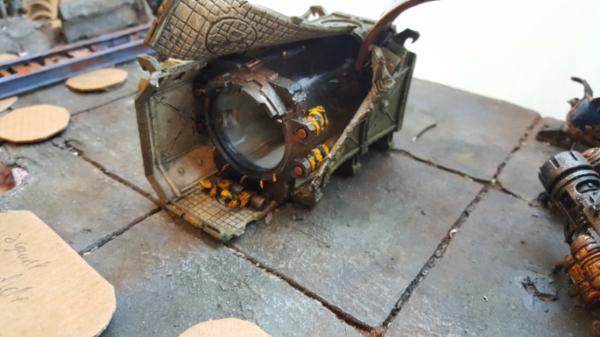
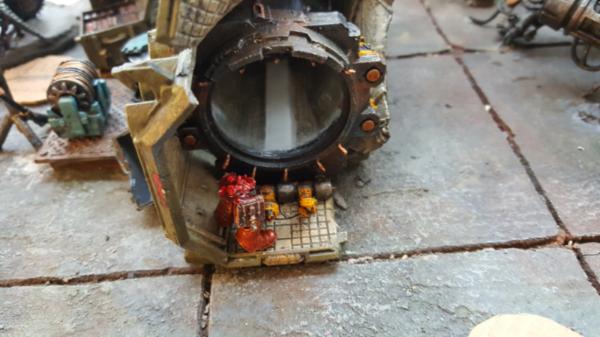
Haha, you and me both! so much left to do. Automatically Appended Next Post: IT LIVES. Its also very bright too! Surprisingly actually.. too bright. Which is good! because once i get the bio-liquid in there spilling out (did i mention I'm doing that too? yeah, im nuts. But i mean, if it burst out of that thing, wheres all the liquid? oozing out thats all im saying. To glue it down I just used a crap ton of gorilla glue and made a big hole underneath it so the wires would go down. Pretty straightforward and yep, its in there.
It also works well off:
I need to paint up the generator thing on the side but yah, im happy.
|
|
This message was edited 1 time. Last update was at 2016/10/28 20:05:56
|
|
|
|
|
2016/10/31 22:56:30
Subject: Re: multi-level city terrain, marine v nid bases (10/31: painting a small generator )
|
|
Dakka Veteran
|
Sorry for the late update, busy weeekend of things! Mostly playing with fire and water! you'll see later in the week.
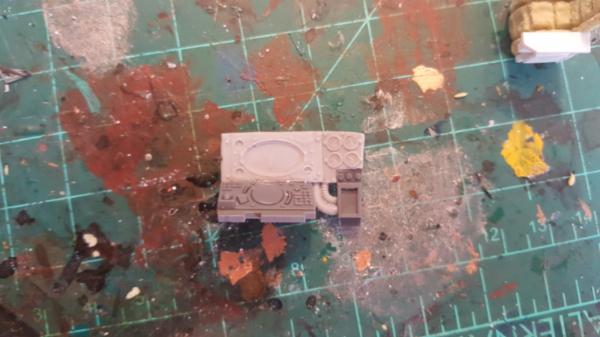
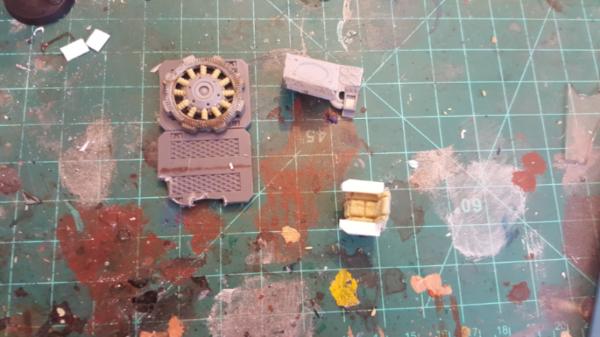
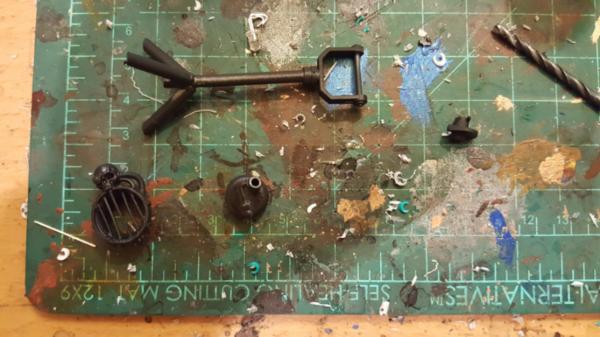
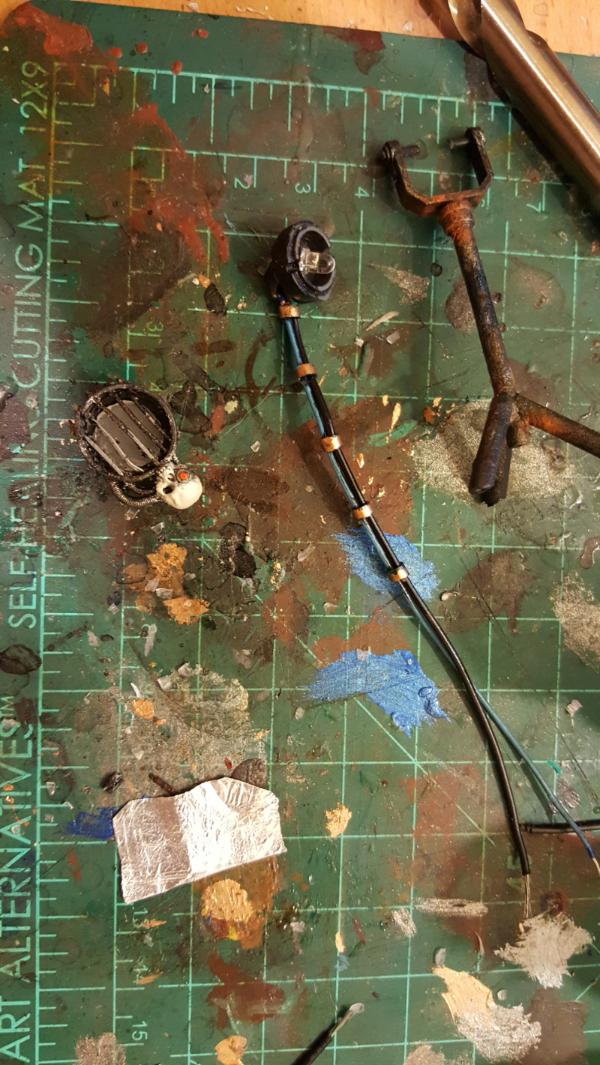
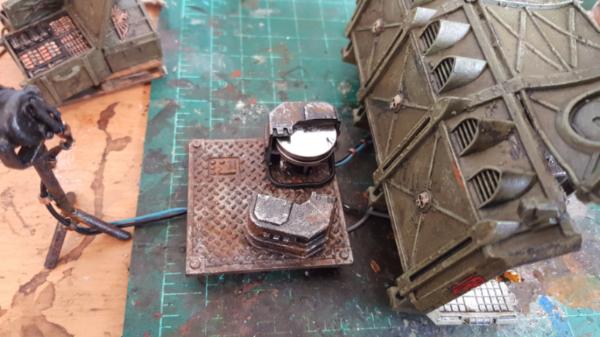
Anyways first up is working on a small generator to append to my little fuel reserve/battery holder. I also had to paint up the poor librarians legs, still standing after his sudden bisection.
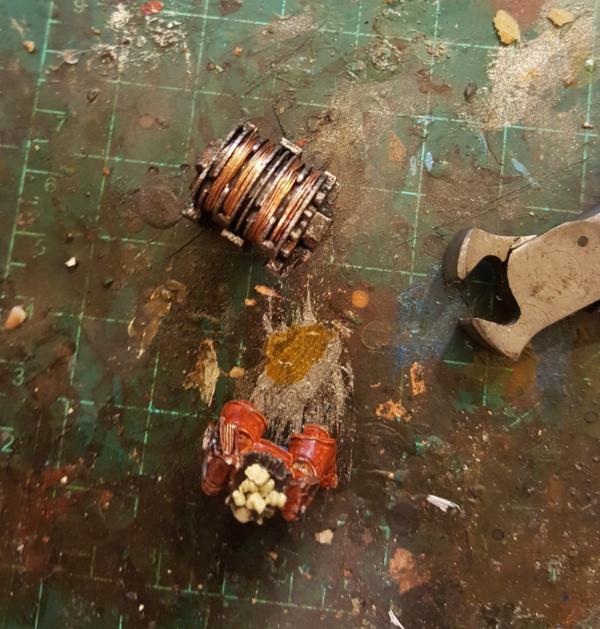
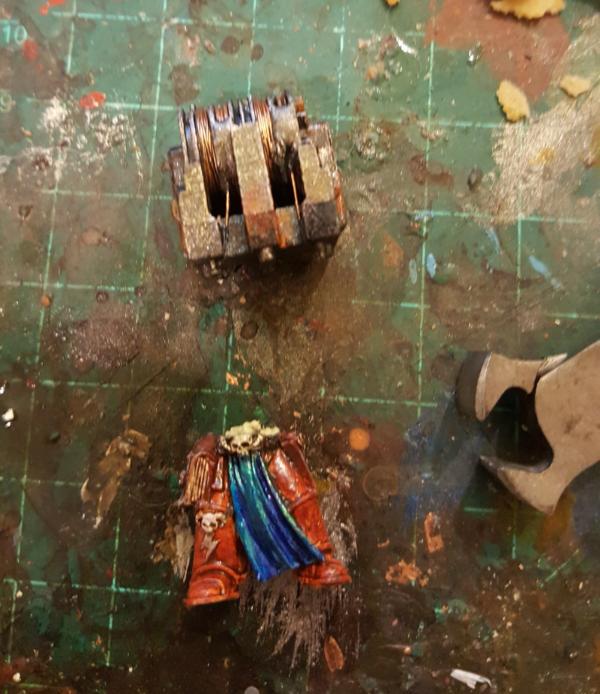
I also needed a power/fuel line cable so I whipped this up. Its not actually painted yet, but I just wanted to shwo you what i've been using lately as primer for this sort of thing. Basically with these particular plastics.. nothing really holds. So I just use some tamiya smoke as an undercoat and it seems to hold slightlly betterthan actual primer (I guess because its an alcohol based acrylic? dunno). Its a fast way to start getting paint on it at least.
|
|
|
|
|
|
2016/11/01 20:57:33
Subject: Re: multi-level city terrain, marine v nid bases (11/1: generator done, adding small rubble )
|
|
Dakka Veteran
|
|
|
|
|
|
|
2016/11/02 20:50:23
Subject: Re: multi-level city terrain, marine v nid bases (11/2: blood/oil streaks, leaking waste)
|
|
Dakka Veteran
|
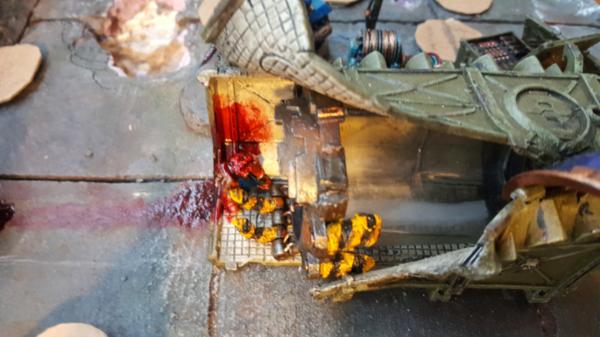
So at this point I'm mostly waiting on EL wire for my flame effect and my shipment of Magic Water to come in for my water effect. Also im still unsure how its all going to work regardless. So I figured I'd do something that i know WILL work and add hero effects aroudn the board to sell things a bit better.
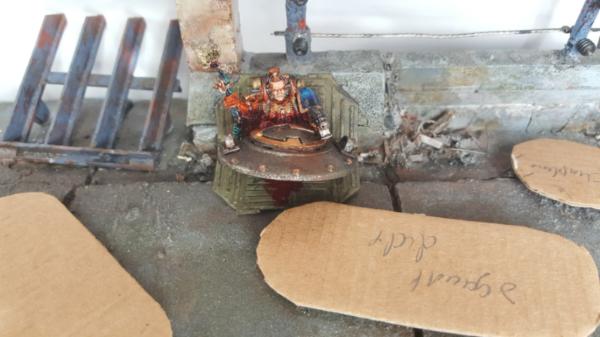
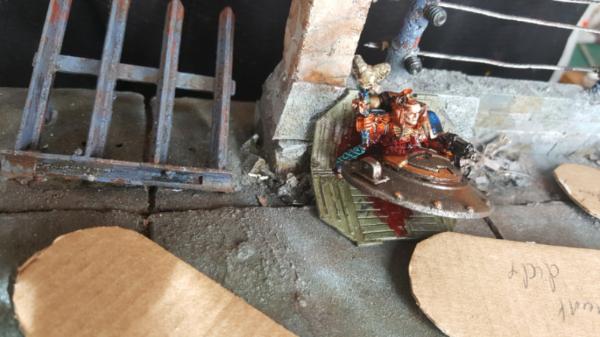
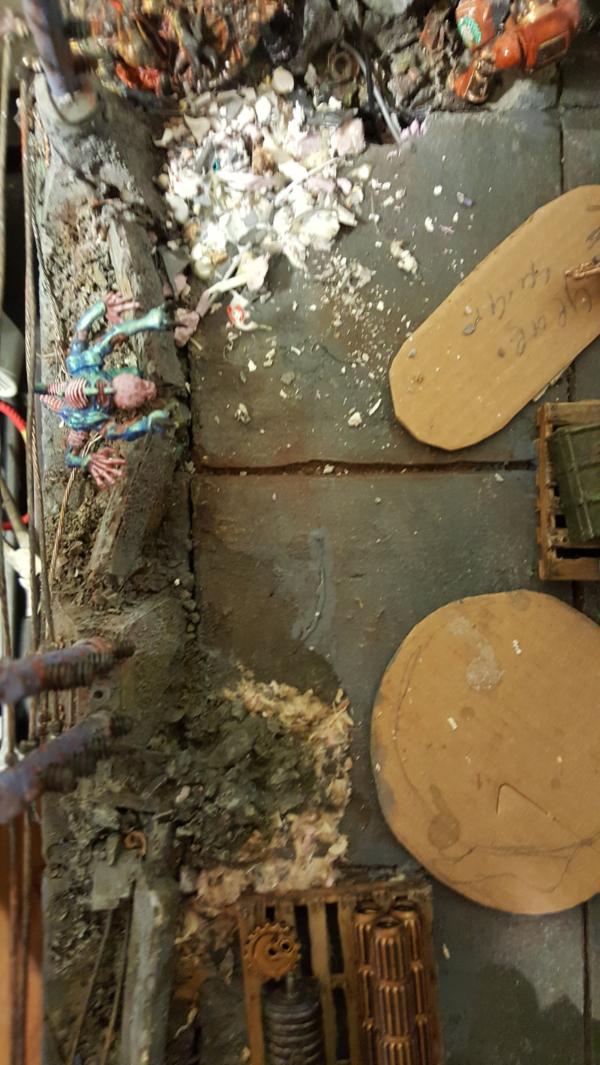
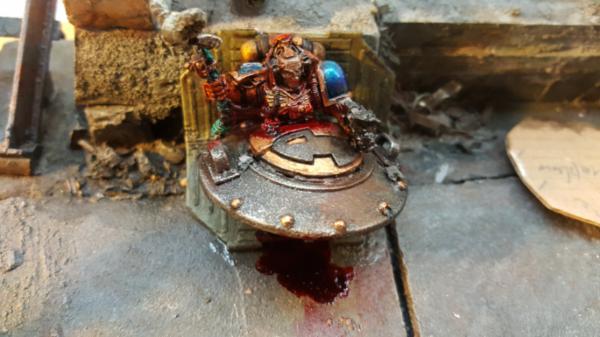
Effects such assss blood streaks:
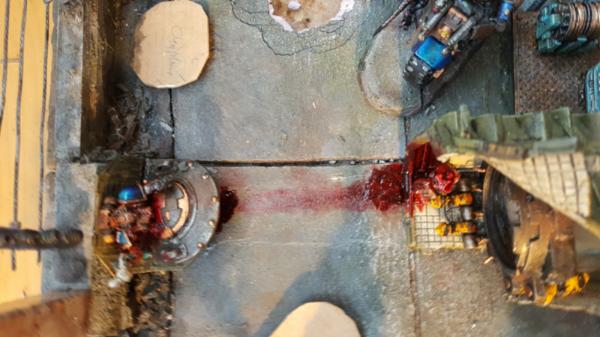
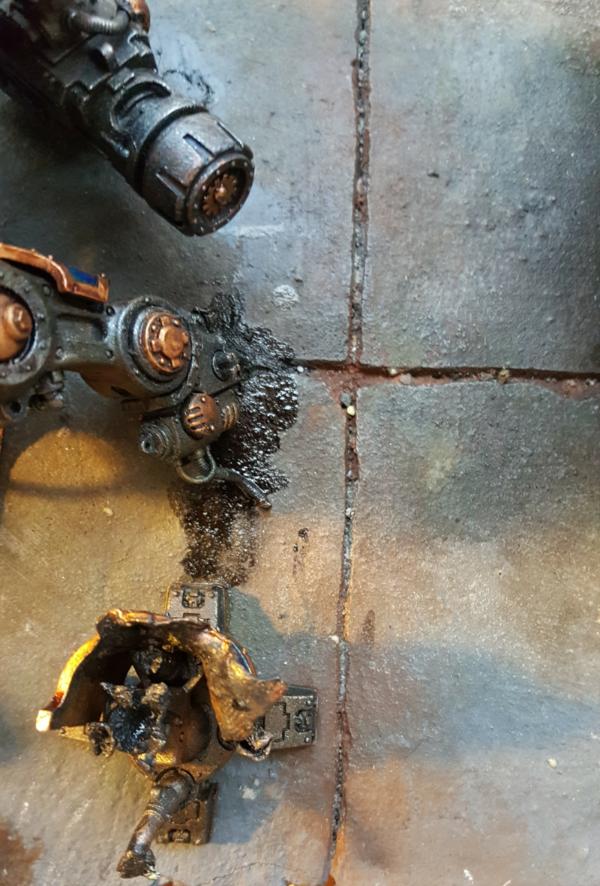
Leaking oil for the leg:
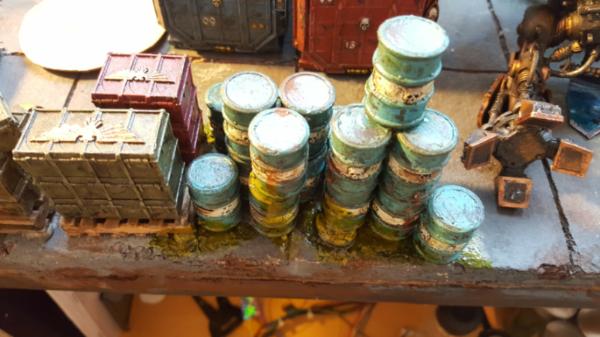
And leaking waste for my barrels.
|
|
This message was edited 1 time. Last update was at 2016/11/02 20:50:55
|
|
|
|
|
|
|