| Author |
Message |
 |
|
|
|
|
Advert
|
Forum adverts like this one are shown to any user who is not logged in. Join us by filling out a tiny 3 field form and you will get your own, free, dakka user account which gives a good range of benefits to you:
- No adverts like this in the forums anymore.
- Times and dates in your local timezone.
- Full tracking of what you have read so you can skip to your first unread post, easily see what has changed since you last logged in, and easily see what is new at a glance.
- Email notifications for threads you want to watch closely.
- Being a part of the oldest wargaming community on the net.
If you are already a member then feel free to login now. |
|
 |
2016/11/03 21:31:40
Subject: Re: multi-level city terrain, marine v nid bases (11/3: EL wire base painted. )
|
|

Dakka Veteran
|
Time to rip apart a base! Wait, what? Yeah. Ergh.
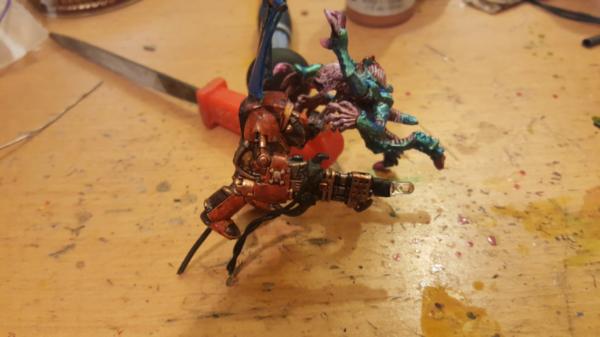
So as i run out of things to do stalling for water I realized i should actually finish the khan/neurothrope base so it too can get wet, as there would definitely be fluid spilling onto it after the pour.
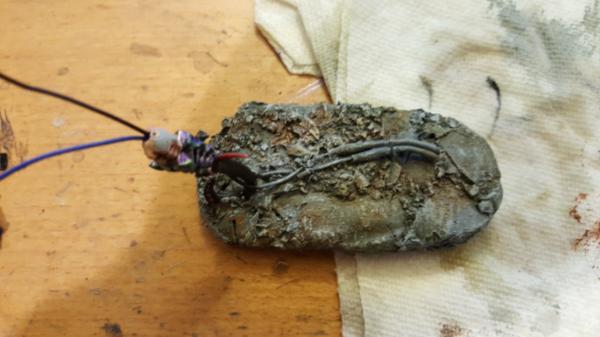
This guy:

But in order to do that I had to do a little prep work for that future project: embed the EL wire controller in the base. EL wire, for those who dont know, is a bendable glowing wire.
https://www.google.com/search?q=el+wire&safe=off&source=lnms&tbm=isch&sa=X&ved=0ahUKEwiYgOzewI3QAhUpslQKHfcgDYUQ_AUICSgC&biw=1881&bih=1038#imgrc=YEUBssHJG0K6fM%3A
It's not necessarily hugely bright but you can solder staright with it and it glows and is very thin. So the plan is to have the neurothrope having a glowing lightning effect hitting a shield of khan. A shield made out of shimmery acrylic and the lightning I 3d print. Its something i'll get to in.. a while. But I need the base done now! Ugh. so I need to at the very least embed the controller and hook up those cables I have running out the neurothrope. ( EL wire runs on AC current, not DC like most things, so you cant just use batteries but need batteries + transformer and stuf, I get mine from cool-neon).
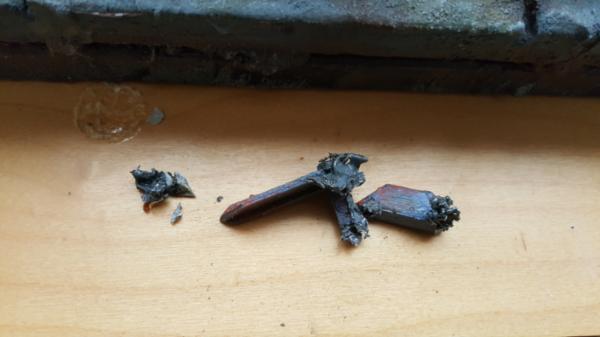
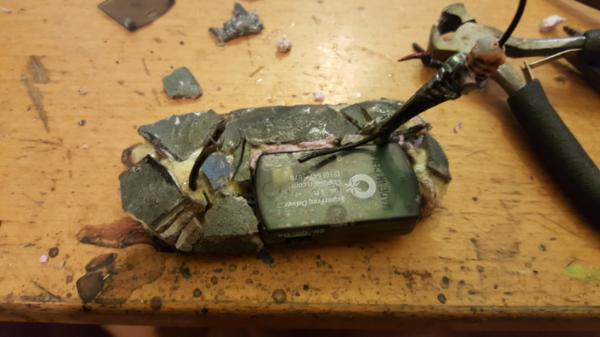
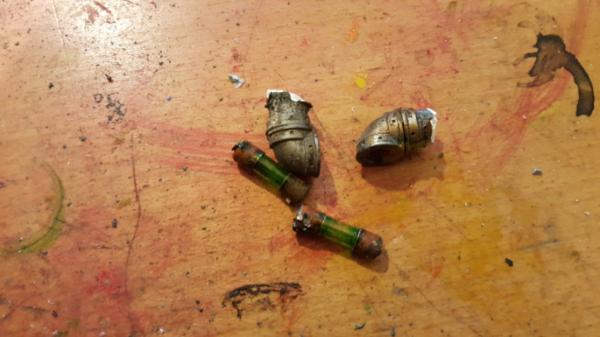
The controller looks like this:

Note that the batteries have a bit of a lip there, turns out it's actually tough gettnig them out unless you have a corner free to use something thin and pokey to essentially pull them out. Something I have to keep in mind.
First up was well, finding a spot to PUT this thing, ideally on the side thats covered up by the diagonal shard of armoured crate. So we get this:

Note the corner on the lower right side of the image. That corner must remain generally free of debris so I can still get out the batteries. I also onyl cut into the wire just enough so the batteries could get out, as I wanted to glue as much as I could of the controller down onto the mesh to make it nice and strong.
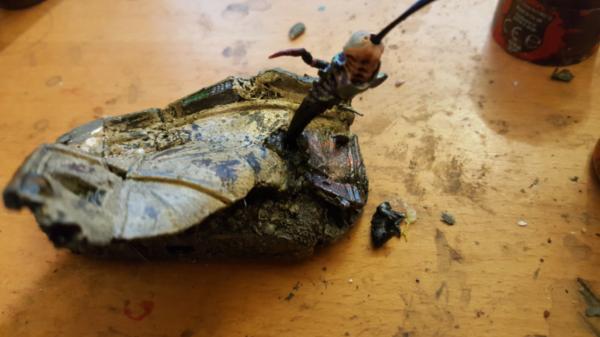
But then I had to rip up even MORE for the cable jutting out and just.. yeah. lol. Lot to repair. So how best to rebuild this base? Well again I come back to my expanding gorrila glue. it just holds super well, super stong and fills the volume. DOwnside is crazy sticky fingers afterwords but hey, worth it. So I just covered everything in glue and as it expanded pressed in various chunks of base I had ripped off.
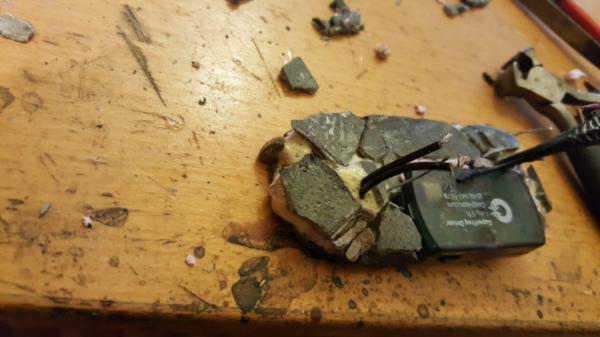
And then occasionally pat it back down to keep the original rounded shape.
More importantly I left in the pin wires I had installed to test the diagonal armoured crate shard so after things were dry it still fit and worked well:
|
|
This message was edited 2 times. Last update was at 2016/11/04 21:01:44
|
|
|
 |
|
2016/11/04 21:01:27
Subject: Re: multi-level city terrain, marine v nid bases (11/3: embedding an EL controller into a base)
|
|
Dakka Veteran
|
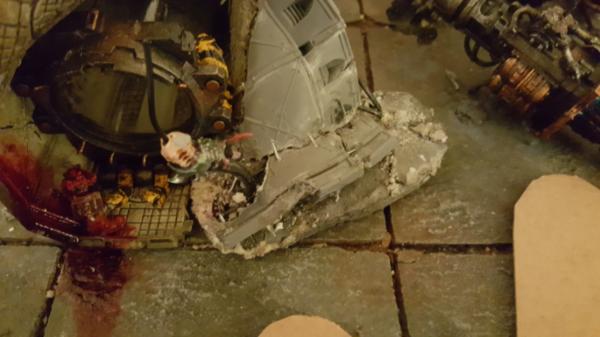
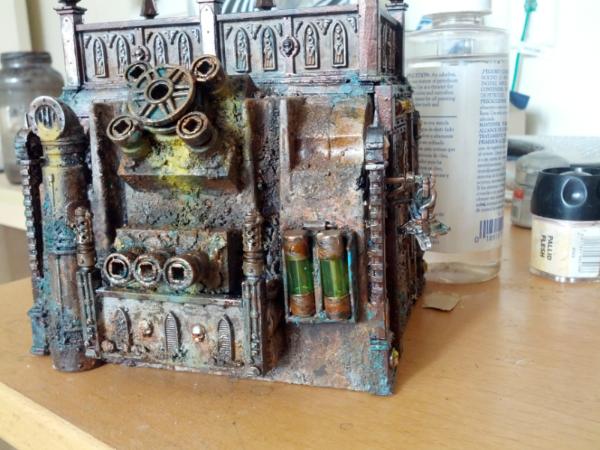
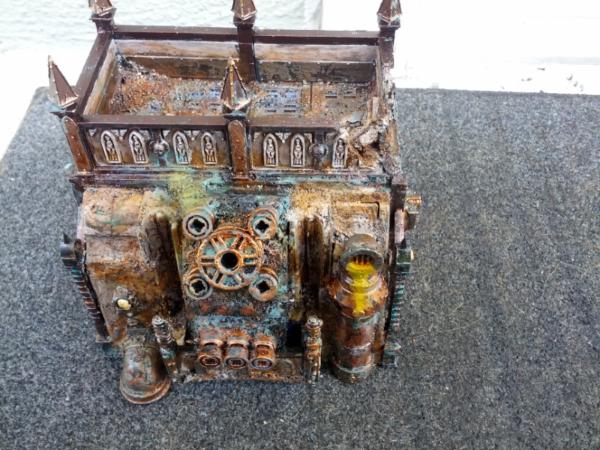
Now that everything dried, time to paint it up. First everything below:
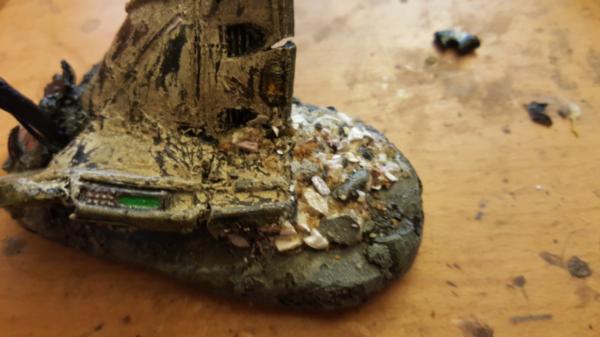
Then I painted up the shard and glued it down
And added yet more rubble to cover up the remaining bits of visible wires:
Bike still fits well!
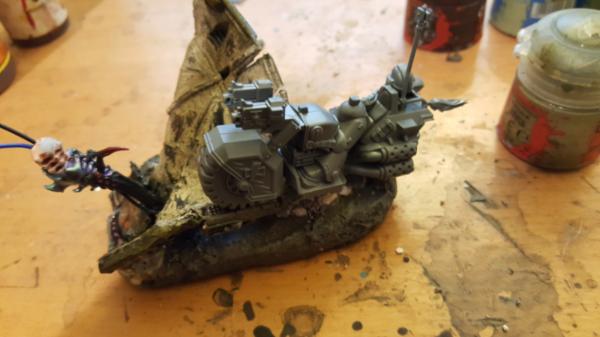
All together!
|
|
|
|
|
|
2016/11/07 19:10:32
Subject: Re: multi-level city terrain, marine v nid bases (11/7: experiments with magic water p1: prep)
|
|
Dakka Veteran
|
So shipmants finally came in and its time to play with flamethrowers and magic water! I'm completely terrified! These are 2 techniques that I REALLY dont know much about so I feel even more than ususal out of my depth. But thats what experimenting is for and why I bought 18 oz of magic water. Lets begin.
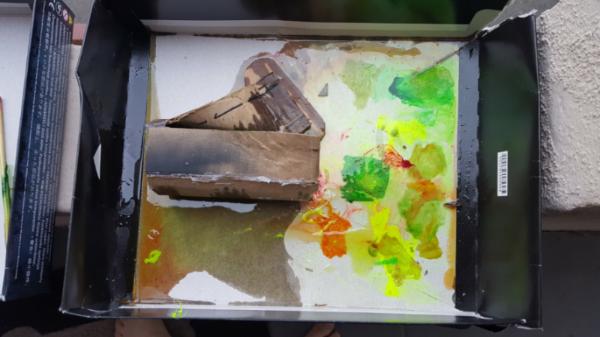
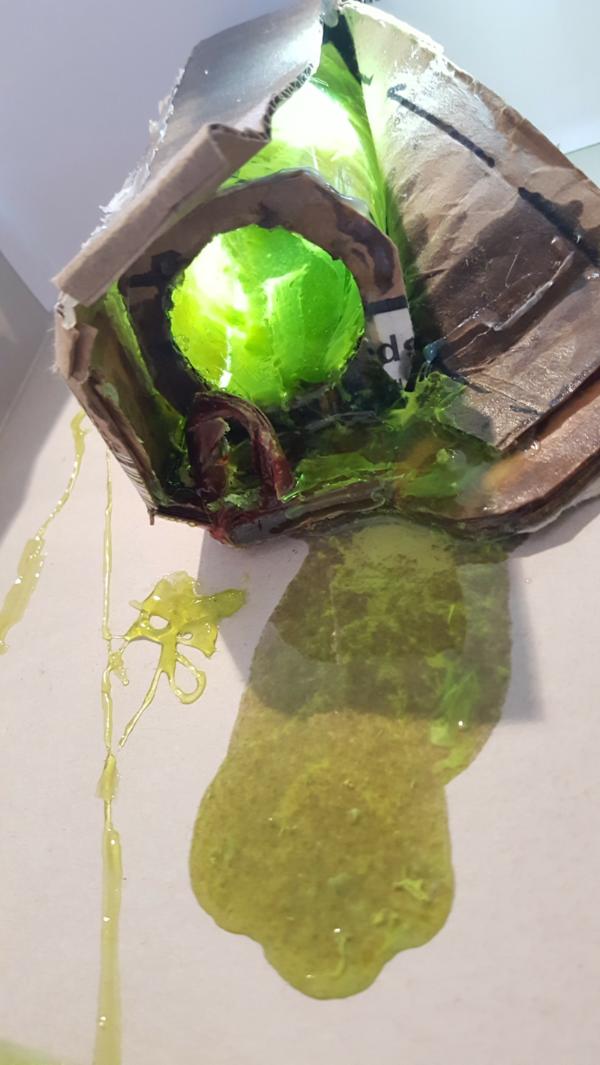
First up is a basic test. Now I wanted to make it fairly realistic so I decided id start by making a cardboard version of my exploded container. Complete with dead guy legs!

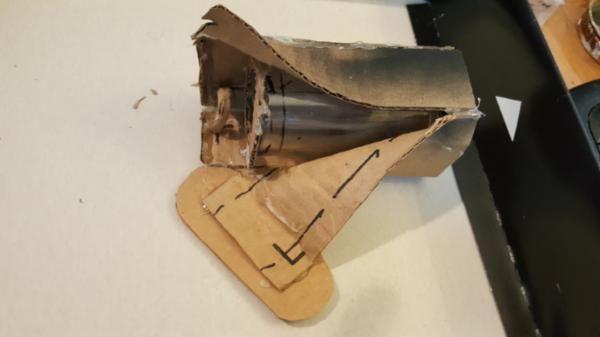
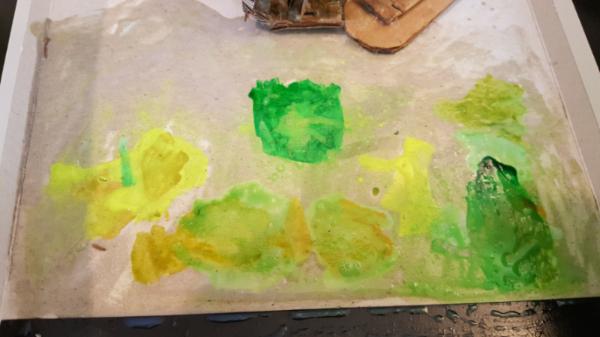
I also wanted to play with any "under colors" i mightw ant to do so I did some swatches of my tamiya green/yellow/blood etc to see how the water would interact over it. I then realized that since the carboard is so porus I might want to coat it in a layer of clear gloss just to make it more sealed like how the tile would be.
This had the side effects of making the cardboard wrinkle, so I had to cutout relief slits (BEST IDEA EVER. Wait...) to get it to sit back down again. after all, this is a test of how much the liquid spreads out so having dips wont exactly be a fair test!
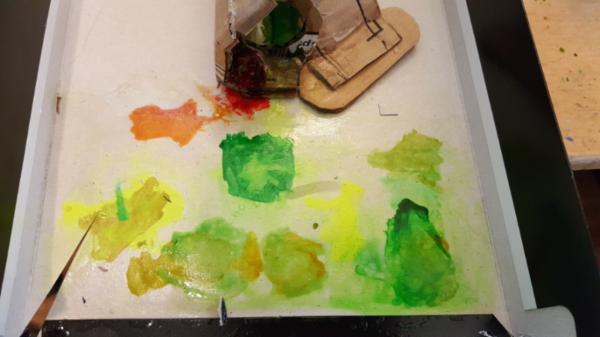
I added some blood to my dude and played with under-glass colors to help tint it up:
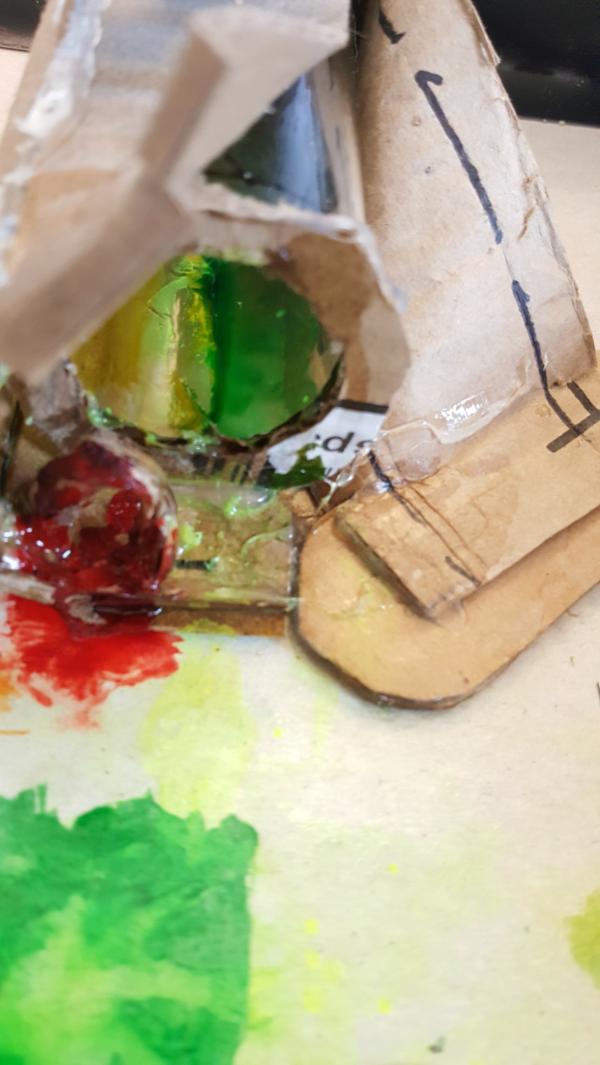
and now we're ready for water!
|
|
|
|
|
|
2016/11/08 18:31:35
Subject: Re: multi-level city terrain, marine v nid bases (11/7: experiments with magic water p2: pour)
|
|
Dakka Veteran
|
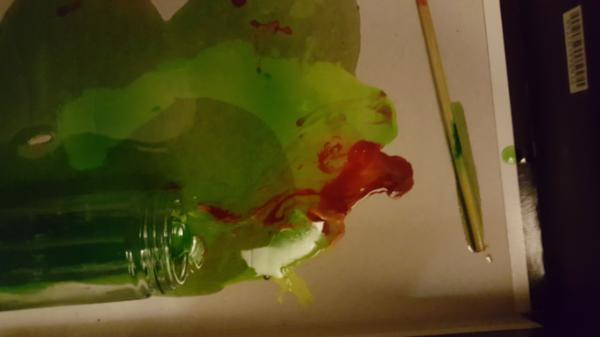
Man it's spreading fast...
You know those slits I made to have the cardboard lay flat? yeah.. yeah it made it there and started to leak out:
Result overnight:
Whoops, so clearly just mix and pour aint gonna work, unless I want to get my whole board slightly damp and thats about it. Quick, time for antoher test!
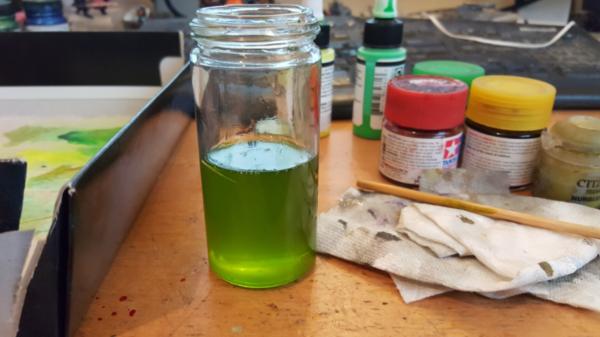
This next batch I mixed up in the bottle as before but let it sit for a few hours before pouring. I also wanted to see what adding still wet droplets of blood and flourescent paint to it to see if it would get and maintain swirl patterns.
Seemed promising at first, it did move, but more slowly.
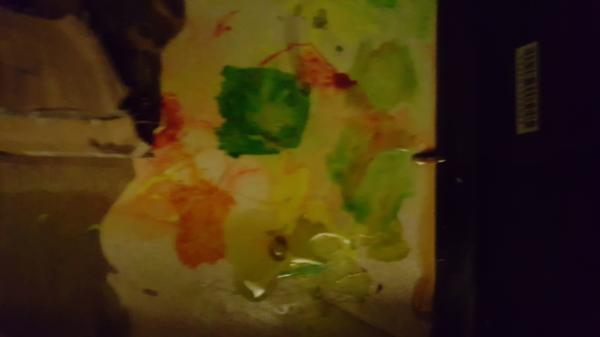
After a few hours:
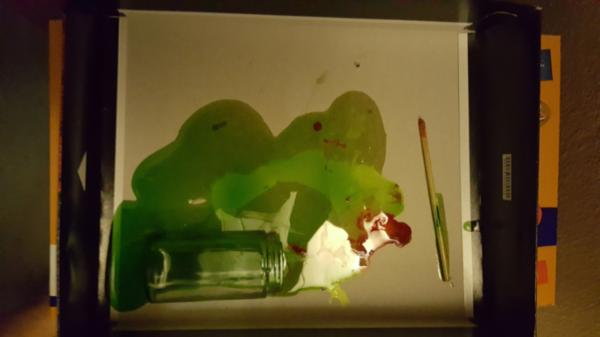
Overnight:
So letting it sit IS defintiely better, BUT i need to do it for a LOT longer, its still spreading too far out. Still its encouraging that the blood swirl didnt get watered down/spread out over time.
|
|
|
|
|
|
2016/11/10 18:54:40
Subject: Re: multi-level city terrain, marine v nid bases (11/7: experiments with magic water p3: final test)
|
|
Dakka Veteran
|
Pardon the brief delay, politics got in the way.
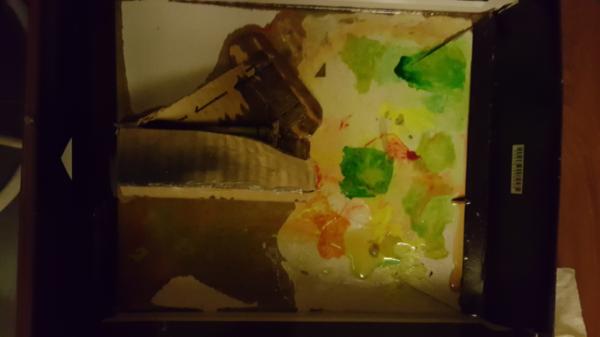
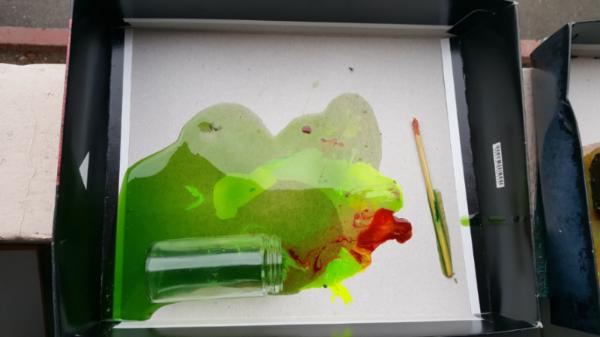
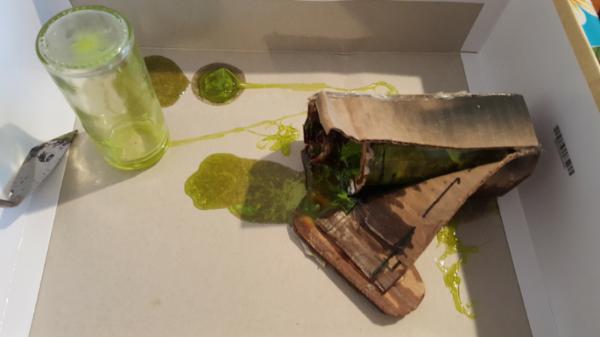
Anyhoo so while my second test was encouraging it still really flowed out too much. So I did one final test reusing the first tests bottle/crate mockup with a 7 hour (!!) delay.
In other words I mix it up in a jar, let that jar sit for 7 hours, pour it into the containment vessel and then make it level so the liquid slowly oozes out. Now 7 hours is a lot, this stuff is basically set after 12-15 hours or so, the remaining 10-15 hours it's just sticky as hell and slowly drying (and probably outgassing), BUT it worked.
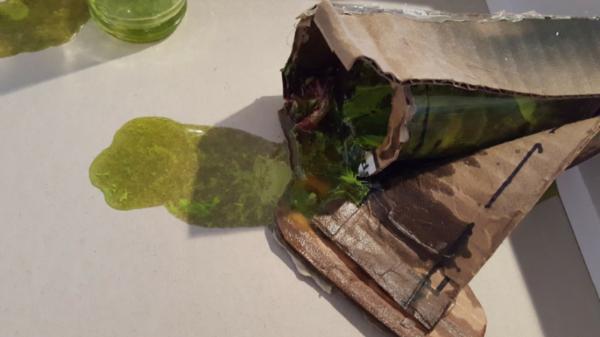
The initial flow after making it all level:
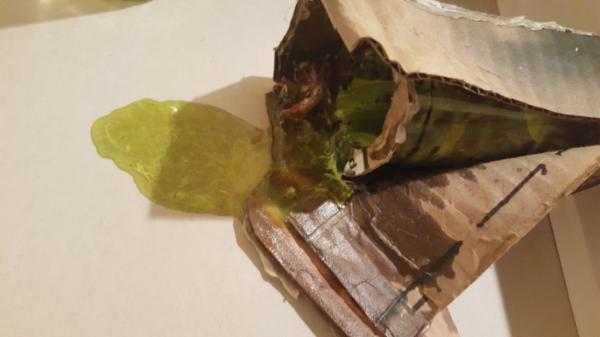
Great oozing going on, the flourecent paint is a good cotnrast:

Few hours later, nothing has moved! I also experimented adding some late flourescent paint too, seeme to work ok. One trick seems to be putting it on there and using compressed air to blow it around and get the driblle look without having to worry about flow from the liquid doing it for you. Very handy.
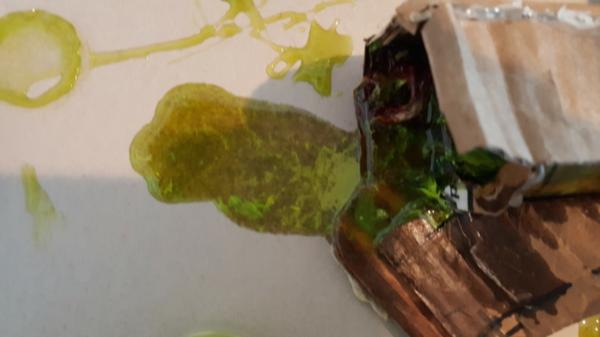
I even upended remnents of the jar to see what it'd do, i took some 12 hour old magic water and swirled it around on the paper just to see if it would smooth out rough spots and it did! So even as it nears setting it'll still settle slightly but not much, which is good if i end up with any wierd holes/patches/etc when i add my flourescent paint dribbles and disturb the water with air/sticks/etc.
Lights up pretty well too:
ALl in all I now feel like I have all the tools I need to do this for realz, and that it'll work out well to boot! Im much more excited about this now, the tests were crucial.
|
|
This message was edited 2 times. Last update was at 2016/11/10 18:56:58
|
|
|
|
|
2016/11/12 16:37:37
Subject: Re: multi-level city terrain, marine v nid bases (11/12: oozing bloody water results!)
|
|
Dakka Veteran
|
So its finally time for the real water pour. Things learned:
- Mix it and let it sit for 6-7 hours
- When pouring it into the bio-containmer also add a few droplets of flourescent paint to start that swirly process
- Remember that compressed air will kickstart a swirly pattern without really affecting the water underneath
- The water smoothes out even late in the game, so last minute changes will still settle.
And off I went! I did all the things and... it slowly started creeping out. But it was TOO slow. Instead of 7 hours due to getting home from work later it ended up being more like 9 and it was molasses.
I panicked slightly and then decided to mix up a second batch and layer it on. Even though this theoretically would have been too fluid, because of the fact that it was mixed in the same jar as old stuff
AND the slowly creeping 9 hour old stuff is super sticky it pretty much just clung to it and didnt spread out crazy far. So it all worked out.
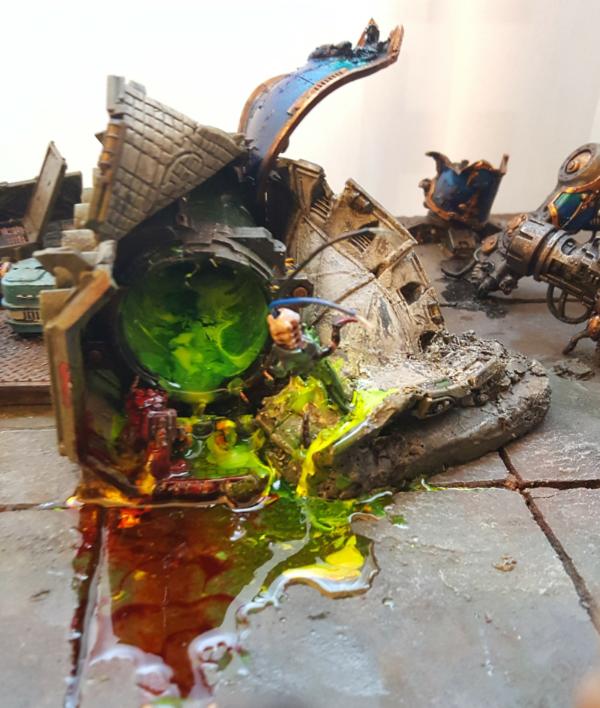
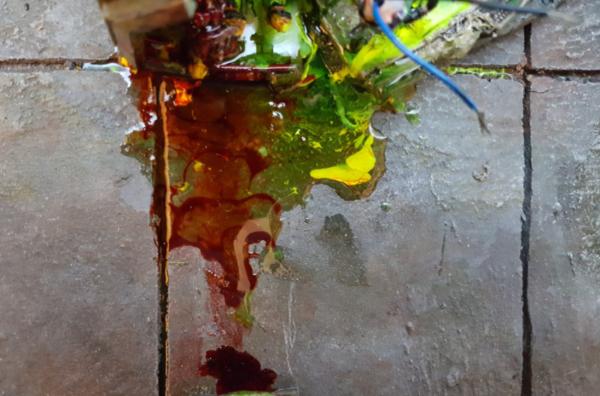
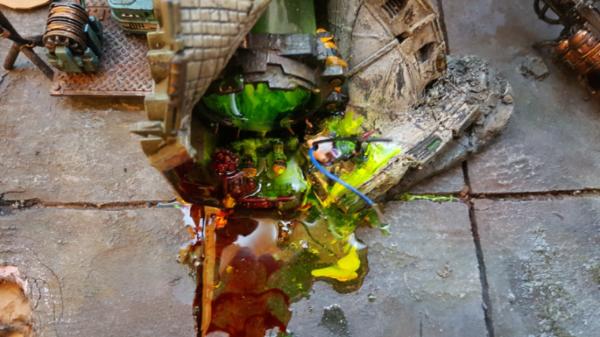
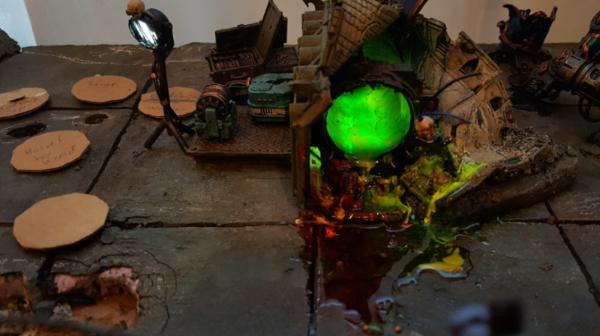
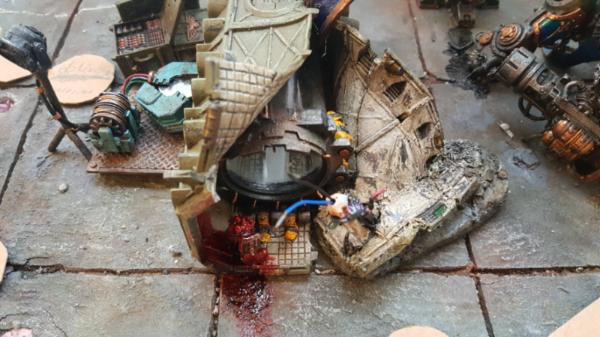
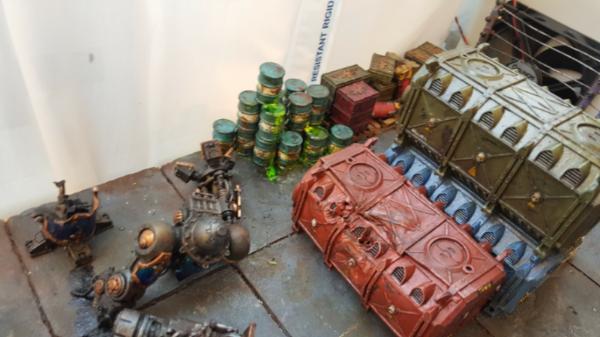
Needless to say im super happy with the result! Looks great, oozes detail, and looks like there is flow.
|
|
|
|
|
|
2016/11/15 19:52:33
Subject: Re: multi-level city terrain, marine v nid bases (11/12: oozing barrels )
|
|
Dakka Veteran
|
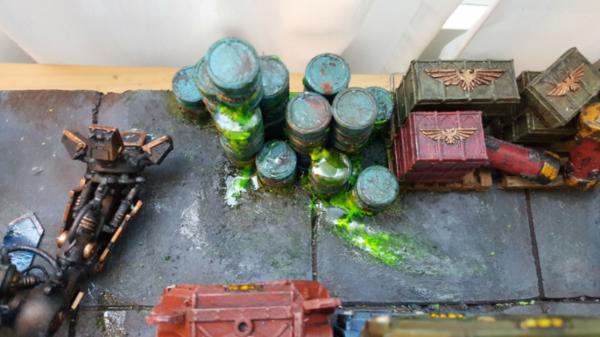
So i dropped the ball a bit in updating this weekend but as followup I had some leftover liquid ready to go so I figured id spruce up my barrels even a bit more. The idea being they are containing the liquid for the bio-container and are, themselves, leaking. Now I went ab it.. ah.. crazy at first. Mostly cause it was late and I had a lot of excess to use:
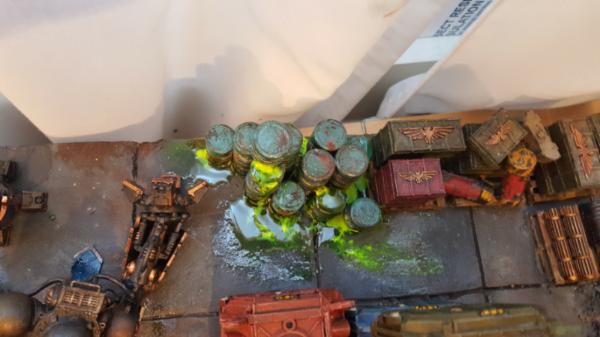
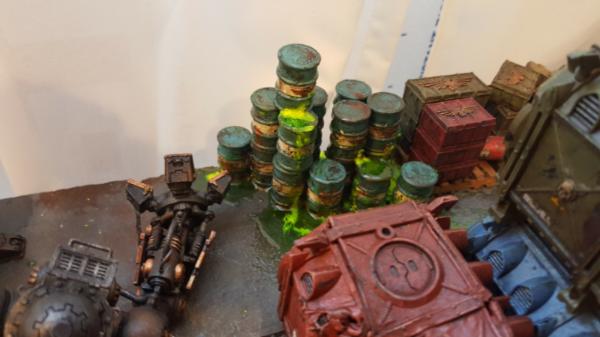

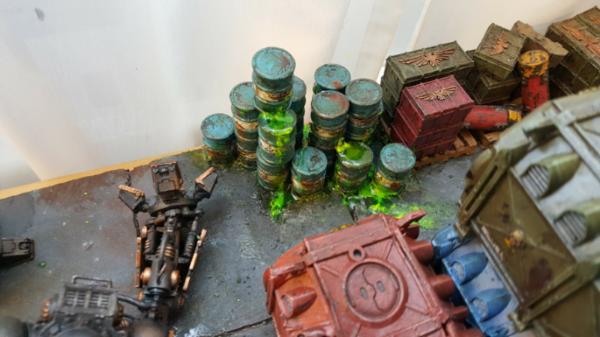
But then the morning after I went "yeah.. too much" and, turns out, scraped it off fairly easily! Pretty good thing to learn actually, even 20ish hours on it still comes off relatively well, sort of like.. hm.. stuff jello? Either way it worked well and i toned it back to a more reasonable oozing down the sizes look without nearly as much pooling. One thing I might try for in the future is adding tire tracks, I really like that "whisked" streak and it would be really nice to get some wheels and stuff to show the motion of the bikes as they move through the puddles. Just got to figure out the best way of doing that, I dont have any free bike tires handy to run through a mixture.
|
|
This message was edited 2 times. Last update was at 2016/11/15 19:58:50
|
|
|
|
|
2016/11/15 21:36:48
Subject: multi-level city terrain, marine v nid bases (11/12: oozing barrels )
|
|

Agile Revenant Titan
|
I've been watching this come together and I must say I'm in awe. Really really impressive stuff 
|
|
|
|
|
|
2016/11/15 21:52:23
Subject: multi-level city terrain, marine v nid bases (11/12: oozing barrels )
|
|
Crushing Black Templar Crusader Pilot
|
Loving all of this so far.
The gak coming out of the barrels looks like its been wiped away by a cleaner... in the grim darkness of 40k there is still cleaning duty!!
|
  
Relapse wrote:
Baron, don't forget to talk about the SEALs and Marines you habitually beat up on 2 and 3 at a time, as you PM'd me about.
|
|
|
|
|
2016/11/16 01:34:42
Subject: Re: multi-level city terrain, marine v nid bases (11/12: oozing barrels )
|
|
Dakka Veteran
|
Very sloppy cleaning duty
|
|
|
|
|
|
2016/11/16 13:16:35
Subject: Re: multi-level city terrain, marine v nid bases (11/12: oozing barrels )
|
|

Regular Dakkanaut
|
 Epic ! The end result is very realistic.
|
|
|
|
|
|
2016/11/16 23:01:20
Subject: Re: multi-level city terrain, marine v nid bases (11/13: making flame, p1)
|
|
Dakka Veteran
|
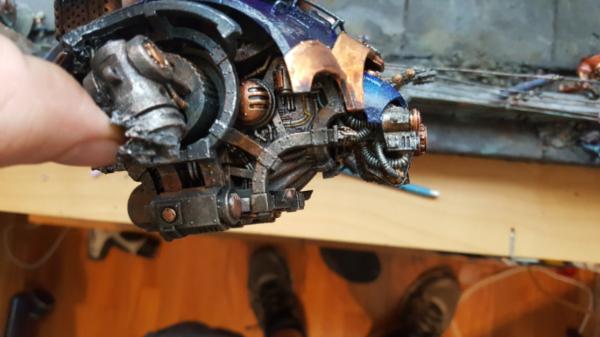
Thanks! Im quite pleased. Now for my next "i have no idea what im doing" trick! Making a flamethrower flame effect.
So I've always wanted to do one of these, because it could look really cool (and I want jump marins in the sky flaming down enemies below bases), but i've never before found a good technique for it.
Most of the time now it's either cotton balls and spray paint which looks okay or a plastic casted form which.. dont look as good. But the cotton balls dont quite have that life to them.
Then I found this guys post:
http://www.onesixthwarriors.com/forum/sixth-scale-action-figure-news-reviews-discussion/728891-wwii-marine-flamethrower.html
Which looks AMAZING, so then its like "well how do I make that!". So, lets figure it out.
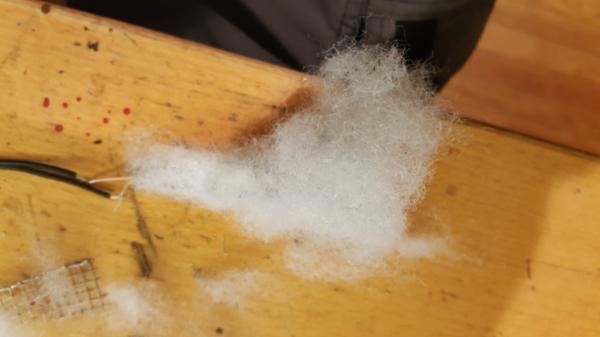
THere isnt much in the way of tutorial from the thread but I did gather that the key ingredient, instead of cotton balls, is poly fill pillow filler:
https://www.amazon.com/Fairfield-Poly-Fil-Premium-Polyester-12-Ounce/dp/B000YZ7G44/
Secondly there is a wire mesh underneath for structure and, as always, spray paint to paint it. Finally the piece de resistance are lights INSIDE the flame to light it up. Now I figure I might get a more realistic effect if I can use EL wire instead because I want light all throughout the flame and not just at the end.
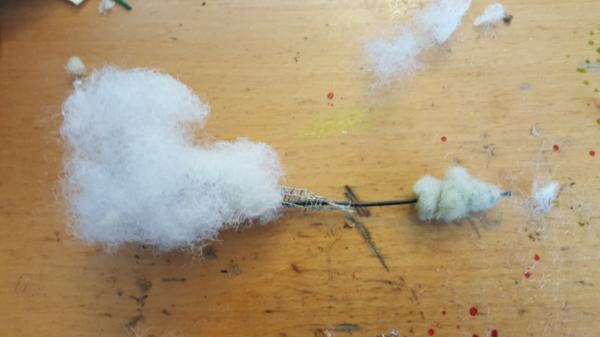
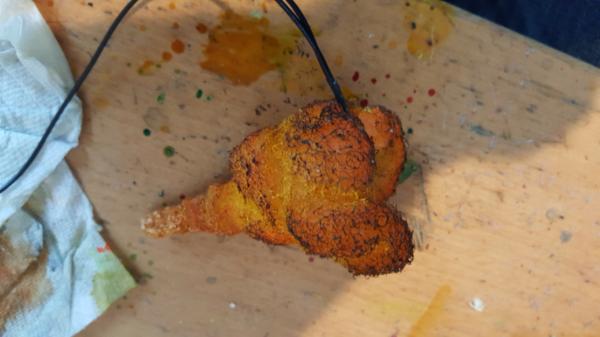
So i got some fine mesh from my hardware store made a little bent/bubbly cone out of it and started spiral wrapping the polyfill around it to get it to hold on:
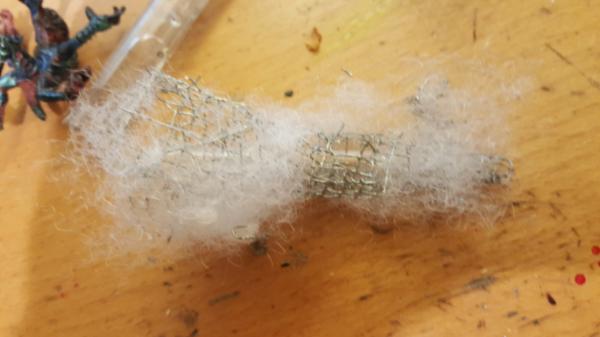
Note the tube down the middle. This was to make sure I have a clear passage way to eventually put in the EL wire. Otherwise it could get tangled in the mesh cone and not look as good.
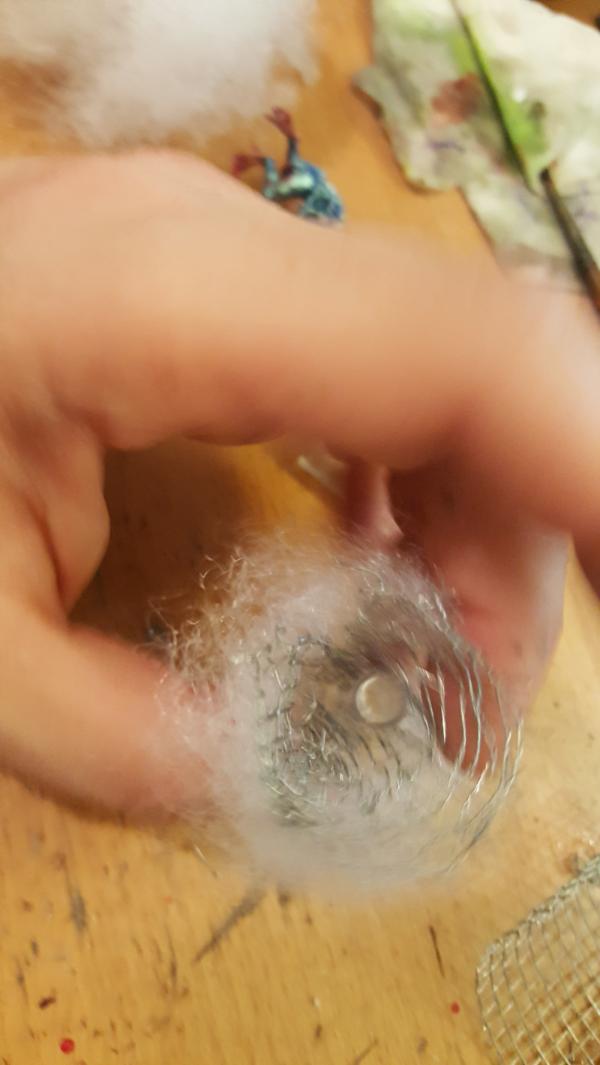
And I just kept wrapping around and got this!
It's pretty big though, I need a smaller mesh next time.. hrm.

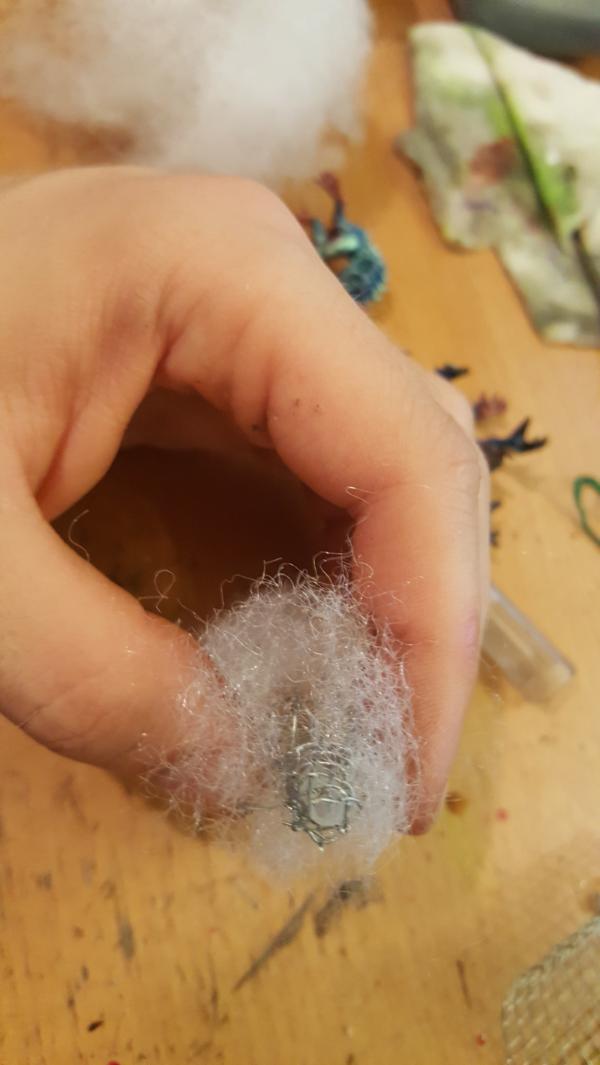
And it lights! But.. not very brightly though. That doesnt seem like it'll penetrate after all the spray is on..
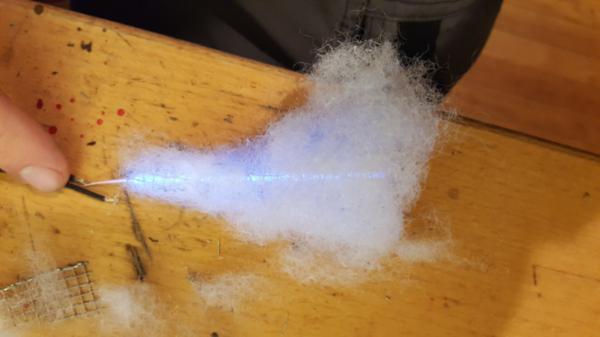
Furthermore, after re-checking back with the reference picture it doesnt.. have that puffy nature that the other modeller got. Its more like a flame cloud than thrower, and its just very.. thin, still, lets see how it spray paints. First I need to let the glue to dry.
|
|
This message was edited 1 time. Last update was at 2016/11/16 23:02:03
|
|
|
|
|
2016/11/18 00:47:10
Subject: Re: multi-level city terrain, marine v nid bases (11/17: making flame, p2)
|
|
Dakka Veteran
|
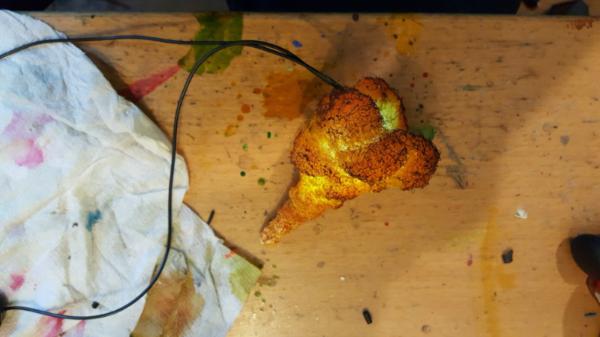
So I switched techniques because after a test spray paint it really wasnt working well:

Bleh. So a bit of a break but I went ahead and added an LED (very carefully) to the terminator:
Which, as I think about it later, I didnt really need to do but you'll see why later. Either way it worked and looks pretty good.
Next up was making a new mesh and one thats a bit smaller:

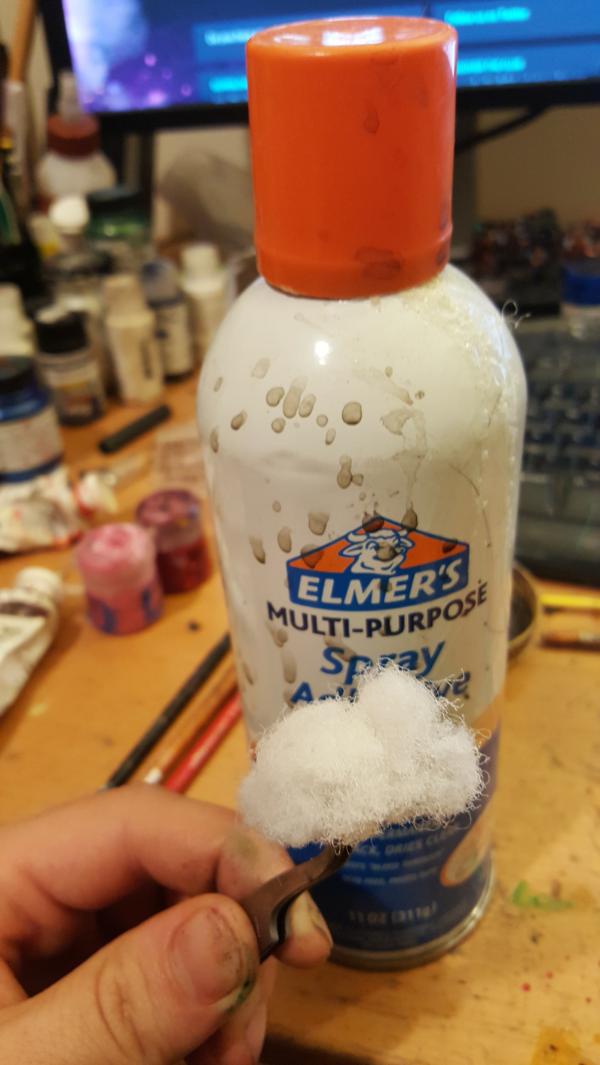
The big one was switching techniques. Before I was wrapping it around the mesh but that just looked.. wispy. So Instead I started balling it up. Then using VERY sharp small scissors I would cut holes in the balls to make donuts and feed that to the mesh:
Already thats looking cloudier and more full.
Obviously as you get further up the cone you cant make donuts anymore so I started using my favorite adhesive to glue it down. This stuff ALSO adds thickness and bulk to the fibers as it is somewhat opaque and makes things a globbier, so keep that in mind. Spray some but not all over or ull get too opaque.
Now the piece your seeing is actually a cap piece because well, i made a lot of progress and am running the tutorial backwards, but basically once I had the cone filled with balls (and ususally pry them apart a bit to make them more interesting) I would cut down the width of the fire with scissors and also use scissors to accentuate the crevases. This thing ends up being super large so scissor work is key to making it more manageable and thinning it out where needed.
Then you paint. I used a nice slightly warm yellow as a base:
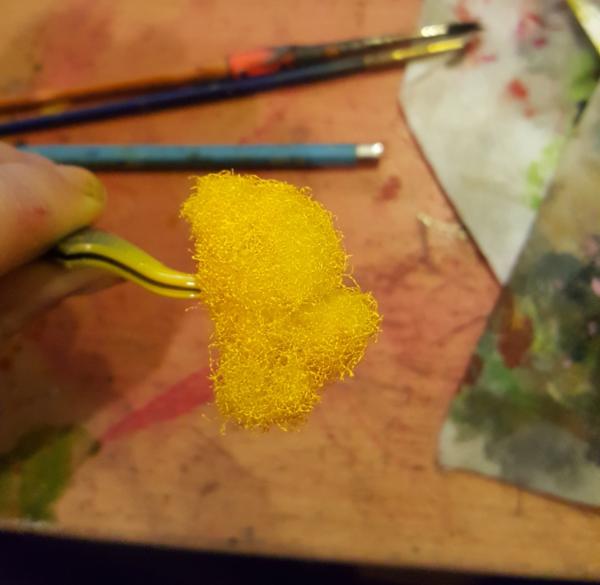
And then orange on the "leading" edge or edge facing out. inner edges you want still yellow as the core of the fire is super hot and as you billow out it cools.
I think used these for my darks and just use a drybrush, again only on the orange/outer facing side.
 Automatically Appended Next Post:
 A preview of the result:
|
|
This message was edited 1 time. Last update was at 2016/11/18 01:07:50
|
|
|
|
|
2016/11/19 16:36:34
Subject: Re: multi-level city terrain, marine v nid bases (11/17: making flame, p3 ON FIRE)
|
|
Dakka Veteran
|
SO! the story of fire. Basically a LOT of snipping, as previous mentioned. While the ball technique got me in a good starting place, the scissors were invaluable at just trimming it down and also making sure the crevases were well defined. Defintely start with a smaller than you think youll need mesh!
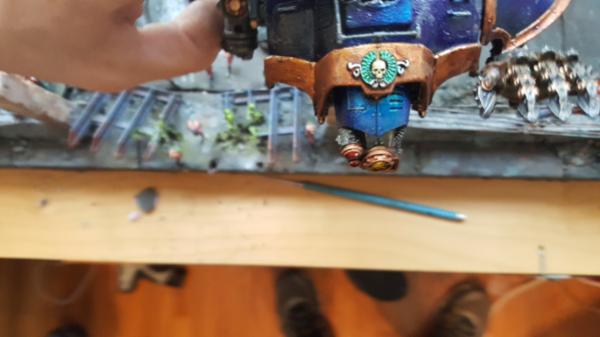
Anyhoo, so first up I made the structure, and then it was time to add the end LED. For reasons of tiredness I thought both LEDs would need to be on very clearly defined seperate circuits. Basically here was the problem, instead of the normal 2 penny batteries I've been doing for everything else I did just 1. Which means 3v instead of 6v which means only a single LED per circuit instead of 2 leds per circuit. But I kept forgetting that so whenver i'd test Id have both LEDs "in series" with each other (positive of 1 led was hooked up tot he negative of the other) which failed to light. Therefore I thought "okay just have one on either end and hide the wires" which is what I ended up doing.
Of course I could still have had them connected to each other by just doing positive->positive, which makes 2 circuits of 1 LED each, but again, tired. So thats why we have wires coming out the back. However, in the end its probably for the best because it REALLY helped lock this thing down. The 2 points of attachment did great for relieving the stress on my LED flamethrower, so its all good. Anyhoo to anchor the end wires I just used superglue, turns out it works rather well with this stuff. It seems to keep its shape, doesnt dissolve and just gets hard. Very handy.
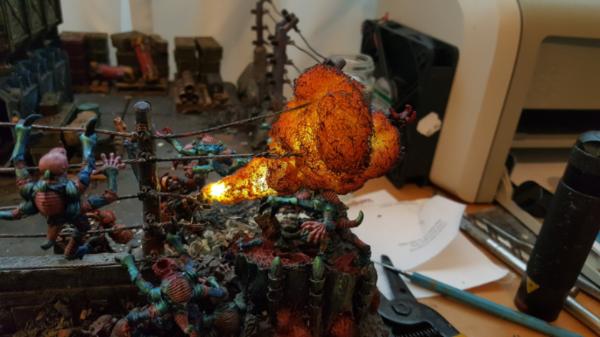
A quick test and it lights! and is looking gooood
So it was time to isntall. Note the new rubble, to cover my wire sins I just added yet more rubble in the area, pretty straightforward and using the gorrila glue has really made that an easier process. There is still the dreaded problem of loose rubble but its much more manageable than before.
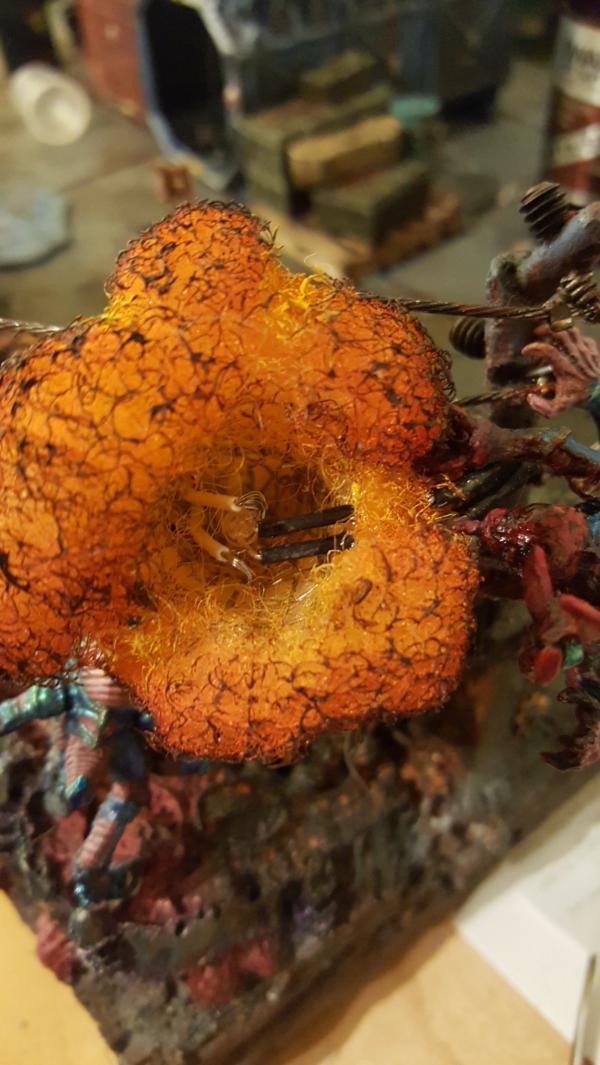
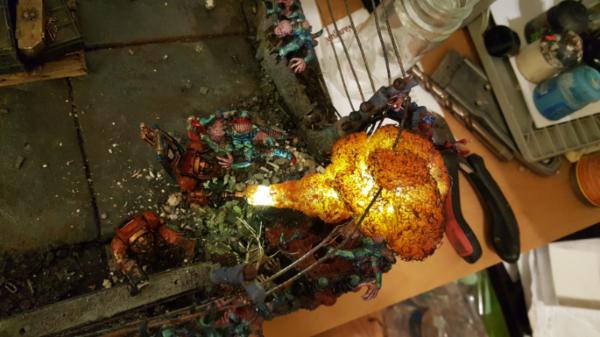
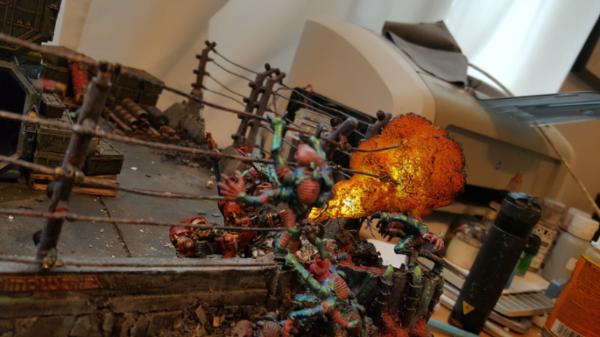
After installation I lit it up and it was great! but.. missing some light. The beginning of the flame was SUPER bright, as it should (maybe a touch TOO bright but its easy to patch that), and the end of it was also nice and bilowy lit, but the middle was missing it. I thought my LED at the beginning would bleed more into the middle sections as well but it just never made it there. So it was emergency adding light time. This is where the "single strand of leds" I realize I could do came in handy because I just attached it in parallel to my end light:
and shoved it down the middle. The only trick was carreeeffullly trying to solder those joints, because I knew if the soldering iron even breathed on this stuff it would start to shrivel and melt. I'm still not entirely certain the solder actually cemented the joints but we'll see in time!
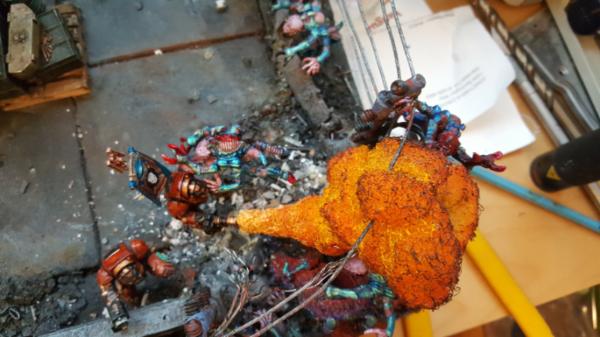
I also took a bit to "burn" the genestealers

What I had before (charcoal with white/orange) wasnt really working, so I thought id try for a more realistic burn victim look. I didnt really know what it would look like AS you were burning and.. not something I wanged to search for on google, so I just assumed it was black and bloody like it how it ends up. Basically just sponged on reds, pinks, and charcoal blacks and did a blood pass over it. Looks, surprisingly realistic actually, i was pretty happy for how little time it took.
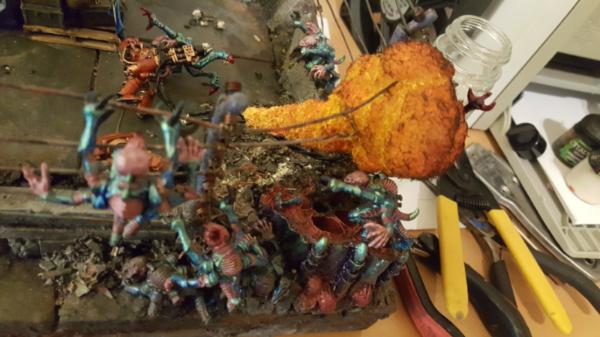
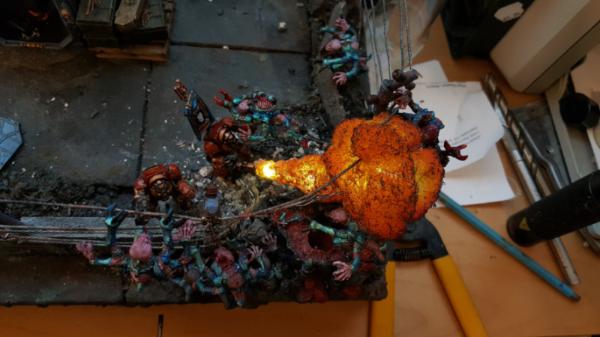
Now pics of it all lit up! Its going to be hard to get the full sense of it in picture form because the exposure will always be off, but it looks great and looks very realisitc, so im happy.
|
|
This message was edited 1 time. Last update was at 2016/11/19 16:37:13
|
|
|
|
|
2016/11/19 21:31:00
Subject: multi-level city terrain, marine v nid bases (11/19: finished flamethrower effect)
|
|
Rogue Inquisitor with Xenos Bodyguards
|
very nice work on leaking green goo and flame-blast effect! that LED in the painted wool adds that flame-glow!

|
"Your mumblings are awakening the sleeping Dragon, be wary when meddling the affairs of Dragons, for thou art tasty and go good with either ketchup or chocolate. "
Dragons fear nothing, if it acts up, we breath magic fire that turns them into marshmallow peeps. We leaguers only cry rivets!


|
|
|
|
|
2016/11/20 07:45:50
Subject: Re: multi-level city terrain, marine v nid bases (11/19: finished flamethrower effect)
|
|
Dakka Veteran
|
Thanks! Yeah the LEDs really are what make it special and look realistic, im really happy with how it turned out, it definitely was a challenge.
|
|
|
|
|
|
2016/11/20 09:20:24
Subject: Re: multi-level city terrain, marine v nid bases (11/19: finished flamethrower effect)
|
|
Rogue Inquisitor with Xenos Bodyguards
|
Largo39 wrote:Thanks! Yeah the LEDs really are what make it special and look realistic, im really happy with how it turned out, it definitely was a challenge.
Now it will only get easier, and you will make even better effects!
|
"Your mumblings are awakening the sleeping Dragon, be wary when meddling the affairs of Dragons, for thou art tasty and go good with either ketchup or chocolate. "
Dragons fear nothing, if it acts up, we breath magic fire that turns them into marshmallow peeps. We leaguers only cry rivets!
|
|
|
|
|
2016/11/20 10:41:02
Subject: multi-level city terrain, marine v nid bases (11/19: finished flamethrower effect)
|
|

Regular Dakkanaut
|
Man, this is so cool! I've gotta try that myself one day.....
|
|
|
|
|
|
2016/11/20 13:14:52
Subject: multi-level city terrain, marine v nid bases (11/19: finished flamethrower effect)
|
|
Irked Necron Immortal
|
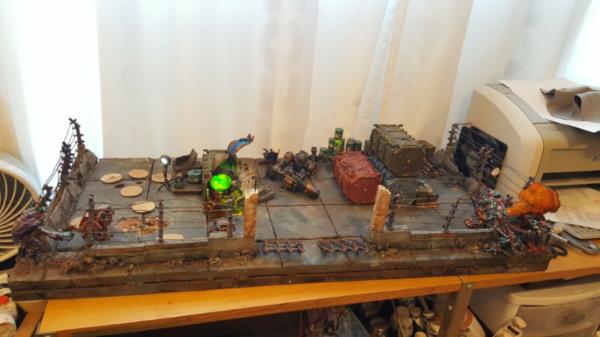
This is frankly, amazing! Are you planning to do a few overview shots of the project?
It would be awesome to see everything in one big image
|
|
|
|
|
|
2016/11/20 13:52:02
Subject: multi-level city terrain, marine v nid bases (11/19: finished flamethrower effect)
|
|
Arch Magos w/ 4 Meg of RAM
|
Wow, the heavy flamer looks so so cool
|
Bye bye Dakkadakka, happy hobbying! I really enjoyed my time on here. Opinions were always my own :-) |
|
|
|
|
2016/11/20 17:39:55
Subject: multi-level city terrain, marine v nid bases (11/19: finished flamethrower effect)
|
|
Growlin' Guntrukk Driver with Killacannon
|
wicked flamer.
|
|
|
|
|
|
2016/11/21 05:53:08
Subject: Re: multi-level city terrain, marine v nid bases (11/19: finished flamethrower effect)
|
|
Dakka Veteran
|
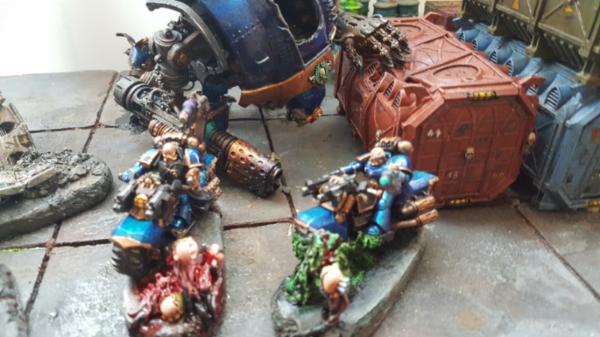
Thanks all! Here is an old (sigh, should have put on the knight) pic that shows the progress! Also i should have turned ON the flamethrower for this pic but hey we're gettin gthere. More pics to come
|
|
|
|
|
|
2016/11/21 06:46:43
Subject: Re: multi-level city terrain, marine v nid bases (11/19: finished flamethrower effect)
|
|
Malicious Mutant Scum
|
Largo, your blog is absolutely astounding! Your terrain is mindboggling, and the way in which you transform normal models into centerpieces is phenomenal. I am definitely a subscriber, and cannot wait to see what comes next!
-LostCarcosa 
|
Cultists, Mutants, Traitors, & Dregs of Society - a Lost and the Damned PLOG
Then suddenly I saw it. With only a slight churning to mark its rise to the surface, the thing slid into view above the dark waters. Vast, Polyphemus-like, and loathsome, it darted like a stupendous monster of nightmares to the monolith, about which it flung its gigantic scaly arms, the while it bowed its hideous head and gave vent to certain measured sounds. I think I went mad then.
-from "Dagon" by H.P. Lovecraft |
|
|
|
|
2016/11/21 06:55:17
Subject: multi-level city terrain, marine v nid bases (11/19: finished flamethrower effect)
|
|
Pious Palatine
|
Wow, what a great read, both the toxic waste and flamethrower effect look really amazing.
EDC
|
|
|
|
|
2016/11/22 01:29:19
Subject: Re: multi-level city terrain, marine v nid bases (11/19: finished flamethrower effect)
|
|
Dakka Veteran
|
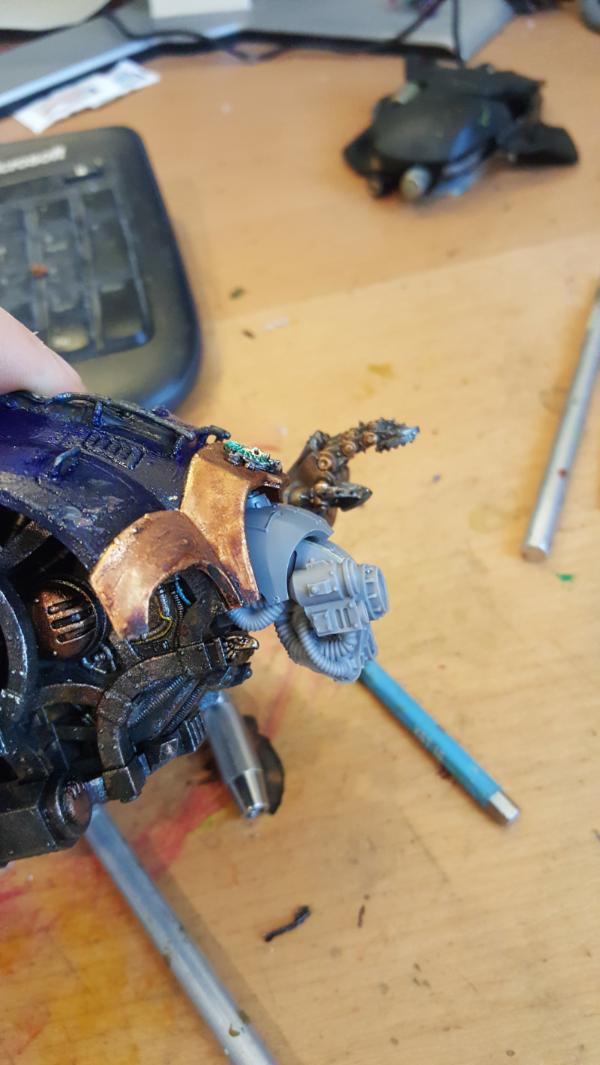
Thanks! next up is a small breather and a few small details like the knight head and so forth that finally came in.
|
|
|
|
|
|
2016/11/25 19:04:16
Subject: Re: multi-level city terrain, marine v nid bases (11/25: imperial knight mechanicum head)
|
|
Dakka Veteran
|
|
|
|
|
|
|
2016/11/29 18:24:01
Subject: Re: multi-level city terrain, marine v nid bases (11/29: knight head painted, spore mine invasion)
|
|
Dakka Veteran
|
|
|
|
|
|
|
2016/11/30 18:55:50
Subject: Re: multi-level city terrain, marine v nid bases (11/30: spore mines at the gates!)
|
|
Dakka Veteran
|
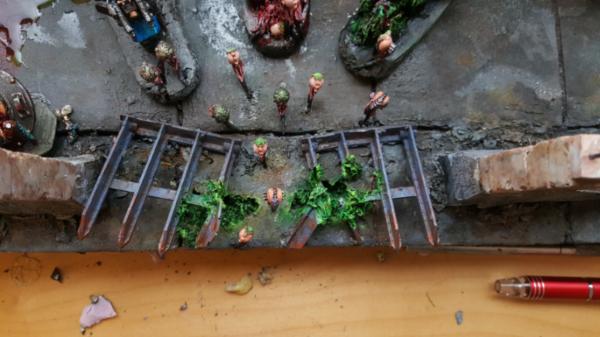
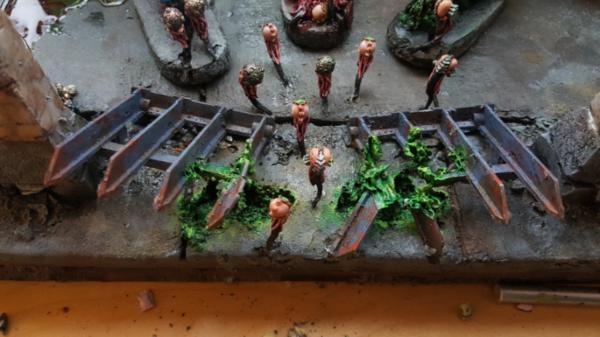
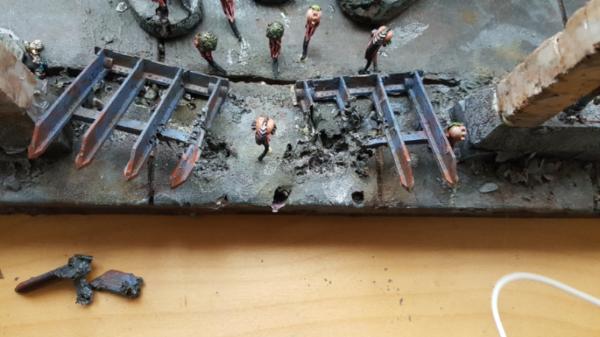
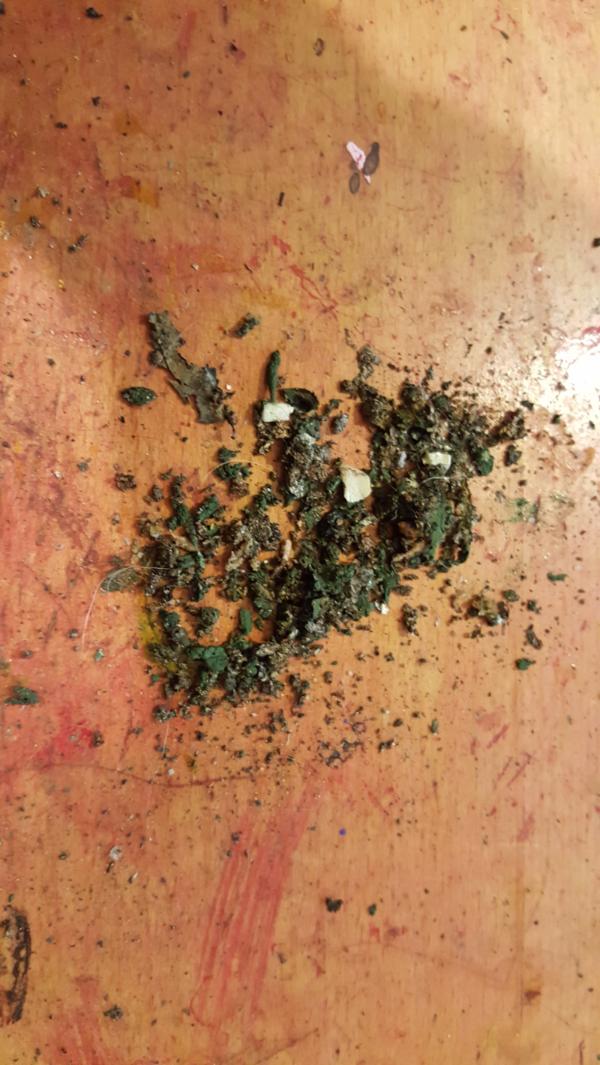
hey look its all acidy! I want to add some slimy acid goo coming from out the spore mine, just to really illustrated that it caused this spray, but for that I need to wait on UHU. Apparently, very specifcally, international UHU. American UHU just doesnt cut it. So that will be in a few weeks. But still, yay invasion!
|
|
|
|
|
|
2016/12/06 00:25:22
Subject: Re: multi-level city terrain, marine v nid bases (12/5: more genestealers attacking, repainting VSGs)
|
|
Dakka Veteran
|
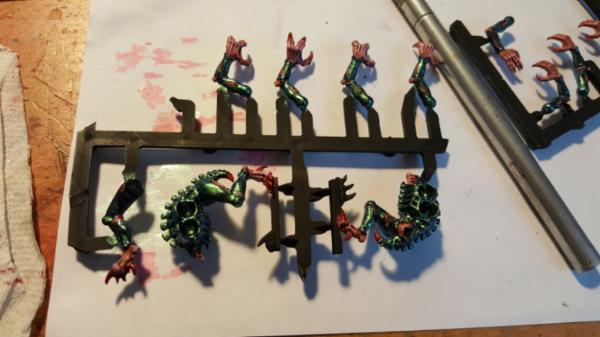
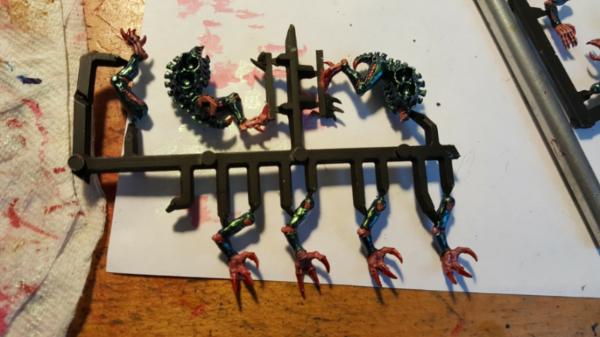
Next up ist he right side and adding all my remaining (pretty) genestealers. Older genestealers, while on the board already, can stay few in number. Just.. yeah, not quite as pretty. And having fixed arm poses is lame.
So I had 5ish remaining and wanted to add a breakout of stealers behind the broodlord. Let mass painting begin! (ugh)
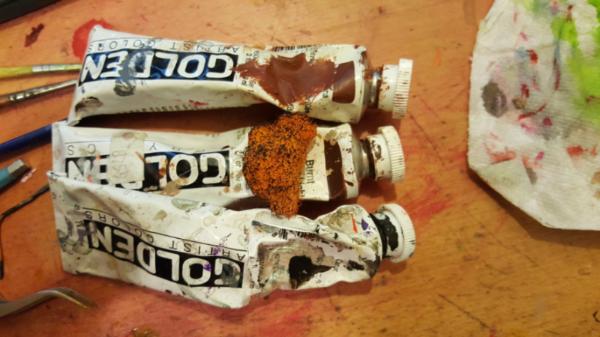
The paints required:
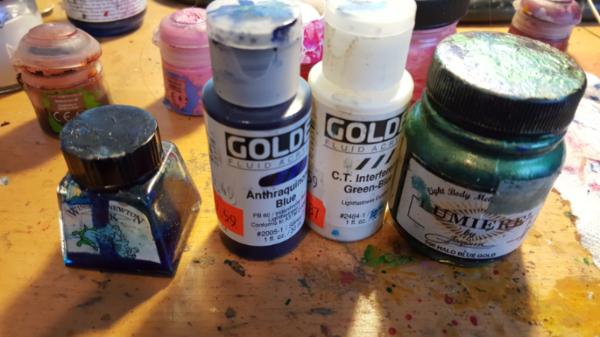
so these stealers will be different in color (a touch) than the original batch attacking the front. mostly because i like the darker slightly greener stealer look better that the broodlord exemplifies. I figure if people notice I just say that the ones are part of his particular brood. easy peasy.
I also wanted to go back and re-do some of my previous buildings. Now that im much more comfortable painting industrial colors and so forth it.. was time to repaint the VSGs. Given both the success/easy of dark metal and the fat that the shipping containres also turned out well its just time to do a redo on them. Im also giving one to one of my friends so I wanted to paint it up prettier for him to use on his future board endeavours
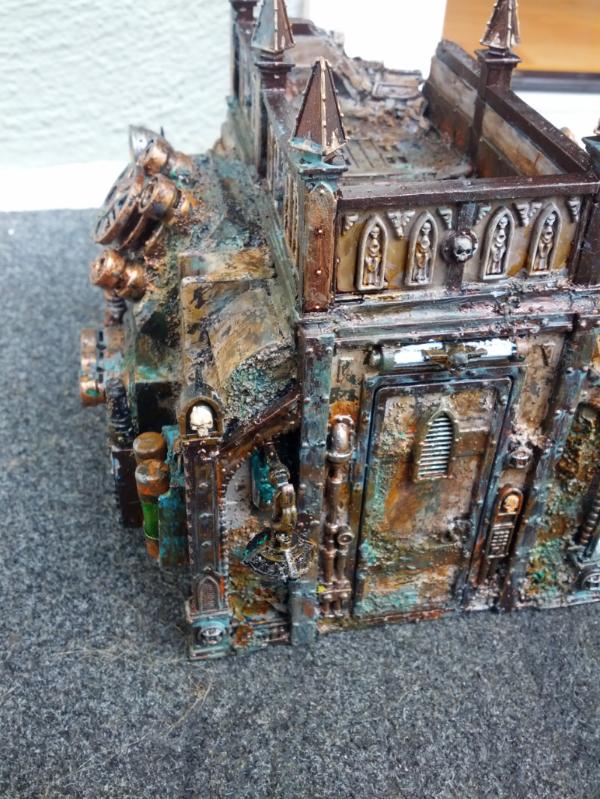
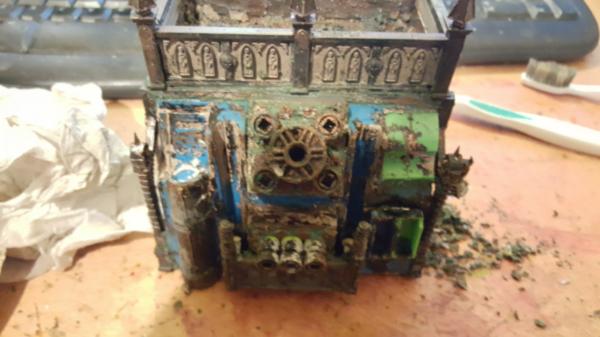
As reference this is what we started with:
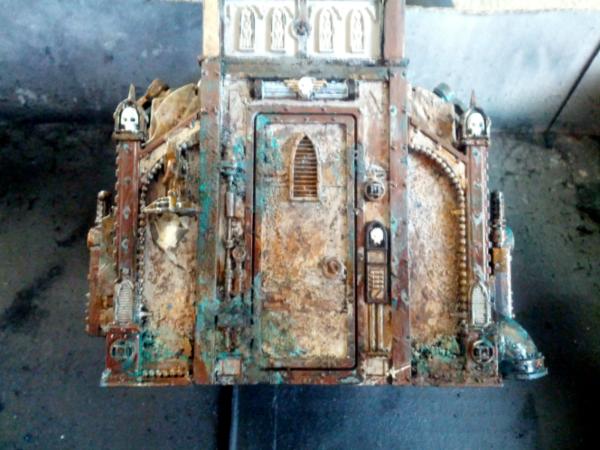
First up will be stripping them. Because of all the nooks and crannies using the purple stuff is no bueno, as it is caustic and there is no way I wont get some on my fingers. So I bought a gallon of simple green and dunked it in that, we'll see what happens.
|
|
|
|
|
|
2016/12/06 22:50:07
Subject: Re: multi-level city terrain, marine v nid bases (12/6: stripping with simple green)
|
|
Dakka Veteran
|
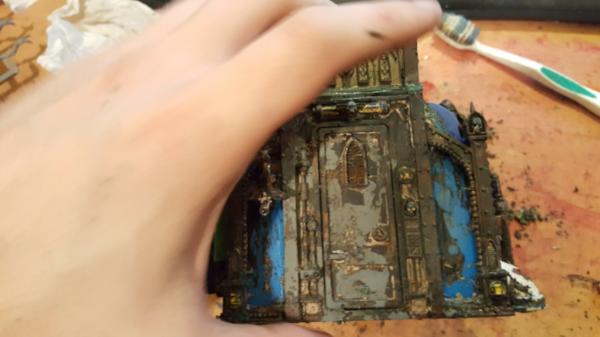
So I submerged the first one in simple green, waited 24 hours and scraped it all off.
Few things learned:
It DOESNT affect super glue. Yay! I was really worried the whole thing would fall apart which is why I only did one at a time, so I'd have the other as reference.
It DOES, however, completely dissolve the dental plaster stuff I had cast. So some of my pipe fittings got melted. Ugh, still i have some spares after the broodlord so thats okay.

For the second one i just ripped them off beforehand:
The bits you get scraping this off are perfect rubble scrap, keep it!

|
|
|
|
|
|
|
|