Forum adverts like this one are shown to any user who is not logged in. Join us by filling out a tiny 3 field form and you will get your own, free, dakka user account which gives a good range of benefits to you:
No adverts like this in the forums anymore.
Times and dates in your local timezone.
Full tracking of what you have read so you can skip to your first unread post, easily see what has changed since you last logged in, and easily see what is new at a glance.
Email notifications for threads you want to watch closely.
Being a part of the oldest wargaming community on the net.
If you are already a member then feel free to login now.
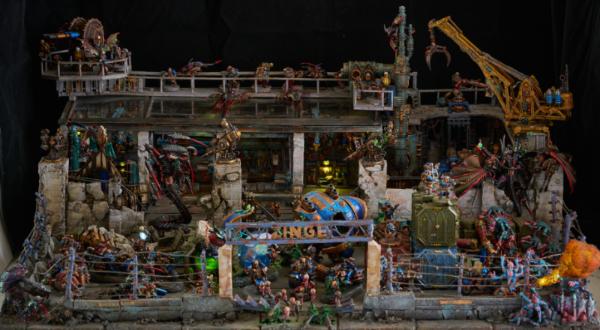
In this sub i built 6 realm of battle style modular terrain tiles with some additional
handmade buildings to go on top of them. Pretty mcuh every detail is covered so you guys can follow along! I eventually transitioned to making a hero "diorama" which sort of encapsulates all the tricks I learned in the process. Enjoy the lengthy read!
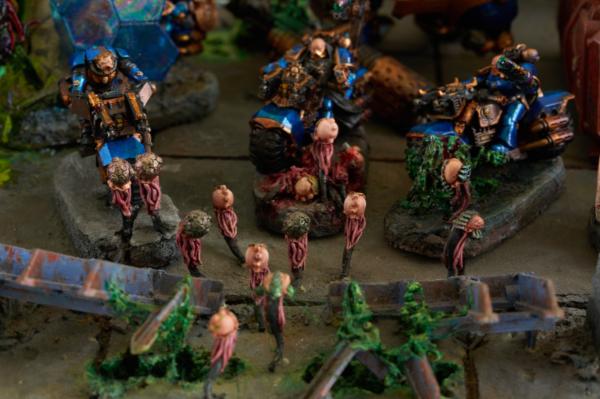
Key techniques:
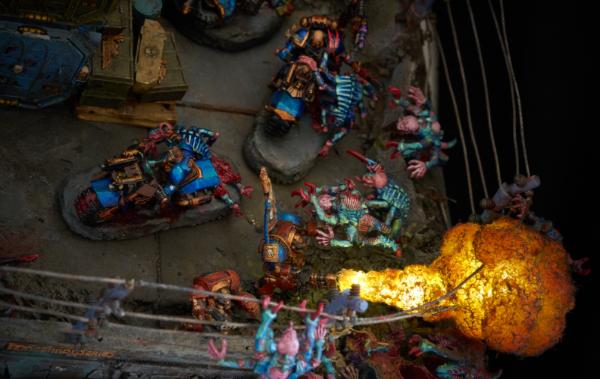
El wire
Blood effects
General rust effects
Paint chipping techniques
making realistic craters
Foamcoat/building sturdy tiles that are still relatively light (IE: not solid. hard plaster coating foam)
This message was edited 467 times. Last update was at 2019/12/31 00:54:43
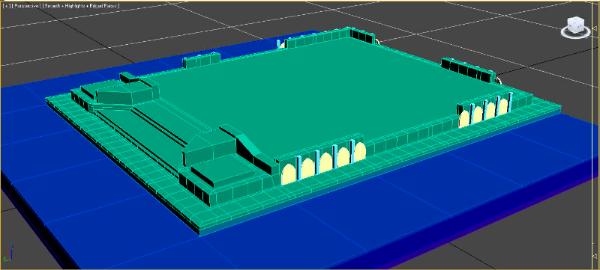
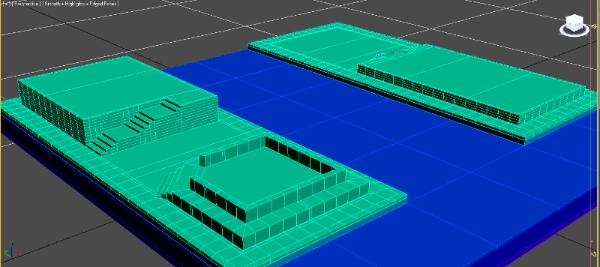
Given a 2 foot square tile I've determined that the main "squares" are about 4 inches square, and
the smaller floor tiles are probably either 1/2 inch or 5/8 inch in size. This is primarily dictated by
what size you make the “rim” that rings each foundation. If you make it ⅛th thick then the small
floor tiles become 5/8th, if you make it ¼th thick then they become ½ inch tiles.
Currently I'm working with the assumption that they are 5/8th inch sized tiles.
I've also layered it based on how I intend to build it, the bottom layer is the 1/4th inch thick of MDF,
then 3/4th of pink foam, then I'm estimating 1/8th of foam craft plaster stuff on top. Then the foundations
follow a similar pattern.
Attached is the .3ds file so you guys can take this and run with it.
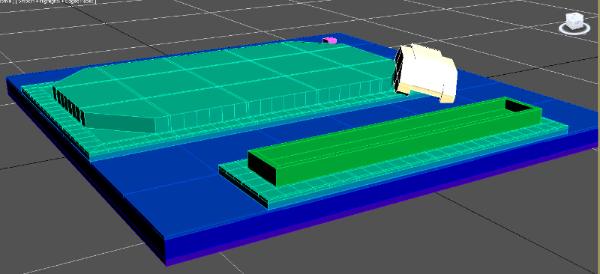
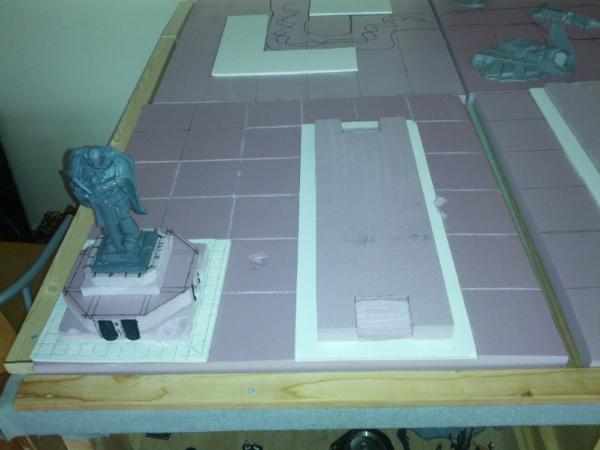
Just chugging along with the next tile, still using 5/8 inch small tile size with 1/8th rims. All rises are 3/4 inch and the only
shorter rise is the first level of the smaller 8x8 section for statues which is 1/2 inch high. 3d file uploaded for you guys!
Terranscapes is a great site/definitely have bought stuff from him and have been in contact with
him going over my general build ideas. Once I get to building i'll defintiely be reviewing/hightlighting
his youtube videos.
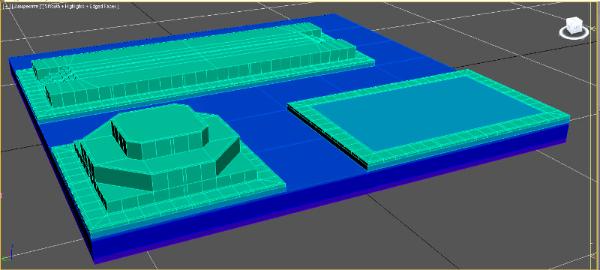
I'm experimenting with 1/4 inch rims with 5/8th tiles to see if it works any better.
So far I'm digging it but we'll see. The walls are 1/2 tall and 3/8 thick and the from wall is 3/4 high.
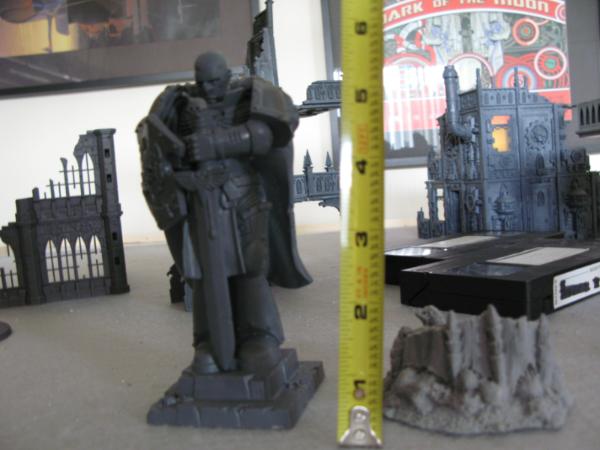
I need to build a space marine reference to see how that stacks up but for now it seems decent.
What are you using to created the .3DS files ?
Thanks, grabbing a free student version off the Autodesk site. javascript:emoticon('');
Above it was stated 6x boards does mean each square is 2x2, I am assuming a 4x6 table.
I am subscribed and will tag along and hopefully finish a shelved project for once.
This message was edited 1 time. Last update was at 2013/06/12 21:26:40
2013/06/12 21:06:14
Subject: Re:Homemade FW-style realm of battle terrain boards/buildings
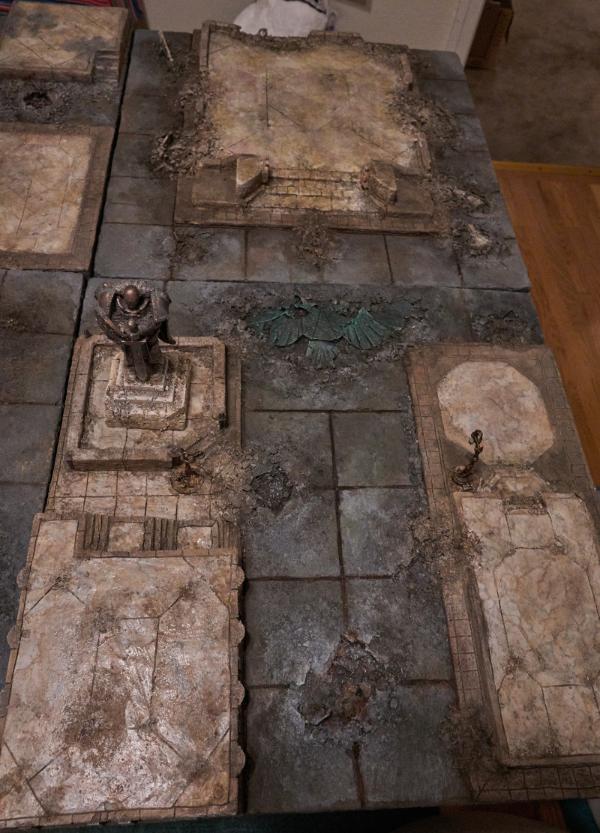
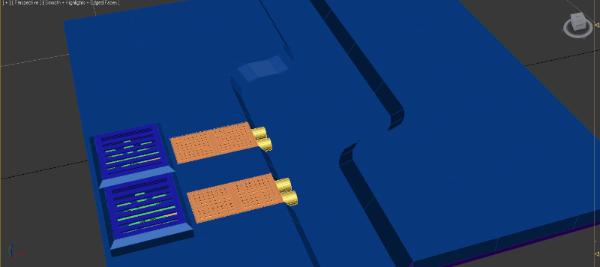
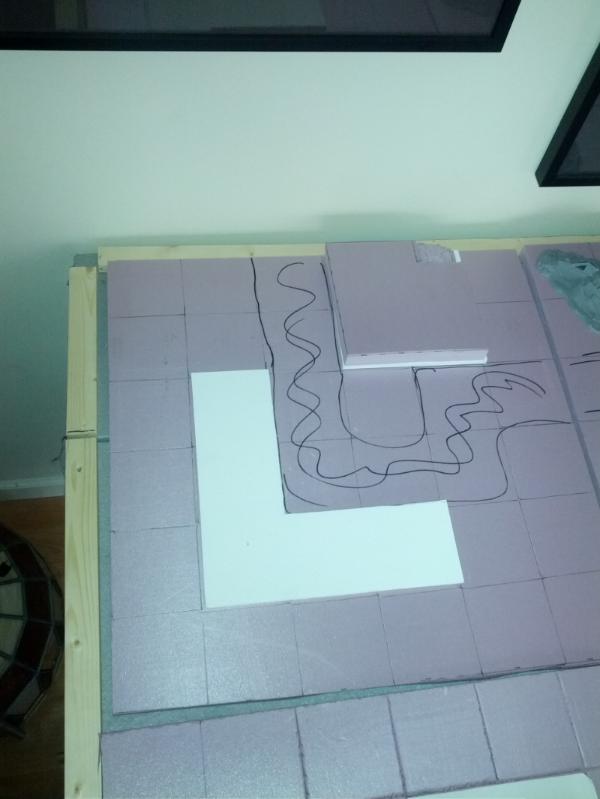
Im starting with 2 river tiles for now, one straight and one corner. This lets me cover a
reasonable chunk of the board in river without forcing me to mess up the other tiles. Given that
I also plan on making the rivers glow with EL wire.. 2 tiles seems like just enough for now.
This tile is a bit light on foundations, but given that the river cuts it in half I’m not sure where
I would put them without really crimping where stuff can go.
For the big fans I plan on using 90mm computer case fans. I'd love to plug them and let them
run but I'd have to really undervolt them so they move super slowly otherwise it wouldnt really
match the scale.
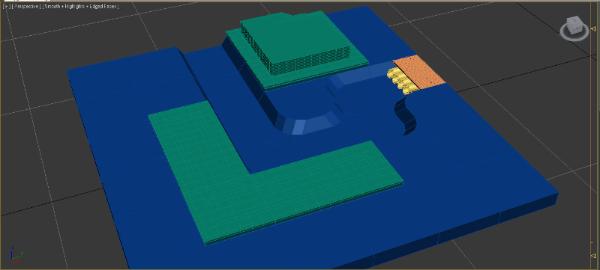
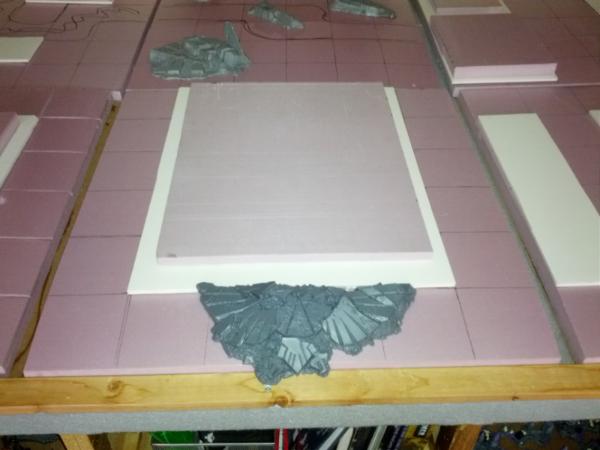
Automatically Appended Next Post: And now for the last tile, the water corner sector!
One thing to note is the pipe/grill section at the end. I designed that to serve as an "endcap"
and wont be permenntly attached. That way I can have these river sections butt up against
no river tiles and it still make sense.
Updates: I went ahead and added all my tile designs into the main post to bring it all together
and make it easier to read. Now we get to the part where I showcase what building’s i’m
working with/paint, as well as the extra buildings I intend to make.
Where to get/make buildings!
Spoiler:
Games Workshop:
A bit obvious but they really do have great stuff. 2 of the best/most flexible kits are the
manufactorum and sanctum imperialis. One thing I would highly suggest is that, if you do get one
of their kits, DONT assemble it vanilla. These kits have so much extra detail that (as you will see
later), when combined with electrical boxes/cheap dollar store bits you can ususally get 2-3 buildings
out of it instead.
Pegasus Hobbies:
A cheaper version of GW buildings that is sturdy, snaps together, but lacks a smidgeof detail. Still
makes for some great buildings though and would be indistinguishable with a bit of work. Look especially
for their great plastic bridge kit and Gothic City Ruins kit
Gale Force 9: Battlefield in a Box:
More specifically: Hall of Heroes These guys make some fantastic stuff. It’s cheap, prepainted (o.O) and cast in some sort of solid
heavy resin so they feel fantastic. I cant reccomend them enough!
Hirst Arts:
If you intend on doing a large amount of buildings this is the BEST way of doing it by far. They
offer great silicon molds of a lot of classic bits like pipes/drains/castles/cathedrals/pretty much
anything that you are willing to assemble. The downside, the molds arnt cheap to make (hence
this being best for mass building production/assembly), and you have to cast yourself.
Terranscapes As mentioned earlier Terranscapes is an amazing place to get both painted and unpainted
terrain. Most of the stuff is doen via casting with tuffstone, a stronger plaster that’s more resilient.
He also offers hirst arts cast at 2.50 a cast. A pretty fantastic deal given that his casts come out
flawlessly (he uses a vacumn pump) and you know they are in a tough material/a lot less than the
cost for the molds themselves (in small numbers that is)
Iron Hands And now we get to what is one of the better DIY building sites I’ve seen! His work has some incredible
detail, is very easy to keep up with, and uses those GW bits all over the place combined with cheap
dollar store bits (see why I told you to save them?). I’m making use of this site extensively for
my custom buildings
Where to get bits
Spoiler:
Hoard-o-bits:
A great place for terrain bits, they have pretty much all the GW kits split up so you can just get
what you need. They also have bits from pegasus hobbies/cliptix/etc so you can get
scaffolding/trusses for cheap too.
Spikey Bits:
Another good store tho they have less in the way of terrain bits, still can find some good stuff
there though for the most part they are liquidating their GW bits, so it’ll be about finding bits from
other companies that you want.
Also dont forget about ebay! One of the best things to search for are “bitz-piles”. They pop up
every once in a while and are a great way to get bits to populate ur ruins. You can also find the
occasional forgeworld cities piece (amazing detail, super solid resin, but tend to go for 150
each since they rae in high demand), or other prepainted terrain.
And now for my buildings! About half just need to be painted, whereas others are going to be designs
Standard Buildings
Spoiler:
A collection of the standard buildings I just made straight out of the kit. We have in order a manufactorum (GW), sanctum imperialis (GW), gothic city ruins (Pegasus), Hall of Heroes/Colesium (Battlefield in a box), and some assorted building corners (6 in all, 2 of each shown)
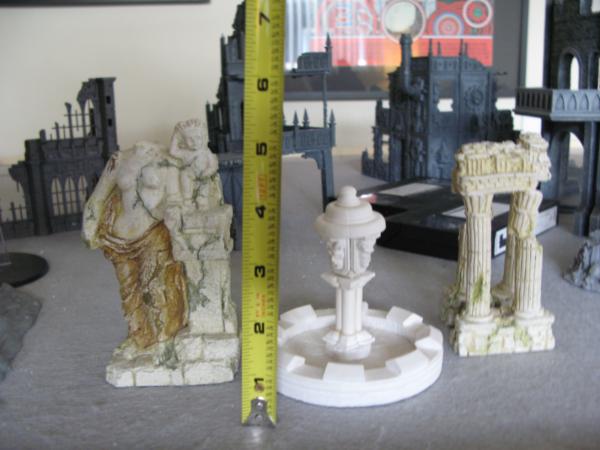
The Fountain
Spoiler:
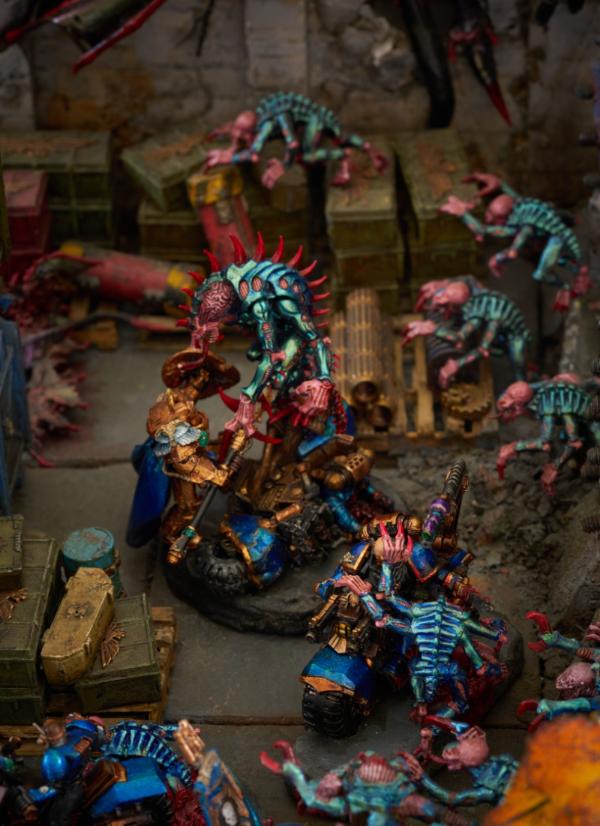
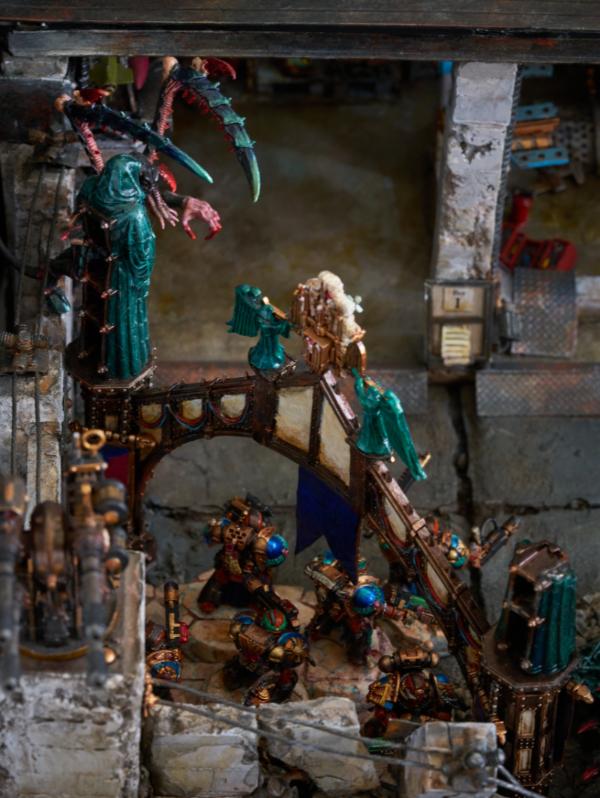
The main central fountain came from Terranscapes, the statues came from ebay. Although
painted I may look to darken them up a bit to match the general theme. I also hope to “infect” the
fountin a bit with some tyranid theming/tentacles to show that they are slowly working their
way on this planet.
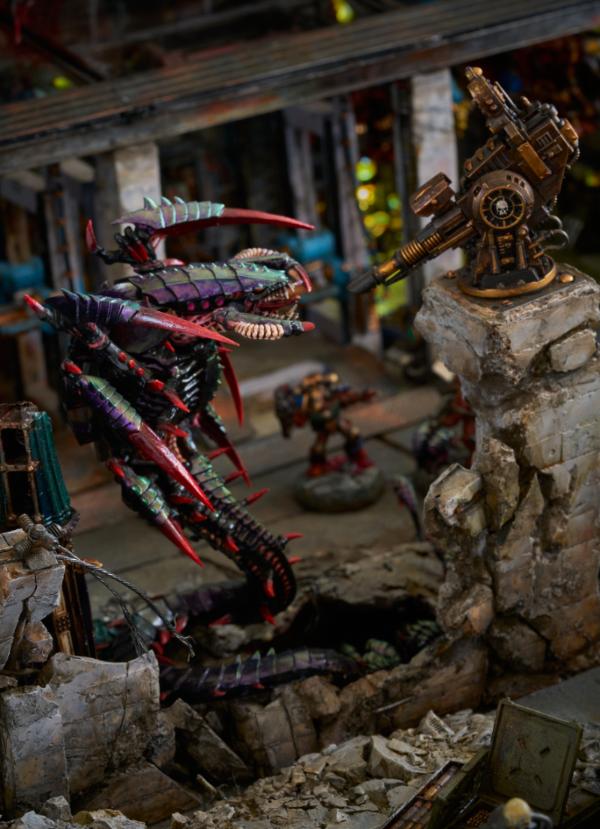
A great piece from GW that will be a great place to try and test out weathering/old bronze
looks. The tyranid piece next to it is an old forgeworld piece you can find on ebay (Forgeworld
OOP nest is a good search tem for it) fairly regularly. About 2 inchs wide by as you can see
tall it goes for about 15 bucks.
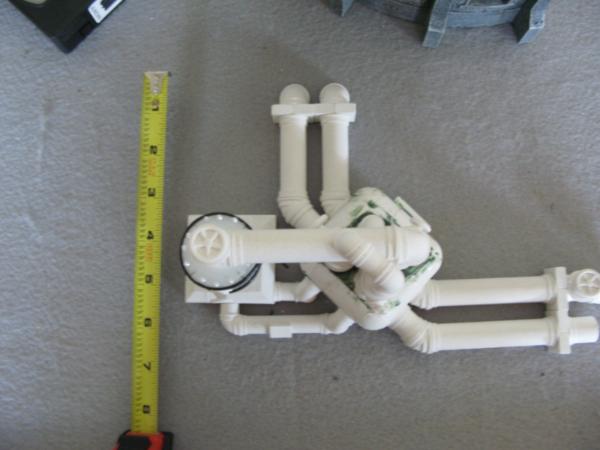
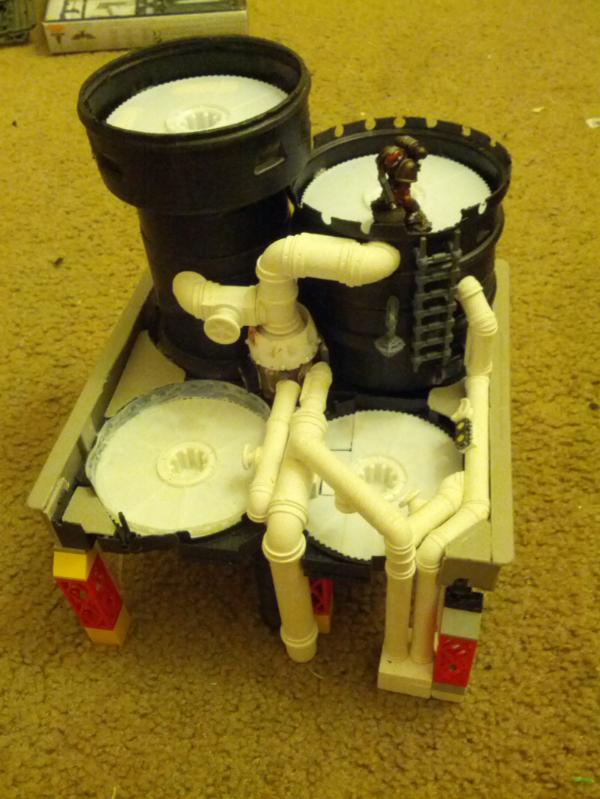
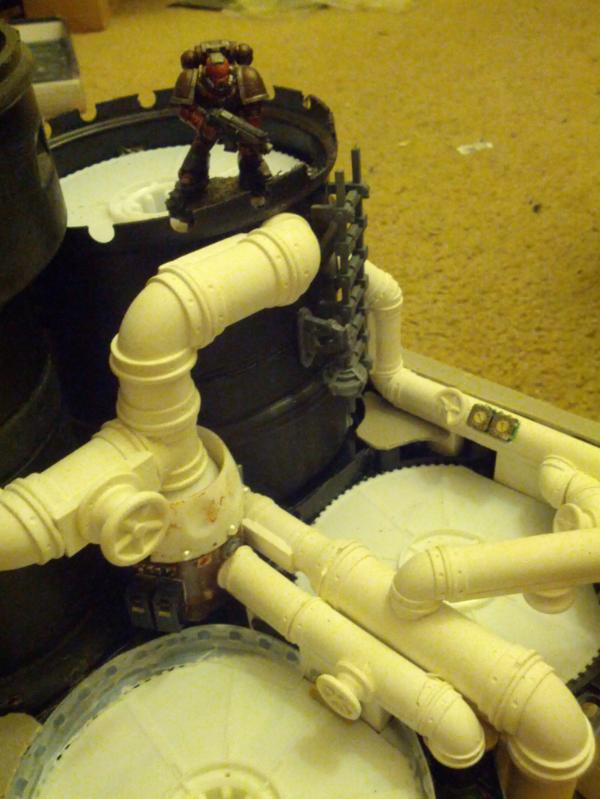
Water Processor
Spoiler:
My first hirst arts creation! Got the casts from Terranscapes and the design from here:
My first handmade building from the Iron Hands how to pages. I ended up making 2
Seen here
Plasma Tower
Spoiler:
Another building I plan to make from the how-to pages:
Plasma Tower
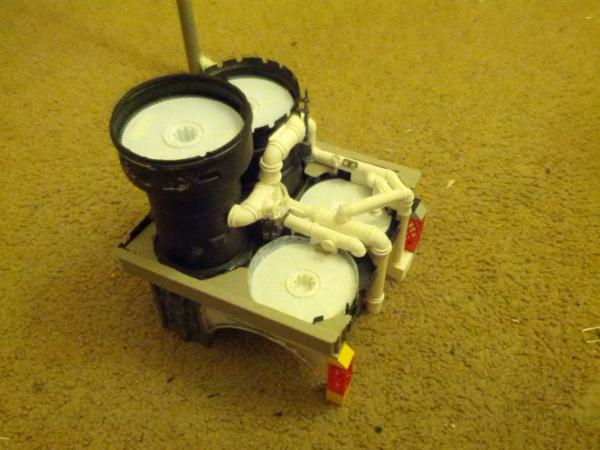
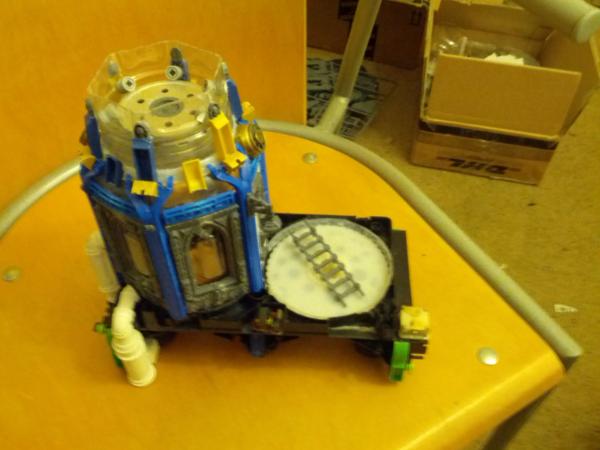
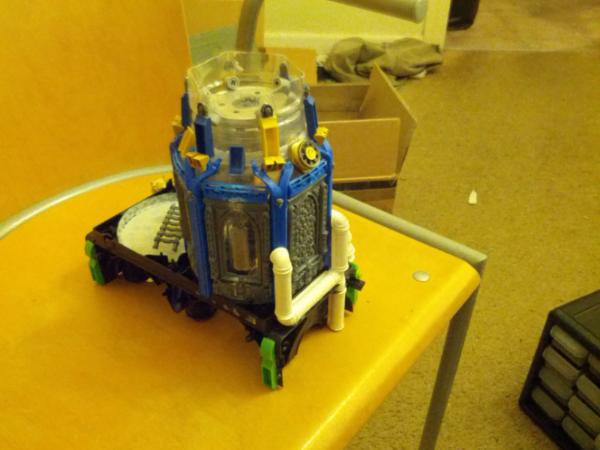
Water Tower
Spoiler:
The final building from the how-to pages I plan to make. One thing I plan to change is using 2
VHS tapes to make it instead of one. Although it looks amazing it still seems a bit cramped, so
I just want to let it breathe a bit and expand it a bit more.
Water Tower
Flakk Tower
Spoiler:
The final building I plan to make is a large military flakk tower similar to the german flakk towers
used in WWII to defend cities from assault. This one will get its' own post, however,
as I have yet to design it!
This message was edited 1 time. Last update was at 2013/06/13 21:52:26
These huge structures were meant to defend cities from aerial attack and also house and
keep safe thousands of civilians.They were, on average, about 70 meters high and 45 meters
wide per side, with 3-4 meter thick concrete walls.
I would envision a similar use in the realm of 40k, but in this case they would be used to
defend against orbital attack and thus would be expected to have firepower to engage large
invasive forces. Furthermore they would also need oo be able to fend off ground attacks,
especially infiltrating forces meant to destroy it before the invasion..
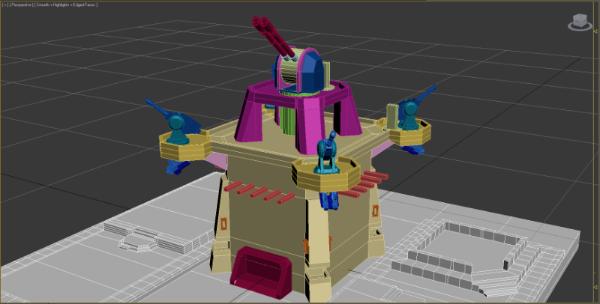
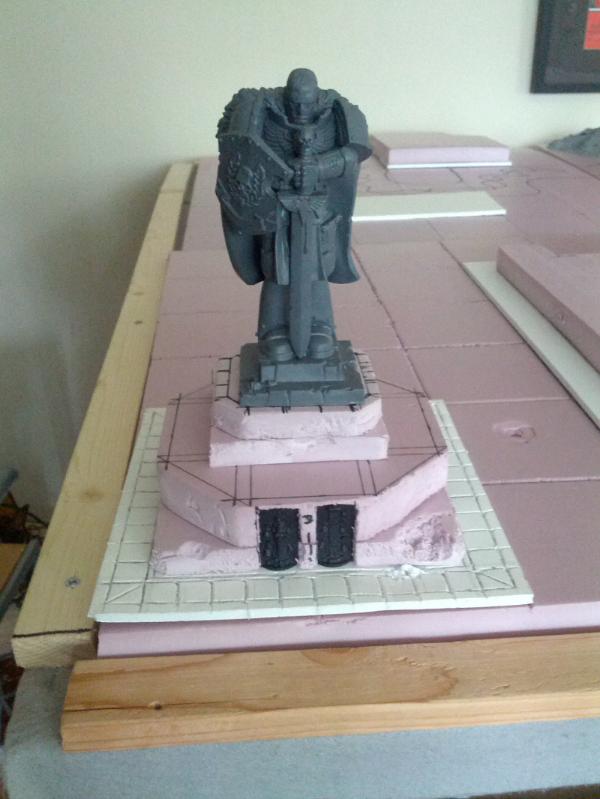
Here is my version, currently weaponless (still working on those, will update with weapons later)
On each of the 4 corners I intend to place an icarus lascannon, with a heavy bolter turrent
underneath for ground defense. Also helping ground defense are lots of windwos at an angle
to make them harder to engage but easier to defend the walls. Nearer to the ground will be MMs for close in heavy firepower.
In the middle on top will be super lascannon from the fortress of redemption kit. I designed the
middle because of the question of how people would get on top. I dont like the bastion design
because if the top is taken any defenders inside would never be able to retake it. with this design
each of those 4 pillars would have a door so any people going to the roof can more easily defend
the doors, and so they exit under roof cover. The central "pillar" will be a semi-open elevator type thing
so the cannon could be raised and lowered to maintain it.
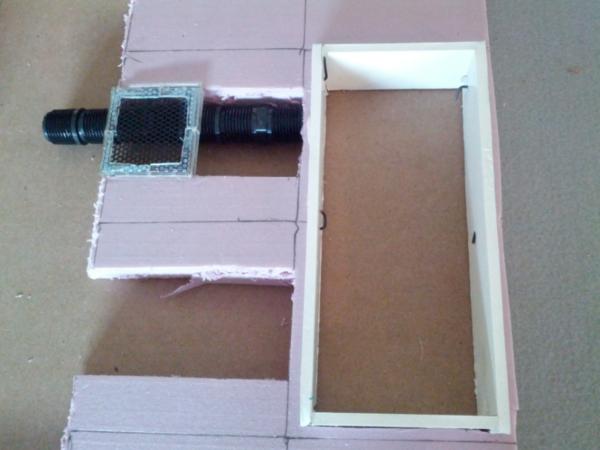
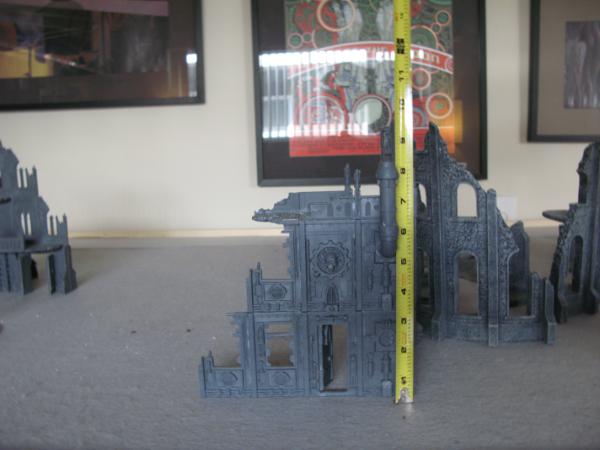
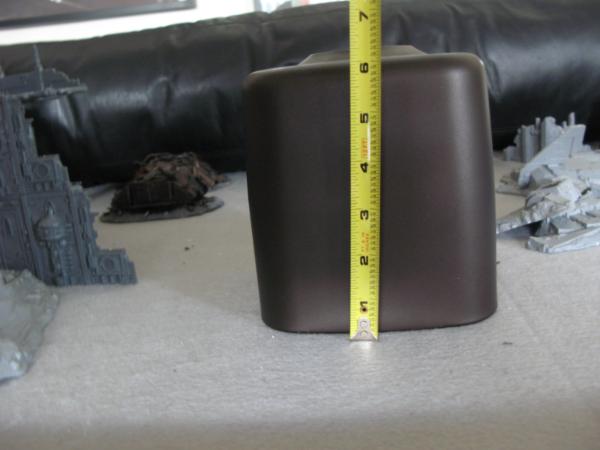
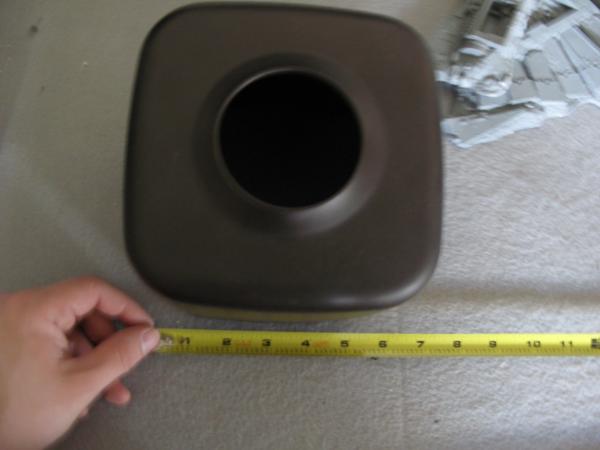
I'll be building this using this:
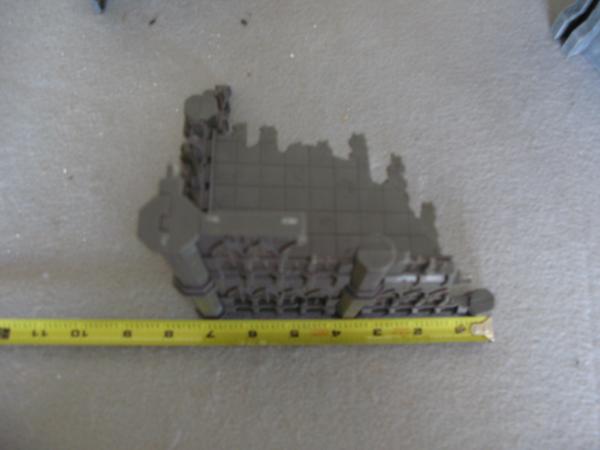
It's a big metal box for what I believ eto be tissue dispensing, but for my purposes it's a perfect
base to my tower. The hole in the middle will be great for letting me potentially add wiring if I want
to light it up or even get more ambitious and have the super lascannon be motorized.
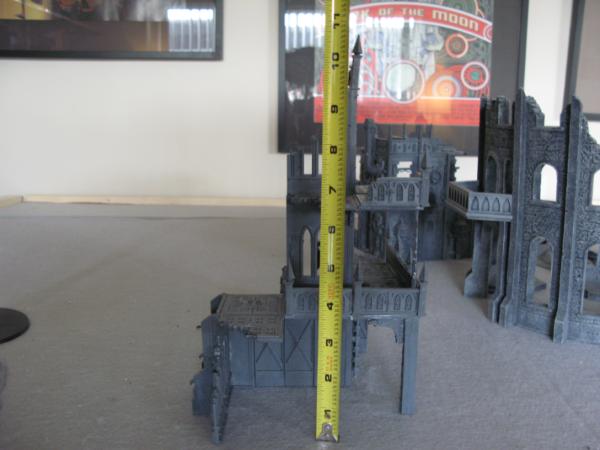
. Size wise as you can see it's big. About 7.5 inches wide at the base, this thing (before guns)
will reach about 8.5 or so inches high. So all in all it should be a pretty imposing piece
on the battlefield
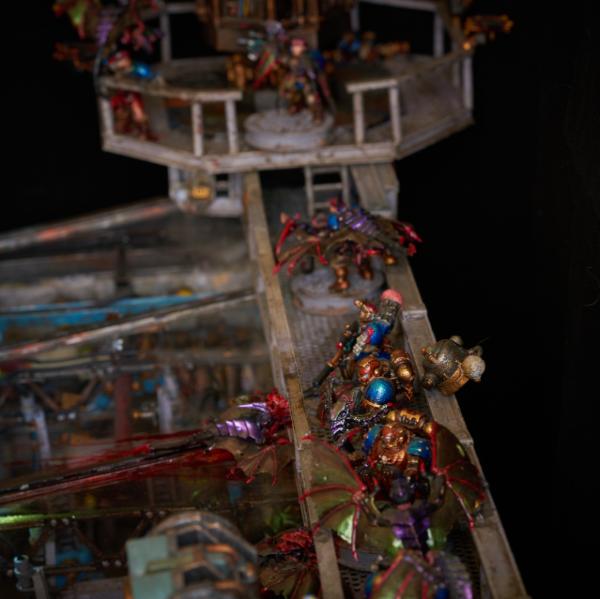
As promised here is the flakk tower again with weapons! They should all be about the right size
and give a good sense of the scale of it. Attached again is the 3ds file.
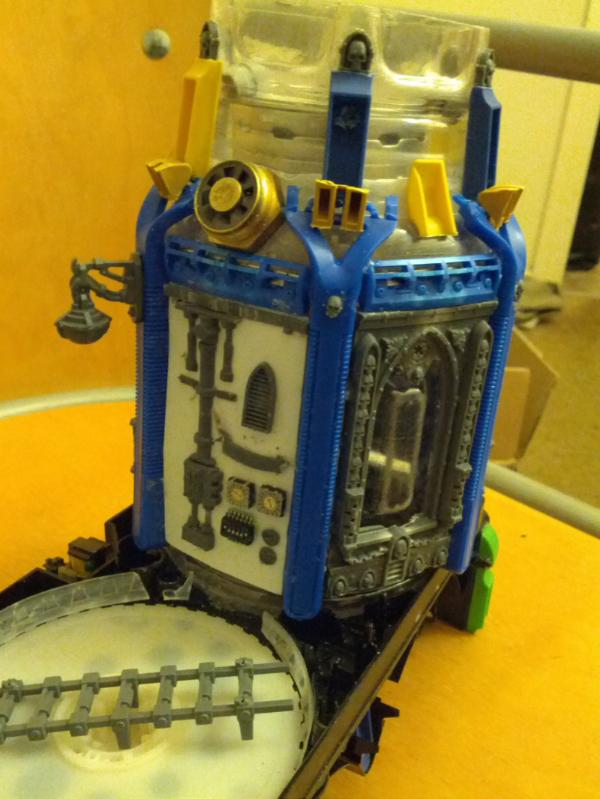
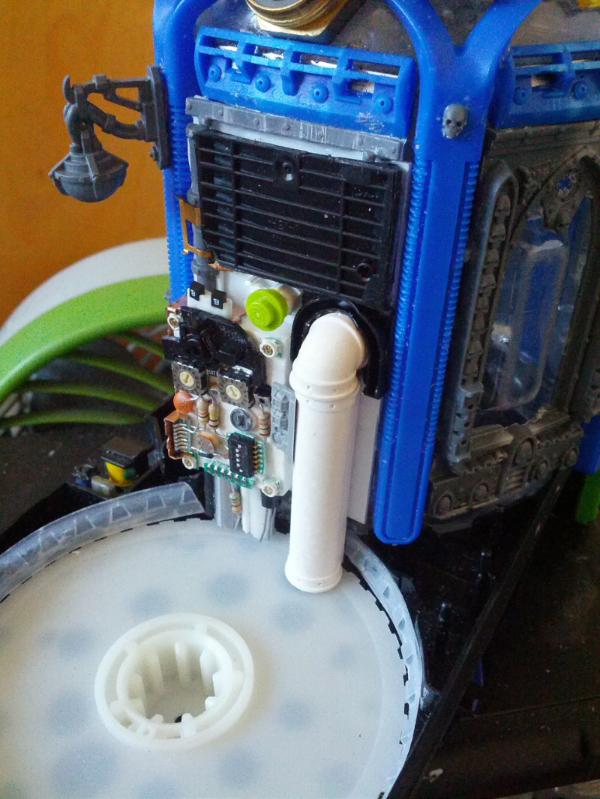
As mentioned I tweaked his original design to incorporate 2 vhs tapes to make it a bit bigger.
I also wanted to use my excess pipe bits/electronics bits (take apart any electronics you dont need!
they are full of wonderful little switches and things!)
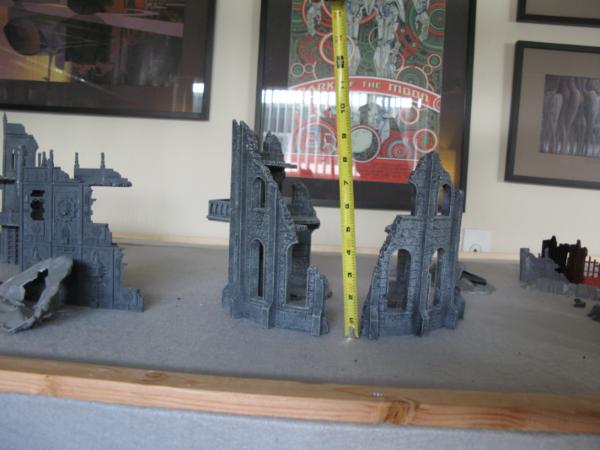
Scale wise it's about 8x8x9 inches tall, which is about perfect for my tiles. Note the front where all
the pipes are is a little barren of a protective wall, eventually I'll add somethere there but I have yet to
figure out if I want the cities of death type point walls or to make my own, so that's gonna
happen later once I finish the other buildings and take stock of my remaining bits.
as before still waiting on more walls to surround the edge of it, and i still have to figure out where i'm putting the ladder, but otherwise it's in pretty good shape.
Eventually i'll also add the flicker bulb as per the tutorial to light it up but I have to figure out the wiring. For now it's time to work on the tiles.
This message was edited 1 time. Last update was at 2013/06/27 05:48:14
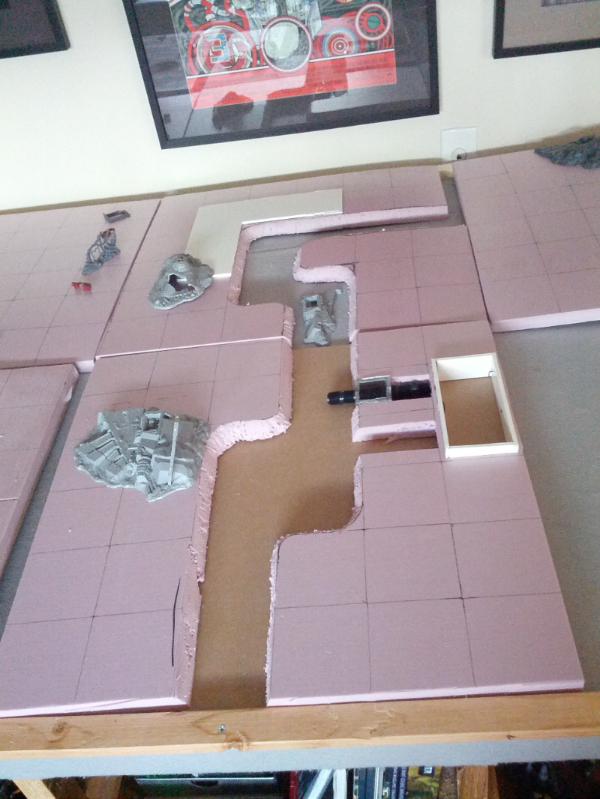
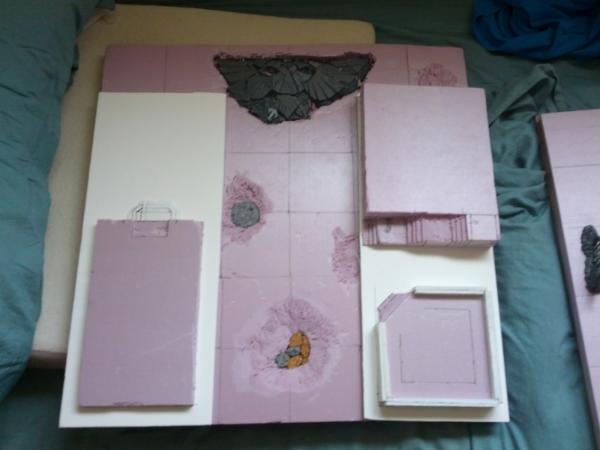
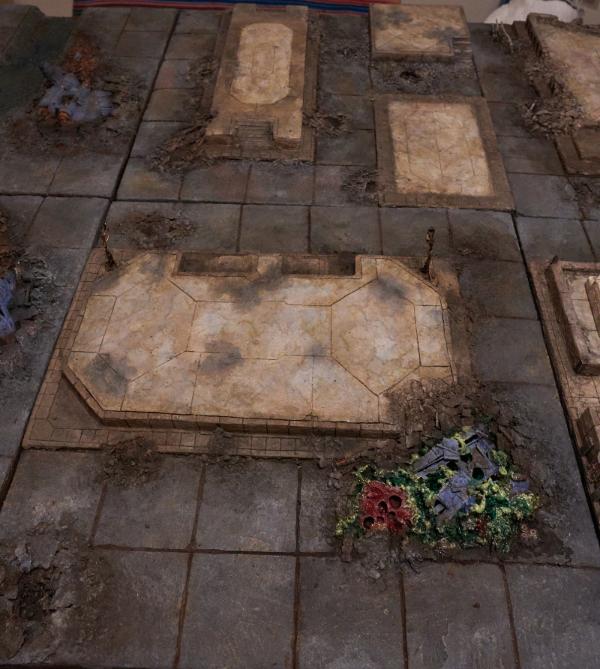
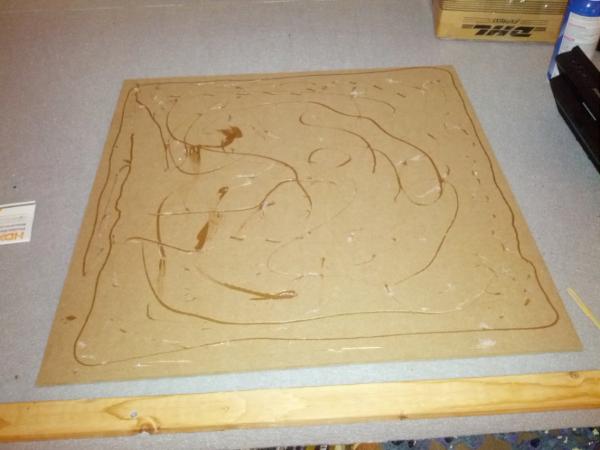
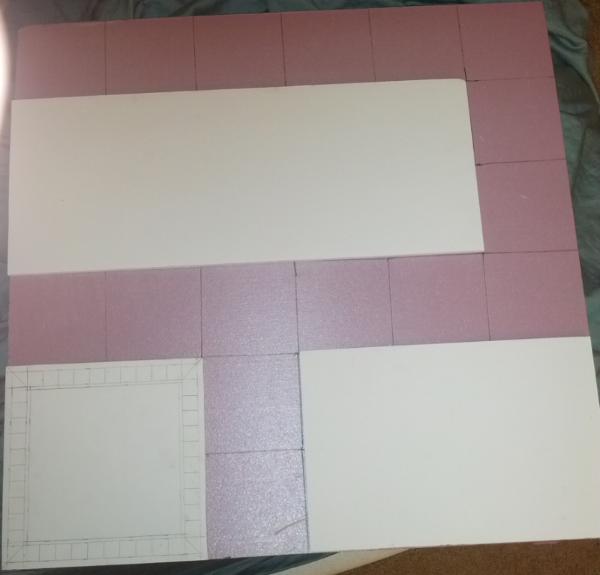
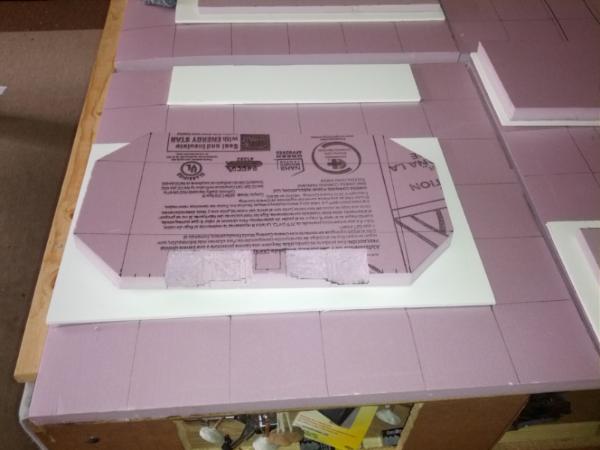
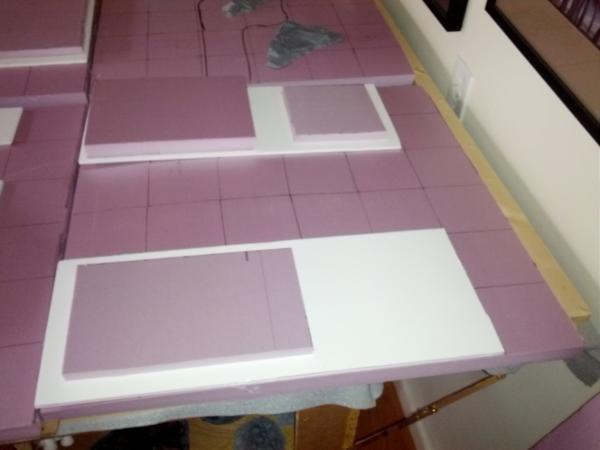
quick update: all the mdf boards are cut and the pink foam cut and the initial 4inch grid laid out on top.
I glued one tile down with liquid nails and so far it seems to be holding well with what I would consider
moderate application
Liquid Nails:
Spoiler:
A few things I noticed when drawing the grid:
The most helpful thing I found was making a 4 inch square piece of plastic to help draw it all out.
You definitely want this to be as precise as you can because error propogation means that as you
start drawing out your grid you'll suddenly be off by an inch or so. It's best to error on just smaller
than 4 inches than just bigger, especially given the width of whatever you are drawing the lines with.
Initial Layout:
Spoiler:
Finally I've also been working with a friend who has been showing me the ropes on casting.
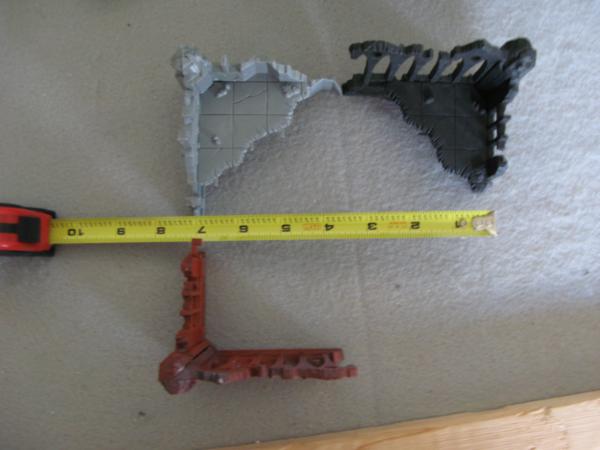
I decided to try and cast a few wall pieces/the main razorback turret stand. I dont intend to cast
any weapons because I have enough and they are too detailed, I just wanted to try casting stuff
where losing a bit of detail here and there/messing it up slightly wouldnt affect it much.
The basic process is relativly simple just lots of steps. The main idea is first you have to secure
half of object to some medium, then cover it in whatever goo you are making the mold in
(in this case a silocon rubber I think). Once that has set flip it over, remove the medium
it was stuck too (without pulling it out of the now set goo!), and do the other half.
Once you have both halves you can start casting away in resin/plastic/what have you.
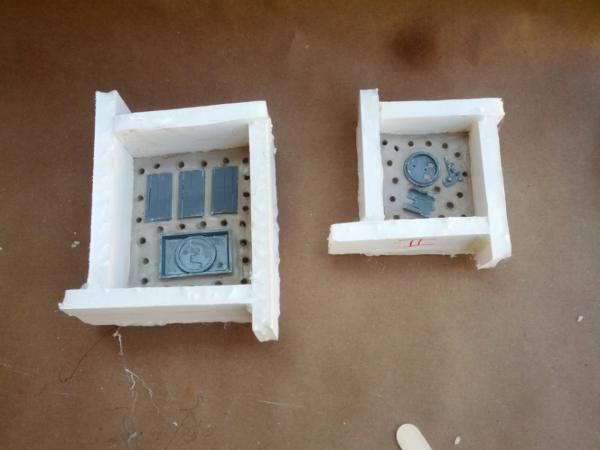
In our case we embedded the objects in clay like so:
The clay holder:
Spoiler:
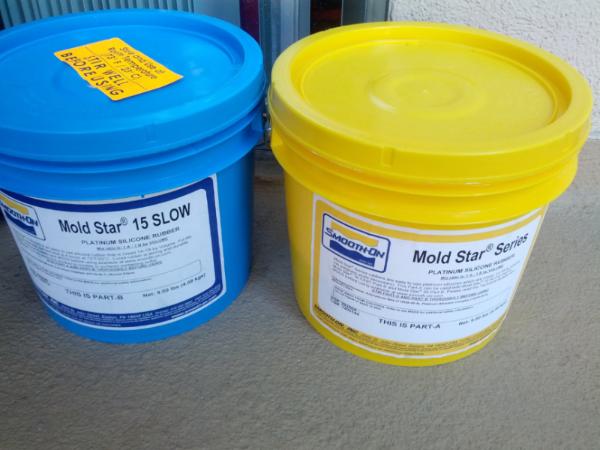
The Silicone Rubber we used to make the mould:
Spoiler:
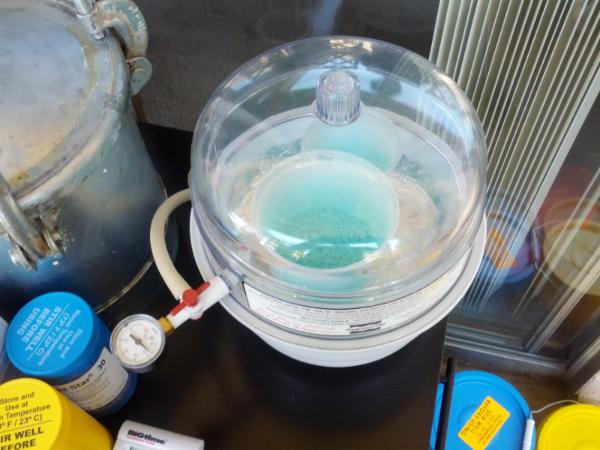
Then today we went ahead and did the mixing and the initial pouring of the first half of the mould
A key thing to realize is that air bubbles are killer, so we had to use a vacumn chamber to remove
as many as we could from our goo before pouring it into the clay holders. Once that dries tonight
we'll do the other half of the mould making and then actually seehow well they cast (and when
casting we have to again worry about air bubbles in the plastic, though it's mildly less crucial here
since we can always try casting again)
Yay vacumn!
Spoiler:
While this method is not the only one (and a bit time consuming), it apparently is the most flexible
and can handle the most types of shapes/materials while still providing a high quality. However it is
NOT really cheaper than buying the bits unless you are doing it en mass (and im talking on the order
of minimum 10 casts). I'm fortunate in that my friend already has all the tools or I wouldnt be able to do this.
That said it's still a great learning experience.
Just recieved my foam coat so tonight will be experimenting with that testing.
The primary thing I need to test is whether doing pre-coating detail work in the foam (to carve out the lines/tiles) is worth the effort or not.
Stairs and craters I'll still be carving int he foam, im just wondering how well it retains the tile lines.
I also need to see what the inclusion of the grit does and how I want all that to look
Here's how the foam carving is turning out. A few things I have noticed is that the foam
seems to have a directionality to it, in that carving grid lines one way is easier/smoother
than the other way (which will carve but have lots of mini breaks or snaps int he foam).
While the end result with foam coat should still be smooth, it's something to be aware of.
to cover my boards. I just got my kit and have been messing with it and have found out the following:
1. It's definitely tough stuff, but a minimum of 2 layers (which seems to be 1/32-1/16th thick?) is a must
2. Very carvable and should be perfectly fine to carve tiles, but DOESNT require pre-carving. Actually adding in
the lines in the foam beforehand seems to weaken the result, my guess is because the foam coat tries to
fillin the gap but doesnt quite well and so it just sorta sits there and crystalizes instead of doing what it needs too.
3. One tip I've seen a lot of is adding some latex paint in the mix to slow down the process and give it a base color
and I have to agree it helps a lot. It also should save on some priming.
4. Always use boost with it, and medium grit makes for a great concrete looking surface.
5. One of the best things about it is that with the long drying time you have a lot of time to, well, mess with it to add
cracks/rough patches/etc. I still need to figure out a way to reliably MAKE cracks but there are a lot of points during
it's drying time (2-3 hours to really work with it, after that it's sandable/carvable. I think technically it takes 12 to fully dry)
Quick update this morning and then more later tonight:
Some more river work, carving them out and starting to make the pipes in the straight section.
I got the grill from a computer case and the corner/covering was made from the corners from CD cases. It takes a while but should look pretty good painted.
Now i just need to do 3 more (sigh). I also need to go find the CPU fans to fill in that gap/figure out if it's possible to undervolt/amp them to only run at 100 rpm
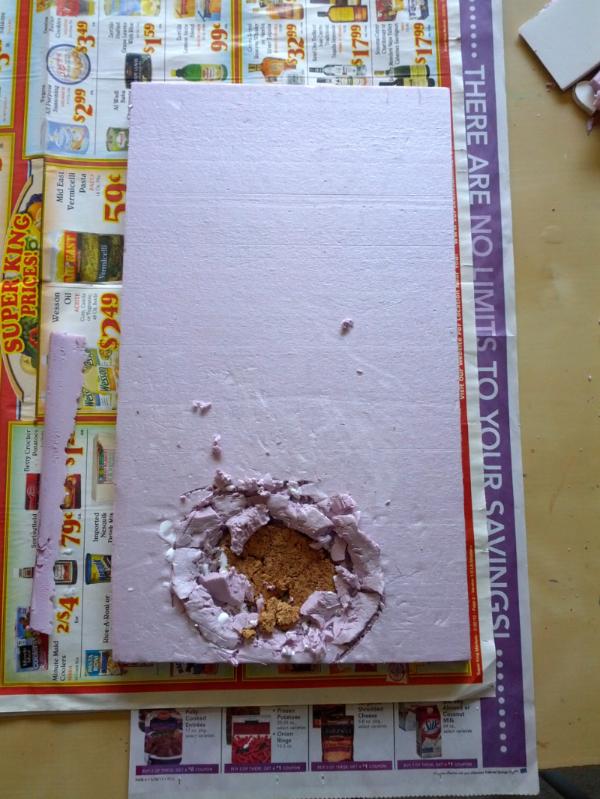
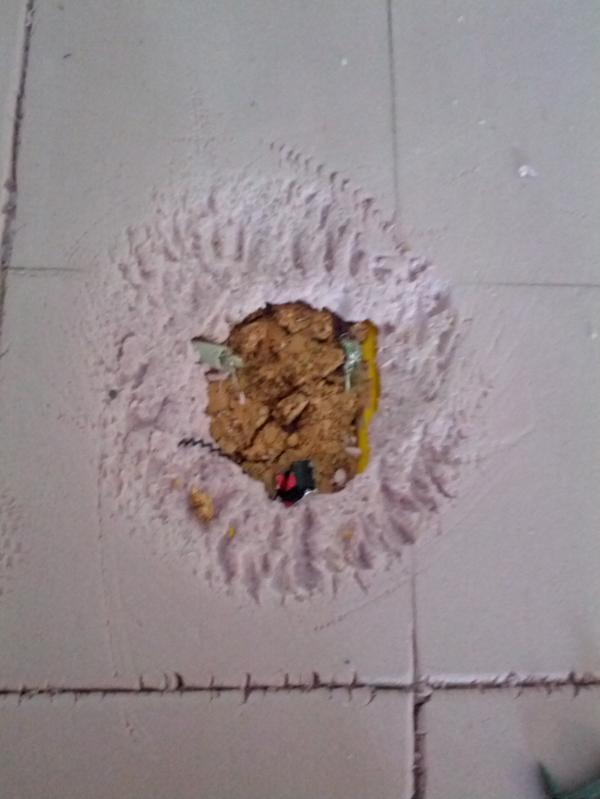
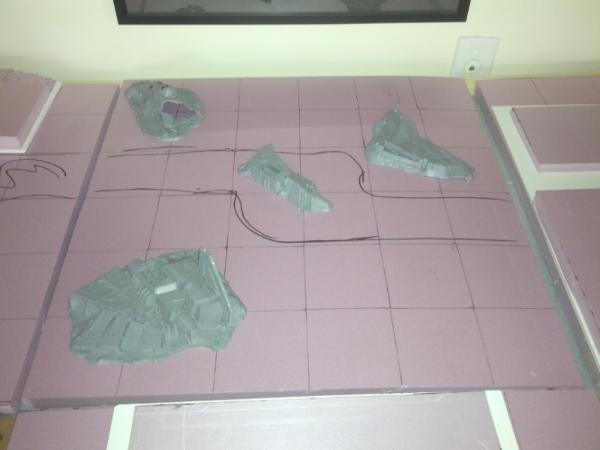
So now that the stairs/foundations are pretty much roughly all cut, it's time to start trying out craters!
THis is pretty much the last main step before starting the coating process, so, of course, we start with a test crater.
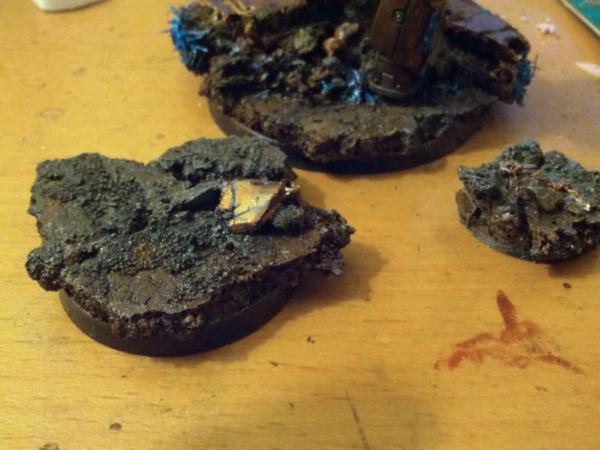
The reason for the cork is because it makes for a great "dirt" look, the idea beying that the crater cracks through the street into the dirt below, should provide some nice reasons to give some depth in color for the really deep craters.
I've been using cork in all my basing, so it should help tie that in too:
And this is the test!
Now dried. Texturing was added after about 30-40 minutes with a drybrush. I tried some screws and such to make it but the brush seemed to look the best. I'd like it to be mostly smooth and then occasional pockets of rougher concrete like texture.
I also painted some newspaper with some foam coat with the idea of being able to break it and make fractured pieces out of it
for each tile
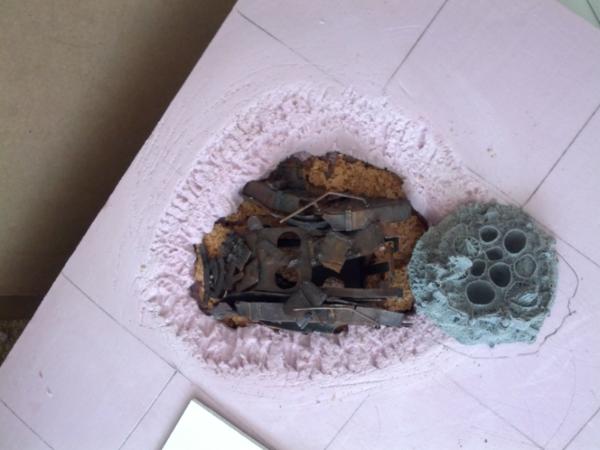
1. Dig out any craters/indents I want to mix it up, most shallow and 1-2 deep enough to punch through to the "cork" dirt layer.
I'm not worrying about debris yet unless it's big enough I have to embed it.
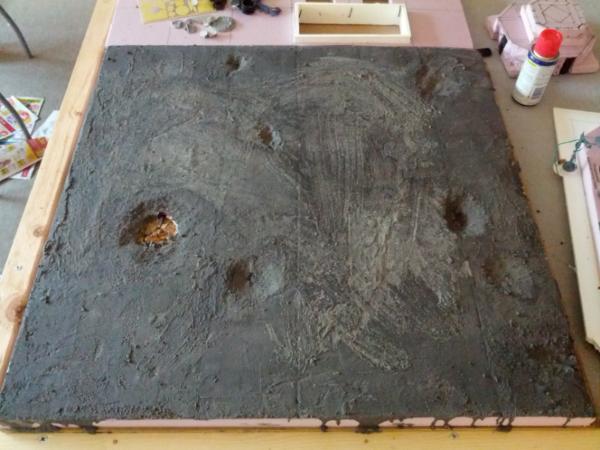
2. Cover the while tile in 1 layer of foamcoat. This will NOT be thick enough to carve but gets a base going. Let it dry
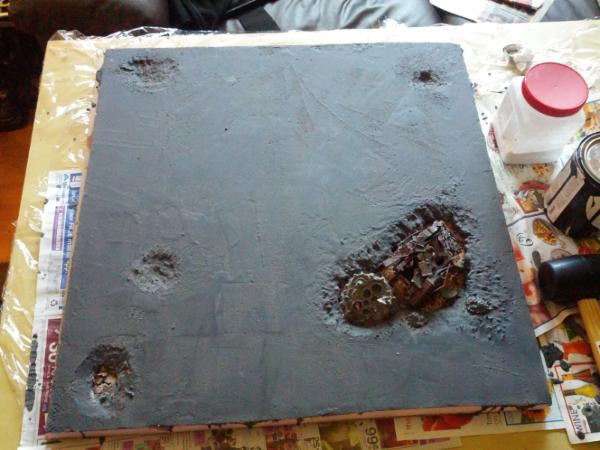
3. Cover the tile in a second layer of foamcoat, and while that is drying embed the big broken crater chips.
4. Sand the top if necessary (i want mostly smooth but some rough patches), carve in the lines,
probably add a third thin layer of foamcoat to the craters for more grid. also some boost on top.
5. Foamcoat my foundations/carve/etc (more detail on this later as i get to it)
6. GLue them down then add surface rubble
So right now we're working on steps 1-2. One thing to note is that this process will use a LOT of foamcoat,
so if you decide to follow along just help yourself and get the 25 pound box/associated 32oz boost with it.
Given that 25 pounds of foamcoat is only 3x as much as 3 pounds of foamcoat... it's a good plan (and shipping aint much more to boot)
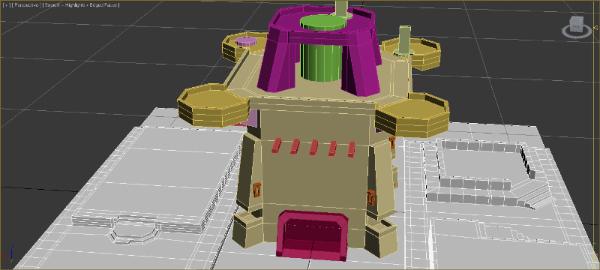
Concourse Sector:
Primus Sector:
Generatorum Sector:
This message was edited 1 time. Last update was at 2013/07/09 20:28:28
Largo39 wrote: I also need to go find the CPU fans to fill in that gap/figure out if it's possible to undervolt/amp them to only run at 100 rpm
You won't be able to get them down to 100 rpm (more than likely) but 500 rpm is probably doable. Find a 3v source (those quarter sized CR2032 batteries http://www.digikey.com/product-detail/en/CR2032/P189-ND/31939?WT.mc_id=PLA_31939 should work) and try it. If that doesn't work, try spinning it with your finger and then applying the 3v - some fans need more than 3v to start up.
My beautiful wife wrote:Trucks = Carnifex snack, Tanks = meals.


 )
)