First off, just to give you fair warning, this is a long post.
I have a bunch (20 or more) of old metal Space Marines. Some are basic, some are (were) Space Wolves and Blood Angels. I originally wanted to convert these guys into Chaos Space Marines for my World Eaters Army, but I figured if you are going to have squads of Marines with bolters for holding objectives, why settle for
CSM? So, then I was going to covert them into bionically enhanced
CSM, and have them "count as" Plague Marines. Then I thought...What am I thinking? If I want Plague Marines, why not have Plague Marines!

I think at the time I actually did a "Face Palm". True, they are for my World Eaters Army, but I can just say either they were swayed more by Nurgle during the Heresy, or they are allies, but they are going to have World Eater shoulder pads too, so I'm leaning toward, the warband commander being tactically savy enough to relize the benefits of objective holders. Anyway, this is a discusion for a different thread.
So I started on the conversions, and after posting some pics, I was asked to make a Tutorial. So, I had to go back and takes some pictures of some of the more basic stuff that I didn't touch on the first time, so I could have more of a narative going from begining to end.
I plan for this tutorial to be "on-going", and as I get more and more pictures, I will edit this first post to include them, and add a post to let you know there is new info on the first post. That way, you don't have to wade through all the random posts and conversations that seem to follow my threads!

(Just teasing guys! If you think this applies to you, it probably does!

)
As I said, these are done to the older metal Marines. I don't see any reason most of these things can't be done to plastic Marines.
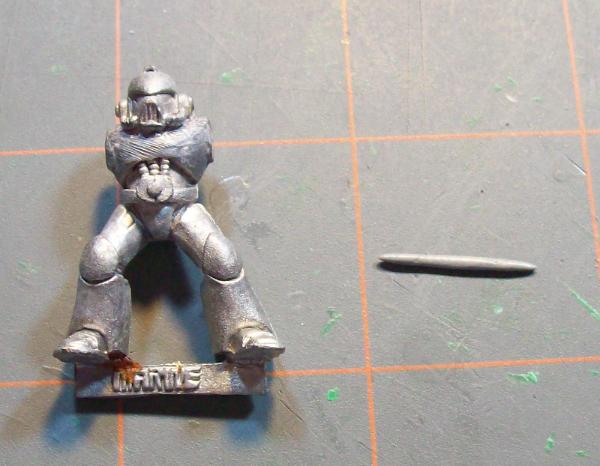
Before you begin, remove all "Loyalist" markings. Having a pair of old fingernial clippers and a set of files hleps a lot!

After that, you should end up with something that looks like this:
I will be switching between several different figures throughout this series. (just a "heads up", in case you notice it.)
Don't woory about making it too clean...it will be a follower of Nurgle after all. But if you want to do some of these conversions for a different army, you can clean it up as much as you like. I also clipped off the "tube thing" on the top of the helmet after I started on this project, you will see that it is gone after a couple of pictures. You don't have to do this, but if you are going to add a helmet spike or horn to the top, it will make it easier.
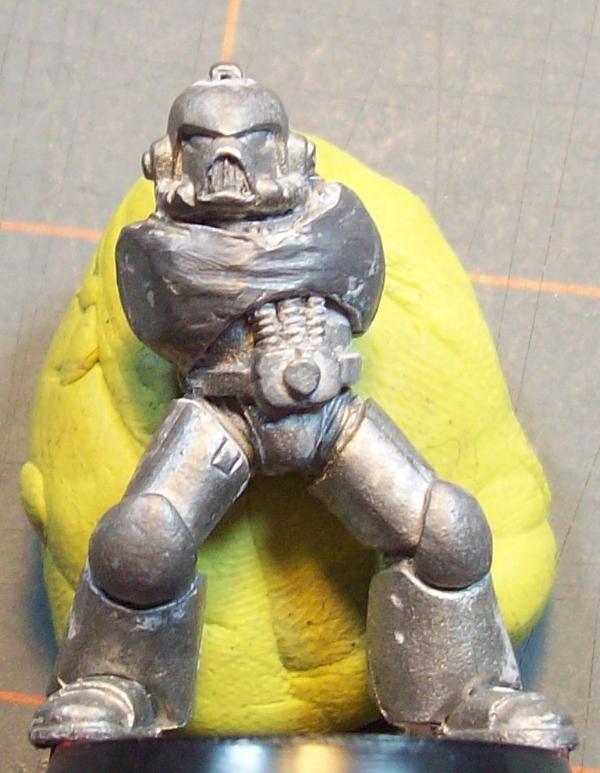
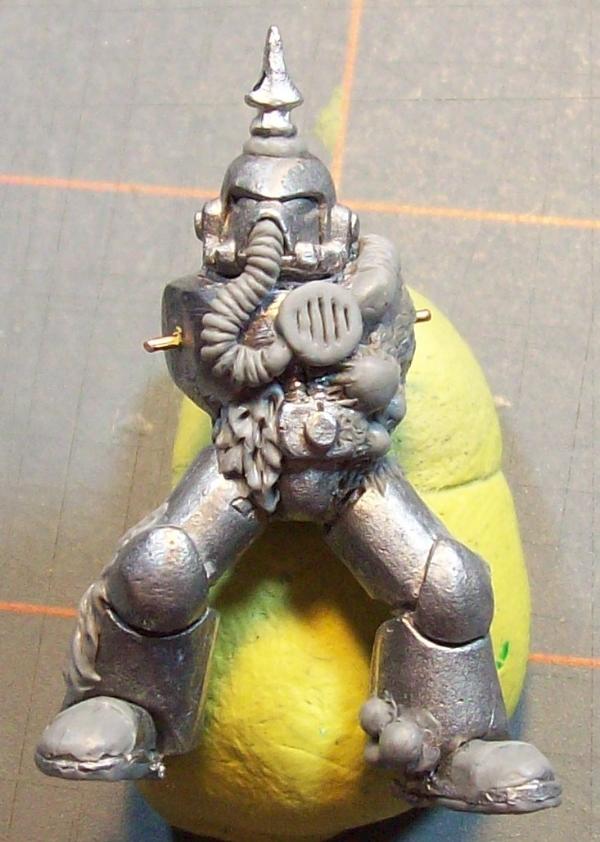
First I am going to add an extra breathing tube to the helmet. I'm not sure why Marines who are completely infected with noxious gases and such need extra breathing tubes, but it looks good.
Roll out a piece of
GS to the thickness of the tube you want. I use ProCreate instead of Kneadatite (Green Stuff), but ProCreate is gray stuff, so I still just call it
GS. Feel free to use what ever sculpting material you are comfortable with. I like ProCreate the best.
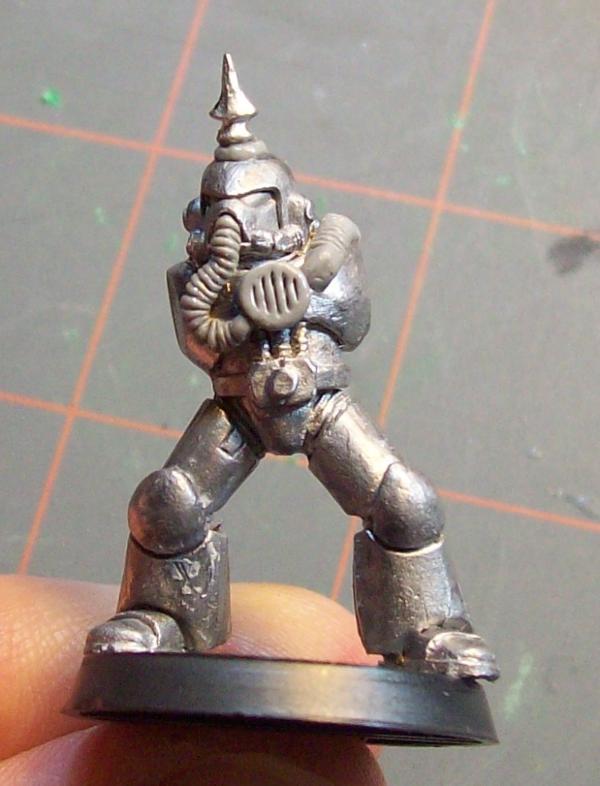
Take the tube, and place it where you want it. For this one, I want the tube to go from the front of the mask back to the backpack.

Using a sharp sculpting tool, I make fairly shallow indentations from top to bottom along the the tube, spaced very close together...leaving a little extra at the front to make whatever sort of attachment to the helmet that you like. I made mine kind of look like a gas mask...the choice is yours.
When you are done, it should look "something" like this.
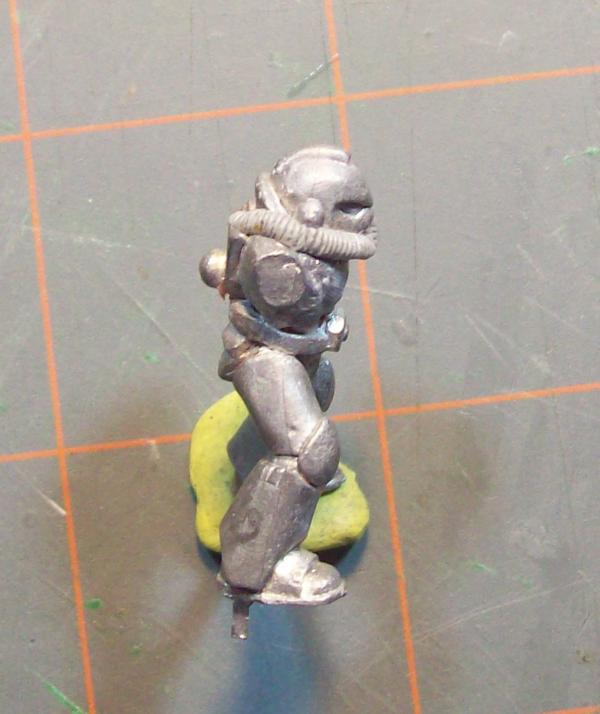
I did not make mine too clean because...Nurgle! You can make it look cleaner if you want to. And if it doesn't come out the way you want it too, take it off! Do it again! You really do have quite a bit of time before it gets too hard to work with. Even after it dries, if you are not happy with it....take it off! Do it again! This is not gold we're working with, if you waste a piece of
GS smaller than a pea, who cares! Unless it's your last bit...in that case, you need to order more!
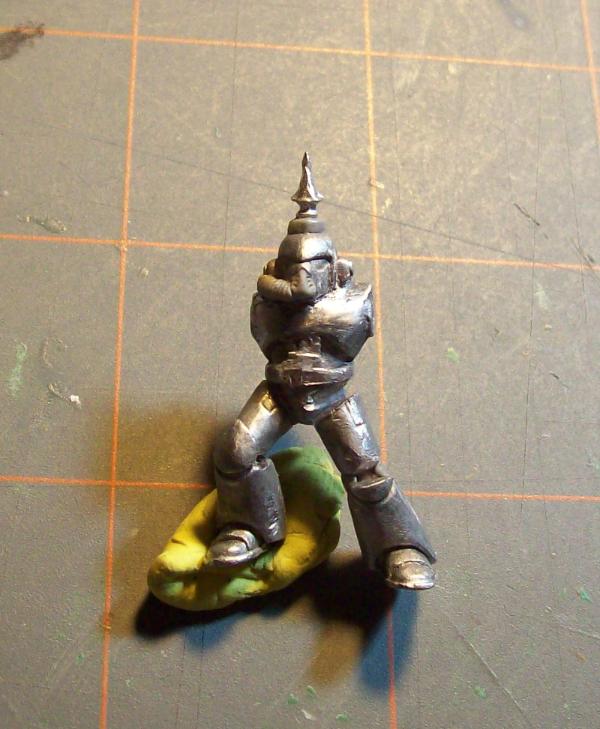
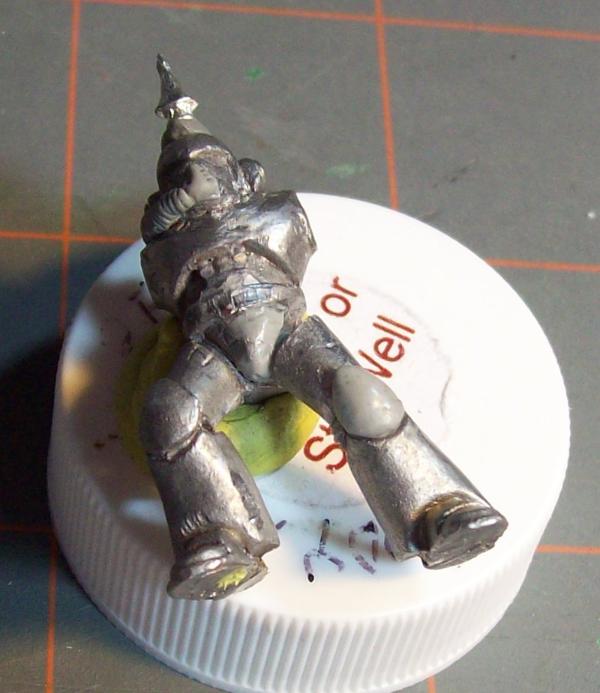
After that, I did not like the stance of this model...he was leaning too far forward. So I cut off his leg at the knee. (you will also notice that I have cut off the tube thing from the top of the helmet.)
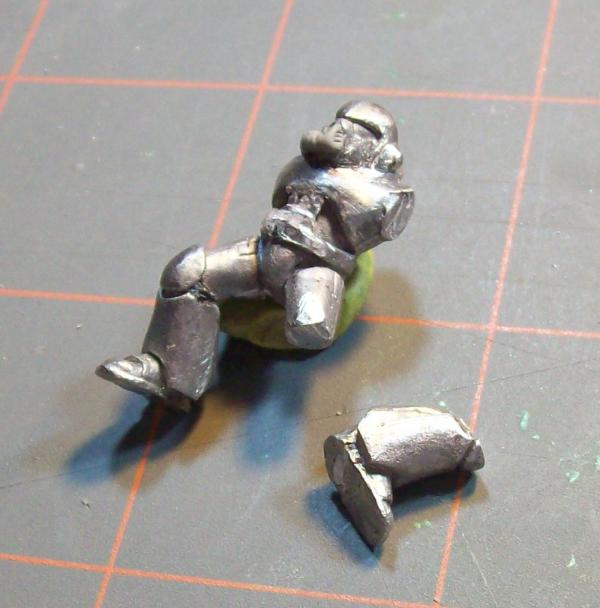
Even that wasn't enough, so I cut it off again at the hip. I will then pin it back together.
(forgot to take a picture of this)

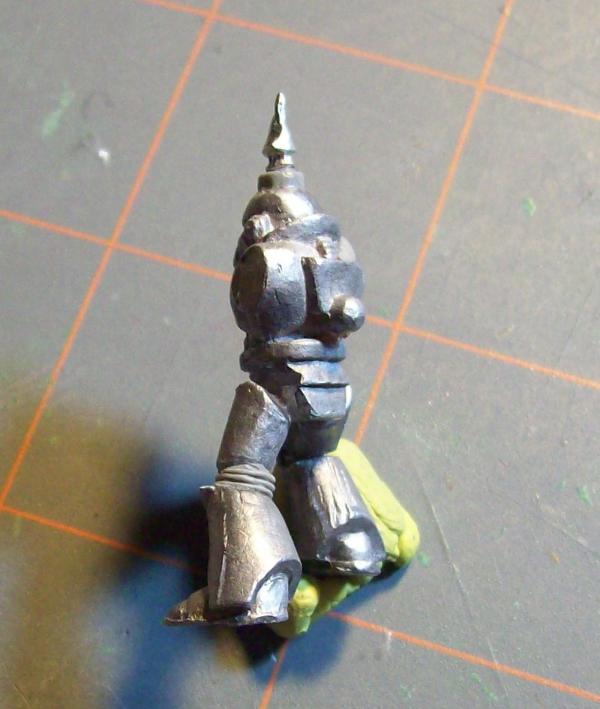
Here is the model with the leg pinned into a "Captain Morgan" sort of pose: (also, I have drilled a hole in the top of the helmet, and added a spike from the trophy racks from a metal Chaos Terminator.)
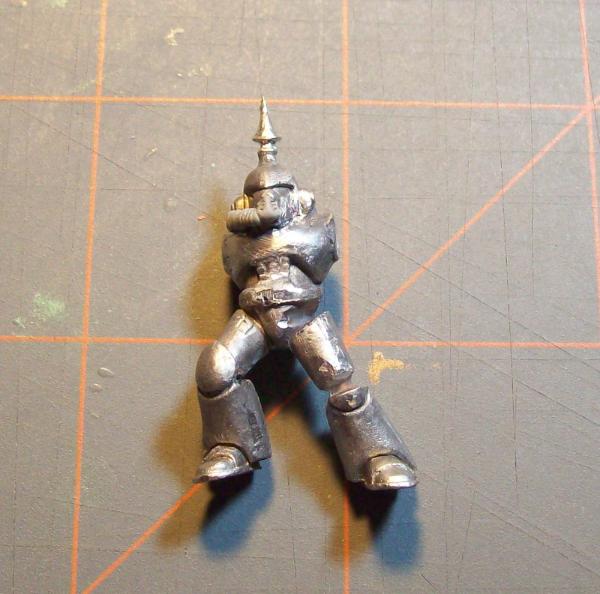
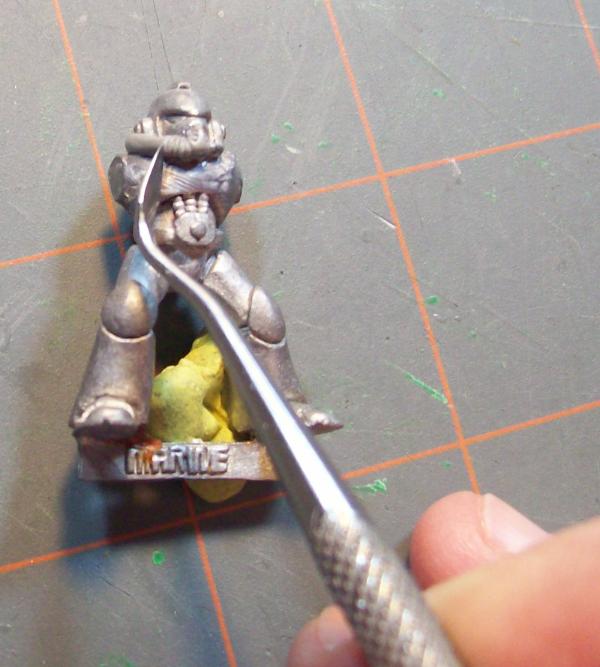
Once the glue is good and cured, I take a small bit of
GS and stuff it in around the back of the knee. (also, I have added a small bit of
GS around the helmet spike, and smoothed it out to form a ring that not only looks good, but it makes the spike more secure.)
I didn't go al the way around to the front because I will add the missing part of the knee cap that I cut off later.
Then using a similar porcess I used with the tube, I make the knee joint look like the "accordion" material that Marines have at the joints.
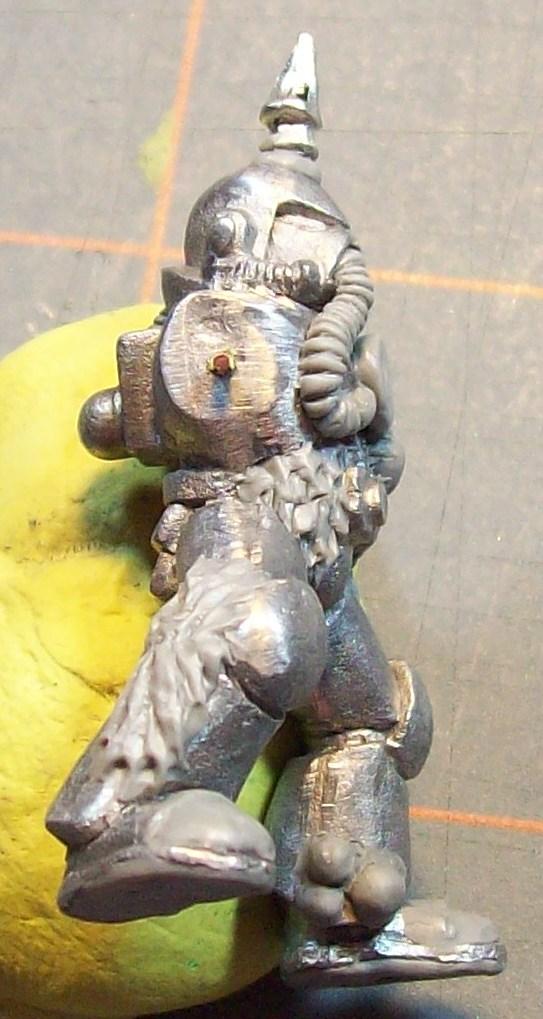
Using the same process as I did with the tube, I made more tubes for a different Plague Marine, along with a "Chest Vent". The chest vent is simply a small ball of
GS smashed flat, and "vents" added using the same technique as the tube ridges. Just make lines where you want the vents to be, and then make them deeper, and smooth them out.
Then I got kind of advanced...I don't have good pictures of the process, I'll hopefully get those later, when I do another
PM. I added fairly large balls of
GS of differing sizes. Once those cured, I added very tiny bits of
GS around them, and moved it around untill it looked like the large boils are stretching the skin around and underneath them...That was the plan anyway, I don't know if that comes across in the pictures.
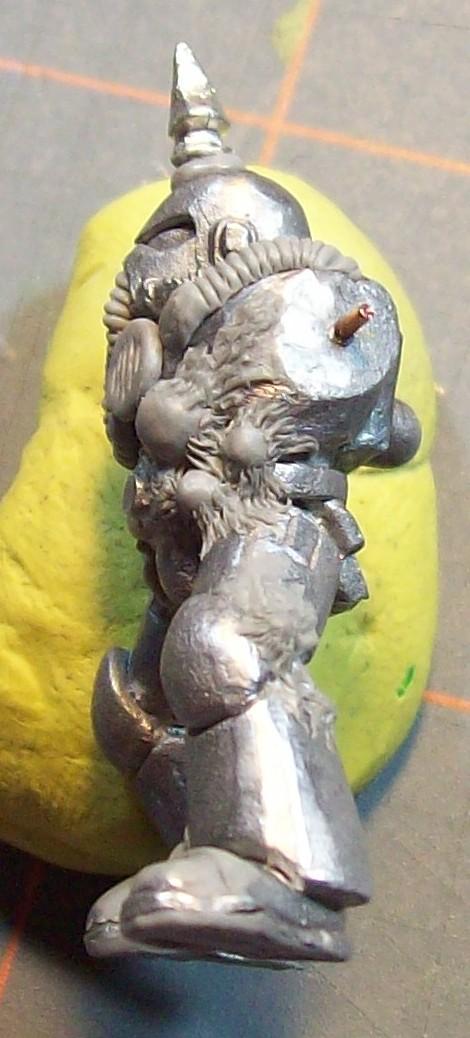
You can see here, on the bottom of the Marine's left leg, there is the start of the process, I still need to add the skin parts around the boils. Also, under the right side of his chest armor, there is something...I'm not even sure what it is, it just looks gross!
I just put a blob of
GS there, and moved it around to kind of look like skin there had stretched beyond the breaking point and then ruptured. There will be lots of goo and puss coming out of this area later.
And on the side of his right leg, you can see some sort of....thing....again, just played with a blob of
GS until it looked good.
Most of this is trial and error. Just play around with the
GS with it until it looks good. There will be plenty more to this tutorial as I get more done.
Thanks for looking, and feel free to comment and definately post pictures of your results if you try these things!
RSJake
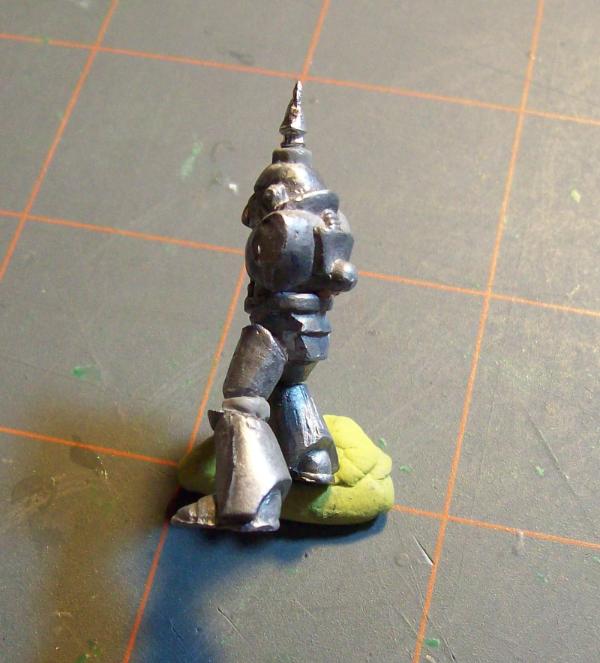
*EDIT* Updated info inserted:
I finished off the first guy's legs, I used
GS to re-create the knee cap, and the crotch guard that was damaged by the hacksaw when I altered his leg.
*END EDIT*


 You are one good sculpter