Switch Theme:

Quick, Easy and Effective Terrian-Part 3: Quick and Simple Hills  [RSS] Share on facebook Share on Twitter Submit to Reddit
»
Author Message
Advert


Forum adverts like this one are shown to any user who is not logged in. Join us by filling out a tiny 3 field form and you will get your own, free, dakka user account which gives a good range of benefits to you:
  • No adverts like this in the forums anymore.
  • Times and dates in your local timezone.
  • Full tracking of what you have read so you can skip to your first unread post, easily see what has changed since you last logged in, and easily see what is new at a glance.
  • Email notifications for threads you want to watch closely.
  • Being a part of the oldest wargaming community on the net.
If you are already a member then feel free to login now.


Made in au
Scarred Ultramarine Tyrannic War Veteran


Melbourne, Australia

Part 3 of the Quick, Easy and Effective Terrian series.
Other parts:
- Quick, Easy and Effective Terrain- Part 1: Rock Formations
- Quick, Easy and Effective Terrain- Part 2: Boulders and Hills


Quick, Easy But Effective Terrian- Part 3: Quick and Simple Hills


The easiest way I've found to make simple hills that look great!

Tools and Materials List

- Pen & Paper
- Scissors or hobby Knife.
- Thick Cardboard
- Modelling Clay (I used Terracotta)
- PVA/White Glue
- Masking Tape
- Glue Sticks
- Basing Sand and Stones.
- An old paintbrush for applying PVA Glue.
- Paints and Brushes.


Method

Draw out something like this... 3 or more rough shapes (depending on how high you want your hill) inside of each other.


Next you're going to use your Template and cut out your pieces of thick card.
Every time that you trace a shape on the card trim the template until you have your next smaller shape.
You should end up with about 3 pieces like this. Stack them on top of each other and they're already looking like a hill.


Now you'll need a couple scraps of cardboard to make some cardboard sandwiches.
Just add as much height as you want between the levels by sandwiching layers of glued cardboard.
Also remmember to SPREAD THE WEIGHT EVENLY.


Here is my Cardboard Sandwich.


Now you've got your basic shape, masking tape comes to the rescue!
Cover all the gaps with as least about three layers of masking tape.
Make the lengths fairly long to ensure maximum grip strength!
With some minis on it it's already looking like a lot like a hill!


Now get out your modelling clay and cover up all the masking tape bits.
This will give us a nice solid more shaped surface.
It's good to keep the clay moist but not too wet.
This will help it adhere to the surface of the tape and the cardboard.


Now cover it with basing Sand and stuff...


And then paint!


I hope this helps someone,

until next time!

FP.

This message was edited 1 time. Last update was at 2013/01/09 13:20:29


"Whilst we stand, we fight. Whilst we fight, we prevail. Nothing shall stay our wrath"
Guilliman and the Ultramarines are like Manchester United, everyone hates them because they are so awesome!


Made in gb
Crazed Spirit of the Defiler


The eye of terror

I may try this, good idea

If you see slaanesh, just look away.
"I can't look away!!!"
 
   
Made in gb
Longtime Dakkanaut


United Kingdom

Thinking of trying this, however I have no experience of using modelling clay. How easy is it to use? Are there any major does and don't? Are there any brands which are better than others etc. Nice tut by the way, and the results are great hence why I want to play copy cat.

   
Made in gb
Crazed Spirit of the Defiler


The eye of terror

Eldercaveman wrote:Thinking of trying this, however I have no experience of using modelling clay. How easy is it to use? Are there any major does and don't? Are there any brands which are better than others etc. Nice tut by the way, and the results are great hence why I want to play copy cat.


It's pretty simple to use: Just keep moist (Drip water onto it if it starts drying), and then push into where you want it.
Don't let it dry unless you're finished.
Don't know about brands, though.

If you see slaanesh, just look away.
"I can't look away!!!"
 
   
Made in us
Longtime Dakkanaut


Maryland

That's pretty fantastic!

Any idea if it'll work if I cover it in grass flocking and hit it with a layer or two of spray varnish?

   
Made in nz
Scarred Ultramarine Tyrannic War Veteran


Wellington, NZ

Wow. When I saw that result I was expecting to see foam and everything being used but for cardboard, this is fantastic, great work!

___________________ Check out my Ultramarines P&M Blog!___________________


Made in gb
Longtime Dakkanaut


United Kingdom

Ok I'm going to give building some of this stuff a go, I'm going to build half a dozen pieces how much clay do you think id need roughly? Its sold in kilos here so in thinking maybe two or three?

   
Made in se
Regular Dakkanaut


Does it warp?

The Tick: Everybody was a baby once, Arthur. Oh, sure, maybe not today, or even yesterday. But once. Babies, chum: tiny, dimpled, fleshy mirrors of our us-ness, that we parents hurl into the future, like leathery footballs of hope. And you've got to get a good spiral on that baby, or evil will make an interception.  
   
Made in gb
Bane Knight


Imprisoned in stone, Canterlot Gardens.

For something made from card, clay and masking tape, this looks great! I may have to give it a try myself.
   
Made in au
Scarred Ultramarine Tyrannic War Veteran


Melbourne, Australia

Wrakkar wrote:I may try this, good idea


Thanks, plaese post a pic here if you do!

Eldercaveman wrote:Thinking of trying this, however I have no experience of using modelling clay. How easy is it to use? Are there any major does and don't? Are there any brands which are better than others etc. Nice tut by the way, and the results are great hence why I want to play copy cat.

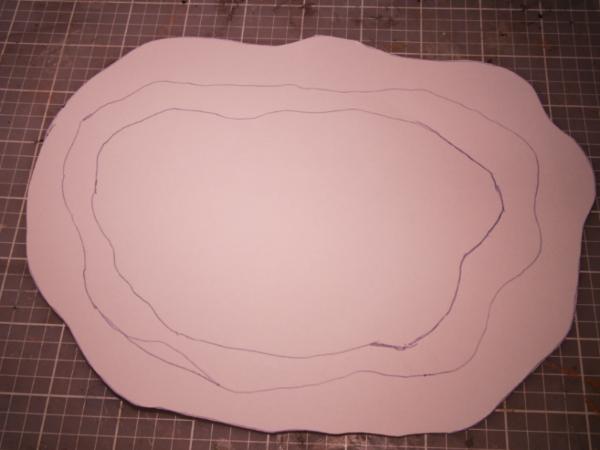
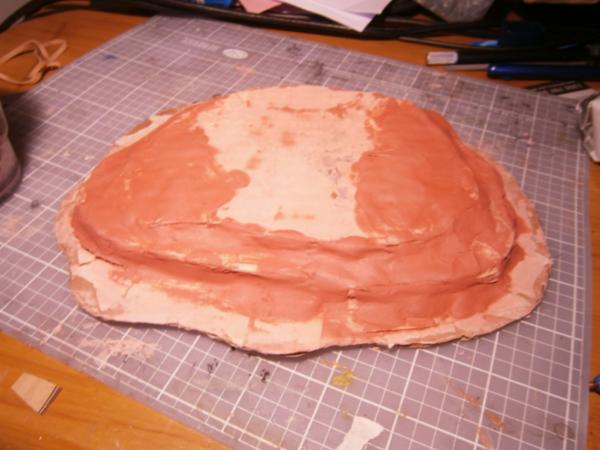
It's really easy to use and that's why I love the stuff! Just slap it on and shape it with your hands in this instance. It's good to keep it moist but not too wet. If it's too wet the cardboard will be more susceptible to warping! The only thing you have to worry about when using air drying clay (like I did) is to KEEP IT AIRTIGHT WHEN STORING IT. With brands I really do not think it matters at all for this. They all do the same basic thing and in this instance it does not have to hold an intricate shape or anything so the cheaper the better!
Do 'play copycat'! That's why I put the tut up here.
Show pics here if you do it!

infinite_array wrote:That's pretty fantastic!

Any idea if it'll work if I cover it in grass flocking and hit it with a layer or two of spray varnish?


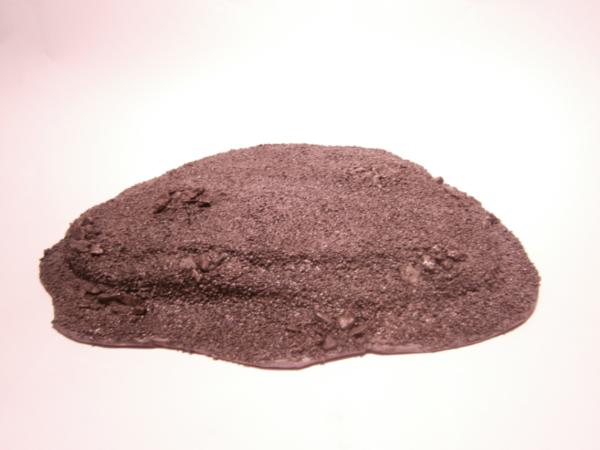
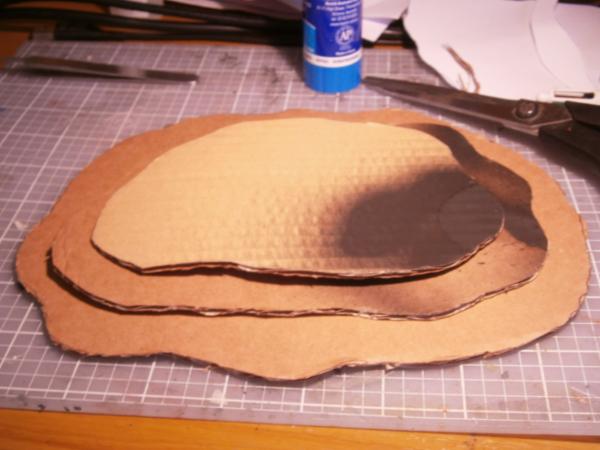
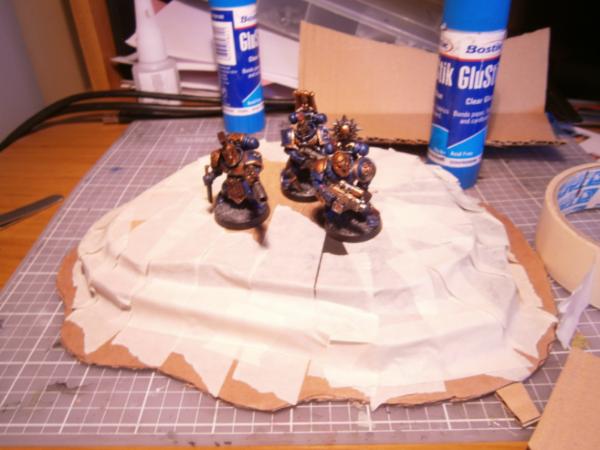
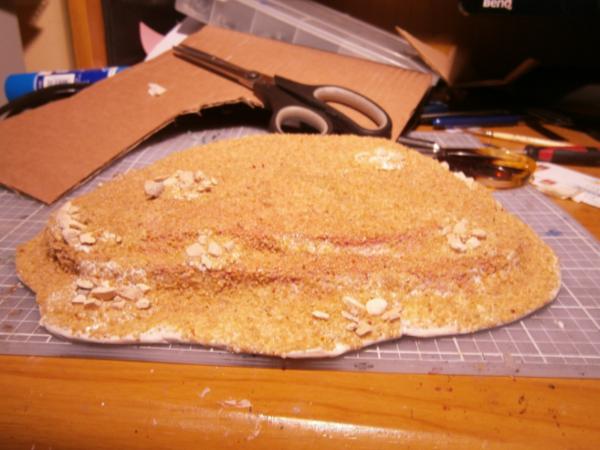
I made a really, really basic hill here. Of course you can add Grass/Flock and other stuff, in fact you could go to all lengths to make it better looking.
Spray Varnish is a good Idea though, it holds everything in place!
Just use one with a Matte finish and not a glossy one...Unless your making a Khorney hill, and even then it's not that good of an idea!

lipsdapips wrote:Wow. When I saw that result I was expecting to see foam and everything being used but for cardboard, this is fantastic, great work!

Thanks mate! For some reason I hate foam and try to avoid it!

Eldercaveman wrote:Ok I'm going to give building some of this stuff a go, I'm going to build half a dozen pieces how much clay do you think id need roughly? Its sold in kilos here so in thinking maybe two or three?

I used around one sixth of a 1kg pack so roughly ~150g per hill would be about right. Two should be more than right! But it depends on how big you want to make it, I'd say buy 3kg and save the leftovers for a rainy day.
JUST REMEMBER TO STORE THE LEFTOVERS IN AN AIRTIGHT PLACE SO IT DOESN'T DRY OUT WHILE YOU'RE NOT USING IT!!!!!

Gargantuan wrote:Does it warp?

Yes and no! (Mine didn't).
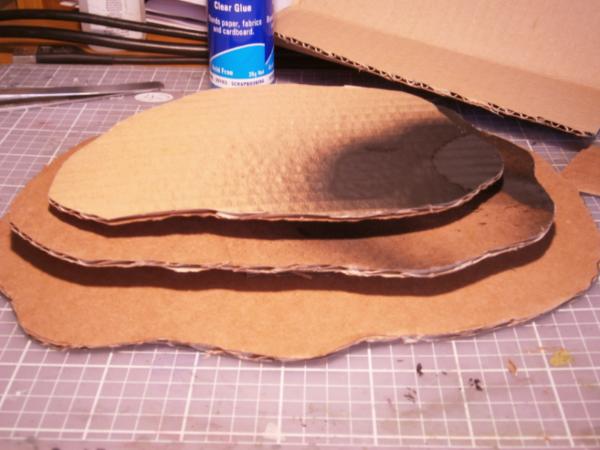
If the cardboard gets soggy then probably yes. But if you don't use too much glue and water it should be right. I only used a glue stick to stick the hill sections together PVA tends to warp...
With enough experience working with cardboard you generally know what will warp it and what wont.
If you want guaranteed no warping start on an MDF or another type of base that is not so susceptible to warping.
Just as a basic rule though go easy on the PVA. The clay will not really warp it. It holds the shape and adds weight thus counter warping if that makes sense.

bloodaxegit wrote:For something made from card, clay and masking tape, this looks great! I may have to give it a try myself.

Do try, it's not too much effort and looks just as good and better than most basic hills.
Post pics here if you do try though!

"Whilst we stand, we fight. Whilst we fight, we prevail. Nothing shall stay our wrath"
Guilliman and the Ultramarines are like Manchester United, everyone hates them because they are so awesome!


Forum Index » Painting & Modeling Tutorials
Go to: