Part 1 of the Quick, Easy But Effective Terrian series.
Other parts:
- Quick, Easy But Effective Terrian- Part 2: Boulders and Hills
- Quick, Easy and Effective Terrain- Part 3 Quick and Simple hills
Quick, Easy and Effective Terrain- Part 1 A: Rock Formations
Hello everyone,
If you don't already Know I'm Flying Pooo. I am going to be starting a tutorial series that will show you some of the various terrain making techniques I have picked up while I have been part of this amazing hobby.
All of the tutorials will be made with simplicity in mind but will still look great on your gaming table! They're also rather inexpensive!
The materials used in these tutorials are also easy to get hold of as most can be found around the house and garden or they are so common that they can be purchased at all hobby, hardware or art stores!
So with out further ado here is Part 1A of the series which is looking at
Rock formations!
START OF TUTORIAL
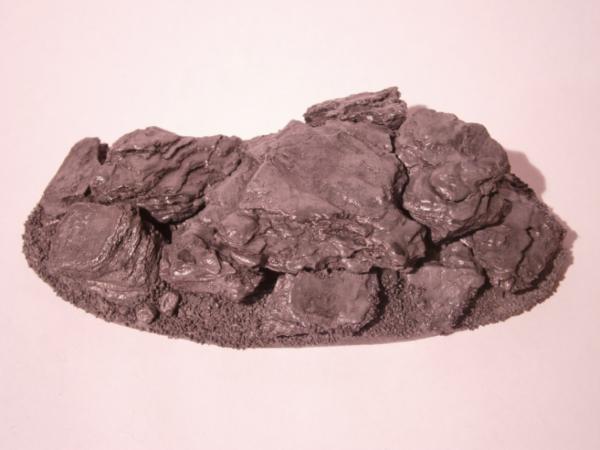
I find that some of the best scatter terrain is the humble rock formation.
I also find that the best thing to use for rocky terrain is actual rocks from the garden, that and bark!
This tutorial which is part 1A will be looking at using bark to make Rock Formations. Part 1B will be looking at using rocks.
The whole process of making this took 2 hours and around 70% of that was drying time. I could have made many more while wating.
I usually make these in groups of about 3-5 and that takes about 4 hours in all.
 Materials List
-A Handfull of Bark Chips found Around the garden.
-Cardboard (The Shoebox type).
-Scissors.
-Pen.
-Any implement that can score clay. (Say a Kebab stick).

-Some Quick Air Drying Clay (I Used Terracotta).
-PVA/White glue.
-Basing Sand.
-Masking tape.
-An old paintbrush for applying PVA Glue.
-Paints and Brushes.
- And If you're lucky an airbrush (Not nessesary but makes things a lot easier).
- Also not necessary but makes things if you have some spray on varnish. It doesn't really matter which type (I used satin furniture varnish).
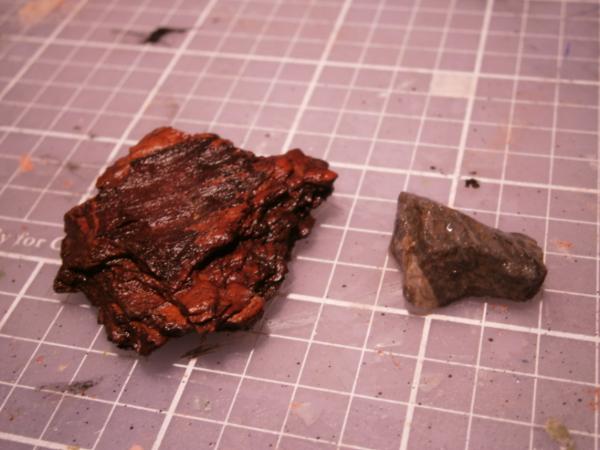
Pictured below are the types of Rocks and Bark that I use. Both I found in the garden, But before you use them you have to wash them.
Let them soak in a tub of warm soapy water to clean off most of the dirt. if there is still some left use a scrubbing brush to remove it.
After all the dirt has been removed allow them to dry in the sun of If you're impatient like me under an incandescent desk lamp. If you're still too impatient (like me again) you can use a hair dryer.
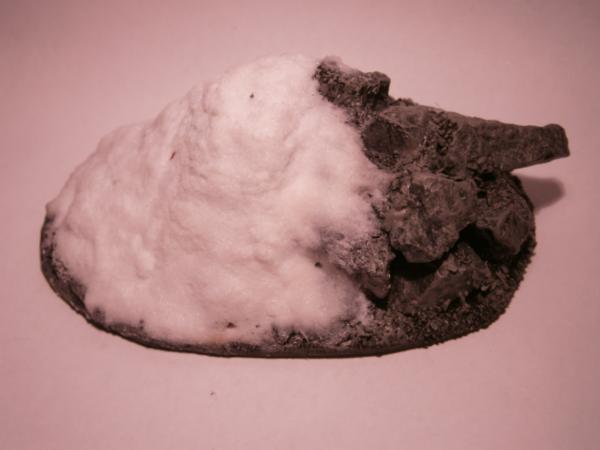
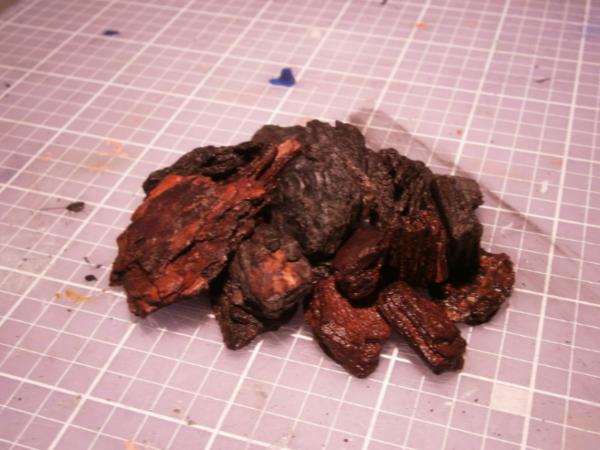
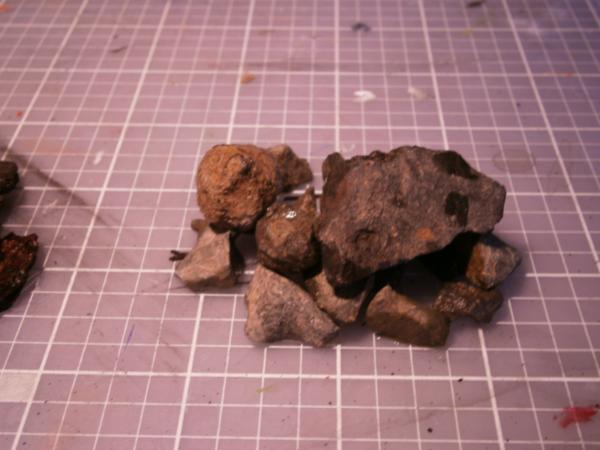
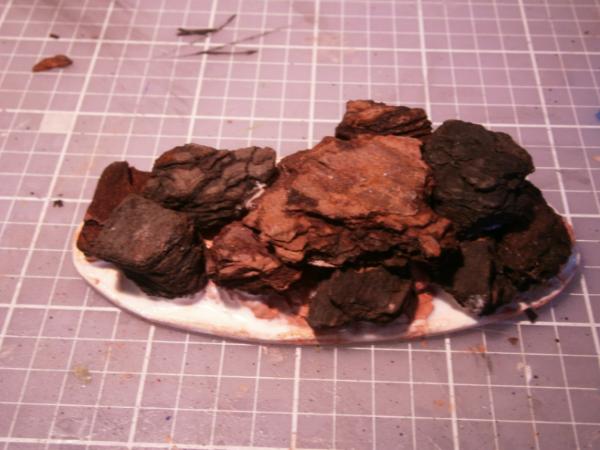
Clumps of these make wonderful rock formations.
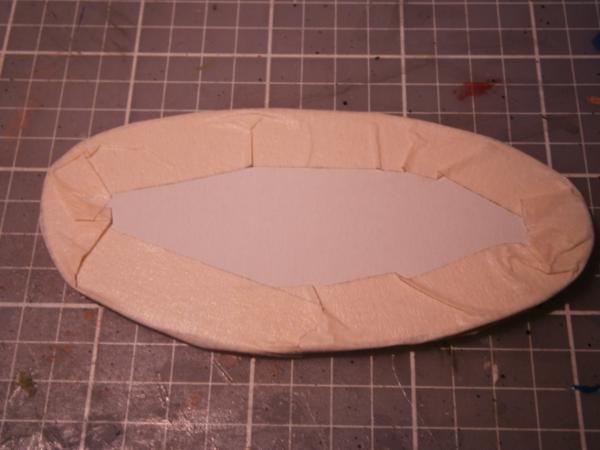
Now we have to make a base for the formation. So draw out the shape you want for the base on to some cardboard.
You could use
MDF, a CD or something else that does not warp but if you treat cardboard right it wont warp. I find that the weight of the clay and rocks keeps it from warping.
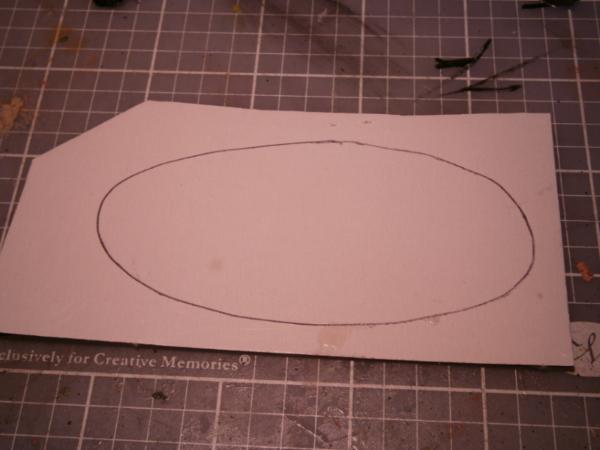
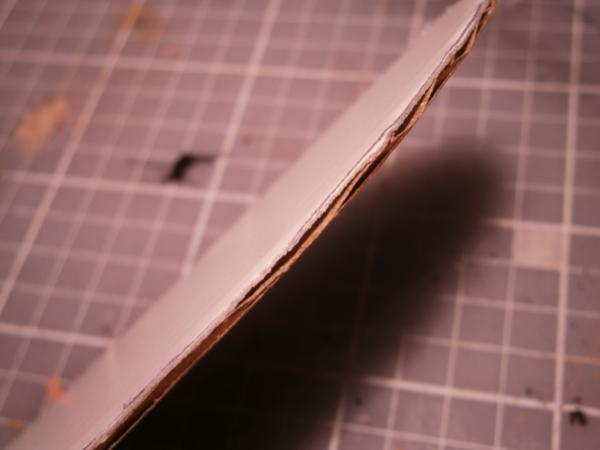
The edges of cardboard can be rather rough so I used some masking tape to smooth out the sides.
What I did now was pile some clay onto the base after painting it with a layer of PVA. This will give the bark something to stick to. It will also give the formation some hight.
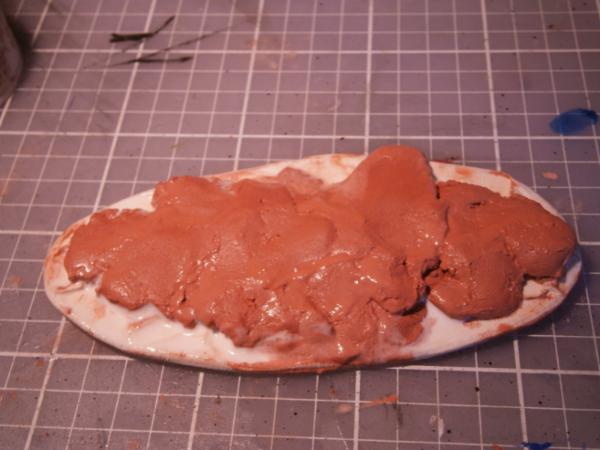
I then scored the clay to give the bark more texture to cling to.
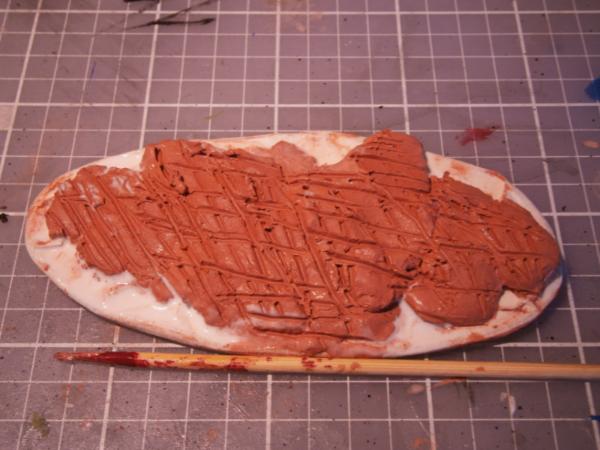
Then I stuck the largest piece of bark in the centre and worked my way out from there. Before sticking the bark onto the base I attached a small ball of the clay to the bottom of it with some PVA. I then scored that clay and stuck it on.

Then I painted some watered down PVA over the rocks. You should let it seep in between the cracks to ensure the rocks hold firm to the base. This also stops the bark from flaking off.
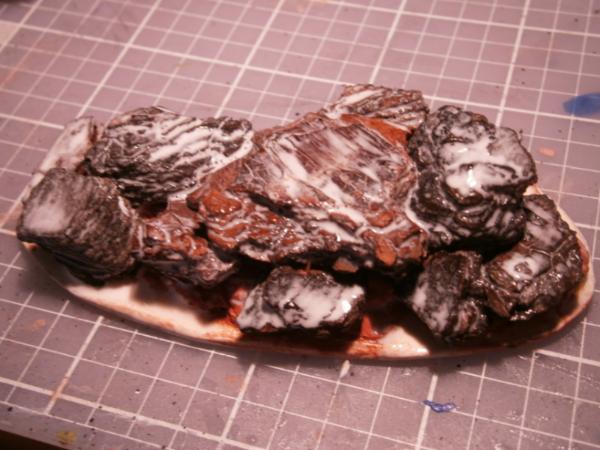
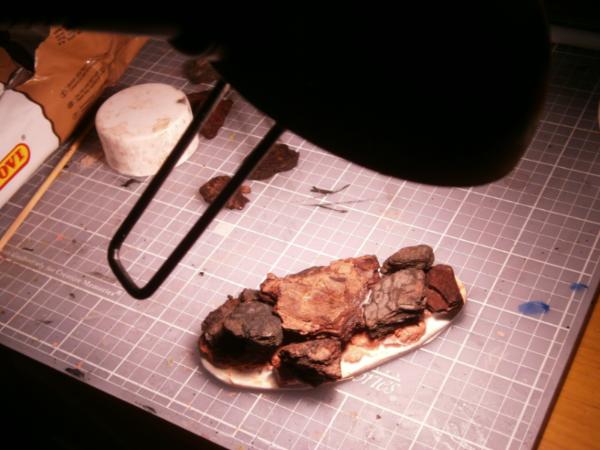
Now place the formation under a incandescent desk lamp to allow the glue and clay to dry. If you're impatient (like me!) you can use a hair dryer.
If your patient and don't want to cause a fire hazard then you can always leave it to dry in the sun.
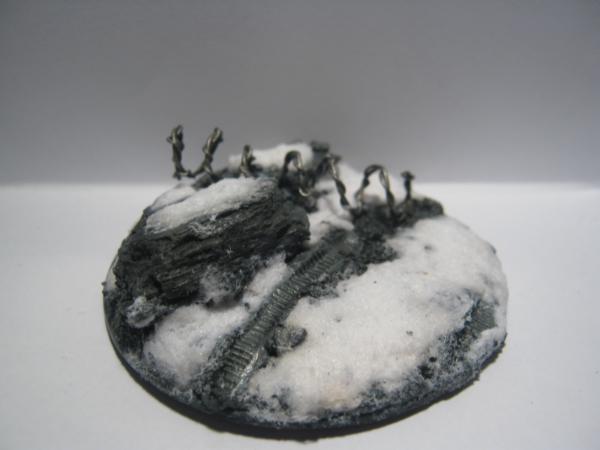
Then I added some good old basing sand to the base.

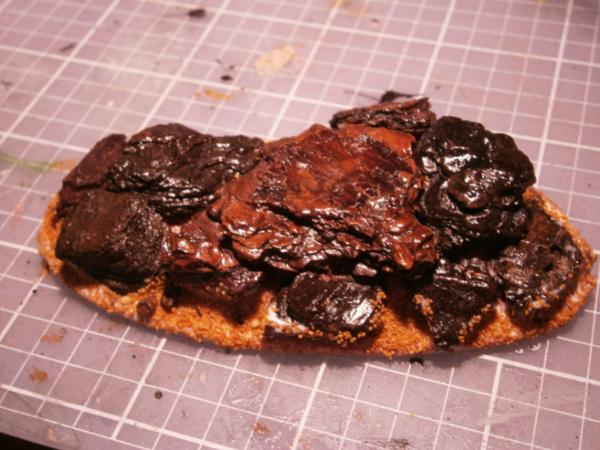
Now what I did was give it a spray of Varnish to seal everything and keep things from falling off.
If you don't have spray on varnish you can always paint it with another layer of watered down PVA.
All that is left now is the painting.
This is how I painted mine:
1st airbrush prime with VMA Grey Primer
2nd airbrush watered down VMC Black
3nd Drybrush Codex Grey
4rd Overbrush 1:1 Codex grey Chaos black
5th Drybrush Fortress grey
5th Wash with very watered down Didi's magic ink (the one that you get from the warstore).
BUT if you don't have an air brush or didi's magic ink.
You can paint it like this:
1st prime Black
2nd Drybrush Codex Grey
3rd Overbrush 1:1 Codex grey Chaos black
4th Drybrush Fortress grey
5th Wash Badab Black
Or you can paint it anyway you like!!!!!!
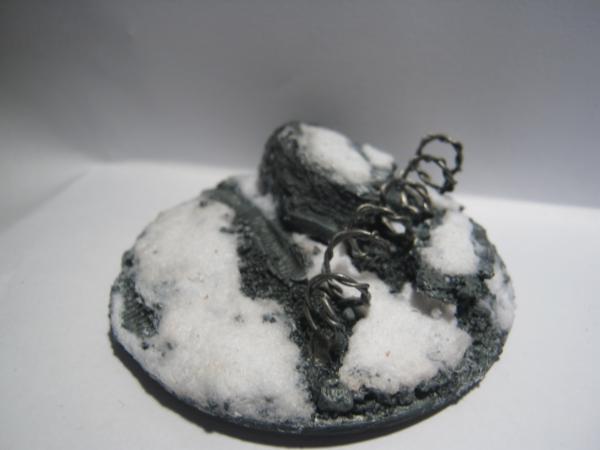
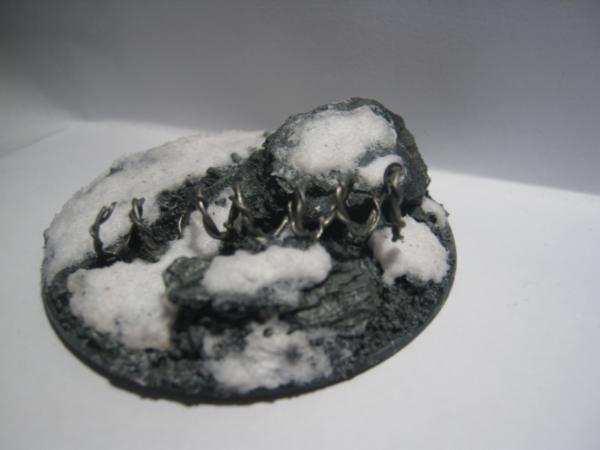
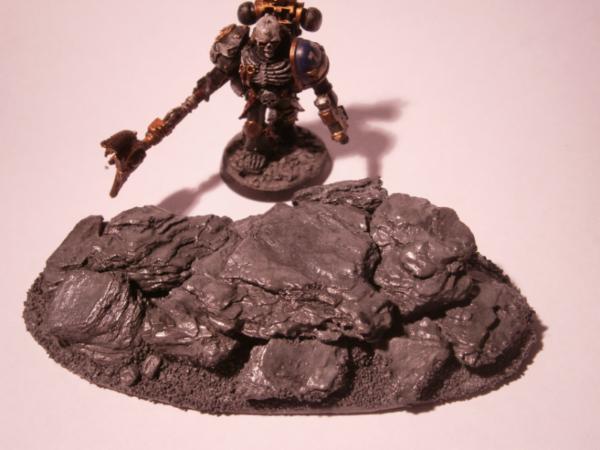
And now you have an awesome piece of terrain, if I do say so myself.
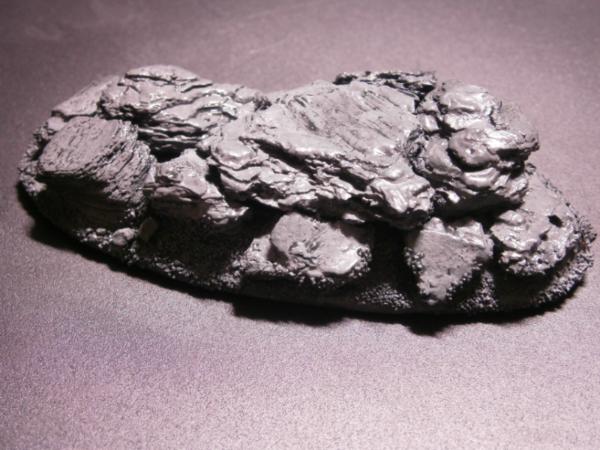
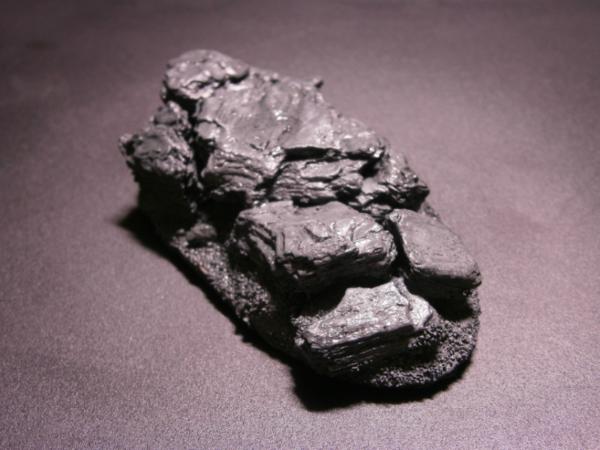
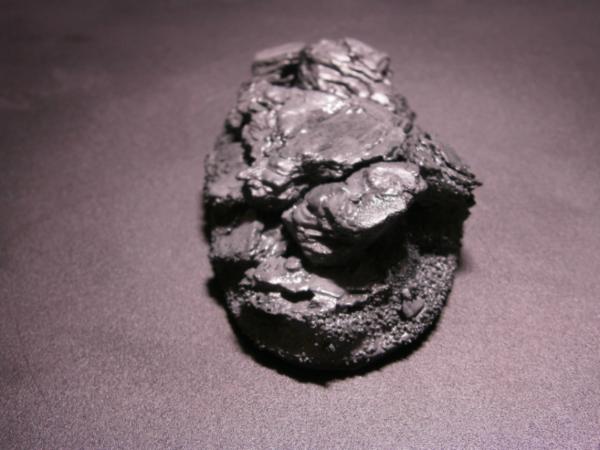
I did just a very basic version I was focusing on simplicity. you can of course complicate it if you like.
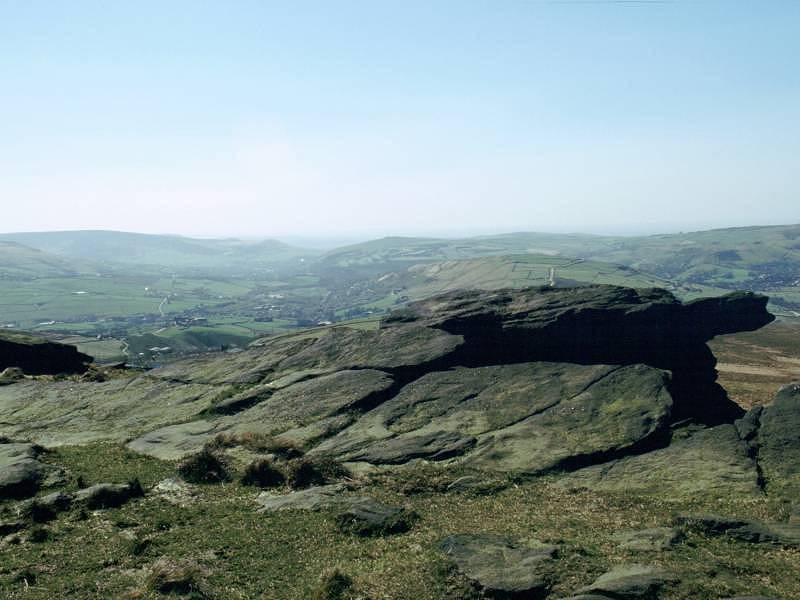
With some more material and some inspiration from nature you can make rock formations a thousand times better than this.
Here are some awesome examples from nature.
The sky is the limit here people! I want to see everyone out do me. If you do post a picture of it here.
That's all.
Until next time!


 "Whilst we stand, we fight. Whilst we fight, we prevail. Nothing shall stay our wrath"
  Guilliman and the Ultramarines are like Manchester United, everyone hates them because they are so awesome!