Hello, everyone!
As promised in
this topic, just because it seems there is someone interested, here it is my first tutorial ever: I will explain how to make in a quick way some ancient paved-like bases made with stone tiles, simply using putty remains (did you noticed that you always prepare more than you need it?) and glue.
I'll personally use this kind of bases for my Thousand Son's units (thinking about the hunting for ancient and powerful chaos relics...), but I think they will work perfectly even for dwarfs, hight elves, and other fantasy armies.

I'm sure a lot of experienced wargamers already know equivalent or even better techniques and I'll be glad to discuss eventual improvements (never finish to learn...), maybe by
PM.

Hope you will enjoy it... for every question, just ask!
 ***
***
 Step 1:
 first of all, you need to prepare (or left from other activities) some putty (in this picture I'm using some standard Milliput) and squeeze it on a tiny layer of talcum powder until you've obtained a putty sheet with thickness about 1-2 millimeters.
Don't care too much about getting a uniformed level for the sheet: until there is not a huge difference, that's really not important.
Step 2: when the putty sheet is dry and hard (I usually wait one night, just to be sure of it), just take it and break it into pieces of different sizes.
(Side note: don't throw away the pieces left from past works! They could be conserved into a box to be used in future...)
 Step 3:
 before starting composing your tile collage, take every single tile and polish it (I use my mother's old nail file and it works good!) until you've obtained a more tapered, but not perfect, one.
Step 4: now it's time for fun! Remember when you were in school and the teacher gave you materials to make some collages? Well, that's the same thing! Take the tiles you've prepared and glue them to the base trying to fit them together in the most efficient way possible (if necessary, change a bit the shape using your tools). Of course, some of them will lean over the edge of the base, but that's not a problem...
 Step 5:
 After a couple of hours (or the time needed by the glue to become dry), cut away the excess parts from the protruding tiles using some pliers or some nail-scissors (the curved blade it's perfect for this kind of works), then polish the new rough edges as made in the step 3 to obtain a more "clean"-looking base.
Step 6: we don't want to leave holes in our bases! So we have to repeat the steps 4 and 5 with other pieces of tile (if it's possible, I'll suggest you to use the pieces left from the previous cut away of the excess. Why waste a new tile for a little, little hole?) until the entire base is filled with our stones.
Step 7 (optional) : Wanna do more? Why don't carve a rune-like symbol on a tile, so? In the base you can see in the picture I've noticed there is a tile a bit taller than the others... so I've used a small awl to decorate it!
***
Now that your base is done, it's time to take colours and paint it!
The palette I'm going to descrive is pretty basic, just because in this way I'm sure that the needed colours are for the most part already owned even from the users that don't have a huge amount of different colours (varnish is expensive, dudes!

) :
- chaos black
- calthan brown
- fortress grey
- bleached bone
- devlan mud
(for the rune)
- regal blue
- ice blue
Obviously, if you feel to use other colours... well, go on your way!
 Step 1:
 we start with a simple, common and almost standard base made with
chaos black.
Step 2: colour the edges of each tile with a generous amount of
calthan brown, paying attention to reach the bottom of the base in the space between them (when it's possible).
Step 3: paint every single tile using
fortress grey. If it's necessary, give two layers.
Step 4: after gave the main colours, it's time for some drybrush to simulate the wear out. Some
bleached bone will work well, in this case.
Step 5: to make the shadow and a minimum dirt effect, go on with a (just a bit diluted) wash of
devlan mud.
Step 6 (optional) : I personally like, for my Thousand Sons, giving a little more darker-dirtier-older look to the base. To obtain this effect, if you want to do it too, just give a second wash of
devlan mud, as described in the previous step.
In the picture you can also see the rune carved into the stone painted with a base of
regal blue.
Step 7 (optional) : going on with the rune, I've completed it with a very thin strate of
ice blue.
...and, after all those passages, the only thing you've left to do is paint the border using your favourite colour (most people, including me, like the brown... but even the black is a good solution), then your base is done!
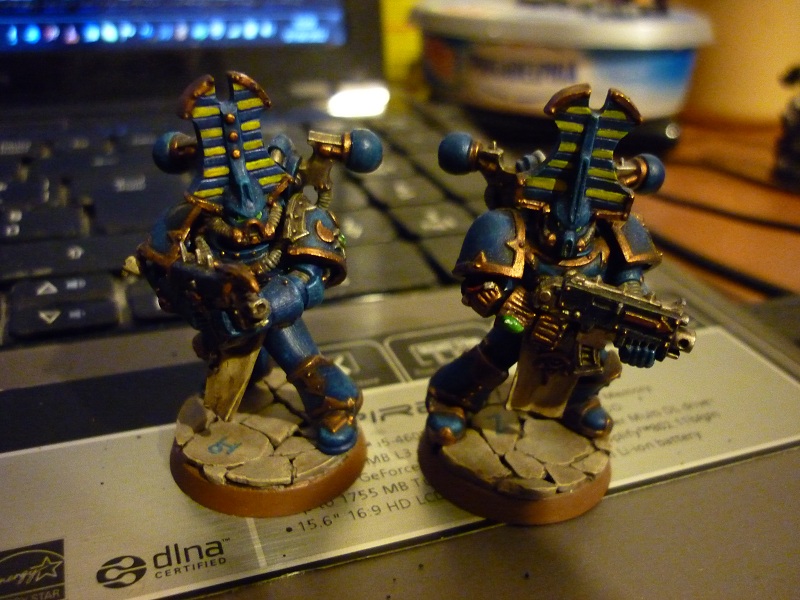
(a pic to show how it looks like with a miniature on it)
***
That's it, people... I've done. Hope you enjoy my work!
Also I'm thinking about preparing a little more accurate tutorial for my website, so if you want to post here or send me by
PM some variations or implementations to this tutorial, I'll be glad to see and discuss about them (some examples: I'm currently working on a black-stone/red-rune combo for my chaos demons, or thinking about some items like books, scrolls or talismans abandoned on the floor of those bases). Comments and suggestions are welcome... see ya!


 Tau 2000pts
