Background
(I was originally going to post this in the thread for
Part I, but I figured I'd post it here to cut down on the load time for the report.)
So if you read the first battle report (and if you didn't, why the heck not!?!), you'd know the Blood Angels got creamed pretty badly early on and didn't have the manpower to make up for it. In particular, Atlas was kind of ticked off about the Doom of Malan'tai and asked me to take it out of my list in the next game (he redacted the request later, but I figured I'd go a game without him anyway). Atlas decided to use the same list, with the only addition being a Chapter Banner (he was actually 30pts short last game because he didn't really add up his points costs properly) but I tinkered around with mine slightly. The list I came up with wasn't as good as the last one, but I wanted to try out some units and hopefully have a closer game than last time (I wanted to take 9 Ripper Swarms, but couldn't justify the cost...

).
Hive Fleet Maliades
Atlas' Blood Host
DEPLOYMENT
We rolled for Mission and got The Relic again. Atlas didn't want to play The Relic
again, so we decided to reroll. We also decided we didn't want to play Purge the Alien or The Emperor's Will either (bleh, kill points and bleh, auto-tie). In the end, we rolled and got Big Guns Never Tire with 4 objectives. For deployment, we ended up with Dawn of War. We rolled for our Warlords' (Dante and the Swarmlord again) traits and got Tenacity on the Swarmlord (ooh that could be handy) and Master of Manoeuvre on Dante (bleh, useless).
We also rolled for psychic powers. Atlas got Prescience and Invisibility for his Epistolary... man, he has some amazing luck rolling his powers!

Meanwhile, the Broodlord got Iron Arm and Endurance (AWESOME). The Swarmlord got Smite, Iron Arm, Warp Speed and Puppet Master (I was hoping for Objuration Mechanicum, but Puppet Master can be handy I suppose). Finally, my 2 Zoanthropes rolled off. One got Objuration Mechanicum and Gate of Infinity (

YEAH!), while the other got stuck with Assail and Shockwave (
NO!).
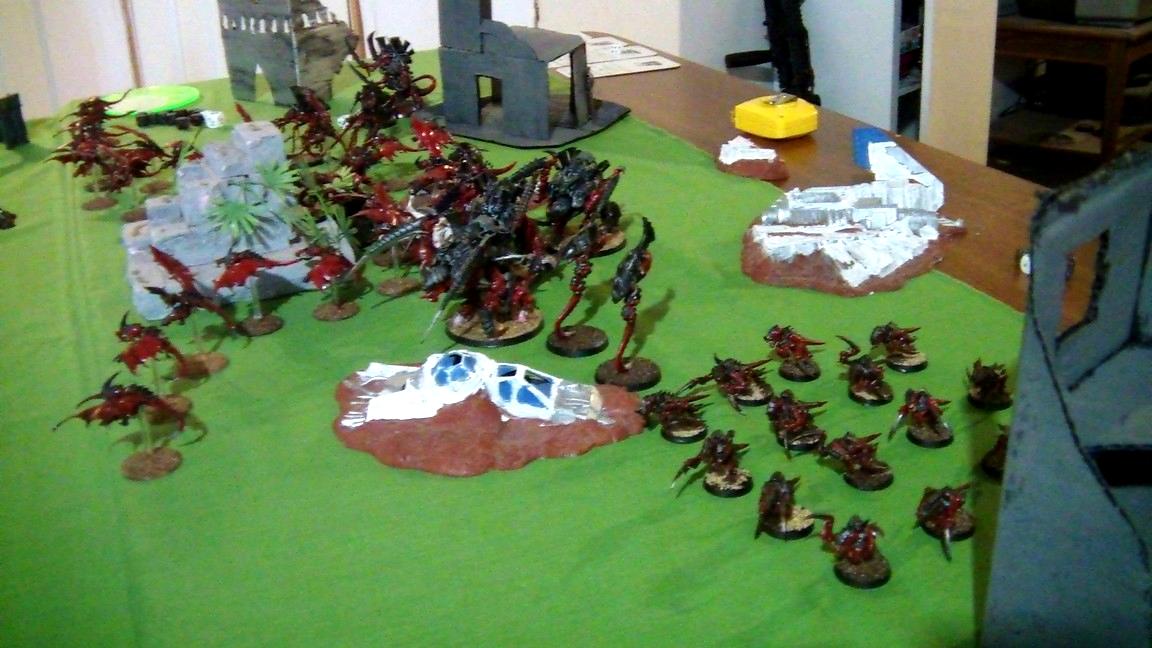
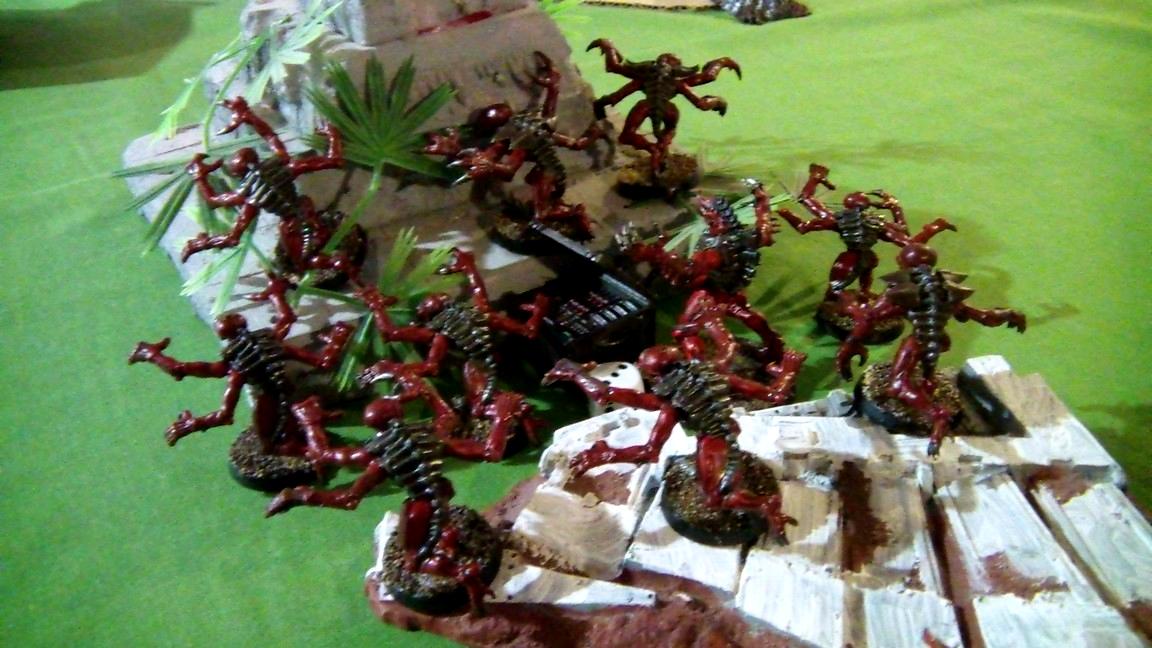
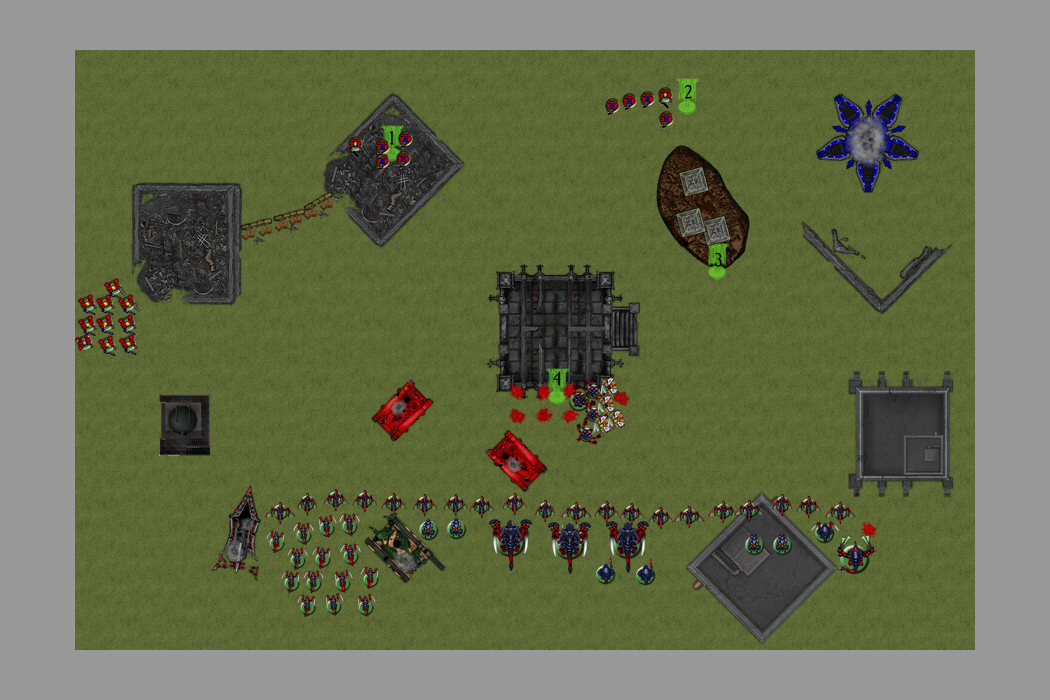
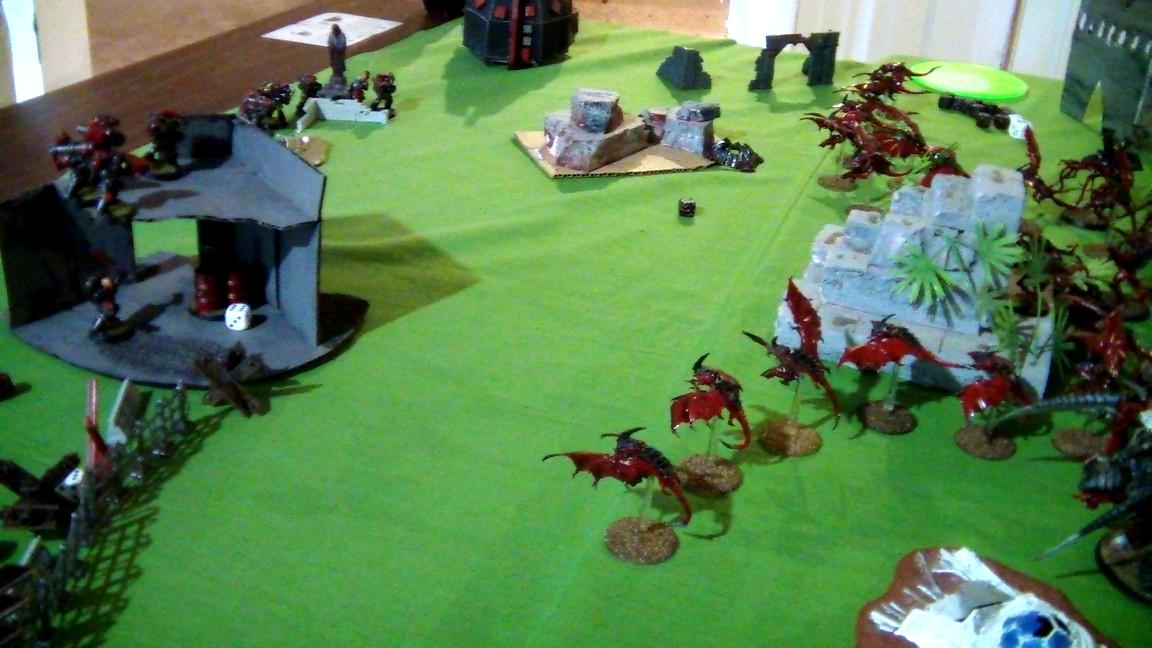
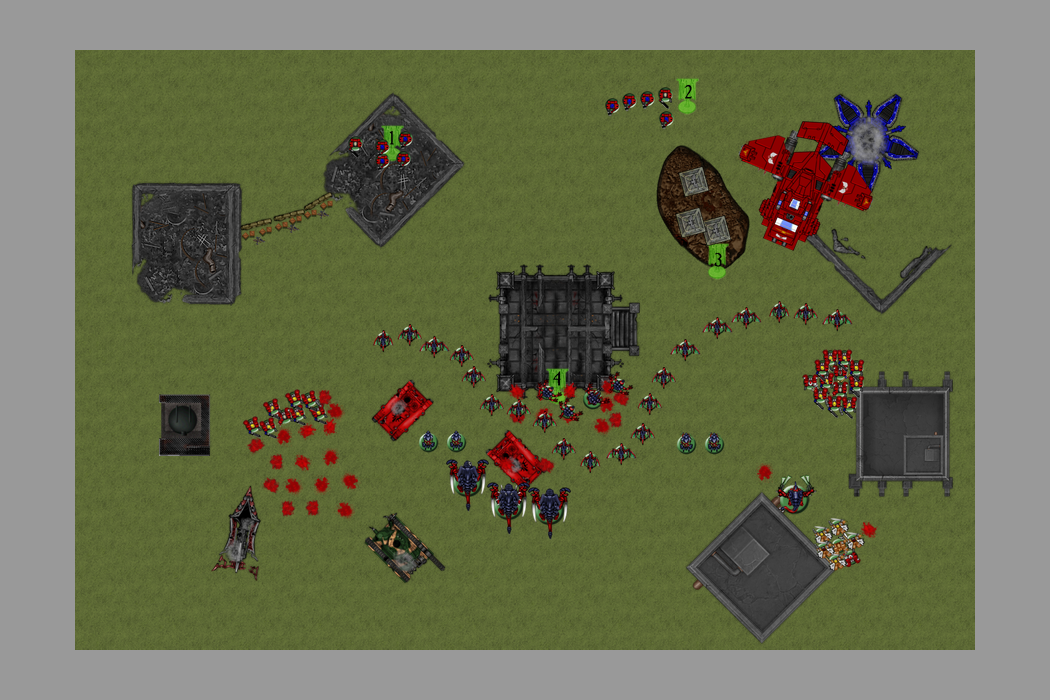
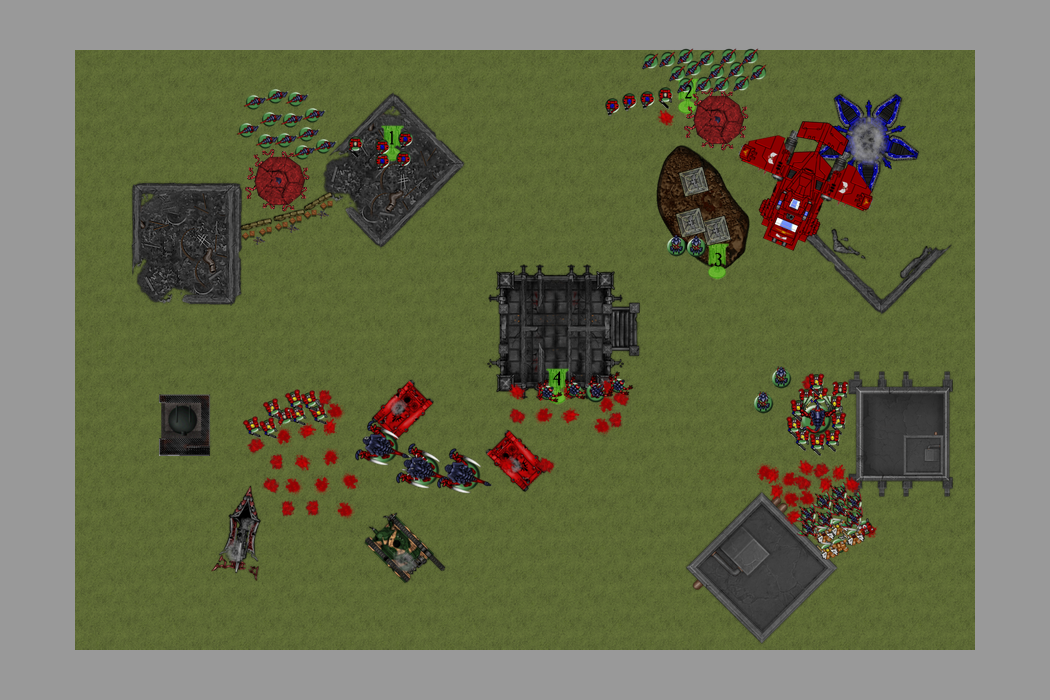
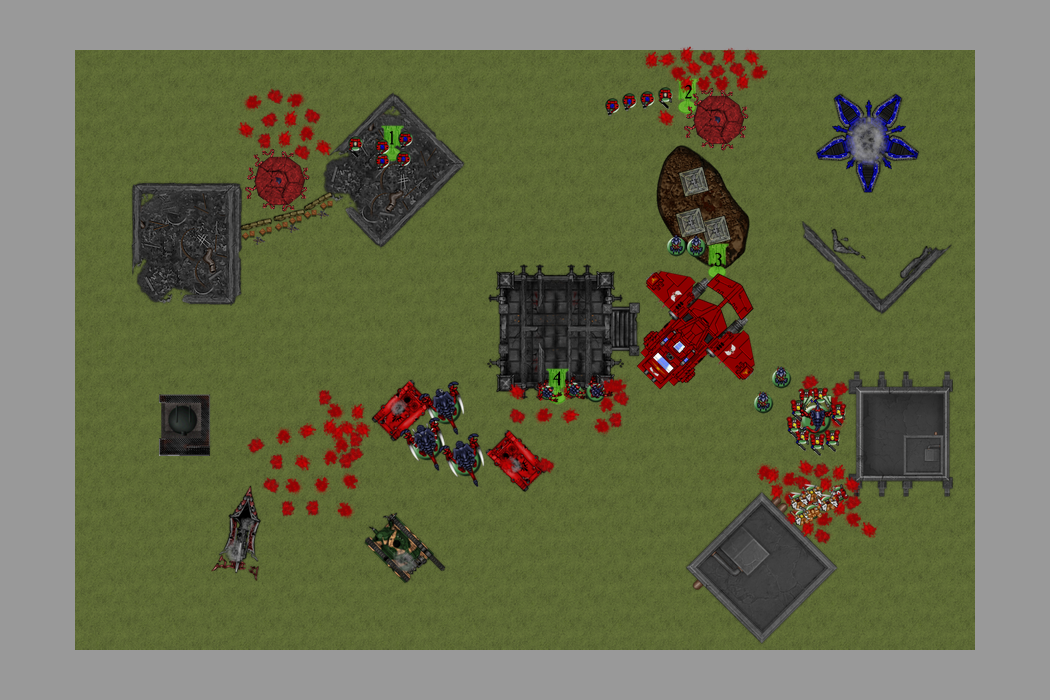
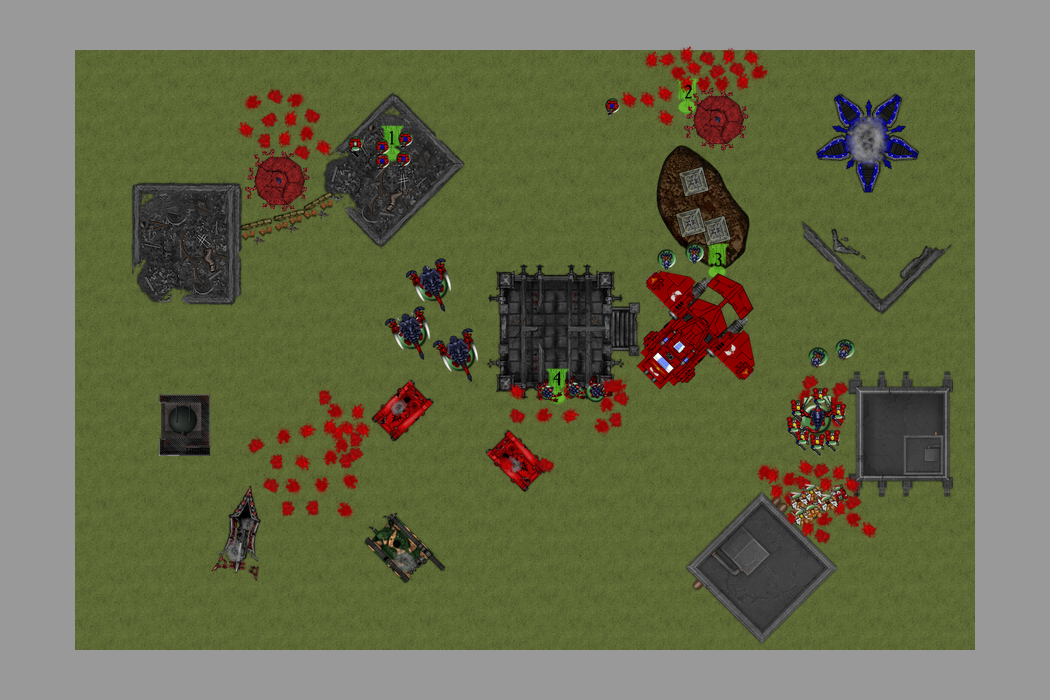
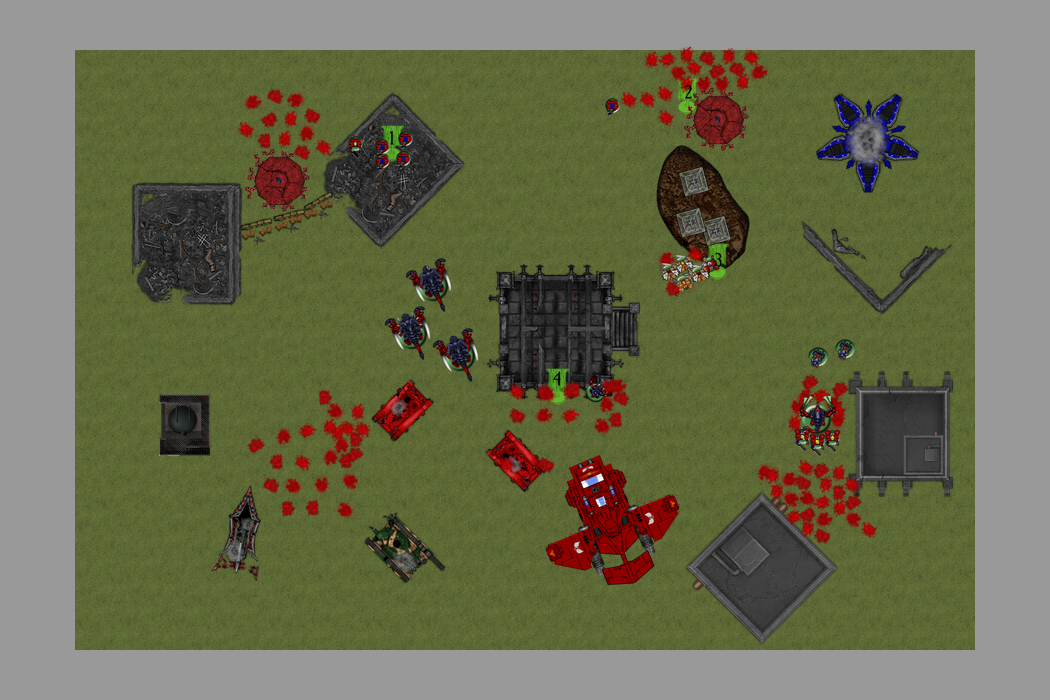
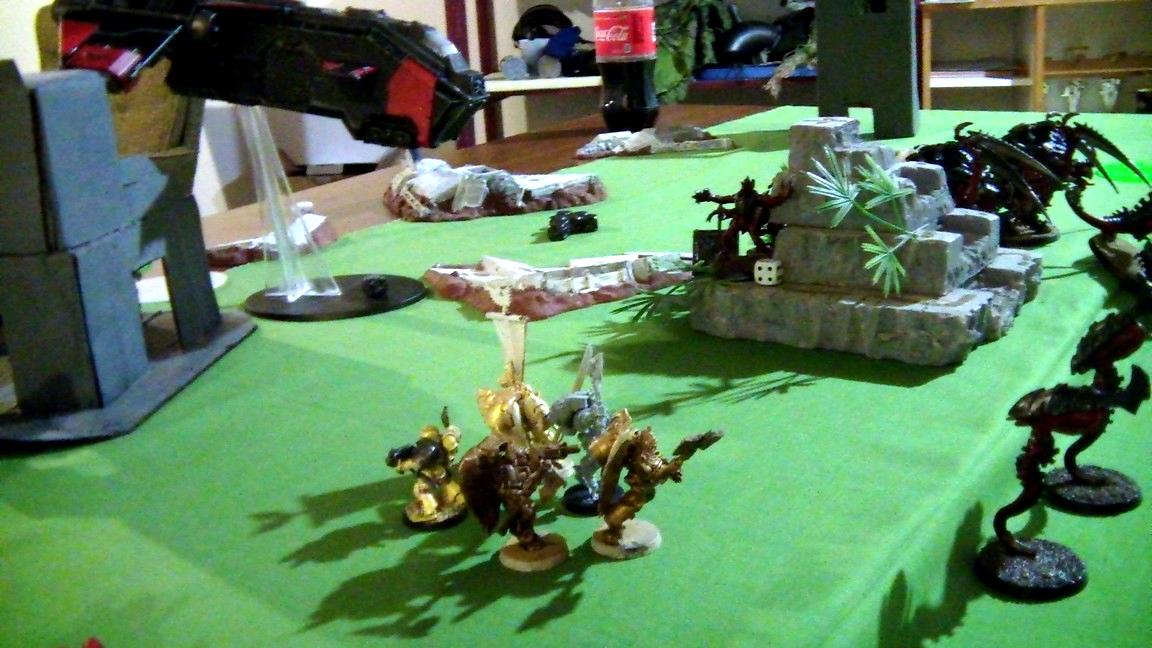
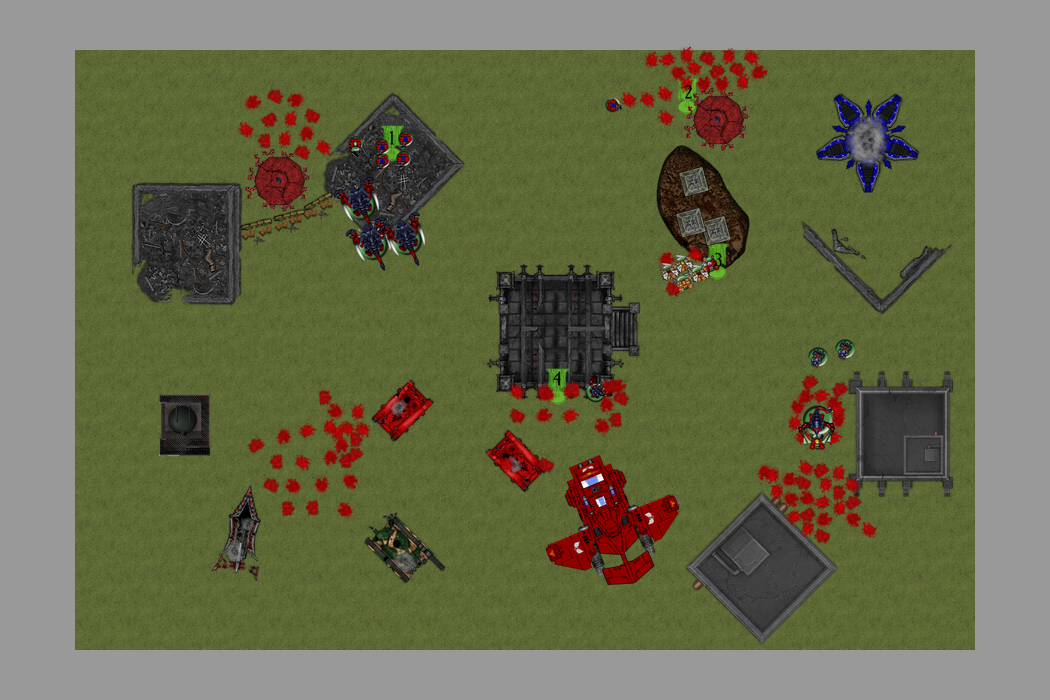
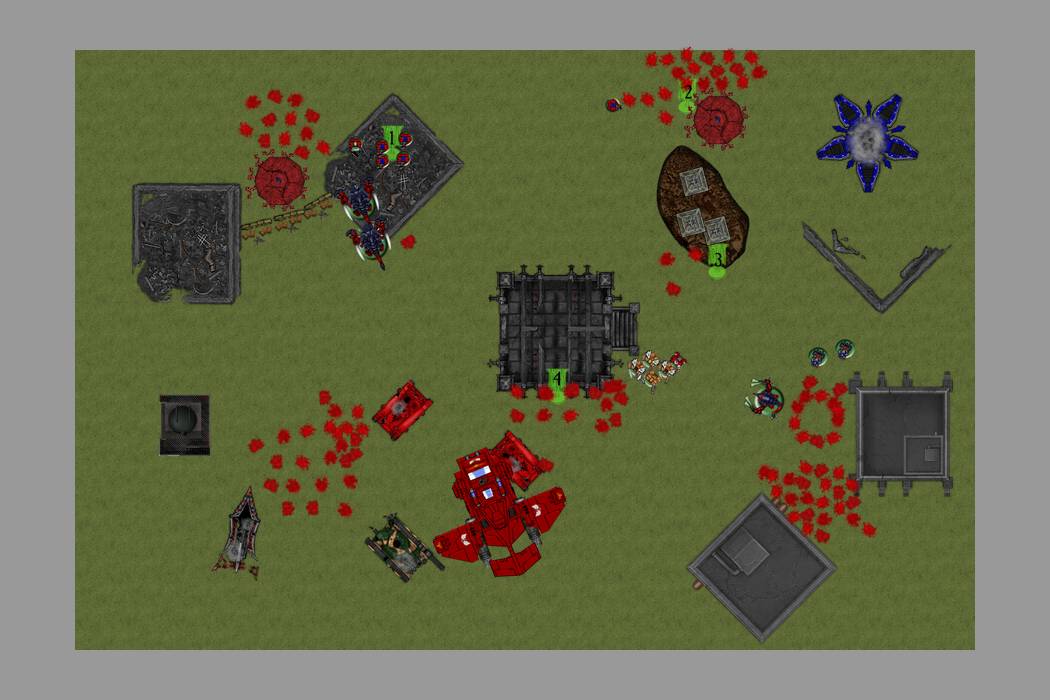
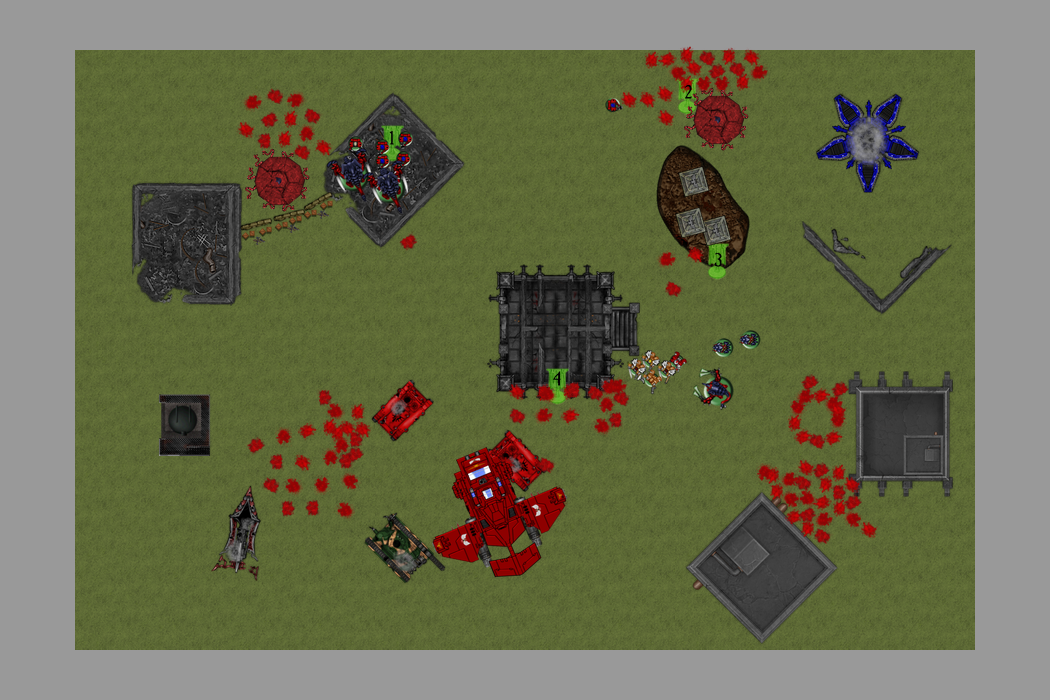
We rolled to see who would go first and Atlas won the roll off once again. We placed the objectives, 2 in buildings on Atlas' end, 1 behind the pyramid in my end, and 1 in no-man's land (I placed this one here to try to keep Atlas in his own end of the board and to avoid spreading myself too thin). Atlas did the same basic set-up as last time, reserving Dante, Atlas, a squad of Sanguinary Guard and an Assault Squad, while placing the rest of his forces behind cover. Once again, I used the Gargoyles as a screen while the Swarmlord strengthened the right flank and the Genestealers infiltrated onto the objective. The 2 units of Termagaunts stayed in reserves to try to kill his Devastators. We also rolled and determined that it would not be Night Fighting for the first turn of the game this time (although it could be later).
As the game was about to begin, I rolled to seize the initiative and...

 Turn 1 – Blood Angels
We decided to play this game with mysterious objectives, so we rolled for the ones that had troops within 3”. Both objective 1 and 2 (their numbers are marked on the Vassal map for reference) had a ___ Grav Wave Generator, meaning it would be more difficult for me to assault units defending these objectives. Meanwhile, objective 4 was a Skyfire Nexus... OMG YES. I
really needed that, because I really wasn't packing nearly enough anti-air to deal with his Stormraven reliably. If my Hive Guard could get near it (and survive) then there was a good chance I'd shoot it down. Meanwhile, Objective 3 remained unclaimed, so it continued to remain... mysterious.
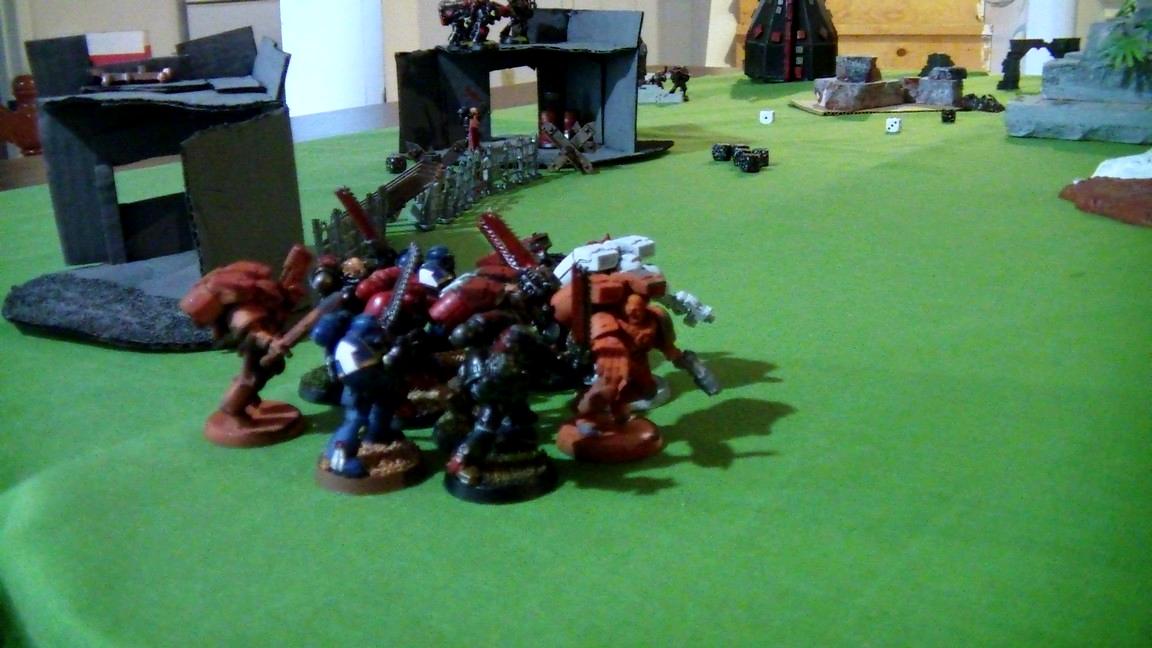
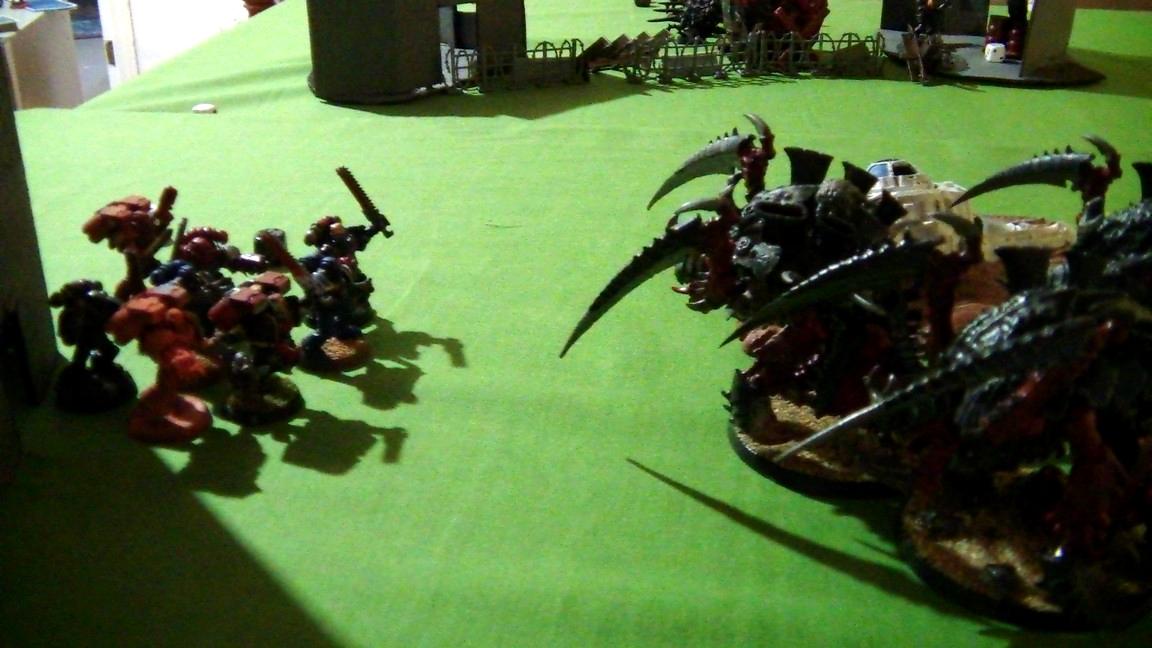
Atlas started his Movement phase by charging his Sanguinary Guard forward after the Genestealers. Normally they wouldn't be able to get in a first turn charge, but since the Genestealers had infiltrated, they were actually reasonably in range. Meanwhile, the Assault Marines took advantage of cover, moving sneakily up their right flank unimpeded.
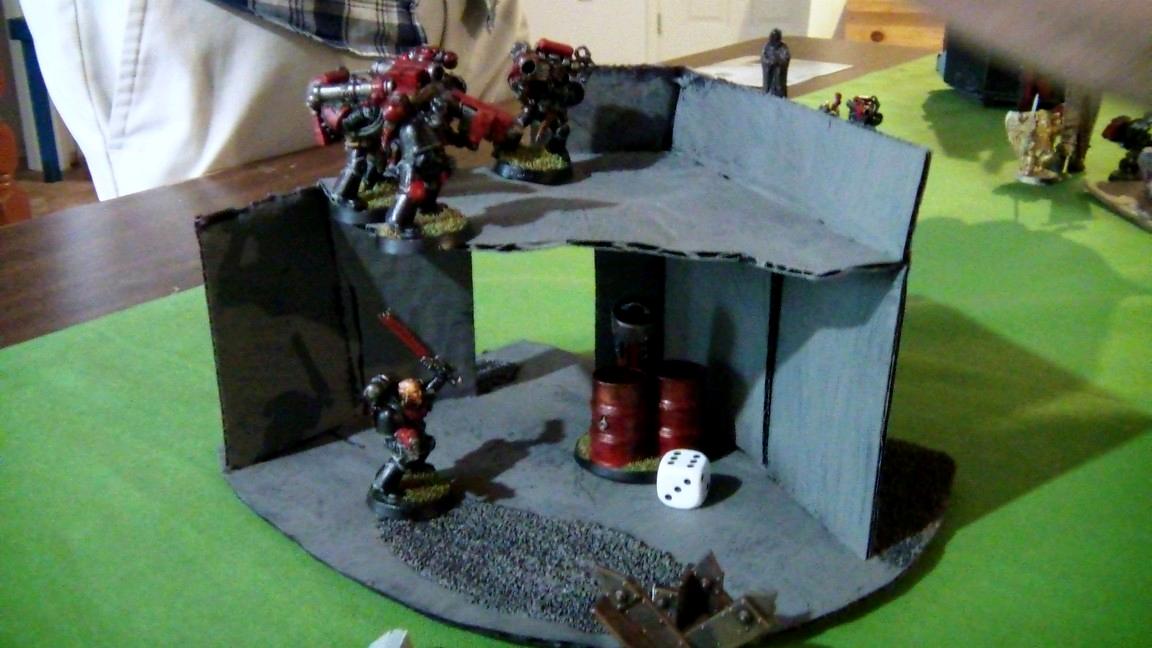
In the Shooting Phase, the left squad of Devastators fired at the Genestealers with frag missiles. The missiles killed more Genestealers than I expected, downing 5 of them. The other Devastator squad aimed their krak missiles at the Swarmlord and opened fire as well. The missiles killed a Tyrant Guard and wounded the other – I rolled pretty badly on my cover saves.
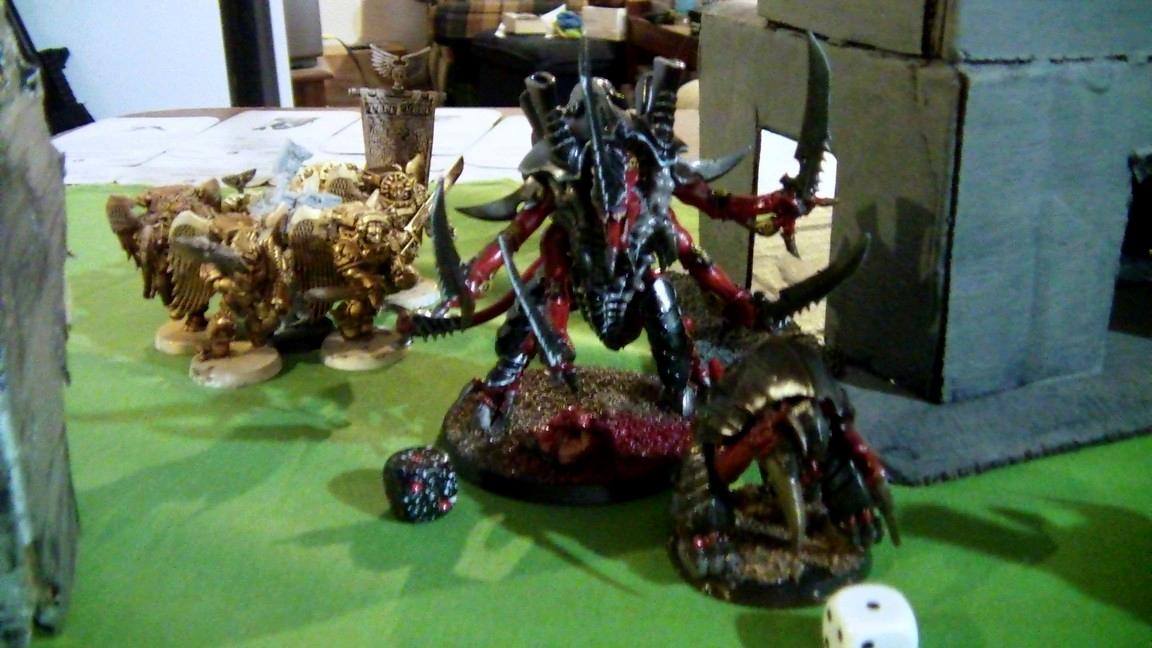
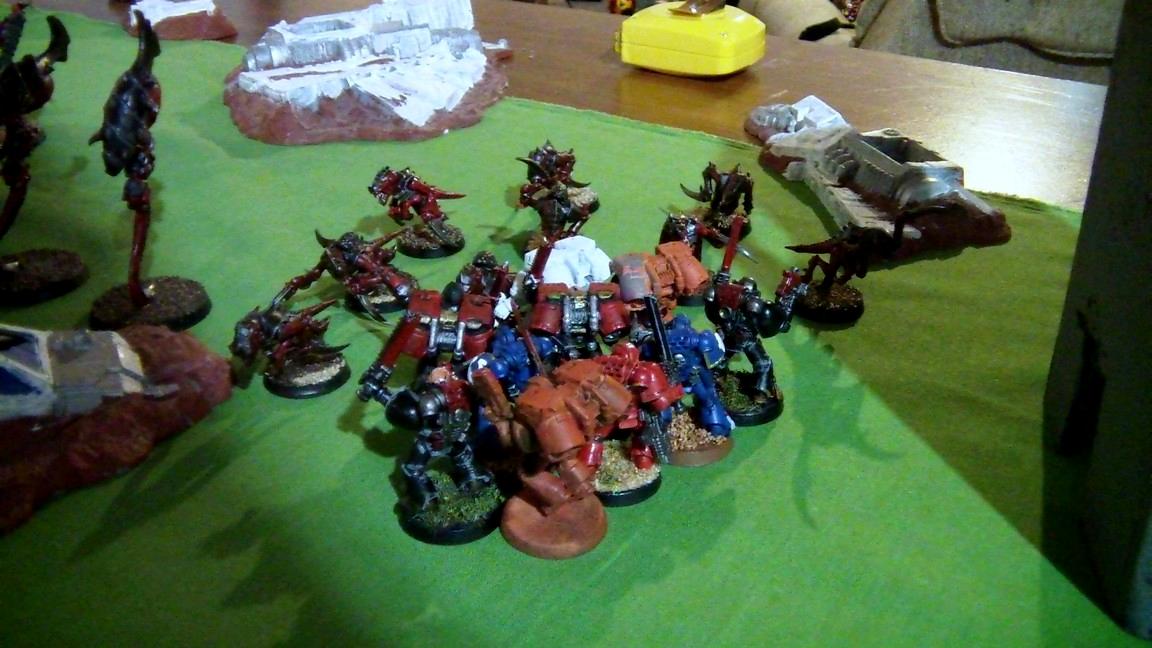
In the Assault Phase, the Sanguinary Guard successfully made it into combat with my Genestealers. However, they whiffed pretty badly, killing only a single Genestealer. The Genestealers themselves did decently, as the Broodlord killed a Sanguinary Guard with its rending claws.
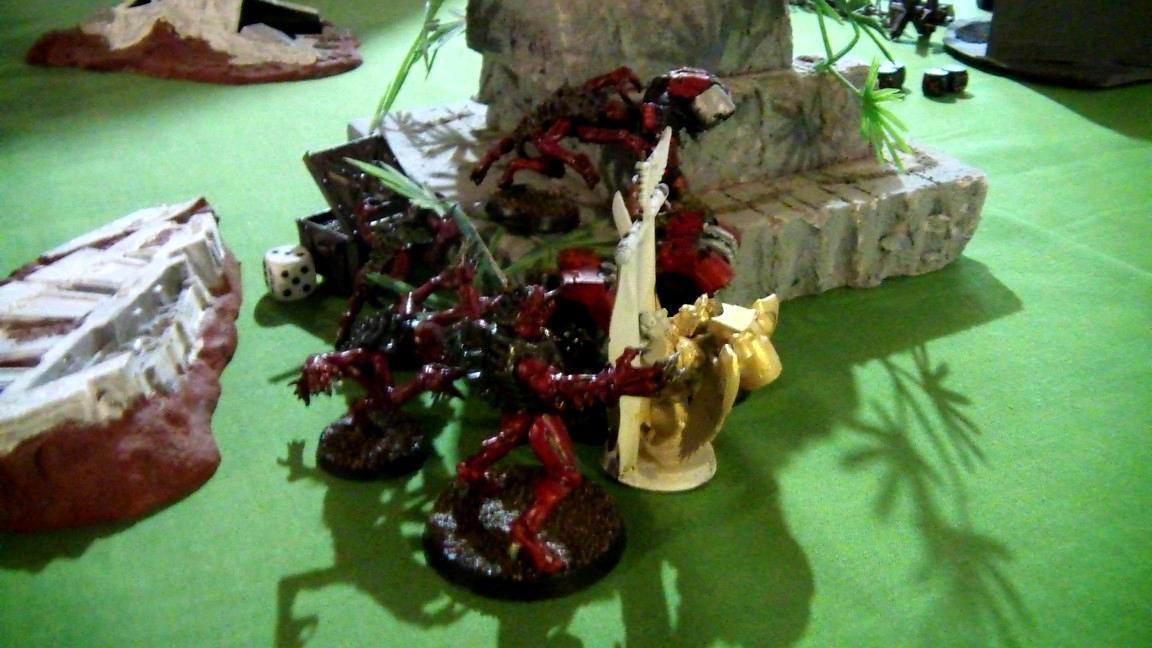
 Turn 1 – Tyranids
At the start of this turn, I cast Iron Arm on the Broodlord, gaining +1S/T to help kill the Sanguinary Guard. The Swarmlord also cast Iron Arm in case he got shot at again (which was a good likelihood), but only added +1S/T as well...
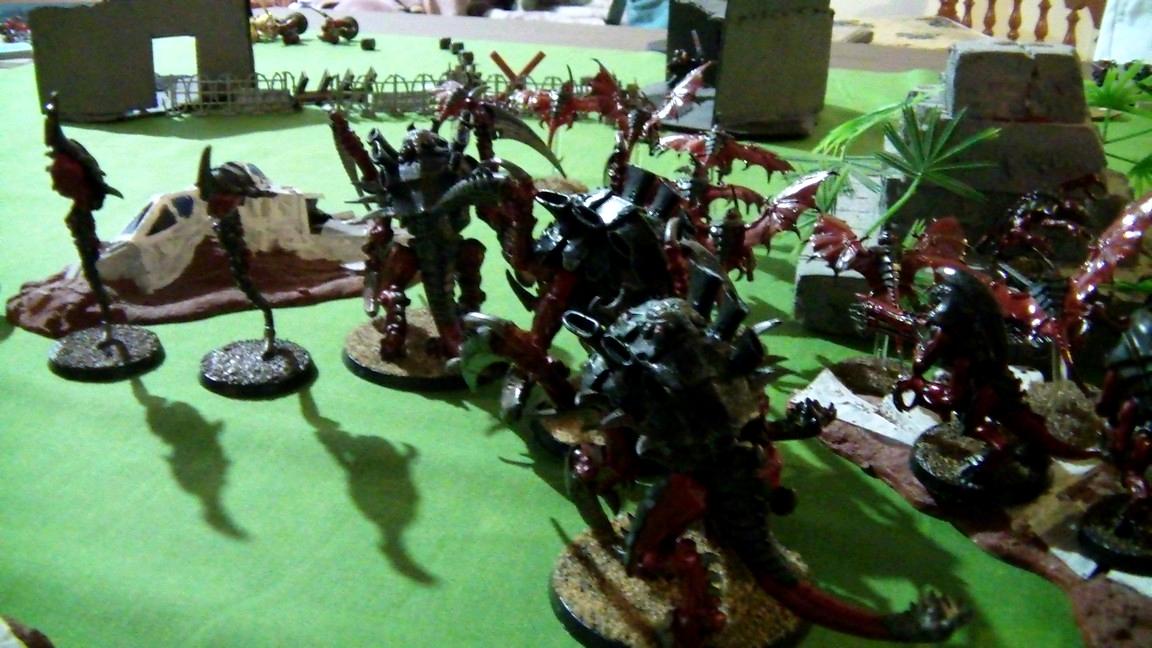
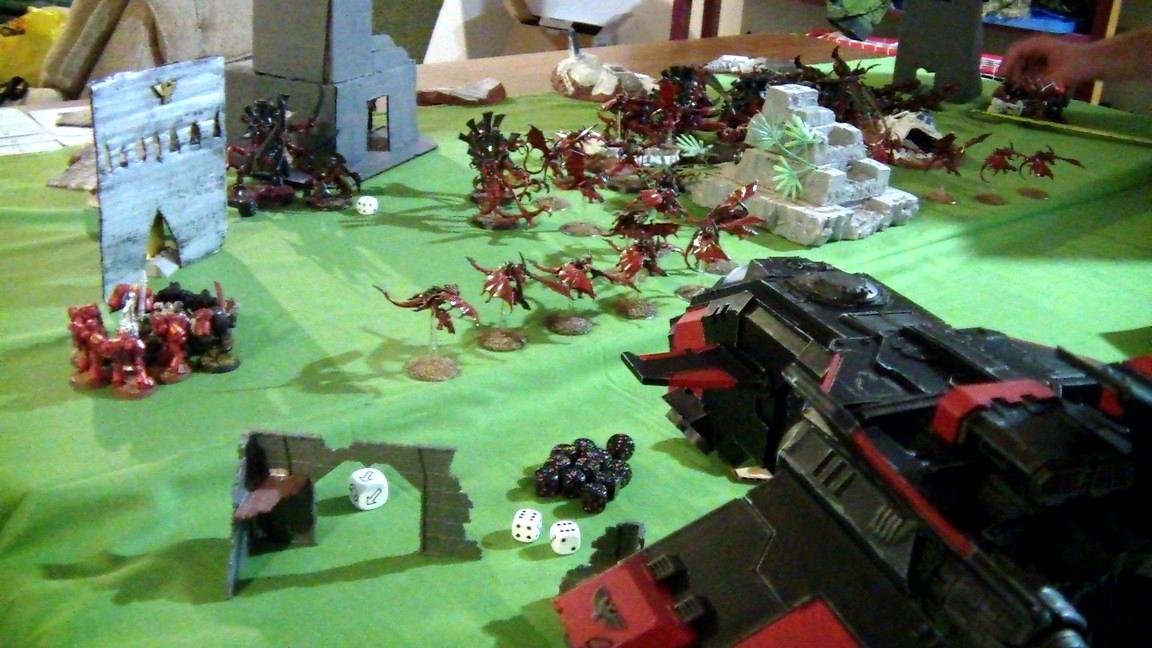
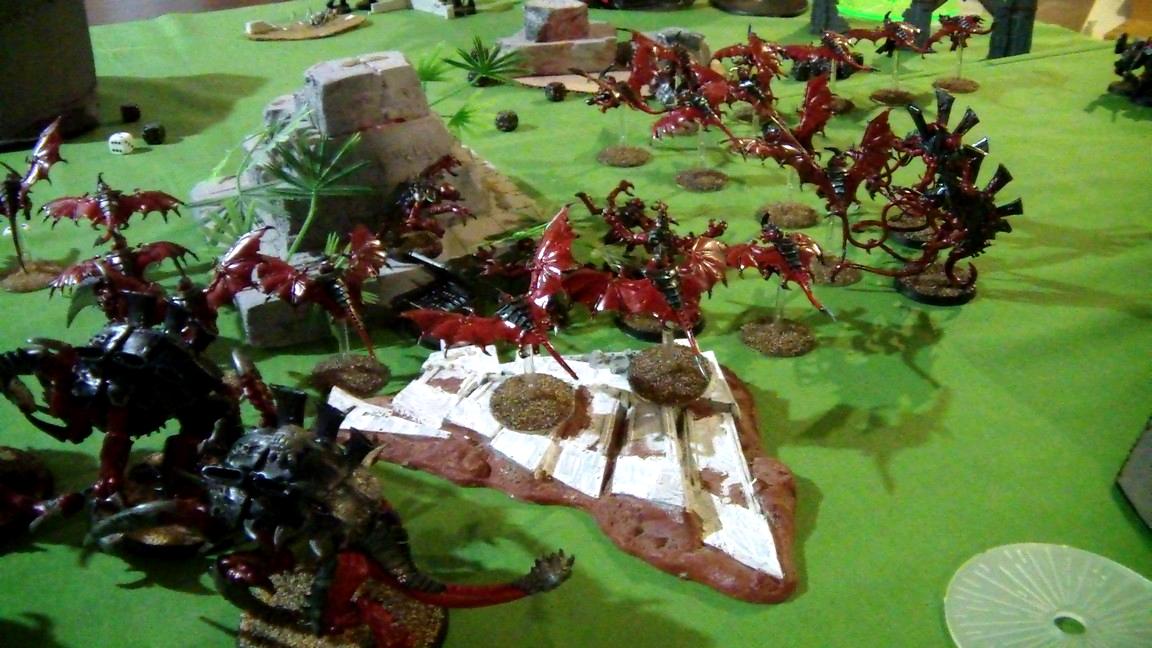
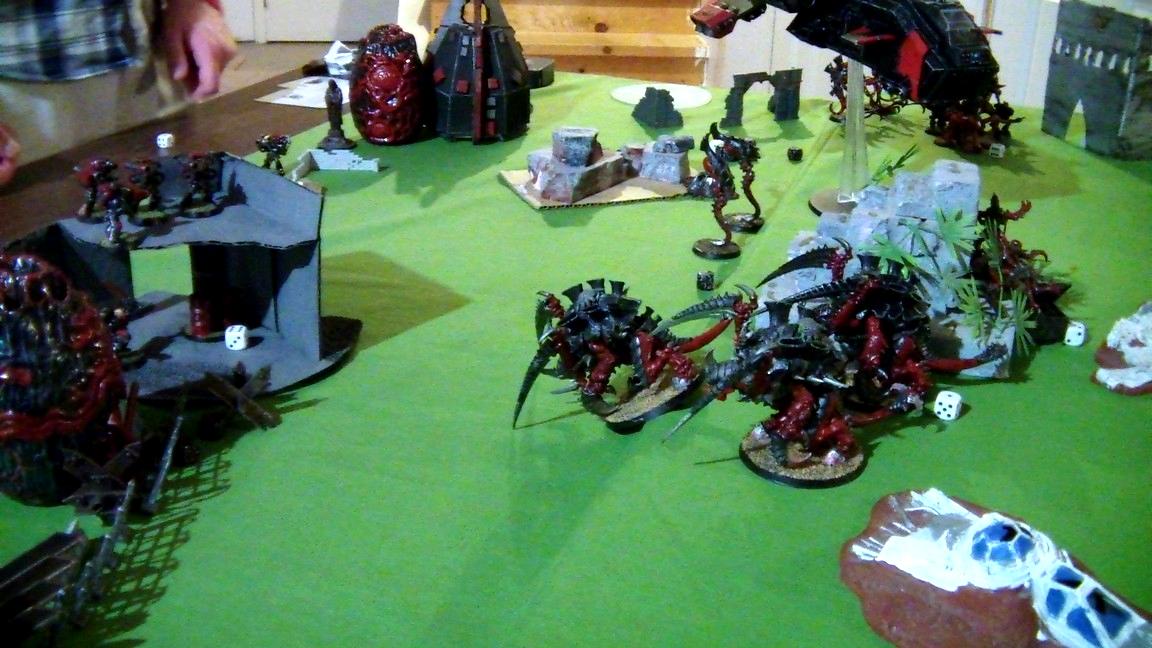
I moved all my forces forwards, the Swarmlord and Venomthropes heading for the right flank, the Carnifexes and Hormagaunts heading towards the left and the Hive Guard making for the Skyfire Nexus. The Gargoyles continued to screen my units. I hoped the Genestealers could kill off the Sanguinary Guard, or I might be in trouble soon when the survivors jump over my Gargoyle screen...
All I did in the Shooting Phase was run with my units. In the Assault Phase, the remaining Genestealers somehow managed to rally and get enough rending attacks to kill the last 4 Sanguinary Guard before they were even able to strike back! Just like that, my lines were a little more secure once again (although I was sure Dante and Atlas would change that next turn).

 Turn 2 – Blood Angels
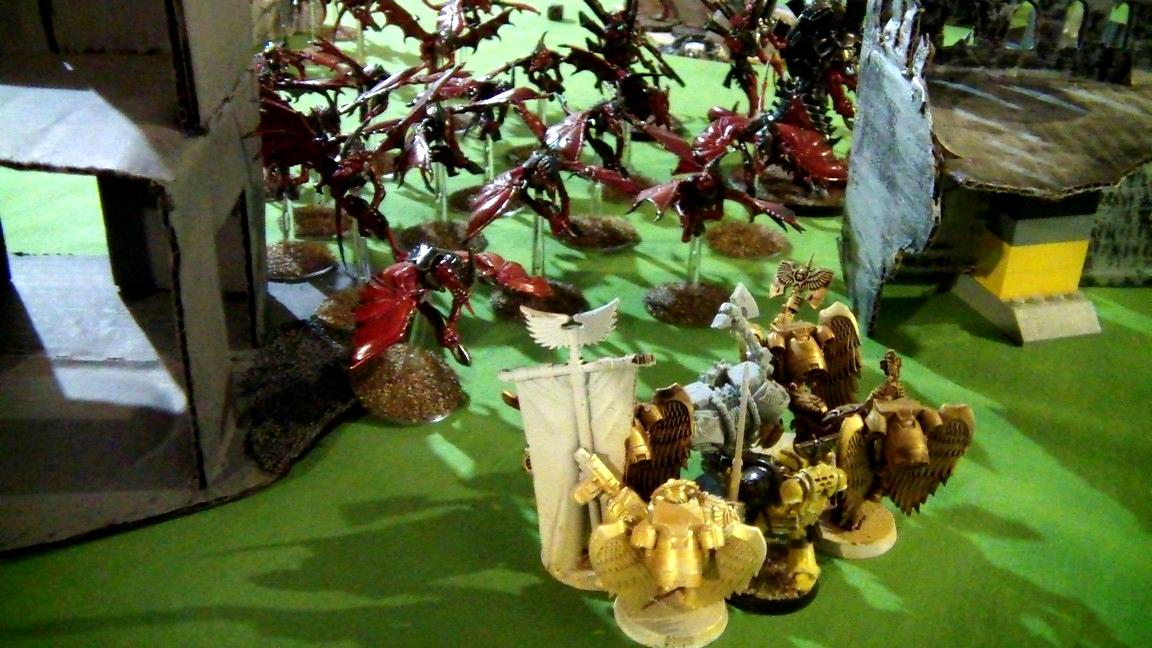
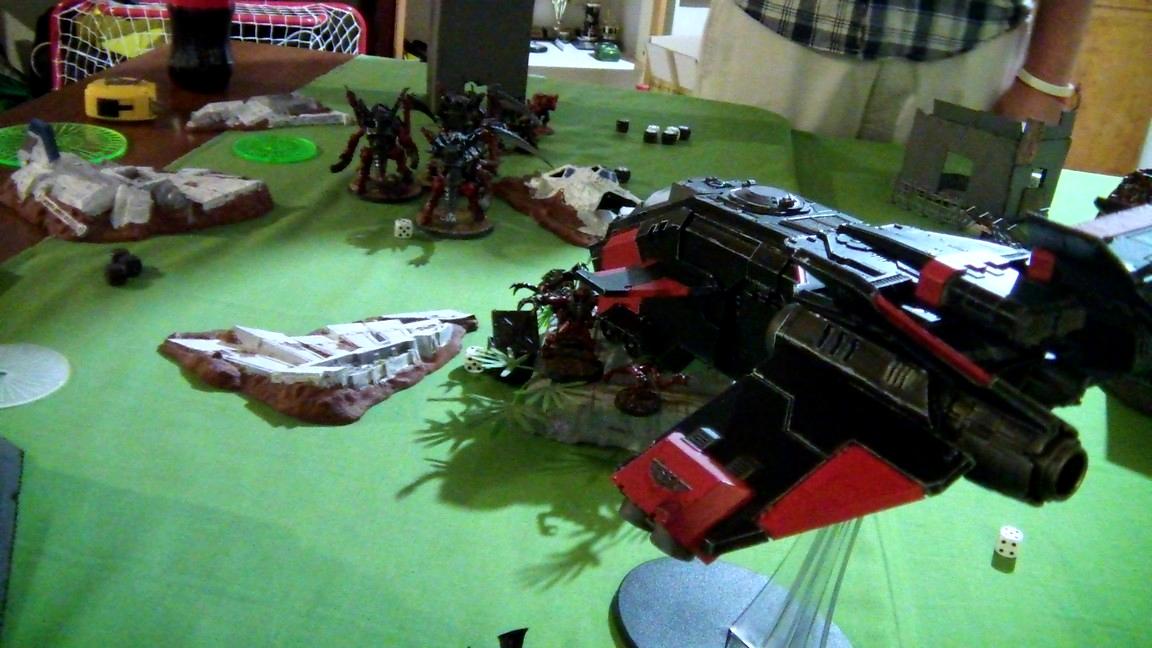
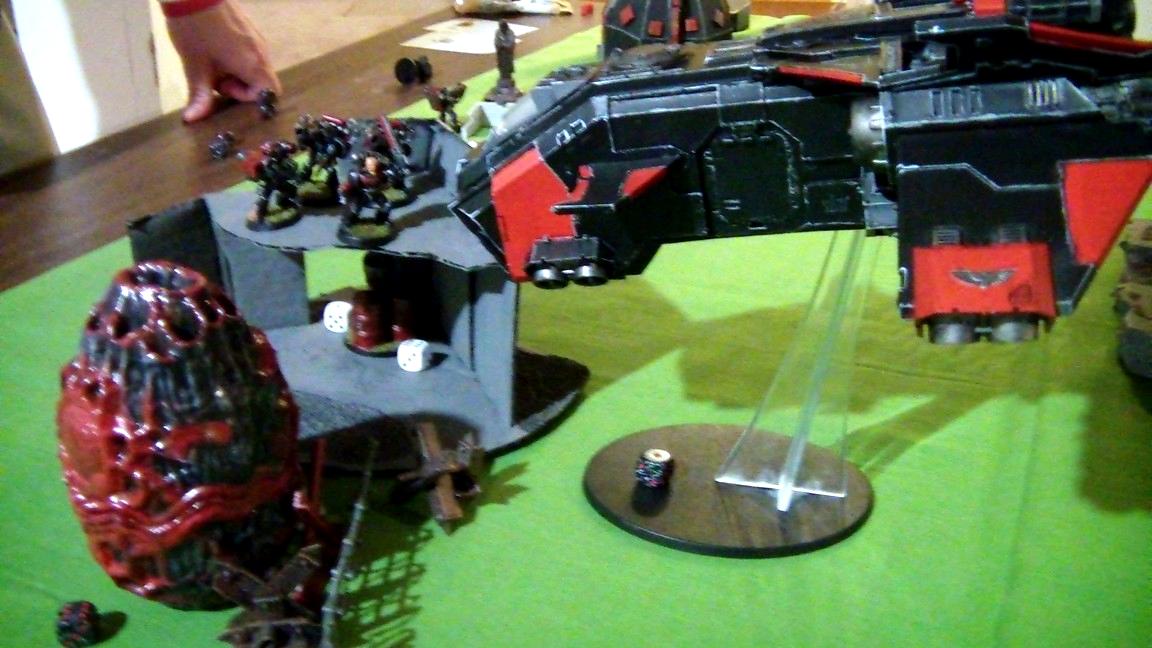
As expected, Atlas' Stormraven, Assault Marines and Dante arrived this turn. The Stormraven moved up Atlas' left flank to take a shot at the Hive Guard – if it didn't kill them, it was likely dead next turn, so he
needed to destroy them immediately. Meanwhile, Dante landed behind the Swarmlord, while Atlas aimed his Epistolary just in front of the Swarmlord for a 2-pronged attack. However, they scattered 6 inches backwards and behind a building, so their shooting effectiveness wasn't what Atlas was hoping for (it's ok, I don't mind

). Meanwhile, the other Assault Squad moved up to charge the Hormagaunts.
In the Shooting Phase, the Assault Marines killed 5 Hormagaunts, softening them up for the assault. Dante and Atlas' squad also fired everything they had at the Swarmlord and his retinue. They did manage to finish off the Guard and wounded the Swarmlord 3 times – respectful, but less than expected (thank the Hive Mind for Venomthropes). The Stormraven also fired everything it could at the Hive Guard, just barely managing to wipe them both out with its last shot.
Not good, now my anti-flyer capabilities are
very limited, and definitely won't come to bear for another turn at least... The Stormraven also used
POTMS to fire a hurricane bolter at the Genestealers, killing 1.
In the Assault Phase, the Assault Marines charged the Hormagaunts successfully. The Hormagaunts struck first, killing 2 Marines, but the survivors wiped out the last 9 Hormagaunts with their return blows.
 Turn 2 – Tyranids
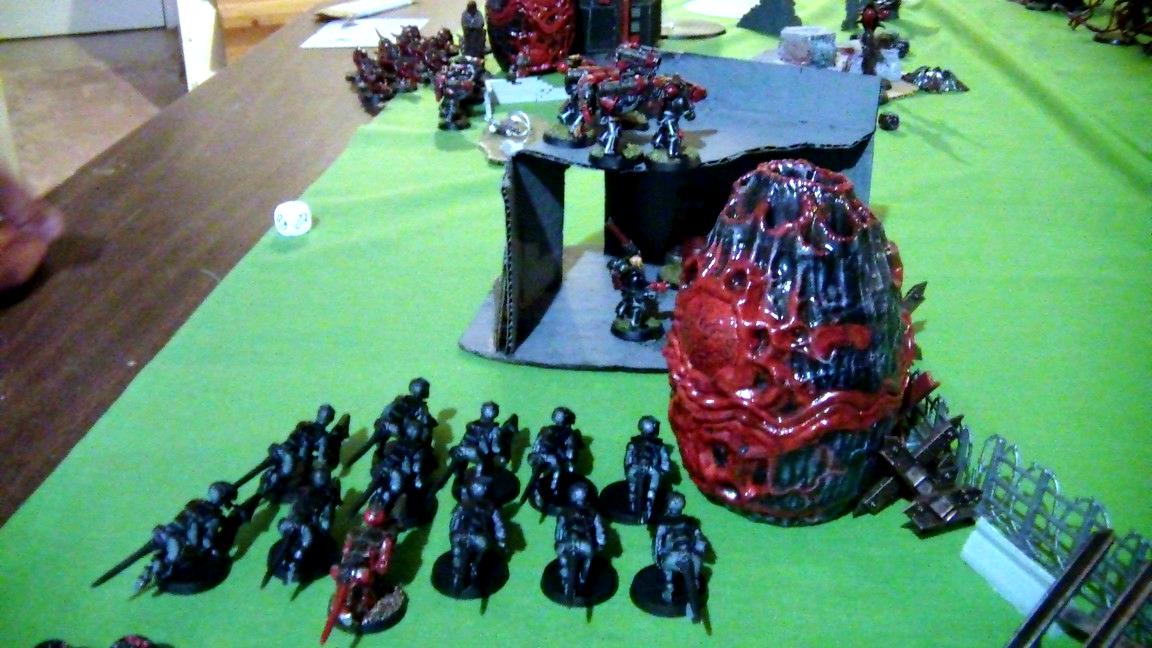
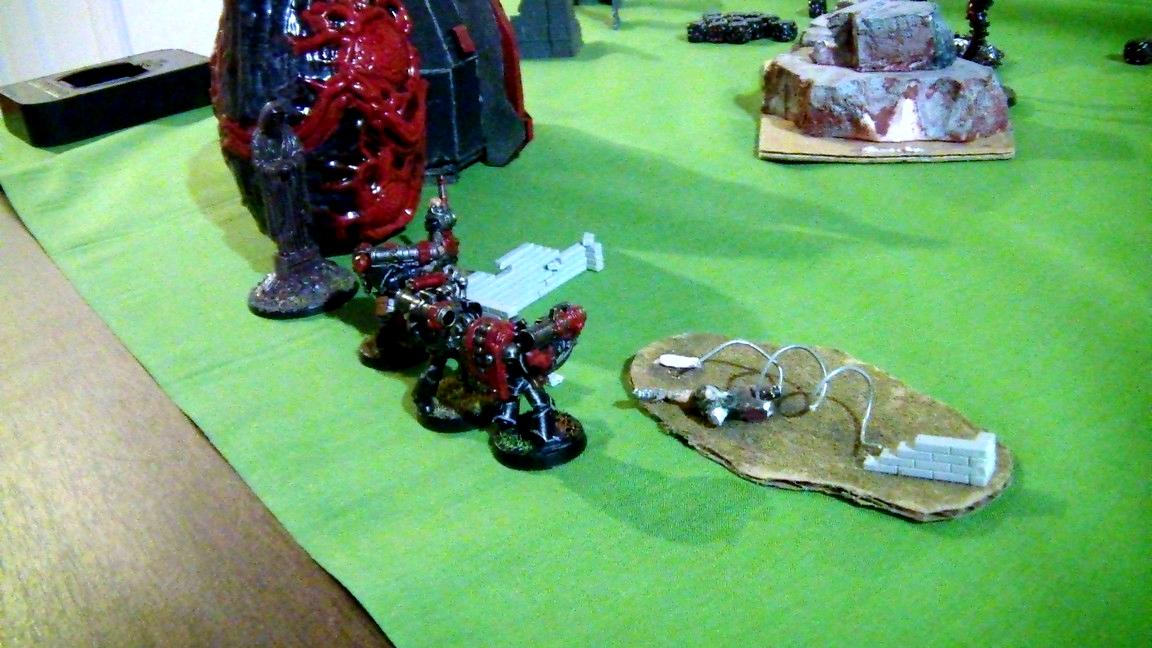
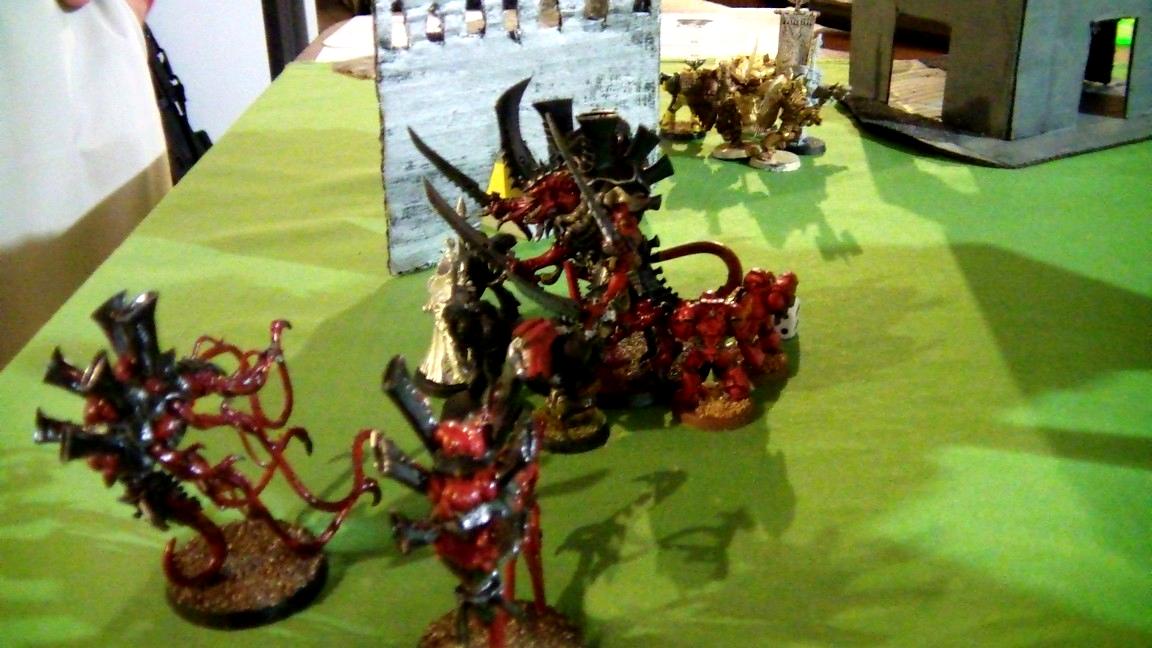
I needed to cause some damage if I wanted a chance of turning things around. I hoped to do that with my pairs of Spore Pods, which both arrived. I dropped each pod beside the Devastators and unloaded their gaunt occupants. The Zoanthropes also used Gate of Infinity to get behind the Stormraven so I could use Objuration Mechanicum on it next turn and hopefully take it out. In doing so, they land within 3” of Objective 3, revealing that it was a Scatterfield (+1 to cover save... big whup). The Broodlord casts Endurance on the Swarmlord to hopefully get back a wound from It Will Not Die. The Swarmlord himself casts Iron Arm (with +2 to his S/T) and heads after Atlas and his unit – I figure there's no sense in assaulting Dante since he'll Hit and Run anyway and just shoot the Swarmlord, so I might as well cause as much damage as I can. The Venomthropes also moved that way since I thought Atlas would try to dogpile the Swarmlord, so they'd make him take dangerous terrain tests and lose his assault bonus. The Carnifexes also move to kill the Assault Marines which destroyed the Hormagaunts. Finally, the Gargoyles all move to charge Dante's unit, and hopefully drag down some Sanguinary Guard in the process.
In the Shooting Phase, the Gaunts and Pods all fired on the Devastators, but whiff spectacularly – the Termagaunts and Pod kill only a single Missile
Dev, while the Devilgaunts and Pod do absolutely
NOTHING.

The Zoanthropes try to help make up for it, casting Assail on a Devastator Squad, but does nothing as well. The Swarmlord continues the poor performance by rolling

to cast Smite, putting himself down to a single wound!
At the very least, he kills 2 Marines but he really couldn't afford that lost wound and was really relying on It Will Not Die now. The Gargoyles are the only unit that does half decently, killing a Sanguinary Guard with their Fleshborers.
In the Assault Phase, the Carnifexes rolled really poorly on their charge roll and ended up not making it into assault! Dammit, as if this turn couldn't get worse! The Swarmlord did successfully make it into combat, but was challenged by the Sanguinary Priest (which he killed with ease). Unfortunately, he did not regain a wound from It Will Not Die, but at T8 he was practically indestructible anyways. The Gargoyles made their way into combat and managed to kill another Sanguinary Guard, but 12 are killed in return.
 Turn 3 – Blood Angels
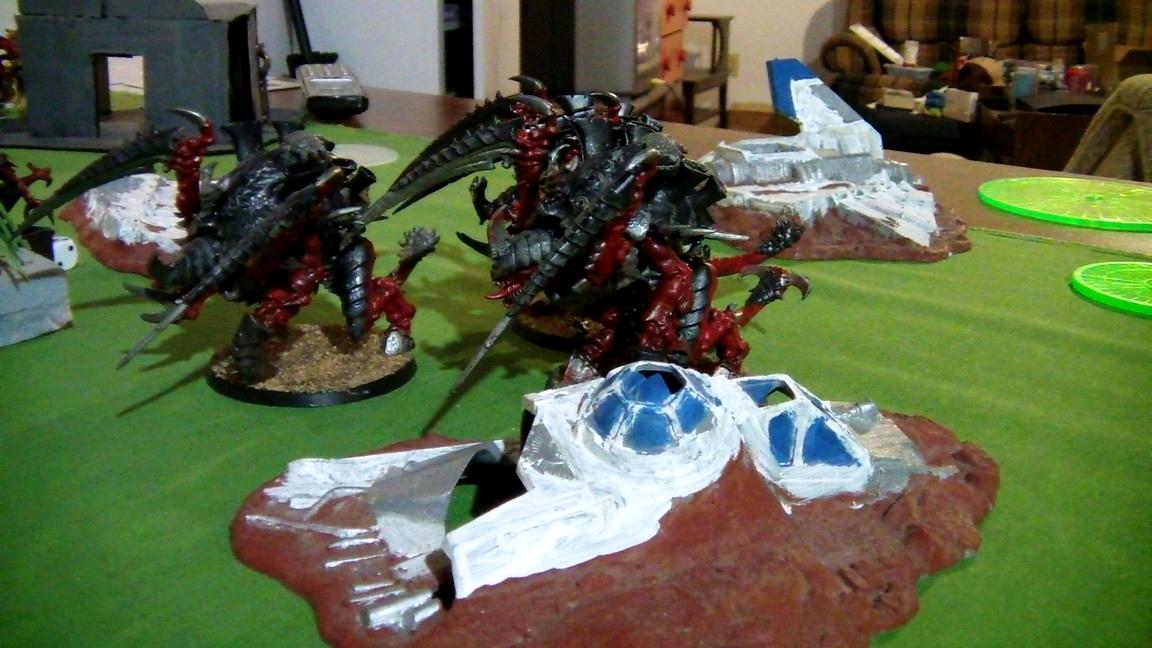
In Atlas' Movement Phase, he directed the Stormraven at the vulnerable Carnifexes and prepared to attack them with his Assault Squad. With most of his units engaged in combat, Atlas wasn't able to make any other moves. In the Shooting Phase, he risked firing frag missiles at the Gaunts bunched up near his Devastators. The gamble paid off, wiping out both units (Atlas barely even rolled any scatter!) and freeing up the Devastators to cause further damage. The Stormraven and Assault Marines then pointed their guns at the Carnifexes and fired. Amazingly, their luck ran out – between the 2 units, they only caused a single wound!

In the Assault Phase, Atlas decided to try killing the Carnifexes in close combat. This, however, turned out to be a mistake – they failed to cause any damage whatsoever, and the Carnifexes tore them to pieces in return. To be fair, they would have been assaulted next turn anyway, but it was a disappointing and surprising turnout for Atlas. Elsewhere, Dante's unit finished off the Gargoyles and consolidated, and the Swarmlord was challenged by the Assault Squad Sergeant, which he killed easily. The Assault Marines tried to break, but the Swarmlord caught them and continued the fight.
 Turn 3 – Tyranids
Hoping that It Will Not Die would work this turn, the Broodlord cast Endurance on the Swarmlord again. The Swarmlord, on the other hand, cast Iron Arm and got +3S/T, making him invulnerable to the Assault Marines' attacks! Meanwhile, the Zoanthrope cast Objuration Mechanicum on the Stormraven, stripping off a Hull Point with its Haywire effect. I was hoping for the penetrating hit, but I'll take what I can get at this point.

After this, the Carnifexes pointed themselves directly at the Devastators holed up on Objective 1 and made a beeline for them. At the very least, I'd be able to contest their objective.
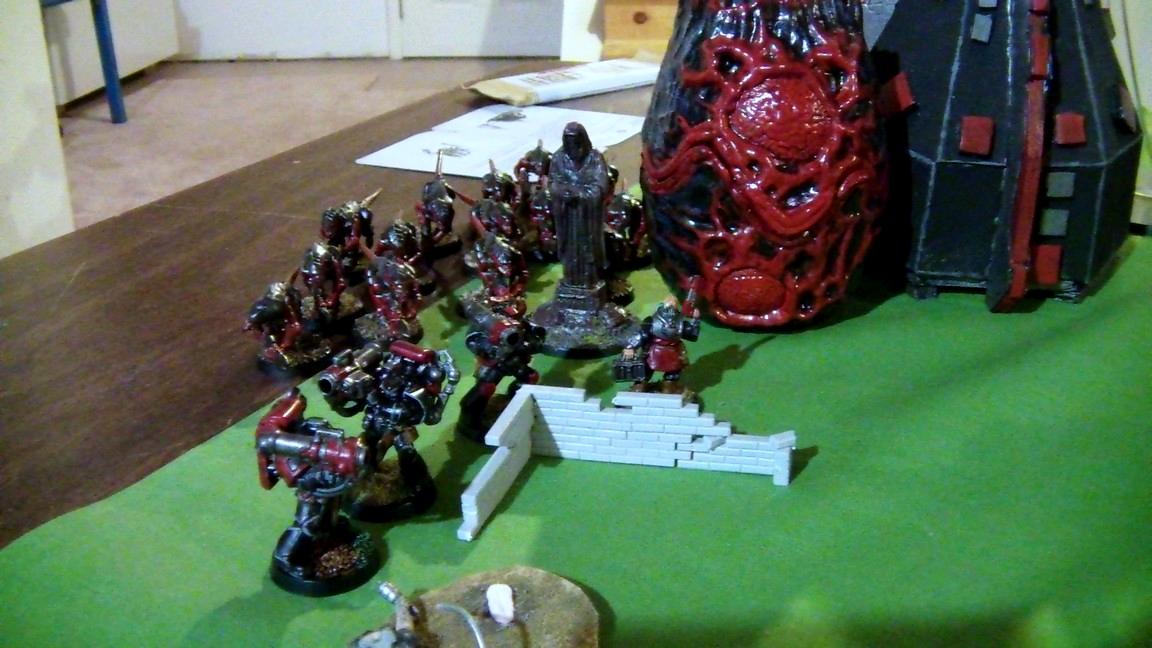
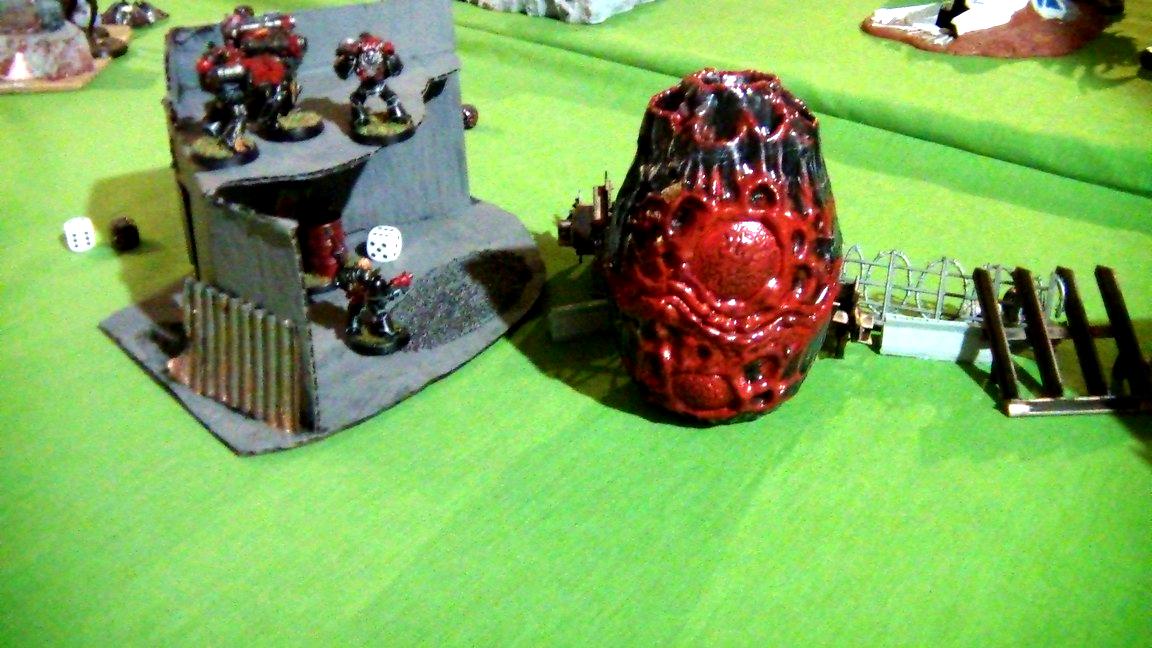
In the Shooting Phase, the Spore Pod by Objective 2 gave a surprise wake-up call to Atlas – its cluster spines and ripper tentacles actually managed to kill 3 Devastators, leaving a single stunned survivor!
In the Assault Phase, Atlas decided to sacrifice his Epistolary to keep the Swarmlord locked in combat (I probably would have challenged him anyway regardless). The Librarian was scythed down once again, unable to wound the psychically charged Swarmlord. The Marines tried to break, but The Swarmlord caught them first and forced them to continue fighting. The Swarmlord also got an unexpected gift as he passed his It Will Not Die check, moving back up to 2 wounds!
 Turn 4 – Blood Angels
Feeling confident and not wishing to disengage, Atlas put the Stormraven into Hover Mode and manoeuvred it to open fire on the Genestealers on Objective 4. Dante and his squad also moved to kill the Zoanthropes and make my chances of gunning down the Stormraven even poorer.
In the Shooting Phase, the Stormraven fired its guns at the Genestealers, killing 2 of them and wounding the Broodlord twice. Dante's unit fires their Infernus pistols at the Zoanthropes, killing the one with Assail. The Devastators on Objective 1 also fired at the Carnifexes, but thankfully only caused 1 wound. The other Devastator fired a krak missile at the Spore Pod that had killed his comrades, but missed from point-blank range. To make things funnier, Atlas had actually considered assaulting the Pod until he realized that it was a monstrous creature...
In the Assault Phase, Dante and his unit wiped out the last Zoanthrope, but not before it actually managed to kill 1 of the Sanguinary Guard! The Swarmlord was also finally given free reign against the Assault Marines, killing 4. Surprisingly, they held their ground.
 Turn 4 – Tyranids
The Swarmlord cast Iron Arm again, getting +3S/T once more. Not wanting to lose my Broodlord, I also cast Iron Arm on him, but unfortunately he only got +1S/T. I considered charging the Stormraven with my Broodlord, but he was too far out to reach it reliably, so I just stuck to cover. The Carnifexes, on the other hand, couldn't reach the Devastators since they were on the 2nd floor of a ruin, so they went to hide underneath them instead.
In the Shooting Phase, the Spore Pod by Objective 1 killed 1 Missile
Dev, while the other one failed to wipe out the last one on Objective 2. In the Assault Phase, the Swarmlord killed 2 of the Assault Marines, leaving a sole survivor – thank God! Now I wouldn't get shot to pieces next turn!
 Turn 5 – Blood Angels
Atlas decided to finish off the Broodlord – he sent Dante and his squad to go kill the tenacious, over-glorified Genestealer. Meanwhile, the Stormraven went to go deal with the Carnifexes. In the Shooting Phase, it went to fire on the Fexes, but its Plasma Cannon overheated and stripped off another Hull Point! Slightly shaken, Atlas continued his shooting, killing a Fex and wounding another from the combined fire of the Stormraven and Devastators. Dante and his unit also manage to kill the Broodlord with their Infernus pistols. Meanwhile, the lone Devastator misses with his krak missile on the Spore Pod
yet again, and forevermore gains the nicknames “Derp Marine” and “Noob Marine”. In the Assault Phase, the Swarmlord finishes off the final Assault Marine and consolidates towards Objective 4.
 Turn 5 – Tyranids
I had hoped to wipe out some Heavy Support choices to pull a comeback, but it was looking pretty dire at this point. I needed to kill the Derp Marine with the Pod severely, and keep my Carnifexes alive while contesting objectives if I wanted to win. Not looking great, but not impossible.
First off, the Swarmlord cast Iron Arm again and got +3S/T yet again! I moved him and the Venomthropes towards Dante to kill the
and try to get Slay the Warlord – or, at the very least, deny an objective. I moved the Carnifexes into the bottom floor of the ruin and contested Objective 1, although due to the way their talons were positioned, I couldn't physically place them directly inside so there was a bit of their bodies poking out.
In the Shooting Phase, the Spore Pod couldn't kill the Fail Marine again (I wounded him a few times, but he passed all his armour saves, damn him). That wasn't boding well for my Pod... In the Assault Phase, the Swarmlord tried to assault Dante's unit, but came up short on his charge roll! Uh oh!
We rolled to see if there would be a Turn 6 (at this point, I hoped there wouldn't – I was actually winning by 1
VP) and...
 Turn 6 – Blood Angels
Atlas moved the Stormraven to the best position to finish off the Fexes. He also said that his missile launchers could hit them since parts of their bodies were fitting from the ruins. I said it was basically wobbly model syndrome since they only couldn't fit because of the way their talons were positioned, but I don't really think Atlas has encountered that rule before (since he usually plays on Vassal right?). In any case, I basically said “sigh, fine” and let him go ahead. The two units fired at the Carnifexes and wiped them out. Also, the Derp Marine
finally killed my Spore Pod, showering himself in acidic bile and alien goo in the process (and also ending up 4” away from the objective like a shmuck).
Meanwhile, Dante and his unit fired at the Swarmlord, but their shots came up short (I can't remember if it was bad luck, the Venomthropes' cover saves, or a combination), wounding the Swarmlord only once.

 Turn 6 – Tyranids
The Swarmlord casts Iron Arm once more, getting +2S/T this time. He and the Venomthropes manoeuvre to get the best position on the Sanguinary Guard for their assault. In the Shooting Phase, the Swarmlord casts Smite, killing the Sanguinary Priest and a Sanguinary Guard before he and the Venomthropes assault the unit. The Swarmlord challenged Dante, but the
COWARD refused!

The Commander slunk to the rear while the Swarmlord and Venomthropes destroyed the rest of his unit. We weren't really sure whether Dante had to roll to stay in combat or not, but just let him Hit and Run anyway. When the dust settled, he moved to fire his pistol at the Swarmlord if there was another turn...

 AFTERTHOUGHTS
That was a tough game, I was basically in the same position Atlas was last game – bent over.
Nah, but in all seriousness, I lost a lot of my strength early on which hurt me badly, and that disastrous 2nd turn basically sealed my fate when I couldn't kill a single bloody Devastator squad. Seriously, my monstrous creatures hate missile launchers. My list was also kind of weak (certainly weaker than my previous list, and even that one was casual at best), which didn't help. I'll have to make sure I bring more anti-flyer units in the future as well, relying solely on Hive Guard and randomized psychic powers is a terrible idea. If my enemy is running flyers vs my Tyranids, I won't feel so bad about using the Doom in the future.
I'm not sure if I'll run Zoanthropes without their default powers anymore. Or, at the very least, I'll stick with Telepathy powers next time rather than Telekinesis. I'm loving the Swarmlord and Broodlord though, definitely sticking with them. I might drop the Swarmlord for a regular Tyrant in my next game though. And I definitely need to buy a couple Tervigons. Tyranids are a lot of fun in 6th edition, loving the changes.
If you enjoyed this, be sure to check out my
other battle reports!


 No one Provokes me with Impunity
 Craftworld Mymeara
 440 points - in progress (....sort of a given


 Lord-Commander Jeremiah Alexandre: 5th Victorian Army
 Phaeron Amheosiris of the Isiran Dynasty
  Lord Yersina Thrax of the Death Guard
