Forum adverts like this one are shown to any user who is not logged in. Join us by filling out a tiny 3 field form and you will get your own, free, dakka user account which gives a good range of benefits to you:
No adverts like this in the forums anymore.
Times and dates in your local timezone.
Full tracking of what you have read so you can skip to your first unread post, easily see what has changed since you last logged in, and easily see what is new at a glance.
Email notifications for threads you want to watch closely.
Being a part of the oldest wargaming community on the net.
If you are already a member then feel free to login now.
Background It's been quite a while since my last battle report (which, for the record, was my most popular battle report thread ever). Since that game, I've tried to get in a report on multiple occasions, but it never quite worked out – either the game would be entirely one-sided, we didn't get to finish it, dates got cancelled, or no one showed up to play at all! But finally, I got in a game with regular opponent and all-round cool guy, Crablezworth. I played this game a week and a half ago, but suddenly found myself overwhelmed with final assignments, exams, video editing and blogging. Bottom-line: this report has been a long time coming, so enjoy it!
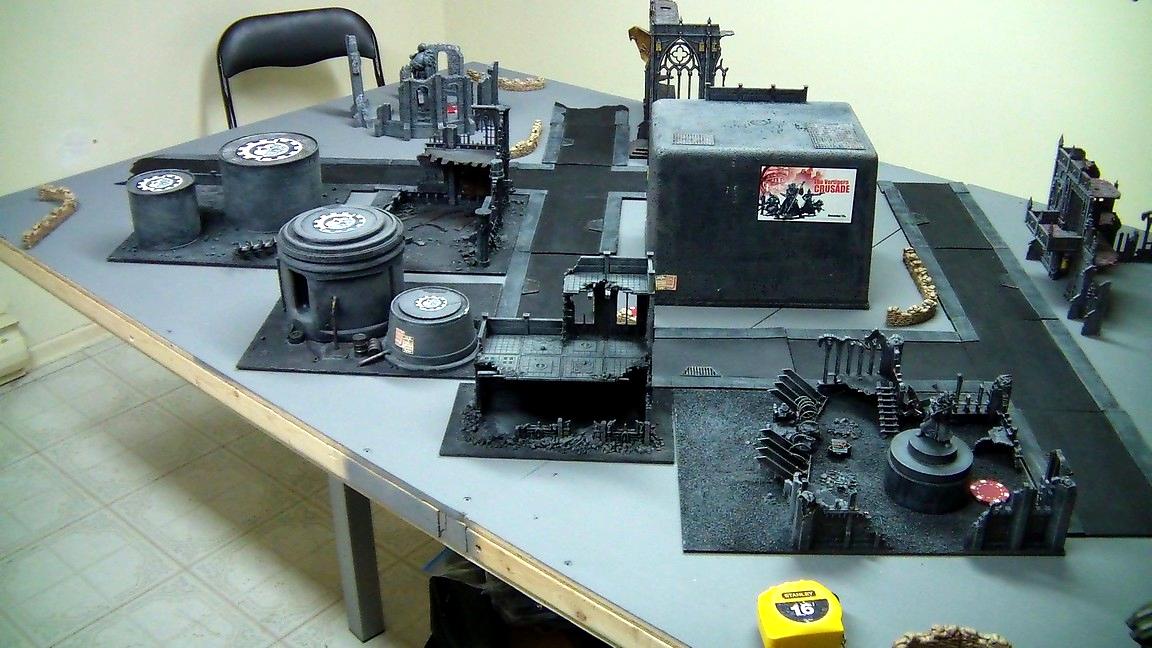
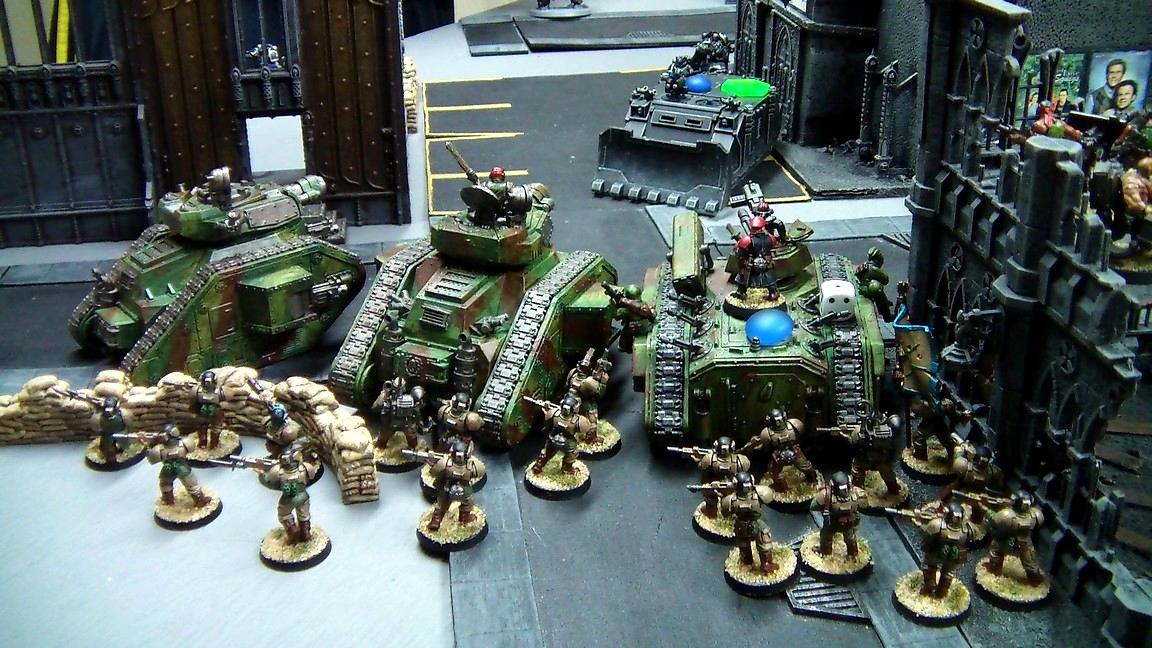
Crablezworth and I settled on a 1500pt game. He would be running his Deathwatch army as a counts-as Nurgle army. I've been playing my Space Wolves a lot lately, and so I decided to give my Tyranids or Imperial Guard a try for a change. I ended up settling on my Metal Gear-themed Imperial Guard because I had just over 1500pts to work with, whereas I have trouble getting my Nids to work under 1850pts. We also decided to do our usual game set-up – ruins provide 5+ cover (makes going to ground a better option and is just generally more dangerous to discourage static play), no melting through cover, you get to pick your warlord trait (which is actually a very good set-up in all honesty, not at all overpowered, and rarely do we all end up gravitating to Immoveable Object) and Crusade as the mission.
Battle report images were taken by myself and Crablezworth. You can check out his impressive 40k photography on his gallery and his photography thread.
Imperial Guard
Spoiler:
HQ Company Command Squad (Company Commander [Meryl] with 2x Plasma Pistols, 4x Meltaguns, Chimera)*
Lord Commissar (Bolt Pistol, Bolter, Camo Cloak, Meltabombs)
TROOPS
Kill Team [Plague Marines] (Champion with Plasma Pistol, 2x Meltaguns, Rhino)
Kill Team [Plague Marines] (Champion with Plasma Pistol, 2x Meltaguns, Rhino)
Kill Team [Plague Marines] (Champion with Power Sword)
FAST ATTACK
Bikers [Chaos Bikers] (Champion with Power Axe/Plasma Pistol, 2x Plasma Guns, Mark of Nurgle)
HEAVY SUPPORT
Vindicator [Chaos Vindicator] (Combi-bolter)
Vindicator [Chaos Vindicator] (Combi-bolter)
2x Deathrain-Pattern Terminators [Obliterators] (Mark of Nurgle)
*Warlord; Master of Deception
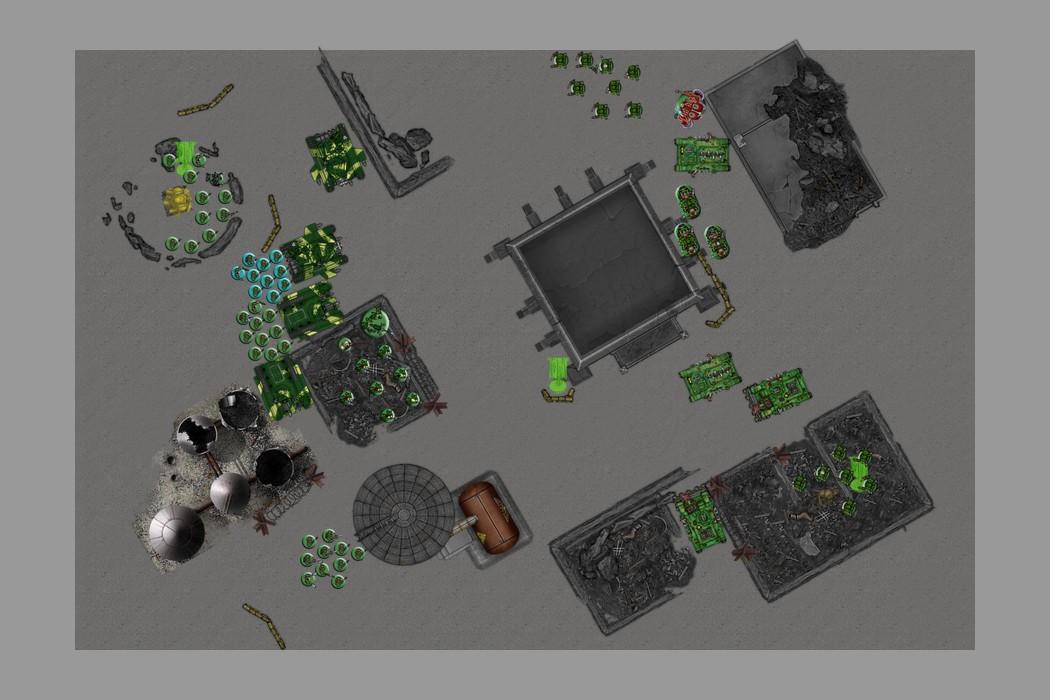
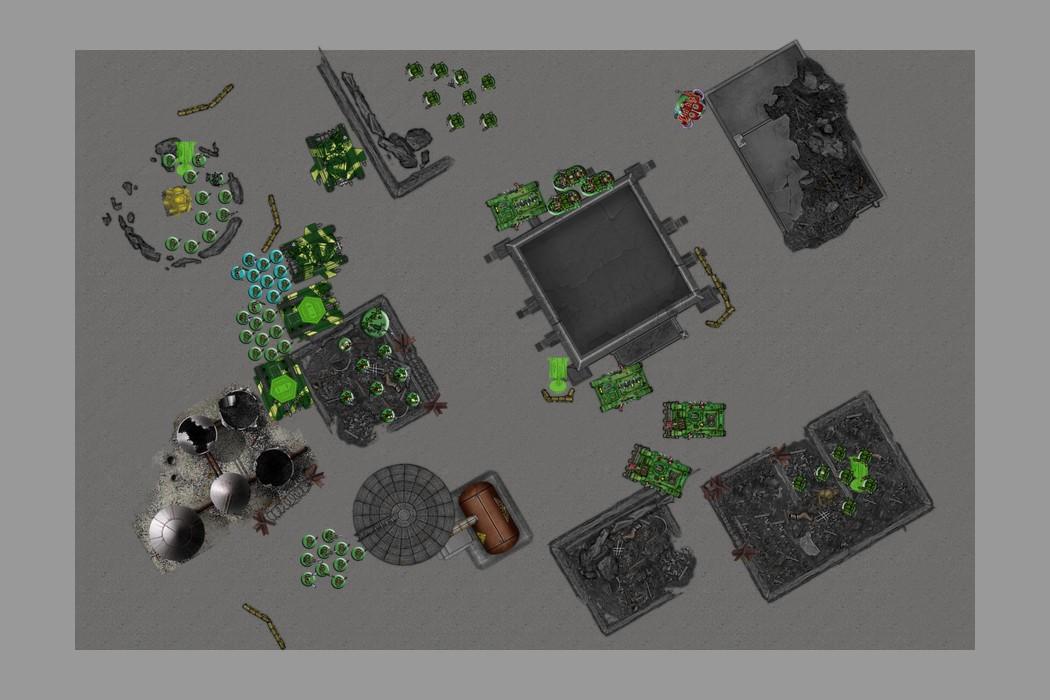
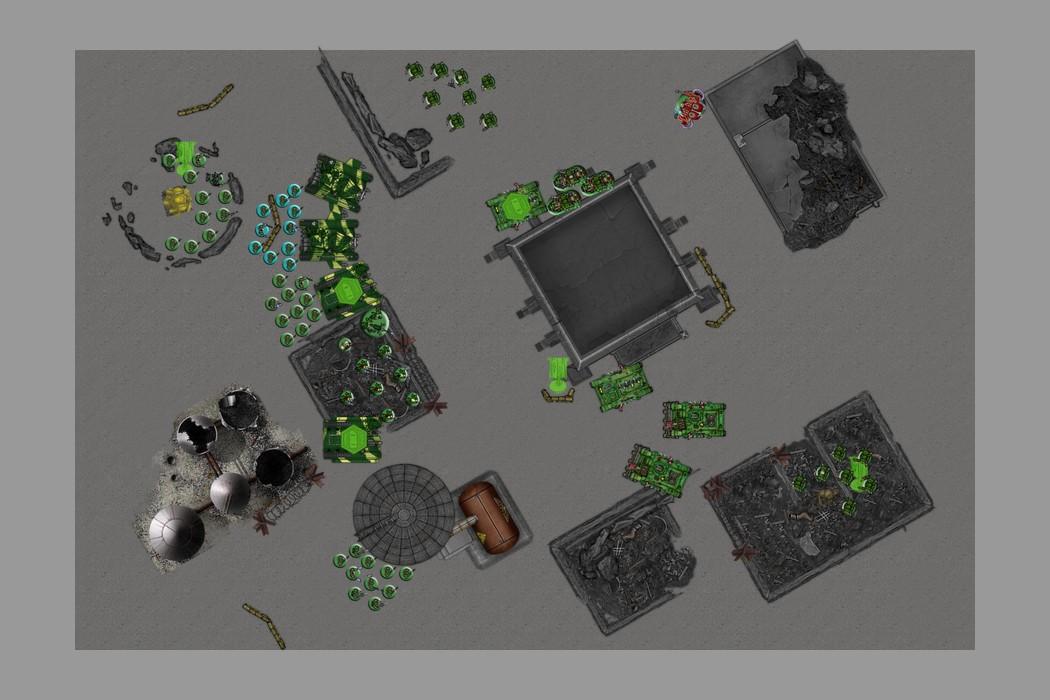
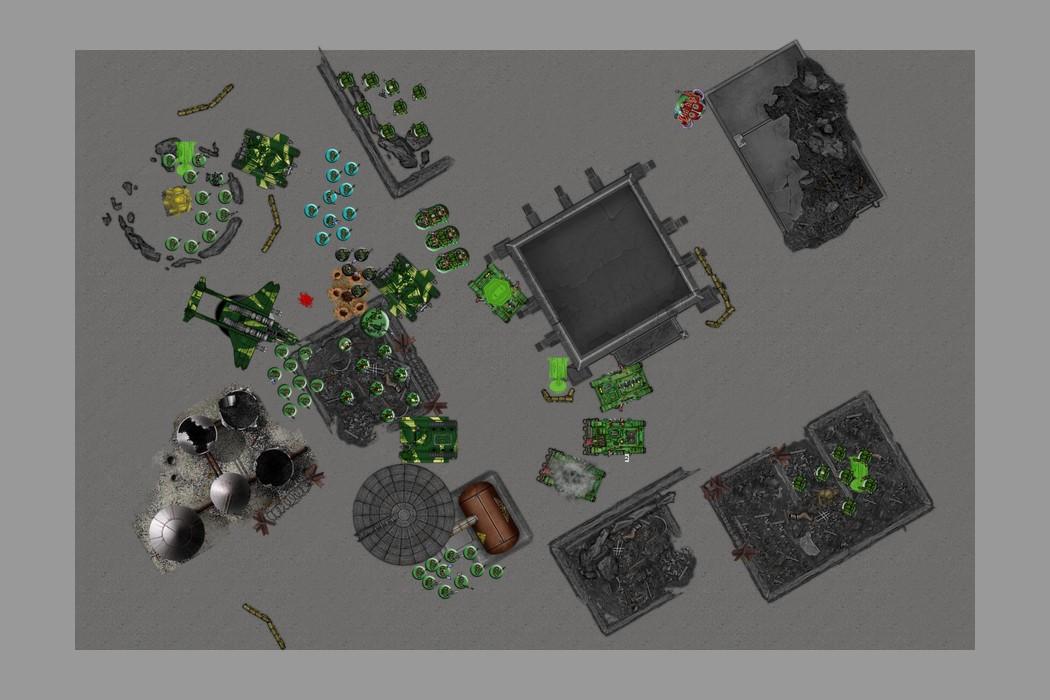
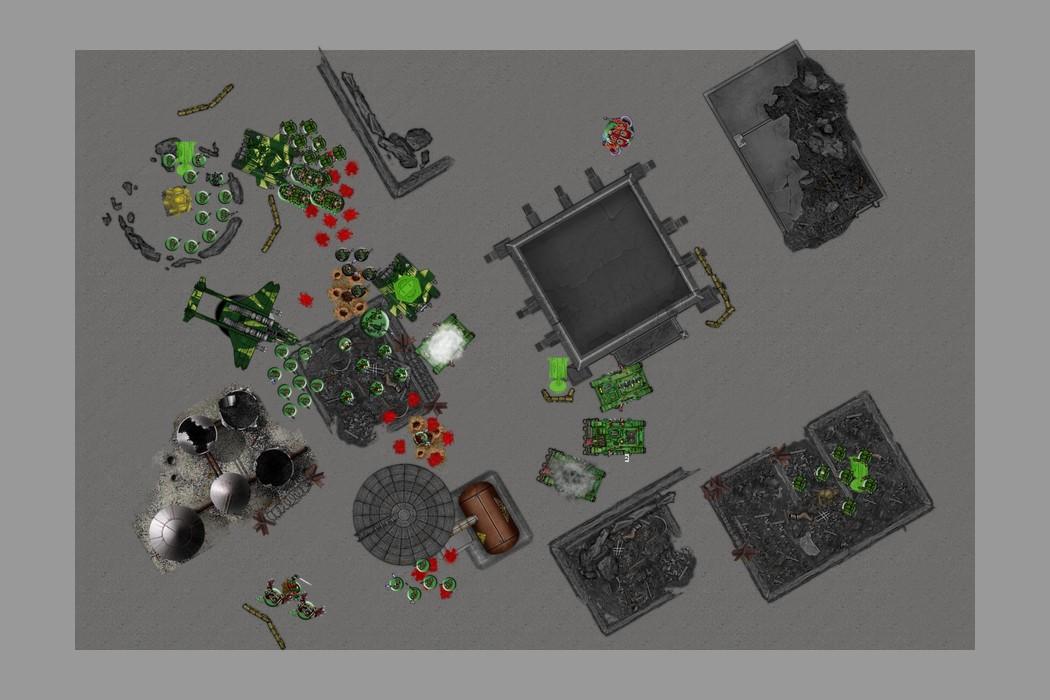
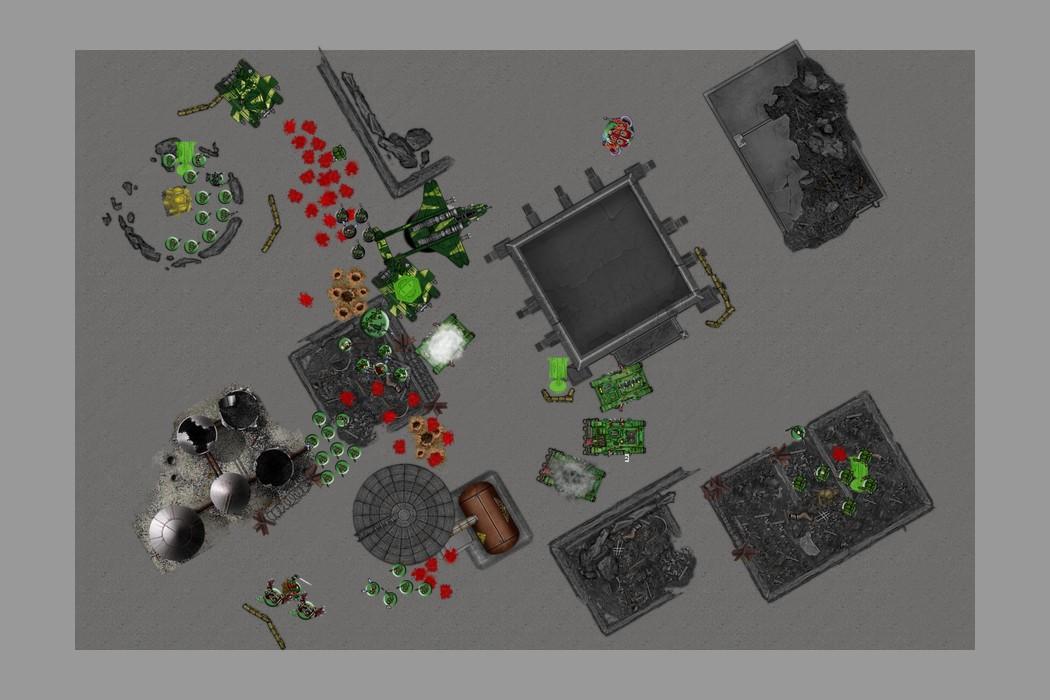
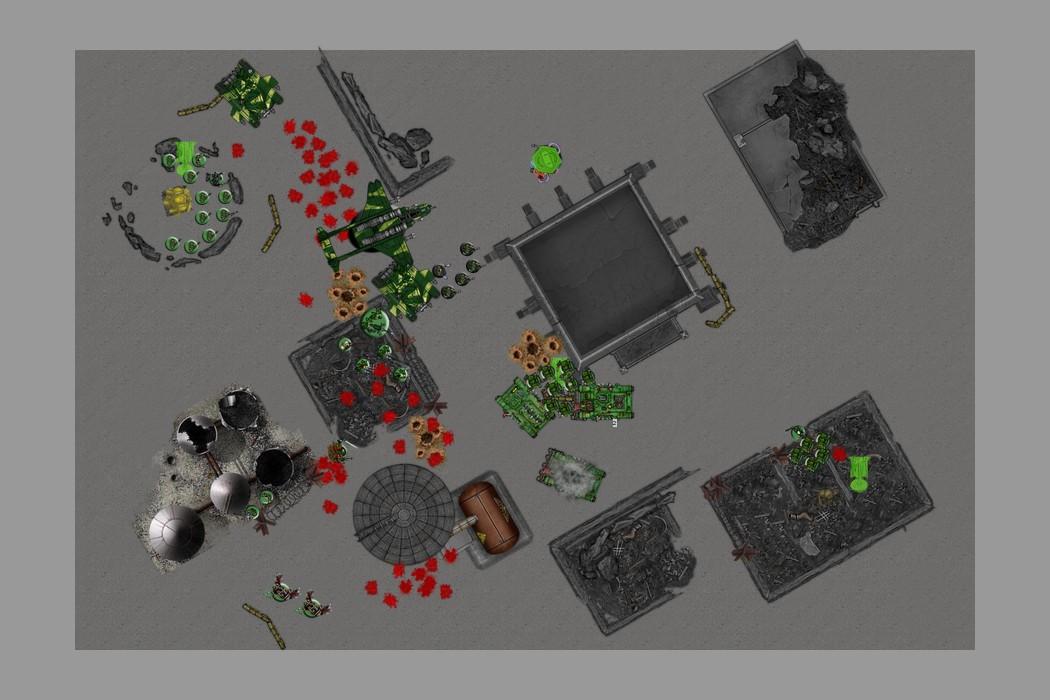
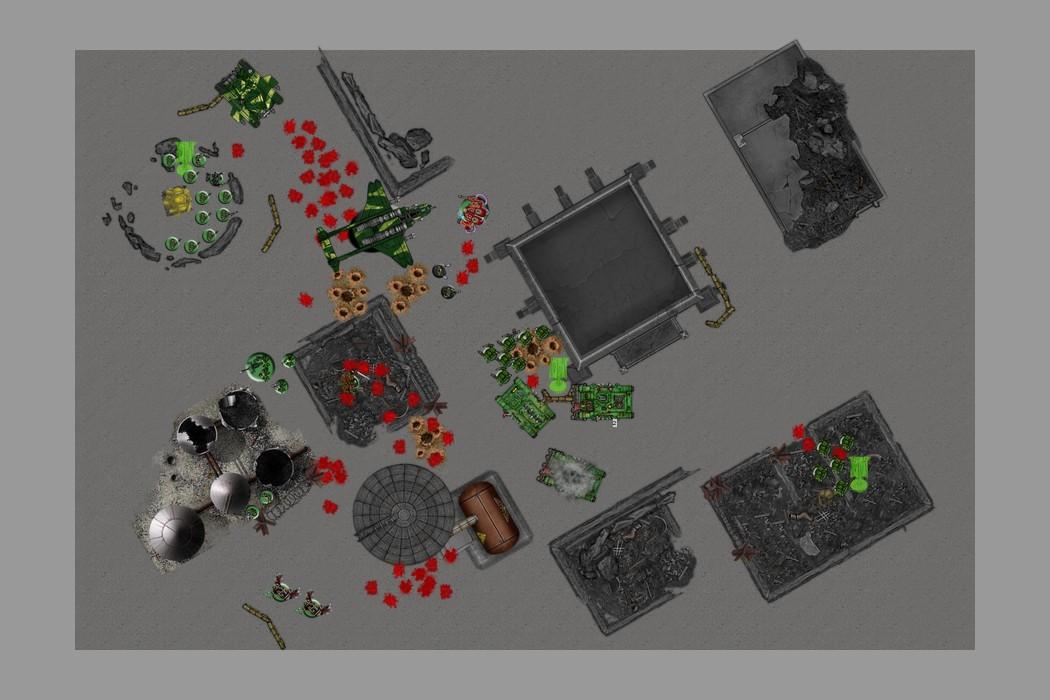
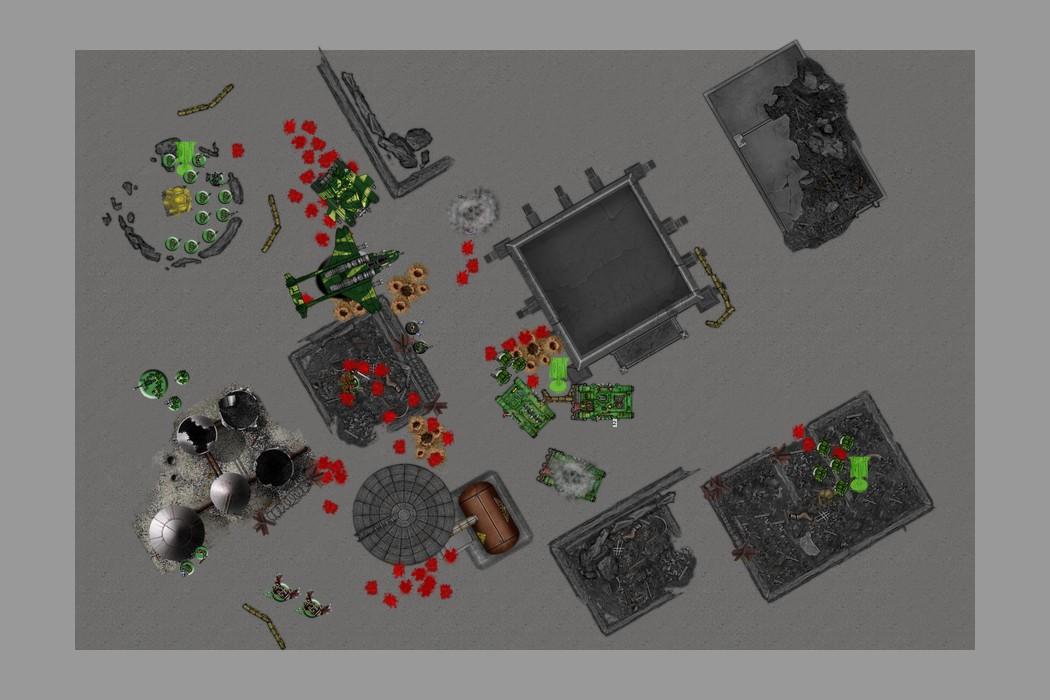
DEPLOYMENT We rolled for the number of objectives and ended up with 3, and got Hammer and Anvil deployment. Night Fighting was in effect on Turn 1. We placed the objectives (Crablezworth had priority) and Crablezworth set up his forces first (after the pair of us rolled the same number 3 times in a row!!!). Crablezworth kept his Chaos Lord and Obliterators in reserves in order to deep strike them together. We then rolled off for Infiltrators (Crablezworth got 1 unit of Infiltrators for Master of Deception). I won that roll off and placed Harker's unit in a forward position inside a ruin. Crablezworth placed his Infiltrating Plague Marines about 6” ahead of his deployment limit on his right flank.
After all of that, I rolled to seize the initiative and...
Spoiler:
...failed. Oh well, I guess he'll come a bit closer to my Demolisher Cannons then.
Yes, one of the Tallarns has the Demo Charge.
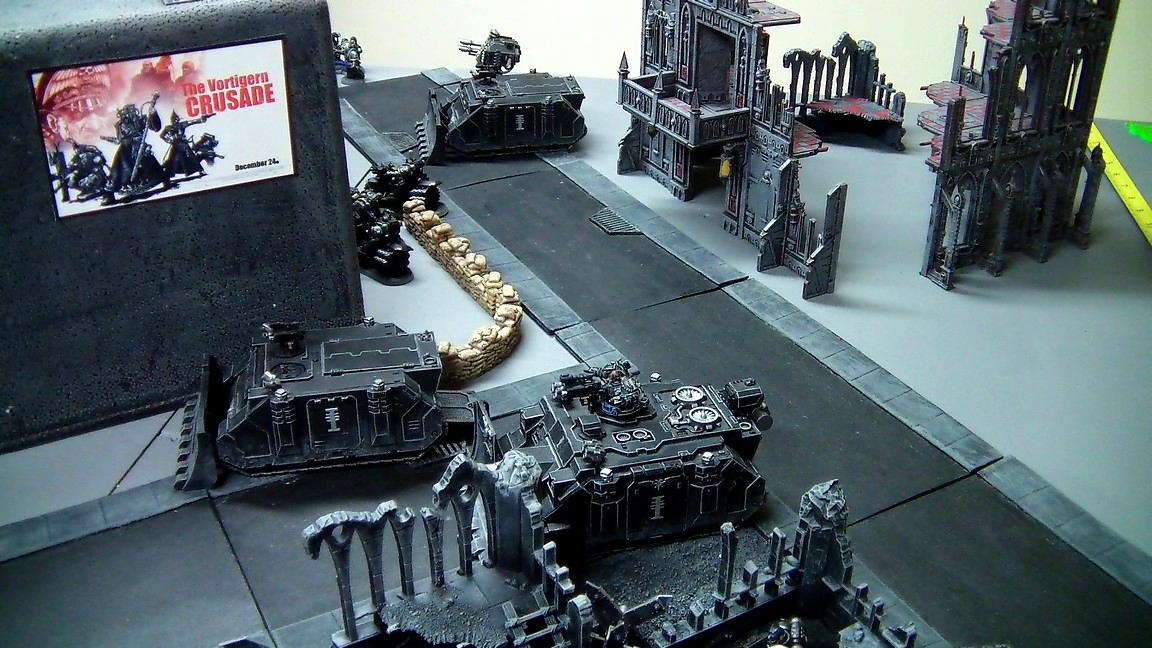
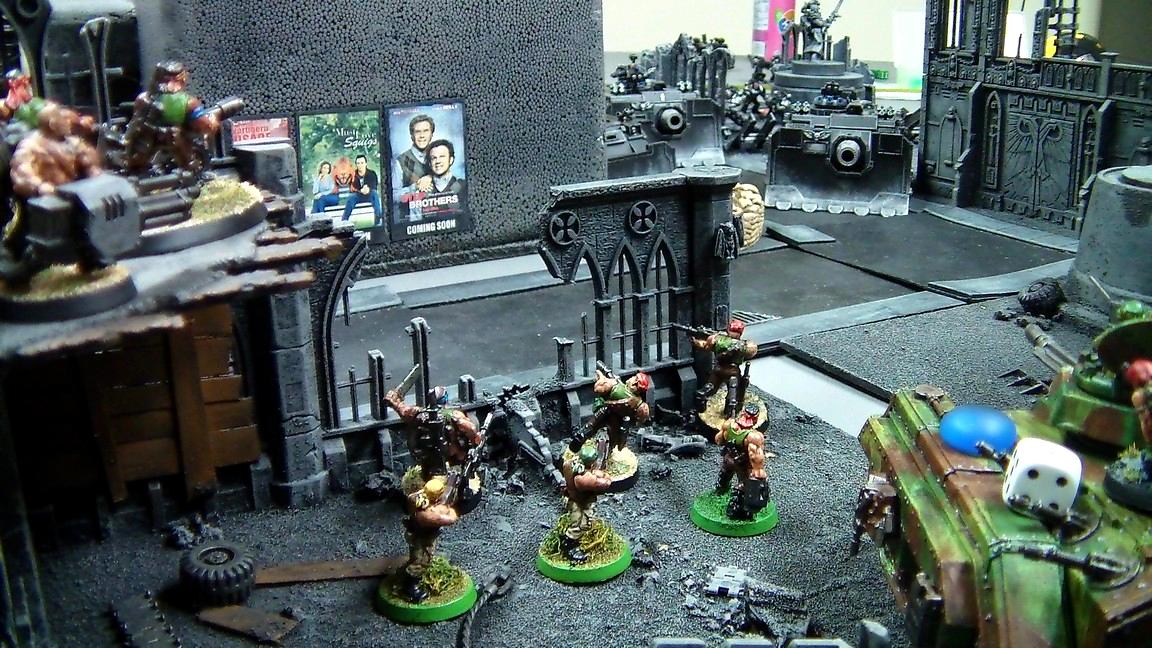
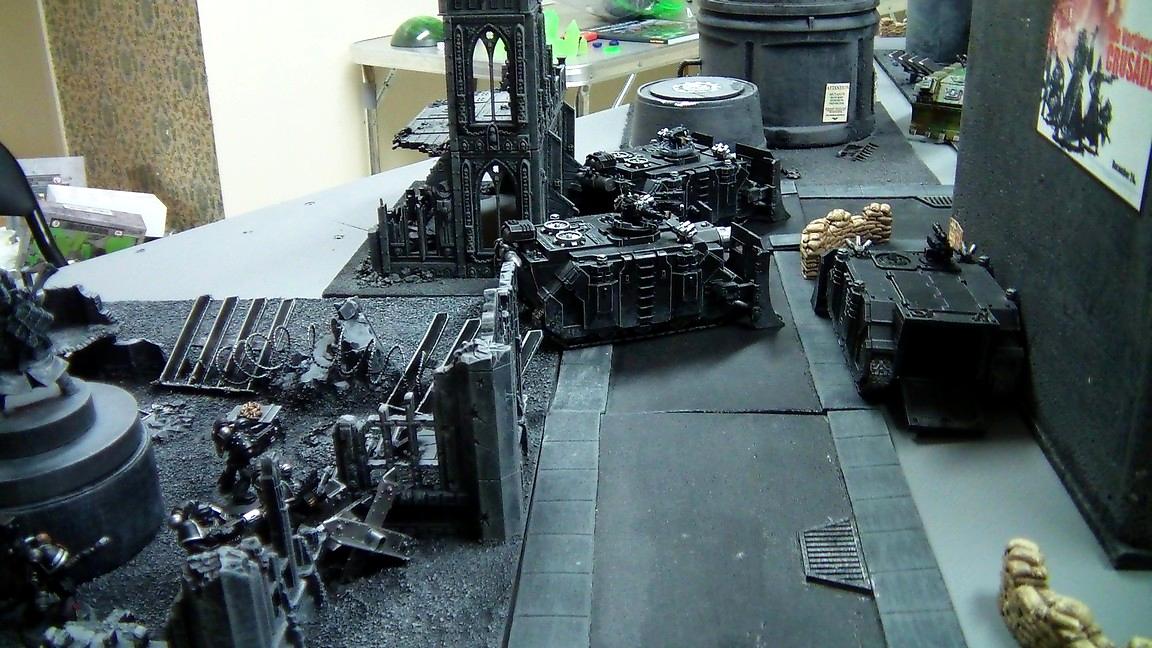
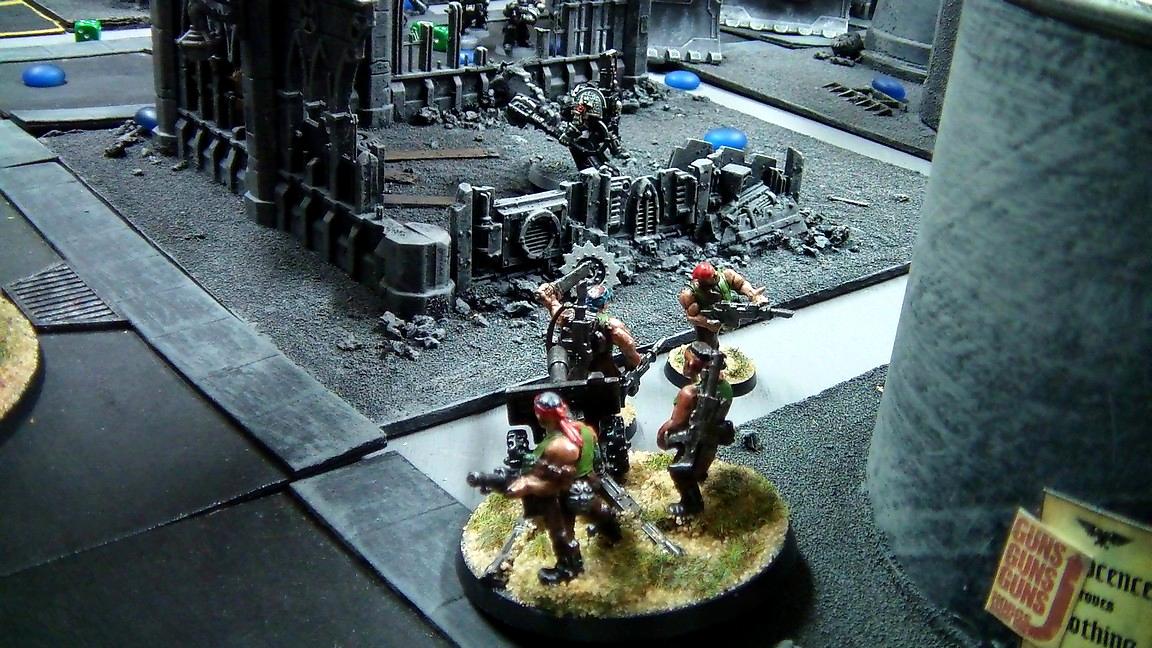
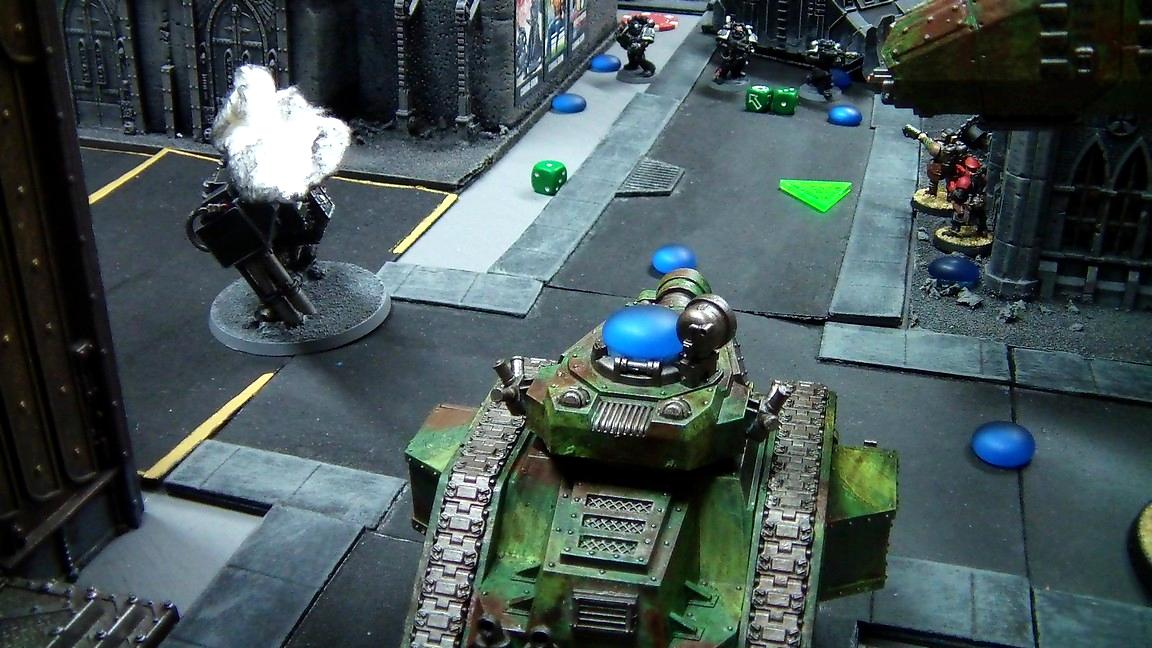
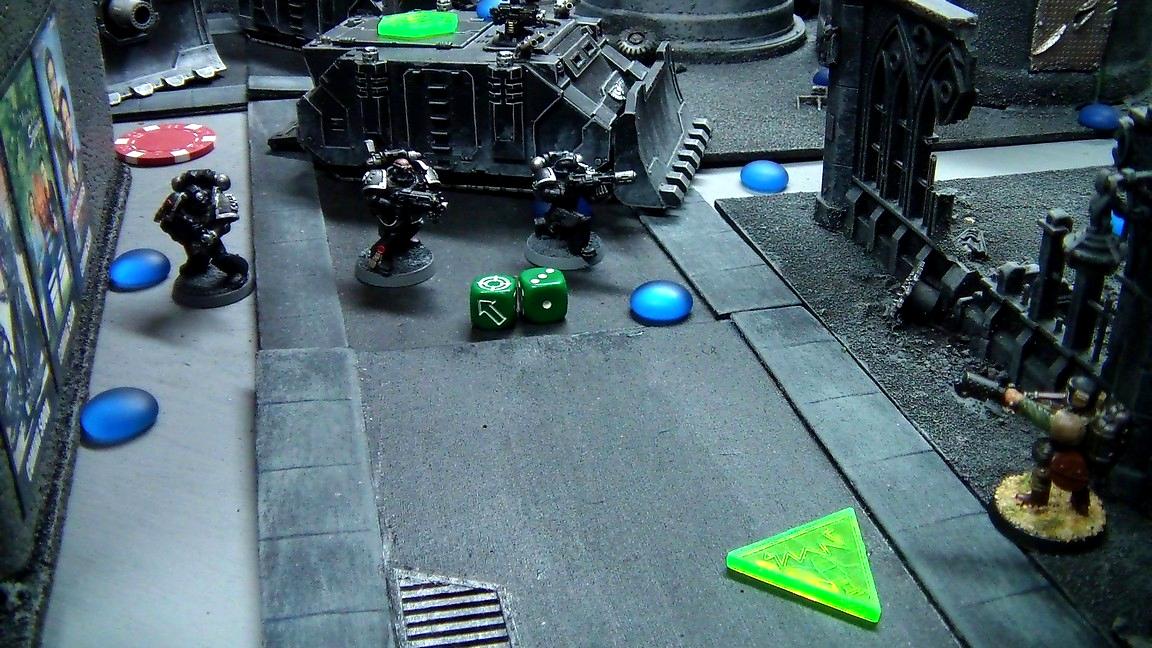
Turn 1 – Deathwatch Crablezworth moved his Vindicators and a Rhino with Plague Marines inside forward to cover the middle obective. On his right flank, the infiltrating Plague Marines moved up the board edge, while their empty Rhino moved ahead to cover the Nurgle Bikers. The Helbrute elected to remain stationary.
In the Shooting Phase, I believe the Helbrute and one of the Vindicators managed to shake both of my Chimeras, despite both receiving fairly hefty cover saves. Unexpected, but hey, that's 40k... and it's not like it was too critical in the grand scheme of things. The Plague Marines ran forward to get closer to the ruin ahead of them, ending Crablezworth's turn.
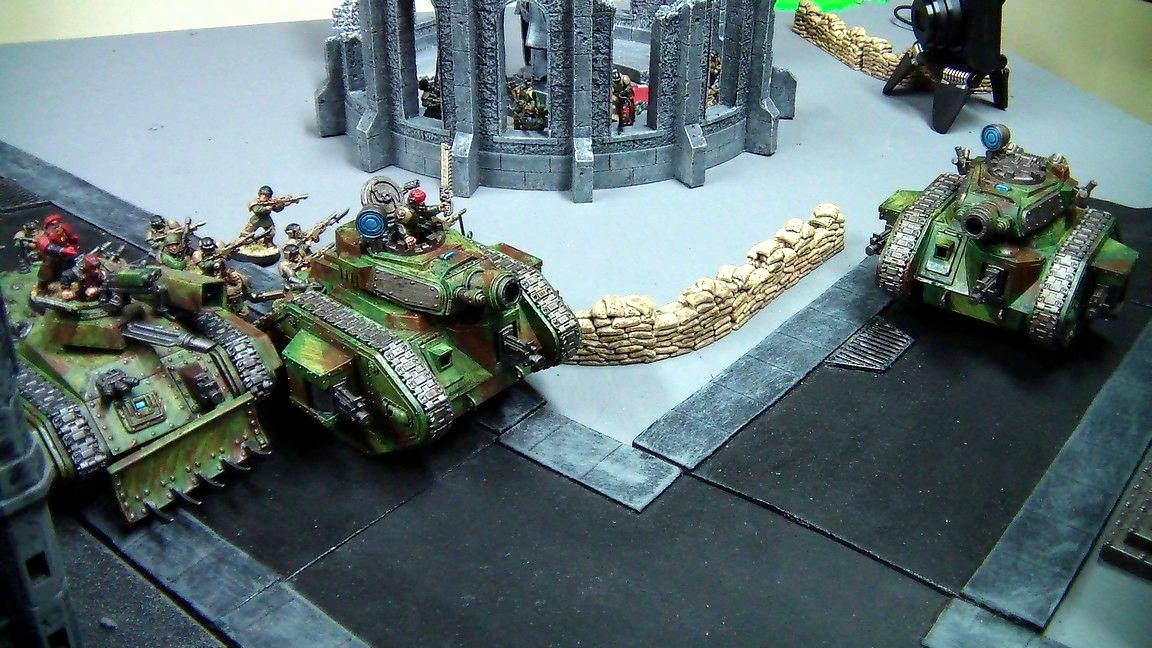
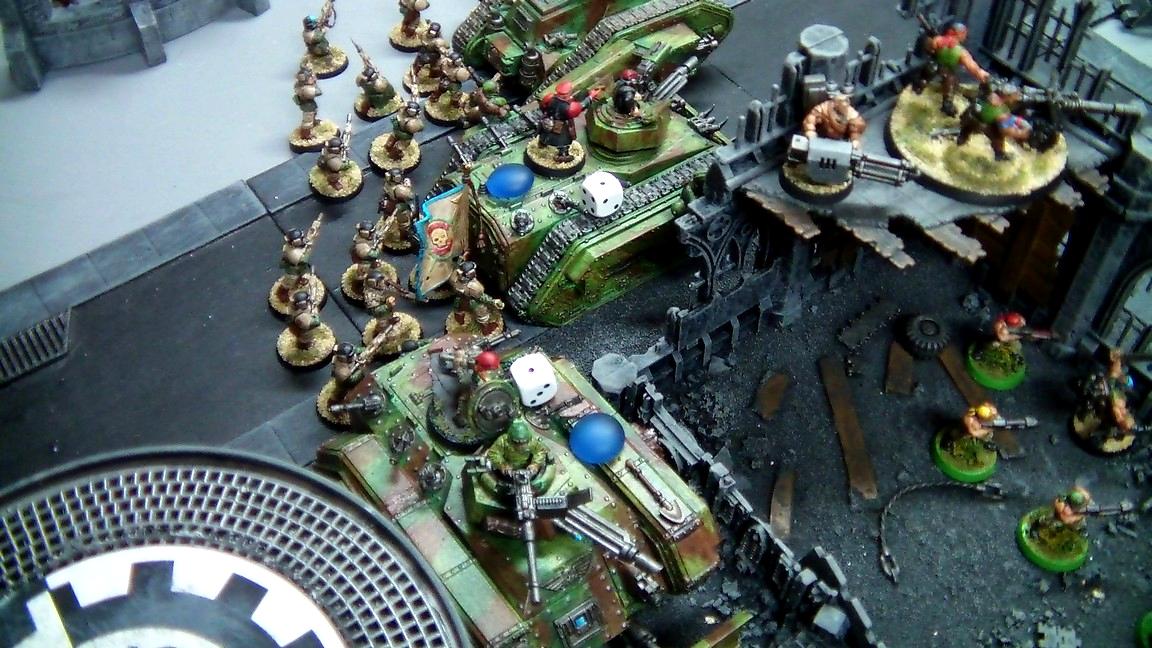
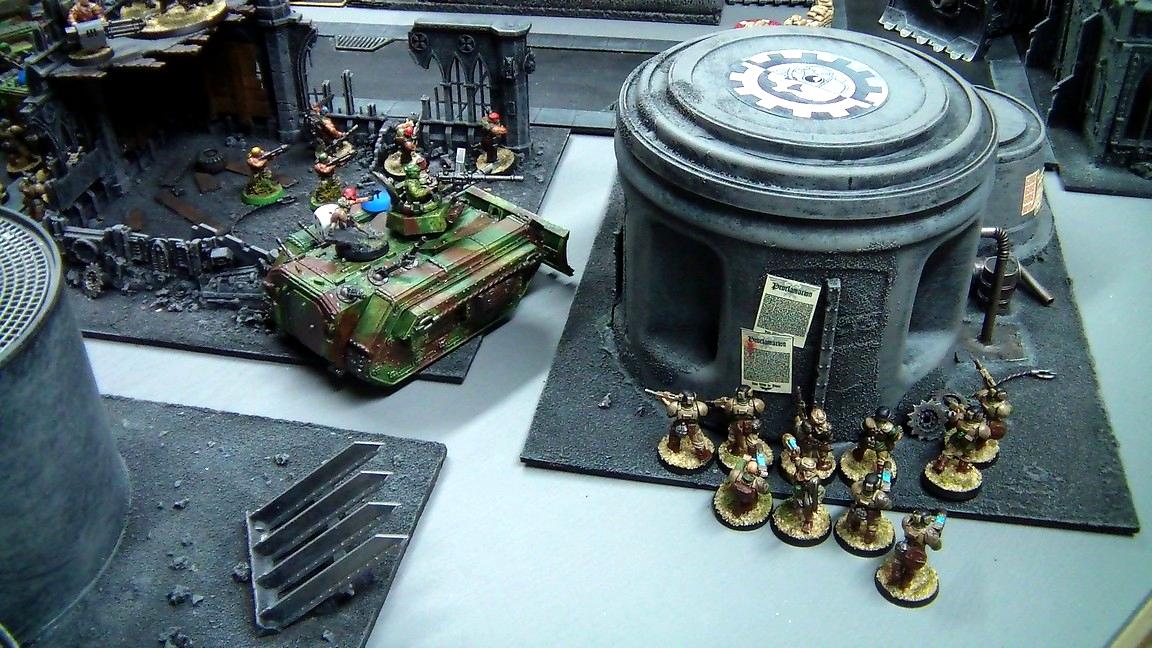
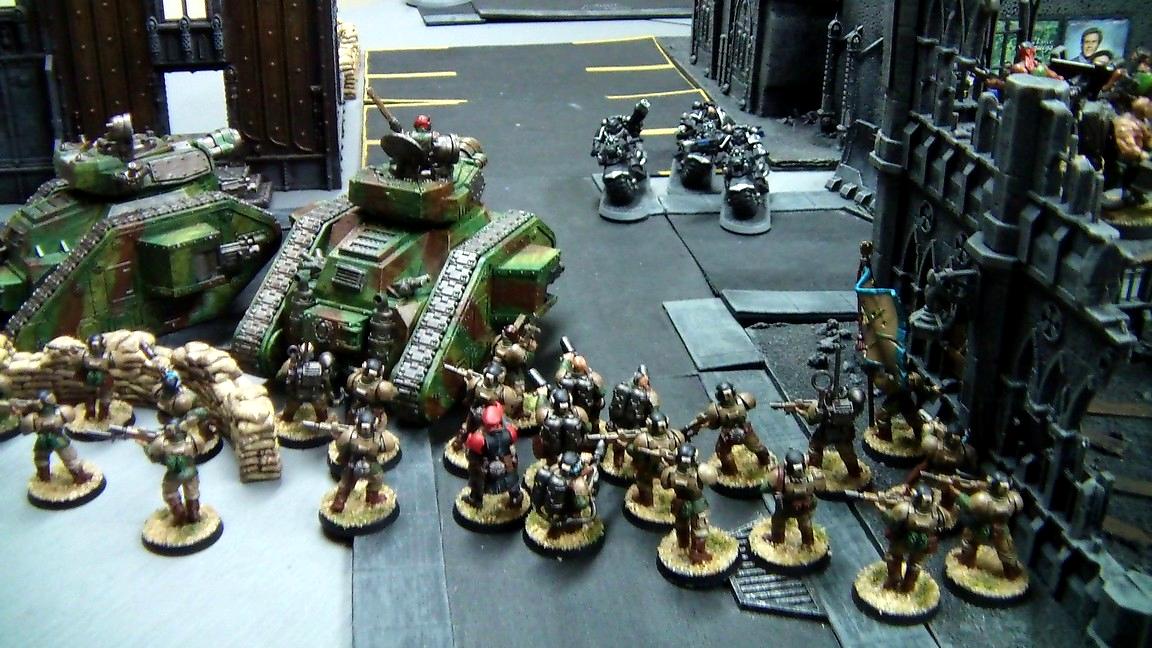
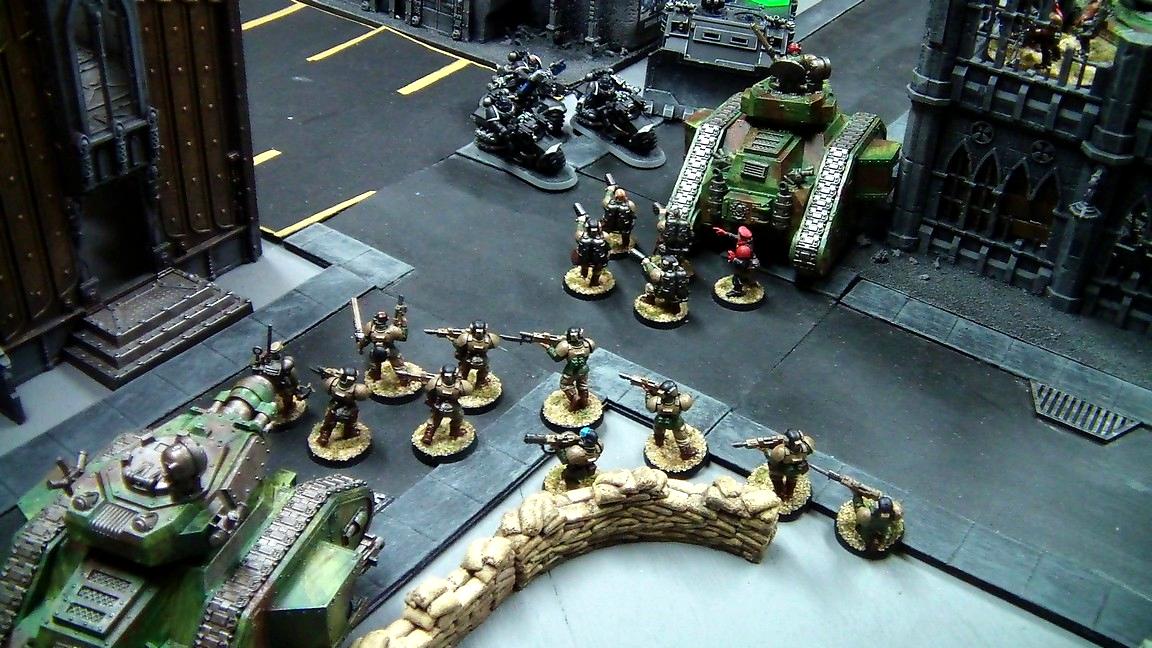
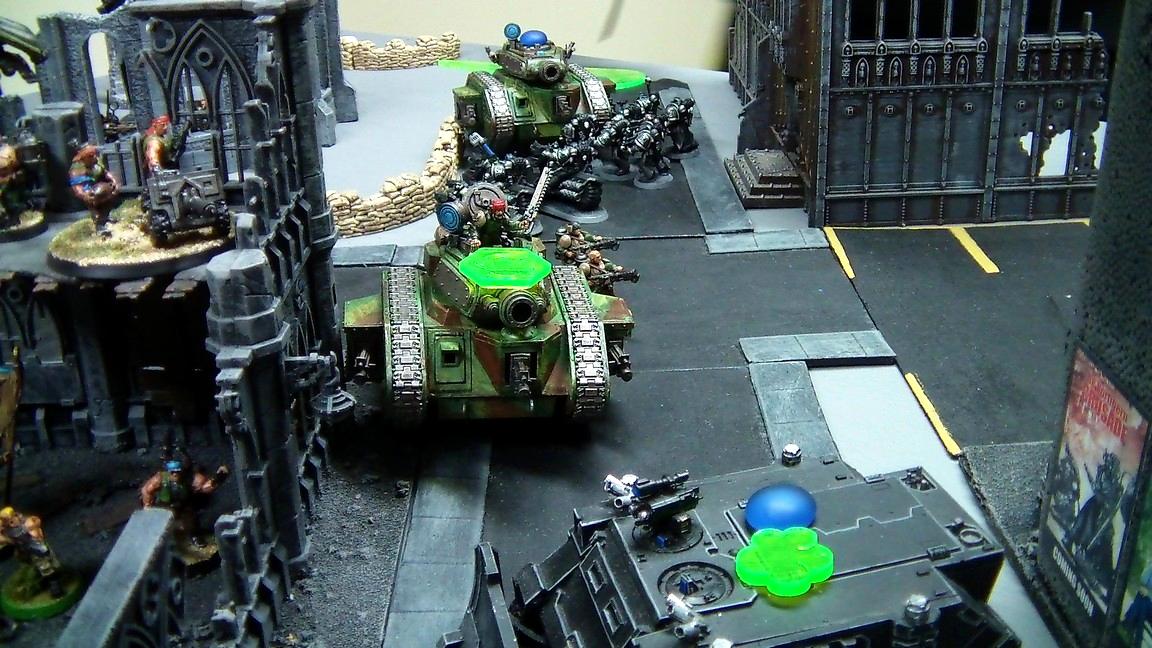
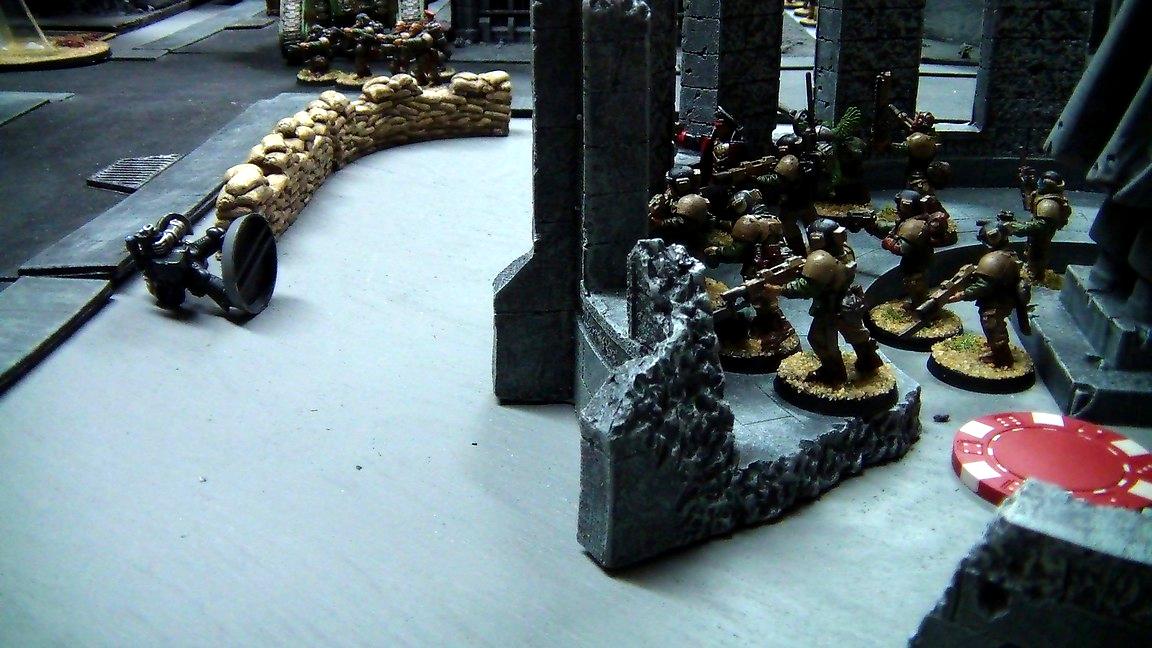
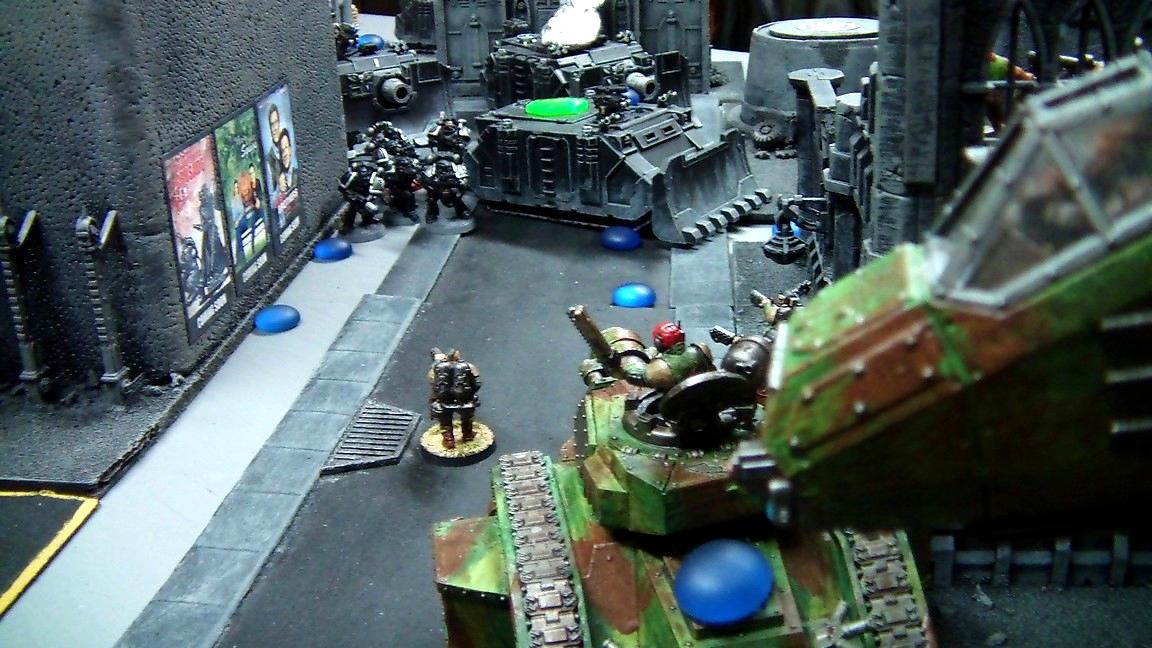
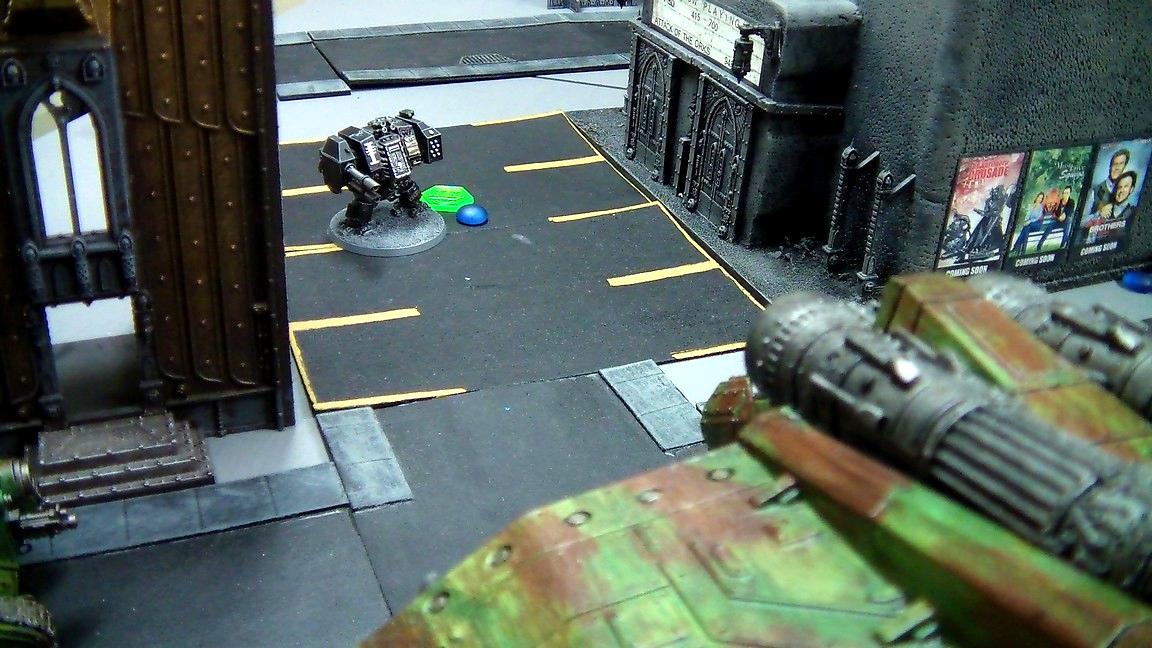
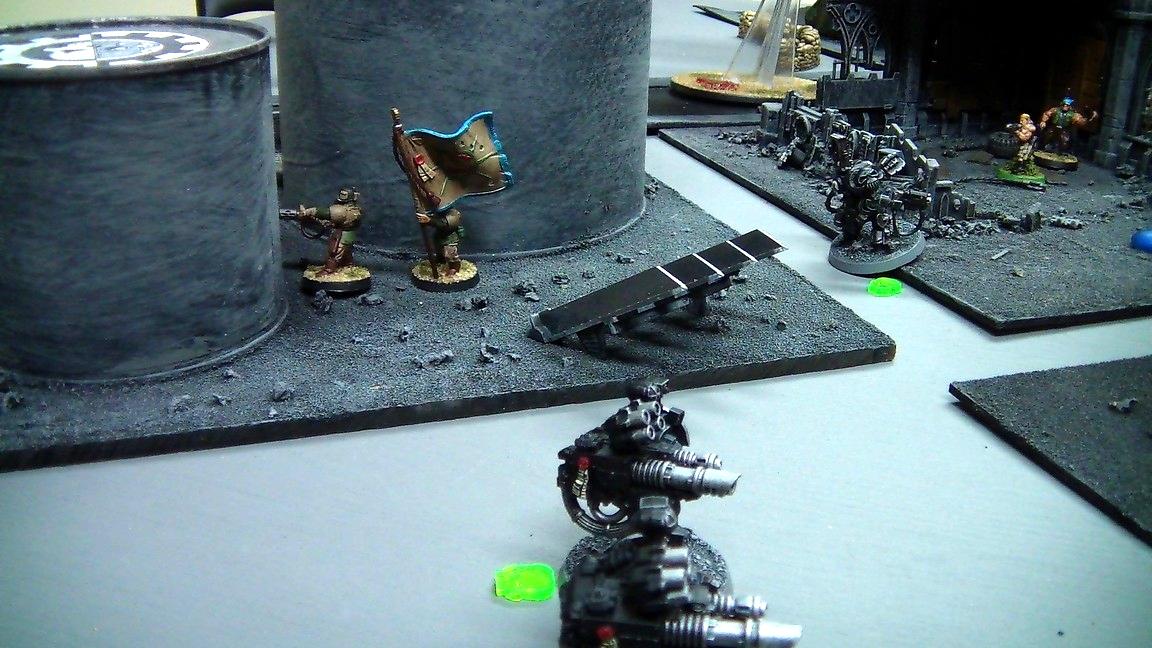
Turn 1 – Imperial Guard Meryl's Chimera (Company Command Squad) decided to go around Vulcan Raven's building (Harker) and try to take out the Vindicators with the squad's meltaguns. The Demo Vets moved up the silos to hopefully mop up the Vindicators and Plague Marines in a turn or two. Meanwhile, the Demolishers and Platoon Command Chimera formed up to blast the crap out of the lone Rhino for an easy First Blood and then hopefully annihilate the Nurgle Bikers behind it.
In the Shooting Phase, Meryl's Chimera couldn't damage any of the Vindicators due to having to fire snap shots (not that I really expected them to). However, Vulcan Raven's squad also failed to cause any damage to the Vindicators, despite having Meryl order them to Bring It Down for a twin-linked lascannon and plasma guns (I think I forgot they were BS4 this turn too which didn't help). Despite that misfortune, it was the Demolishers which would have the biggest fail of the turn. Between two Demolisher cannons, 21 heavy bolter shots and a multilaser, the Demolishers and Chimera caused a grand total of 1 hull point of damage to the Rhino, shaking it. Wow...
Since I am playing Imperial Guard, there was no Assault Phase.
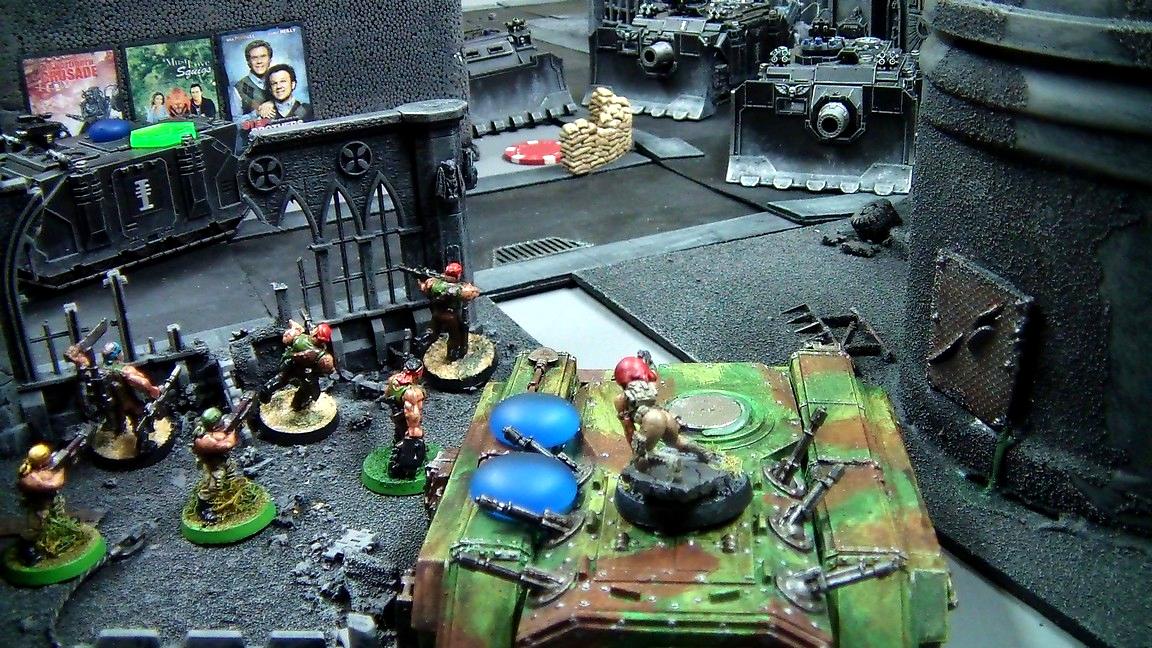
Turn 2 – Deathwatch Crablezworth rolled for his reserves, but they failed to arrive. With the unexpected fortune of having his Rhino survive, Crablezworth moved it ahead, allowing the Bikers free reign on Ocelot's Chimera (Platoon Command Squad). The nearby Plague Marines also advanced into cover on the ruins, preparing to strike next turn with their meltagun. Once again, the Helbrute elected to remain stationary. Meanwhile, the pair of Vindicators advanced slightly further ahead and prepared to rain the pain down on Meryl and Vulcan Raven.
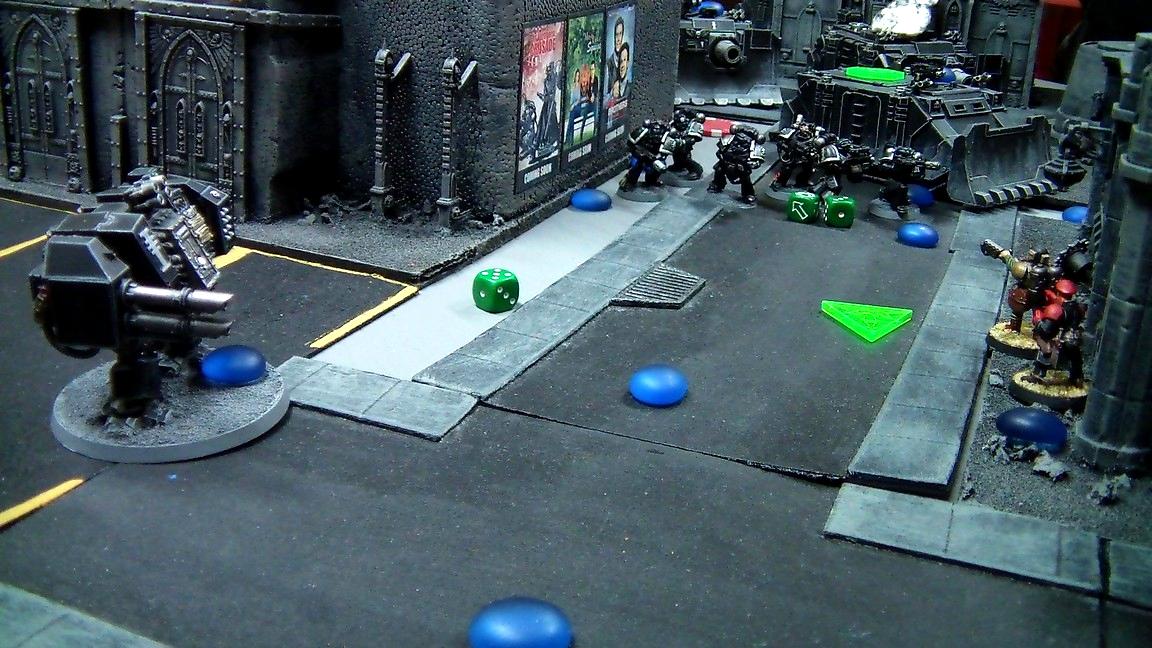
In the Shooting Phase, the Helbrute opened fire on one of my Demolishers, but its shots glanced off. However, a volley of plasma from the Bikers managed to destroy Ocelot's Chimera and earn First Blood, but the blast only killed a single nearby Guardsman. On the other side of the field, the Vindicators opened fire on Meryl's Chimera, but only managed to blow off its multilaser.
In the Assault Phase, the Bikers tried to charge Ocelot's unit of flamers, but their charge came up short. Luckily for them, none of the Bikers were killed from flamer overwatch (T6 is hard to crack with small arms fire!!!).
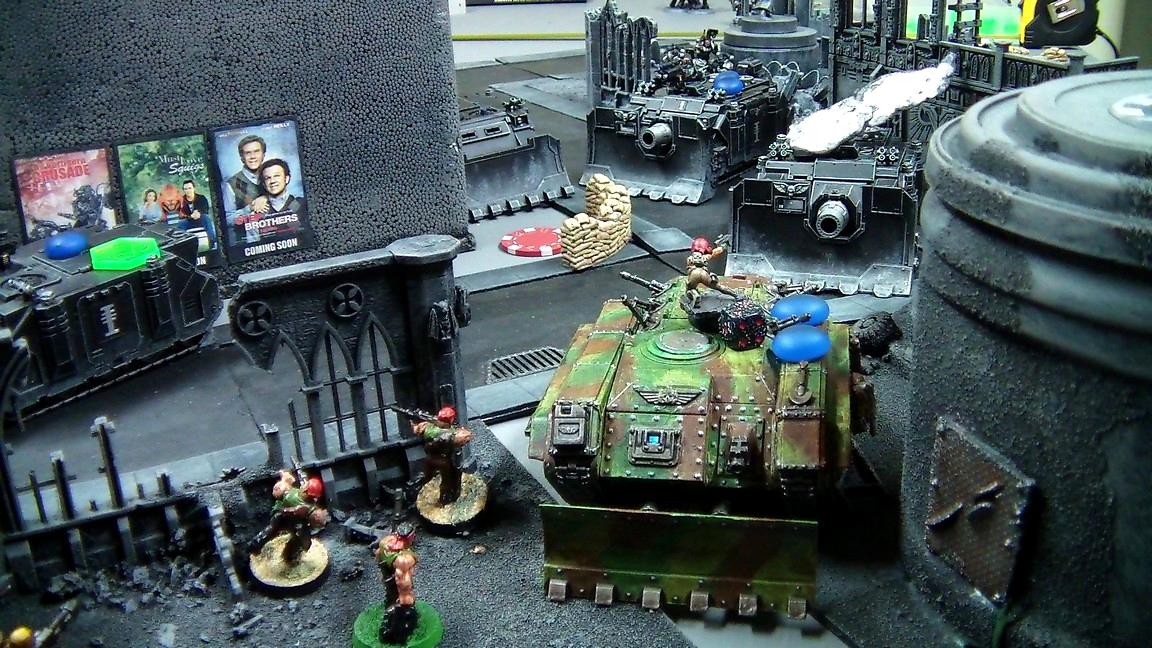
Turn 2 – Imperial Guard I rolled for my reserves and the Vendetta arrived. Solid Marbo would remain in reserves and wait to strike... The Vendetta zoomed in and prepared to airstrike one of the Vindicators off the table. If that failed, Meryl's crippled Chimera advanced and turned to face away from the Vindicators – it was basically screwed already, so I figured that I might as well expose its rear armour in order to get the top hatch closer to the Vindicators and get the meltaguns into firing range. Elsewhere, Ocleot's squad moved to flame the Bikers alongside one of the Infantry squads. The other Infantry squad which had lost a man to the explosion moved around Vulkan Raven's building in order to try to reach the middle objective. The Demo Vets continued to advance for a flanking attack on the middle objective as well. Finally, one of the Demolishers moved to fire its cannon at the Vindicators and clear out the middle objective, while the other Demolisher would concentrate on the Bikers if need be.
In the Shooting Phase, the combined fire of Meryl and Vulcan Raven's units managed to strip the hull points off of a Vindicator, wrecking it. The other sustained heavy damage from the Vendetta, losing 2 hull points. Meanwhile, the Platoon Command Squad's flamers and the combined fire of 2 Infantry Squads did absolutely no damage to Nurgle Bikers. Even worse, the Demolisher cannon missed them entirely, leaving the squad free to run about inside of my lines. Craaaaaaap, not good.
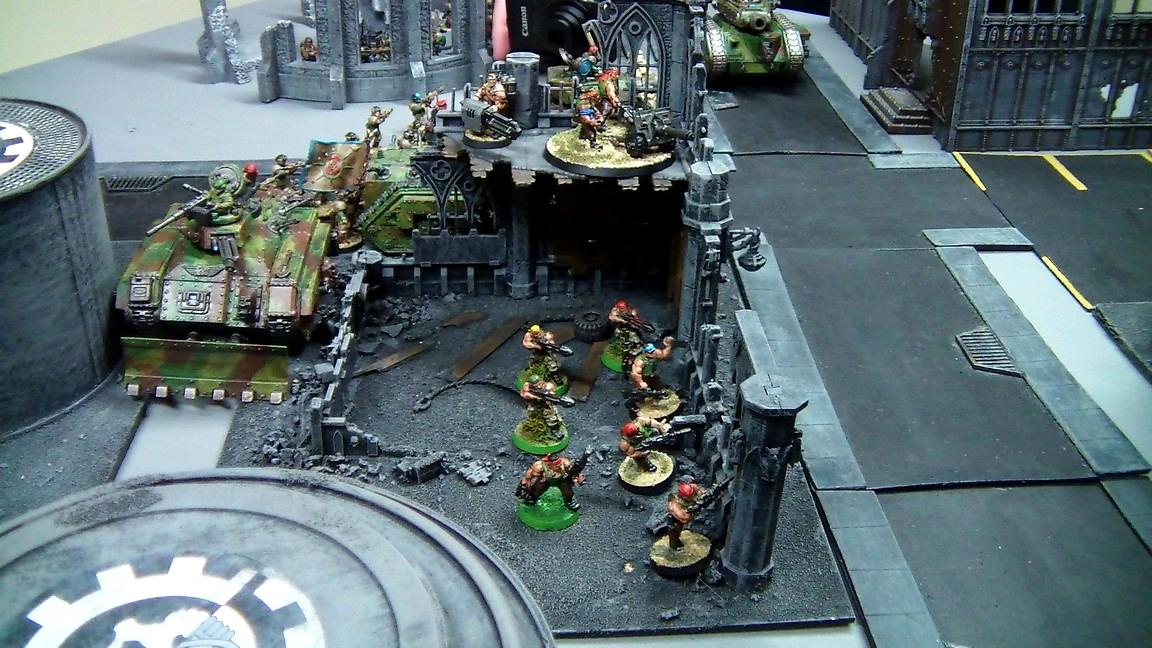
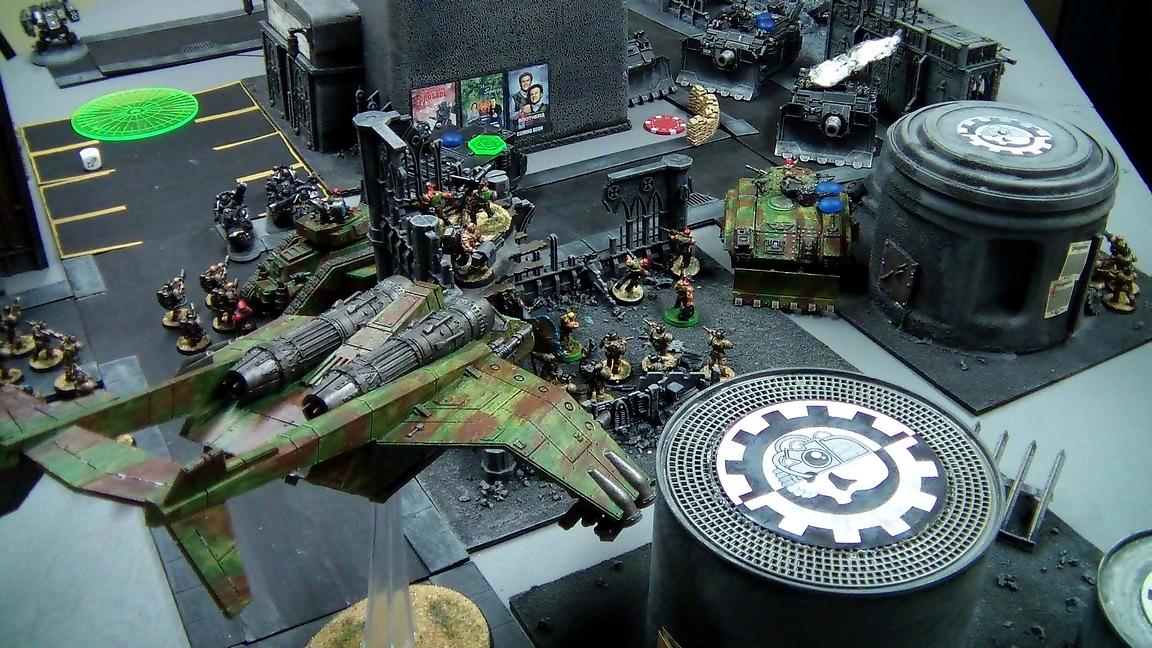
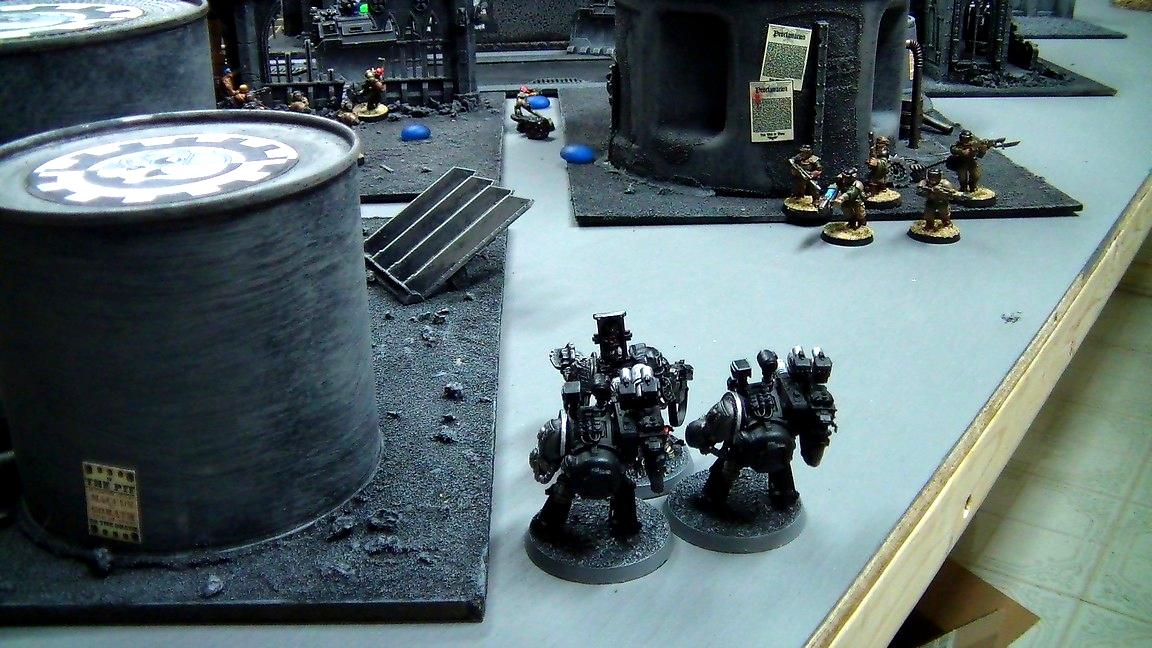
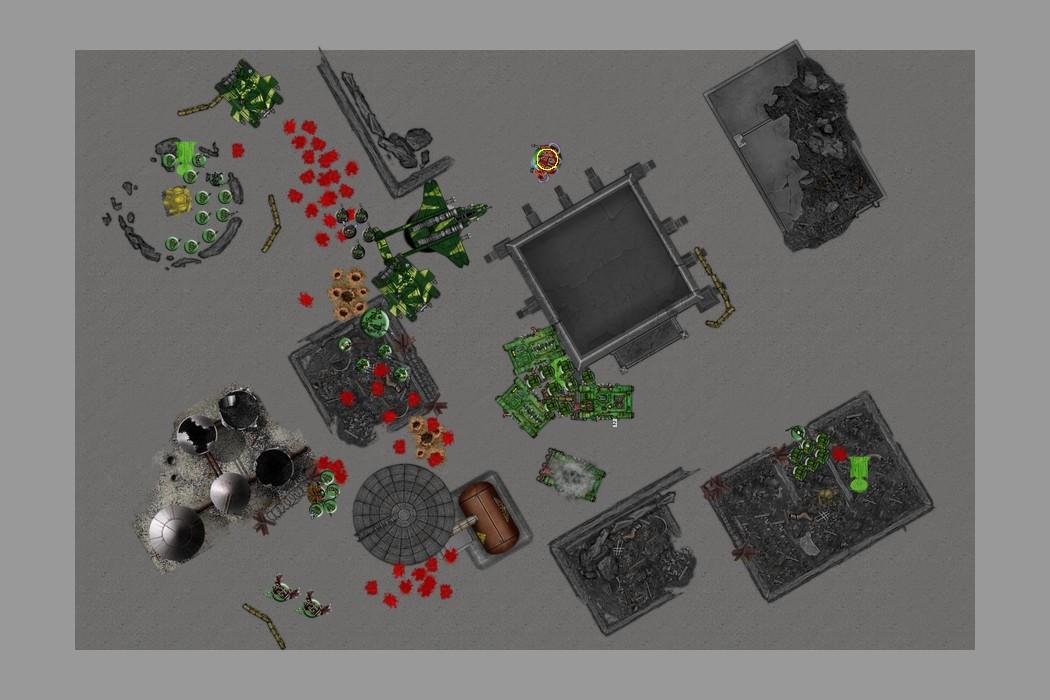
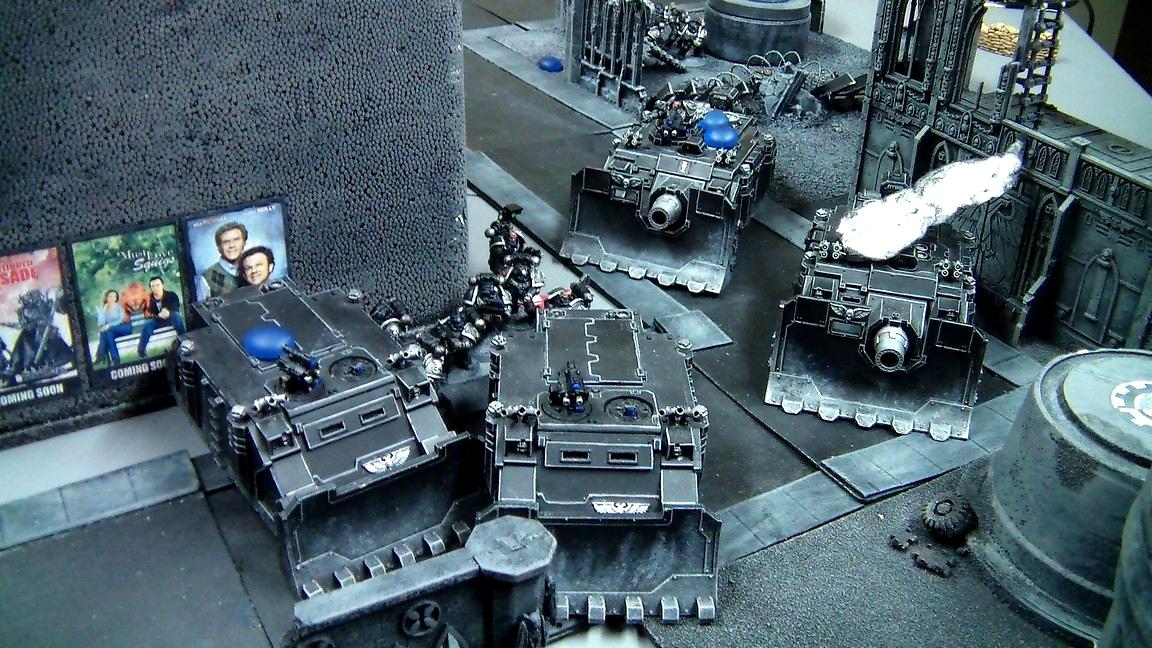
Turn 3 – Deathwatch This turn, Crablezworth's Chaos Lord arrived with his Oblierators. They tried to land near Vulcan Raven's unit, but ended up scattering far down the table, landing near my Demo Vets... oh crap. The empty Rhino then moved to block the Demolisher attacking the Vindicators, popping smoke to help this. The Plague Marines then both moved to attack my other Demolisher while the Bikers focused on the Infantry squad. Lastly, the Helbrute finally started moving towards my lines, targeting the side armour of the Demolisher attacking the Vindicators.
In the Shooting Phase, the Helbrute opened fire, managing to stun the Demolisher. The Plague Marines also fired their meltagun at the other Demolisher, but failed to cause any damage. The Bikers killed a few Guardsmen in the Infantry squad and prepared to charge. On the other side of the field, the other Vindicator blew up Meryl's Chimera, killing all but Meryl and a single Guardsman in the blast. However, that Guardsman was cut down by the nearby Rhino's combi-bolter, leaving Meryl in a crater with a single wound. Dammit, I should have made the Lord Commissar my warlord... Finally, the Chaos Lord and Obliterators (using twin-linked plasma guns) fired at the Demo Vets, killing 5 of them and forcing them to fall back.
In the Assault Phase, the Bikers charged the Infantry Squad and slaughtered them wholesale with ease. The Plague Marines, on the other hand, charged the Demolisher and attacked it with their krak grenades. However, somehow they only managed to cause a single hull point of damage to the battle tank! I breathed a sigh of relief and then prepared to blast the interlopers to oblivion.
Turn 3 – Imperial Guard I rolled for reserves and this turn Solid Marbo showed up.
Marbo decided to go after the Plague Marines camping the bottom objective. The mobile Demolisher backed up in order to blow the Plague Marines and Bikers apart, while Ocelot's squad prepared to flame them as well. The Vendetta elected to remain in flyer mode and moved to gun down the Helbrute. Meryl moved to get some cover from Vulcan Raven's squad, although at this point she was in serious trouble. Finally, the Demo Vets regrouped, and prepared to open fire on the Chaos Lord's unit with help from the nearby Infantry Squad.
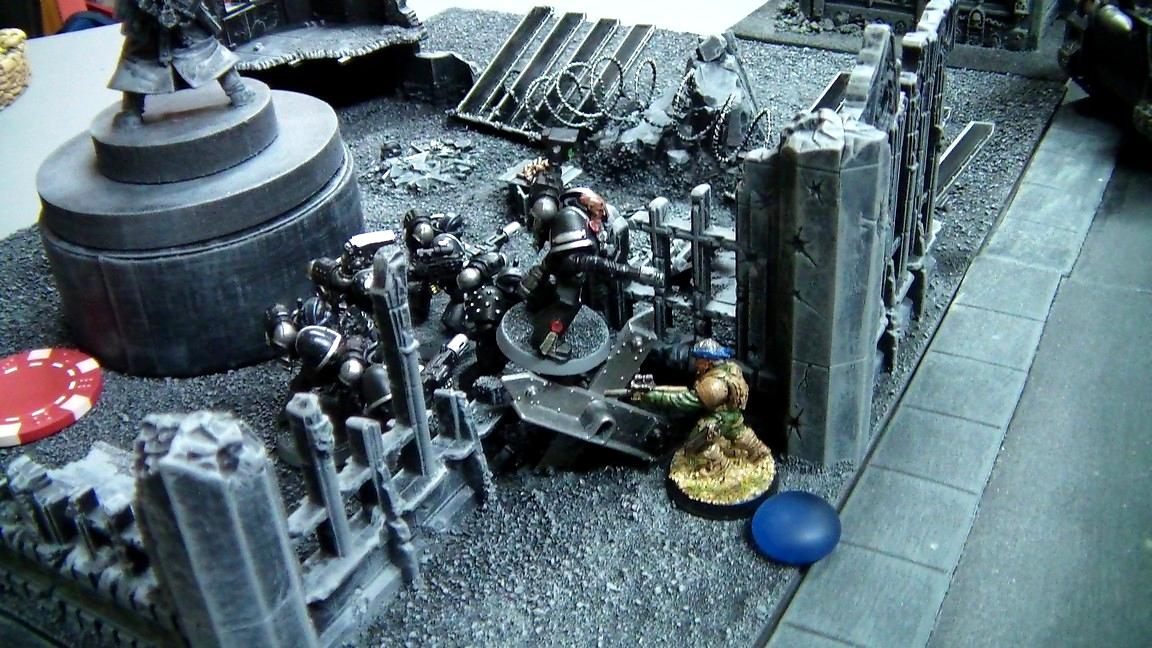
In the Shooting Phase, the Vendetta whiffed completely as the Helbrute laughed off the 3 lascannon shots. Meryl also had a massive fail, rolling double 1s on her plasma pistols and killing herself 2 times over... sigh. Furthermore, the Infantry Squad failed to wound the Chaos Lord, but the Demo Vets managed to cause a single wound on one of the Obliterators. On a more positive note, the Demolisher, Ocelot's unit and the Infantry Squad camping their objective killed all of the Bikers and all but one of those pesky Plague Marines. The lone Marine decided he was going to go out like a man and prepared to charge the Lord Commissar's unit. Lastly, Marbo tossed his demo charge at the Plague Marines, but due to their cover saves (and a bit of good luck), only 1 of them died.
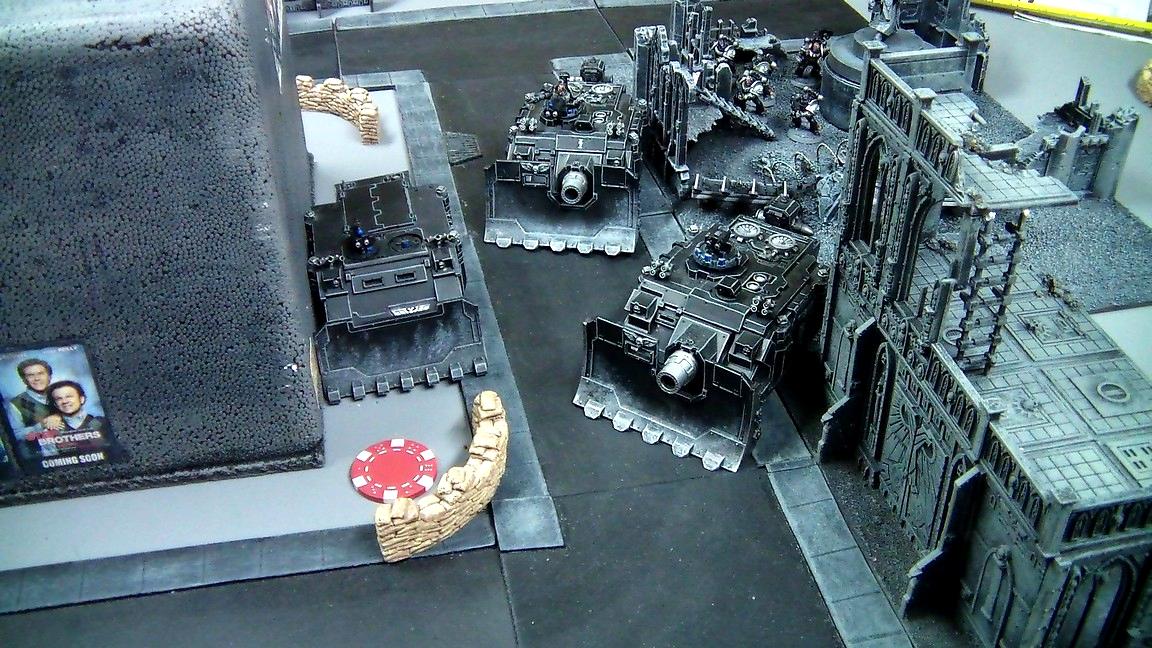
Turn 4 – Deathwatch I had been hoping to tie up Crablezworth's Chaos Lord and Obliterators for two turns, but he smartly split the Lord off from the Obliterators to attack the nearby Infantry squad while the Obliterators would focus on the Demo Vets. Dammit. At the far end of the board, the remaining Plague Marines prepared to charge Marbo. On the opposite end, the last surviving Plague Marine decided that he would charge the Lord Commissar's unit and possibly sweep them off the board if he got lucky. The Helbrute continued to advance up the board towards the Vendetta. Finally, the Plague Marines inside of the Rhino disembarked onto the middle objective, and the two Rhinos created a shield around the unit.
In the Shooting Phase, the Obliterators used their assault cannons to annihilate the remaining Demo Vets. The Chaos Lord also managed to gun down a couple Guardsmen from the Infantry squad. However, the Deathwatch's other shooting attacks were unsuccessful – the Helbrute failed to damage the Demolisher, the lone Plague Marine didn't kill any Guardsmen with its pistol and Marbo didn't suffer any damage.
In the Assault Phase, the Chaos Lord charged the Infantry squad, killing 3 of them (we forgot about the always having to challenge rule) but unexpectedly suffered a wound in the process! The surviving Guardsmen managed to hold their ground as well... they were clearly a bunch of over-achievers. The lone Plague Marine also launched his charge, but despite having only a couple Guardsmen in line of sight, the Plague Marine got gunned down by a single lasgun overwatch shot! If nothing else, that was a moral victory right there. Finally, Solid Marbo failed to wound the Plague Marine champion and ended up suffering one wound himself as a result.
Turn 4 – Imperial Guard Things were starting to get down to the wire now. I was probably going to need a 6th turn or somehow knock Crablezworth off his objectives if I wanted a realistic chance at a win here. The Vendetta moved into hove mode and prepared to gun down the Helbrute, which was dangerously close to reaching my Demolishers. Ocelot's unit started moving to hopefully try to capture or contest the middle objective if the Demolishers cleared it out.
In the Shooting Phase, the Vendetta fired at the Helbrute, but only stunned it. Hopefully it would fail its crazed roll... Meanwhile, the Demolisher fired at the Rhinos, blowing up one of them and exposing the Plague Marines. However, the other shooting was ineffective, failing to kill any other targets.
In the Assault Phase, Solid Marbo managed to take out the Plague Marine Champion (thank God, because he would have been dead otherwise). Meanwhile, the Chaos Lord killed 2 Guardsmen, causing the final 2 Guardsmen to break and run... leaving the Chaos Lord free reign to attack Vulcan Raven's unit. That won't end well.
Turn 5 – Deathwatch The Helbrute rolled for its crazed result and ended up getting Rising Fury (recovers from the stun and gains Rage). It immediately moved to attack the nearby Demolisher. Elsewhere, the Plague Marines spread out to rapid fire Ocelot's unit and avoid Demolisher pie plating. Finally, the Chaos Lord moved to attack Vulcan Raven and his unit.
In the Shooting Phase, the Helbrute opened fire on the Demolisher's side armour, tearing it open and causing the tank to explode. The Chaos Lord fired his combi-bolter, killing a Veteran. Finally, the Plague Marines killed 3 Guardsmen in Ocelot's unit with their bolters.
In the Assault Phase, the Chaos Lord managed to get into combat with Vulcan Raven and remembered to challenge this time. Vulcan Raven was killed easily, and his squad failed their morale check as they lost the combat. Meanwhile, Marbo failed to kill any Plague Marines and was killed by the 5 surviving Marines as a result.
Turn 5 – Imperial Guard Unless the game went on for another turn or two, the chances of me turning things around were looking pretty unlikely. However, I would at the very least be defiant to the last! Ocelot and the last surviving flamer Guardsman moved up to try and reach the middle objective next turn. Covering them, the last Demolisher moved to blow apart the Plague Marines camping the objective. The Vendetta decided to take another pass at the Helbrute, hoping to actually kill it this time and save the other Demolisher.
In the Shooting Phase, Ocelot's unit ran, hoping to reach the objective next turn. The Demolisher also fired at the Plague Marines, hitting them dead-on. Even with cover and Feel No Pain, 4 Plague Marines were incinerated. The Vendetta also avenged the destroyed Demolisher, stripping the last 2 hull points off of the Helbrute with its lascannons.
As I have said, my only real chance of pulling out a win would be if the game went into Turn 6. We rolled the dice and...
Spoiler:
...there would be no Turn 6.
Total VPs:
Deathwatch – 8 (First Blood, Slay the Warlord, 2 Objectives)
Imperial Guard – 3 (1 Objective)
VICTORY FOR THE DEATHWATCH!!!
AFTERTHOUGHTS That was a fun game. If only I had managed to take out that Rhino on the first turn! I think I would have taken a more commanding position in the game, as then his Bikers would have been exposed (and likely destroyed by Demolisher fire) and his Plague Marines on the middle objective wouldn't have had as much cover. I was also kind of stupid by making Meryl my warlord (warlady...?) though, especially since I gave her squad meltaguns. I'm still learning Guard though, so it was fun to actually get the whole thing out for its first real match. Crablezworth is always a great opponent and our games tend to be a lot of fun for the both of us!
Also, this is probably obvious, but sniper rifles are terrible on infantry squads. I had 1 hit all game with it and it didn't even wound. Unless I'm literally just filling out 5 points, I'm only ever going to run them on Ratling squads or on a static Company Command Squad. At least Crablezworth had similarly bad luck with is Helbrute's missile launcher, I think it hit once all game as well.
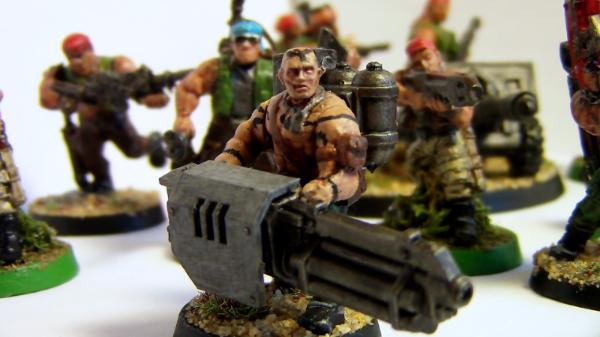
Thumbs up sir. Love your bat reps. Any chance we could see a few pics of models close up? Namely your Harker conversion and crablezworth's Lord and oblits?
Red Corsair wrote:Must love squigs LMAO! Thanks for the coffee spittle covered keyboard sir
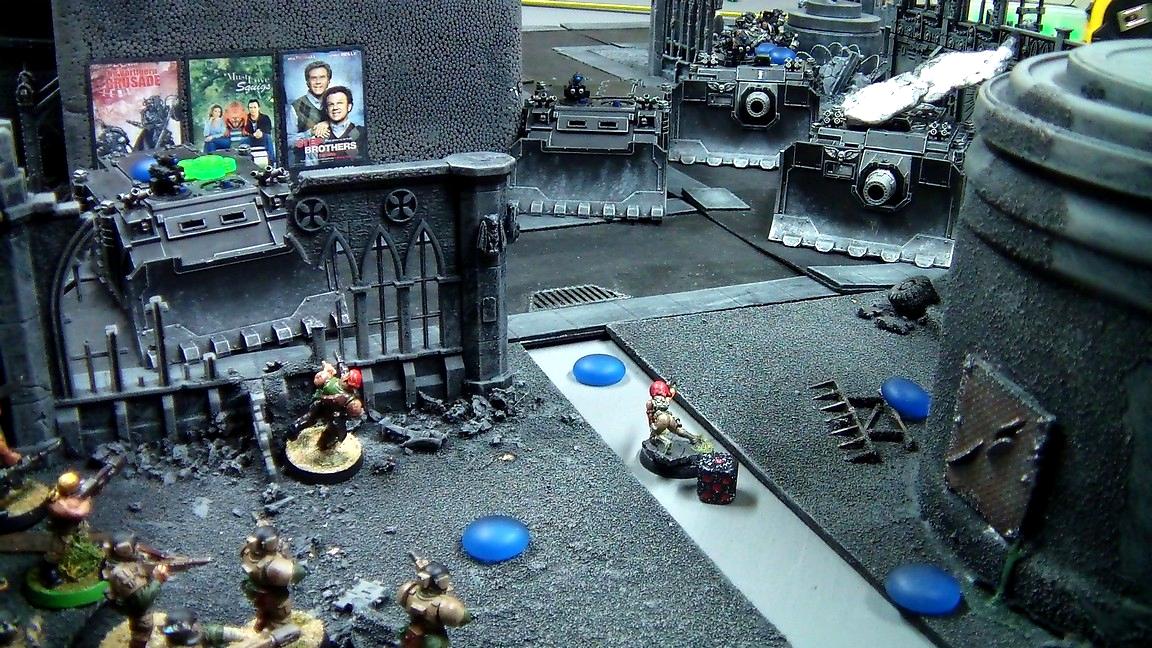
Likewise, Crablezworth's 40k movie posters always make me laugh.
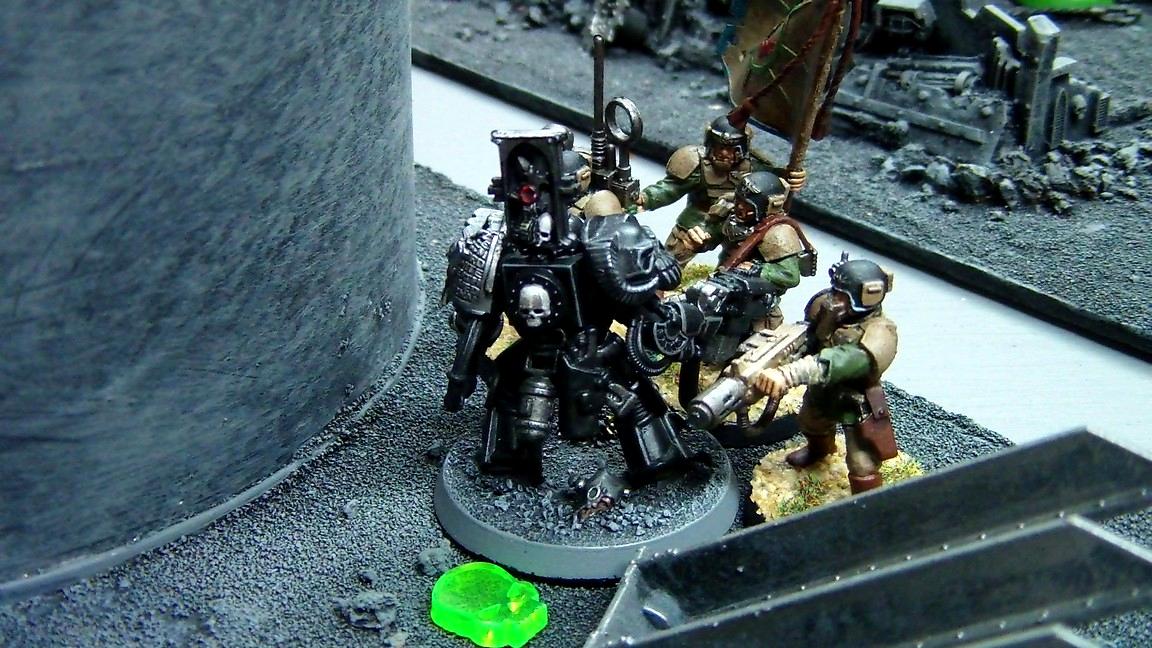
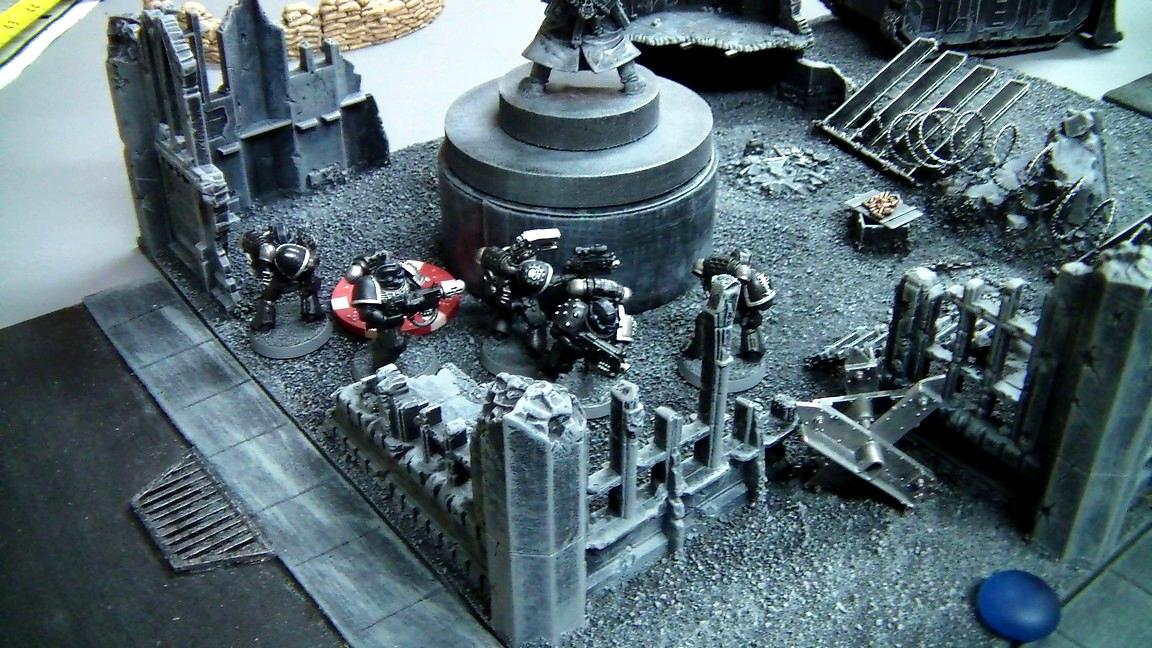
Holy~Heretic wrote:Thumbs up sir. Love your bat reps. Any chance we could see a few pics of models close up? Namely your Harker conversion and crablezworth's Lord and oblits?
Crablezworth has a lot of photos of his minis in his photography thread, but here's 2 good pics of the Lord and the Oblits (complete with freaking mood lighting lol):
Here's Vulcan Raven/Harker, I had an extra assault cannon and some really old Catachans lying around that I tore apart and built him out of:
Aside from the 2 pictures of the Lord and Obliterators, there was no special lighting used, the pictures were taken "as-is". Crablezworth's pictures were taken with a little Canon point-and-shoot. Most of the pictures were taken with my camera, which I believe is actually a Samsung HMX-200 camcorder. So nothing particularly special for either of us.
Can I just ask did you have any special lighting or camera?
My cam is a canon 300hs point and shoot. For the pix with the blue light I used a little led flashlight that gives off a very cool light, I had also turned off one of the two main lights above to table to make the game a bit darker and give it more contrast.
I'm very disappointed with how long it took me to catch all the MGS references.
I thoroughly enjoy your BatReps. Keep it up.
A soft answer turneth away wrath. Once wrath is looking the other way, shoot it in the head. - Maxim 12 - The Seventy Maxims of Maximally Effective Mercenaries
xPeepz wrote: Beautiful models and scenery. Awesome battle report! The death watch problem costed a gak ton of money with all those bitz.
Sadly yes, I've been able to get shoulder pads as cheap as $1 a piece and as expensive as $5 a piece, the count as forgefiend cost almost $100 in bits.
Ailaros wrote: Either she's naked, or wearing the most flesh-toned body glove in the existence of skin suits.
Okay, fine, she's not naked. She's wearing a backpack.
It's probably the lighting or the angle or something, she's got khaki-coloured pants and IRL she doesn't look quite so... skanky. It might also be the colour on our respective monitors.
This message was edited 1 time. Last update was at 2013/04/30 03:19:14


 The empty Rhino then moved to block the Demolisher attacking the Vindicators, popping smoke to help this. The Plague Marines then both moved to attack my other Demolisher while the Bikers focused on the Infantry squad. Lastly, the Helbrute finally started moving towards my lines, targeting the side armour of the Demolisher attacking the Vindicators.
 Finally, the Chaos Lord and Obliterators (using twin-linked plasma guns) fired at the Demo Vets, killing 5 of them and forcing them to fall back.


 Unless I'm literally just filling out 5 points, I'm only ever going to run them on Ratling squads or on a static Company Command Squad. At least Crablezworth had similarly bad luck with is Helbrute's missile launcher, I think it hit once all game as well.


 3000 Points
 500 Points


 For the Tau Empyre
 2000pts
 2000pts