Switch Theme:

Repurposing a Rifle Case into Wargaming unit case  [RSS] Share on facebook Share on Twitter Submit to Reddit
»
Author Message
Advert


Forum adverts like this one are shown to any user who is not logged in. Join us by filling out a tiny 3 field form and you will get your own, free, dakka user account which gives a good range of benefits to you:
  • No adverts like this in the forums anymore.
  • Times and dates in your local timezone.
  • Full tracking of what you have read so you can skip to your first unread post, easily see what has changed since you last logged in, and easily see what is new at a glance.
  • Email notifications for threads you want to watch closely.
  • Being a part of the oldest wargaming community on the net.
If you are already a member then feel free to login now.


Made in us
Longrifle


Christmas was nice to me this year. My wife, mother-in-law, and brother all teamed up to get me a strong head start on my Cygnar.


I’ve been assembling and painting like a fiend. While the results are not terribly beautiful, I’ve completed enough of them that storage and transport has become a critical issue. Wrapping paper towels around units is getting old, and it’s not terribly effective protection anyways. Recently I bought four BluFoam trays. I’m keeping them in a printer paper box, and while this works, it not ideal.

I need a dedicated storage/transport case for my units. I’ve developed a list of requirements and listed them in order of importance to me.

• Hard-shell
• Inexpensive
• Easy to use
• Sufficient Unit Protection
• Durable
• Easy to make
• Distinctive Appearance

My Google-Fu brought me here:
http://www.dakkadakka.com/dakkaforum/posts/list/241220.page

This is brilliant. There’s only one problem: I had two hard-shell cases exactly like the ones kutzmon used, but I sold them in December. I’ve been checking my local Wal-Mart and similar stores, but they are either out of stock, incredibly expensive, or too small.

Luckily, yardsaleing could be a recognized sport where I’m at, so I’ve been waiting for spring. Last weekend I found this and my wonderful wife talked him down to $10.


It’s old and a little banged up, but it’ll do. There is one thing I’ll have to take into consideration though: the ridges in the case protrude noticeably into the interior. You can see the imprint they’ve left in the foam over the years. It’ll work fine, but I’ll need to bear this in mind as I layout my storage zones.


Step One:
Glue two pieces of foam together. I laid out the foam halves on the table and gave each several passes of the web-like spray. The directions said to allow ~2 minutes between coats on each side if it’s porous, so I did. It also warns that repositioning is not advised after placing the subject. I can vouch for this. I misaligned the foam ever so slightly and was not able to remove it after less than 10 seconds of foam-to-foam contact. Oh well. It doesn’t look like it will affect me after later steps anyways.

To ensure a good gluing, I placed the case itself on top of the foam and added some weight (two speakers and a box with stuff in it.)


The bottle gave no information on cure time, but Google-Fu suggests allowing 30 minutes for dry time. 1 hour later I removed the weight and tested the foam. It did not separate after a few good tugs. I set the foam back into the case and tried to close it. Unfortunately, it doesn’t close easily. It seems the case doesn’t like having the top piece of foam not inserted into its proper place. I pushed the foam in with my finger around the gaps and it closed fine.

Next:
• Bevel the top foam edges for an easier time closing the case.
• Prepare foam for unit placement
• Plan unit placement in case, remembering to leave foam for future expansion (New Stormblade UA, I’m looking at you!)


Inspiration:
http://www.dakkadakka.com/dakkaforum/posts/list/241220.page

BluFoam:
http://www.portablewarfare.com/products/

Battlefoam’s Warmachine bag, standard loadout:
http://us.battlefoam.com/products/%28Warmachine%29-Privateer-Press-Warmachine-Bag-Pluck-Foam-Load-Out.html

This message was edited 2 times. Last update was at 2013/05/09 18:54:10


Continuing to look for Warmachine and nWoD Mage games in South Central PA along 81.
I build more than I play: Completed Minis - Custom Folding Swamp Table - Rifle case minis case - Ironclad Color Book - Custom Paint Rack 
   
Made in us
Longrifle


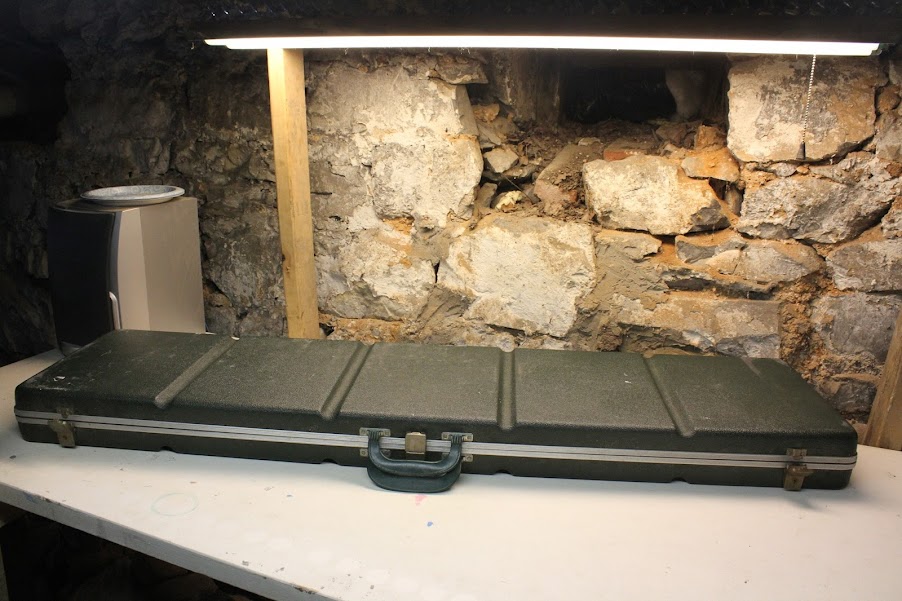
I carved some time out of my shcedule to finish the case the other night.

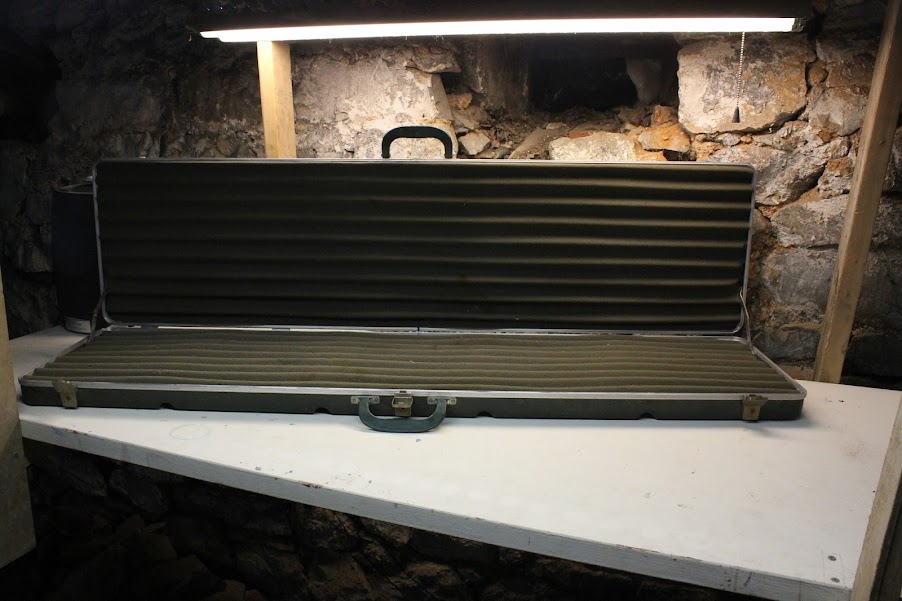
First, I used a kitchen knife to bevel three sides of the top half of my faom block. Now it fits into the case and the lid closes easily over it.

Next, I needed to cut holes. I saw that kutzmon used pipe for his hole cutters and loved the idea. I went to Lowe’s to find 30mm, 40mm, & 50mm pipe. I found the copper coupler he mentioned and confirmed that it is ever so slightly larger than a 30mm base. I looked around and the biggest fittings they had for their metal pipes were 1.5 inches (~38mm.)

I grabbed an associate and explained what I was looking for and what I was doing. About half way through his eyes glazed over, confirming my earlier impressions of Hardware Store employees. They’re great at locating a specific product or explaining the common home repair in a codified step by step manner, but get a little panicy when asked to step out of the box. I let the poor man off the hook and said I’d think of something.

Quickly, I found a WD-40 that looked to be a good size. I held the 40mm base of my Hunter up to the bottom of the can and found it to be a perfect fit. The WD-40 is slightly larger than 40mm. Hopefully this extra space will decrease the frustration of inserting and removing units from their holes.

Unfortunately, I spent the next 45 minutes going up and down every isle looking for something in the 50mm range. I found nothing and walked into the garden center to think outside. As I walked out I saw an insect repellant can that was smaller than spray paint and larger than my WD-40. I compared it base to base with my Ironcald and it was perfect. Relieved, I grabbed another bottle of spray adhesive and checked out.


When I got home, I emptied both the WD-40 and Bug Spray into a 5-gallon bucket . I drilled a small hole in the base of each and was glad to find there was no pressure left in either can. Then I tried to cut the tops off each can. I placed the WD-40 on the table and used a few clamps to hold it in place. I first tried with a hack saw. The can kept moving around. The harder I tightened the clamps, the more it deformed. The more it deformed the less usefull it would be as a home made circle drill. Also, excess WD-40 leaked out and made everything slick. Eventually I gave up and cot a chop saw with a metal cutting blade. This worked MUCH better. The edges were a little jagged and raw, so I smoothed them out with a flat file.

I next sharpened the edges with a dremel tool. I’ve never used the sharpening attachment before, and I have to say it was excellent. The DW-40 and Bug Repellant cans deffinately took on a pretty sharp edge in a few seconds. The copper pipe, however, was a pain. It was so think it took forever (30+ Minutes) to sharpen. I changed the stones a few times to make sure that wasn’t the issue. In the end, the pipe was only pinted, it never got “sharp.”


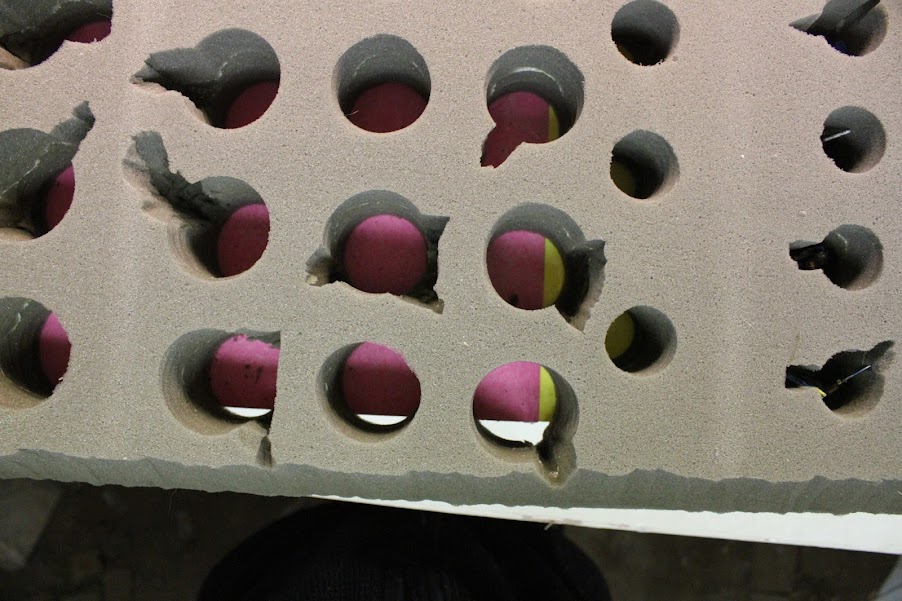
I next laid out my foam and prepared to cut the holes. I kept in mind the ridges in the case as I planned my holes. I put the sharp end down, pressed lightly, and twisted gently from side to side. The 50mm and 40mm worked like a dream, straight down, and back out. The hole in the top of the can allowed air to escape and prevented the air from compressing the foam. The copper pipe was less ideal. It was shorter than the depth of the foam. I had to compress the foma around the hole to get it all the way down. After 10 30mm holes I gave up. I feared tearing the neighboring holes. I grabbed my file from earlier and hammered the handle down into the pipe so I could have a handle to hold. This dulled the blade again. I spent some time sharpening it and it worked servicably. It took more force and cut a more ragged hole than the 40mm and 50mm tools, but it’s good enough.


Next I made the foam floor for my now drilled out walls. I laid out a layer of crafting foam and sprayed it and the bottom layer of the thick foam with glue. After CAREFULLY laying the foam in place I set the case ontop of it and the speakers + amazon box ontop of that.


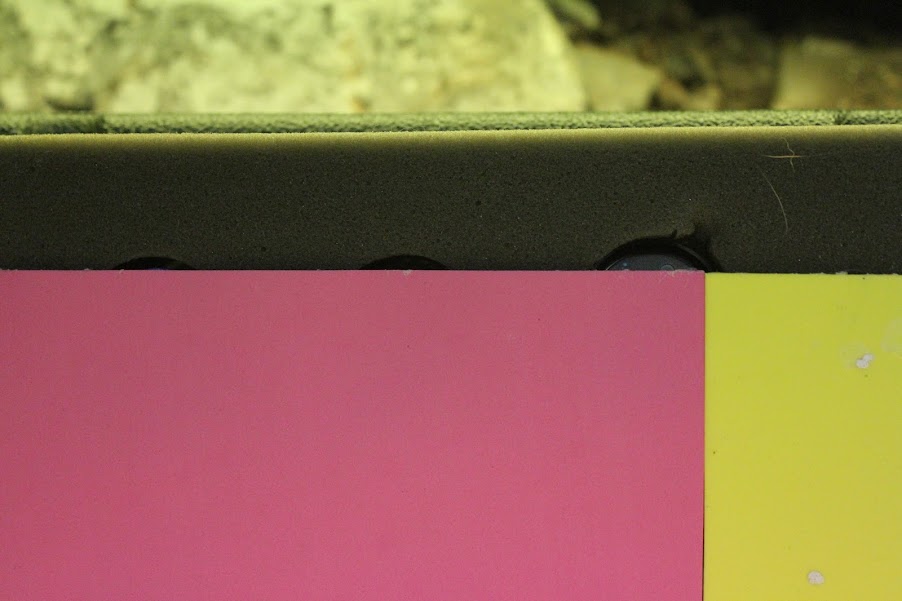
I handn’t been careful enough. The front most edge has three holes that are only mostly covered. At this point there’s not much I could do, and the gap they leave is so small that I’ve decided to leave it as is and move on.


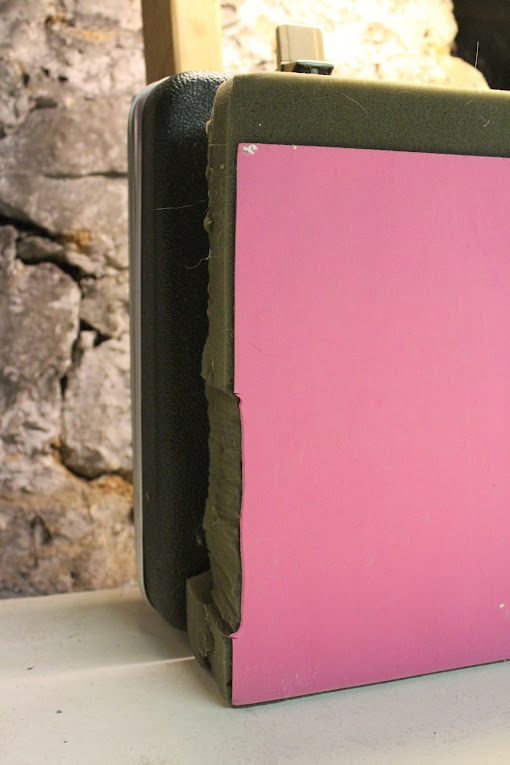
Next, I trimmed the excess bottom foam and cut out a path for the case interior hinge arms to fold down into. I found a razor blade at this point and the cutting here is much smoother.


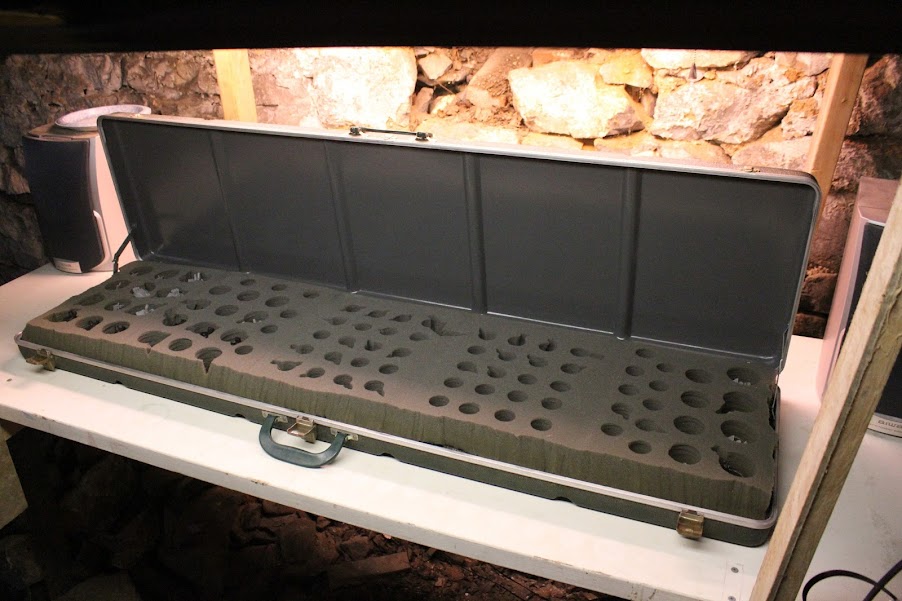
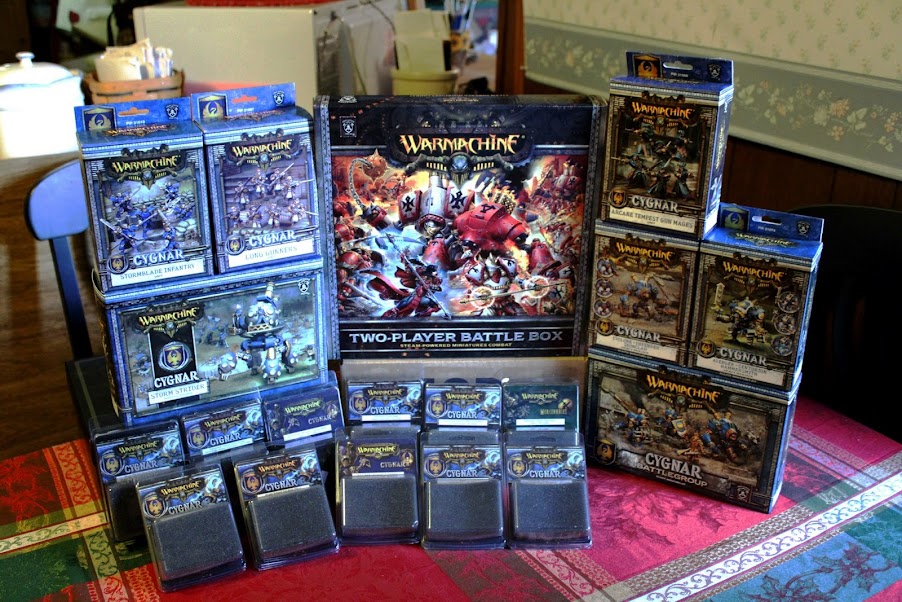
Everything fits into the case. I’ve got 88 holes. My Cygnar collection is ~45 models right now, so I have pelenty of room to grow. I’m realy looking forward to a set of Tempest Blazers and maybe a few more casters.


There’s only one complaint. My wife got me the Two-Player battle box for christmas. I love it, but those darned Khadoran jacks are tall, and the Protectorate ones can’t keep their chains down. So far, the Kahdorans are surviving well enough and only stick up < 1/8 inch. I had to break the protectorate jack’s fist and chain off though. Eventually I’ll magnatize it and move on.


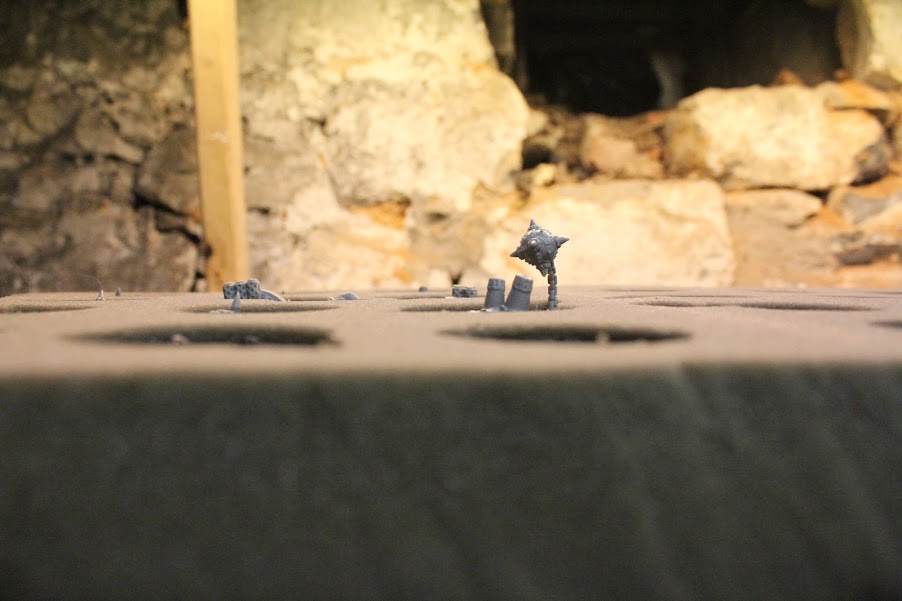
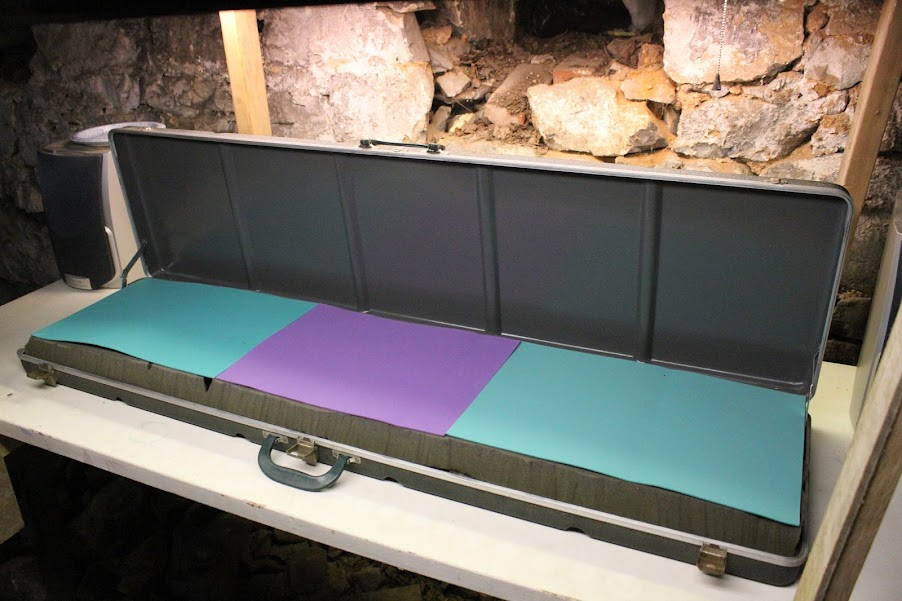
Now for the topper. I simply laid out three sheets of the same thin foam I used for the base and close the top. No glue, not special cutting, no nothing. The case holds them in place and the foam ensure no model hits the case directly. When I carry the case by it’s handles, the models all lay on their sides. The holes are just large enough that they don’t move around overmuch.

All in all, I’m considering this a success.


Now, all that remains is to paint it blue and add a gold Swan to it. Not sure when that’s going to happen as my wife will be spearheading that portion of the project. In the mean time, I have a gun case that carries my gun mages. Squee!

Continuing to look for Warmachine and nWoD Mage games in South Central PA along 81.
I build more than I play: Completed Minis - Custom Folding Swamp Table - Rifle case minis case - Ironclad Color Book - Custom Paint Rack 
   
Made in us
Badass "Sister Sin"


Camas, WA

Very nice! Make sure to store it in your trunk though. Gun cases have a tendency to walk more often than mini cases.

Looking for great deals on miniatures or have a large pile you are looking to sell off? Checkout Mindtaker Miniatures.
Live in the Pacific NW? Check out http://ordofanaticus.com
 
   
Made in us
Monstrous Master Moulder


Utah

That is pretty cool. The only problem I see with using gun case would people freaking out thinking you are walking around with a gun. Now I suppose that depends on where you live.


Made in us
Longrifle


 pretre wrote:
Very nice! Make sure to store it in your trunk though. Gun cases have a tendency to walk more often than mini cases.


Thanks! And Noted. I'll make sure to keep a good eye on it. I pity the thief who steals this case, no bang for his work.

 UnCool Villain wrote:
That is pretty cool. The only problem I see with using gun case would people freaking out thinking you are walking around with a gun. Now I suppose that depends on where you live.


Thanks! I've grown up as an army bratt, so for me gun cases are more normal than... flower vases? I understand that's not the norm for most people though. I'll make sure to bear that in mind when toting the minis. Luckily I live in PA, and for the most part it's a reasonably gun friendly environment outside the borders of dense urban areas.

Continuing to look for Warmachine and nWoD Mage games in South Central PA along 81.
I build more than I play: Completed Minis - Custom Folding Swamp Table - Rifle case minis case - Ironclad Color Book - Custom Paint Rack 
   
Made in us
Badass "Sister Sin"


Camas, WA

 lunavoco wrote:
 pretre wrote:
Very nice! Make sure to store it in your trunk though. Gun cases have a tendency to walk more often than mini cases.


Thanks! And Noted. I'll make sure to keep a good eye on it. I pity the thief who steals this case, no bang for his work.
Yeah, usually they end in a dumpster nearby when they open it and are disappointed. :(

Looking for great deals on miniatures or have a large pile you are looking to sell off? Checkout Mindtaker Miniatures.
Live in the Pacific NW? Check out http://ordofanaticus.com
 
   
Made in us
Wraith


What are you doing for the Storm Strider and your eventual Stormwalls? I really like this idea but all my armies have at least a colossal and/or a BE.
   
Made in pt
Longtime Dakkanaut


Portugal

 lunavoco wrote:
 pretre wrote:
Very nice! Make sure to store it in your trunk though. Gun cases have a tendency to walk more often than mini cases.


Thanks! And Noted. I'll make sure to keep a good eye on it. I pity the thief who steals this case, no bang for his work.


Pity?! He would be stealing over, what, 200$ of minis?! I would pity the kneecaps outta him, at least

*AHEM*. Looks really nice. The case looks enormous and they really look well protected. Just be sure to keep it out of sight But here in Portugal, if someone ever showed up with a gun-case, he probably would be talk of the neighbourhood for the whole month.

"Fear is freedom! Subjugation is liberation! Contradiction is truth! These are the truths of this world! Surrender to these truths, you pigs in human clothing!" - Satsuki Kiryuin, Kill la Kill 
   
Made in us
Hangin' with Gork & Mork


The Ruins of the Boston Commonwealth

Very nice!


Made in us
Longrifle


12thRonin wrote:
What are you doing for the Storm Strider and your eventual Stormwalls? I really like this idea but all my armies have at least a colossal and/or a BE.


Originally, I had a much grander plan. I was going to make a wooden box that holds all of my units + my paints supplies and game accessories. I'll share them here, but please don't point out inaccuracies. These are rough plans. They were mostly made so that I didn't forget the idea. The scale is not correct, and the numbers may not add up. Again, these are concepts, not blueprints.


The box would look like this (below.) All of the details are extremely exaggerated to ease understanding. There would be enough room for 6 2inch Blü Foam trays, and 4 4inch Blü Foam trays in total. These would be laid out in 2 columns. One column has the topmost 4inch tray flipped over for the Storm Striders (more later.) Additionally, there's a drawer at the bottom that slides out. I planned on storing all my paints, brushes, dice, tape measure, templates, lasers, et all here. The whole case has 4 corner protectors. the front two hold down the top flap. Both the flap and the corner holders are magnetic. The corner holders open up on piano hinges to allow the top to flip open.


The top flips up like this. (No animation for corner holders.)


The storm strider uses 2 4inch Blü Foam trays like this (below.) Then, this slides into the case on one side.


Assuming this all went as planned, I'd still have 2 4inch trays available for Heavy Jacks. I priced it out and was ready to move out on it when I found the rifle case at a flea market. All told, the rifle case ran ~$40, while this proposed case would start at $50 assuming i didn't make any mistakes which is not possible. I can't even link pictures into this post on the first try.

I've heard of some players using tall CD spindles to make a Strider case. I know the huge base matches the diameter of a CD, so it sounds reasonable. Unfortunately, Walmart isn't stocking large spindles anymore. All the ones on the shelves have no outer case and just wrap the CDs in the flimsy label plastic. I've got my eyes peeled though.

Continuing to look for Warmachine and nWoD Mage games in South Central PA along 81.
I build more than I play: Completed Minis - Custom Folding Swamp Table - Rifle case minis case - Ironclad Color Book - Custom Paint Rack 
   
Made in us
Longtime Dakkanaut


good job now take it to the airport and fly to adepticon with it.
   
 
Forum Index » Painting & Modeling Tutorials
Go to: