| Author |
Message |
 |
|
|
|
|
Advert
|
Forum adverts like this one are shown to any user who is not logged in. Join us by filling out a tiny 3 field form and you will get your own, free, dakka user account which gives a good range of benefits to you:
- No adverts like this in the forums anymore.
- Times and dates in your local timezone.
- Full tracking of what you have read so you can skip to your first unread post, easily see what has changed since you last logged in, and easily see what is new at a glance.
- Email notifications for threads you want to watch closely.
- Being a part of the oldest wargaming community on the net.
If you are already a member then feel free to login now. |
|
 |
2014/03/18 00:09:18
Subject: Airbrushing Lessons that I have learned over the last few months
|
|

Drakhun
|
This is from my blog. Because of all the questions that get asked here about airbrushing I figured I would post it here as well. Please add your insights and correct me where I am wrong.
Airbrushing Lessons Learned (the hard way).
I've had this blog up for a few months now. I think it’s a good time to review a good few things that I have learned about airbrushing along the way.
1. PSI matters. I first started out shooting at 35psi. As long as I was spraying from about 6 inches away it was fine for things like priming or coating with a varnish. I was pretty frustrated that I was unable to get any detail work done though. I was given some friendly advice and dropped my PSI down to between 15- 20psi and my airbrush kept clogging up…. Which leads to number 2
2. Thin your paints! Seriously even Vallejo Model Air needs a bit of thinning out. I use Vallejo airbrush thinner. I am sure that others work just fine and I know some people use Windex. Personally I don’t want to use a respirator when I airbrush so I will stick to thinners that don’t contain ammonia.
3. Equipment really does matter. I started out with a Masters G22 airbrush. This is an inexpensive airbrush made by TCP Global that costs $29.99 and is basically an Iwata clone. At first I thought it was the bee’s knees. I thought I had cracked the code to not paying over $100 for a “real” airbrush. Let me tell you how wrong I was. I was lucky enough to have a friend pay for his finished models with a Badger Patriot 105. It’s honestly like night and day. The trigger pull is smooth and responsive. There is no play in the trigger on the Badger (which is extremely important for control). The Badger has a wide cup opening making cleaning much easier as well.
As for compressors I still have a relatively inexpensive Harbor Freight model and it works. I have had 4 hour painting sessions and it has held up just fine. For $89 I think this was a good buy. My only complaint is that the compressor sometimes jumps up in PSI for no reason. I’ll be painting along at 20psi and BLAM out of the blue I’m up at 30psi. It’s gotten to the point where I can hear the difference and adjust the regulator but still a weird quirk.
4. Clean your airbrush regularly. No joke even when you think you are done you’re not. Don’t be lazy and just wipe out the cup and run some cleaner through it when you’re done for the day. Spend the extra 10 minutes and break it down and clean it. There is nothing quite like getting all set in the right mind frame, mixing your paint. Finding the right music to keep you in the groove. Turning on the compressor and pulling down the trigger only to have a clog because you just didn't get that one little dab of paint off the needle…..
5. Primer matters. I started off using a cheap primer and thinned it some. Not a good idea. It ran and flaked off the models. I now use Vallejo primer in grey. It works well and covers fantastically. I will caution that a little goes a long way and I have had to strip a good few models where I thought I was good to go and sprayed way too much primer on them obscuring detail. Cure times are very important here too. Do not be tempted to keep painting just because it looks and feels dry. Primer needs a few hours to cure. Trust me on this one the results are immensely different.
6. Head phones! Get a good pair. Between the noise of the compressor and the noise of a spray booth fan you will either be cranking your music load enough to piss off your wife and neighbors, or make yourself go deaf in the process. I have a pair of noise canceling headphones and everyone is happy. My wife because she doesn't have to listen to music over the TV, and me because I can’t hear her yelling from upstairs that it’s time to call it a night…
I hope this has been helpful to people. Please let me know if you have anything to add or something that is just flat out wrong in your experience.
|
|
|
|
 |
|
2014/03/18 00:55:22
Subject: Airbrushing Lessons that I have learned over the last few months
|
|
Colonel
This Is Where the Fish Lives
|
 darefsky wrote: darefsky wrote:1. PSI matters. I first started out shooting at 35psi. As long as I was spraying from about 6 inches away it was fine for things like priming or coating with a varnish. I was pretty frustrated that I was unable to get any detail work done though. I was given some friendly advice and dropped my PSI down to between 15- 20psi and my airbrush kept clogging up…. Which leads to number 2
I work in a range of pressures depending on what I am trying to accomplish, but like you I spend most of my time in the 15-20psi range. 2. Thin your paints! Seriously even Vallejo Model Air needs a bit of thinning out. I use Vallejo airbrush thinner. I am sure that others work just fine and I know some people use Windex. Personally I don’t want to use a respirator when I airbrush so I will stick to thinners that don’t contain ammonia.
Yeah, I get tired of saying this too. VMA paints should still be thinned, especially at low pressures. Granted, they don't need it as much as a non-airbrush paint, but I have found that they all need to be thinned. 3. Equipment really does matter. I started out with a Masters G22 airbrush. This is an inexpensive airbrush made by TCP Global that costs $29.99 and is basically an Iwata clone. At first I thought it was the bee’s knees. I thought I had cracked the code to not paying over $100 for a “real” airbrush. Let me tell you how wrong I was. I was lucky enough to have a friend pay for his finished models with a Badger Patriot 105. It’s honestly like night and day. The trigger pull is smooth and responsive. There is no play in the trigger on the Badger (which is extremely important for control). The Badger has a wide cup opening making cleaning much easier as well.
If you think the Patriot 105 is a nice brush (which it is!), just wait until you try out a Badger Sotar 20/20 or a Harder & Steenbeck Infinity... As for compressors I still have a relatively inexpensive Harbor Freight model and it works. I have had 4 hour painting sessions and it has held up just fine. For $89 I think this was a good buy. My only complaint is that the compressor sometimes jumps up in PSI for no reason. I’ll be painting along at 20psi and BLAM out of the blue I’m up at 30psi. It’s gotten to the point where I can hear the difference and adjust the regulator but still a weird quirk.
I used to use a regular shop compressor when I first started, but after switching to a dedicated airbrush compressor I could never go back. The decrease in noise level alone is worth the price, and I don't even have a fully "silent" model! 4. Clean your airbrush regularly. No joke even when you think you are done you’re not. Don’t be lazy and just wipe out the cup and run some cleaner through it when you’re done for the day. Spend the extra 10 minutes and break it down and clean it. There is nothing quite like getting all set in the right mind frame, mixing your paint. Finding the right music to keep you in the groove. Turning on the compressor and pulling down the trigger only to have a clog because you just didn't get that one little dab of paint off the needle…..
I agree, regular maintenance is must. Get an ultrasonic cleaner if you don't have one already. I give mine a bath in my ultrasonic cleaner once or twice a month, depending on how much it gets used. Just make sure to lubricate everything when doing something like that! 5. Primer matters. I started off using a cheap primer and thinned it some. Not a good idea. It ran and flaked off the models. I now use Vallejo primer in grey. It works well and covers fantastically. I will caution that a little goes a long way and I have had to strip a good few models where I thought I was good to go and sprayed way too much primer on them obscuring detail. Cure times are very important here too. Do not be tempted to keep painting just because it looks and feels dry. Primer needs a few hours to cure. Trust me on this one the results are immensely different.
I like to give mine at least 24 hours to cure before I paint over it. If I'm in a hurry, I'll wait less, but I try to avoid it. 6. Head phones! Get a good pair. Between the noise of the compressor and the noise of a spray booth fan you will either be cranking your music load enough to piss off your wife and neighbors, or make yourself go deaf in the process. I have a pair of noise canceling headphones and everyone is happy. My wife because she doesn't have to listen to music over the TV, and me because I can’t hear her yelling from upstairs that it’s time to call it a night…
My compressor is quite and I don't use a spray booth, so I don't use headphones, but I do listen to a lot of music. I like to keep it quite to make sure the kids aren't off making mischief. Good list, mate! I read your blog and added you to my reading list.
|
|
This message was edited 1 time. Last update was at 2014/03/18 01:40:40
 d-usa wrote: d-usa wrote:"When the Internet sends its people, they're not sending their best. They're not sending you. They're not sending you. They're sending posters that have lots of problems, and they're bringing those problems with us. They're bringing strawmen. They're bringing spam. They're trolls. And some, I assume, are good people."
|
|
|
|
|
2014/03/18 01:06:06
Subject: Re:Airbrushing Lessons that I have learned over the last few months
|
|
Stalwart Ultramarine Tactical Marine
|
Great tips for anyone wanting to get into airbrushing. I'm so no where near a pro I still have my airbrush training wheels on but everyone needs to read this list. 
|
|
|
|
|
|
2014/03/18 01:19:58
Subject: Airbrushing Lessons that I have learned over the last few months
|
|
Martial Arts Fiday
|
Hmm.. nice list!
I would add that using a compressor with a tank on it will cut down on the running time of it and they fluctuations in pressure.
|
"Holy Sh*&, you've opened my eyes and changed my mind about this topic, thanks Dakka OT!"
-Nobody Ever
Proverbs 18:2
"CHEESE!" is the battlecry of the ill-prepared.
 warboss wrote: warboss wrote:
GW didn't mean to hit your wallet and I know they love you, baby. I'm sure they won't do it again so it's ok to purchase and make up. 
Albatross wrote:I think SlaveToDorkness just became my new hero.
EmilCrane wrote:Finecast is the new Matt Ward.
Don't mess with the Blade and Bolter! |
|
|
|
|
2014/03/18 03:51:44
Subject: Airbrushing Lessons that I have learned over the last few months
|
|
Savage Khorne Berserker Biker
|
darefsky wrote:This is from my blog. Because of all the questions that get asked here about airbrushing I figured I would post it here as well. Please add your insights and correct me where I am wrong.
Airbrushing Lessons Learned (the hard way).
I've had this blog up for a few months now. I think it’s a good time to review a good few things that I have learned about airbrushing along the way.
1. PSI matters. I first started out shooting at 35psi. As long as I was spraying from about 6 inches away it was fine for things like priming or coating with a varnish. I was pretty frustrated that I was unable to get any detail work done though. I was given some friendly advice and dropped my PSI down to between 15- 20psi and my airbrush kept clogging up…. Which leads to number 2
2. Thin your paints! Seriously even Vallejo Model Air needs a bit of thinning out. I use Vallejo airbrush thinner. I am sure that others work just fine and I know some people use Windex. Personally I don’t want to use a respirator when I airbrush so I will stick to thinners that don’t contain ammonia.
3. Equipment really does matter. I started out with a Masters G22 airbrush. This is an inexpensive airbrush made by TCP Global that costs $29.99 and is basically an Iwata clone. At first I thought it was the bee’s knees. I thought I had cracked the code to not paying over $100 for a “real” airbrush. Let me tell you how wrong I was. I was lucky enough to have a friend pay for his finished models with a Badger Patriot 105. It’s honestly like night and day. The trigger pull is smooth and responsive. There is no play in the trigger on the Badger (which is extremely important for control). The Badger has a wide cup opening making cleaning much easier as well.
As for compressors I still have a relatively inexpensive Harbor Freight model and it works. I have had 4 hour painting sessions and it has held up just fine. For $89 I think this was a good buy. My only complaint is that the compressor sometimes jumps up in PSI for no reason. I’ll be painting along at 20psi and BLAM out of the blue I’m up at 30psi. It’s gotten to the point where I can hear the difference and adjust the regulator but still a weird quirk.
4. Clean your airbrush regularly. No joke even when you think you are done you’re not. Don’t be lazy and just wipe out the cup and run some cleaner through it when you’re done for the day. Spend the extra 10 minutes and break it down and clean it. There is nothing quite like getting all set in the right mind frame, mixing your paint. Finding the right music to keep you in the groove. Turning on the compressor and pulling down the trigger only to have a clog because you just didn't get that one little dab of paint off the needle…..
5. Primer matters. I started off using a cheap primer and thinned it some. Not a good idea. It ran and flaked off the models. I now use Vallejo primer in grey. It works well and covers fantastically. I will caution that a little goes a long way and I have had to strip a good few models where I thought I was good to go and sprayed way too much primer on them obscuring detail. Cure times are very important here too. Do not be tempted to keep painting just because it looks and feels dry. Primer needs a few hours to cure. Trust me on this one the results are immensely different.
6. Head phones! Get a good pair. Between the noise of the compressor and the noise of a spray booth fan you will either be cranking your music load enough to piss off your wife and neighbors, or make yourself go deaf in the process. I have a pair of noise canceling headphones and everyone is happy. My wife because she doesn't have to listen to music over the TV, and me because I can’t hear her yelling from upstairs that it’s time to call it a night…
I hope this has been helpful to people. Please let me know if you have anything to add or something that is just flat out wrong in your experience.
Great post.
You hit the basics on the nose. esp. spraying at lower psi. Drying Retarder can help with the clogging in the tips as well.
|

https://www.youtube.com/watch?v=8xqOf-KjdVY
My Hobby Blog:
http://www.dakkadakka.com/dakkaforum/posts/list/594118.page
http://i.imgur.com/yLl7xmu.gif |
|
|
|
|
2014/03/18 04:41:47
Subject: Airbrushing Lessons that I have learned over the last few months
|
|
Regular Dakkanaut
|
I think that those are good points that will help a newbie out a lot.
I would add that you should really be mindful and careful of your airbrushes and put them up when you aren't using them. I ruined my Kromes needle entry piece. Not sure what its called, where the handle comes off. I had it off for cleaning and then my krome went backside first into the floor and those things smashed off.
I dropped my krome twice this weekend when I was reaching across my table for something. So I dropped my krome twice and my sotar once this weekend.
Be careful with your stuff kids!
However, before and after I am finding more and more I have to really fight with my Krome and Sotar 20/20 to atomize paint well below 15 psi.
I have brand new needles and nozzles on both and I find that in the single digits these airbrushes really don't atomize well. I hear that the Iwata's are much better at that at low psi and when I want to pull in real close to do a subtle blend or OSL effect I'm tired of fighting with the badger brushes.
|
|
|
|
|
2014/03/18 21:51:36
Subject: Airbrushing Lessons that I have learned over the last few months
|
|
Hardened Veteran Guardsman
|
A question regarding thinning:
What is a good rule of thumb regarding ratios of paint to thinner when airbrushing?
I have been using VMA paints and have been doing 1 drop thinner for every 3 or 4 drops of paint since its already thin in comparison to other paints. However, I'm more interested in the ratios people use with other acrylics.
|
|
|
|
|
2014/03/18 22:28:35
Subject: Airbrushing Lessons that I have learned over the last few months
|
|
Drakhun
|
I don't know that I have a ratio per say as I use P3, VMA, VMC, VGC, stuff I still have from the old GW line (while I still have it) and Reaper.
Each line and each paint in each line is different. I put about how much I want in a little medicine cup (I get them on amazon its like $4 for 100) and then add my thinner till it looks right. I go for just thin enough that it runs off the sides of the cup leaving just a bit behind.
|
|
|
|
|
|
0013/04/18 23:12:27
Subject: Airbrushing Lessons that I have learned over the last few months
|
|

Furious Fire Dragon
|
Nice post darefsky. Maybe the mods can create some kind of sticky from this post since a/b questions are popping up all over the place .
|
Got milk?
All I can say about painting is that VMC tastes much better than VMA... especially black... 
PM me if you are interested in Commission work.
|
|
|
|
|
2014/03/19 07:49:16
Subject: Airbrushing Lessons that I have learned over the last few months
|
|

Grizzled Space Wolves Great Wolf
|
AngularDeath wrote:A question regarding thinning:
What is a good rule of thumb regarding ratios of paint to thinner when airbrushing?
I have been using VMA paints and have been doing 1 drop thinner for every 3 or 4 drops of paint since its already thin in comparison to other paints. However, I'm more interested in the ratios people use with other acrylics.
There is no rule of thumb. Not all VMA paints are the same consistency when you buy them, so they tend to require different thinning. My Fiery Orange requires far less thinning that most my other VMA paints for some reason.
Also, you can use different consistency depending on what you're trying to do. If doing large broad strokes, you can use a higher pressure and thicker paint. If you're doing fine detail work, you have to be a bit thinner and have a smaller margin for error.
Also the consistency depends on what AB you are using and what needle size.
|
|
|
|
|
2014/03/19 20:07:25
Subject: Airbrushing Lessons that I have learned over the last few months
|
|
Hardened Veteran Guardsman
|
Gotcha. I have been thinning all of my paints before use, trying to get the classic milky consistency before spraying - about the consistency of what Darefsky is getting in his medicine cups.
Also, I have a pretty old airbrush setup. My dad bought me a Badger 175-7 Crescendo airbrush back in 1997 with a basic Paasche D500 air compressor for my 11th birthday. I was too scared to use it growing up (parents hated messes despite having a little hobbyist) and it took me 17 years to finally take it out of the box a week ago. Needless to say, I am surprised these are both still available for purchase on the market.
The air compressor has no pressure regulator/gauge, but since the airbrush is double action and the triggering allows me to control the degree to which I spray, is a pressure regulator/gauge still necessary?
|
|
This message was edited 1 time. Last update was at 2014/03/19 20:12:43
|
|
|
|
|
2014/03/19 20:20:51
Subject: Airbrushing Lessons that I have learned over the last few months
|
|
Drakhun
|
AngularDeath wrote:Gotcha. I have been thinning all of my paints before use, trying to get the classic milky consistency before spraying - about the consistency of what Darefsky is getting in his medicine cups.
Also, I have a pretty old airbrush setup. My dad bought me a Badger 175-7 Crescendo airbrush back in 1997 with a basic Paasche D500 air compressor for my 11th birthday. I was too scared to use it growing up (parents hated messes despite having a little hobbyist) and it took me 17 years to finally take it out of the box a week ago. Needless to say, I am surprised these are both still available for purchase on the market.
The air compressor has no pressure regulator/gauge, but since the airbrush is double action and the triggering allows me to control the degree to which I spray, is a pressure regulator/gauge still necessary?
Is a pressure regulator necessary? No, you can spray without one. Is it highly recommend? Yes, and here is why. Even though you can have some control with your trigger you are still pushing PSI well in excess of what is needed for detail work. Once you dial down your PSI you will be amazed at how much less paint you need. Also I'm willing to bet there is no moister trap on the compressor (unless you have an inline one attached to your air hose.
You can get one that is both for about $20 with shipping. This is the one I have (it came with my compressor), is it perfect? Nope but it does the job and its cheap.
http://www.amazon.com/Airbrush-Compressor-Regulator-Water-trap-Included/dp/B00171BFKK/ref=sr_1_6?ie=UTF8&qid=1395260203&sr=8-6&keywords=air+compressor+pressure+regulator
|
|
|
|
|
|
2014/03/19 20:26:03
Subject: Airbrushing Lessons that I have learned over the last few months
|
|
[ARTICLE MOD]
Huge Hierodule
|
Remove the cap before you start spraying for the first time.
|
|
|
|
|
|
2014/03/19 20:35:57
Subject: Airbrushing Lessons that I have learned over the last few months
|
|
Hardened Veteran Guardsman
|
You are indeed correct. It is a very, very basic compressor with only a hose to the airbrush and a power cord.
The regulator sounds like a very reasonable and cheap investment. Just one question - and forgive my ignorance - but this would hook into the compressor, then the air hose? Or the airbrush, then air hose? Or does that even matter?
|
|
|
|
|
2014/03/19 21:12:40
Subject: Airbrushing Lessons that I have learned over the last few months
|
|

Ancient Venerable Black Templar Dreadnought
|
darefsky wrote:This is from my blog. Because of all the questions that get asked here about airbrushing I figured I would post it here as well. Please add your insights and correct me where I am wrong.
Airbrushing Lessons Learned (the hard way).
I've had this blog up for a few months now. I think it’s a good time to review a good few things that I have learned about airbrushing along the way.
1. PSI matters. I first started out shooting at 35psi. As long as I was spraying from about 6 inches away it was fine for things like priming or coating with a varnish. I was pretty frustrated that I was unable to get any detail work done though. I was given some friendly advice and dropped my PSI down to between 15- 20psi and my airbrush kept clogging up…. Which leads to number 2
15-20 I agree, is about right 30+ was getting fantastic atomization but had to sit back a fair bit or got "spiders", I now have a flow control valve and keep it at 30 but decrease the air flow to suit and works much better. 2. Thin your paints! Seriously even Vallejo Model Air needs a bit of thinning out. I use Vallejo airbrush thinner. I am sure that others work just fine and I know some people use Windex. Personally I don’t want to use a respirator when I airbrush so I will stick to thinners that don’t contain ammonia.
Easy fix: use alcohol (rubbing, you know, for cuts...) and 50:50 with distilled water.
Change to more alcohol if you want to dry faster.
I thin 50:50 with paint and that thinner.
There are lubes you can apply to the inside of the final nozzle to help keep the paint from sticking to it a bit longer.
The great thing is you can twist them off and run a brush through it and keep going pretty well.
I REALLY wish you would use a proper respirator anyway: the paint will bond to your lungs AND many have Cadmium in them that is a BAD cancer causing agent when aerated. 3. Equipment really does matter. I started out with a Masters G22 airbrush. This is an inexpensive airbrush made by TCP Global that costs $29.99 and is basically an Iwata clone. At first I thought it was the bee’s knees. I thought I had cracked the code to not paying over $100 for a “real” airbrush. Let me tell you how wrong I was. I was lucky enough to have a friend pay for his finished models with a Badger Patriot 105. It’s honestly like night and day. The trigger pull is smooth and responsive. There is no play in the trigger on the Badger (which is extremely important for control). The Badger has a wide cup opening making cleaning much easier as well.
Depends on what you need: typically you need two brushes, one for a base coat (wide spray) and another for detailing.
Lubricating the moving parts in the brush will help with the smooth movement you like, you can also get other strength springs to suit trigger pressures preference.
There is a point of diminishing returns, my $150 dollar brush I could not tell a difference from this $400 brush other than the expensive one looked amazing. As for compressors I still have a relatively inexpensive Harbor Freight model and it works. I have had 4 hour painting sessions and it has held up just fine. For $89 I think this was a good buy. My only complaint is that the compressor sometimes jumps up in PSI for no reason. I’ll be painting along at 20psi and BLAM out of the blue I’m up at 30psi. It’s gotten to the point where I can hear the difference and adjust the regulator but still a weird quirk.
I looked around for quieter compressors and the GMC Syclone worked well: the 6.3 gallon tank and two pistons help minimize the pulsing and a braided hose to the airbrush will act as a "shock absorber" to smooth it out.
Adding a dryer to the output is much needed as well.
Having a flow valve at the base of the gun will stop dead anything that remains. 4. Clean your airbrush regularly. No joke even when you think you are done you’re not. Don’t be lazy and just wipe out the cup and run some cleaner through it when you’re done for the day. Spend the extra 10 minutes and break it down and clean it. There is nothing quite like getting all set in the right mind frame, mixing your paint. Finding the right music to keep you in the groove. Turning on the compressor and pulling down the trigger only to have a clog because you just didn't get that one little dab of paint off the needle…..
Hehehe, I had the dreaded "blowing bubbles in the paint cup" the other day. Cleaning the initial paint nozzle, the needle and the final air/paint mix opening is brutal if a single bit of paint sticks and prevents a perfect seal.
I soak the gun a bit in brake fluid, it has the fun properties of chewing paint but not rubber (like O-rings and seals) or the metal of the gun.
I hate to say you REALLY do need those fancy tiny brushes to get in all the crannies to get the dried paint out.
You may want to consider getting a bunch of those paint strainers (paper funnel with screen), tearing out the screen and trapping it in the squeeze bottle cap you keep your prepared paint in. 5. Primer matters. I started off using a cheap primer and thinned it some. Not a good idea. It ran and flaked off the models. I now use Vallejo primer in grey. It works well and covers fantastically. I will caution that a little goes a long way and I have had to strip a good few models where I thought I was good to go and sprayed way too much primer on them obscuring detail. Cure times are very important here too. Do not be tempted to keep painting just because it looks and feels dry. Primer needs a few hours to cure. Trust me on this one the results are immensely different.
I tend to leave this to the spray cans for now.
Only a light dusting is needed and do not spray from too far back (greater than 1') or you get furry models.
I find the great thing with airbrushing is when you apply paint and spray too much filling details you can keep blowing air at the area to move the paint around and remove the fill of paint. 6. Head phones! Get a good pair. Between the noise of the compressor and the noise of a spray booth fan you will either be cranking your music load enough to piss off your wife and neighbors, or make yourself go deaf in the process. I have a pair of noise canceling headphones and everyone is happy. My wife because she doesn't have to listen to music over the TV, and me because I can’t hear her yelling from upstairs that it’s time to call it a night…
No argument here.
Quieter compressor will help.
Room off to one side in basement prevents hearing anything at all especially when to call it a night I hope this has been helpful to people. Please let me know if you have anything to add or something that is just flat out wrong in your experience.
Very nice write-up, allowed me to piggy-back some of the things I figured out in the last while.
Best advice I can give from the tutorials I have seen: Press down and turn on air, start moving and pull back to apply paint, turn off paint when clear of area you want to paint.
The air almost never goes off while you are painting.
Gotta love those who learn the hard way still willing to help others not make the same mistakes
|
A revolution is an idea which has found its bayonets.
Napoleon Bonaparte |
|
|
|
|
2014/03/19 21:23:42
Subject: Airbrushing Lessons that I have learned over the last few months
|
|
Drakhun
|
AngularDeath wrote:You are indeed correct. It is a very, very basic compressor with only a hose to the airbrush and a power cord.
The regulator sounds like a very reasonable and cheap investment. Just one question - and forgive my ignorance - but this would hook into the compressor, then the air hose? Or the airbrush, then air hose? Or does that even matter?
It screws onto your compressor and then the air hose gets screwed into it. The knob to turn the pressure down or up is on the bottom. The air trap is decent and some people like the "belt and suspenders" of having one on the regulator and an inline as well (goes between the hose and your airbrush) I personally have not seen the need for two but YMMV.
|
|
|
|
|
|
2014/03/20 02:13:42
Subject: Airbrushing Lessons that I have learned over the last few months
|
|

Hellacious Havoc
Old Trafford, Manchester
|
That's the same type of regulator/moisture trap that my compressor came with. I'm very happy with it (insofar as I've had no reason to get mad at it, though).
You definitely need one of these, or something very similar.
|
"If I advance, follow me. If I retreat, shoot me. If I fall, avenge me. This is my last command to you all. FORWARD!!" |
|
|
|
|
2014/03/20 05:18:29
Subject: Re:Airbrushing Lessons that I have learned over the last few months
|
|
Been Around the Block
|
For cleaning my Iwata, I have found that rinsing with Alcohol, and then a few drops of Iwata's branded cleaner I have had no need for teardown except when I've clogged it
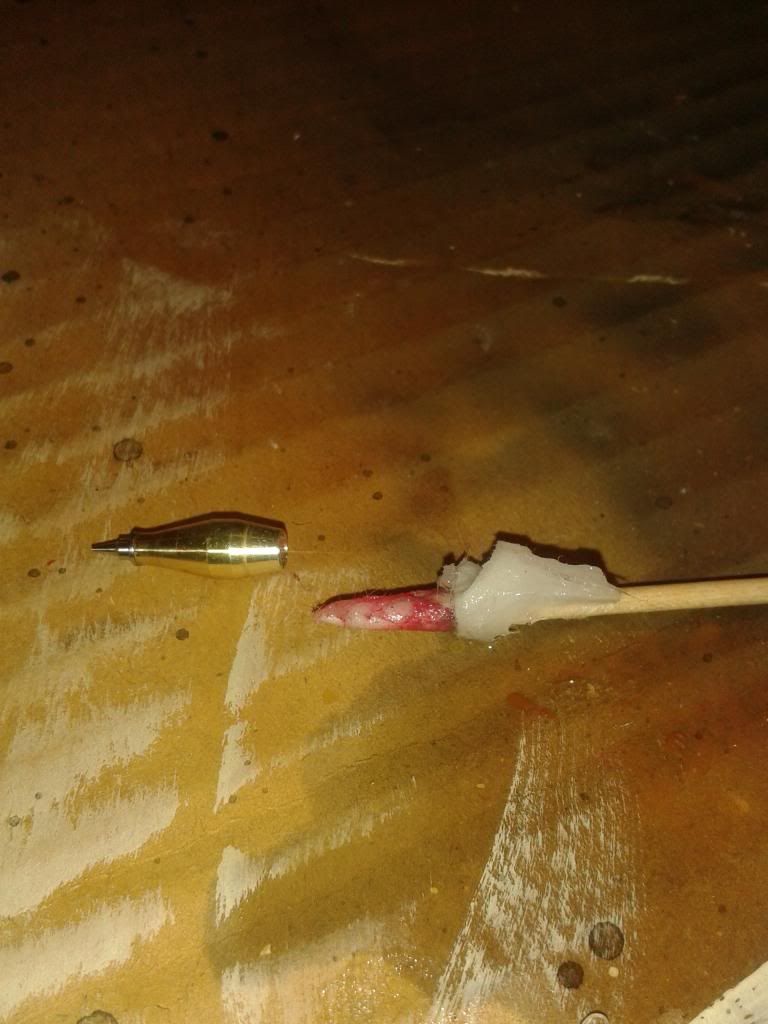
Interestingly I went to take a picture of my other recommendation and realized I did no cleanup on my airbrush today, man I must of been out of it this morning.
Ive just been using a toothpicks wrapped in alcohol soaked papertowel, works a real treat.
|
|
This message was edited 1 time. Last update was at 2014/03/20 05:20:48
|
|
|
|
|
2014/03/26 16:44:52
Subject: Re:Airbrushing Lessons that I have learned over the last few months
|
|
Hardened Veteran Guardsman
|
So... I return again with some more comments and questions.
Last night I had quite the experience while airbrushing. Firstly, my air hose got moist and I think it contributed to some sputtering while spraying - now I fully understand why the moisture trap and pressure regulator is necessary. Secondly, when cleaning my airbrush after my session, I somehow managed to get back spray into the body of the airbrush - that wasn't fun as it got paint in EVERYTHING (luckily not the tip and spray regulator). I had to strip the whole airbrush down, wipe it down, give the stubborn bits a soak in some warm soapy water, and gently scrub it down with an old toothbrush.
As an airbrush noob to other airbrush beginners, I would highly recommend you take your airbrush apart and put it back together before you consider painting anything, and learn this process well. It allows you to rapidly take apart the airbrush and do emergency cleaning and maintenance should you run into any problems. Despite my stupid mistakes and the stress involved, the whole process was pleasantly enlightening, and I'm actually glad this happened as I learned quite a lot.
Onto my question now for the more experienced airbrushers. I am now interested in getting a respirator (not a paper mask - I work in toxic torts and can tell you for a scientific fact they are worthless). With all the maintenance I had to do last night, the smell/fumes of airbrush cleaner became quite overwhelming towards the end. Not only that, but when I varnish my figures I use dullcote and glosscote, both sprays are very overpowering unless you have your face covered (I just normally lift my tshirt over my nose and mouth). This is obviously proving ineffective (not to mention very stupid of me) and at times I have to cough up a lung, and the pain from coughing that hard stays in my chest a few hours afterwards.
So, for those in the US, what sort of respirators do you guys use or recommend? I'd like to be able to protect myself from the fumes and smell of airbrush cleaner as well as spray varnishes/rattle cans in general.
Thanks again!
|
|
This message was edited 2 times. Last update was at 2014/03/26 16:55:57
|
|
|
|
|
2014/03/26 17:18:54
Subject: Re:Airbrushing Lessons that I have learned over the last few months
|
|
Been Around the Block
|
AngularDeath wrote:ot a paper mask - I work in toxic torts and can tell you for a scientific fact they are worthless)
So, for those in the US, what sort of respirators do you guys use or recommend? I'd like to be able to protect myself from the fumes and smell of airbrush cleaner as well as spray varnishes/rattle cans in general.
Paper masks are not useless, they are just specifically for dust particles.
Vaporized chemicals are much smaller than dust particles.
http://www.lowes.ca/safety-masks/3m-multipurpose-chemical-respirator_8779603.html
http://www.lowes.ca/safety-masks/3m-painting-respirator_10240499.html
Those are what you are looking for.
|
|
This message was edited 1 time. Last update was at 2014/03/26 17:19:39
|
|
|
|
|
2014/03/26 17:28:40
Subject: Airbrushing Lessons that I have learned over the last few months
|
|
Thunderhawk Pilot Dropping From Orbit
|
You gotta eyeball the paint honestly versus your psi. We can give you an exact. It's difficult sometimes, bit the lower the psi the thinner the paints. It took me over a year to figure it out...not I just dump paint in and drop thinner in and mix in the cup. I kinda look at the consistancy usually it's almost how a wash should be @ around 20psi.
I test a couple sprays on a napkin, make adjustments, and go for it.
Also I dont usually paint on a model until 24 hours has past from priming. I have found the Vallejo primer is too thin to go onto metals also.
Make sure your nozzle cap is ALWAYS cleaned after usage. I recommend getting a nozzle cap cleaner, and if your needles bent - toss it don't even try to straighten it with a coin or something.
Keep a couple extra nozzle caps, needle bolts, and needles on hand in case you lose or break one. Basically the smaller parts or fragile parts.
Get an airbrush holder. Silly putty is gold.
I do not ever keep my needle or nozzle cap in my air brush while not in use.
|
|
This message was edited 2 times. Last update was at 2014/03/26 17:30:52
Click the images to see my armies!

 |
|
|
|
|
2014/03/26 17:33:43
Subject: Airbrushing Lessons that I have learned over the last few months
|
|
Regular Dakkanaut
|
And a respirator is of limited use without a way to remove the fumes from the room. You really should have some type of exhaust fan going as well, or be working outside as soon as you crack open the lacquers or any other type of medium containing VOC's.
|
|
|
|
|
2014/03/26 18:32:14
Subject: Re:Airbrushing Lessons that I have learned over the last few months
|
|
Hardened Veteran Guardsman
|
I apologize for any confusion - I think what I was trying to say is I am more concerned about the carcinogens in varnishes/sprays - I understand the particles in them are way smaller than dust and their carcinogenic properties are why they're of concern to me. Reading the MSDS sheets for my Vallejo thinner and cleaner, they basically indicate that the amount of chemicals in them are considered non-hazardous if exposed. However, the Testors varnishes have known carcinogens, so I try to use them as quickly as possible and try to use them as rarely as I can - maybe once a month. Maybe I'm just a little paranoid working in a law firm.
It is far from ideal, but I figured the space in my basement would provide enough ventilation (if I take periodic breaks) to allow the work space I have down there to air out and dissipate the fumes after a while. Unfortunately, there is no real exhaust down there, nor any windows, just the air. I work with sprays and the airbrush in my basement (it is unfinished and the size of the property, maybe 40 feet long by 15 feet wide), as I'm not allowed to work with those items anywhere else in the house. The smells don't make it to the rest of the house (so I assume minimal fumes do as well) and I figured with time the air would be safe down there after I'm done working.
I live in a row home in South Philadelphia/Filthadelphia and I have no garage, so working outside isn't a very good option with all the dust and garbage floating around in the wind, not to mention our city's wonderful crime rate.
Painting and modelling in the city is a tricky endeavor I guess.
|
|
|
|
|
2014/03/27 02:28:25
Subject: Re:Airbrushing Lessons that I have learned over the last few months
|
|
Drakhun
|
AngularDeath wrote:I apologize for any confusion - I think what I was trying to say is I am more concerned about the carcinogens in varnishes/sprays - I understand the particles in them are way smaller than dust and their carcinogenic properties are why they're of concern to me. Reading the MSDS sheets for my Vallejo thinner and cleaner, they basically indicate that the amount of chemicals in them are considered non-hazardous if exposed. However, the Testors varnishes have known carcinogens, so I try to use them as quickly as possible and try to use them as rarely as I can - maybe once a month. Maybe I'm just a little paranoid working in a law firm.
It is far from ideal, but I figured the space in my basement would provide enough ventilation (if I take periodic breaks) to allow the work space I have down there to air out and dissipate the fumes after a while. Unfortunately, there is no real exhaust down there, nor any windows, just the air. I work with sprays and the airbrush in my basement (it is unfinished and the size of the property, maybe 40 feet long by 15 feet wide), as I'm not allowed to work with those items anywhere else in the house. The smells don't make it to the rest of the house (so I assume minimal fumes do as well) and I figured with time the air would be safe down there after I'm done working.
I live in a row home in South Philadelphia/Filthadelphia and I have no garage, so working outside isn't a very good option with all the dust and garbage floating around in the wind, not to mention our city's wonderful crime rate.
Painting and modelling in the city is a tricky endeavor I guess.
I live in the city and my hobby cave is also in the basement.
I use this spray booth and it takes most of everything out of the air. If I were spraying anything other than acrylic paints/primers/varnishes I would grab a respirator as well.
http://www.amazon.com/Master-Airbrush%C2%AE-Portable-Airbrush-Extension/dp/B00B2TESUQ/ref=sr_1_1?ie=UTF8&qid=1395887161&sr=8-1&keywords=airbrush+spray+booth
|
|
|
|
|
|
|
|