Switch Theme:

1850 Tyranid endless swarm at TSHFT  [RSS] Share on facebook Share on Twitter Submit to Reddit
»
Poll
How will the endless swarm do out of 6 games?
Tyranids dominate all! Even their stomachs are sated by this feast. 24% [ 7 ]
A loss due to match up against allllll the flamers, but still place in the end. 14% [ 4 ]
A couple wins, a couple losses, what you expect from non meta fun. 34% [ 10 ]
Ties everywhere. Not a win or a loss, just 6 no results. 0% [ 0 ]
A win or two because at the bottom of the barrel we're all even odds. 17% [ 5 ]
Nothing but death for the nids. Shut out at the championship because....competitive. 10% [ 3 ]
Total Votes : 29
Author Message
Advert


Forum adverts like this one are shown to any user who is not logged in. Join us by filling out a tiny 3 field form and you will get your own, free, dakka user account which gives a good range of benefits to you:
  • No adverts like this in the forums anymore.
  • Times and dates in your local timezone.
  • Full tracking of what you have read so you can skip to your first unread post, easily see what has changed since you last logged in, and easily see what is new at a glance.
  • Email notifications for threads you want to watch closely.
  • Being a part of the oldest wargaming community on the net.
If you are already a member then feel free to login now.


Made in us
Tough Tyrant Guard


Seattle

All right, this coming weekend is the ever exciting TSHFT Championship! Many trials and tribulations have stood in the way of getting the endless swarm ready, but they are just about there! (As of four days before tournament.) This was largely accomplished by changing the list to drop the two super exciting, but super complex projects, and by being comfortable with a finished, painted and varnished model that didn't have all the exciting extra basing I plan on. (Carnifex smashing through a wall.) The adventure in painting is available here: http://www.dakkadakka.com/dakkaforum/posts/list/668863.page

There are also links at the end of that first post on the endless swarm page for the handful of pre tourney battles I had in trial and training.

Now then, on to the good stuff. First my list:

Spoiler:


Endless swarm: ___________________________________________560pts
20 Hormagaunts___________________________________100 pts
15 Hormagaunts____________________________________75 pts
10 Termagants 5xDevourers___________________________60 pts
10 Termagants _____________________________________40 pts
3 Warriors: 1X sword/whip, 1X RC, barbed strangler ________125 pts

Sporefield:__________________________________________________90 pts
Mucolid___________________________________________15 pts
Spore mine cluster__________________________________15 pts

CAD: ____________________________________________________________1240 pts
HQ:_______________________________________________________515 pts
Flyrant, 2X brain leech worms, ESG _______________________240pts
Flyrant, brain leech worms, ESG, Maw claws ________________235pts

Troops:_____________________________________________________30 pts
Mucolid___________________________________________15 pts
Elite: _____________________________________________________220 pts
Malanthrope_______________________________________85 pts
Zoanthrope_______________________________________ 50 pts
Heavy: ___________________________________________________395 pts
Trygon__________________________________________ 190 pts
Stone wrecker carnifex, bio-flail _______________________165 pts
Biovore___________________________________________40 pts
Fortifcation
Bunker; escape hatch________________________________________80 pts

This was the final iteration of plenty of tweaking, as well as limits of time vs cool project. I initially wanted to avoid psychic powers to save time during the game, but I have the cool posed flyrants and the zoanthrope gives me that other annoyingly durable synapse for the slow walkers and return group.


Many armies from TSHFT:
Spoiler:


GAME ONE
Spoiler:

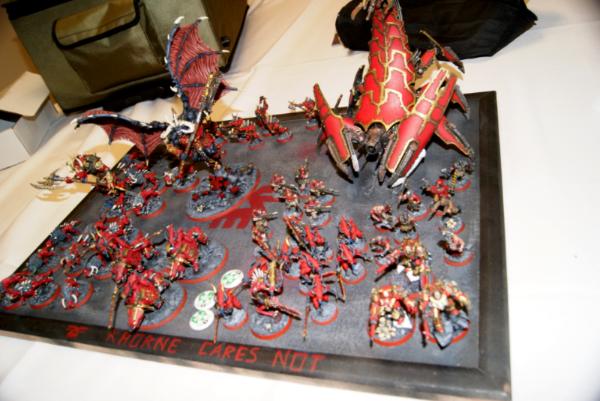
First game was against the vaunted Captain-A! We were even given top table by random assignment. I can say that endless swarm was at the top table! Yeah!
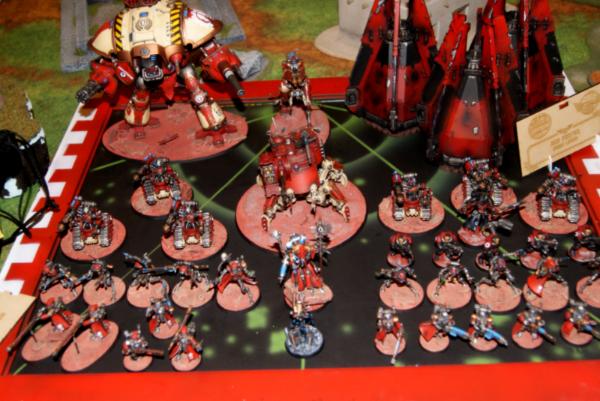
On to his list:
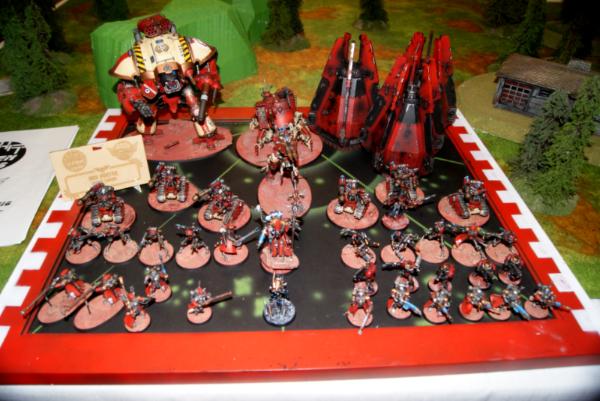
White scars CAD_______________________________________________________905
HQ______________________________________________________________145
Librarian: lvl 2 terminator armor, HUNTERS EYE ________________145
Troops___________________________________________________________110
scouts (5)_______________________________________________55
Fast attack_________________________________________________________90
drop pod: locator beacon___________________________________45
Heavy support_____________________________________________________560
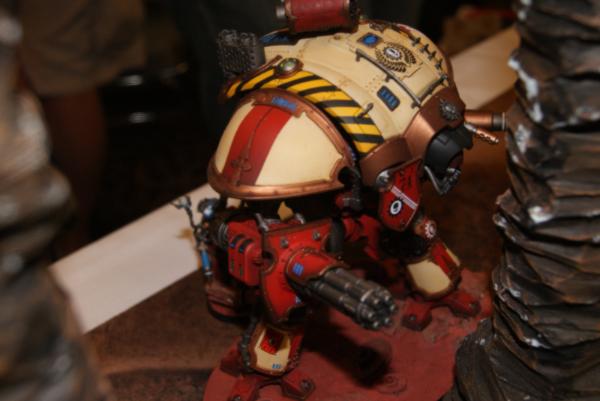
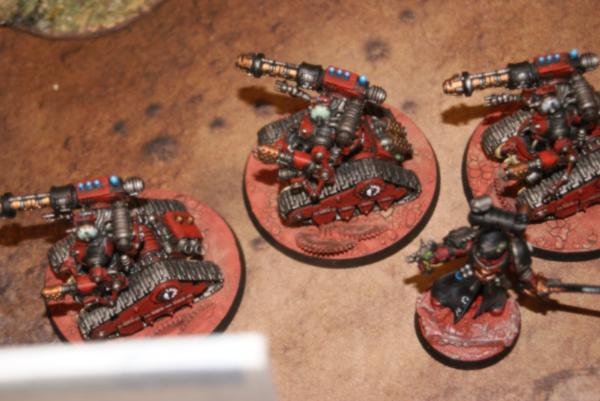
Centurion devestator squad grav cannon/amp, ML, omniscope_____280

Red scorpions CAD_____________________________________________________230
HQ______________________________________________________________175
Severin Loth____________________________________________175
Troops____________________________________________________________55
scouts (5)_______________________________________________55

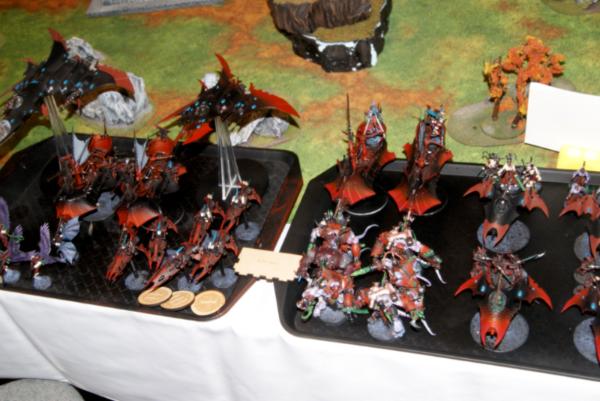
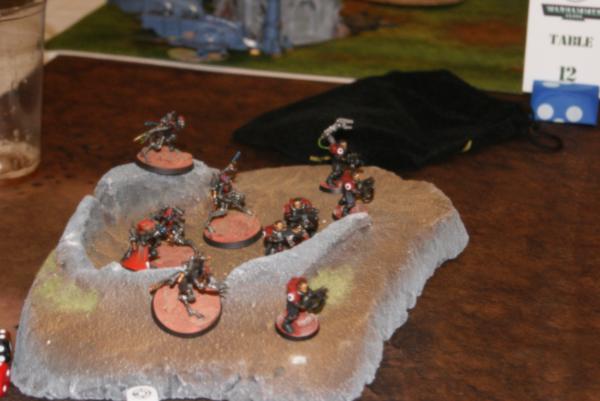
Grey knights knemesis strike force__________________________________________715
HQ______________________________________________________________165
Librarian: Liber daemonica, daemon hammer, psyker lvl 3, warlord__165
Troops___________________________________________________________110
Strike squad all swords____________________________________110
Heavy____________________________________________________________195
Nemesis dreadknight: heavy psycannon, teleporter_______________195

LoW_____________________________________________________________245
Draigo: Extra warp dust____________________________________245

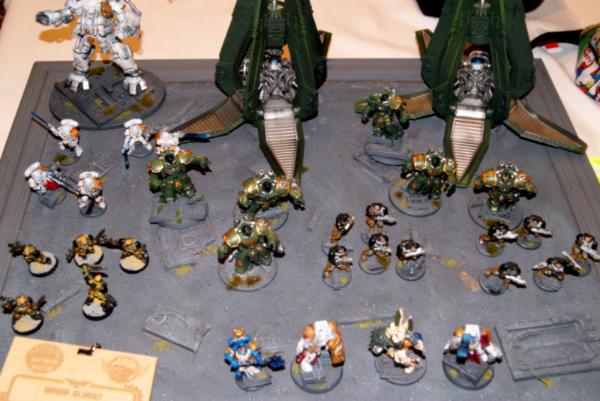
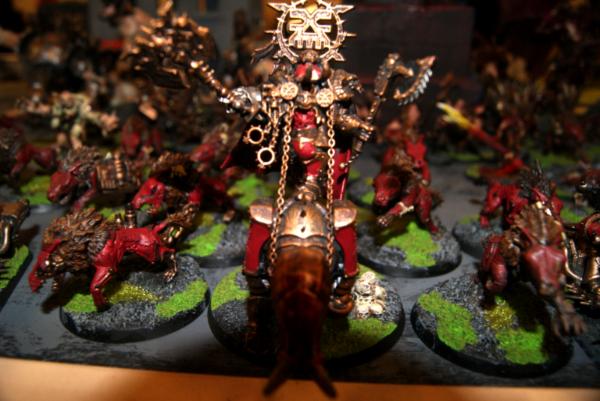
Here are the great warriors of the white pod bomb.


Pregame thoughts:
Well, I didn't actually realize I was playing Captain A actually, I just got his name. Hunters eye is something I expect to be a theme here whenever I face some centurions. White scars really didn't need any help, but they got to ignore cover for very little. Enough complaining now from the tyranids codex. My hope is that when the centurions deep strike next to me I'll be able to overwhelm them with hormagaunts, and even if they hop out with hit and run, I can remove a couple each time, it's a greater loss for him then for my hordes. Then at the end of the game I'll swarm as many objectives as possible.


Mission: ITC 1/Emperors will, dawn of war deployment

Deployment:

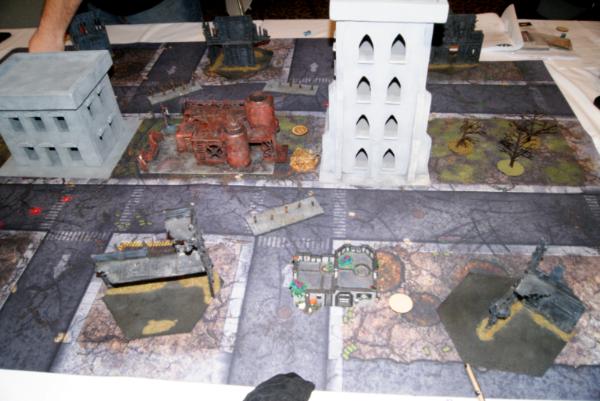
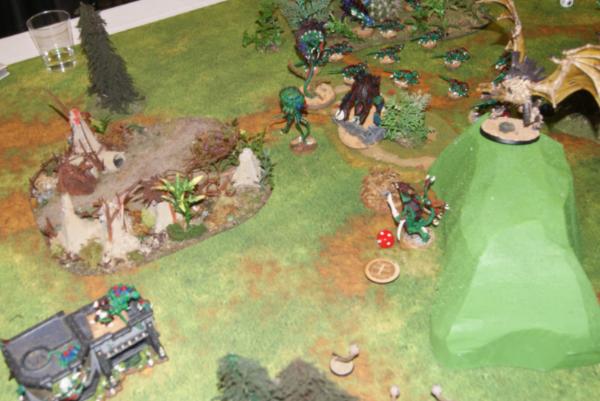
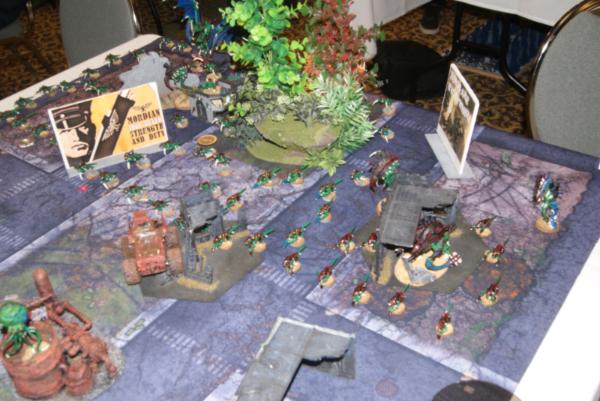
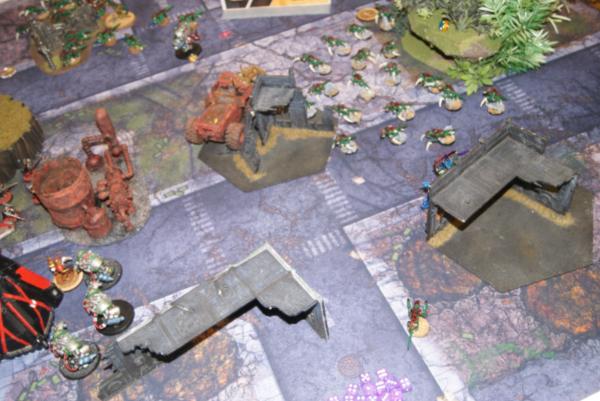
Dawn of war deployment and the way the objectives were placed. The left side of the table and the center is where most of the action will occur.


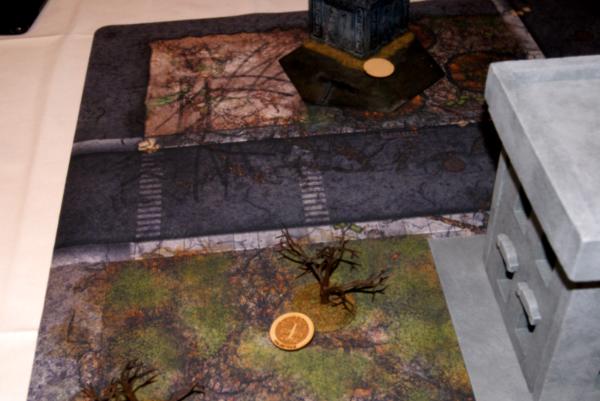
My eternal war objective is next to the bunker, close enough that a model inside will claim it.


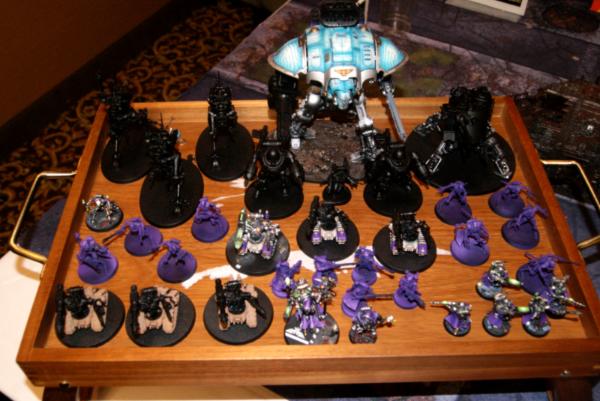
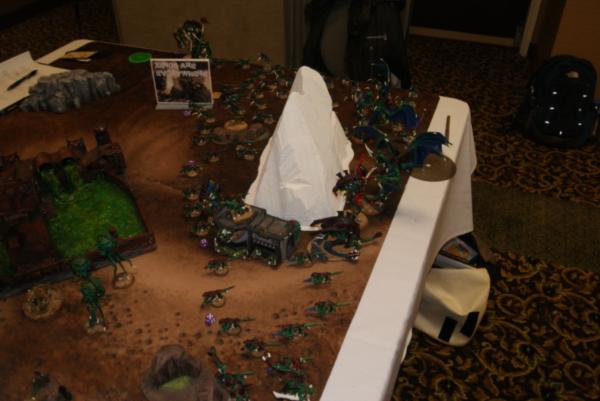
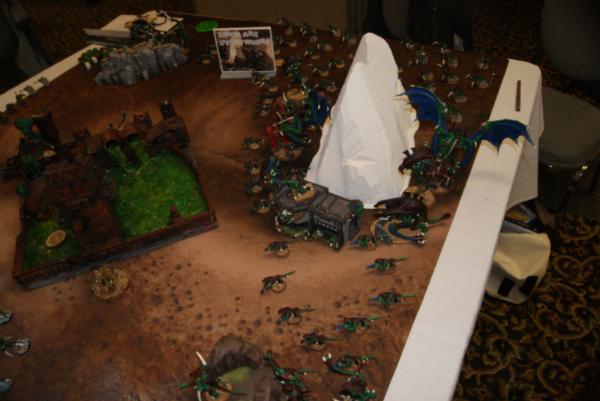
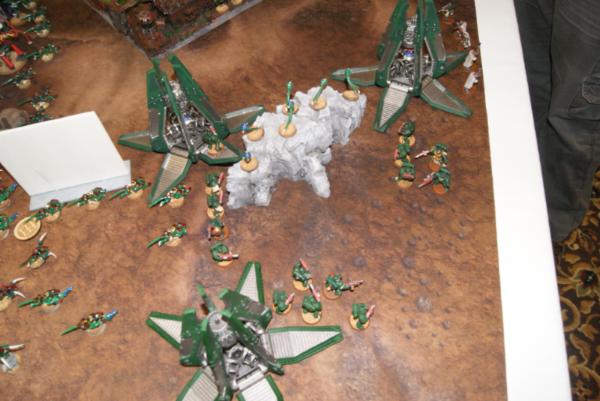
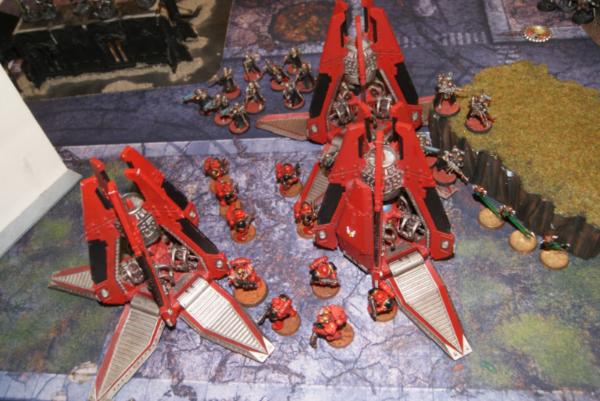
Grey knight deployment.
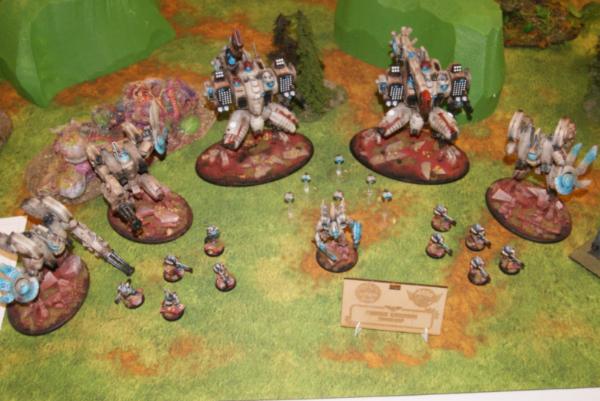
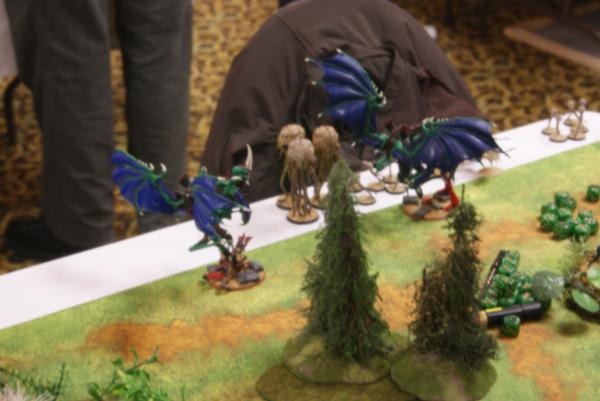
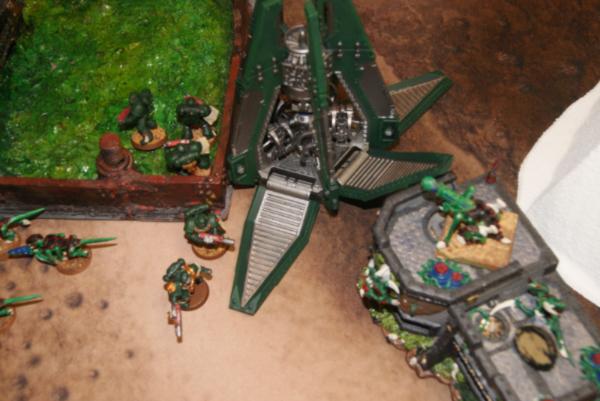
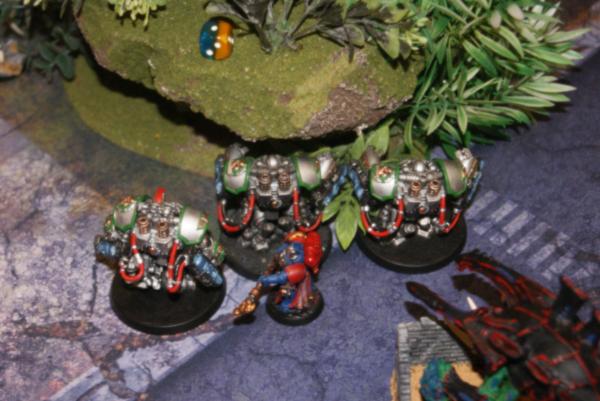
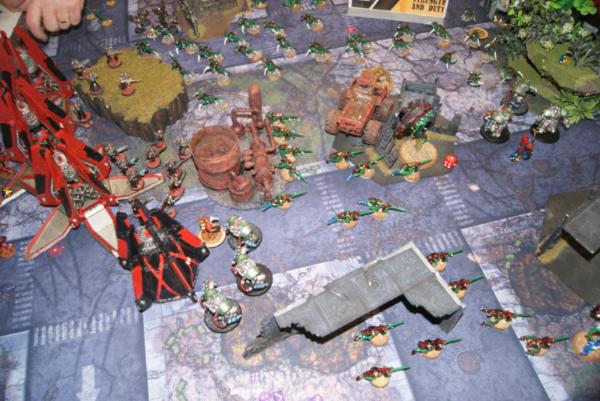
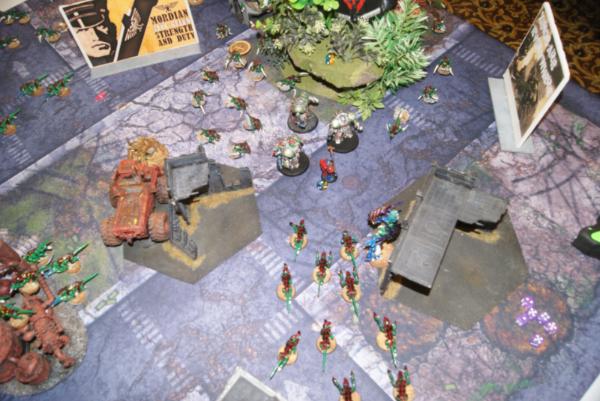
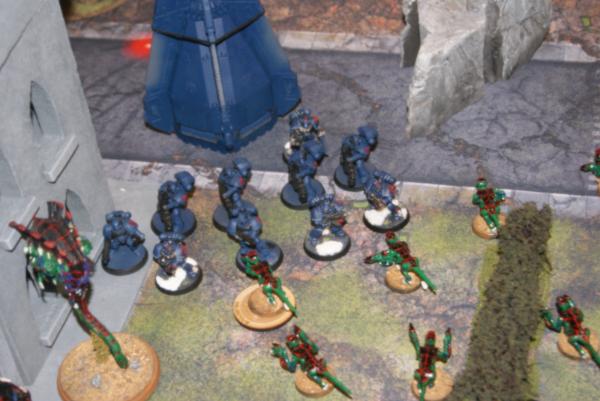
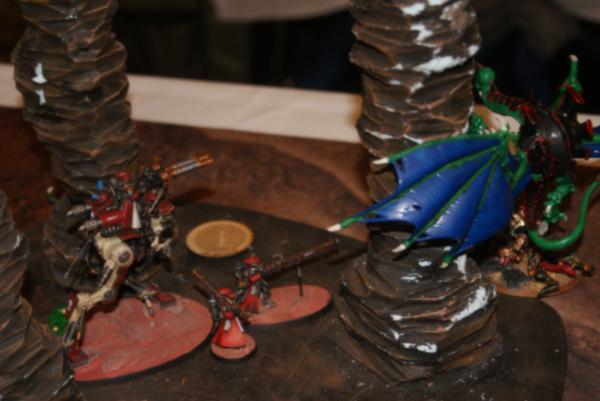
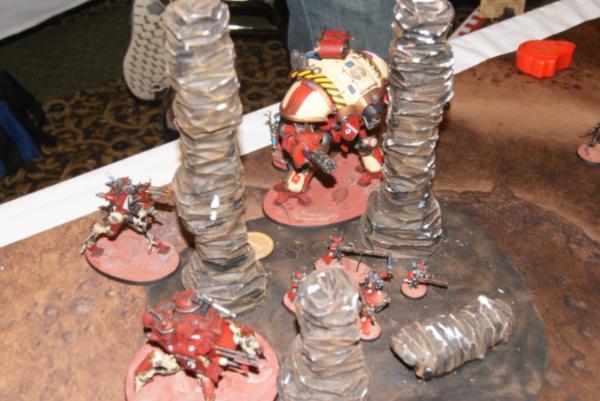
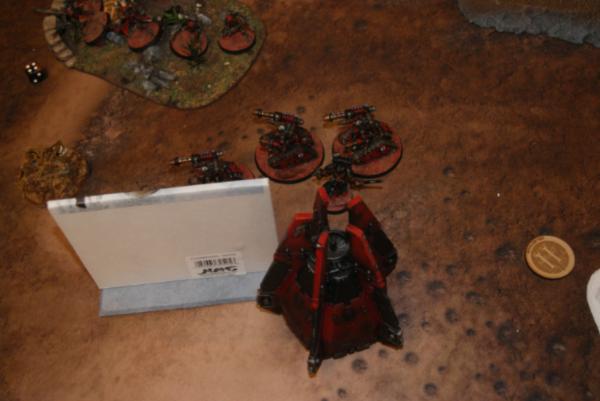
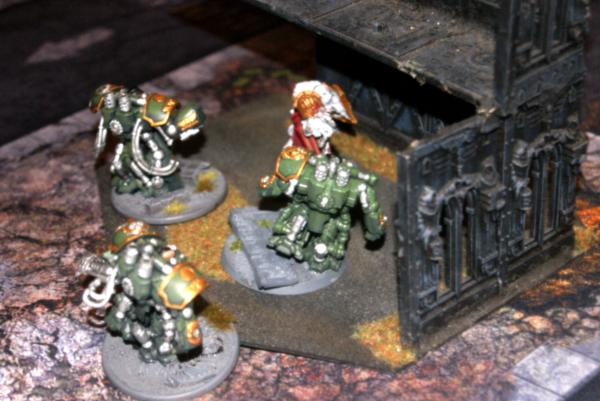
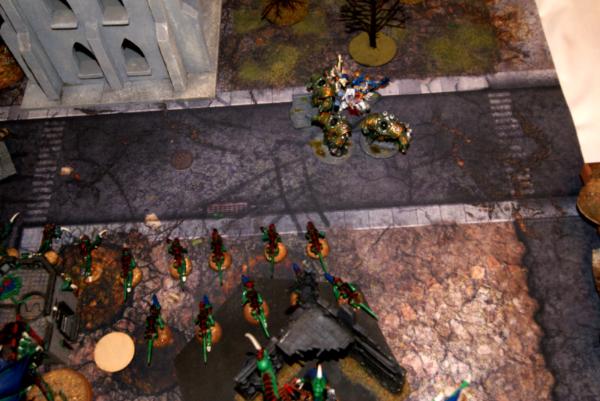
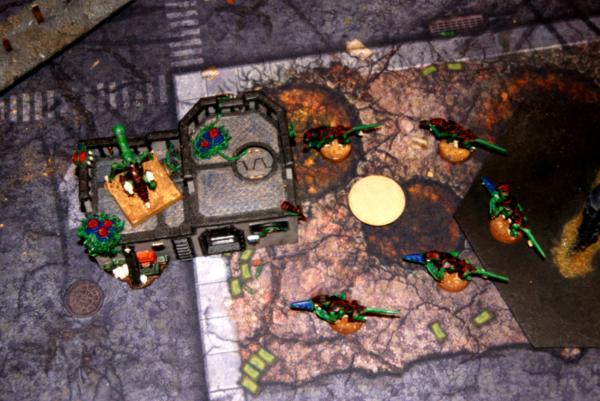
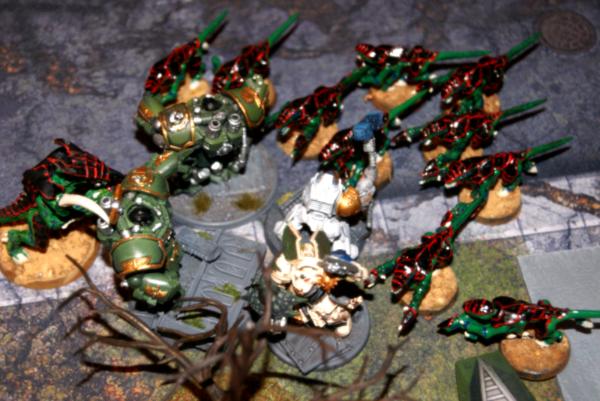
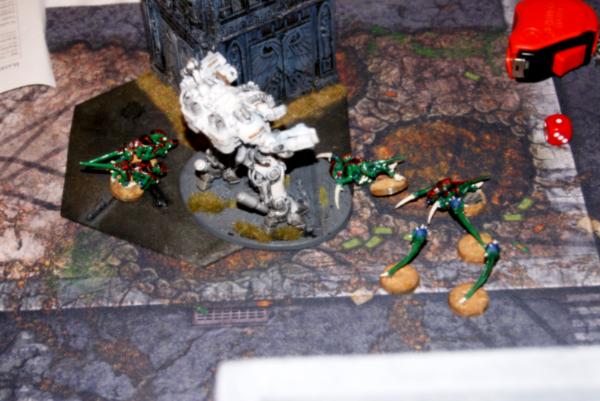
My opponent deployed a couple of scouts behind ruins on my left flank of his deployment zone. One centurion squad set up in those same ruins with the librarian and loth.


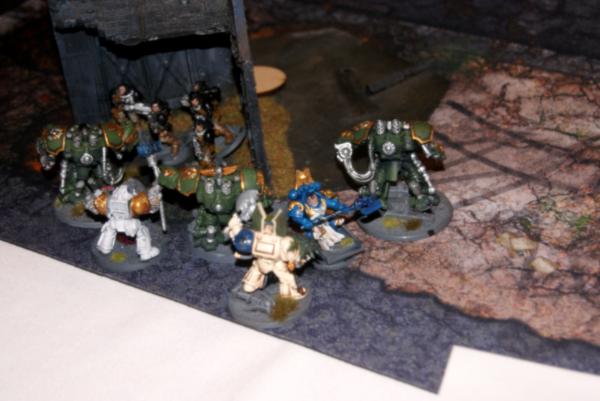
The other squad of centurions with Draigo attending deployed on the ruins to the right flank.
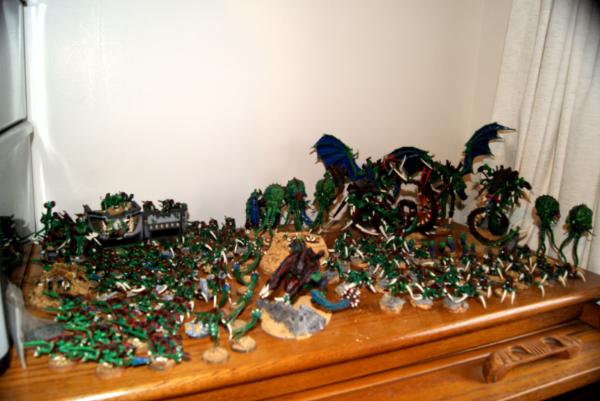
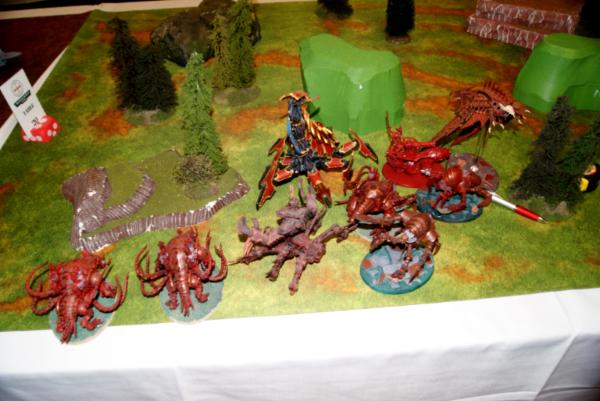
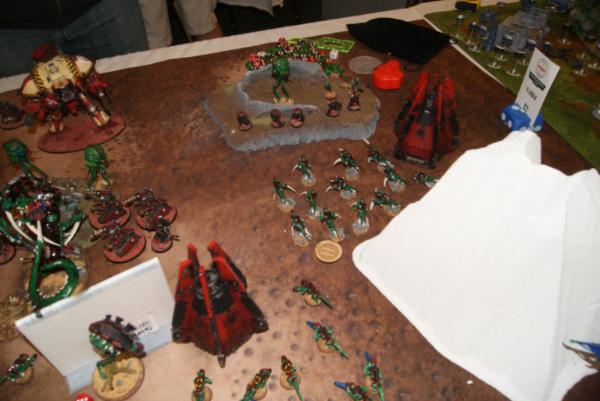
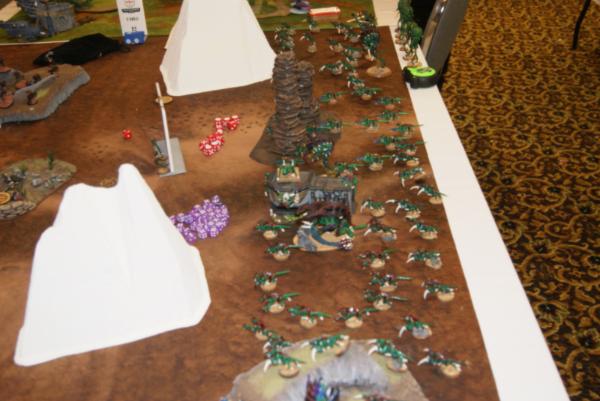
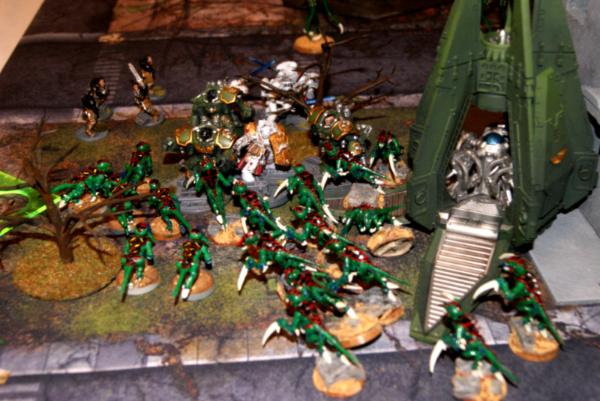


Tyranid deployment.
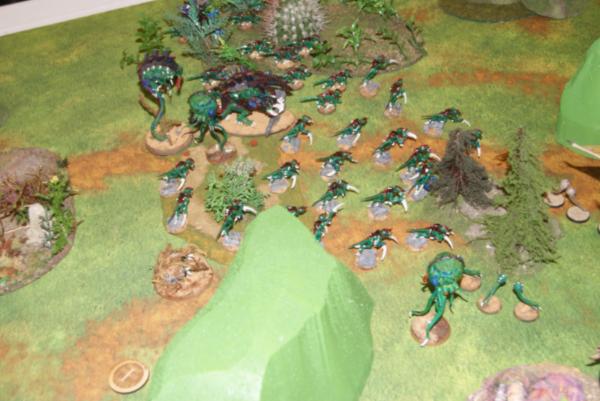
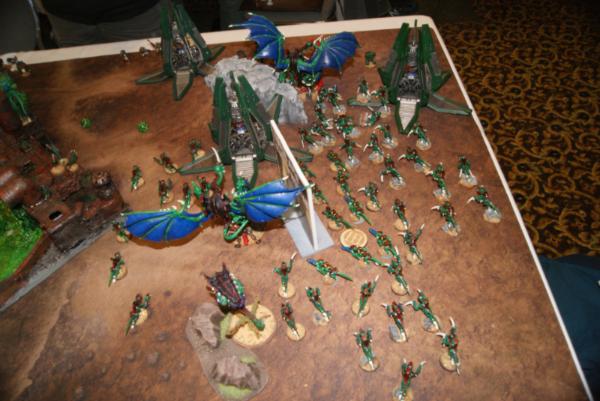
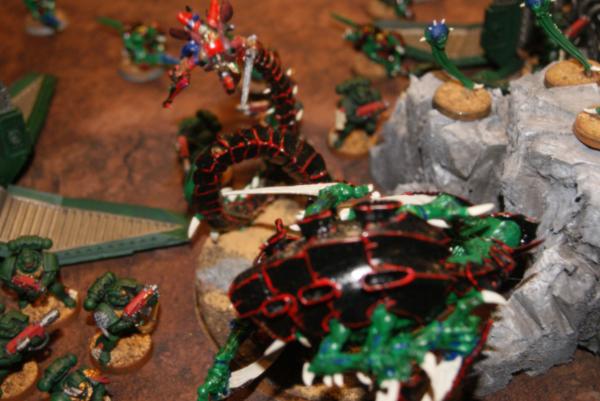
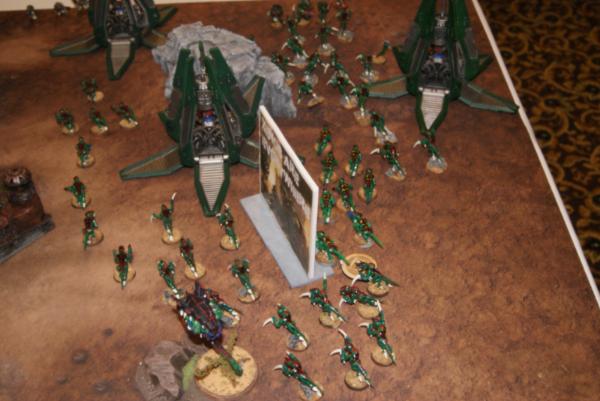
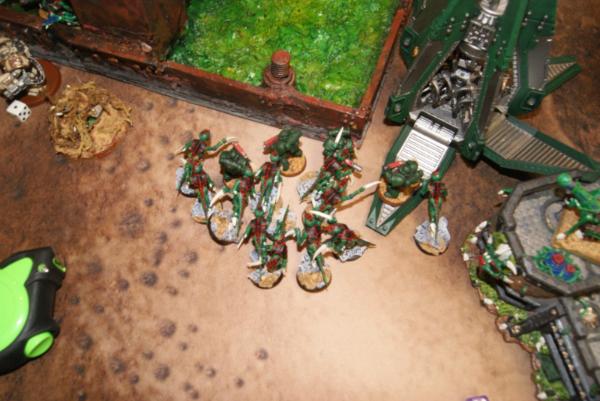
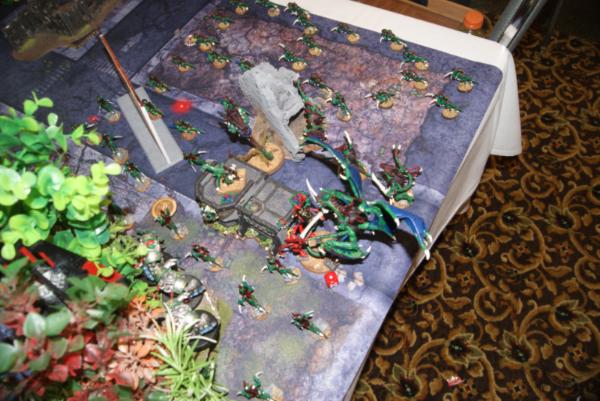
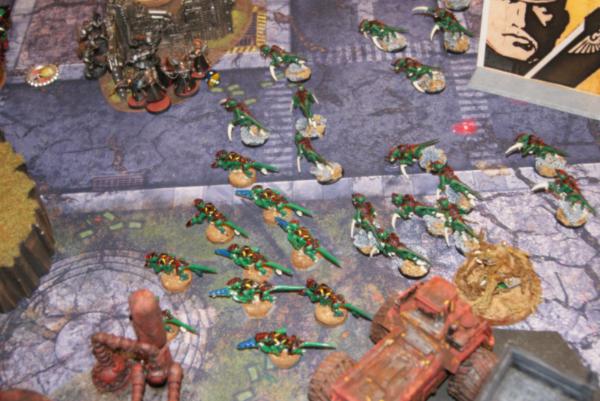
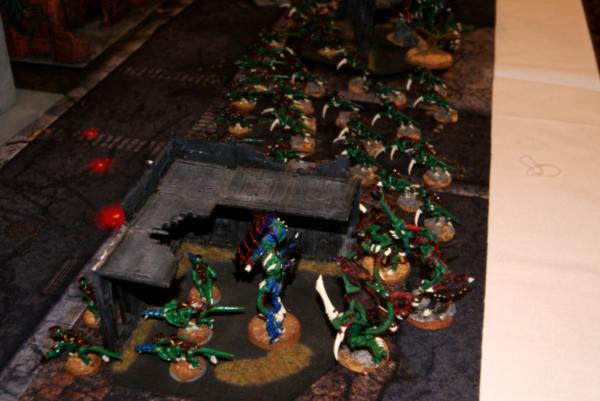
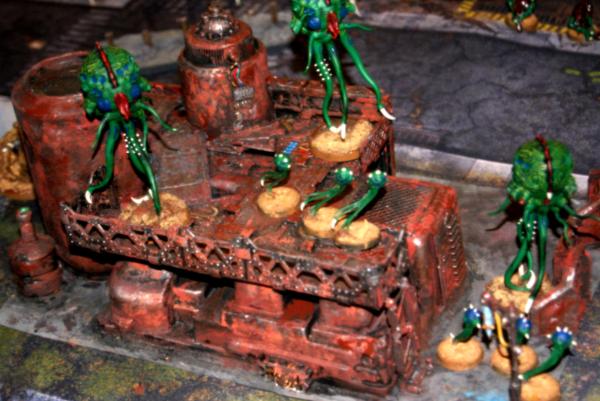
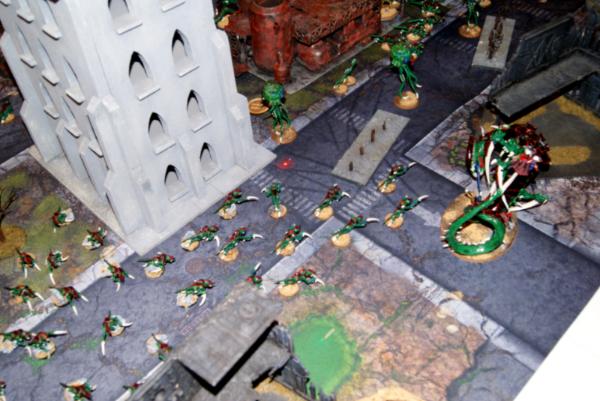
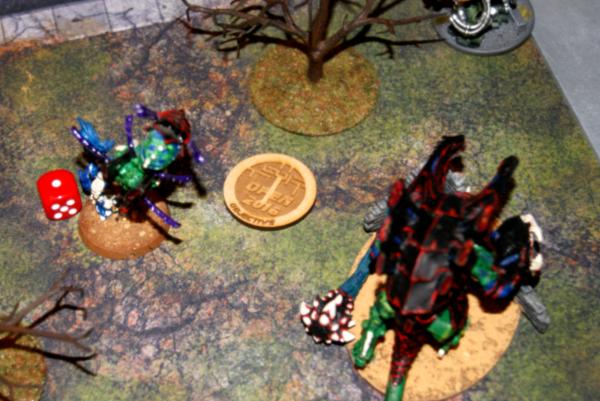
I set up across almost the entire board, malanthropes set up to give everyone shrouded. Twenty gaunts in the box, which was placed in the center of my deployment zone, with the escape hatch set up right next to the center objective.


My right flank had both of the flyrants in it, a malanthrope and a couple squads of gaunts and gants.


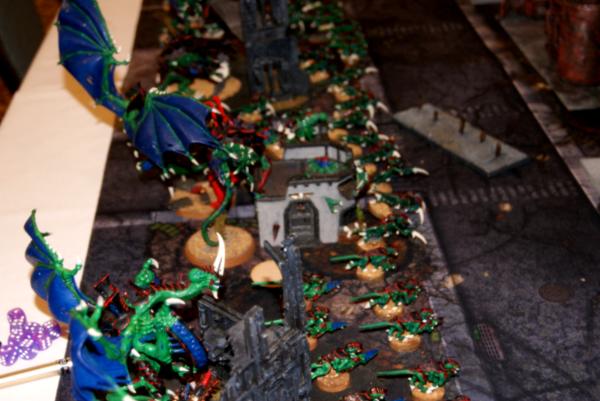
The left flank was anchored by the zoanthrope and my warrior squad. More gaunts and two squads of gants.


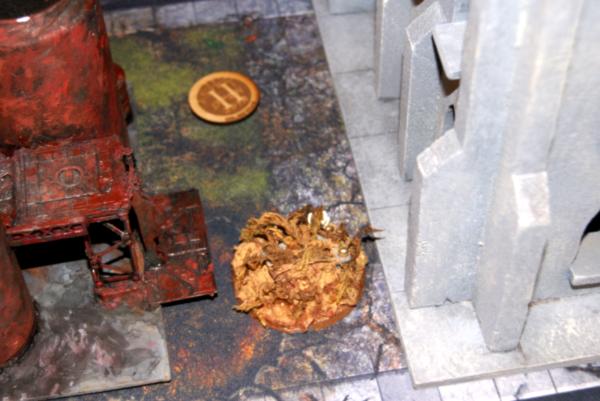
The spores I infiltrated into the center ruin of the board. I wanted to play area denial here and just intimidate him from making an attempt on the central objective. If I am lucky, I will roll this repeatedly on the maelstrom objectives. Additional bonus if one of his deep strikers scatters into the area.


Turn one objectives:
Knights: 3/4 (have a unit partially in opponents deployment zone/kill something)
Tyranids: 1.6 (Hold maelstrom objective 1/Kill something)


First turn Greyish/white knights:
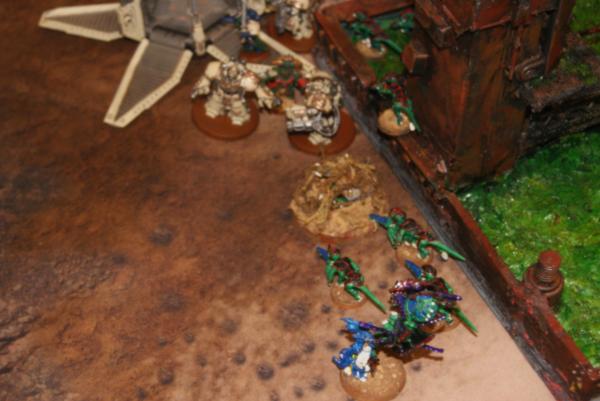
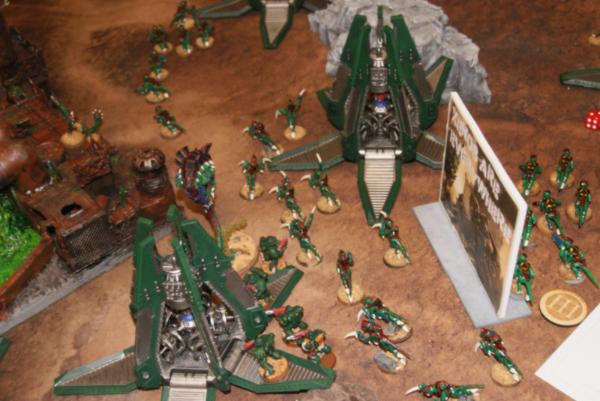
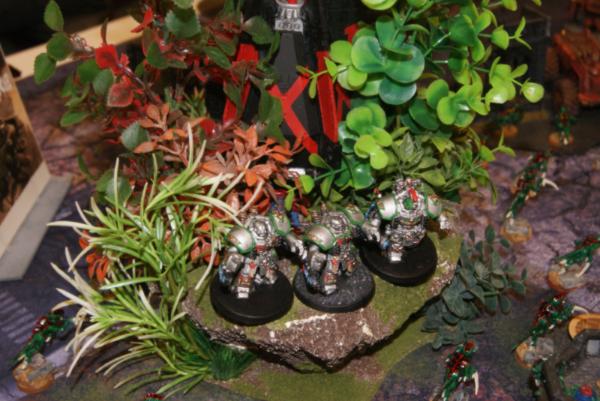
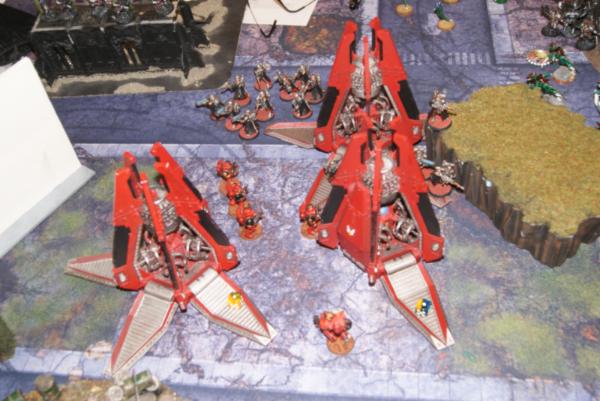
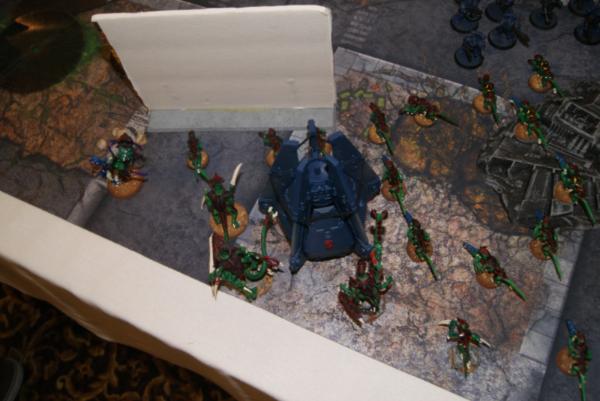
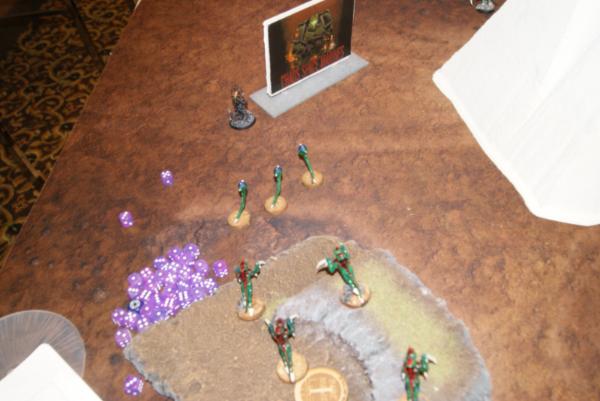
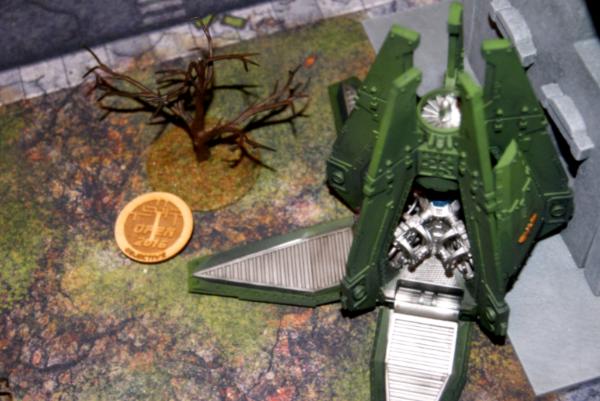
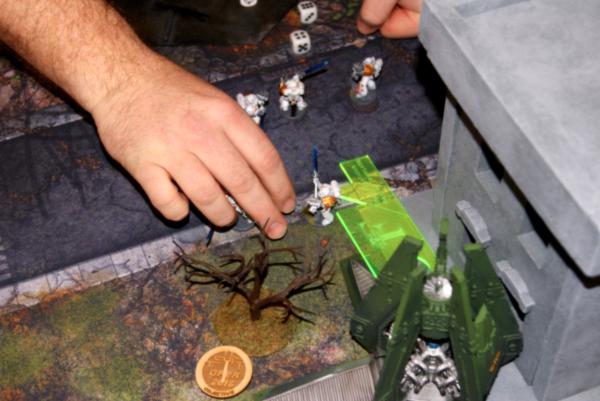
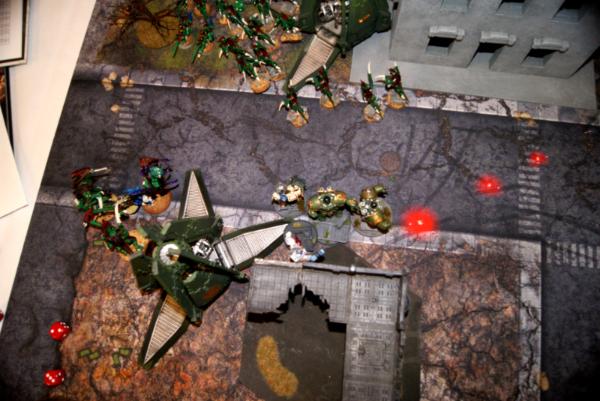
Movement phase was pretty quick, the squad of Loth and his white scar centurions came out from behind the ruins. The dread knight teleported in first turn, along with an empty drop pod who landed next to the mission objective on the left flank.


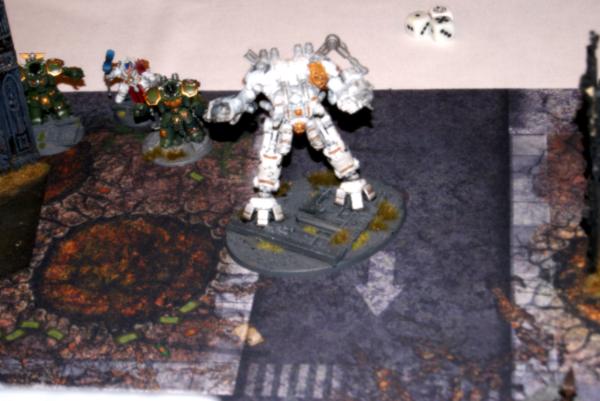
In the psychic phase the first centurion star powered up and gated all the way across the table. Now hold on I said, I thought gate only had a 24" range. Well I am misinformed, it turns out my memory of gate was from quite a while ago. So instead of my warlord being quite safe an entire board away.


My opponent dropped his grav squad comfortably in range with the happy ability to completely ignore cover.

The Draigo led squad of centurions gated to the left flank of the board using the drop pods teleport homer to avoid scattering entirely. He lined up shots on the zoanthrope on that flank.
The following shooting phase as you would expect resulted in the absence of my warlord. He decided to catch an early flight home I suppose.

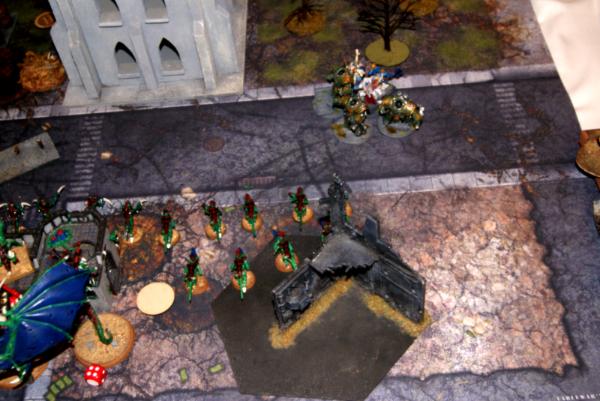
Shooting a zoanthrope with no armor save it turns out is not a good policy for grav weapons. This little mistake resulted in a unit that caused no wounds what so ever.


Turn one Tyranids:
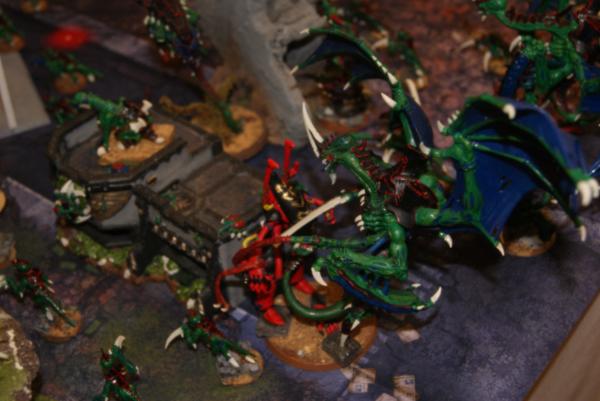
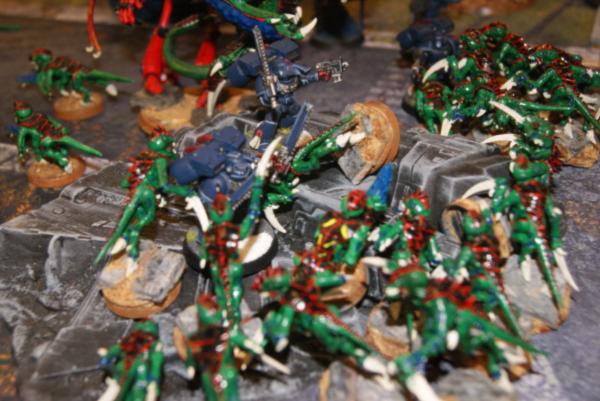
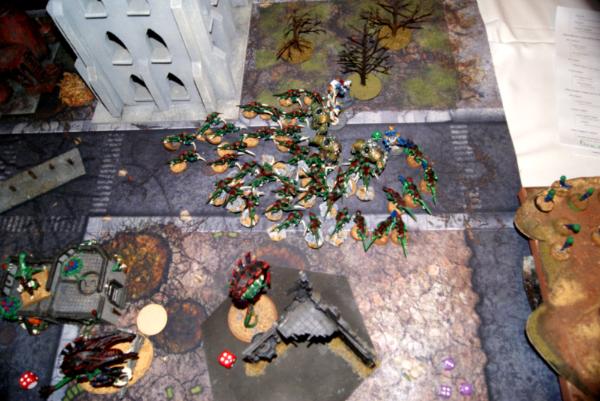
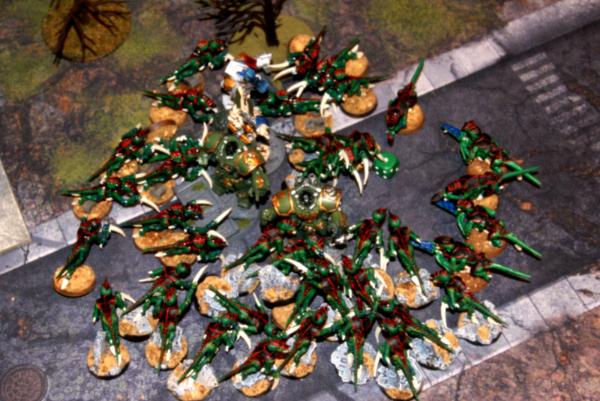
Well that was a surprise move there. I really thought that my flyrants were safe. Threw me so far off my game I only took one picture during my turn. Well, the side effect of this is that I can now happily chase him down in combat. The Gaunts in the bunker, the gaunts outside the bunker, and the squad of termagants with devourers will all happily take aim at the Loth star. Flyrant who survived flies onto the building near the Loth star, providing more synapse and hopefully some smack down. Malanthrope came along, hoping to make a charge the second turn to get a win combat, try and get preferred enemy that way. On the other side of things gaunts, warriors and zoanthrope move towards the Draigo star. Psychic phase is understandably underwhelming. Catalyst for flyrant and malanthrope goes off, but warp lance from zoanthrope attempting to destroy the drop pod fails. Shooting manages to put one wound on the Loth centurions, and assault kills him off, the centurion, not Loth. The white scars fail their get out of dodge (hit and run) and are trapped in combat. I learned later that hit and run doesn't work when you are surrounded. As there is no room for your models base to pass another models base. Ah well, the more you know.


Knights: 1
Tyranids: 0
Wrap up.
So the game starts with a huge mistake by myself. I remembered gate in an old version or something, I thought the deep strike was limited to 24 inches away from where you started. With his hunters eye dude entirely across the board, I thought for sure my warlord was safe. Wanh, Wanh. Aside from that, I was unable to kill off anything. Assault on the left flank just was too far away to do much, and the right side while I surrounded him only netted me a single kill.

Turn two: Grey knights

Knights maelstrom: 3/4 (Have a unit within 12" of my board edge/kill something)
Tyranids maelstrom: 1/6 (Control objective 1st/have 3 of my units and none of my opponents in my deployment zone)

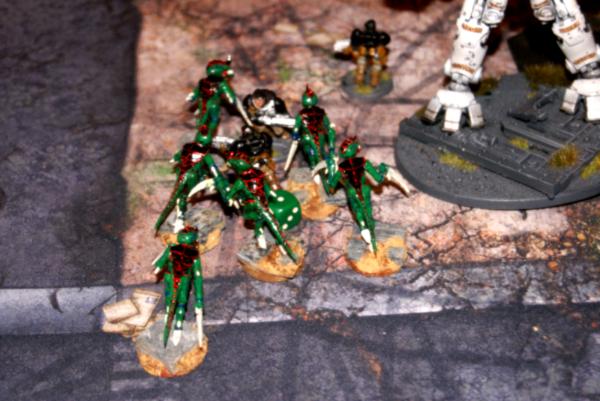
Out flanking scouts come in on the left flank as that's where the maelstrom objective is.


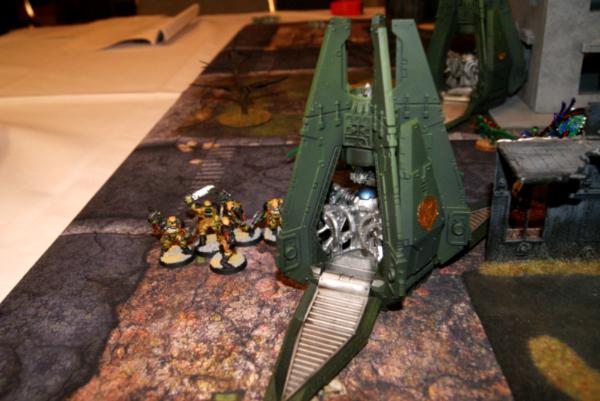
Scouts and a drop pod come in at my deployment zone. This also completed his objective of having a unit in my deployment zone if they survived.


Grey knight troops use the drop pods locator beacon to avoid scattering.

The knight moved closer to maelstrom objective 1, but still decided to take pot shots at the numerous mucolids in cover. Grav weapons from draigo star managed to kill a single warrior. They were still in ruins and had a 2+ cover due to the nearby malanthrope.

Loth attempts to gate out of combat, perils, and promptly rolls a one. Shadow in the warp causes his head to explode, and another wound put on a grav centurion.


Evening out the luck, the hormagaunts fail to cause any additional wounds to the now librarian led centurion star, they make their hit and run, and a whole lot of gaunts are left waiting for someone to hit. He chose to hit and run towards his own deployment zone, and with a good 6 on my consolidation I was able to follow him quite well with one squad of gaunts. The other went half the distance, but has a good chance of making it.


Tyranids turn two:

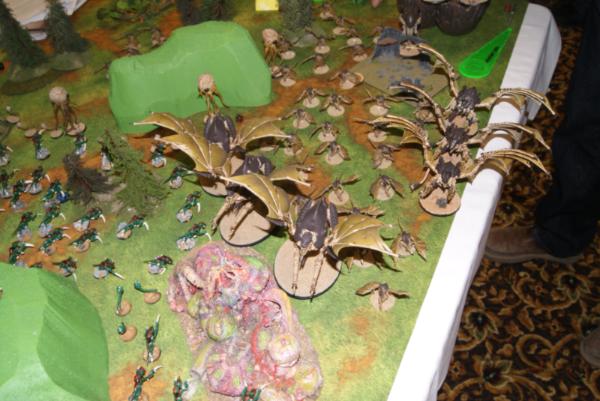
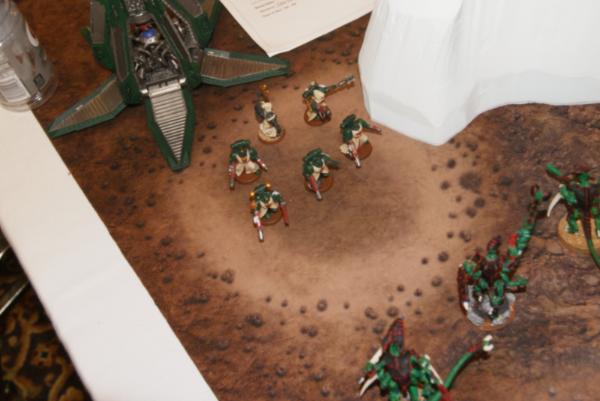
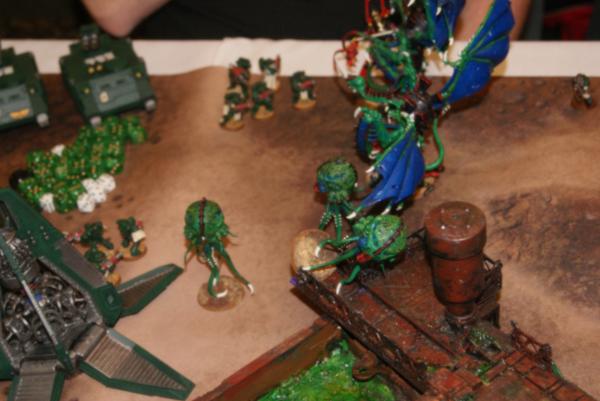
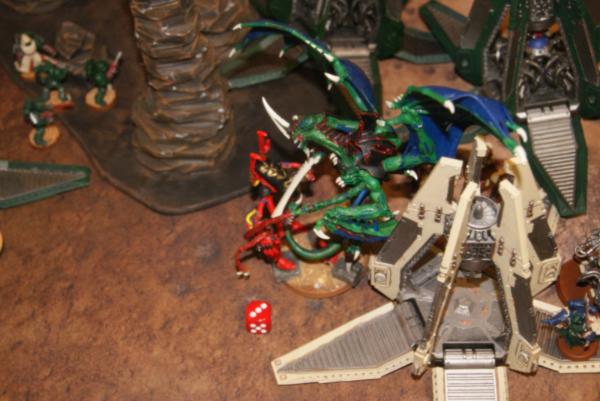
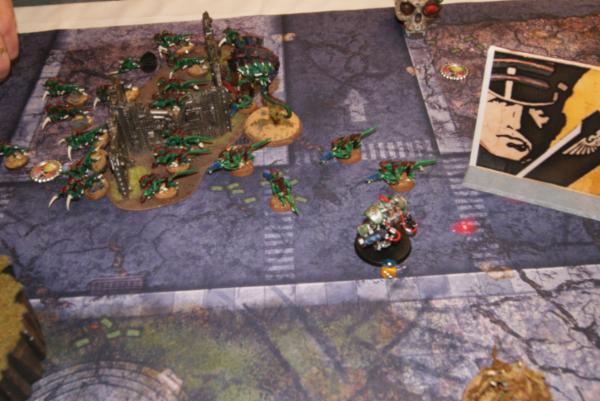
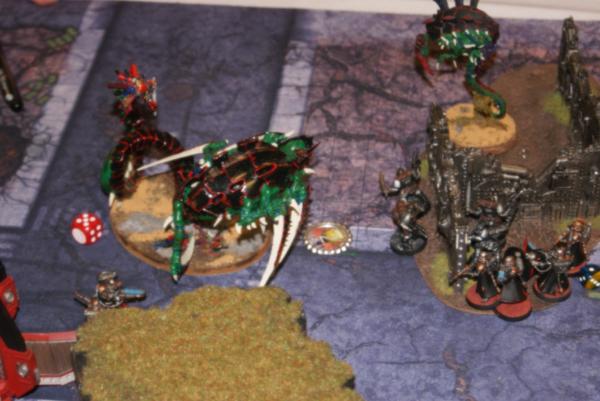
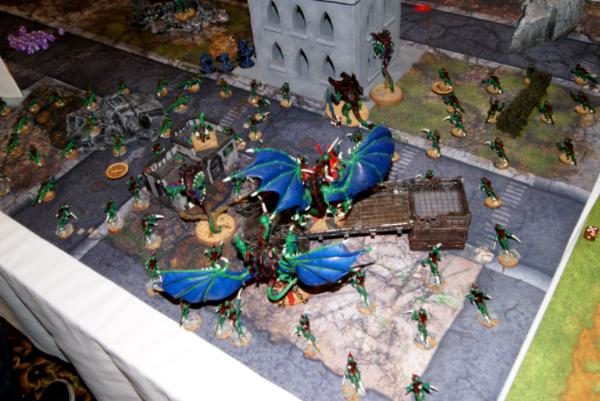
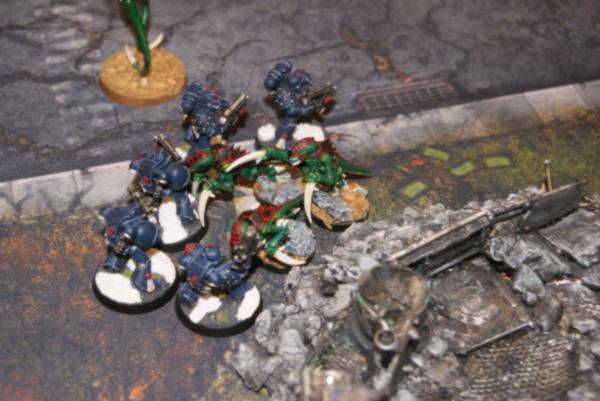
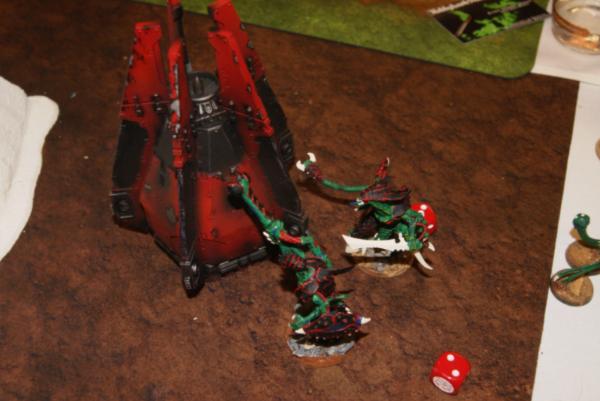
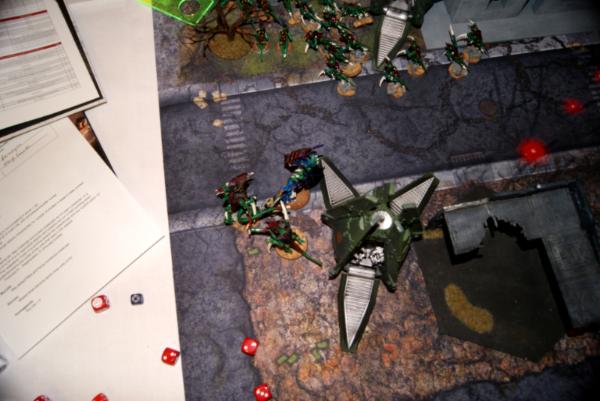
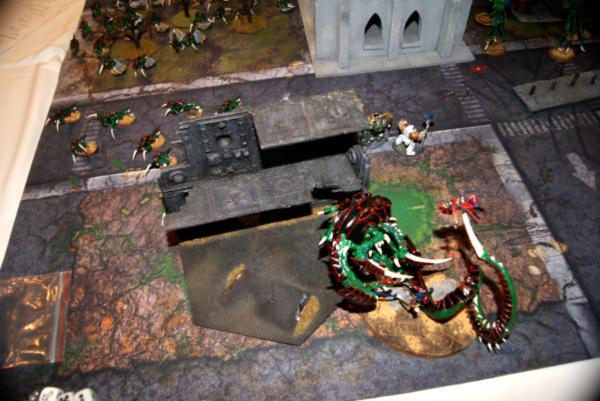
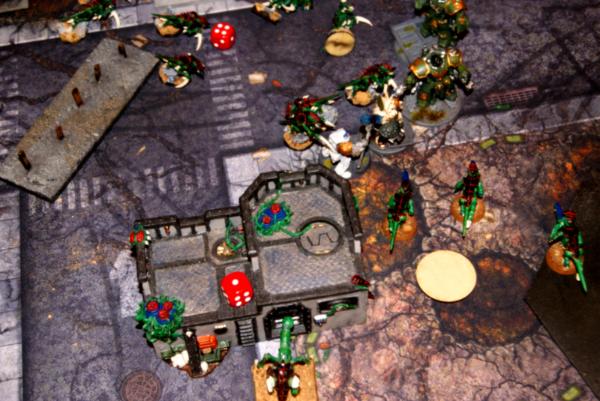
Once more, super excited about my turn I forgot to take pictures until the assault phase. All my reserves came in for me. The trygon I decided to deep strike near the librarian led centurions. The two mucolids came in on the other side of the table bracketing the scouts and draigo if they attempted to retreat. My carnifex realizing it was headed away from any and all action, turned tail and tried to haul it back towards the left flank. Two squads of termagants had made their way into the center ruins. The psychic phase worked as I have come to expect the flyrant managed catalyst to himself and the trygon, but the zoanthrope was unable to manifest anything. The warriors shot at the scouts in my deployment zone then charged them along with the zoanthrope. The final scout held his ground, tieing my models up. A mucolid charged the grey knight strike squad and wiped it out in the ensuing blast.


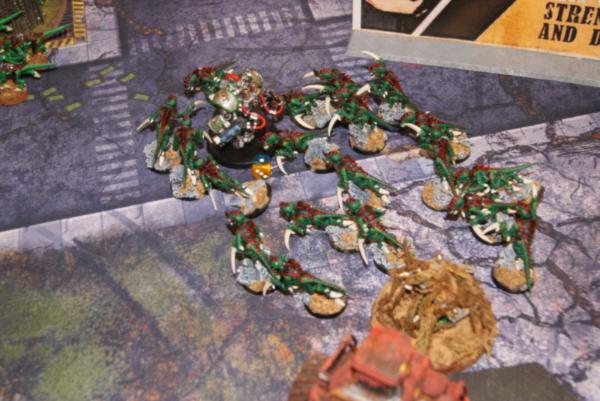
Gaunts assault Draigo and manage to kill a single centurion.


Draigo and company then hit and run out of the combat, setting themselves in my deployment zone and doubly preventing me from earning that maelstrom.


One squad of hormagaunts on the left flank made it into the librarian led centurions and managed to drag down one more body, however hit and run struck again and they were left hanging.


Knights: 2
Tyranids: 0

Wrap up:
Well, that hit and run is just frustrating. I continue to hit him, but I can't wrap him up. The drop pod on the left flank is managing to hold that objective away from me, and while I would like to say the zoanthrope should have shot the drop pod in my deployment zone, draigo hit and ran over there anyway. I'm slowly whittling away at his forces, one grav star is nearly useless even though the one centurion still ignores cover. I have secured the useless right flank through sheer numbers, and I'm well on the way to doing the same in the center. If I can take out the remaining scouts, I'll be in good shape. I really want to get the carnifex into combat with one of these grav units. He could eat all of them for breakfast.

Turn 3

maelstroms
Knights: 1/5 (hold objective 1/kill something)
Tyranids: 2/4(hold objective 2/kill something)


Grey knights turn 3:

Because why would I take pictures?
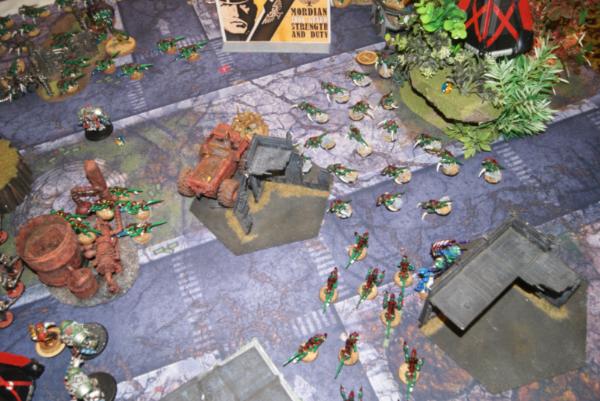
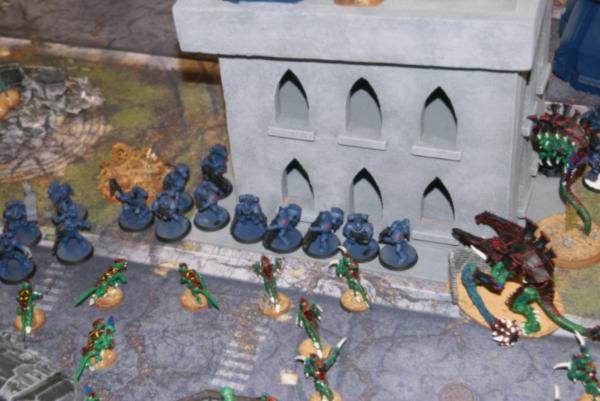
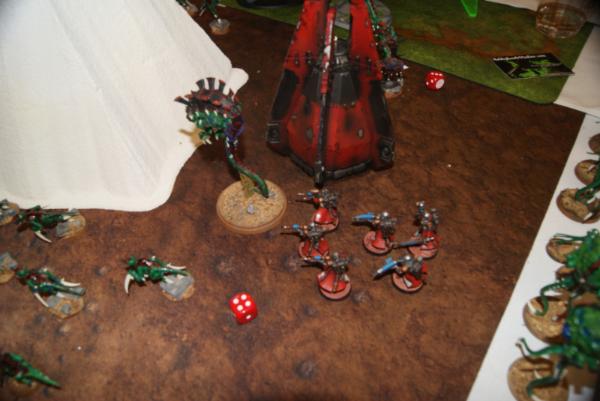
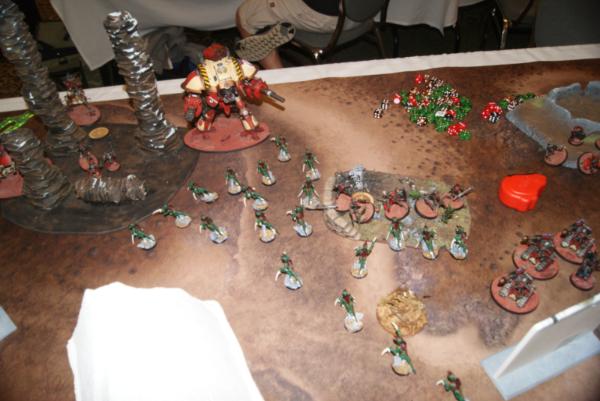
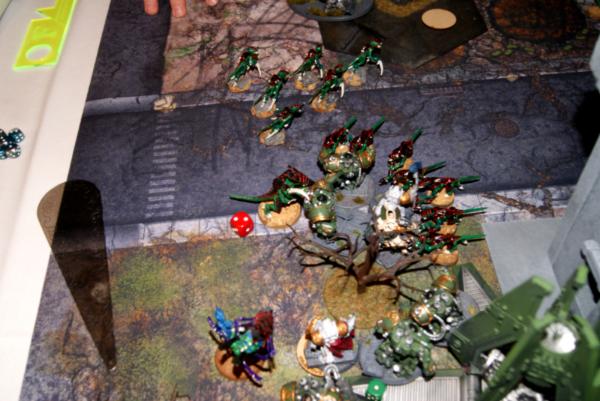
So the dread knight stepped closer to his emperors will objective. He already had a squad of scouts hiding directly behind the line of sight blocking ruins directly above it. Both grav squads teleported next to maelstrom objective 1, using the drop pods teleport homer again. Scouts backed up a little and prepared to fire at the remaining mucolid. Mucolid is taken out by scout fire. Fire from grav weaponry is targeted largely on hormagaunts and termagants, so much more ineffectual then usual.

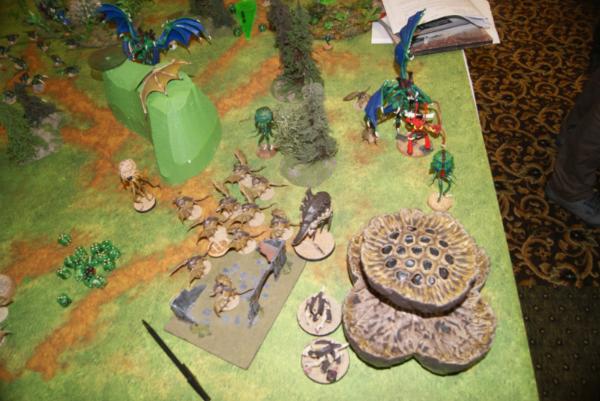
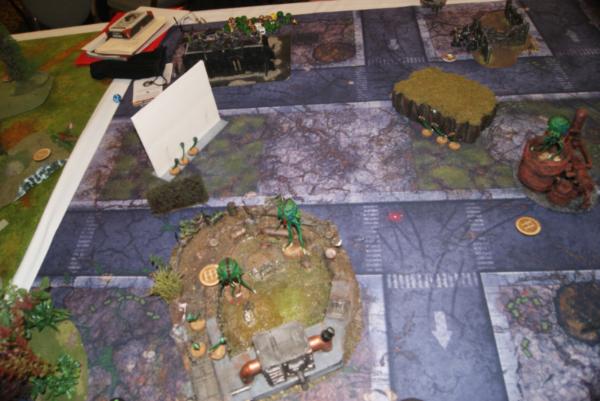
In my turn, the remaining flyrant zipped over to where the scouts were cowering behind the ruins, landing above them. Trygon and hormagaunts from the right flank turn the corner and start booking it as fast as they can. Mental mistake here, I did not move any of the three nearby scoring units I had onto objective number 2. Doh.


Thinking towards the end of the game I use a damaged squad of termagants to take up position around my emperors will marker. Placing them so that keeping 1" away an opponent will be out of range of contesting.


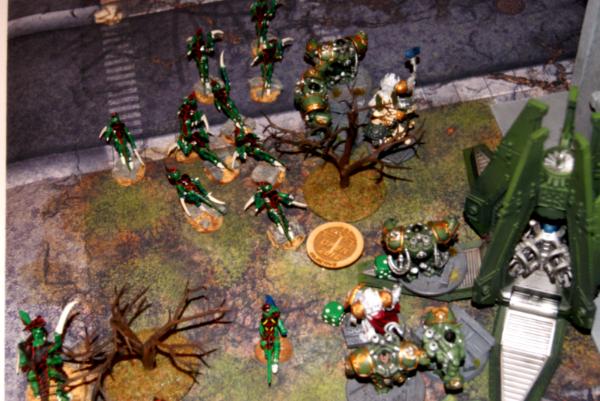
Carnifex continued his slow loping run across the table. Left flank termagants and hormagaunts lined up to charge the two grav stars again, and hopefully take them out. Warriors push up the left board edge preparing to charge into the librarian led grav star. A full squad of termagants came from the central group to charge the grav star as well.

Hormagaunts rushed past the same squad to get a charge on the retreating scouts.


On the right flank the trygon and the hormagaunts continued to book it towards the real battle.


Some of those hormagaunts surround the central objective to give it to me and in case I need it again next turn.


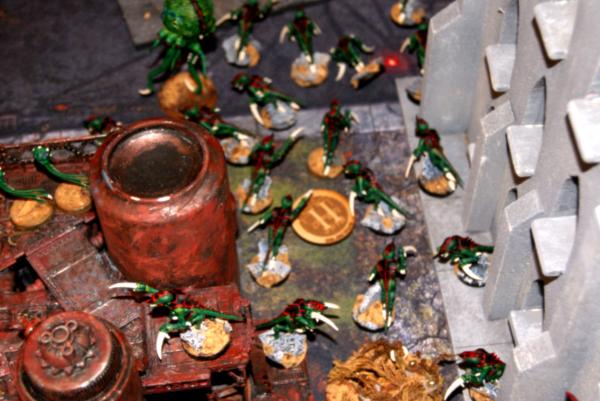
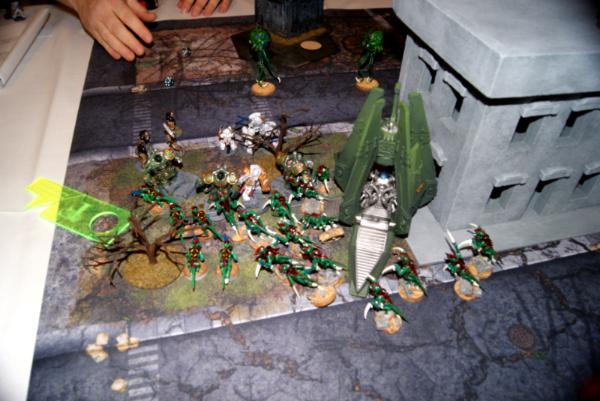
Termagants and warriors charge into the librarian led grav centurions.


Hormagaunts make it into the scouts and quickly wipe them out.


The hormagaunts consolidate towards the emperors will objective in case the game ends next turn. Librarian led grav is stuck in combat without taking much damage.


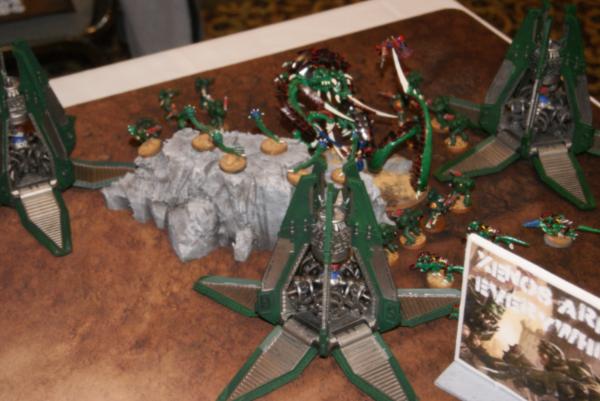
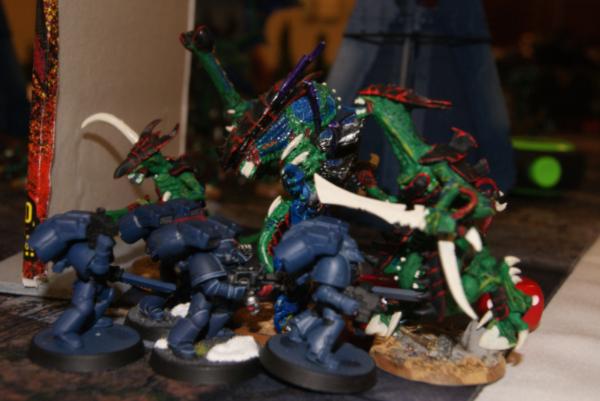
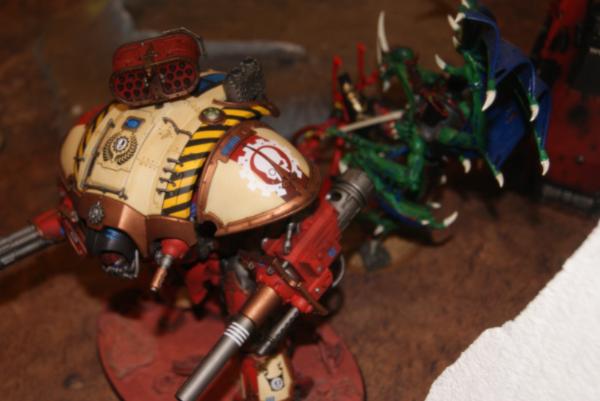
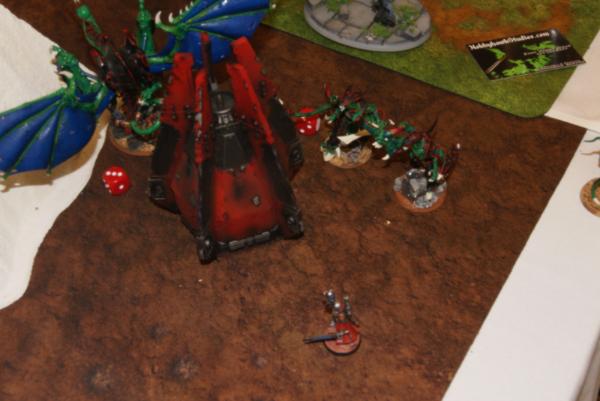
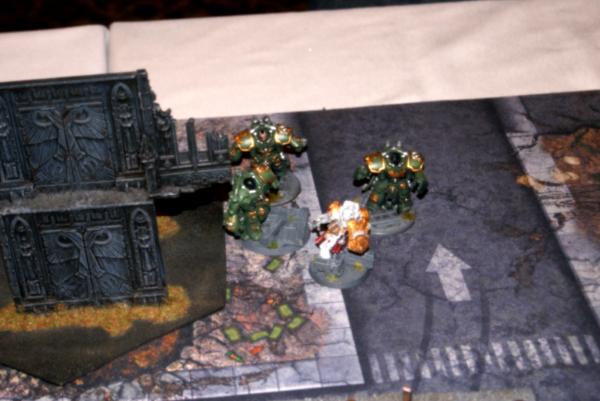
Carnifex finally makes it in! AP2 hammer of wrath insta-kills two of the grav centurions. Draigo manages to cause only two wounds, before managing to save three punches from the instant death machine that is the stone wrecker.


Draigo and his one white scar friend hit and run out of the combat.

Knights: 3
Tyranids: 2

Wrap up:
Closing in with maelstroms, I need to get lucky to manage it though. I've proactively prevented him from claiming my objective unless he wipes out my squad, I should have that. If I can prevent him from killing both my flyrant and the hormagaunts, and the nearby termagants, I can at least block his objective. That would leave me with victory on the primary. Having him hit and run out of the combat with my carnifex actually becomes an advantage as I can now charge the objective secured drop pod that has been sitting there all game if I need that objective.


Tyranid turn 4:

Maelstrom objectives:


Knights: 3/4 (kill two units)
Tyranids: 6/2 (Have three of my and no enemy units in my deployment zone/control maelstrom obj 2)

Pictures were rare as the conclusion came about.
Knight turn 4:
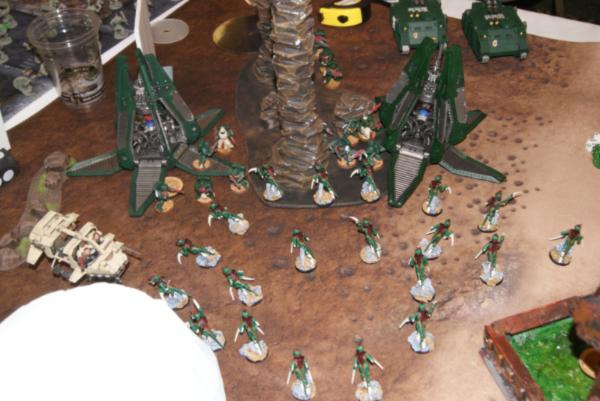
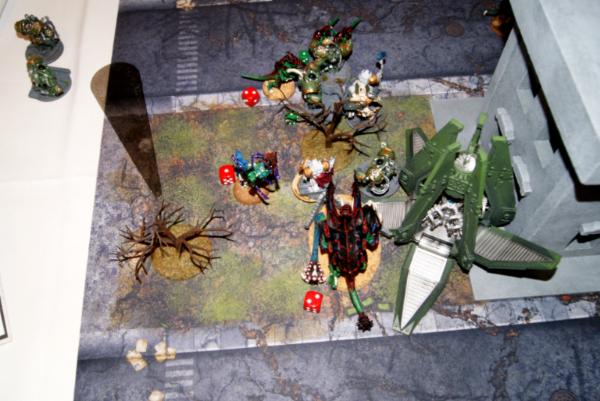
All my warp dice were spent to keep the librarian grav squad trapped in combat with a couple of termagants and the remaining warrior. The draigo star, already out of combat was free to gate over to four inches away from my objective. Grav weaponry is sadly ineffective without ignores cover against models with a 6 up save. Only one termangant dies. (They had shrouded from a nearby malanthrope.)

My turn was quick. Carnifex charged and destroyed the drop pod on principle. He and the zoanthrope were contesting an un-needed objective.


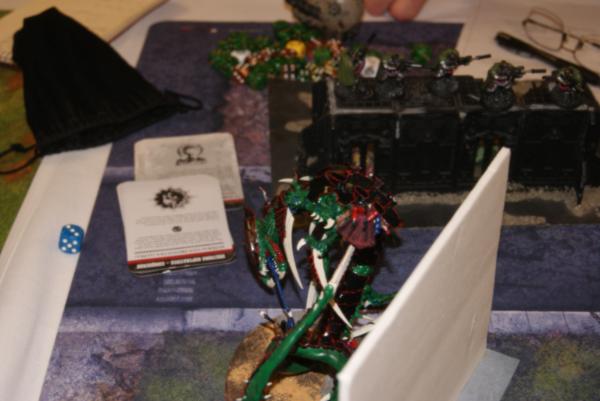
Hormagaunts charged the dread knight and pulled him slightly away from the objective, though not far enough. A termagant crawled in close enough to assist in denying his possession.


At my emperors will, the termagants toughened up to continue the block, and some hormagaunts charged in to pull the marines farther away from the objective he needed.


Knights: 3
Tyranids: 3

Wrap up: Draigo squad prevented me from winning the maelstrom secondary, but I had the primary in hand. I've forgotten things in the time since I played this game. There was a 5th turn, because in the fourth I killed his scouts near his objective with my flyrant, landing to do so. Which pulled the dreadknight into shooting him and prevented that beast from engaging anyone else. I was proud the endless swarm had made it through a full 5 turns in the tournament. I was playing an opponent that had an elite army with a great knowledge of both his own and my army, so not too much time wasted. I made some mental mistakes with the power of gate, and with not knowing how hit and run works in ITC. I think it would have been a more lopsided game had he been unable to remove his grav centurions at the beginning of the game, and later when draigo was surrounded as well. Would not have prevented gate, but I had consistent success in blocking at least one gate per turn. I made a mistake with placing the trygon way out of the way, he didn't do much. I think the wraith knight may have shot at him one turn. I was worried about my spores being useless in the center, and they kind of were. I never moved them aggressively enough to cause either distraction or threat. Carnifex really never should have left the area by the left most objective, that was the mid point that would be crucial, and I wasted two or three turns running in circles.


Game one if finished to the best of my recollection, I'm not going to go into the same depth with the rest of the games. I will order and describe the pictures, then write a brief synopsis at the end. My fault for thinking I could remember and pay attention to pictures during a 6 game tourney.

Game Two:
Spoiler:


His flappy list:

CAD:

HQ
Flyrant: 2xDevourers, ESG

Troops:
Mucolid
Mucolid

Elite:
Malanthrope

Heavy:
Biovore (3)

Void shield generator: 3 fields

Skyblight swarm
Flyrant: 2xDevourers, ESG

Gargoyle brood: (20)
Gargoyle brood: (10)

Harpy: Heavy venom cannon

Hive crone:


Pregame thoughts: A match up against one of the two other tyranids at TSHFT. I wish I could be picky about my opponents and not have a match against other tyranids. After all, we are all controlled by the same hive mind. However, this ended up being my one game against non Imperial super friends, so I better not complain.

His list is largely air borne. Sky blight,
ITC Mission 2: The relic/adjusted maelstrom missions

My opponent placed his void shield generator in the right flank corner. While I placed my bunker close to the center of my deploment zone. Spore mines and mucolids placed in or near cover with the plan of trying to push his flyers towards the center of the board.


My opponent placed his mucolids and spore mines in a long, likely to dissuade me from sending my flyers towards his.


First turn my hormagaunts popped out of the hatch, running right up against his spore mines, and seizing the relic.


Everything else pushed forward and I thought I set up my warriors to control that upside down objective. (Turned out that wasn't actually there. Whoops.)


Fire power focused on taking out various spore mines and mucolids, flyrants focused on the doubling out of mucolids. Those flyrants hugged the left flank to stay out of range of his fliers.


If his fliers come center board I'll have a good chance of taking out one or two before he can respond.


Much as I was hoping he hugged that right flank, but he can shoot mucolids too. More strength 6 allowed him to cause a lot of death. Strength 9 from the two harpies killed my warriors, doubling them up. The biovored did crazy work! Two turns in a row a squad of 20 hormagaunts grabbed the relic. Two turns in a row, the three biovores annihilated them.


His gargoyles got well ahead of other units, and positioned well for me to charge with hormagaunts. They happily chopped up a dozen gargoyles, and then only lost one or two in return. (He couldn't get into base/base to strike back with more then a couple.


This is up on the third turn after the flyrants caused a squad of gargoyles to run. They were then barely caught by the malanthropes synapse before they went off the board. Returning mucolids deep struck aggressively and the flyrants came inside of the void shield. Warp lance smashed the void shield in one shot, killing a biovore in the process.


Devil gant fire power brought down the hive crone which had been ID smashing my mucolids. The stone wrecker hammer of wrathed it into the dirt.


As time grew precious, my ability to take pictures failed. So I'll wrap up the end of the game. Maelstroms were a push at this point, it was all about the relic. I had knocked out a number of his models, his important void shield. He was forced to come into the center of the board, his small squad of gargoyles charged into the fifteen hormagaunts and were decimated. With only three gargoyles left, I felt in control, he had no other ground troops aside from the biovores and the malanthrope, so tyrants would have to land and try to wrestle away the relic. However, a point I did not know....The relic in seventh edition is an objective, and his objective secured gargoyles had the rights to the relic that one of my models was actively holding. Wanh, wanh.

Over all, endless swarm did really well against what was the super strong tyranid build, my opponent was a lot of fun to game against, and we had a lot of fun. If I had known the relic could be obsec taken away from me, or if the game had continued, I think I had it in the bag. I made some big mistakes with the warriors holding a non objective half the game.


Game Three:
Spoiler:

Mission: Kill points

Opponents list:
LIONS BLADE STRIKE FORCE
Company commander: power fist, foe-smiter, artificer armor
Chaplain: auspex

Tactical squad: (5) melta gun, combi-melta, drop pod
Assault squad: (5) 2x flamers, melta bombs, drop pod
Devestator squad: (5) Lascannon, razorback (twin linked lascannon)
Comman squad: (5) 5x melta gun

white scars allies:
Librarian: hunters eye, lvl 1
Scouts (5) 4x shot guns, combi melta, land speeder storm (heavy flamer)
Drop pod,
Centurians: (3) 3x grav cannon, 3xhurricane bolters, omniscope

Pregame thoughts:
Return of the hunters eye and tons of drop pods. Yay. At least with no gate I won't be surprised by the drop. He only has one squad of grav, and I'm hoping pod traps will work to dissuade him from pushing them up hard. If maelstroms are at all kind to me, I think I can sweep the dark angel green wave aside and overwhelm him with numbers. The drop pods themselves will likely be the largest problem to smash, but each one is a kill point.

My deployment involved a lot of pod traps, mucolids and spore mines were placed in the central ruins with the intent of moving quickly towards the dark angels lines. After the three turn game last go around where the trygon didn't show up, I felt I had to keep him in and use him as a massive threat on one flank.


My first turn I protect the warlord, keeping him behind LOS terrain and bubble wrapping him as best I can. The trygon pushes forward quickly. Having set up first I felt the need to push quickly across the board.


Hormagaunts pour out of the escape hatch and run within range of the objective I need.


The right flank was not important, but we both threw everything at it. Flyrants decimated marines, and blew up drop pods, with the plan of sweeping towards the center of the board as time passed.


A squad full of melta guns lands in my deployment zone to gather in a maelstrom he needed, and to provide some instant death for my poor warriors.


Trygon was the primary target of the drop pods coming in, taking him down to a single wound as the focus of four drop pods, a squad of lascannons, and two razorbacks.


Hormagaunts popping out of the escape hatch made it to within an inch of where all the dark angels are. Objective secured keeps the maelstrom firmly in his grip.


Most of the early drop pods focused on coming around the trygon. He focused on this his first turn, both to crush it, and to get first blood.


He manages to wipe out the trygon.


Nearly every unit that came in over here had flamers, the hormagaunts did not fare well.


Hormagaunts devour the last of the marines on the right flank.


Grav cannons with ignore cover drop in and wipe out the carnifex. No carni-snacks this go round.


Flyrant moves aggressively to take out kill points. I need to win the primary to have a chance.


Flood of hormagaunts along the right flank have wiped out all the bodies over here, now trying to catch stragglers in the center.


Final turn the flyrant moves to the center of the field to try and gain a couple more all important kill points.


Land speeder is destroyed.


Another squad of marines eaten.


Late arriving marines are assaulted by returning hormagaunts.

Final marines arrive.


The last marines arriving fire into the stream of hormagaunts.


Game Four:
Spoiler:


Blood angels:
Sanguinary priest: Auspex,
Tactical squad: (10) flamer, heavy flamer, drop pod
Tactical squad: (10) melta gun, heavy flamer, drop pod
drop pod
drop pod
drop pod

Skitarii maniple
Skitarii vangvanguard: (10) 6x radium carbine, 3x arc rifle, omnispex

White scars CAD
Librarian: hunters eye
Scout squad: (5) 4x sniper rifle
Drop pod
Drop pod
Centurions (3) 3x grav cannons, grav amp, omniscope, hurricane bolters


Game Five:
Spoiler:


Opponents list:
Sky hammer annihilation force:


Game Six:
Spoiler:


\


This message was edited 32 times. Last update was at 2016/02/15 17:37:04


~seapheonix
 
   
Made in us
Tunneling Trygon


The House that Peterbilt

Good luck! Wish I could attend but had to choose between LVO and TSHFT. Vegas won...

I am also working on an endless swarm list so I am interested in seeing how you do and how many turns you get in.

snoogums: "Just because something is not relavant doesn't mean it goes away completely."

Iorek: "Snoogums, you're right. Your arguments are irrelevant, and they sure as heck aren't going away." 
   
Made in us
Tough Tyrant Guard


Seattle

As I have gotten familiar with the list I'm averaging 5 turns in 3 hours, but that includes unboxing time, list explanation time, etc...Practice and display board set up I think are the two most important keys to the time it takes.

~seapheonix
 
   
Made in eu
Changing Our Legion's Name


Coventry

I voted "A win or two because at the bottom of the barrel we're all even odds." because i anticipate the Synapse getting nuked immediately and the wheels falling off the bus, but i'm rooting for you buddy, love me some non-flyrant spam BS nids.
   
Made in us
Tough Tyrant Guard


Seattle

First version had no flyrants, but my project to make a dimachaeron and crone were just taking too long.

I've only had one game so far where all the synapse died, and that was on turn 5 when I was about out of gribblies anyway. Any which way though, the main goal was for everyone to have fun, and who doesn't love a swarm of hormagaunts eating themselves in the middle of the game? (I of course voted I would win all games.)

I appreciate the rooting for me.

This message was edited 2 times. Last update was at 2016/01/14 17:50:18


~seapheonix
 
   
Made in us
Longtime Dakkanaut


Eye of Terror

I wish you the best of luck and may your dice roll like fire !

My blog... http://greenblowfly.blogspot.com

Facebook...
https://m.facebook.com/Terminus6Est/

DT:60+S++++G++++M+++B+++I+++Pw40k89/d#++D+++A++++/eWD150R++++T(T)DM+++ 
   
Made in us
Ancient Ultramarine Venerable Dreadnought


Illinois

Tyranids dominate all!!!!

They are the great devourer, anyway.

INSANE army lists still available!!!! Now being written in 8th edition format! I have Index Imperium 1, Index Imperium 2, Index Xenos 2, Codex Orks Codex Tyranids, Codex Blood Angels and Codex Space Marines!
PM me for an INSANE (100K+ points) if you desire.
 
   
Made in us
Tough Tyrant Guard


Seattle

I'm going to need all the luck in the world. The participants list: http://tshftopen.com/warhammer-40000-participants-list/ is like a top ten of each faction from the ITC rankings.

~seapheonix
 
   
Made in ca
Bush? No, Eldar Ranger


Vancouver, BC

Good luck. I look forward to your report on the event.

I've played against a few of the participants on that list before [primarily the guys from LAMBS], and they are really good players. Sacco is known for bringing big and powerful units.
   
Made in us
Tough Tyrant Guard


Seattle

Pictures for game one uploaded. Taking a while to get time to work on battle reports. They should come a little faster now.

~seapheonix
 
   
Made in us
Boosting Space Marine Biker


Hays, KS

Zoenthropes have a 5+ armor save. Not saying that its impossible you walked away unscathed using their real save but you should either correct your report or make note of that got the best game

   
Made in us
Longtime Dakkanaut


Eye of Terror

It's not a big deal. I can't wait to read the rest of the report ! I'm thinking you should win this one.

This message was edited 1 time. Last update was at 2016/01/30 23:46:20


My blog... http://greenblowfly.blogspot.com

Facebook...
https://m.facebook.com/Terminus6Est/

DT:60+S++++G++++M+++B+++I+++Pw40k89/d#++D+++A++++/eWD150R++++T(T)DM+++ 
   
Made in us
Tough Tyrant Guard


Seattle

Thanks for the encouragement Dozer Blades. Got really swamped with work another week in a row. I haven't forgotten the battle reports, and while I might be foggy on some of the maelstrom details I should be able to get the points of the battle reports across.

@dmthomas7
Totally didn't know the 5+ natural armor save on the zoat, thought they just had the warp field. Another bit I've learned since TSHFT. I don't think it had any outcome on the battle, aside from soaking up shots, the zoat didn't do anything all game.

~seapheonix


Forum Index » 40K Battle Reports
Go to: