So after a couple of requests for a tutorial, here it is. The thinking behind these asteroids were to try and replicate the cardboard tokens as closely as I could. There are lots of options for asteroids out there, but I begrudge paying £30+ for some plastic asteroids - thats three more ships I could have! I'm also not a fan of the lava rock look, so I made my own. They are lightweight, yet sturdy. The initial inspiration came from seeing the awesome acrylic bases that Games of War make. Panic was using them with his ship wrecks.
Games of War don't have an online store, but you can buy them through their Facebook page here:
https://www.facebook.com/pages/Games-of-War/162862513753764
Shopping list:
Some foam core. 1 A4 sheet is more than enough. I think mine was about 6mm thick.
White glue. (I use Evostick Wood Glue instead of PVA. I've used this stuff to glue guitar bodies together. It's the business).
Superglue.
An old newspaper.
Wood Filler/Spackle
Gravel
Sand
1x set Games of War bases (£5)
6x clear flight stems.
All in this cost me £11 - I bought
GW flight stems and the bases. I had everything else already. On with the tutorial...
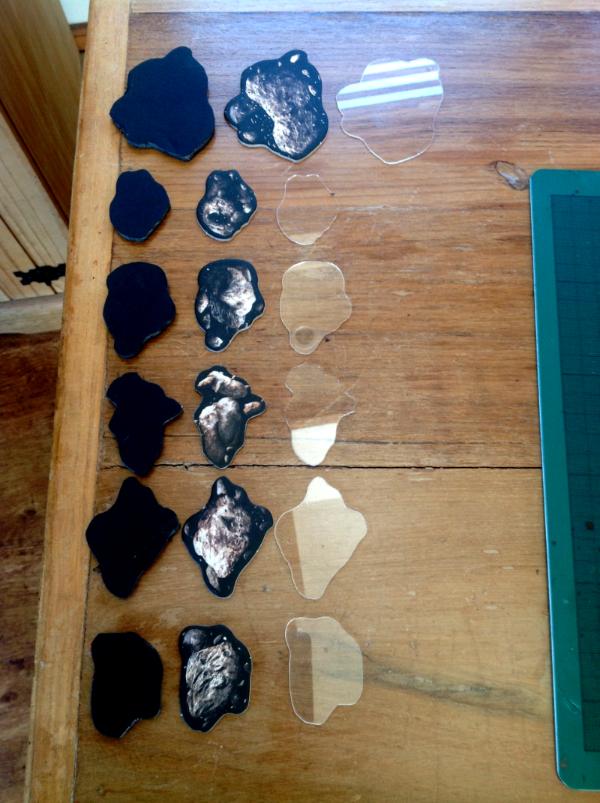
First job is to draw round your existing tokens on the foam core, and cut them out. Make the cut on the inside of your pencil line. The resulting templates should be about 1mm or so smaller than the actual tokens - they will be bulked up again at a later stage:
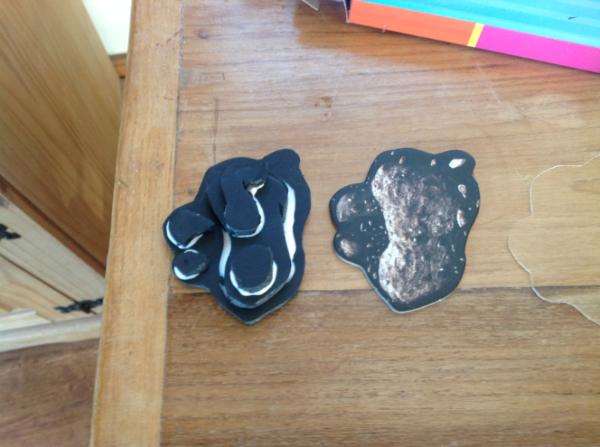
Build up any 'raised' areas you want, on both the top and bottom. I tried to keep the top similar to the pictures on the tokens, but this isn't necessary, as long as you stay within the silhouette of the big piece. Because the images on the tokens are the same both sides, I made the undersides different, just going with what I thought would look good.
Water down some white glue, about 50/50, and cut some strips of newspaper. Dip the paper in the glue, shake the excess off, and fold it into long, thin sausages. Wrap them around the areas that 'step' up. The idea here is to 1: Seal the edges of the foam, and 2: Bulk out the asteroids without adding much weight. This will take ages to dry naturally. I put them on an off cut of foam core, and left them on the radiator for an hour or so. This dried it enough to get going with the next step.
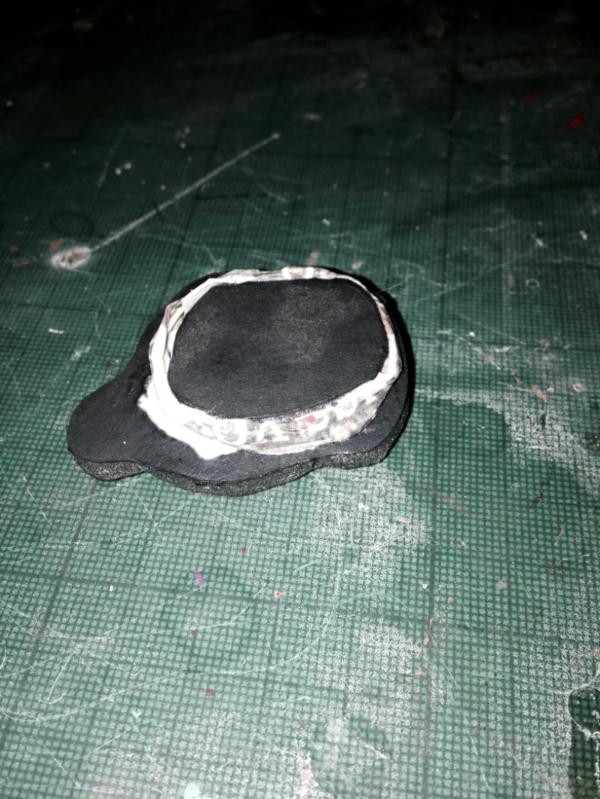
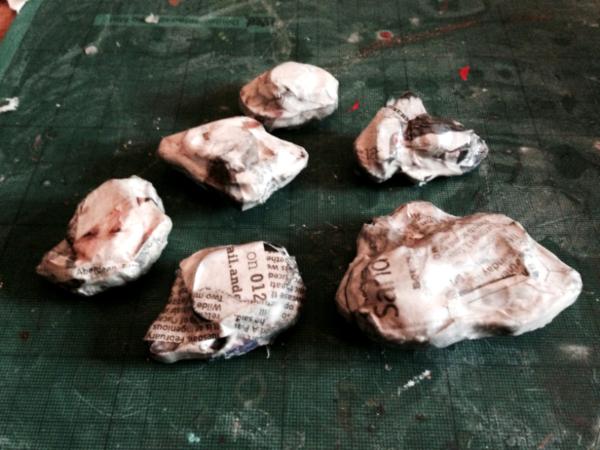
Using neat white glue, paint the whole asteroid, then using the same technique with watered down glue, but not folding up your paper strips, cover the whole thing in newspaper. You'll end up with an extremely lightweight 'core' for your asteroid. Make sure there are no air bubbles here. Chuck them back on the radiator.
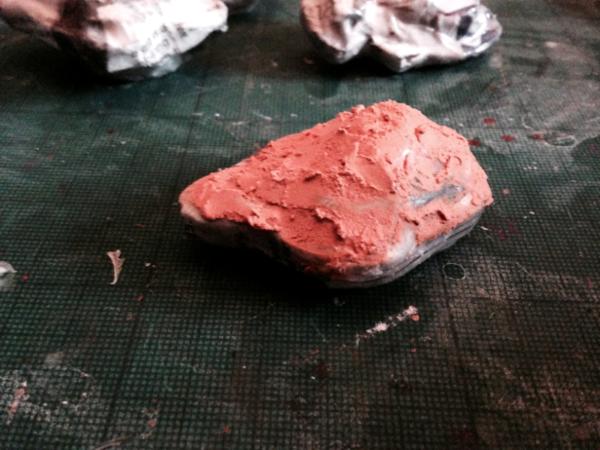
At this stage, Once touch dry, I gave the whole asteroid a coat of neat glue, and let it dry again. It's probably not necessary, but it makes sure everything is sealed properly. If your wood filler or spackle is solvent based, and the core isn't sealed, it'll dissolve the foam inside the asteroid. Now comes the fun part. Get your filler and 'dress' the asteroid. I used wood filler because it has a grainy texture that represents rock fairly well. Crack on and do both sides. You will probably be able to see the line of the largest piece of foam core running around the centre of the asteroid. Make sure you hide this with your filler. Also, while the filler is wet, make a depression in the underside for your flight stem. This will save you drilling into your asteroid later. Then back on the radiator until dry
Once dry, start gluing gravel to the asteroid. I used smaller pieces in the crevices and little piles on raised areas, and the occasional larger stone:
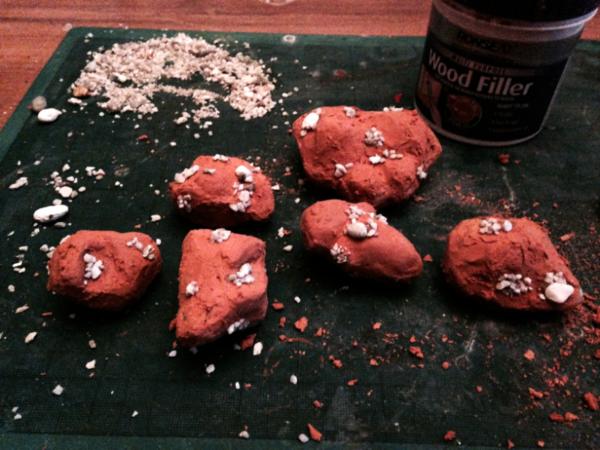
Then using neat white glue, I added sprinkles of fine sand to vary the textures.

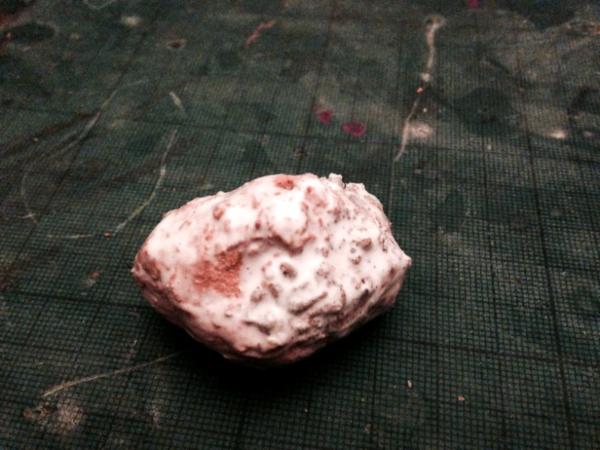
Finally, another coat of neat glue:
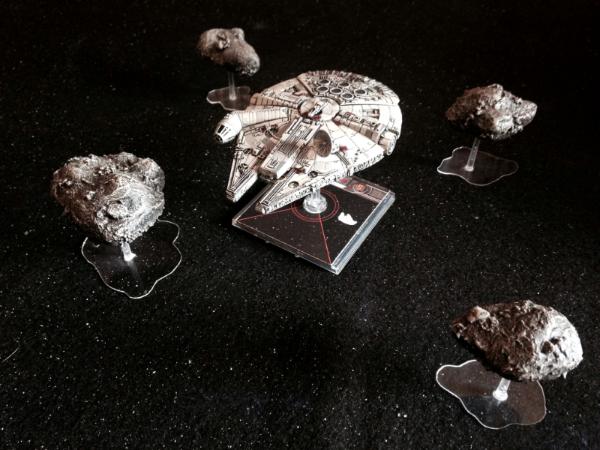
Then it is onto painting! Obviously you can paint them how you like. I went for Primed black, 3 progressively lighter dry brushes of greys, and then a coat of Army Painter strong tone and a coat of testers dullcote. The strong tone acts as a varnish too, so they are well protected. Anyway, paint them however you see fit.
All that remains, is to drill a hole in the Games of War bases. Do this slowly - you don't want the tip of your drill to slip and scratch the acrylic. If you use
GW stems, you'll also need to clip a bit off the bottom of the stem, as the bases are pretty slim. Be careful when superglueing the stems to the bases - any overspill spoils the clean base. I remedied this by removing the overspill with wire wool, then restoring the finish with T-cut (a car polishing micro abrasion liquid). Better just to be extremely careful with the superglue!
Job done!
Any questions, just ask!
Edited for typos.


