Switch Theme:

Share on facebook Share on Twitter Submit to Reddit  [RSS] 

Making your own miniature carrying case @ 2009/05/22 18:55:57


Post by: kutzmon


Everyone in this hobby eventually comes to the same point whether they be a newcomer or hardened veteran.

“How do I store and carry my miniatures from point A to point B without damaging my investment?”

With all due respect to Sabol, Battle Foam, and the other fine suppliers of army protectors/transports, it can be a bit out of budget for some gamers to afford these products. Or, if you’re like me, you just want a challenge to see if you can make something to do the job. In the following tutorial I will show you a relatively cheap and easy way to create your own case.

Supplies used in this tutorial:
Case
Foam
Copper pipe couplings
Adhesive
Sharpening tool
Ruler
Sharpie
Craft knife

THE CASE
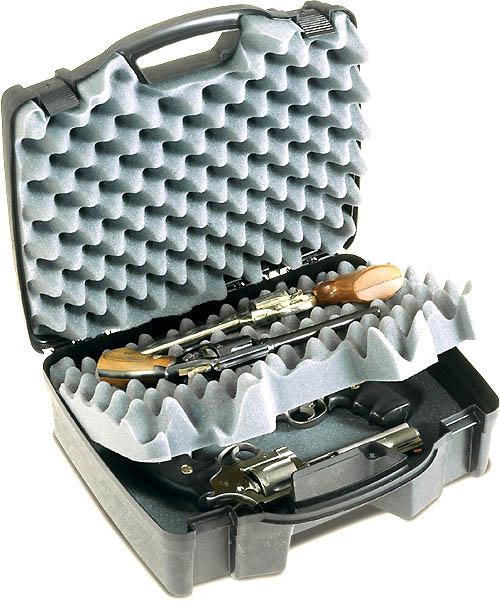
The case I use is a Plano 1404-02 four pistol carrying case. These ran $9.95 each from Wal-mart. You have to go to the firearms section to find. They are durable, lockable and come with 2 layers of 1-1/2” eggcrate foam and 1 layer of 1-1/4” pick-n-pull. I picked up 6 of these over a three month period. Although, you can use any case you come across. I’ve seen some pretty cool looking cases that would work from Harbor Freight, Canada Tire, and other discount sites. The case you decide to use is not important. Whatever you come up with and are happy with will work for your transport.
THE FOAM
While looking for foam I came across an ebay auction from a company out of Troy, Michigan. Here is their ebay store:
http://stores.ebay.com/Foam-N-More-Upholstery-Inc_Mix-Upholstery-Foam_W0QQcolZ4QQdirZ1QQfsubZ12QQftidZ2QQtZkm
They also have a regular website:
http://www.foamandupholstery.com/

As you can see, the pricing is pretty good but shipping can get a little expensive. You may be able to find foam locally.
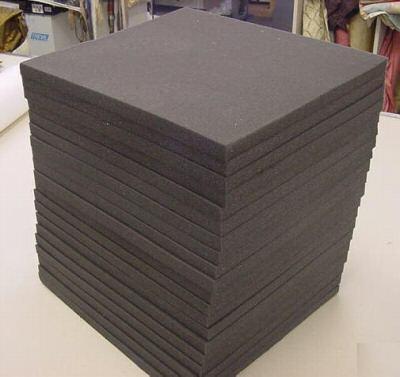
I purchased one of the offcut lots they had. I paid $23.00 ($10.95 for foam, $12.00 shipping) for 15 pieces of 16”x18”x1” charcoal, high density packing foam. The foam I received has a layer of rubbery skin on one side. At first I saw this as a problem but, as I will explain further on, this came to be a good thing. You will need a bottom to your foam trays so you need to also purchase a thin (1/4” or thinner) piece of foam sized up for the size of project you intend to do. If you plan on making three trays that are 12”x10” you need enough bottom foam to make 3 12”x10” bottoms. If you plan ahead and purchase the thickness of foam you need you don’t have to layer it like I did. When I first started gathering the supplies for this project I didn’t think ahead and got the 1” thick foam. It’s kind of a pain to have to layer your foam to the desired thickness.
ADHESIVE
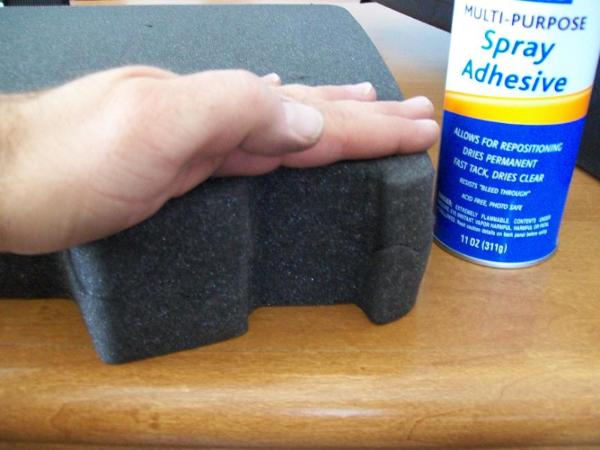
You need something to glue foam together. I have used PVA glue but it tends to get brittle and can cause problems when cutting. I have opted for the spray on foam adhesive. Make sure to read the instructions on the can.

COPPER PIPE COUPLINGS
You can find copper pipe and couplings at any DIY hardware store. They range from ¼” to 2”. The thing to remember about pipe is the measurement is the inner diameter (ID). Copper tubing usually has a 1/16” wall thickness so whatever the size is you need to add 1/8” (you need to add both sides of the wall thickness) to get the outer diameter (OD). The couplings fit over the pipe so the ID of the coupling is the same as the OD of the pipe. Then, you need to add the wall thickness of the coupling, usually 1/16”, to get the OD of the coupling. Whew… math. So, for instance, a 1” pipe has an OD of 1-1/8” so the coupling would have an OD if 1-1/4”. Confused yet? It’s handy to take a ruler marked in millimeters to measure the couplings. I wanted to be able to accommodate 25mm and 40mm bases with 5mm of room to allow for any overhang. I needed a 30mm and 45mm OD so I picked up 1” and 1-1/2” couplings at Sutherlands (local DIY store) for $1.29 and $1.89. They aren’t perfect but they’re pretty darn close. I also picked up a bunch of drywall for the basement but that’s another tutorial.

SHARPENING TOOL
This is pretty self explanatory. What we need to do is put an edge on the couplings.
I have used a round file
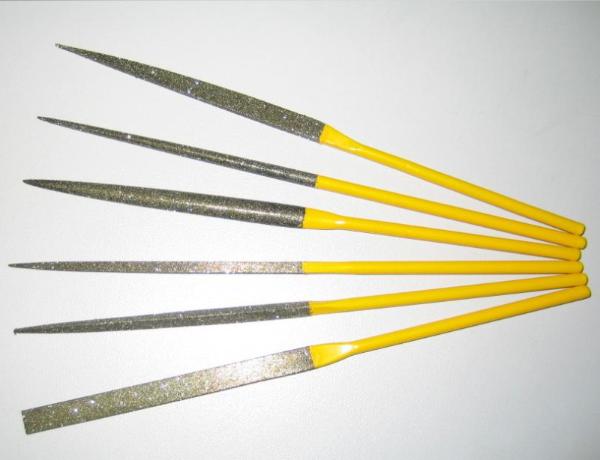
A Dremel tool with the lawn mower blade sharpening attachment or drum sander

and this:
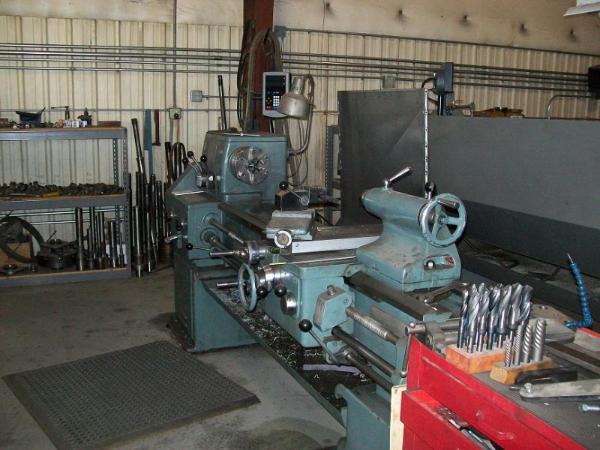
The shop I work in has a computerized lathe used for turning piston rods. While you may not have access to one of these you can still put a nice edge on the coupling with the other two tools. Copper is a soft metal so there isn’t too much to it.
TAPE MEASURE
The handy dandy tape measure.
RULER
Yep. The old reliable ruler. I use a metal one with cork on the back to prevent slipping. It’s also marked in metric and imperial units. (ie: millimeters and inches)
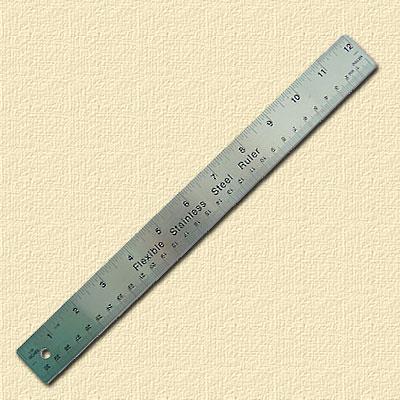
SHARPIE
I use the sharpie to mark out my cut and guide lines. If you have a problem with seeing lines on your finished product you can find something else to mark with.
CRAFT KNIFE
The main idea here is SHARP. Dull blades make for poor cuts when dealing with foam. I use the extendable utility knives with the break-a-way blades found in dollar stores.


PREPARING THE CUTTERS
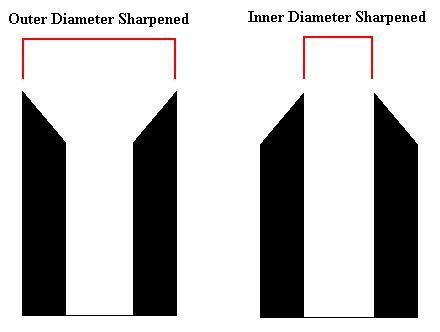
We need to give the copper couplings a nice edge to do the cutting of your foam. As stated previously you can use a few different tools to do this. There are two ways to sharpen the couplings to match your needs. You can sharpen the inner edge or the outer edge. I found that sharpening the outer edge gave me the diameters I was looking for. See the diagram below:

THE FILE
When sharpening with the file you need to pay close attention to the edge of the coupling. Try to keep a nice level cutting surface while sharpening the edges. We’re not looking for razor sharp surgery scalpals here, just a nice edge.

THE DREMEL
If your dremel came with the blade sharpener you can quickly get the edge you’re looking for although the sharpener may not fit into a smaller coupling. The drum sanding bit also comes in quite handy for putting an edge on the coupling. Once again, pay attention to keep a nice level cutting surface.

THE LATHE
If you have one of these you should probably already know how to use it.

You should end up with something like this:
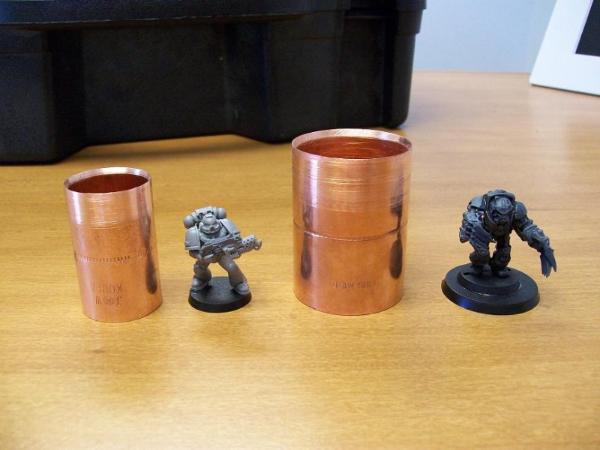

THE PROJECT
Now that we have all the supplies gathered up and your cutters are ready it’s time to begin.

PREPPING THE TRAYS
Find the inside dimensions of the case you are using.
You can do this by measuring the length and width of the inner cavity. This measurement will be the size of your trays.
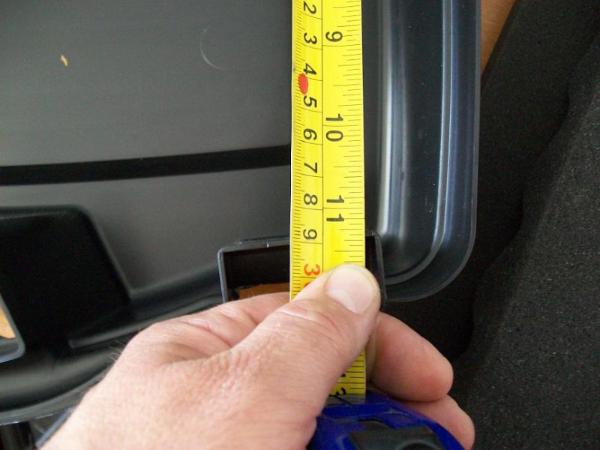
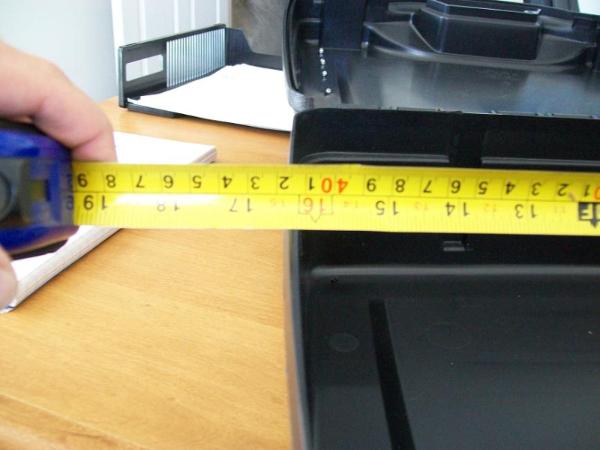
It’s easier to measure a rectangle or square case than the one I chose. If you’re case came with foam like mine you have a template for the trays.
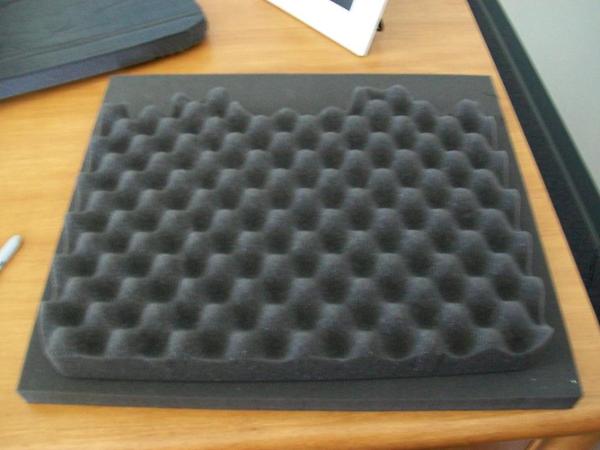
Next, you need to determine how many trays your case can hold. This would be the depth of the case plus any depth in the lid. Divide the total depth of the case by the depth of each tray. This will be the number of trays your case can hold. Remember, you will be adding a bottom to each tray so keep that in mind when adding up the total.
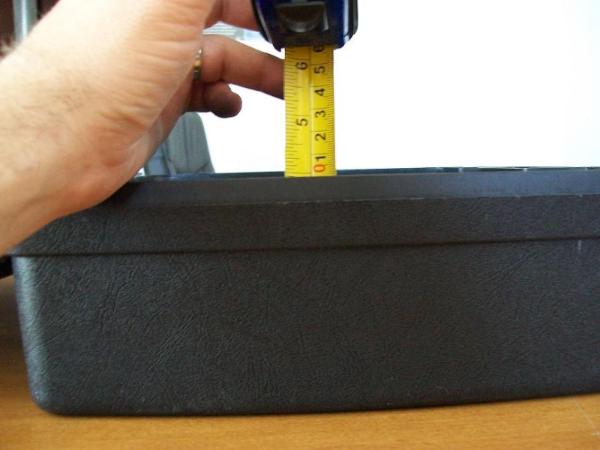
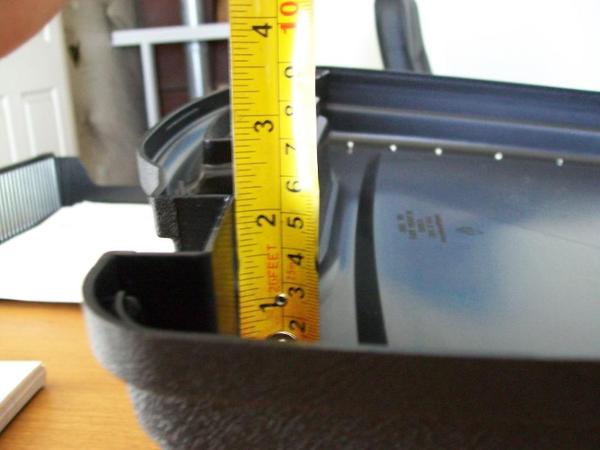

For example:
The total case depth is 6.75”
Each tray you plan on making is 2.25” (2” tray with ¼” bottom)
6.75/2.25=3
You can put 3 trays in your case.

You can now start cutting the foam to the dimensions of your case. Measure your width and length onto the foam and mark it with the sharpie. I came up with 15-7/8” x 11-1/8”.
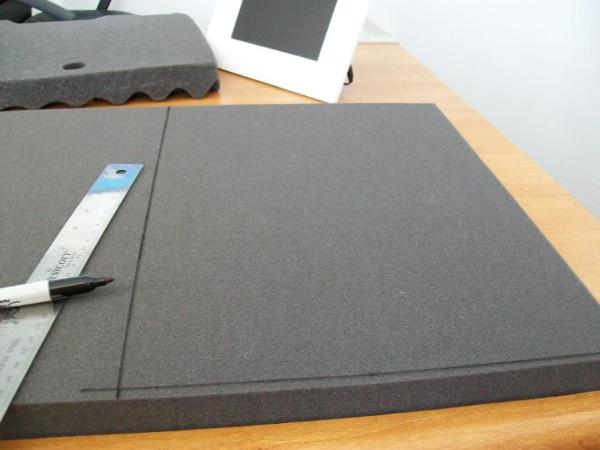

Place your ruler against the lines and firmly/smoothly cut along the ruler with your craft knife. Try to cut the foam all the way through on your first cut. Multiple cuts into foam tends to make the edges look ragged. I don’t have any pictures of the actual cutting. It’s hard to cut and hold a camera at the same time!
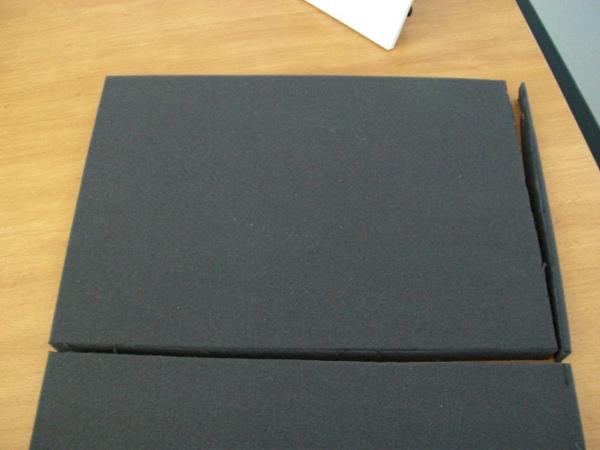
You now have a blank tray ready for cutting.
I had to make a few adjustments to the rectangle piece as my tray is rounded.
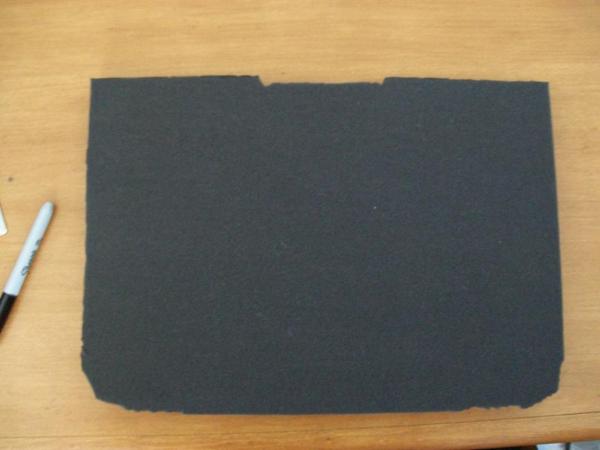

LAYERING FOAM
If you were like me and only bought one thickness of foam you may need to layer it to give you the needed depth. Take your blank trays and spray both bottoms with the spray adhesive. Take care when laying the foam together to line up the edges. Press down on the top layer to compress the pieces together. Let the glue dry completely. (See directions on can) You can add another layer as needed to get the proper depth.
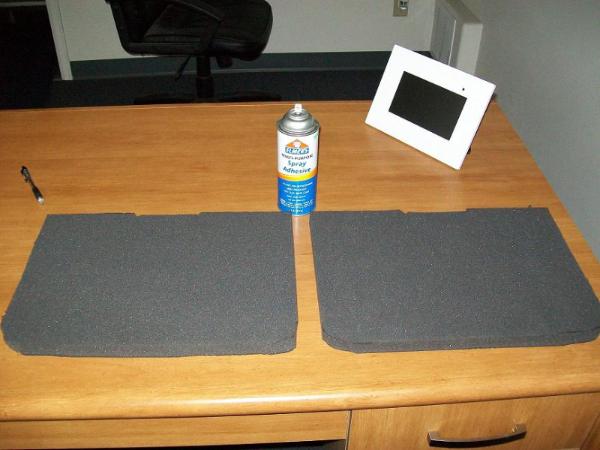
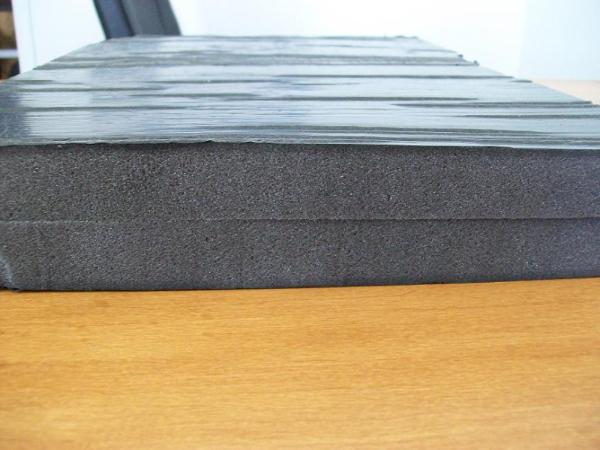
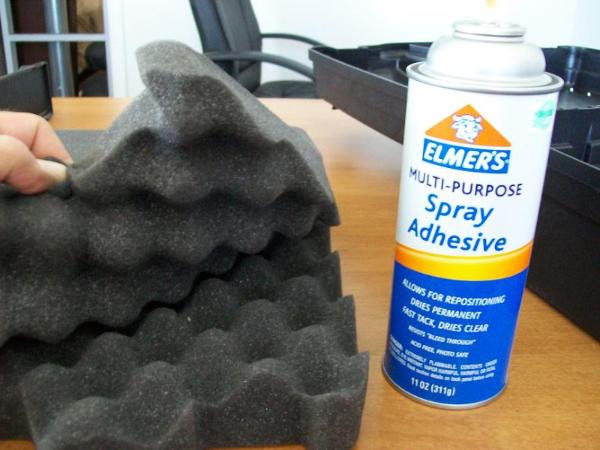
You can also glue together eggcrate foam in this way. Just spray, interlock the “teeth”, and compress.
TRAY LAYOUT
There are a few ways to lay out the compartments on your tray. You could just start cutting out holes with your new foam cutters and try to keep a straight line. While this can be fun you can start to stray and waiste precious space. I started by making guide lines. I measured in 3/8” (8mm) from the sides of the tray and made lines to better my chances on keeping everything straight. The 3/8” keeps enough material on the outside of the tray to give it a bit of rigidity and protection.
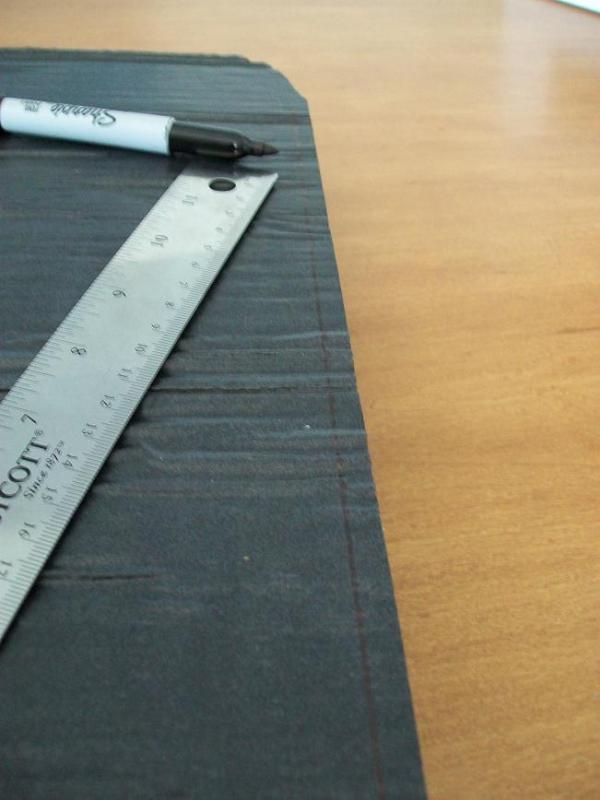
You’ll notice my top line is a bit further than 3/8” on the sides due to the recess in the middle.

Line up your cutter (30mm in this pic) on the perpendicular lines.
[
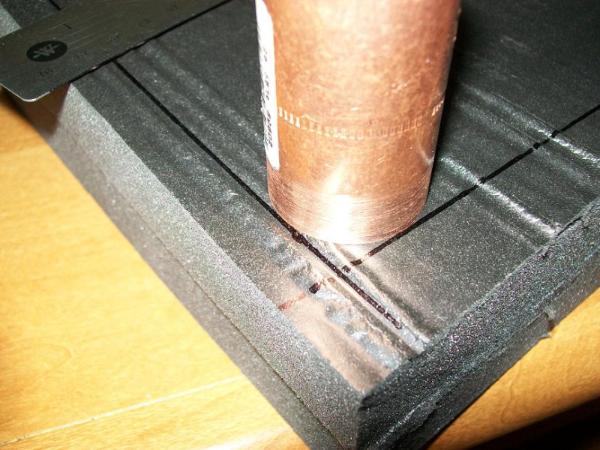
Press down while twisting the cutter. Kind of like screwing a lid onto a bottle of soda. You will get the feel of how much force to use.
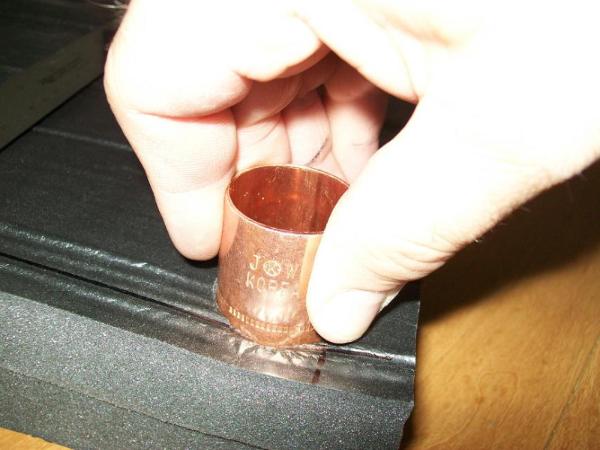

Try to keep the cutter as level as possible.
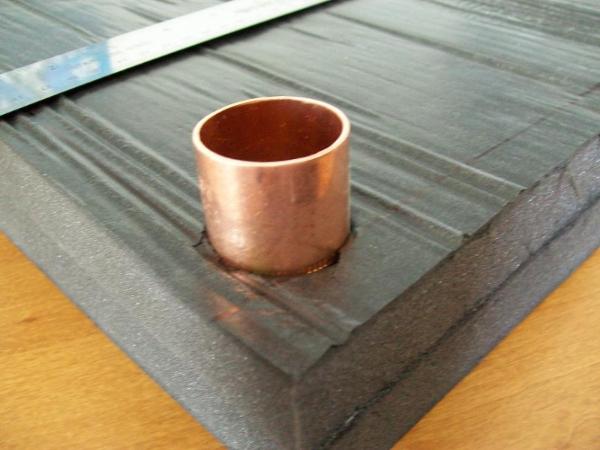

VIOLA! One 30mm compartment ready for occupancy.
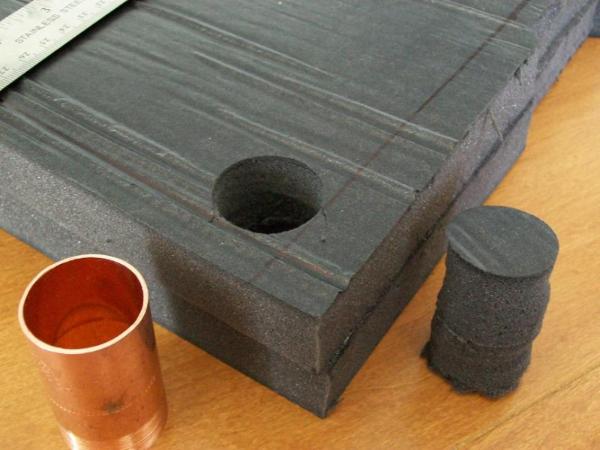

Move your cutter approximately 3/8” down the guide line and repeat process.
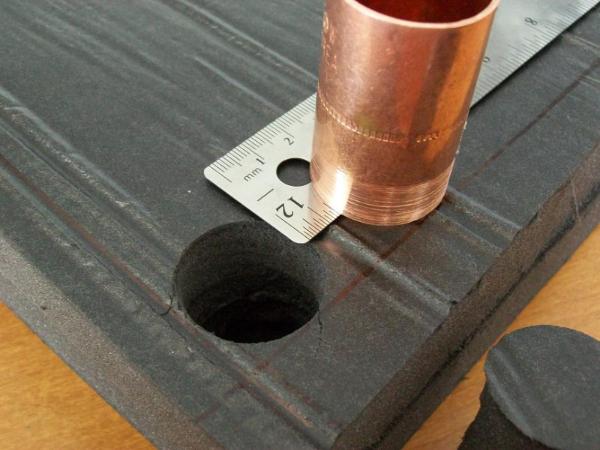

When you have completed the row get your handy ruler back out and measure and mark another guide line 3/8” from the bottom of the last row.
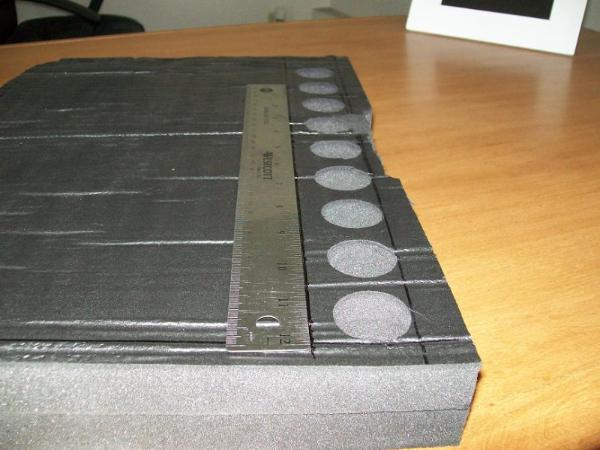


Repeat process until you have enough compartments or don’t have any room left on the tray. The rubbery skin on the foam got a little torn up from the cutting process but the foam is nice and smooth and ready for troop transporting.
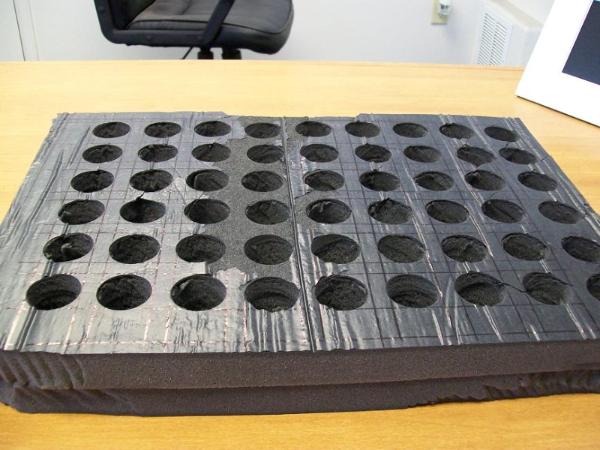

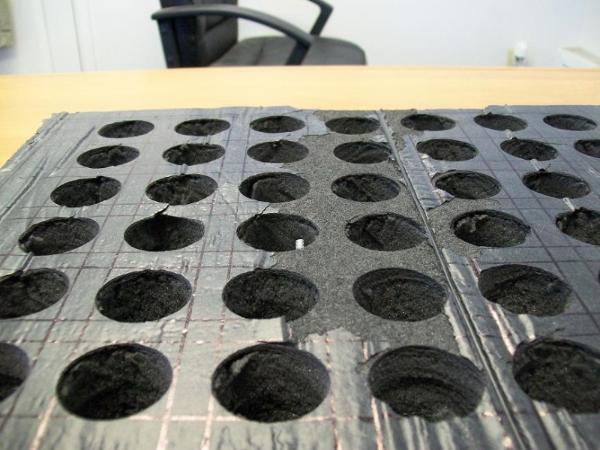

Keeping 3/8” of material between compartments keeps enough rigidity for the foam and protection for your minis. I don’t recommend going any thinner. You can mix and match compartment sizes.

EGGCRATE FOAM
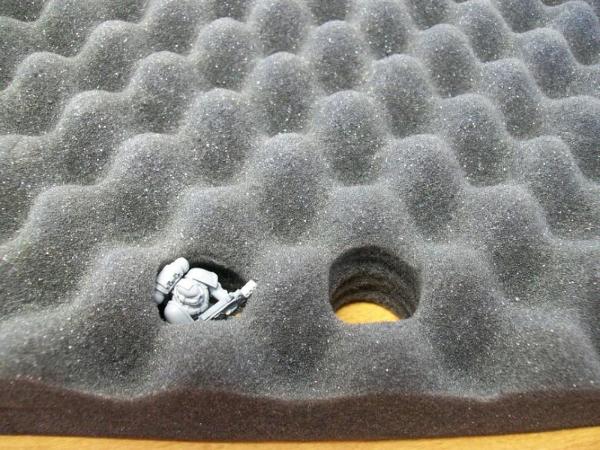
You can also use eggcrate foam.
Place your cutter into one of the valleys and use the same cutting techniques as the flat foam. The eggcrate foam I have is softer than the packing foam so I had to be careful during the cutting process.

APPLYING THE BASE
Take your precut bases and glue them to the tray just like layering the foam. Spray, line up, compress.

You’ll notice my trays don’t have a base glued onto them. Remember that rubberized skin from the foam I bought? I just cut the foam down to the skin and plucked the foam circle out of the tray. Premade bases!
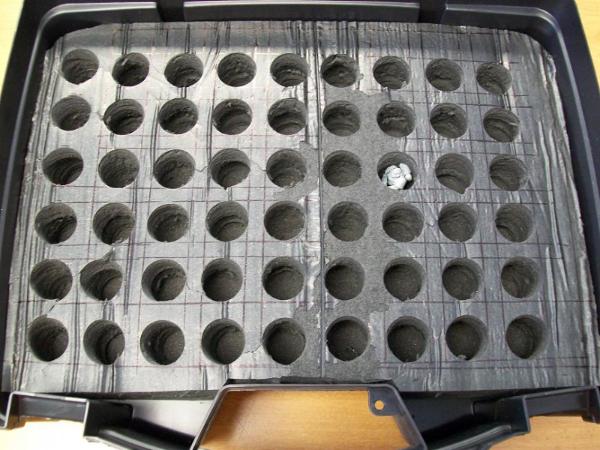

If your case has a gap between the top tray and the lid you can cut another piece of foam to use as a spacer. Just be careful to get the thickness right. You don’t want to compress the trays too much, damage can occur to your minis.

In my armour case I took two of the pick-n-pull pieces and layered them together for 2-1/2" of tray. I added an 1/8" foam for a base that I found at a craft store. Now I have a dedicated tank transport.
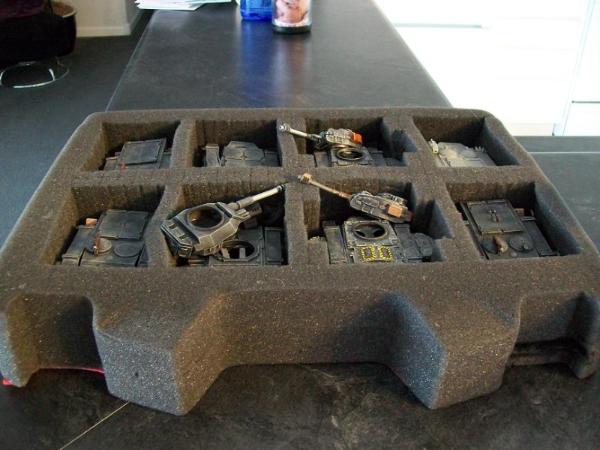
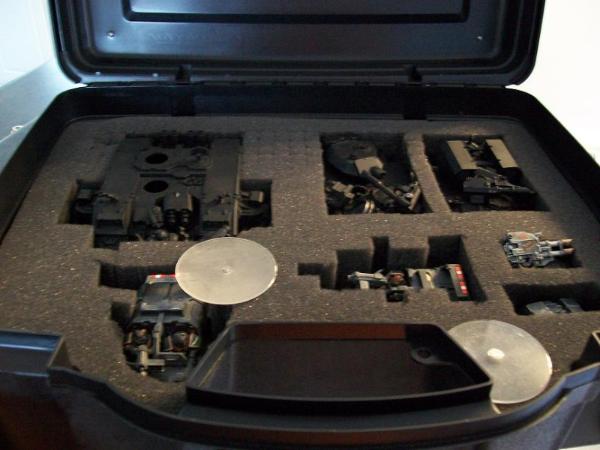
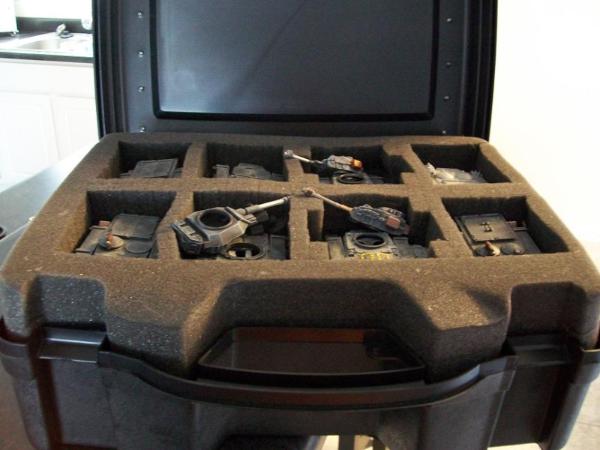

CONNECTING CASES
This step is not required to make the cases but it’s a cool little idea I came up with.

SUPPLIES

VELCRO
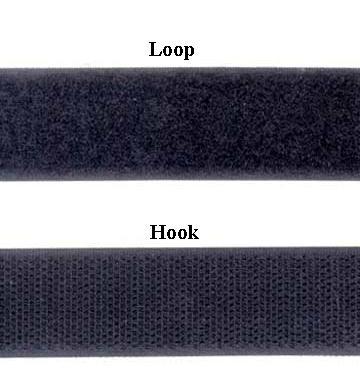
Velcro is the brand name of the hook and loop fastener that comes on kids shoes, cheap wallets, pretty much everywhere. The hook side is the plastic. The loop is the soft frayed material. I picked up a 5’ roll of self adhesive velcro at Wal-mart for $6.00. The sticky back is NOT strong enough to hold by itself for this application. The sew on velcro is cheaper but makes the mounting process harder.

POP RIVET GUN
You can pick one of these up on the cheap at Harbour Freight. I believe I purchased mine for $5.00 with an assortment of pop rivets all in one package. I used this to stick the velcro to the case. Remember, the velcro sticky back is not strong enough to hold by itself.
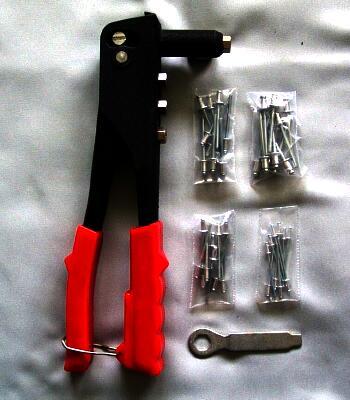

DRILL
Yep. A drill.


THE CONNECTING
Take two cases and set them lid to lid. See where they meet up to each other.
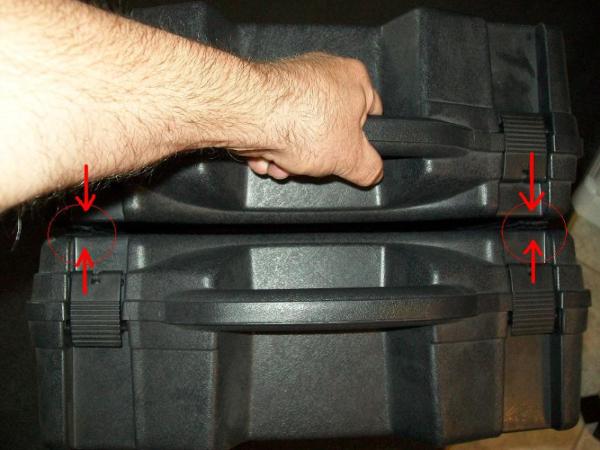

I’m sorry, but there are no “in progress” pictures for this.
Measure out a piece of velcro to the height of the connecting surface on each side of the lid. . If you don’t have a moulded guide like my case does simply measure in from the side and draw a line as a guide. The closer to the side the better.

Remove the paper backing from your velcro and attach the velcro along the guide line.

Find the largest pop rivets you have and find the proper drill bit.

Measure down 1/2” from the short edge and drill a hole through the velcro and case.

Put your pop rivet in to secure the velcro.

Move down 1-1/2” to 2” and repeat drilling and pop rivets. Repeat this until you reach the other end of the velcro. Ensure both ends are securely fastened.
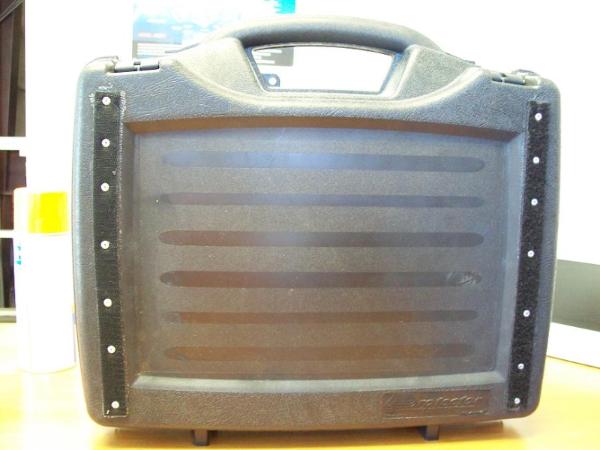

Take the matching velcro and repeat this process on the other side of the lid. It is important to use the same measurements for both guide lines. Ie: If you measure 2” from the left make sure you measure 2” from the right.

Repeat the process on the other case(s). Make sure you use the same kind of velcro on the same side of both cases. Ie: Use hook on the right and loop on the left.
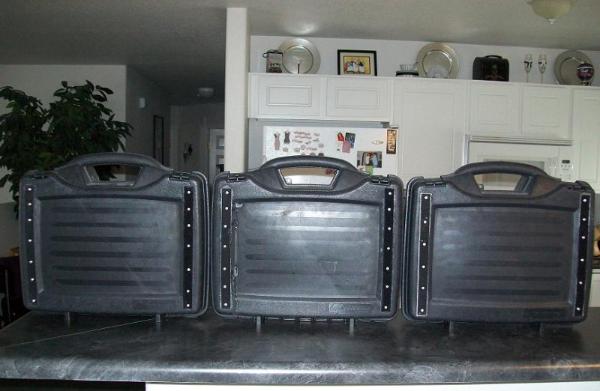

Now you can press your cases together and carry two with one hand. I have all my cases set up like this. Now I can grab my case of armour and slap it to my case of tactical marines… or my case of terminators… or my case of…. you get the picture. The velcro is pretty stong. My cases are pretty heavy when full and I haven’t had the velcro give out yet.
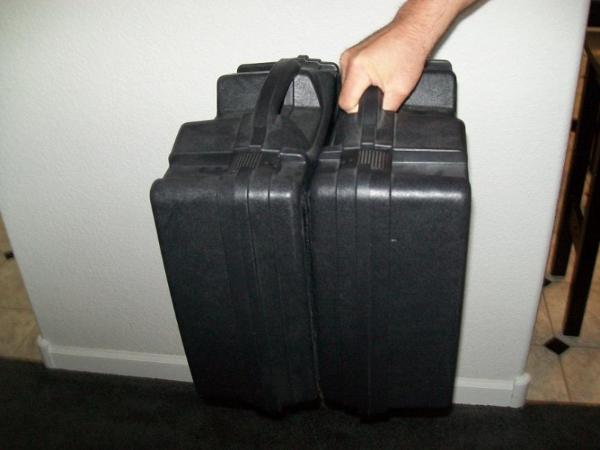

There you have it. I hope this was informative and useful.


Making your own miniature carrying case @ 2009/05/22 19:01:29


Post by: Ghost in the Darkness


The images don't show up. Did you use the right link in the gallery. Its one of the lower ones.


Making your own miniature carrying case @ 2009/05/22 19:12:02


Post by: kutzmon


Pics fixed


Making your own miniature carrying case @ 2009/05/22 19:38:08


Post by: Gavin Thorne


Great tutorial, get the pics fixed and it'll be that much better. Edit the entry and use the "Forum" link on your gallery page to enter the pic in the place of the links currently posted.


Making your own miniature carrying case @ 2009/05/22 20:12:32


Post by: Clthomps


Fantastic!


you get an A+ and a shinny sticker!


Making your own miniature carrying case @ 2009/05/22 20:54:29


Post by: randomfrog


I've been looking for a guide like this for a long time! Thanks!


Making your own miniature carrying case @ 2009/05/22 23:09:15


Post by: tuatha1337


For an alternative source for the same type of foam, check out www.foambymail.com
I find that they're a little cheaper.

Very nice tutorial though.


Making your own miniature carrying case @ 2009/05/25 08:12:11


Post by: Nuwisha


Amazing! Wow...


Making your own miniature carrying case @ 2009/05/25 08:14:15


Post by: FoxPhoenix135


This is frickin awesome. Your cutter design made from copper piping.... priceless. I may have to try it.


Making your own miniature carrying case @ 2009/05/26 04:58:41


Post by: CF Scout


Praise the Emperor! This is great.

I have a WWII ammunition case that we found when we were emptying my uncle's house. I was trying to figure out just how to utilize it for transporting my Warhammer figs, and this is perfect.

Thanks a bunch.


Making your own miniature carrying case @ 2009/05/26 06:46:48


Post by: djphranq


This is too awesome


Making your own miniature carrying case @ 2009/05/27 18:02:01


Post by: SargentPixi


An electric turkey carving knife also works VERY well for cutting foam. I used to work at a fabric store and we sold foam by the yard, and thats what we used to cut it. Makes very nice clean fast cuts! You can get foam typically at fabric stores, or even upholstery shops - in many different thicknesses and a few densities. It may be a bit more economical that way if you plan on making many totes.


Making your own miniature carrying case @ 2009/05/27 21:12:45


Post by: wittzo


FoxPhoenix135 wrote:This is frickin awesome. Your cutter design made from copper piping.... priceless. I may have to try it.


The copper tubing cutter would be handy for all sorts of uses, like when you cut foamcore or craft foam to make scenic carrying trays or cut out magnetic bases.

CF Scout wrote:Praise the Emperor! This is great.

I have a WWII ammunition case that we found when we were emptying my uncle's house. I was trying to figure out just how to utilize it for transporting my Warhammer figs, and this is perfect.

Thanks a bunch.


I bought a neat ammo crate from Barret Firearms, it's what they ship their custom .50 BMG ammo to dealers in. If you know a dealer that sells the ammo, they might sell you one of their cases cheap or a case from surplus ammo.

SargentPixi wrote:An electric turkey carving knife also works VERY well for cutting foam. I used to work at a fabric store and we sold foam by the yard, and thats what we used to cut it. Makes very nice clean fast cuts! You can get foam typically at fabric stores, or even upholstery shops - in many different thicknesses and a few densities. It may be a bit more economical that way if you plan on making many totes.


We have a lot of furniture plants around here, I found two companies that sell foam in all densities, cut to order. I found a place that sold it cheap online, but the shipping made it cheaper to use Sabol cases. I wanted to use Rubbermaid containers because that's what I use so they stack right. I used foam glue to stick some quarter inch thick layers to the bottom after I cut out the holes. An elecric knife would have made it a lot easier, the copper pipes would have been the best. Keep the plugs in the holes so the spray foam won't get on the insides of the cavity of the foam tray and pull them out from the top after you put the bottom layer on.

I would suggest getting very dense or rubberized foam to use for the bottoms. The main pieces of foam are 1.8 density, it's the same density as gun case foam.


Making your own miniature carrying case @ 2009/05/28 00:09:04


Post by: tobi-nid-guy


Thanks man i really needed a tutorial for that thanks.


Making your own miniature carrying case @ 2009/06/05 06:17:56


Post by: rzsanguine


Very good. This will save some money.


Making your own miniature carrying case @ 2009/06/05 08:25:14


Post by: Trasvi


I started making a modular carrying case system for my army. However now i have foam cutouts perfectly sized for my miniatures but no case that will fit them.
Probably I should have done it your way around, but, does anyone know of a cheap way to source 4-5 custom sized cases? Or a retailer who sells a lot of various sized cases for cheap?


Making your own miniature carrying case @ 2009/06/05 23:19:08


Post by: kutzmon


What size cases are you looking for?


Making your own miniature carrying case @ 2009/06/06 13:13:41


Post by: Trasvi


Ideally to fit everything to design... something like 500x350x200

or... 20"x14"x8"

I'm thinking I may have to settle for creating my own if I can't find a sufficiently cheap option.


Making your own miniature carrying case @ 2009/06/07 03:44:23


Post by: ReaperRob


I looked around for one of those cases at Wal-Mart the other day and couldn't find any. Anyone know if they're a seasonal item?


Making your own miniature carrying case @ 2009/06/08 03:36:14


Post by: Trasvi


Aha! I found a carry case. Work to commence in a few days.
Would you mind if I added pictures of my own forays into case building to the bottom of this tutorial, to show how much you inspired me (Particularly the idea of the copper piping cutter)


Making your own miniature carrying case @ 2009/06/08 14:36:47


Post by: kutzmon


Have at it. The more info shared the better!


Making your own miniature carrying case @ 2009/11/25 21:27:07


Post by: Newt-Of-Death


Very interesting.

Seems to be all about getting sum sort of box, and being 'crafty' with putting foam into it.

I did similar things with those tool boxes that have the little compartments.

I find it scary and generally hilarious on the scale of ridiculous that you can by gun carrying cases at your local supermarket. And they say Northern Ireland is a mad country! lol

America is certainly an individual place.


Making your own miniature carrying case @ 2009/11/25 21:46:13


Post by: Kokojo


Great tutorial, I'll defiantly use this.


Making your own miniature carrying case @ 2009/12/28 16:58:00


Post by: Sarnath666


good work off to walmart i go


Making your own miniature carrying case @ 2010/01/12 17:08:52


Post by: Kyley


kutzmon wrote: Everyone in this hobby eventually comes to the same point whether they be a newcomer or hardened veteran.

THE CASE
The case I use is a Plano 1404-02 four pistol carrying case. These ran $9.95 each from Wal-mart. You have to go to the firearms section to find. They are durable, lockable and come with 2 layers of 1-1/2” eggcrate foam and 1 layer of 1-1/4” pick-n-pull. I picked up 6 of these over a three month period. Although, you can use any case you come across. I’ve seen some pretty cool looking cases that would work from Harbor Freight, Canada Tire, and other discount sites. The case you decide to use is not important. Whatever you come up with and are happy with will work for your transport.


Only in america, we don't get firearms sections in tesco


Making your own miniature carrying case @ 2010/01/12 20:51:39


Post by: TheRhino


Great tutorial. I make my own cases as well, but use M249SAW ammo cans instead of a pistol case.
I'd picked up a bunch of foam at a craft shop that sold fabric, and I can fill about three SAW cans with what I have on-hand. Best part was, I got it all for 40% off during a big sale.

I really like that copper coupling used as a cutter. I've been cutting my foam with an extendable craft knife, like you show in your tutorial. Involves a lot of hemming and hawing, and the squares don't come out anywhere as clean as your circles. The circle cuts won't work for me, as I own a LOT of bikes, but I might have to look into something similar.


Making your own miniature carrying case @ 2010/01/14 07:34:30


Post by: =I= White-Wolf


This makes me regret attempting to make my own one, thanks mate


Making your own miniature carrying case @ 2010/01/14 08:42:58


Post by: Karl Deathwolf


Ive been thinking about building my own case, and now I think I might actually do it.


Making your own miniature carrying case @ 2010/01/15 09:52:12


Post by: Bramnero


Hmm... I finished making my own carry case a couple of weeks ago, i wish it looked as good as this one does. Luckily, it does carry all my mini's so i have an excuse to make a better one.


Making your own miniature carrying case @ 2010/01/15 14:40:50


Post by: PaFF


Great post, thanks.


Making your own miniature carrying case @ 2010/02/19 00:03:43


Post by: drakenkanon


rofl firearms section, i still dont believe that 60.000 people get killed in the usa each year and they still have a firearms section in most random shops -_-

anyway back to the thing: nice tut, but could somebody point me to a place where i could get a good case without destroying the one from my dad? :p (as we dont have a freakin firearms section XD)


Making your own miniature carrying case @ 2010/02/19 00:08:32


Post by: Aerethan


Cigarettes and alcohol kill far more people annually than firearms, and I'm sure they still would if we counted firearm deaths from war.

As for where you can get a case, if you don't want to use GW, BattleFoam or Sabol, then Wal Mart or the equivalent in your country should carry some sort of plastic storage container that would suffice with regular old foam.


Making your own miniature carrying case @ 2010/02/24 12:41:12


Post by: mangames50


I use a small suitcase with foam blocks around the edges and foam in the middle. Works fine.


Making your own miniature carrying case @ 2010/02/25 15:50:25


Post by: SkeTcHy LaRRy


Ok, they may not have Wal-Mart or these EXACT cases everywhere, but you get the idea. Great tutorial. A+ and a gold star. Another Option is using a larger case with the same concept. I used a rifle case (cheap, plastic type) lined with carpet padding for years. I did not cut round holes though, so models flopped a bit. Thanks again for the great tutorial.


Making your own miniature carrying case @ 2010/02/25 18:27:16


Post by: FoxPhoenix135


drakenkanon wrote:rofl firearms section, i still dont believe that 60.000 people get killed in the usa each year and they still have a firearms section in most random shops -_-

anyway back to the thing: nice tut, but could somebody point me to a place where i could get a good case without destroying the one from my dad? :p (as we dont have a freakin firearms section XD)


Check out Australia's gun control laws. VERY liberal. And yet, they have a very low crime rate. Maybe if you knew that EVERYBODY had a gun, you would be less likely to do stupid stuff.


Making your own miniature carrying case @ 2010/02/25 19:02:13


Post by: daedalus


drakenkanon wrote:rofl firearms section, i still dont believe that 60.000 people get killed in the usa each year and they still have a firearms section in most random shops -_-

anyway back to the thing: nice tut, but could somebody point me to a place where i could get a good case without destroying the one from my dad? :p (as we dont have a freakin firearms section XD)


Guns can be a very good thing. I'd say the Netherlands could have used a few more about 70 years ago.
If people want to kill others and didn't have guns, knives, swords, spears, or bow and arrow, they'd use bricks. Would you have us remove those also?


Automatically Appended Next Post:
If you can't get a gun case, you could try a tacklebox or some sort of fishing case if you can find one that lets you remove all of the internals.


Making your own miniature carrying case @ 2010/04/05 09:59:11


Post by: Sveinn Shieldsbane


Awesome. I got pretty much all the tools needed for this in my garage, I think I need to start making less expensive cases.


Making your own miniature carrying case @ 2010/04/05 18:31:52


Post by: Robed_Chaplain


This is really handy, Thanks!


Making your own miniature carrying case @ 2010/04/17 23:48:41


Post by: cosmic pixie


NICE


Making your own miniature carrying case @ 2011/03/03 06:48:05


Post by: NakedBatBoy


Thabks for the awesome tutorial! I'll start shopping around for a case now..

And thanks Tuatha, for the great cheap foam link.

tuatha1337 wrote:For an alternative source for the same type of foam, check out www.foambymail.com
I find that they're a little cheaper.


Making your own miniature carrying case @ 2011/03/03 15:29:28


Post by: Zefig


Excellent work mate! I picked up one of these cases earlier this week and had been contemplating how to make it work a bit better. And now I know! Thanks.


Making your own miniature carrying case @ 2011/03/03 16:50:00


Post by: Perkustin


To be honest your parts and labour makes this pretty redundant when i comes to saving money. It does look like a good carry case though and obviously it is ingenious and well made, it is by no means thrifty however.


Making your own miniature carrying case @ 2011/03/03 20:05:17


Post by: MagickalMemories


LOL @ 11 month threadomancy.


Making your own miniature carrying case @ 2011/03/03 23:49:05


Post by: NakedBatBoy


MagickalMemories wrote:LOL @ 11 month threadomancy.


Go eat a soggy ing grot. This thread it too good to let die!


Making your own miniature carrying case @ 2011/03/04 01:13:21


Post by: Lorek


NakedBatBoy wrote:Go eat a soggy ing grot. This thread it too good to let die!


EDITWoops! Spoke with the poster, and this was meant to be tongue-in-cheek.

I'm going to leave this thread open for now, as there seems to be interest in it.


Making your own miniature carrying case @ 2011/03/04 19:05:00


Post by: DefQonOrk


lol you could buy one case for 50 or spend mnore then 50 on making a case of your own...


Making your own miniature carrying case @ 2011/03/04 19:06:54


Post by: MagickalMemories


You didn't add those costs right.
He doesn't have near that much into them individually.

Eric


Making your own miniature carrying case @ 2011/03/05 08:40:21


Post by: Joske De Veteraan


coolness 10/10


Making your own miniature carrying case @ 2011/03/07 15:48:37


Post by: bdix


You= Genius...

I'm definately doing this soon.


Making your own miniature carrying case @ 2011/03/07 19:05:38


Post by: DefQonOrk


MagickalMemories wrote:You didn't add those costs right.
He doesn't have near that much into them individually.

Eric


actually i did. a case that size with foam and all from GW is around 50. now, saying you dont have those tools, you have to buy them. the foam is 25 for 4 pieces at GW and more expensive online. so i did figure it out because i dont want to spend that on making cases so i have been researching. its a geat idea though. i just buy foam, and make boxes out of the IOB and AOBR boxes. they are big enough for 2 layers untill i buy a case.


Making your own miniature carrying case @ 2011/03/07 20:15:49


Post by: MagickalMemories


DefQonOrk wrote:
MagickalMemories wrote:You didn't add those costs right.
He doesn't have near that much into them individually.

Eric


actually i did. a case that size with foam and all from GW is around 50. now, saying you dont have those tools, you have to buy them. the foam is 25 for 4 pieces at GW and more expensive online. so i did figure it out because i dont want to spend that on making cases so i have been researching. its a geat idea though. i just buy foam, and make boxes out of the IOB and AOBR boxes. they are big enough for 2 layers untill i buy a case.


Right. So, then, you aren't even making the same cases he is. You're pricing GW foam? His foam is cast off foam boughtat a discount. Calculate what *he* spent to make them.


Making your own miniature carrying case @ 2011/03/07 20:30:14


Post by: Zefig


DefQonOrk, your costs still aren't adding up. Let's work this out, using kutzmon's example as a guide and a standard GW Citadel Figure Case.

The Citadel Case is listed as carrying 108 miniatures in 3 layers, for $57.75.

Now let's break down the cost for Kutzmon's, assuming you start with no specialized tools for building these. I'll shoot for a similar price point to one Citadel case.

You can buy 2 of the Walmart pistol cases for $19.90, at $9.95 each. While you're there, pick up a can of spray adhesive. It's not listed on Walmart's website, but I did find it on Office Depot's site for $5.50. I'll use that price for reference.

The cases each come with 2 sheets of eggcrate and 1 of pick-n-pull foam, as detailed in the OP. That's 2-4 trays right there, fully customizable, already included. But we'll assume you want to make your own infantry trays as well, again based on kutzmon's. As ebay sales are a bit hit-and-miss, let's assume you go with a known entity. There appear to be a number of websites selling packaging foam, but I found with a minimum of googling this site which lists shipping costs and a number of types of foam. For this example, I'll use their quarter sheet of 2" standard charcoal foam. This is a 24"x72" sheet, which by kutzmon's dimensions would let you make 8 different 2" trays with enough spare for 2 half-size trays. This sheet would run you $28.47 shipped. Other sites list cheaper foam prices, but don't give a quote for shipping. You could customize the sheets as you see fit, but using kutzmon's cutting pattern and tray depth, you'd be able to fit 54 infantry figures per tray, with 3 trays per case, for 162 figured per case assuming you go pure infantry. You still need to put bottoms on the trays though. The site I listed didn't offer quarter inch foam in quarter sheets, so you'll need to either use a different site or use a suitable substitute. This I'm making up on the fly, but it occurred to me that you may be able to use craft foam sheets. These are $.79 each from Hobby Lobby but widely available elsewhere. They also come in many different colours so you can choose whichever you want to suit your army or whatever-some colours are slightly more expensive. I have chosen a dull grey in this example in anticipation of a new Grey Knights force. You'd need 9 to outfit every tray made from the foam you've ordered, and let's throw another one in to put on top of everything to make 10 just in case you run out of the eggcrate or something.

Now here's the big one. To cut your holes using kutzmon's method, you'll need a copper pipe coupling. Sharpen it with the hobby files you already have on hand. The coupling he lists at $1.29.

The velcro and whatnot is all extra. Useful, I'm sure, but not really necessary.

Totaling up the costs here, for two cases, and let's say 3 trays included with the cases and basically 9 scratchbuilt trays, you're running $63.03. Slightly more than one GW case, but cost per case is down to about $31.50, and EACH case can carry more infantry than one GW case. Combined, you have the capacity of about 3 GW cases. Plus, you have a ton of extra trays that you can switch out at will. AND you have the opportunity to customize each tray to suit your needs, rather than being stuck with pure infantry.

With the amount of foam in the one $30 order in this example combined with the foam included with each case, you'd easily have enough to fill 4 of the cases. The only added cost here would be the 2 extra cases. So for 4 full cases, you're looking at a total cost of $82.96, with a per-case cost of about $20.74.


In other news, I think I just convinced myself to pick up a few more of these pistol cases, stop by Hobby Lobby, and make an internet foam order...


Making your own miniature carrying case @ 2011/03/07 23:45:34


Post by: Lt. Coldfire


Geez, old thread.
Anyways, that's a daunting amount of work...


Making your own miniature carrying case @ 2011/03/08 09:04:21


Post by: NakedBatBoy


Lorek wrote:
NakedBatBoy wrote:Go eat a soggy ing grot. This thread it too good to let die!


EDITWoops! Spoke with the poster, and this was meant to be tongue-in-cheek.

I'm going to leave this thread open for now, as there seems to be interest in it.


Thanks Lorek. Sorry for the misunderstanding.

Zefig wrote:DefQonOrk, your costs still aren't adding up. Let's work this out, using kutzmon's example as a guide and a standard GW Citadel Figure Case.

...

With the amount of foam in the one $30 order in this example combined with the foam included with each case, you'd easily have enough to fill 4 of the cases. The only added cost here would be the 2 extra cases. So for 4 full cases, you're looking at a total cost of $82.96, with a per-case cost of about $20.74.

In other news, I think I just convinced myself to pick up a few more of these pistol cases, stop by Hobby Lobby, and make an internet foam order...


Thanks for the awesome price rundown Zefig. I think you convinced me as well. Will my upcoming move, it will be important to have some great, cost effective packaging!


Making your own miniature carrying case @ 2011/03/08 12:35:52


Post by: Primarch Of The 2nd


Great no more chipped models for me! yay!!!


Making your own miniature carrying case @ 2011/03/08 14:14:39


Post by: Ouze


I wound up getting one of these back when I was playing MW clix for my mechs, using this tutorial. I couldn't find this case at Walmart, and the shipping price on it was extreme (like $40). I would up getting a very similar one at Gander Mountain (a sporting goods store), but it was $20. It's about half as big as a Sabol Army Transport, so unless you can really get these at Walmart for $10, you're not going to save very much money doing this, if at all.

Thant being said, another angle to think of here is this is that even at $20 each, it's far cheaper then GWS ripoff "monster case" at $82 (!). It's not quite as big as the monster case, but it's still easily large enough to fit in 4 or maybe 6 drop pods, or a pair of baneblades, or 4 land raiders, etc etc. It's also much, much sturdier then a soft-sided Sabol case.


Making your own miniature carrying case @ 2011/03/08 19:01:45


Post by: DefQonOrk


Zefig and MAgikalmemorys, you guys are not including the tools used. ouze is also right, he got really lucky. 10 buck case? doubt it. even if he did, its uncommon to sell them at ALL stores. i have worked at a market like wal mart, they dont all sell the same stuff. your not saving that much.


Making your own miniature carrying case @ 2011/03/08 19:05:47


Post by: Hückleberry


I did find these cases on Amazon. I had to buy 4 of them to get free shipping.


Making your own miniature carrying case @ 2011/03/08 19:30:12


Post by: MagickalMemories


DefQonOrk wrote:Zefig and MAgikalmemorys, you guys are not including the tools used. ouze is also right, he got really lucky. 10 buck case? doubt it. even if he did, its uncommon to sell them at ALL stores. i have worked at a market like wal mart, they dont all sell the same stuff. your not saving that much.


Well, as long as you're going down that path, you might as well include the electricity required to power those tools, the cost of gas required to get to the store to buy the cases, a dollar value for the amount of your time that it takes you to make these cases...

I think you've got it wrong. I think it's you who's being obtuse about the whole thing, really.
It's apparent that you don't like the idea when compared to GW cases. It seems you're throwing every obstacle in the OP's path you possibly can.

Christ! Does every thread on Dakka need to include a disclaimer about all of the presumptions that must be made for the thread to make sense (that you own the tools, can get the cases, have opposable thumbs with which to operate the tools, etc)?
it should be pretty apparent that, if you dont have a method to file the copper, you're SOL.

Oh, wait... you can get a nice set of files for $10.
Fine. You've got to buy files. That brings the total (using Zefig's numbers) to $92.96, or $23.24 per case.
STILL a better deal*.

Eric
*"Better deal" indicates that the final cost per case is a better cost per case and/or cost per stored 25mm based miniature than GW's case and does not take into factor any costs due to electricity, automobile wear & tear, gasoline or valuable time that someone might incur while making said cases.


Making your own miniature carrying case @ 2011/03/08 20:03:25


Post by: Zefig


I'd just like to start out with this:

DefQonOrk wrote:Zefig and MAgikalmemorys, you guys are not including the tools used.


Zefig wrote:[...]
Now here's the big one. To cut your holes using kutzmon's method, you'll need a copper pipe coupling. Sharpen it with the hobby files you already have on hand. The coupling he lists at $1.29.
[...]


That and maybe the spray adhesive are the only "tools" you really need to make these that you wouldn't already have in your hobby toolbox. I'll assume for this that your hobby toolbox includes the hobby files, a ruler, and a craft knife/razor blades. All of the other things like dremels, lathes, rivet guns, and what-have-you are purely optional. If I missed anything else, let me know and I'd be happy to include it in my cost breakdown.

DefQonOrk wrote:ouze is also right, he got really lucky. 10 buck case? doubt it. even if he did, its uncommon to sell them at ALL stores. i have worked at a market like wal mart, they dont all sell the same stuff.


I'm sorry you haven't been able to find them, assuming you've actually looked. But keep trying buddy, they're definitely out there! If your Walmart doesn't currently stock them, then try again in the fall when hunting season is starting up. There's probably a better chance of finding them then. The closest of my area's Walmarts had 3-4 of them in stock last week when I bought one though, so you never know. Try shopping around.

DefQonOrk wrote:your not saving that much.


For a single case, sure. You're saving maybe $4 versus buying a GW case. But you've also got enough trays now for your one case to have about 4 different sets of trays for different armies or whatnot. But then I'll refer you back to my cost breakdown:

Zefig wrote:Totaling up the costs here, for two cases, and let's say 3 trays included with the cases and basically 9 scratchbuilt trays, you're running $63.03. Slightly more than one GW case, but cost per case is down to about $31.50, and EACH case can carry more infantry than one GW case. Combined, you have the capacity of about 3 GW cases. Plus, you have a ton of extra trays that you can switch out at will. AND you have the opportunity to customize each tray to suit your needs, rather than being stuck with pure infantry.

With the amount of foam in the one $30 order in this example combined with the foam included with each case, you'd easily have enough to fill 4 of the cases. The only added cost here would be the 2 extra cases. So for 4 full cases, you're looking at a total cost of $82.96, with a per-case cost of about $20.74.


That's two of these cases for about the price of one GW case. Or 4 for 20 bucks each. That's about a third of the price of a GW case, each. Saying that's not saving much is just being willfully ignorant. But maybe it depends on what you think your time is worth. I enjoy the creative aspect of all this, so that's half the draw of it for me. Plus, I like the idea of being able to customize my trays to be exactly how I want them. YMMV.


edit- MagickalMemories, I think you summed it up pretty well. Can't please everyone I guess.


Making your own miniature carrying case @ 2011/03/09 06:47:18


Post by: Ouze


MagickalMemories wrote:Christ! Does every thread on Dakka need to include a disclaimer about all of the presumptions that must be made for the thread to make sense


Does every thread on Dakka need to include someone getting worked up for no apparent reason?

One of the stated aims of the tutorial was that this would be cheap, indeed, it was the third sentence. Since virtually everyone in America has access to a Walmart, the unstated hypothesis was that everyone could get these for $10. I simply pointed out I myself was not able to find this case at Walmart in person, and that online the shipping costs queer the deal. The closest approximation I could find cost twice as much. As these cases are half the size of a Sabol Army Transport, I pointed out - accurately! that you won't save that much money unless you can find them at Walmart for $10. So, settle down, Beavis. I'm not saying I don't believe him, just that your mileage may vary, or it could be seasonal.

A better thrust, imo, for this excellent tutorial would point out that you can probably get these parts locally, it's fun to make them, and they do provide superior protection then a Sabol, points I thought I made rather clearly. It's a very solid tutorial and I enjoyed making my own following it.


Making your own miniature carrying case @ 2011/03/09 09:42:29


Post by: NakedBatBoy


First off:
MagickalMemories wrote:
Fine. You've got to buy files. That brings the total (using Zefig's numbers) to $92.96, or $23.24 per case.
STILL a better deal*.

*"Better deal" indicates that the final cost per case is a better cost per case and/or cost per stored 25mm based miniature than GW's case and does not take into factor any costs due to electricity, automobile wear & tear, gasoline or valuable time that someone might incur while making said cases.


That made me chuckle!

Also, you guys might consider looking anywhere else for any other kind of case. It could be anything - the gun case was just a suggestion. An army surplus store maybe, a garage sale, your grandpa's old luggage, whatever. The case could even be a hollowed out coconut.* The tutorial is mainly to show you hot to setup the foam trays to fit inside whatever you choose as a case.

*reference to recent Daily Show episode


Making your own miniature carrying case @ 2011/03/09 16:14:09


Post by: MagickalMemories


Ouze wrote:
MagickalMemories wrote:Christ! Does every thread on Dakka need to include a disclaimer about all of the presumptions that must be made for the thread to make sense


Does every thread on Dakka need to include someone getting worked up for no apparent reason?

One of the stated aims of the tutorial was that this would be cheap, indeed, it was the third sentence. Since virtually everyone in America has access to a Walmart, the unstated hypothesis was that everyone could get these for $10. I simply pointed out I myself was not able to find this case at Walmart in person, and that online the shipping costs queer the deal. The closest approximation I could find cost twice as much. As these cases are half the size of a Sabol Army Transport, I pointed out - accurately! that you won't save that much money unless you can find them at Walmart for $10. So, settle down, Beavis. I'm not saying I don't believe him, just that your mileage may vary, or it could be seasonal.

A better thrust, imo, for this excellent tutorial would point out that you can probably get these parts locally, it's fun to make them, and they do provide superior protection then a Sabol, points I thought I made rather clearly. It's a very solid tutorial and I enjoyed making my own following it.


I wasn't worked up. Using specific terminology for effect does not necessarily equate to being worked up.
That said, I know how difficult it is to express tone via text. So, I'm presuming your above quoted message was just meant straightforward, as was mine.
Knowing that, PLEASE take the following question in the jovial manner it was intended.

If I'm Beavis, does that make you Butthead?

Back on topic... a quick feebay search found that Plano four pistol cases can be had easily for $25 each, shipped. Even at this substantially higher cost, you're looking at $38 a case. Considering all the factors involved, it's not a bad deal.

Also, FWIW, the Plano case I have was about $12.

@ OP
Perhaps you should edit the first post to state that this tutorial is based on the premise that all of the mentioned supplies are available to you at the costs indicated.

Eric


Making your own miniature carrying case @ 2011/03/10 05:21:34


Post by: Arionel


I bought the same type of case, you can't beat the $10 price tag...if only Wal Mart kept them in stock, at least at the one I go too....I'm going to stock up with a couple more.


Making your own miniature carrying case @ 2011/03/10 06:56:17


Post by: hehe FAIL!


only if this was posted sooner... o well looks pretty nice
A+!


Making your own miniature carrying case @ 2011/03/10 12:04:16


Post by: porkuslime


I went to my local Walmart (10 miles south of me) to find said Plano Pistol case.. no dice. However, I did talk to the Sporting Goods Guy, and he told me that local restrictions prevented them from carrying that case within the city limits I live in.

So, I drove 10 miles NORTH (on a different day) and went to a more rural Walmart.. where I bought 2 of these (only had 2 else I would have gotten more.

So, if your local doesn't have em, ask as to why. They MAY be able to order them in for you.


Making your own miniature carrying case @ 2011/03/10 13:18:52


Post by: Kirbinator


Now if only I could find a good way to make ovular-shaped holes in the foam for my WHFB cavalry and my Termagants...

I bought a couple of these Plano cases off of Amazon, two for $26 shipped (free shipping on orders over $25 at the time). This is definitely a fantastic idea for circular infantry, I'm just not sure what to do about these darn cavalry models.


Making your own miniature carrying case @ 2011/03/10 16:40:37


Post by: knowman


This is an excellent tutorial, thank you to kutzmon for taking the time to put it together.


Making your own miniature carrying case @ 2011/03/10 17:34:52


Post by: Hatemonger


Ouze wrote:Does every thread on Dakka need to include someone getting worked up for no apparent reason?

Well, I couldn't actually find that requirement in the posting guidelines, but if I were to answer based on a sampling of threads...

Kirbinator wrote:Now if only I could find a good way to make ovular-shaped holes in the foam for my WHFB cavalry and my Termagants...

I would think that Termagants could just go into the same holes "on end"/face-down, although you might need to use a thicker layer of foam.

For cavalry, you could make some holes the shape of 40k bike bases by cutting two circles, then using a knife to cut a straight line between them, like this:
_____
O___O

By using different sized circles and the distance between them, you could make a lot of different holes. Using the 1" hole and slightly overlapping them would give something like the 'gant sized hole you wanted; two overlapping 4" holes would probably approximate a trygon-style base. Using a 2" pipe spaced about 2-3" apart would give something more chariot-sized. Of course, you could always just cut rectangle shapes with a normal knife and get holes more like a GW case anyway and lay the cavalry down on their sides. The round holes are mostly useful for 40k or Warmachine, although using the pipe cutter is probably faster than making 4 knife cuts per hole.

I think I'm off to price some pistol cases too...

- H8


Making your own miniature carrying case @ 2011/03/11 12:15:35


Post by: Praxiss


I already have obne the big GW cases, but i was looking into getting cheper foam soi coudl swap out armies. Thansk for the info!


Making your own miniature carrying case @ 2011/03/11 12:41:37


Post by: Chibi Bodge-Battle


Great tutorial

pity I don't have access to a lathe
or cheap Walmart cases.

Have just ordered some infantry foam off ebay but will also need some more customised trays for cav and tanks etc. Must check out that foam see if it is available here.

If anyone has any linkys it would be helpful please.


Making your own miniature carrying case @ 2011/03/11 21:28:26


Post by: MagickalMemories


hehe FAIL! wrote:only if this was posted sooner... o well looks pretty nice
A+!


It was posted in May 2009.
Please, tell me that was just poorly delivered sarcasm. : )


Eric


Making your own miniature carrying case @ 2011/03/12 18:42:08


Post by: Zarathstra


I picked up one of the pistol cases at my local Walmart for the poster's 9.95 price point. I found the performated foam sheet is just the right size for the Uncharted Seas fleet with a little room to expand. Outside of glueing a sheet of foam to the bottom to keep the models in place, I plan to use it unmodified. I'll use the eggcrate to store my dice, rulebook, and measuring tape.


Making your own miniature carrying case @ 2011/03/27 18:22:38


Post by: Eilif


Thanks for bringing this thread back again and to kutzmon
for making it in the first place. Read it years ago and forgot about it.

I have a number of miniatures cases made from resale shop tape cases filled with surplus foam, for my vehicles, but as they are all separate, it's hard to transport them except in a larger case. Looks like I need to get some rivets and velcro!

Here's the cases I use. (pasted from a different thread)
Armor boxes.
I have two boxes very much like this one

They are cassete tape totes and are very common at your local resale shop. I think I paid a dollar or two each!
Break out the cassete tape dividers (this takes some patience) and line with foam.

I specify Cassete totes, because they are almost exactly the correct depth for a Sentinel or Tank hull and two layers of foam (top and bottom). The tank hulls above are held perfectly in place without subdividing walls and don't touch at all, while being stored as compactly as possible. One additional piece of foam on top of the Bassilisk hulls as they are slightly shorter than the Russes.
All safe with room to expand.


Making your own miniature carrying case @ 2011/03/27 18:37:19


Post by: Asphalt


Found those gun cases at walmart today. Larger than I expected.


Making your own miniature carrying case @ 2011/04/05 18:38:41


Post by: Eilif


I think I may have posted this elsewhere, but Cabela's is selling these cases online for $11.24. It's the same case, labled as a "reel case".
http://www.cabelas.com/fishing-reel-cases-plano-reel-case-1.shtml?type=product&WT.tsrc=CSE&WT.mc_id=GoogleBaseUSA&WT.z_mc_id1=704776&rid=40&mr:trackingCode=860BDE51-F5D2-DF11-82EF-001B21631C34&mr:referralID=NA

The truely shifty (who are willing to wait for a card via mail) can sign up for a Cabella's credit card and get $25 (two cases) in Cabela's credit for free! I'm buying 3 as soon as my card arrives.

Also, I bought a pipe fitting as pictured in the first post. Though I don't have a lathe, two 8 minute sessions (copper gets hot) with a dremel and a bit of hand filing and I've got a nice foam cutter ready to go!


Making your own miniature carrying case @ 2011/04/05 18:59:43


Post by: Asphalt


The only problem I found with the pipe fitting is that it dulls quickly. But other than that it works like a champ.


Making your own miniature carrying case @ 2011/04/05 20:11:55


Post by: Zefig


I went exploring and found a local source of foam for any of you who aren't so keen on ordering huge sheets of it online. A Jo-Ann fabrics near me had a bunch for use in seat cushions and stuff like that. It's about the same firmness as the foam that comes in the cases. The color...largely a taste thing I guess. I'm not incredibly keen on it, but I bought some so I guess it wasn't a deal breaker. Display like this:


The upside is that lots of different thicknesses were available for different sorts of trays. Jo-Ann Fabrics are pretty easy to find too, and I wouldn't doubt a lot of equivalent stores stock the same, or similar, stuff.

The biggest downside is the price. I ended up getting some offcuts of it, but they were firm on the price so I didn't get any sorts of discounts there. You may have better luck if you have a winning smile, who knows. I ended up forking over a little under $40 though for enough foam to make 2 2" thick trays and 2 3" thick trays, with some left over for miscellaneous foaming. Hopefully not at the mouth.

So. If you're going to make a ton of similarly-sized trays, you're probably better off going online and getting your foam in bulk. If you want to pick up a bit of extra-thick stuff to store your baneblade or a couple of flyers in, you can probably save yourself some dough by heading to your nearest fabric store.

Added note: I'm not sure if it helps anyone out, but the particular case being used is a Plano 1404. I couldn't find it on Plano's website, but if you do some digging it could potentially help someone out.


Making your own miniature carrying case @ 2011/04/05 20:24:36


Post by: Asphalt


I had forgotten about ol jo-anns. Thanks


Making your own miniature carrying case @ 2011/04/05 21:45:56


Post by: Eilif


Jo-annes is a good source. I've bought foam there in the past, but as you say, it's a bit expensive. However, if you're patient, sometimes they have great sales and coupons.

Now I try to source all my foam from packaging and friend's with connections with businesses that regularly recieve foam packaging.


Making your own miniature carrying case @ 2011/04/07 16:42:41


Post by: Asphalt


recycle recycle recycle
I found an old soil testing kit box. Since at the moment my army is very small, it will work just fine.
It will hold two layers of the 2 inch foam. So a full squad of warriors per level and a couple larger. It will work for now.

[Thumb - DSC_0059.JPG]
[Thumb - DSC_0060.JPG]
[Thumb - DSC_0061.JPG]


Making your own miniature carrying case @ 2011/04/07 18:04:51


Post by: Eilif


Nice find! Boxes like that are great for holding warbands and other groups of figs smaller than an entire army.


Making your own miniature carrying case @ 2011/04/07 21:28:19


Post by: Asphalt


Once I get my third Tomb Spyder finished I will probably upgrade to a larger case. But I'm not in a big hurry since I don't count them unless they are finished.


Making your own miniature carrying case @ 2011/04/15 20:34:04


Post by: im2randomghgh


Excellent tutorial (it saved me sooooo much money).


Making your own miniature carrying case @ 2011/04/18 02:23:18


Post by: Eilif


Just picked up two of these cases. The walmarts around Chicago don't seem to carry them, but the Farm and Fleet in Montgomery (near Aurora) does. 15 bucks each is more than 10, but more than satisfactory for me.


Making your own miniature carrying case @ 2011/04/18 11:48:57


Post by: im2randomghgh


Eilif wrote:Just picked up two of these cases. The walmarts around Chicago don't seem to carry them, but the Farm and Fleet in Montgomery (near Aurora) does. 15 bucks each is more than 10, but more than satisfactory for me.


What cases?


Making your own miniature carrying case @ 2011/04/18 13:03:11


Post by: Eilif


im2randomghgh wrote:What cases?


The plano 1404 cases pictured in the first post.

Of interest, I've now seen at least 3 different title's applied to this case, all of which are the exact same case with the exact same interior foam and all have the same model of 1404.

Protector series 4 pistol case
Reel case
XL Accessory case

The one I bought was called the Protector 4 pistol case on the website http://www.farmandfleet.com/products/466298-protector_series_four_pistol_case.html?source=googleps but in the store it had the sticker calling it a XL accessory case. Interestingly, the sticker had the same pictures of pistols and reels that I'd seen in ads mentioned above.

I now only have one of the two cases I bought as it turns out that the case with just the two sheets of eggshell was the perfect size for the small guitar pedalboard my dad had just finished building so I gave him one of them. As a bonus he gave me back the pluck foam sheet since he didn't need it. This case has uses far beyond pistols, reels and miniatures. My dad said he'll probably buy a second case for microphones.


Making your own miniature carrying case @ 2011/04/18 14:17:40


Post by: Asphalt


The one I picked up was labelled XL accessory case. I think it has to do with state by state regulations on selling firearm accessories.


Making your own miniature carrying case @ 2011/04/18 15:59:14


Post by: Eilif


Yep, it's probably that and wanting to sell the case to as many markets as possible. Here in Illinios firearms regs vary from county to county and even city to city.

Plano really should market this beyond sportsmen though. If I'd had a 15 dollar hard-sided mic/accessory case this large to sell when I worked at Guitar Center, I would have have sold dozens, perhaps hundreds.

Just got back from Hobbly lobby where I picked up some 3mm sheets of Funky foam (EVA foam) that looks to be the same stuff as the dense foam bottoms of some miniatures trays. 12x18" sheet of 3mm for 99 cents!
http://shop.hobbylobby.com/store/item.aspx?ItemId=159888

The miniature tray I'm using appears to have 5mm of foam, so I may double layer it, but I haven't decided yet.

I also stopped at Menards and got a second pipe fitting, this one slightly smaller than one inch in diameter.


Making your own miniature carrying case @ 2011/04/18 20:04:15


Post by: im2randomghgh


Eilif wrote:Yep, it's probably that and wanting to sell the case to as many markets as possible. Here in Illinios firearms regs vary from county to county and even city to city.

Plano really should market this beyond sportsmen though. If I'd had a 15 dollar hard-sided mic/accessory case this large to sell when I worked at Guitar Center, I would have have sold dozens, perhaps hundreds.

Just got back from Hobbly lobby where I picked up some 3mm sheets of Funky foam (EVA foam) that looks to be the same stuff as the dense foam bottoms of some miniatures trays. 12x18" sheet of 3mm for 99 cents!
http://shop.hobbylobby.com/store/item.aspx?ItemId=159888

The miniature tray I'm using appears to have 5mm of foam, so I may double layer it, but I haven't decided yet.

I also stopped at Menards and got a second pipe fitting, this one slightly smaller than one inch in diameter.


Why get one smaller than an inch? the bases are 28mm...

also you will need a lot of 3mm foam trays, since a millimeter is almost nothing...an average FW mini is 3.5-4cm tall, so well over ten of those sheets...


Making your own miniature carrying case @ 2011/04/18 20:08:52


Post by: Zefig


im2randomghgh wrote:
also you will need a lot of 3mm foam trays, since a millimeter is almost nothing...an average FW mini is 3.5-4cm tall, so well over ten of those sheets...


I believe he's talking about using it as the bottom of the tray, possibly double layered. Not as the whole tray.


Making your own miniature carrying case @ 2011/04/18 20:12:03


Post by: im2randomghgh


Zefig wrote:
im2randomghgh wrote:
also you will need a lot of 3mm foam trays, since a millimeter is almost nothing...an average Citadel mini is 3.5-4cm tall, so well over ten of those sheets...


I believe he's talking about using it as the bottom of the tray, possibly double layered. Not as the whole tray.


That makes SO MUCH more sense...


Making your own miniature carrying case @ 2011/04/18 20:15:56


Post by: Zefig


Yeah, haha. Especially when you get into vehicle trays and whatnot.

But...at least you could make different color patterns, I guess?


Making your own miniature carrying case @ 2011/04/18 20:22:37


Post by: im2randomghgh


Zefig wrote:Yeah, haha. Especially when you get into vehicle trays and whatnot.

But...at least you could make different color patterns, I guess?


Hot Pink, Dull Pink, Hot Pink...lol


Making your own miniature carrying case @ 2011/05/26 11:55:18


Post by: Shasta Hawk


Lt. Coldfire wrote:Geez, old thread.
Anyways, that's a daunting amount of work...


Old but awesome and not really all that much work


Automatically Appended Next Post:
DefQonOrk wrote:Zefig and MAgikalmemorys, you guys are not including the tools used. ouze is also right, he got really lucky. 10 buck case? doubt it. even if he did, its uncommon to sell them at ALL stores. i have worked at a market like wal mart, they dont all sell the same stuff. your not saving that much.


Actually, there's three Walmarts in my area and they all have the same 10$ cases. Concerning of tools, this really is a non-issue since the tools are easy to get at a very reasonable price IF we don't already have them. Compared to the standard miniature cases you're saving a bundle


Making your own miniature carrying case @ 2011/05/30 05:46:58


Post by: The Terrifying Terror


Looks pretty good, I may have to try this.


Making your own miniature carrying case @ 2011/06/13 23:16:56


Post by: Rayvon


nice thread, The old ones are normally the good ones.
May i just add, that i have been doing a similar thing with much succes in the UK with Drill cases from ebay.


Making your own miniature carrying case @ 2011/06/13 23:36:56


Post by: Eilif


I'd love to see pictures of your drill case miniature transport.

If you want to see a slightly cheaper and updated version of this case check out this:

http://www.dakkadakka.com/dakkaforum/posts/list/362407.page


Making your own miniature carrying case @ 2011/06/14 16:54:53


Post by: Grendler7


This is great! I have detested laying my figures on their side for ages. A vertical orientation is highly preferable.


Making your own miniature carrying case @ 2011/07/04 15:02:32


Post by: JustWeaver


That is brilliant. Must try this for myself.


Making your own miniature carrying case @ 2011/07/08 23:05:13


Post by: black templar


Thanks for the help


Making your own miniature carrying case @ 2011/07/13 19:31:23


Post by: Iggyrocksall


Amazing idea!


Making your own miniature carrying case @ 2012/01/16 09:05:06


Post by: Shaozun


Am I the only one scared by the fact there's a 'firearm section' at a regular store?

Good post anyway, but I don't think Woolies or Coles would exactly be allowed to sell that kind of stuff.


Making your own miniature carrying case @ 2012/01/16 15:38:51


Post by: reds8n


Thread is being locked due to thread necromancy.