Switch Theme:

Make Your own Miniatures Case 2.0. The 19 dollar Plano Wonder! (5/5 Contact Cemt. and Elec Knives)  [RSS] Share on facebook Share on Twitter Submit to Reddit
»
Author Message
Advert


Forum adverts like this one are shown to any user who is not logged in. Join us by filling out a tiny 3 field form and you will get your own, free, dakka user account which gives a good range of benefits to you:
  • No adverts like this in the forums anymore.
  • Times and dates in your local timezone.
  • Full tracking of what you have read so you can skip to your first unread post, easily see what has changed since you last logged in, and easily see what is new at a glance.
  • Email notifications for threads you want to watch closely.
  • Being a part of the oldest wargaming community on the net.
If you are already a member then feel free to login now.


Made in us
Brigadier General


Chicago

This is an updated version of Kutzmon's amazing case tutorial seen here. It's a great article and I will refer to it, so go read it!
http://www.dakkadakka.com/dakkaforum/posts/list/241220.page However, there's enough difference that I felt this version deserved it's own thread.

Both our articles use the Plano 1401. The largest difference in this case build is that I think I can take the Plano 1401 and turn it into a miniature storage and transportation solution without buying any additional figure foam! By eliminating either the cost of purchasing extra foam which usually costs more than the case itself, or having to hunt down bargain surplus options that not everyone will be able to find, this project comes much more within the reach of everyone who can acquire a case and get to a hardware store and a craft store.

This project relies on the Plano 1404 case. The Plano 1404 is amazing in that it comes with 3 pieces of foam (two eggshell and one pluck and pull) that if purchased anywhere else would cost more than the case itself. It can be found from 10-20 dollars and depending where it is purchased, the sticker may call it any of the following:

Plano Protector series 4 pistol case
Plano Reel case
Plano XL Accessory case
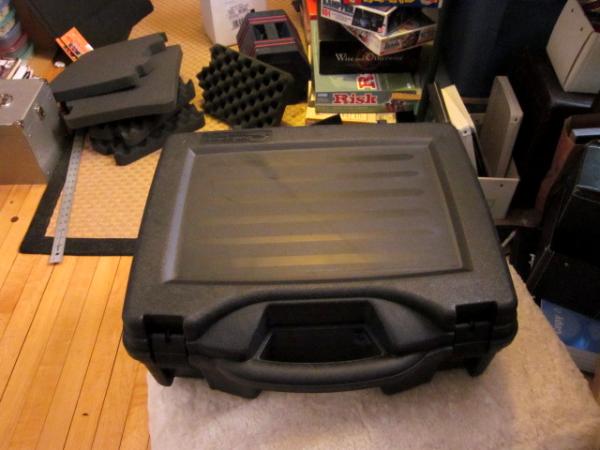
Regardless, they all seem to have the 1404 number (some times followed by a -02 or -05) on them and have the same foam inserts. I purchased mine for 15 dollars at Farm and Fleet.
http://www.farmandfleet.com/products/466298-protector_series_four_pistol_case.html?lref=%2foutdoor%2fhunting%2fstorage%2fgun%2f A google shopping search reveals some even cheaper.

The other supplies you will need to buy.

At the craft store:
Adhesive spray: 7 dollars EDIT 5/7/2012: I no longer use Adhesive spray (it's weak) or Pliobond (it smells). I have switched to DAP Contact Cement (http://www.dap.com/product_details.aspx?product_id=35). See my post about it several posts down.
4 sheets of Funky foam: 99 cents each

At the Hardware store:
A 3/4" copper fitting and a 1" copper fitting : 1 dollar each

Tools you probably have but will need
-dremmel with grinding bit or Power drill with grinding bit for sharpening your copper fitting into a cutter Grinding bits are fairly inexpensive.
- Small slightly curved file for final sharpenign of the cutter
-Utility knife with lots of extra blades for foam cutting (I like the "break off blade" kind)
Addition 5/7/2012 If you have an electric carving knife, it will cut foam perfectly strait. For interior cuts, you will have to make a pilot how with a knife or foam cutter, but it slices though foam like butter and will make the sides of your trays very even!

Step one. Make your foam cutters.
I'm going to refer you to Kutmon's original thread for this one as there's nothing that I have to add to the process except the following:
-If you don't have a drum sander or a dremmel, but do have a power drill, you can get a griding bit for your drill.
-Kutzmon uses 1" and 1 1/2" fittings to cut into sold foam.
-Due the the fact that we are using eggshell foam for the trays which opens up a bit at the top, we can make smaller holes. Thus the smaller 3/4" and 1" fittings. You can use 1 ½ inch fittings to make holes for 40mm figs, but they don't evenly fit in between the rises in the eggshell foam.
-The sizes on the fittings do not exactly match the interior or exterior diameters of the fittings. Suffice to say that if you sharpen from the inside you will end up with cutters with the following dimensions:
3/4" fitting gives a hole 24mm in diameter which is just under 1” in diameter and snugly fits a 25mm standard slotta base.
1" fitting gives a hole 31mm in diameter which is approximately 1 1/4" in diameter and only 1mm larger than a privateer press 30mm base.
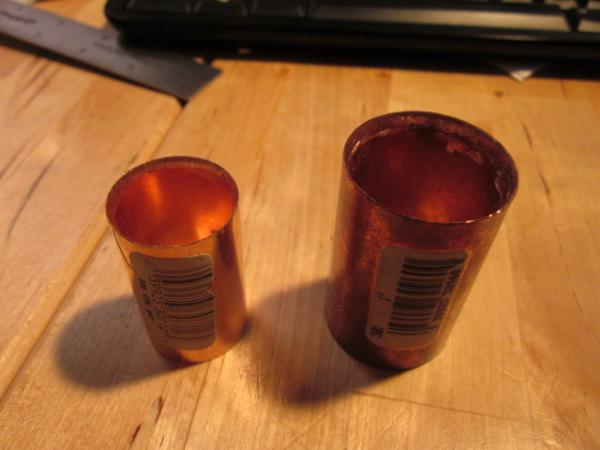
Hereafter, these will be referred to as the 24mm and 31mm cutters.

Step Two Tray division
Cut the trays in half. Don't just do one cut though. Measure out a strip ½ or ¼ wide down the middle and cut it out. This will give just a touch of space in between the foam sections which are very tightly fit to the case and become even more so when the stiff foam bottoms are applied.
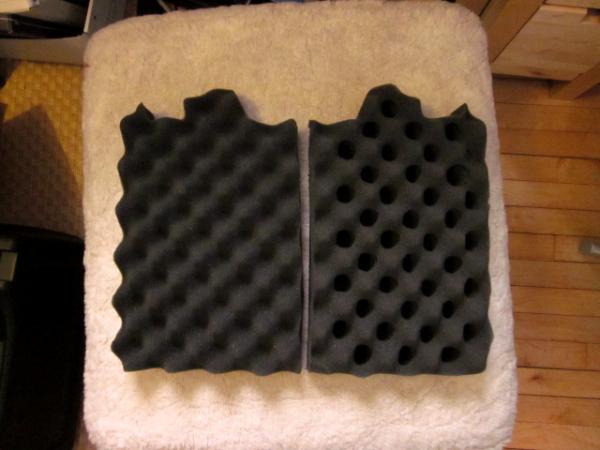
The smaller size will make for manageable trays, especially if you have alot of metal miniatures. I can't stress enough the necessity of cutting with a very sharp blade. If your blade has any resistance at all, get a new blade. Otherwise you will end up with very rough cuts. Foam dulls blades very quickly.

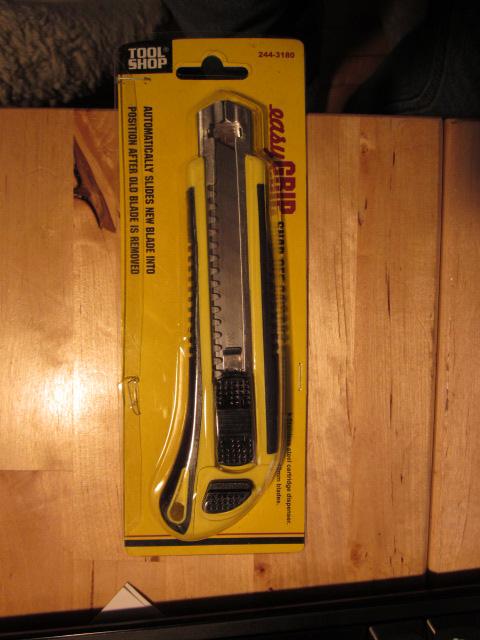
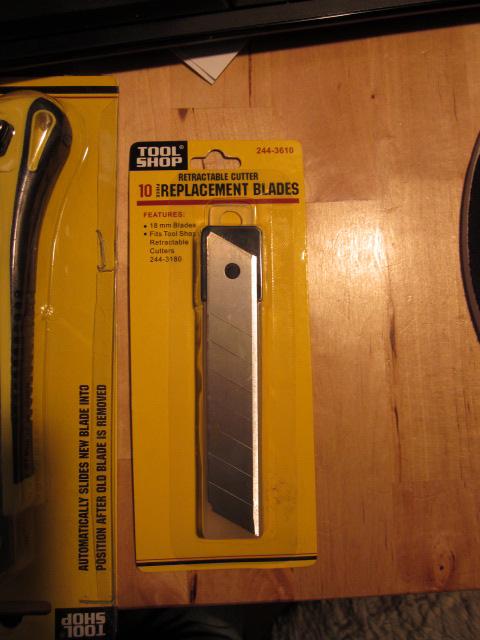
I'm using the knife shown below. It includes 3 extra blades and costs about 3 bucks. A pack of 10 replacement blades is less than 2 bucks! This project is about cheapness, but don't be cheap when it comes to replacing the blades. All right, enough about that...

Step 3 Make the figure cavities.
Use your foam cutters to cut out the indented sections of the eggshell foam tray. If you made them correctly, you just need to press gently and keep twisting to make the holes.
For the tray below I only used the 24mm cutter. The 24mm cutter may result in holes that are too small for larger models like terminators and such
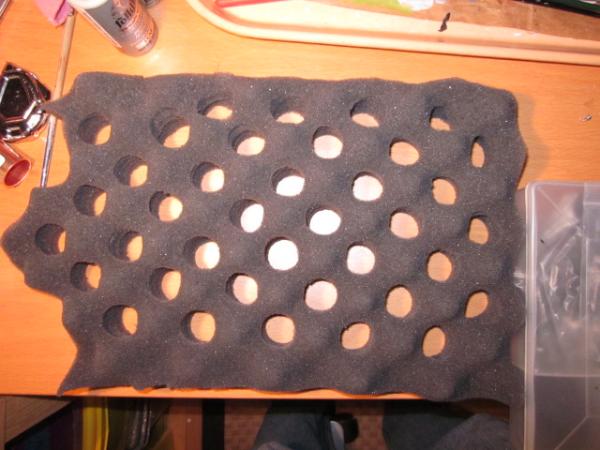

Using just the 31mm cutter may result in walls between cavities that are too small, so for the second tray, I used alternate rows of of 24mm and 31 mm with 24mm on the edges.
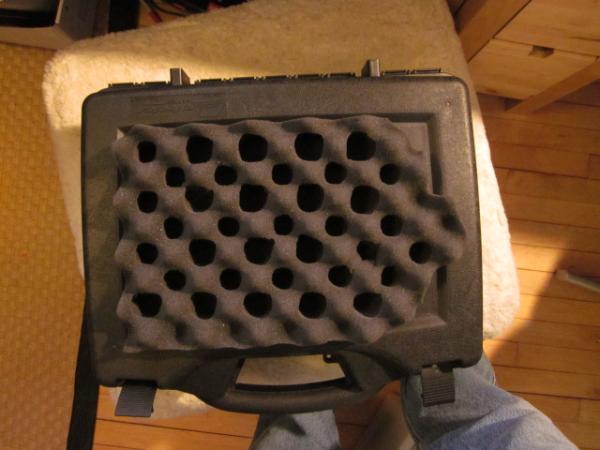

Use your own judgment about how close to the edge to cut. You will want to take a minute to sharpen your cutters a bit after every tray or every half a tray. Copper is a soft metal and foam dulls metal fast. Dull cutters will tear up the walls between the figure cavities.

After you've made the cavities, It's not a bad idea to trim off a bit of a corner or two to make it easier to lift the trays out.

Step 4 Prepare the Funky foam Base.
Funky Foam is what Hobby Lobby calls thin sheets of EVA foam. It is the very dense foam that many miniatures tray companies put as the base of their trays. It may also be the same foam that some companies with more rigid trays make their entire trays from.
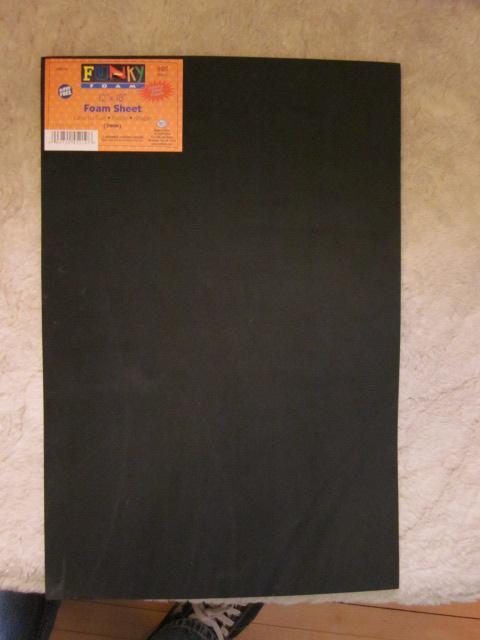
It can be bought at hobby lobby (and other craft stores I assume) in large 12x18" sheets that are 3mm thick and smaller sheets that are 2mm thick. We are using the larger 3mm thick sheets.
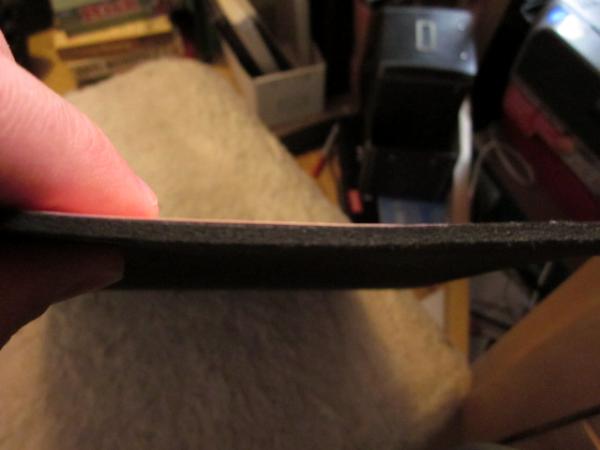
Miniatures trays with EVA bottoms tend to be 5mm thick. For now I'll go with one layer of 3mm. If it seems to flimsy I can always add another layer later.

One large piece of Funky Foam will provide the base for two trays. Cut The funky foam sheet in half

Step 5 Glue Funky Foam base to eggshell tray.
I use Elmers Spray adhesive because that is what Kutzmon recommends. I expect it will work just fine, but if it begins to separate, I can always supplement with my hot glue gun.

-Wipe dust off the Funky foam base. Funky foam is like a static dust collector.
-Spray the back of the eggshell section and the funky foam and press together well.
-Let it dry for a full hour. You want it to be as strong a bond as possible.
-Cut of the excess funky foam.
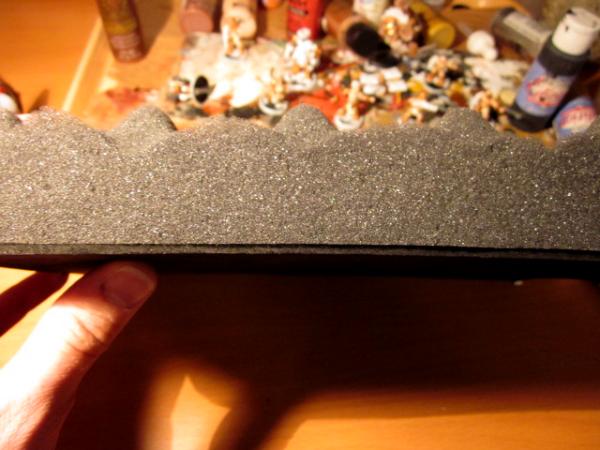

Your Tray is now done.
The dimensions are different, but it has roughly the same surface area and depth as a 2" Standard Sabol tray and holds almost exactly the same number of figures. Two more than Sabol in this case, but the number of figures depends on the arrangement of eggshell depressions.


Step 6 Other Eggshell Trays.Repeat the process for the other 3 eggshell trays.


Step 7 the Pluck and pull tray.
3 options:

1. You may wish to make it the bottom tray. If you don't think you will be removing it often, leave it as one large tray and glue a full piece of funky foam. The Pluck and Pull layer is 1 1/4" thick and is great for oddly shaped models.

2. If you decide to split it in half you will end up with two trays that each have one side that is weak because it will be made of pluck pieces rather than a solid edge. I recommend either using elmers to glue all the pluck pieces on the cut side to each other, or cut piece of funky foam and glue it to the side for strength.

3.Lastly, if you have more than one case is to match two of the pluck and pull sections to make a vehicle tray. Two sections of pluck and pull end up being 2 ½ inches deep which is enough for most 40k vehicles without their turrets.

No pictures of this step as I haven't decided whether to do a vehicle tray or one or two figure trays yet.

Step 8 Pad the top of the case.
Measure a piece of Funky foam the size of the top of the case and cut it. This will be the pad between your top tray and the top of the case. This may take a bit of fiddling as the top of the case is a touch smaller than the outline of the foam trays.
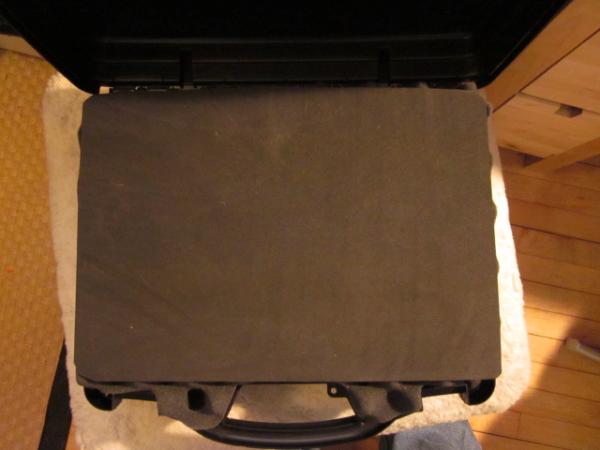
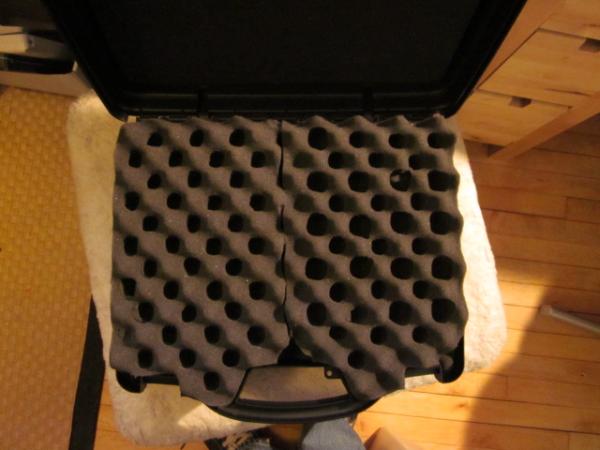
It just so happens that the two layers of Eggshell (not interlocking), the pluck and pull layer, and 4 layers (3 tray bottoms and a top cover) of 3mm funky foam fits nice and snugly in the Case with no room for shifting of models! Imagine the picture below plus 4 sheets of funky foam minus the indentions on the top and bottom of the case and you see what I mean.
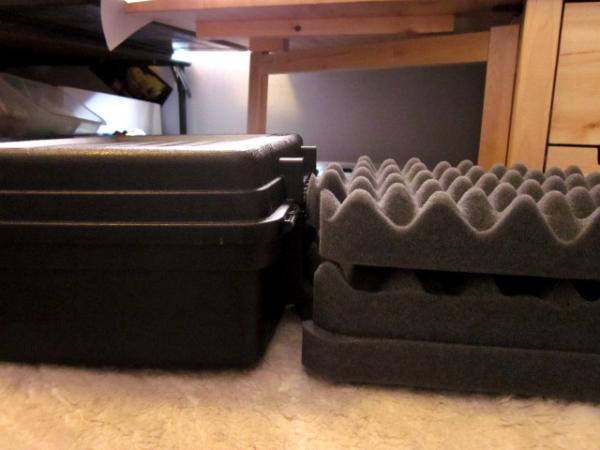

Final numbers.

The case can hold about 180 standard size figures in it's 3 levels.

Using Sabol as a comparison, you now have a hard case with the equivalent of 6 sabol trays, totaling a total of 11 inches (of equivalent sabol) of trays. This is about 2 inches less space than a standard "Army Transport". However you have a hardshell case and you just spent:
-$15 Plano 4104
-$4 4 sheets of Funky Foam
For a total of 19 bucks, as compared to $65 for an Army Transport

Even the cost of project specific supplies:
$2 Fittings
$8 Adhseive
$4 Grinding bit for dremmel or Drill

Brings the cost to 29 bucks. I don't count the cost of Dremel/drill, files and knives as every hobbyist should have or find a way to have access to these things. I will be making at least 3 of these, so divvying the cost of the adhesive and fittings over 3 cases, I'm looking at about 22 bucks a case.

A few pics of my IG in the trays.
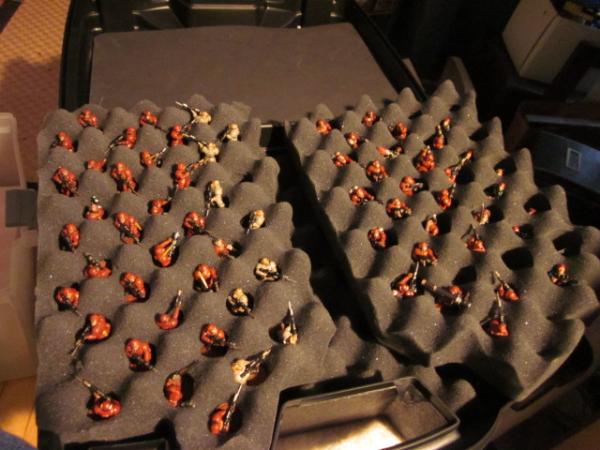
Note the difference between the 24mm and 31mm holes.
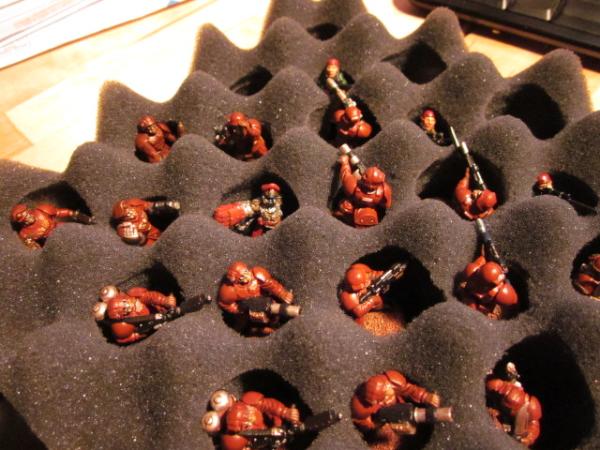

Now go make your own!

This message was edited 10 times. Last update was at 2012/05/07 20:31:40


Chicago Skirmish Wargames club. Join us for some friendly, casual gaming in the Windy City.
http://chicagoskirmishwargames.com/blog/


My Project Log, mostly revolving around custom "Toybashed" terrain.
http://www.dakkadakka.com/dakkaforum/posts/list/651712.page

Visit the Chicago Valley Railroad!
https://chicagovalleyrailroad.blogspot.com 
   
Made in us
Brigadier General


Chicago

Here it is Finished and filled with Blood Angels.


Currently is setup for about 90 figures and 3 vehicles with room for one more. For space marines with dynamic poses or weapons sticking out at odd angles put I them in the mini trays or joined two cavities in the eggshell foam.

Even though the figs appear to stick above the foam, all are below the level of the top of the eggshell trays.


The grey tray is a premade miniature tray that I got second hand and cut down to fit the space. The Predator is in a slot made from cutting the pluck and pull sheet in half and glueing it together. The mini trays are sections of that same pluck and pull sheet.


I found two of these cases yesterday in tan being sold as reel cases at Fleet and Farm (not Farm and Fleet) for 10 bucks so I ordered them. They are sold out now, but just goes to show that these do show up at the 10 buck rate occasionally.

I've pretty much decided to move all my figs over to thse Plano cases even though I've got about four of these file cases cases already purchased and setup with bead trays and foam.

http://www.dakkadakka.com/gallery/images-24779-13923_Ig%20Army%20Storage.html

I thought they were the bees knees, but the Plano's hold about as many figures more safely/securely, better looking and about 2 dollars left.

This message was edited 1 time. Last update was at 2011/04/19 19:55:44


Chicago Skirmish Wargames club. Join us for some friendly, casual gaming in the Windy City.
http://chicagoskirmishwargames.com/blog/


My Project Log, mostly revolving around custom "Toybashed" terrain.
http://www.dakkadakka.com/dakkaforum/posts/list/651712.page

Visit the Chicago Valley Railroad!
https://chicagovalleyrailroad.blogspot.com 
   
Made in us
Brigadier General


Chicago

Another tiny update. My two "reel" cases from Fleet Farm came in. Same size and foam contents as the others I've bought and seen except that they are army tan (a nice color) and as seem below say "reel case" on the side and they were only 10 bucks each! (sorry, I bought the last 2).


Not sure if I'll leave it, put a sticker there, or try and sand it off. Nothing against fishermen, but for some reason I don't like it.

This message was edited 1 time. Last update was at 2011/04/22 13:59:40


Chicago Skirmish Wargames club. Join us for some friendly, casual gaming in the Windy City.
http://chicagoskirmishwargames.com/blog/


My Project Log, mostly revolving around custom "Toybashed" terrain.
http://www.dakkadakka.com/dakkaforum/posts/list/651712.page

Visit the Chicago Valley Railroad!
https://chicagovalleyrailroad.blogspot.com 
   
Made in us
Mutilatin' Mad Dok


Great Tut! I have a plano gun case (got it at wallyworld for ten bucks) Mine came with two interlocking eggcrate foam that I glued together and use to hold two rhinos, two baal preds, a land raider, and a dreadnought. Then used the pluck n pick to make 50 slots for marines and still have enough space for another foam sheet.

"See a sword is a key cause when you stick it in people it unlocks their death" - Caboose


Made in ca
Imperial Recruit in Training


looks great i was wonddering what that long veichle is that is beside your lr


Made in us
Brigadier General


Chicago

(Update 4/23 Two more cases optimized for IG.)

Ultrafool,
Do you have a pic of yours, I'd love to see how you arranged the tanks.

Imperialgaurd12,
It's an M113 Tank that I made about 10 years ago as a Razorback. It has a double heavy bolter firing position that goes on top. I originaly had 3 US tanks in my army, but one by one they've been scraped or turned into post-apoc vehicles. Eventually this one also will be replaced with a Rhino/Razorback.

Quick note on glue. Spray adhesive sometimes has patches where it doesn't adhere all the way, I've found that superglue can work ok, for mending these, but proper application of rubber cement (apply to both sides, let dry then attach) works really well.

Now, what you've all been wating for....

Two more cases for my IG.

The Infantry box.
Since I've got nearly all plastic troops, I decided to not cut the trays in half, though I did trim the sides and front so they would be easier to remove

Tray 1 Line Infantry. All 24mm holes except for the lengthened slots for my autocannons.

Tray 2 Rest of the troops. Mostly 24mm holes with 3 lines of 31mm and some custom slots as well.

Tray 3 will be a third eggshell piece, it's uncut and waiting for how I may decide to expand this army.

The Armor box.
Tray 1. Guns and Sentinels This base layer is two layers of pluck and pull (one from each box) glued to each other and to funky foam. I didn't trim the edges of the trays so this one would be really hard to remove, but it'll probably never be take out so it's no big deal.


Tray 2. Tank hulls.
The 3 plastic casette suitcases I was using for vehicles before...
http://www.dakkadakka.com/gallery/182443-.html
http://www.dakkadakka.com/gallery/182442-.html
...were almost exactly the length and width of the Plano, so rather than using up foam, I:
1) Selected one of them and took case halves apart. (Saved the other for storage of post apoc vehicles.)
2) Cut off the handle
3) relined the case half with funky foam as it is thinner, of more uniform thickness and looks better than the random foam pieces I had in it
4) Cut a large piece of funky foam to go between the base tray and the plastic tank hull tray.


I also cut a piece of funky foam and layered some scrap foam and funky foam to match the different heights of Russ and Basilsik hulls.


It goes between the top of the hulls and the top of the case and I got it just the right tightness so it holds them firmly in place without any damage. I can pick up the case and shake it and the hulls remain in place and not touching each other!


So how does it compare to my previous storage solution?

Previously, the collection took up one and a half of my previous storage boxes and two cassete briefcases. Now it all fits into 2 plano 1404's
As you can see, the Tan Plano case is a bit wider and taller than my previous File box filled with stacked bead cases.


However, it's considerably shallower and that's the measurement that counts, as I keep them on a shelf sideways.

Between these two and my Blood Angel case, I've cut my required shelf space by around 40% and it also looks much better!


Lastly, As I have a Russ, Hellhound, two Chimeras, a Valk and an ogryn squad unassembled in boxes out on the porch, someday I'll need more space. However, I've no doubt that one more vehicle case like the above, plus utilizing the third as-yet-uncut infantry tray will cover all my case needs and still save space.

This message was edited 4 times. Last update was at 2011/04/23 11:33:39


Chicago Skirmish Wargames club. Join us for some friendly, casual gaming in the Windy City.
http://chicagoskirmishwargames.com/blog/


My Project Log, mostly revolving around custom "Toybashed" terrain.
http://www.dakkadakka.com/dakkaforum/posts/list/651712.page

Visit the Chicago Valley Railroad!
https://chicagovalleyrailroad.blogspot.com 
   
Made in us
Lurking Gaunt


You can get the plano cases for 10 bucks each at walmart, in the sporting goods section by the fishing and ammo stuff. usually 2 in stock with them being instantly restocked it seems.

This message was edited 1 time. Last update was at 2011/05/12 16:57:55


Made in us
Brigadier General


Chicago

Thanks,
Alot of folks seem to be able to find them at Walmart. Over here in the Chicago area, restrictive gun laws seem to have kept gun cases out of the local Wal-Marts.

I had to drive from Chicago to Montgomery (near Aurora) about 40 miles away to get mine for $15 from a Farm and Fleet.

Where are you located at?

Chicago Skirmish Wargames club. Join us for some friendly, casual gaming in the Windy City.
http://chicagoskirmishwargames.com/blog/


My Project Log, mostly revolving around custom "Toybashed" terrain.
http://www.dakkadakka.com/dakkaforum/posts/list/651712.page

Visit the Chicago Valley Railroad!
https://chicagovalleyrailroad.blogspot.com 
   
Made in us
Resentful Grot With a Plan


AL

Well, I got my two Plano cases tonight; also at local Wallmart. I'll post pics when I start building. Thanks for the tut!

   
Made in us
Powerful Orc Big'Un


Somewhere in the steamy jungles of the south...

Love the tutorial, nice and cheap, blah blah blah, but oh my gosh! I noticed your Lego pieces in one of your photos! So cool to find another Lego fanatic on here. Where can i find piccies of your Lego creations?

Cheers!
_Tim?

   
Made in us
Sinister Chaos Marine


Norfolk, VA

Great tutorial. I am adding another company of marines to my collection and this will solve the storage/transport problem thanks.

It is easier to extinguish the light within, than to dispell the darkness that surrounds without
DR:70S+++G+++M++B+++I+Pw40k88/f#-D+++A++++/fWD120R++++T(Pic)DM+


Made in us
Brigadier General


Chicago

JBW wrote:Well, I got my two Plano cases tonight; also at local Wallmart. I'll post pics when I start building. Thanks for the tut!

Glad to be of help. I'd love to see pics of what you come up with.

Some_Call_Me_Tim? wrote:Love the tutorial, nice and cheap, blah blah blah, but oh my gosh! I noticed your Lego pieces in one of your photos! So cool to find another Lego fanatic on here. Where can i find piccies of your Lego creations?
Cheers!
_Tim?

Hey Tim, glad to find that you're a LEGO fan.
Links to threads and pics concerning the MOC's I've made for "Brickington" my module for the Northern Illinois LEGO Train Club is here:
http://www.eurobricks.com/forum/index.php?showtopic=43402&st=0&p=762584&hl=Brickington&fromsearch=1&#entry762584
You can find pics of most of my stuff here:
http://www.brickshelf.com/cgi-bin/gallery.cgi?m=eilif

Prophet40k wrote:Great tutorial. I am adding another company of marines to my collection and this will solve the storage/transport problem thanks.

Thanks! Glad to be of help.


A very important updates to this tutorial! UPDATED AGAIN 5/7/2012

1) I'm having mixed results with Elmers Spray adhesive. Some of the trays are very sturdy and some separate if pulled on. While visting my parents, I told my dad about this probalem and he gave me PlioBond, a rubbery contact adhesive. Pliobond worked well, but stinks to high heaven so I switched to regular DAP Contact Cement. http://www.dap.com/product_details.aspx?product_id=35 which is quite inexpensive and if used correctly (apply both sides, let dry a bit and then attach) it is absolutely bombproof . Also, when it dries it dries smooth and not at all tacky and the solvent smell goes away in a couple days. If you applying it liberally all over the base sheet there's no danger of it sticking to the bases of your minis.
Look for this product at your hardware store:

This message was edited 4 times. Last update was at 2012/05/07 20:28:21


Chicago Skirmish Wargames club. Join us for some friendly, casual gaming in the Windy City.
http://chicagoskirmishwargames.com/blog/


My Project Log, mostly revolving around custom "Toybashed" terrain.
http://www.dakkadakka.com/dakkaforum/posts/list/651712.page

Visit the Chicago Valley Railroad!
https://chicagovalleyrailroad.blogspot.com 
   
Made in us
Elite Tyranid Warrior


East TN

For everyone new to foam cutting try this an electric carving or electric fillet knife. Like you would use to carve turkeys at thanksgiving or when cleaning fish. These are as cheap as 20$ us prolly even cheaper if you look around a bit. I have made 2 different cases out of standard size footlockers, so i have cut an enormous amount of foam. These knives are fantastic for straight line cuts.

31,600 points
38750 points before upgrades
My hobby blog http://warfrog.blogspot.com/ 
   
Made in us
Resentful Grot With a Plan


AL

Eilif wrote:
JBW wrote:Well, I got my two Plano cases tonight; also at local Wallmart. I'll post pics when I start building. Thanks for the tut!

Glad to be of help. I'd love to see pics of what you come up with.
It might be a month or so. I'm looking at fitting 3 Stormravens, 2 DC Dreads, and about 31 DC models. While I have purchased two cases, do you forsee me fitting all that into one? I haven't actually opened the SR kit yet. (thought they were between a LR and a Pred). Thanks for the insight!

   
Made in us
Sinewy Scourge


Murfreesboro, TN

Any advice for making spaces to fit space marine bikes?

"I'm not much for prejudice, I prefer to judge people by whats inside, and how much fun it is to get to those insides." - Unknown Haemonculi 
   
Made in us
Brigadier General


Chicago

gardeth wrote:Any advice for making spaces to fit space marine bikes?

I'd go with two large circles joined by cutting out the foam in between. Sort of a larger version of what I did with the rectangle based Autocannons in the blurry IG infantry tray above.

This message was edited 1 time. Last update was at 2011/05/18 22:04:31


Chicago Skirmish Wargames club. Join us for some friendly, casual gaming in the Windy City.
http://chicagoskirmishwargames.com/blog/


My Project Log, mostly revolving around custom "Toybashed" terrain.
http://www.dakkadakka.com/dakkaforum/posts/list/651712.page

Visit the Chicago Valley Railroad!
https://chicagovalleyrailroad.blogspot.com 
   
Made in us
Strangely Beautiful Daemonette of Slaanesh


Tucson az

Great tutorial. Plan to mod my case this weekend.
   
Made in us
Regular Dakkanaut


Excellent tut! I've got three of these cases and wasn't sure how to make them work. This seems to be it though. Thanks.
   
Made in za
Land Raider Pilot on Cruise Control


Utapau

Great tutorial, thanks!

I'm just worried about several of my models, which are elaborately-positioned terminators etc. and I don't know whether the above approach will be better for this than the standard citadel case and its "lay models horizontally" approach, which wouldn't be difficult to DIY either...

I'm just wondering if anyone knows which approach will be less susceptible to miniature "break-off"...

~1200
DT:90-S+G++M---B--I+Pw40k10+D+A+/mWD372R+T(D)DM+ 
   
Made in us
Storm Trooper with Maglight


The only real problem I could see with this idea is someone thinking that you're carrying a gun.

This message was edited 1 time. Last update was at 2012/05/01 15:33:05


3200 points > 5400 points
2500 points 
   
Made in us
Brigadier General


Chicago

I wouldn't worry too much about it. The Plano 1401 is a rectangular case similar to those used for cameras, microphones, and other fragile equipment. It's even sold by Plano in some areas with labels that make no mention of pistols and instead call it an accessory case or a Reel Case.

The real danger is that someone may steal it thinking somethign vaulable is in there. Don't ever leave it visible in your car and walk away.

Now if you choose a rifle case to store your minis, that's a whole different matter.

Chicago Skirmish Wargames club. Join us for some friendly, casual gaming in the Windy City.
http://chicagoskirmishwargames.com/blog/


My Project Log, mostly revolving around custom "Toybashed" terrain.
http://www.dakkadakka.com/dakkaforum/posts/list/651712.page

Visit the Chicago Valley Railroad!
https://chicagovalleyrailroad.blogspot.com 
   
Made in us
Brigadier General


Chicago

Sam__theRelentless wrote:Great tutorial, thanks!

I'm just worried about several of my models, which are elaborately-positioned terminators etc. and I don't know whether the above approach will be better for this than the standard citadel case and its "lay models horizontally" approach, which wouldn't be difficult to DIY either...

I'm just wondering if anyone knows which approach will be less susceptible to miniature "break-off"...


Either means of storage is fine if you can find a way to make the models sit so they are not leaning on the small parts that extend from them. If using my meathod above, the best way is to work with several size hole cutters and pick one that holds the model firmly, and doesn't allow too much jostling.

If lying them flat, I would advise taking little pieces of scrap or blister foam and gluing them in the compartments you use in such a way as to support the main sections of the model so the delicate parts won't be flailing about or supporting the weight of the model in transit.

Hope this helps.

Chicago Skirmish Wargames club. Join us for some friendly, casual gaming in the Windy City.
http://chicagoskirmishwargames.com/blog/


My Project Log, mostly revolving around custom "Toybashed" terrain.
http://www.dakkadakka.com/dakkaforum/posts/list/651712.page

Visit the Chicago Valley Railroad!
https://chicagovalleyrailroad.blogspot.com 
   
Made in za
Land Raider Pilot on Cruise Control


Utapau

Yes it does, thanks. I have yet to think about which to use put at least now I know how to fix my potential problem. Thanks

~1200
DT:90-S+G++M---B--I+Pw40k10+D+A+/mWD372R+T(D)DM+ 
   
Made in us
Sneaky Kommando


USA

Congratulations, sir. You win the internet.

"Get 'em boyz!
Dakka dakka dakka!
WAAAGH! THE ORKS!
WAAAGH!!"
-Rotgob, Ork strategist  
   
Made in us
Brigadier General


Chicago

Thanks, I think. I can't see the pic though.

What did I do to deserve such an honor...

Chicago Skirmish Wargames club. Join us for some friendly, casual gaming in the Windy City.
http://chicagoskirmishwargames.com/blog/


My Project Log, mostly revolving around custom "Toybashed" terrain.
http://www.dakkadakka.com/dakkaforum/posts/list/651712.page

Visit the Chicago Valley Railroad!
https://chicagovalleyrailroad.blogspot.com 
   
Made in us
Fresh-Faced New User


Ultrafool wrote:Great Tut! I have a plano gun case (got it at wallyworld for ten bucks) Mine came with two interlocking eggcrate foam that I glued together and use to hold two rhinos, two baal preds, a land raider, and a dreadnought. Then used the pluck n pick to make 50 slots for marines and still have enough space for another foam sheet.


Question? Is the bottom tray, the pluck foam one IIRC, removable? It would be great if it is. I saw these at my local Walmart as well but wifey was rushing me so I didnt really have time to look at them
   
Made in us
Brigadier General


Chicago

Shasta Hawk wrote:
Ultrafool wrote:Great Tut! I have a plano gun case (got it at wallyworld for ten bucks) Mine came with two interlocking eggcrate foam that I glued together and use to hold two rhinos, two baal preds, a land raider, and a dreadnought. Then used the pluck n pick to make 50 slots for marines and still have enough space for another foam sheet.


Question? Is the bottom tray, the pluck foam one IIRC, removable? It would be great if it is. I saw these at my local Walmart as well but wifey was rushing me so I didnt really have time to look at them


Yep. all the trays are removable. Just cut/pull your shapes, glue on a piece of funky foam for a base and you've got a tray.

Remember though it's a good idea to cut off the tabs of the tray that extend along the handle and trim the sides just a bit. Otherwise it is very hard to get the a tray stiffened with funky foam out, because the case tapers slightly toward the bottom. The bottom tray of my armor case (made from two bottom pluck sheets) is very difficult to get out because I didn't trim it down at all.

Chicago Skirmish Wargames club. Join us for some friendly, casual gaming in the Windy City.
http://chicagoskirmishwargames.com/blog/


My Project Log, mostly revolving around custom "Toybashed" terrain.
http://www.dakkadakka.com/dakkaforum/posts/list/651712.page

Visit the Chicago Valley Railroad!
https://chicagovalleyrailroad.blogspot.com 
   
Made in us
Regular Dakkanaut


love it

Monster Rain wrote: Don't be so neurotic about your lil' space manz.[/quote 
   
Made in us
Brigadier General


Chicago

Just finished 2 cases for my 10mm sci-fi. These cases hold my army of rebased mechwarrior figures. These are not battletech figs, they're the 10mm (N scale) clix game figs that have been removed from their bases and mounted on wargaming bases. A few of my club members have done the same thing and we use these figures for playing Mech Attack ( http://armorgridgames.blogspot.com/2010/03/armor-grid-mech-attack.html ) and Future War Commander ( http://www.blitzkrieg-commander.com/default.aspx?Area=FWC )

The first is made from the same Plano 1404 style as I used last time.


First tray for my largest mechs. One layer of eggshell with cutouts made with my hobby knife, glued to a layer of 3mm funky foam for a base. By a lucky coincidence,the eggshell foam is just a bit taller than the depth of the 45mm hex bases.


The second layer is two layers of eggshell. Interlocked. My largest cutter isn't very deep so I interlocked them and cut through the first layer and slightly into the second, then I pulled away the first layer and finished the cut. After all cuts were made, the two layers were glued together and a base of funky foam was attached to the botom.


This was the first time using my largest sharpened-copper-fitting-foam-cutter which is about 2.25 inches in diameter.


This left me just enough room to hot glue some foam scraps to the bottom of the case to make some trenches for storing the flattest of my ground vehicles.


A few notes.
1) This case uses 3 eggshell foam pieces. The plano 1401 comes with 2 eggshell pieces and a pluck piece. I've bought about 6 of these cases, so I've been able to mix the foam around a bit.
2)Pliobond brush on flexible adhesive has proved to be an amazing adhesive and much better than the Elmers spray adhesive used on my earlier cases, however, it gets used up fairly quickly. An 8 dollar 8 oz can has enough for about 2 cases. Before I attached the funky foam bases, I used chalk to trace the outline of the tray foam onto the funky foam. This saved me from alot of wasted Pliobond.
3)Both trays in this case were trimmed down slightly to facilitate easier removal from the case. Otherwise the fit is too tight.

Case 2.
This is a case I picked up at a game store auction for about 2 bucks. I was later told it was a D&D case, but it came with no foam.


The top layer holds all my infantry upside down. I have marked them on the bottom with type and color


For those unfamiliar with Mechwarrior, here's what the infantry look like when right side up.


The bottom of the case holds the rest of my vehicles. A piece of funky foam at the top of the case provides just enough pressure to hold everything in place without damaging any vehicles.


There you have it. A full storage solution for a 10mm sci-fi army!

Chicago Skirmish Wargames club. Join us for some friendly, casual gaming in the Windy City.
http://chicagoskirmishwargames.com/blog/


My Project Log, mostly revolving around custom "Toybashed" terrain.
http://www.dakkadakka.com/dakkaforum/posts/list/651712.page

Visit the Chicago Valley Railroad!
https://chicagovalleyrailroad.blogspot.com 
   
Made in us
Hungry Little Ripper


So I was wondering - for those of us who don't have or have access to a dremel, what would be the best possible way to sharpen the copper fittings? also, which dremel bit would be the best use for sharpening these fittings?

DQ:90S+GM--B--IPw40k11#+D+++A+/wWD-R++T(M)DM+ 
   
 
Forum Index » Painting & Modeling Tutorials
Go to: