76303
Post by: Warboss_Waaazag
I'm very glad you're finding my tutorials helpful Knightley. Thanks for the feedback!
76303
Post by: Warboss_Waaazag
Try as I might, I simply could not get these images to load right side up. Anyway, here's a brief update for the modular sidewalks I'm making. I bought a package of these little wooden rectangles:
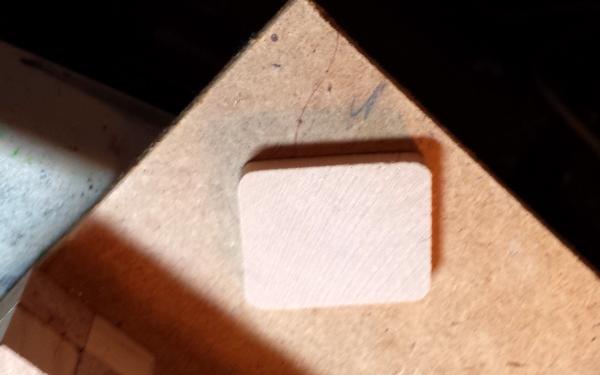
And added them to the preexisting model. Turns out they fit perfectly in the gaps I had left to fill:
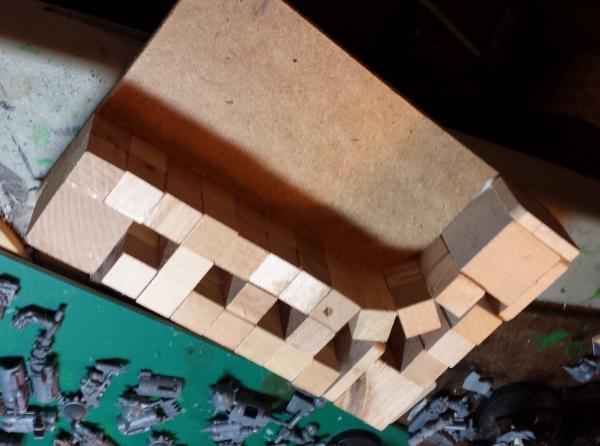 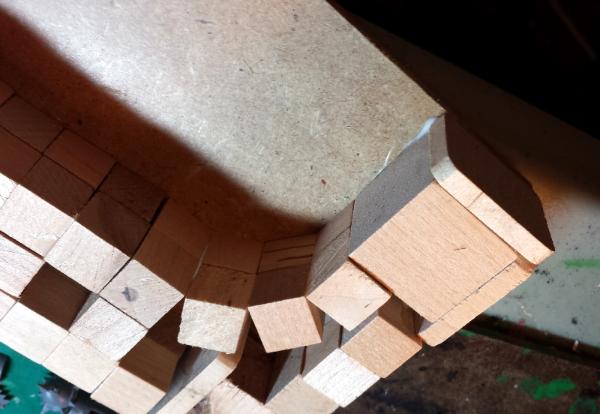
Just pretend we're in space and you're looking at my terrain from above because of Zero G and everything will seem normal. Thanks for looking! Have an awesome day (in space).
76303
Post by: Warboss_Waaazag
76303
Post by: Warboss_Waaazag
76303
Post by: Warboss_Waaazag
68152
Post by: JoeRugby
Looking good dude 
72556
Post by: Red Harvest
I like the scrubby plants. Very desert-ish. I'll need to borrow the idea. 
62749
Post by: Dr H
Nice work on the stairs and the rocky / muddy ground. 
Nice use of the trees. I wonder which way the wind blows around there... 
Could probably use some smaller bits of vegetation around those trees though, but that's me.
10972
Post by: Ruglud
Gorgeous work on the rocks - very realistic...
76303
Post by: Warboss_Waaazag
Thanks very much, JoeRugby.
 Red Harvest wrote: Red Harvest wrote:I like the scrubby plants. Very desert-ish. I'll need to borrow the idea. 
More than welcome to, Red.
 Dr H wrote: Dr H wrote:Nice work on the stairs and the rocky / muddy ground. 
Nice use of the trees. I wonder which way the wind blows around there... 
Could probably use some smaller bits of vegetation around those trees though, but that's me.
Thanks, Dr H! There's yet more work to do and I agree more vegetation will look better. Some scrubby plants of some sort I think.
Thanks, Ruglud!
Thanks for all the feedback folks. More photos of more stuff soon!
76303
Post by: Warboss_Waaazag
85471
Post by: Grag
Those are looking fantastic  , are they going to be bright colours or more earthy? I like the fact that some of them seem to have love heart shaped bases. 
89231
Post by: ckig
Some funky looking trees. Very alien. Looks good!
76303
Post by: Warboss_Waaazag
 Grag wrote: Grag wrote:Those are looking fantastic  , are they going to be bright colours or more earthy? I like the fact that some of them seem to have love heart shaped bases. 
Thanks, Grag! Yep, they totally do have heart shaped bases! I haven't really decided on a color scheme yet. It will probably be a mix of vibrant and earthy, though. Automatically Appended Next Post:  ckig wrote: ckig wrote:Some funky looking trees. Very alien. Looks good!
Thanks very much ckig! More photos up soon.
76303
Post by: Warboss_Waaazag
76303
Post by: Warboss_Waaazag
79341
Post by: kenderthistle
very good work! will be the same on some ideas ! Could you help with an idea for - mushrooms. forest mushrooms.(очень хорошие работы! буду равнятся на некоторые идеи! не могли бы вы, помочь с идеей для - грибов. лес грибов.)
sorry for my english . automatic translator .
68152
Post by: JoeRugby
How are the spires n crags going?
How many plants bases are you up to? Look forward to seeing some pics of the collections set up as a table 
62749
Post by: Dr H
Good to see more terrain happening over here. Welcome back.
76303
Post by: Warboss_Waaazag
Thanks for the feedback everyone! It's great to be back. I'm going up to the place where I'm building the rocks and spires on Wednesday so there will be updates in a few days. I'll definitely put a tutorial up for forest mushrooms. Can you elaborate on your idea, kenderthistle?
Automatically Appended Next Post:
 kenderthistle wrote: kenderthistle wrote:very good work! will be the same on some ideas ! Could you help with an idea for - mushrooms. forest mushrooms.(очень хорошие работы! буду равнятся на некоторые идеи! не могли бы вы, помочь с идеей для - грибов. лес грибов.)
sorry for my english . automatic translator .
Спасибо вам большое, kenderthistle. Ваша идея лесных грибов - Вы имеете в виду, как маленькие грибы поганки, что можно найти в лесу или вы имеете в виду, как гигантские грибы, как высокий, как дерево. Лес грибами или лесными грибами? Кроме того, извините за мой русский. Я использовал Google Translate.
79341
Post by: kenderthistle
хочется все варианты. грибы высотой как дерево. маленькие грибы, которые растут на грунте. грибы паразиты, которые растут на деревьях. комнатные растения в горшочках
я нарисовал несколько скетчей. но орки любят награбленные идеи .
хочу сделать грядку грибов. и прикрепить плакат " ясли ". в русском языке есть фразеологизм - Дети - цветы жизни.
вариант для моих орков и гротов - Дети - грибы жизни!
want all the options. mushrooms tall as a tree. small mushrooms that grow on the ground. fungi parasites that grow on trees. houseplants in pots
I drew a few sketches. but like orcs looted ideas.
I want to make a bed of mushrooms. and attach the poster "nursery". In Russian there phraseologism(idiome) - Children - flowers of life
option for my orcs and grottoes - Children - mushrooms life!
любимец моего БигМека - гриб по имени "Игорь". my darling BigMek - mushroom named "Igor".
 
67097
Post by: angelofvengeance
Some really alien looking scenery coming out here 'Zag 
Nice work. Have any tutorials for these?
76303
Post by: Warboss_Waaazag
72556
Post by: Red Harvest
Perfect alien world plant life. I'll have to make a few sometime. Maybe give a few a cactus like quality...
But leaving the stickers on the bases like that... It would drive me nuts not to remove them. I salute you for having the strength to do it 
76303
Post by: Warboss_Waaazag
The stickers don't come off easily and I work on hundreds of pieces simultaneously. It's an extra and utterly unnecessary step. They will be covered by hotglue, paint, sand, and everything else in the final product anyway. To take the time to remove them is meaningless.
76303
Post by: Warboss_Waaazag
2326
Post by: shasolenzabi
Those are wild alien trees
65595
Post by: Camkierhi
Great tutorial.
Like everyone else I love your alien forest landscape.
Did we ever get a table top shot of a forest? I think it would be spectacular.
68152
Post by: JoeRugby
Another vote for a table shot here.
76303
Post by: Warboss_Waaazag
 Camkierhi wrote: Camkierhi wrote:Great tutorial.
Like everyone else I love your alien forest landscape.
Did we ever get a table top shot of a forest? I think it would be spectacular.
I wish I could guys, but I've sold most of my creations. However, next Thursday I'm going to that store I'm doing the crag table commission at and I'll bring what I have. They have tables there and I'll get something akin to a table shot that way. Thanks for the high praise!
76303
Post by: Warboss_Waaazag
68152
Post by: JoeRugby
A great bit of recycling there.
What's the big building going to be in the end? The doors halfway up are throwing me, otherwise I would have said an admin building.
if you want to save having to put in so many pins in, I found putting the pins in at 45 degree angles kept my joints really well with just a few pins.
76303
Post by: Warboss_Waaazag
 JoeRugby wrote: JoeRugby wrote:A great bit of recycling there.
What's the big building going to be in the end? The doors halfway up are throwing me, otherwise I would have said an admin building.
I'm hoping to build a staircase up the back of the giant rock that leads to a balcony that reaches the upper story door. I thought the building would be administrative as well and because I'm not detailing the interior I wanted to make the exterior more than just a giant line of sight blocker. In other words balconies, walkways, and dynamic roofs.
76303
Post by: Warboss_Waaazag
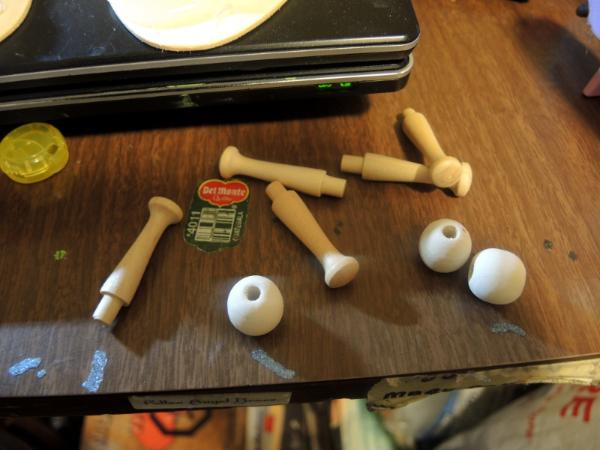
Next up are what I'm calling " pom trees". I started with some wooden silhouette shapes, some packing styrofoam, some wooden beads, and some wooden drawer pegs. Except for the styrfoam, one can find all of these materials in a local craft store or online relatively easily.
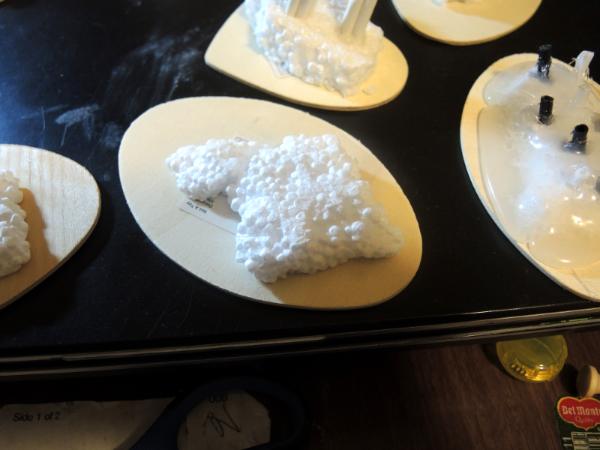
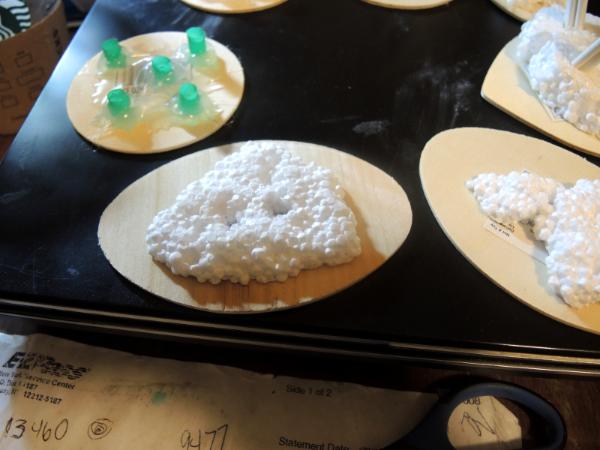
After white gluing the styrofoam to the silhouette, i dug a few divots into the it and hot glued the drawer pegs into them:
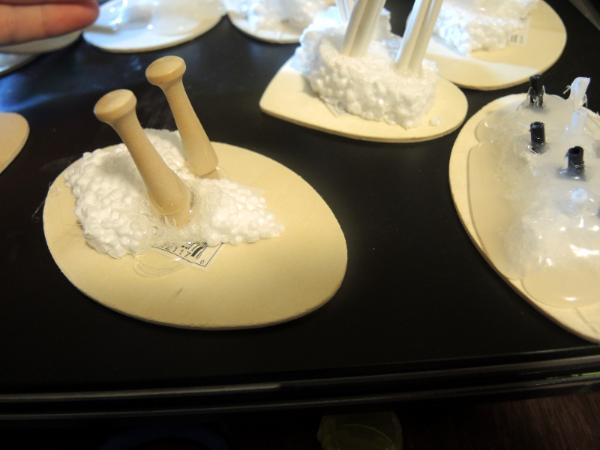
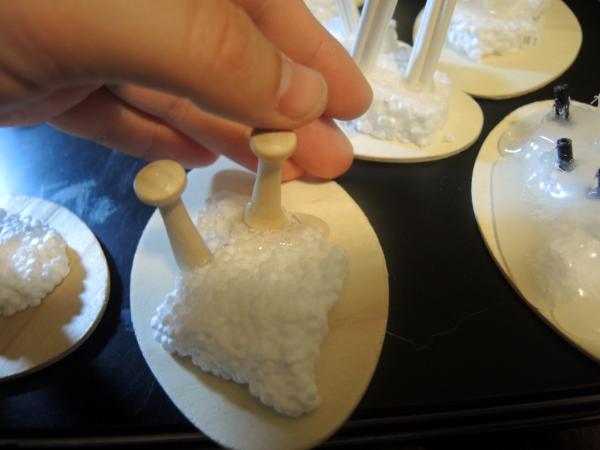
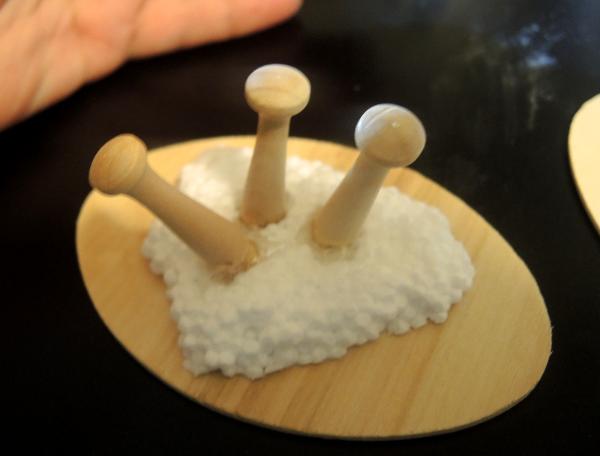
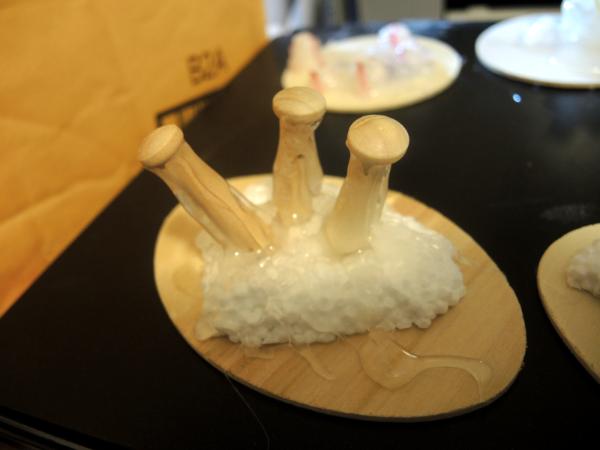
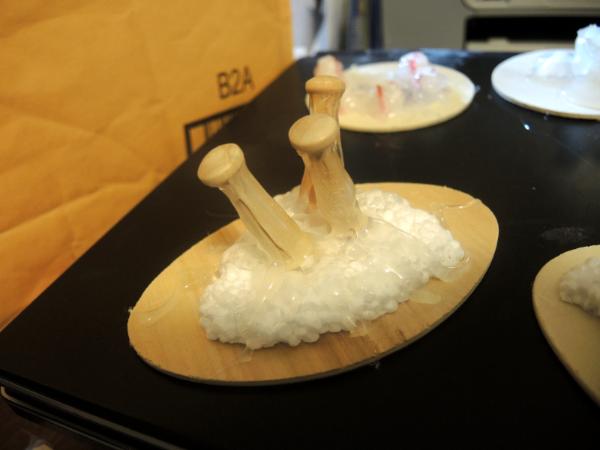
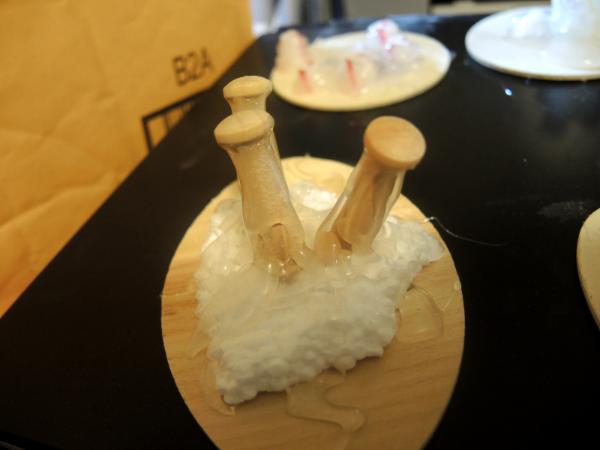
Sometimes you have to hold them in place at the angle you want until the hot glue cools enough that it will stand on its own. Once in place, I reinforced the join with more hot glue and then created a loose stripey pattern on the "stems" of the drawer pegs and some roots across the foam and base:
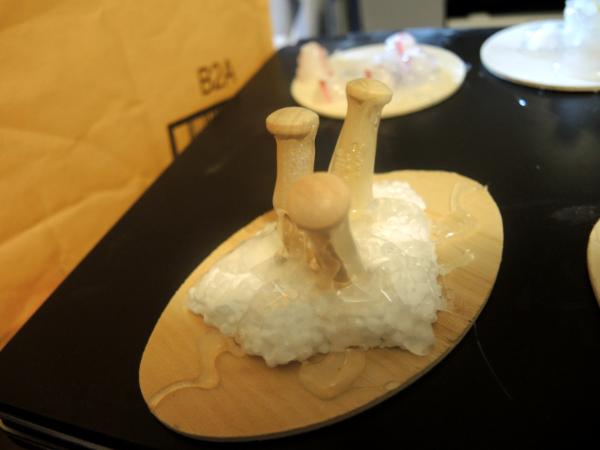
Then I put a dollop of hot glue on the tops of the pegs and glued on the wooden beads:
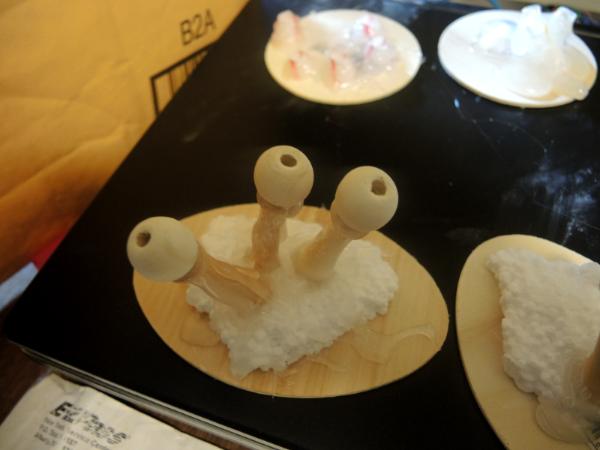
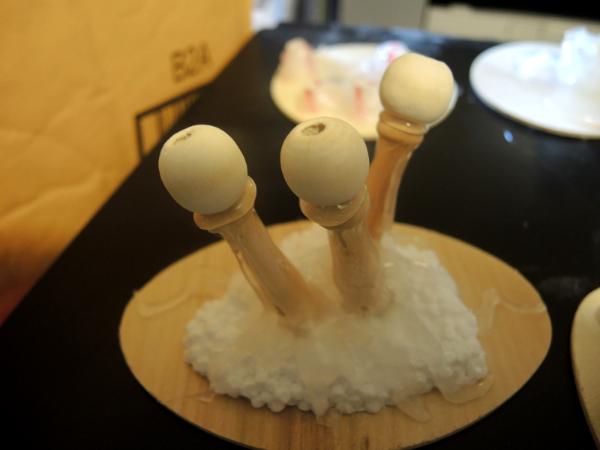
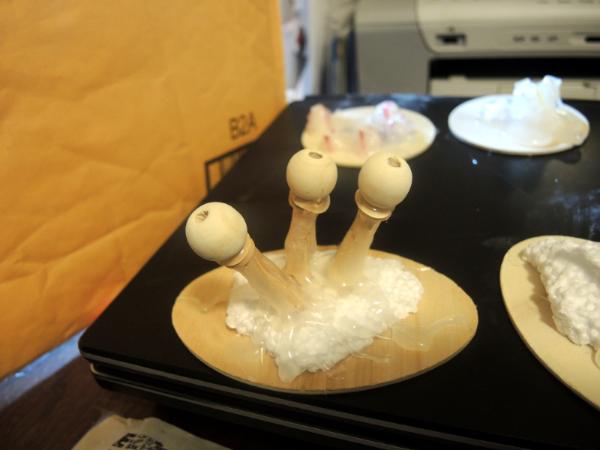
Once everything was cool I coated the entire piece with a liberal coating of sand texture gel and white glued craft sand & some small stones to the base:
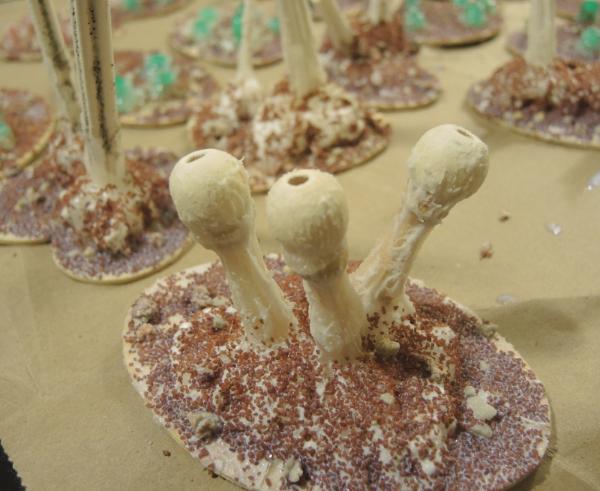
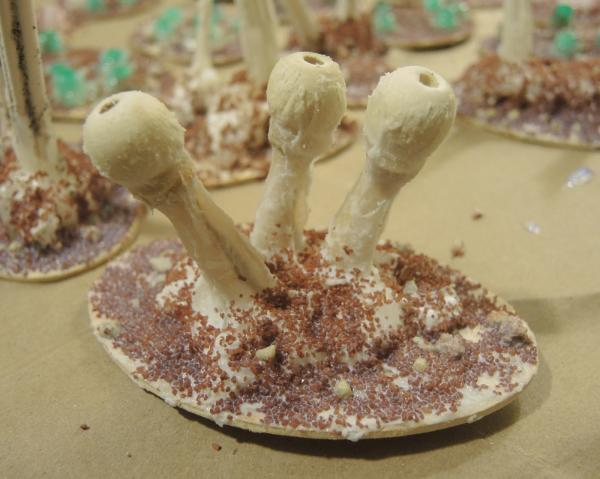
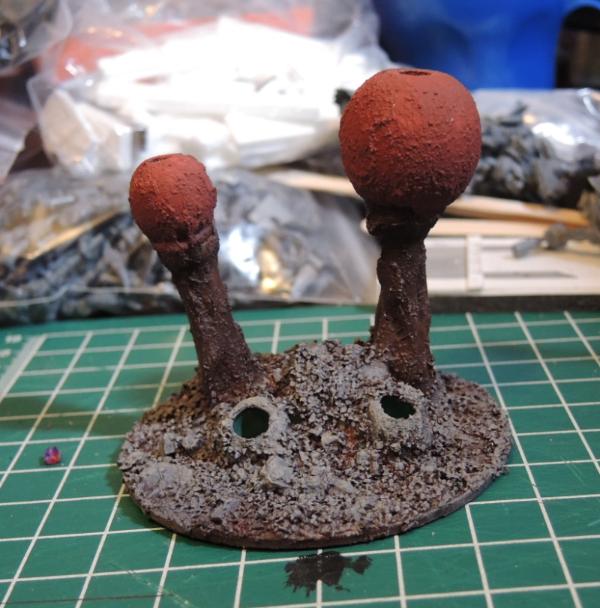
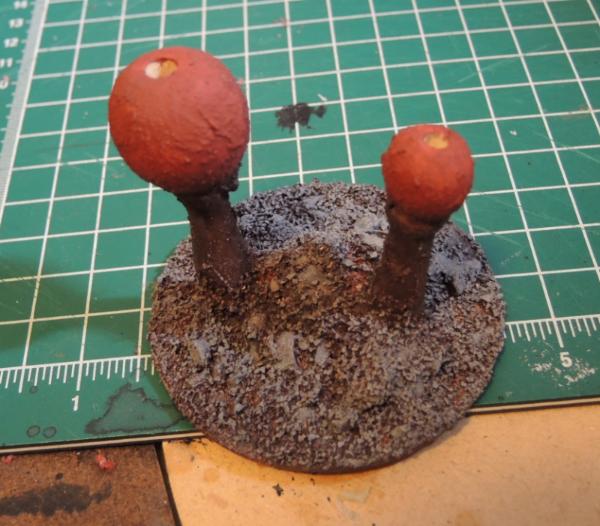
After the sand and gel texture dried, I went back and gave it a coat of watered down white glue to seal the sand and rocks in place. Then I painted them (as you can see, on some of the bases I also added some straw-holes for variety). These aren't at their final color highlight, but I'll save that for the end:
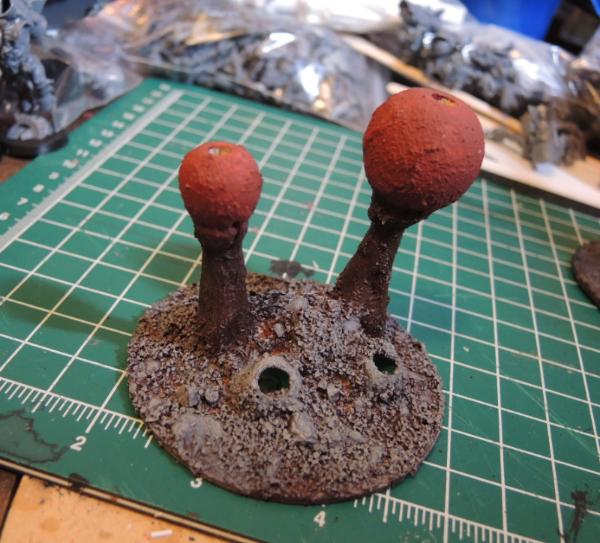
Next, I took 2 varieties of fake flower head and butchered them for parts:
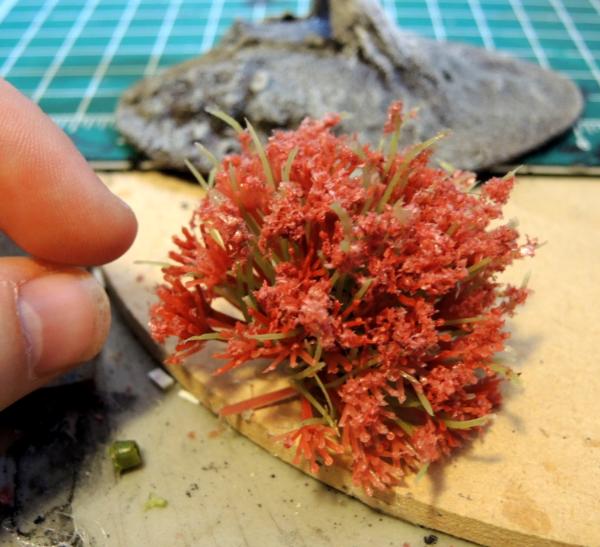
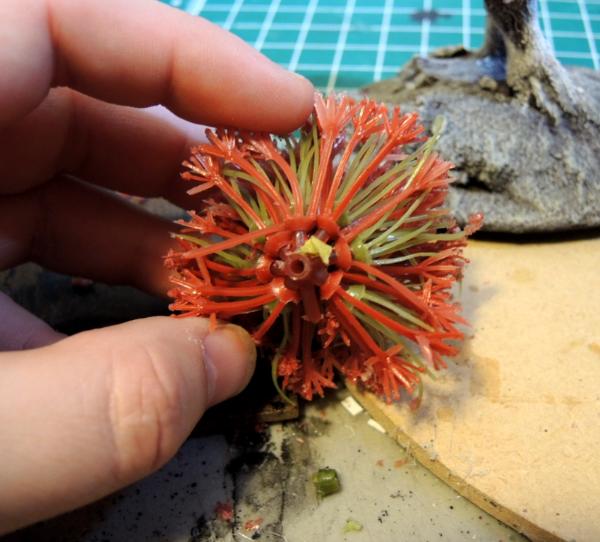
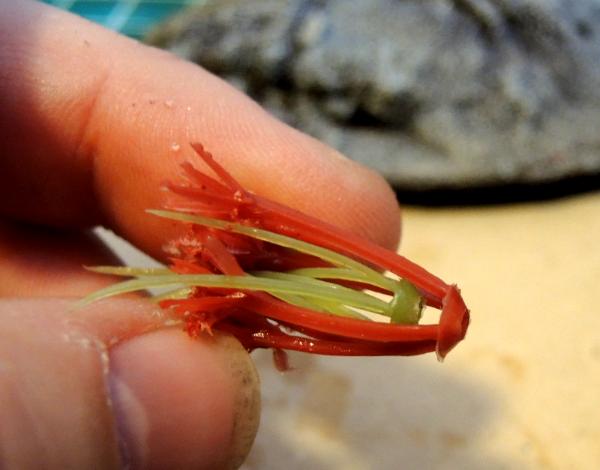
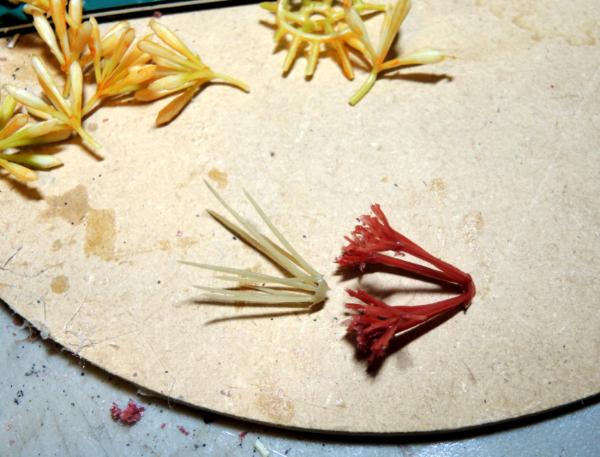
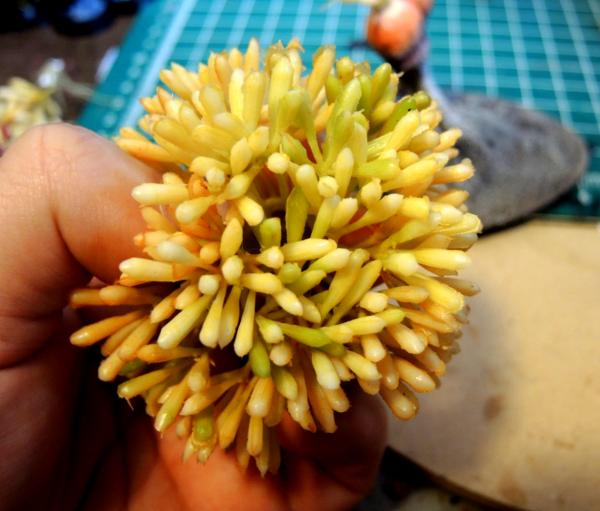
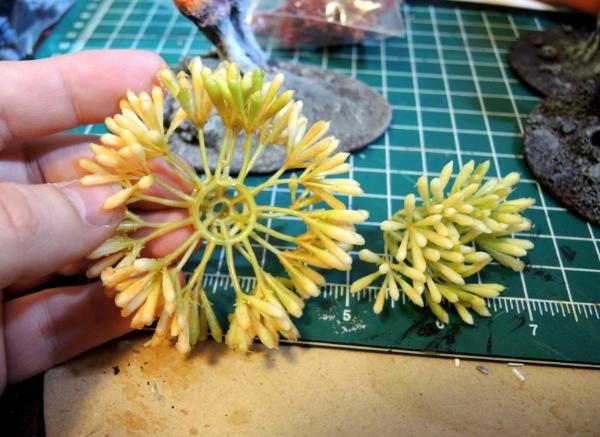
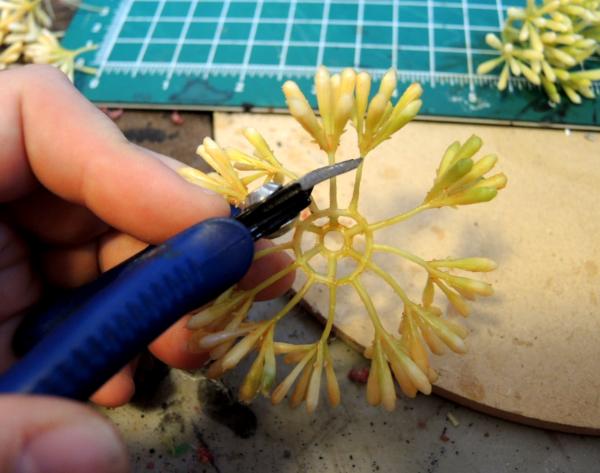
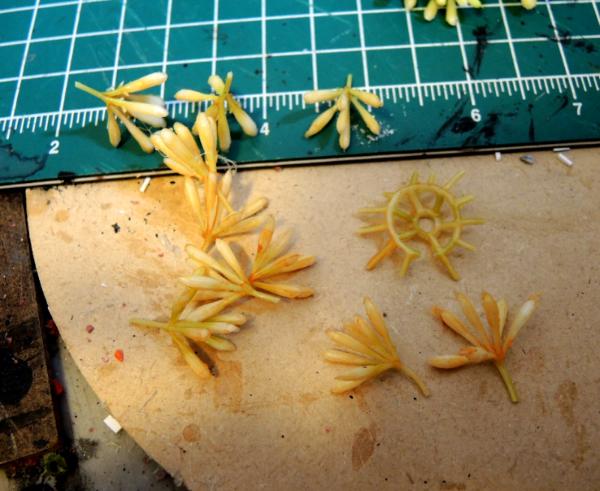
Then combined them for effect:
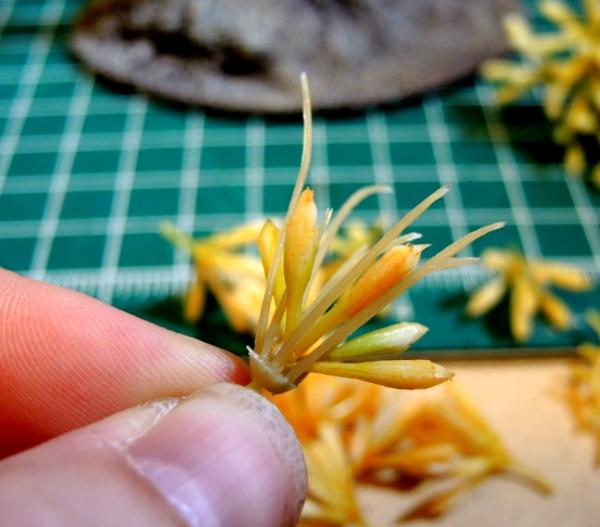
Dry-fitted them:
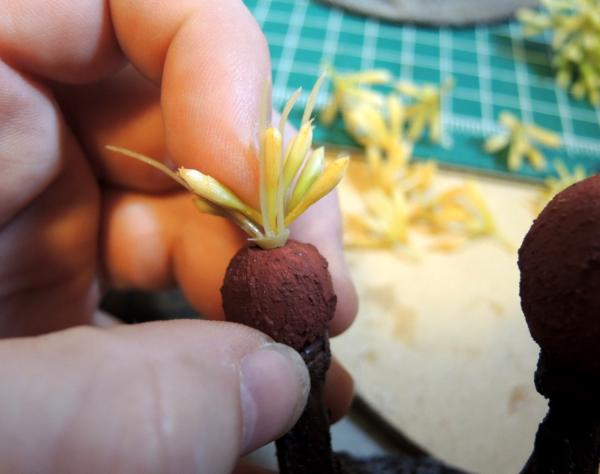
And finally finished painting the Pom Trees and hotglued the fake plant bits into the beads' top holes:
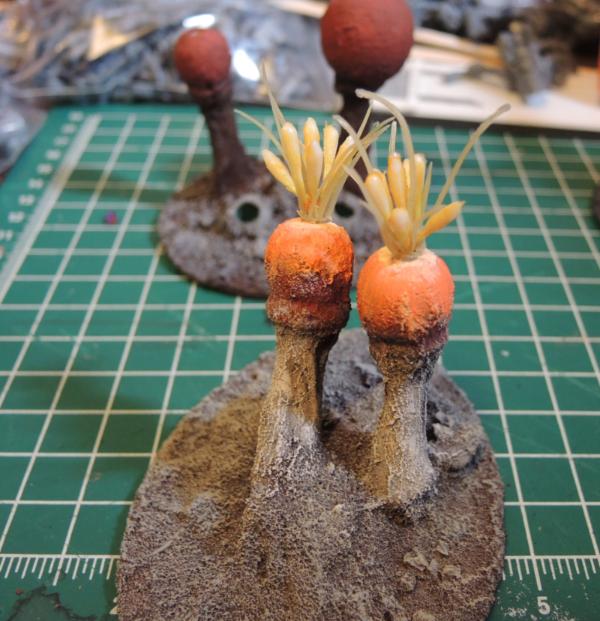
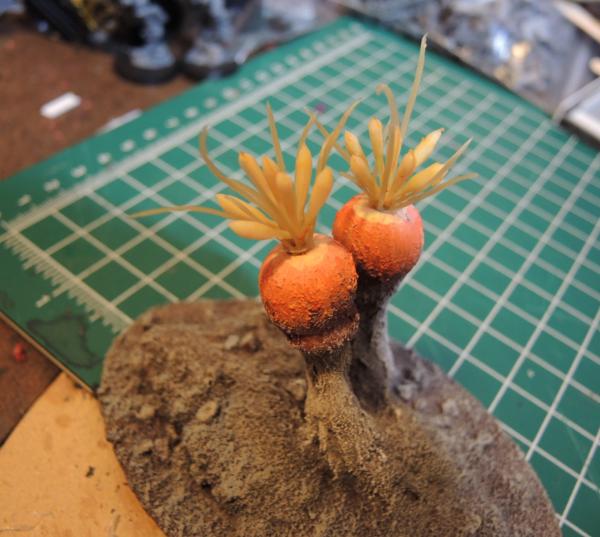
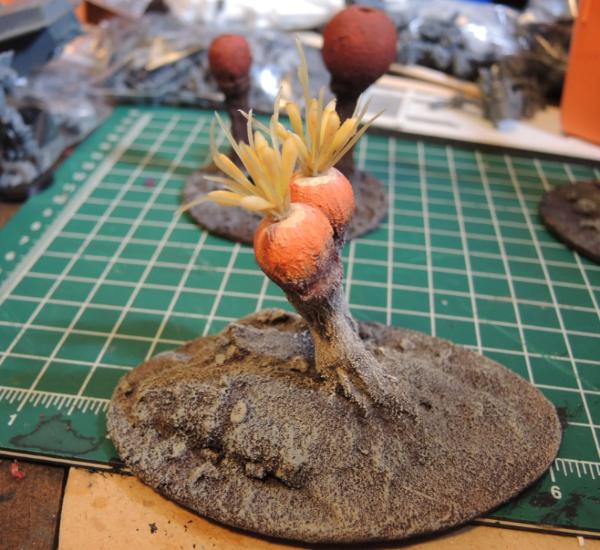
Tada! Pom Trees:
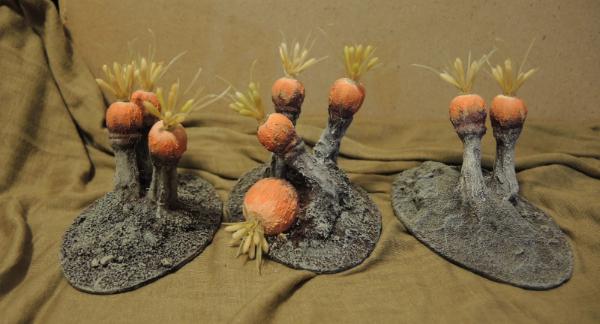
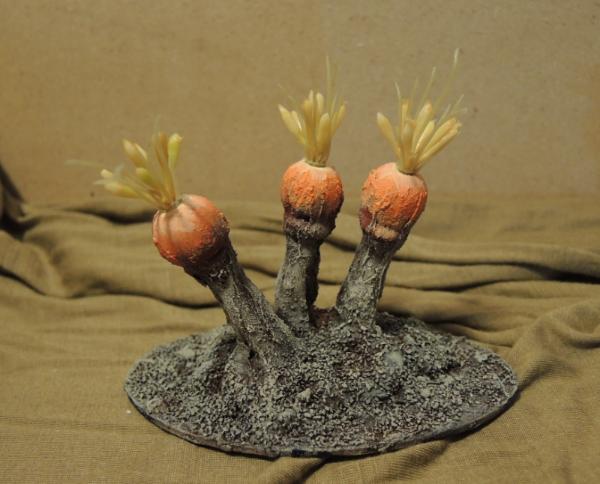
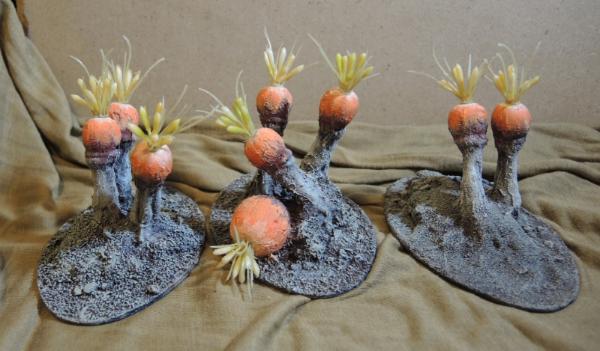
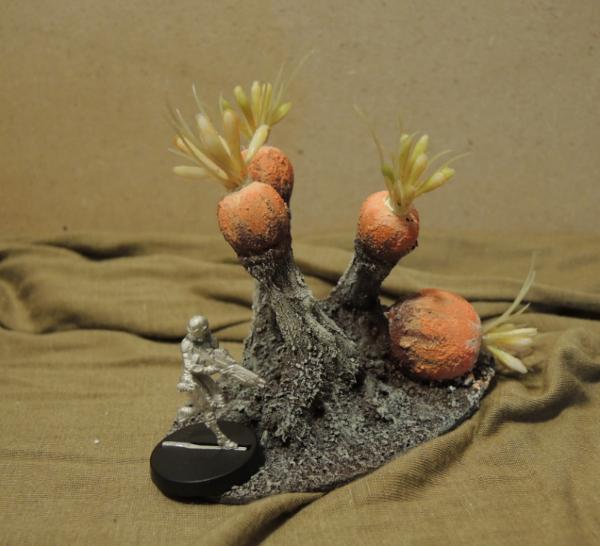
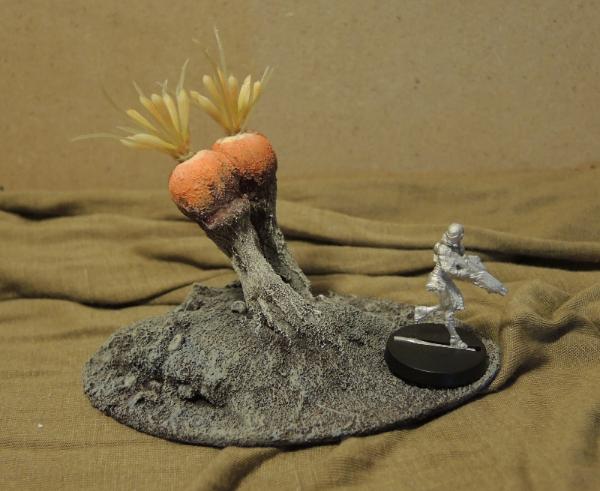
Thanks for looking. Have an awesome day! C&C always welcome.
75552
Post by: MagosBiff90
from the humble origins of where these pieces start off... the end result is truly believable! Really cool looking but truly alien... 
62749
Post by: Dr H
You are single-handedly convincing me I need to get a hot-glue gun.
Good work. All looking great. 
Do you make much profit on selling these (if you don't mind me asking)? I'm seeing something similar in scale in my future.
Liking the enclosed industrial building too. Good idea to use the inside. 
76303
Post by: Warboss_Waaazag
 Dr H wrote: Dr H wrote:You are single-handedly convincing me I need to get a hot-glue gun.
Good work. All looking great. 
Thanks! [Also, I own 4 hot glue guns]
Do you make much profit on selling these (if you don't mind me asking)? I'm seeing something similar in scale in my future.
They don't sell often, but when someone does buy them they turn out quite a handsome profit. The materials per base cost me about $2 or $3, although when I buy materials I buy in bulk and when I build terrain, I build in bulk. I sell them in lots of three bases for around $30, so I make about $20 profit for every 3 I sell. I'm starting to make rubber molds and plastic casts, which will reduce the time it takes to make pieces, if not the cost. It can be a slim margin of gain if you aren't mass producing product. Automatically Appended Next Post:  MagosBiff90 wrote: MagosBiff90 wrote:from the humble origins of where these pieces start off... the end result is truly believable! Really cool looking but truly alien... 
Thanks very much, MagosBiff90!
84656
Post by: nflagey
Amazing trees!!!
76303
Post by: Warboss_Waaazag
84656
Post by: nflagey
Are those all done with foam?
Look really great ... and since I have a square foot of such foam lying around, I may steal your idea 
76303
Post by: Warboss_Waaazag
 nflagey wrote: nflagey wrote:Are those all done with foam?
Look really great ... and since I have a square foot of such foam lying around, I may steal your idea 
Pink insulation foam, yes.
62749
Post by: Dr H
I'll start with one and work up from there. 
Do you make much profit on selling these (if you don't mind me asking)? I'm seeing something similar in scale in my future.
They don't sell often, but when someone does buy them they turn out quite a handsome profit. The materials per base cost me about $2 or $3, although when I buy materials I buy in bulk and when I build terrain, I build in bulk. I sell them in lots of three bases for around $30, so I make about $20 profit for every 3 I sell. I'm starting to make rubber molds and plastic casts, which will reduce the time it takes to make pieces, if not the cost. It can be a slim margin of gain if you aren't mass producing product.
That's not a bad turn around on material. Time is the silent killer of profit, but on the side of the hobby that's not so much of a problem.
Yeah, casting can be good. A large outlay of money to start with, but it does pay for itself and then some. So long as the moulds last, and there's minimal losses to mis-casts or other problems.
Large rock looks good. Like the blue-ness of the rock. 
93291
Post by: Dr.Muchachos
I've always wondered who buys those heart shaped flat pieces of wood and what they use them for. Your use is much cooler than what I always imagined. Great stuff, although I'm really interested to see more of that giant building you've started a few comments up. Casting isn't bad at all once you get quick with the mix...it's the resin. The fumes man they will melt your face off. Either way keep it coming we are all learning a thing or two from you out here.
2326
Post by: shasolenzabi
Still incredible terrain work!
76303
Post by: Warboss_Waaazag
 Dr.Muchachos wrote: Dr.Muchachos wrote:I've always wondered who buys those heart shaped flat pieces of wood and what they use them for. Your use is much cooler than what I always imagined. Great stuff, although I'm really interested to see more of that giant building you've started a few comments up. Casting isn't bad at all once you get quick with the mix...it's the resin. The fumes man they will melt your face off. Either way keep it coming we are all learning a thing or two from you out here.
I'm very glad to be positively affecting the community! Thanks for the feedback, Dr.Muchachos! I'm going back to the site where the giant building is tomorrow, so I should have an update in a few days.
Automatically Appended Next Post:
Cheers, shasolenzabi!
Automatically Appended Next Post:
I buy the miniglueguns. They usually cost about $3-$4 USA, use smaller glue sticks, and are easier to handle. However, they take longer to heat up so I use 4 at a time so I never notice the slack.
Large rock looks good. Like the blue-ness of the rock. 
Thanks!
76303
Post by: Warboss_Waaazag
53843
Post by: Ignatius-Grulgor
Never used the walls inside out before they do work surprisingly well that way round, much more specialised way of filling in the windows too (I usually just glue a big rectangle of plasticard behind them).
Pom trees work really well as a concept, looks properly sci-fi.
76303
Post by: Warboss_Waaazag
 Ignatius-Grulgor wrote: Ignatius-Grulgor wrote:Never used the walls inside out before they do work surprisingly well that way round, much more specialised way of filling in the windows too (I usually just glue a big rectangle of plasticard behind them).
Pom trees work really well as a concept, looks properly sci-fi.
Thanks for the feedback, Ignatius-Grulgor! I should have another update for y'all Sunday or Monday evening.
76303
Post by: Warboss_Waaazag
Just a quick update (because I took so many photos of the stuff I was working on that I need to spread it across a few posts...and I also need to cook dinner tonight). There are quite a few half finished terrain pieces at the store I am working at. They are mostly of an "okay" quality. I have been instructed to make them better. So I started with this piece:
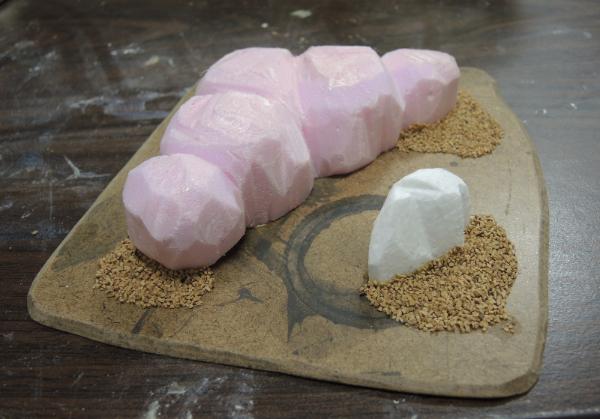
This was the quality and condition I found it in. Foam glued down with a loose smattering of texture. I could go on for hours and pages of text about my arguments against this kind of texturing, but alas the butternut squash is not going to cook itself. A summary would be - don't texture surfaces like this. It looks like you glued some rocks in a clump to a masonite base. After you paint it it will STILL look like you glued a bunch of rocks to a base because the flat masonite where you didn't glue any rocks to is still flat; it's just a different color. Probably the same color as the clump of rocks you glued to the part of the base where they are sitting right now.
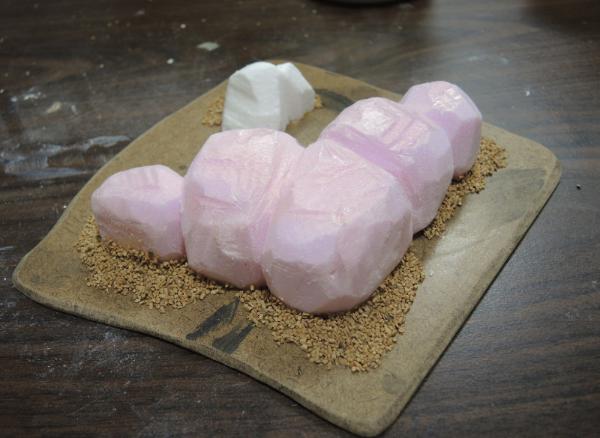
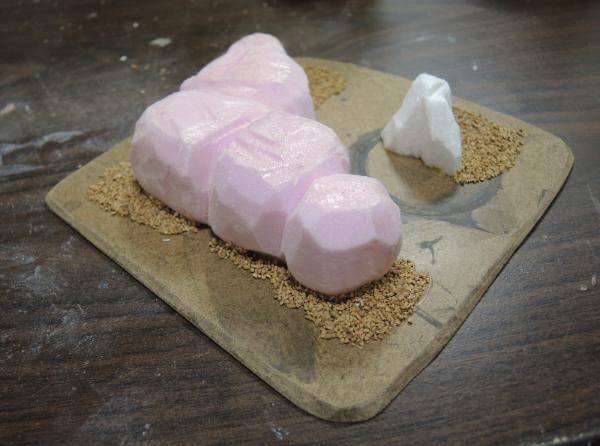
Also, don't use white packing styrofoam. It is too soft to hold up to the rigors of game play, much less the rigors of turning it into terrain. It will get smashed and ruin all your hard work before you are even halfway through, no matter how much glue you slather it with in an attempt to "strengthen" it. It was the first thing I broke off when I got started.
I used this...
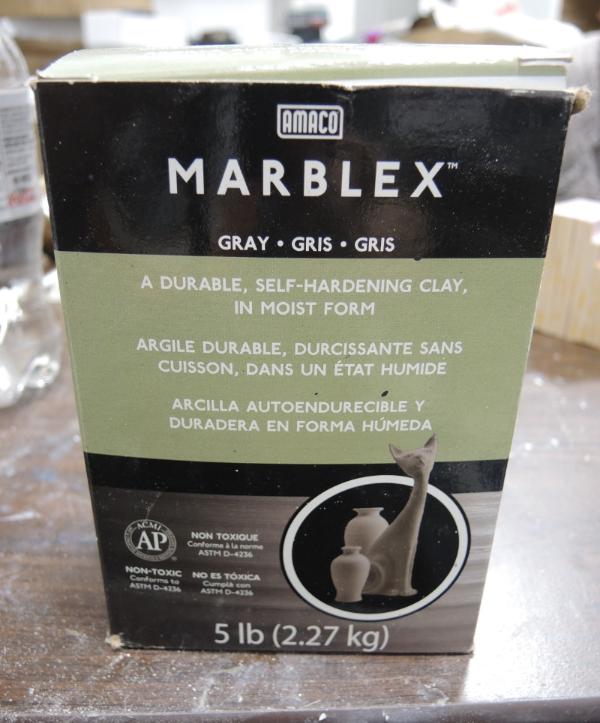
...to hide the foam and the rocks, and to smooth all the hard edges of the pink block:
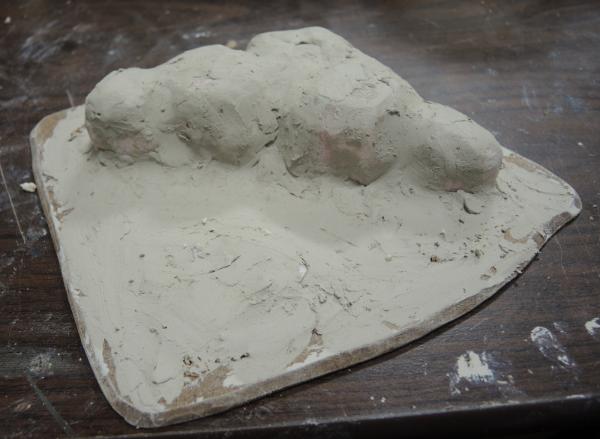
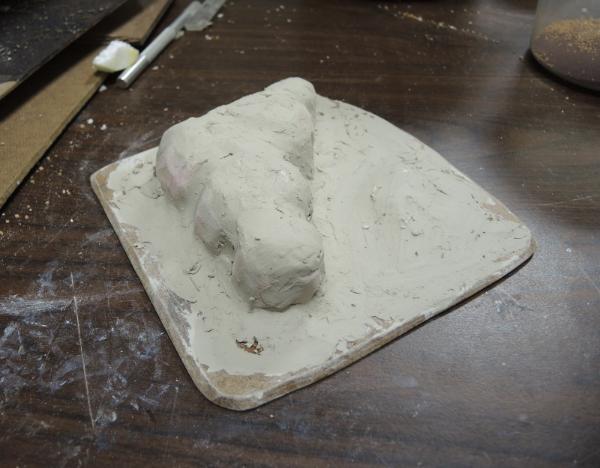
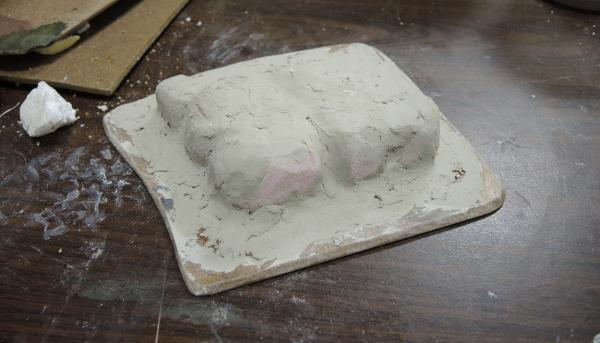
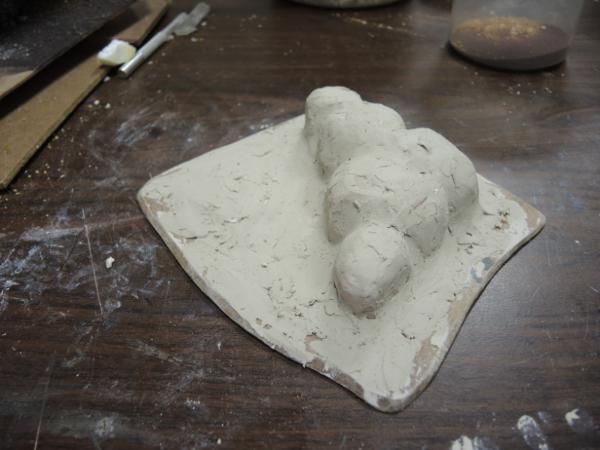
Incidentally, now the piece weighs about 5 pounds (2 and a half kilograms).
Next, I hand-mashed some of these aquarium gravel stones into the still-drying clay exterior:
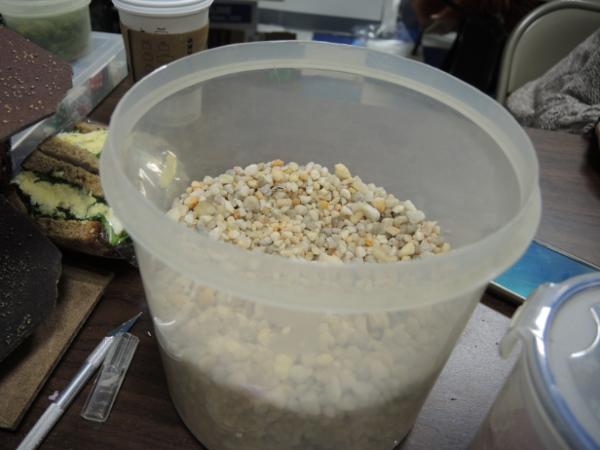
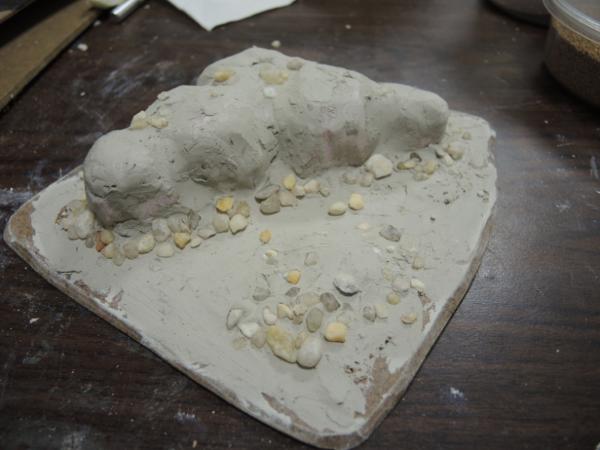
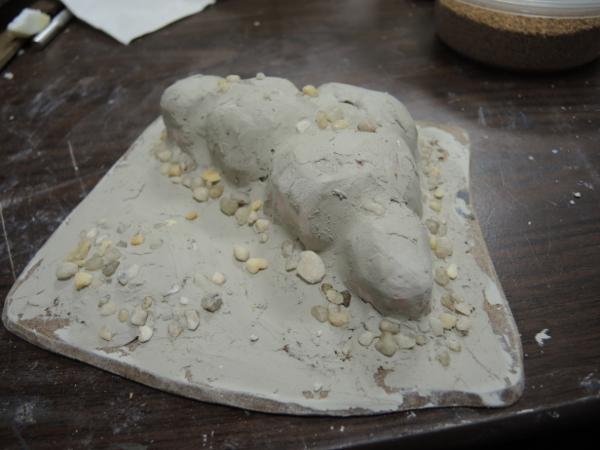
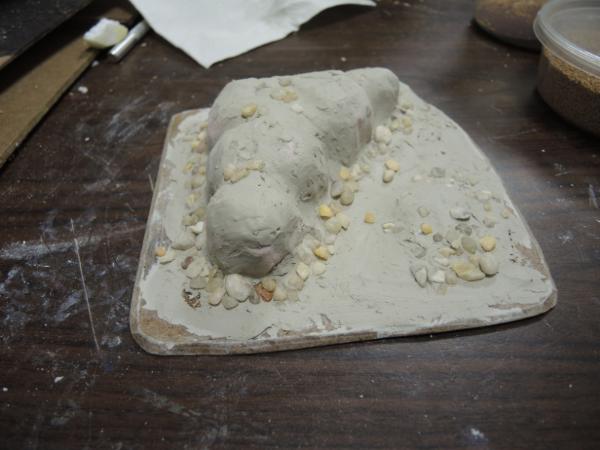
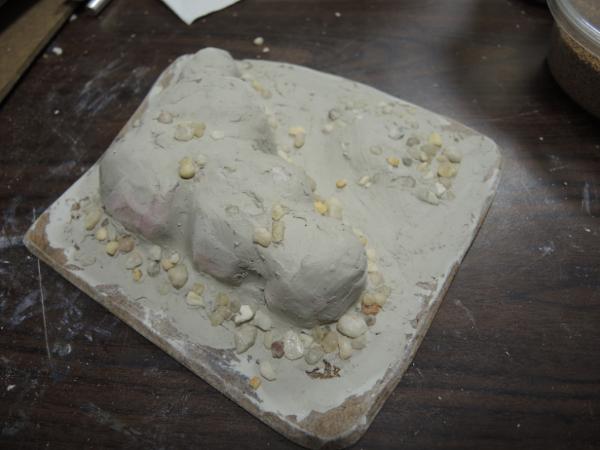
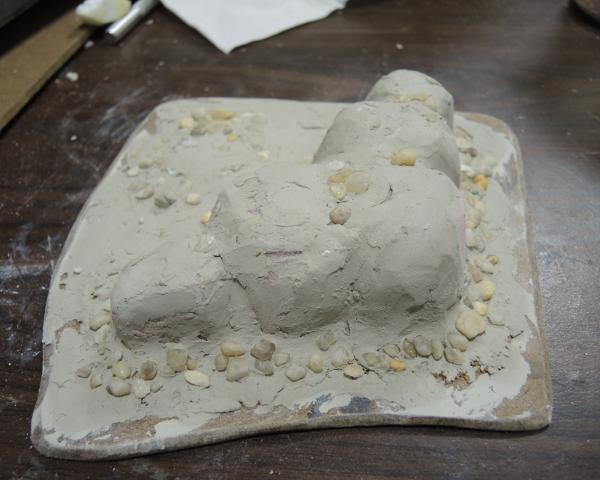
And then these, which are pulverized walnut shells that you can pick up at a pet store or craft store:
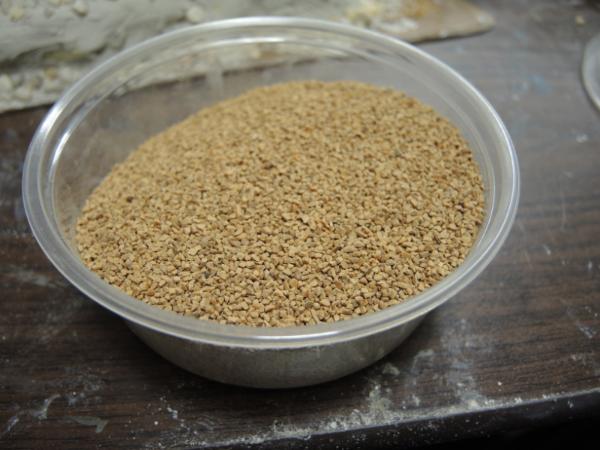
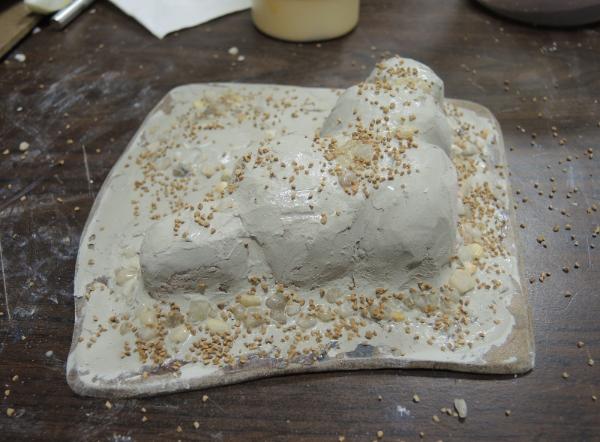
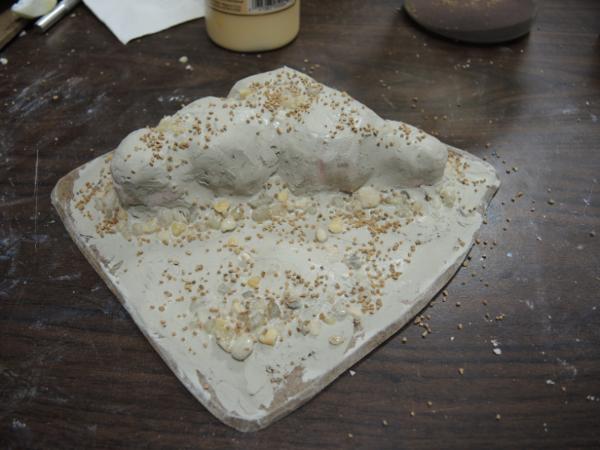
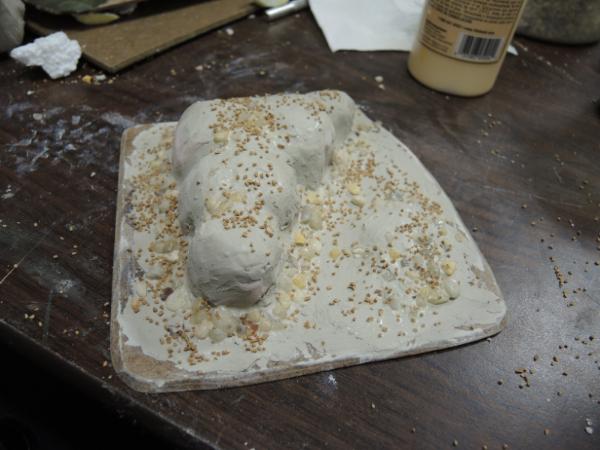
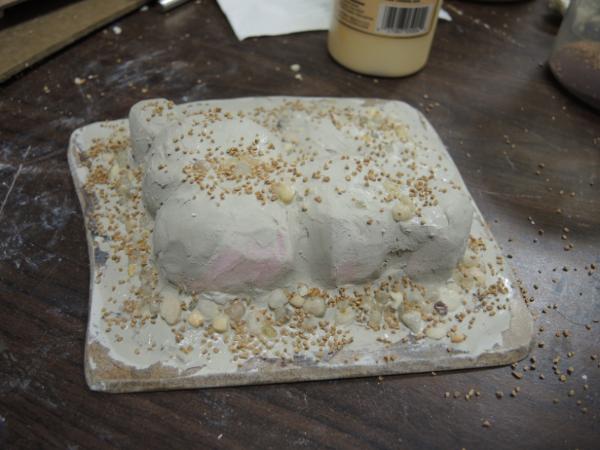
And then craft sand for which I have no picture, but you'll have to believe me that I got it at a craft store and that it is exceptionally fine:
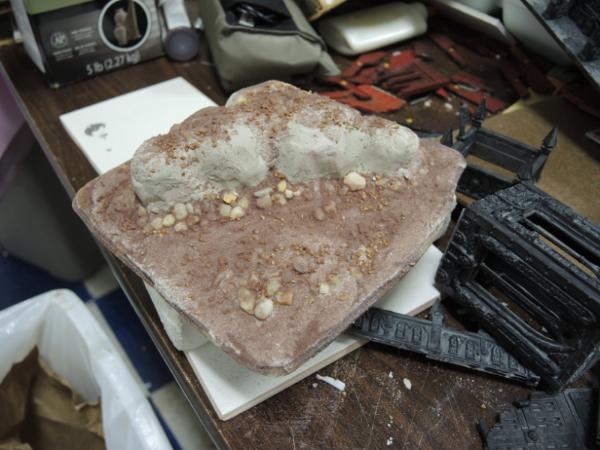
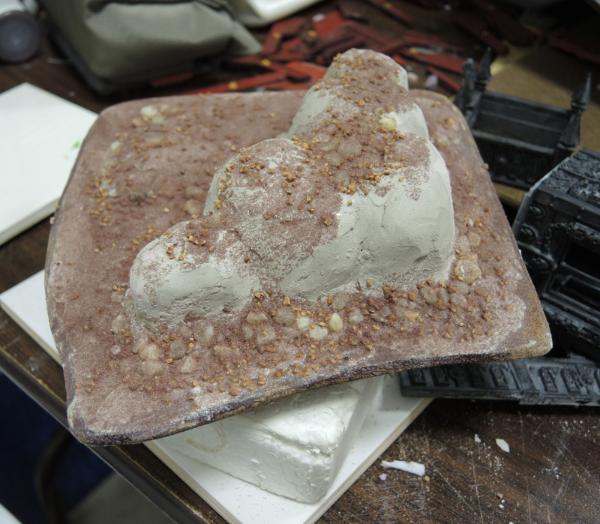
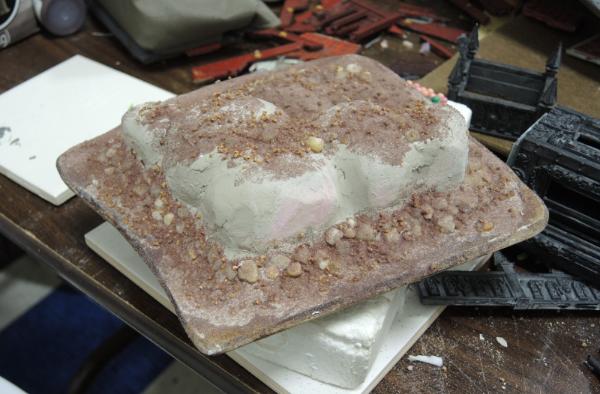
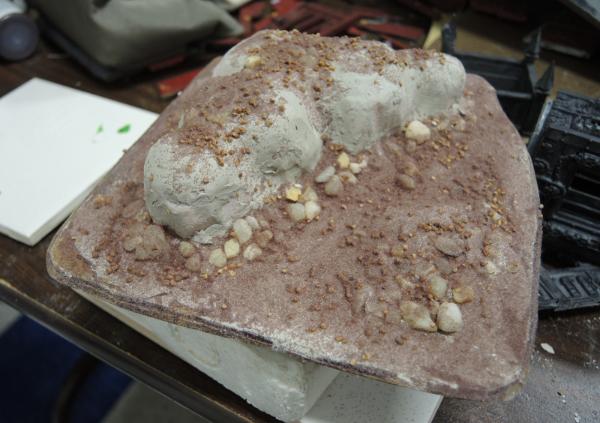
I applied the sand deliberately sparsely and hope that the clay will crack between now and when I return in a few days. Then I'll seal it and paint it and you will see the miles (or kilometers, if you prefer) of difference between the original and my improvement.
Thanks for looking! C&C always welcome. Have an awesome day!
53843
Post by: Ignatius-Grulgor
I saw a croissant and now I can't unsee it!
76303
Post by: Warboss_Waaazag
That would be the crunchiest and worst-tasting croissant in the history of bread.
62749
Post by: Dr H
Good work on the colourful plants, 'boss. 
Nice improvements on the croissant-rock piece. 
2326
Post by: shasolenzabi
Those plants were so bright! Makes me recount the odd camo schemes from the old RT book
76303
Post by: Warboss_Waaazag
Thanks for the feedback Dr H and shasolenzabi! Yeah, I know what you mean shas. Like those yellow and black tiger stripe patterns on the space marines? I remember thinking that that pattern would only work on a very specific world.
57070
Post by: SJM
I really liked the way the Peg trees turned out, I was worry for a few moments as they were slightly... well phallic, but well recovered!! 
68152
Post by: JoeRugby
You've clearly not had a Croissant from Asda before 
Terrain is looking great dude, 
76303
Post by: Warboss_Waaazag
 SJM wrote: SJM wrote:I really liked the way the Peg trees turned out, I was worry for a few moments as they were slightly... well phallic, but well recovered!! 
Heh. Any potential "tree" is likely to look phallic to begin with. Automatically Appended Next Post:  JoeRugby wrote: JoeRugby wrote:
That would be the crunchiest and worst-tasting croissant in the history of bread.
You've clearly not had a Croissant from Asda before 
Terrain is looking great dude, 
Thanks, Joe! And no, I don't even know what Asda is. A cafe chain, I guess?
2326
Post by: shasolenzabi
Knowing a wee bit of other countries and such, Asda is a Food or grocery chain, and based on what he says, they have issues baking decent bread products in their stores
87301
Post by: lliu
I am now an official builder of my LFGS' terrain, all thanks to you!
76303
Post by: Warboss_Waaazag
76303
Post by: Warboss_Waaazag
76303
Post by: Warboss_Waaazag
62749
Post by: Dr H
Good progress. Interested to see how you paint up the blocked in windows. 
76303
Post by: Warboss_Waaazag
 Dr H wrote: Dr H wrote:Good progress. Interested to see how you paint up the blocked in windows. 
Thanks, Dr H. I'm pretty curious about that myself. My intention is to black prime the interiors so it's nothing but darkness within, but I'm not really sure if I should paint the cardstock to emulate a glass window pane or if I should make it look like a metal shutter. Any ideas? Input appreciated.
62749
Post by: Dr H
The problem I see with making them shutters is that they are on the inside of the windows, so you would still have to paint in the glass.
However, a gloss black would probably work fine as a dark interior though glass.
2326
Post by: shasolenzabi
A full multi-story builing! That will stand tall in the battles!
74514
Post by: Phutarf
I feel your pain about making life difficult for yourself... Keep it going though, I'm impatient (ha!) to see how this build turns out! Oh, and on the window front, my vote would be for shutters - more in keeping with the industrial feel, and probably easier to achieve than glass..?
71978
Post by: london1662
Warboss_waaazag loving your work mate, keep it going
Alan
68152
Post by: JoeRugby
 Warboss_Waaazag wrote: Warboss_Waaazag wrote: Dr H wrote: Dr H wrote:Good progress. Interested to see how you paint up the blocked in windows. 
Thanks, Dr H. I'm pretty curious about that myself. My intention is to black prime the interiors so it's nothing but darkness within, but I'm not really sure if I should paint the cardstock to emulate a glass window pane or if I should make it look like a metal shutter. Any ideas? Input appreciated.
I think I'd be tempted to;
Cut out the windows
Put in clear plastikard in the window spaces for window panes
Put black/dark dark grey painted card at the back
That way you get some depth in your windows and the black card stops light getting in and giving away that the building is empty.
76303
Post by: Warboss_Waaazag
 JoeRugby wrote: JoeRugby wrote:
I think I'd be tempted to;
Cut out the windows
Put in clear plastikard in the window spaces for window panes
Put black/dark dark grey painted card at the back
That way you get some depth in your windows and the black card stops light getting in and giving away that the building is empty.
Hmmm, that might win the prize. I'm limited to working with materials at the site, but I'm pretty sure I can find something that could stand in for clear plasticard. Like blister plastic. I think I might buff one side to see if that gives it a more realistic feel. Glossy side out, buffed side in. We'll see, I'm going back up to the store tomorrow.
Thanks for all the feedback everyone!
76303
Post by: Warboss_Waaazag
62749
Post by: Dr H
Ah well, if you are willing to cut out the card to add "glass", then yes, do that. 
Good work on the rocks 'n' craters. 
76303
Post by: Warboss_Waaazag
 Dr H wrote: Dr H wrote:Ah well, if you are willing to cut out the card to add "glass", then yes, do that. 
Good work on the rocks 'n' craters. 
Thanks, Dr H. I'm not sure what I'm going to do. It was a lot of effort to make the cut outs and now that the building is mostly assembled, I'm not sure I want to alter it that much. They aren't paying me a fortune, so I'm not hell bent on perfection. We'll have to see come this Thursday.
2326
Post by: shasolenzabi
Such desert like terrain! makes me thirsty!
76303
Post by: Warboss_Waaazag
22619
Post by: inmygravenimage
Always enjoy your buildings, and that is a truly disgusting colour 
72556
Post by: Red Harvest
Nasty color. That really has to be from the Oops we mixed it wrong shelf at the DIY.
The screen used for the windows, I can't figure out where it is from, and I don't recall you mentioning it. Help an old man with a fading memory?
2326
Post by: shasolenzabi
Shanty is how big? if large enough, maybe a small shanty bar?
76303
Post by: Warboss_Waaazag
 Red Harvest wrote: Red Harvest wrote:Nasty color. That really has to be from the Oops we mixed it wrong shelf at the DIY.
The screen used for the windows, I can't figure out where it is from, and I don't recall you mentioning it. Help an old man with a fading memory?
I actually didn't build this one, but the window screens would be from a needlepoint mesh. They sell them in craft stores, fabric stores, and yarn shops, typically. They come in a variety of colors and shapes, & density of holes. They need to be soaked in warm soapy water before use, though because they can be quite waxy. I use it as cheap window screens, deck plating, and the like.
Also, this poop color came from the "mistake" collection at the local DIY store (in the states that's Lowes or Home Depot). There's usually a paint section where they will make custom colors for customers. Occasionally those mixes turn out terrible, but they save the samples for people like me to ask for and buy on the super cheap. Automatically Appended Next Post:
It's barely 4" (10cm) square. It almost annoys me that whoever built it just made one. Forces me to contemplate making more. They're simple buildings to construct, but they are ugly as hell. Automatically Appended Next Post:
Thanks very much!
2326
Post by: shasolenzabi
Ah limited occupancy hovels! A whole town would make a good battle zone
72556
Post by: Red Harvest
Ah needlepoint. Thanks for the answer. I thought it might be something like that. And I get a lot of paint that way. The employees at the local DIY seem to have trouble with mixing browns and greens, which suits me fine.
68152
Post by: JoeRugby
This may sound wrong but...
I am a fan of your Poo Hut.
Yea that definitely sounded wrong. :*(
2326
Post by: shasolenzabi
Pooh insulation against the acid rains
76303
Post by: Warboss_Waaazag
2326
Post by: shasolenzabi
The cracked clay could have been used for say, deserty scenery? Still repairs seem to have fixed the cracking issues.
Oh and the Hanomag is about 7.5 inches long, a Beefy ride!
76303
Post by: Warboss_Waaazag
 shasolenzabi wrote: shasolenzabi wrote:The cracked clay could have been used for say, deserty scenery? Still repairs seem to have fixed the cracking issues.
The air dry clay is going to crack. That's not something that can honestly be solved easily. The cracking is because I'm applying it very thinly and not immediately sealing it. The clay becomes brittle very quickly. If I were to make dry earth or deserty terrain I would use a crackle medium instead of the clay, personally.
Anyway, thanks for commenting. Now I can add another update and have it post!
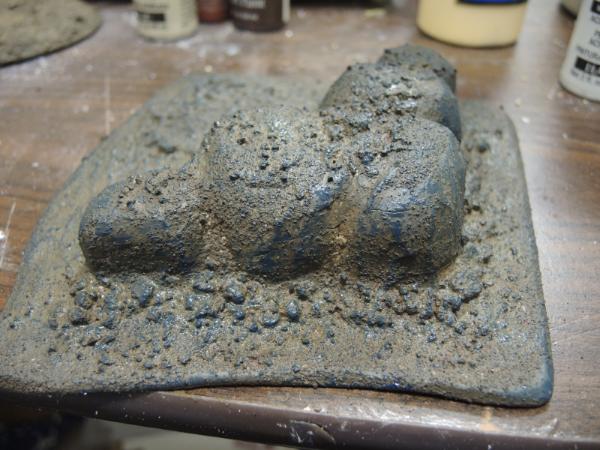
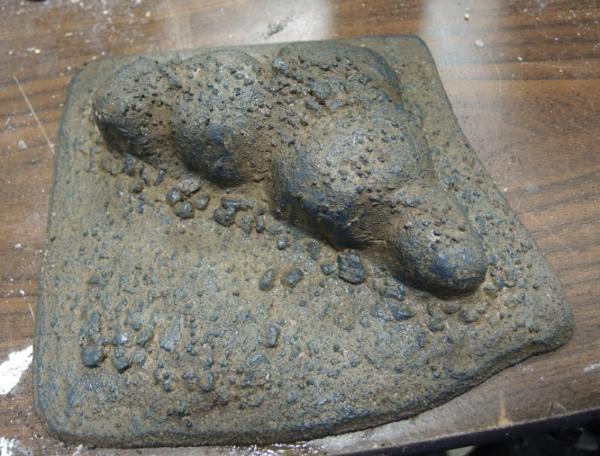
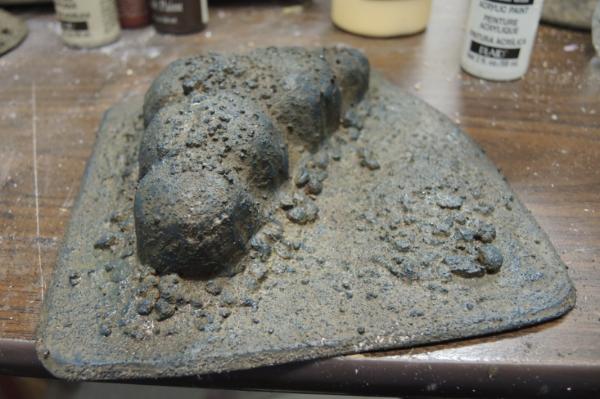
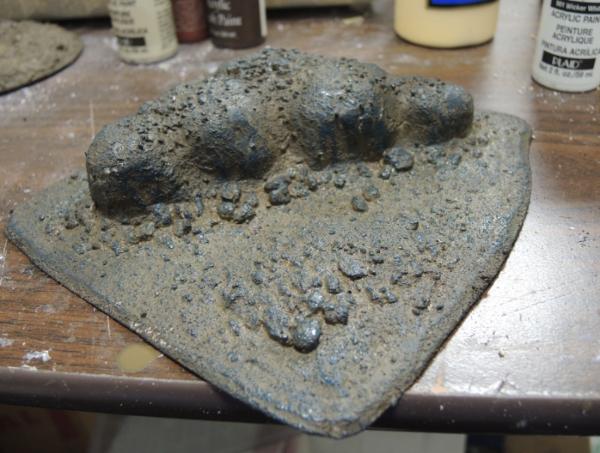
Since I already put up a picture of the ridge base-coated, I'll show my progress on that. This is what it looked like when I came back and sealed it with a 70:30 mix of wood glue and water:
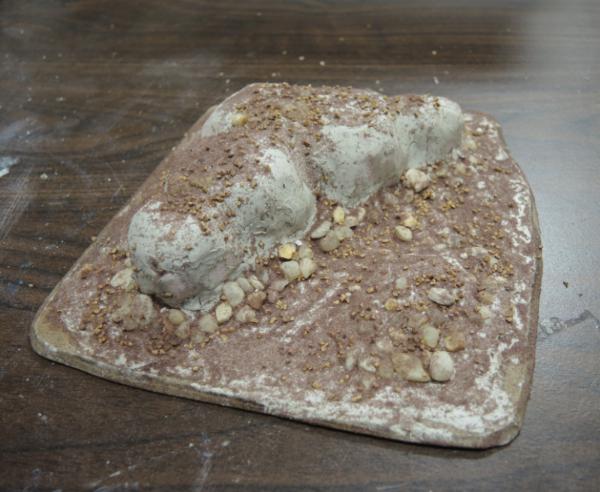
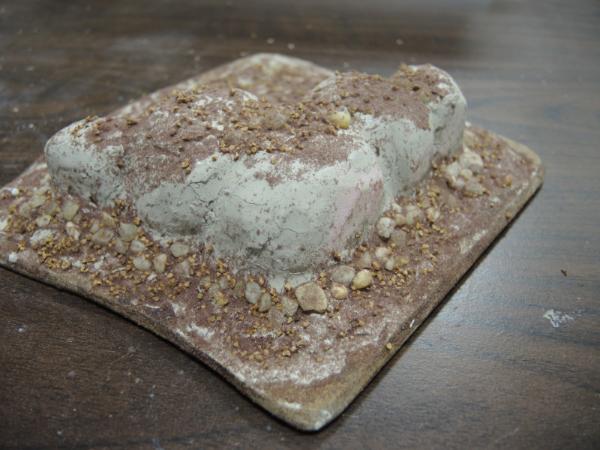
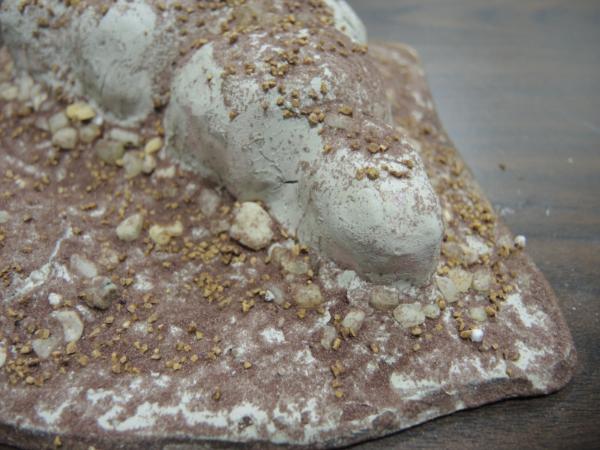
Again, you can see some minor cracking in the clay, but nothing that threatens the integrity of the whole piece. Then it got this poop coat:
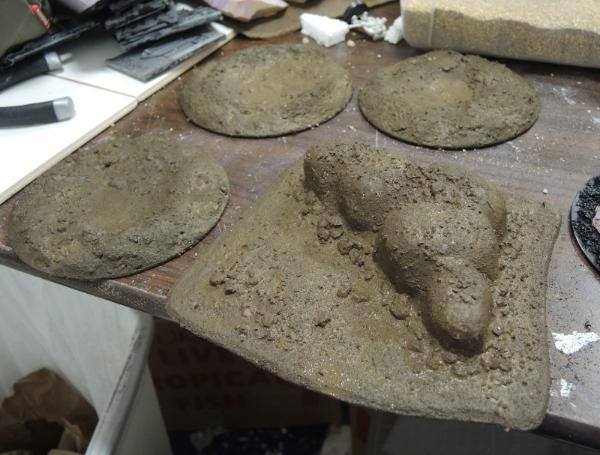
Followed by a heavy drybrush of this blue:
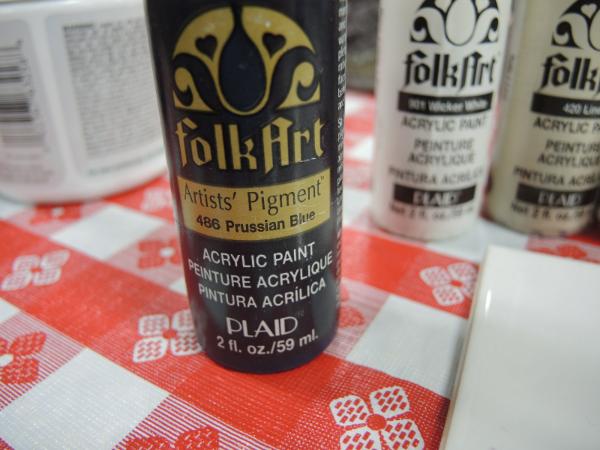
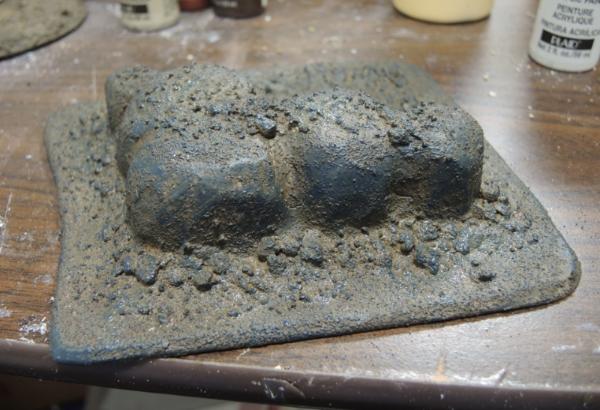
Followed by a heavy drybrush of this red:
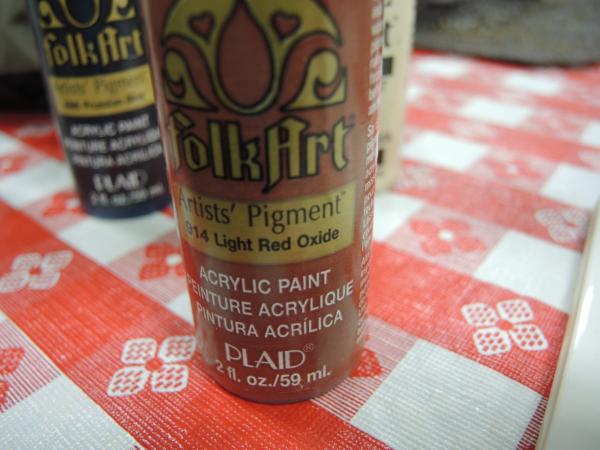
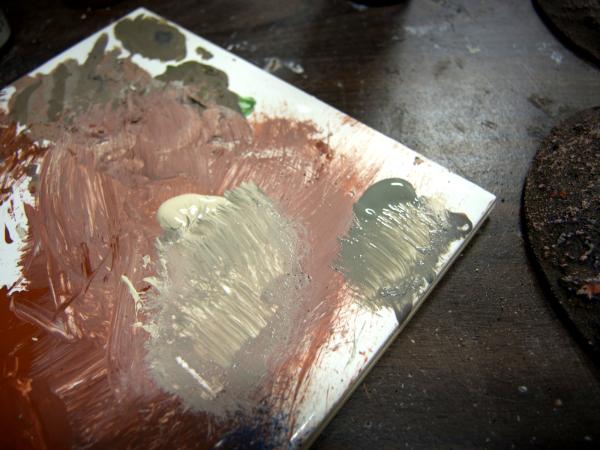
I did some basic mixing of the colors right on my palette:
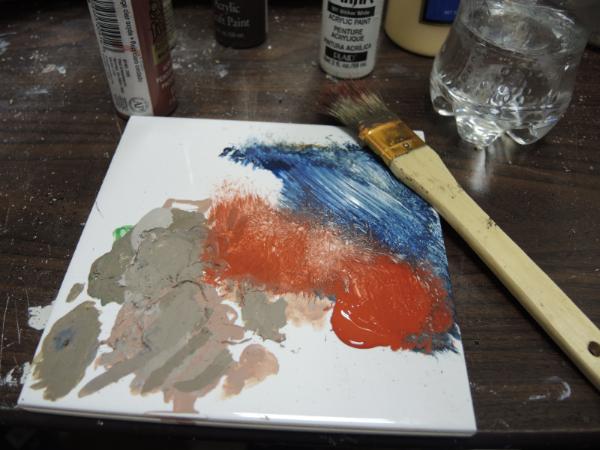
For this effect (sorry about how some of the photos look like the color has been blown out, the local lighting really muted the blues and reds, so I was forced to use the auto adjust feature on the uploads to make the colors more noticeable and true):
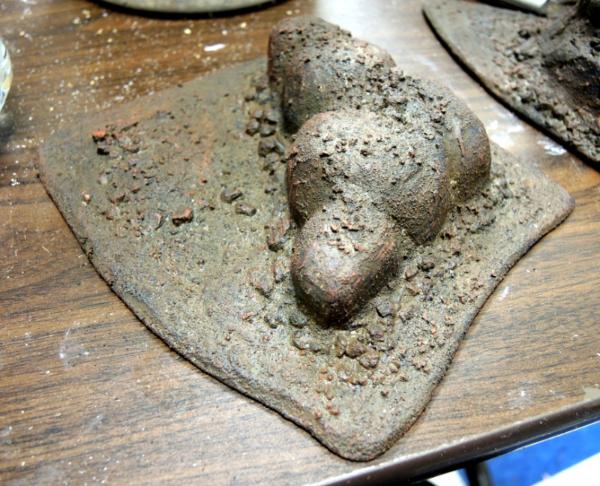
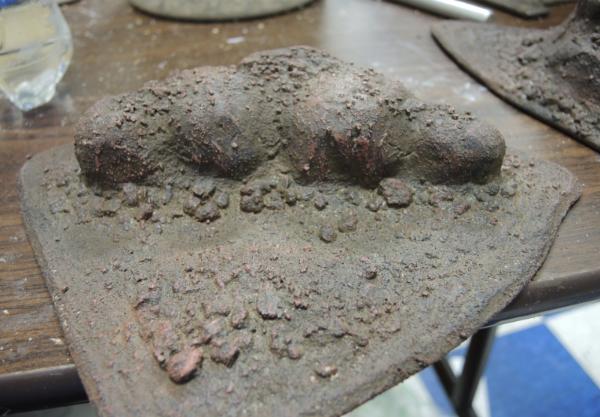
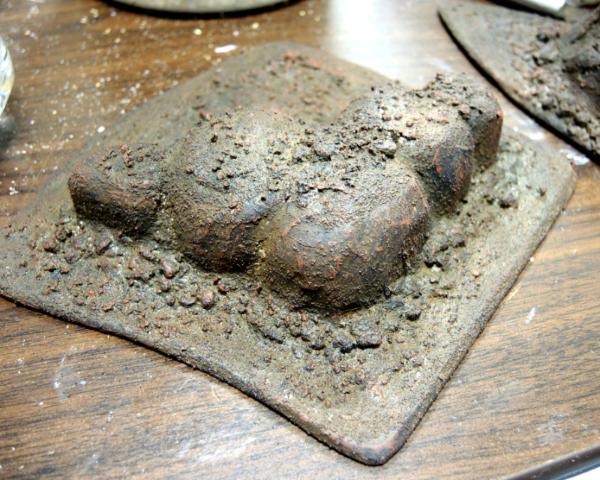
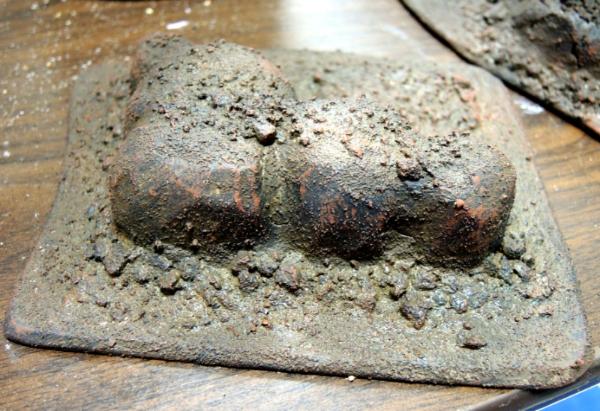
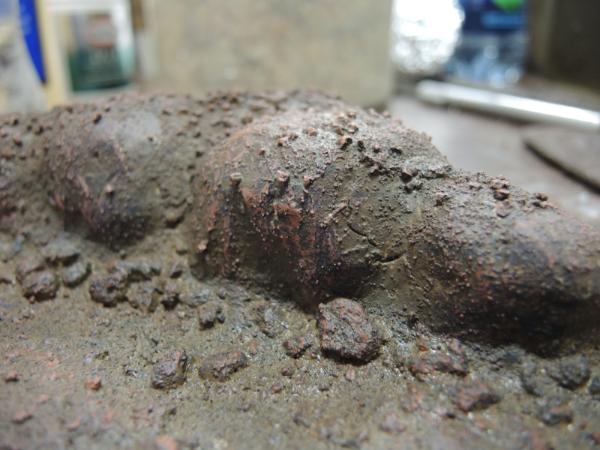
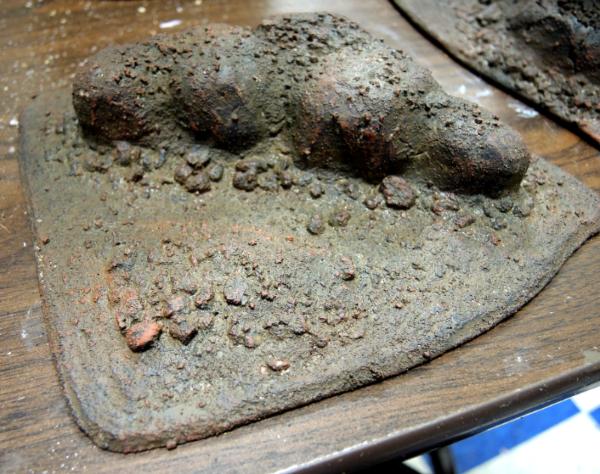
If you'll notice, in some cases I didn't even wait for the underlying brown to completely dry. This helps blend the colors on the piece a little better. Next up I used this color:
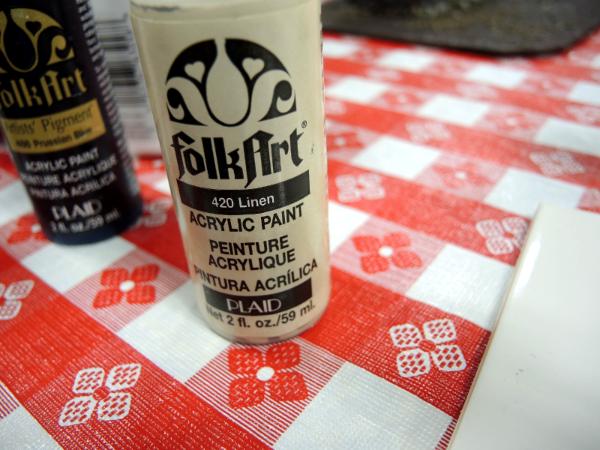
And again palette blended:
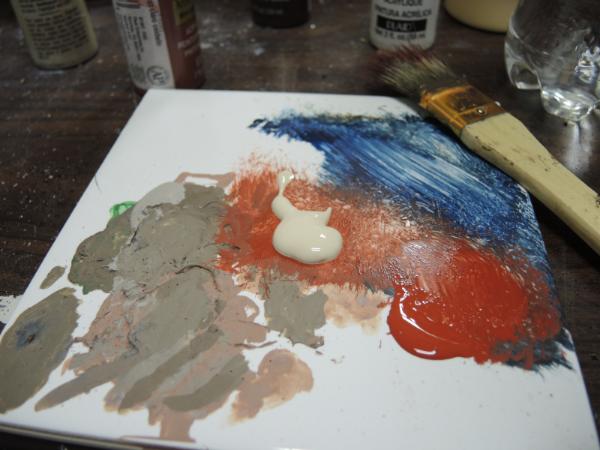
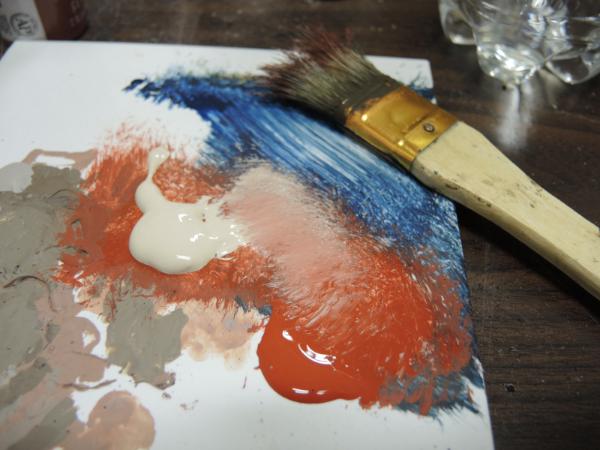
To get this:
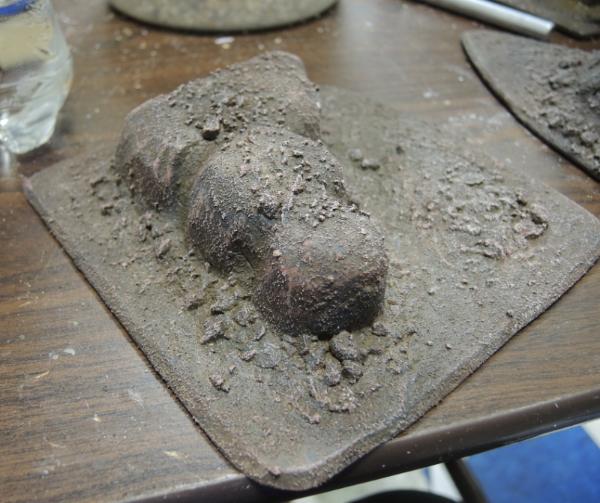
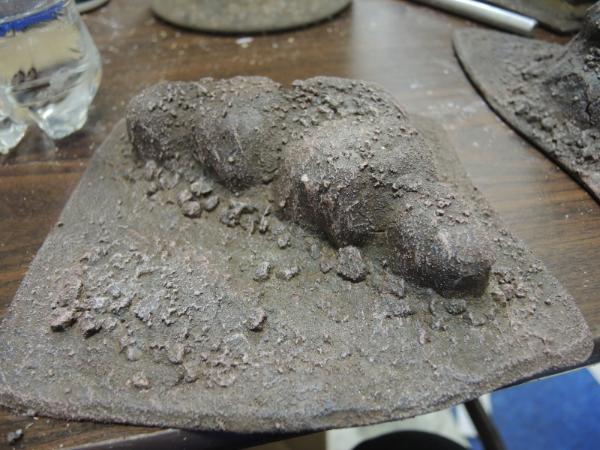 
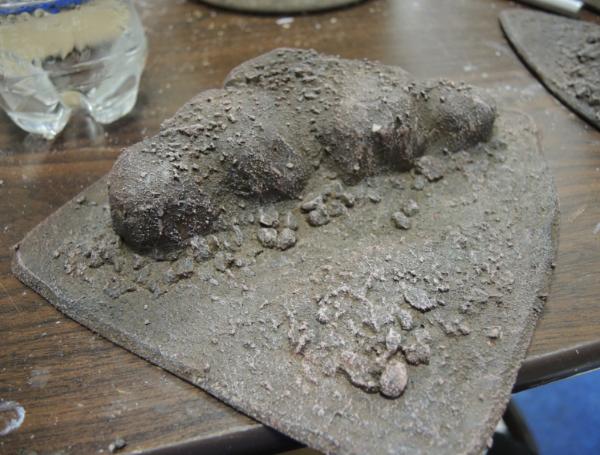
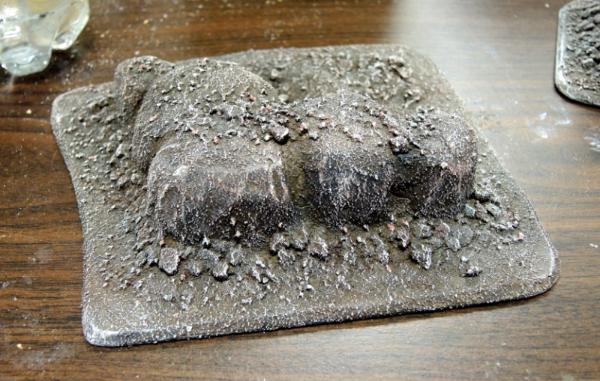
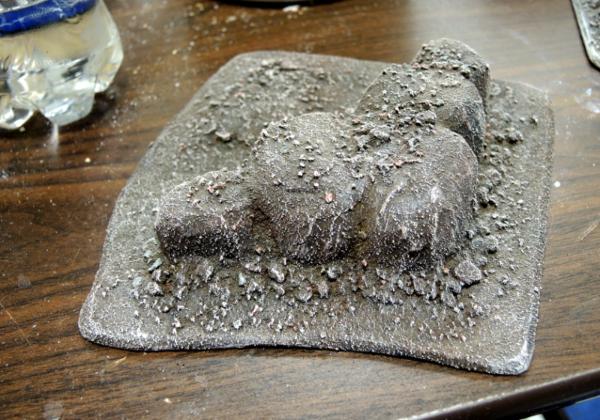
And then I went completely flying rodent gak crazy and started painting individual stones in a medium grey I forgot to take a picture of, the oxide red, and the original poop brown.
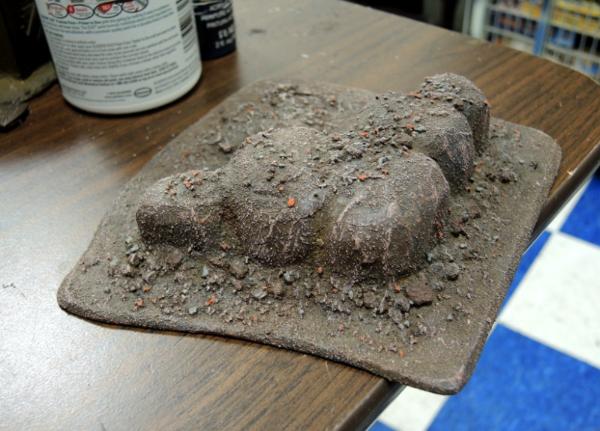
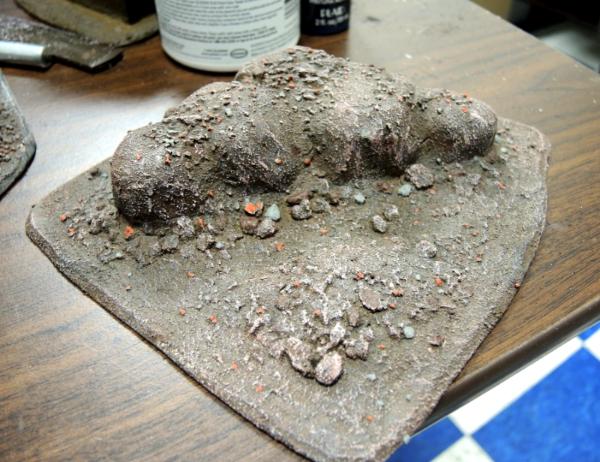
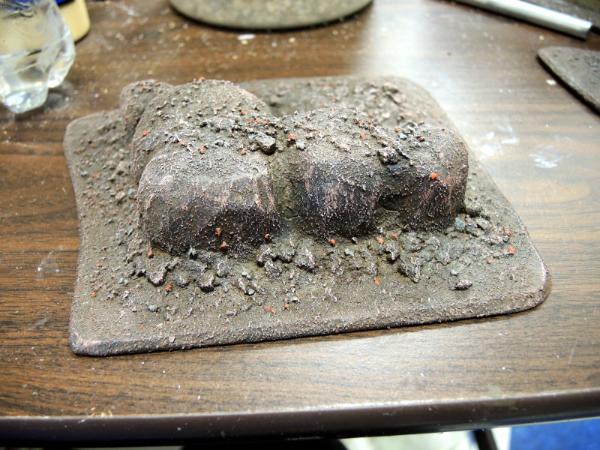
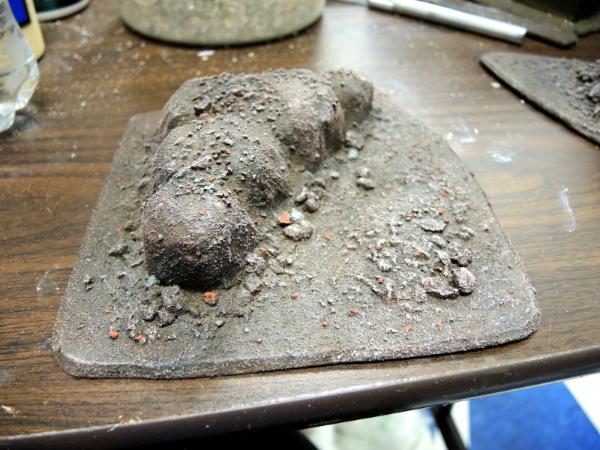
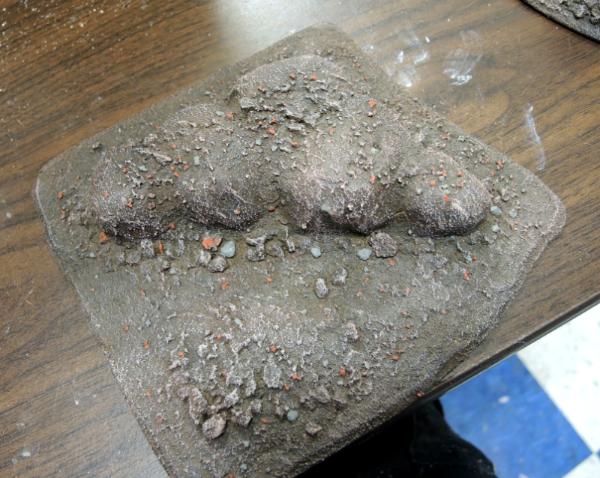
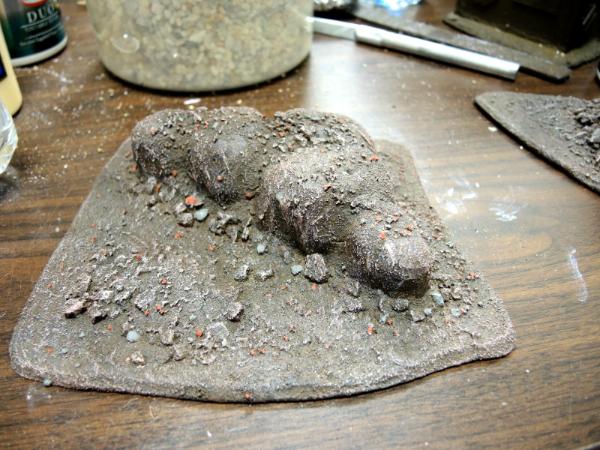
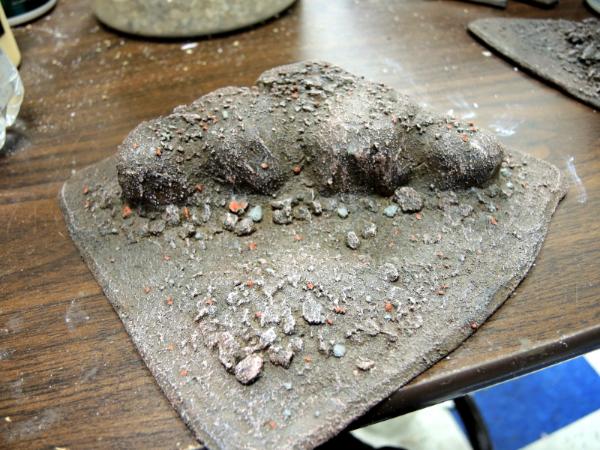
And finally used this:
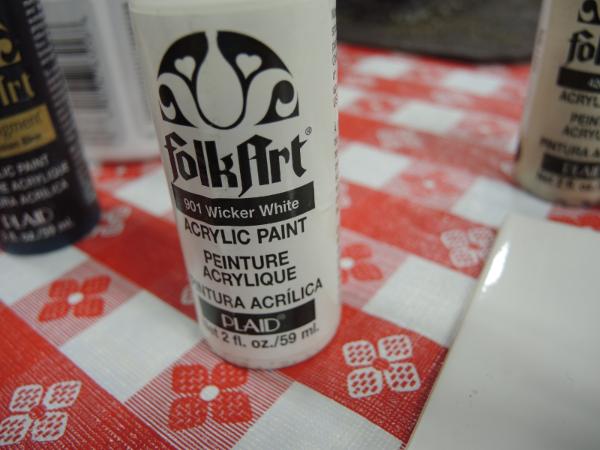
As my final highlight top coat:
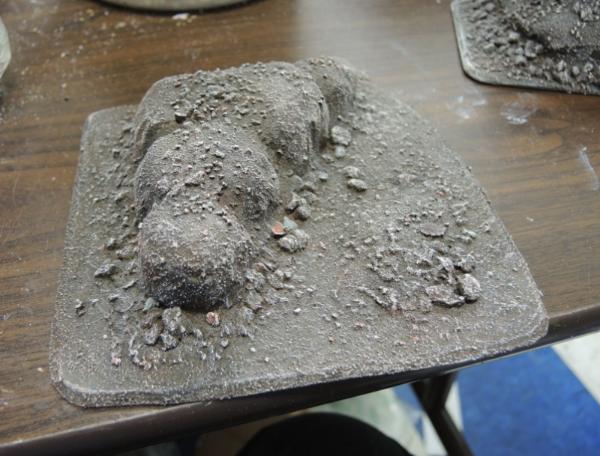
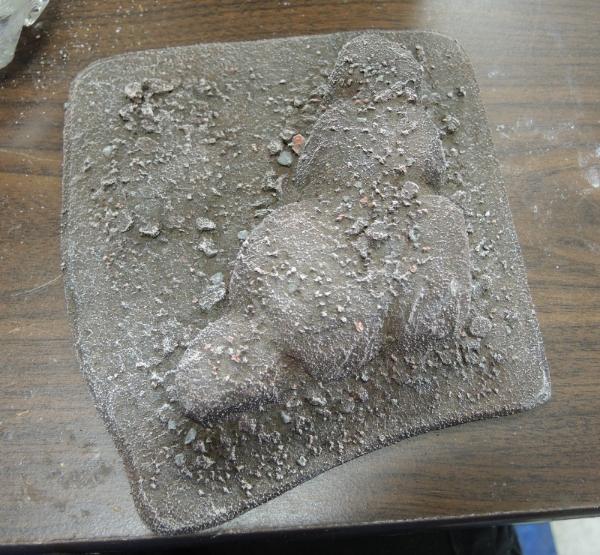
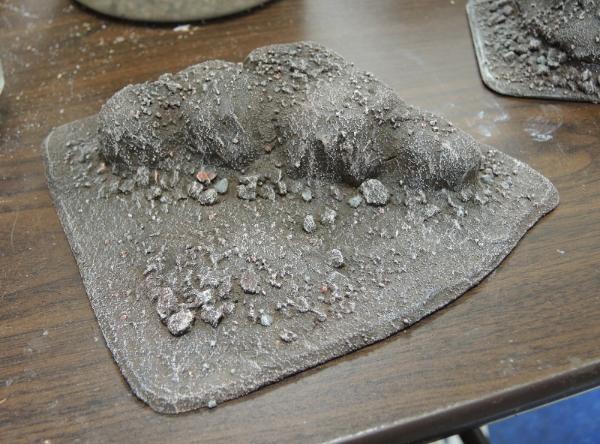
And then I glued on some flock:
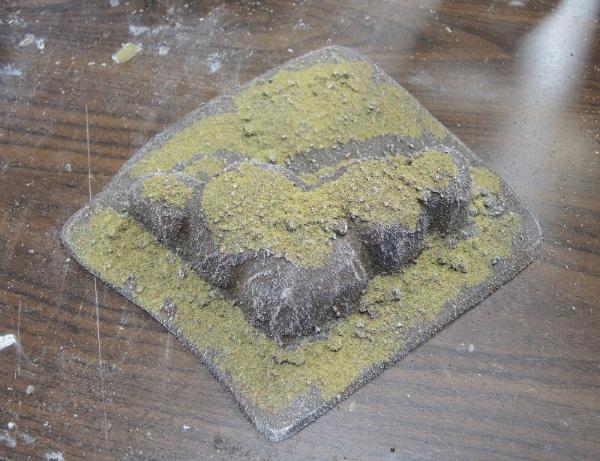
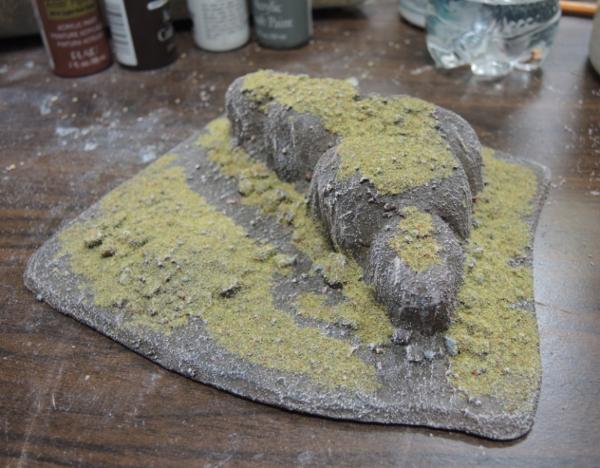
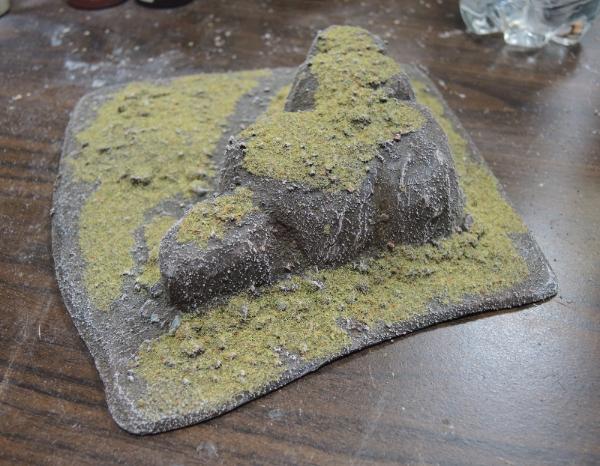
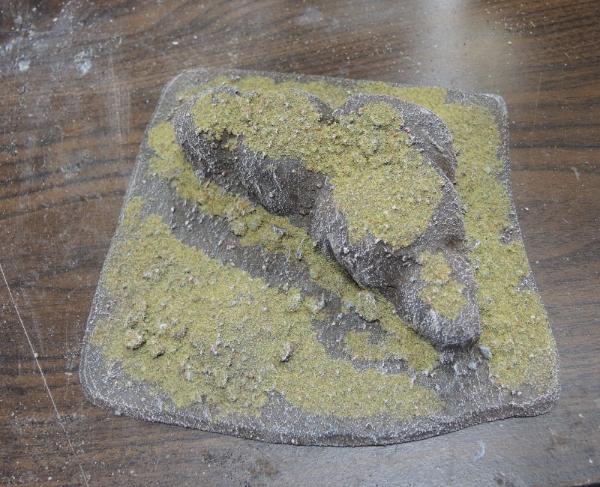
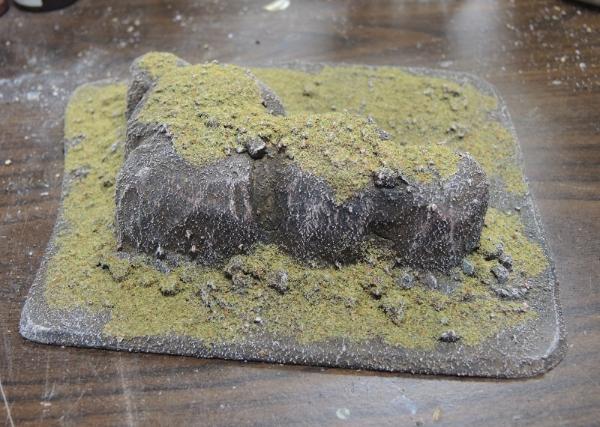
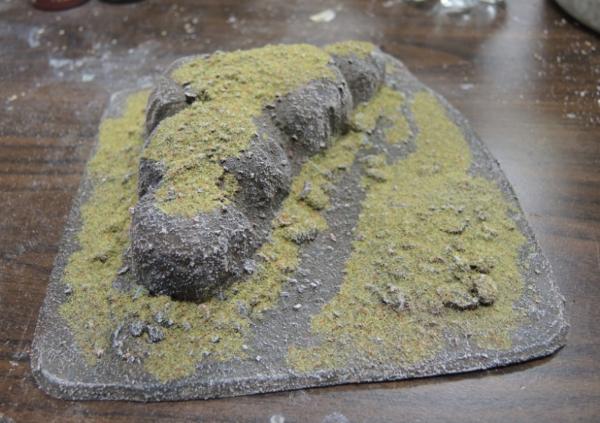
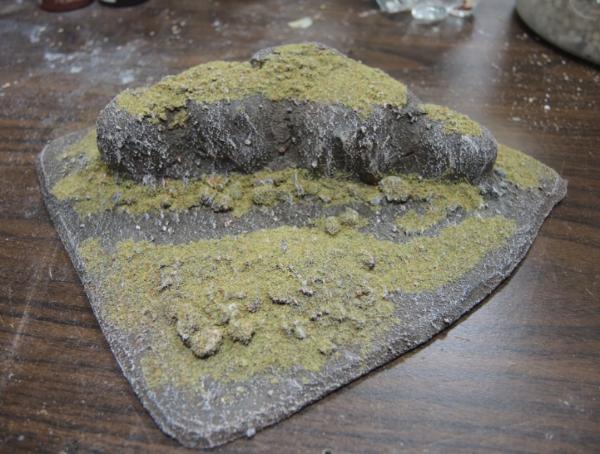
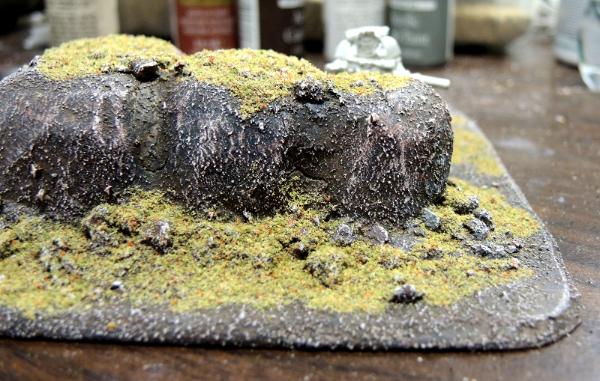
Thursday I seal the flock on and add static grass and then I can finally call this piece done. Phew! Thanks for looking and have an awesome day. C&C always welcome.
62749
Post by: Dr H
Oh, that thing looked so disturbing when it was just painted with your poo paint. 
Good job on the final result. 
2326
Post by: shasolenzabi
"Quick! get behind that ridge! set the mortar for firing ASAP!"
76303
Post by: Warboss_Waaazag
76303
Post by: Warboss_Waaazag
The good news is that I finally remembered to put my jungle terrain in the car. The bad news is that I still haven't arrived at the site yet. But fear not! I WILL get pictures of my jungles in all their glory today! And post about a million (give or take) pictures of the results soon. Cheers!
68152
Post by: JoeRugby
Yay been waiting ages for a table pic of your Xeno jungle.
76303
Post by: Warboss_Waaazag
22619
Post by: inmygravenimage
That's looking interesting indeed. What do you seal your sand etc with?
76303
Post by: Warboss_Waaazag
Thanks, inmygravenimage. I use a 70:30 mix of wood glue to water. Sometimes I add an equal amount of paint (7 parts glue, 3 parts water mixed till the glue dissolves completely, and then 7 parts paint or thereabouts). It depends on what my resources are like at the time (mostly meaning how much base color paint I have). In the case of the poop brown I have a huge tub of it, but I only have a small amount of the indigo color I used to base coat the much taller rocky crags.
76303
Post by: Warboss_Waaazag
76303
Post by: Warboss_Waaazag
I realized I will be making some buildings in the near future, so I decided to build a prototype and a tutorial walk through at the same time. I didn't get very far, but I'll post what I have so far.
I started with a scrap piece of foam core from which I had cut a 2" by 3" rectangle out of already. I figured I'd cut at an angle and have a perfectly aligned two story building:
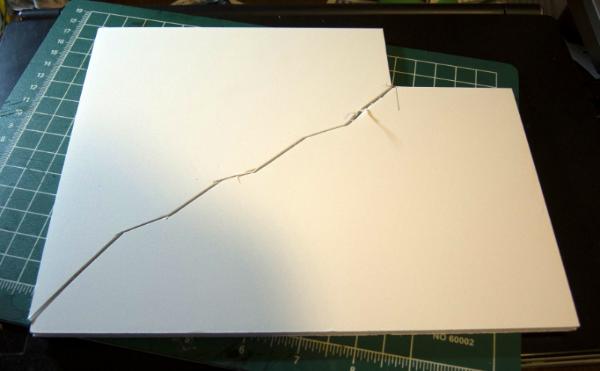
Not so perfect:
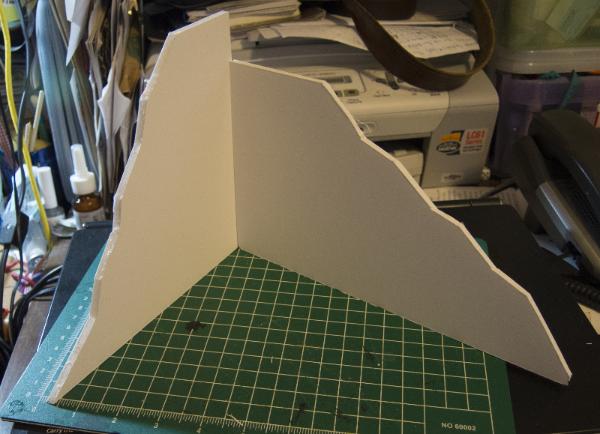
So I used the short piece as a straight edge and measuring device:
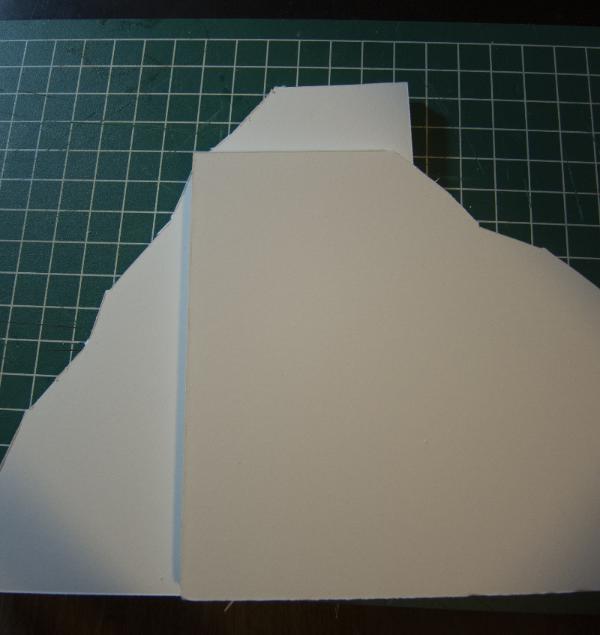
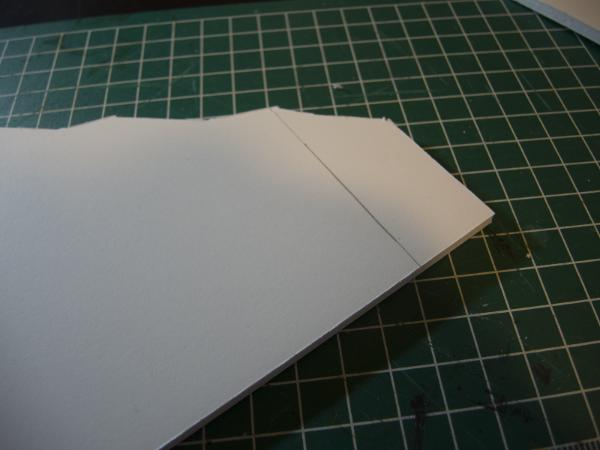
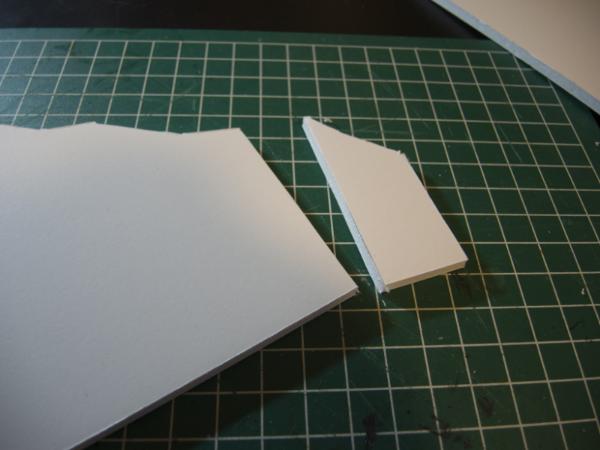
Much better:
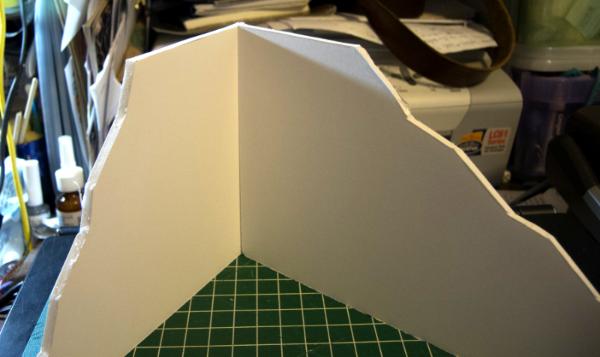
I decided I wanted floors so I used one wall again as a straight edge and tool:
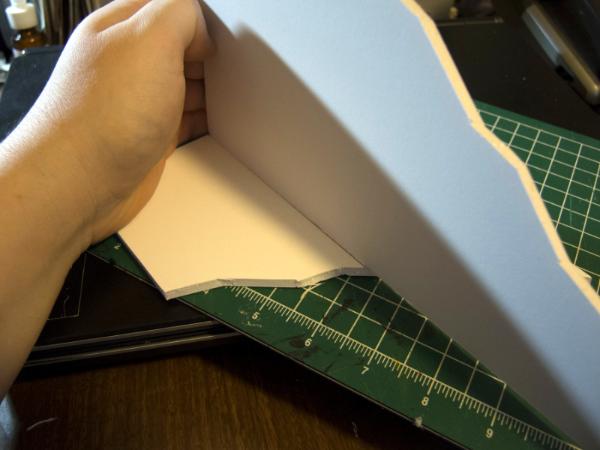
Exactly the width of the foam core:
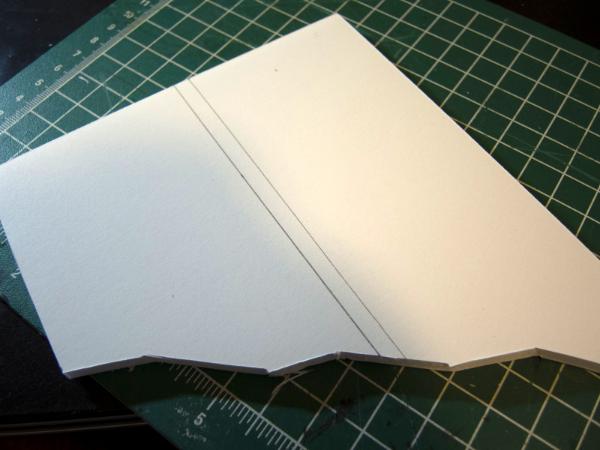
In case there was any confusion in the future:
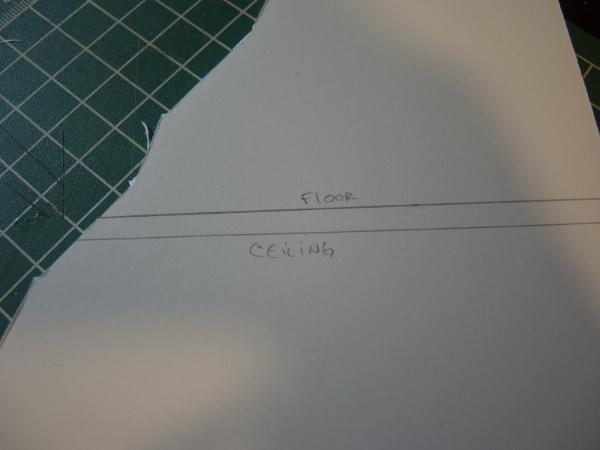
And then the first floor and roof, too:
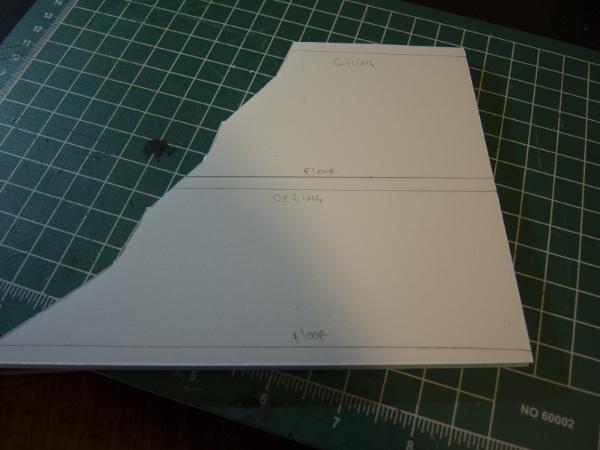
Then I thought to use a T-square for measurements. I used to have a 12" one made of plastic, but I couldn't find that one. So I was forced to use the T-square I used in college. Sigh, it's a bit long:
 
Anyway, I aligned both pieces and marked where the lines of the first would be on the second:
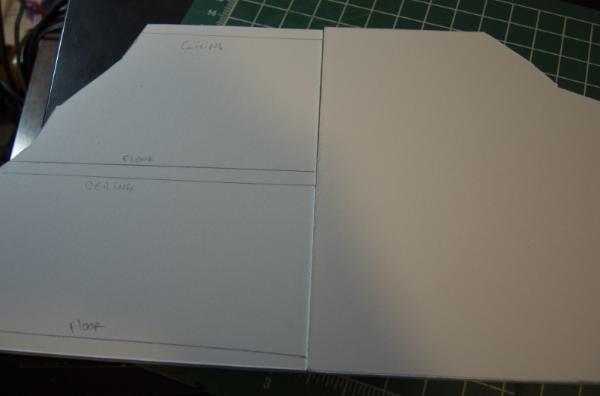
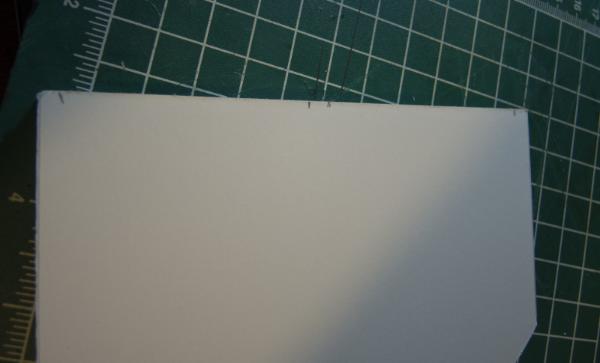
And then used the longest T-square to extend those lines all the way across the foam core:
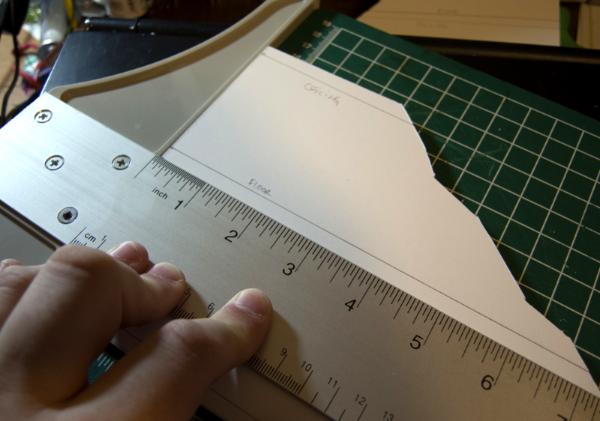
Then I aligned both pieces to mark the join:
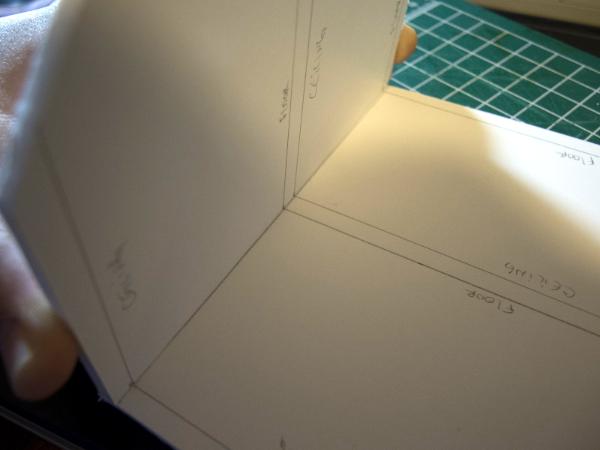
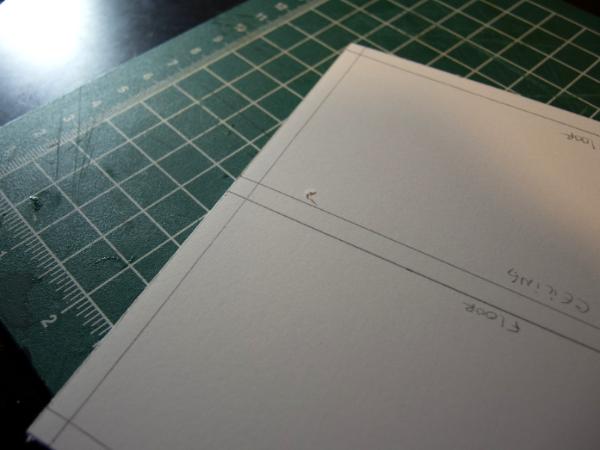
Then I used a 40k scale space marine and a Dreamforge Eisenkern as reference for the width of my windows. I decided on half inch width (that's roughly 5cm):
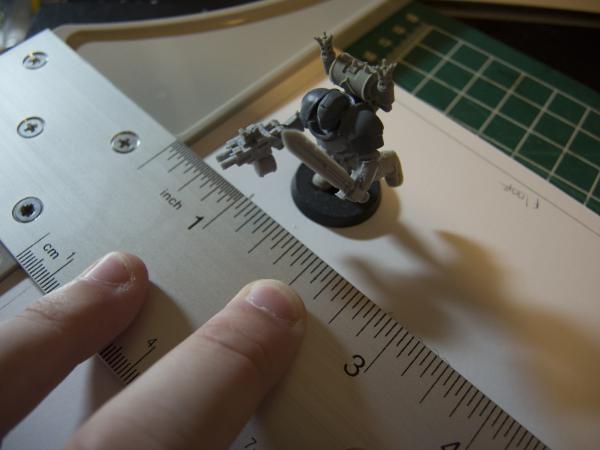
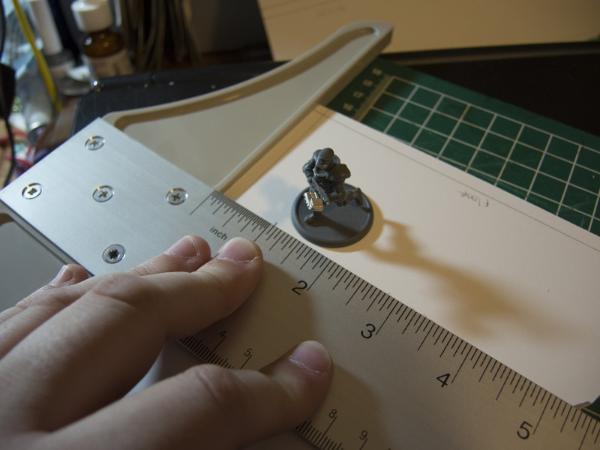
I also decided to have the windows start 3/4 of an inch from the corner and each be a 1/2 inch away from another (it was just easier):
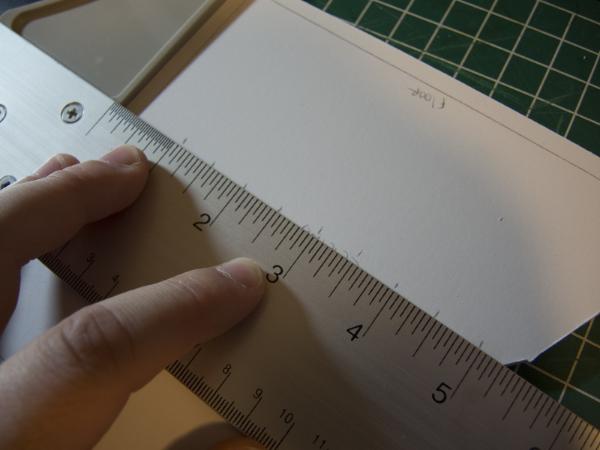
The trick with straight lines is to make measured marks at 2 or 3 locations on your piece:
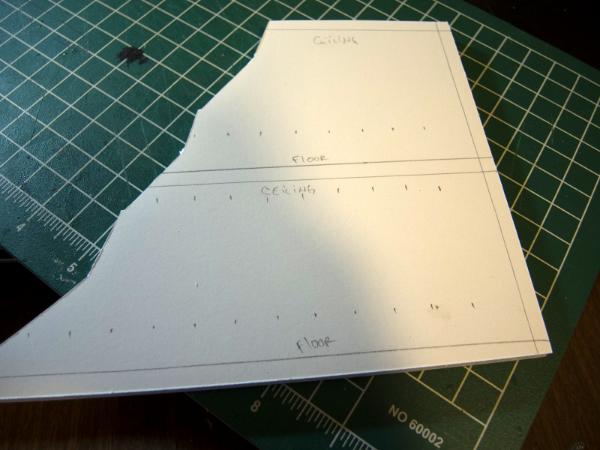
And then align the T-square at a factory-straight edge to link them:
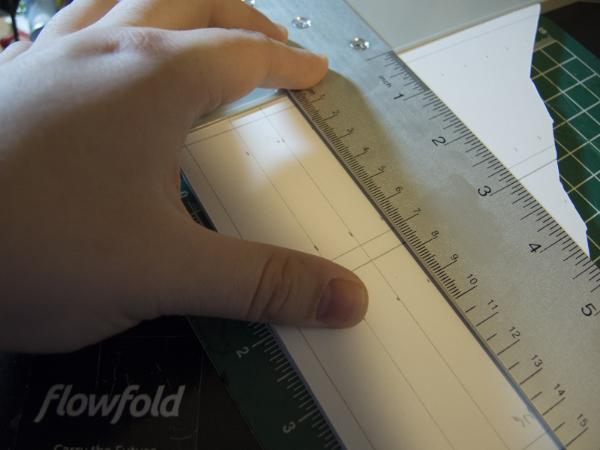
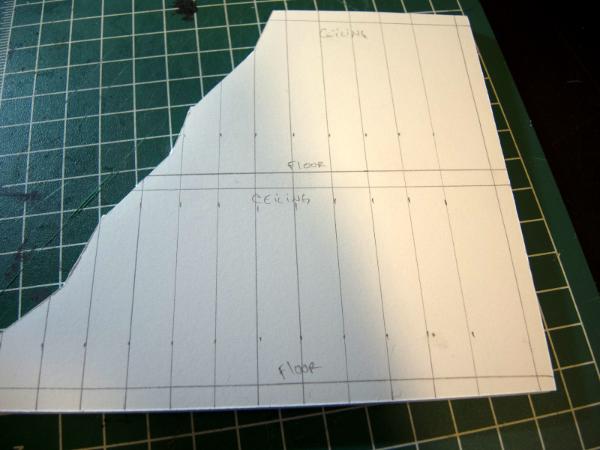
Then again, I used the Marine and Eisenkern to determine where the bottom sills of these windows should begin, being sure that their bases sit on the line I determined would be the floor and not the bottom of the foam core sheet:
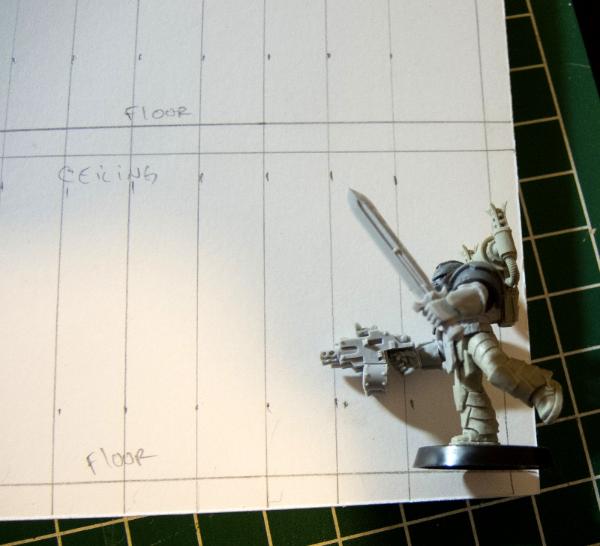
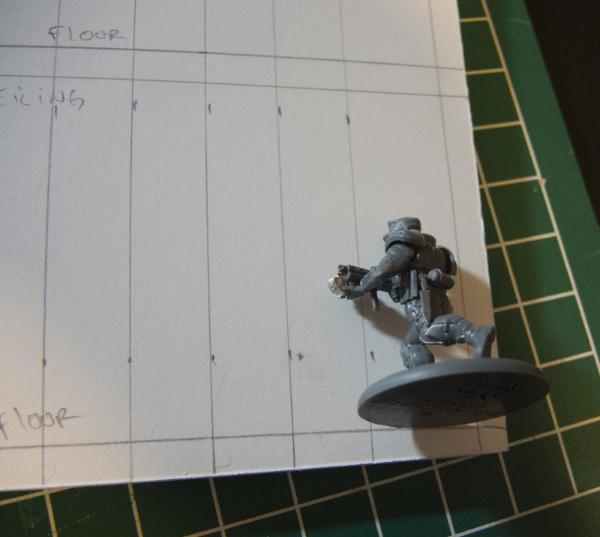
Measure twice and all that:
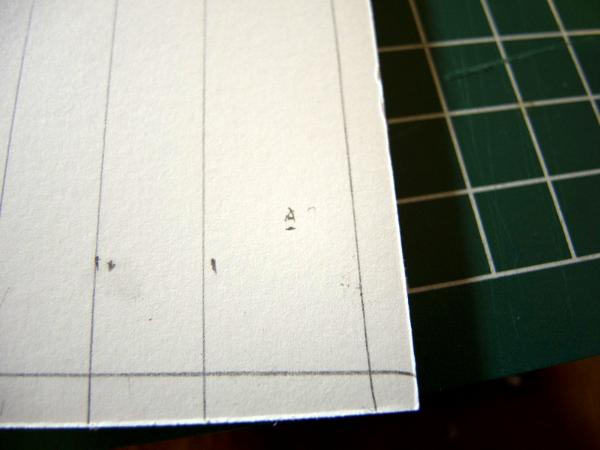
I compared using Imperial measurements and Metric to see if one was easier than the other:
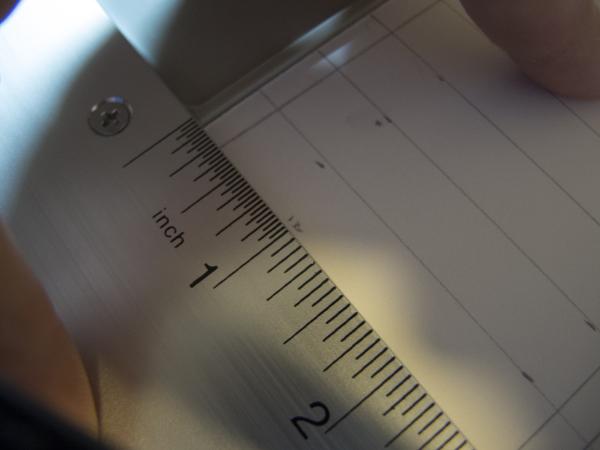
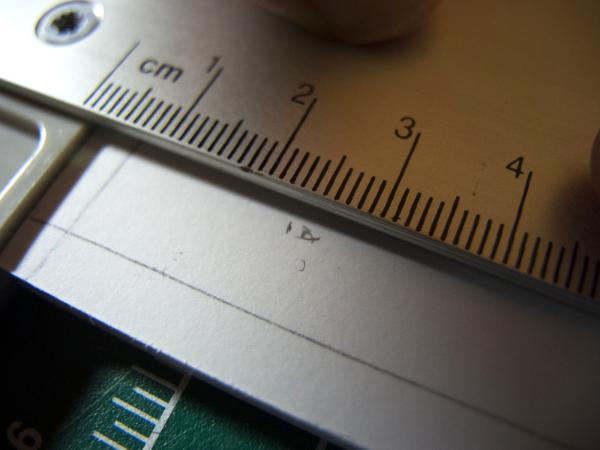
Turns out they both sucked. So, I just settled on the closest arbitrary number and duplicated the measurement for the second floor, keeping in mind the thickness of the floor:
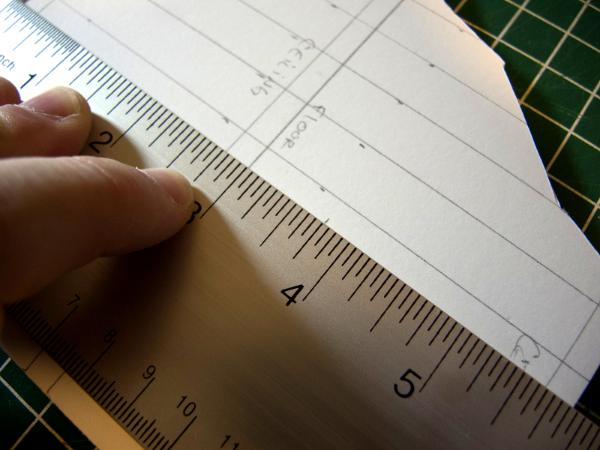
Then extended the sill marks on both floors:
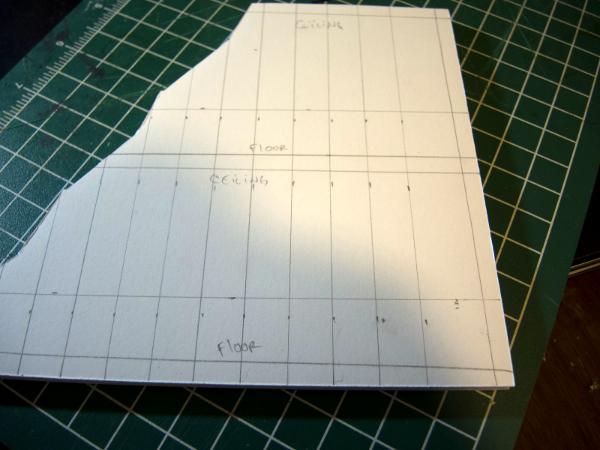
And used Marine and Eisenkern to determine the height of the windows. The Eisenkern is slightly shorter than the Marine, so I decided to use the Marine's head as the ultimate deciding factor for height:
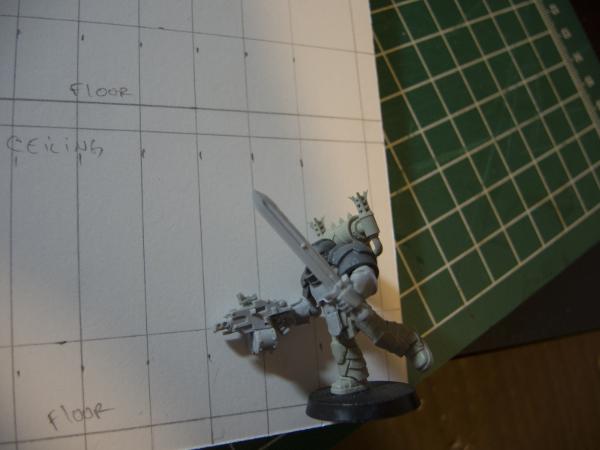
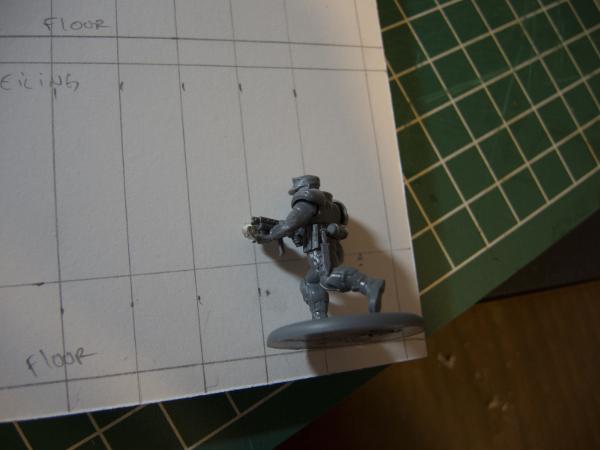
(that first mark)
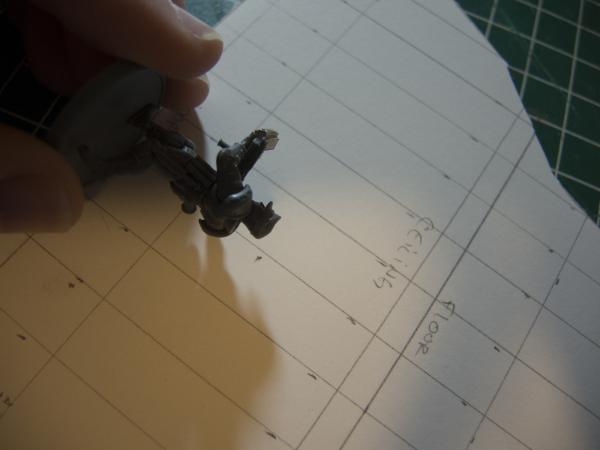
(and then the second)
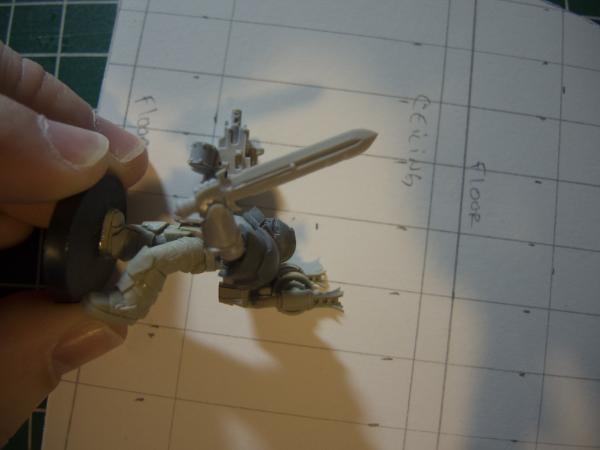
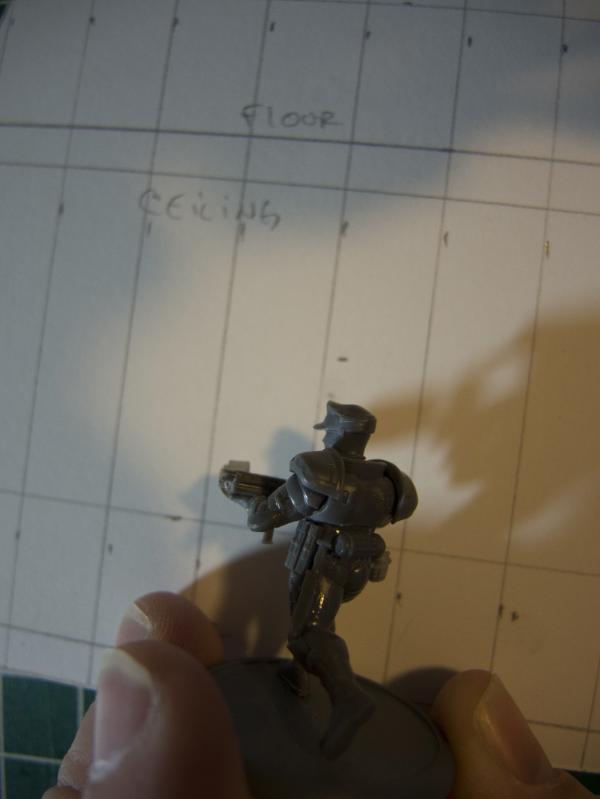
Duplicating the marks across and on both floors:
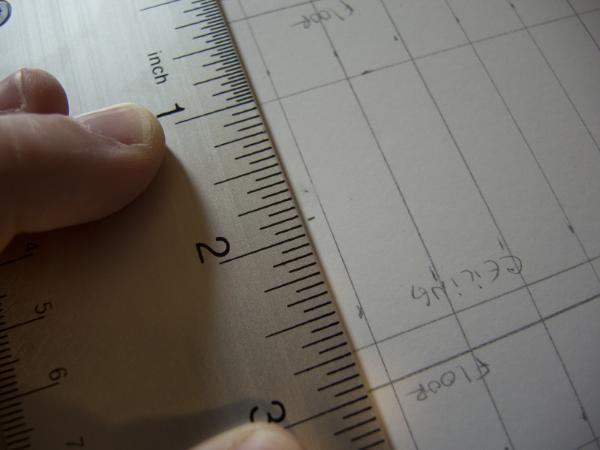
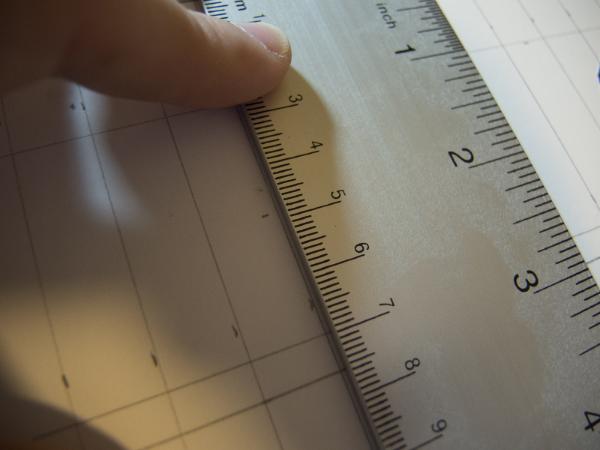
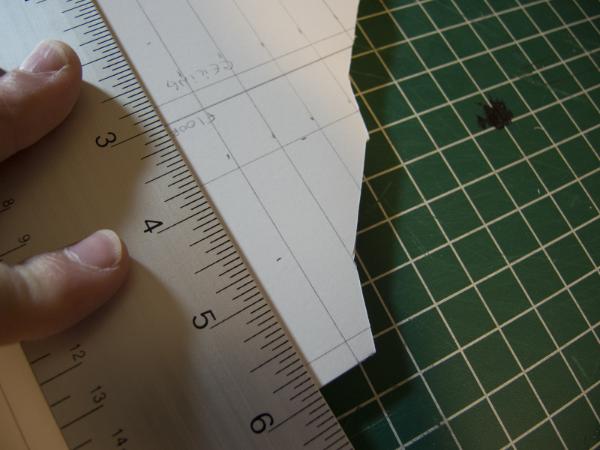
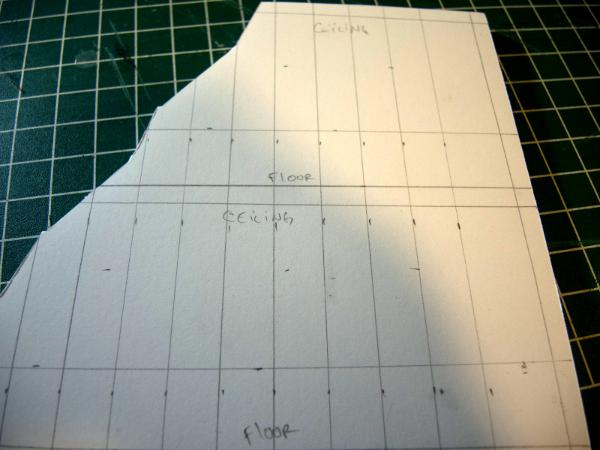
Window tops drawn in:
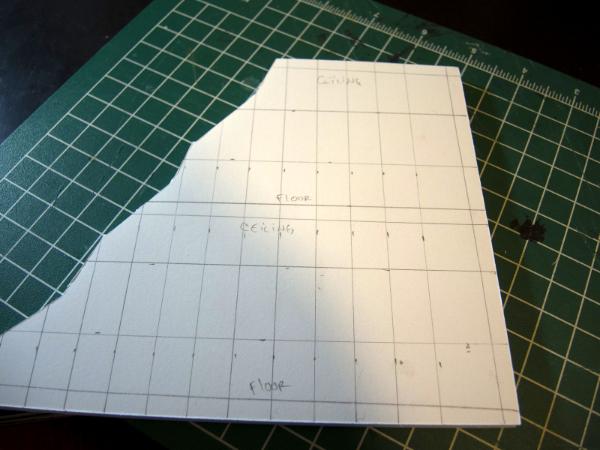
And then, so I don't drive myself bonkers later when I have cut those windows out, I erased the lines between the windows and colored in the windows themselves:
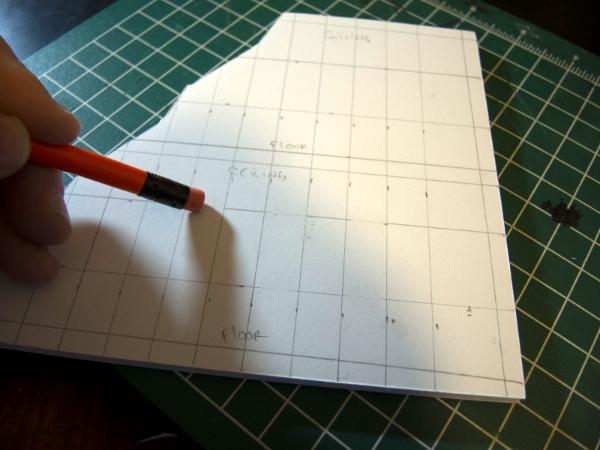
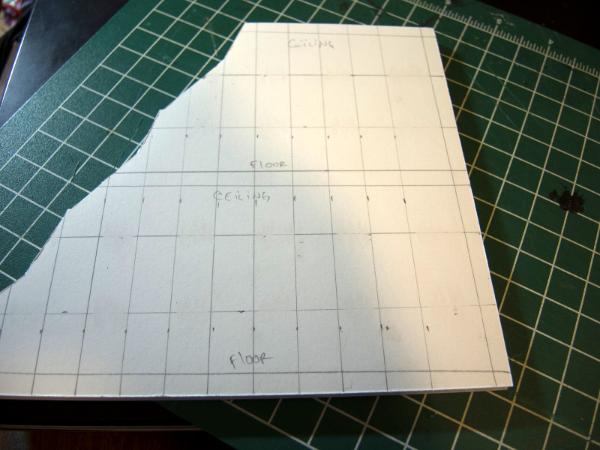
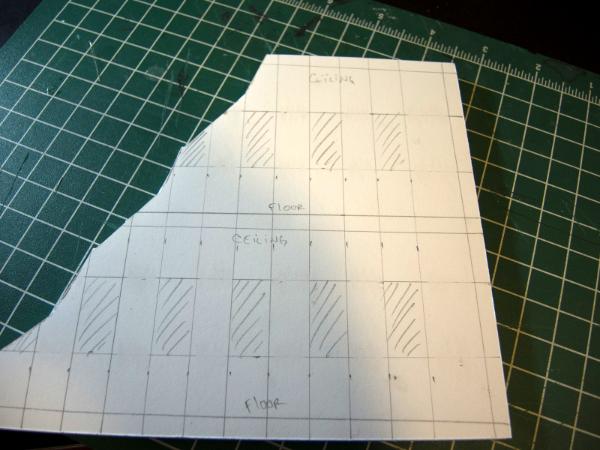
It's almost starting to look like a real building! Also, this was to fix in my brain whether or not I needed to extend the windows on the other wall more than the 3/4" that I had on the other wall. The outer view convinced me of no, that extra 1/4" wouldn't be necessary because the join is meaningless on the exterior (it'll make more sense much later):
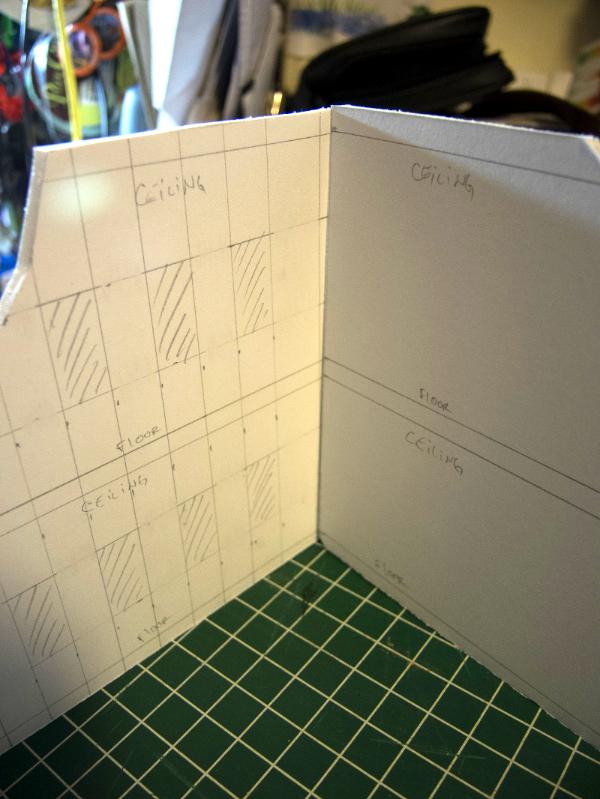
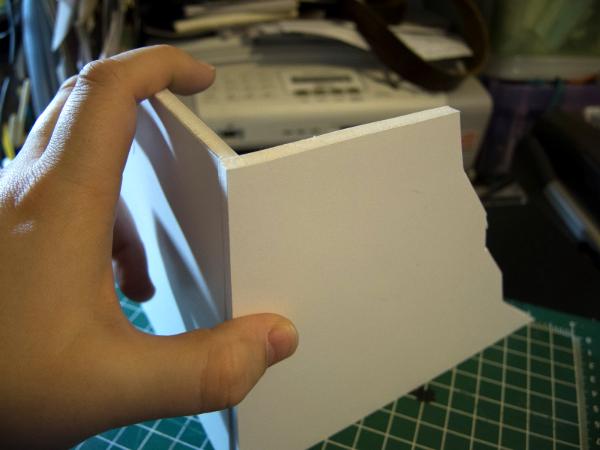
Next I marked the window widths on the other wall and the starting and ending heights for same:
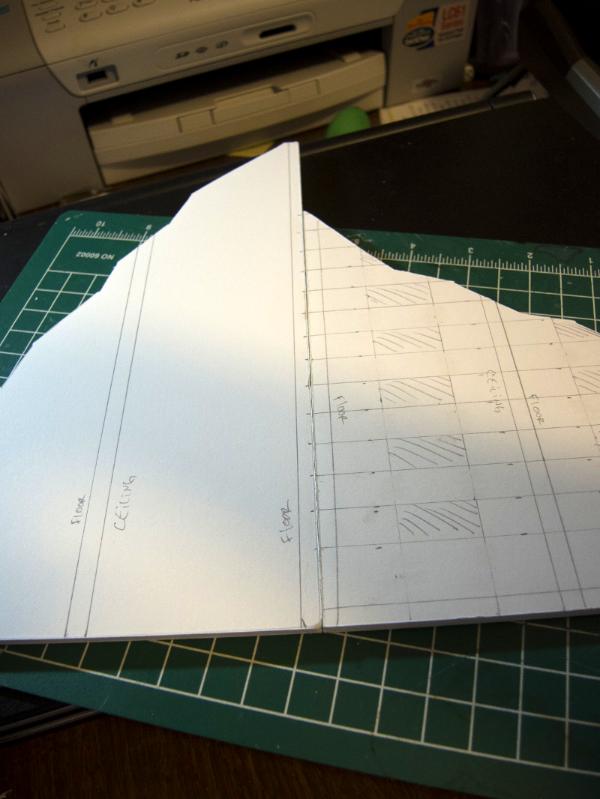
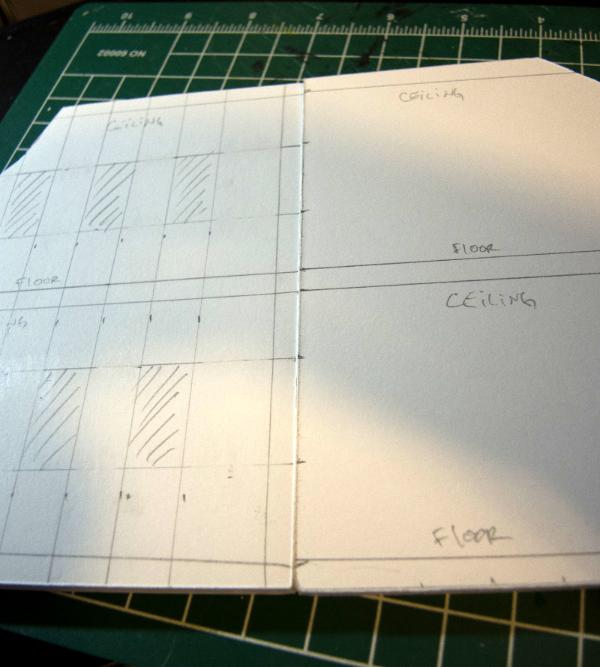
Then T-squared the heck out of those marks:
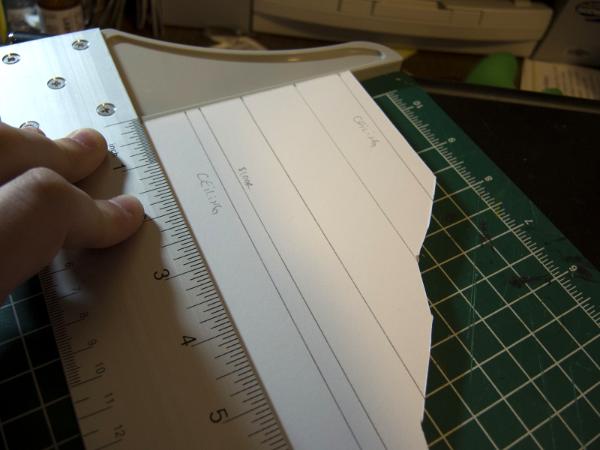
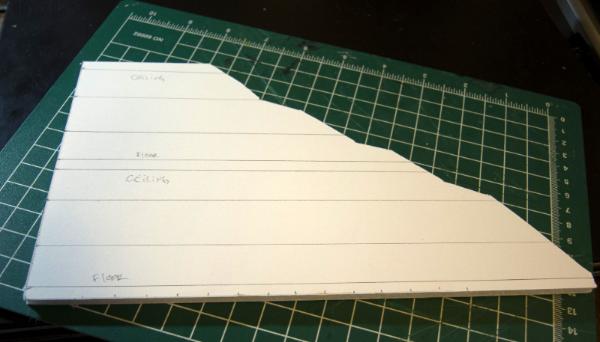
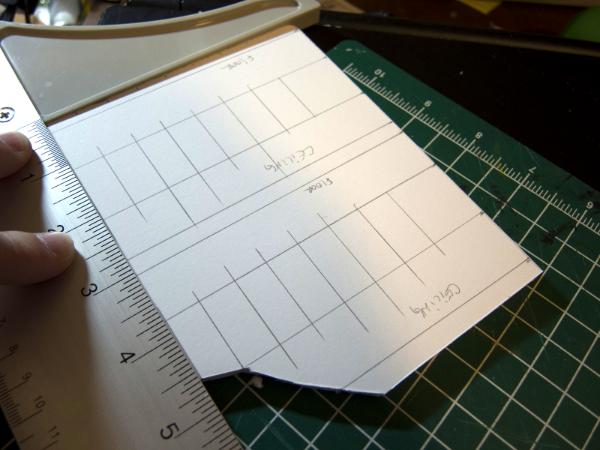
And then made extra marks for more windows because the first wall was shorter than the second. Whoops:
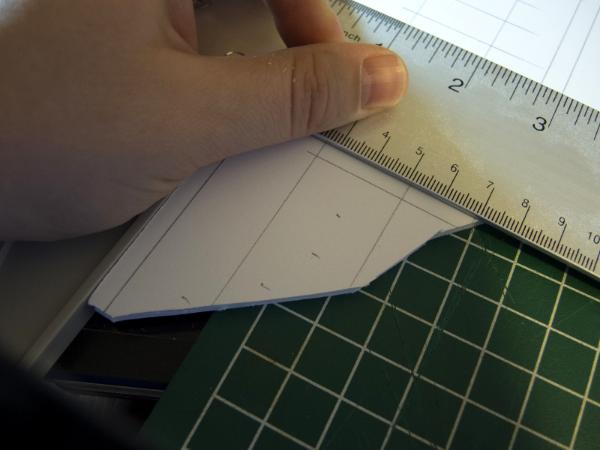
Viola! The second wall windowed up:
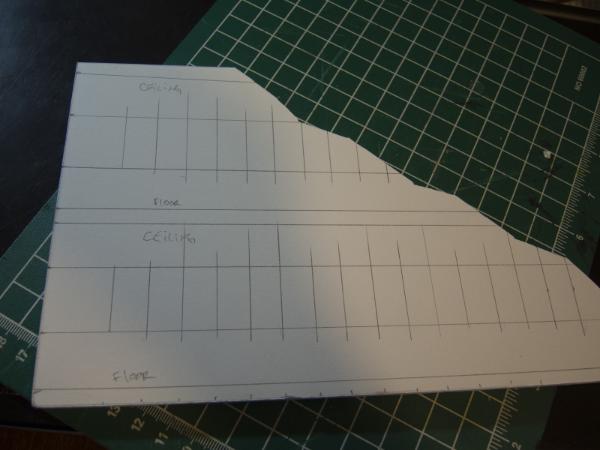
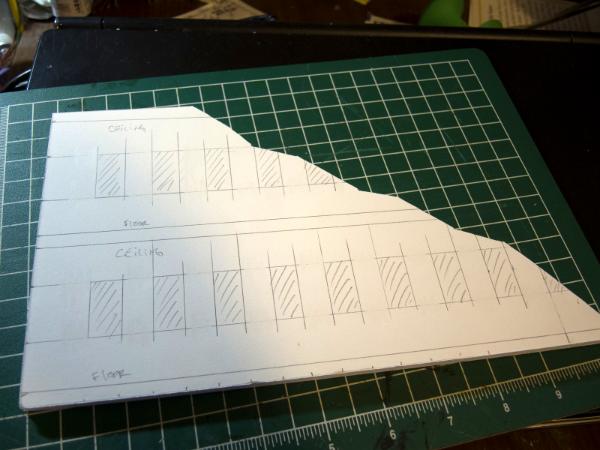
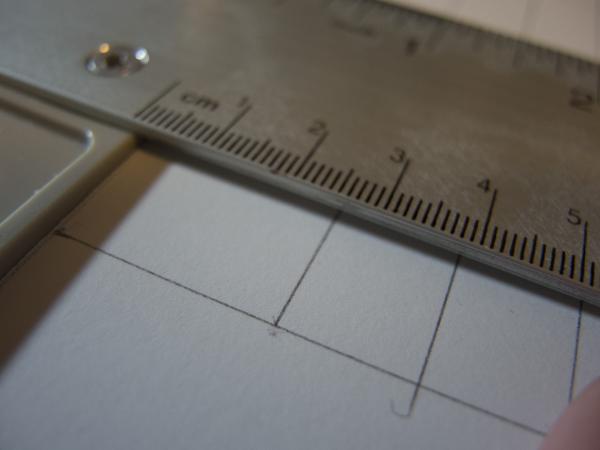
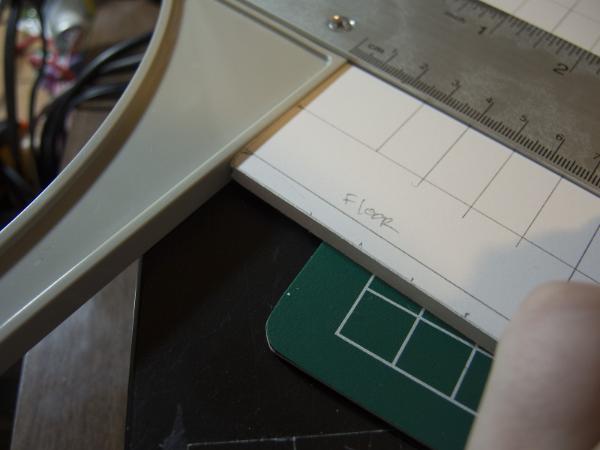
That's it for part one. I just want to advocate for the proper use of the T-square. You want it to hang off the edge of your table or work surface, but still remain flush with the edge of the piece you are working on. For me, I used a cutting mat to prop up the foam core. And here I illustrate how when the measuring tool sits on the same level as your piece it isn't flush to its surface (there's a miniscule gap that can affect your measurements):
And flush (in my case there's still a tiny gap, but it isn't substantial enough for my pencil to escape under. Plus when I apply pressure to the T-square with my hand this gap virtually vanishes):
Anyway, thanks for looking. Have an awesome day, and, as always, C&C is always welcome!
62749
Post by: Dr H
The table layout looks great. Nice variety of shapes and colours. 
Good tutorial too.
76303
Post by: Warboss_Waaazag
 Dr H wrote: Dr H wrote:The table layout looks great. Nice variety of shapes and colours. 
Good tutorial too.
Thanks, Dr H. I thought the table looked a little flat, so I'm thinking of building some more dynamic pieces. As I sell most of this terrain and rarely get to use it, I rarely see it all on the same table. Makes me want to get more uniform with my colors and introduce some more ambitious designs. Any suggestions from the audience?
48248
Post by: kencotter
some rocky outcrops with the plants growing out of them would be cool
76303
Post by: Warboss_Waaazag
 kencotter wrote: kencotter wrote:some rocky outcrops with the plants growing out of them would be cool
Thanks for the feedback, kencotter. Do you mean like the craggy pieces I've done before except with plants aplenty? Or, hmmm, now that I think about it I could probably do something new that fits that criteria, too.
Awesome, keep the ideas coming folks!
89231
Post by: ckig
That board looks beautiful! Lovely colours. I think a water feature would fit in nicely with all the plants maybe.
59054
Post by: Nevelon
Nice stuff. One of these days I’ll make terrain. But it always get shuffled down the To-Do list.
76303
Post by: Warboss_Waaazag
 ckig wrote: ckig wrote:That board looks beautiful! Lovely colours. I think a water feature would fit in nicely with all the plants maybe.
Hmm, like a swamp? Or a stream? Or a lake? I suppose all of those options would work. Thanks for the feedback, ckig. Automatically Appended Next Post:  Nevelon wrote: Nevelon wrote:Nice stuff. One of these days I’ll make terrain. But it always get shuffled down the To-Do list.
Yeah, I know what you mean, Nevelon. For me it's conversions that often take a back burner. I do both, but I feel like I need to focus on one or the other, for months at a time. Thanks for the feedback.
48248
Post by: kencotter
yeah like the rocks you done already with plants would be awesome
62749
Post by: Dr H
Ambitious designs...hmm...
...Look to nature?
Scour the internet for pictures of what you want to see on the table and then do it. 
Nature has produced more interesting/weird/wonderful things than imagination can do many a time. 
Plants on rocks sounds good for the time being. 
76303
Post by: Warboss_Waaazag
 Dr H wrote: Dr H wrote:Ambitious designs...hmm...
...Look to nature?
Scour the internet for pictures of what you want to see on the table and then do it. 
Nature has produced more interesting/weird/wonderful things than imagination can do many a time. 
Plants on rocks sounds good for the time being. 
Good advice. If any body else has ideas please feel free to contribute them any time. I still have in the back of my mind the Mushroom request from kenderthistle from way back on page 11. I haven't forgotten about you! I've just been very, very busy.
Anyway, continuing with the building tutorial, I moved on to the actual cutting of things. After all that careful measuring and lining, I just cut out the windows freehand. I don't know why I prefer it that way, I just do. Anyway, be sure your exacto blade is fresh and sharp before cutting. I lightly cut the surface first, letting the blade do all the work. It's always okay to go over your cuts again and again until they've completely penetrated the foamcore. For me that's usually 3 or 4 strokes per line on the rectangle I've drawn. Also, I'm a righty, so these are "fake action" shots. I did the work with my right hand, then posed my left and took the picture. However, I really do cut stuff pinky out because my little finger helps keep my hand steady as I cut (as I drink a lot of caffeinated beverages which makes minute stability all but impossible for me):
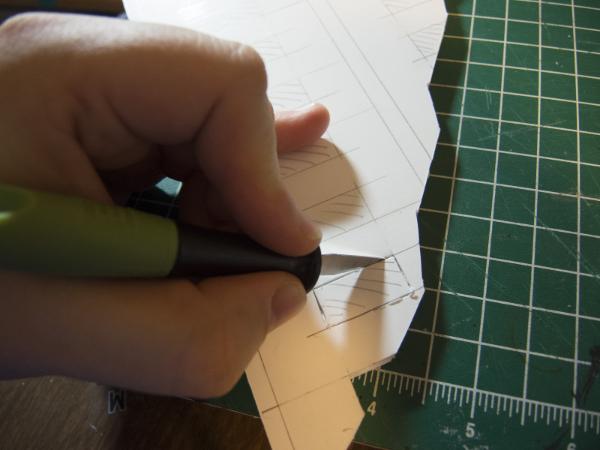
I also press and pull slightly on the part that's going to be cut out with my free hand while I cut. It just seems to make it easier for the pieces to separate or my blade to slice:
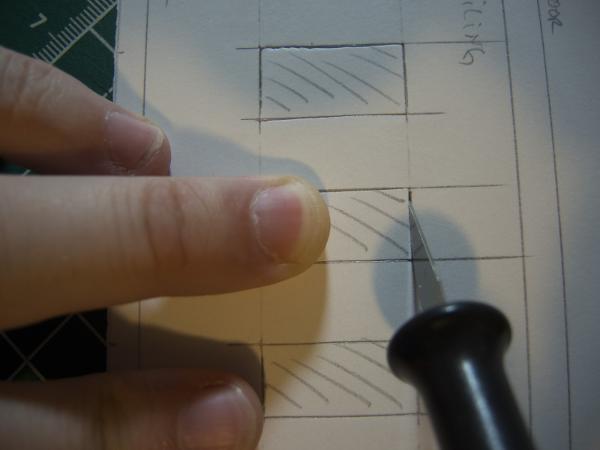
I test my technique and steadiness on one window to begin with, finishing all the cuts on the front of the piece until I can feel the blade moving easily all the way through (this typically means the exacto has cleared the paper on the other side):
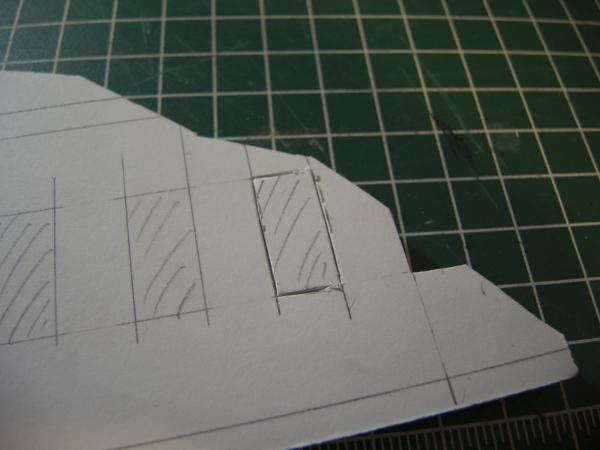
Then I flip the piece over to check where my lines are and clean up the cuts from there:
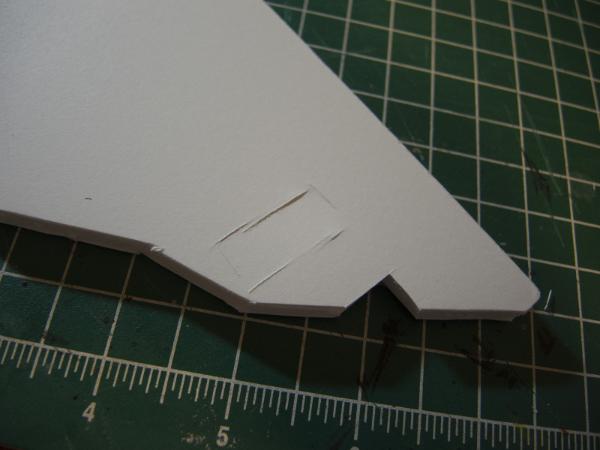
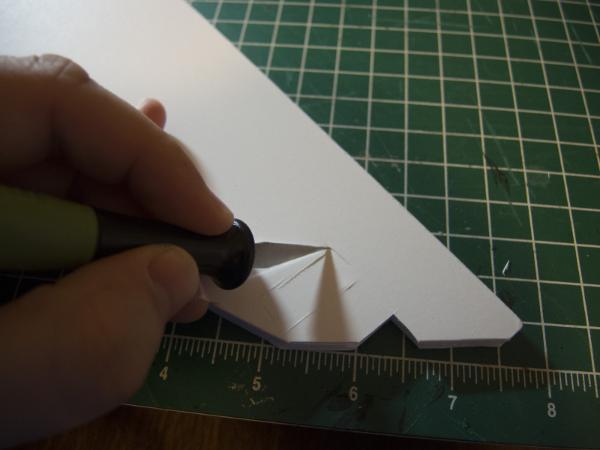
It's important to make sure your blade closes the shape and cuts all the way to the corner. Don't worry about perfection at this stage of the production, there's plenty more to come that will cover your mistakes later. And believe me you will make plenty of mistakes. Don't sweat it:
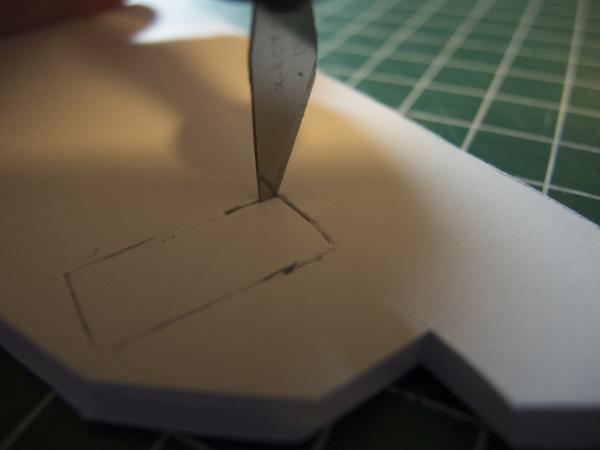
Once I'm satisfied with my cuts I grasp the foam core with one hand, positioning my index and middle finger on the window's frame so that when I push the "blank" out of the hole I've cut the pressure of my fingers doesn't damage the sometimes delicate frame:
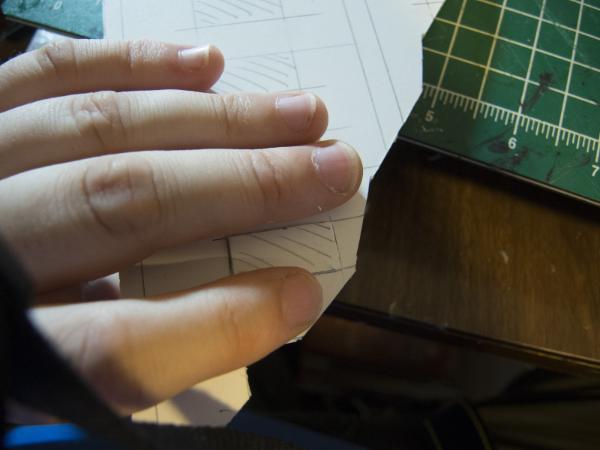
Then I use my thumb to "walk" the blank out. Basically this means applying pressure to first one end and then the other, and alternating this pressure until the blank pops out. The action vaguely resembles waddling or walking, so hence the term:
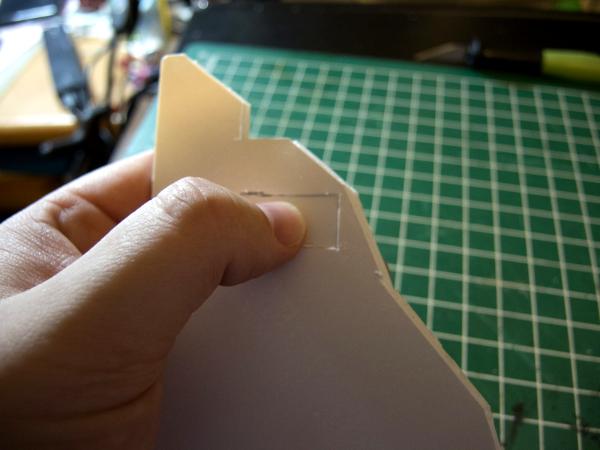
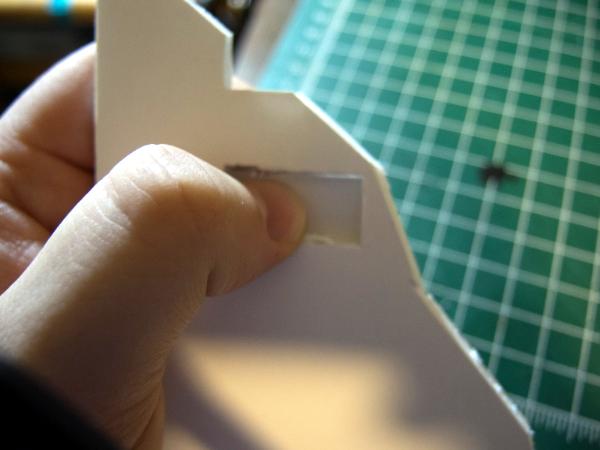
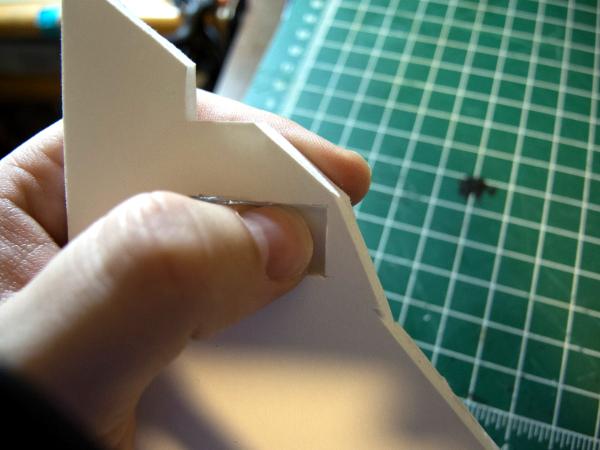
Sometimes this method causes the blank to snag in a corner like it did here:
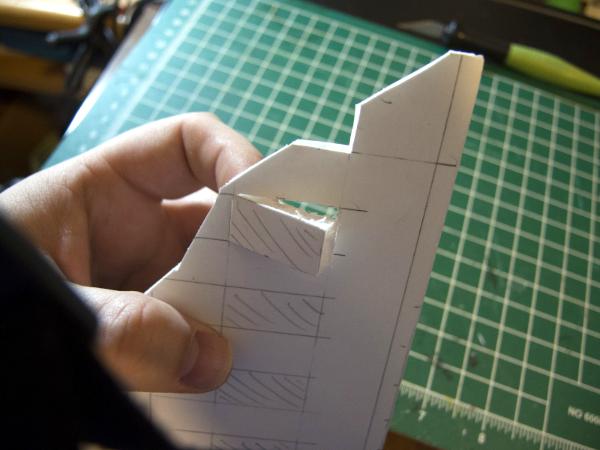
No worries. Just turn the piece over and reverse the process to free it, walking it out the other side:
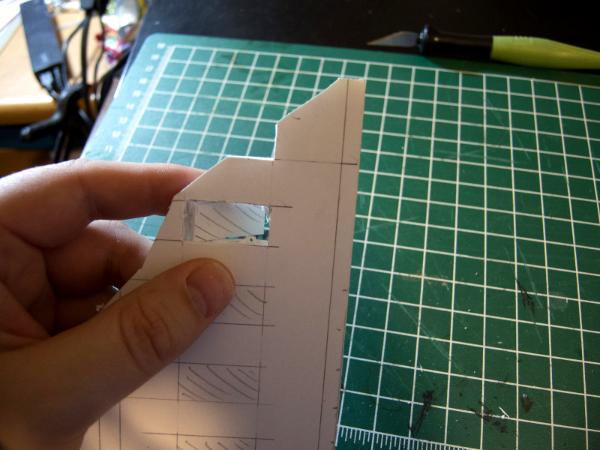
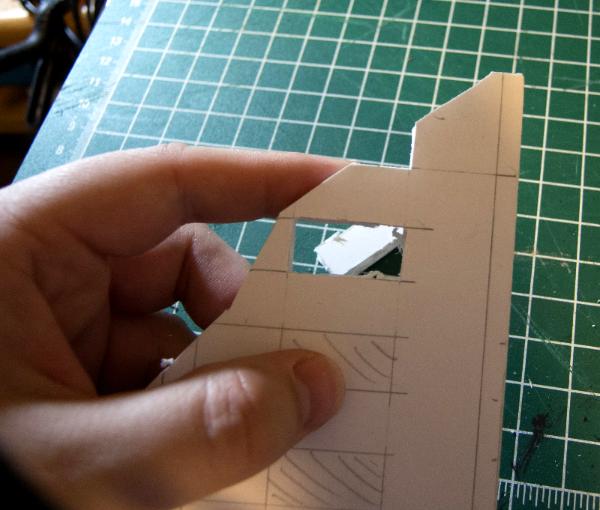
Tada!
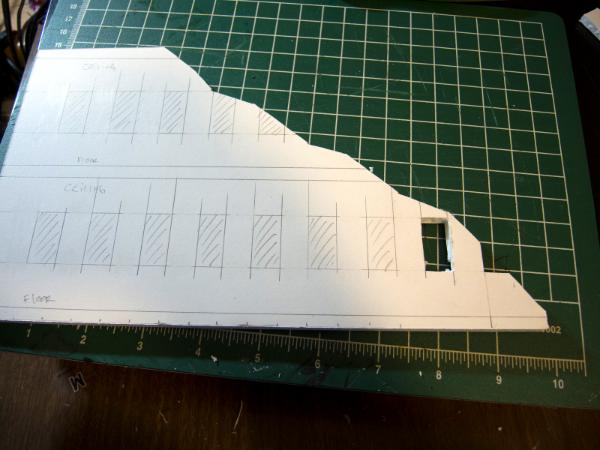
Once I know how the first window reacts, I do all the remaining floor by floor:
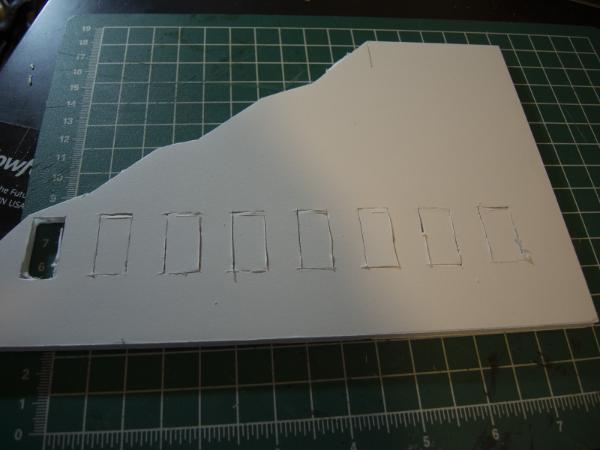
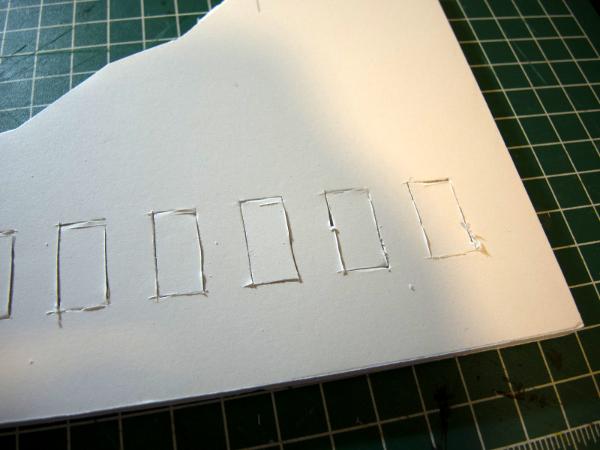
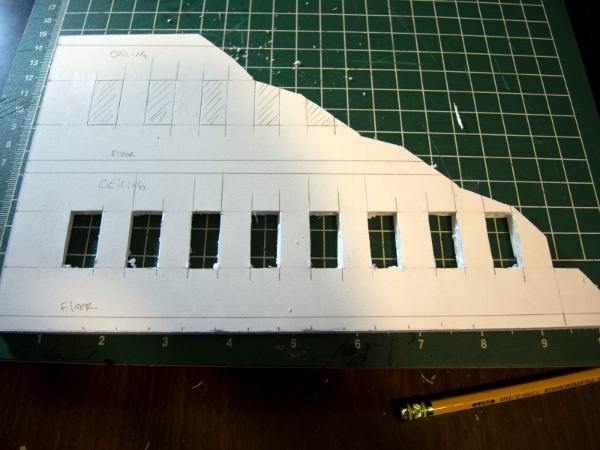
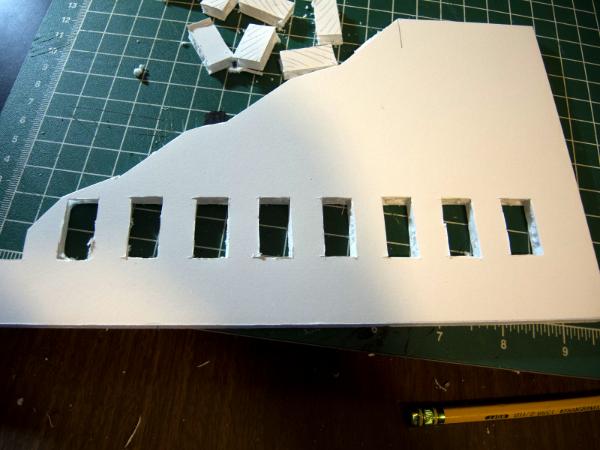
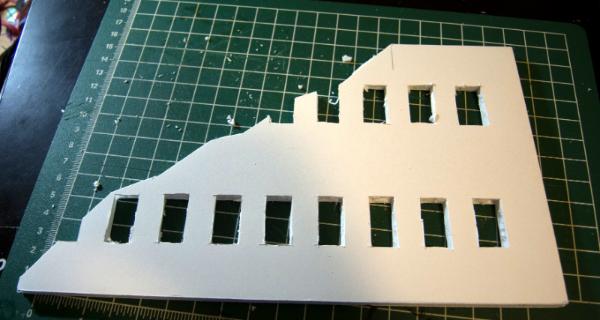
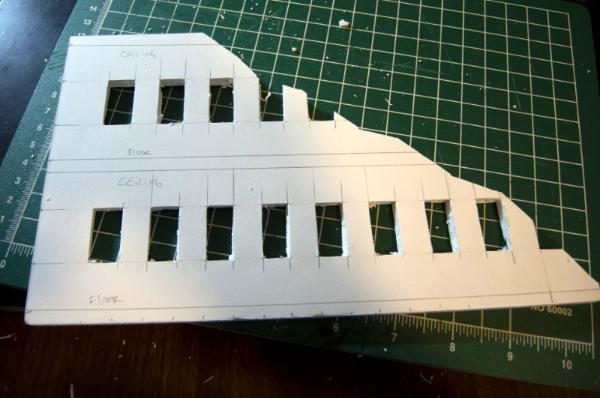
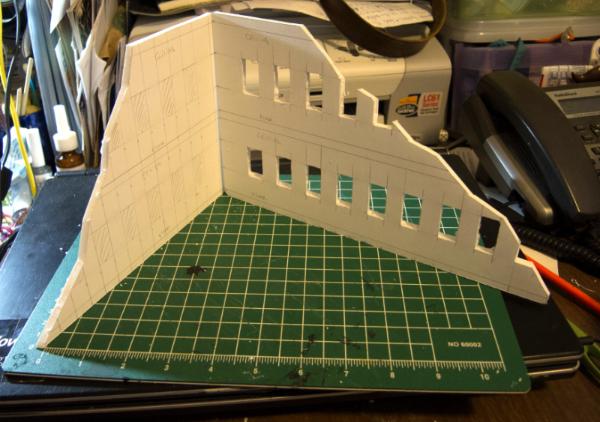
It's almost starting to look like a real building!
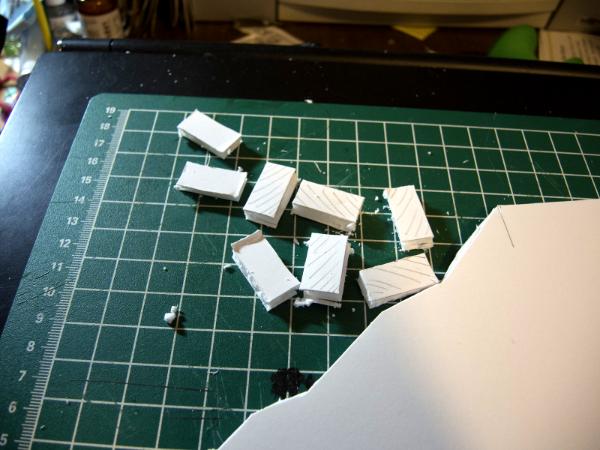
Also, always remember to save your cutoffs for later. You never know when having a small chunk of foamcore will come in handy for debris, a wedge, or what have you:
Thanks for looking! C&C always welcome. There's a lot more of this to come, fyi, so stay tuned folks. Have an awesome day.
10972
Post by: Ruglud
I'll admit, I dislike working with foamcore, such a PITA, but your tutorial is great and I hope it inspires others to give it a go 
76303
Post by: Warboss_Waaazag
 Ruglud wrote: Ruglud wrote:I'll admit, I dislike working with foamcore, such a PITA, but your tutorial is great and I hope it inspires others to give it a go 
Thanks, Ruglud! I like it because it's cheap, comes in easy to work with sizes, and responds well to basic tools, but I understand that not everybody would like it.
Also, thanks for the feedback. Here's an update on the hills I've been working on. First up is the large hill, which dried in the interim between my visits. I touched with indigo first:
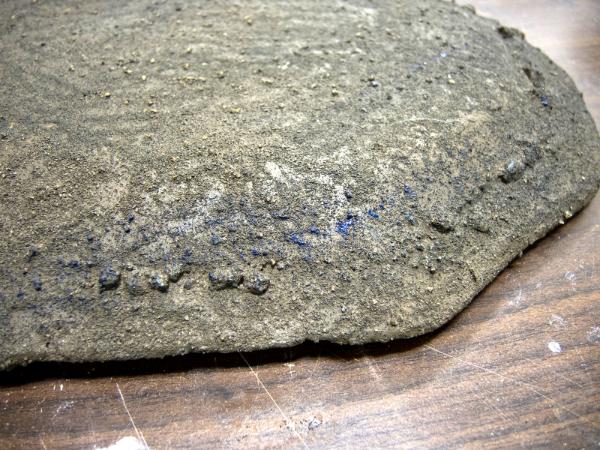
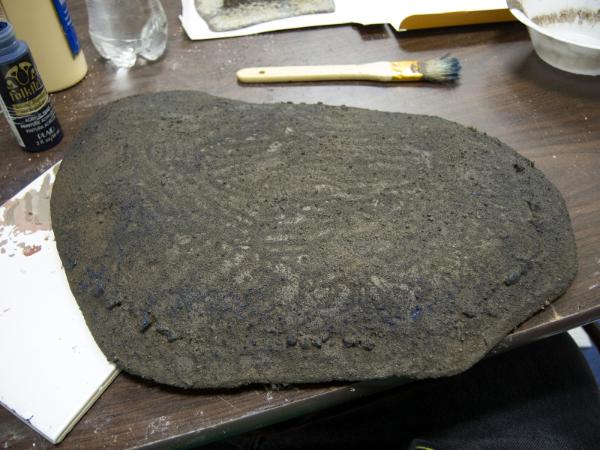
Then red oxide:
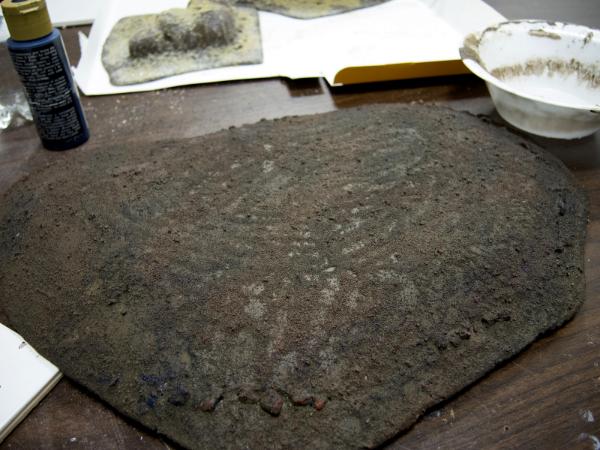
Overbrushed in pink:
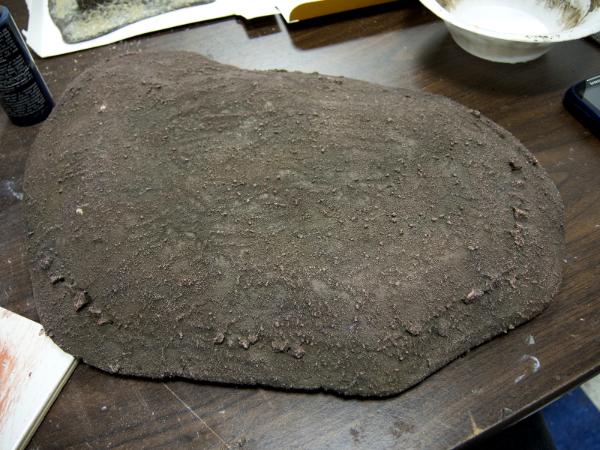
Then picked out a few stones in grey and red:
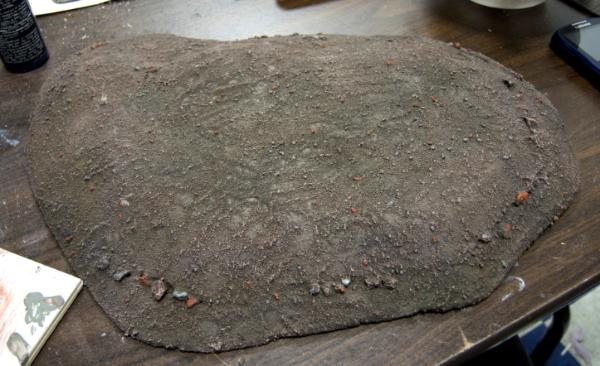
And finally white overall:
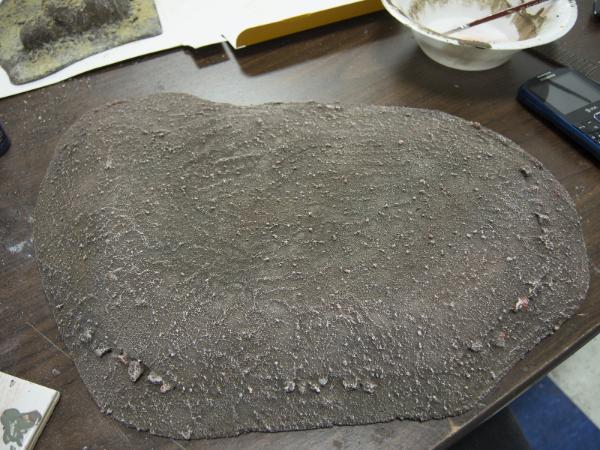
And then flocked in stages:
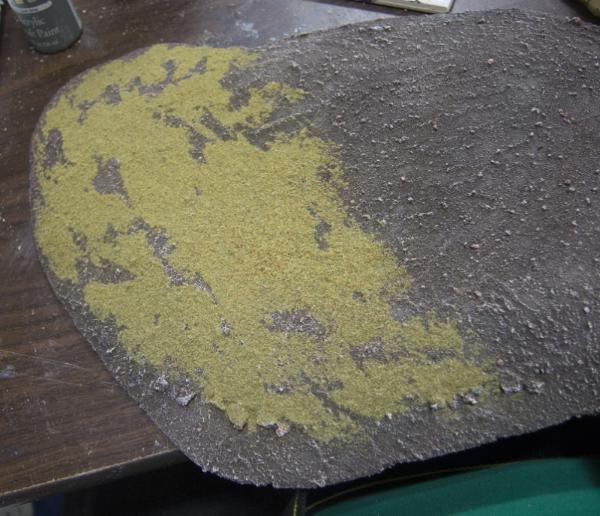
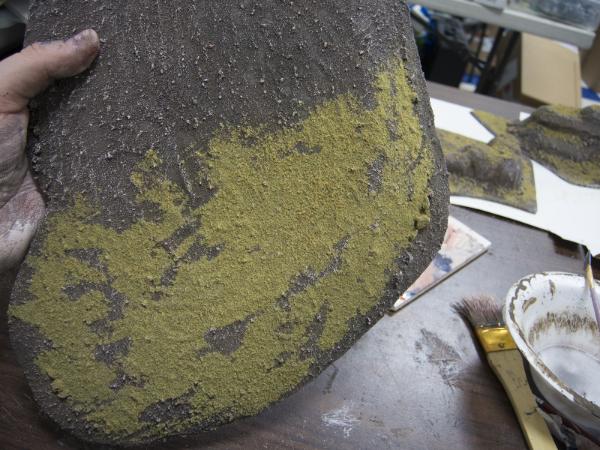
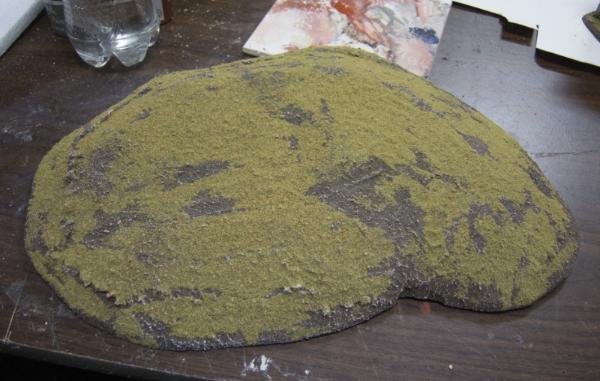
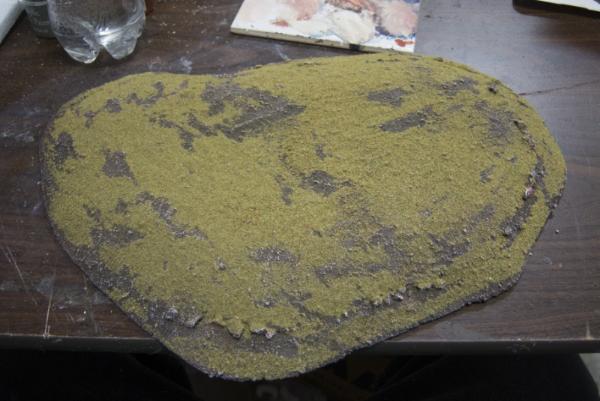
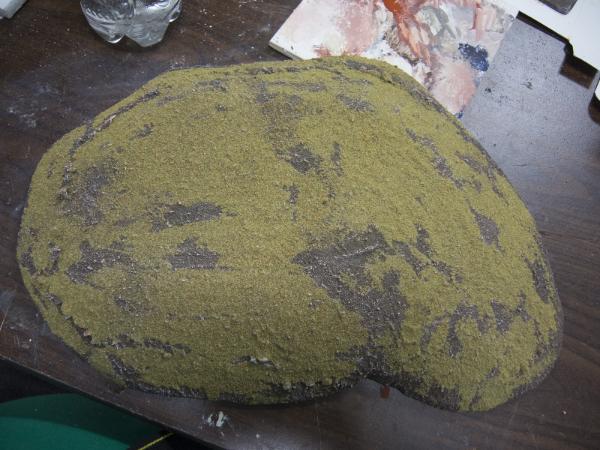
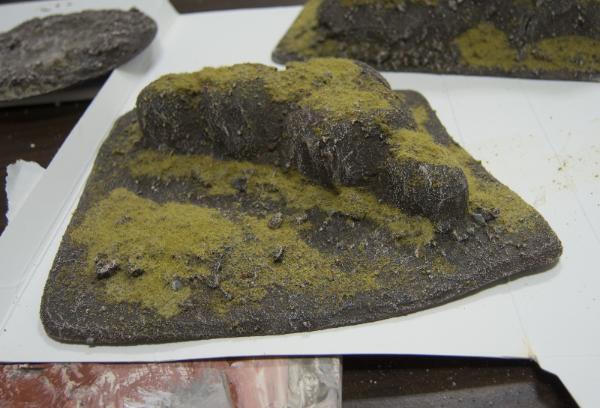
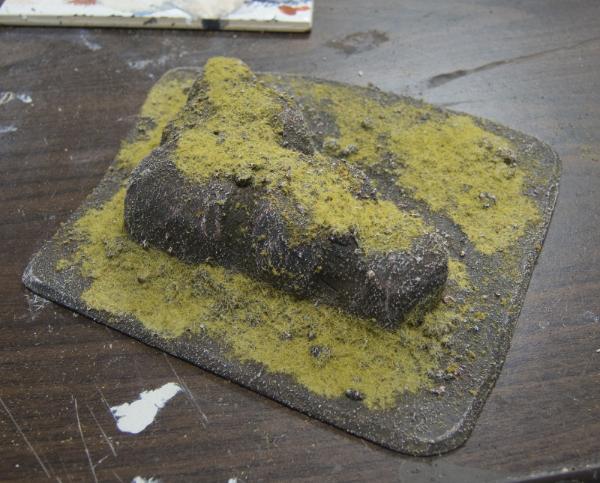
Tomorrow the above hill will get sealed and grassed just like the ridge and wolfshead hill did last time. For some reason I didn't take any pictures of the hill, but here's the ridge. It doesn't look a whole lot different, but what evs:
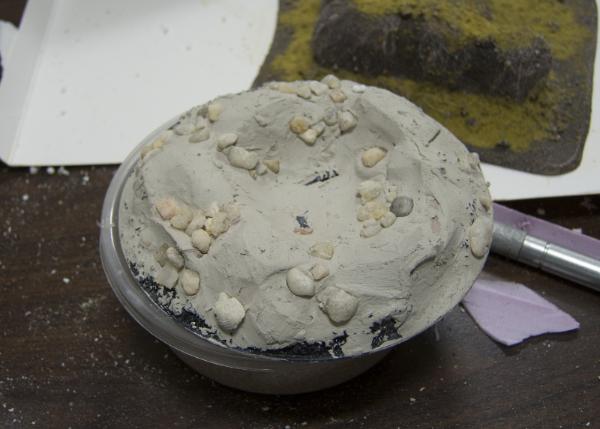
I also did some work on another "cd crater":
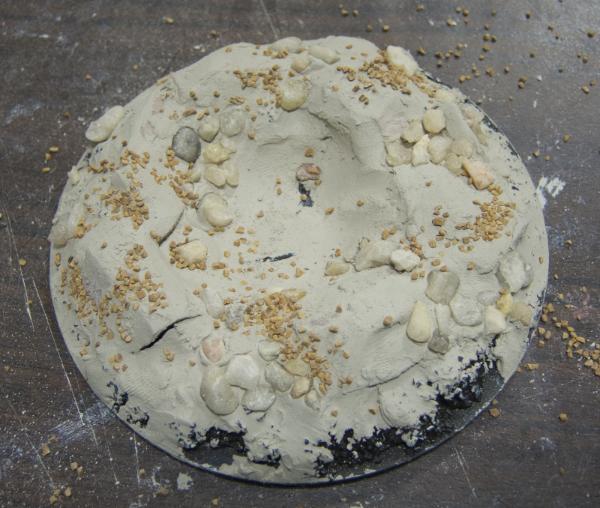
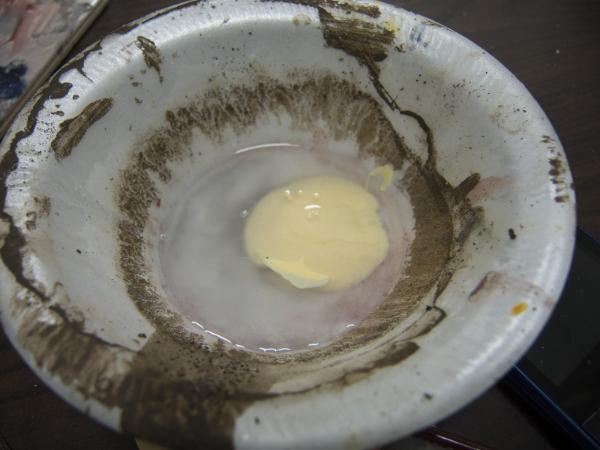
And here's a picture of what my glue mix looks like before I actually mix it:
More replies equals more updates. Thanks for looking. C&C always welcome.
10972
Post by: Ruglud
Forgot to comment on the hill - that's an excellent build / tutorial... really impressive mate and looking forward to the updates 
76303
Post by: Warboss_Waaazag
Thanks, Ruglud! I found a picture of the wolfshead Hill with static grass on it. All I took was one picture for some reason:
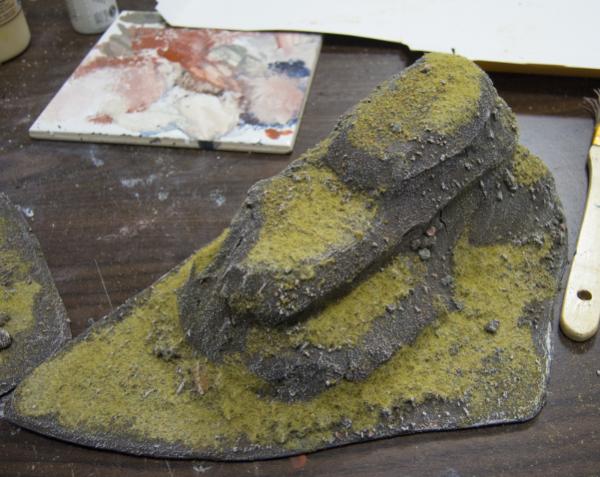
Thanks for looking, there will be more later or tomorrow to show/see.
57070
Post by: SJM
Smart looking hill, I like all the textures that go into it,
72556
Post by: Red Harvest
That static grass mixes well with the other texturing. The hills look like something from the Northernmost latitudes, with the dark soil. Nicely done.
76303
Post by: Warboss_Waaazag
2326
Post by: shasolenzabi
Terrain is all looking good! grassy knolls, rocks and hills, and the shanty too!
Ruined building will be nice as well.
76303
Post by: Warboss_Waaazag
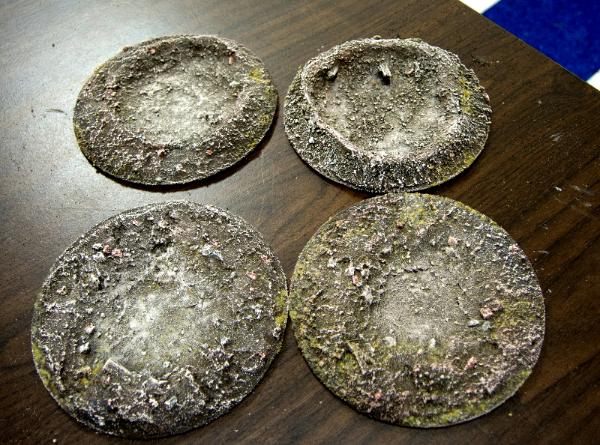
Thanks, shas! Automatically Appended Next Post: The cd craters got some love, too.
I overbrushed them with blue (while my brush still had some off white paint on it, but eh):
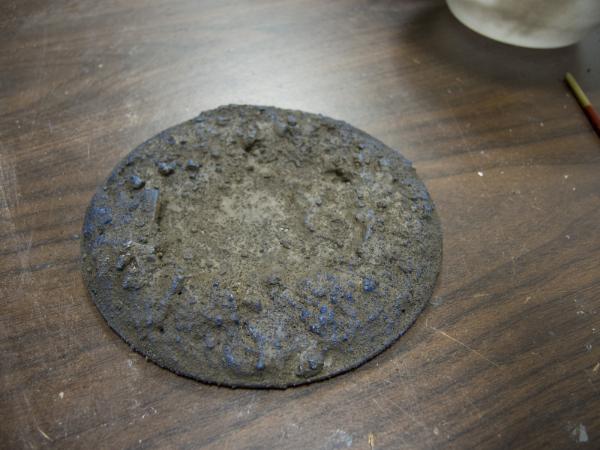
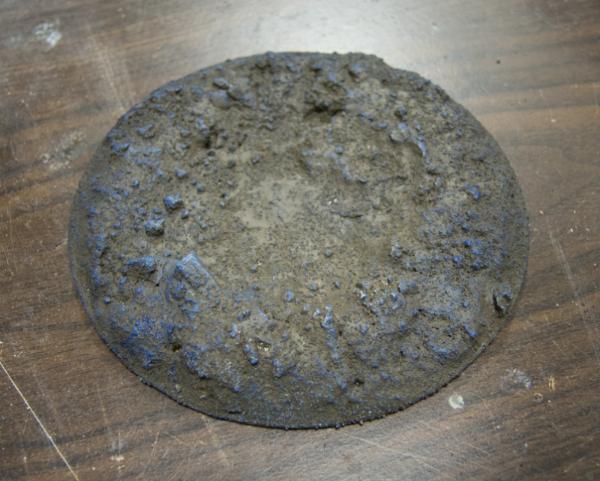
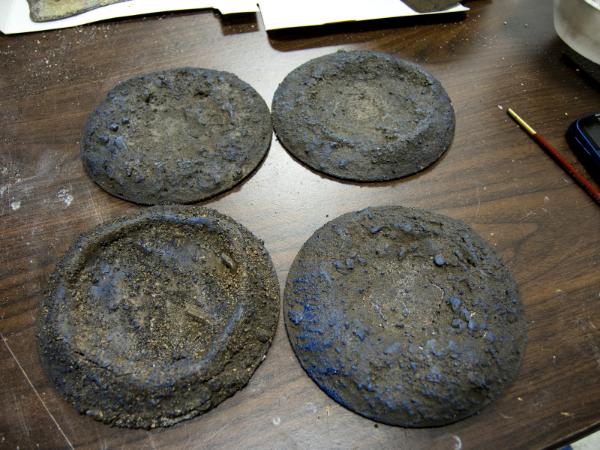
And then red:
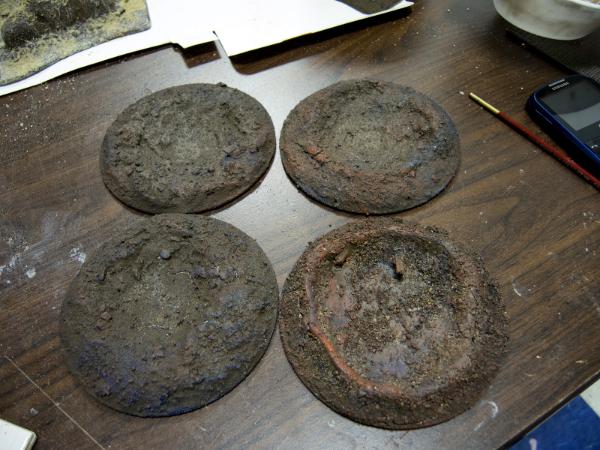
And then pink:
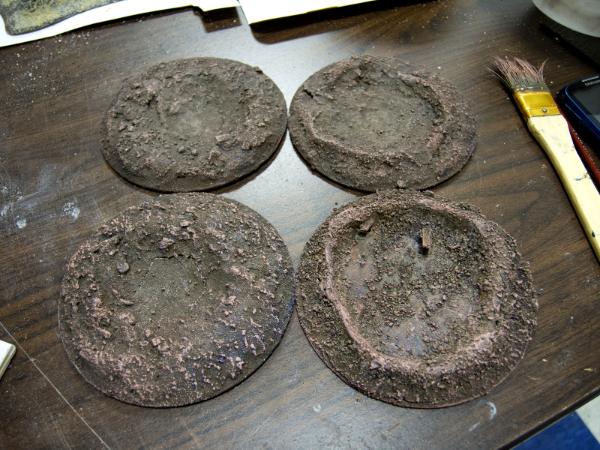
And then I wanted the centers of the blasts to be a slightly different color than the rest of the pieces, so I did them first in a medium grey and then in a 2:1 mix of grey and off white (as shown below):
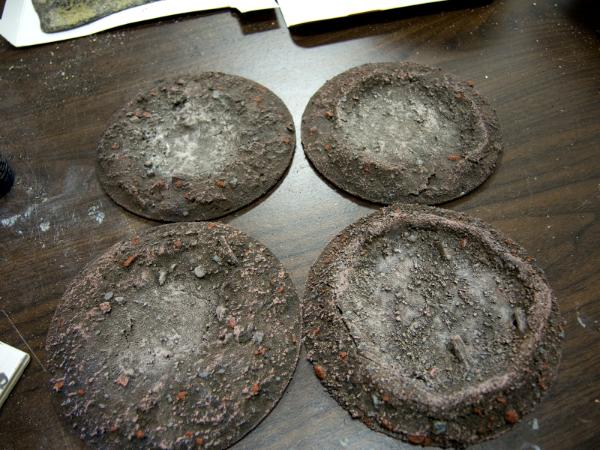
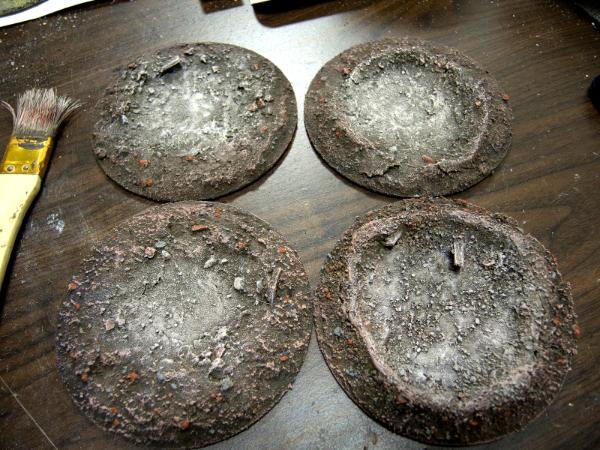
Of course you can see above that I also picked out some rocks in grey and red, and finally treated them with white:
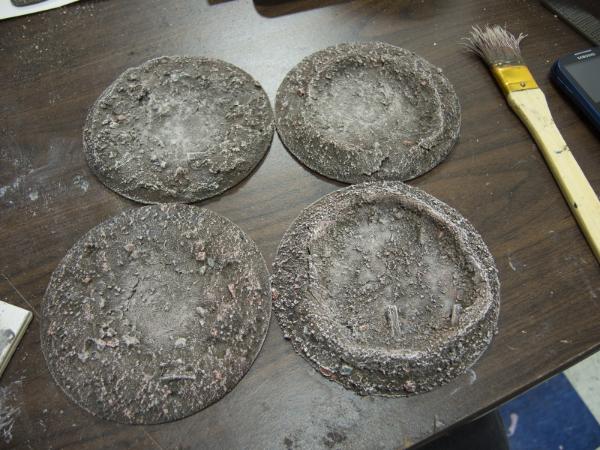
Followed by a teensy tiny amount of flock:
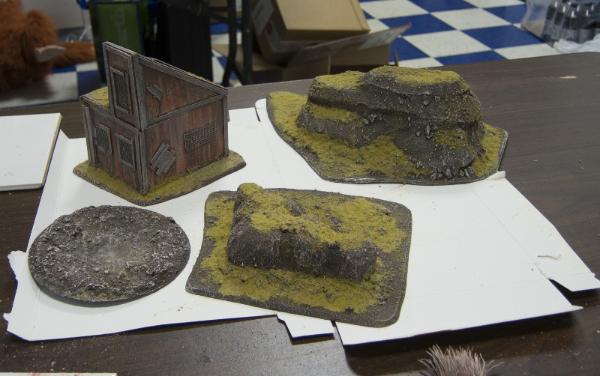
Here they are resting together with the shanty:
76303
Post by: Warboss_Waaazag
To all who were wondering, this is what my glue to water ratio looks like before I mix it:

76303
Post by: Warboss_Waaazag
65595
Post by: Camkierhi
Well you are really knocking it out at the moment. Brilliant work. All looks amazing. Love the table of jungle shots. And the tutorials are spot on. Great stuff.
76303
Post by: Warboss_Waaazag
 Camkierhi wrote: Camkierhi wrote:Well you are really knocking it out at the moment. Brilliant work. All looks amazing. Love the table of jungle shots. And the tutorials are spot on. Great stuff.
Thanks, Cam! Good to have you back.
89231
Post by: ckig
Looking good! And very useful.. if I ever decide to try my hand at terrain 
74210
Post by: Ustrello
Very cool stuff man, helpful too since I am starting to build my own table
76303
Post by: Warboss_Waaazag
 Ustrello wrote: Ustrello wrote:Very cool stuff man, helpful too since I am starting to build my own table
Thanks, Ustrello! Exactly what I'm hoping to do - be helpful to the community by sharing what I love. Have an awesome day!
22619
Post by: inmygravenimage
Thanks man, really informative.
76303
Post by: Warboss_Waaazag
Thanks for the feedback, inmygravenimage. I'll post more progress pics this evening.
10972
Post by: Ruglud
Brilliant work - your terrain absolutely oozes class...
68152
Post by: JoeRugby
What you finaly do the table pics I wanted and I missed them :(.
Looking really good I'd love to play on that board with a science outpost in the middle 
84656
Post by: nflagey
 Warboss_Waaazag wrote: Warboss_Waaazag wrote:Sorry to keep you waiting so long, JoeRugby, but here finally are pictures of my alien jungle terrain all sprawled out on a regulation 6x4 table. Enjoy:
C&C always welcome. Thanks for looking and have an awesome day!
This is beautiful!
And the fact it's colorful changes from the usual grimdark.
I would love to have my Orks burn all those trees!!! 
76303
Post by: Warboss_Waaazag
 Ruglud wrote: Ruglud wrote:Brilliant work - your terrain absolutely oozes class...
Wow. Thank you. I'm flattered
 JoeRugby wrote: JoeRugby wrote:What you finaly do the table pics I wanted and I missed them :(.
Looking really good I'd love to play on that board with a science outpost in the middle 
Thanks, Joe!
76303
Post by: Warboss_Waaazag
 nflagey wrote: nflagey wrote: Warboss_Waaazag wrote: Warboss_Waaazag wrote:Sorry to keep you waiting so long, JoeRugby, but here finally are pictures of my alien jungle terrain all sprawled out on a regulation 6x4 table. Enjoy:
C&C always welcome. Thanks for looking and have an awesome day!
This is beautiful!
And the fact it's colorful changes from the usual grimdark.
I would love to have my Orks burn all those trees!!! 
Thanks very much, nflagey. I'd love to see your Orks on this table, too. My own Boyz could use a good scrap.
84656
Post by: nflagey
Hopefully I'll have the opportunity to visit NYC sometime soon 
76303
Post by: Warboss_Waaazag
Sorry it's been so long since I updated this blog. I promise there will be updates soon. I have been very busy with "real life". You will all be rewarded for your patience soon. Thanks!
76303
Post by: Warboss_Waaazag
76303
Post by: Warboss_Waaazag
76303
Post by: Warboss_Waaazag
2326
Post by: shasolenzabi
So many images! and the production is like seeing a terrain bakery of permanent works of cake and pastry!
22619
Post by: inmygravenimage
That's... a lot of stuff! rather awestruck.
75552
Post by: MagosBiff90
Bloody hell... that is a lot of terrain! Very cool...... for me.... those craters are my fav! Very nicely done and cool to get an insight into the process!
Thanks for sharing!
76303
Post by: Warboss_Waaazag
 shasolenzabi wrote: shasolenzabi wrote:So many images! and the production is like seeing a terrain bakery of permanent works of cake and pastry!
 MagosBiff90 wrote: MagosBiff90 wrote:Bloody hell... that is a lot of terrain! Very cool...... for me.... those craters are my fav! Very nicely done and cool to get an insight into the process!
Thanks for sharing!
Wow, thanks guys! I always feel like I'm not doing enough and that somehow I'm falling behind, but I guess my reality is that I work at a murderous pace and I'm my own worst critic. My next update will have to wait for tomorrow, as I am exhausted tonight. Thanks again and I hope everyone has a extra special day! Cheers.
2326
Post by: shasolenzabi
No need to kill yourself
76303
Post by: Warboss_Waaazag
2326
Post by: shasolenzabi
You must have made at least an entire state worth of terrain!
76303
Post by: Warboss_Waaazag
I've certainly made a lot. I actually only work on this commission one day a week. It's never ending, but I'm loving it.
76303
Post by: Warboss_Waaazag
76303
Post by: Warboss_Waaazag
76303
Post by: Warboss_Waaazag
Wow, no feedback at all? No ideas? Come on guys, anything!
48248
Post by: kencotter
whats the scale like on the bird house could be a small fantasy/mordheim building
76303
Post by: Warboss_Waaazag
 kencotter wrote: kencotter wrote:whats the scale like on the bird house could be a small fantasy/mordheim building
Hooray! Feedback! That might actually work, kencotter. The birdhouse is about the right size for that. I'll get some photos with minis for scale.
Anybody else have any suggestions?
75552
Post by: MagosBiff90
Would be cool as a stables perhaps? or an old byre..... nice and muddy.... or even have it half underground and the round "door" could be for a squat or dwarf hall or something? 
Those drones look really cool aswell nice form to them....
62749
Post by: Dr H
Good work 'boss. 
Yeah the birdhouse should make a good basis for a house of some kind. Although you'll get bonus kudos points for referencing birds somewhere in the build or paint job. 
I love those turrets and have thought about making some "in scale".
What to do with them? Other that using them as turrets, maybe add some arms/legs and make robots of them, or stick them on a tank and use them as sponsons etc...
76303
Post by: Warboss_Waaazag
 Dr H wrote: Dr H wrote:Good work 'boss. 
Yeah the birdhouse should make a good basis for a house of some kind. Although you'll get bonus kudos points for referencing birds somewhere in the build or paint job. 
I love those turrets and have thought about making some "in scale".
What to do with them? Other that using them as turrets, maybe add some arms/legs and make robots of them, or stick them on a tank and use them as sponsons etc...
Thanks, Dr H. I was considering using the turrets as parts for a robot's forearms. They aren't very articulate; they don't open/collapse. They're static. They come apart easy though.
87301
Post by: lliu
Those Turrets look really sleek. You could make them into, like, Tau or Tauist buildings and weapons batteries, or some Alien Dropship.
Automatically Appended Next Post:
Those pads on the sides could be used for some Titan-Sized models.
76303
Post by: Warboss_Waaazag
lliu wrote:Those Turrets look really sleek. You could make them into, like, Tau or Tauist buildings and weapons batteries, or some Alien Dropship.
Those pads on the sides could be used for some Titan-Sized models.
These are interesting ideas, lliu. The only issue is that the turrets are really small. Only about as big a space marine. But they may work as Tau stuff. Might have to try my hand at that.
45565
Post by: cormadepanda
I am way too impressed with the quantity and quality of the terrain you make. Well done.
76303
Post by: Warboss_Waaazag
 cormadepanda wrote: cormadepanda wrote:I am way too impressed with the quantity and quality of the terrain you make. Well done.
I'm very flattered, comradepanda. Thank you very much. I'll have another picture - packed update in a few days. Thanks for looking, everyone and have just a fantastic day.
9394
Post by: Malika2
That terrain is just mindblowing. What about those robots though, what are they?
76303
Post by: Warboss_Waaazag
 Malika2 wrote: Malika2 wrote:That terrain is just mindblowing. What about those robots though, what are they?
Wow, thank you!
The turrets are originally from the game Portal. Thinkgeek had a run of them and I had a 50 dollar gift certificate and couldn't decide what to get, so I bought a bunch. They were all "blind packs" so I got a bird nest and a comfort cube in addition to these walking turrets.
76303
Post by: Warboss_Waaazag
76303
Post by: Warboss_Waaazag
65595
Post by: Camkierhi
Your technique is quick and very effective. As always looking good.
76303
Post by: Warboss_Waaazag
 Camkierhi wrote: Camkierhi wrote:Your technique is quick and very effective. As always looking good.
Thanks, Cam! I'm a firm believer in using simple materials to make beautiful things. One needn't use super expensive stuff just to make their art look perfect. You can make virtually anything with the simplest materials if you are inventive and willing to make mistakes.
65595
Post by: Camkierhi
There are no such things as mistakes, just WIP.
And indeed you are absolutely right, cheap as chips is best. On that note, I use grit for bird cages alot, dont know how it compares to the aquarium grit you use, would be interested to know. Also I use PVA and kitty litter for larger rubble, again interesting to see how others use different materials for similar results.
2326
Post by: shasolenzabi
Interesting, if we do go post-apocalyptic, you have a hidden treasure in those terrain pieces if we go from paper to bottle caps! 
22619
Post by: inmygravenimage
Your wips are an absolute inspiration mate; I've said it before, and I'll say it again. You've totally made me push myself, particularly in the current League contest. Fantastic work.
62749
Post by: Dr H
Good work, 'boss. 
I now have a hot-glue gun. My first thought on trying it out (had to check it worked, of course. New toy an' all) was the potential for making giant spider webs...
76303
Post by: Warboss_Waaazag
Thanks for all the wonderful feedback everyone!
 inmygravenimage wrote: inmygravenimage wrote:Your wips are an absolute inspiration mate; I've said it before, and I'll say it again. You've totally made me push myself, particularly in the current League contest. Fantastic work.
Thanks very much, inmygravenimage! I'm very glad to inspire you. It's always good to give back to the community.
 shasolenzabi wrote: shasolenzabi wrote:Interesting, if we do go post-apocalyptic, you have a hidden treasure in those terrain pieces if we go from paper to bottle caps! 
Hooray? But I will have to tear apart all my beautiful terrain to use it. Oh, dilemma!
 Camkierhi wrote: Camkierhi wrote:There are no such things as mistakes, just WIP.
And indeed you are absolutely right, cheap as chips is best. On that note, I use grit for bird cages alot, dont know how it compares to the aquarium grit you use, would be interested to know. Also I use PVA and kitty litter for larger rubble, again interesting to see how others use different materials for similar results.
Yeah, it's really cool to get an idea of what everybody uses.
 Dr H wrote: Dr H wrote:Good work, 'boss. 
I now have a hot-glue gun. My first thought on trying it out (had to check it worked, of course. New toy an' all) was the potential for making giant spider webs...
You have no idea. Whether you want to or not you will soon have strands everywhere. EVERYWHERE, Dr H. And tiny balls of cooled glue. Just be careful with it, I once burned all the skin off my lower left pinky because I didn't realize it was right up against the super hot nozzle. It literally registered as freezing cold first, then pain, then hot. Stupid brain.
I'll have some more updates either later this evening or tomorrow.
76303
Post by: Warboss_Waaazag
22619
Post by: inmygravenimage
Some excellent ales there, btw  Blue Moon always pleases me. I'm less of a cider man, although good for making space orchards, I see 
2326
Post by: shasolenzabi
Yeah, but the caps could mean the difference between purified water to stave off dehydration, or bullets to defend yourself with! LOL!
76303
Post by: Warboss_Waaazag
 inmygravenimage wrote: inmygravenimage wrote:Some excellent ales there, btw  Blue Moon always pleases me. I'm less of a cider man, although good for making space orchards, I see 
Yes. I'm not a huge fan of most ciders, either. But I frequent parties with folks who do. And they all know I collect caps for terrain.
Automatically Appended Next Post:  shasolenzabi wrote: shasolenzabi wrote:Yeah, but the caps could mean the difference between purified water to stave off dehydration, or bullets to defend yourself with! LOL!
Alright, you win this round, logic.
76303
Post by: Warboss_Waaazag
22619
Post by: inmygravenimage
Whilst very cool, it's quite a stark transition from trunk to foliage. Possibly more gradation? Also, this evening I had a gingered beer from the mighty Badger - at 5.2%, worked a treat with me curry  
76303
Post by: Warboss_Waaazag
 inmygravenimage wrote: inmygravenimage wrote:Whilst very cool, it's quite a stark transition from trunk to foliage. Possibly more gradation?
Also, this evening I had a gingered beer from the mighty Badger - at 5.2%, worked a treat with me curry  
Yeah I hear what you're saying, but that isn't in the client's budget. So I build things a little simpler.
Gingered beer you say? That sounds quite good. Is it like spiced wine?
87301
Post by: lliu
Wow! This is inspirational... And, about gingered beer, are you supposed to be talking about that in a website where at least 1 12 year old is on...
76303
Post by: Warboss_Waaazag
lliu wrote:Wow! This is inspirational... And, about gingered beer, are you supposed to be talking about that in a website where at least 1 12 year old is on...
What difference does talking about beer or not talking about beer make? How does someone's age affect anything about the conversation? Are you kidding me? This is a website dedicated to the glorification and trivialization of war and destruction and you're worried about casual conversations about beer?
87301
Post by: lliu
Well... If I am allowed to... Main root's ginger beer is fantastical.
22619
Post by: inmygravenimage
Blandford flyer is an IPA style beer with ginger infused into it, rather than a fermented ginger ale.
Also, I'm fairly sure that 12-year olds are aware of the existence of alcohol.
76303
Post by: Warboss_Waaazag
22619
Post by: inmygravenimage
You are a machine. Staggering level of output!
76303
Post by: Warboss_Waaazag
45565
Post by: cormadepanda
Jebus, your skills and method is simple and rewarding. You are still blowing my mind here.  If I only had a bit of what you do.
88080
Post by: ciuncky
Great stuff here mate. I enjoy making my own bases as well, sadly due to space i have to limit myself to small things.
but the CD and drink caps idea is amazing, and it's really interesting how you used the straws to make bases for the plants. Until i saw that i thought it's going to be something more of the lines of a "bleeding" vein or so
Now let's see what ideas i could borrow 
Keep it up!
76303
Post by: Warboss_Waaazag
ciuncky wrote:Great stuff here mate. I enjoy making my own bases as well, sadly due to space i have to limit myself to small things.
but the CD and drink caps idea is amazing, and it's really interesting how you used the straws to make bases for the plants. Until i saw that i thought it's going to be something more of the lines of a "bleeding" vein or so
Now let's see what ideas i could borrow 
Keep it up!
Thanks for the feedback, ciuncky! Borrow away!
2326
Post by: shasolenzabi
NIce ruined building and another outdoor piece! 
57070
Post by: SJM
Fantastic stuff as always.
I was thinking rusty pipes in the ground, then they were trees,
75552
Post by: MagosBiff90
Inspiration in every pictire..... great work and even more so toroduce such a lot of high quality! Really cool....
72556
Post by: Red Harvest
lliu wrote:Wow! This is inspirational... And, about gingered beer, are you supposed to be talking about that in a website where at least 1 12 year old is on...
Ginger beer is non-alcoholic. Regatta is probably the best, but it is pricey. Maine Root makes a nice one. If you want heat to your drink, get a Goya. They add capsicum to their ginger beer.  Gosling is cheap but drinkable. Dee-Gees and Frosties have too much sugar. Fentiman's is in a class unto itself, but it is good. And very expensive. Now, If I can only find a good Sarsaparilla.
You did a fine job inking those plants. The only other way I know to diminish that artifical look they have is a light drybrushing.
76303
Post by: Warboss_Waaazag
 SJM wrote: SJM wrote:Fantastic stuff as always.
I was thinking rusty pipes in the ground, then they were trees,
 MagosBiff90 wrote: MagosBiff90 wrote:Inspiration in every pictire..... great work and even more so toroduce such a lot of high quality! Really cool....
 Red Harvest wrote: Red Harvest wrote:...You did a fine job inking those plants. The only other way I know to diminish that artifical look they have is a light drybrushing.
Thanks for all the positive feedback, everyone! It's really appreciated.
Here are some shots of the terrain I've been making assembled on a table at the gaming store I'm making all the terrain for! (more angles and some close ups in my finished thread here)
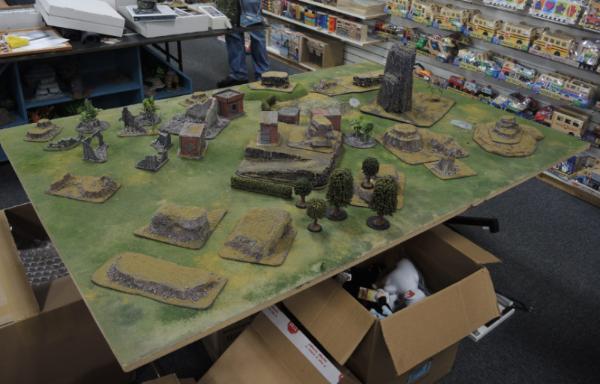
Thanks for looking and have an awesome day. C&C always welcome!
22619
Post by: inmygravenimage
That is truly...  I demand an applauding orkmoticon be made especially in your honour.
Also, an irrelevant side question: I got a very special, limited edition ale for father's day. Would you like the cap? 
24297
Post by: Viktor von Domm
still can´t get over your garlic trees....  the nerve...the ideas, the eye for opportunities....
feel a little ashamed to drop in to this party so late...
 colour me subscribed...and sitting here taking notes^^
*bows* vik
76303
Post by: Warboss_Waaazag
 inmygravenimage wrote: inmygravenimage wrote:That is truly...  I demand an applauding orkmoticon be made especially in your honour.
Also, an irrelevant side question: I got a very special, limited edition ale for father's day. Would you like the cap? 
Yes. Automatically Appended Next Post:  Viktor von Domm wrote: Viktor von Domm wrote:still can´t get over your garlic trees....  the nerve...the ideas, the eye for opportunities....
feel a little ashamed to drop in to this party so late...
 colour me subscribed...and sitting here taking notes^^
*bows* vik
Wow, thanks.
75552
Post by: MagosBiff90
As functional & usable terrain pieces they look awesome! And they could really give an endless number of different layouts and terrains to fight over! Very cool! 
76303
Post by: Warboss_Waaazag
Thanks MagosBiff90! I'll post some more WIP/PIP stuff in a few.
65595
Post by: Camkierhi
Great to see your stuff laid out on a table. All looks excellent. Kinda lucky you have a gamestore to have your mass produced goodies.
Inspirational as always sir.
76303
Post by: Warboss_Waaazag
74210
Post by: Ustrello
Well nothing better to stop yourself from going all The shining by painting a few hundred orks  . But the hill looks great!
24297
Post by: Viktor von Domm
well....i don´t see the jungle from here in that sprue...yet... but i have faith 
and that hill... awesome!
76303
Post by: Warboss_Waaazag
 Ustrello wrote: Ustrello wrote:Well nothing better to stop yourself from going all The shining by painting a few hundred orks  . But the hill looks great!
I think my sarcasm detector was just set off, Ustrello.  But yeah, everything I do is a "No work and no play make Jack a dull boy" kind of project. Thanks for the feedback! Automatically Appended Next Post:  Viktor von Domm wrote: Viktor von Domm wrote:well....i don´t see the jungle from here in that sprue...yet... but i have faith 
and that hill... awesome!
I take so many pictures I currently have a backlog of several hundred yet to upload to my galleries here on dakka. I have to find the work in progress shots of that sprue jungle so you can watch its transformation. Fear not Vik, all shall be revealed. Thanks for the feedback!
24297
Post by: Viktor von Domm
*rubs hands* looking forward to these then!
74210
Post by: Ustrello
 Warboss_Waaazag wrote: Warboss_Waaazag wrote: Ustrello wrote: Ustrello wrote:Well nothing better to stop yourself from going all The shining by painting a few hundred orks  . But the hill looks great!
I think my sarcasm detector was just set off, Ustrello.  But yeah, everything I do is a "No work and no play make Jack a dull boy" kind of project. Thanks for the feedback!
Automatically Appended Next Post:
 Viktor von Domm wrote: Viktor von Domm wrote:well....i don´t see the jungle from here in that sprue...yet... but i have faith 
and that hill... awesome!
I take so many pictures I currently have a backlog of several hundred yet to upload to my galleries here on dakka. I have to find the work in progress shots of that sprue jungle so you can watch its transformation. Fear not Vik, all shall be revealed. Thanks for the feedback!
Maybe make an ork at a type writer with sheets around him saying No fightin' and No WAAAGH make da warboss a dull boy
76303
Post by: Warboss_Waaazag
I just might, Ustrello.
Anyway, I found some pics of my sprue jungle bases WIP. I didn't seem to take any pics when I hotglued on the straw bits or when I latticed the sprue with more hotglue, but I did take some shots with the clay half on to prove that these bases were still indeed the ones I had made of sprue:
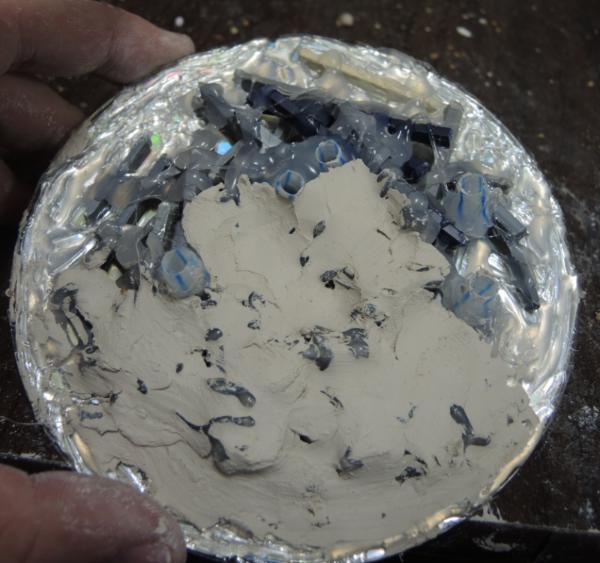
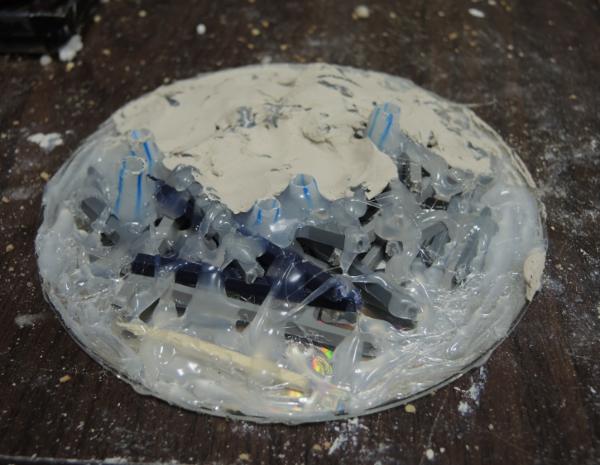
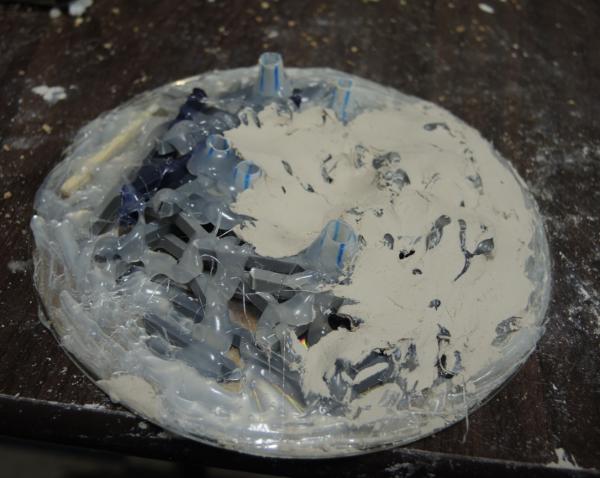
And then this same base with sand pressed on:
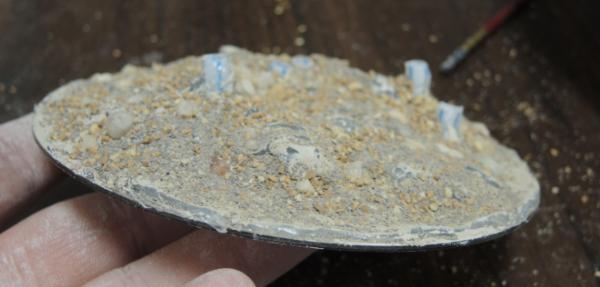
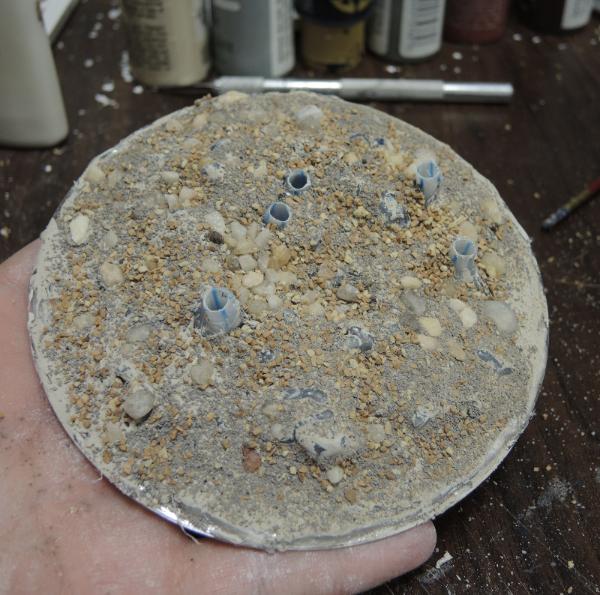
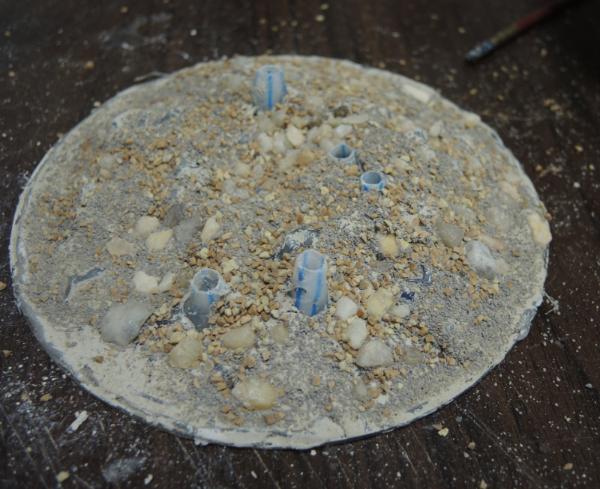
I think that's as far as I've gotten on this so far. More pics of my many projects in about 12 hours. Thanks for looking and have an awesome day!
24297
Post by: Viktor von Domm
ah... so used the sprue as a means to get the base bumpy...now i see^^
22619
Post by: inmygravenimage
That's some league worthy sprue action 
76303
Post by: Warboss_Waaazag
Thanks, guys. Yes. There's no such thing as trash (except rotting food, because gross).
62749
Post by: Dr H
Did someone mention Sprue? 
Nice work, 'boss. 
Shame the sprue was covered up. 
68152
Post by: JoeRugby
All looking good Waaazag.
Nice seeing some more table pics 
76303
Post by: Warboss_Waaazag
Thanks, Joe. I hope to post up some more pics of the million or so projects I'm working on shortly.
76303
Post by: Warboss_Waaazag
Happy "Haha Britain, we colonials aren't going to put up with your rule-from-across-the-Atlantic bs/luckily-France-and-Spain-recognize-our-sovereignty-and-dislike-you-enough-to-give-us-foreign-aid-so-we-can-wear-you-down-and-make-you-quit-fighting-us" day to all my United States of America friends and followers.
76303
Post by: Warboss_Waaazag
I have too many photos. I still have 57 pics left to upload. Hopefully I'll have time to do that and make a GIGANTIC post a little later tonight.
24297
Post by: Viktor von Domm
your audience is waiting patiently 
76303
Post by: Warboss_Waaazag
22619
Post by: inmygravenimage
Better have a trapdoor in it... 
76303
Post by: Warboss_Waaazag
So, it turns out I've uploaded a TON of photos to the site. Here they are in some sort of order. I'll try to keep projects together.
Finally put a roof on the giant building:
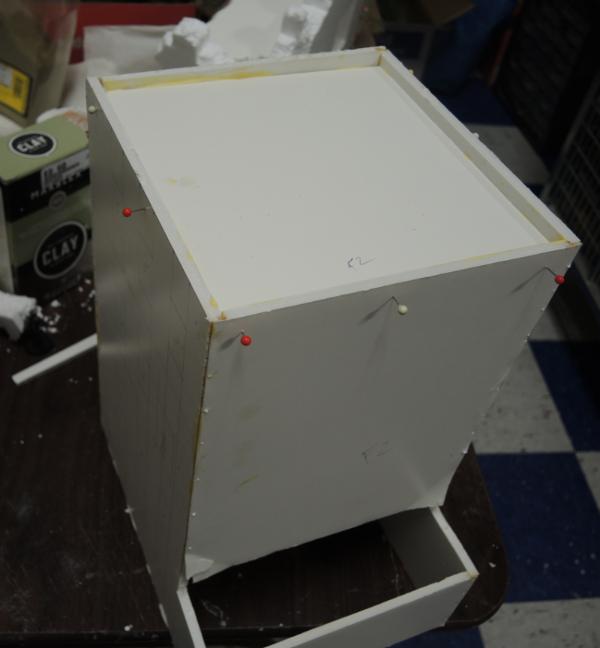
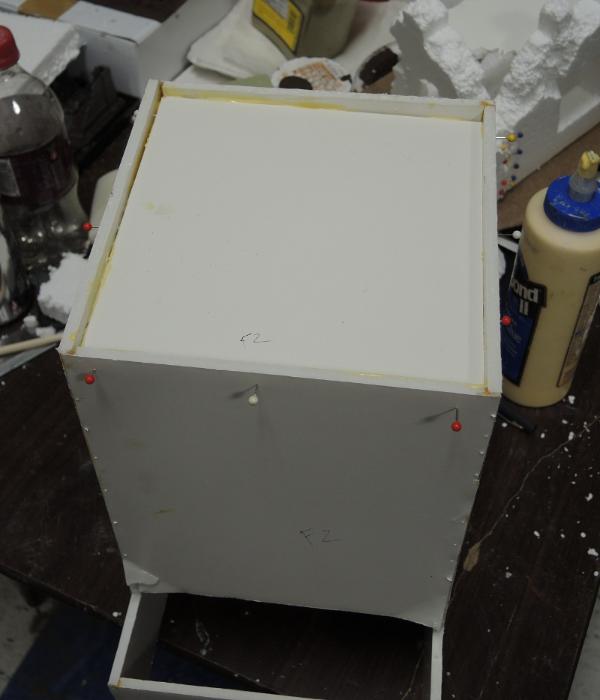
Trying not to go crazy because the roof isn't perfectly flat:
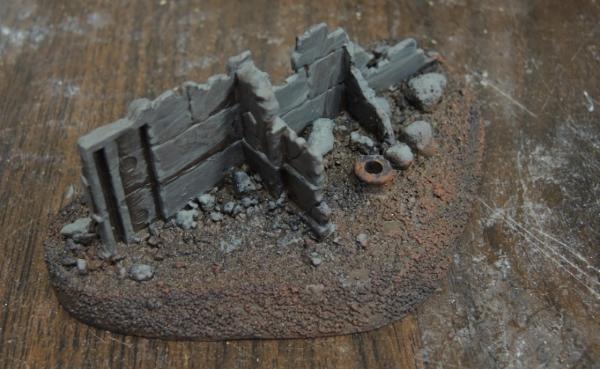
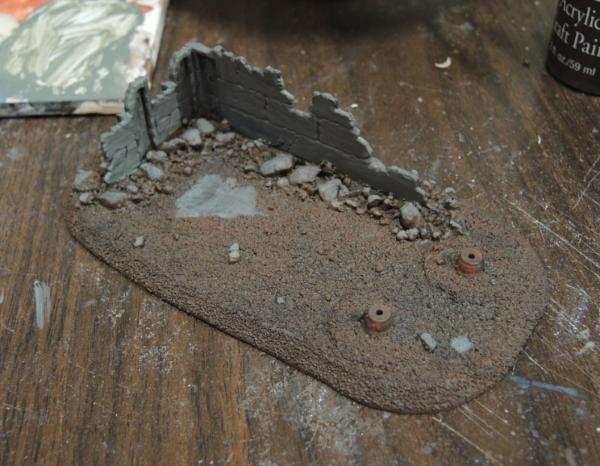
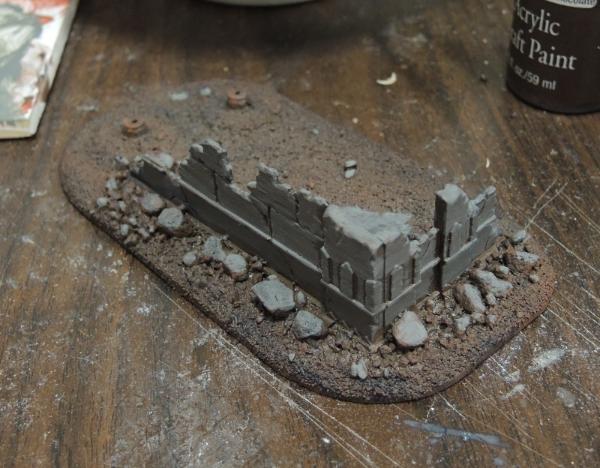
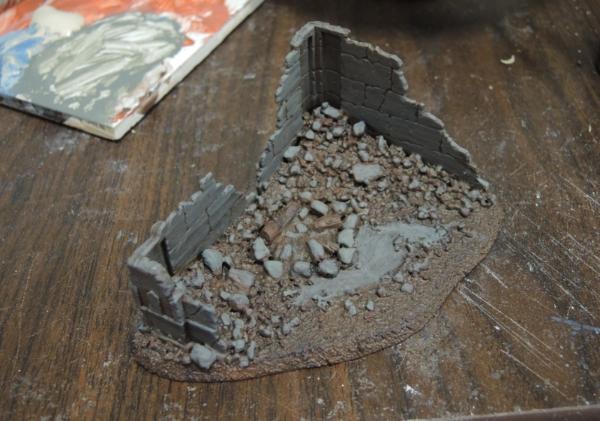
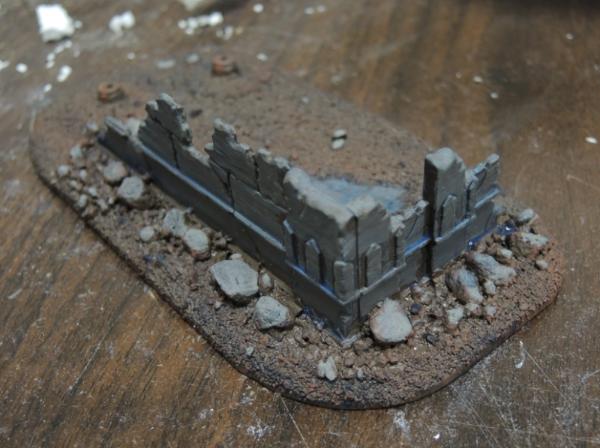
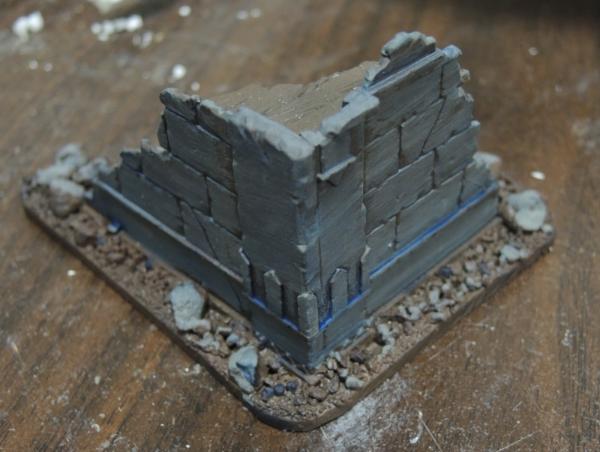
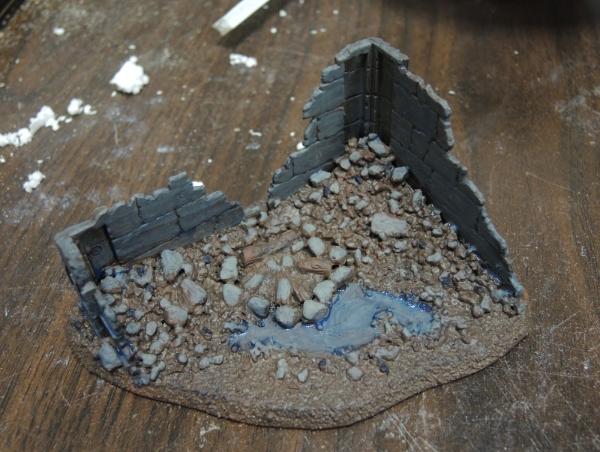
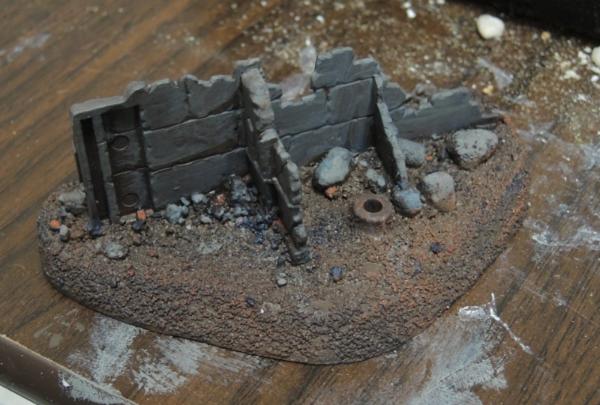
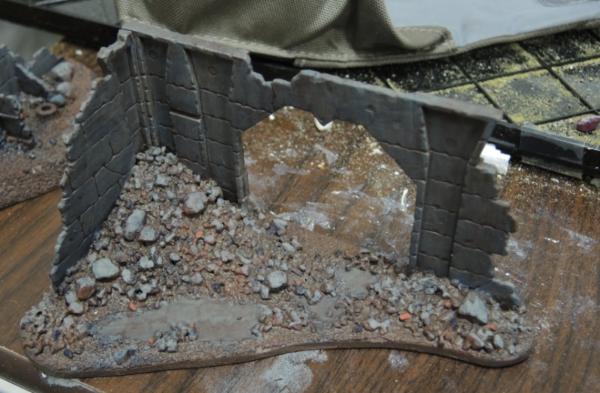
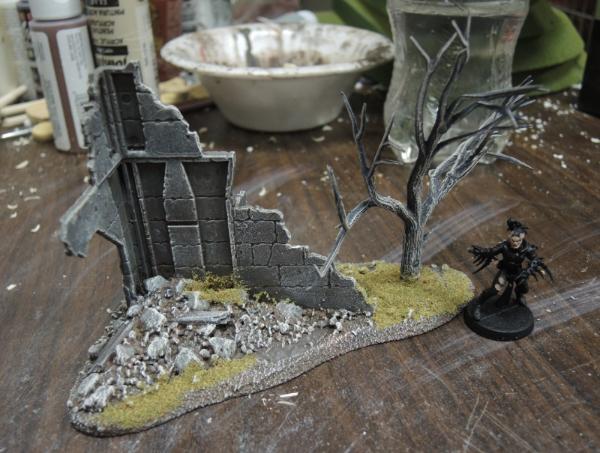
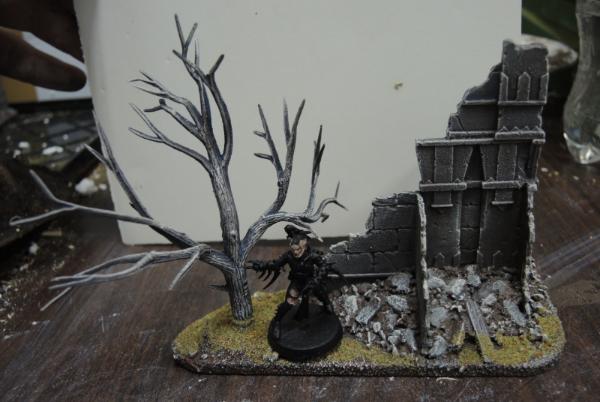
These are the ruined wall bits from the Lord of the Rings: The Fellowship of the Ring boxed set arranged this way and that on masonite bases, then rubbled up and based brown:
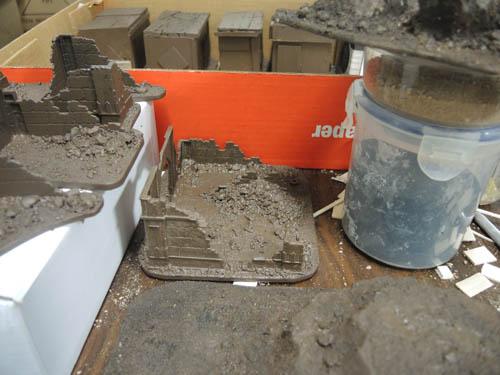

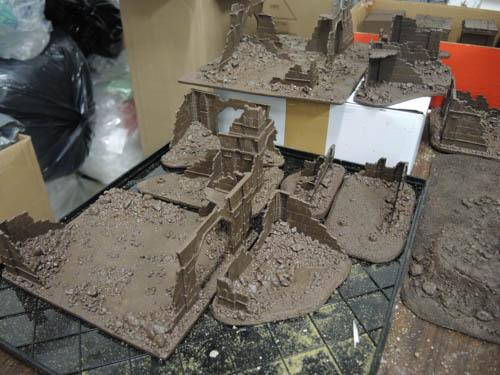
Then overbrushed blue:
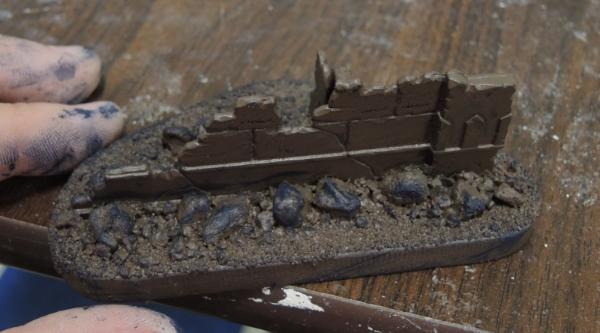
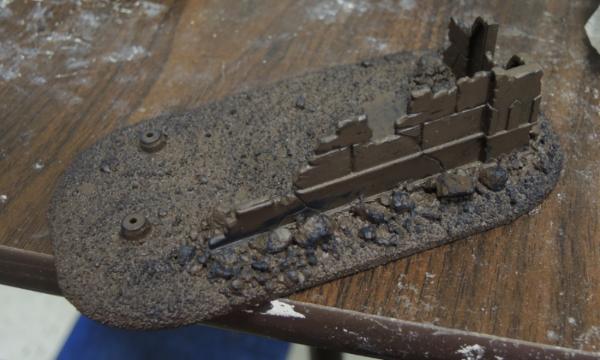
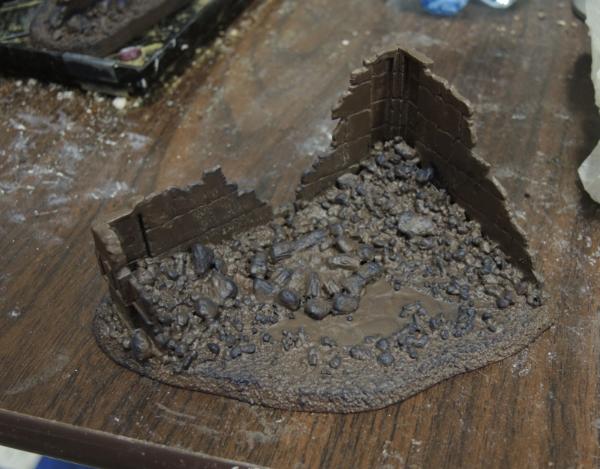
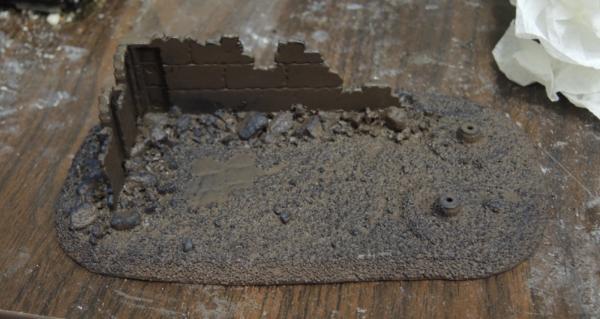
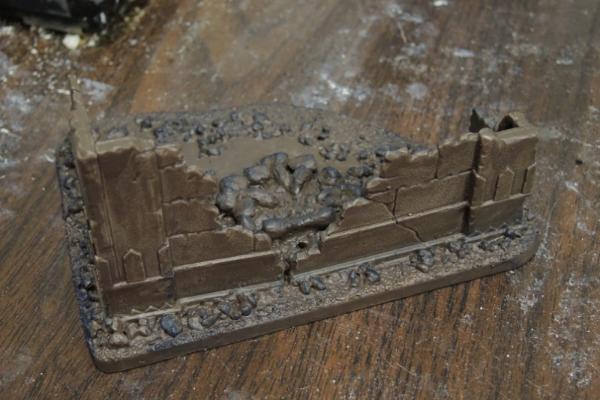
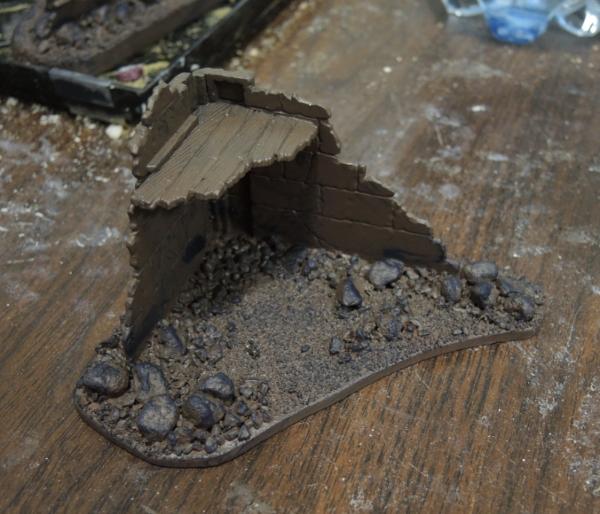
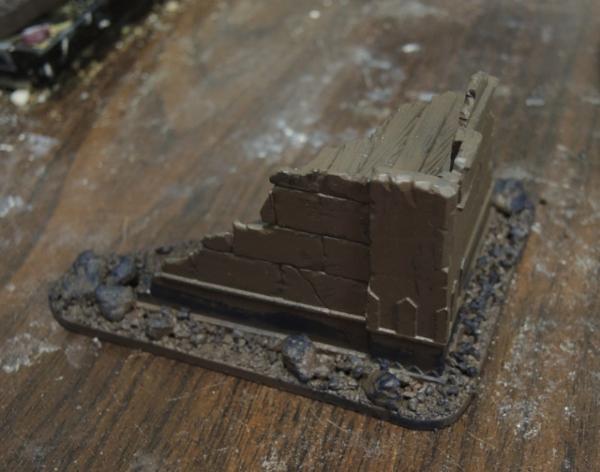
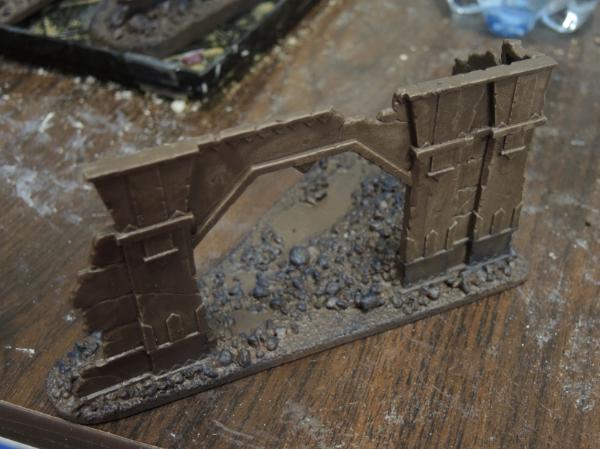
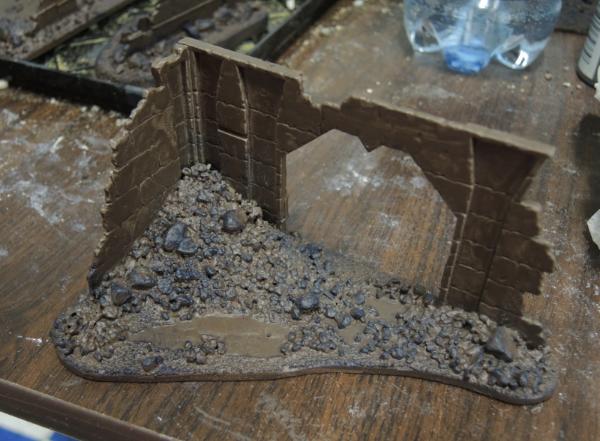
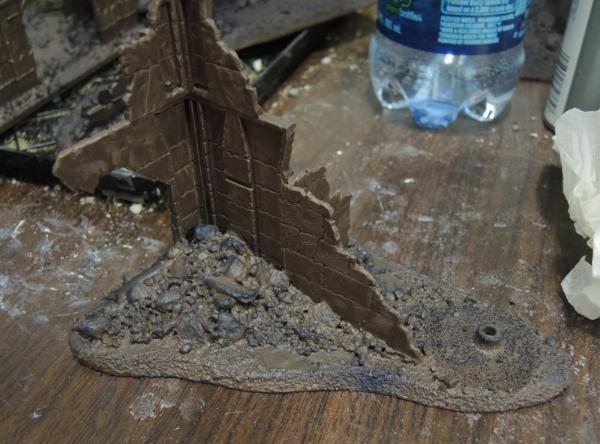
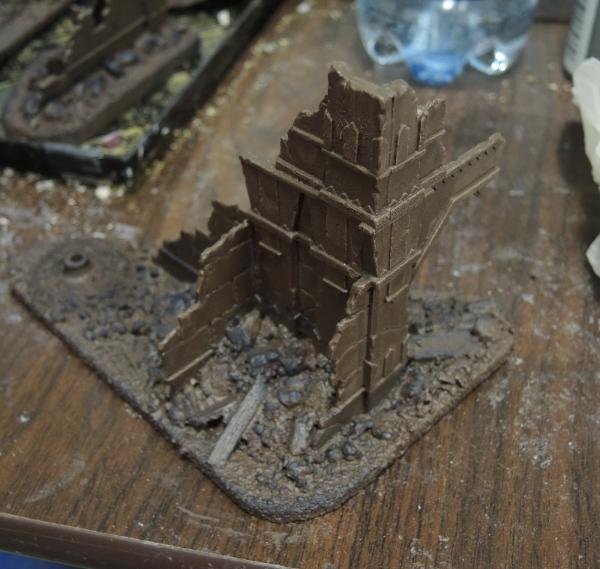
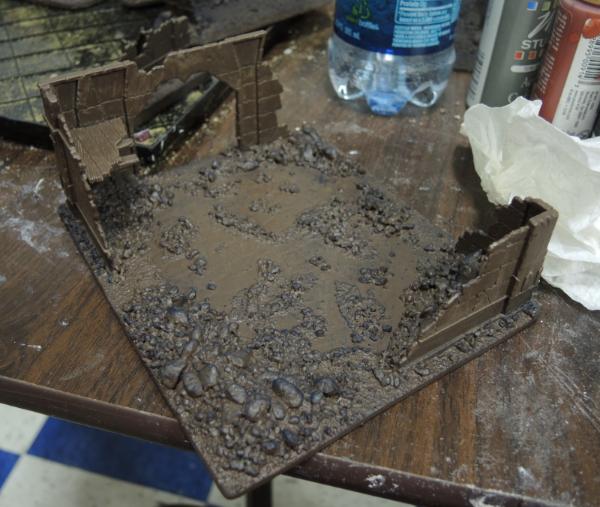
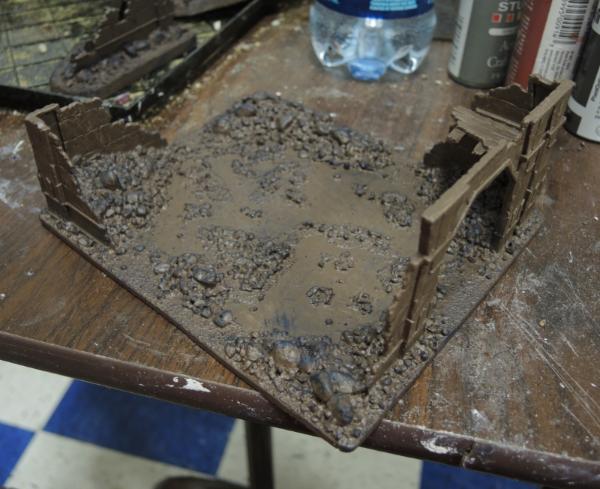
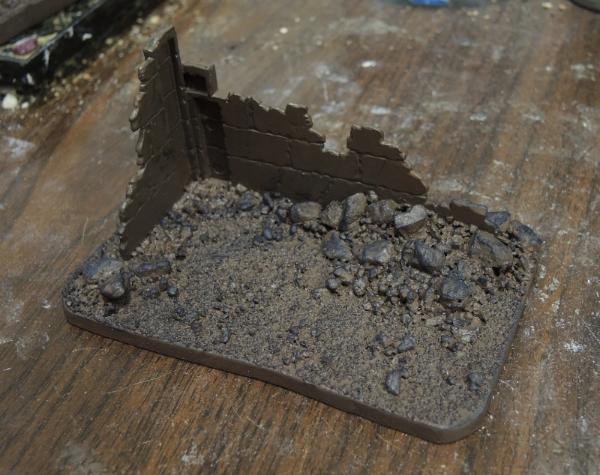
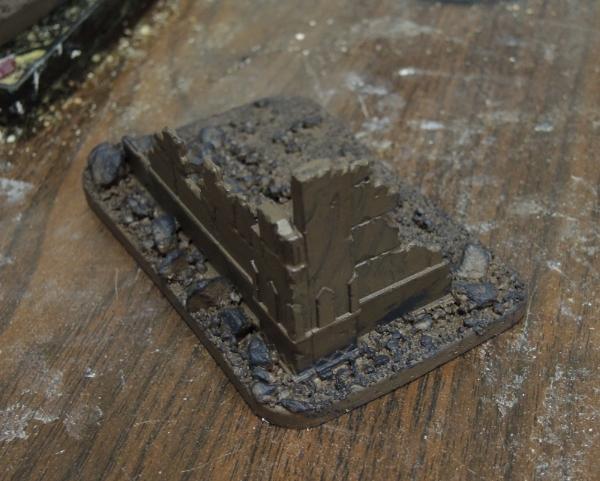
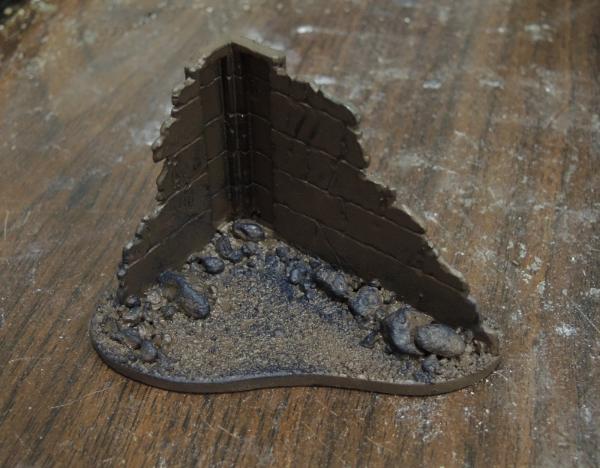
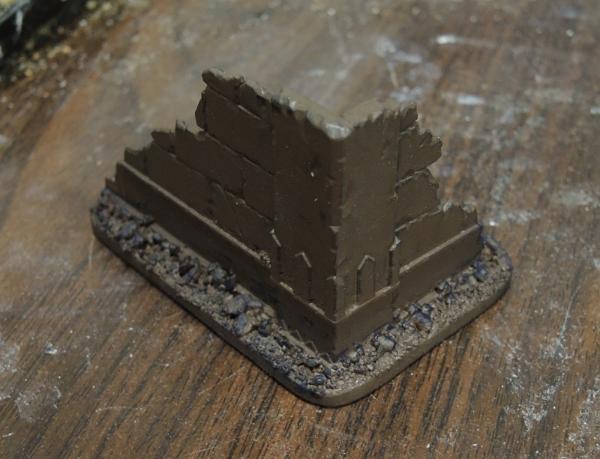
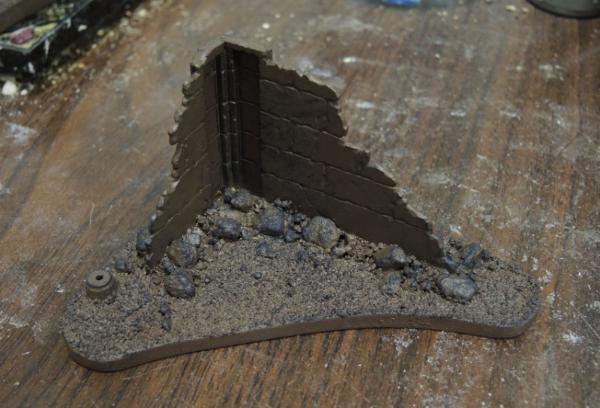
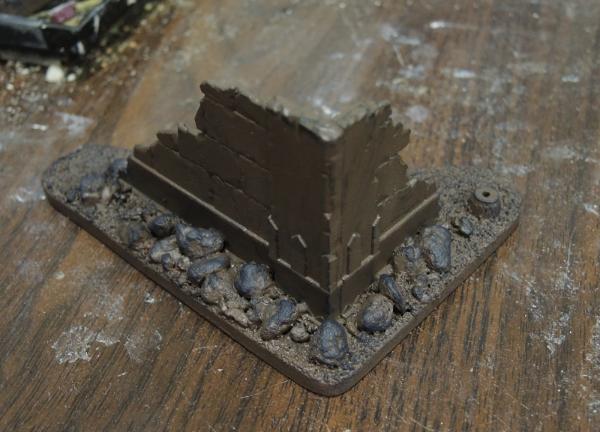
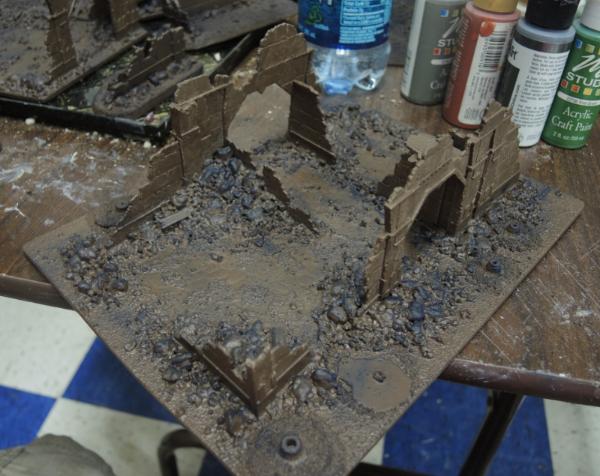
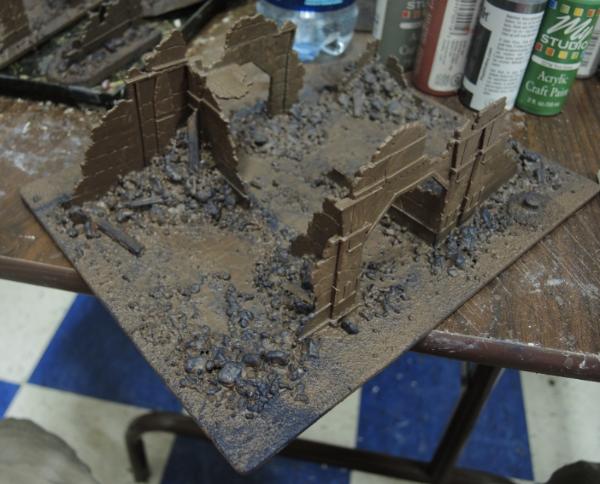
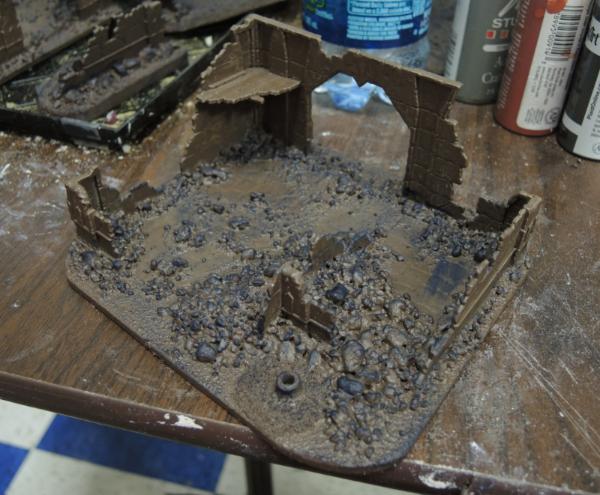
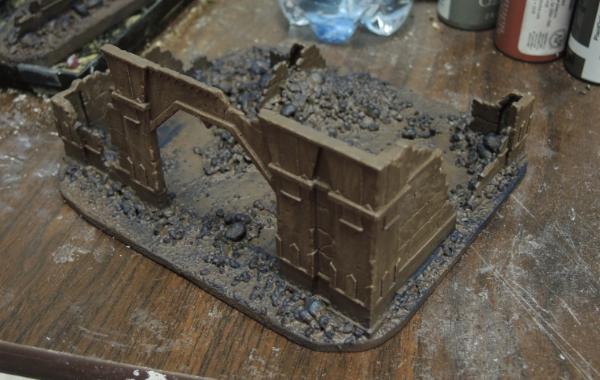
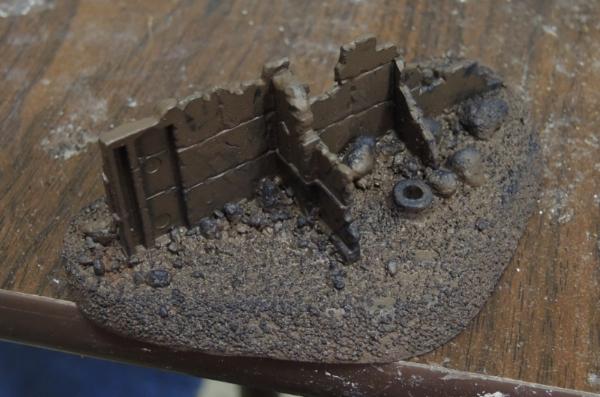
Then overbrushed red:
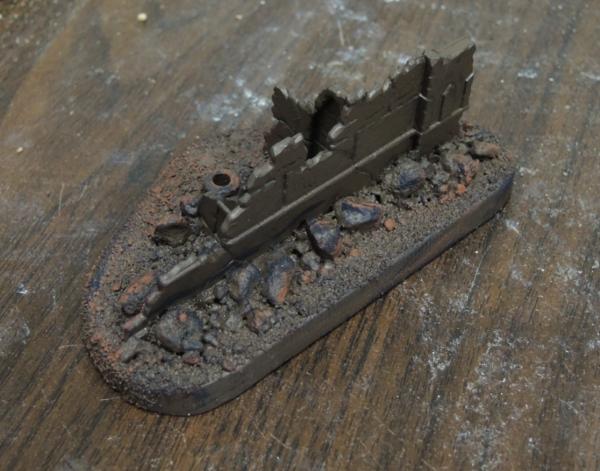
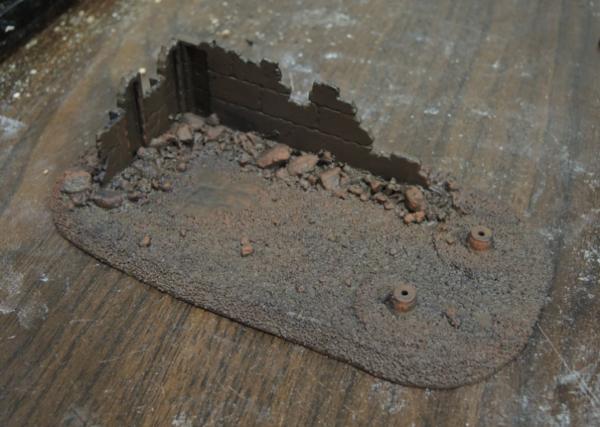
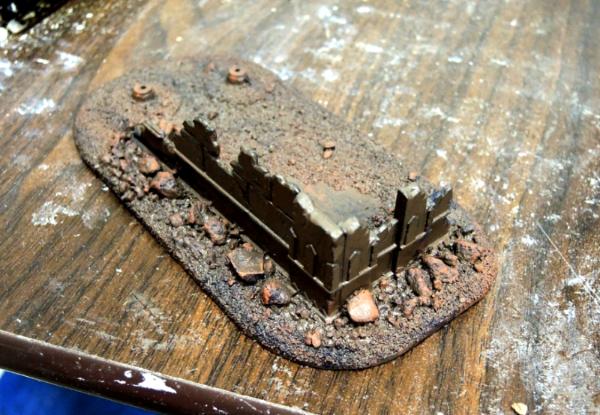
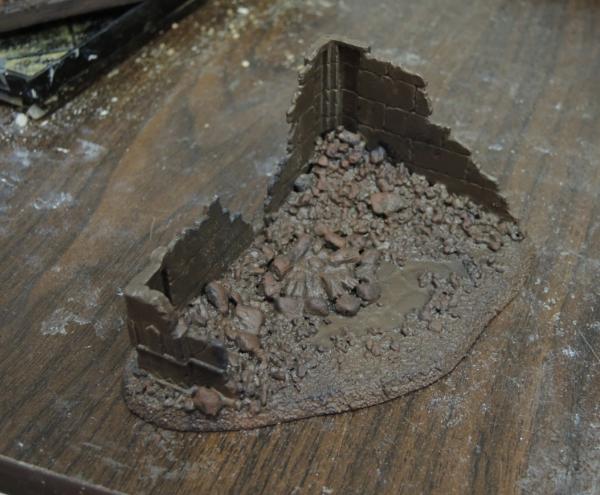
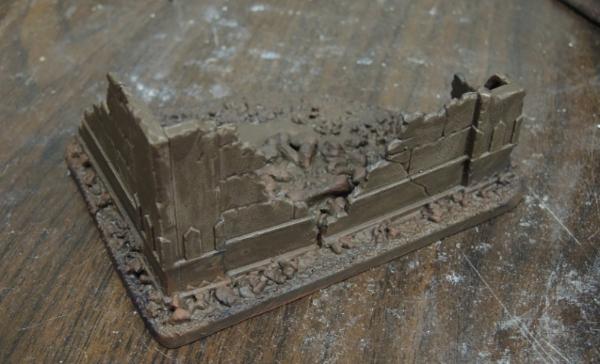
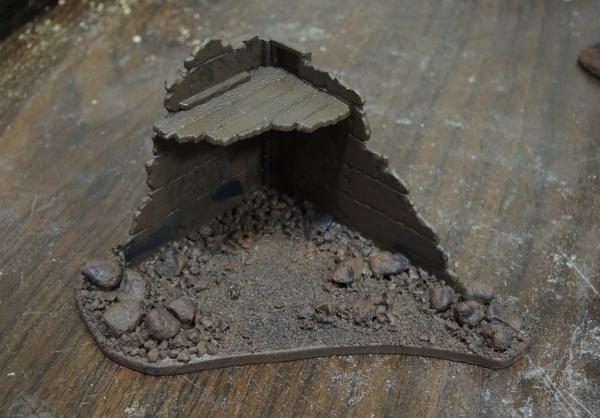
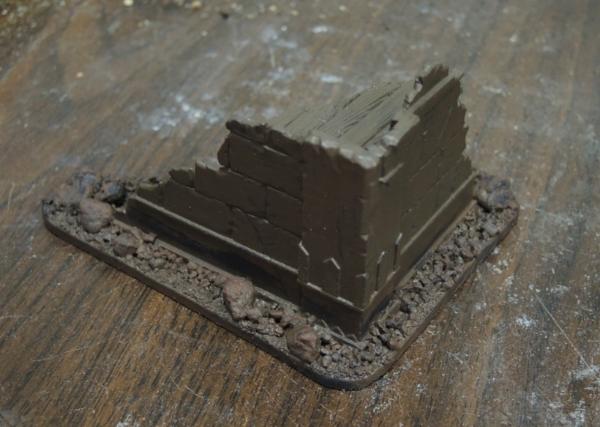
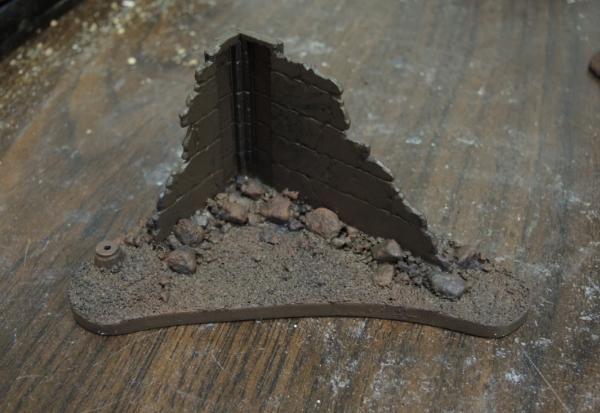
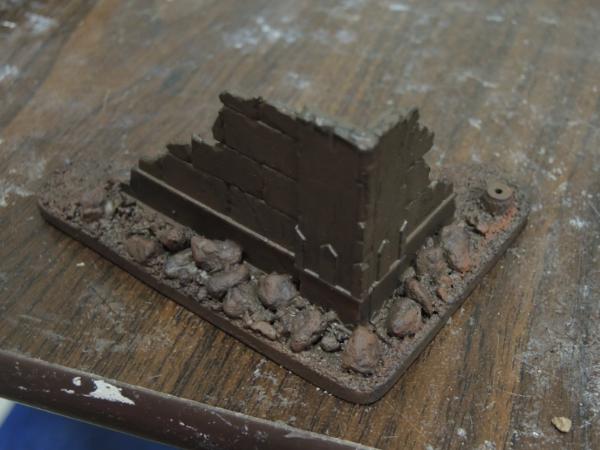
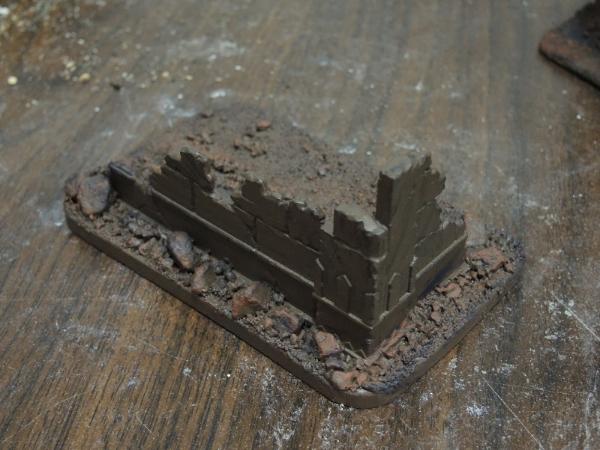
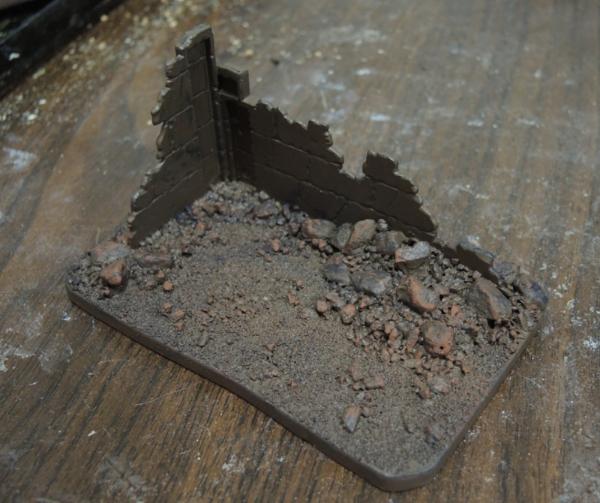
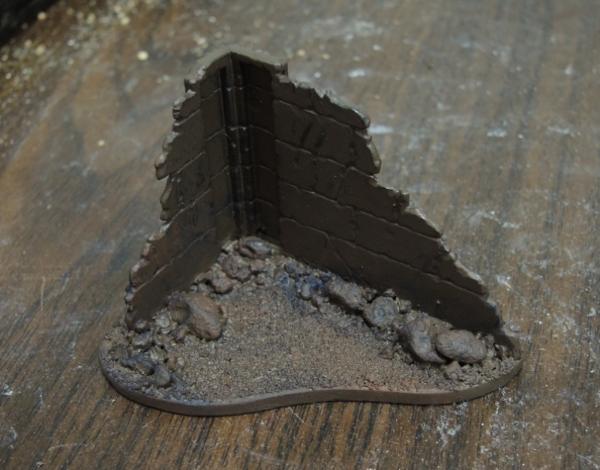
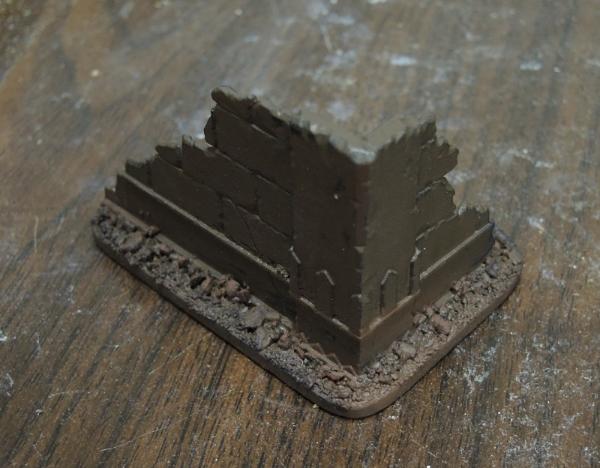
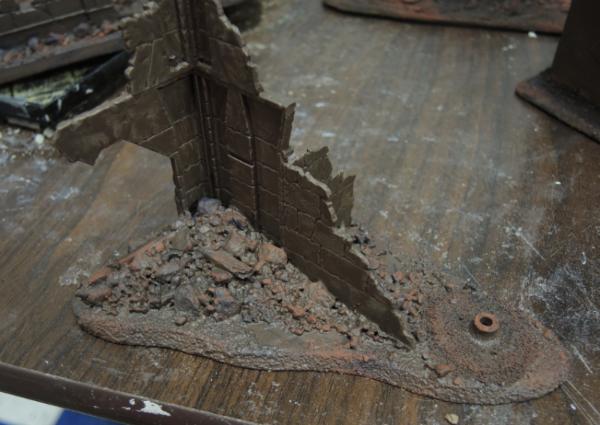
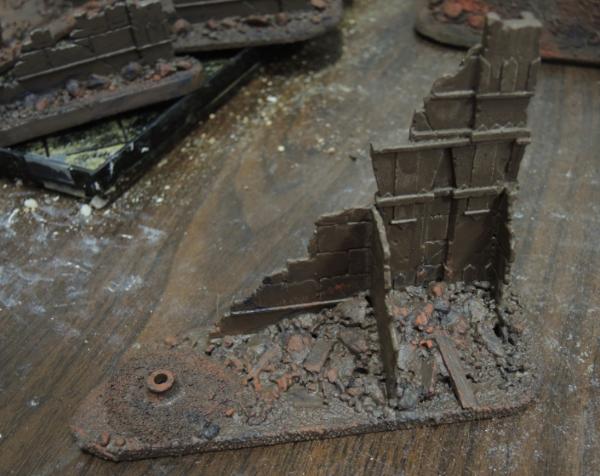
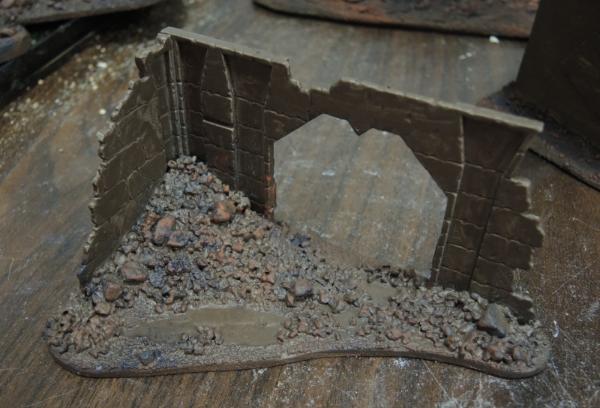
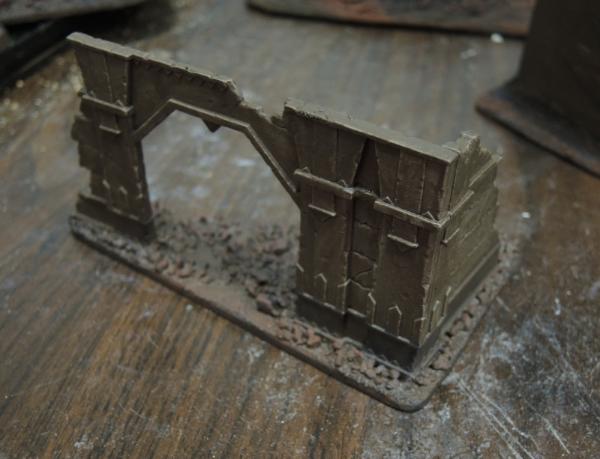
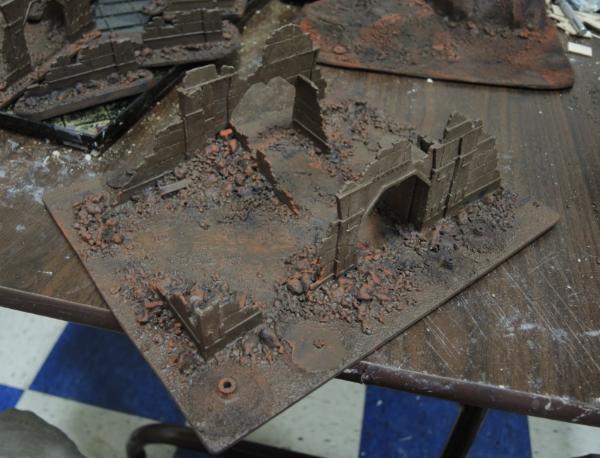
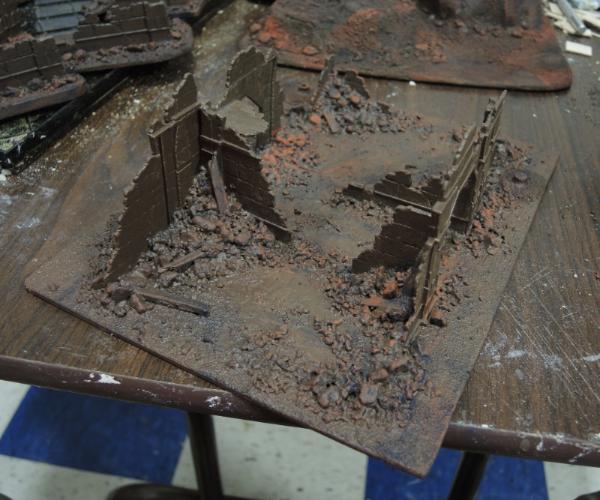
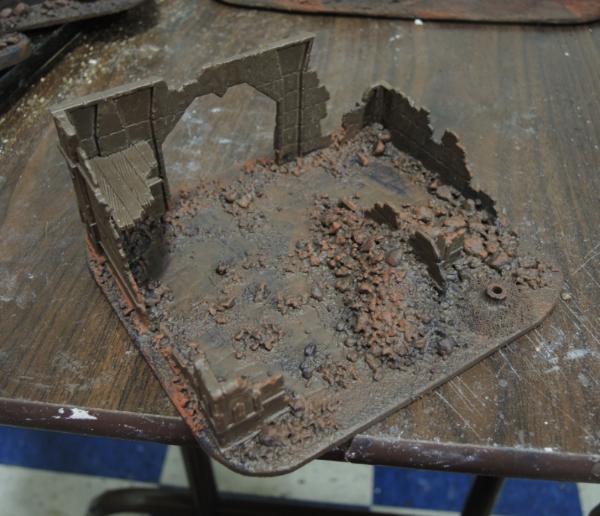

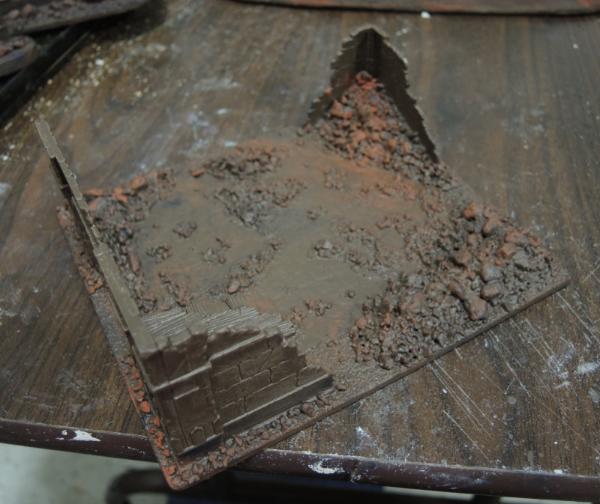
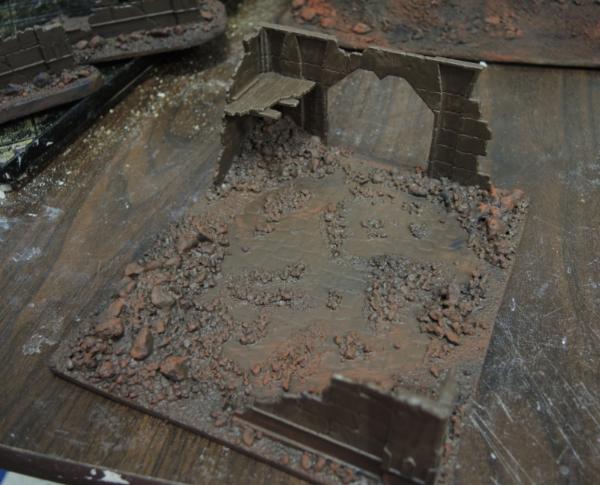
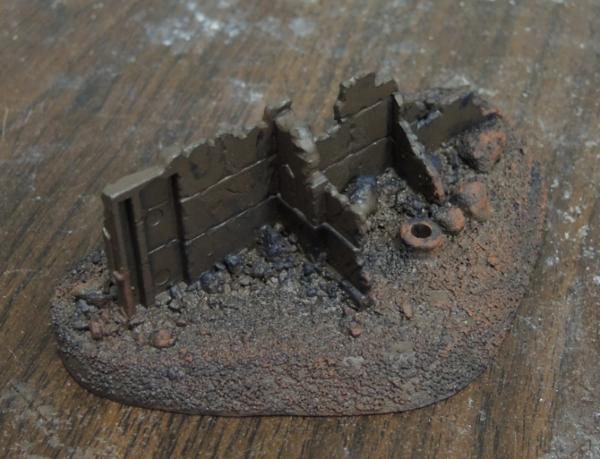
You'll notice some of these bases have round pits on them. Those are plastic tree bases from woodlandscenics (link leads to the woodland scenics tree armature page) and will later be filled with the rest of the armature.
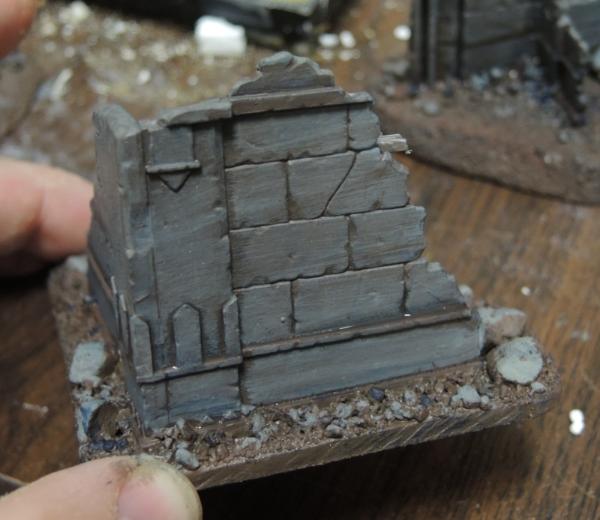
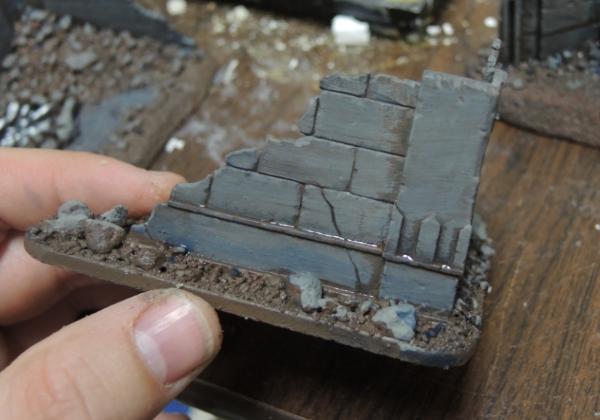
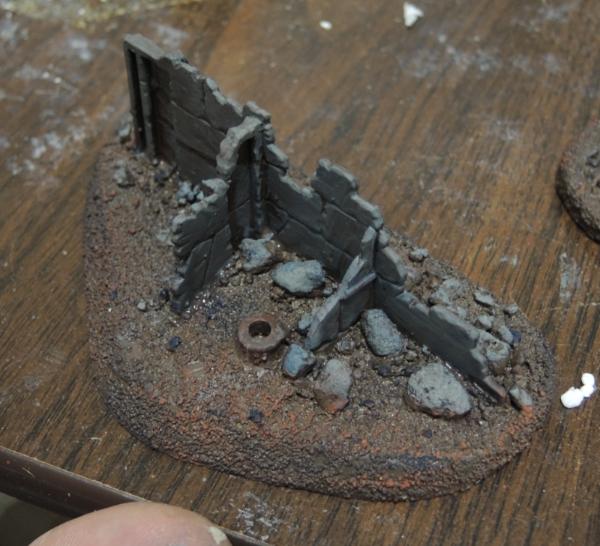
Next step I painted the walls, exposed paving stones, and a selection of the ground rubble in grey:
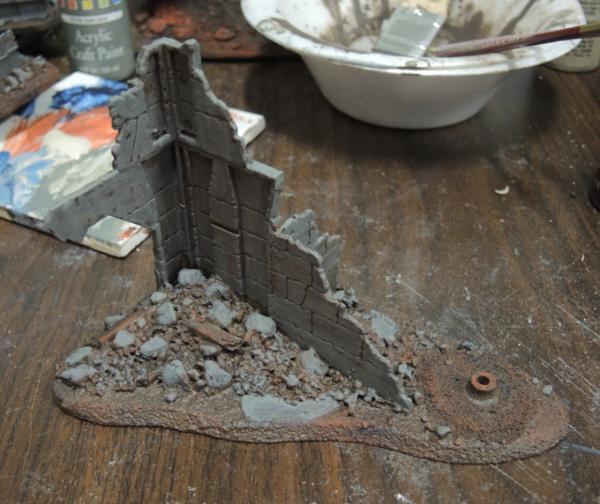
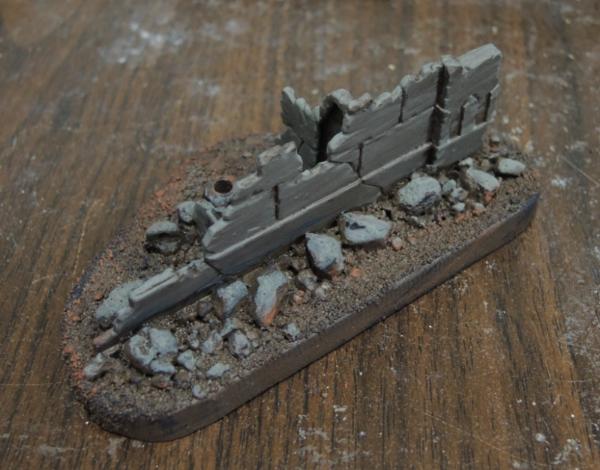
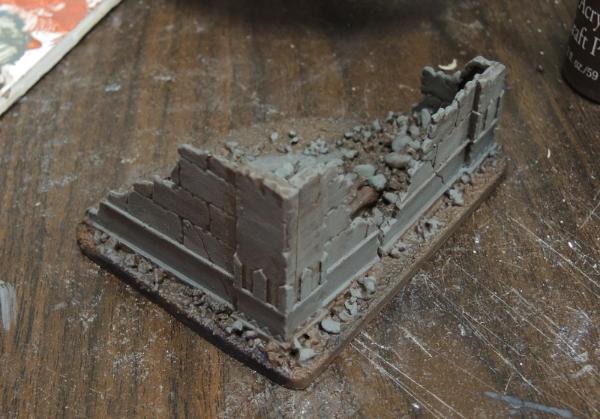

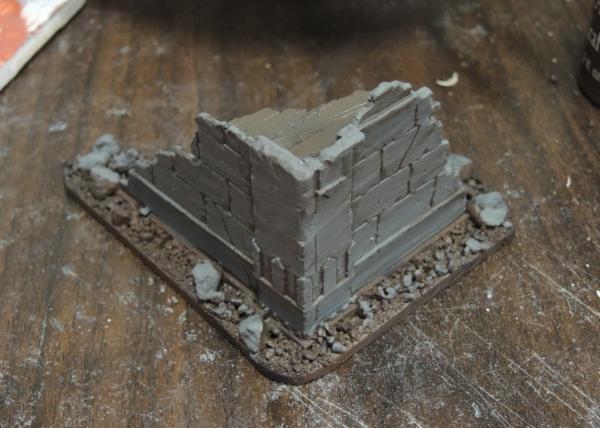
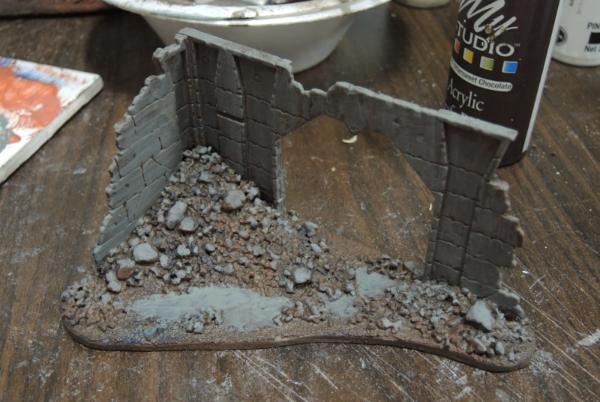
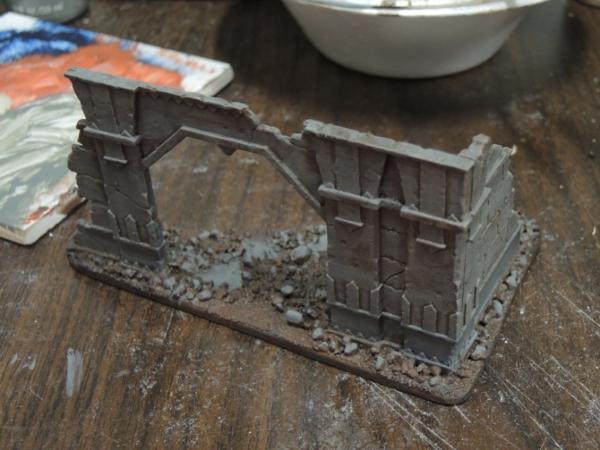
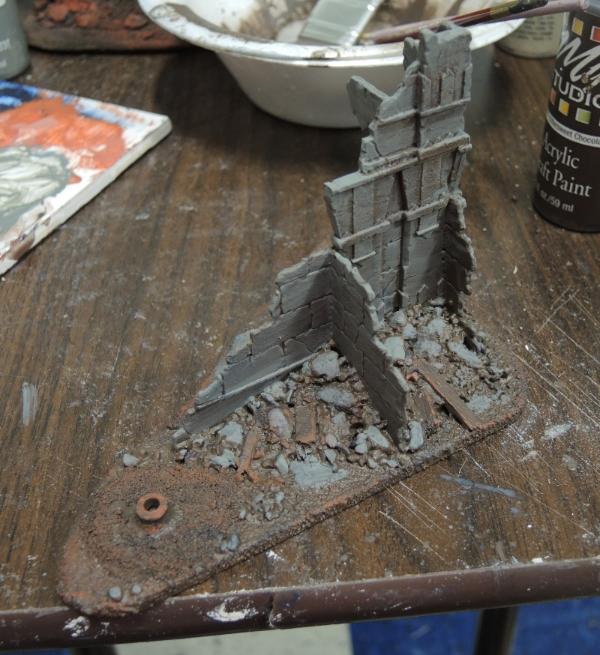
Then I put a blue wash on all the grey areas:
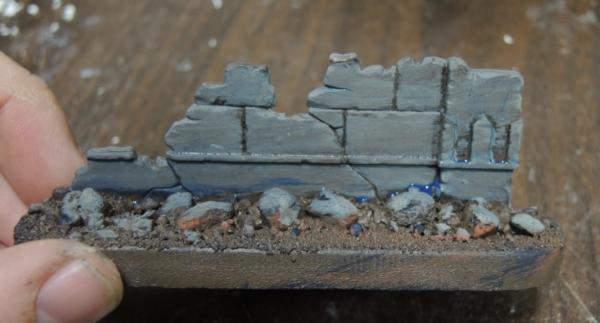
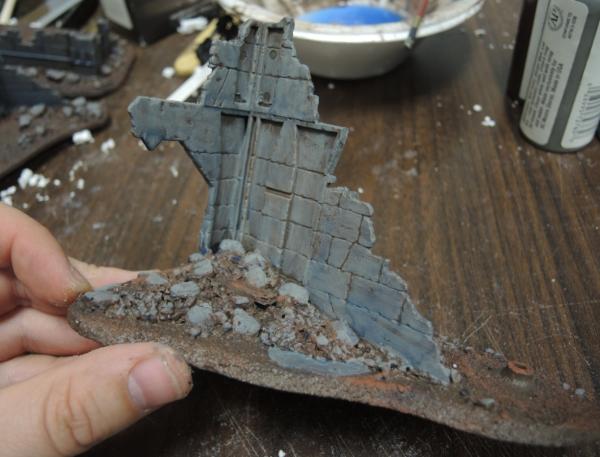
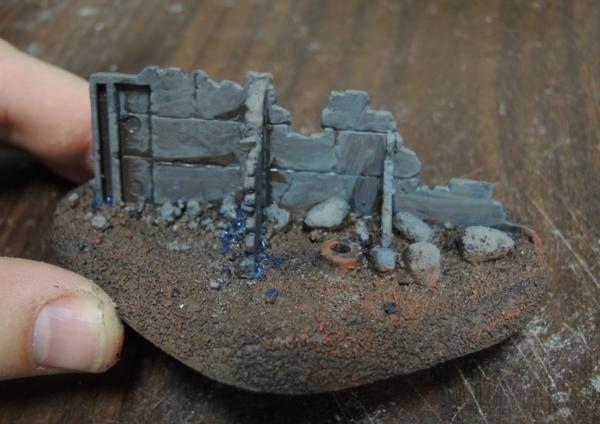
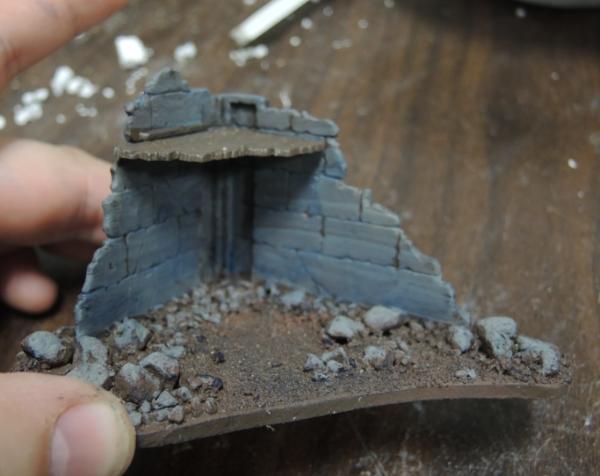
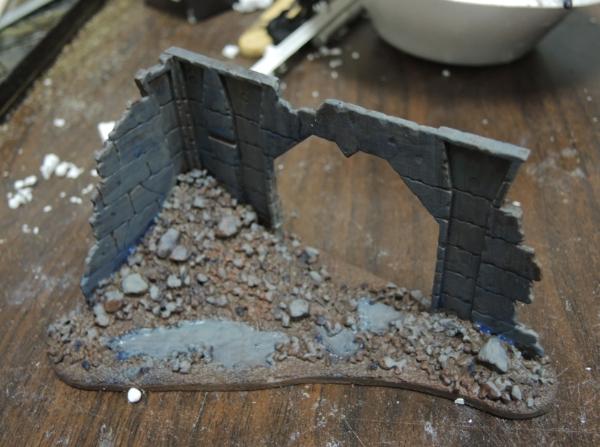
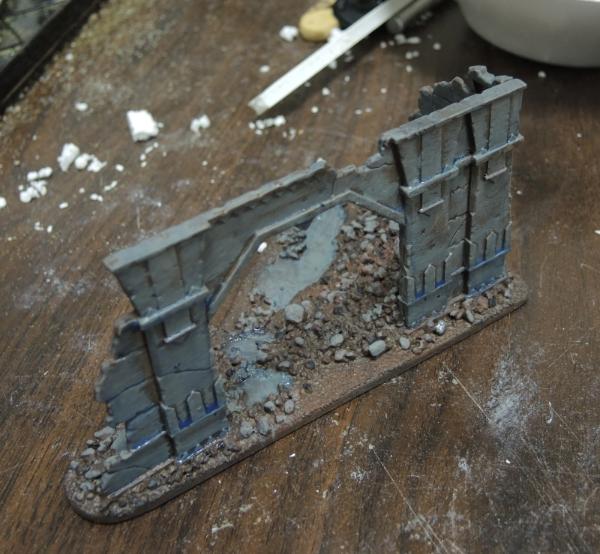
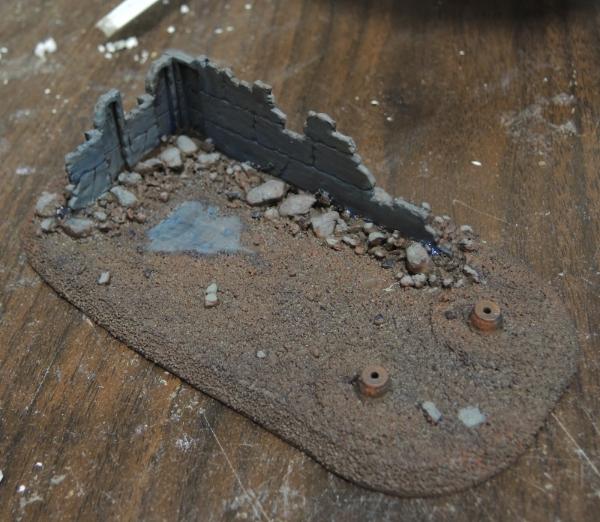
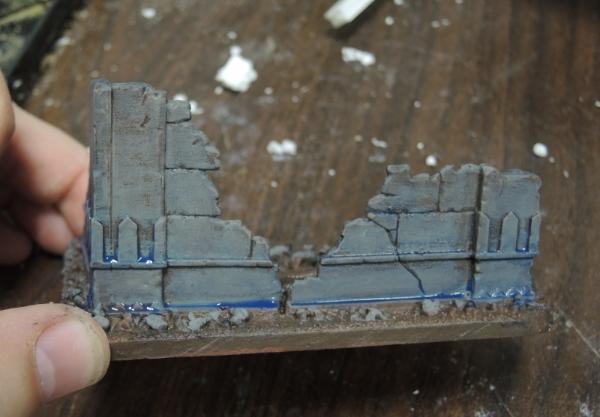
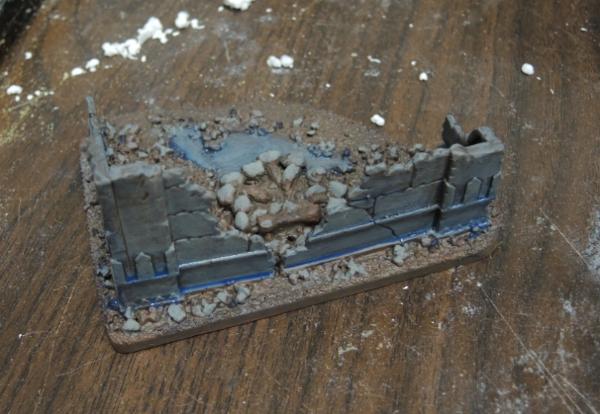
Followed by a brown wash to "dirty it up":
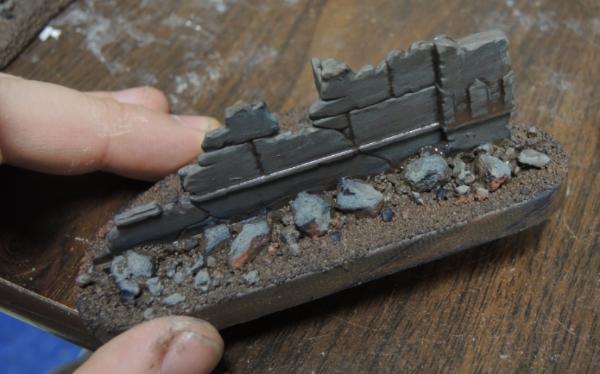
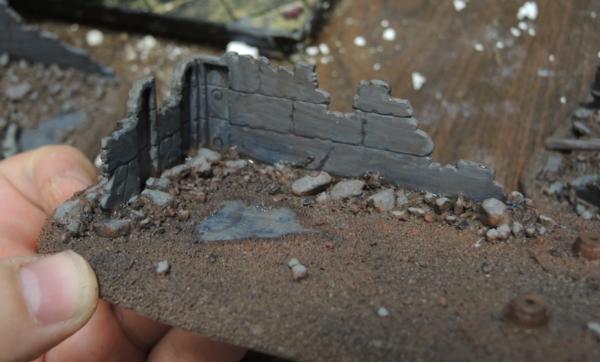
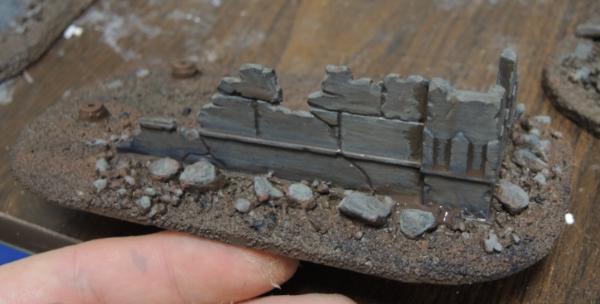

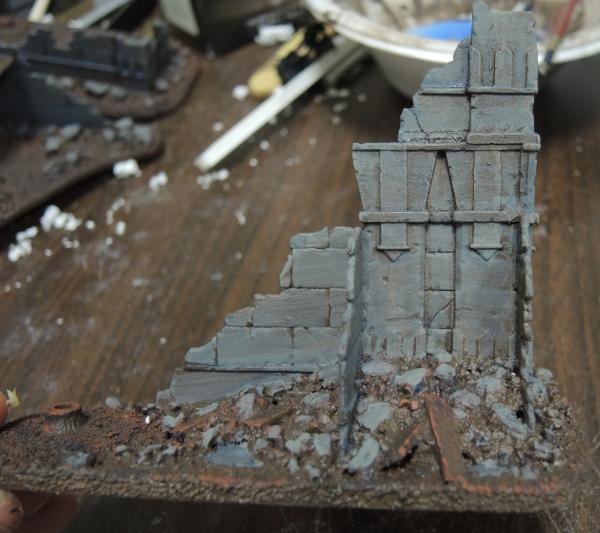
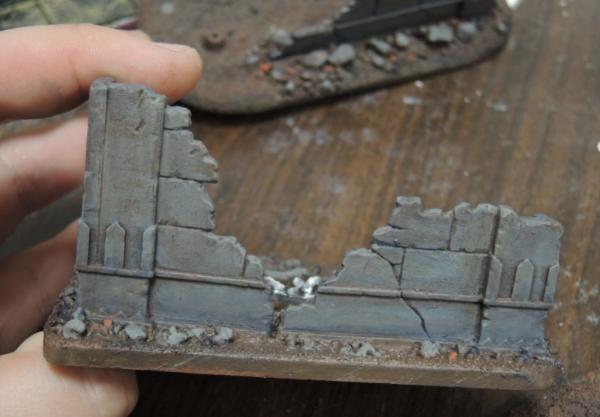
You'll also notice that the pictures get fewer and fewer as I decided to work on individual pieces rather than continue to batch paint.
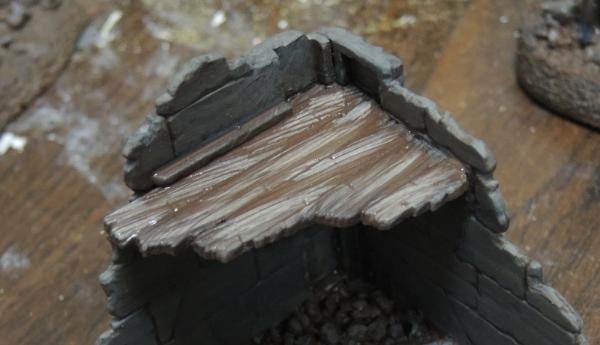
I repainted the wood planks on all the pieces in brown to clean them up a bit, dabbed the ends with watered-down indigo to suggest charring, and started layering on greys, grey-browns, and grey-whites to create a wood grain effect:
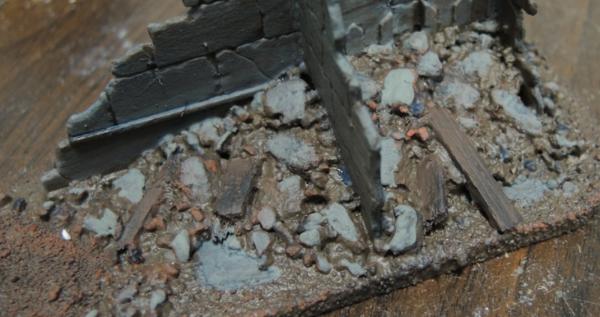
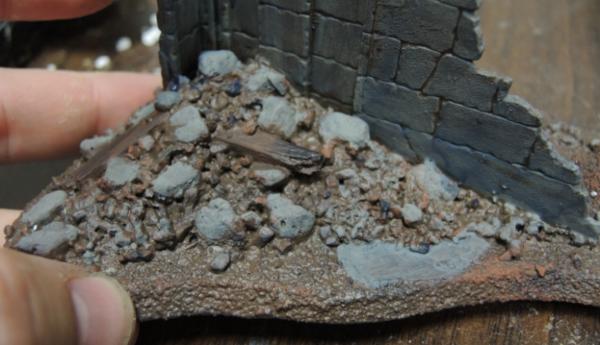
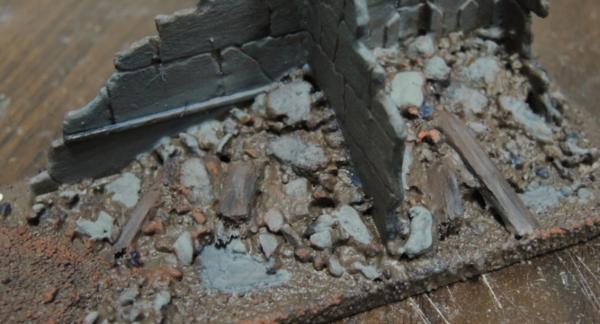
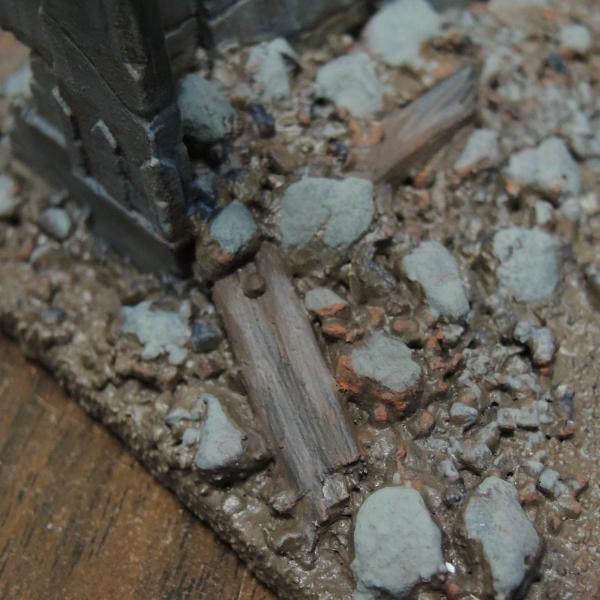

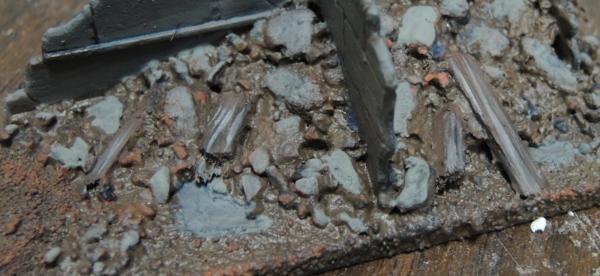
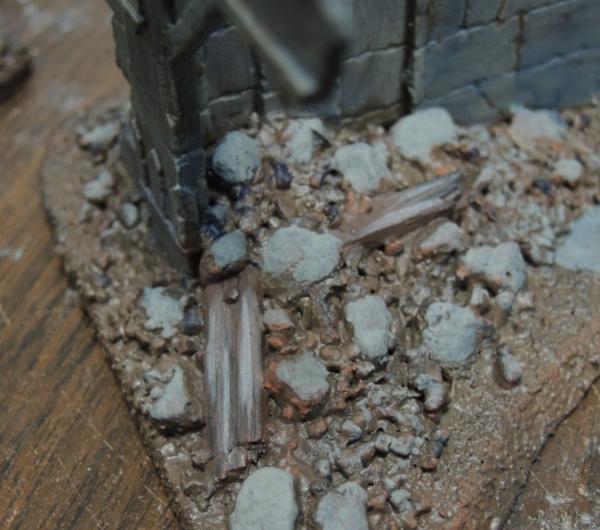
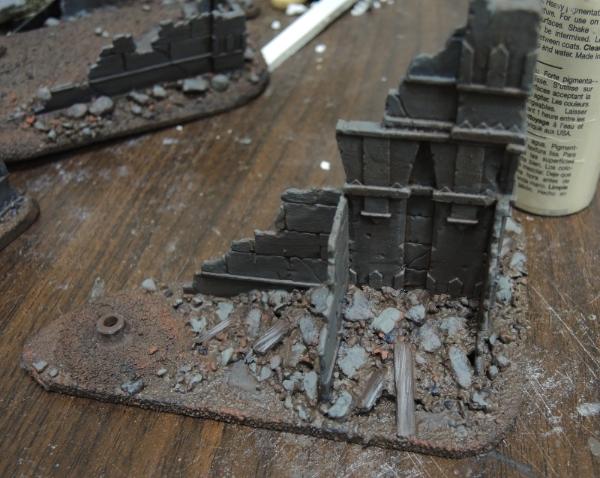
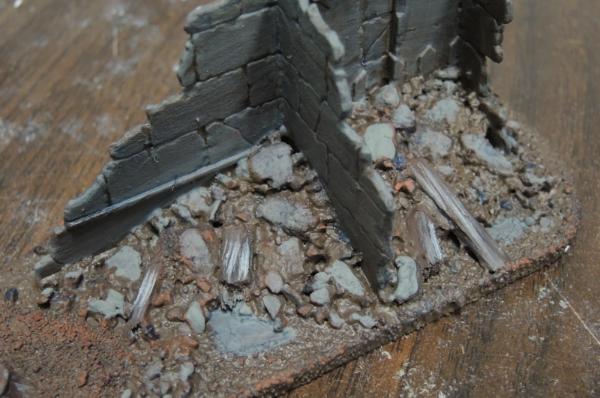
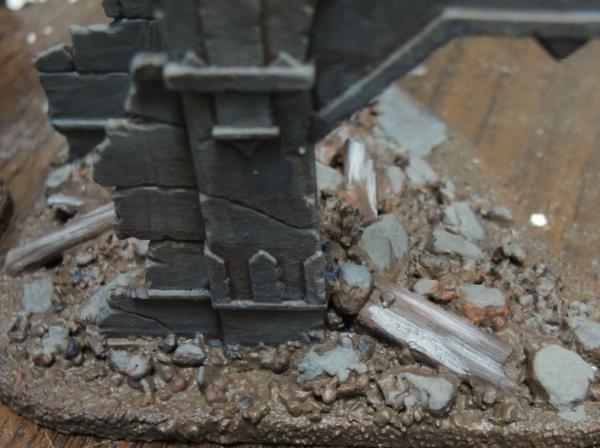
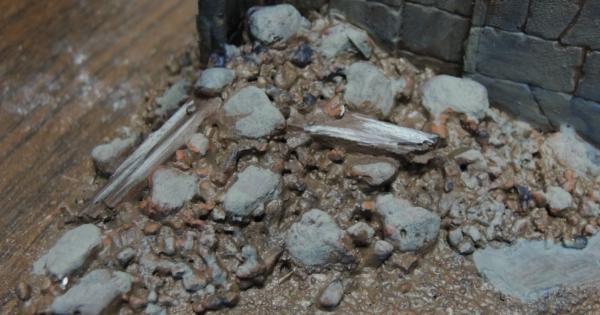
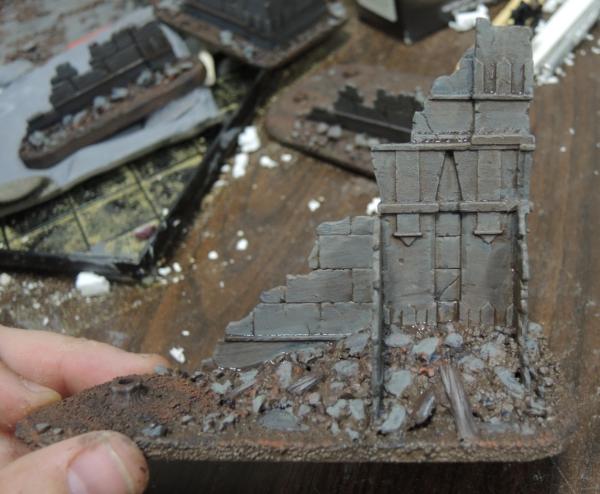
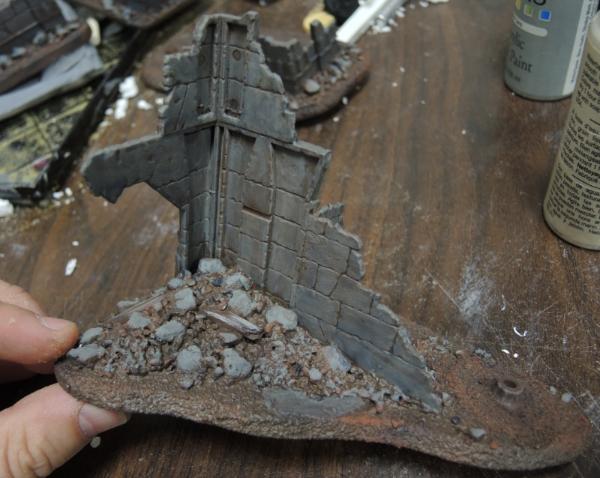
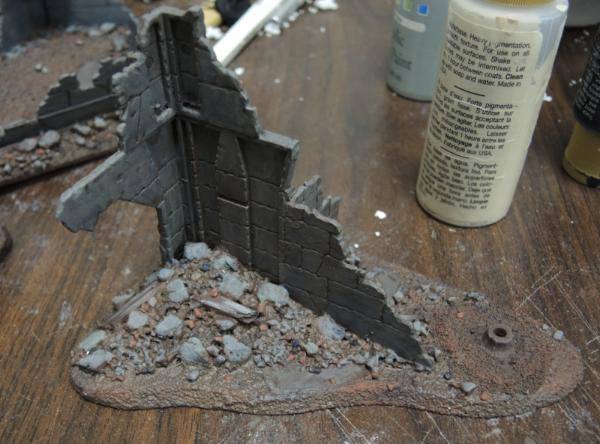
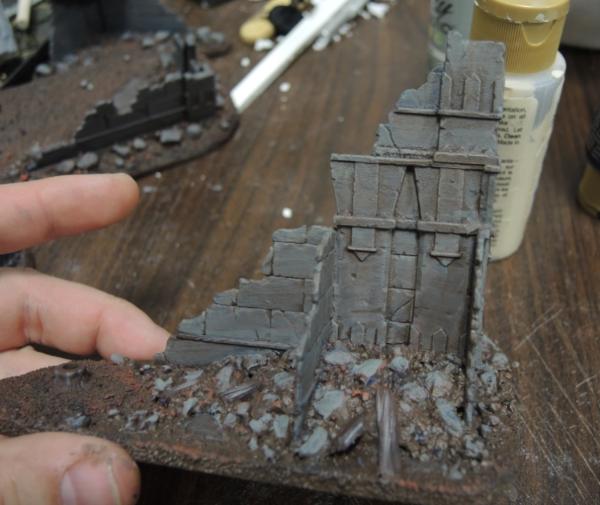
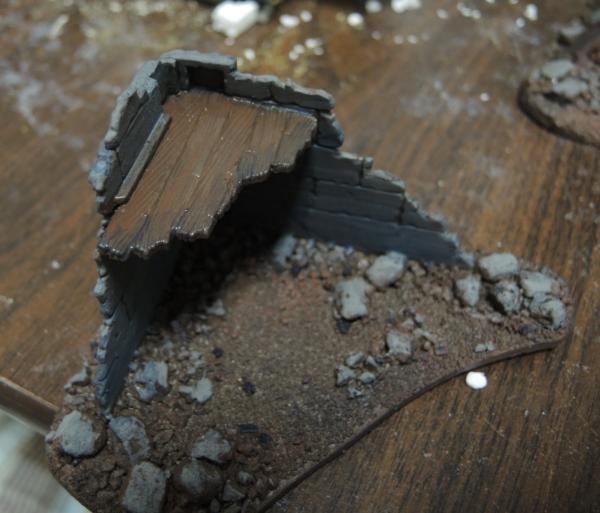
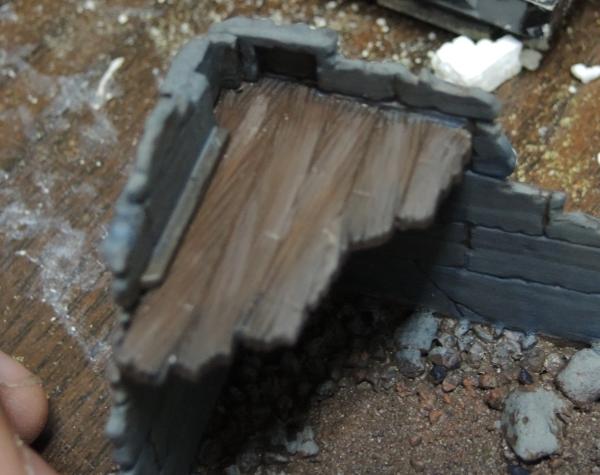
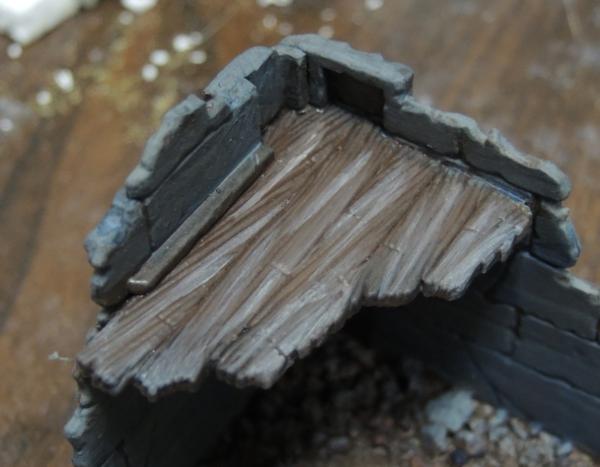
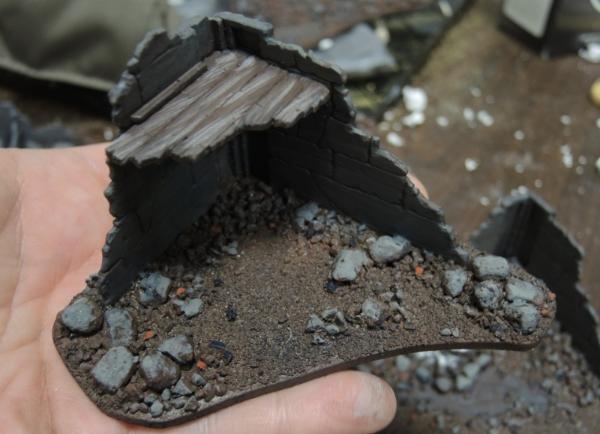
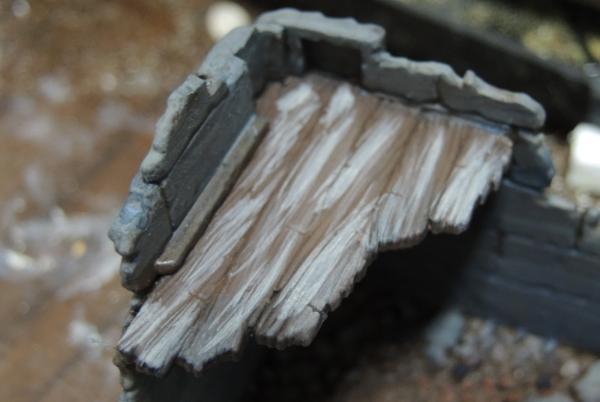
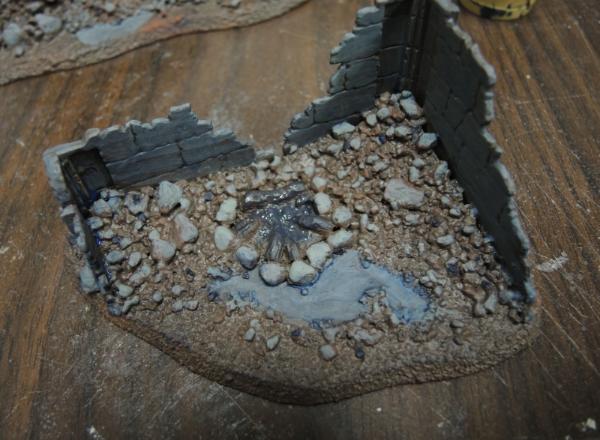
And layered watered-down indigo, grey, and white on the campfire to make it stand out:
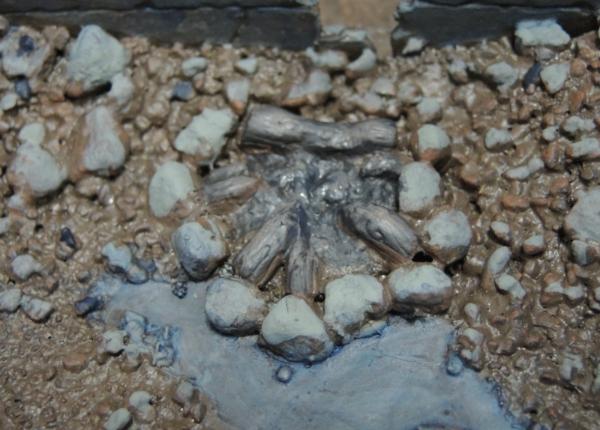
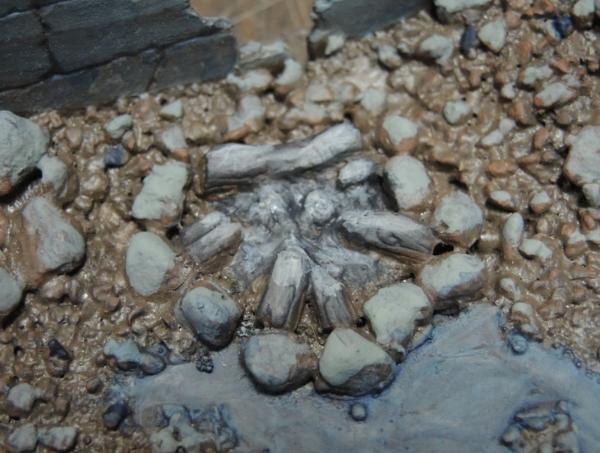
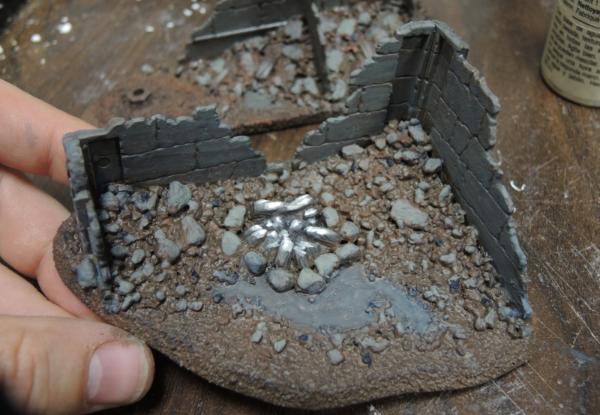
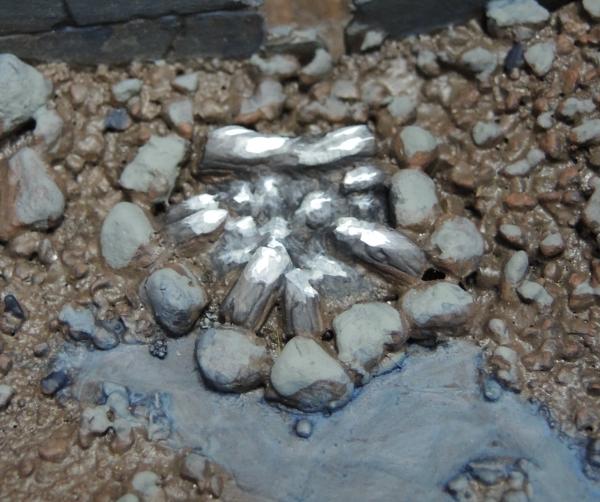
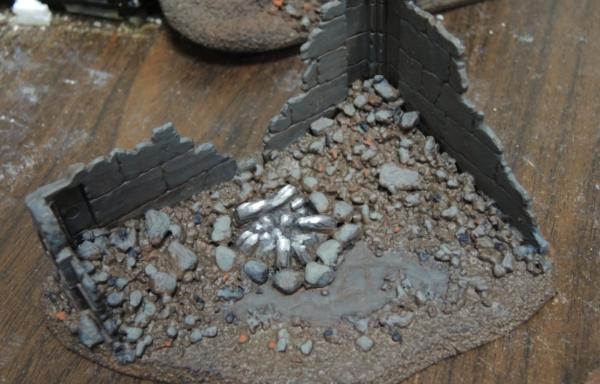
Then I picked out some stones in red and blue:
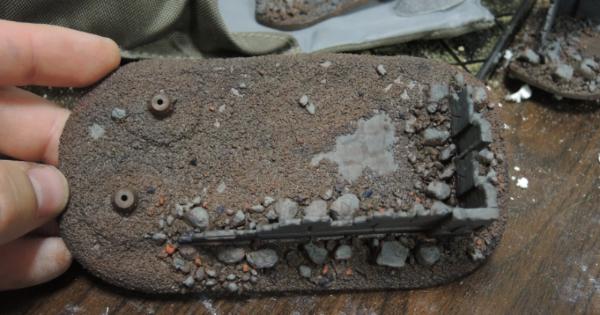
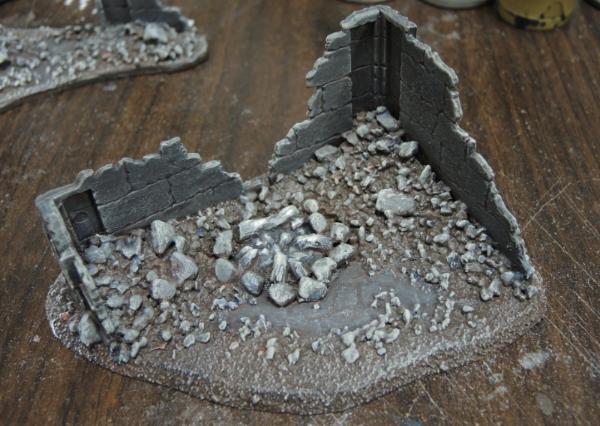
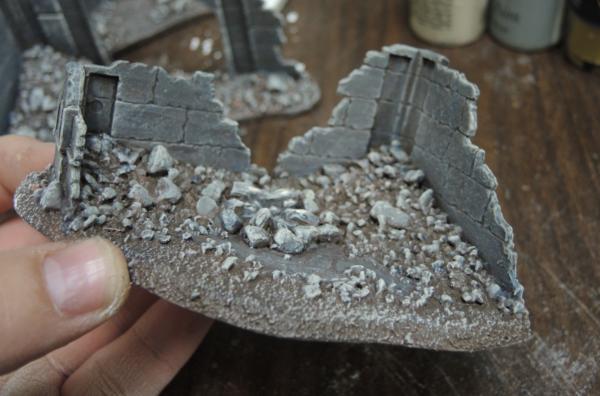
And then drybrushed everything in white:

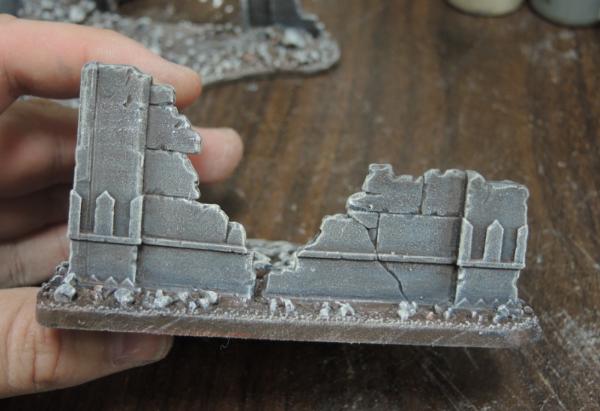
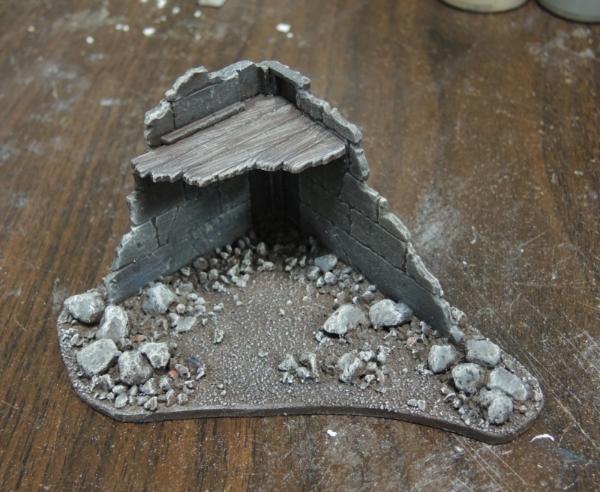
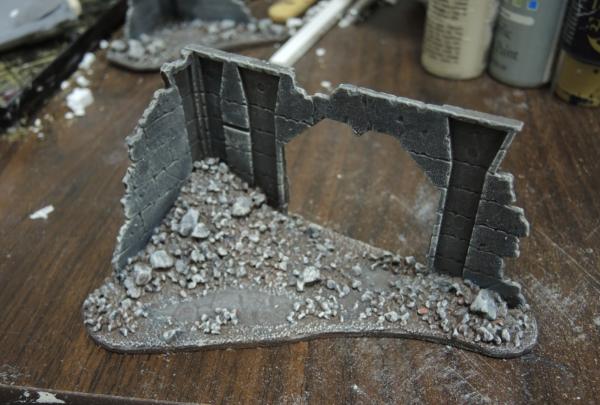
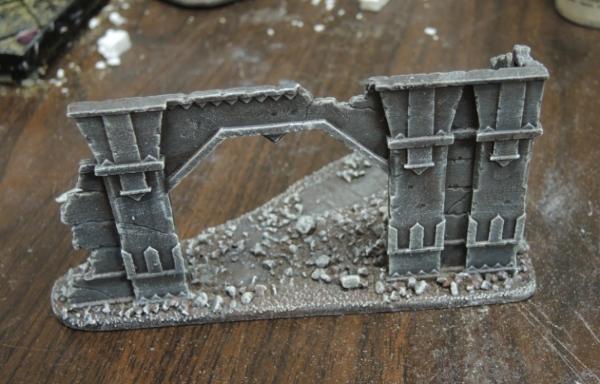
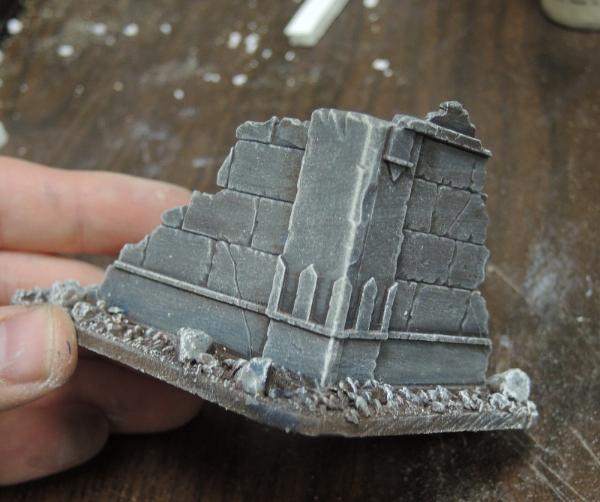
Then for just this one I painted and affixed the tree armature:
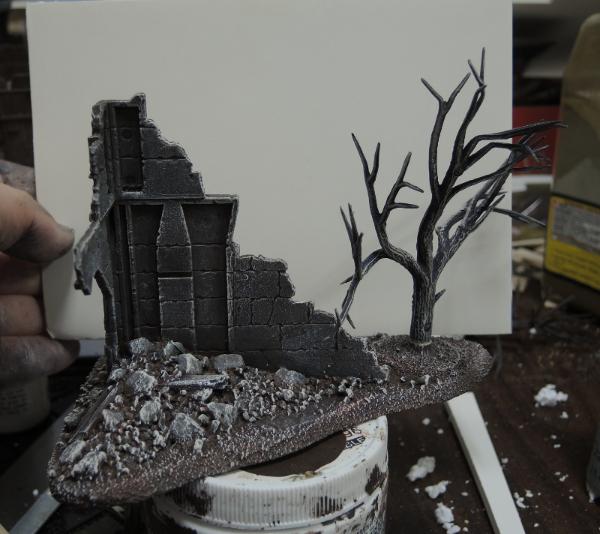
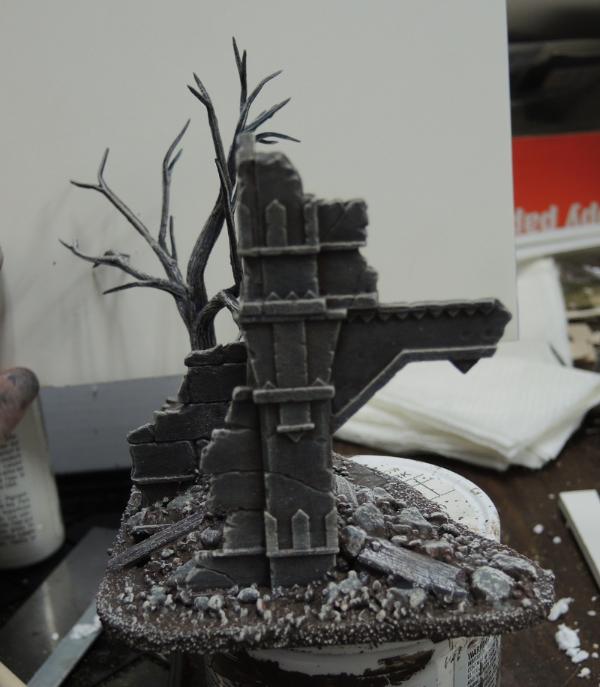
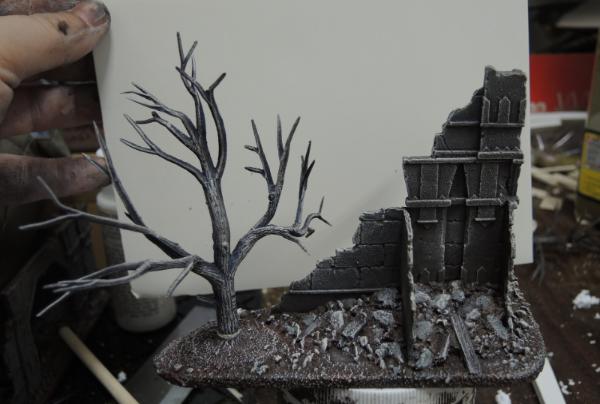
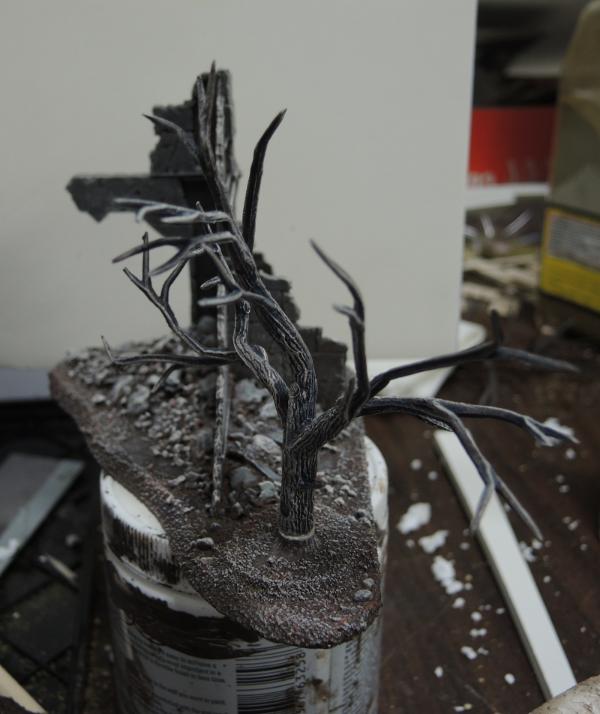
Then glued on some turf and static grass:
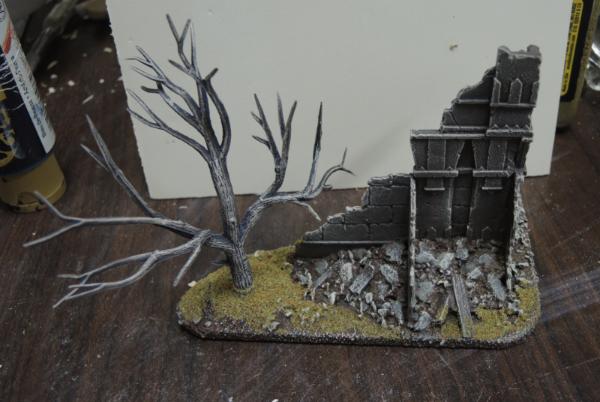
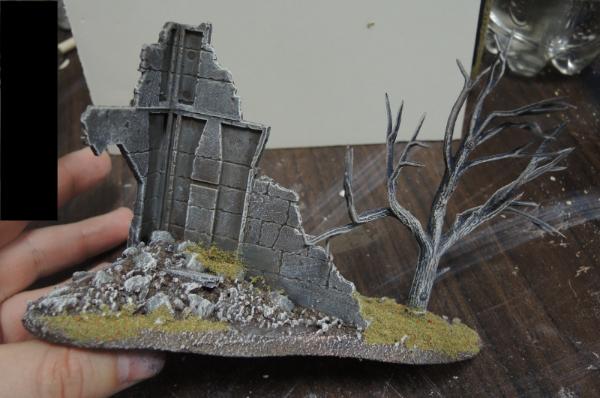
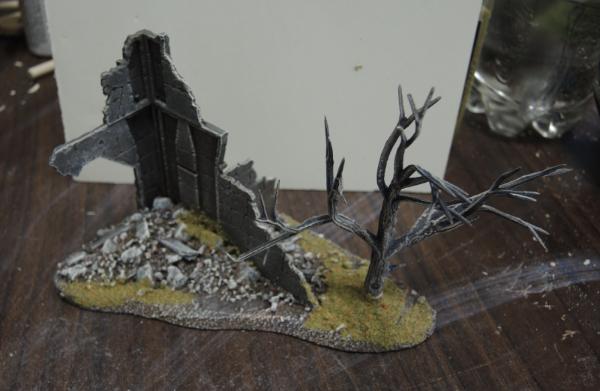
With a Dark Eldar Wych for size and playability:
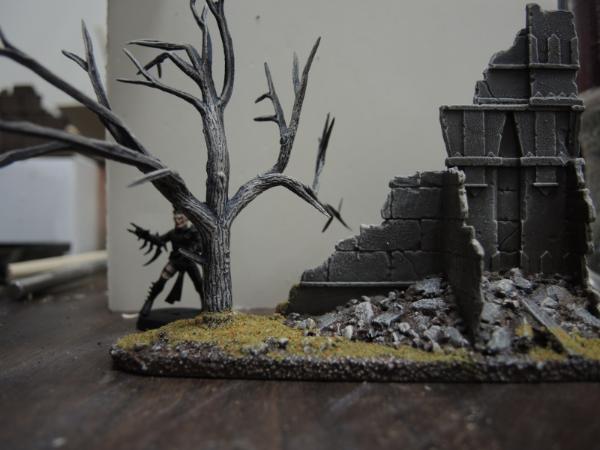
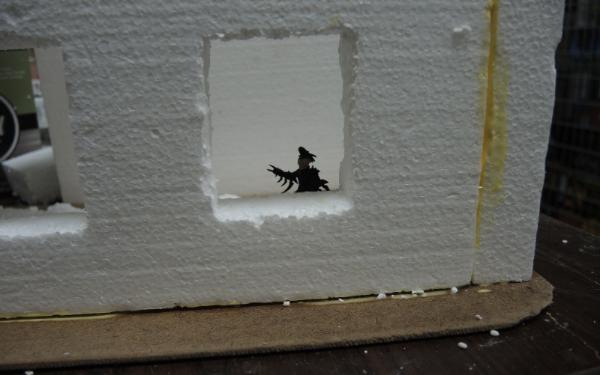
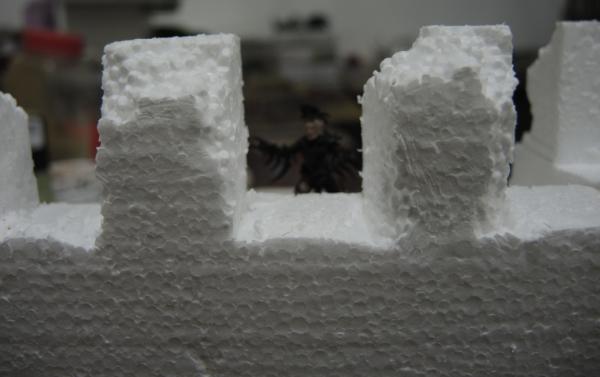
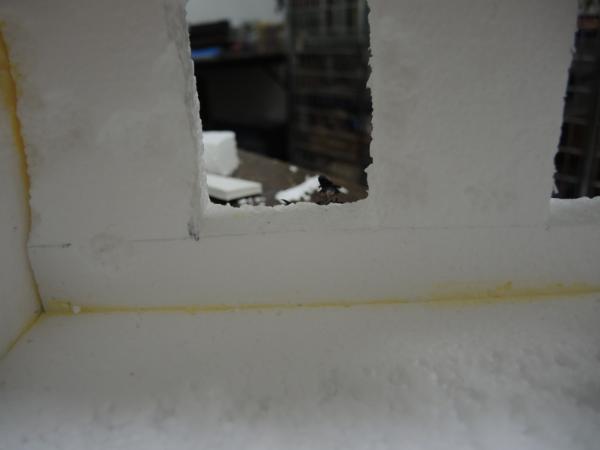
I also started working on this building because there's a lot of Styrofoam material laying around:
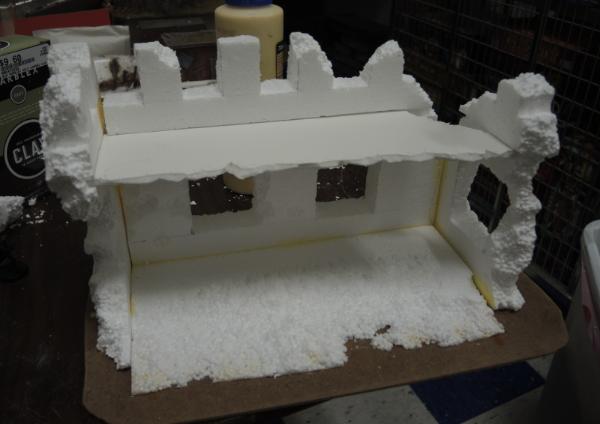
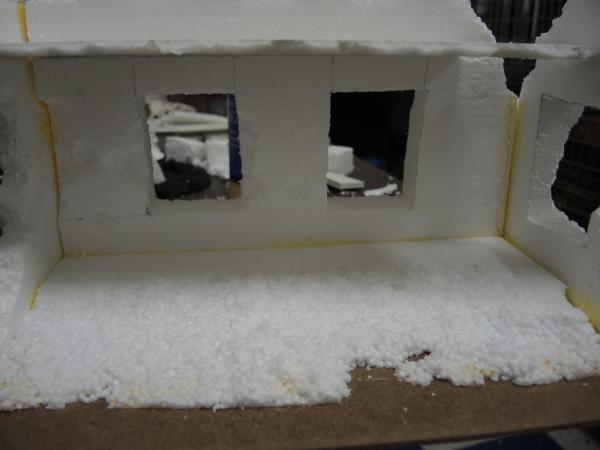
All the corners had to be creatively pinned in place:
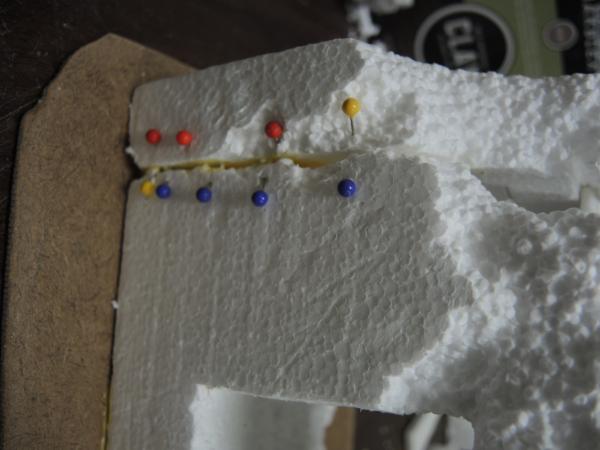
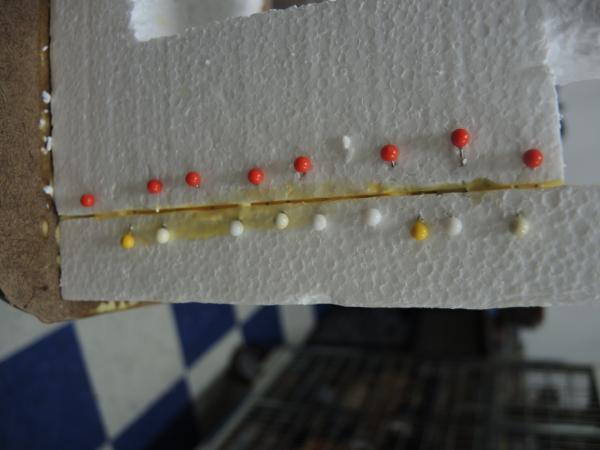
But in the end I like how the structure is coming out:
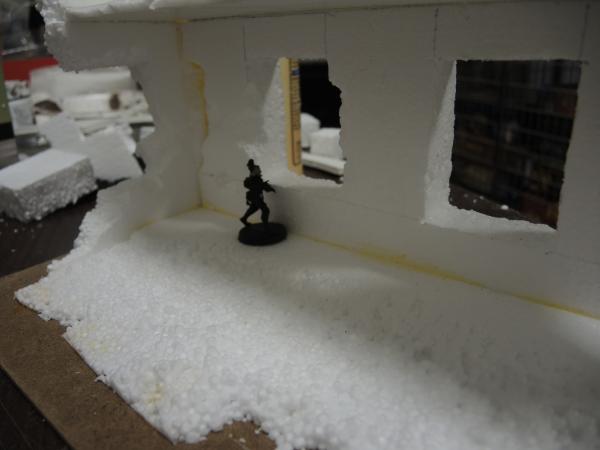
Phew! Anyway, thanks for looking. Sorry about the tremendously long post and thanks for everyone's patience while I wallowed in not posting things up because the volume of photos I had to post was overwhelming. There's still (and always will be) way more to come. Critique and/or feedback is always welcome. Have an awesome day!
74210
Post by: Ustrello
Really liking the ruins man! Makes me wonder if I should add some grass flock to my terrain at all.
22619
Post by: inmygravenimage
Wow. You have been busy!
88080
Post by: ciuncky
Cool ruins dude! For the sake of your sanity, i hope your net connection was fast when opening and pasting so many links 
Keep this up please, i need motivation for my diorama 
75552
Post by: MagosBiff90
Ahh missed out on so much!! Looks great... going to go back through and appreciate it all properly! 
76303
Post by: Warboss_Waaazag
84360
Post by: Mymearan
Really love your stuff! Some constructive criticism though: I think you may be better off posting less pictures, maybe 1/5th or so of what you're posting now? Please don't take this the wrong way, I really want to look at your stuff, but there are so many almost identical pictures of all angles of all buildings at every step of the process. Maybe save the "everything from every angle" until the finished product, an just post one or two (as opposed to 10+) pics for every "step" before that? Just some thoughts you may disregard if you wish  looking forward to more!
76303
Post by: Warboss_Waaazag
 Mymearan wrote: Mymearan wrote:Really love your stuff! Some constructive criticism though: I think you may be better off posting less pictures, maybe 1/5th or so of what you're posting now? Please don't take this the wrong way, I really want to look at your stuff, but there are so many almost identical pictures of all angles of all buildings at every step of the process. Maybe save the "everything from every angle" until the finished product, an just post one or two (as opposed to 10+) pics for every "step" before that? Just some thoughts you may disregard if you wish  looking forward to more!
First of all, thank you very much for the feedback, Myrmearan! I always appreciate it!
Secondly, Myrmearan makes a valid point. What does everybody else think, should I post fewer in progress shots and keep the multiple angles for the end or continue with the way I've been doing it? Your opinions matter to me, so thank you in advance!
62749
Post by: Dr H
Great job in both quantity and quality. 
As for wip pictures, it does make sense that we don't need to see every piece of terrain from every angle at every stage.
However, it is still worth taking those photos. But then pick the best one or two to represent the stage of the model (or group of models) as a whole. It'll save you time if nothing else.
Also, if you have done something that you feel is worth seeing from more angles, or is unique to a particular model, for example, you have a hut that you have painted a door in one way, and another hut that also has a door but the result is different, then it's worth showing both so you don't have to explain the differences later (a picture says a thousand words). If, however, both doors have just been base-coated in one colour, then a blue door is a blue door and another blue door is still a blue door...
I tend to save all-round picture dumps for when the building has finished (probably primed), and then when painting is finished. The rest of my wip shots are only one or two angles to show the changes.
I do like to see each stage of a build though. So keep that aspect. 
But it's your blog, show what you want to show. But keep in mind that many similar pictures may lead people to scroll over them and not stop to "look" at something, you may not be passing on all the information you think you are ("wood for the trees" kind of thing).
76303
Post by: Warboss_Waaazag
Thank you for the comprehensive response, Dr H. What I'm hearing is keep the build pics and lessen the PIP pics unless I need to showcase something interesting. Is that a correct interpretation of what you said?
84360
Post by: Mymearan
Dr H said it much better than I could!
62749
Post by: Dr H
Yeah, pretty much. Building tends to involve more dramatic, and specific, changes than painting, so could deserve more pictures indeed.
2326
Post by: shasolenzabi
Very nice terrain work! I especially like the ruins and shanty
76303
Post by: Warboss_Waaazag
Okay, I hear you guys and I'll start implementing the changes right away. Thanks very much for your feedback on this issue.
22619
Post by: inmygravenimage
Even just spoiler block the PIPs? I find them highly informative, that gives folk the choice.
76303
Post by: Warboss_Waaazag
 inmygravenimage wrote: inmygravenimage wrote:Even just spoiler block the PIPs? I find them highly informative, that gives folk the choice.
I could do that. My intention has always been to be thorough; to show every step of the process. I want to teach and give back to the community.
So: lots of build pictures, a few choice PIP visible, and the rest of the PIP pictures in spoilers for people who don't want to see every phase but have the option to see each step in case they do find those steps helpful.
Does this sound like a fair compromise?
76303
Post by: Warboss_Waaazag
22619
Post by: inmygravenimage
Very nice indeed! Perhaps some very fine wire coming out of one to be ripped cable?
62749
Post by: Dr H
Liking the one with the cables spilling out of the pipe. 
76303
Post by: Warboss_Waaazag
Thanks for the comments guys. Sorry I have been away so long, my wife's sister has been hospitalized with an unknown illness for the past few months on and off. Doctors can't seem to diagnose the issue. First they said it was Crohns disease, then it wasn't, then it was Ulcerative Colitis, then it was both, then maybe it was neither. You get the idea. She had surgery this weekend past and is slowly making a recovery. Fingers crossed that this solves whatever issue she had and we can all get back to our normal lives.
Thanks for your patience, everyone. I'll get back to posting an avalanche of terrain shortly. Thanks for reading and have an awesome day!
22619
Post by: inmygravenimage
Nightmare. All thoughts and etc. Bases are fab and highly castable.
76303
Post by: Warboss_Waaazag
Thanks, 'graven. In fact, that's exactly what's happening to them this week. Hopefully those will be the first photos I post in a few days - the first cast copies.
62749
Post by: Dr H
All the best to the family and good luck with the casting. 
76303
Post by: Warboss_Waaazag
Thanks, Dr H!
76303
Post by: Warboss_Waaazag
76303
Post by: Warboss_Waaazag
62749
Post by: Dr H
Good work on the terrain pieces.
Are you not tempted to mix them up a little; some plants on the ruin pieces and some ruin on the plant pieces?
The ruins in particular look a bit sterile to me, but I appreciate that a LOS blocker is pretty much what many want and details are not required.
76303
Post by: Warboss_Waaazag
I make terrain to sell, so a lot of what I do becomes things that fit into easy categories. If I were making these for myself there might be more variety and complexity for that matter.
76303
Post by: Warboss_Waaazag
22619
Post by: inmygravenimage
I like the colours in your plants especially 
76303
Post by: Warboss_Waaazag
Thank you very much, inmygravenimage! I always appreciate feedback!
76303
Post by: Warboss_Waaazag
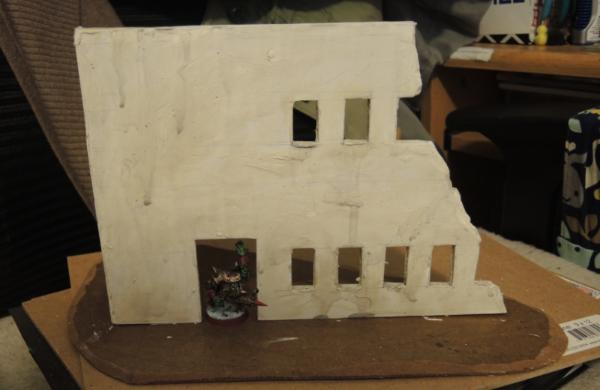
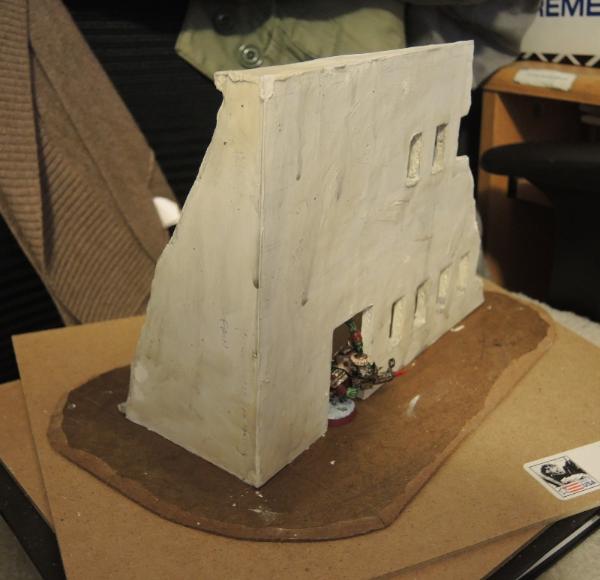
Here's the beginnings of a new project I'm working on for a 40k campaign I'm running at a local gaming store. The background is that it is an abandoned planet from the Golden Age of Technology at the edge of the Ultima Segmentum. It's continent-cities are crumbling as winds laden with abrasive particulate dust erode every surface unchecked. This is the first ruin I'm building and it is barely the foundation before the heaps of rumble, mounds of black dust, and other details get added. Let me know what you think so far.
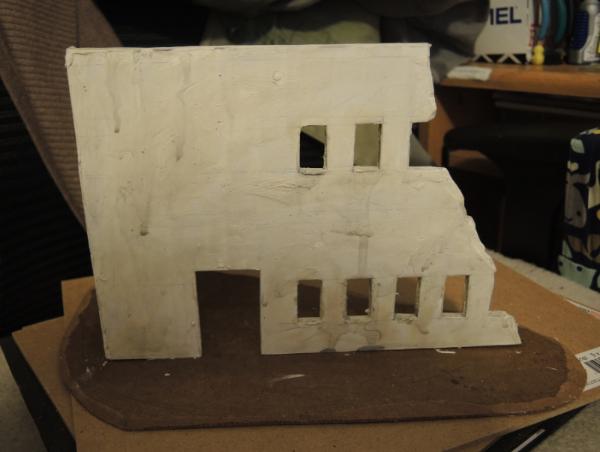 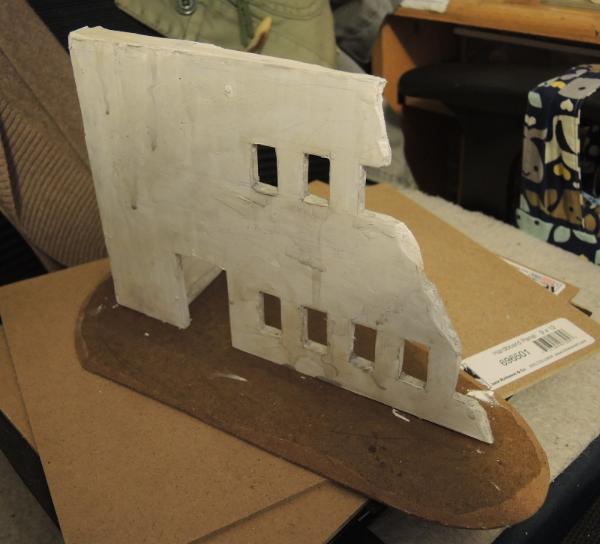 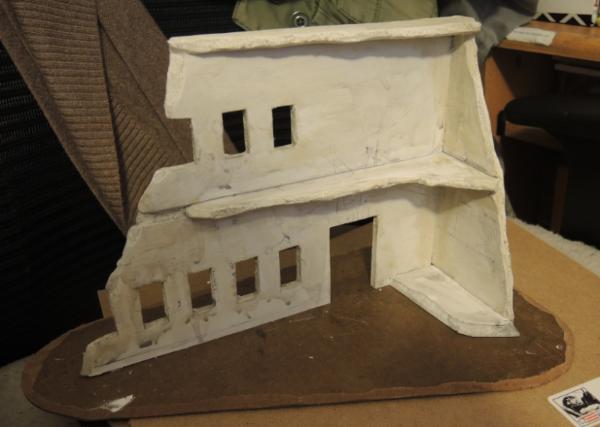
The walls have been coated with a thin layer of very watered down air-dry clay from Crayola, followed by a layer of 50/50 water and white glue for strength and to resist cracking. Here it is with Barry Ork for scale:
Thanks for looking and have an awesome day!
22619
Post by: inmygravenimage
Looks good. In some ways, though, might some cracking not be a good thing?
76303
Post by: Warboss_Waaazag
Yes, that's bound to happen and will definitely add to the effect. What I'm trying to avoid is the clay flaking off the model entirely, which it has a tendency to when applied so thin. Excellent observation and feedback, though.
76303
Post by: Warboss_Waaazag
22619
Post by: inmygravenimage
Looks awesome. Craft night? I love your life!
76303
Post by: Warboss_Waaazag
58000
Post by: mars2024
Really nice!
76303
Post by: Warboss_Waaazag
74210
Post by: Ustrello
Very nice so far! I wish I had the time/patience to make custom terrain!
62749
Post by: Dr H
Good work.
Do you always cover your foamboard with clay/plaster? Does it last well, is it resilient for gaming?
Just considering options for when I start to play with foamboard.
76303
Post by: Warboss_Waaazag
Thanks for the feedback, guys!
@Dr H: I just started using clay to cover the foam board, but I've always used it on my hills and amongst the rubble. If you coat it with thinned PVA glue, in any stage of drying it's in, it adds resilience to the piece overall. The hills have lasted for a year without damage, although they weigh significantly more than hills without the clay. I think, though, that the added weight adds to their longevity as players are less likely to knock them off the table. The buildings have been sitting dry, with one coat of watered down PVA, for about a week and haven't cracked. When I layer the first base coat it will be a 30/40/30 mix water/pigment/glue. Every layer adds strength.
76303
Post by: Warboss_Waaazag
A semi-quick road tutorial. I bought a sheet of 18"x12" foam from a craft store for less than a $1 USD.

It's about 1mm thick:

I aligned it on a sheet of masonite ( MDF board):
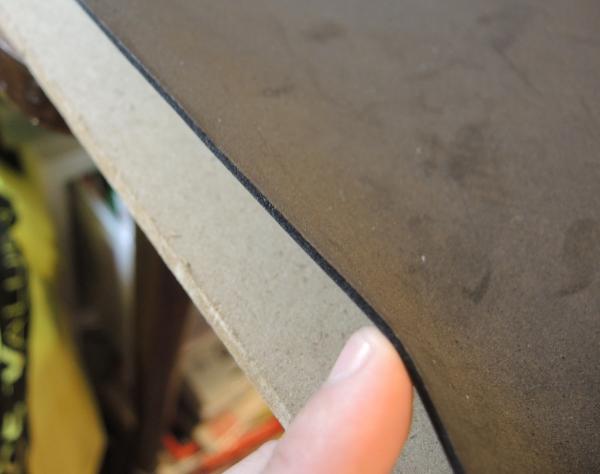 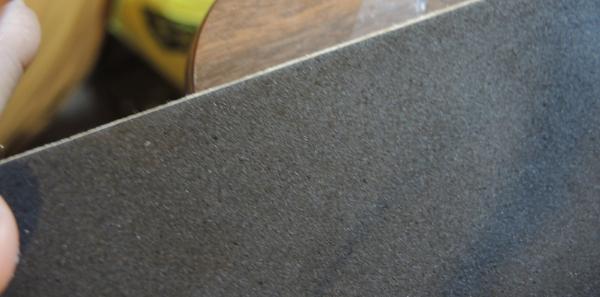
Flush with the edge to make using a T square to draw lines easier:
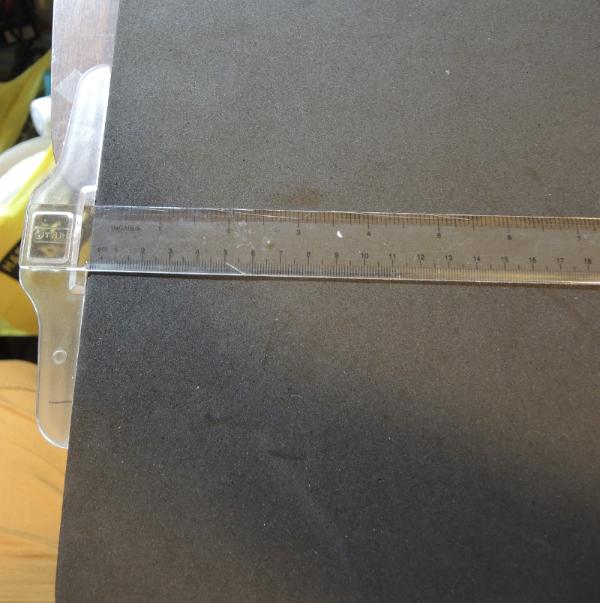
At 9" I drew a line across the sheet (marking it literally in half):
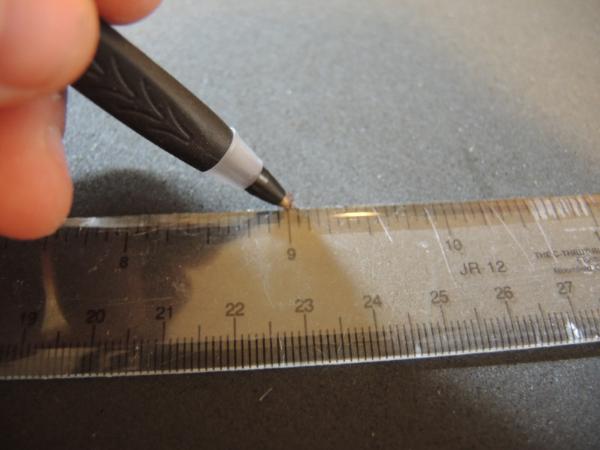 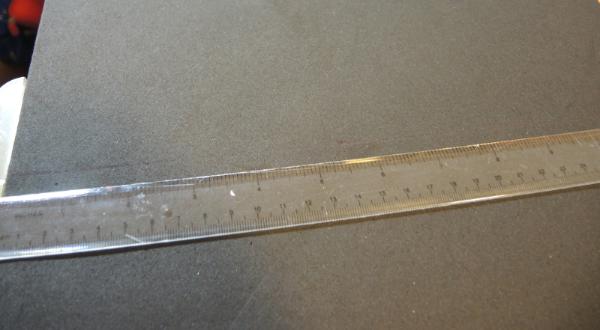
And cut it with a scissor to make a half-sized sheet:
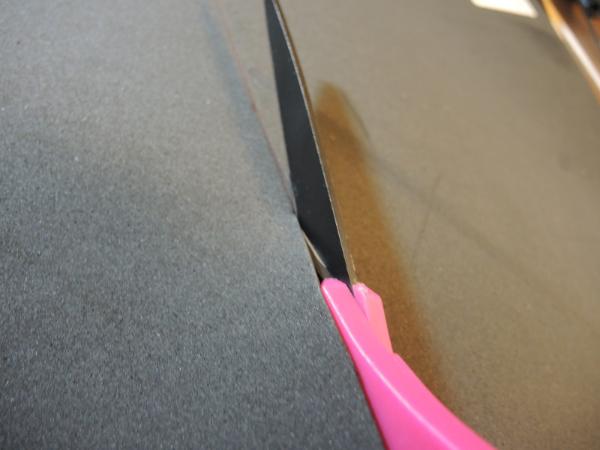 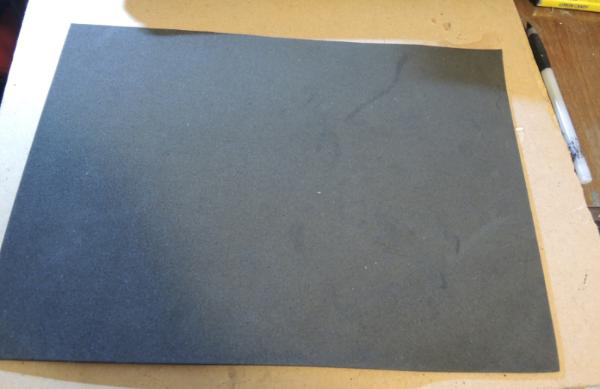
Then measured and drew lines at 4" intervals:
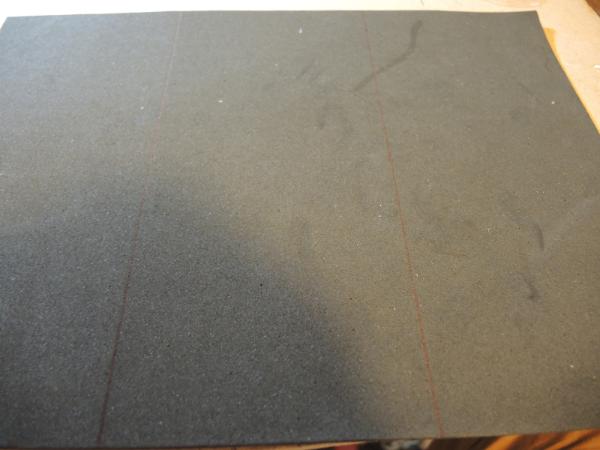
And scissored it into 3 pieces:
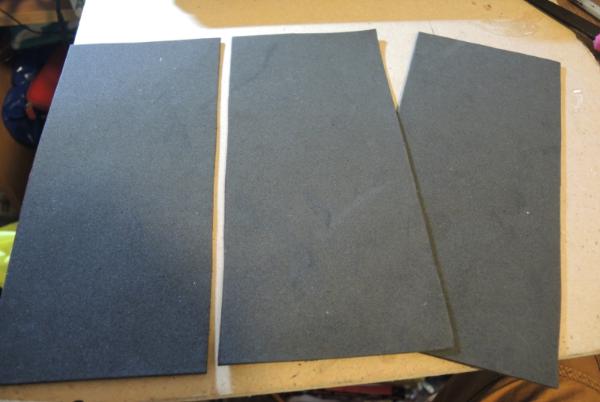
Then, using this:
I glued "stiffeners" to one side of the road section to give it some rigidity:
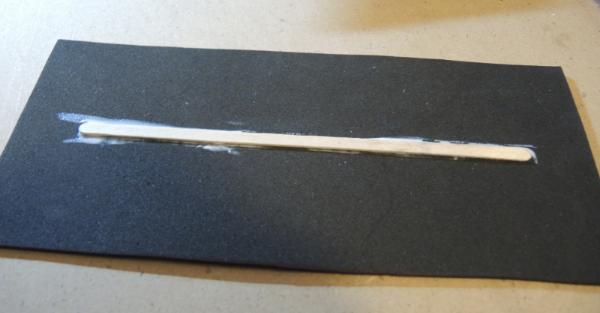 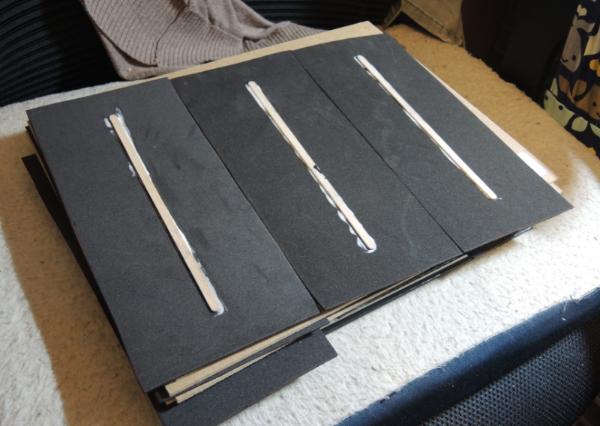
And covered them with something heavy to let them dry:
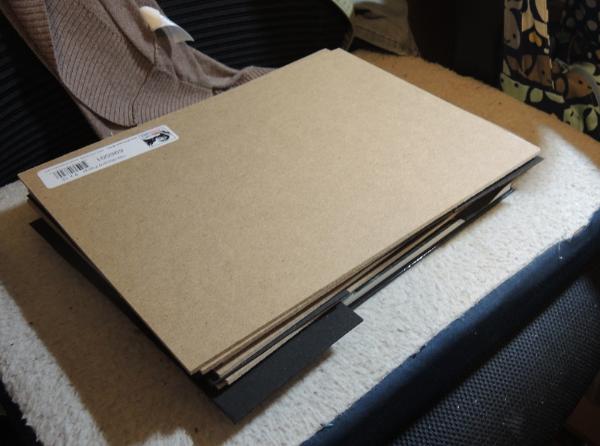 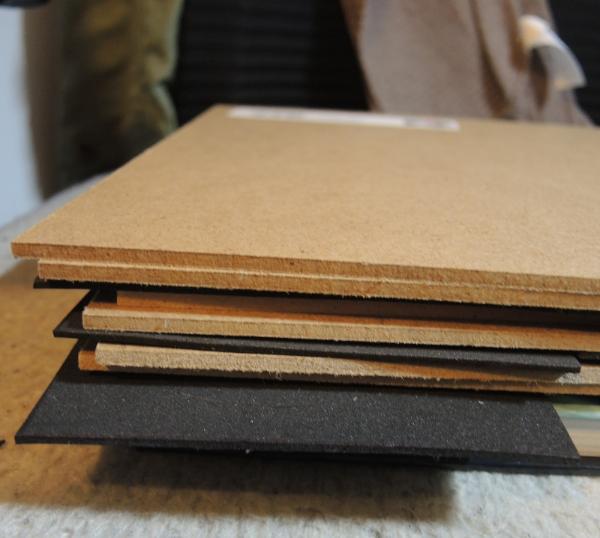
Once dry, I sloppily applied some grey paint (here we see the painted road on the left vs the unpainted one on the right):
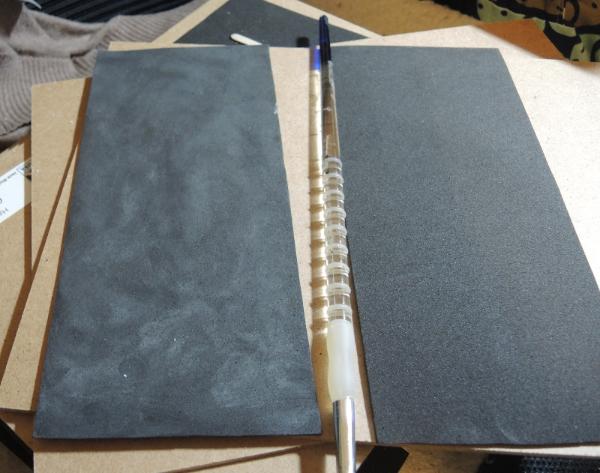
Then some off-white (the highlighted on the left, the grey only in the middle, and the unpainted on the right):
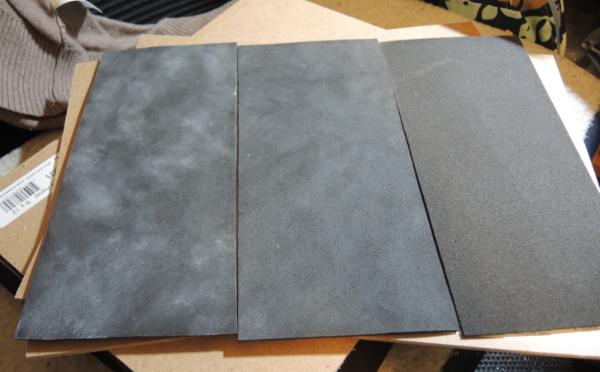
And then used an obnoxious orange for road markings:
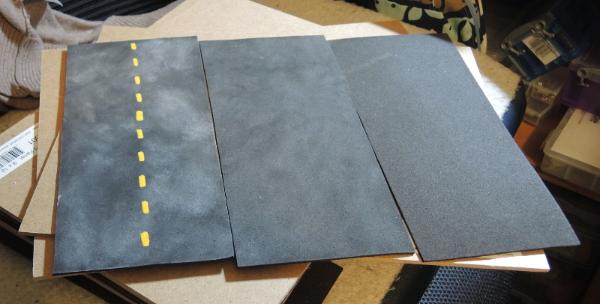
I got six 9"x4" road sections out of each piece and my costs were maybe $1.25 in total (including paint and glue).
Thanks for looking. C&C always welcome. Have an awesome day!
72556
Post by: Red Harvest
Great Minds think alike.  I did the same thing-- a few pix are in my blog, but I am still debating how to keep them flat. I was planning to use 1/8" MDF ( or tempered hardboard)
76303
Post by: Warboss_Waaazag
I've found the coffee stirrer sticks work just fine to keep them flat. They've seen active use at a gaming club for 3 weeks already with no discernible damage.
76303
Post by: Warboss_Waaazag
Here is yet another building I am working on. Front, back, and two sides:
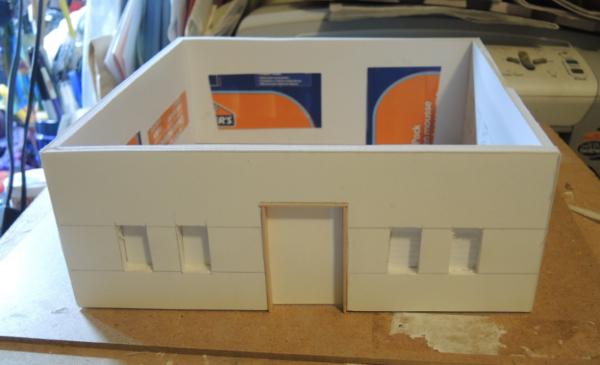 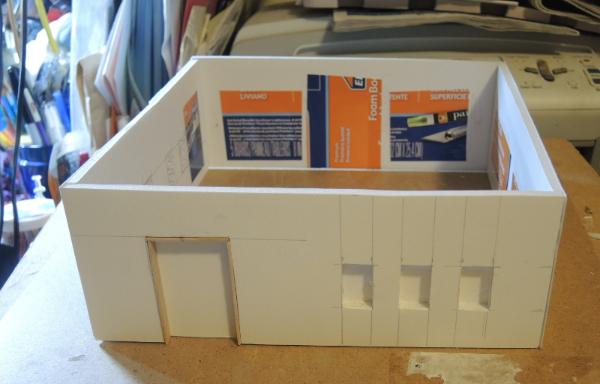 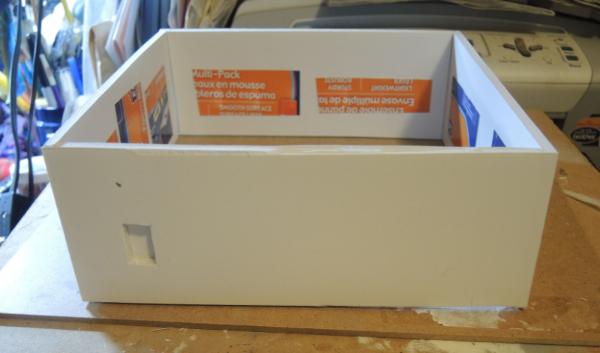 
And then some shots of the roof before I glue it on:
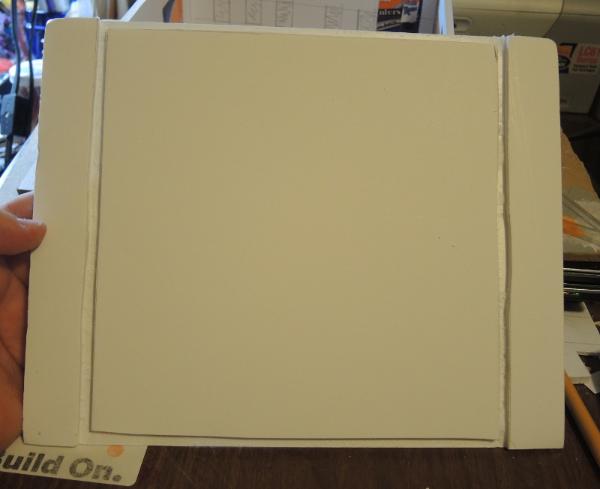
I cut a channel all around so it would fit over the walls. Hopefully this will work:
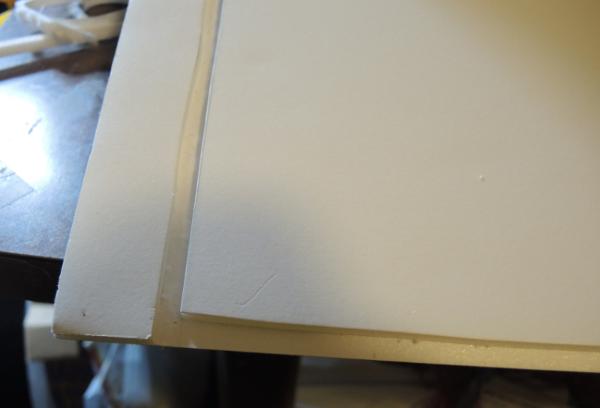
More photos as I get stuff done. Thanks for looking and have an awesome day!
76303
Post by: Warboss_Waaazag
Some details in the making:
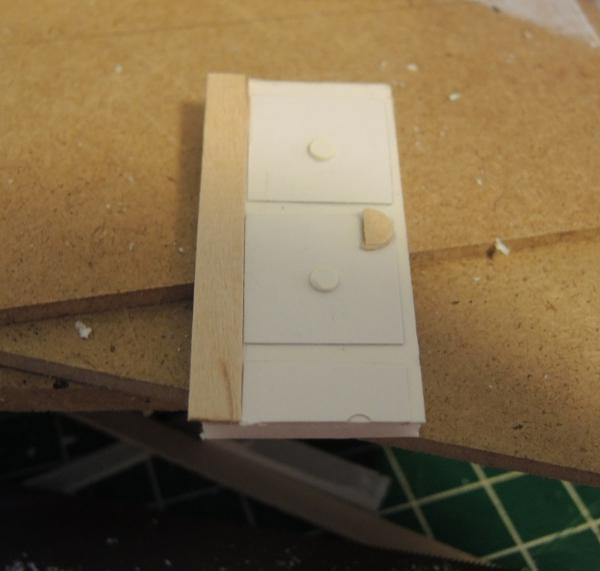 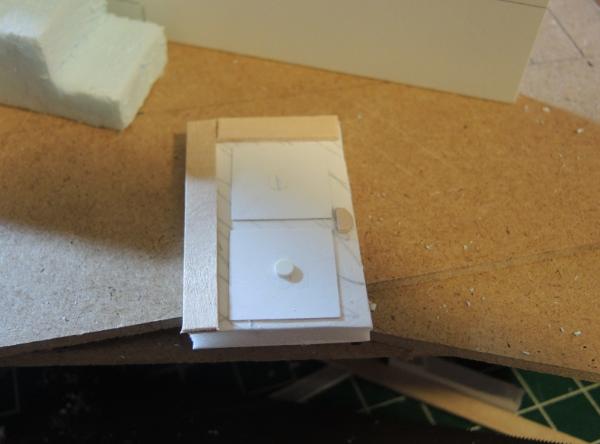
More to come.
62749
Post by: Dr H
More, show me more...!  
65595
Post by: Camkierhi
You have to be one of the most prolific builders on Dakka.
Keep it going.
76303
Post by: Warboss_Waaazag
Thanks very much for the kind words, gents. Here's another preview (the one on the bottom of the stack is the building with the overhang I was working on a few posts back - the roof worked) :
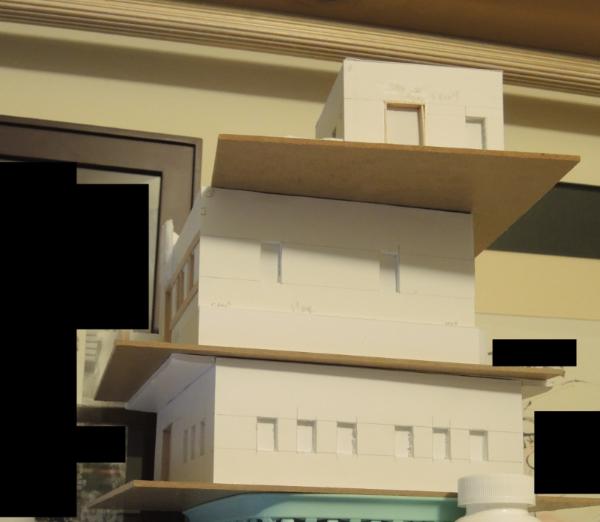
97350
Post by: Plains of War
As a T.O I am always looking for new ideas for terrain. Your blog is inspiering and has given me a few new ideas
76303
Post by: Warboss_Waaazag
 Plains of War wrote: Plains of War wrote:As a T.O I am always looking for new ideas for terrain. Your blog is inspiering and has given me a few new ideas
Wow, thank you, Plains of War. Your comment humbles me. I'm very glad I can give back to this community, especially considering how much I love building terrain. I hope I can continue to inspire you and many others. Have an awesome day!
76303
Post by: Warboss_Waaazag
22619
Post by: inmygravenimage
That's fantastic stuff mate! Love it! What's going above the door?
76303
Post by: Warboss_Waaazag
Thanks, 'graven! Probably some sort of signage. I haven't really decided yet.
62749
Post by: Dr H
Nice and tidy job, 'boss. Looks great. 
72556
Post by: Red Harvest
Good use of craft sticks ( or Starbuck's coffee stirrers  ) for the window and door framing. I'll certainly borrow that idea.
The MDF bases, don't you round off the edges and corners, or at least 'break' them, before attaching the building?
'Break' means to simply round the edge ever so slightly in this context.
76303
Post by: Warboss_Waaazag
No, Red, I leave them straight and flush so that what I'm gluing to them sticks better and they align better once done. The project is enormous. I'm making enough buildings and roads to completely cover a 4 foot by 6 foot table.
Automatically Appended Next Post:
As I get further along in the project it will make more sense as to why I'm not beveling the edges.
65595
Post by: Camkierhi
Love the look of the building so far, great use of materials, I bought a pack of a thousand stirerers at costco, cost me £10, thats a lot of building material for a tenner. Is this going to be orky? The shape of the signage and some of the design is hinting, but not absolute. And will the windows be boarded up or glazed?
76303
Post by: Warboss_Waaazag
Yeah I'm thinking of trying to find a box of those sticks somewhere so I don't have to keep nicking them from coffee houses. The buildings aren't going to be orky, but there's plans to make others that are. The idea is to make them weathered and to make them look lived in. Windows will get frames and "tinted" glass in the form of painted plastic. There's still plenty of work to do. I have to detail my buildings before I detail them, because that's just how I roll.
72556
Post by: Red Harvest
I got a box of 1000 from my local Michaels craft store for $3.70 by using the 40% off coupon.
You intend to make the pieces fit together on the table top and essentially be a second tabletop? And re-arrangeable? My guess.
76303
Post by: Warboss_Waaazag
 Red Harvest wrote: Red Harvest wrote:I got a box of 1000 from my local Michaels craft store for $3.70 by using the 40% off coupon.
You intend to make the pieces fit together on the table top and essentially be a second tabletop? And re-arrangeable? My guess.
Excellent and accurate guess, Red.
Also, the local Starbucks told me they get a box of 1000 for 15 cents. I want that deal.
76303
Post by: Warboss_Waaazag
9394
Post by: Malika2
Wow, this is really awesome!
76303
Post by: Warboss_Waaazag
Thanks Malika2 (who I assume was once just Malika, but had to make a new profile for some reason)!
52201
Post by: evildrcheese
Dayum. Those are some nice buildings.
D
52812
Post by: Tiger9gamer
I gotta subscribe to this, as I am on a terrain building kick =D excellent job!
can I ask what your using? at work and don't have time to look at all the posts
62749
Post by: Dr H
Nice job, 'boss. The pieces work well together. 
76303
Post by: Warboss_Waaazag
Thanks for the feedback, everyone! New updates in a day or so.
89231
Post by: ckig
I like the layout of it all. Looking good!
76303
Post by: Warboss_Waaazag
Thanks, ckig!
76303
Post by: Warboss_Waaazag
22619
Post by: inmygravenimage
That is one happy looking ork! All Dis - dis iz mine! Now where did me paint squig go?
65595
Post by: Camkierhi
Love the look of this project at the moment, getting my juices flowing.
Dat ork certainly has de bestest pad in town right now. Needs a pool mind you!
22619
Post by: inmygravenimage
Mmmm... With Terkilla! And chimichangas!
Wait now I want to do an ork deadpool army 
32193
Post by: PDH
Those building are really cool. They give me a warm fuzzy feeling of nostalgia towards 90's WD.
76303
Post by: Warboss_Waaazag
Thanks for the feedback, guys! More progress shots up tomorrow.
76303
Post by: Warboss_Waaazag
72556
Post by: Red Harvest
No internal access though :( But it will all look very good indeed as a unified table.
76303
Post by: Warboss_Waaazag
 Red Harvest wrote: Red Harvest wrote:No internal access though :( But it will all look very good indeed as a unified table.
I have never seen gamers take advantage of internal access to buildings. Either they leave the roof off while they play - which looks visually jarring - or they ignore tall buildings. So now I mean to give players plenty of roof, courtyard, and sidewalk space to maneuver around.
22619
Post by: inmygravenimage
^Spoken like a man who needs to be playing Batman!
72556
Post by: Red Harvest
Or Infinity, or Malifaux 1e. Heck, even in 2nd ed 40k we used the insides of buildings. Perhaps it is a skirmish game thing? Or If you build it, they will use it.
76303
Post by: Warboss_Waaazag
No, I've built it. They don't use it. I've seen battle reports where they don't use it. I decided not to waste my time. Later, when I am further along in the production of my own wargame, I will make buildings with detailed, playable interiors. For now I make solid buildings with the understanding that players will use them primarily for cover.
76303
Post by: Warboss_Waaazag
22619
Post by: inmygravenimage
I feel like I want to hire you to make me a Gotham city. Seriously mate, brilliant stuff.
62749
Post by: Dr H
Nice job 'boss. 
I know it's meant to be a big boxy line-of-sight blocker for gamers, but I feel the large building could do with a sign of some kind on one side, just to give it a bit of personality?
31320
Post by: Knightley
That is very cool, I do agree with Doc H that the large building needs something 'else' not sure what though.
76303
Post by: Warboss_Waaazag
62749
Post by: Dr H
That's why I'm suggesting it now. No point telling someone the models could do with x feature, if they've finished. 
Looking nice and "official" now. Good detailing. 
|
|