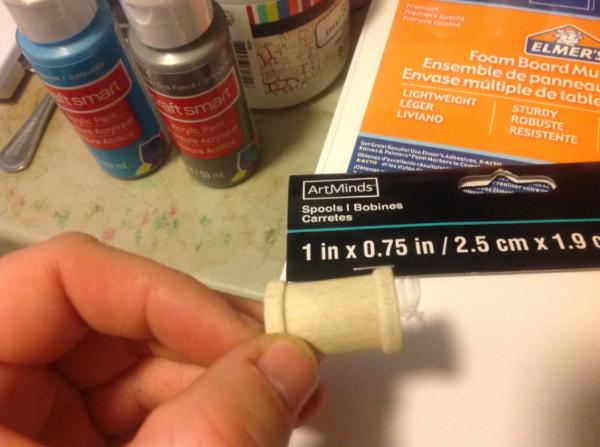
Here's some more detailing on my "L building". I built a door.
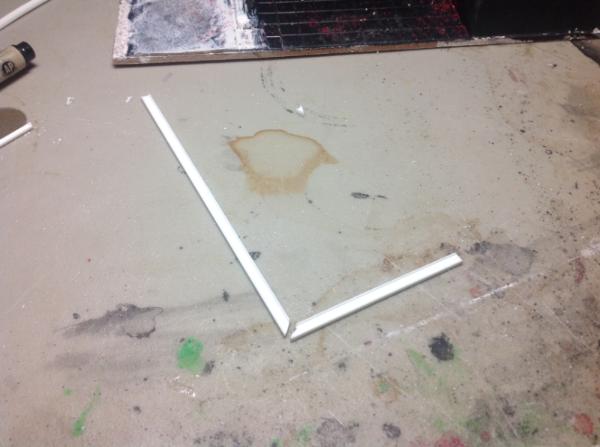
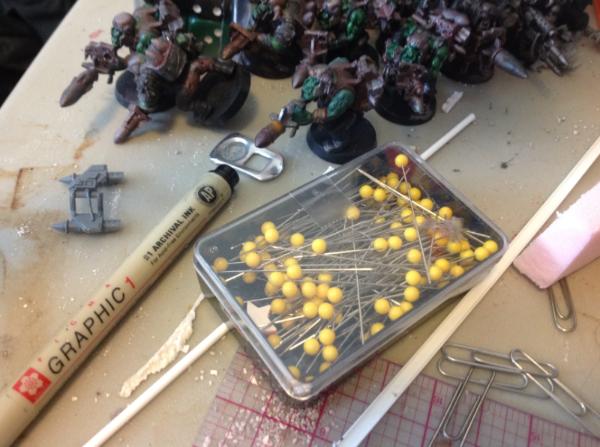
Making cross beams:
And a doorknob (I made the divot in the "knob" with a ballpoint pen. In hindsight I wonder if it will translate in any meaningful way once the paint gets applied):
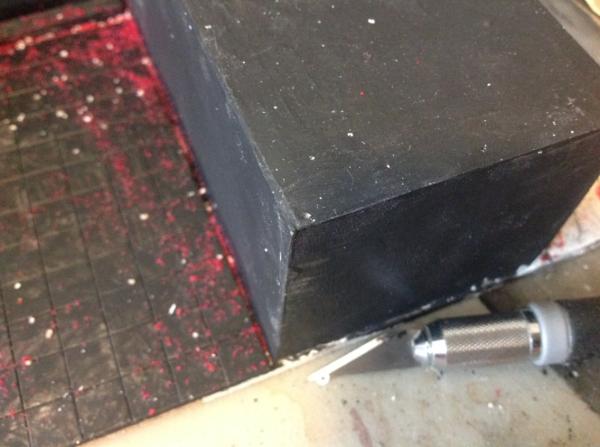
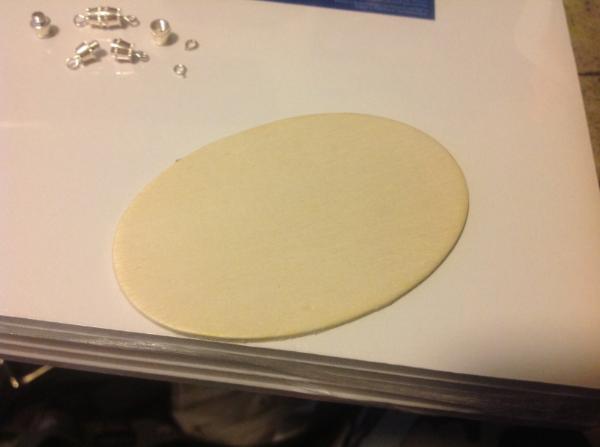
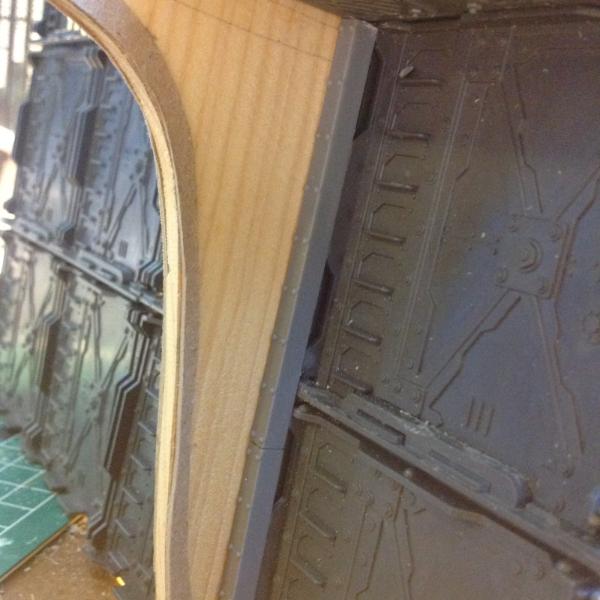
I coated the whole piece with a thin layer of air dry clay and reinforced it with elmers glue (White Glue) before it dried. The effect I'm trying to reproduce is poured concrete construction:
Anyway, thanks for looking. More updates either tomorrow or tonight (if someone is so kind as to comment on my progress so another post today doesn't automatically append ). Thanks for looking and have an awesome day!
You and your fancy set-square ruler thing, making people that do these things by eye (me) feel bad. Nah, I do put some effort in to using square things to get perpendicular and parallel lines.
Dr H wrote: You and your fancy set-square ruler thing, making people that do these things by eye (me) feel bad. Nah, I do put some effort in to using square things to get perpendicular and parallel lines.
Looking good, and appending interruption.
Haha! I mean, what you do is cool, too, Dr H. Thanks for the interrupt! Also, although I measure everything perfect I still eyeball it when I cut. Because I kind of hate T Squares.
Sidewalk!
Test fitting the door to the frame:
And then gluing it in and totally neglecting the fact that the sidewalk pins it shut (whatever):
Notice my "hinge"?:
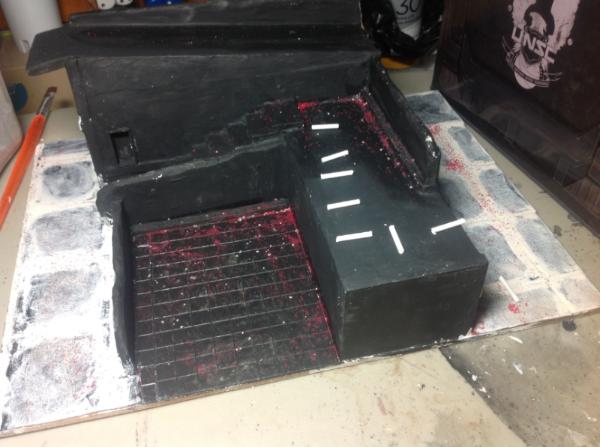
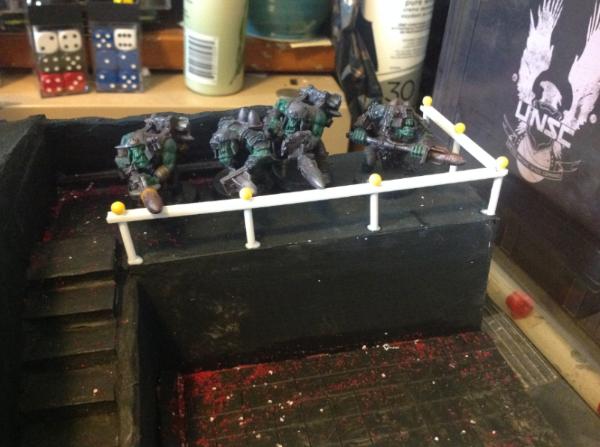
The heavy file is there to weigh the sidewalk plates down so they glue better. Here are some shots of models with cover:
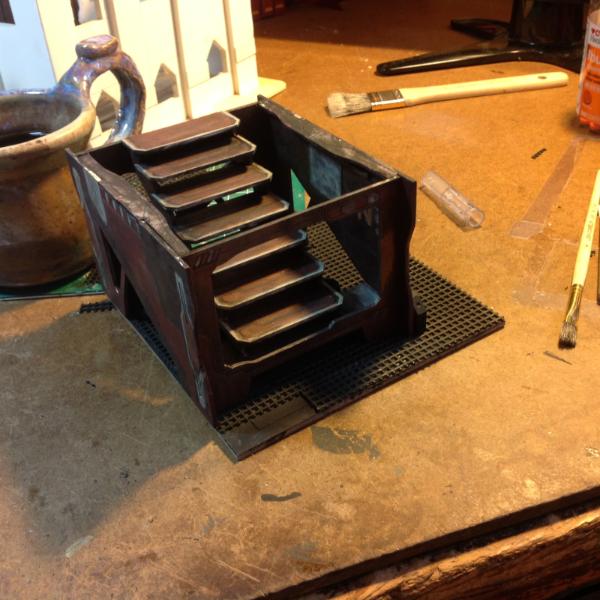
For some reason I love taking pictures of this staircase:
Here's work on the "courtyard":
For those tiles I just used a sheet of evergreen plastic cut to size. These shots with Barry illustrate the perfect coverage:
You'll likely also notice the gutter:
Here illustrated with another WIP side by side:
And now working on window frames:
One last shot with a road section WIP:
Thanks for looking! More updates soon! Have an awesome day!
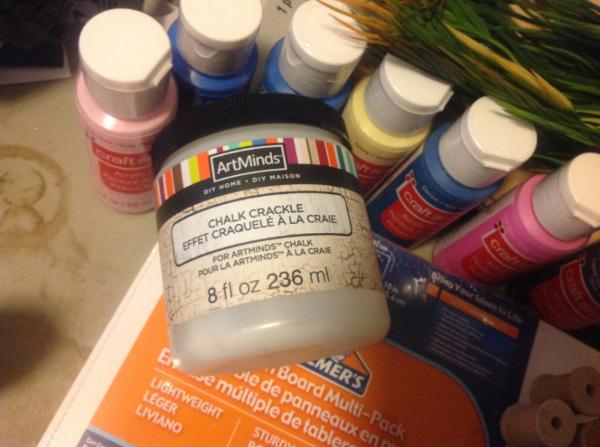
ckig wrote: Lovely work as usual. Is that plaster stuff easy to use? Looks like fun, although possibly messy.
Yes on both counts, ckig. It can be messy, it dries out my hands, but washes off with warm water and soap. It's also really cheap and even if it dries before I use it I can easily reconstitute it with water. I mix mine with about 1 part to 10 of white glue for added strength and to reduce cracking in the final product. Thanks for the feedback!
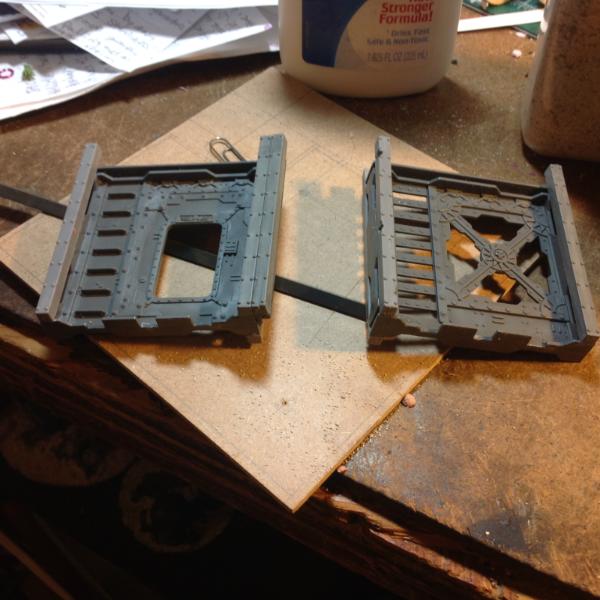
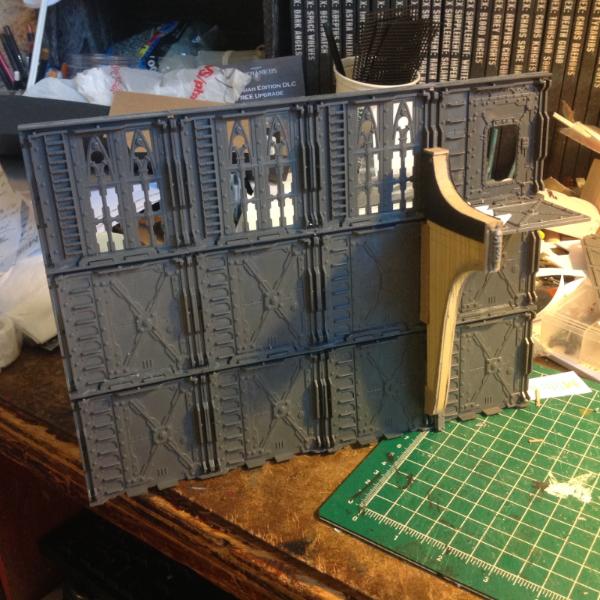
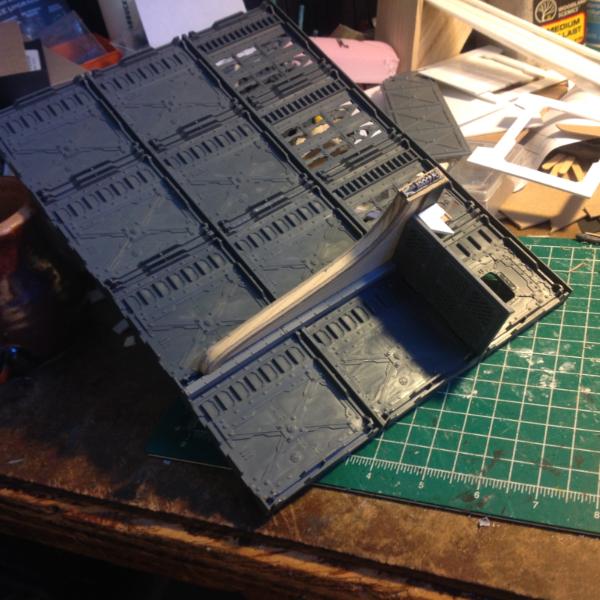
Then started work on the attached smaller building, trying not to make it look too plain:
Glued and pinned it and then test fit it alongside the other building:
Barry inspects my work:
Here I've started to detail the conjoined buildings and wanted to get a feel for how it would look side by side with another building in the collection:
Thanks for looking. C&C always welcome. Have an awesome day!
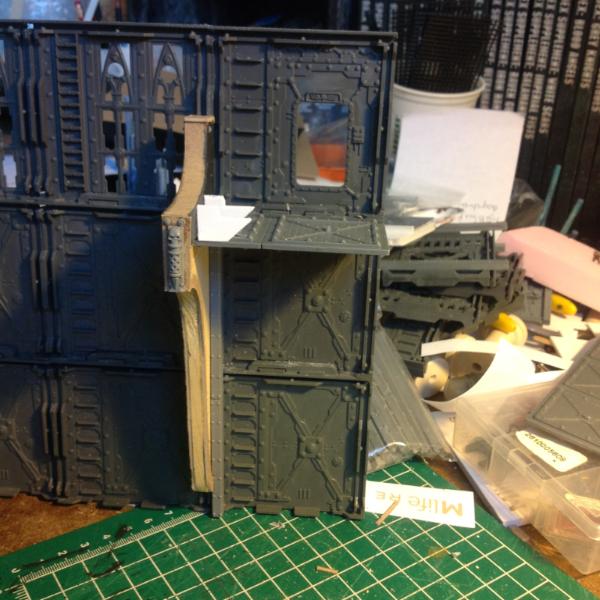
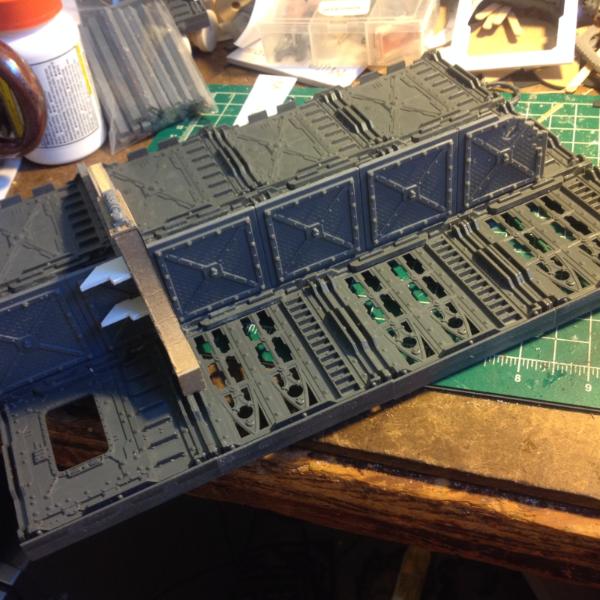
Here's some more shots of the conjoined buildings after the pins were removed and the details have begun:
Pardon the mess in the background. Both me and the Missus are both crafters. I make terrain, she knits, crochets, makes jewelry, sculpts, and paints.
Then I went and did some detailing with coffee stirrer sticks:
I went to a local arts and crafts store that was going out of business (in my case it was the local AC Moore) and bought some discounted paper design strips likely normally used for scrap booking.
Selected a pattern I liked and created a layered molding for the top strip of the shorter building:
Once covered in paint, it should look more the part. I wanted to do something similar for the taller building, too. So selected another pattern I liked:
Realized once painted that it would look a little different, so flipped it over and cut it to size:
The first layer made the building look like it had a moustache, so instead of taking a picture of that disgrace I applied more pieces in an attempt to make it look like fragmented stucco. I wonder if the end product will achieve the look I tried to make?
Next I added more details to the molding and overall:
Remember that gap between the two buildings? Details cover mistakes!
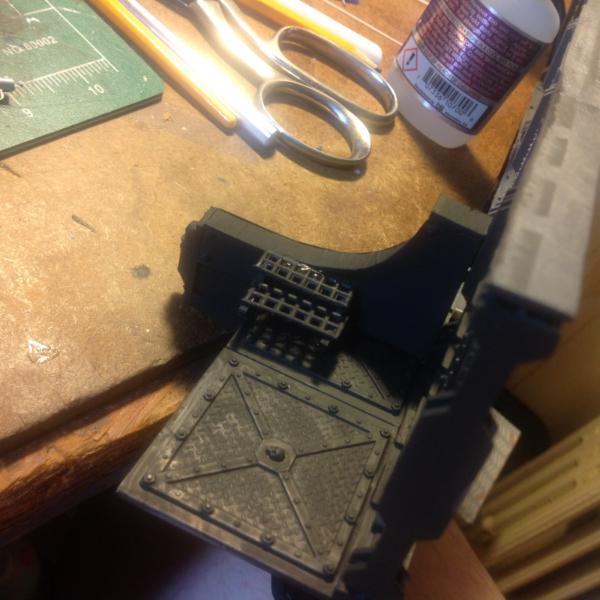
In this spot I hope to place a ladder for roof access:
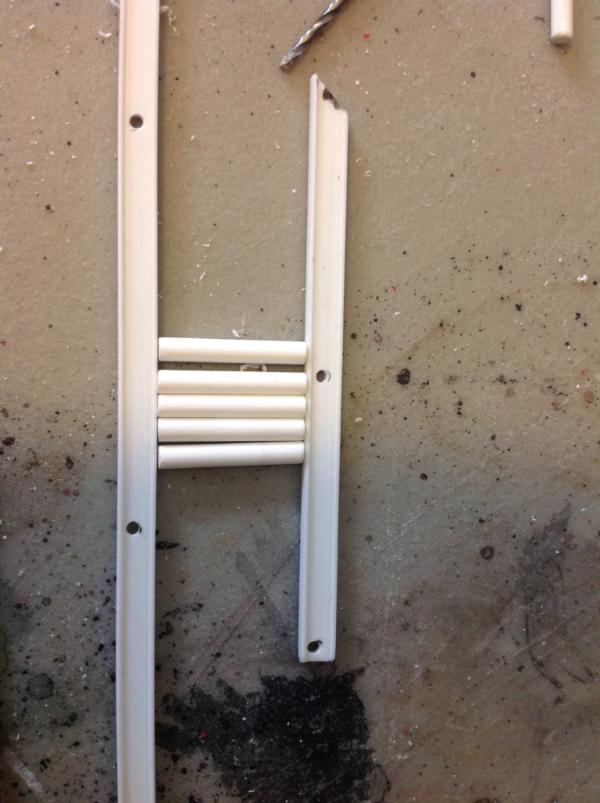
And here is the ladder as I'm working on it:
Cleaned:
And test-assembled:
Thanks for looking. As always, C&C welcome. Have an awesome day!
Thanks for the feedback, guys! Sometimes it's difficult to stay motivated, especially with a project this size.There's like 16 intact buildings of which I've begun about 12, and I'm hoping to also build 16 ruins, each customized to be the collapsed versions of the intact buildings. Whew! It's a lot. I also wanted to make better roads to go along with them. And (one day in the distant future) I will build a 36" tall landing platform with a 36" footprint. More updates soon. Keep the feedback coming!
Thanks for the feedback, guys! Sometimes it's difficult to stay motivated, especially with a project this size.There's like 16 intact buildings of which I've begun about 12, and I'm hoping to also build 16 ruins, each customized to be the collapsed versions of the intact buildings. Whew! It's a lot. I also wanted to make better roads to go along with them. And (one day in the distant future) I will build a 36" tall landing platform with a 36" footprint. More updates soon. Keep the feedback coming!
And as always, have an awesome day!
That sounds like a massive undertaking, not to mention hard to move!
Tiger9gamer wrote: That sounds like a massive undertaking, not to mention hard to move!
All of my projects are massive undertakings, Tiger9gamer. I don't do "small". The landing platform is going to be based around a giant plastic flower pot and will come in two parts for easier transportation (and so I can get it past my front door).
In the meantime I started work on some tiled 30mm bases:
Thanks for the comment, Tiger9gamer. Thanks for looking. C&C always welcome. Have an awesome day!
Tiger9gamer wrote: I hope this isnt dread necromancy but I do love this thread. is there any more news on the terrain pieces?
Thanks, Tiger9gamer! Worry not, this thread is not dead. I'll be getting back to this stuff eventually. Real life has just been very ... intrusive as of late. I appreciate everyone's patience with me.
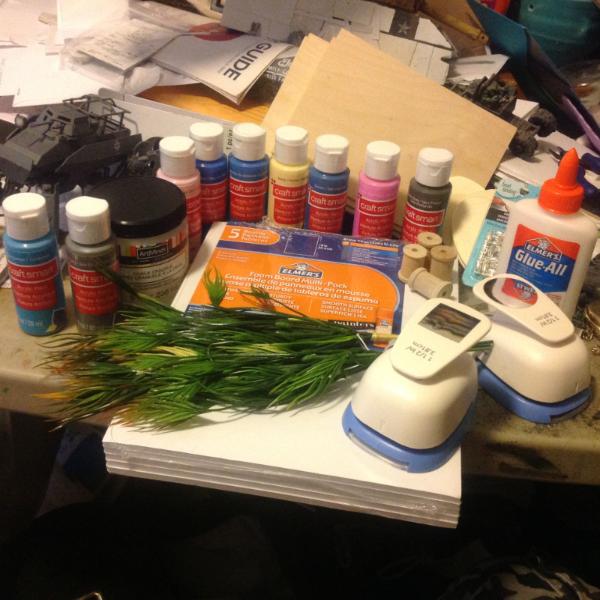
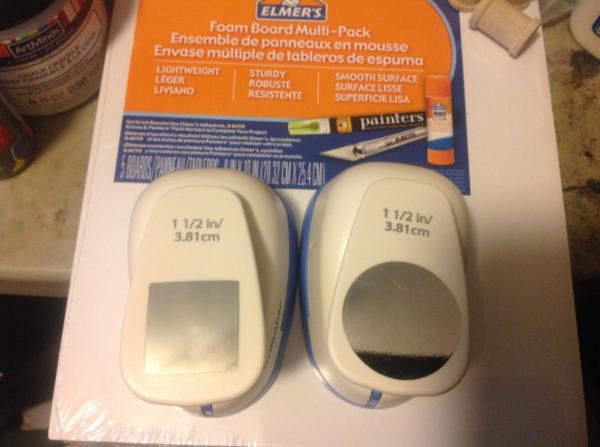
evildrcheese wrote: I like it. That hole punch auto-riveter looks damn useful!
EDC
It certainly is. Except when using slightly thicker sheet styrene than 5mm. Sigh. Ah well, at least most of the details I make don require much thickness.
And the very beginnings of some CD terrain (can you tell I used to work for a college bookstore?):
So using this pile of cut offs from the pillars above:
And these random bits from the left over bag I keep handy:
And went to work on the basics of craters on these CDs:
More on those as I get more work done on them.
Drawing your attention back to this build:
I added some rubble:
Adding spot details using whatever debris I had handy:
And then I thought about adding a ruined chunk of the second floor, so I made a mock up and placed it where I thought I will put it:
And with a Barry for scale:
And then thought about adding an interior wall to the second floor, so I did more mock ups:
And then I realized that adding that interior wall meant that the only place a staircase would be inside this ruin would be amidst the pile of rubble I had already made. Meaning I had to build an entire ruined staircase from scratch. So I switched gears and started work on something else.
Thanks for looking. C&C always welcome. Have an awesome day.
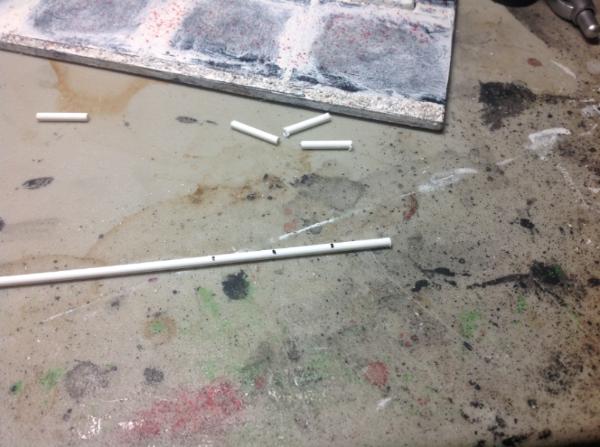
I added a minor detail to the roof of another building. A weensy chimney. First I angle cut a length of plastic tubing to represent the end of an exhaust pipe:
Then sanded the flat end so it looked more like a worn bit of metal than a piece of extruded styrene:
Drilled a hole in the roof and made it bigger with the head of my clippers (and took a really dark picture of it):
Test the fit:
Then a dollop of white glue in the hole:
Glued the pipe in, angled bit first, obviously:
Then use an ultra sophisticated tool (a coffee stirrer stick) to clean the excess glue away:
And tada!
Thanks for looking! C & c always welcome. Have an awesome day!
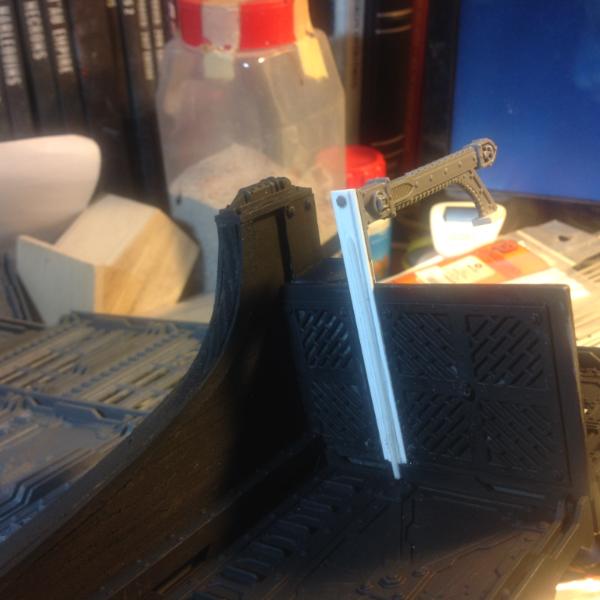
Thanks, Cam. The barricade seems a little thin to me, but my intent the whole time has been to glue two sides back to back once I've cast a copy. But looking at it in the flesh makes me think it's still a little too thin so I might add a flat, capped chunk in the middle of it to broaden it a bit.
evildrcheese wrote: That in tact building looks amazing. I really like the little cosmetics and the lip of the roof is a great idea. Inspirational stuff.
EDC
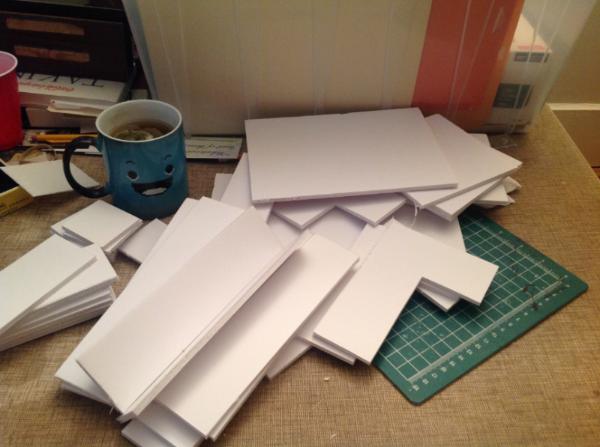
Thanks EDC. The details and roof lip are both made of the foam core cast offs from when I trimmed the walls to make sure they fit together flush. As evidenced here in this photo. I cut away the edge and save them:
They become the thin strips of foam core from the pile of debris at the center of this photo:
Best rule of thumb when it comes to building is "never throw anything away (unless it's organic material because that stuff rots and gets stinky)"
Camkierhi wrote: Brilliant work, love that roof. It is you detailing which really finishes these brilliantly. Nice work.
Thanks very much, Cam. I really appreciate the feedback.
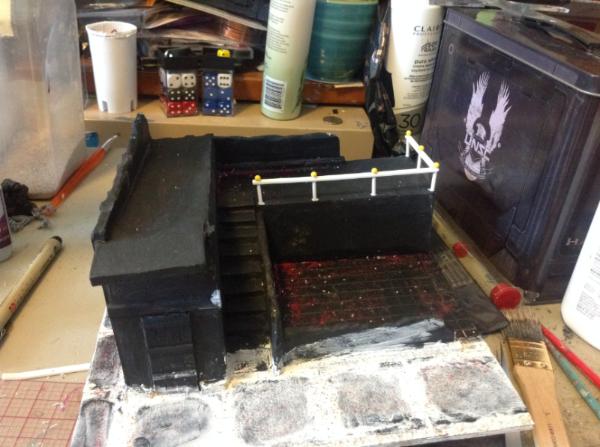
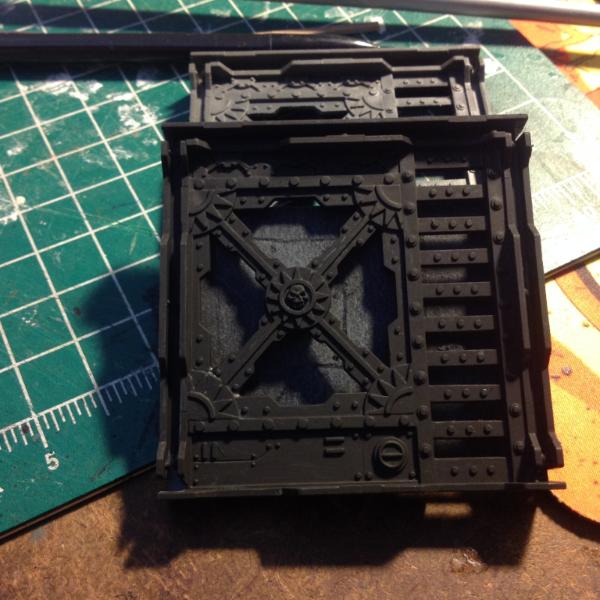
I did even more detailing work. I coated the exterior with some Crayola air dry clay mixed with water and elmers white glue, starting with the low wall and working on to the wall:
I did everything except the rear wall, because I felt like it needed more details, including a small step that I'm hoping will look like a concrete step when I'm all finished:
Thanks again for looking. C&C always welcome. I hope everyone has a super awesome day.
Tomorrow I make sidewalks for this thing out of heavy cardstock. I'm wondering if anyone has any ideas on how to make curbs. Like the metal plates that curve over the edge of the concrete. I might wind up using paper because it's thin enough, but I'm wondering if anyone has any other suggestions. I'm open to ideas!
Alaricuk wrote: Could always try Tim foil, used to use the heavy grade stuff you find on oven meat pies. Not sure if it's easily available in the states??
Do you mean Tin foil? How does that interact with glue and also what kind of glue would I use on it if I were to get my hands on it?
Alaricuk wrote: Could always try Tim foil, used to use the heavy grade stuff you find on oven meat pies. Not sure if it's easily available in the states??
Do you mean Tin foil? How does that interact with glue and also what kind of glue would I use on it if I were to get my hands on it?
Yep I did mean tin foil, auto correct magic again, I'd use impact adhesive or plain old super glue. I have heard of people using builders contact adhesive though this seems like over kill.
Like camkierhi says above, general use filler would work great too, in a mould for regularity or free hand and then scribe your own detail, look forward to seeing your progress, it's looking excellent
Thanks for all the great feedback, guys. I started a Pinterest board full of pictures of various sidewalks from around the world to inspire me, but for this project in particular I went with super easy. I'll post up pictures likely tomorrow as today is the fabricated "love day" in the states and my girlfriend has other ideas about what we are doing. But fear not! I got a great deal of work done at my bimonthly craft night party yesterday. Cheers!
So I coated the whole building with clay and glue and additionally textured the ground (a little) and the low walls (a lot more), pre-detailing phase (because I usually detail things before I detail them...yo, dog):
More pictures and updates after I get some feedback or at least one "neat!" Thanks for looking (and telling me how cool it is). Have an awesome day!
Thanks, guys. Here's more. I painted the whole thing black, first:
And then cut a strip of clear plasticard and marred it with dirty paint water for future use:
Next, I cut squares of heavy card stock and strips of same for the sidewalk and edging (the edging needs more work before I am satisfied with the end product), and glued them into place:
And into the alleyway and backyard:
And cut the dirty windows into pieces and fit the first two into the front window slots:
I think the windows need additional frames on them. The sidewalks need filler and grit, the backyard needs work, the walls might need fencing, the ladder has yet to be built, the whole thing needs painting, more windows, curb treatment, and backyard scatter. Coming along, coming along. Thanks for looking. Feedback always welcome. Have an awesome day!
I'm not usually one to post about his trials and tribulations, but my 87 year old father, with whom I don't get along very well, has just recently been diagnosed with Stage 2 cancer. It isn't the worst diagnosis - the cancer started in his bladder and has since moved into the muscle walls, but the doctors don't think it will spread - but it does mean he has to go in for six and a half weeks of radiation therapy. Then I guess cross his fingers. I'm not overly worried given the endurance this man has shown in the past - he survived walking pneumonia, triple bypass surgery, and a stroke. Hell, he died when he was just 14 from an allergic reaction to anesthesia, an event that likely saved him from service in world war 2 (he had broken his ulna and died when they tried to set it; the surgeons ditched the setting in order to resuscitate him and now his left wrist is permanently turned inward). But this diagnosis does force me to confront my father's mortality. He won't be here forever and I don't know how to mend our broken relationship.
I don't know what I am going to do, but I appreciate anyone who has taken the time to read this post. Any kind words would be greatly appreciated. Thanks, everyone who has encouraged me and supported me throughout my stint here on dakkadakka. You are the reason I do what I do; your words are more powerful than you know.
All thoughts and the best of wishes to you and yours mate. The increasing age of one's parents is certainly an uncomfortable reality check. I guess I would say just try to talk; you have little to lose and much to gain.
My thoughts, prayers and love are yours, and your fathers.
Family are always a pain, however having been through hell with mine, I can categorically say, life (even at 87 years) is far too short to argue, and hold grudges about petty things, and trust me no matter what the issue you have with Dad is, it is petty. It might seem like a big deal, but it aint.
Hug him, tell him you love him, and go from there, the past is irrelevant to the future.
Best wishes to you both.
We will be here no matter what, waiting patiently.
Hard to compare on a forum like this, but although my own father has done a lot for me in life, we've had some really rough periods, and some huge fights with each other. It isn't always easy to get on with someone who can be difficult. The fact you aren't completely estranged suggests there must be something at least halfway decent about him that has prevented that, so maybe try starting from there.
Thank you for your kind words, Cam, Tiger9gamer, and Fifty. I really do appreciate it.
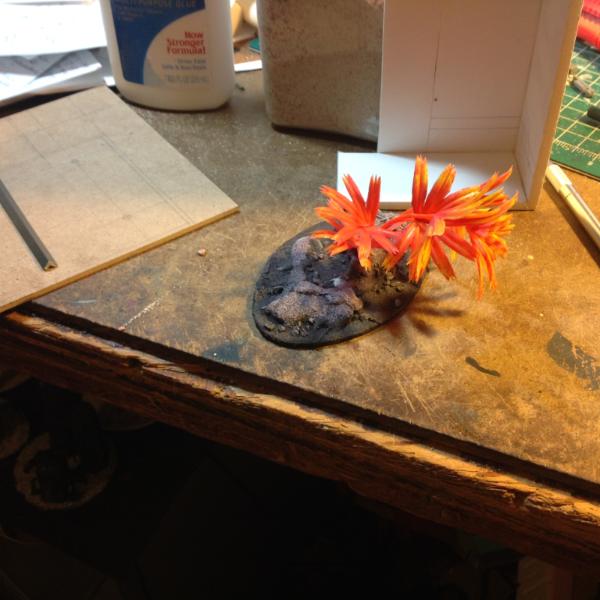
Automatically Appended Next Post: Apparently I never took build in progress shots of this little ruined corner piece. So I have to show you paint in progress shots of an unfamiliar building:
And then finished pictures of same:
If you think of this terrain piece as a "doodle" then you're not far off. Thanks for looking and have an awesome day.
Sorry for the blurry picture with bad lighting, I was using an iPad at night. Just wanted to show that I'm making progress on my building. Slowly but surely.
Sometimes I post up new content on this blog and days and weeks go by and no one comments. I wonder about that. Is it because it gets shunted down the board by new posters and people miss it? Are folks intimidated by my mannerisms? Are you afraid to post a comment because you feel like you have nothing constructive to say?
I try to give back to the community as much as I can, commenting on people's blogs new and old. I follow and friend the builders, converters, and painters I respect and try to make rounds when I haven't been on in a while. Some of my comments are as simple as "great work so far, keep at it!" because I know that even the slightest encouragement can be enough.
Sometimes life outside of our hobby is stressful, traumatic, and/or overwhelming. Sometimes it's filled with wonders, happiness, and joy. Through everything, though, there is the hobby and, more importantly, the community that supports it; that supports us. I know for myself, coming to the boards when I am feeling down and seeing "[first unread]" on any of my threads is an enormous boost, tremendous validation. It can pull me up from darkness and cast me back out into the light. I imagine it does similar things to many others on these boards.
So I encourage everyone, whether this is your first time here on Dakka or the six millionth, whether you just signed up today or you've been here since the beginning, whether you're normally a lurker and have never posted a comment or you're someone like me who posts everywhere, please.
Warboss_Waaazag wrote: Sometimes I post up new content on this blog and days and weeks go by and no one comments. I wonder about that. Is it because it gets shunted down the board by new posters and people miss it? Are folks intimidated by my mannerisms? Are you afraid to post a comment because you feel like you have nothing constructive to say?
I try to give back to the community as much as I can, commenting on people's blogs new and old. I follow and friend the builders, converters, and painters I respect and try to make rounds when I haven't been on in a while. Some of my comments are as simple as "great work so far, keep at it!" because I know that even the slightest encouragement can be enough.
Sometimes life outside of our hobby is stressful, traumatic, and/or overwhelming. Sometimes it's filled with wonders, happiness, and joy. Through everything, though, there is the hobby and, more importantly, the community that supports it; that supports us. I know for myself, coming to the boards when I am feeling down and seeing "[first unread]" on any of my threads is an enormous boost, tremendous validation. It can pull me up from darkness and cast me back out into the light. I imagine it does similar things to many others on these boards.
So I encourage everyone, whether this is your first time here on Dakka or the six millionth, whether you just signed up today or you've been here since the beginning, whether you're normally a lurker and have never posted a comment or you're someone like me who posts everywhere, please.
Post comments.
Grow the community.
Brighten someone's day.
Thanks for reading this. Have an awesome day.
Annnnd exalted! awesome post! Personally I feel a little gunshy for commenting, as I feel I will just become an endless robot saying the word "Amazing" over and over when it comes to your breathtaking models! Your an inspirtation, and If my gw allowed more home built terrain I would defiantly be copying some things I seen here!
Anyways I did have a question: have you ever tried to make a tench line?
Wow. Thank you. And please, robot away. I do the same thing. There are plenty of people here on Dakka that I am in awe of, but I try not to let my lack of meaningful feedback get in the way of saying something. It helps to know people like what you're doing, it really does.
I assume that autocorrect is not your friend like it is not mine and what you meant was "trench line". The answer to your question is no, I have never tried to build a trench line, but for a lot of different reasons. For one, trenches are static positions where soldiers die. It is a tactic for fighting that developed from its nascency to its pinnacle in the span of World War One. It was abandoned at the beginning of World War Two with spectacular results for very good reasons. The French lost because they didn't get the memo that that tactic doesn't work against a modern army. This lesson is doubly true when you are dealing with an enemy that can strike you from orbit or land its troops via drop pod or teleportation anywhere it wants to. Trenches became tactically obsolete in 1918.
For two, even if I put all that historical nonsense aside and built trenches anyway, I will end up with a tactically inflexible terrain board. Every game will be the same, there will be no variety and that would get boring so fast. I try to make terrain that can be placed in different configurations and that will look and be compatible with many different ideas, so I can use my city buildings as rural towns, isolated ruins in the wastelands, or compounds out in the woods. This aspect of terrain building is really important to me. I want people to experience the same sense of setting that I do when I build my pieces. I like evoking many stories.
For three, not to drag this "no" out infinitum, I live in a tiny apartment in New York City. My bedroom is also my workspace and my storage. While I sell my stuff online and sometimes on consignment, the vast majority of my projects live in bins that tower over my sleeping area. I have no where to put such a project.
However, after all that said, now I feel like I might want to try to build some sort of trench system that would counter my own arguments. A modular, orbitally defensible, teleport prohibitive trench system. Who knows? Everything's a challenge. Thanks for the feedback, Tiger9gaming! I really appreciate it. Have an awesome day!
Automatically Appended Next Post:
alabamaheretic wrote: Good post man. I normally lurk on your thread for inspiration and to see cool terrain.
Well keep up the awsome and I'll keep an eye out
Thanks very much, alabamaheretic! I hope the advice I sent you via PM is useful to you!
I know the feeling well bud, you sometimes get a glut of comments, but more often it's a barren and quiet place. Another area is the Gallery, you spend a fair bit of time finishing up a model and making a nice montage pic up and no-one votes for it, But someone who has painted his space marine with a yard brush and tar gets votes galore, admittedly low ones but votes none the less. Sorry rant over......
That little "doodle" is a perfect little piece, love it.
And I forgot to say before, totally loving the windows idea you did, with mucky windows, brilliant, and stolen...
Camkierhi wrote: I know the feeling well bud, you sometimes get a glut of comments, but more often it's a barren and quiet place. Another area is the Gallery, you spend a fair bit of time finishing up a model and making a nice montage pic up and no-one votes for it, But someone who has painted his space marine with a yard brush and tar gets votes galore, admittedly low ones but votes none the less. Sorry rant over......
That little "doodle" is a perfect little piece, love it.
And I forgot to say before, totally loving the windows idea you did, with mucky windows, brilliant, and stolen...
Yeah, I identify with the gallery envy. What're we gunna do? I think most people can't be bothered to sift through the hundreds of thousands of images in the database. I try to make time to go through and vote on images that "need votes" every now and again, but it's time consuming.
Thanks for the compliments and you're more than welcome to "steal" my ideas. That's why all in progress photos I have up on Dakka are in a gallery labeled "tutorial photos".
I did some more work on my building. I started to fill in the gaps between the cardstock "sidewalk" slabs with air-dry clay and craft sand. I also applied a layer of medium ballast to the alleyway and half the yard.
With some scattered ballast to make it look like the gravel from the yard has spilled out. Also, I heard clamor for scale shots, so here are some Barry shots:
Here I illustrate the adjoining back alleyways:
And the broken post on the corner of the sidewalk:
Here I try to figure out how to dress the building with storage items. The roof or the little alley in the yard where no model's base will fit. The roof placement looks awkward to me, even though it would provide cover for anyone on the roof. The backyard placement seems more realistic to me, but feels exposed to the street and will probably force me to build a fence.
Then I filled in the rest of the backyard gravel:
Then the sidewalk got primed and I added more gravel to the sides of the alleyway:
I lavished a lot of detail on the alleyway.
I used clay to create a well-worn path down the center:
And then smoothed all the details with craft sand:
And finally added the trash bin to the backyard:
That's it for now. Thanks for looking and have an awesome day!
Warboss - I'm new to your blog here man but I'm really loving what I'm seeing. Your terrain looks really gritty and realistic; you certainly have your own style.
I was also just browsing your gallery and I love your Loota and Buggy conversions. They're probably from ages ago but I wanted you to know I'm an admirer, nonetheless.
Stay strong with regards to your father's health, man. It sounds like you once had a good relationship with him so I hope that you can find peace with each other now.
That's not a bad idea, graven. I'm definitely going to paint the sidewalks a light grey and the gravel a bluish-grey. I like the idea of muted colors like sand, grey, dull blue, brick red, and the like. Also, I guess as a side note, I have no intention of painting these buildings (at the moment there's 15 of them) in matching colors. But I am definitely going to try to match them in color value (when I was in college I took a year long class on light and color study that introduced me to the 3 aspects of color. This random website that I found through Google helps to illustrate what I am talking about when I say "matching color value" ).
So, I have one vote for Sandy. Anyone else have a suggestion?
It depends a little on the regional area you are depicting.
The generics for Gothic city = grey, Desert = Biege, Temperate zones would maybe lean toward white buildings. Or you can go Balamory on it and have a complete bloomin rainbow.
The vibe I am currently getting would be leaning toward dessert. Flat roofs and open courtyards, so from terracota to cream really.
So long story short (too late) Sandy will be perfect.
Camkierhi wrote: It depends a little on the regional area you are depicting.
The generics for Gothic city = grey, Desert = Biege, Temperate zones would maybe lean toward white buildings. Or you can go Balamory on it and have a complete bloomin rainbow.
The vibe I am currently getting would be leaning toward dessert. Flat roofs and open courtyards, so from terracota to cream really.
So long story short (too late) Sandy will be perfect.
Thanks, Cam! I hadn't thought of using a regional color palette. That's an excellent idea. I am using the city I live in as reference for architectural style (to a certain degree, squeezed through my brainmeats and reinterpreted through my hands), but I could also use this city as a color reference as well. Although I'm not sure how much soot I'm willing to coat everything in (yay, New York). Maybe I'll sift through some online photos of neighborhoods until I find one I like. Great feedback!
you know if you wanted to try something different and give the building an alien yet human vibe make it light green...like a pale greysish green kinda like old hos[pitals from the sixties and seventies....it would be different would be from the norm and yet would still feel the same as in construct. if you were to do it deserty i'd go with a sandiy red honestly to make it a different. those are my two cents.
Working backwards:
Building colour: think about who made it, why they made it, and were they the decorating type. That'll tell you what it was made of, and whether they painted it, and therefore what colour it "should" be.
I think the boxes/storage looks best on the roof, however you will need to add a way of getting on to the roof (ladder or a hatch).
Although, further to your thought about what would happen to the storage in the yard: maybe put some empty boxes in there to show that they have been pilfered, and therefore you don't need to make a fence.
Building is looking nice. Like the "worn" path, good touch.
Nice broken wall also.
Blog comments:
There is an ebb and flow to DDakka traffic. The time of day, and which day of the week, can greatly effect the quantity of comments that you get for a particular post. Sometimes these can't be helped due to real life commitments (a thing called "work" and an entity called "family" are often cited ) and/or geographical position: A practical or convenient time to post is not the same for everyone.
And then there's the times that the usual suspects to your blog go awol. I've had times where one of my blogs will fly along with lots of regular visitors, and then all of a sudden it appears that no one is visiting any more. It turns out that one or more of the regulars have had to disappear for a while and that leads to...
...comments and updates draw in more comments/visitors. I've found that when I'm updating my blog(s) on a daily basis, I get lots of visitors and therefore comments. But it only takes a gap of a few days and the next update gets far fewer comments.
This boils down to a blog appearing at the top of the list. Not just in the "recently updated" list, but in "my subscribed".
I, like many people I suspect, will go though times in a day where you will lurk to see what's been going on and think "I'll comment on that later".
When "later" comes around, if that blog has been pushed off the first page or two, you forget which blogs you were going to comment on and decide to wait until it's updated next time... and a vicious circle begins.
Personally, if I'm going to comment I want to say something useful rather than "good job". However, if I can't find something to add for a while (or I have a massive backlog of blogs to comment on), I will pop in a quick "good job" post; so you should see those posts from me as a big compliment.
And recently I've been afflicted with a horrible disease that has prevented me from updating and commenting on DDakka; it's called Fallout 4.
But I am getting better. Expect me to be more regular than I have been the past couple of months.
I liked the little corner ruin with the blue interior.
and all the best to you and your father.
and I too, liked the dirty windows.
Damn, you've done a lot of stuff since I last commented.
Best wishes to you, your father and your family Warboss. I hope for the best possible results.
The blog comment thing... y'know, sometimes all I can think to say is, "nice." which sounds, well, lame, so I end up not saying anything. What you ought to consider is the number of page views you get. That is the measure of a blog. I would say subscriptions too, but right now there is no way to know how many people subscribe to a page.
I try to post early in the morning ( EST, which as a New Yorker you are in the same zone as me.) before I head out for the day.
I vote for sandy, but then I may be a bit biased about desert or other arid themes...
@Red Harvest: thanks, Red Harvest. Yeah, I try to rely on page views as a measure of how well I'm doing. And like Dr H pointed out, I notice I get a lot more views when I update more frequently. When I'm keeping up, I average about one to two hundred views a day. But as I have no metric for this I don't know if that's good or average or what.
Anyway, I appreciate all the feedback, well wishes, and advice I have gotten these past few days. It really helps put things in perspective. Thanks everyone. Have an awesome day!
Say, what would you recommend for making wood look like concrete? I am planning ahead for this year's Army on Parade, and I wanna make a highway section for my skitarii.
Say, what would you recommend for making wood look like concrete? I am planning ahead for this year's Army on Parade, and I wanna make a highway section for my skitarii.
Thanks, Tiger9gamer. I would recommend mixing a 1:1:1 water, elmers glue (white glue), and Crayola air dry clay and then stippling it onto the surface of your wood. This will create a a rugged texture that your paint can then pick the detail on. Alternatively you could use craft foam to create the road bed and paint that. I find the craft foam is easier to work with, is flexible, and takes paint well. Also, it's super cheap.
I like that idea and I'm probably going to use it for my blacktop on the street itself! And I should have specified: It is going to be a bridge, maybe 1 foot wide and 2 feet long. Any ideas for that then? also I do like that mixture idea. Would it work on pink foam too?
I like that idea and I'm probably going to use it for my blacktop on the street itself! And I should have specified: It is going to be a bridge, maybe 1 foot wide and 2 feet long. Any ideas for that then? also I do like that mixture idea. Would it work on pink foam too?
Yes, that mixture will work on virtually any surface or material. As for a bridge I'd recommend pink foam as your core material due to its light weight. If you add thick wooden dowels to the centers of each structural support, it will add rigidity and strength to the uprights. I recommend doing a Google search of concrete construction highway supports for reference. I live in New York and there are dozens of elevated roadways with blocky concrete risers holding the road beds up. Many of the photos on this page are perfect examples of this. Always use photos of the things you're trying to build as reference. I hope this helps. Also, post pictures of your work in progress so we can see what you're up to. I know I'm interested in seeing that build.
Bit extreme, but I made tarmac with a very similar method. Mixed sand with dental plaster PVA and water. Went on a bit thicker, allowing weathering and damage to be applied. My only gripe was once mine set I could do nothing with it, it would not sand down, could not cut it even with a serious saw.
And the boss is right look to RL, reference material is key.
Seconded, or thirded . Photo references are so easy to find these days, and invaluable. And judging from all the WIP photos I see in these blogs, everybody has a monitor in their workspace... I hope they are using it for *reference* purposes
Warboss, this hobby is something we all can pick up and put down as time is available. That's part of its appeal-- at least to me. I wouldn't worry about disappearing for a time every so often. RL demands are sometimes hard to predict, and there are those days when no energy is left for much of anything except for family time or a quiet activity like reading.
Bit extreme, but I made tarmac with a very similar method. Mixed sand with dental plaster PVA and water. Went on a bit thicker, allowing weathering and damage to be applied. My only gripe was once mine set I could do nothing with it, it would not sand down, could not cut it even with a serious saw.
And the boss is right look to RL, reference material is key.
Thanks, Cam. Yeah, I try to shy away from anything with "dental" in the title. That stuff is made to last forever. If you want something utterly indestructible then yes, go ahead and use it. But if you want to still work it after it's "done" dental plaster is your worst enemy.
Automatically Appended Next Post:
Red Harvest wrote: Seconded, or thirded . Photo references are so easy to find these days, and invaluable. And judging from all the WIP photos I see in these blogs, everybody has a monitor in their workspace... I hope they are using it for *reference* purposes
Warboss, this hobby is something we all can pick up and put down as time is available. That's part of its appeal-- at least to me. I wouldn't worry about disappearing for a time every so often. RL demands are sometimes hard to predict, and there are those days when no energy is left for much of anything except for family time or a quiet activity like reading.
Thanks, Red. I need to be reminded sometimes that the community is still here for me even when RL takes me away for a time.
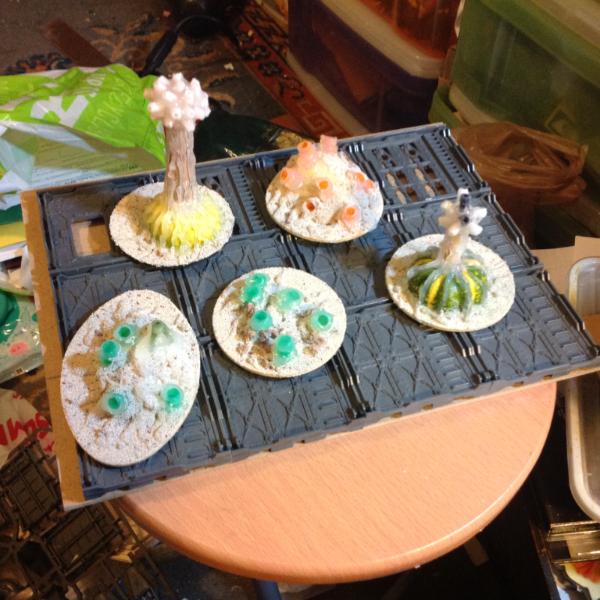
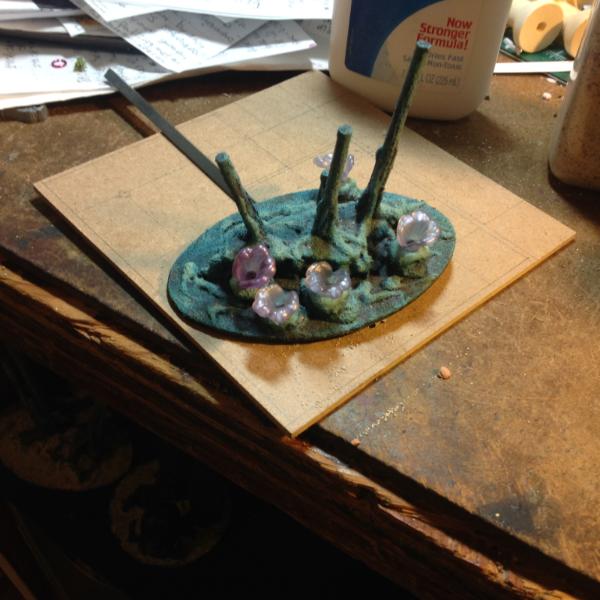
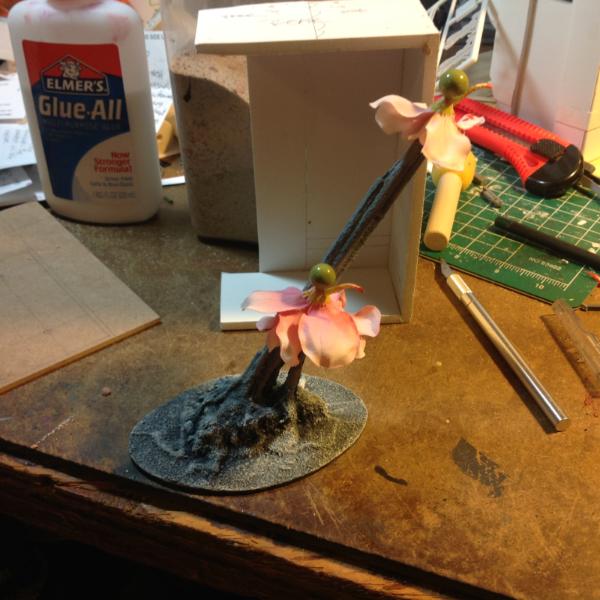
I'm sorry I've been away so long. Blah, blah, blah, family issues, sickness, work, etc. I started work on a series of rock spires. I pinned a plateau on my base and took some pictures. I promise I'll get back to the building I last posted in a few days. In the meanwhile, here's this rock thing:
The top is very slightly irregular:
And there's a gap to be filled with stones and clay. As you can see I've tried to create a surface texture on the stone by stippling white glue onto the surface while the clay was still wet:
More photos and more progress as time permits. Thanks for looking. C&C always welcome. Have an awesome day.
inmygravenimage wrote: Good to have you back. Be intrigued to see where you go with this - can't visualise it just now but I have faith!
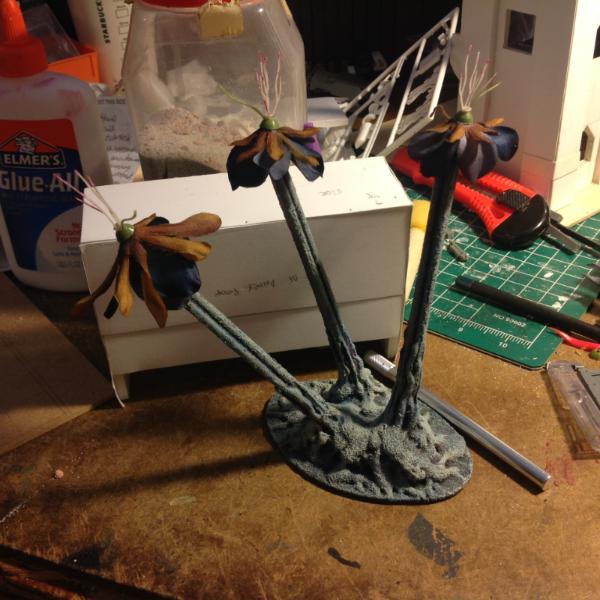
Thanks, graven! The skewers are for internal strength of larger blocks that will go on top. It isn't necessarily coming together the way I orig Nelly planned it, but that part's irrelevant to me. This thing will look like whatever it looks like and if it doesn't look like what I wanted I'll just make another one until I get it right. More pics up tomorrow.
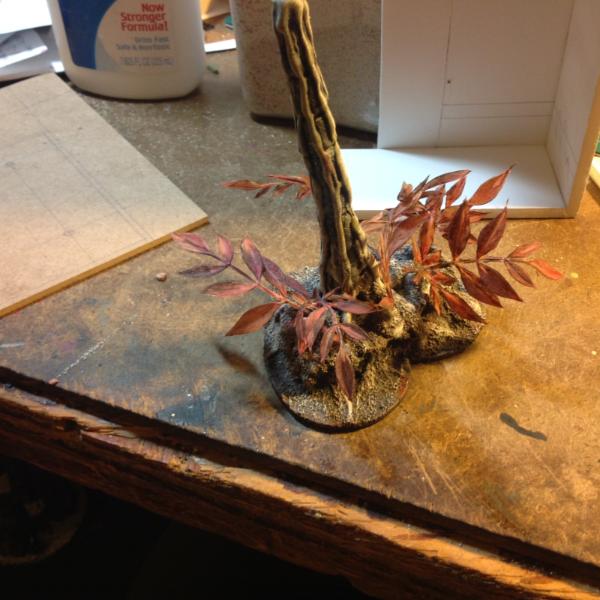
As promised, I did more work on the rock thing I'm making. I carved down one skewer:
And test fit the first prototype rock formation to it:
And detailed up the small pile of pink foam on the base:
Thanks for looking, more pictures following feedback. Have an awesome day!
Automatically Appended Next Post: I didn't like how the first rock " lump" was turning out, so started a new one by gluing some cast offs together and then chopping it up a bit with a hand saw.
Dr H wrote: Looking very cake-like in those colours.
I look forward to how it comes together though.
Thanks, Dr H! I've heard that a lot, actually.
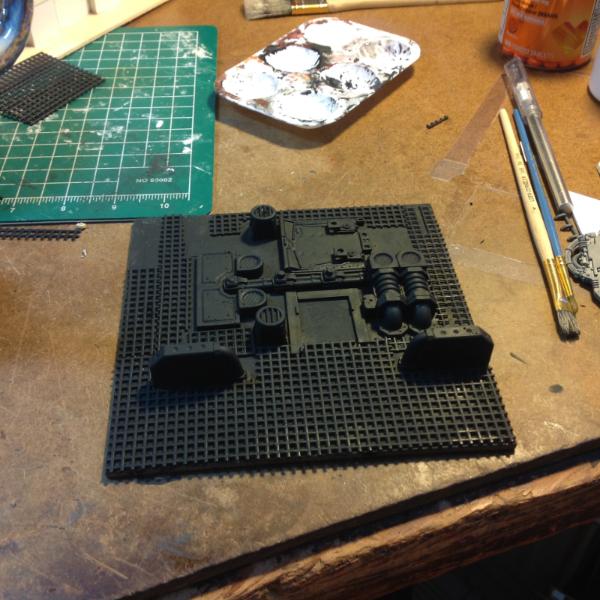
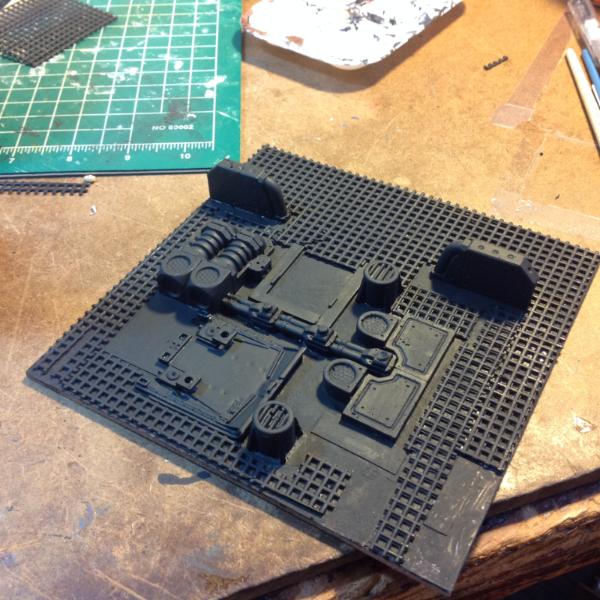
Here's some shots of the base coat I put on that building I was working on 3 months ago.
So essentially it's a blue-grey base coat with a brick red wash in some places. Next I'm going to drybrush a medium tan and a sandy yellow. The gravel needs more blue before it gets its grey and the sidewalk needs lighter grey before it gets a brow wash, but I like how it's coming out so far.
As always, thanks for looking. Critique and commentary always welcome. Have an awesome day.
Littletower wrote: Rocky mountain looks promising, and paint job on the building is coming along well, wiil be waiting for the next coats!
I sudenly feel I'd like to get kebab for dinner, I wonder why...
Thanks, Littletower! Your craving probably has something to do with the materials I've used, but I can't quite put my finger on which one...
cormadepanda wrote: I like how you approach grey with blue under it. Never really thought about that, but it makes sense.
Lump rock was... well lumpy. What type of formation are you after?
I had a stylized lump in mind, comrade. I'm not trying go emulate any real stone formation. I don't like how the original shape was ...well...shaping up, so I've switched to a different chunk in the hopes the aesthetic works better. Ultimately, if that doesn't work either, I'm just going to get more pink foam and start over. I think I need both grittier and finer sand paper, too.
Thanks for the feedback! More pics up soon.
Automatically Appended Next Post: My original idea was for a gigantic slab of stone with multiple tiers to sit on top of the irregular disc I have there now, but I keep cutting my lumps smaller and smaller. I think I'm going to scrap the spires on this one and just use the irregular disc as the top. Then, as I'm concurrently building another base, I'll create a much larger starting slab (maybe 18" cubed) and carve down into that to create a multitiered "spire".
So, as I work on a billion simultaneous projects, I'm going to start some hive world terrain inspired by weirdingway's Navigator Household project. I'm wondering if I should just include that here or open a new topic? Any thoughts? I kind of feel like I should keep all my terrain related stuff in one spot, but if you all think I should put that separate I will do that instead.
Yeah, I'd keep all the terrain together. If nothing else, it'll keep the blog flowing as per the previous conversation about blog updating and comments etc.
Thanks for the advice, guys! I'll post up progress pictures shortly. And comradepanda, I hear you. I'll add nid terrain to the docket and start my research.
I'm sorry I haven't posted in ages. A lot was going on, including a new job (that I've since been let go of) and my father's ultimately losing battle with stage 4 bone marrow cancer. He died on the 3rd of January this year, after a nearly year long battle where he was in and out of the hospital. In the end he could neither eat nor drink without puking it all back up. He wanted to live, but there was no more hope to have. In the end he chose to starve to death. And he did so in my living room for 2 agonizing weeks. I have never known a more stubborn nor tenacious man and I hope that I have inherited even a fraction of his resilience.
Here is my latest project. I am working on a quick and easy tarmac using thin, soft foam sheets. Here I am testing to see if I can make it look worn in an easy and realistic way.
Thanks for looking. I appreciate any feedback. Thanks for being here, friends. You are a lifeline in a sea of darkness.
Sorry to hear of your loss - that's a truly awful way to go. Great part of Dakka is the community - we all have crud (some more than others...) but we can come here and get away from it for a while.
So in classic British style, chin up old chap, let's see where your experiment with the foam goes... It's a medium i'm getting very familiar with at the moment, just not for model purposes, but costume / cosplay...
Ruglud wrote: Sorry to hear of your loss - that's a truly awful way to go. Great part of Dakka is the community - we all have crud (some more than others...) but we can come here and get away from it for a while.
So in classic British style, chin up old chap, let's see where your experiment with the foam goes... It's a medium i'm getting very familiar with at the moment, just not for model purposes, but costume / cosplay...
Thoughts and prayers are with you and your family, (lost Mum-in-law couple years back to that same ) echoing others here, chin up and for what it counts we are here bud.
As to the foam, looking great, I wonder how the surface would take a denting, say from a nasty spiky rock or some very coarse sand paper. Not all over just in spots to add that worn bit.
I'm so very sorry for your loss. I've seen first-hand what a prolonged battle with cancer can do, and I can empathize completely. Do not hesitate to get help if you need it. Please. Family, friends, whoever.
The material, it looks familiar. if it is the soft foam that they sell at craft stores, it is something I've been experimenting with... cutting it with a knife will be the way to make some realistic wear and tear. Lots of bevelled cuts. I have no idea how well sand paper would work. And I think it that it may need backing. I was planning on using 1/8" MDF. That way I could add a few deep potholes and such.
Yes, Red, your assumptions are correct. I've used the material without backing (or rather I glued one wooden craft stick to the back and it was enough), but now that I'm trying to make a damaged road I'm thinking I'll need more. I was thinking of using a fine grit sand paper and just gluing small sections underneath the potholes I make. The sandpaper is pre-textured (I've used it as roofing tar paper and it looks spot on) and is light weight and cheap. The foam cuts with conventional scissors if you get it thin enough. I buy 1mm thickness. It retains its flatness really well on its own - doesn't tend towards warping, you know? I'll see if I can find a picture of the other roads I made with it.
Automatically Appended Next Post: Yeah, here they are showing 3 layers of grey paint in stages:
Then with simple road lines:
And the "ultra-sophisticated" stiffness backing:
After I glued that craft stick on I piled sheets of MDF on them to make sure the glue and sticks didn't warp them.
Speaking of MDF boards, some craft stores and most art stores (at least here in the States) have started carrying precut sheets of MDF for artists ranging in size from 4" square to as large as 48" square. They're inexpensive and perfectly shaped. I use them exclusively now.
Amazing thread, and some good advice about commenting more. It's fairly heartbreaking to post something you've worked on for ages and have tumbleweed rolling around, even if you know people have been looking. I've taken a lot of inspiration from this and will be following from now on. Thank you for posting!
I'm also really sorry to hear about your recent loss. I know there's nothing anyone can really say that will lessen the blow of something like that, but I found this a helpful way of thinking when I had a death in my own family. Either way.
Scarper wrote: Amazing thread, and some good advice about commenting more. It's fairly heartbreaking to post something you've worked on for ages and have tumbleweed rolling around, even if you know people have been looking. I've taken a lot of inspiration from this and will be following from now on. Thank you for posting!
I'm also really sorry to hear about your recent loss. I know there's nothing anyone can really say that will lessen the blow of something like that, but I found this a helpful way of thinking when I had a death in my own family. Either way.
Welcome, Scarper. And thank you.
Cleatus wrote: Sorry for your loss, Warboss_Waaazag. My condolences.
Going to look into the pre-cut MDF boards. Thanks for the tip.
I like the road sections you're making. Looking good.
Always glad to help, Cleatus. I'll have a new update later today.
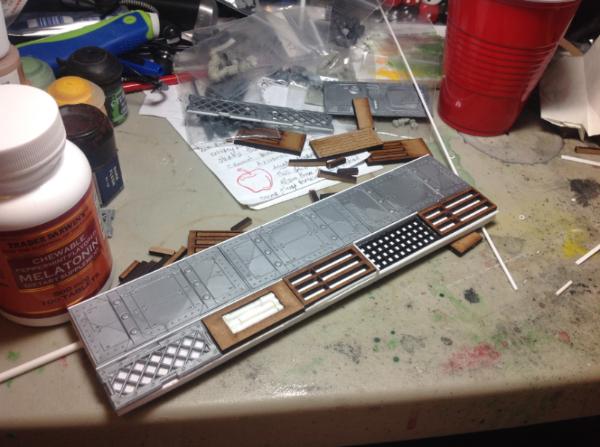
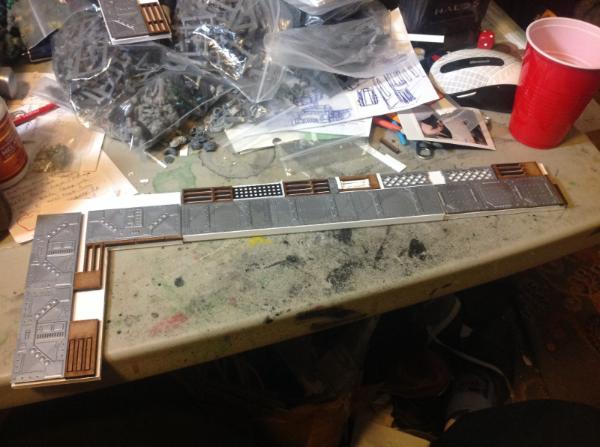
I'm continuing a long term project to build a modular, dynamic city board. This part of the project is the road sections. This piece is the first of many sections that will allow players to change the level of the battlefield without having to change all if their pre-existing terrain. Essentially i take a 6"x6" square of mdf, cut a similarly sized chunk of pink foam (widely available in the states in DIY stores and now available in some art stores (such as Blicks) as blue foam sheets. Either color is fine. Anyway, I rough cut a 6"x6" square of that material and sawed in an angle of roughly the highest point to the lowest. After breathing in styrofoam dust fir 5 minutes, I realized I have no vaccuum cleaner and paused to work on other things. The rough sawed piece is white-glued to the mdf and a square if craft foam is cut. I realized too late that the foam needs to be slightly longer than 6" because the angle adds length. Le sigh. At least these sheets are cheap. After the glue dries I have to take the project outside to shave down the angle with a fine grit to make it mostly smooth. The idea is to create irregularities in the pink foam's surface to try to create a lumpy road. Updates on this project when I have them. Comments always appreciated. Thanks for looking and have an awesome day!
I smoothed down the foam ramp with really fine grain sandpaper and (after breathing in enough toxic dust) got the surface smooth enough to lay the foam over with confidence it will stick. Next I pressed my finger tip into the black foam while it sat on the pink foam and anyplace I made a depression I outlined in pen. These will be the spots where I carve out the potholes.
Sorry if it's difficult to see the pen outlines. It's blue ink on black foam in bad light.
I feel like I've been working on this project in 5 minute chunks.
I used an exacto blade to perforate the outlines I made and added a few more. Then I realized I'm going to put a 1" sidewalk around the edges that will cover up some of the cooler bits. Oh well. Live and learn. It happens with every first piece in my projects. I also remembered to cut 1/8" slices off the ramp sides for the "stone walls" I'll be modelling onto the edges. And finally I measured where the sidewalks would be and then estimated where wheel ruts would happen.
For the wheel ruts I used a straight edge to mark a line and then wrapped the handle of a small file in fine sandpaper to sand the grooves in. Then I smoothed the edges with a flat bit of sandpaper.
Wall gap on one side. The other side looks virtually identical.
[/url]
The perforated sections waiting to be plucked.
And plucked they became.
Next step is to distress the roadway.
Distress level 1.
Outlining the potholes on the foam. Then after pitting them a little deeper with the tip of my knife, I sealed them with white glue.
Distress details.
Then I painted the potholes and added medium ballast to the paint. It's impossible to see it in this photo. You'll have to take my word for it.
And then distress level 2.
I painted the pot holes.
And added the first layer of grey paint to the road surface.
And it turns out the pot holes are insanely deep. Not sure what I'm going to do about that. It may not be as bad once the road surface is glued to the base material. But, hrm.
More pics when I've done more work. Thanks for looking and have awesome day!
Really interesting! IMHO I think you will get a pretty effective result from that! But I do agree... those pot holes look like real "car killers"
To be honest.... the thicknes of the "asphalt" material, looks like it would be thing enough to give a convincing look.... maybe just sprinkle some sharp sand under the pot hole areas and then put the road finish ontop..... just a thought!
Inventive use of the material though! Looks cool!!
I'll agree on the potholes being deep, although you could very easily keep them that way. The universe of 40k is grimdark. Even the potholes are worse than today they do have tanks driving over them after all...
Plus, I've visited a couple of places where those might be considered 'routine'
Brilliant work, looks really effective. If the depth bothers you you could just pour in some sand and drop some watered down PVA in , let it set then paint it grey like gravel, so it looks like the broken up tarmac. Or I do not know where this is bound for but you could maybe put in water effects and make it look like a puddle, I know this is on a slope but it would not look too out of place.
Thanks for the feedback everyone! I wound up reapplying some sand and stones to all but one of the potholes.
Then mixed black paint with white glue and highlighted it up.
I also abraded the underside of the bottom pothole aperture. Might be difficult to see in this photo.
The depth looks a little better.
Next I sealed the edges with black craft paint.
Then plucked some tiny bits of foam and lightly painted them in grey...by whicj I mean I touched them with a paintbrush and smeered the paint with my finger tips. Coin for scale.
Coated the underside with a smooth sheeting of white glue and then weighed the thing down so it dried in place.
Next step will be to construct the sidewalks. In case you're wondering, the tiny foam fragments got glued into the deepest pothole in the road.
Thanks for looking and have an awesome day!
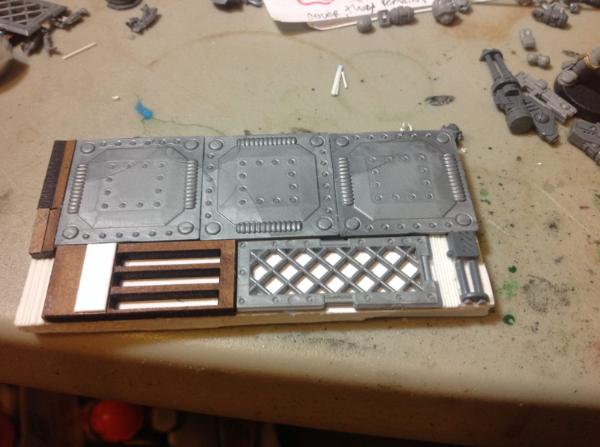
Automatically Appended Next Post: Beginning with heavy cardstock (I can't remember the thickness, but it's probably 2mm) I drew some lines to mark off the sidewalk thickness and support stones for the sides. Not shown here are the lines for the individual sidewalk panels.
Then i cleaned up the left side of excess glue (which was a massive pain in the body part) and trimmed the iverhanging roadway.
Then I trimmed the first "support stone" for the ramp and sanded the edges down.
I also cut a section of brick-pattern plasticard and glued it in place. And then I did all the ither work of sanding down panels and gluing them in place. The left hand sidewalk is done.
More progress tomorrow. Thanks for looking and have awesome day!
Nice experiments with the potholes. I've swerved around holes like that in the past.
Thinking as I type; you could cut cracks into the foam around the hole(s) in places and push the (not quite cut-off) pieces into the hole, glue them in place, to show the process of how the potholes grow; from pieces breaking off the edges.
This adds to the realism and makes the holes less abrupt / seem less deep.
Dr H wrote: Nice experiments with the potholes. I've swerved around holes like that in the past.
Thinking as I type; you could cut cracks into the foam around the hole(s) in places and push the (not quite cut-off) pieces into the hole, glue them in place, to show the process of how the potholes grow; from pieces breaking off the edges.
This adds to the realism and makes the holes less abrupt / seem less deep.
Maybe.
That's not a bad idea. This piece is more or less a prototype for other road sections to come, so this idea is worth a shot. And if it doesn't work, I won't be broken up about it.
Thanks for the suggestion, Dr H! Feedback is always welcome.
They're looking really great! The sidewalk stones are a nice bit of realism, really pull it together. Going to look fantastic when there's a whole bunch of them! Possibly a silly question, but what technique are you using to get the lovely paint finish? It's a really realistic road effect!
Scarper wrote: They're looking really great! The sidewalk stones are a nice bit of realism, really pull it together. Going to look fantastic when there's a whole bunch of them! Possibly a silly question, but what technique are you using to get the lovely paint finish? It's a really realistic road effect!
Thanks for the feedback, Scarper! As for the paint technique, after i distress the surface with sand paper and files (I fold the sandpaper to get a really small surface area along the crease and run it more or less horizontally across the roadbed to create those lines) I use acrylic craft paint in various shades of grey and sort of drybrush, sort of smudge the colors directly onto the foam in a consistent, perpendicular to the lines fashion. The foam sort of absorbs the first few layers of paint and diffuses the color quite nicely. So long as you don't overload the brush and keep the bristles merely damp with rather than full of paint, you should be good to go. And if you find you've layered on too much paint, you can just smudge it away with your fingertip and it has a similar effect. I usually start with black craft paint mixed with a medium grey, then do a straight medium grey, then grey mixed with a touch if suede, and sometimes a light finish of suede mixed with a touch if white, depending on how weathered I want the road to look. I also use photographic reference to give me an idea where to highlight. The darker areas of this road section are just largely unpainted areas. This material is wonderful.
Also: "won't be broken up about it"? Arf...
I can never let an opportunity for a pun to go unused.
I'm always shocked by how many page views this blog gets, even when I haven't posted for weeks. I'm humbled by it, really.
Anyway, mushy human feelings aside, I've finally found some motivation to do stuff but find I'm lacking in inspiration. My lizard brain tells me to finish the half million other projects I started, but my ADHD tells me the world is full of distracting shiny pennies. To wit, I'm asking the community for help. I want to build something, but have no idea what to build. I could try finishing the city I started ages ago and I can just as easily start a brand new project.
Anybody have any ideas or suggestions for a terrain project theme? I want to make an entire table's worth of terrain, I want to challenge myself with new ideas, and I love working on stuff that no one else is. So, please, I encourage you to write in your suggestions here. What type of terrain would you live to see? What kind of terrain do you wish was out there, but nobody seems to be building? What sorts of things would you love to be fighting over, if ever you had the chance? I'd really love to know.
There's some prettyy nice stuff in here, makes sense that people drop by . As for terrain wishlisting: I've always been a fan of crashed spaceships. Not the most original, but it immediately adds purpose. Failing that: titan wreckage?
CommissarKhaine wrote: There's some prettyy nice stuff in here, makes sense that people drop by . As for terrain wishlisting: I've always been a fan of crashed spaceships. Not the most original, but it immediately adds purpose. Failing that: titan wreckage?
Thanks, Commissar!
When you say "crashed spaceships" do you mean like Aquilla Landers or do you mean like Space Marine Strike Cruisers and the like?
If you've got some tubes to hand you could always join in the current LoER terrain contest, there's still plenty of time left.
I can't really give any terrain ideas beyond that. I don't play the game so don't "miss" anything specific, and for my own terrain building I tend to pick random pieces of junk and throw them together following the inspiration of their shapes.
I have always fancied a dockyard scene, with jetty's and deep water being impassable, all around a "true"scale ship wreck partially sunk in the harbour. Sections exposed to allow game play. Would be great for kill team or the new Necromunda thingy, or even necromunda itself. Along with many other games. Bottle necking zombies on a pier would be fun, heroic last stand stuff. Only reason I have not done it yet is I have nowhere to keep it, and getting rid of it would be a pain. By true scale I mean a current tanker cargo ship is hundreds of feet long so a 3 foot boat for a start.
And we come here again and again for the amazing inspiration you give us. This blog is like a reference library for terrain.
Ruglud wrote: +1 for the star/ space ship wreckage...
*cough
Spoiler:
*cough
Yeah, I've seen that ship before and I think it's way out of scale. Like 1/100th the size it's supposed to be.
Automatically Appended Next Post: Also, thanks for the feedback, Ruglud, Dr H, Cam, and Red!
I'm one for combining ideas, so on the drive home this evening I thought about doing a partially submerged crashed space ship. I thought about the size of the thing (I agree it ought to be the whole table), what sort of ship it might be, how it came to rest on this ocean world, and what part of the ship would most likely draw combatants to it.
So, all told, my idea is a listing, semi-flooded space marine strike cruiser. The idea that it drifted into the gravity well of this planet after suffering catastrophic engine damage and that its decaying orbit eventually lead to its gliding impact into the planet's shallow seas. I'm probably going to make the wreckage a 4'x4' board; the first time I will be making a deliberately static table with no modularity at all. The principle aspect if the wreckage will be the damaged bridge/conning tower and central basilica.
If anyone has any input or suggestions for backstory, chapter, details, or anything else they want to see in this build, please don't hesitate to post it in this blog. Doesn't matter if you're a long time follower or a first timer, I want to hear your thoughts.
As always, I am flattered and humbled by your praises. All I ever wanted was to share my love for and knowledge of the hobby with the community. It's the most precious gift to know I have accomplished that. Here's to more and more crazy projects and endless worlds of terrain.
Who were the chapter who became legion of the damned - Fire Hawks? Something like that. Wreckage of that. Or maybe Star Scorpions, who were obliterated and their number and colours went to the Mentor Legion. And if it's flooded, you need a Dianoga in there
I'll start doing test pieces because I'm crazy and want an incredible level of detail for this project. I've been staring at pictures of crashed planes, bombed refineries, ship breaking yards, shipwrecks, derelicts, cutaways of naval vessels, and battlefleet gothic artwork to try to get an idea of what this thing should look like. I've been watching videos of plane crashes, ship collisions, wreck diving, and meteor impact recreations.
I'm envisioning a massive boat-like structure twisted and sheered, with "islands" of tangled conduits and ruptured tunnels. I imagine that half of this thing's details will be obscured by seawater and I will need to find the perfect angle that suggests "toppled" but yet still allows models to stand without difficulty.
Ruglud wrote: Sounds like a lit of Space Hulk potential on this 'terrain' piece ;-)
That thought did occur to me. One of my latent projects is to run a sort of Deathwatch RPG/Space Hulk hybrid game that was essentially a scifi tabletop "dungeon crawl" using sections of decks to represent the unknown quality of the hulk. Players get missions assigned to them and then they decide to either punch a hole in the hulk with a boarding torpedo or risk a teleportation to an area they may have already scanned or mapped. Every time they come to a new section it gets placed on the board, furthering the players' understanding of the wreck. I was thinking of using sheets of paper with vague representations of the tunnels ahead when they have prior knowledge if a section either through an accurate scan or a pilfered deck map (that they've managed to download from a functional terminal or if they've somehow managed to identify the ship that they're exploring, they might have a copy of the rudimentary deck plans in their own files. If you can't tell, I've put a LOT of thought into this scenario. I even made up a backstory regarding how the party has come to find themselves at this hulk.
Poke me in the slightest on this idea and I'll likely post an entire campaign synopsis in the 40k General Discussions section.
Your idea sounds great, and I definitley meant something bigger than a lander, so your whole table can be covered by the wreckage. I'd consider a Mechanicus explorator ship though, you can add a lot more weirdness to it, and you'll be less constricted by how a battlecruiser actually looks. Also, you could use the shadow war terrain skull-lifer thingy on there. Catching that thing would be a nightmare scenario by itself .
There are so many excellent painters here on this forum, but people who can make and design their own terrain blows my mind. Most of my home brewed stuff is just some foam board slapped together covered in paint and a bit of lichen or grass. Very impressed with your work as a builder and painter.
Yorkright wrote: There are so many excellent painters here on this forum, but people who can make and design their own terrain blows my mind. Most of my home brewed stuff is just some foam board slapped together covered in paint and a bit of lichen or grass. Very impressed with your work as a builder and painter.
I also get a lot of inspiration for new projects coming here- and I love doing terrain pieces. I especially like the different techniques you use to allow rearrangement of smaller pieces into larger boards: makes them much more flexible, but also more manageable in terms of space and transportation.
Meer_Cat wrote: I also get a lot of inspiration for new projects coming here- and I love doing terrain pieces. I especially like the different techniques you use to allow rearrangement of smaller pieces into larger boards: makes them much more flexible, but also more manageable in terms of space and transportation.
To prove I'm making progress on this campaign write up, here is the elevator pitch.
"Brothers, we all understood the risks when we swore our oaths to the Deathwatch. Routine or not, our missions are sacred undertakings and the promises we make must be kept at all costs. No matter that we find ourselves lost in this forgotten system, torn from the Immaterium by the abomination our new Admech allies call the [-Redacted-]. No matter that we have no choice but to plunge into the nightmare depths of this derelict hulk to thwart our otherwise inevitable descent into hell with it. And no matter that some of us may die fighting the innumerable horrors we will find within it. We have sworn oaths to destroy the enemies of Mankind wherever they may be found. Let us fulfill our promises of destruction and return the Emperor's light to this forsaken place that we may carry our hatred anew, to dark places yet undiscovered. For we are the Angels of Death and the Deliverers of the Emperor's Grace. Let none stand in our path and live. Let nothing stay our wrath."
I'm currently working on a base structure for this massive new project. I want to build a sort of clean, intact version of all the major parts so I get an idea of the themes and look of the ship and also, if I know what it's supposed to look like intact, I can make a better and more consistent wreck. I would post pictures of what I have so far, but my digital camera's battery is shot and I need to find a replacement (I lost the charger). Sorry.
Totally off topic, but I had a craft night with friends and had an opportunity to paint an old project. Here's where I left off on this project.
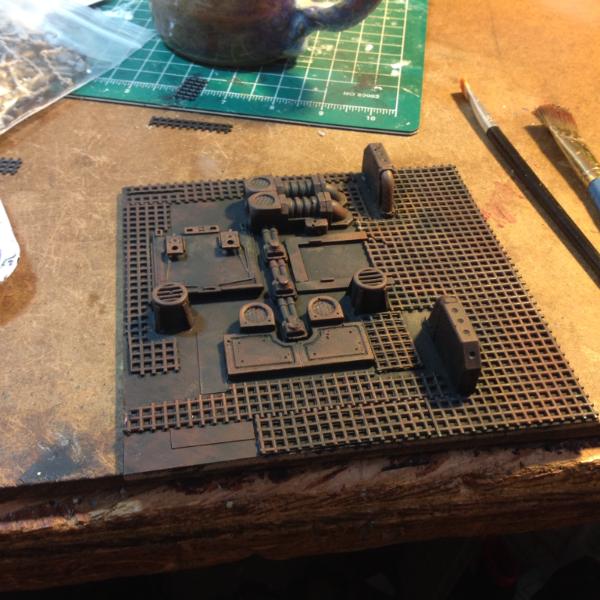
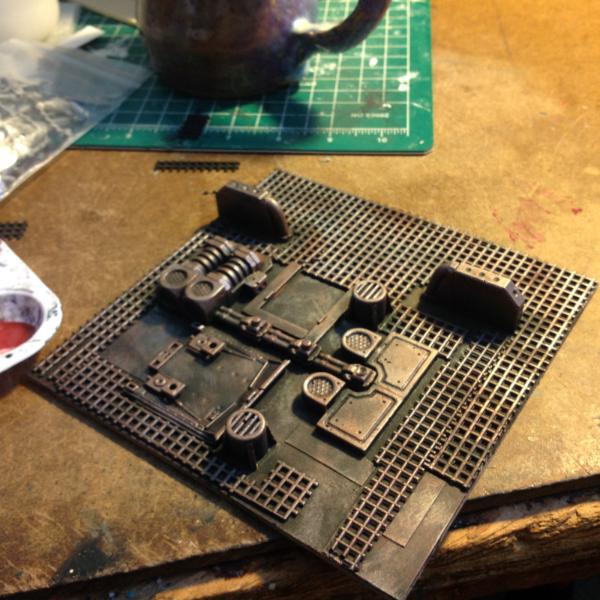
And this is what I did to it today. First, over the blue, I put a layer of brown, then tan.
And then a lighter coat of yellow.
And a whole bunch of extra layers of ever increasingly light yellow/off-white
And the trash bin in the back
And the sidewalk
Dirt
The roof
Any suggestions on how to improve the trashbin in the back? Or is it painted well enough?
Now I need to build the fence, windows, front door, roof ladder, trash in the bin, boxes in the corner, and add the static grass to the durt. Comments welcome. Thanks for looking and have an awesome day.
@ckig: yeah, I was noticing that myself. I'm hoping once the roof ladder goes on it might look a little less plain, but I might also wind up puuting an air conditioning unit up there or storage boxes or stray trash. Roofs don't typically have a lot on them except air conditioning and vents, or a stray bucket, really. But you're correct, it is really plain.
@Yorkright: maybe a squigeon or two?
@Dr H: thanks! I'm most proud of how the one off-colored tile came out. Different enough to stand out, but not so different that it steals the show.
Automatically Appended Next Post: I did some work on two smaller pieces I had lying around. I went about 40 pages back into my terrain tutorial gallery and still didn't find any pictures of these little pieces build, so either I never took pictures of that process or these are years old. Anyway, at the craft party on Saturday I base coated both pieces in dark brown. Sorry for the weird quality of the pictures, light was poor at the party.
Then added successive layers of drybrushed brick red, bright red mixed with brick red, more bright red mixed with less brick red, and finally bright red in rapid succession (i.e. not letting any time pass between layers and not cleaning the brush between layers).
And then today, I started adding grey highlights and the base layers for the rubble.
More pictures as progress is made. Thanks for looking and have an awesome day.
I added a layer of light grey to some parts of the pieces, as evidenced by these photos.
And then, with my light grey still wet on the pallet, I took my most obnoxiously nearly-white color and mixed it to get a slightly highlighted middle tone that only people like me even care about. The piece could easily be highlighted without this mid-tone and still look fantastic, but I always feel better with slightly more range of depth. Layers like these add complexity to color. The viewer appreciates it without even knowing they do. The best way to showcase the irritatingly slightness of this layer is to show it side by side with its unhighlighted twin.
This color:
Pallet mixed:
And side by side for effect:
And then I based coated the interior walls before passing out for the night.
Thanks for looking. Commentary appreciated. Have an awesome day.
I really like these latest pieces, Warboss! Terrific scenicking and the paint layering for weathering is terrific.
I use the craft acrylics a lot also- cheap, and I've never had one dry out on me. And for the price, I don't hesitate to try mixes and washes with them that I wouldn't try with more expensive paints.
inmygravenimage wrote: Lovely work, really like the interior colour and sense of crumbling plasterwork.
Thanks, graven. I started working on another half-finished project. It turns put the best way to motivate me to work on projects is to suggest a massive project about something else entirely. Sigh.
This was one of those projects where I had to go 30 pages into my gallery just to find the spot where I left off on it.
I base coated most of this piece before I realized I hadn't finished the windows or the sidewalk grout. So I started the grouting process. This is literally me using my finger to slather crayola airdry clay into the grooves I've intentionally left between each sidewalk slab. The curvature of my fingertip and the give thereof, gives the clay the look of shrunken grout sagging.
This picture clearly illustrates the window frame I made versus the two I did not.
Here's a few photos to try to give a sense of scale on this piece.
The backyard before I "refined" it by wetting my brush and smoothing away the excess clay (and then using my fingertip to scoop away the liquid excess).
And after. You'll notice I jammed some medium ballast into some of the grooves to indicate broken debris.
After hitting all the clay with lightly watered down white glue I sprinkled some craft sand here and there. And then sealed that layer, too.
I had established with the other piece that the curb looked a certain way and so I tried to make this curb look crumbled using a line of clay and embedded ballast. We'll see how that turns out once I get paint on the thing.
Thanks for looking. Commentary always appreciated. Have an awesome day.
Warboss, that's some tasty blue on interior of the ruined buildings. I really like your window sills as well. Those pieces came out great. Really nice work!
Your new project is coming along nicely. Watching with interest.
Theophony wrote: Really digging that blue color on the inside of the last two buildings , kind of chilling out blue in the middle of a battlefield.
It seems very popular with everybody I show it to.
Definitely like the courtyard house you have here as well. Functional and opportunities for cover and shooting too.
It needs railings and such, but I'm pretty happy woth how it's come out so far. I was thinking of trying to make a bike rack in the courtyard or maybe have removable tables and chairs there.
The problem I have with tables and chairs is scale size. If you made tables then they need to be small enough to fit a couple in there and the legs are usually what blows scale size out for me. I know it's strange, but that's always a killer for me. id like to see your take on a bike rack, and if you have an idea for the tables then go for it too, especially if your making them removable.
And I didn't even get to slap you with leather gloves . I've thought about using paper clips that are cut to length for legs as using paper clips for a powered folding chair worked out okay for my angry servo Skulls.
Theophony wrote: And I didn't even get to slap you with leather gloves . I've thought about using paper clips that are cut to length for legs as using paper clips for a powered folding chair worked out okay for my angry servo Skulls.
"powered folding chair" is the best weapon attachment I've heard of so far! lol! That's better than the "powered bag of doorknobs"
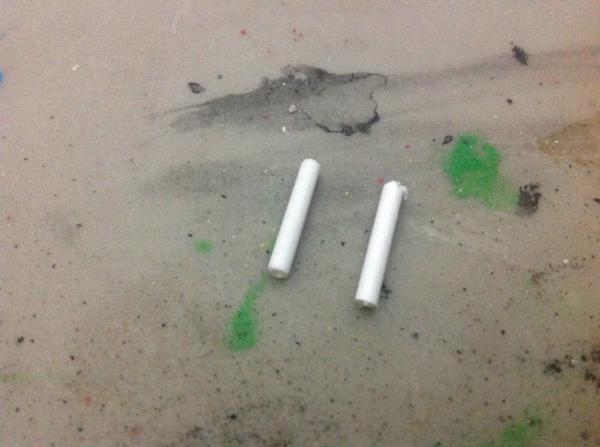
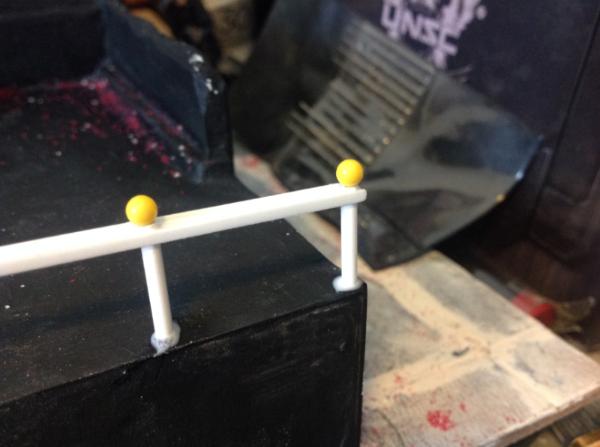
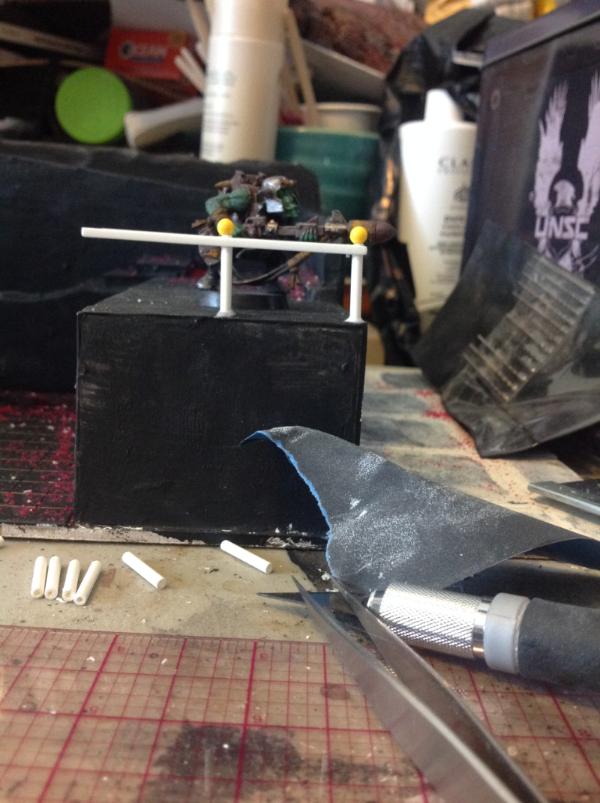
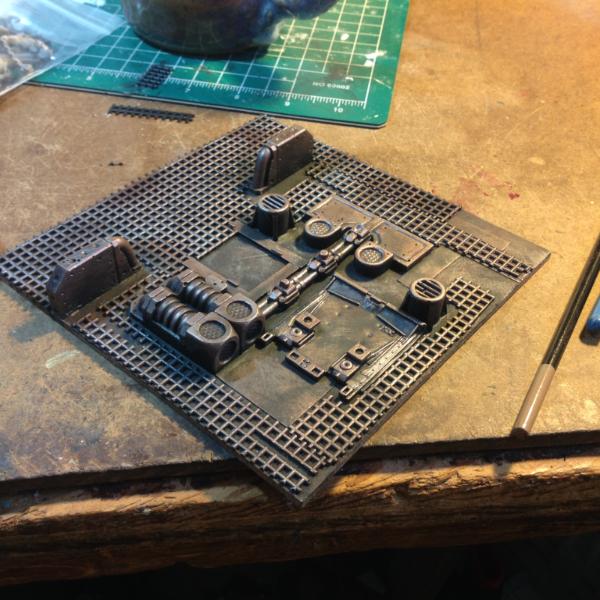
I cut some posts and filed some texture into the railing itself. There's really nothing precise or calculated about this step. I measured off the waist of a random ork and got a random height to use.
I used a fine grit sandpaper to file the gloss off of the posts and tried to take a picture that showcased the difference, but the textural difference is so minute I don't think my camera can record it. You tell me if you notice any difference between these two posts.
Maybe I just need to take the picture in better light? I dunno.
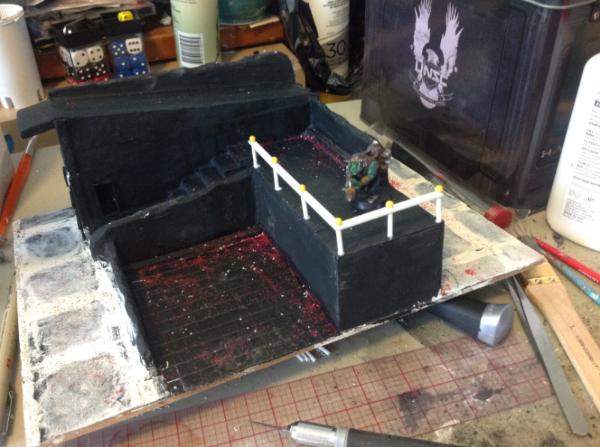
Thanks, CommissarKhaine. This building, along with 11 others and some road sections is part of a massive personal project where I'm trying to build a thematic city board. Essentially, two or three modern city blocks of dense urban terrain.
Well you being in New York you should have plenty of dense urban terrain to inspire you. We visited NY a few years ago, beautiful architecture all around.
Railings look good . I was in the garage grabbing something yesterday and saw some old railroad track of super tiny scale and it was on its side and looked almost perfect for a spaced picket fence, you never k ow when you'll get one of those ideas .
ckig wrote: Can't see much difference between those posts unfortunately but that may be because of the picture.
Great looking terrain though. The grout looks very effective there.
Thanks, ckig! As to the difference between sanded and not sanded, i get the feeling the tiny details aren't going to show up in photos. Hell, people might not even notice the difference once it's painted. But I'll know. And I feel like the rougher texture will allow paint to stick to it better and maybe(?) make it seem more realistic? I don't know. I just feel better sanding it down.
Looking really great, the size of the head will probably be ok once all painted in. Not 100% the sloping rail, but it is still WIP so give you a chance on that. I might be tempted to put some kind of panelling in maybe some mesh or glass.
As to sanding down the shine, I do it all the time, sand the parts to give the paint a better key. Has no real affect on the end result to be honest, other than the paint sticks better, and sometimes it smooths out the finish a little.
As Der Kommissar said- great attention to detail! Really solid work, and the fact that you had pieces left from another part of the build and you said to yourself "I can make something with that" really resonates with me.
The large round tops could work out depending on the theme of the restaurant/ seating area. If it's a tropical themed design just paint them like oranges , if it's techno then paint it like disco balls.
Those look like map pins, not sewing pins. Either way, an excellent use for them. Good railing can be a bit tedious to do, but as the photos show, totally worth the effort.
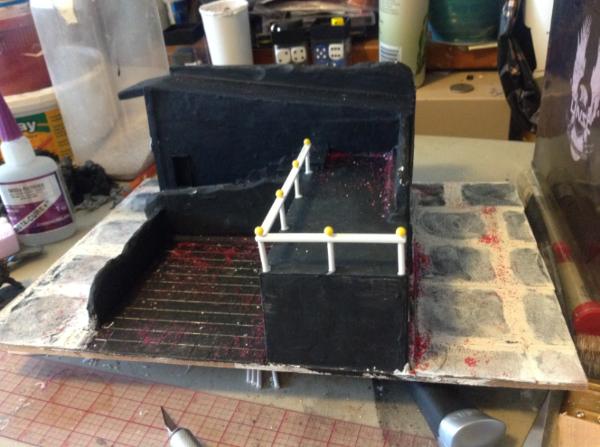
I'm thinking of adding a staircase to the back of this building, but the original idea was for just a ladder. Really, I'm considering the stairs so I don't have to fiddle with a smaller rail at the back.
So, I can't decide, please vote:
Ladder up the back and mini-rail
Or
Staircase into the backyard, probably parallel to the back of the building
Stairs for gaming, but a ladder would make more sense. Depends a bit on the systems you intend to use it for, actually. If you don't need access there for gaming purposes, a billboard or a neon sign would also fit right in.
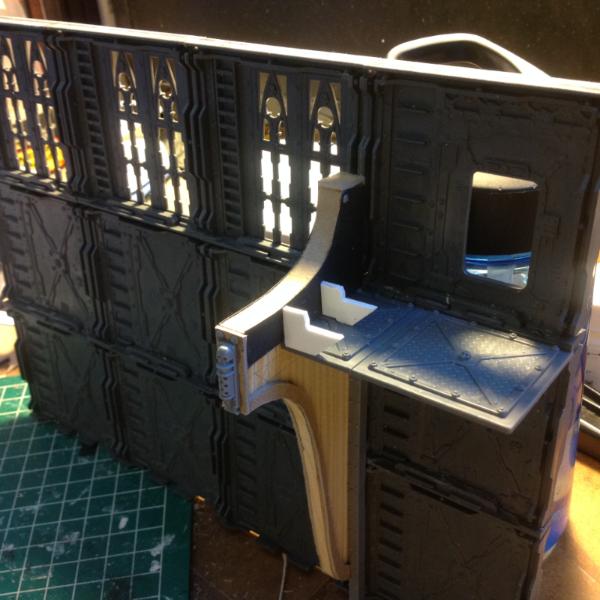
Hmm, so my idea regarding those stairs was originally to build a block of foamcore and have a staircase much like the one in the front of the building. But now I'm thinking to have a stepdown platform and a metal frame work with a short section of metal stairs. (Thanks for the idea, graven).
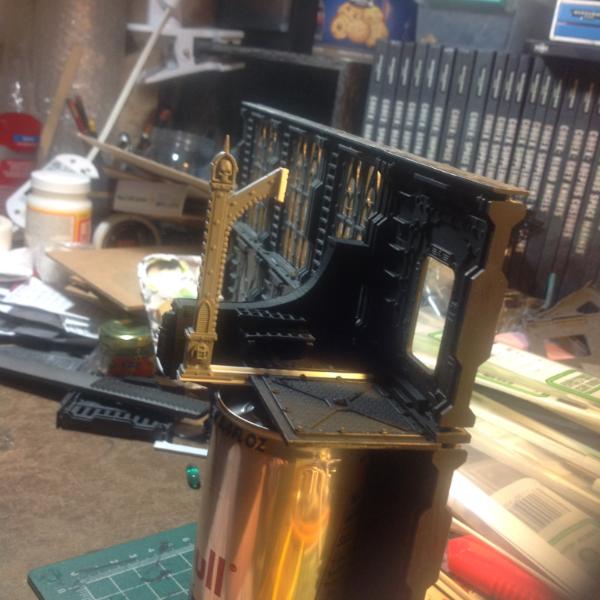
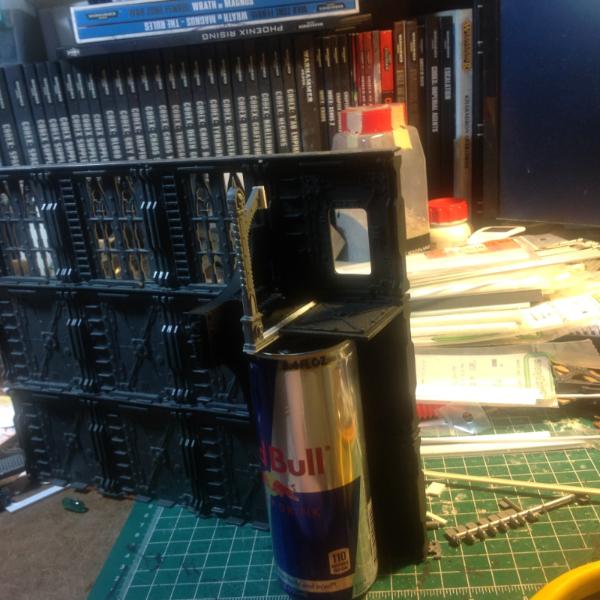
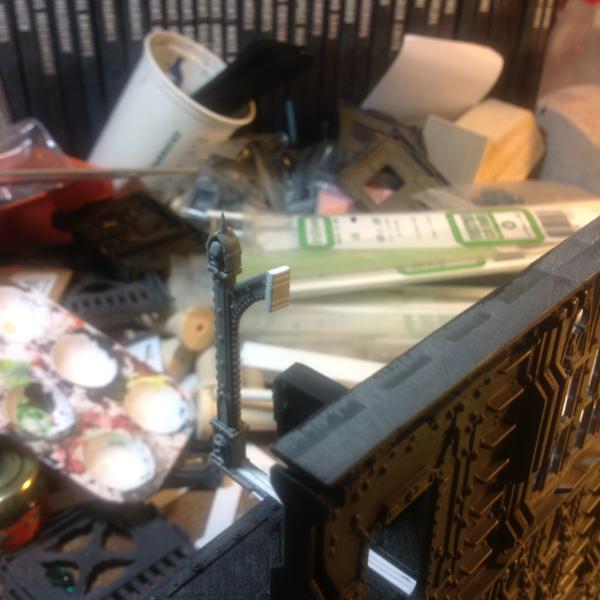
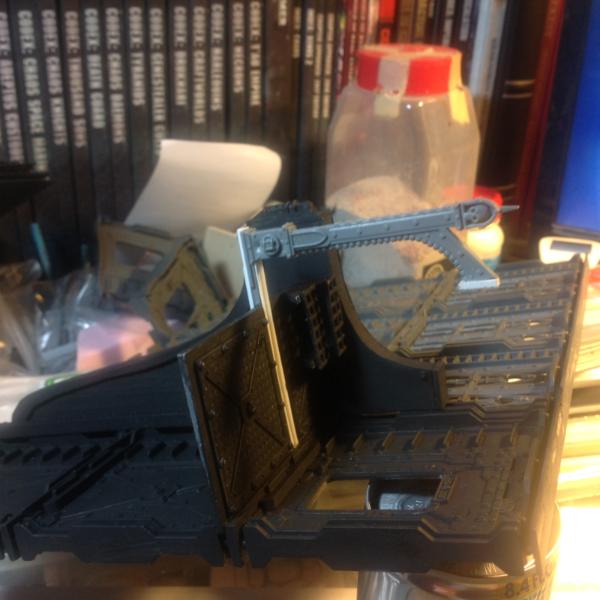
I want a staircase that leaves room between itself and the back wall of the building, so that the platform creates a sort of archway beneath it. I'm not entirely sure this will work with a metal frame work of support beneath the platform, but I think I have enough room in the backyard to make it work.
Hmm, so my idea regarding those stairs was originally to build a block of foamcore and have a staircase much like the one in the front of the building. But now I'm thinking to have a stepdown platform and a metal frame work with a short section of metal stairs. (Thanks for the idea, graven).
I want a staircase that leaves room between itself and the back wall of the building, so that the platform creates a sort of archway beneath it. I'm not entirely sure this will work with a metal frame work of support beneath the platform, but I think I have enough room in the backyard to make it work.
Thoughts? Input?
I live to give I think that your archway idea is pretty sound. A very thin set of supports should make it viable.
I like the idea, my only question would be, from a 'realism' standpoint: why? Why is there an archway? Is something preventing the stairs from being right next to the wall? Not to make your life difficult, it's just that my mind goes off at strange tangents at times
CommissarKhaine wrote: I like the idea, my only question would be, from a 'realism' standpoint: why? Why is there an archway? Is something preventing the stairs from being right next to the wall? Not to make your life difficult, it's just that my mind goes off at strange tangents at times
Storage. The idea was to put random bits of crap in there - like bags of trash, long pipes, random bits of wood, and/or a trash can or two.
A bit late (maybe) but for the steps you could do both.
Have a concrete stair set apart from the building to give the alleyway and then a metal walkway across to the building.
Maybe it was built that way, the builders couldn't find a way to make an arch, or too lazy.
Maybe the arch collapsed and has been replaced with the metal walkway as a temporary solution.
CommissarKhaine wrote: I like the idea, my only question would be, from a 'realism' standpoint: why? Why is there an archway? Is something preventing the stairs from being right next to the wall? Not to make your life difficult, it's just that my mind goes off at strange tangents at times
Storage. The idea was to put random bits of crap in there - like bags of trash, long pipes, random bits of wood, and/or a trash can or two.
Sounds like you got it all figured out then. Now get working!
First, I want to apologize for being away for so long. This past year has been tough. My Dad died unexpectedly at the very beginning of the year and coming up on the one year anniversary does not make his passing any easier.
Second, I want to apologize for never seeming to finish any projects. It's the nature of my ADHD; it's easier to start a project than finish one. Fear not, I am forever working on everything and will likely get back to your favorite build of mine eventually.
Third, I've been busy writing a Space Hulk / 40k / Inquisimunda - compatable campaign and posting updates on the General Discussion forum. You will find it here. To that end, and because I also find myself running a Deathwatch RPG for people unfamiliar with the lore, I have started another new project. I am building a "space dungeon" set. Essentially detailed tiles that can be used to represent spaceship interiors, mining facilities, Imperial bases, etc.
Here is what I've done so far - measured and poorly cut a section of 20" x 30" foamcore (that I bought at an art store called Blick, because they sell bigger sheets than craft stores) into a bunch of 2" wide, various length corridors and turns, plus a bunch of 5" x 5" and a few larger rooms. Next I'll move on to detailing them.
These are literally just bases, so I don't care how sloppily cut they are.
Feedback always appreciated, although I know there's not much here so far. Cheers.
It's very good to see you back Warboss, although I'm very sorry for your loss. I sympathize and empathize heavily, as I have shared that experience in the recent past myself.
I have greatly appreciated your observations and comments on past projects.
I wouldn't worry too much about not finishing things- as long as you're pushing the edge of the envelope a bit and learning a few new things and having some fun letting the creative juices out, then I reckon you're doing the right things.
I like the start to the bases you've made, and look forward to seeing this project advancing a bit to get your overall idea.
Meer_Cat wrote: It's very good to see you back Warboss, although I'm very sorry for your loss. I sympathize and empathize heavily, as I have shared that experience in the recent past myself.
I have greatly appreciated your observations and comments on past projects.
I wouldn't worry too much about not finishing things- as long as you're pushing the edge of the envelope a bit and learning a few new things and having some fun letting the creative juices out, then I reckon you're doing the right things.
I like the start to the bases you've made, and look forward to seeing this project advancing a bit to get your overall idea.
I'm liking these panels, Warboss! There is a perceivable purpose to each piece added- no random bits stuck on to fill space, definite purpose. I'm anxious to see what they shape into as paint is added!
In true Me fashion, I've started another project without finishing any of the previous. Sigh, oh, me.
So I've been commissioned to build some thematic terrain for a client. I haven't actively worked on wargaming scenery since starting my job at the Casino and I'm marginally surprised by how invigorated I am by the prospect of designing and building just a few small pieces.
I've largely been given creative license to do whatever, albeit with a few design guidelines. The most compelling of these guidelines is the fact that the environment is dominated by deserts of blue sand. This probably doesn't seem like much to go on, but coupled with the rest of the data - recently colonized world, built from local materials, was going to be a planet dedicated to mass-manufacturing before being cut off from its patrons then plunged into war, and a Communist Brutalist design aesthetic - means that I dove head first into research governing how deserts work, what minerals are blue, how minerals are processed for use, how sand is created, and also did image searches for just what this architectural style looks like. Turns out that, despite having a reputation for minimalist concrete construction, Communist Brutalism is actually quite dynamic in form and complexity. On top of that , most of what's left of it in the world is in a state of semi-abandoned decay - perfect for this project's needs.
I've spent the last few nights at work rolling these concepts, ideas, and pictures around in my head, occassionally making crude sketches. [One of the strange evolutions of my art is that while I started as a sketch artist, mostly working in pencil, pen, and paper, I've since learned to think and sketch better in three dimensions. But now my drawing ability has kinda atrophied]. Anyway, my basic idea - to start a project that I hope will eventually spawn more work - is to create little, single occupancy habitats for workers that are slowly being swallowed up by the deserts around them.
inmygravenimage wrote: That's a really exciting commission. Looking forward to what you do!
Thanks, inmygravenimage! I hope to begin construction on these in the next few days. I gotta assess my supplies and make sure I have the right materials for what I want to do.
I think I might turn this project into a full-on, start-to-finish project tutorial. Including a "parts list". I'm making a trip to my storage locker on Thursday to ascertain what I have and then possibly hit up a craft store to fill in the gaps.
I also want these buildings to be semi-stackable or to at least imply that they could be. Or that they could align next to one another to create row houses. And lastly, because this is for 40k, I wanted to make these "unfinished world" structures have large, blank panels on them that the original architects would have put in place so that the Imperium and/or the Adeptus Mechanicus could put their icons where they needed.
A man, a can and a plan- get to work, you! Welcome back, Warboss- been too long!
The commission looks very interesting- customer has given you good definition but left the parameters wide open for creativity. The research sounds fascinating as well.
I'm looking forward to watching this one build, and by all means, please make it a tutorial/how to!
Meer_Cat wrote: A man, a can and a plan- get to work, you! Welcome back, Warboss- been too long!
The commission looks very interesting- customer has given you good definition but left the parameters wide open for creativity. The research sounds fascinating as well.
I'm looking forward to watching this one build, and by all means, please make it a tutorial/how to!
Camkierhi wrote: Have tried this myself at times, as in the connection idea, blue sand sounds interesting and will be stunning when done. This is going to be good.
Thanks, Cam. I'm going to post up a supply list and first steps tomorrow I hope. I'm also going to try an experiment with glitter in the sand dunes to see if I can get a scintilating effect.
So I went to the storage locker and found a few things, then went to the craft store and went totally overboard.
The wooden rectangles in the back I already had (along with the fine sand, pulverized walnut shells, insulation foam, airdry clay, exacto blades, strip styrene, styrene rods & tubes, clear plastic sheets, T-square, hotglue & guns, and other paint not pictured). Everything else I purchased new for this project. Also not pictured are the 5 containers of variously blue glitter I bought to experiment with.
Here's close ups of some of the individual bits, like the giant hole punchers (the most expensive items on this list).
The crackle medium (for dry earth) and some of the colors I'll be using on the sand and building interiors.
These plant fronds will be trimmed significantly, given a few dark washes, and then messed around with to see how they look as reeds and scrub.
The idea I have revolves around picking the buildings up off the ground by a small amount and implying that these pylons are actually the source for the buildings' heat, potable water, lighting, and waste disposal. So I got these instead of trying to chop individual sections of rod to the same, even length. Because, quite frankly, I suck at that.
In addition to rods, tubes, and wires, I intend to use these as miscellaneous doodads rusting away in gaping conduits and exposed panels. It will probably make more sense in production.
Lastly, I intend to break up the straight edges of each piece by adding halves or quarters of these oval shapes to help facilitate the effect of building-swallowing sand dunes.
I hope to begin actual prototype construction in a few days.
I have now been acquainted with 'crackle finish'; I must now not rest until I get to Michaels and buy me some! I've admired others' bases that have that Sahara Desert former floodplain cracked look, now I have a means to go try it out.
I also have to admit, even with the explanatory notes the list of supply material is fascinating- I literally can't tell how you're going to do what you're saying you're going to do, and you're telling me up front what you're going to do- this is, to quote Cam, going to be good!
Well, I certainly appreciate the enthusiasm for this project. My only hurdle has been my chronic exhaustion. I work 9 hour overnight shifts at a Casino, essentially walking all night long. While it's awesome to brag about walking 40 miles a week, I find myself sleeping like 10 hours a day with barely enough energy to get ready for work when I wake up. So, in essence, I am planning and building this project on borrowed time. I keep staring at the foamcore, trying to will it to measure and cut itself, lol.
Warboss_Waaazag wrote: Well, I certainly appreciate the enthusiasm for this project. My only hurdle has been my chronic exhaustion. I work 9 hour overnight shifts at a Casino, essentially walking all night long. While it's awesome to brag about walking 40 miles a week, I find myself sleeping like 10 hours a day with barely enough energy to get ready for work when I wake up. So, in essence, I am planning and building this project on borrowed time. I keep staring at the foamcore, trying to will it to measure and cut itself, lol.
I feel your pain. I work as a janitor at a hospital and do 10-15miles a night consistently. Every other week I have a 6 day stretch. This doesn’t include the part time hours and miles I put on doing the same at our church. If I at end healthy I’d be skinny. As it is when I get a day off like today then I feel sick because I’m not walking 5+ miles. Drives my wife crazy as I pace back and forth.
I have not tried that crackle medium. I usually hit hobby lobby as it’s right by our church, but there’s a Michaels about a quarter mile the other direction. I’ll have to see how it turns out for you and then give it a shot.
The big punches work great. I had one that had a giant chevron and one that was a big arrow that I used to make tactical symbols on my rhinos.
Spoiler:
They eventually broke due to overuse on plasticard, but they do great on thick cardstock, and I got at least a hundred out of the plastic before they broke.
I refuse to shop at Hobby Lobby because of their healthcare policies. I don't mind when a person has strong religious views, but the moment a company tries to impose their personal restrictions on its employees and play it off as "religious freedom" is the moment they lose both my respect and patronage. Imposing one's own religious restrictions on others is not freedom, it is tyranny. Therefore, I only shop at Michaels or A.C.Moore.
Warboss_Waaazag wrote: I refuse to shop at Hobby Lobby because of their healthcare policies. I don't mind when a person has strong religious views, but the moment a company tries to impose their personal restrictions on its employees and play it off as "religious freedom" is the moment they lose both my respect and patronage. Imposing one's own religious restrictions on others is not freedom, it is tyranny. Therefore, I only shop at Michaels or A.C.Moore.
Cool enough, I’m not familiar with their policies, just their convenience.
I did a few more terrible sketches for the floorplan and walls. Circles are meant to be either pylon mounts or vents in the walls. I've also shifted the door from the center to the corner and anticipated an interior wall for the "foyer".
And here is the "working sketch" for the basic floorplan. Math is hard.
The proto-Space Hulk tiles is great! With the colors you used, were the rust enhancers washes or paints? If the process is fast, I can see you knocking out a whole game's worth of these, they look good. Maybe a touch more silver highlighting-?
The stairs are perfect as is. Are they a kit, or did you fabricate them out of old potato chip bags and some spit? Really nice work!
Meer_Cat wrote: The proto-Space Hulk tiles is great! With the colors you used, were the rust enhancers washes or paints? If the process is fast, I can see you knocking out a whole game's worth of these, they look good. Maybe a touch more silver highlighting-?
The stairs are perfect as is. Are they a kit, or did you fabricate them out of old potato chip bags and some spit? Really nice work!
I sgree it needs more silver, Meer-Cat. The stairs are a kit from Plast Craft Games. I think they might be out of production. I buy the " TME" kits whenever I see them, but they're usually painted white amnd blue.
And to everybody, I want to apologize for not posting more frequently. My job takes up a lot of my time and I work nights. It seems like I only ever get time to work on stuff or posting stuff when I'm afflicted with medical emergencies. Like now, where my leg is looking horrible and I'm on dusability until the surgeries to correct it all are done. Of late, I took the time to clear off my work area and am trying to complete old projects (of which I seem to have a million). I'll post some progress pictures in the coming days. Thanks, everyone, for your patience and your support.
And to everybody, I want to apologize for not posting more frequently. My job takes up a lot of my time and I work nights. It seems like I only ever get time to work on stuff or posting stuff when I'm afflicted with medical emergencies. Like now, where my leg is looking horrible and I'm on dusability until the surgeries to correct it all are done. Of late, I took the time to clear off my work area and am trying to complete old projects (of which I seem to have a million). I'll post some progress pictures in the coming days. Thanks, everyone, for your patience and your support.
Ouch, first off: get well soon! Following up: it's your blog moving at your rate. We're just along for the ride, and happy that' you're willing to take some of your valuable hobby time to share your journey in our crazy hobby. No need for apologies!
Thanks, graven! I'm working on some big stuff now that I'll post pictures of in a few. Below is a rant about my current medical condition. Feel free to read it, but I didn't think it was appropriate to just leave in the open on the forum.
Spoiler:
Just waiting for the 8/10 pain in my leg to drop down to a 3/10. Morning wound care is agonizing, exhausting, and necessary for my daily function. And, because the US stance on everything only ever swings insanely from one extreme to another (in this case the "opioid crisis"), the specialist I'm seeing won't prescribe me any pain killers beyond over the counter name brand stuff. I've had to mix Acetaminophen and Ibuprofen to get any kind of pain masking and that barely helps. Yesterday I bought neosporin with pain relief (I have 3 open ulcers on my lower left leg) and that seems to help tremendously, but it's not an option most of the time.
My current medical condition stems from poor circulation - a bad circulatory system. I don't know how that happened specifically, but suffice to say too much blood gets whisked away from my lower left leg and not enough gets there. Also, too much lymph goes and not enough comes out. So I end up with wounds that don't bleed or heal and edema (persistent swelling that pits when pushed on), but only in one leg. I've had 3 minor surgeries so far. Two to lazer oversized veins closed and one to insert stents in the arteries of my left groin. I was conscious for both procedures, but in a twilight of anesthesia.
Every week they wrap my lower leg in a silverdine-infused gauze and an ace bandage that "stimulates" my wounds into regrowing skin and fighting off infection. And by stimulates I mean burns like hell. Like reduces me to writhing in agony and whimpering in pain while I pray for the "pain killers" to kick in and at least make it bearable. Also, it provides pressure that helps with circulation and makes my leg feel like it's in a permanent vice.
Needless to say this all sucks. I've been on disability from work for about a month. Despite that, because of my constant pain, I've neither left the house nor gotten much done at home. The disability checks barely cover my living expenses and my savings are dwindling. Being in pain is terrible. Yesterday was the first really productive day I've had for weeks. I hop to get more done today. I'm trying to use my time to complete older, half-finished terrain tasks. If nothing else, I hope I can finish just a few more projects before I have to return to full time work.
Thanks for listening to / reading my rant. Your support does not go unnoticed and this community in no small part has kept me going with its feedback, encouragement, and friendship. Thanks everyone for being here and participating. You all make this a community worth coming back to.
Sorry to hear about your leg, I hope it gets better soon(ish)! Is kinesitherapy an option? In Belgium, kinesists often help with blood circulation/lymph fluid piling up.
That's really awful mate. I'm glad that you feel supported by your fellow dakkanauts. I know that my mental health would be completely dysfunctional if I didn't have this outlet. Much love, brother.
Sorry to hear about your leg, I hope it gets better soon(ish)! Is kinesitherapy an option? In Belgium, kinesists often help with blood circulation/lymph fluid piling up.
Spoiler:
I'm going to a vascular specialist. In the US, kinesiologists are usually reserved for sports humans
That's really awful mate. I'm glad that you feel supported by your fellow dakkanauts. I know that my mental health would be completely dysfunctional if I didn't have this outlet. Much love, brother.
Anyway - more munda!
Spoiler:
Thanks, graven
Yikes indeed. Pics up soon.
Automatically Appended Next Post: So, I started work on a terrain piece that's meant to have multiple floors. This project is essentially my answer to "zone mortalis", although it's also a dream project of making a modular soacehulk board unlike any I've already seen.
To this end, this wall is getting a staircase on the side you can't see and a big overseer room in addition to the tiny platform I've already put into place. Once complete it will be glued to a 9"x12" masonite board for use in my modular terrain kit.
The little white bits are the start of a step up over the structural impediment. Here's a close up of my imperfect detailing work.
And an upside down shot of a mock up for what the gantry on the far side will look like.
C&C always welcome. More pics to come as work gets done.
Thanks, Dr H. It is getting better...slowly. I have an appointment with a Pain Management clinic tomorrow. They keep giving me these weird caveats like, "The doctor uses an injection instead of narcotics, do you still want to come?" Like what? Of course I still want to come! I don't care what the doctor uses, as long as it works! I feel like the entire community assumes everyone seeking pain management is actually a drug addict. It's terrible, ridiculous, and utterly disrespectful. Not only is their bedside manner out the window, but they also ignore my self-advocation for pain relief. I've spent most days of my last month writhing in agony and everybody keeps telling me just take Tylenol (which barely masks the pain and usually only for about 4 hours at a stretch). I haven't slept all the way through a night - on average only 4 hours before I wake up from the pain - in a month and a half.
Thanks for the feedback and well-wishes, my friend.
I decided I needed to prime some of the lightly colored parts before I could no longer reach them. Also, I added some stairs.
And then I added a half-archway to suggest the walls on the opposite side of the corridor. Ignore the energy drink, I just needed something to lean the structure against.

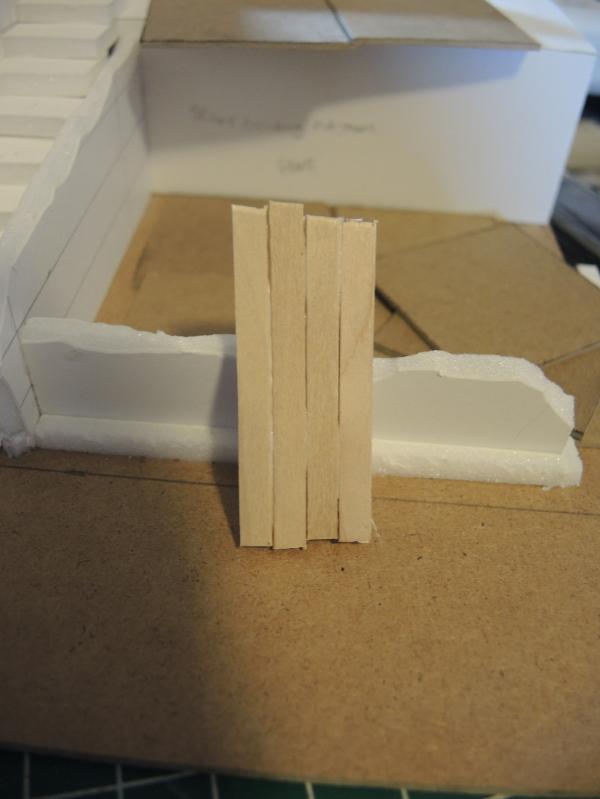
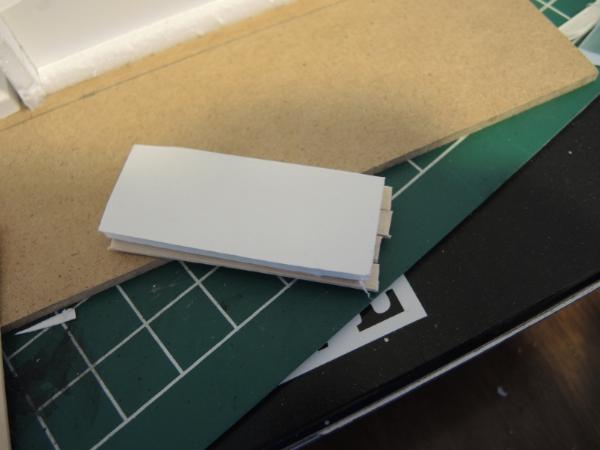
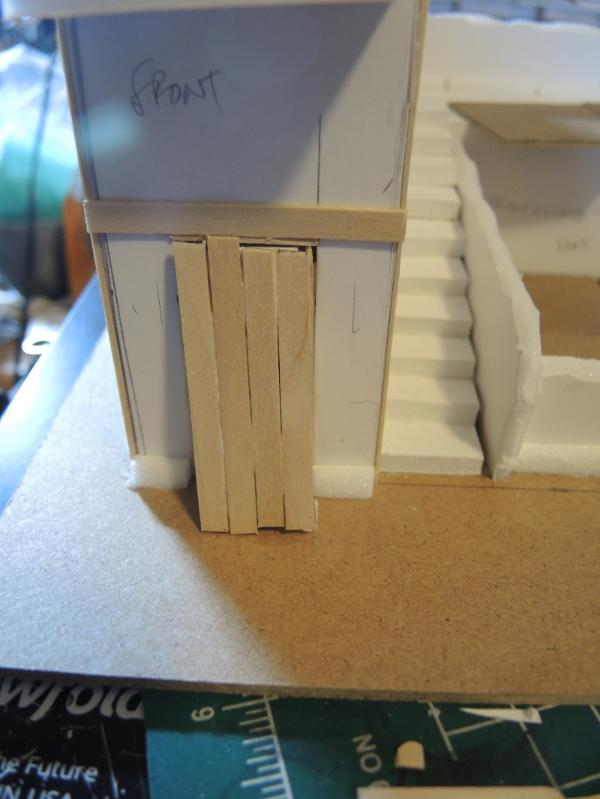
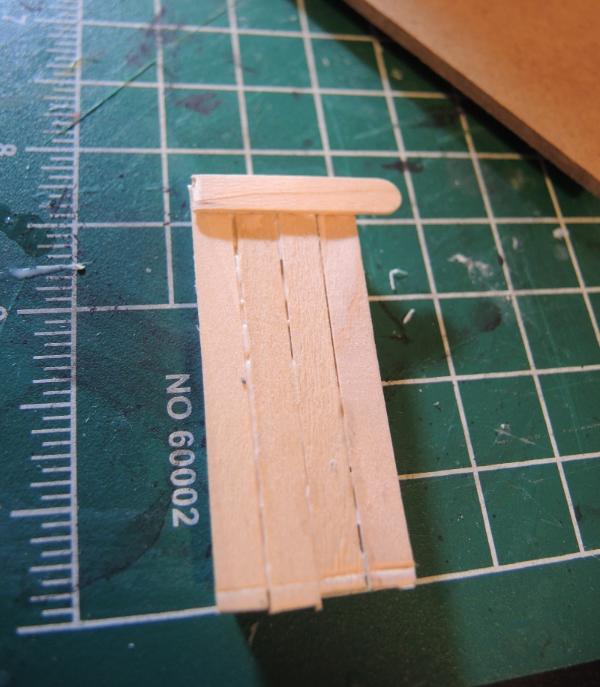
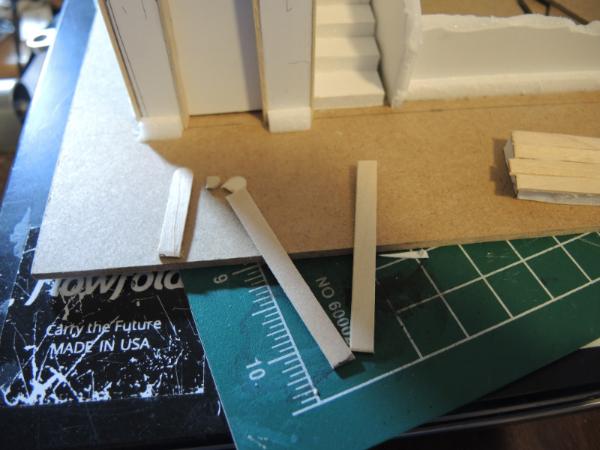

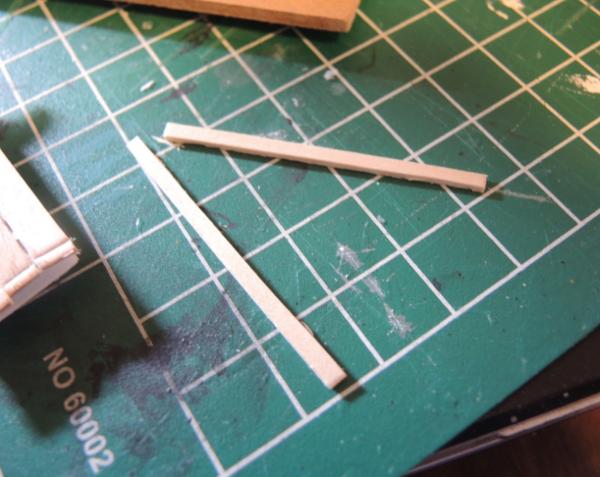
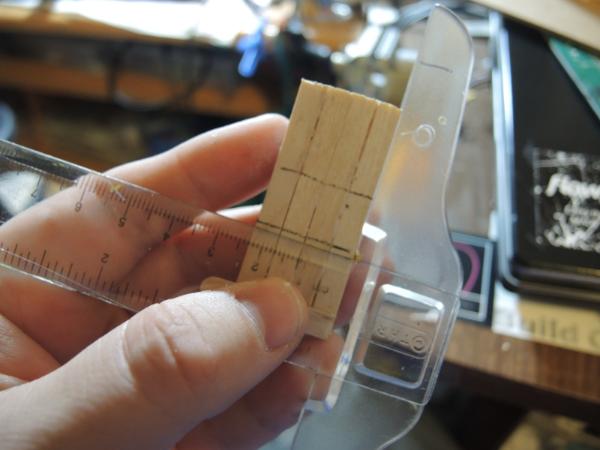
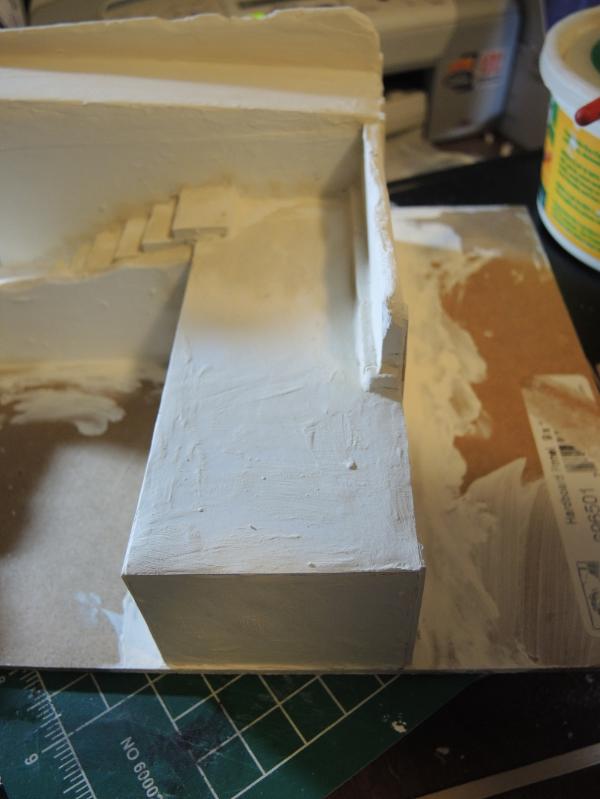
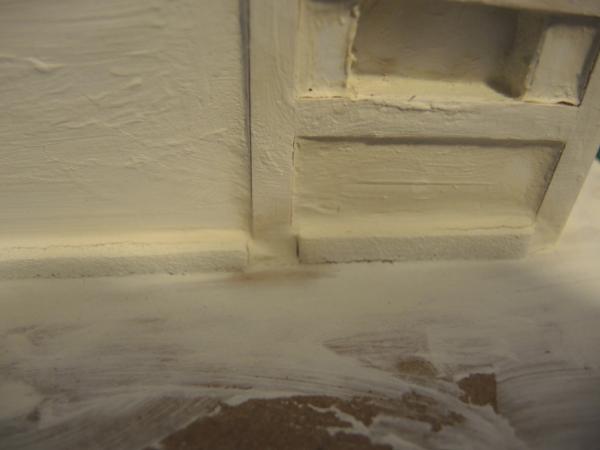
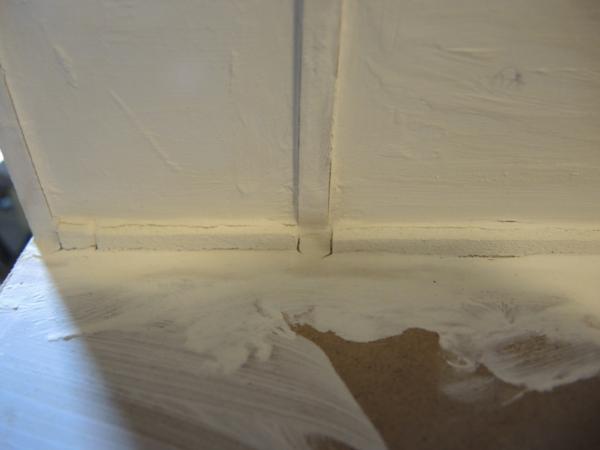
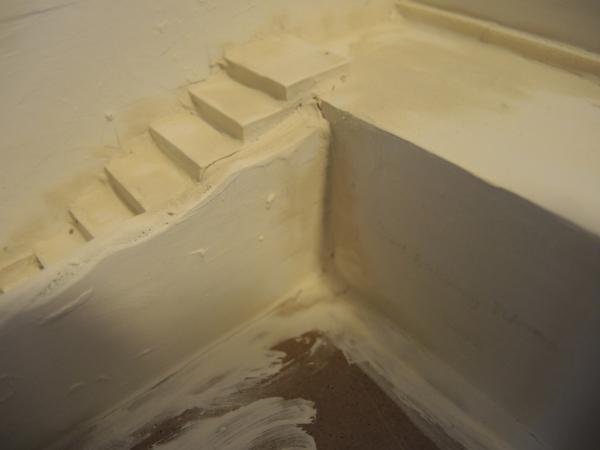
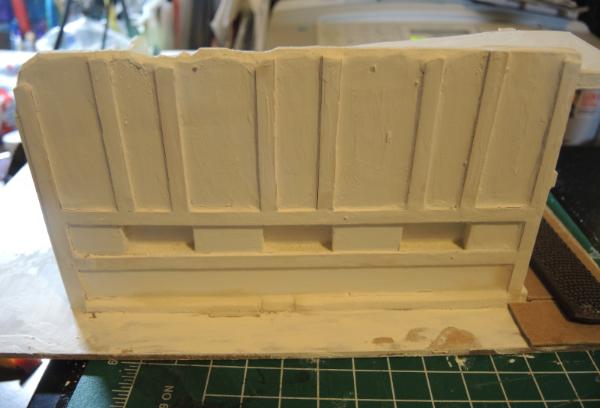
 ). Thanks for looking and have an awesome day!


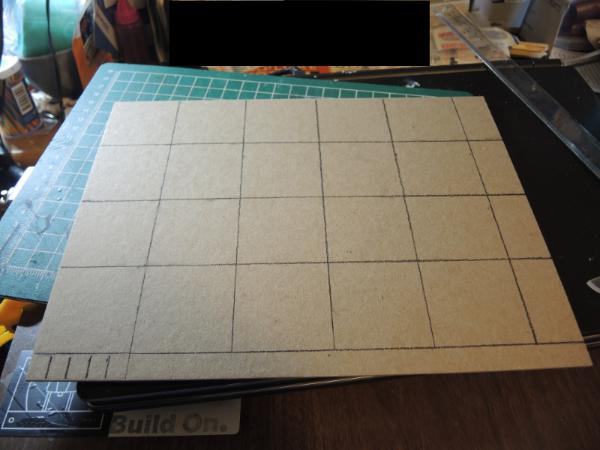
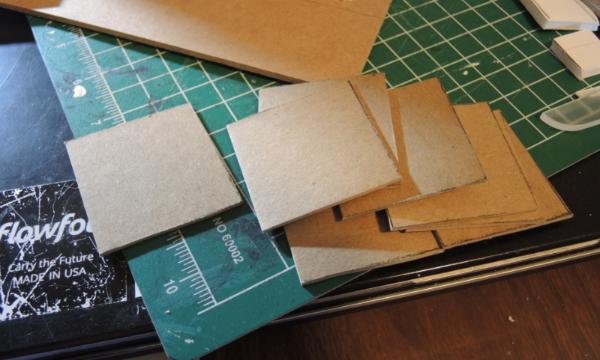
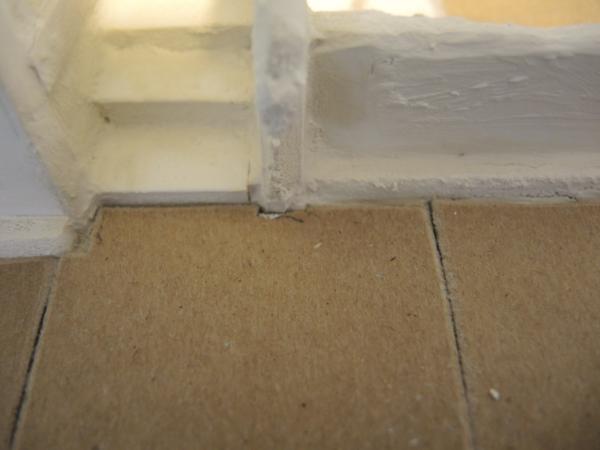
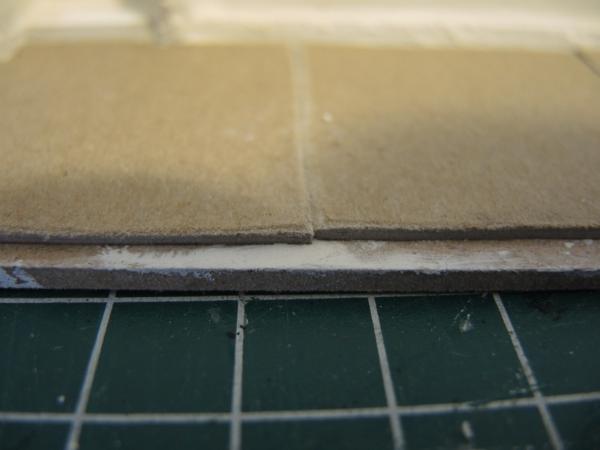
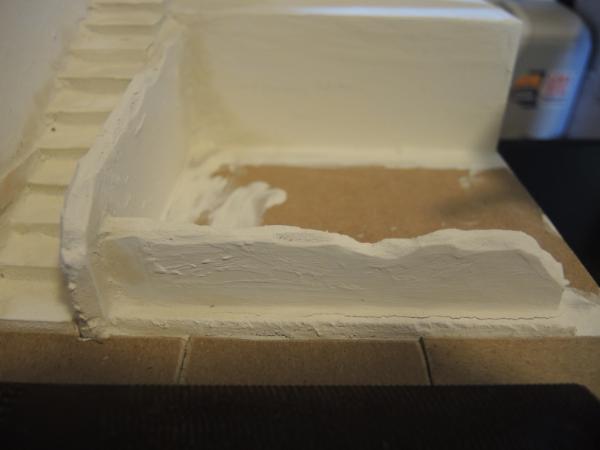

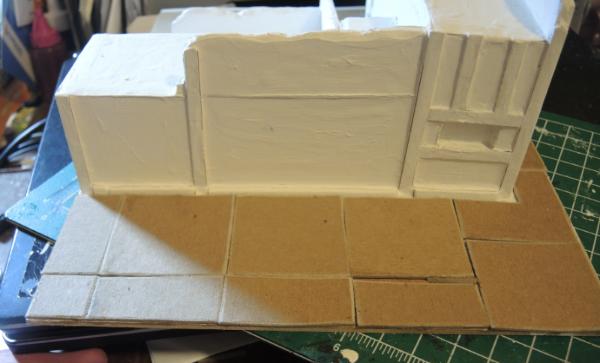
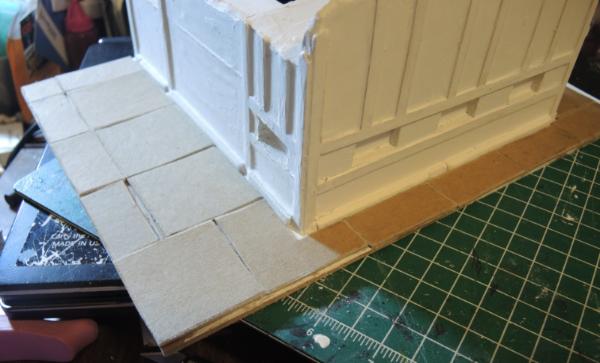
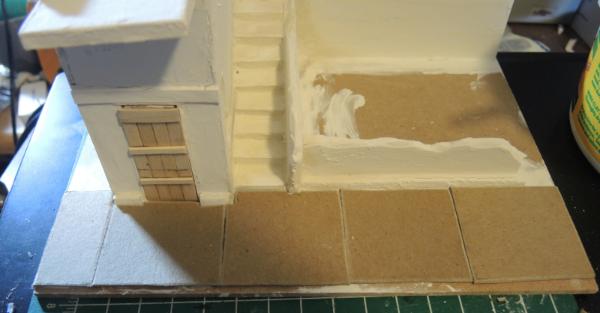
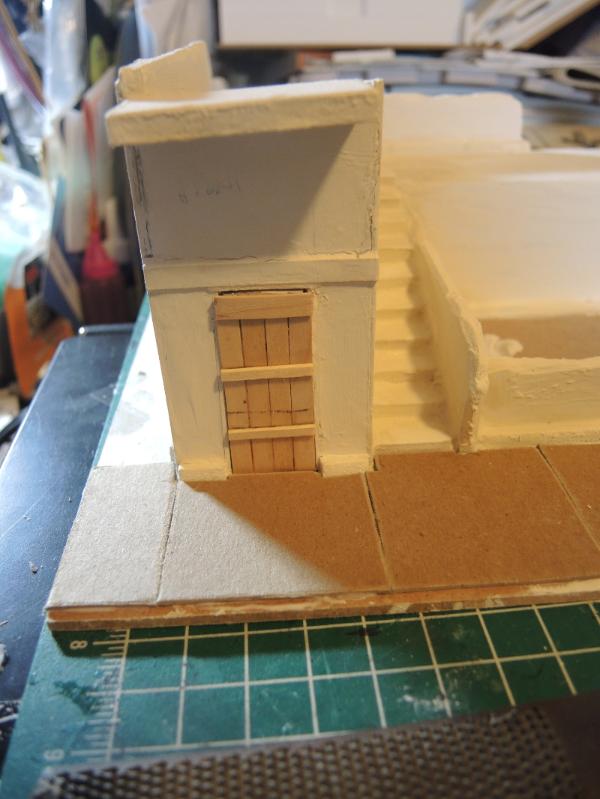
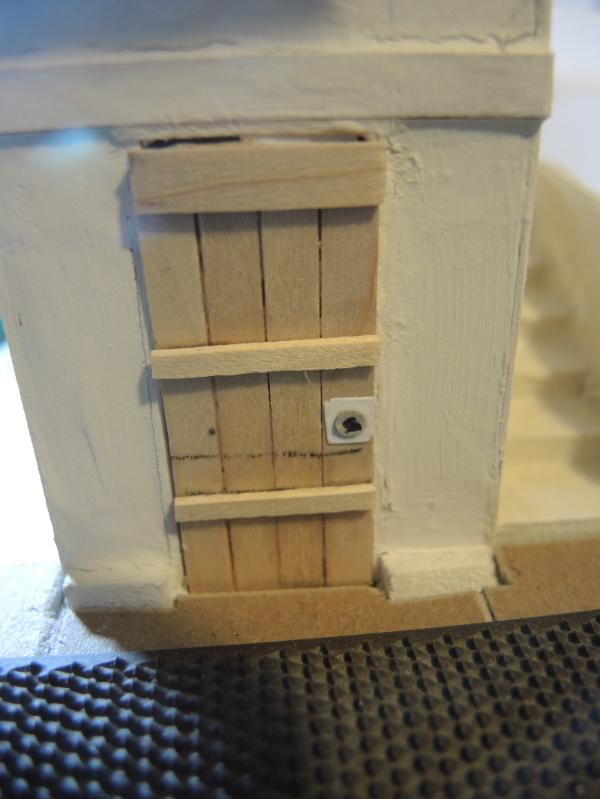
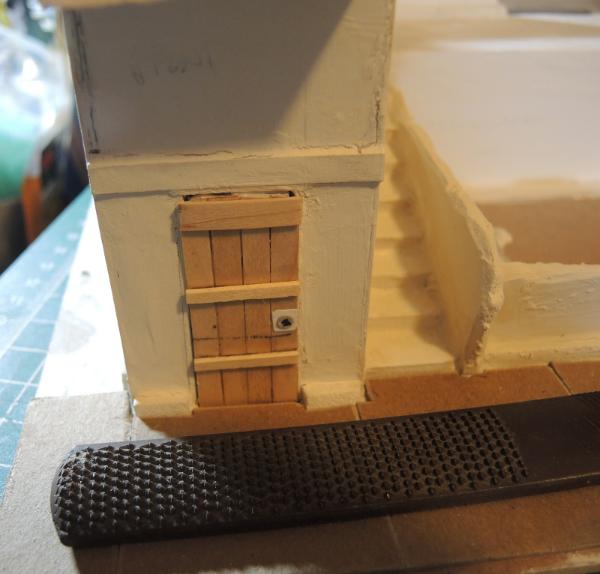
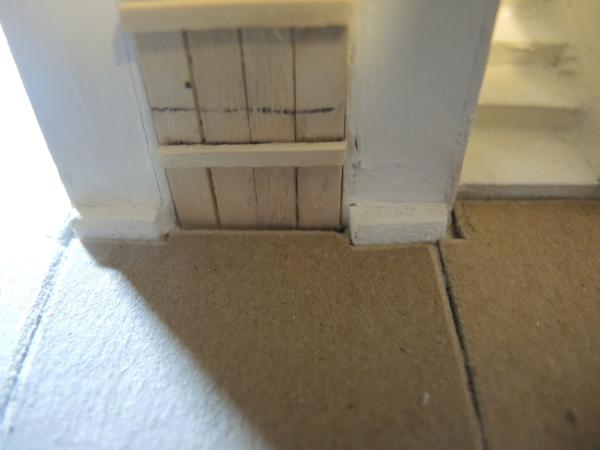
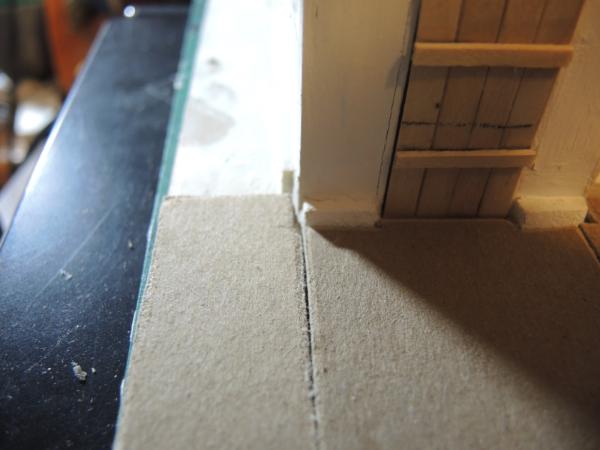
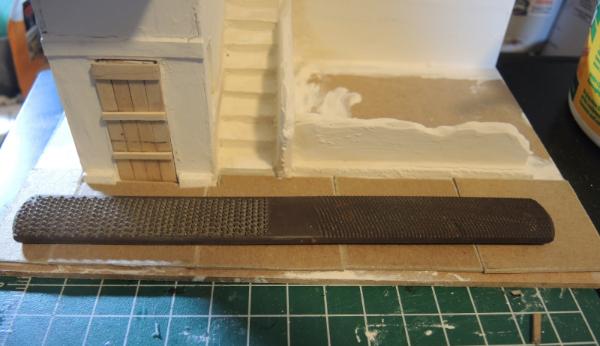
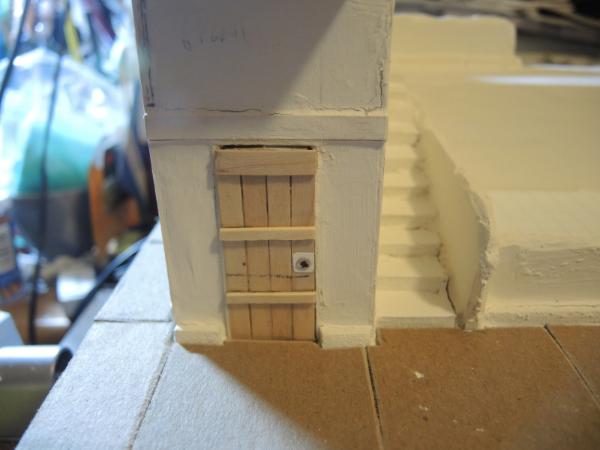
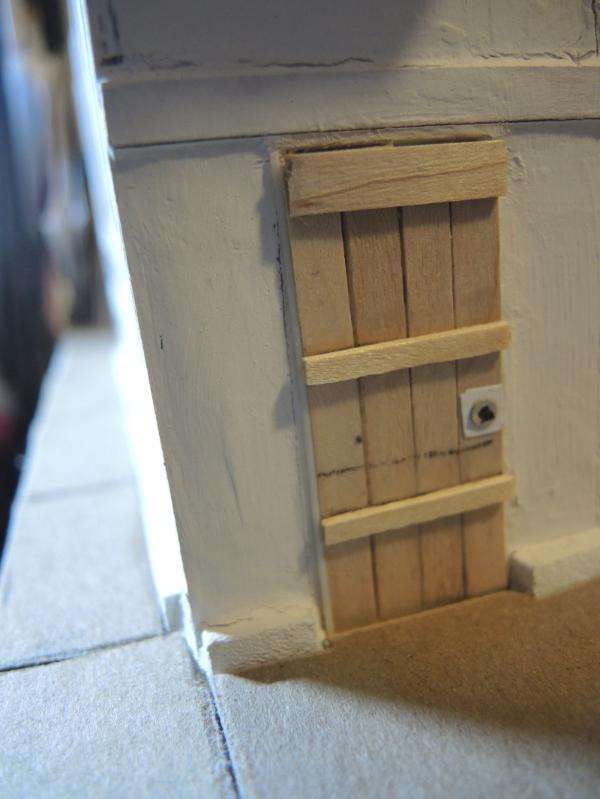
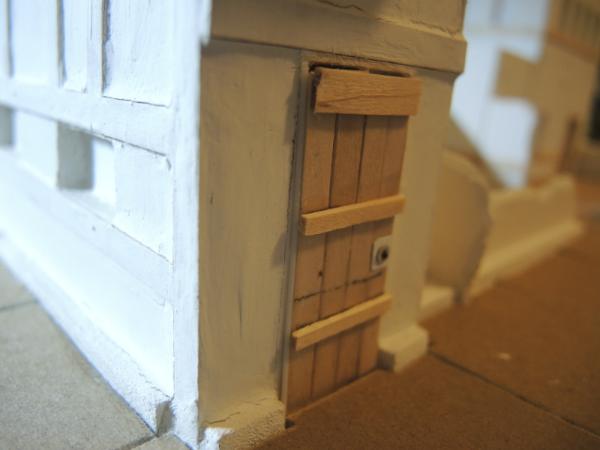
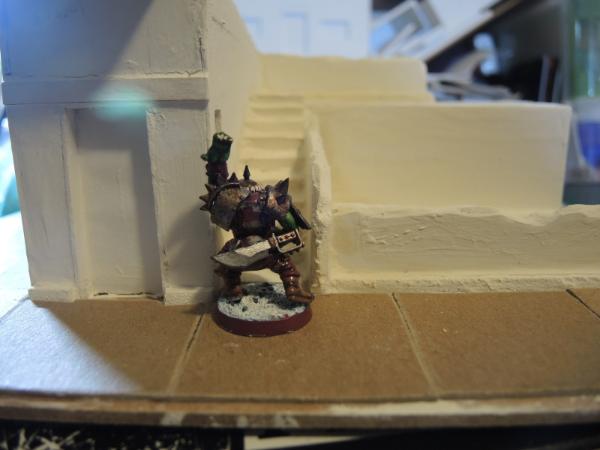
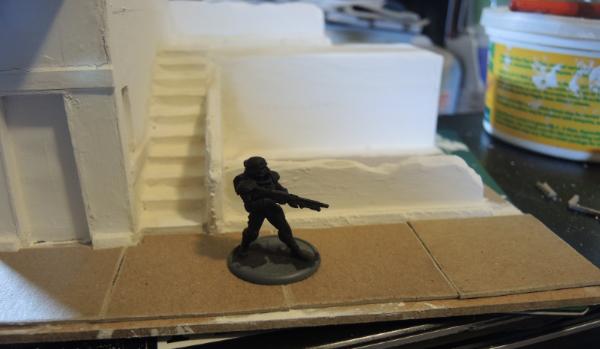
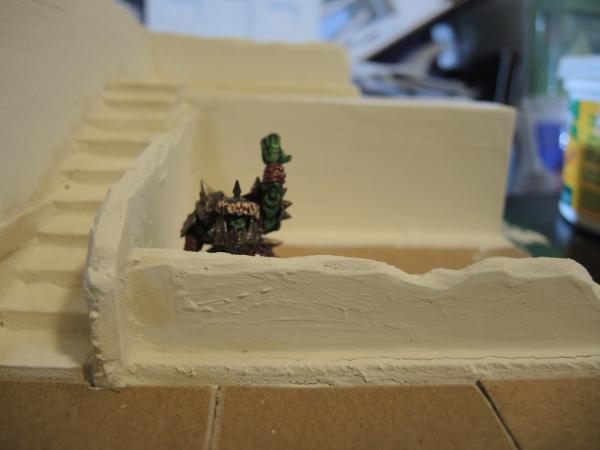
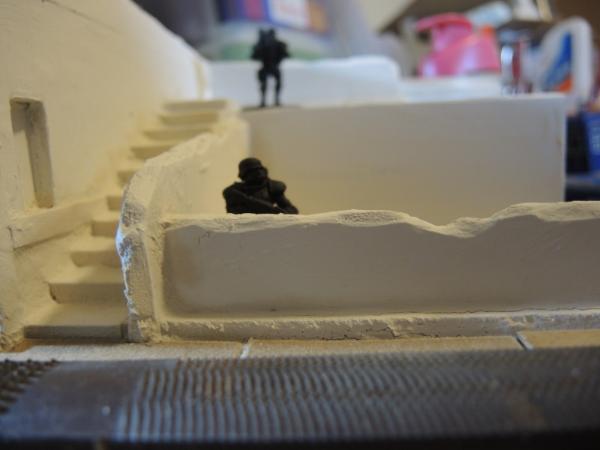
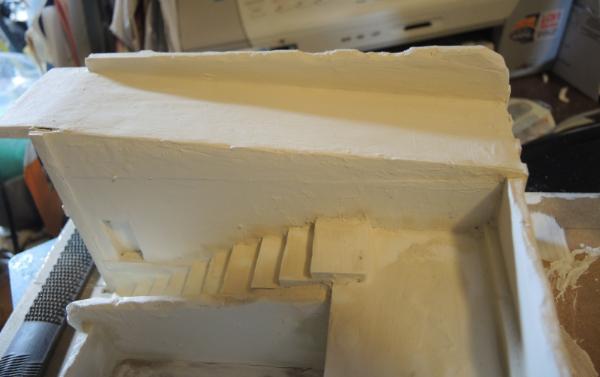
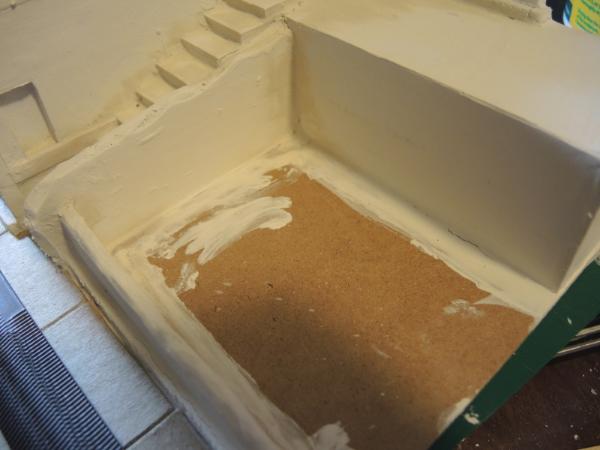
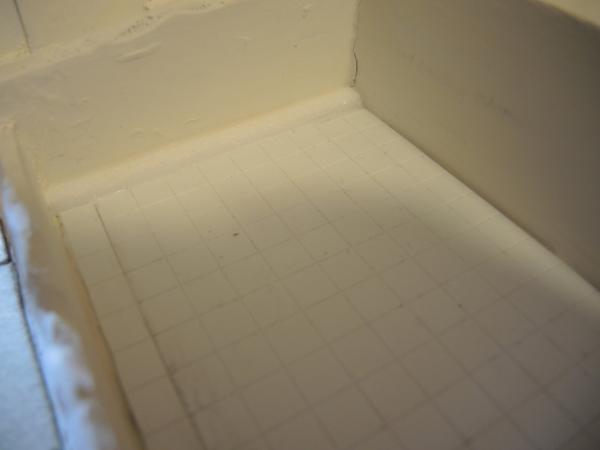
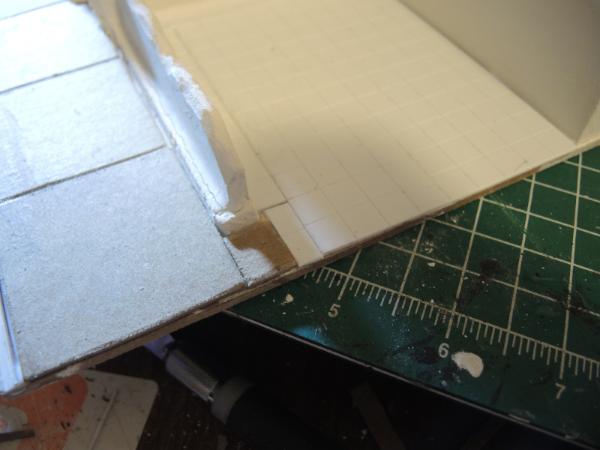
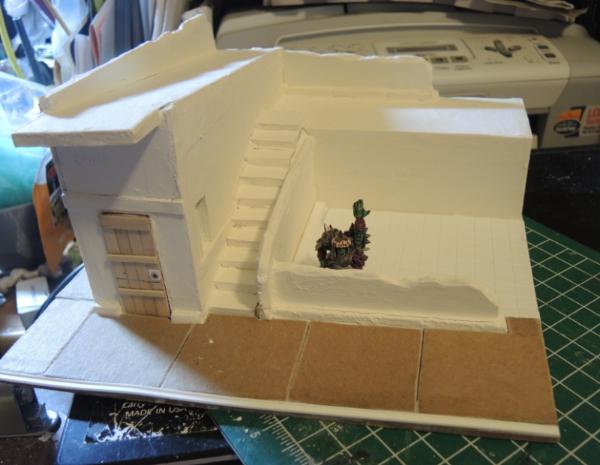
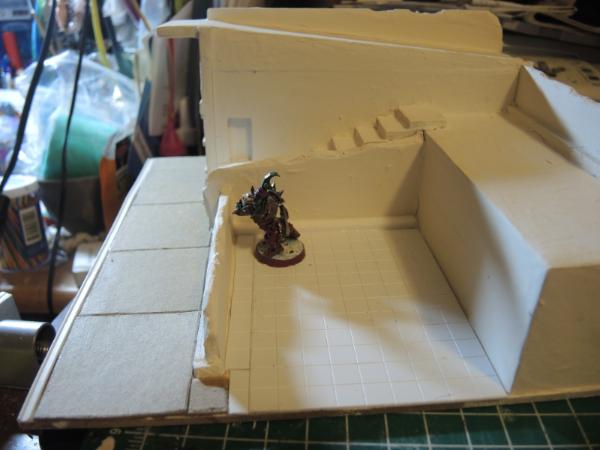
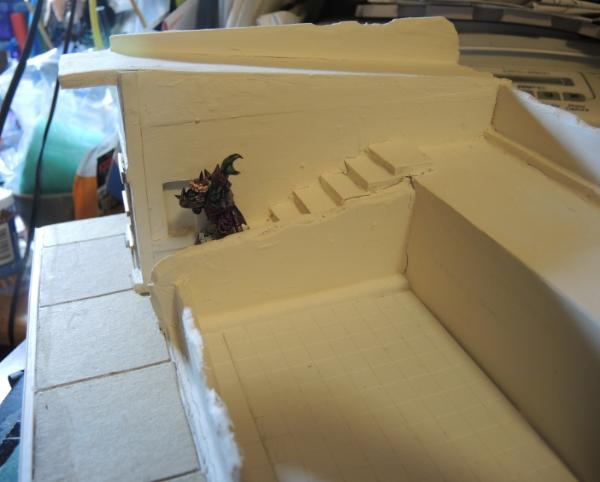
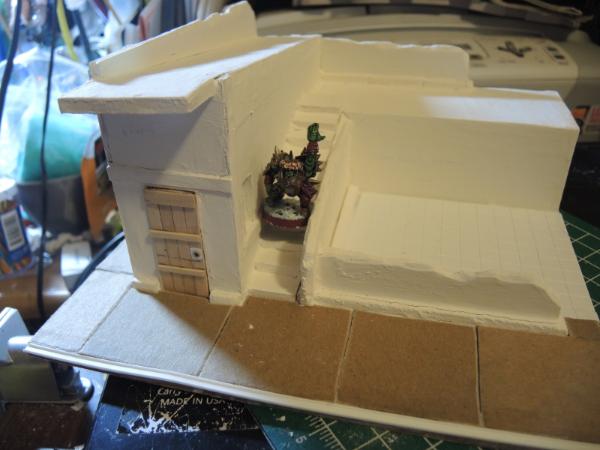

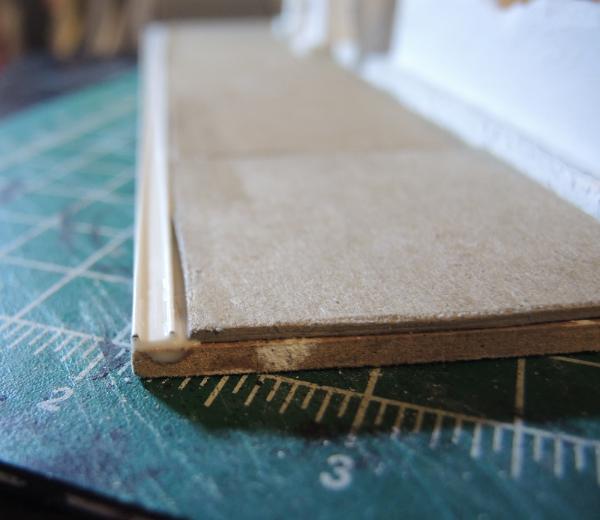


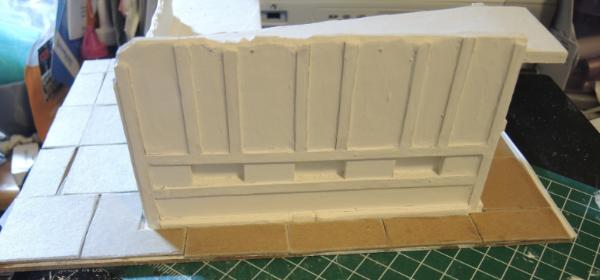
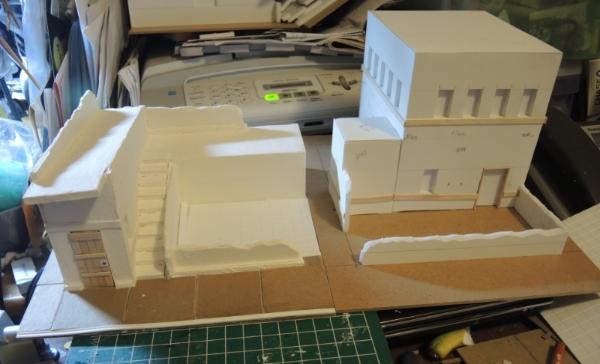
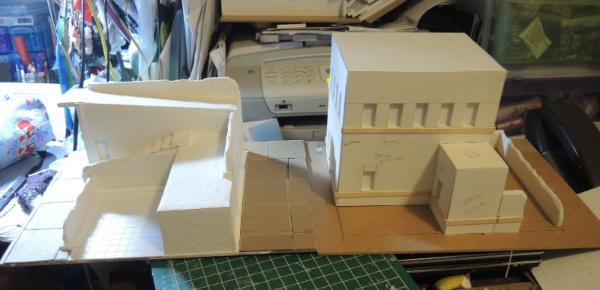
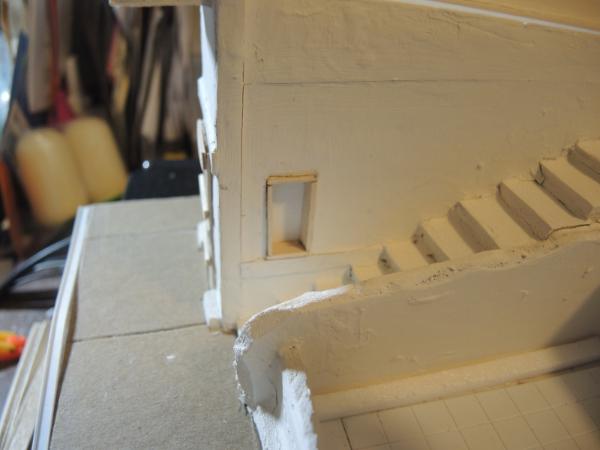
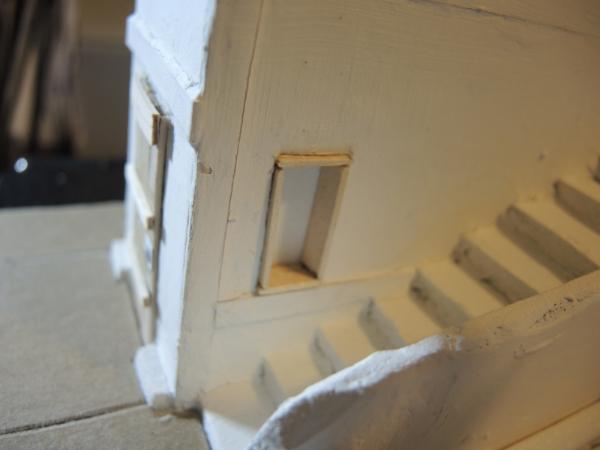

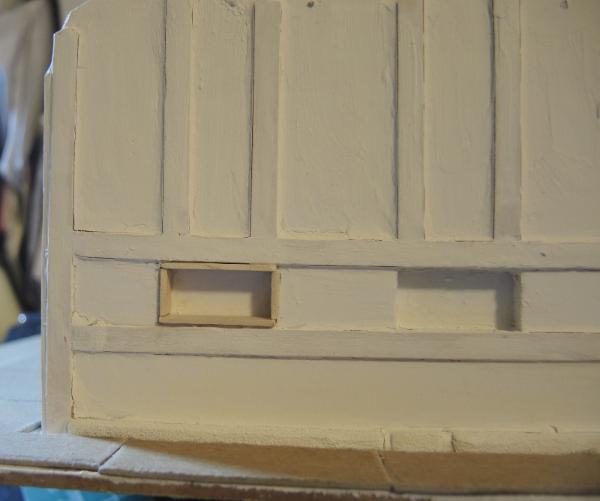
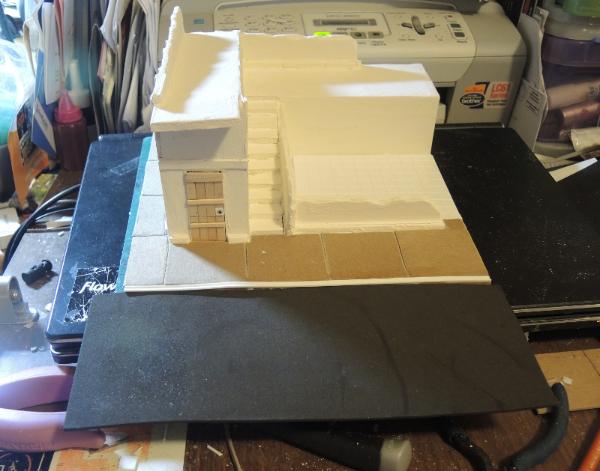
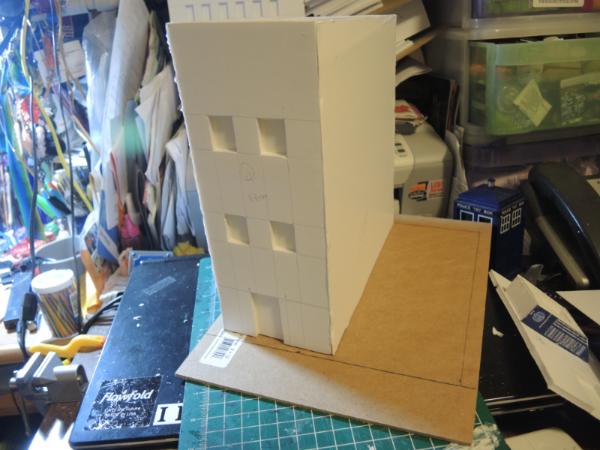
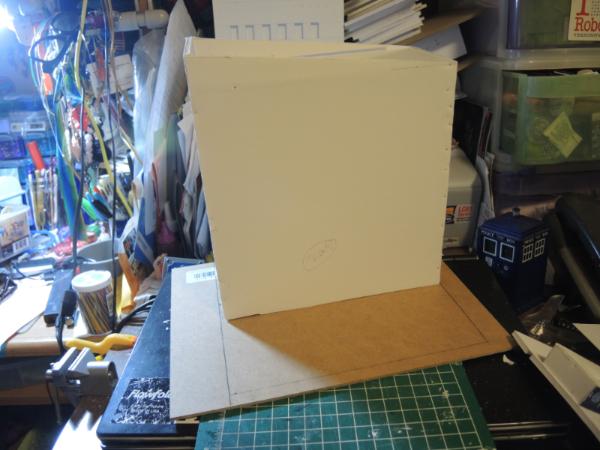
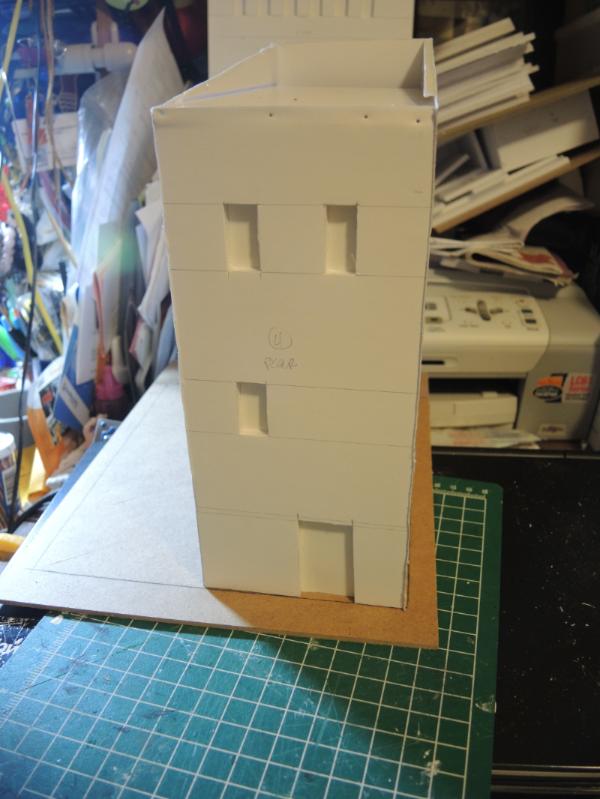
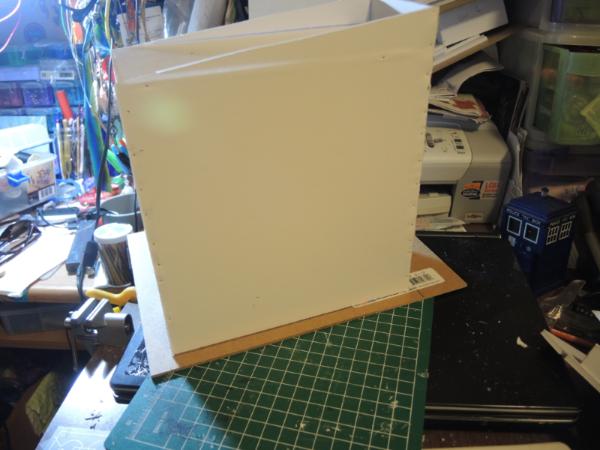
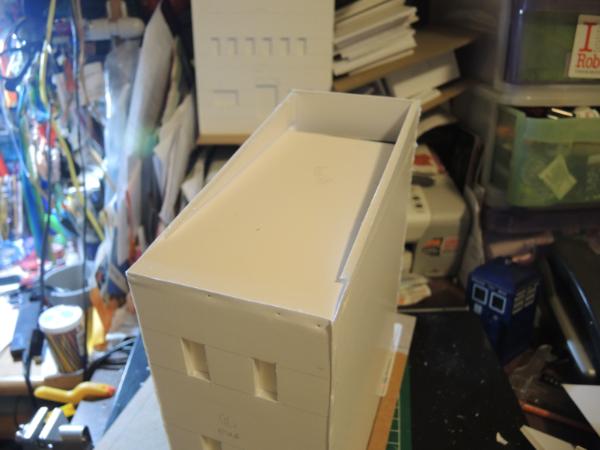
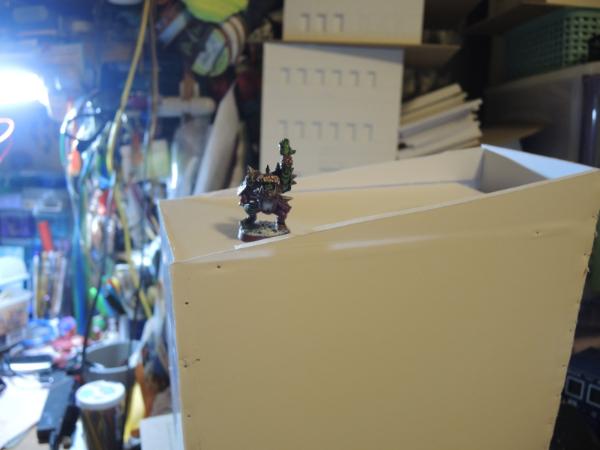
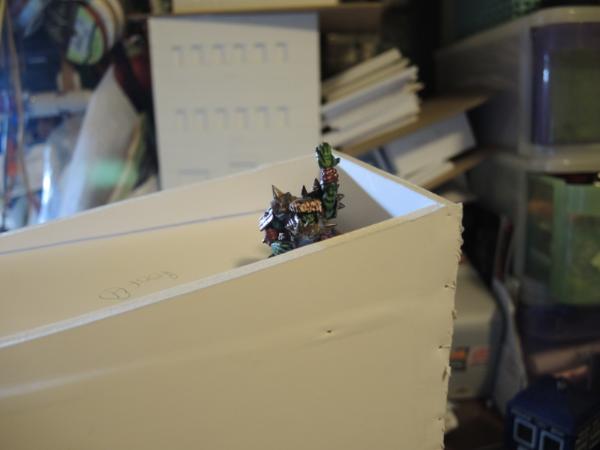
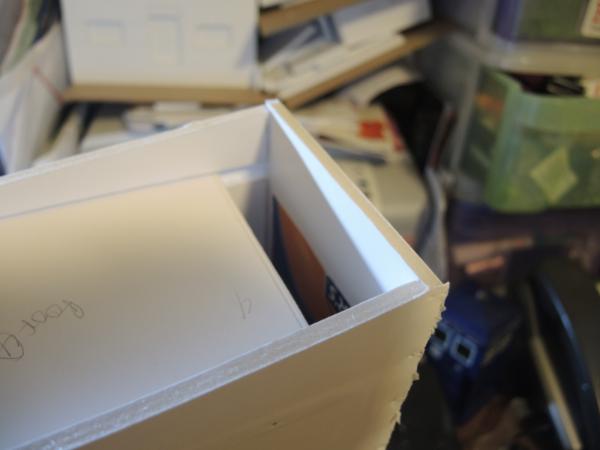
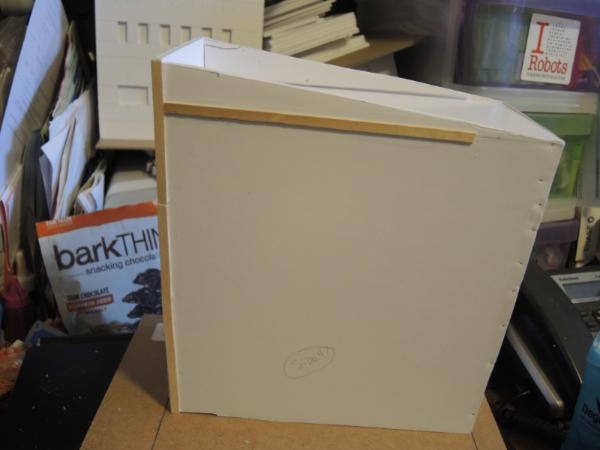
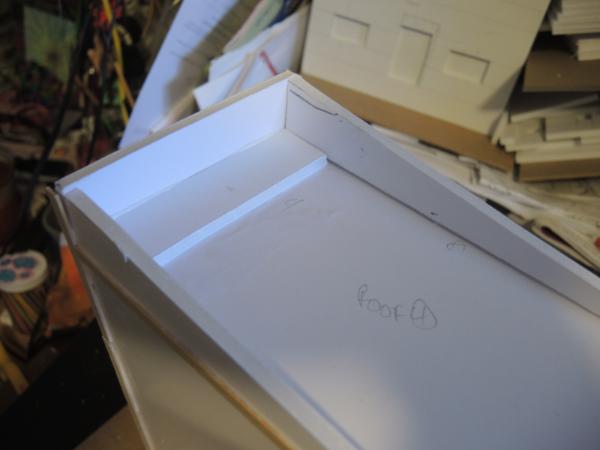
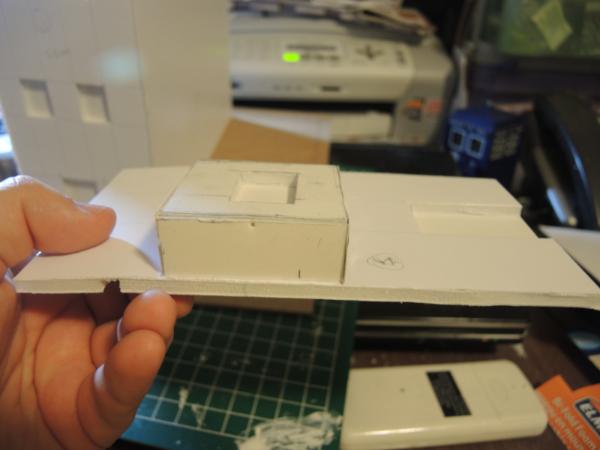
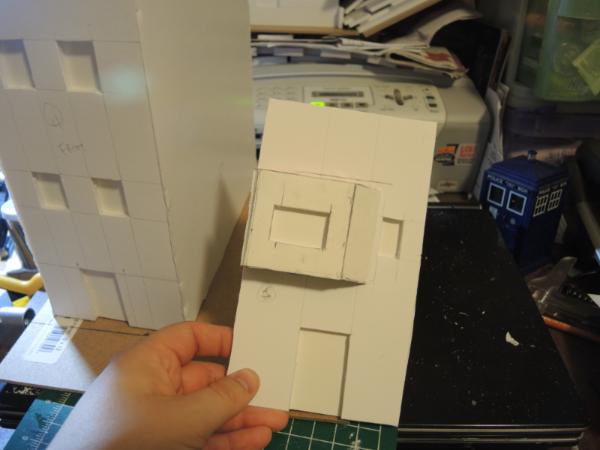
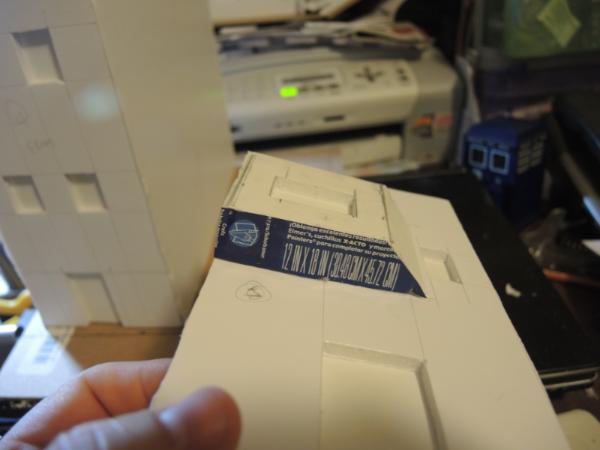
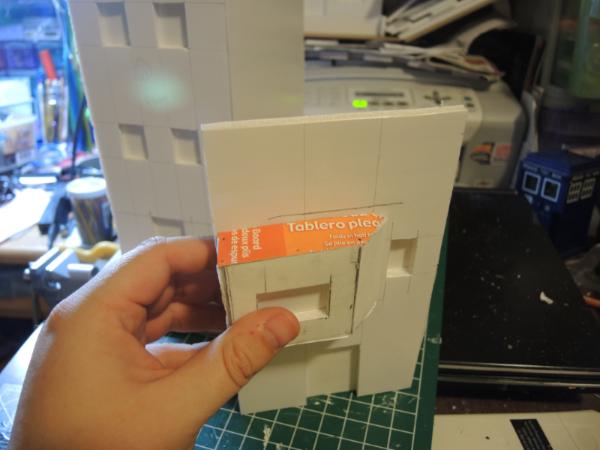
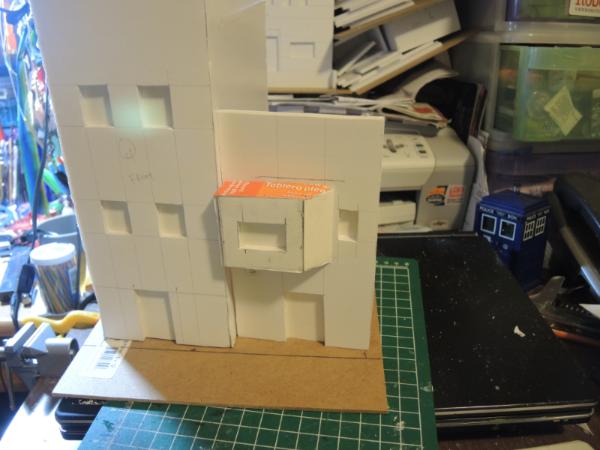
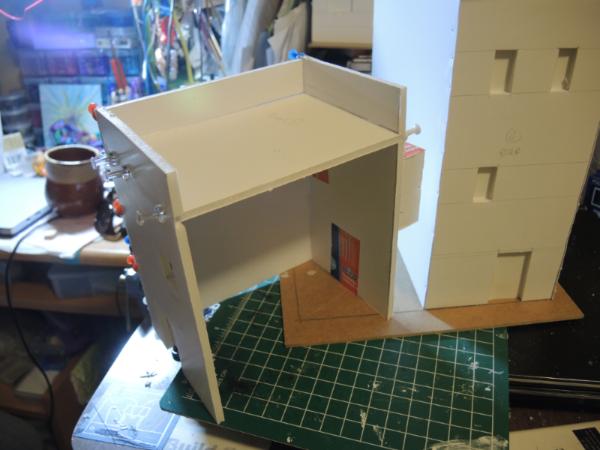
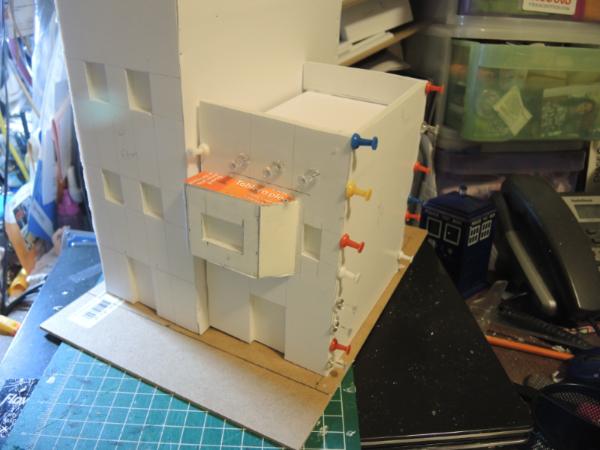
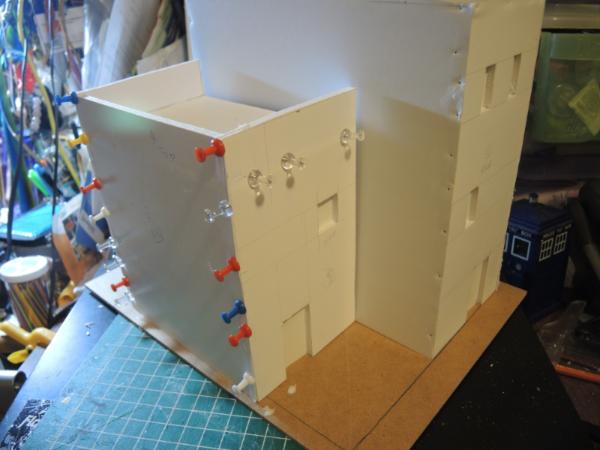
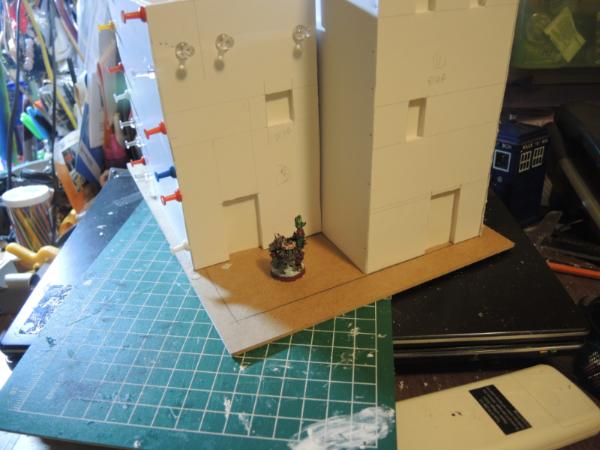
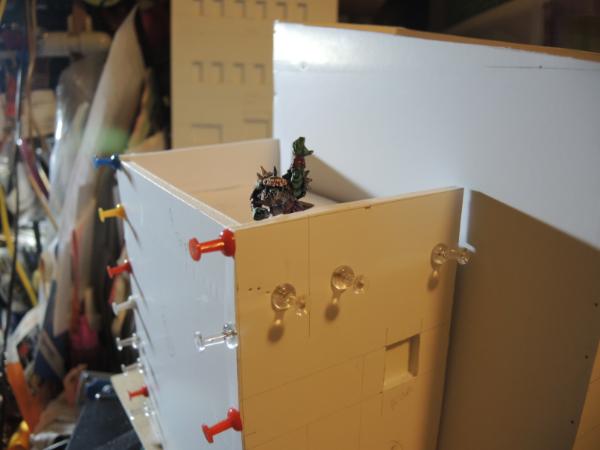
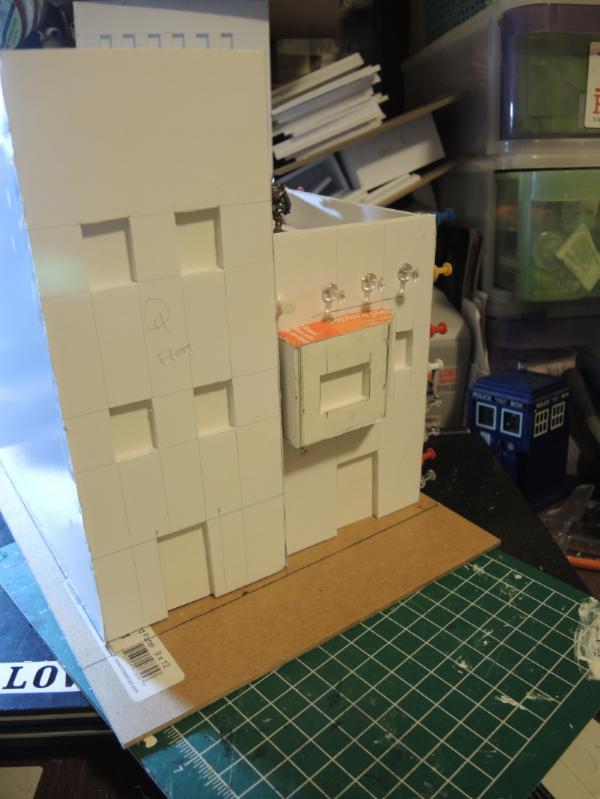
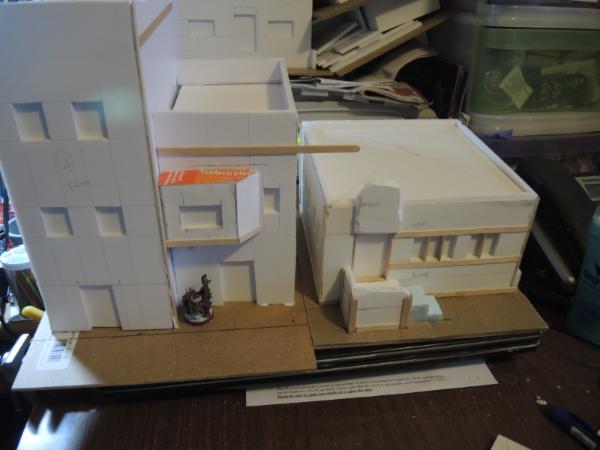
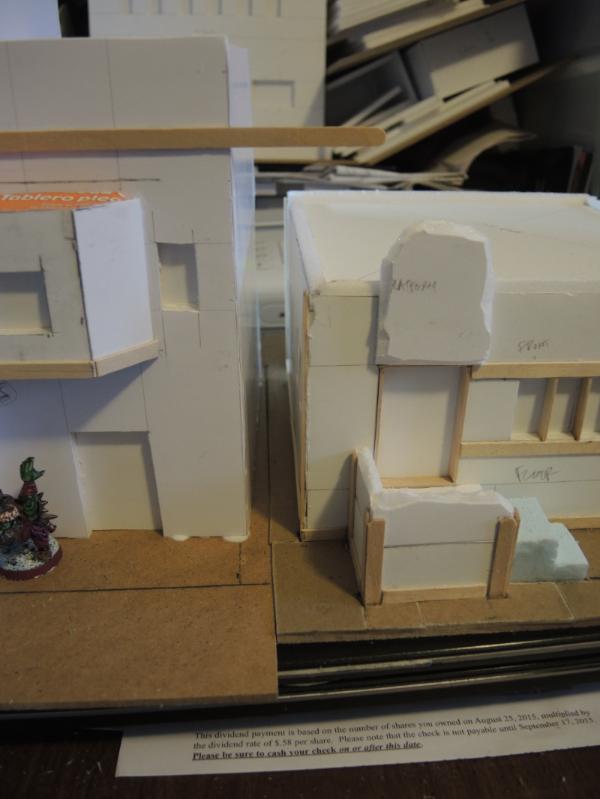

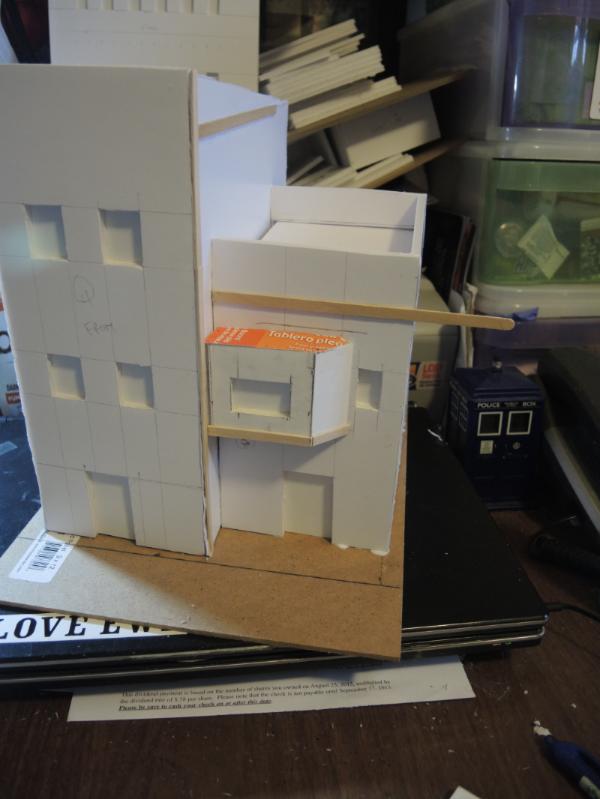
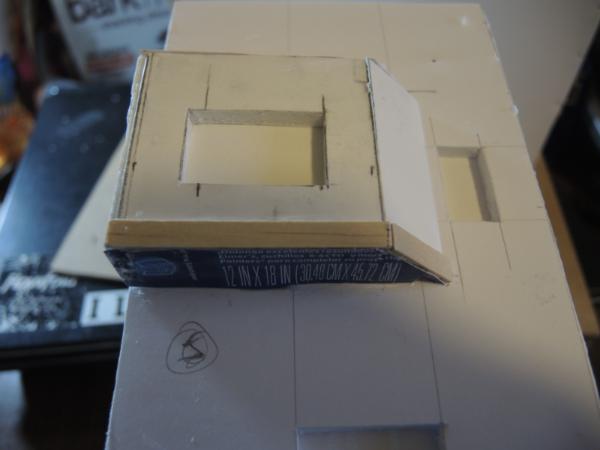

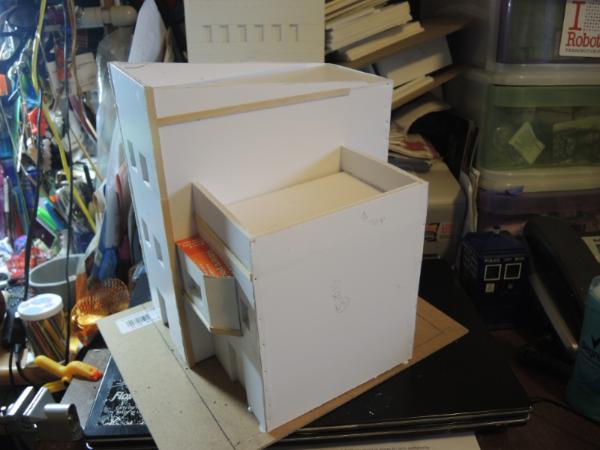
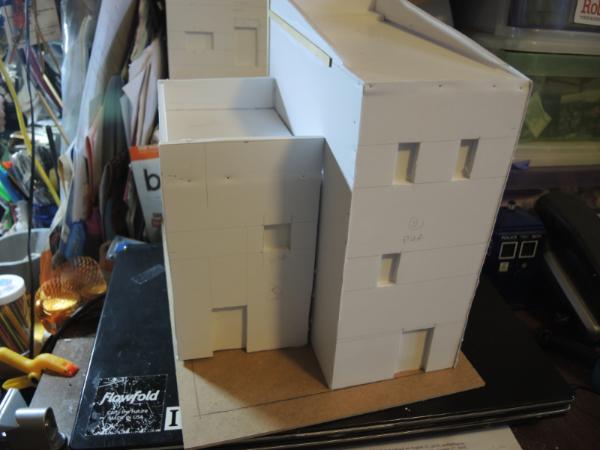
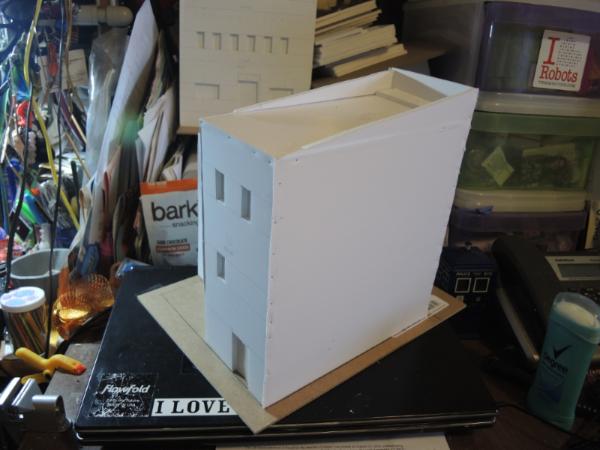
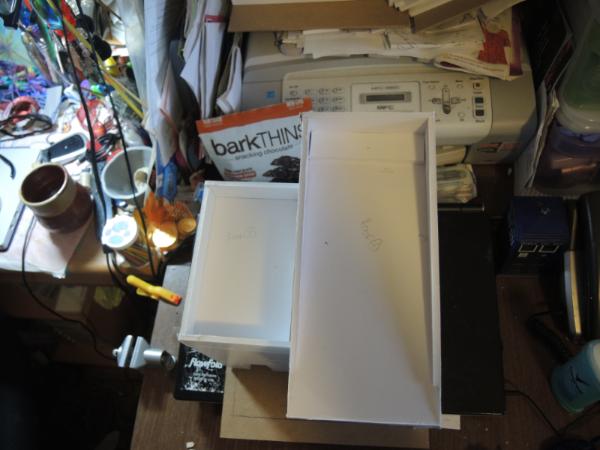
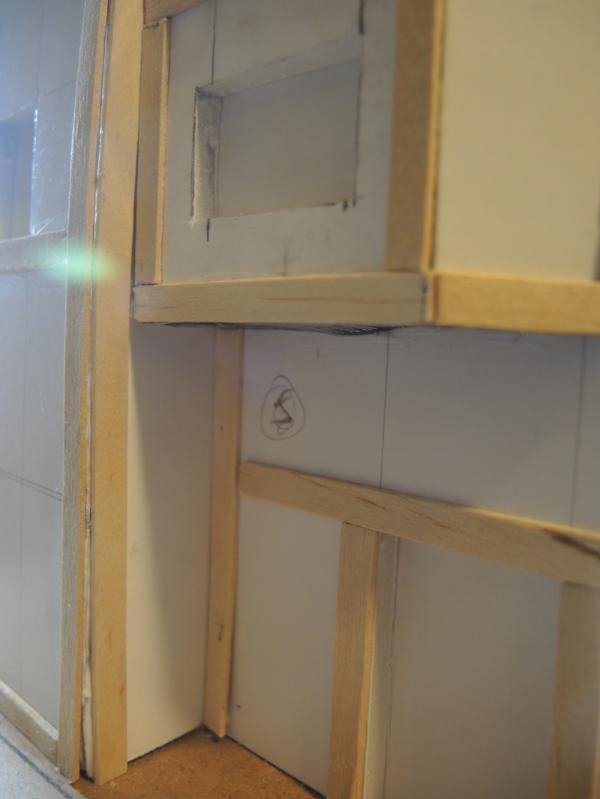
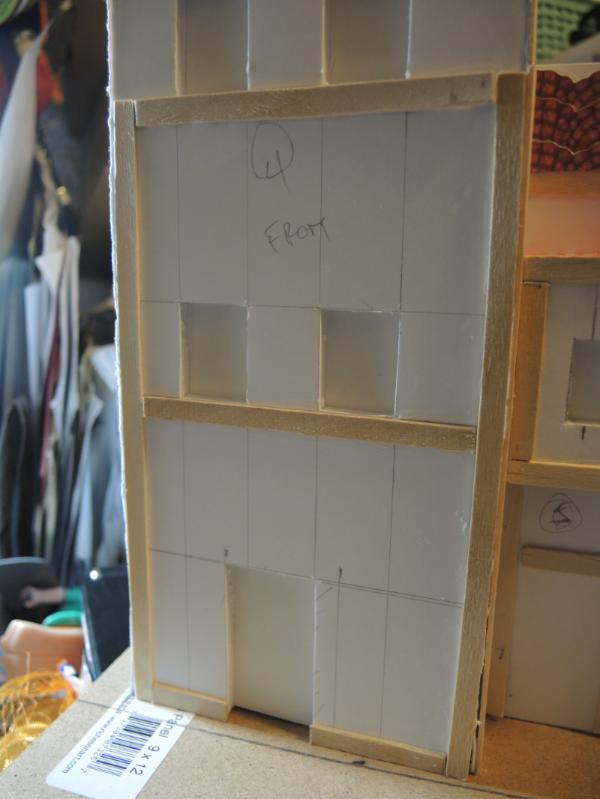
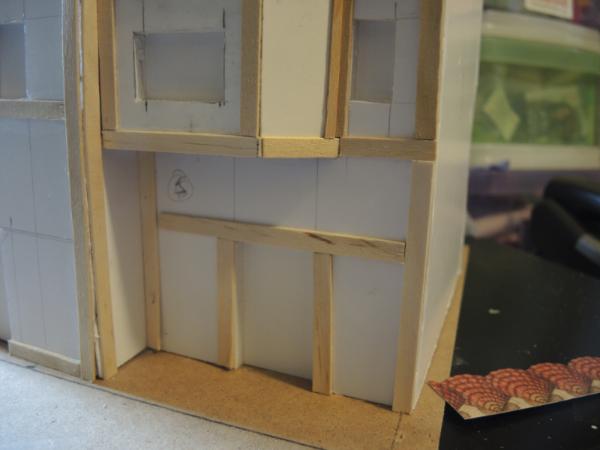
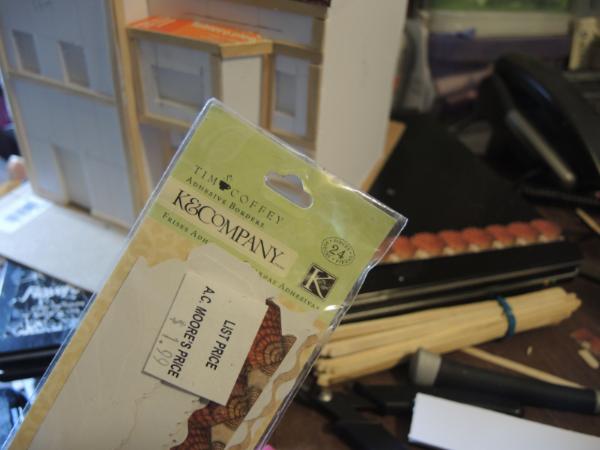
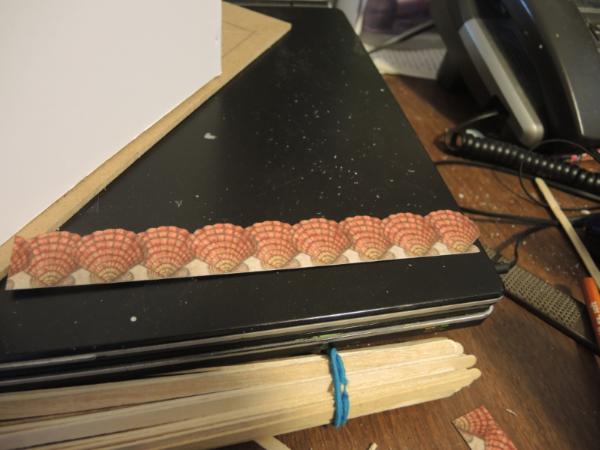
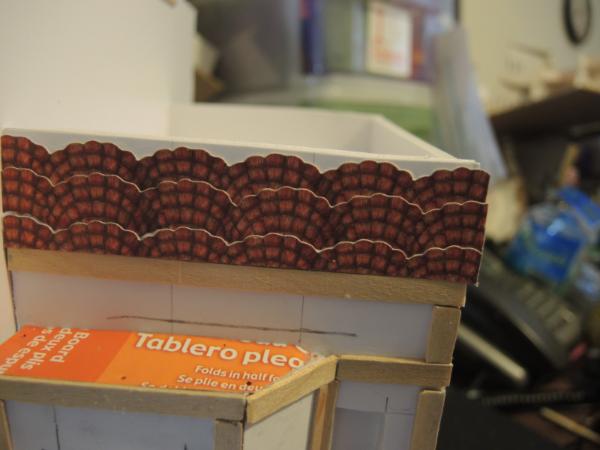
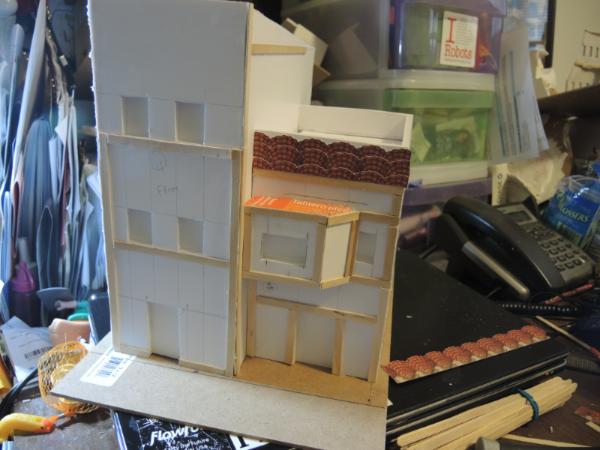
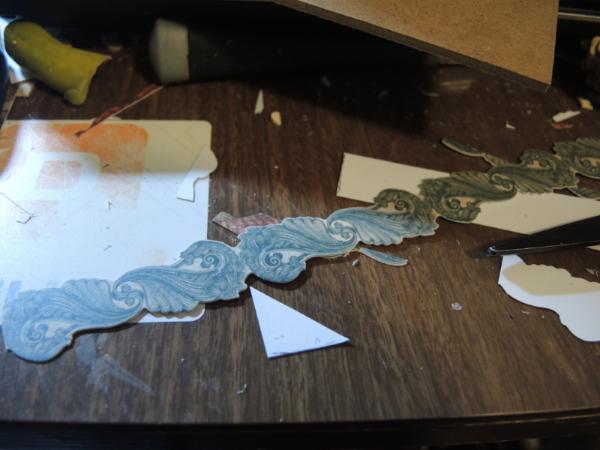
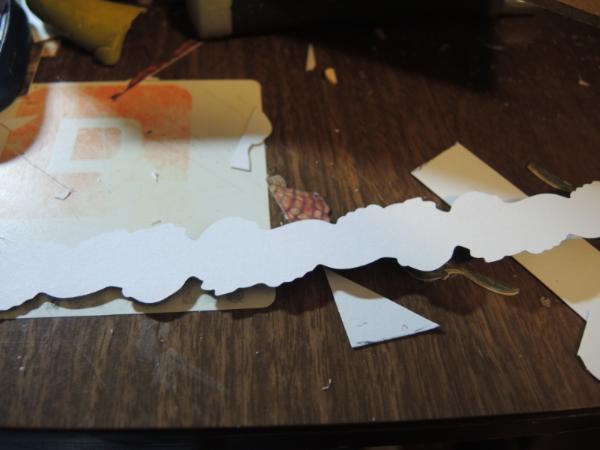
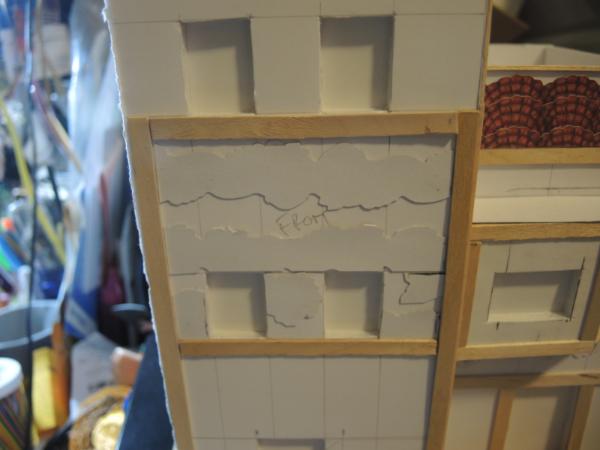
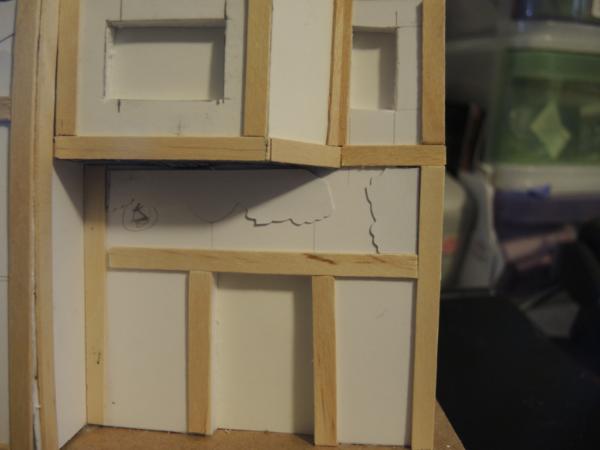
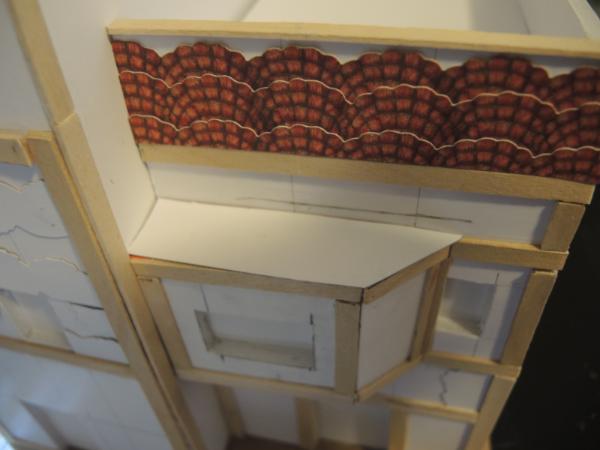
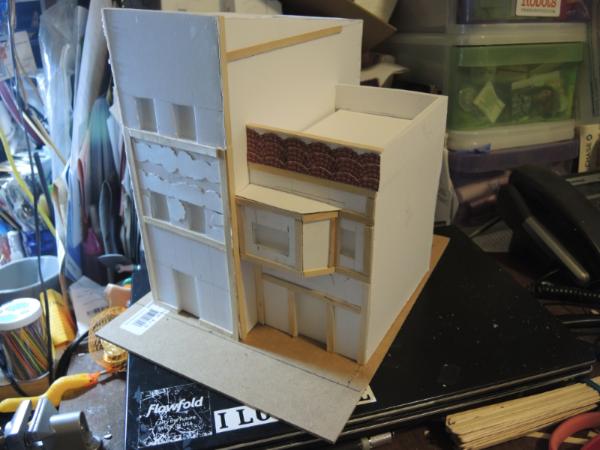
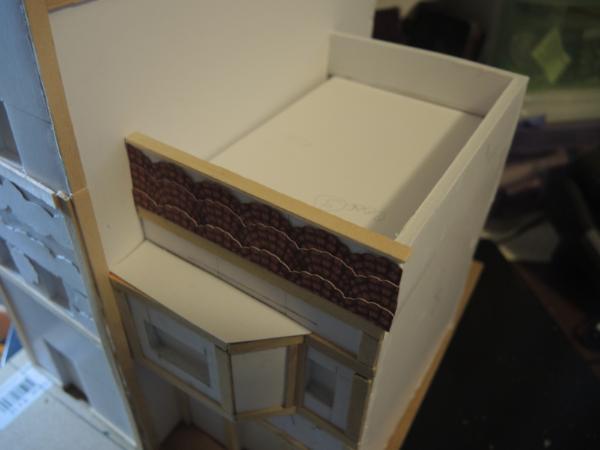
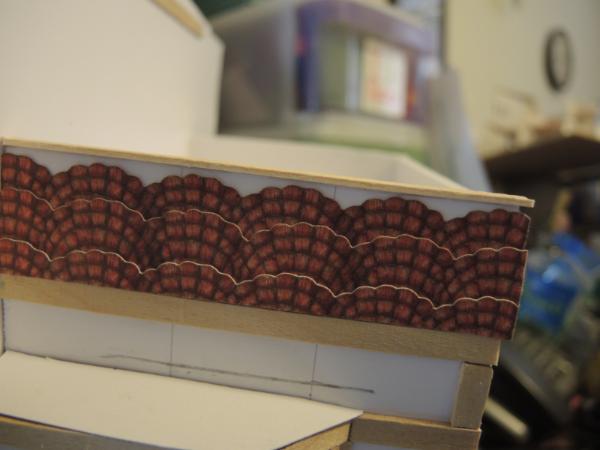
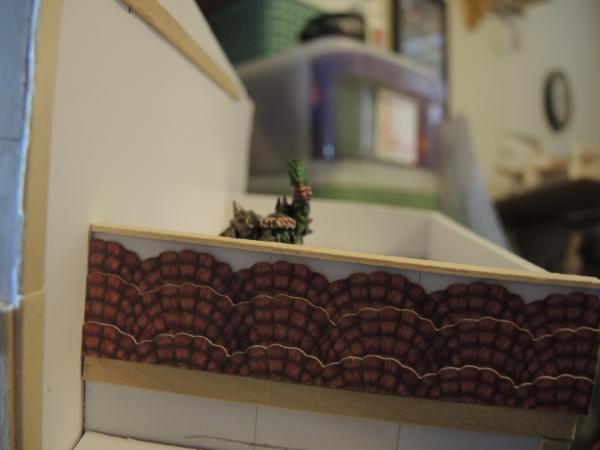
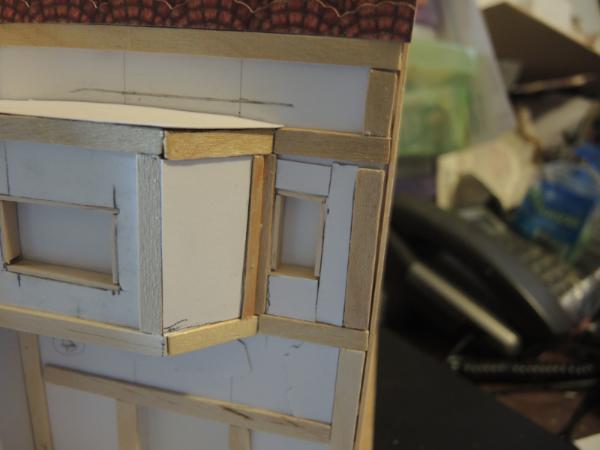
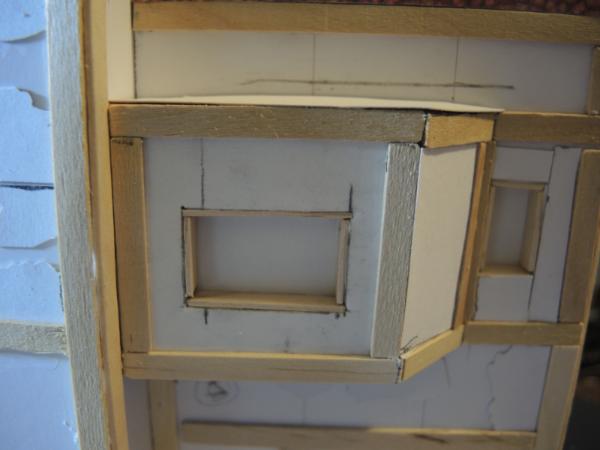
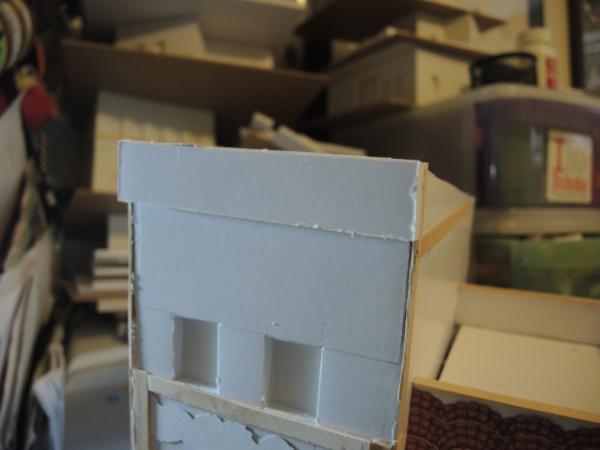

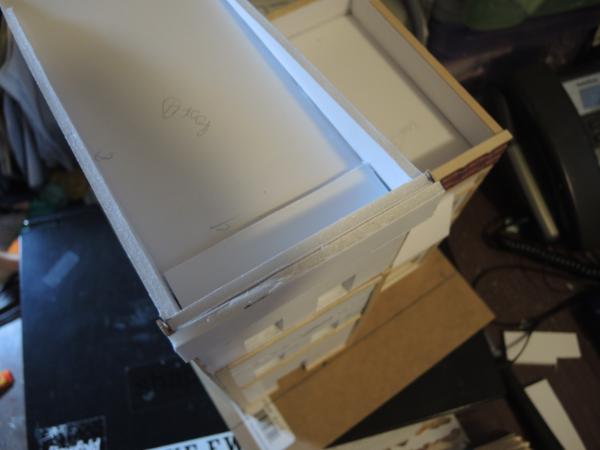
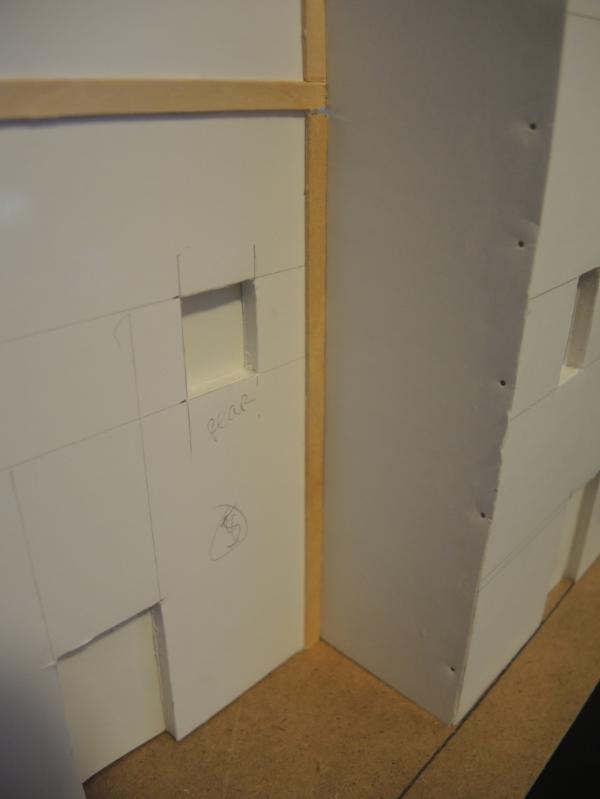
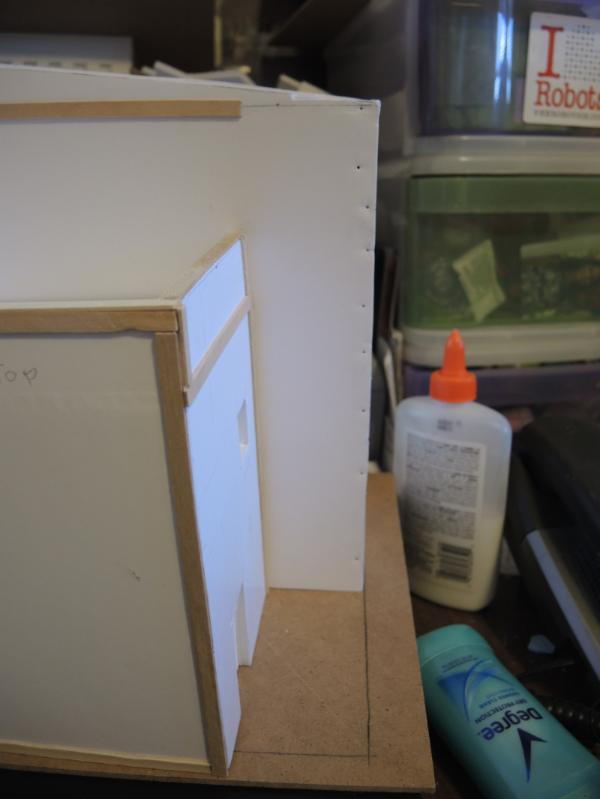
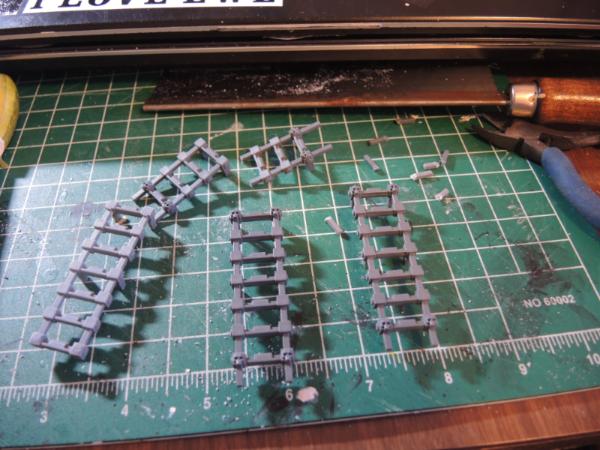

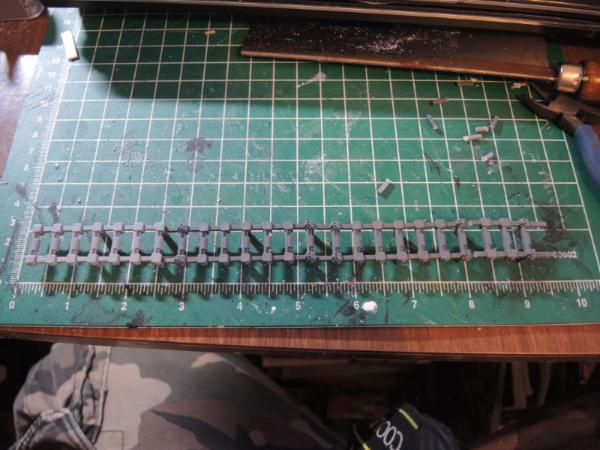
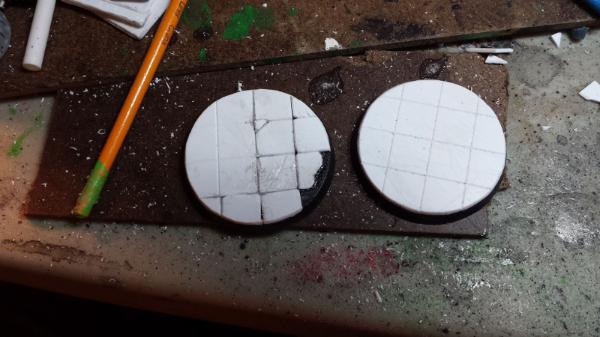

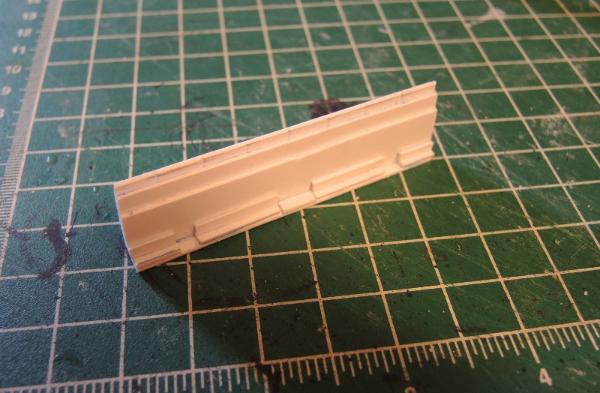
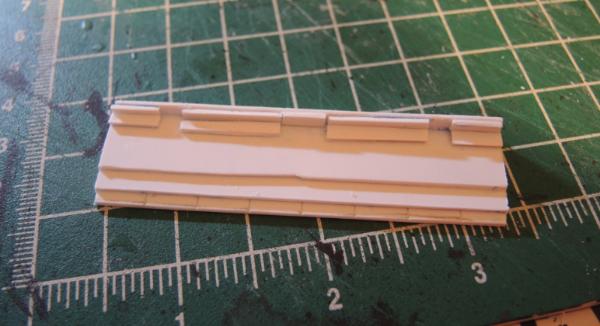
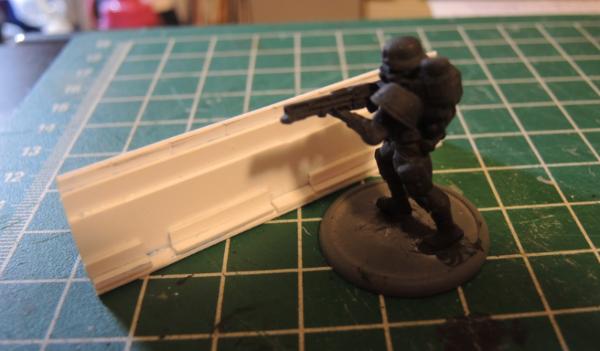
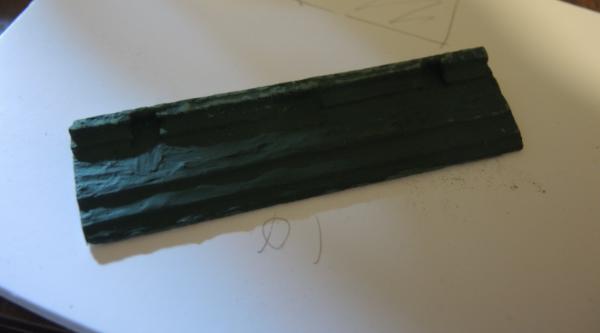
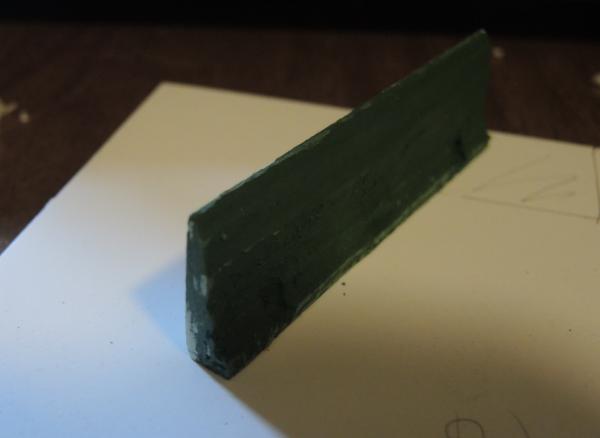
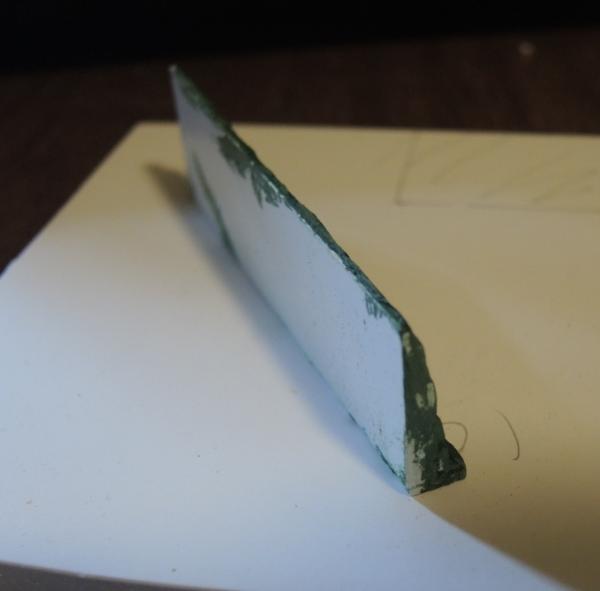
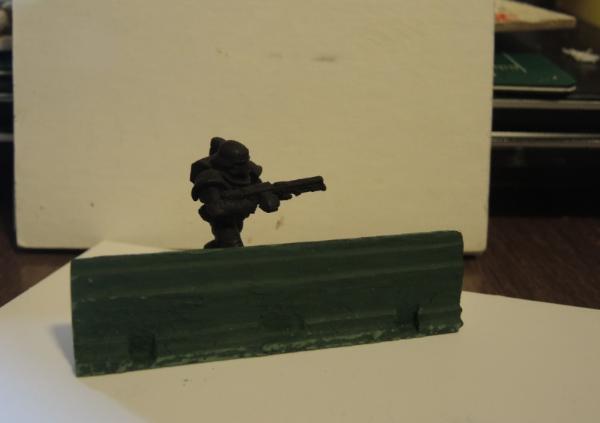
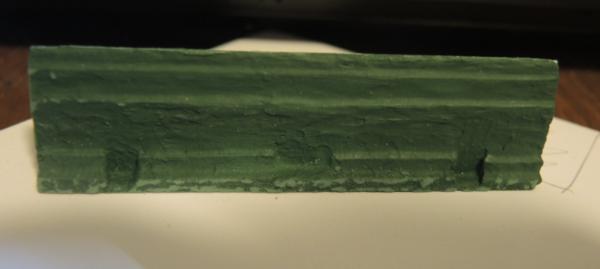
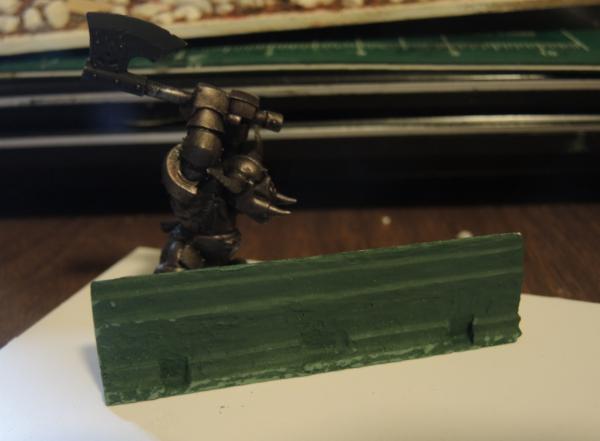
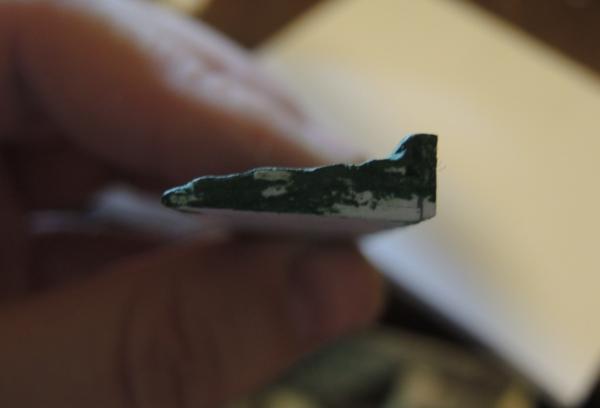
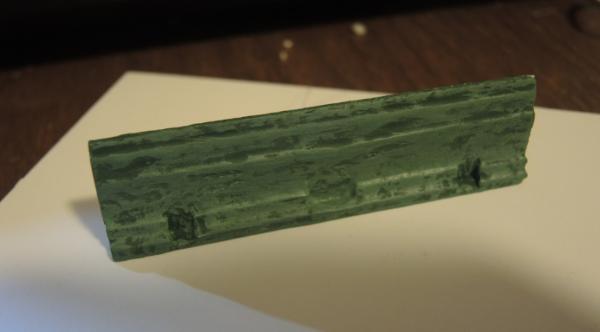
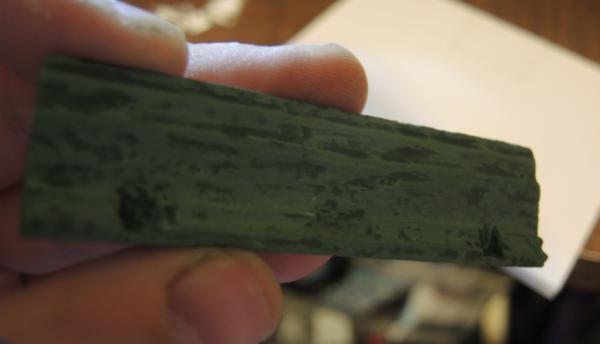
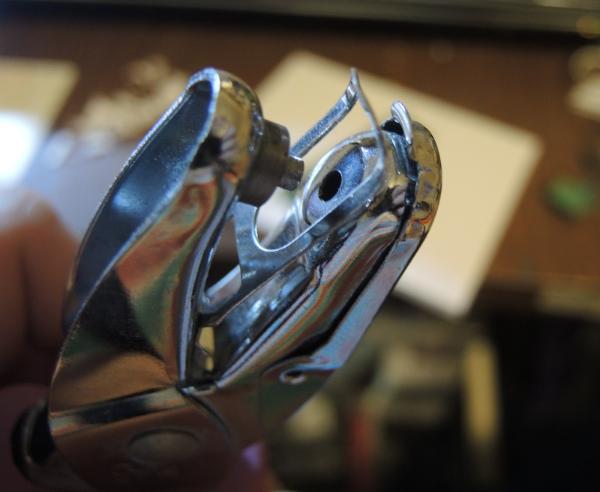
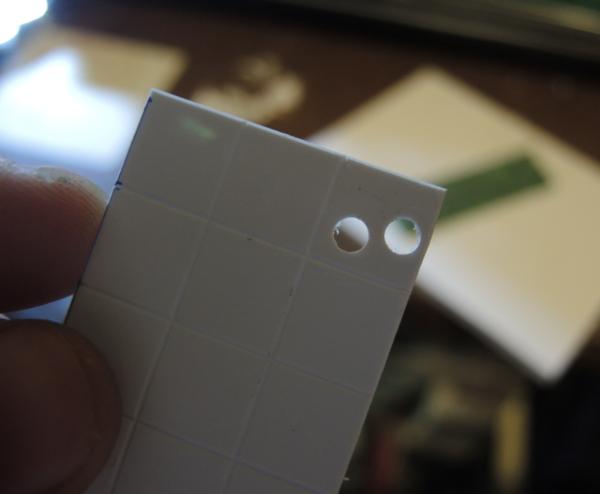
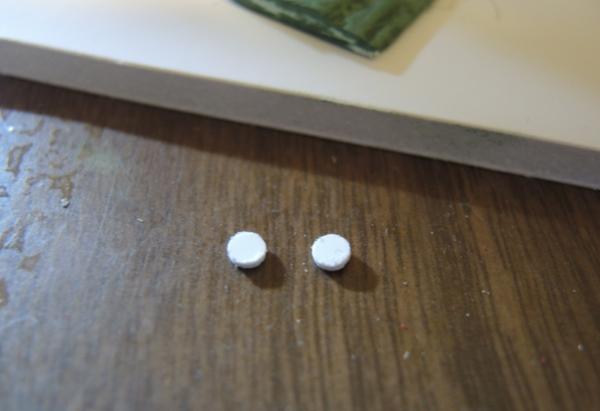
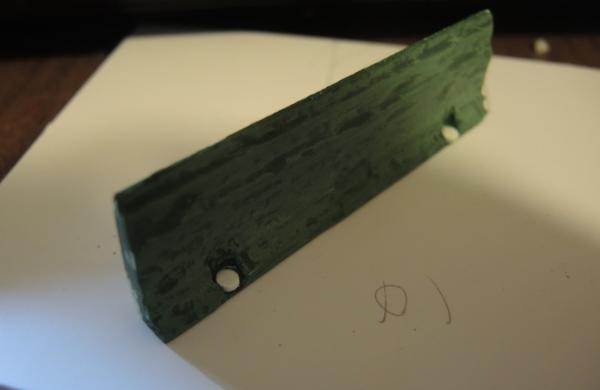
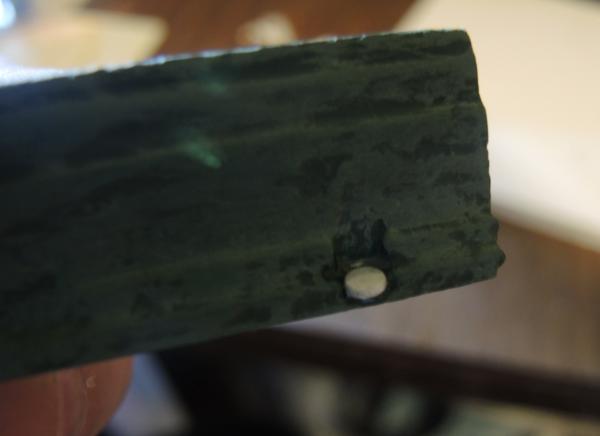
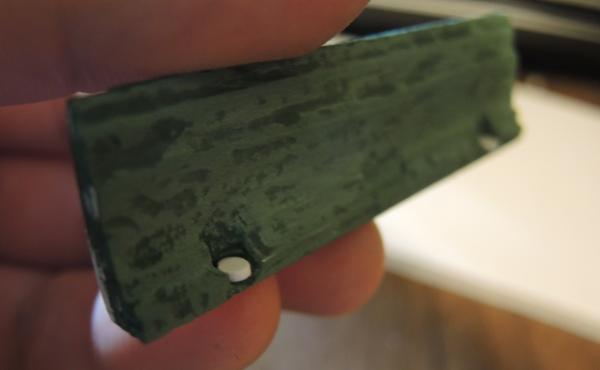
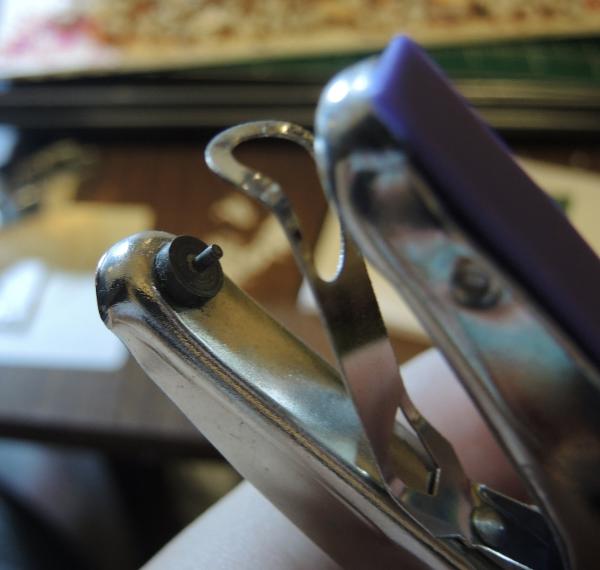
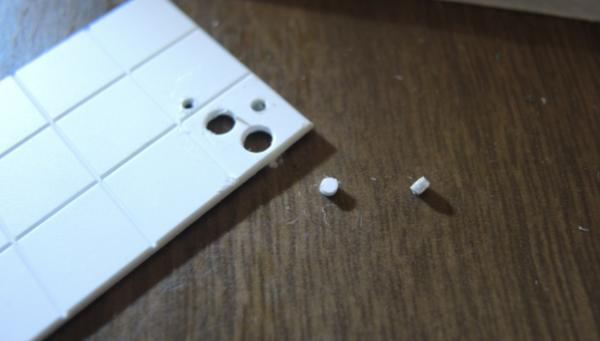

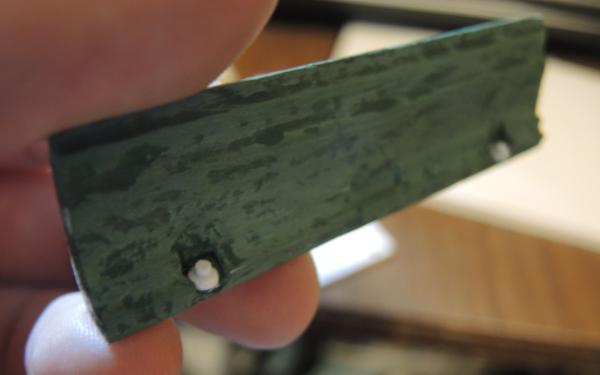
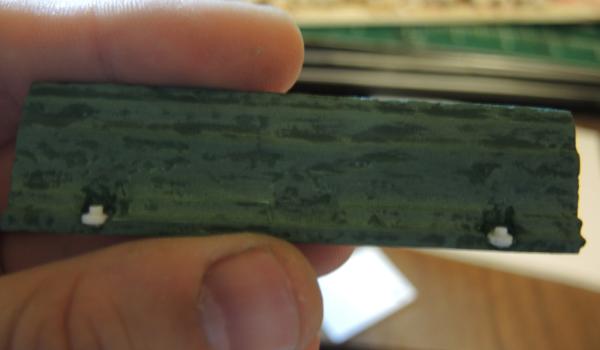
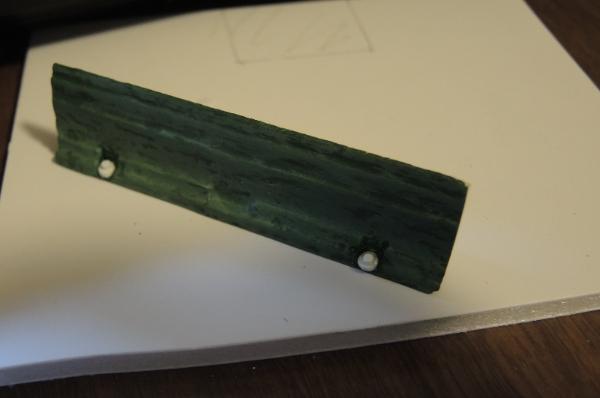
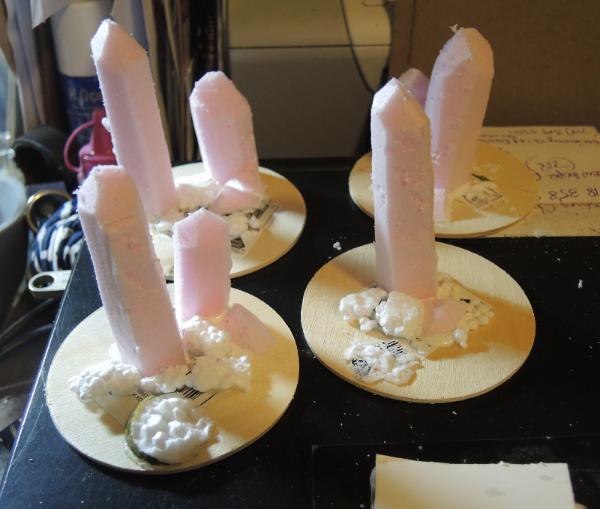
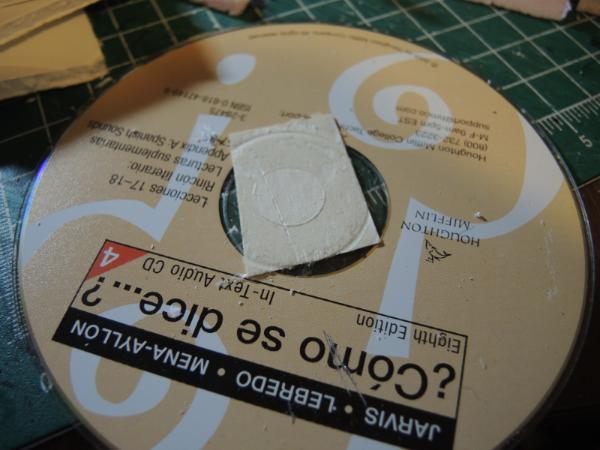
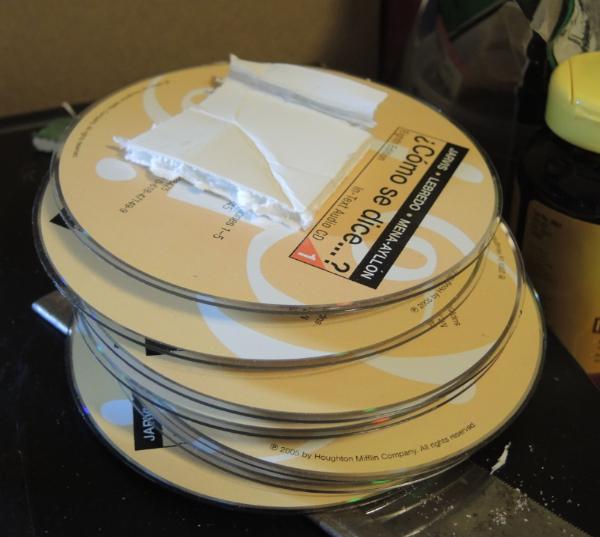
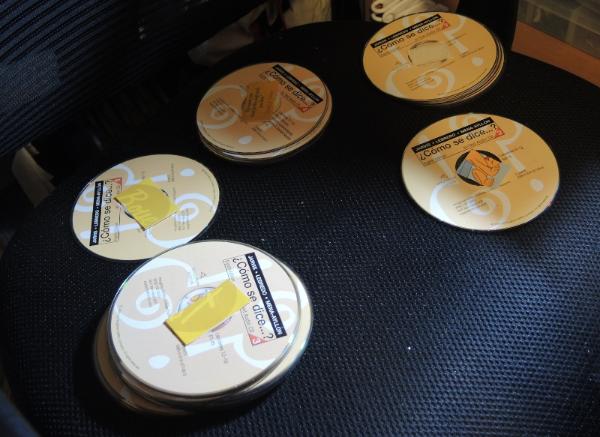
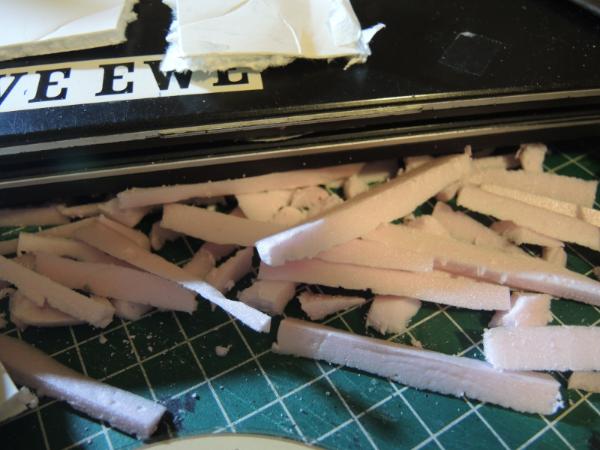
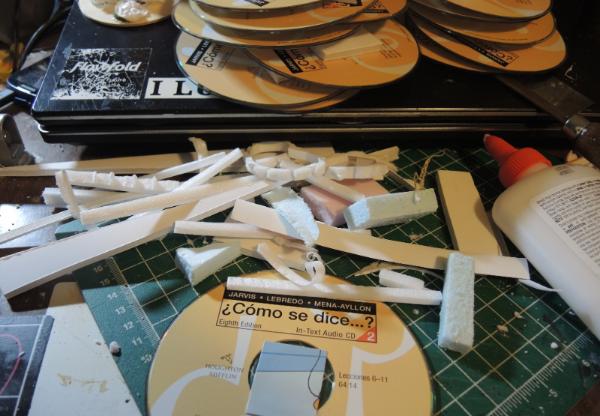
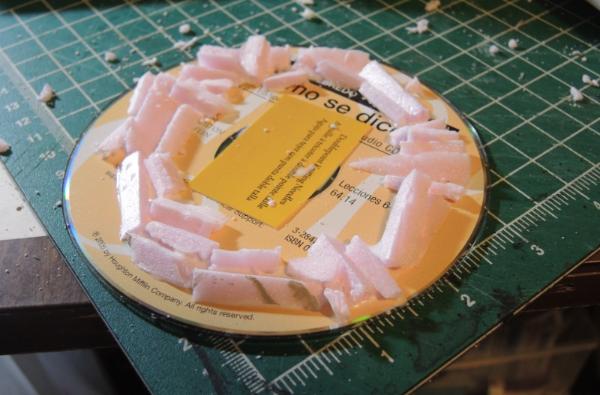
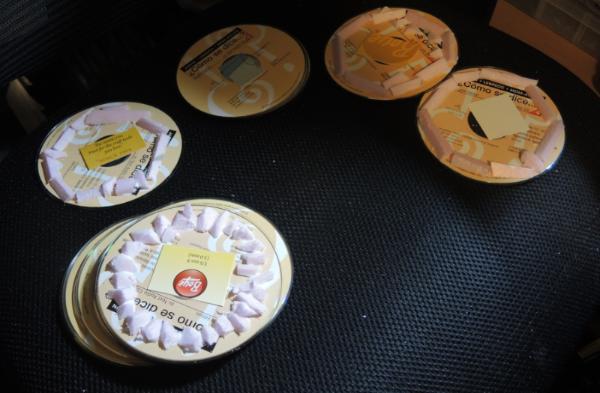
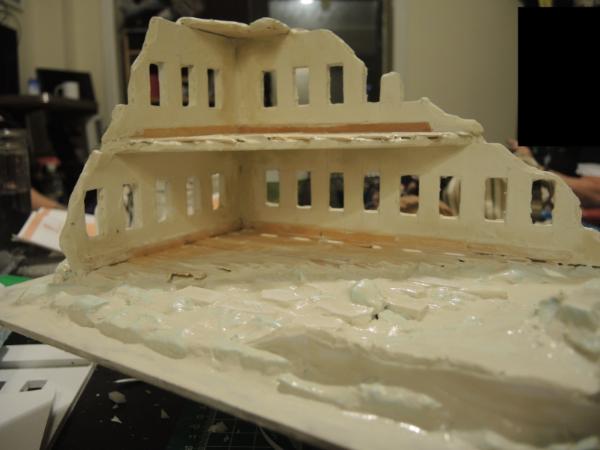
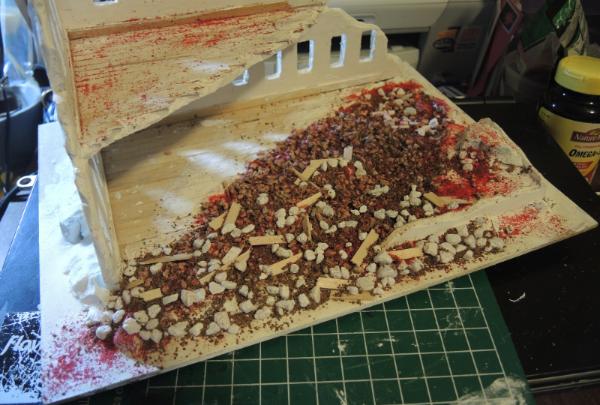

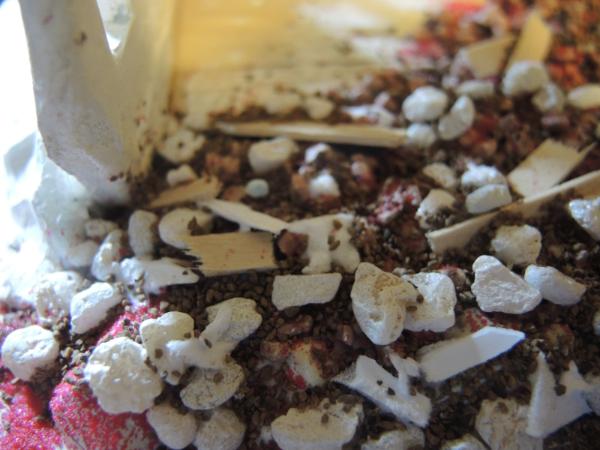
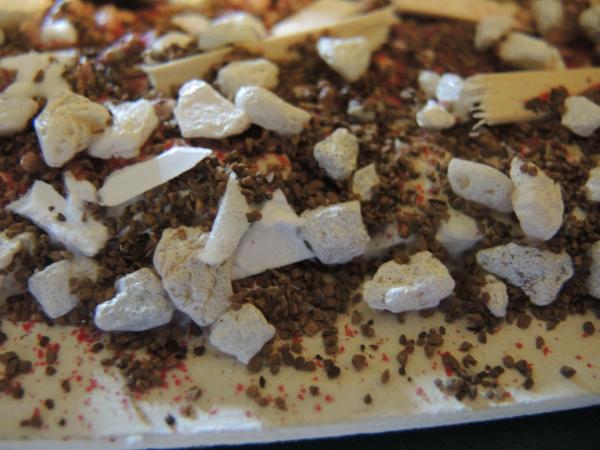
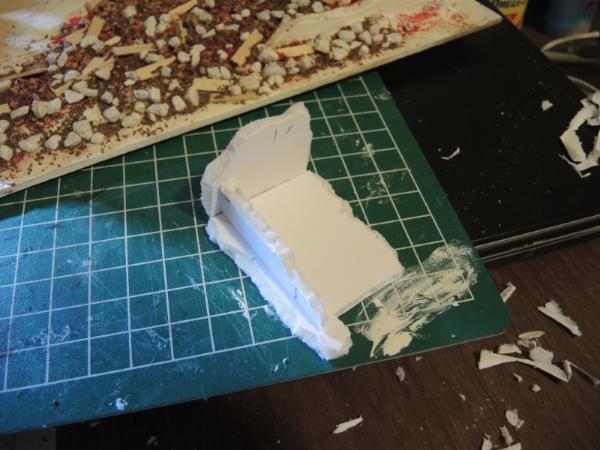
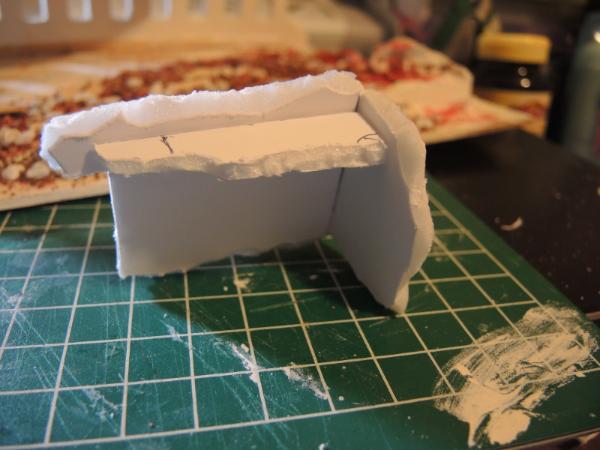
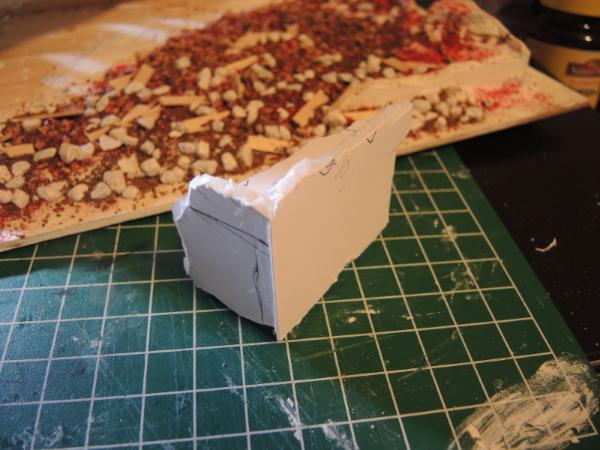
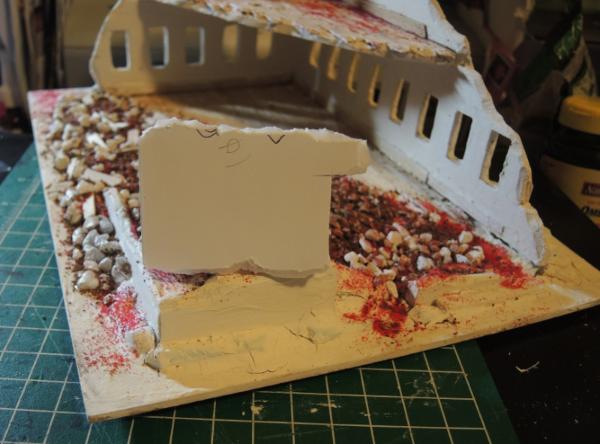


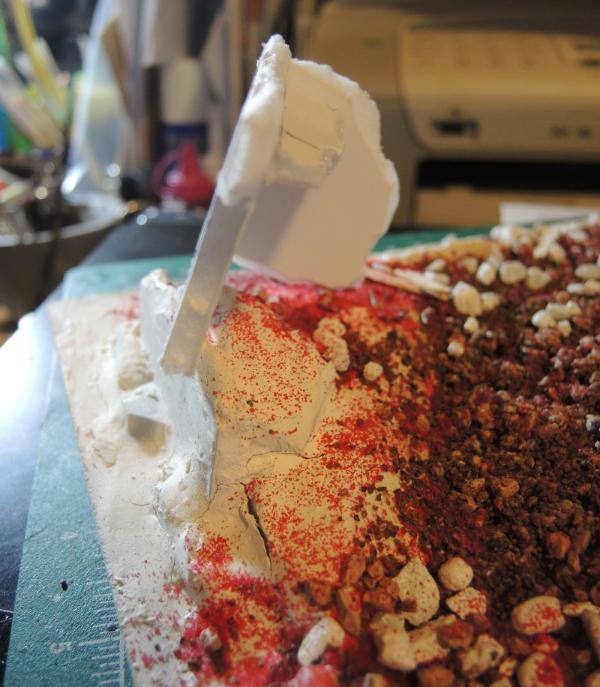
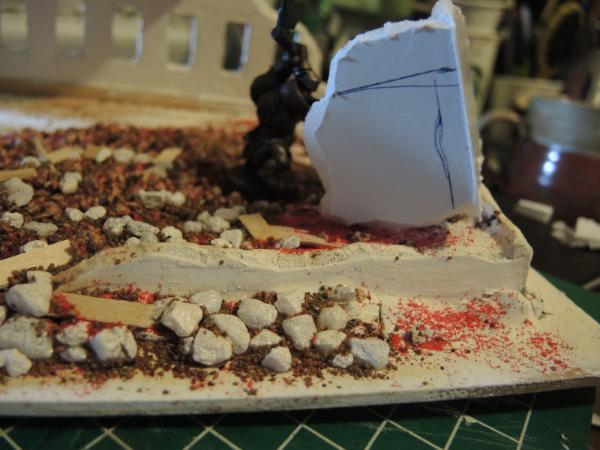
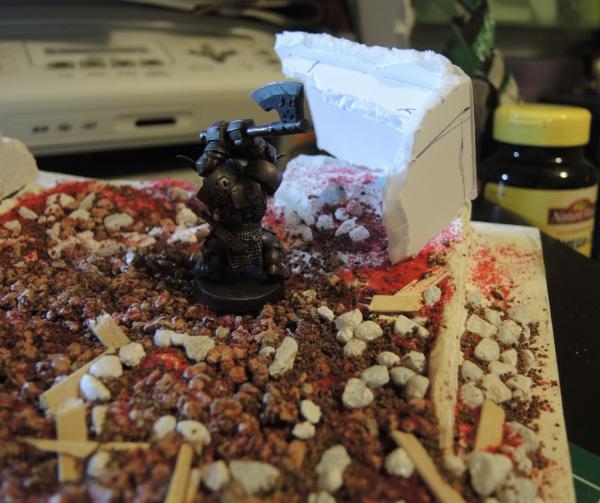
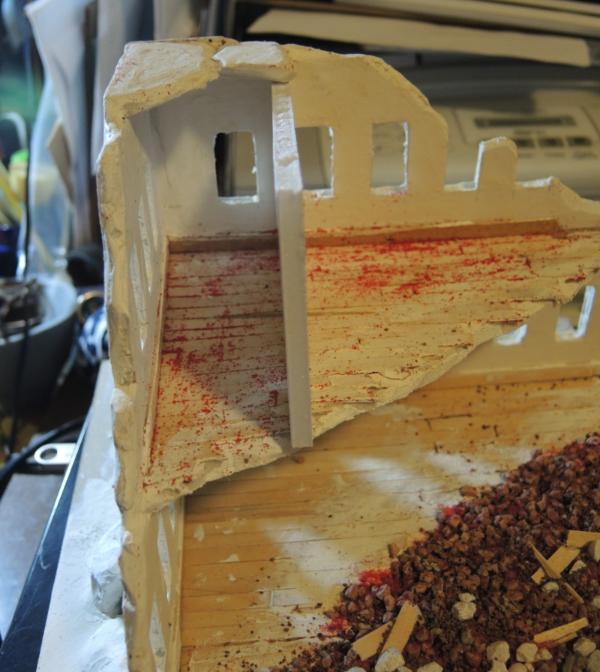

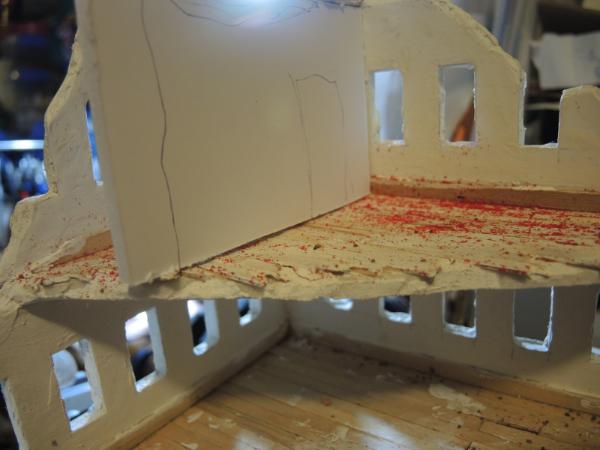
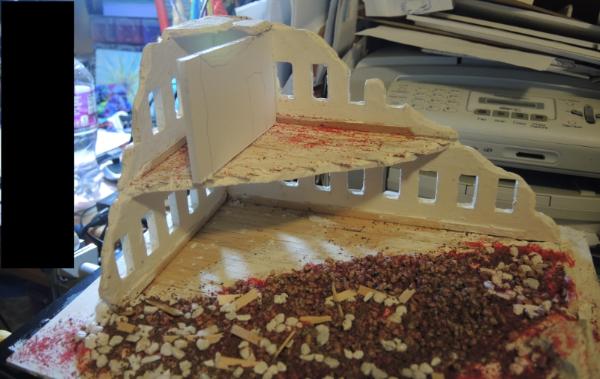

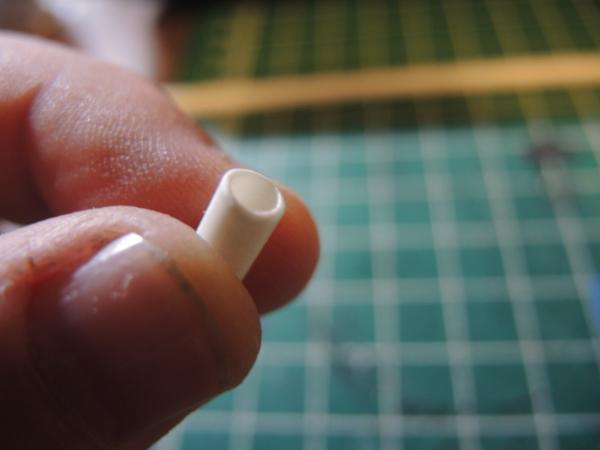
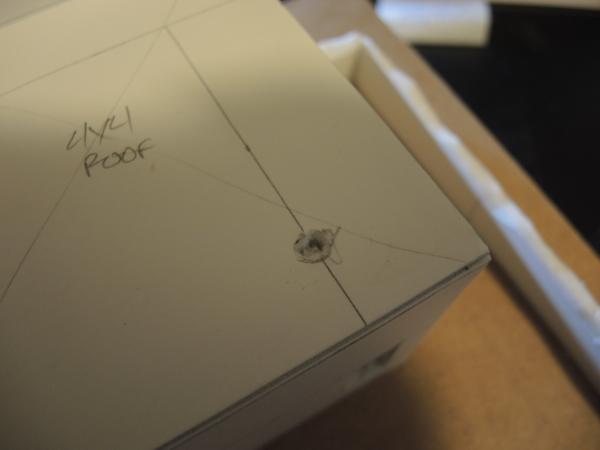
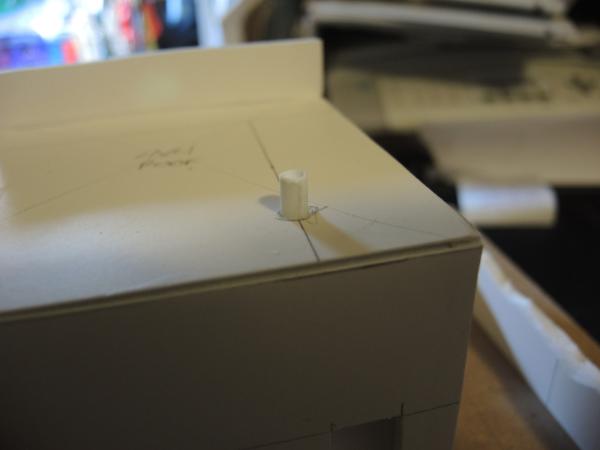
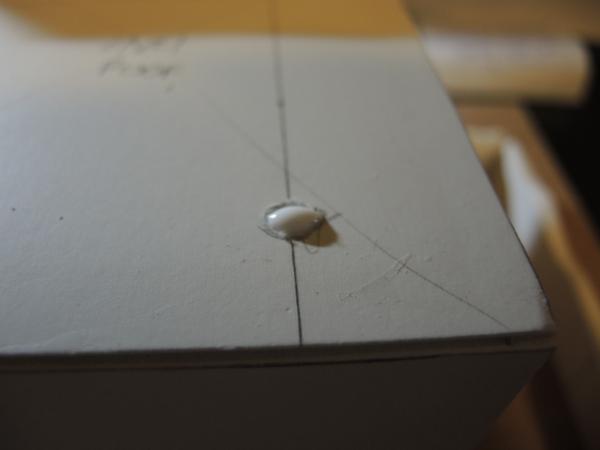
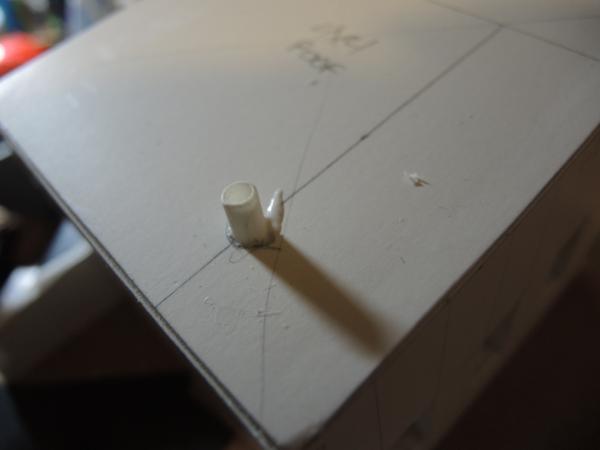
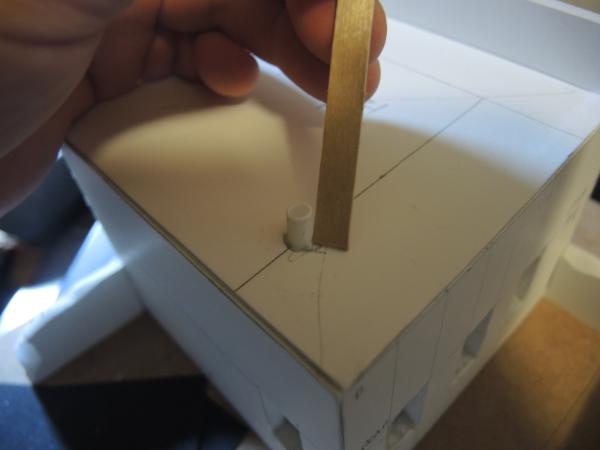
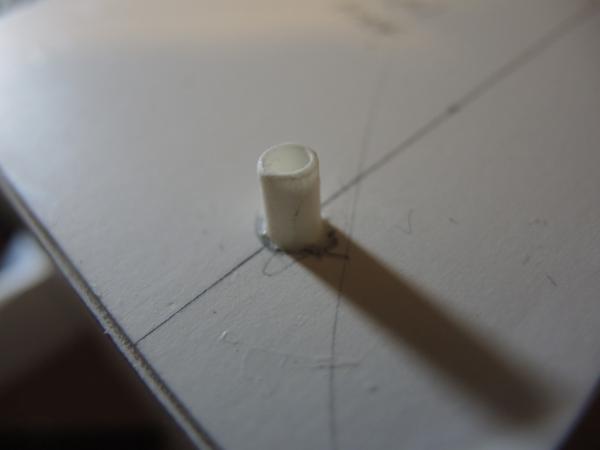
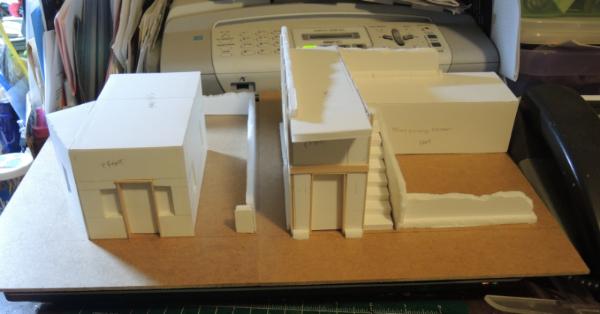
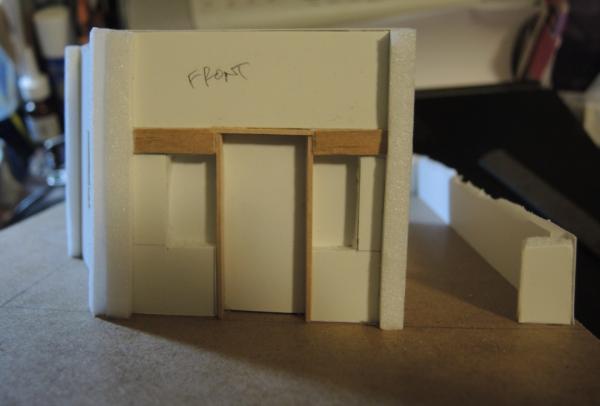
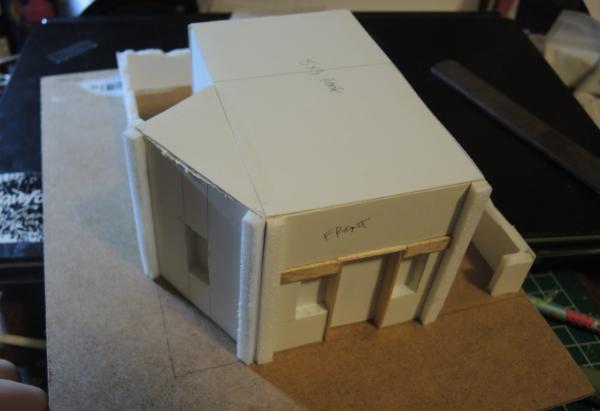
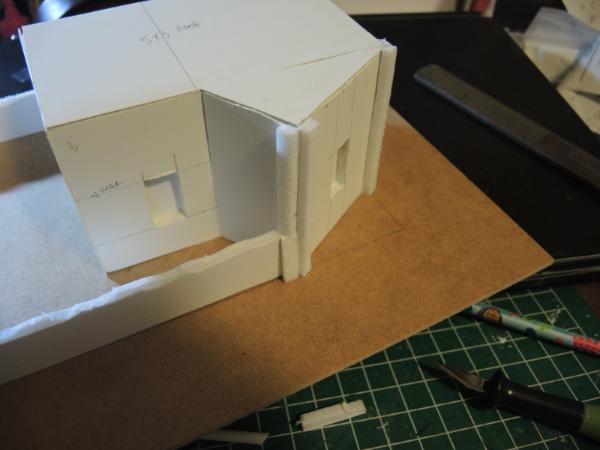
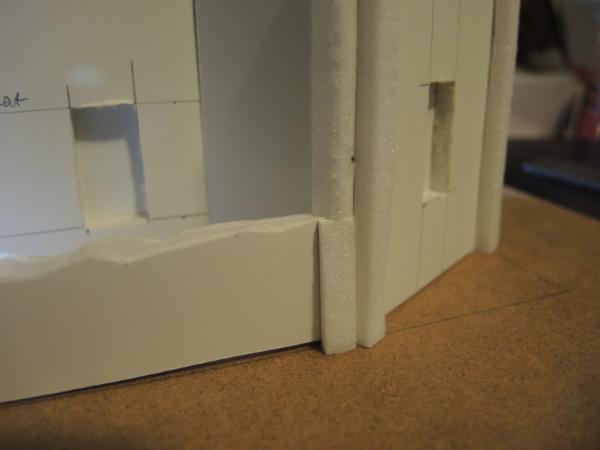
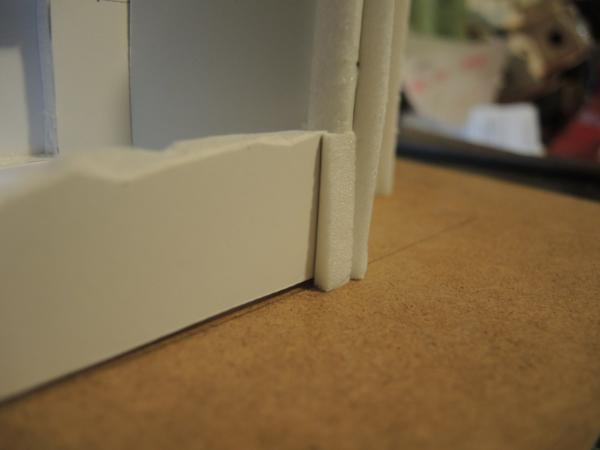
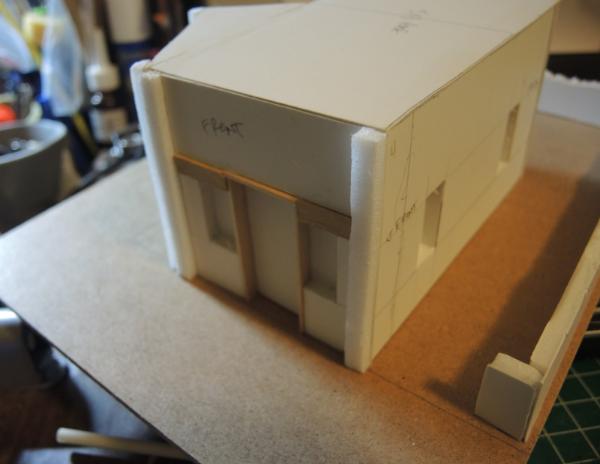
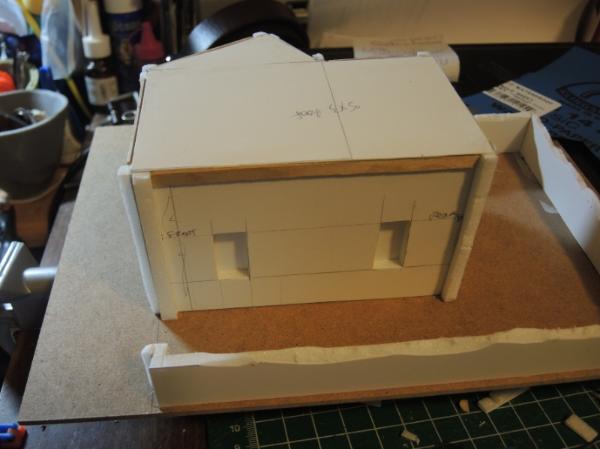
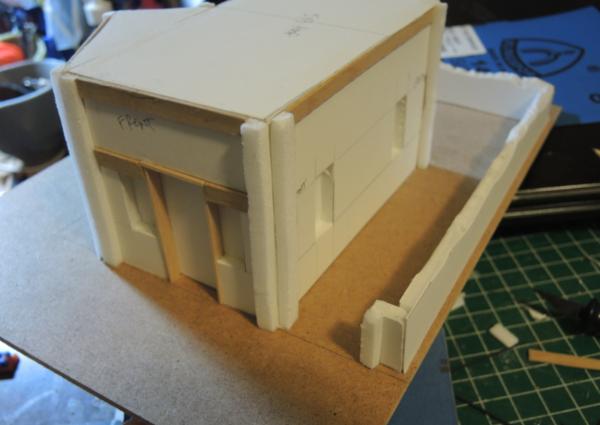
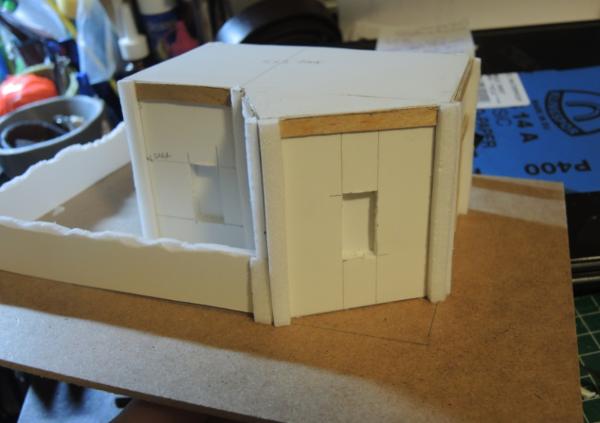
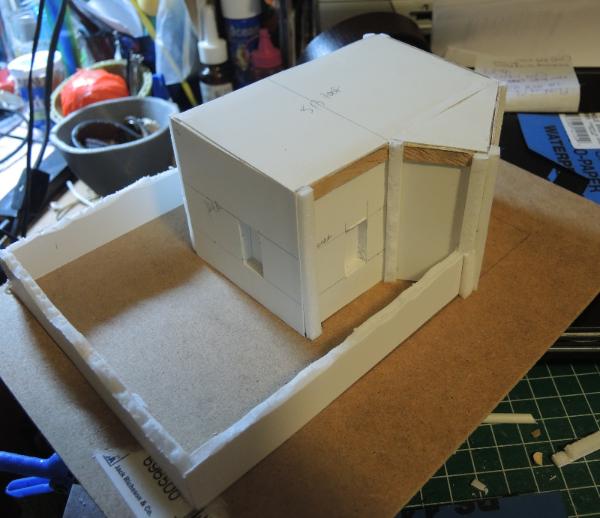
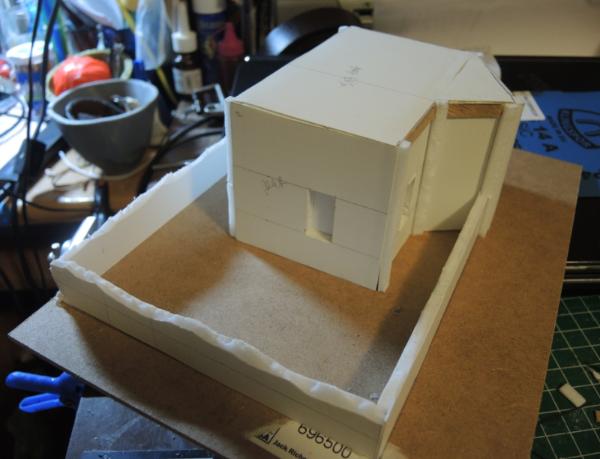
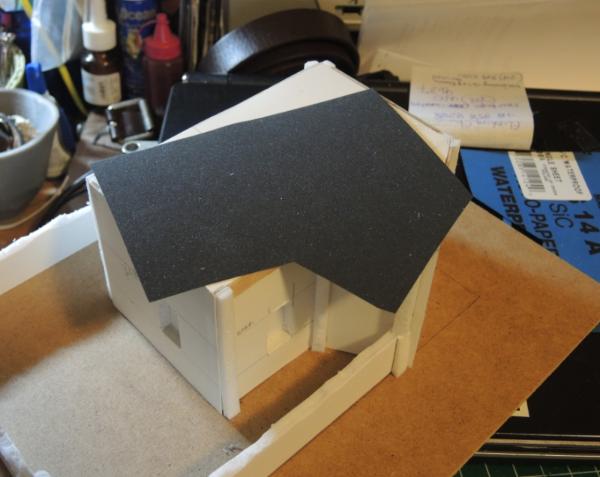
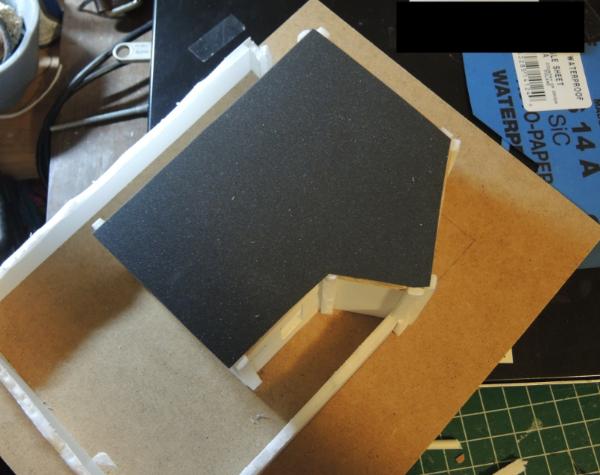
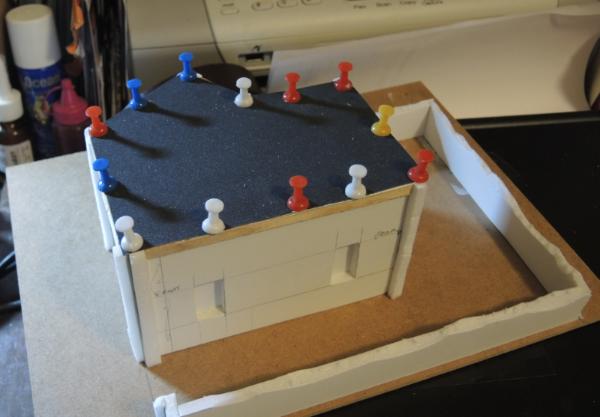
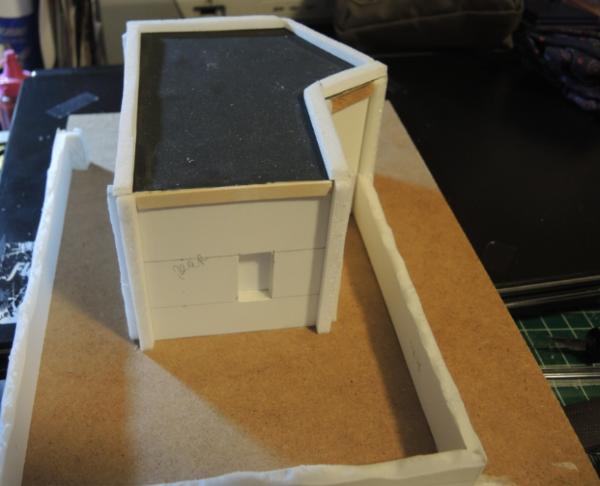
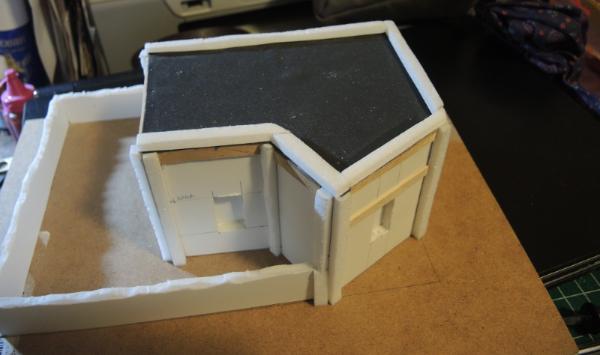
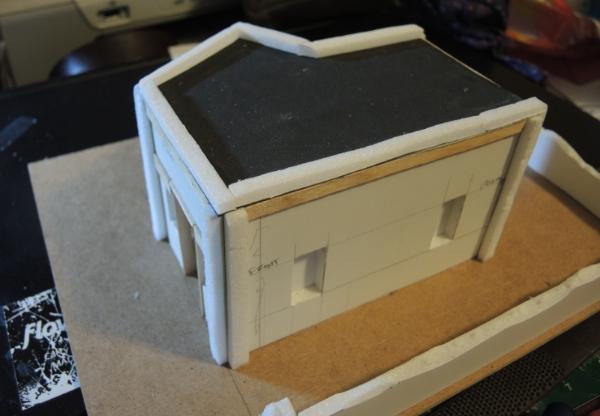
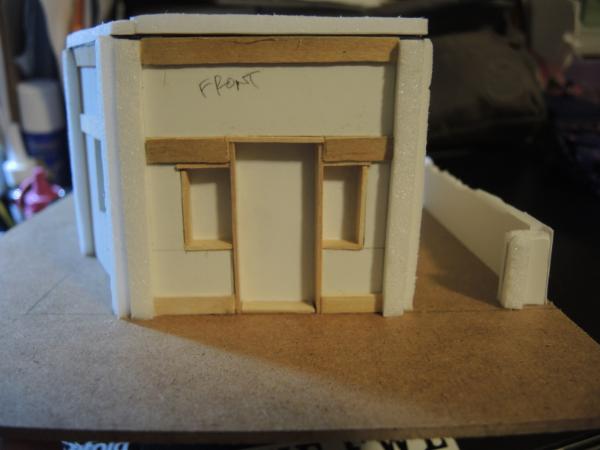
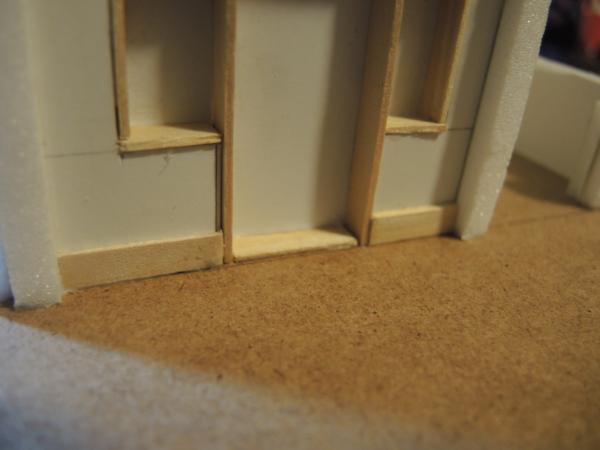

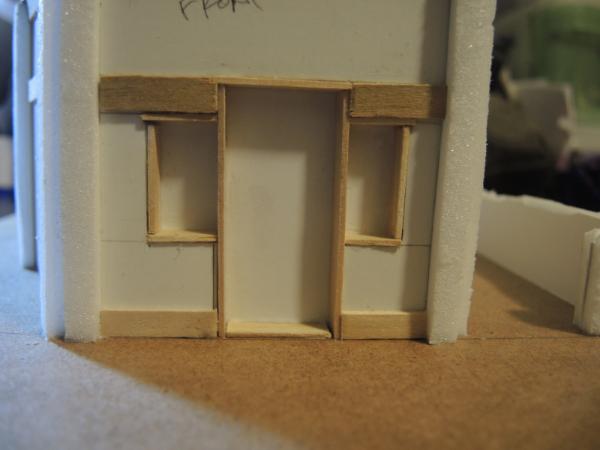
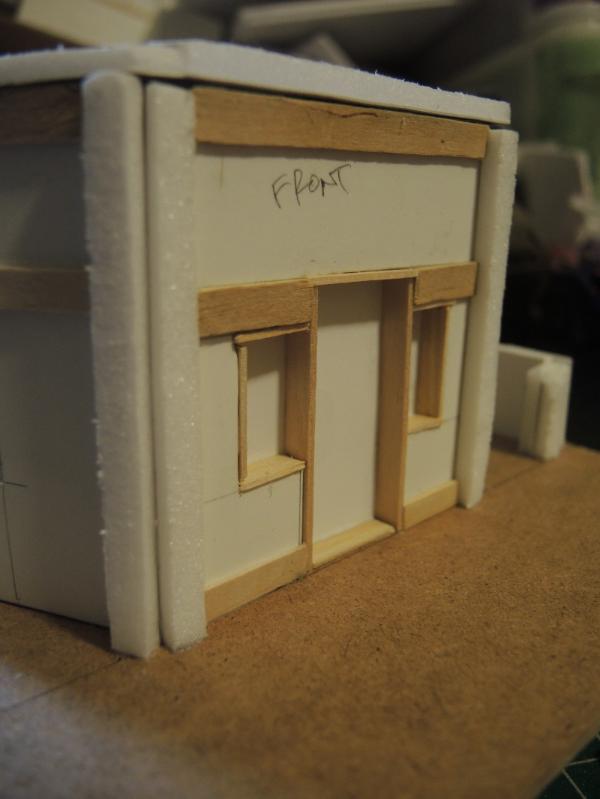
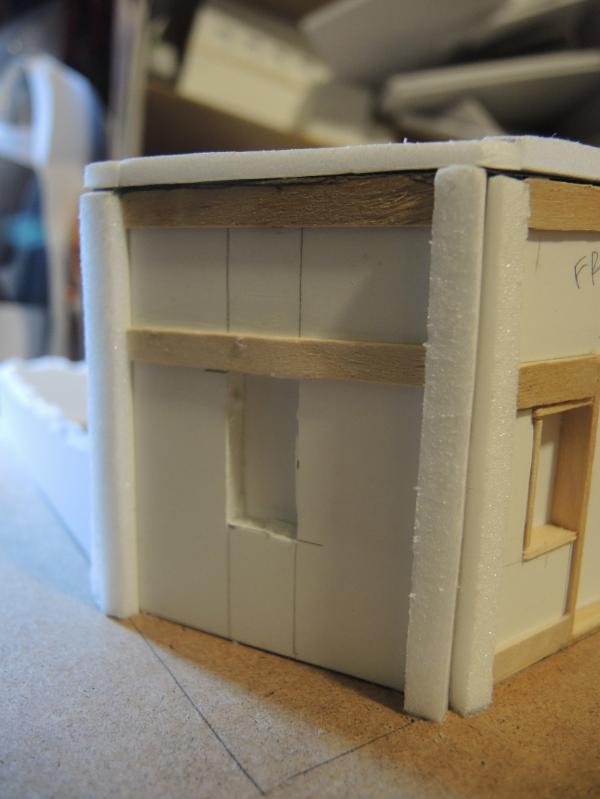
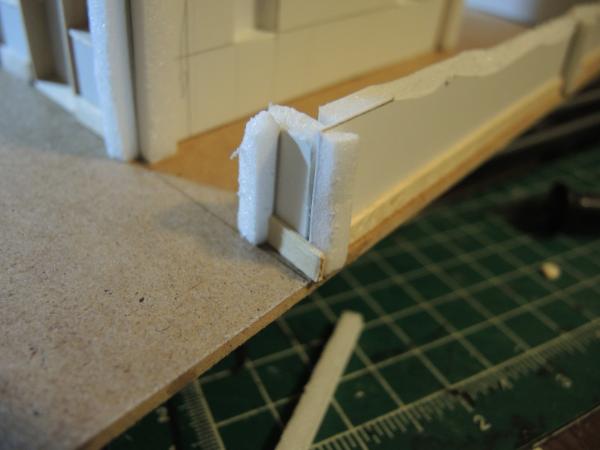
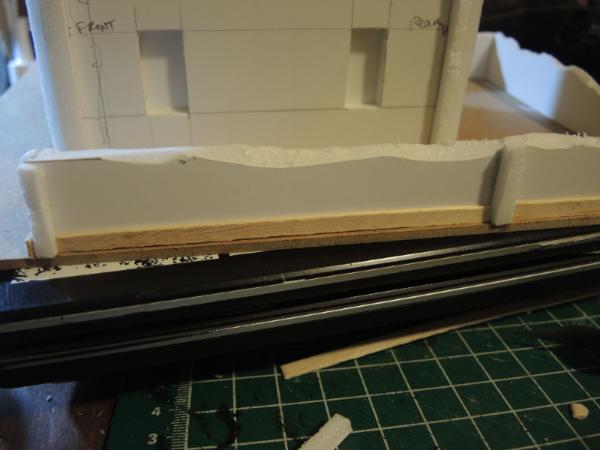
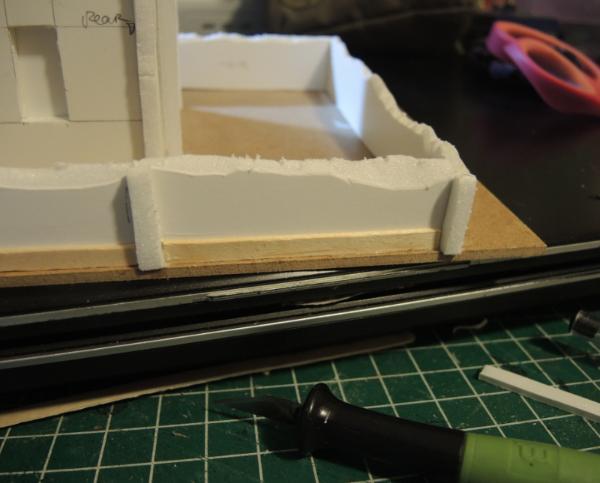
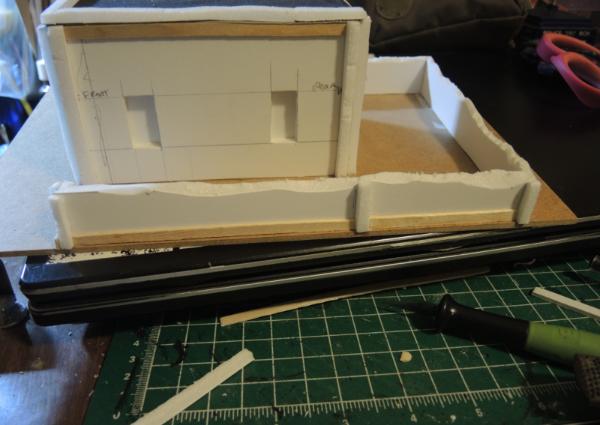
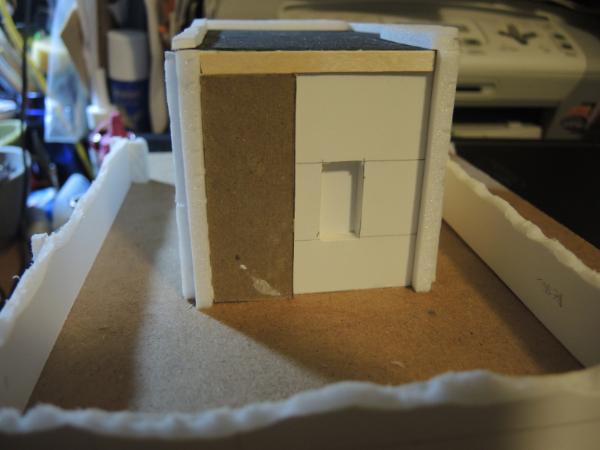
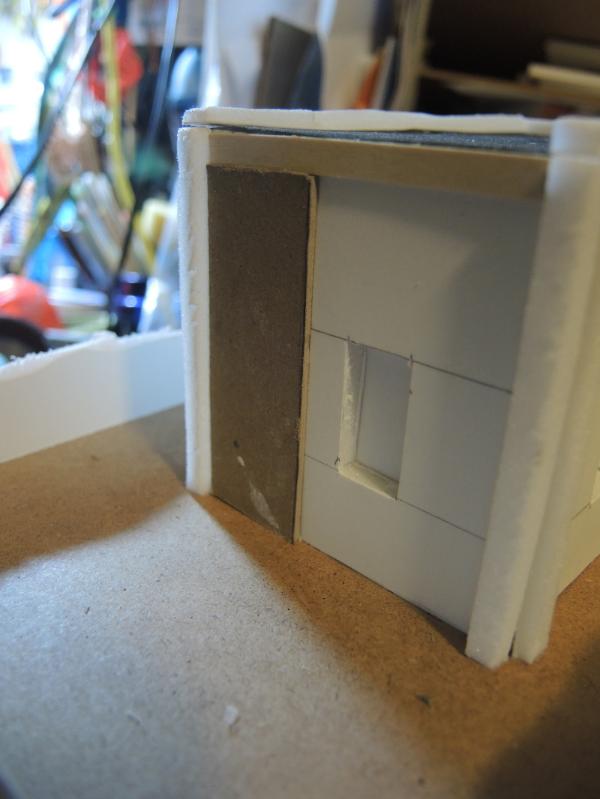
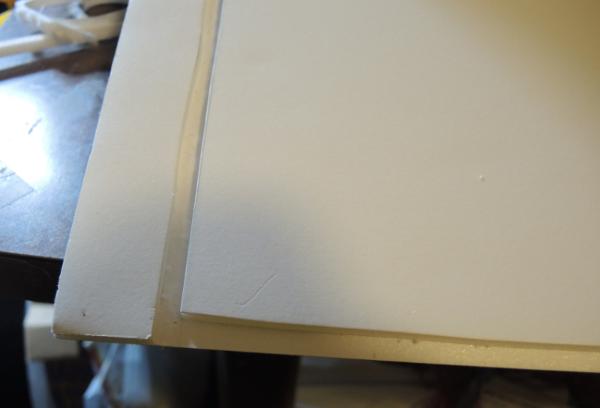
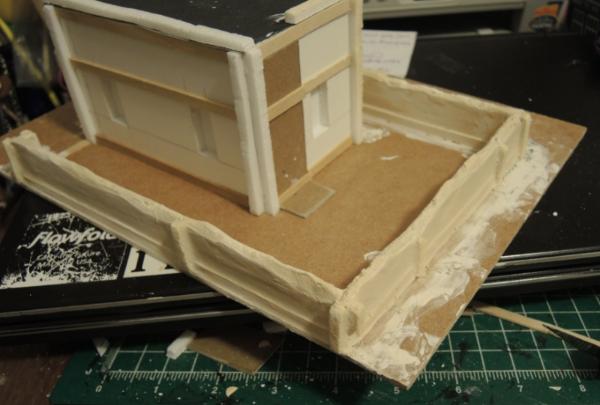
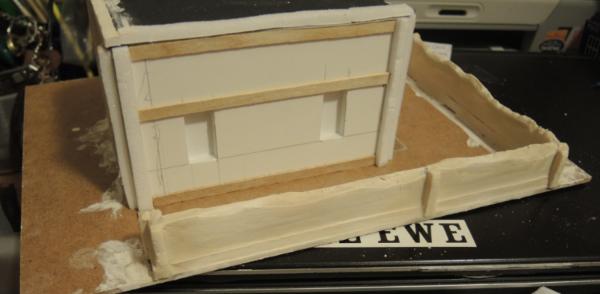
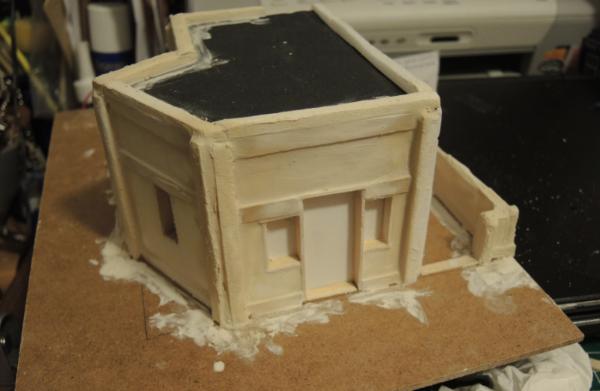
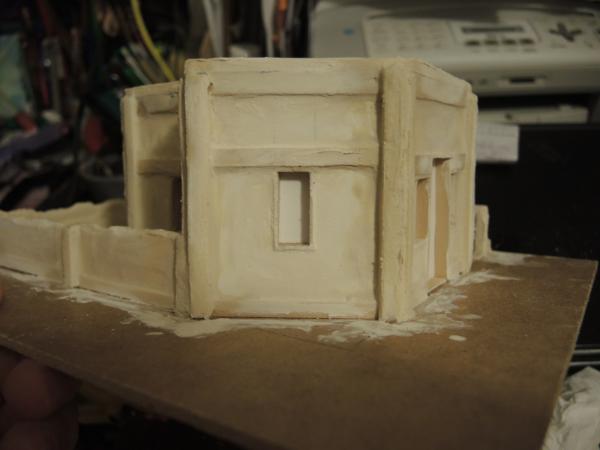
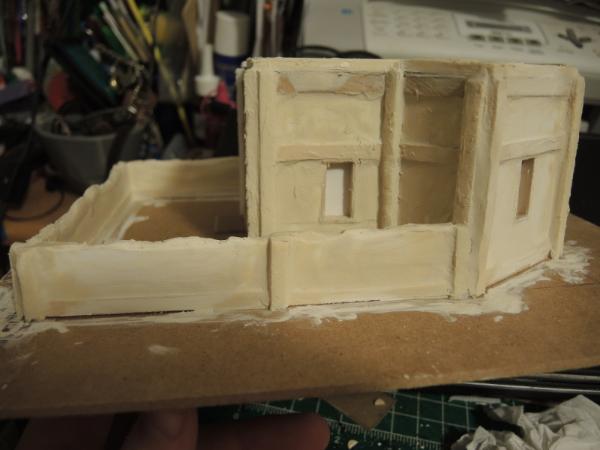
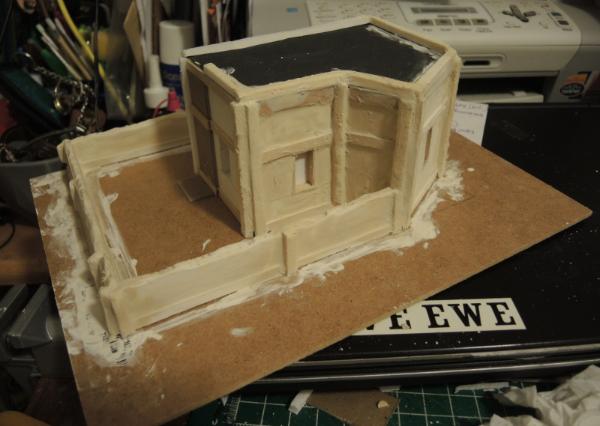
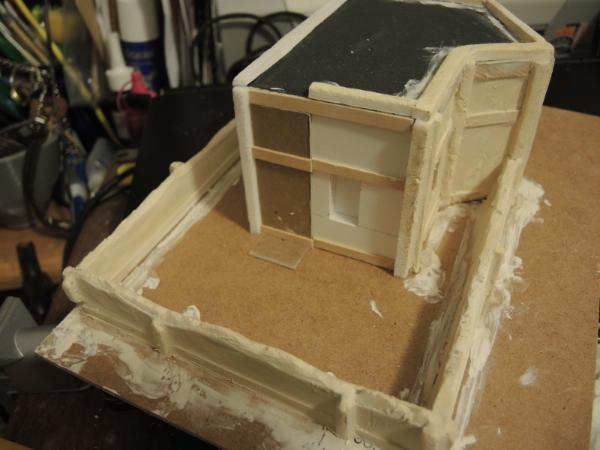
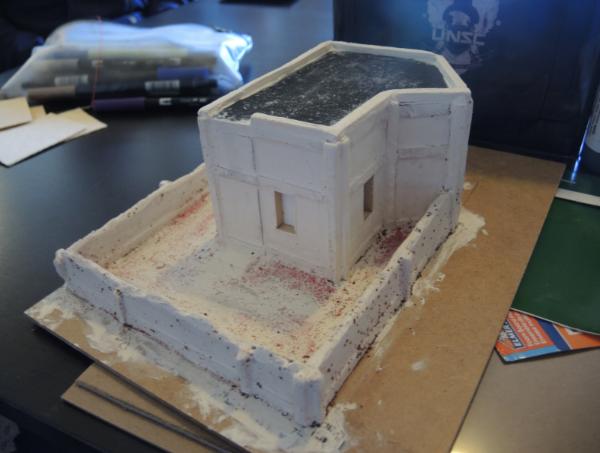
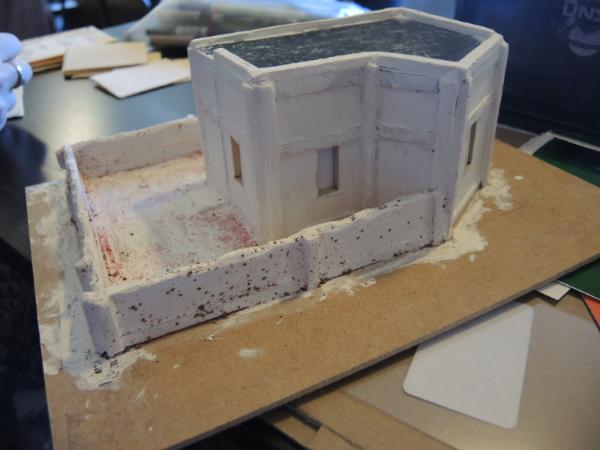
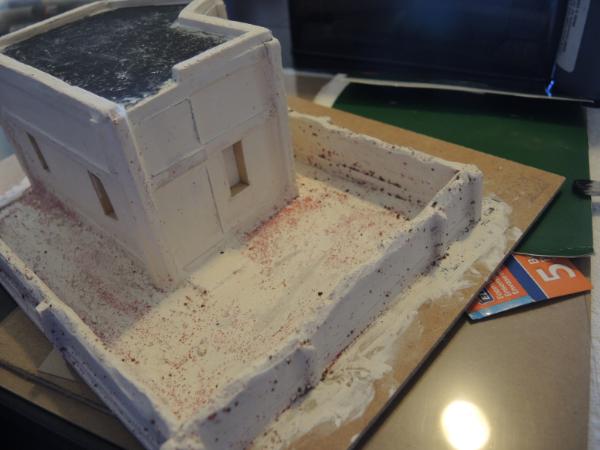

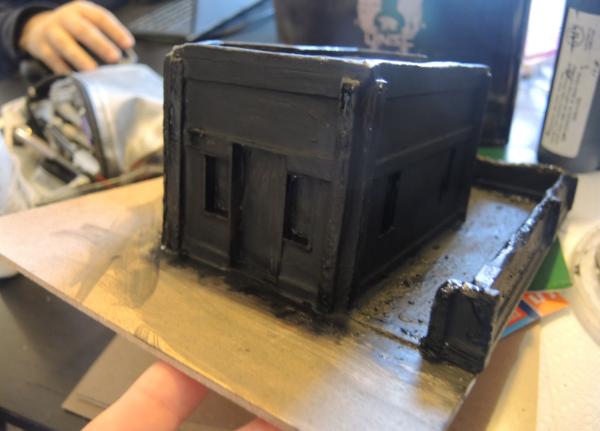
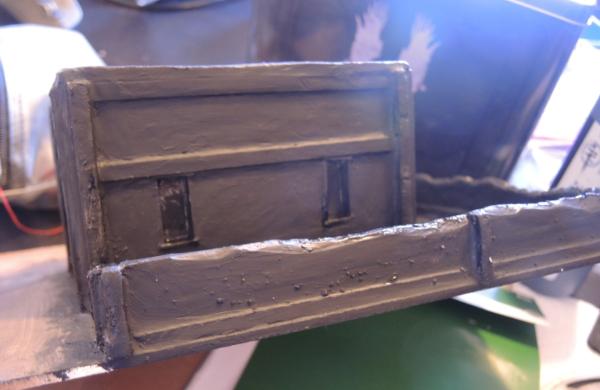
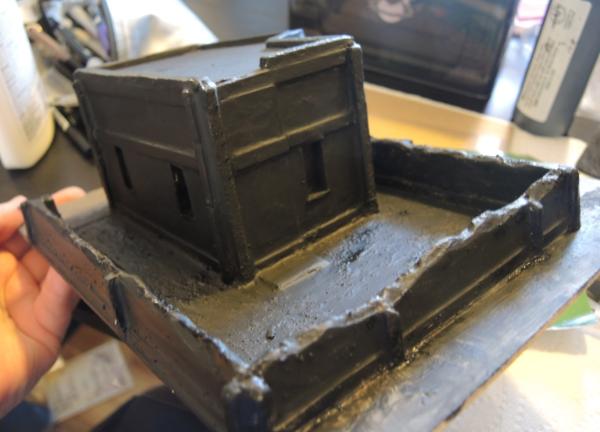
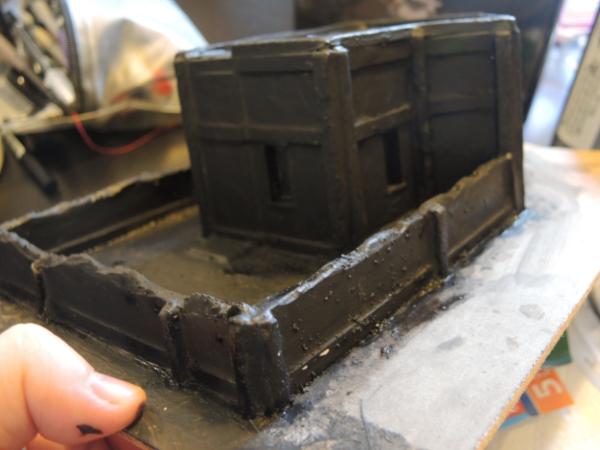
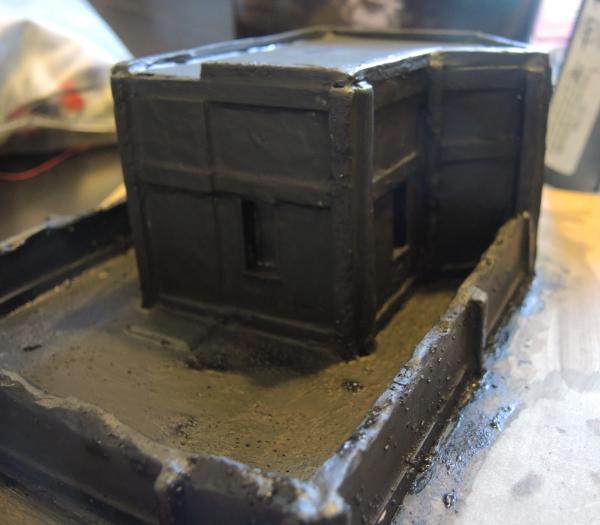

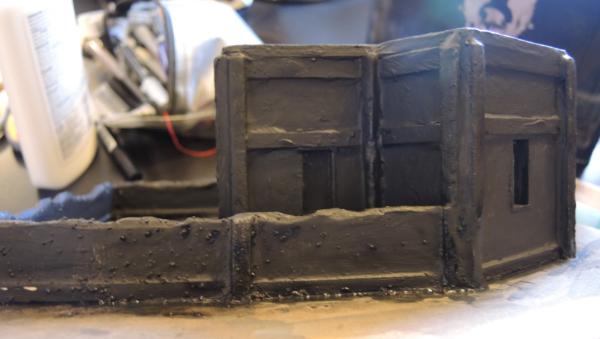

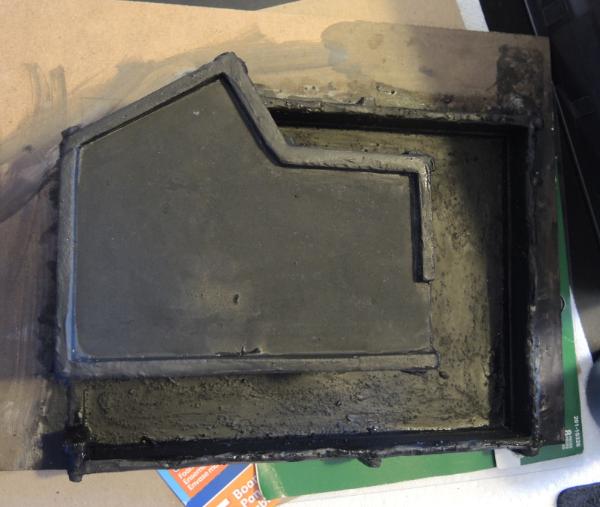
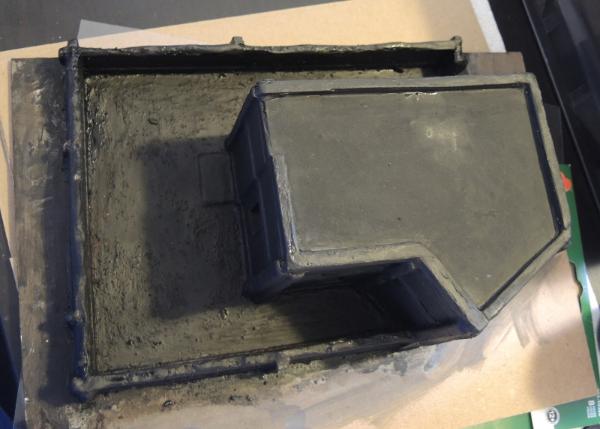
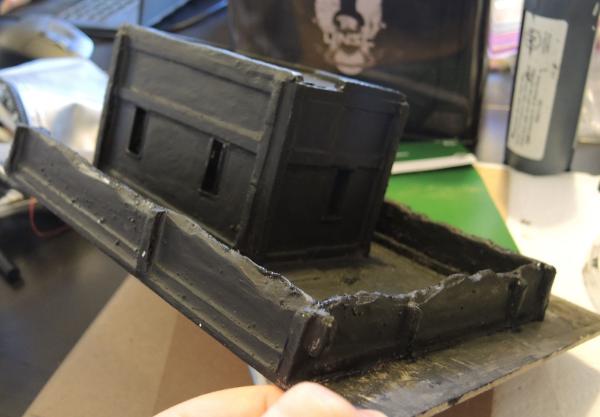
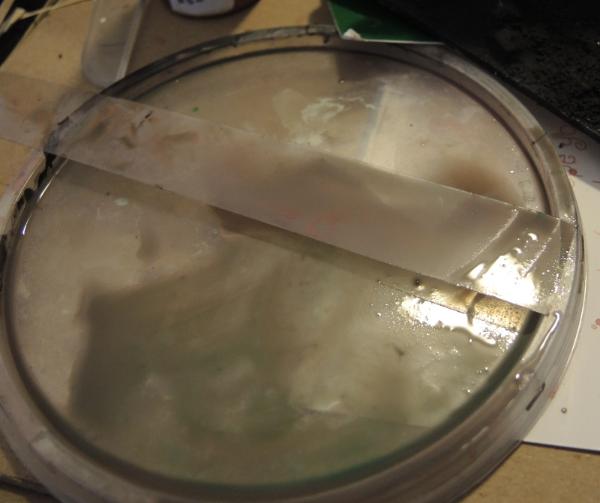
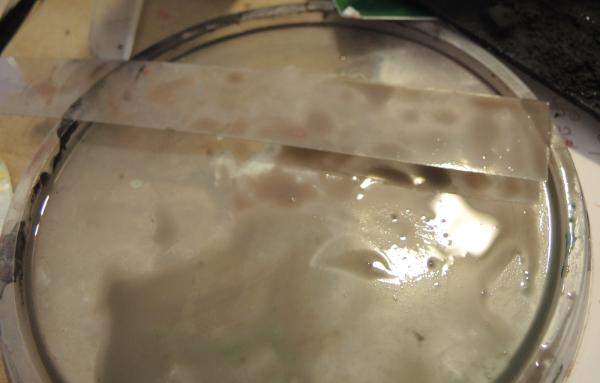

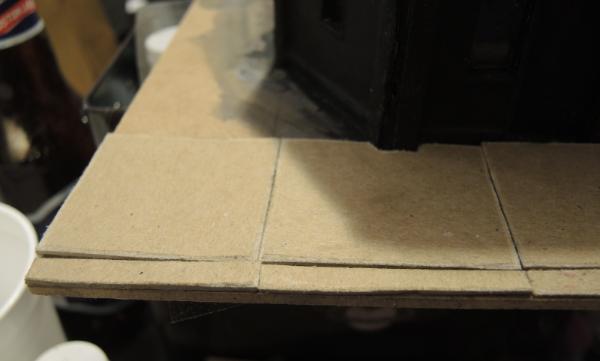
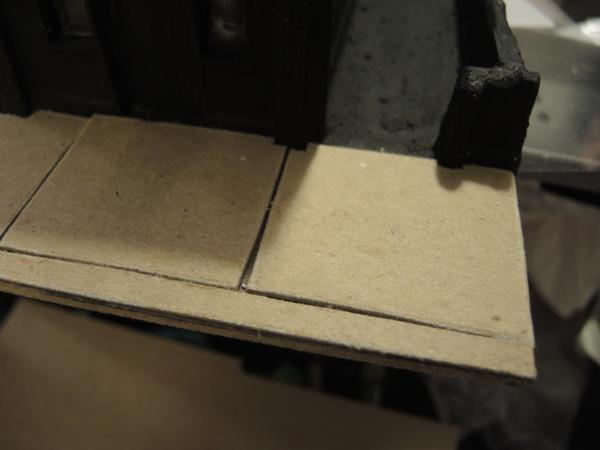
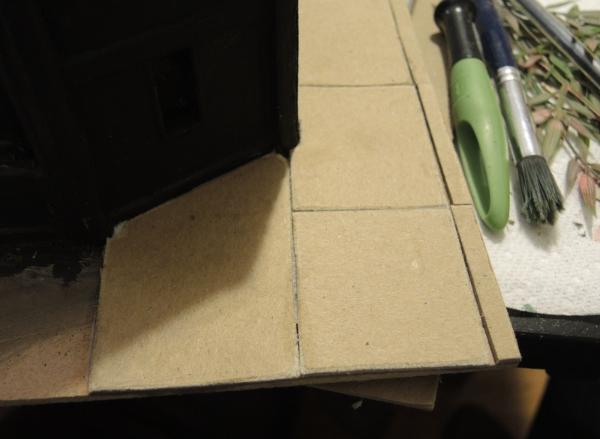

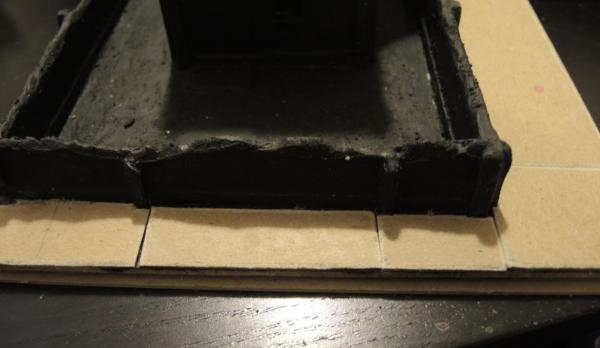
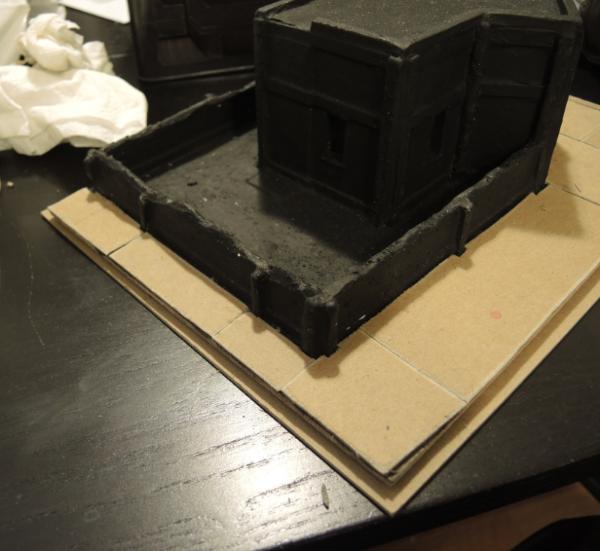
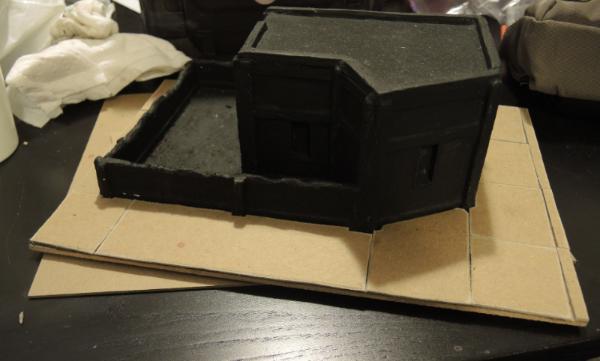
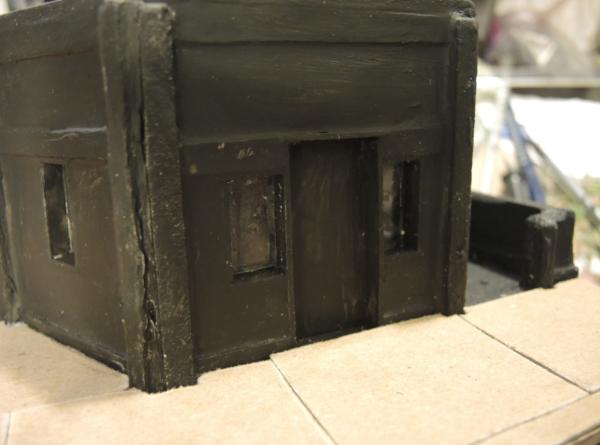
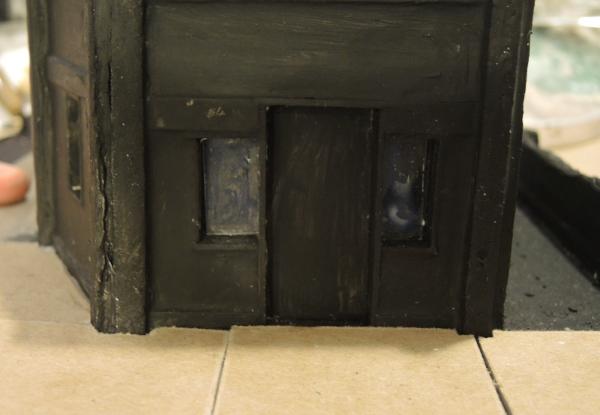
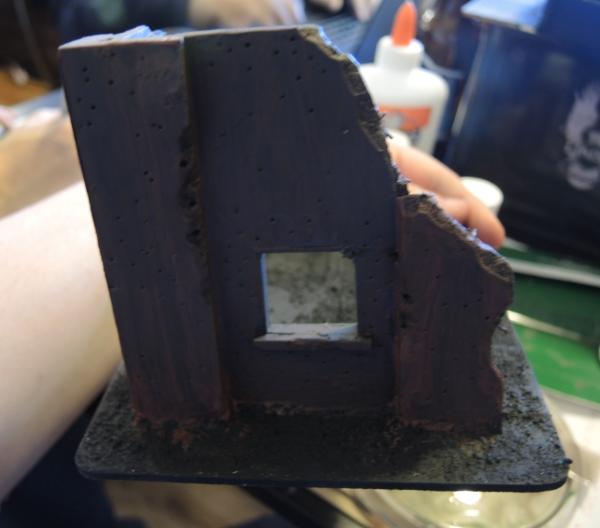
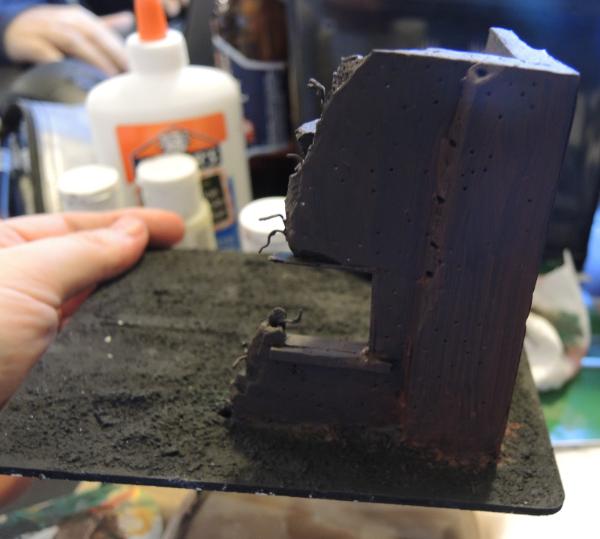

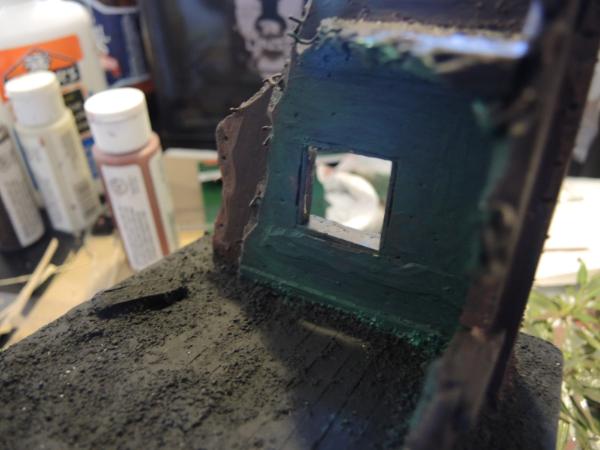
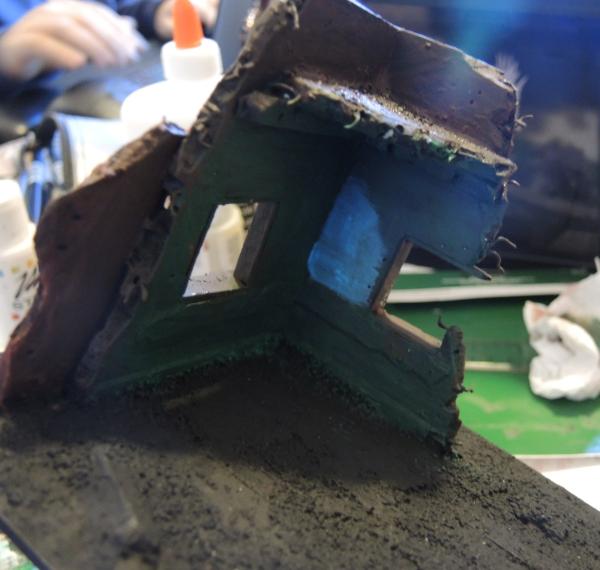
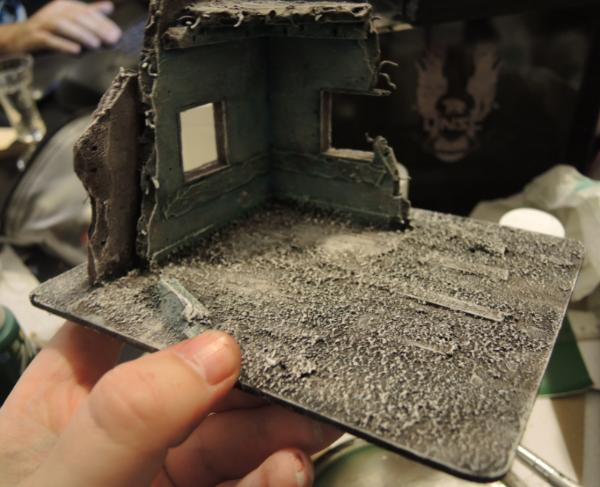
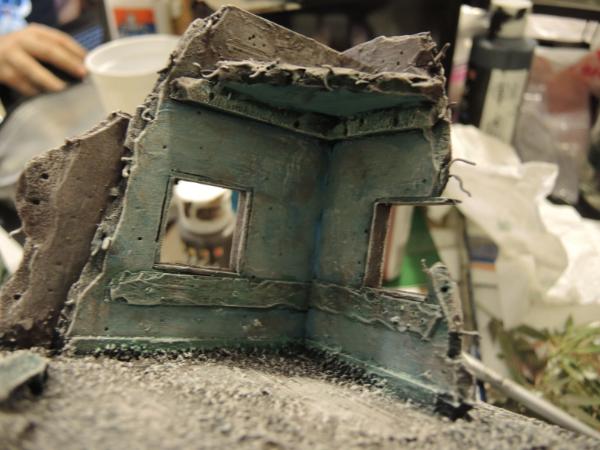
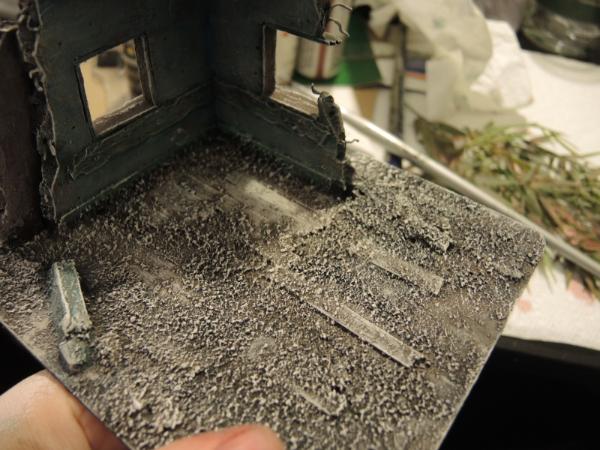
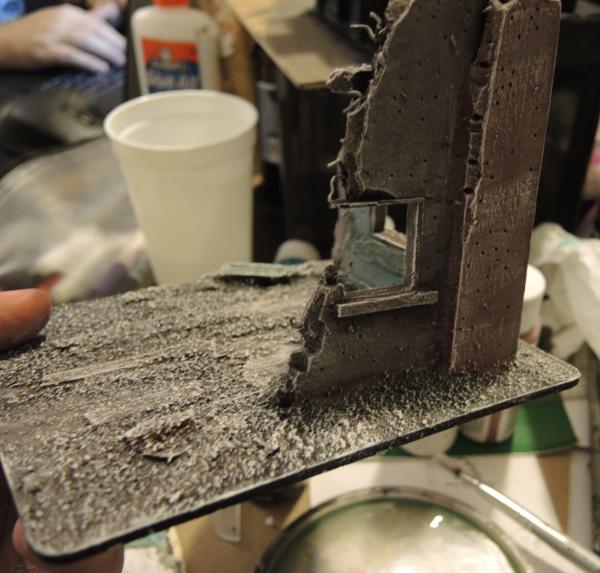
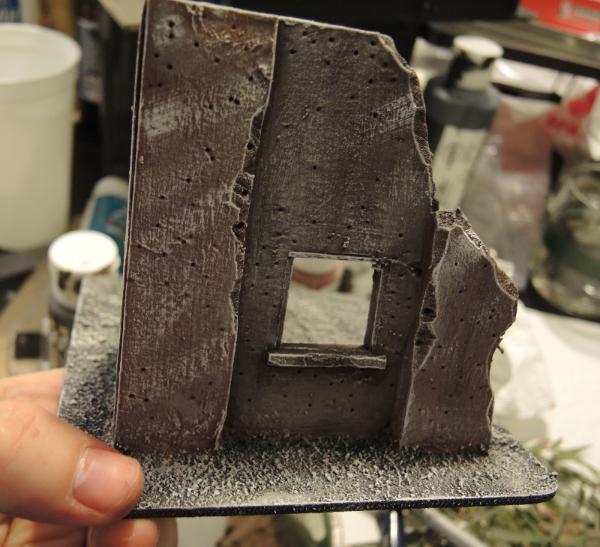
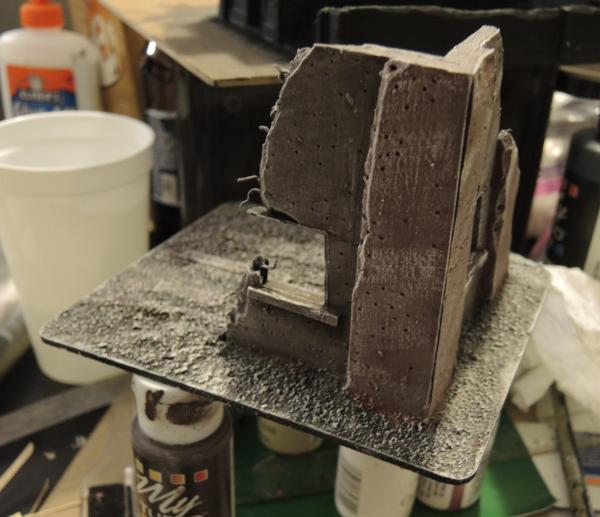
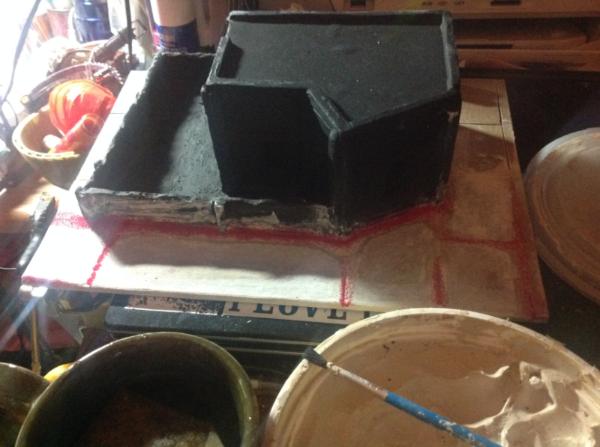
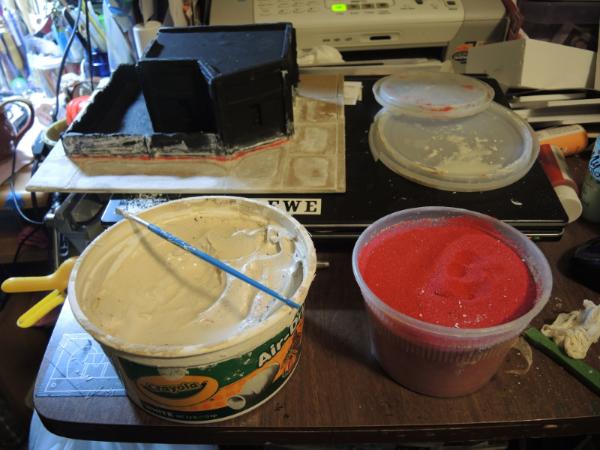
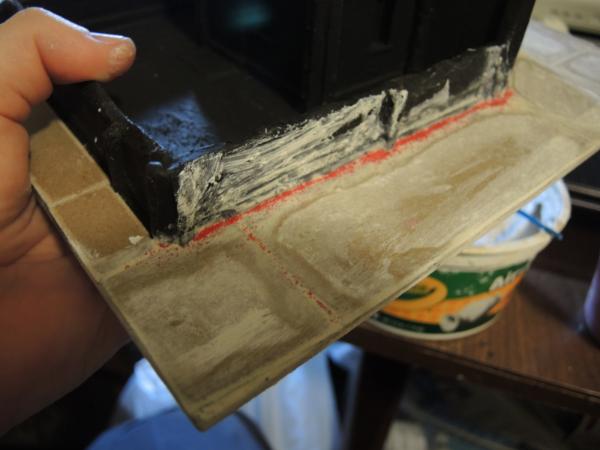
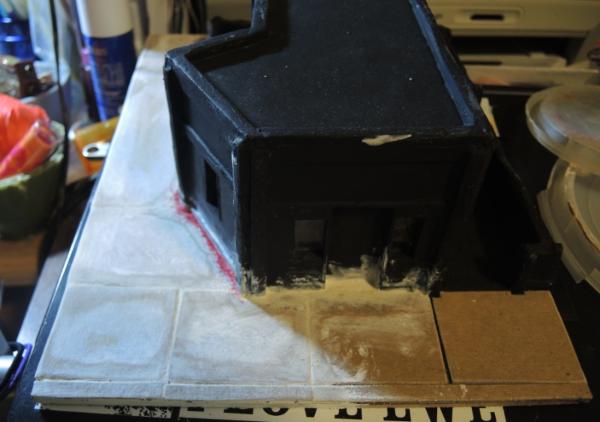
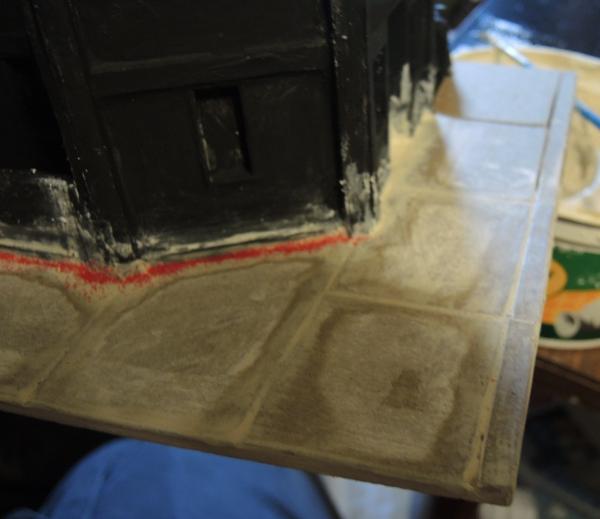
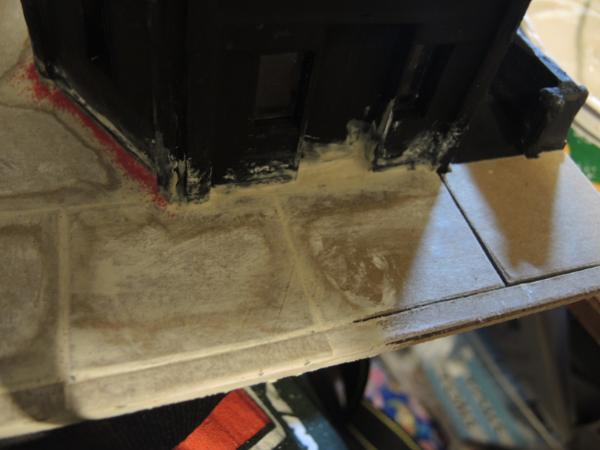
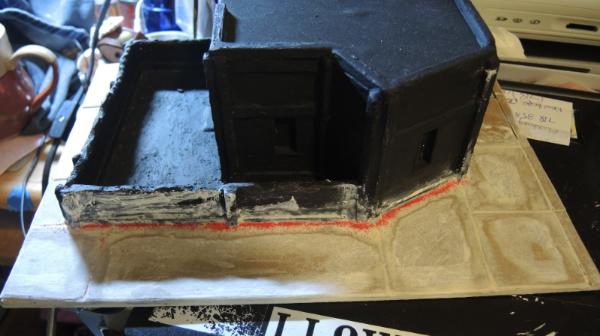
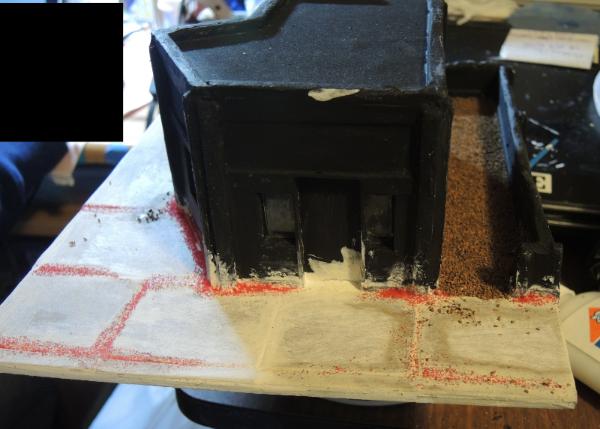
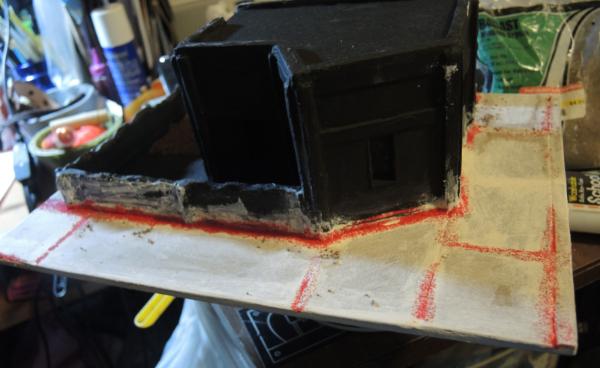
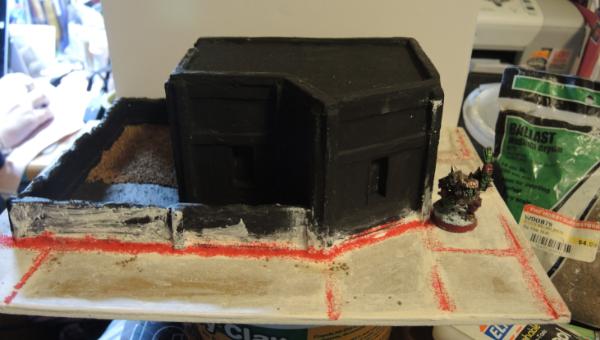
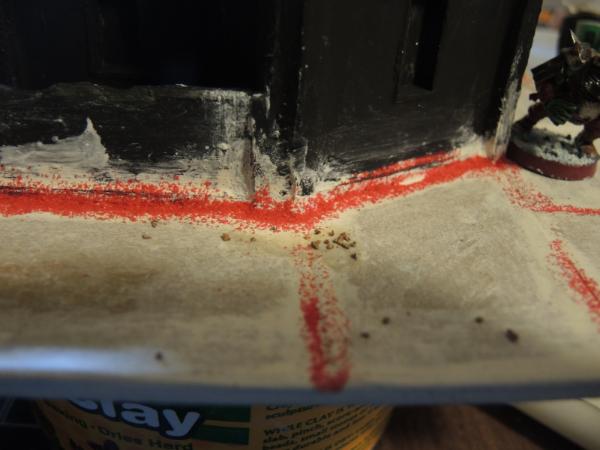
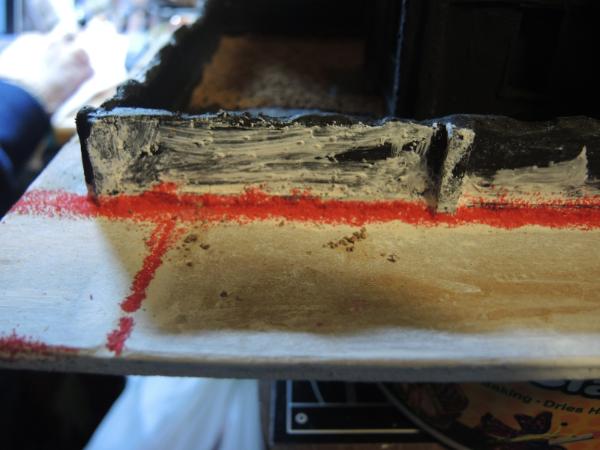
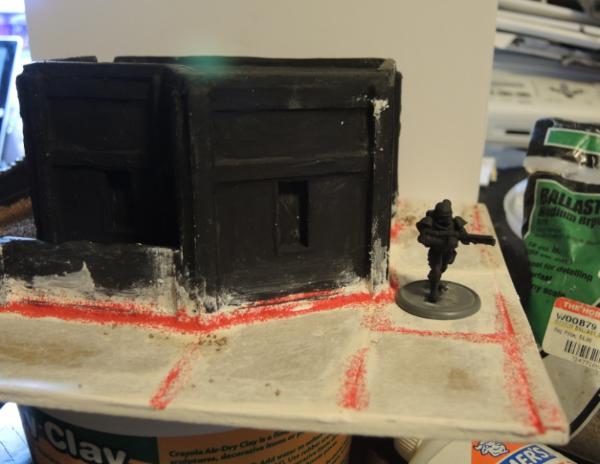
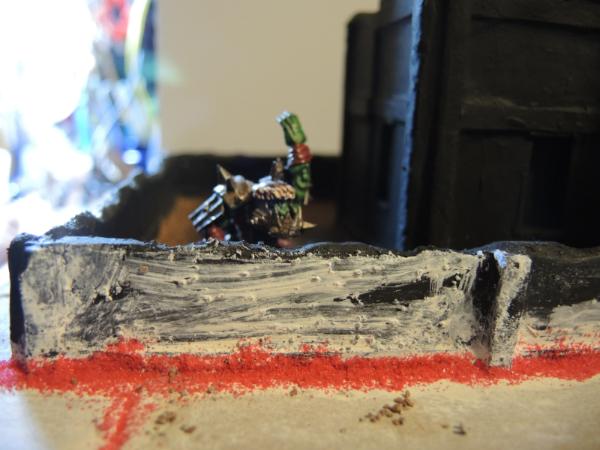
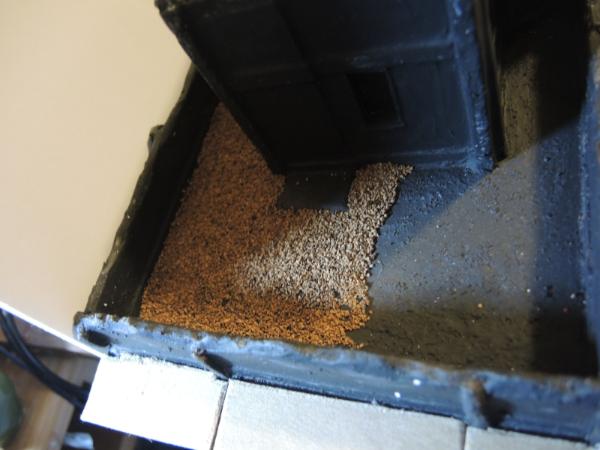
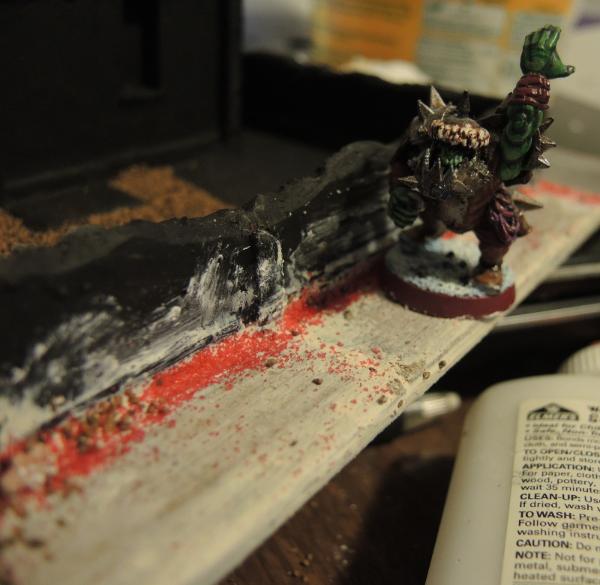
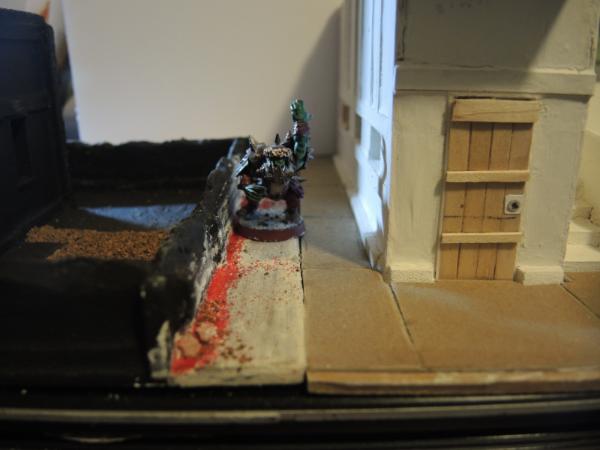
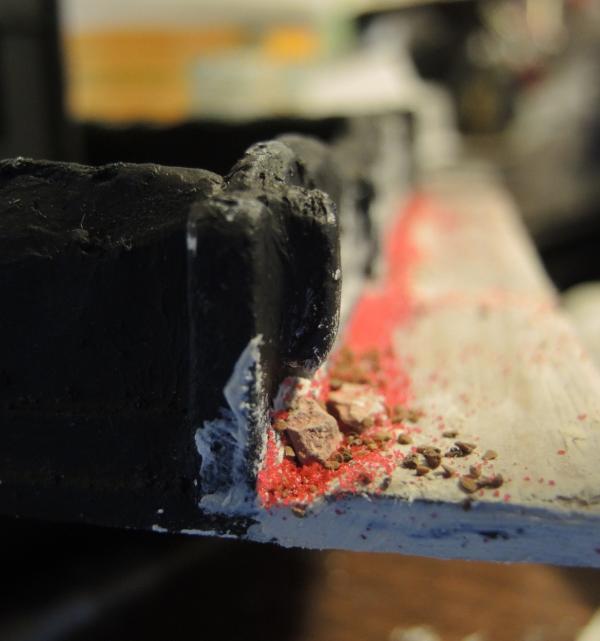
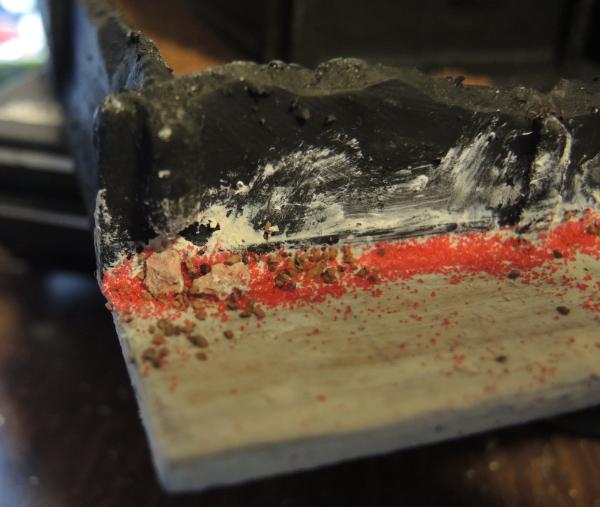
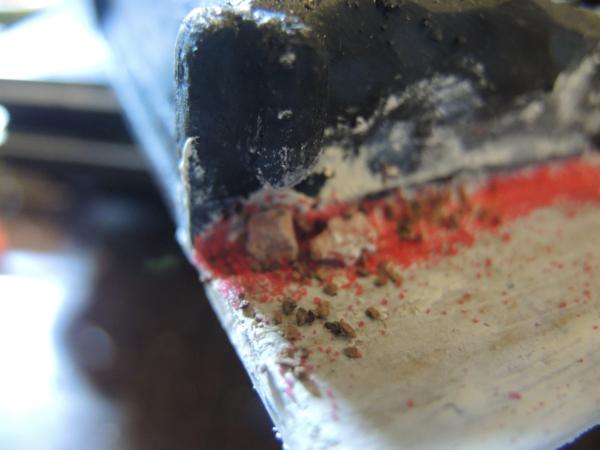

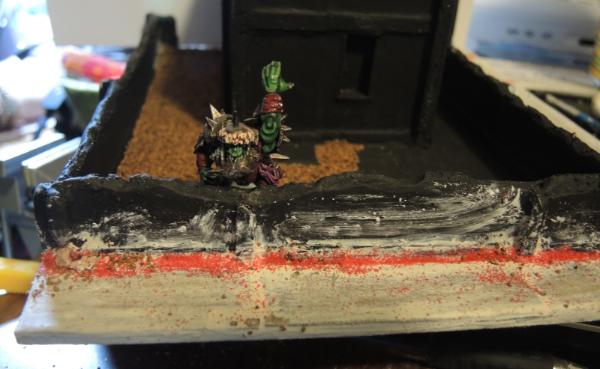
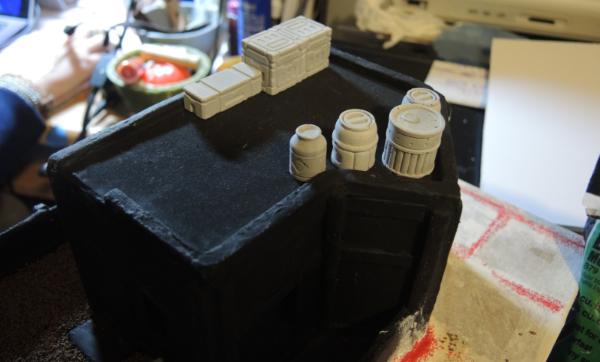
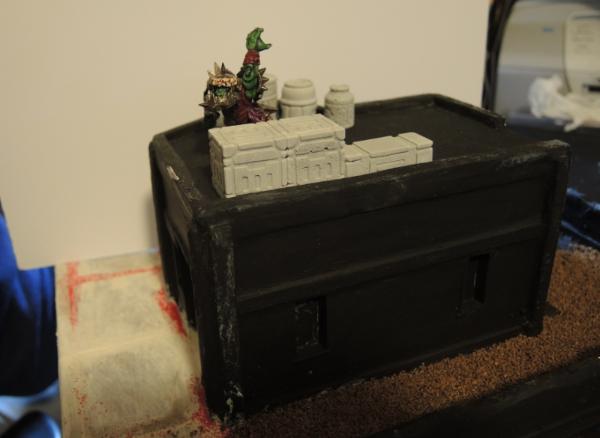
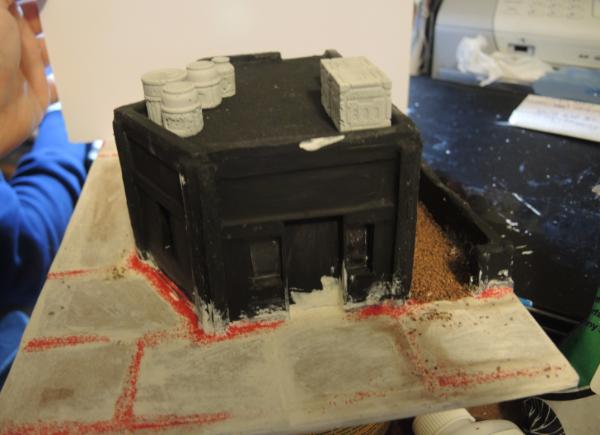
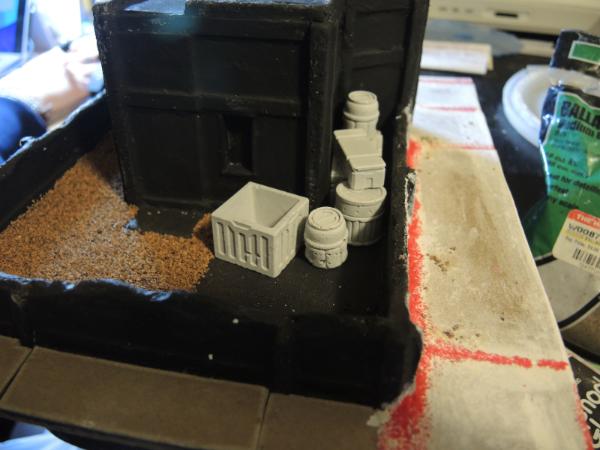

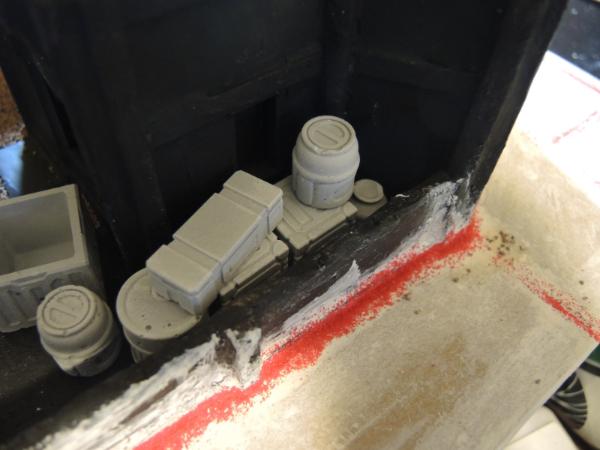
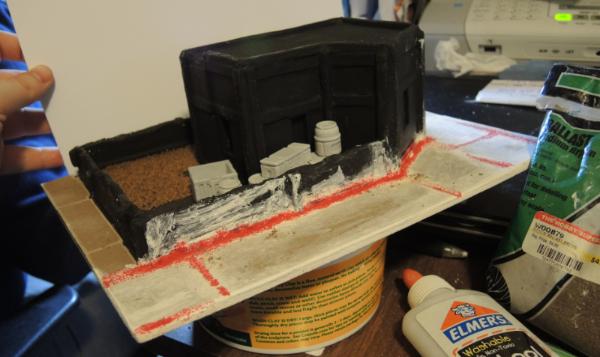
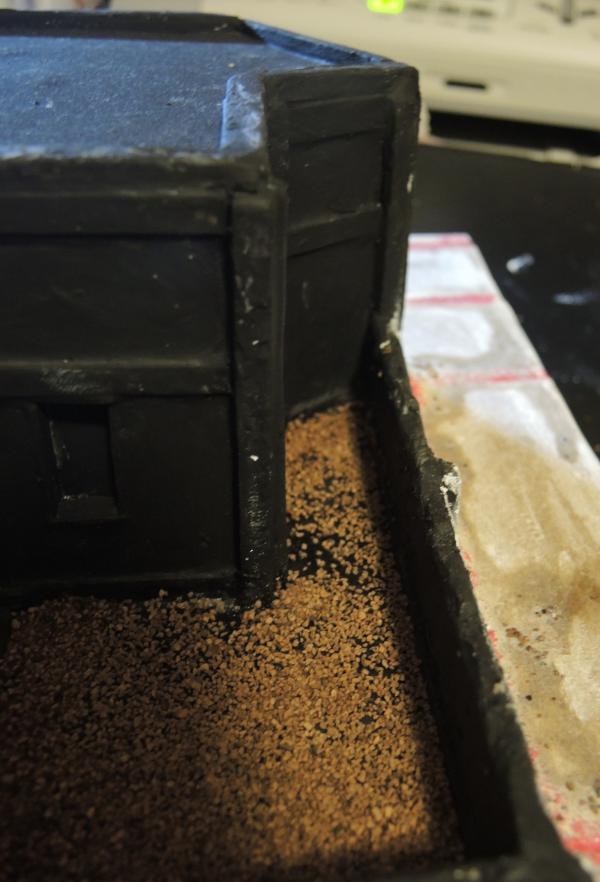
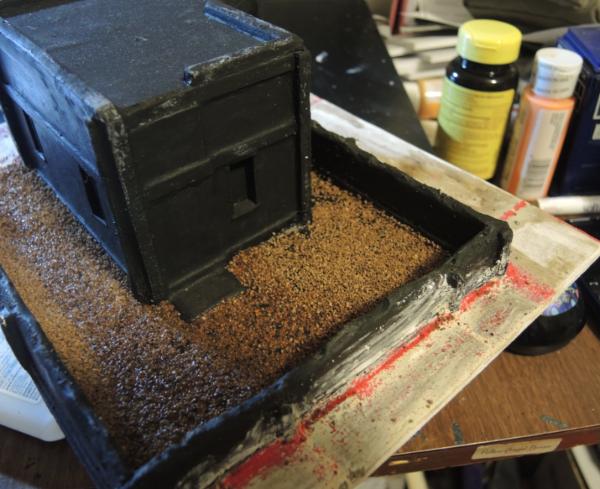
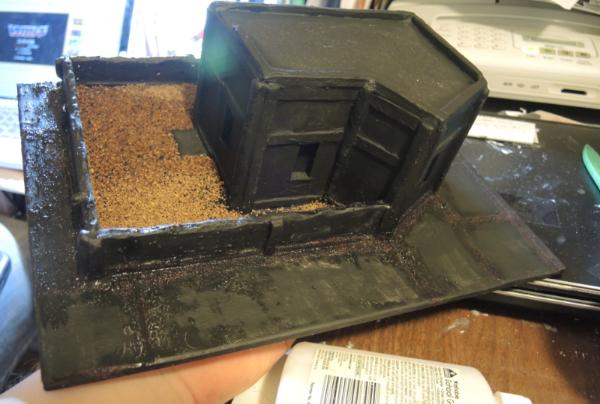
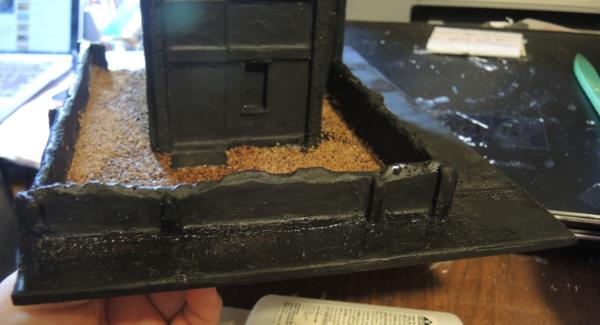
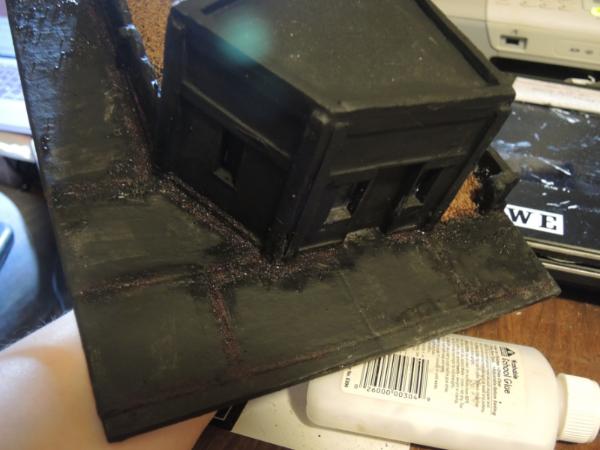
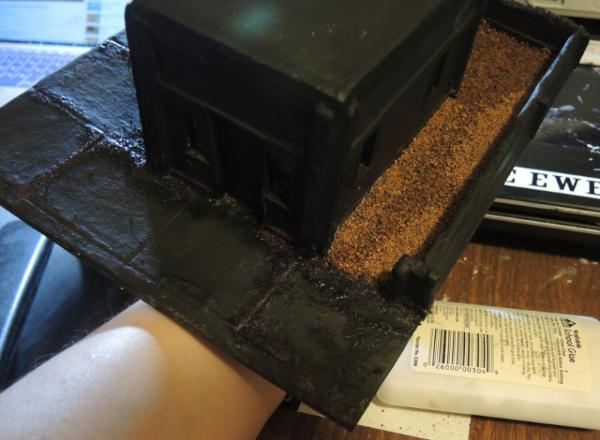
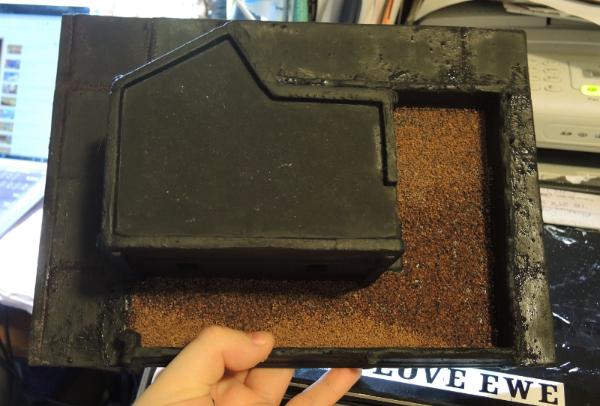
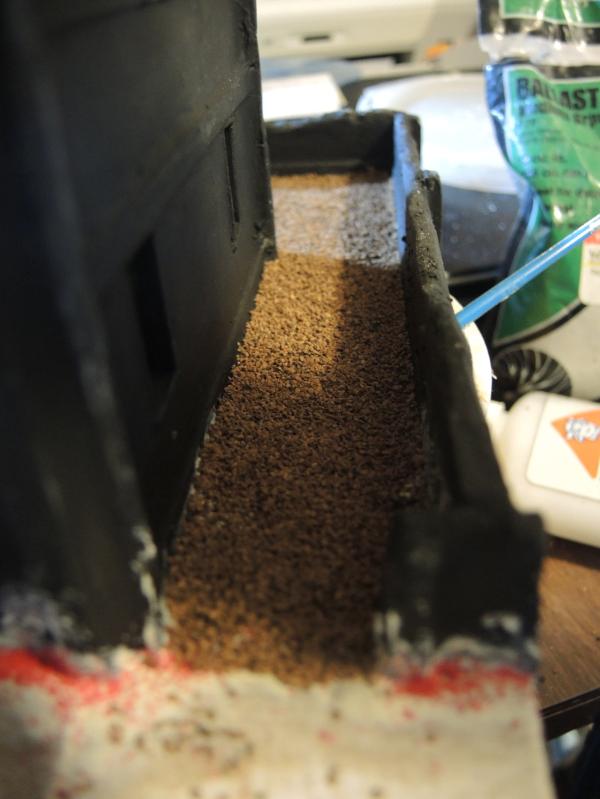
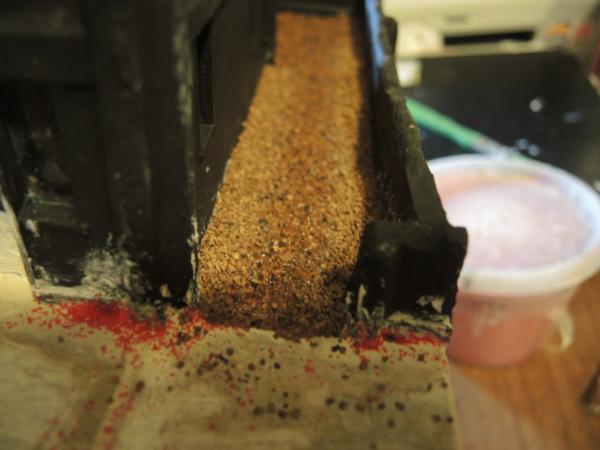
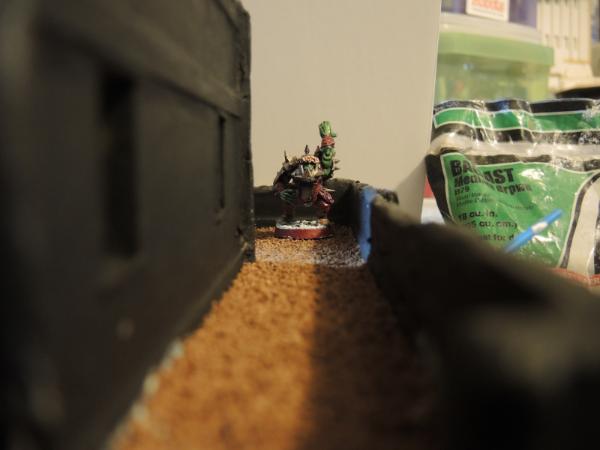
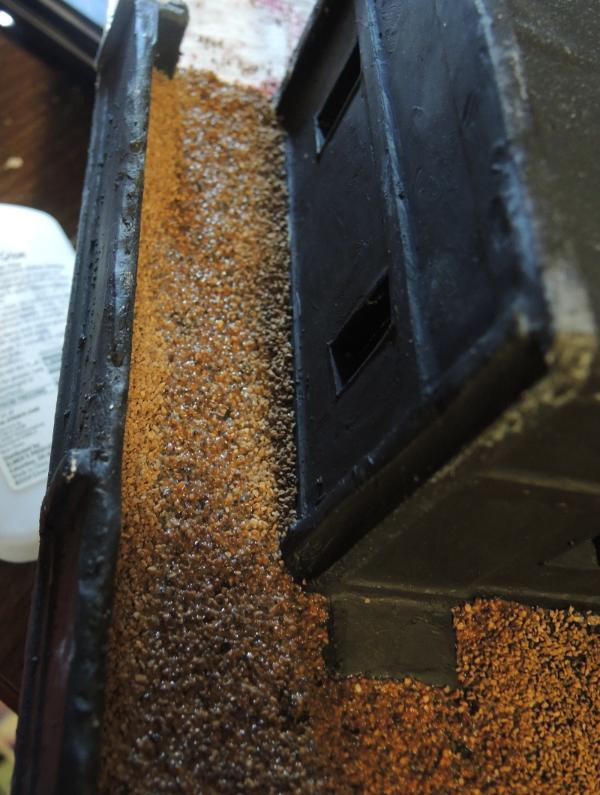

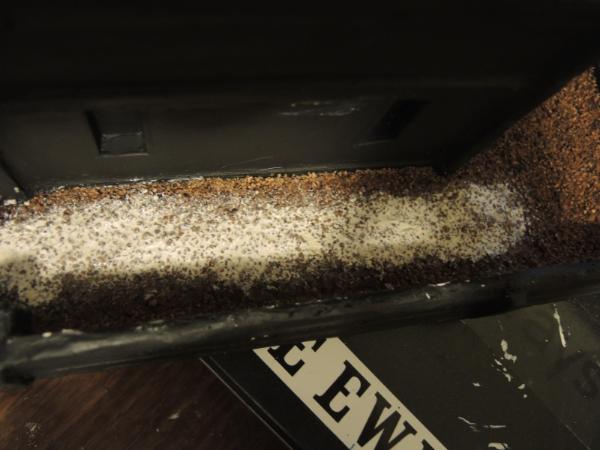
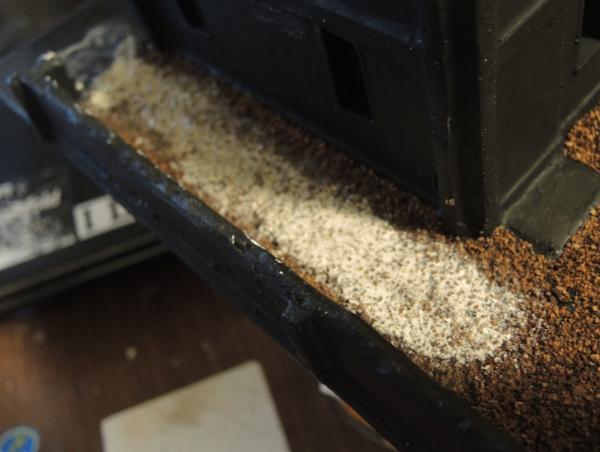
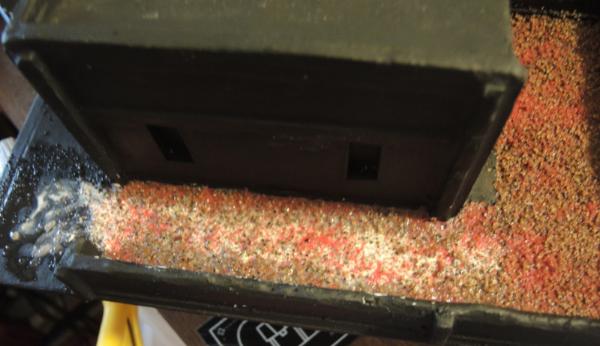
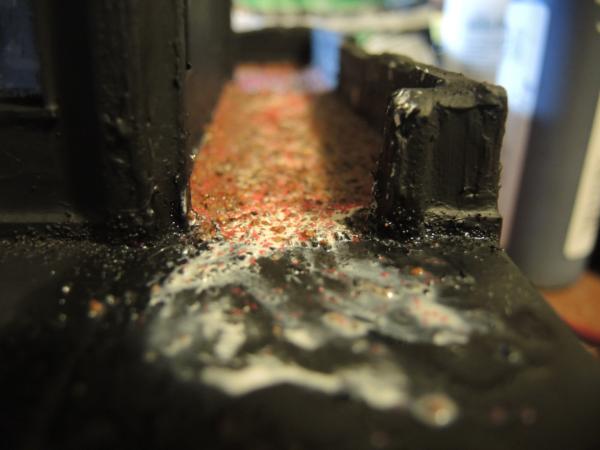


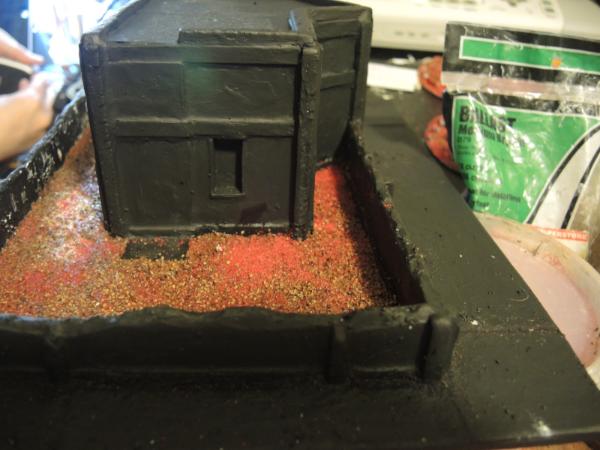
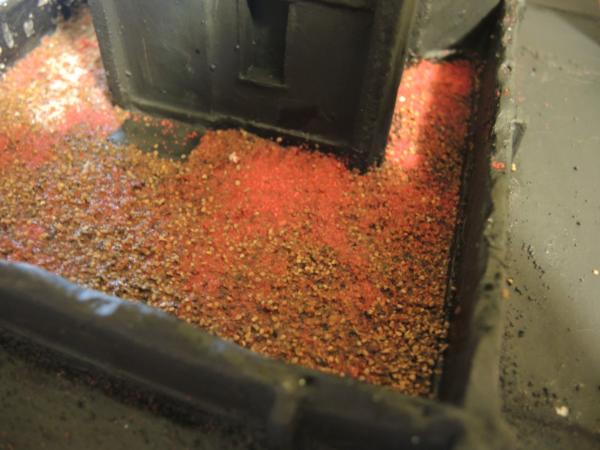
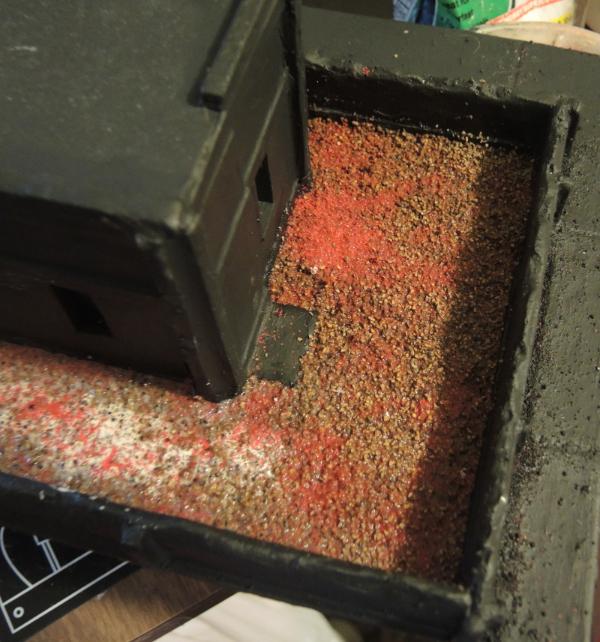
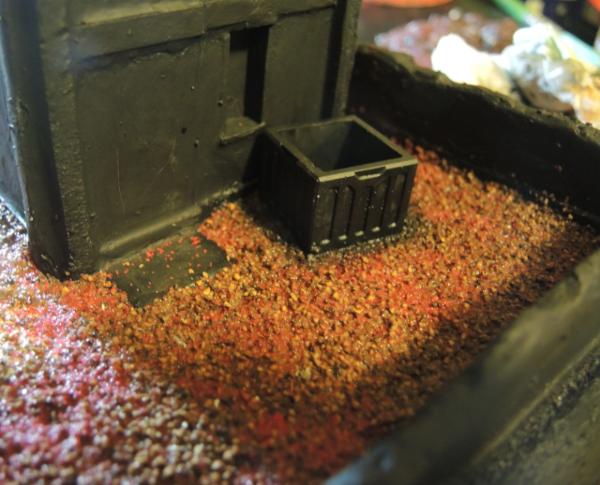
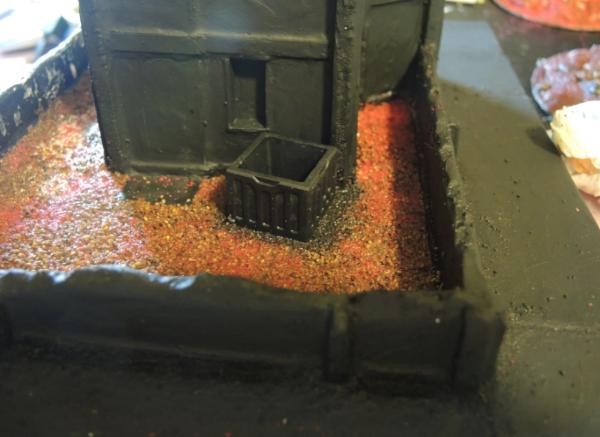

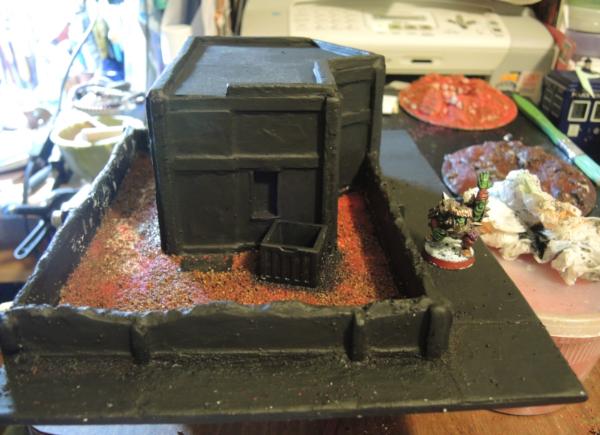
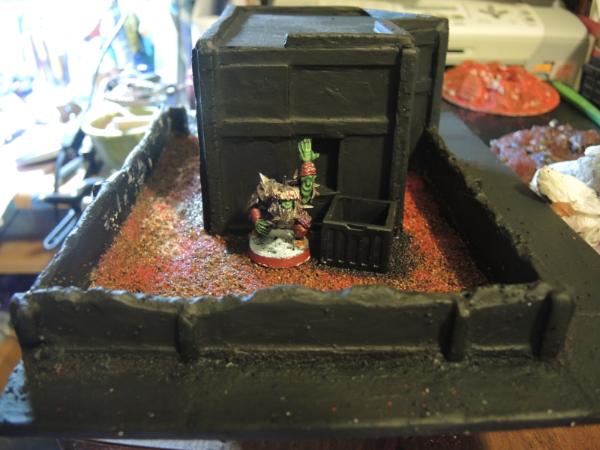
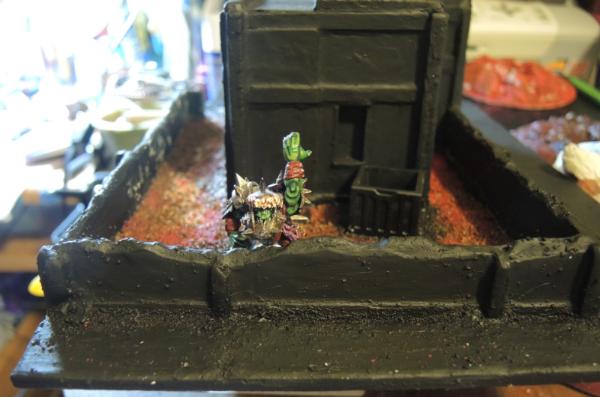
 . Photo references are so easy to find these days, and invaluable. And judging from all the

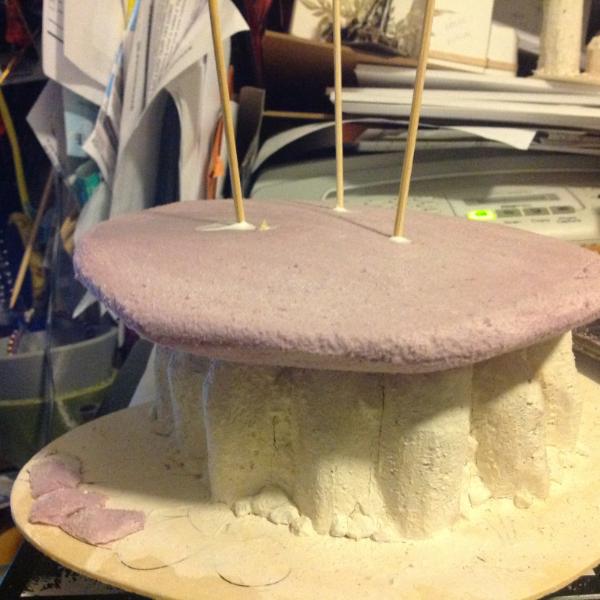
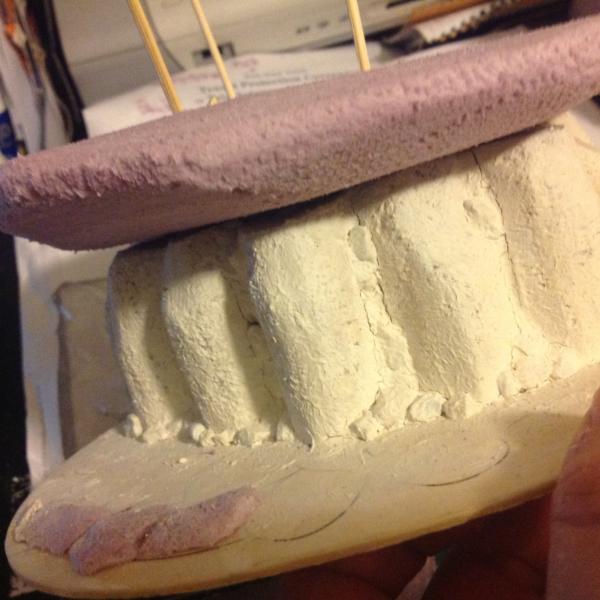


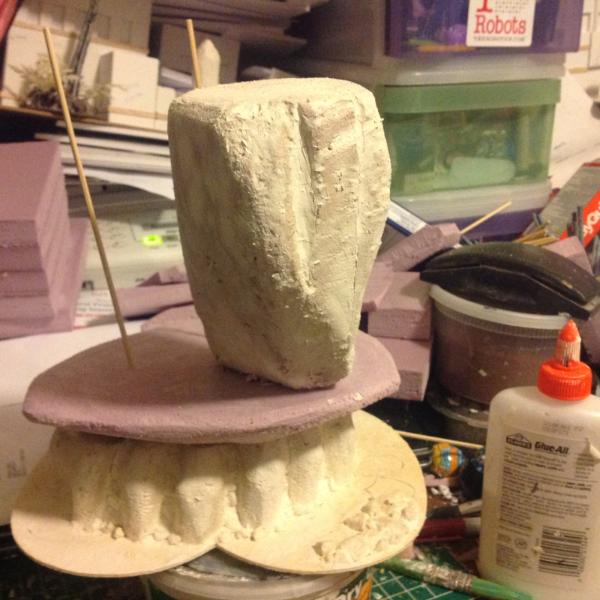
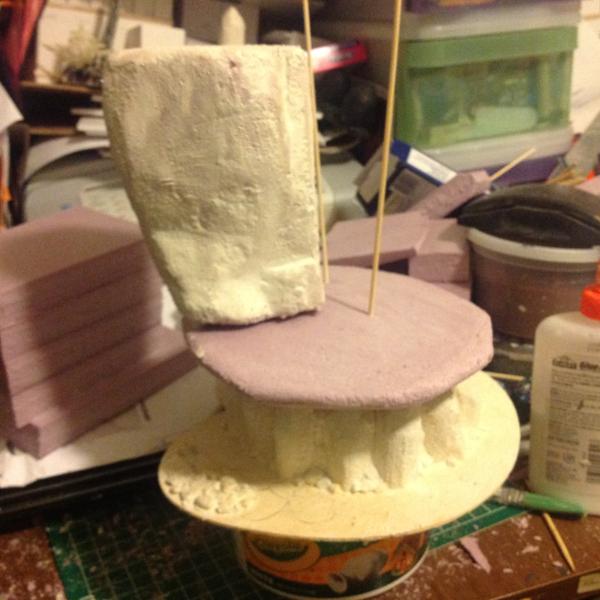
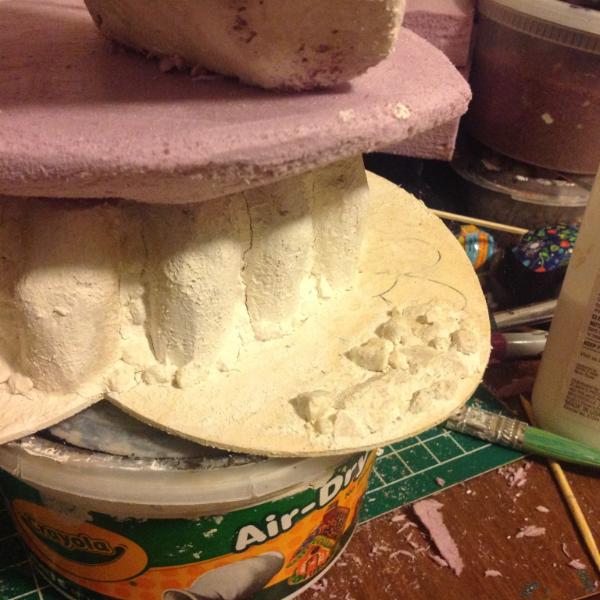
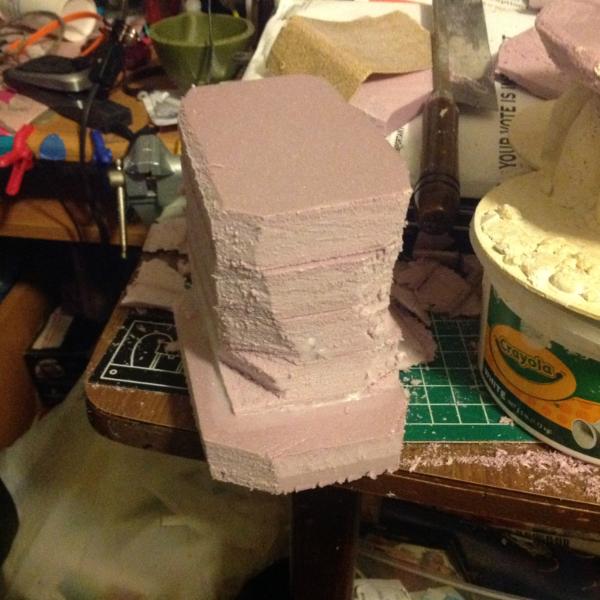
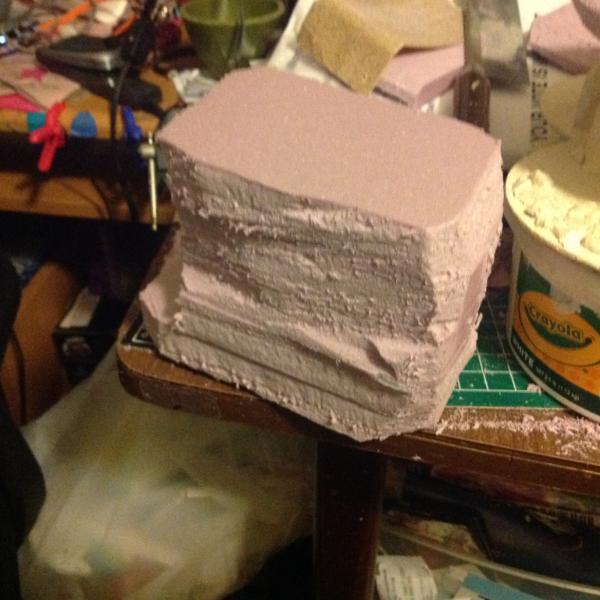
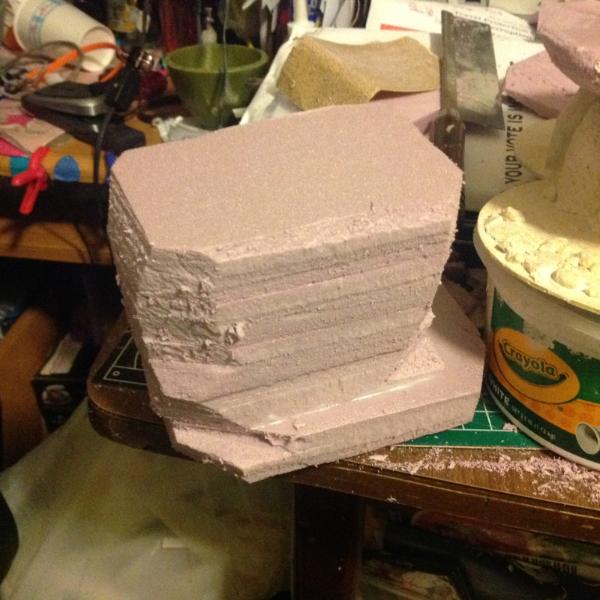
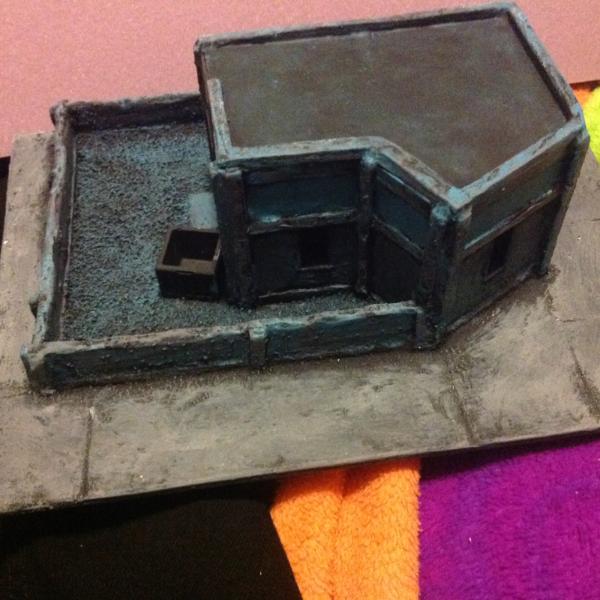
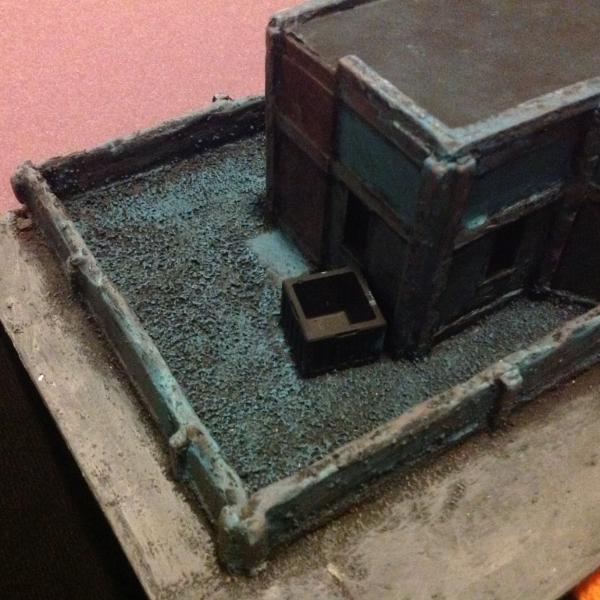
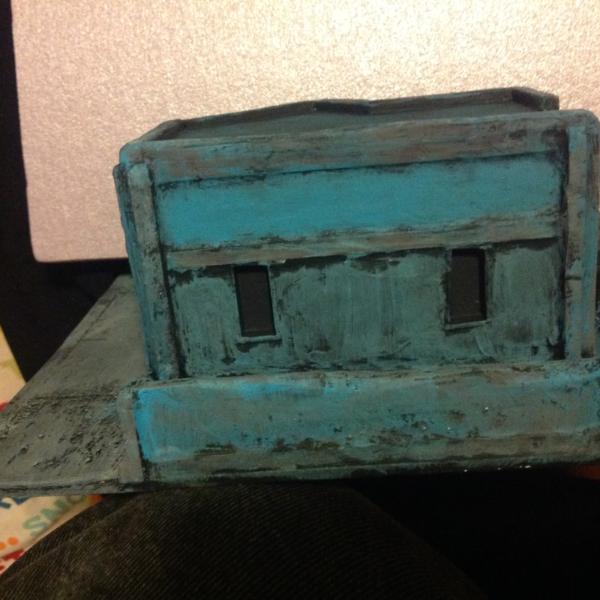
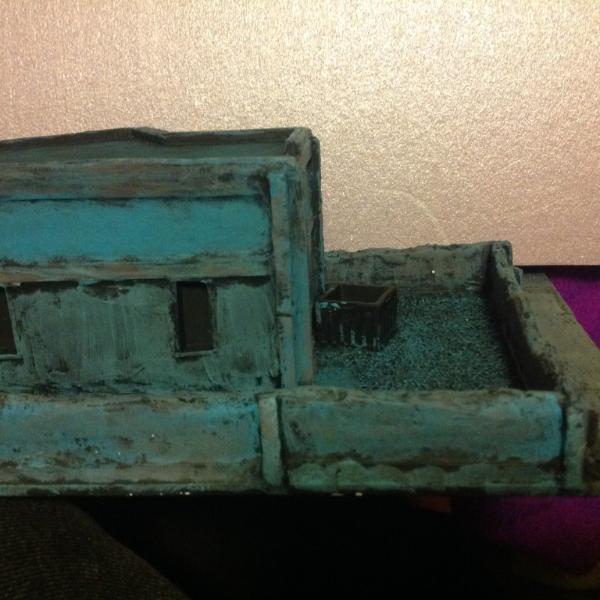
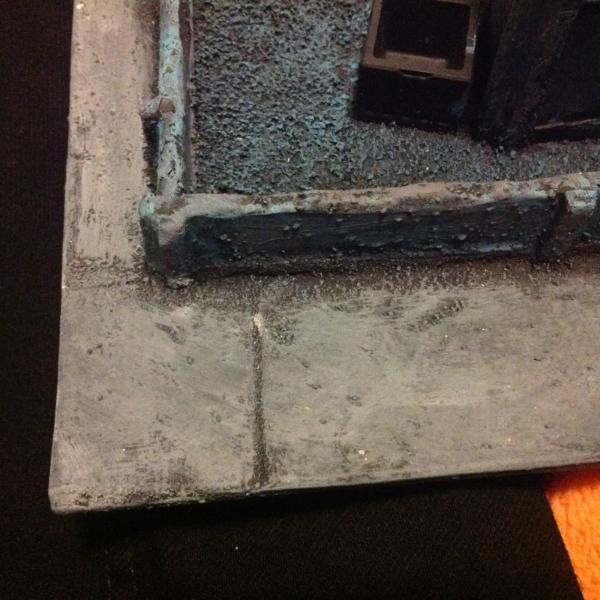
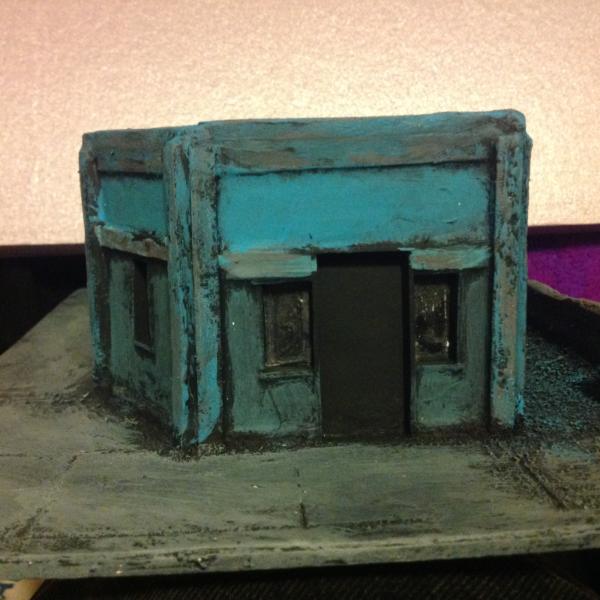
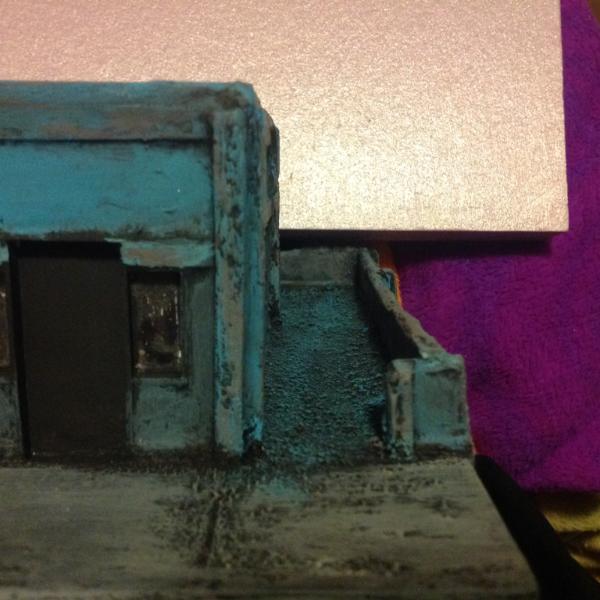
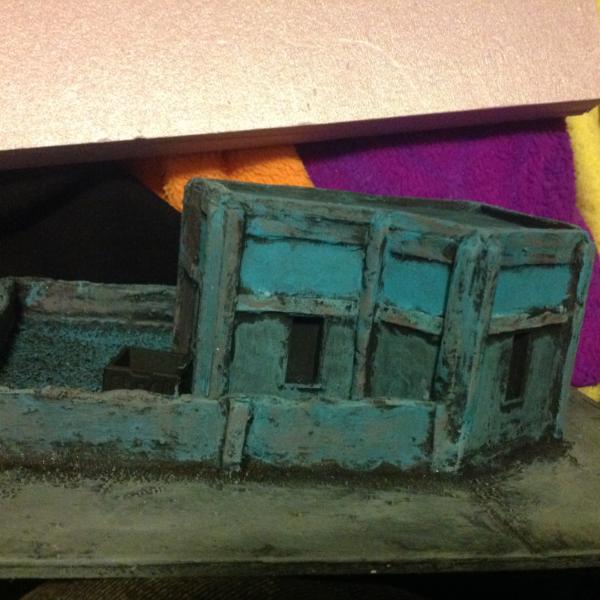
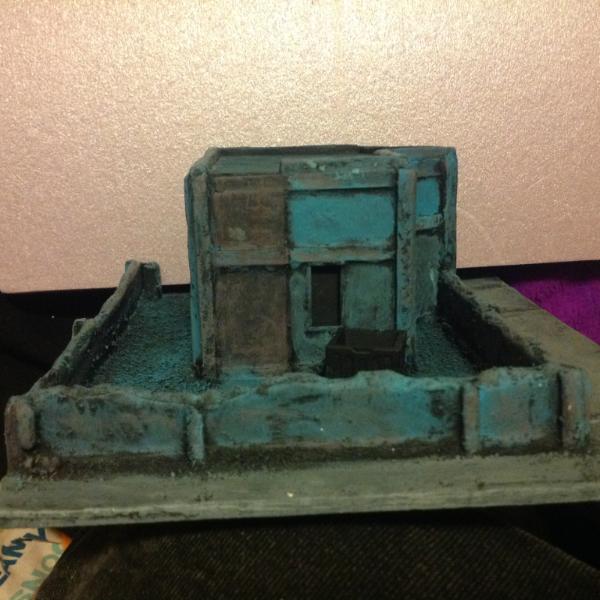
 that navigator stuff is inspiring indeed, I'm trying to channel some of it for Gitsplitta's mantis maker challenge.
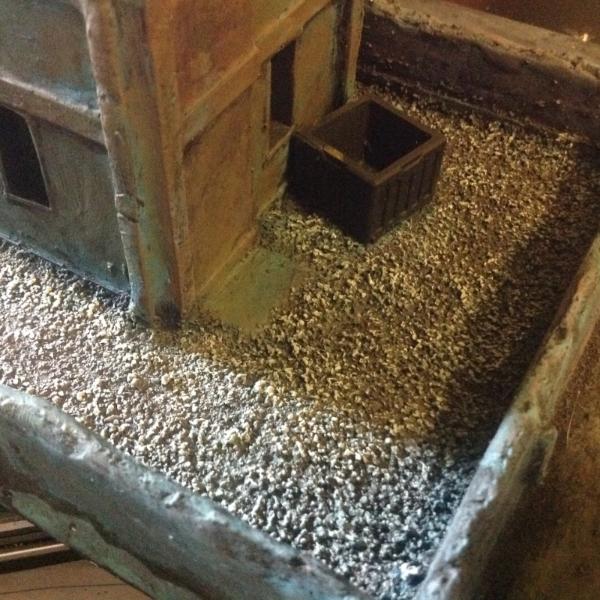
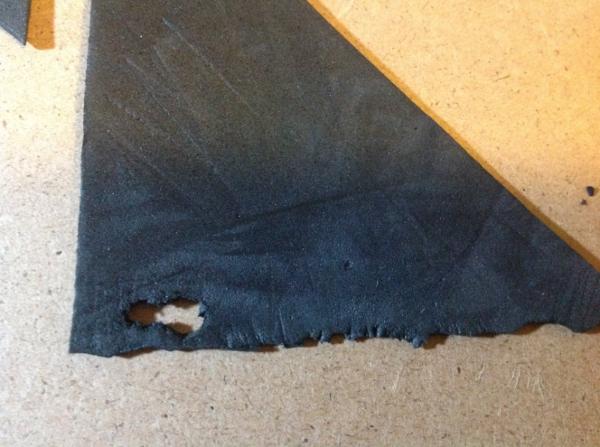
 ) echoing others here, chin up and for what it counts we are here bud.
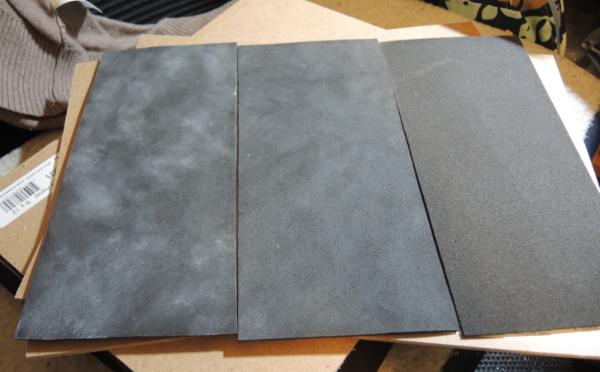
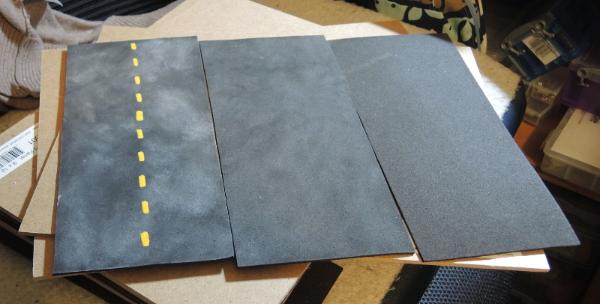
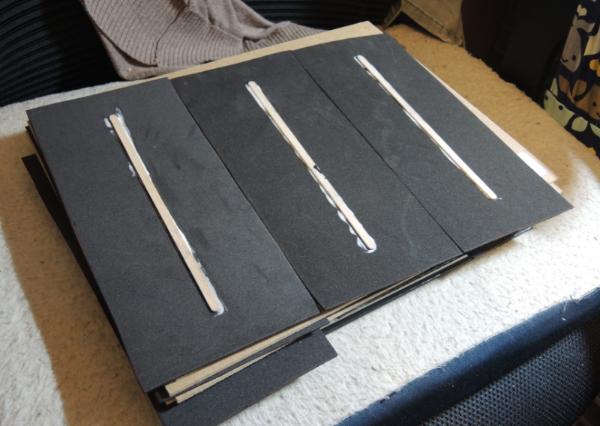
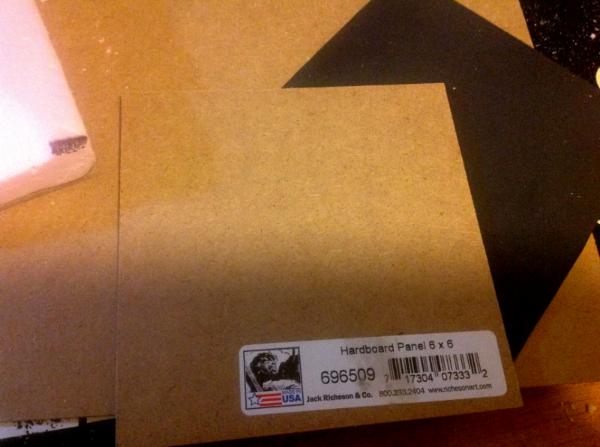
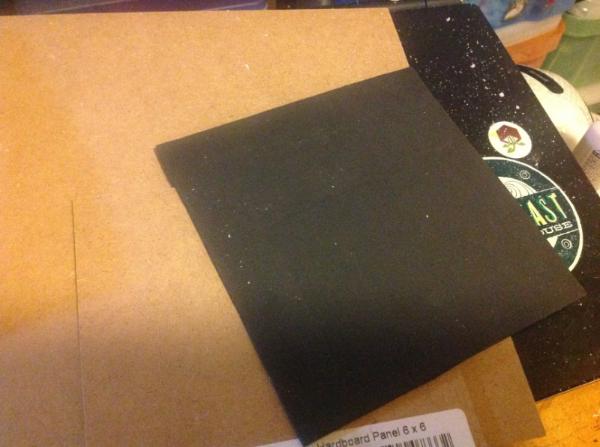
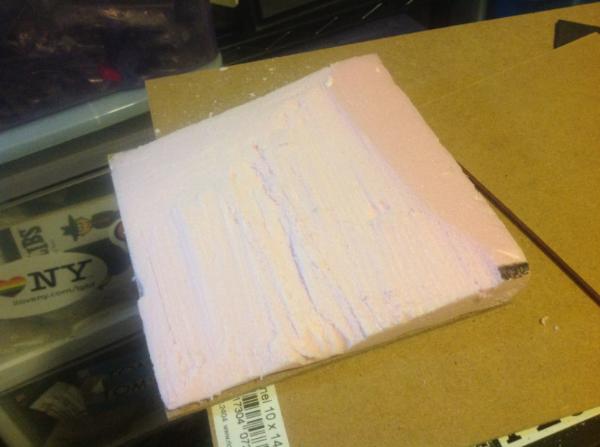
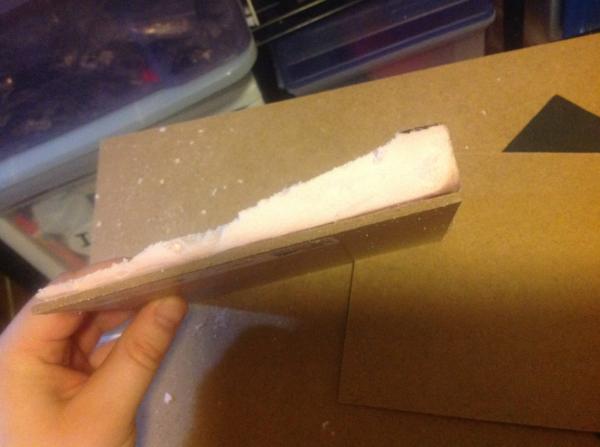
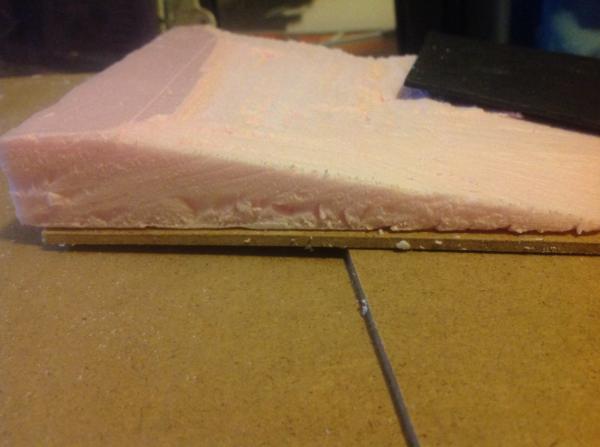

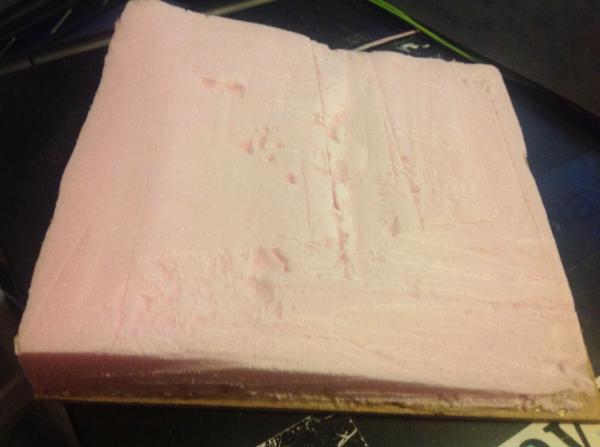
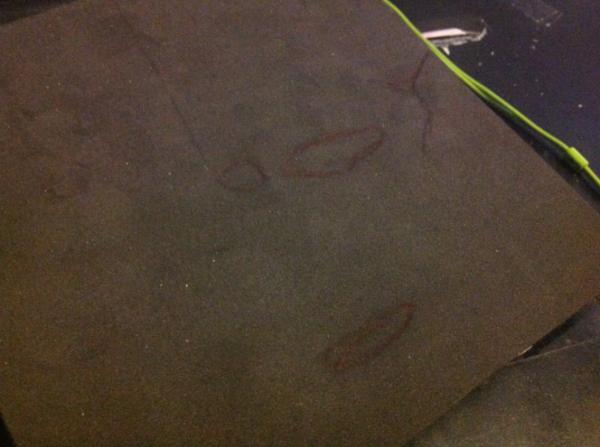
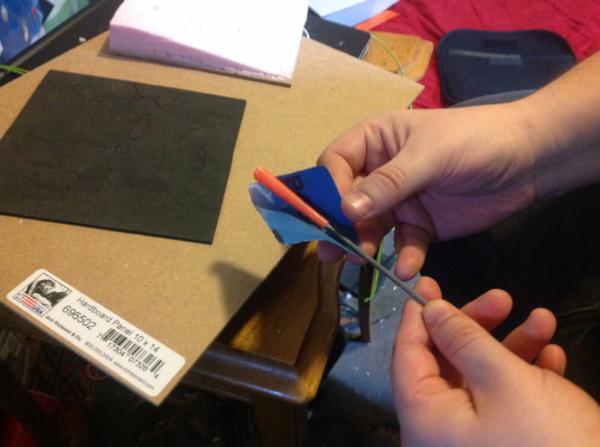
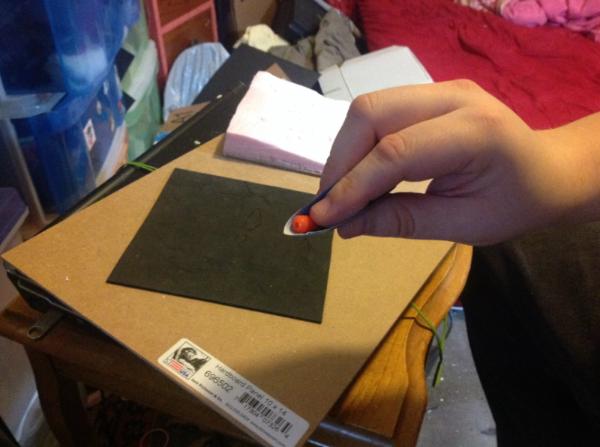
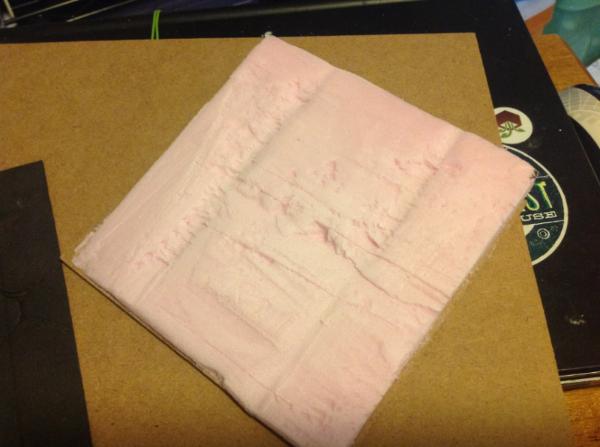
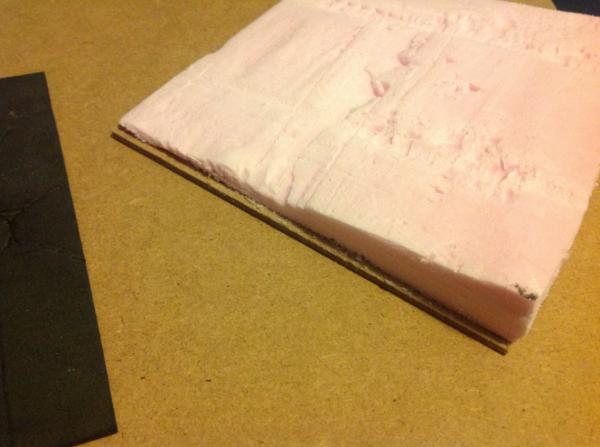 [/url]
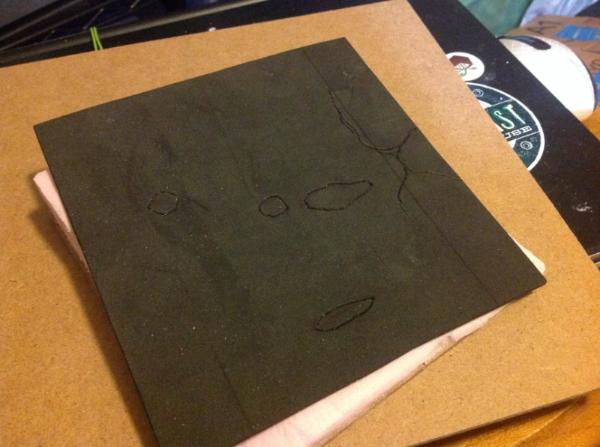
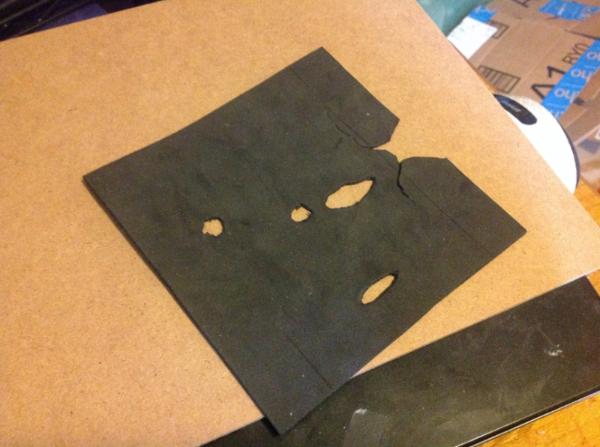
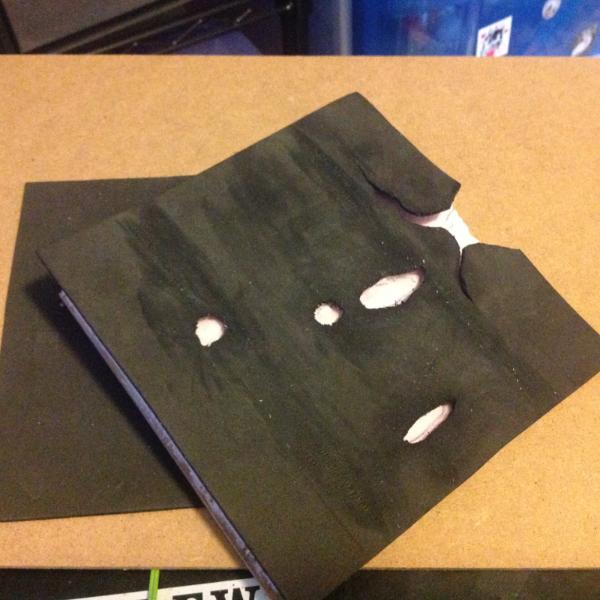

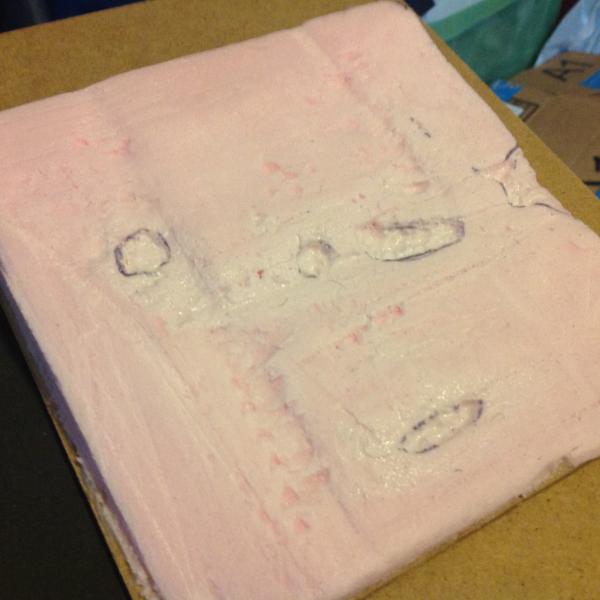


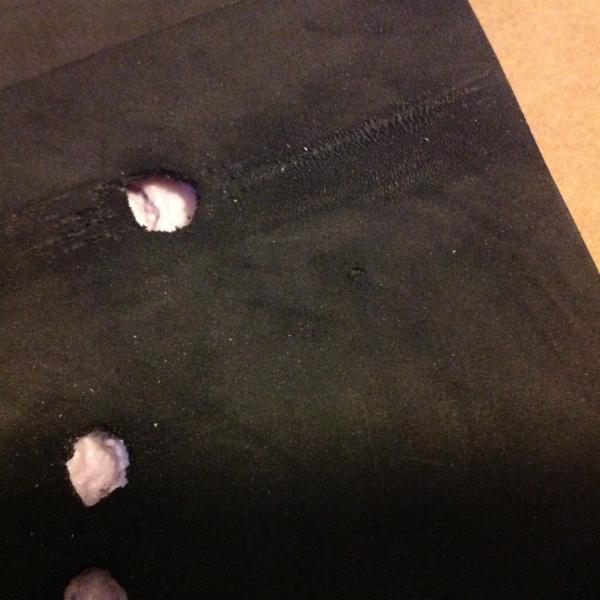
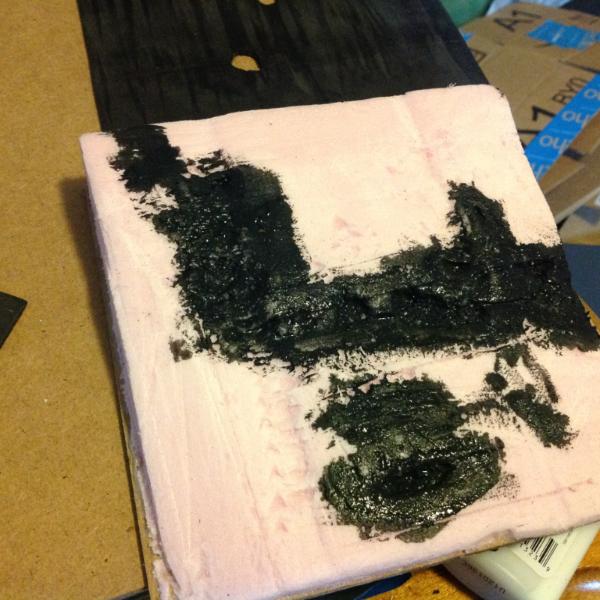
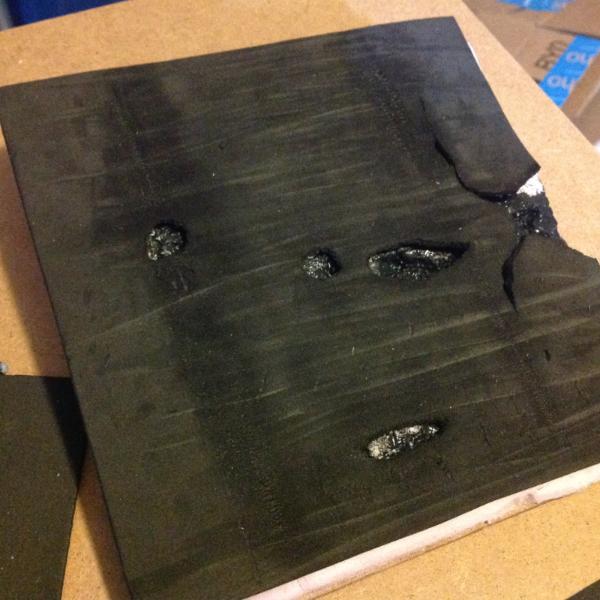
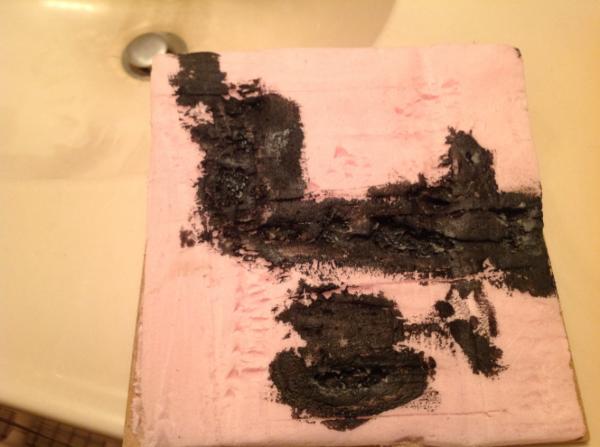
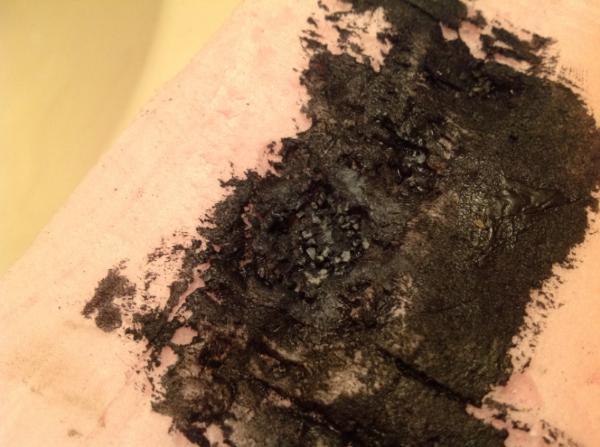
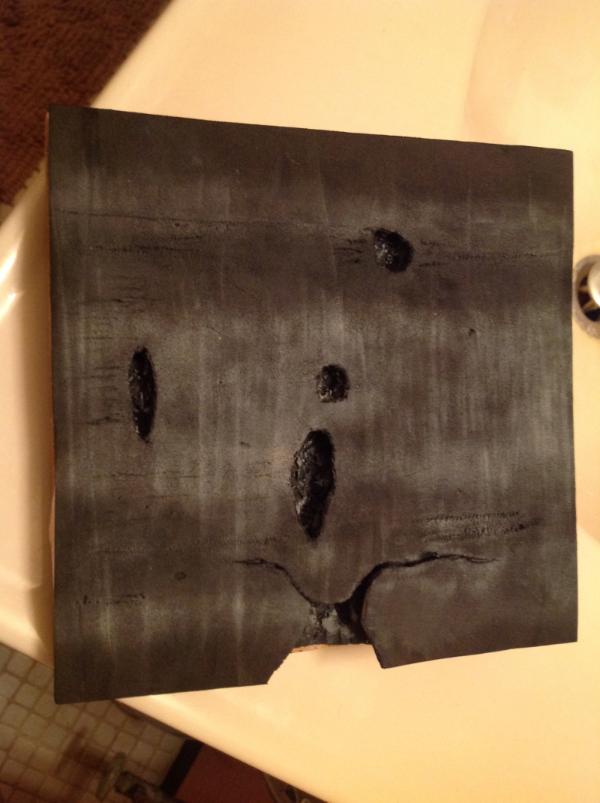

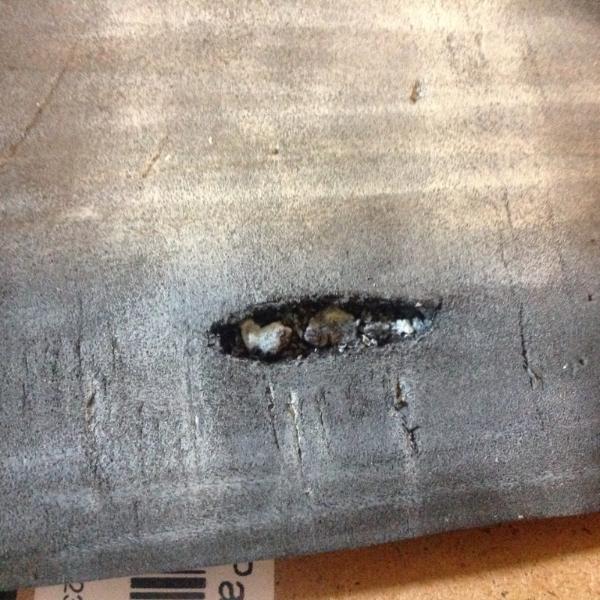
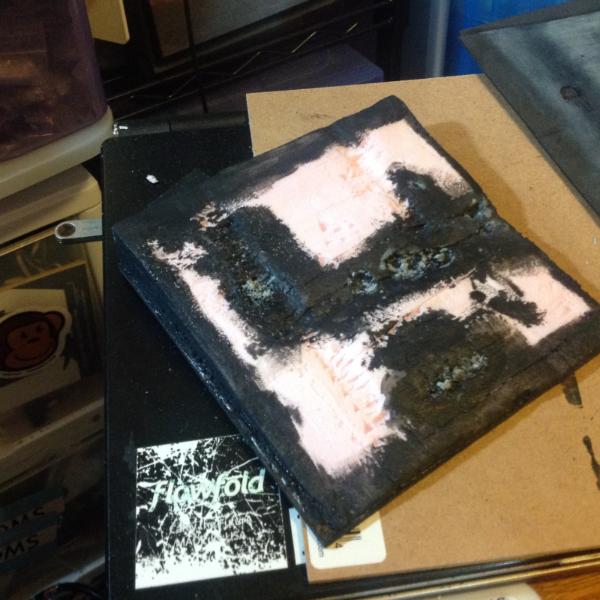
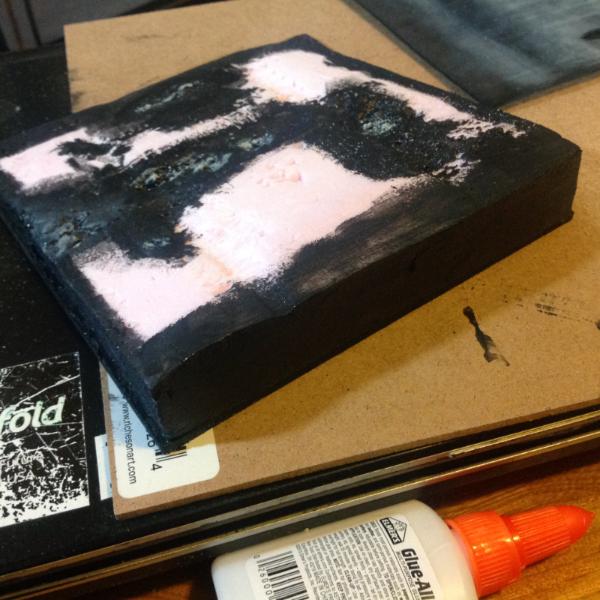
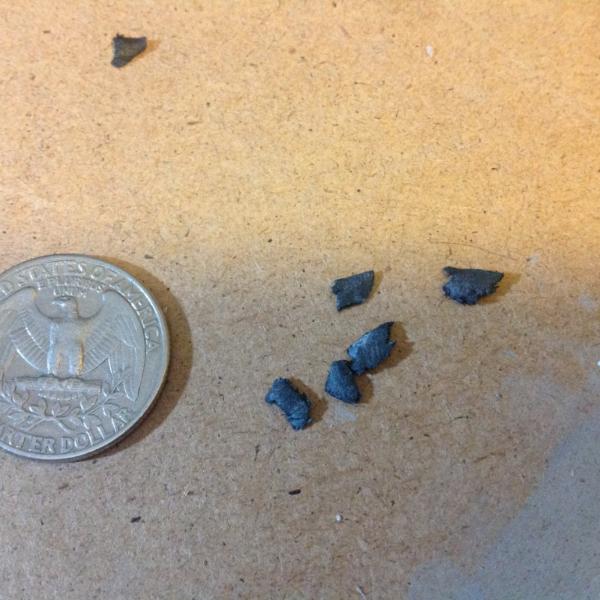
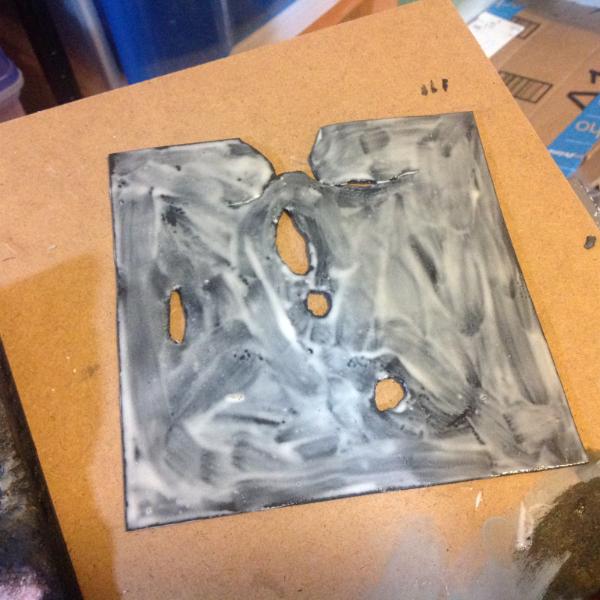
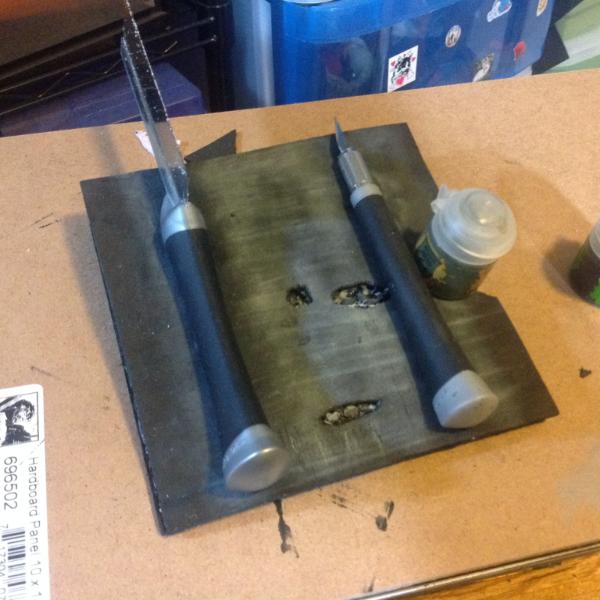
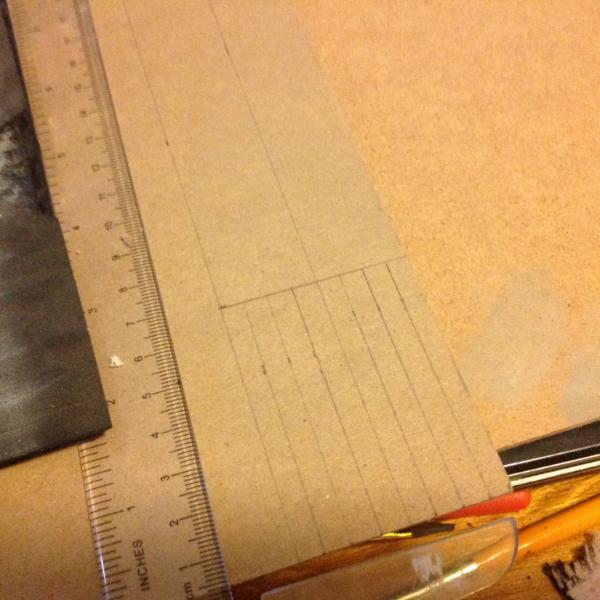

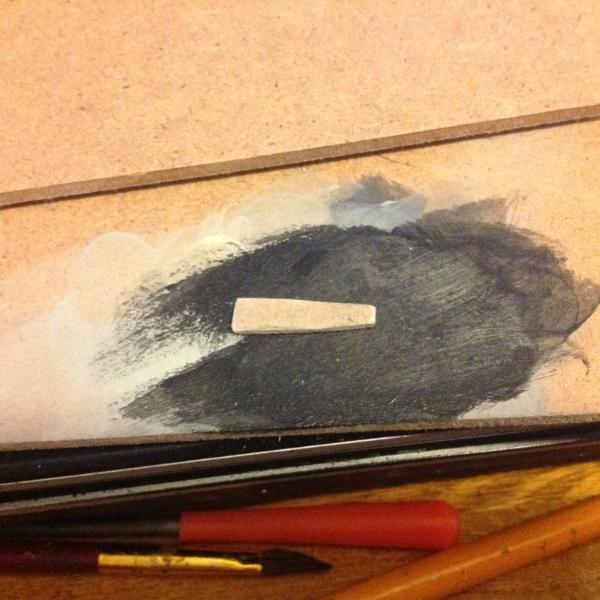
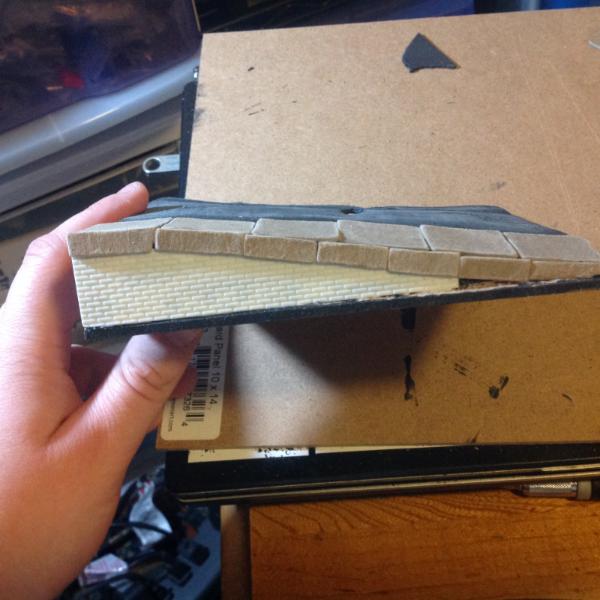
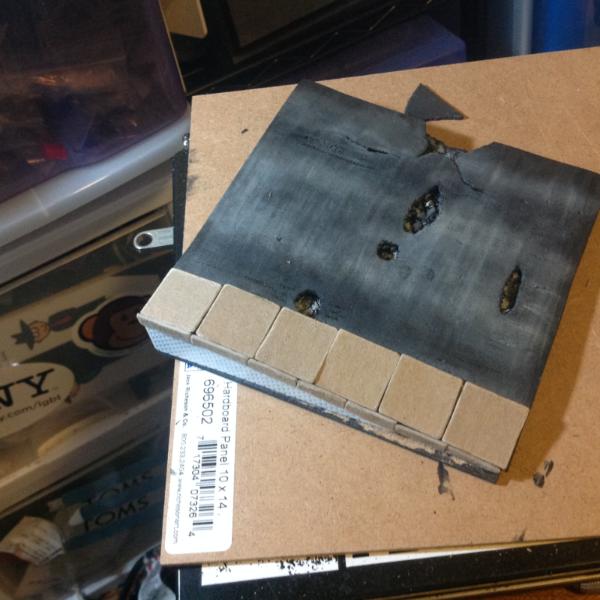
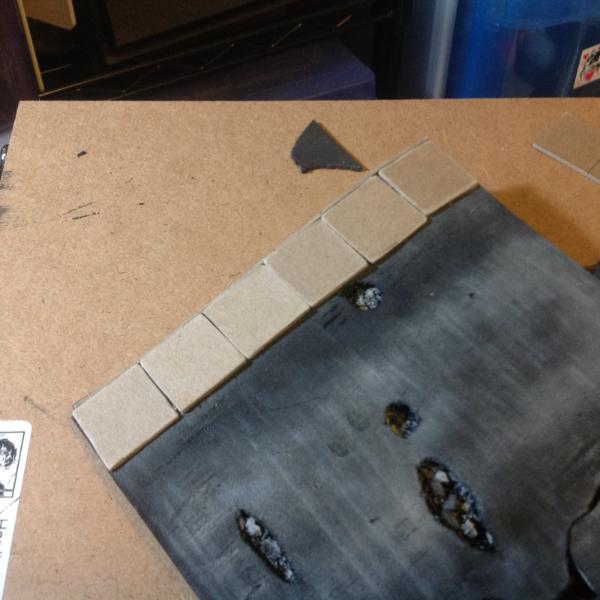


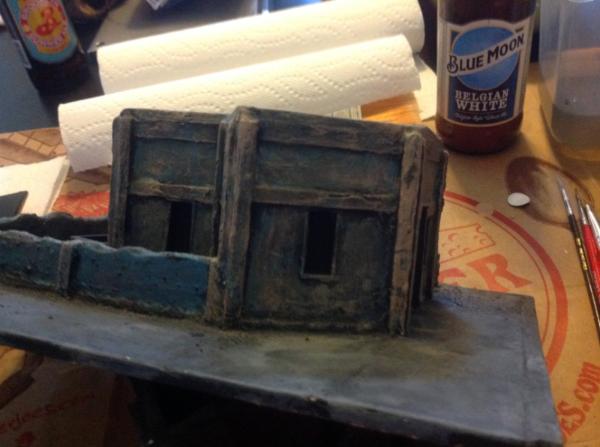
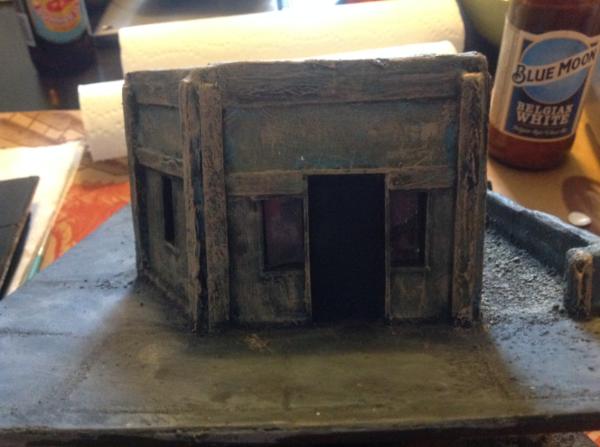
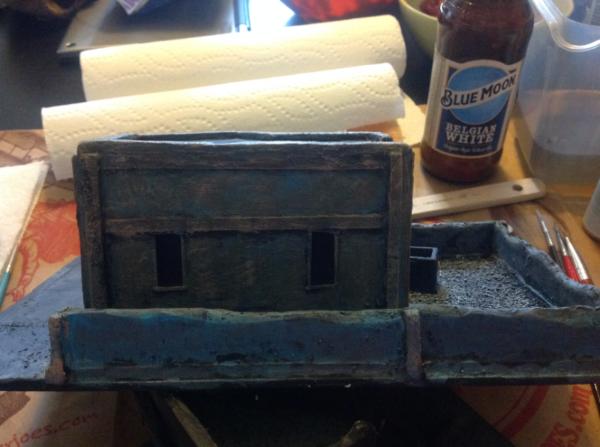
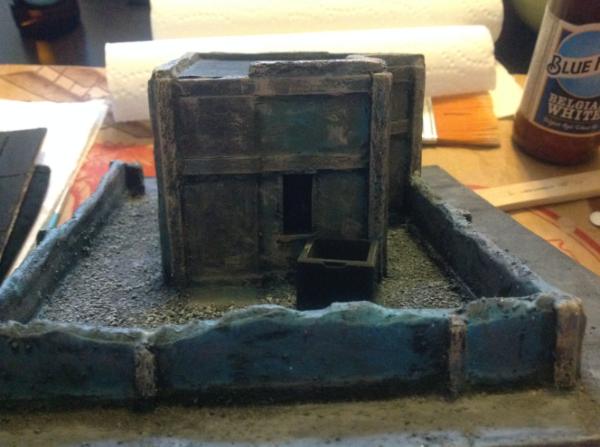
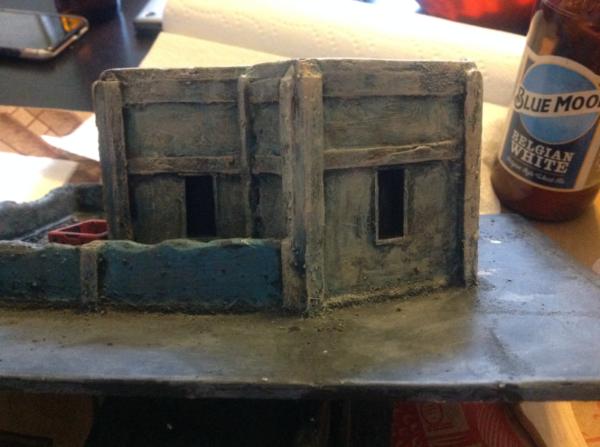
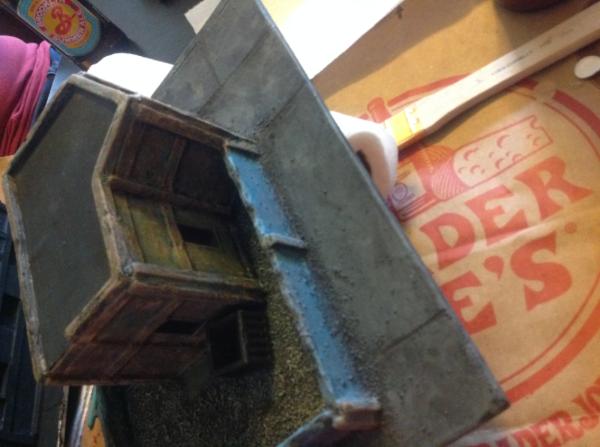
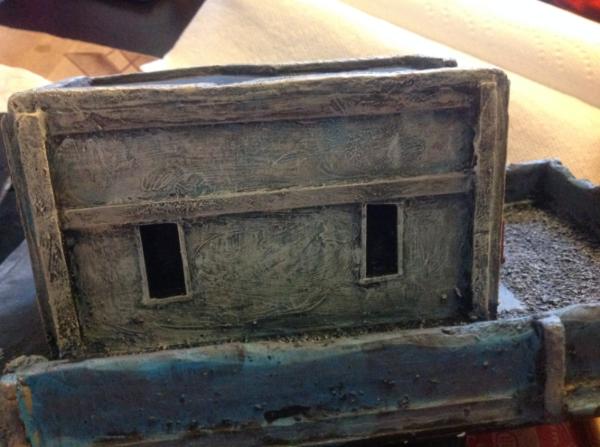
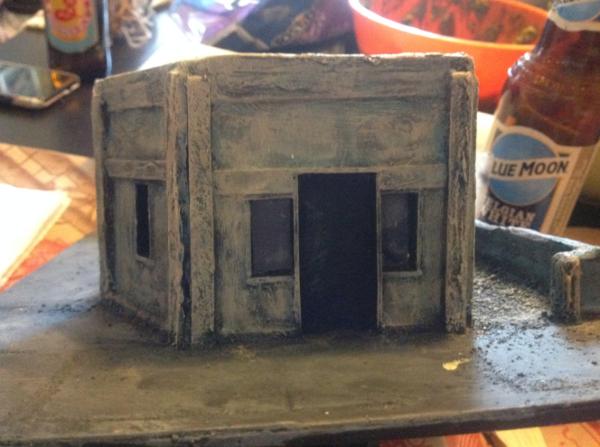
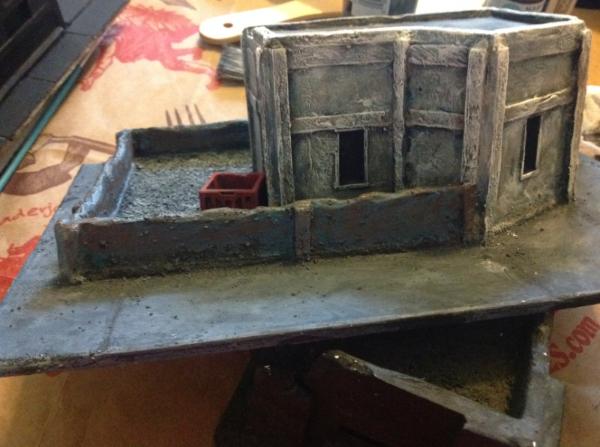
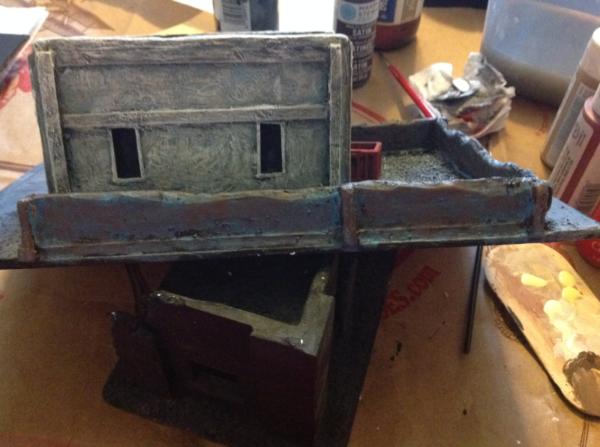
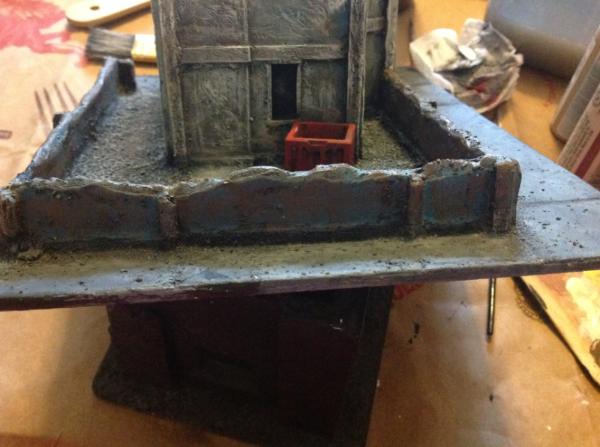
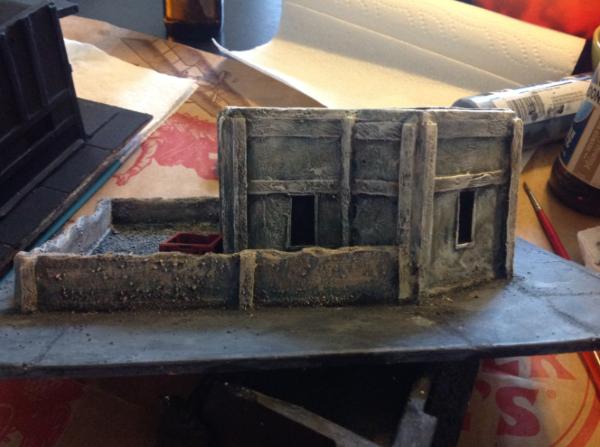
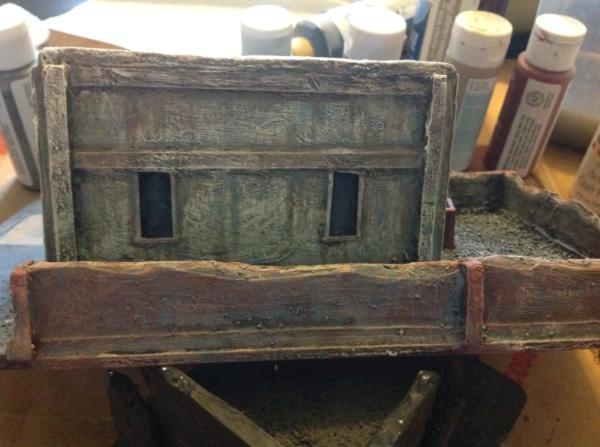
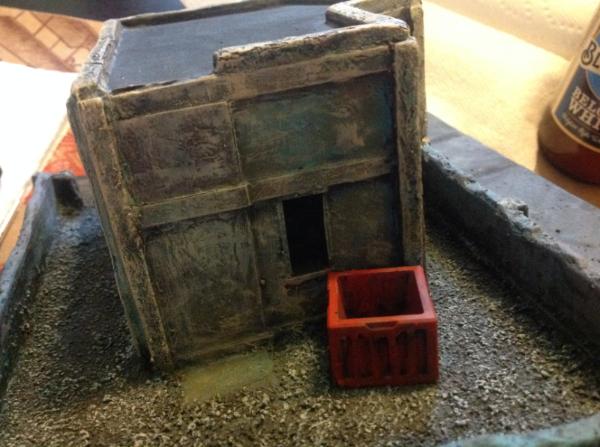
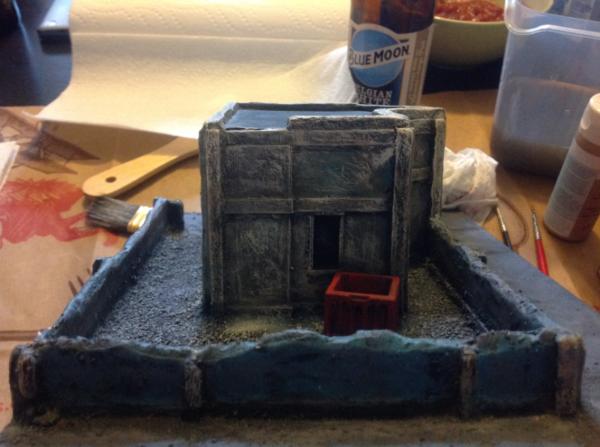
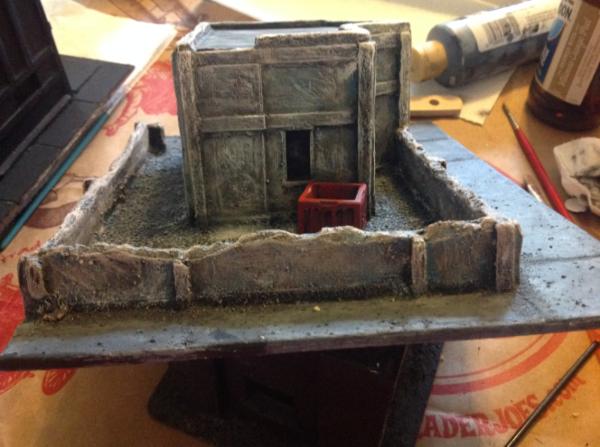
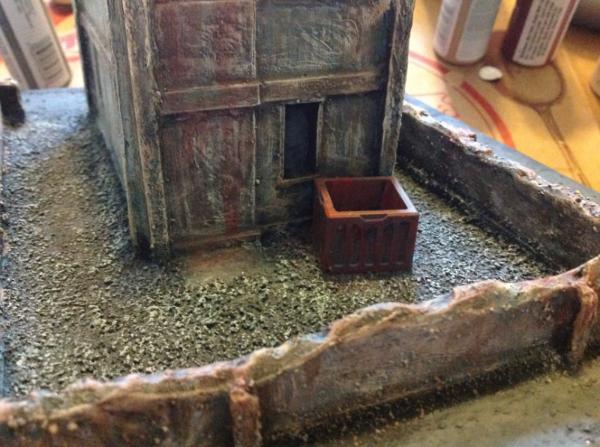
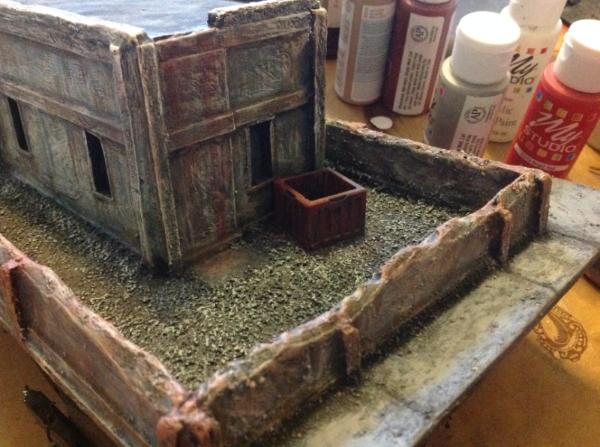
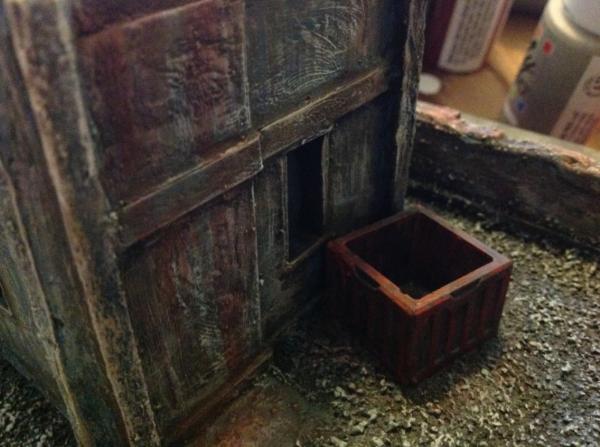
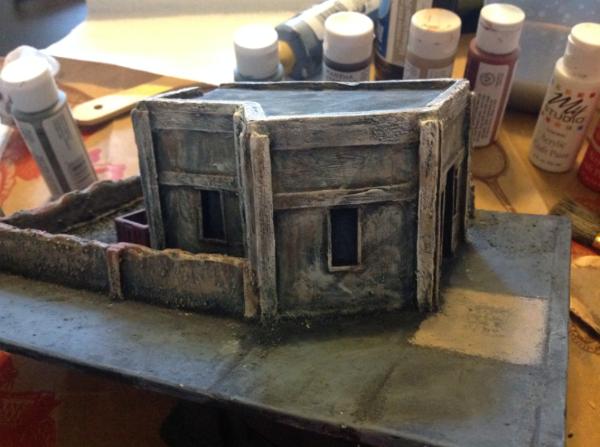
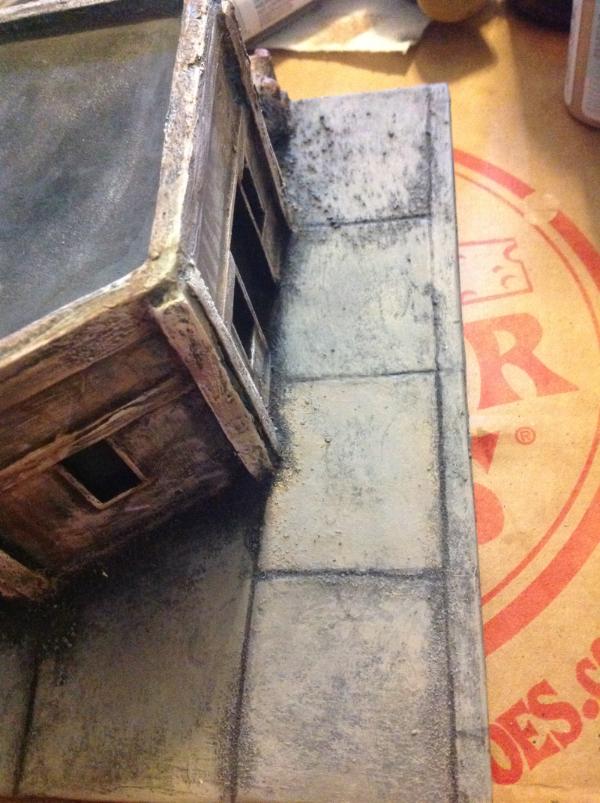
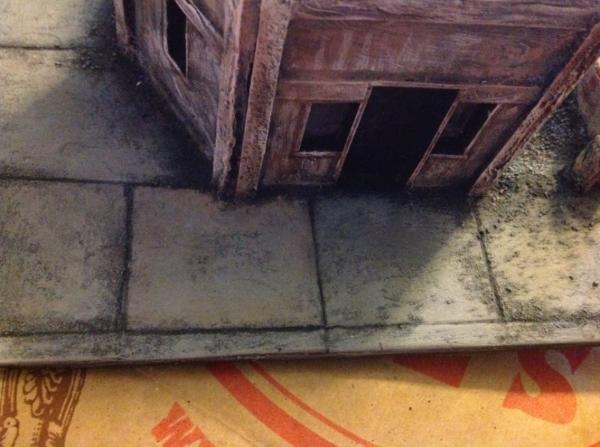
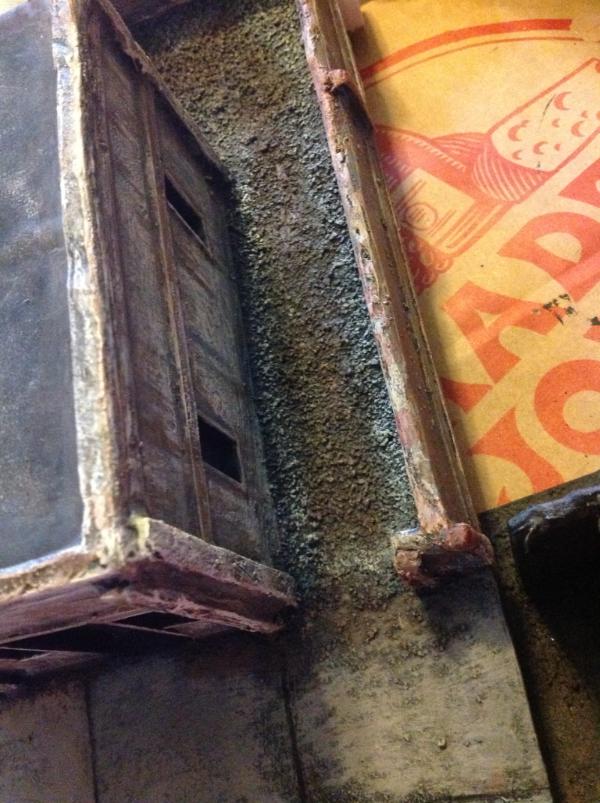
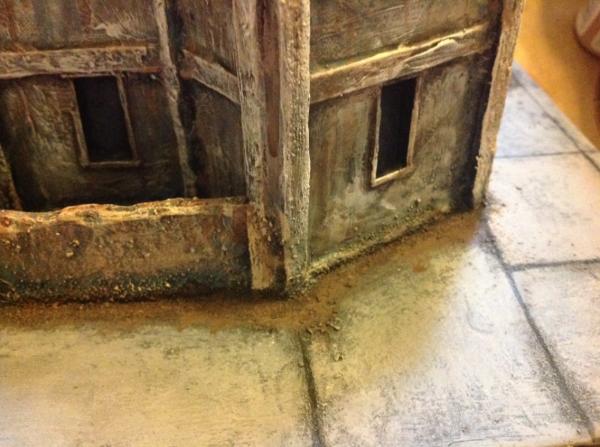
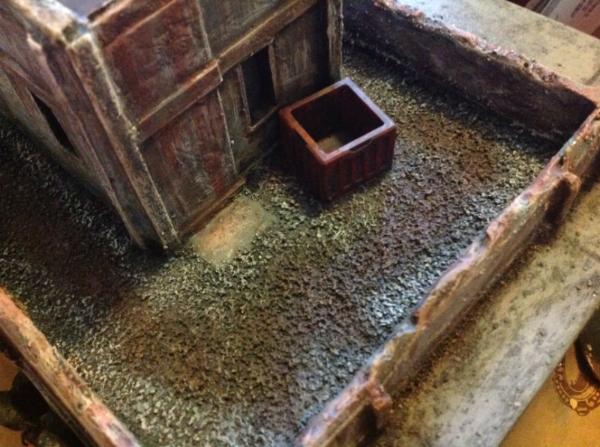
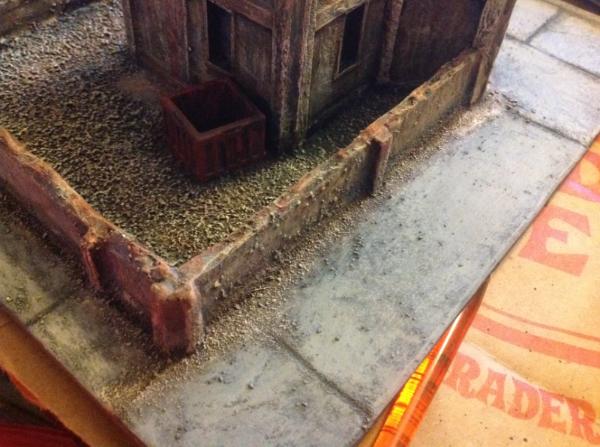
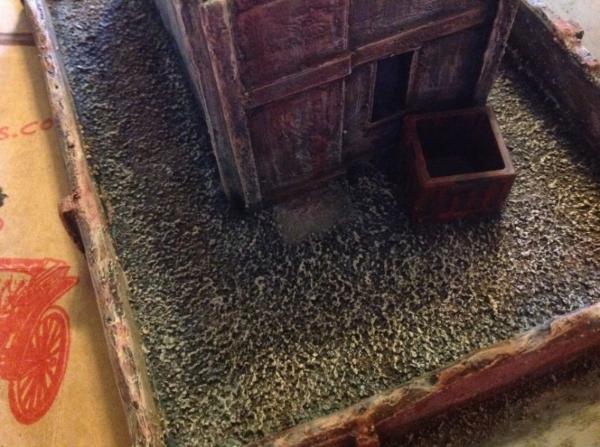
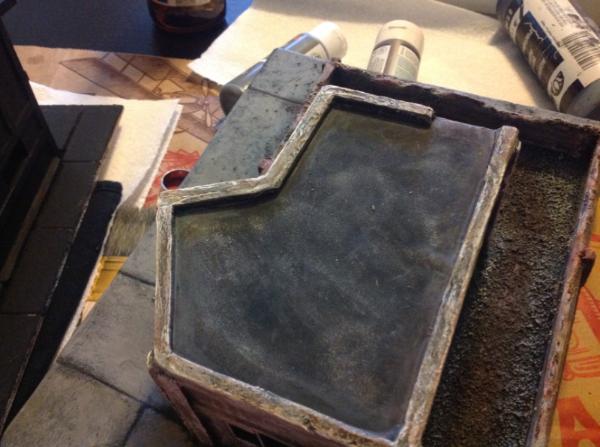
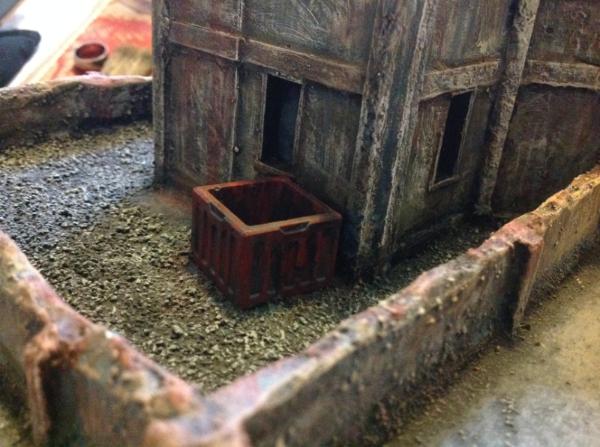
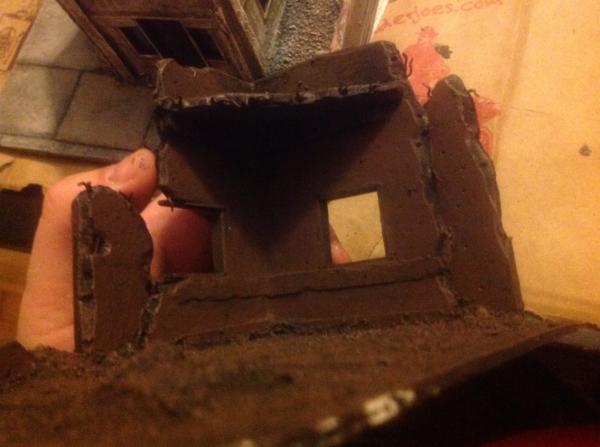
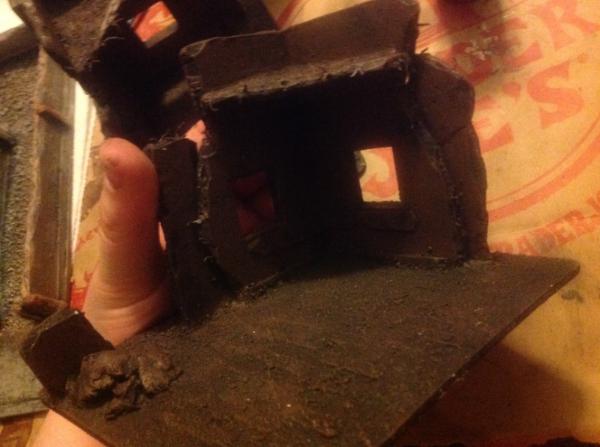
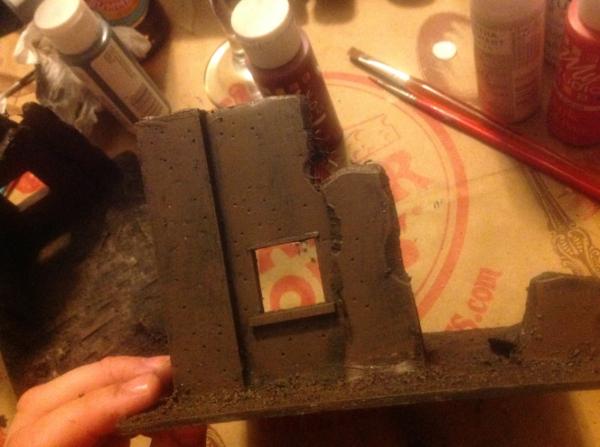
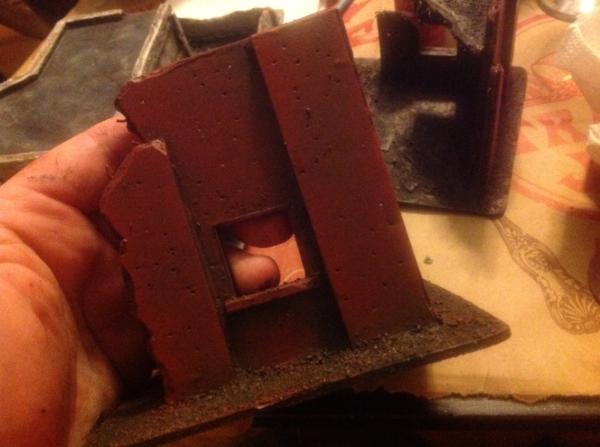
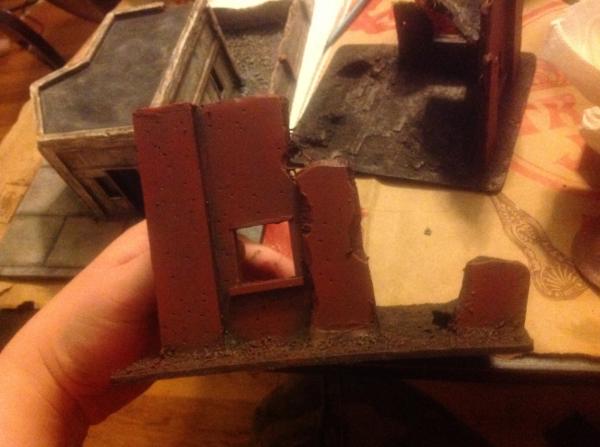
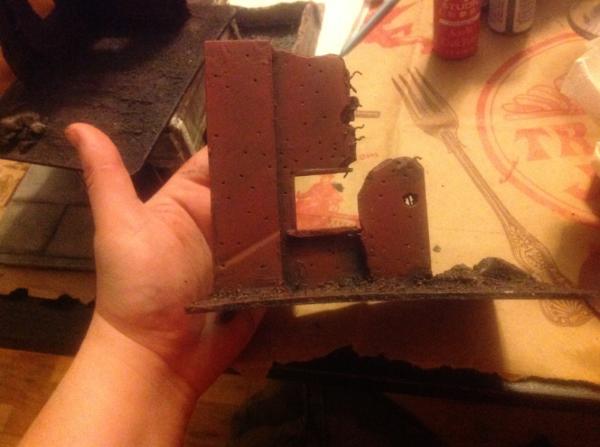
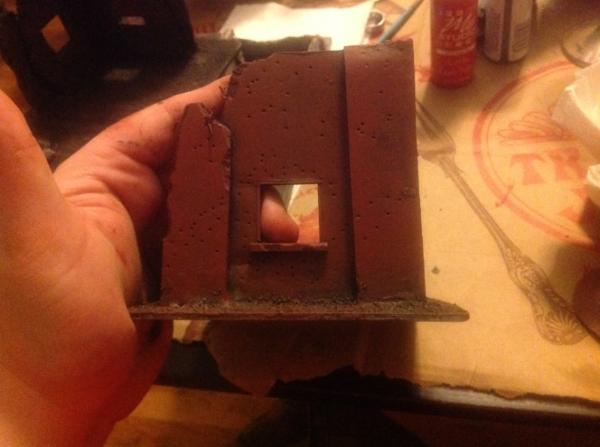
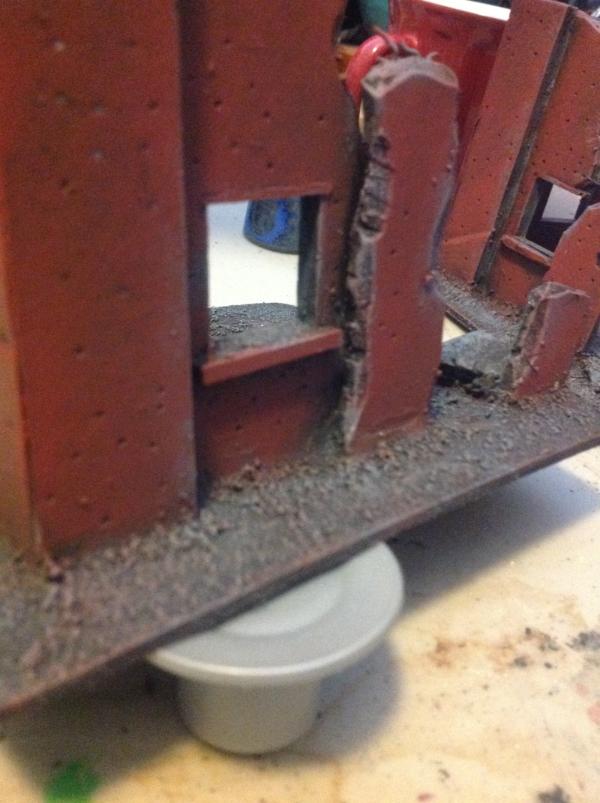
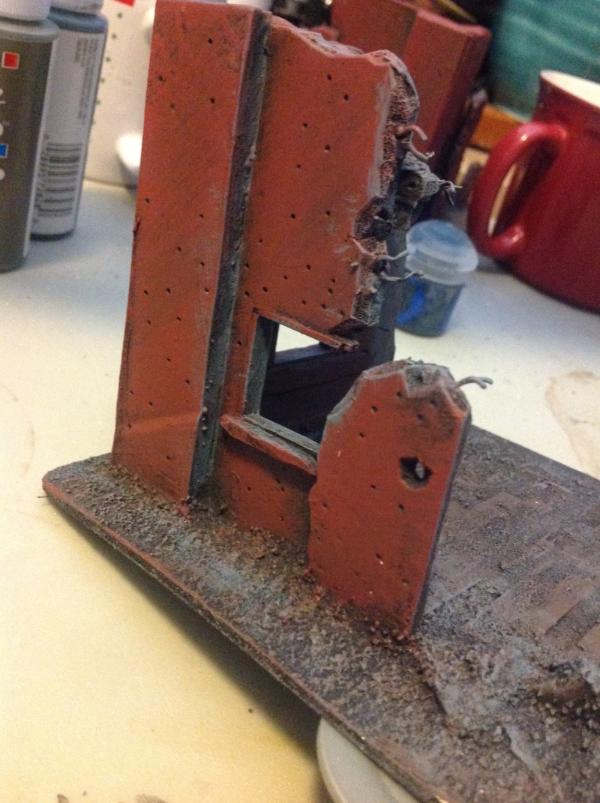
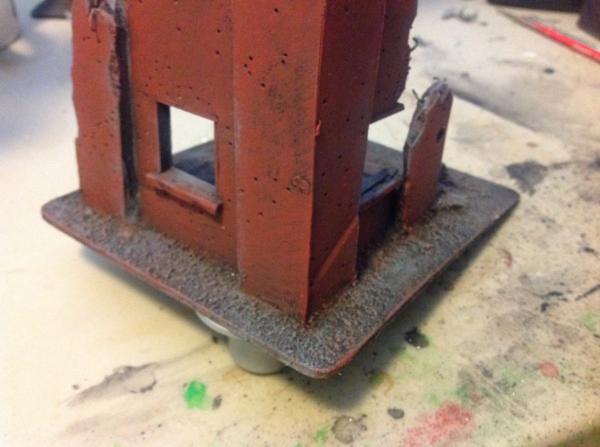
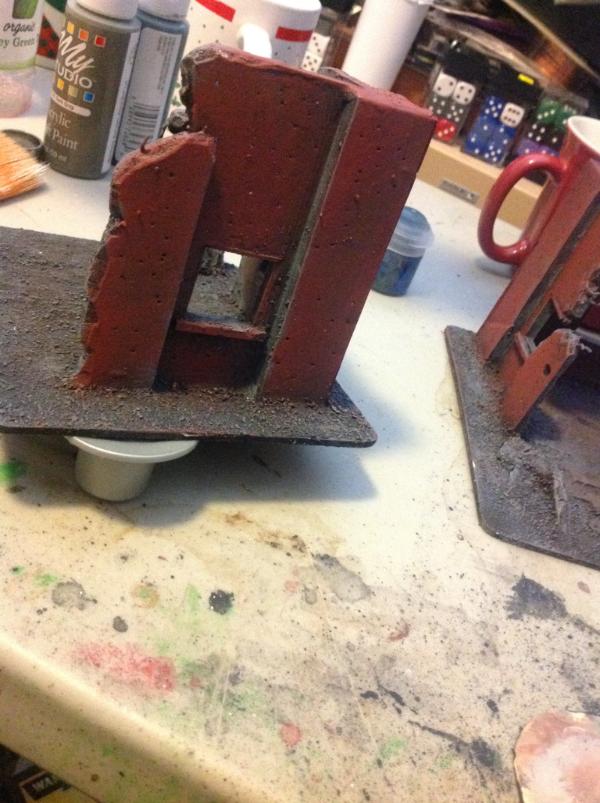
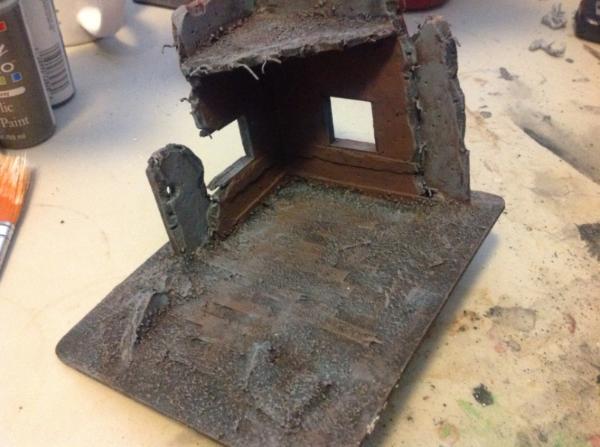
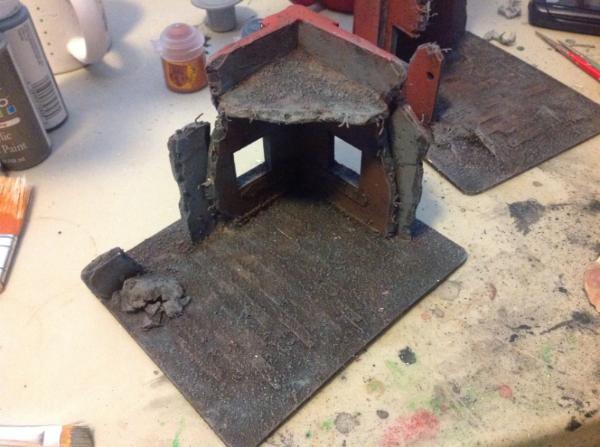
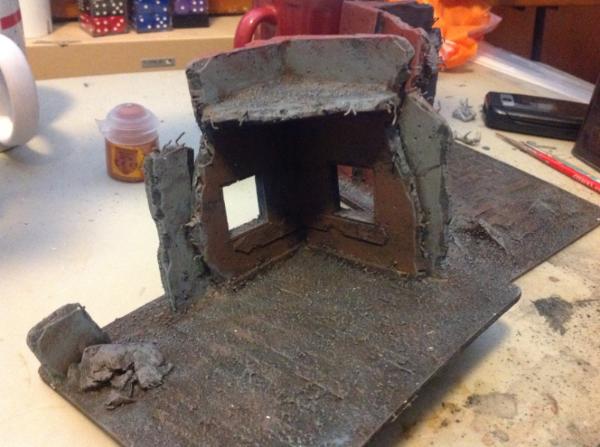
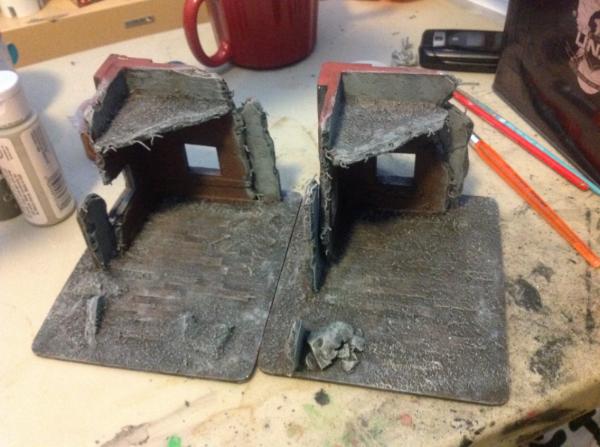
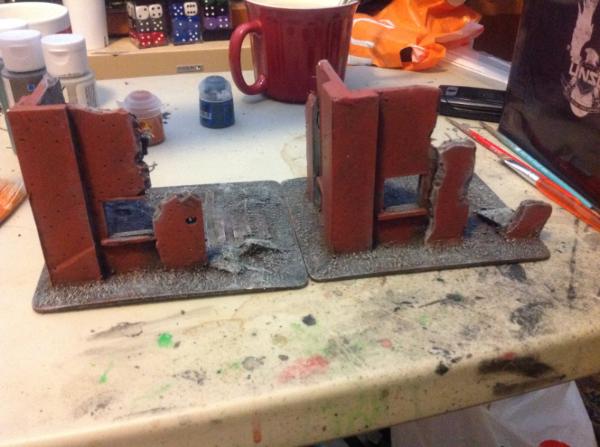
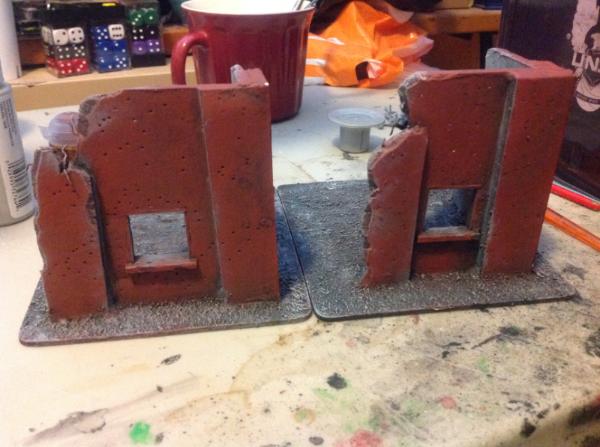
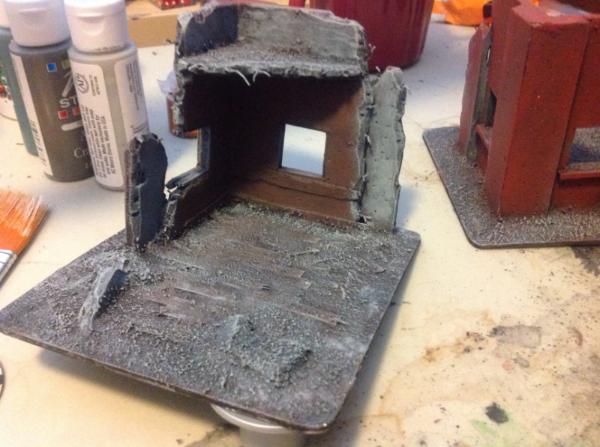
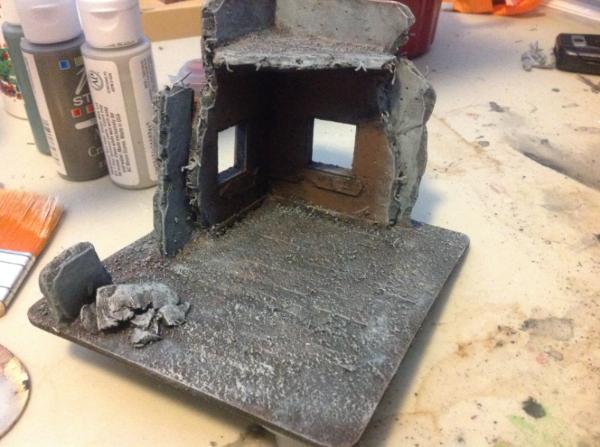
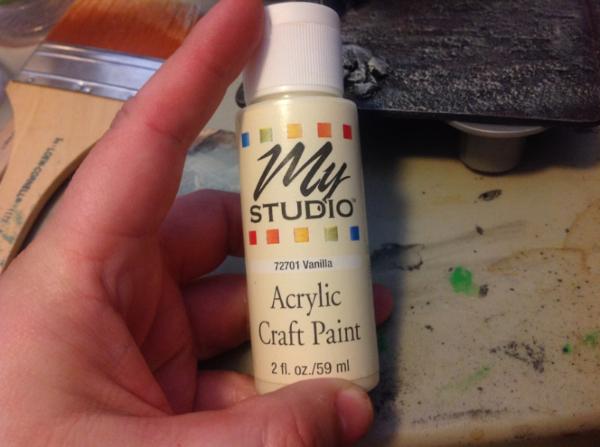
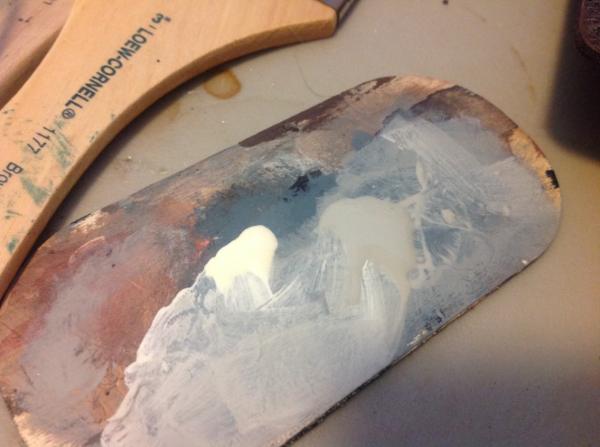
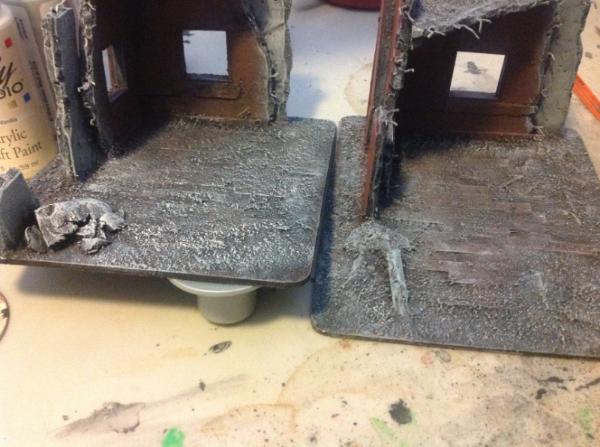
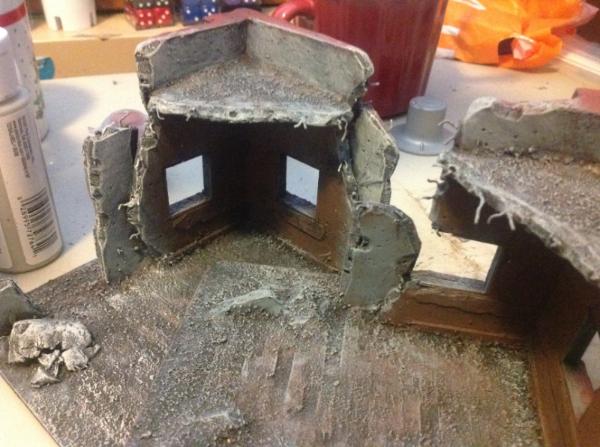
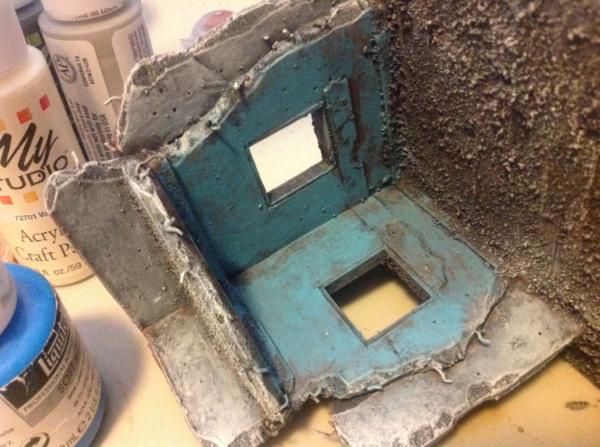
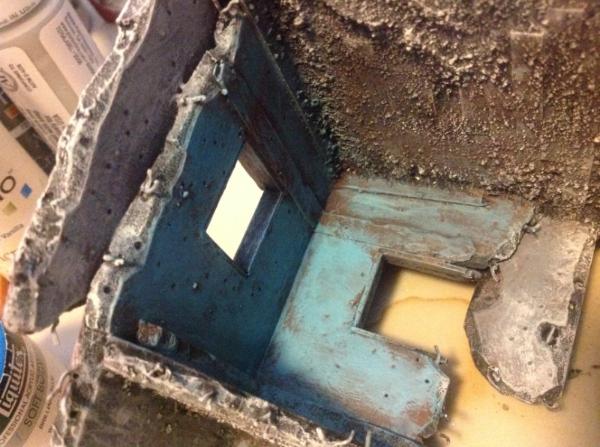
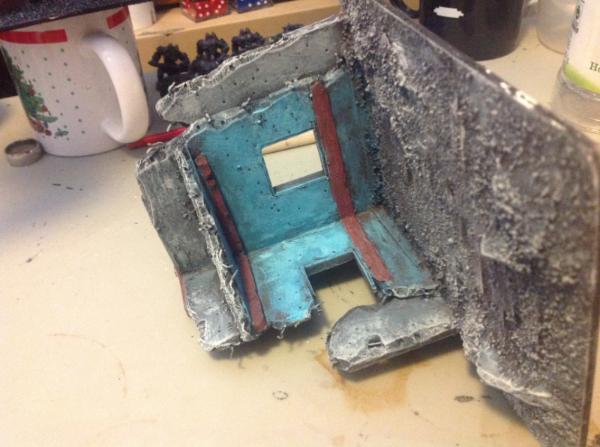
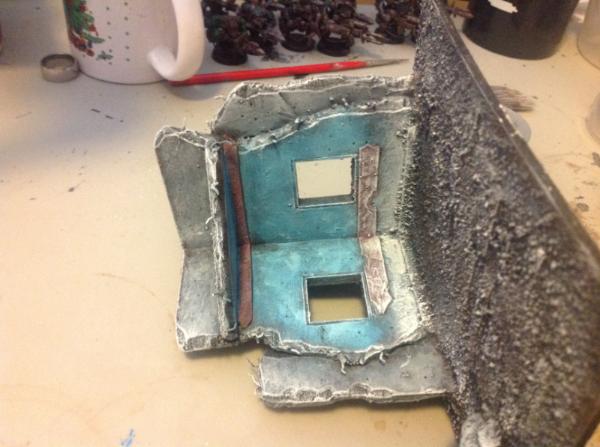

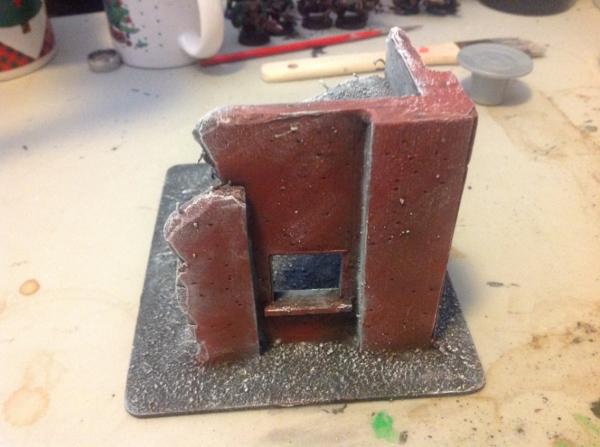
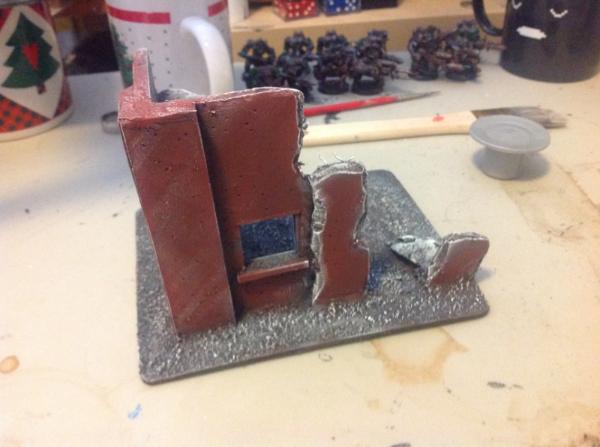

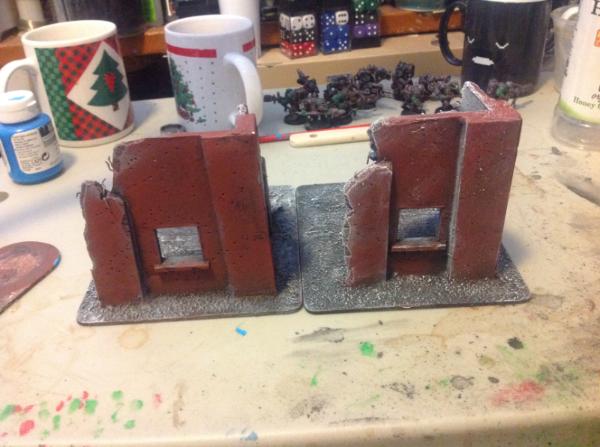
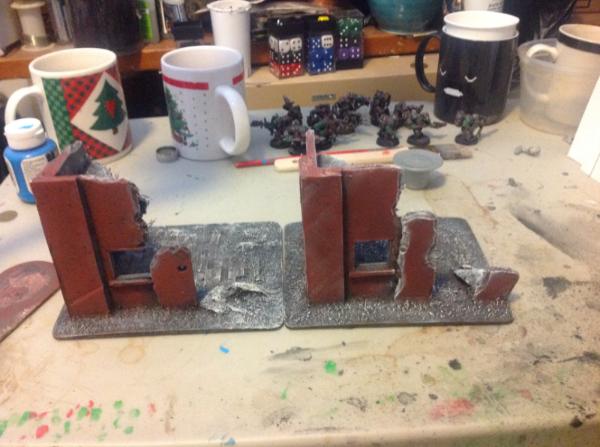
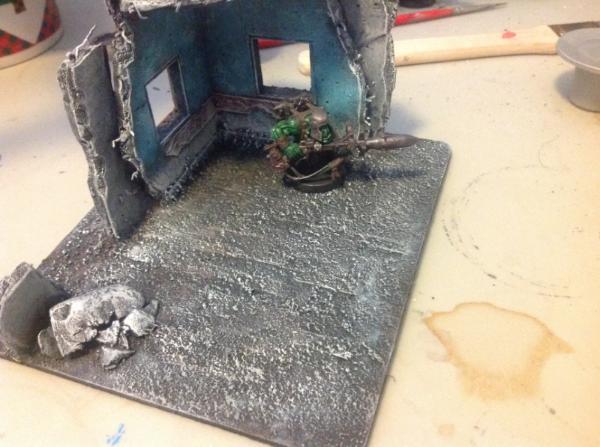
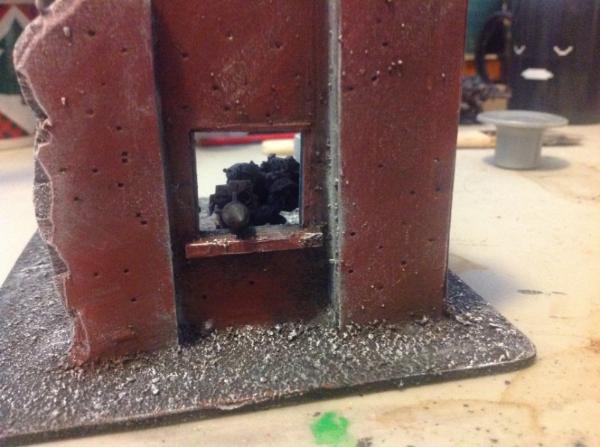
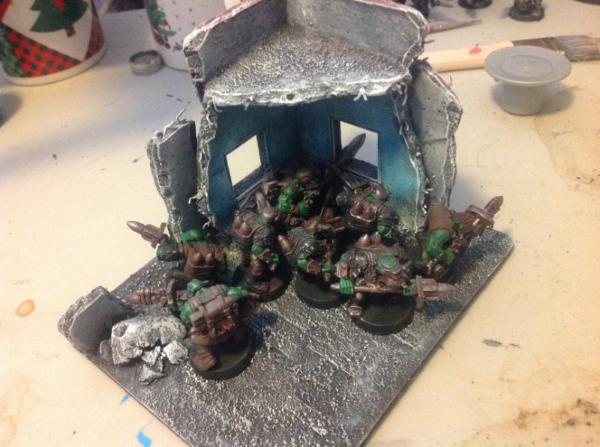

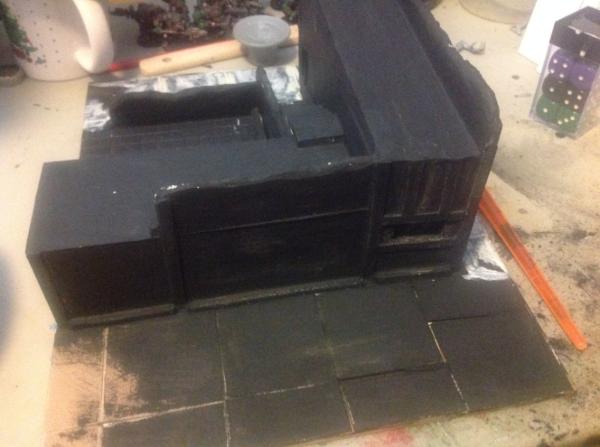
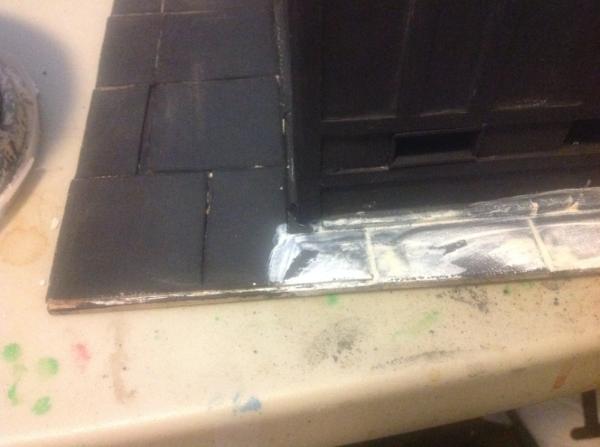
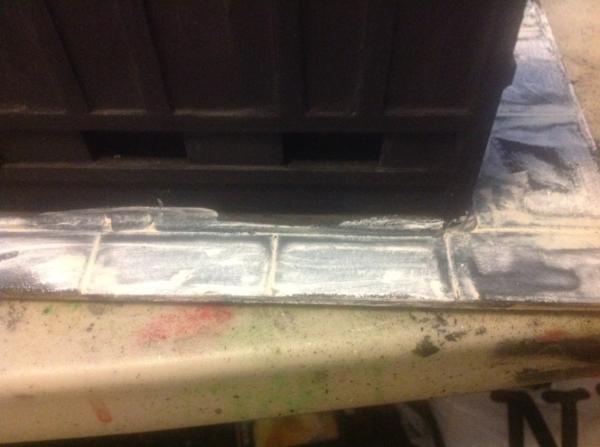
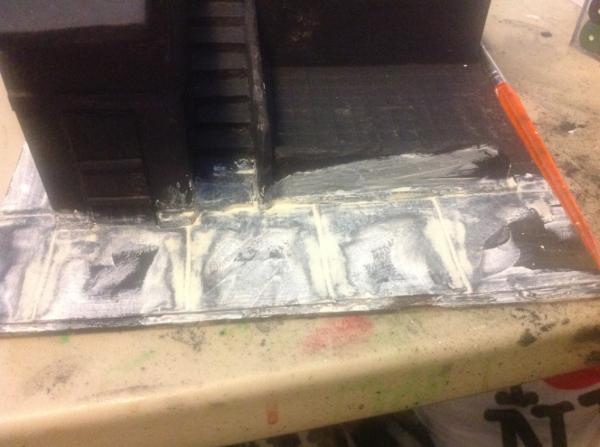
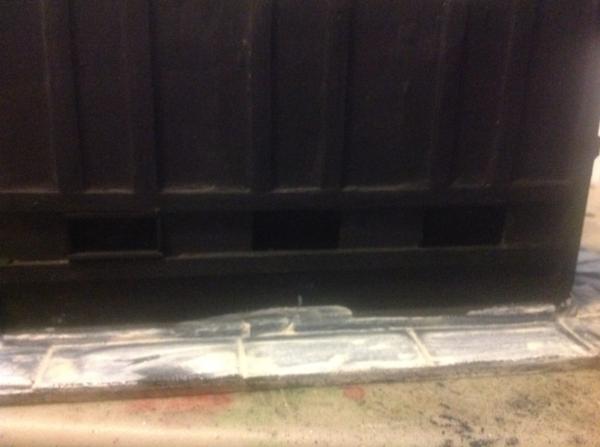
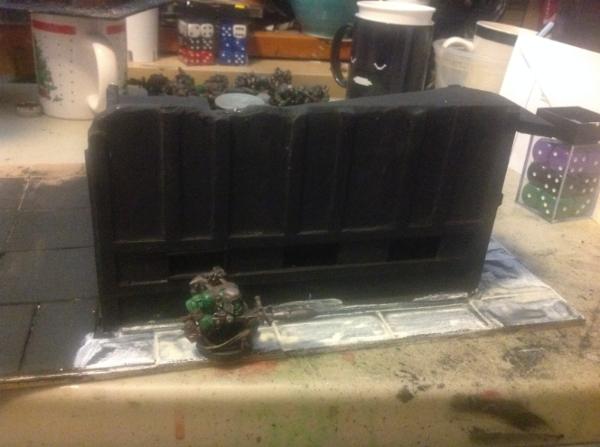
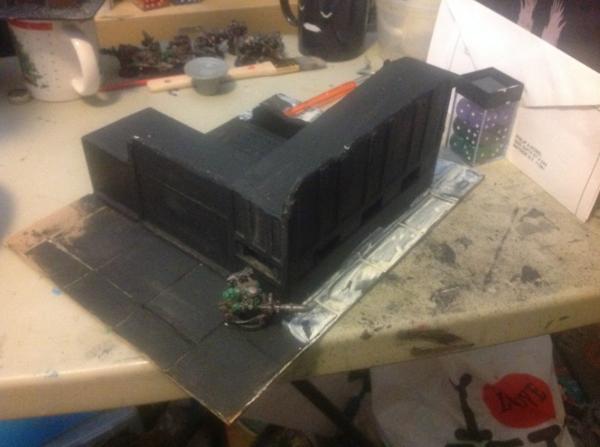
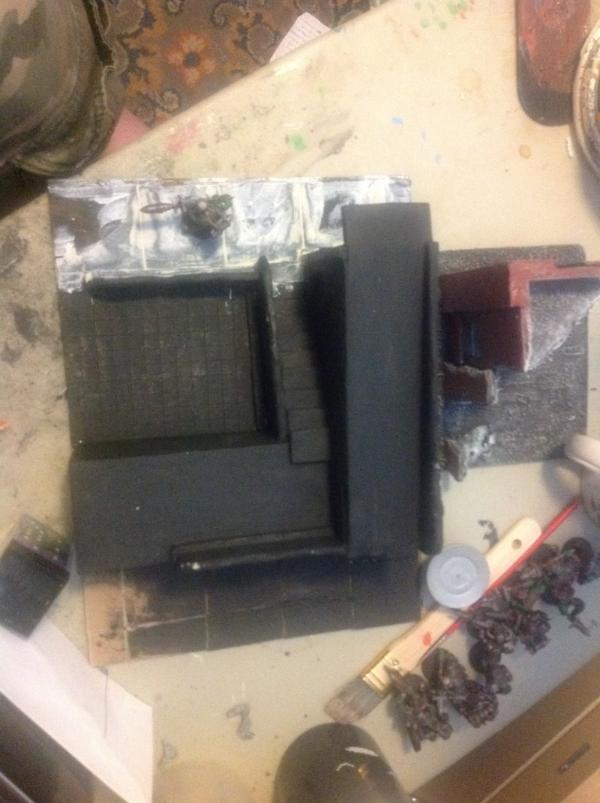
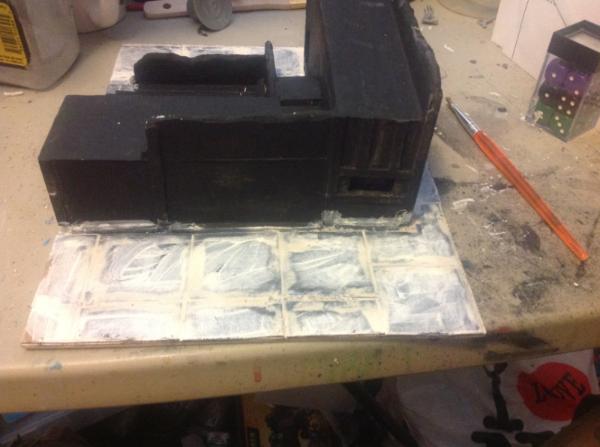
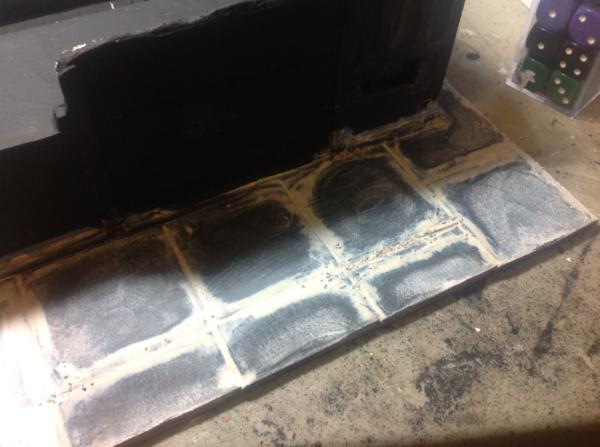
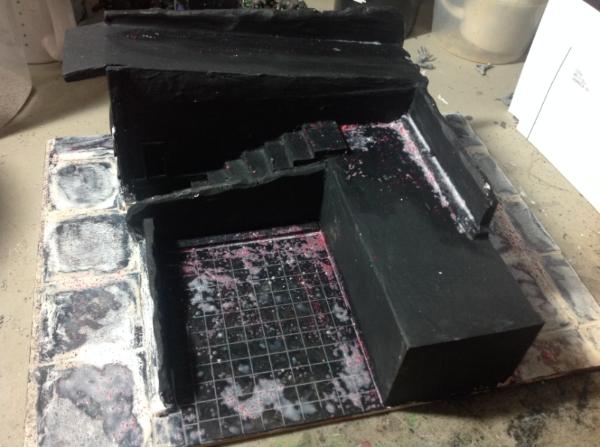
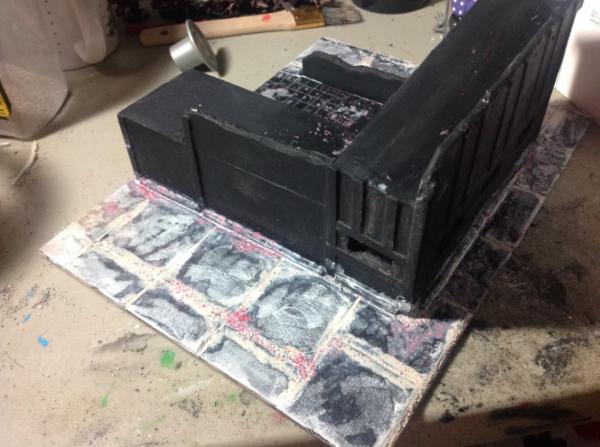
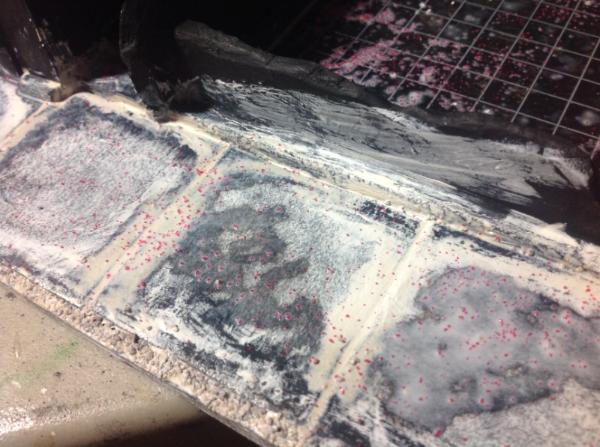
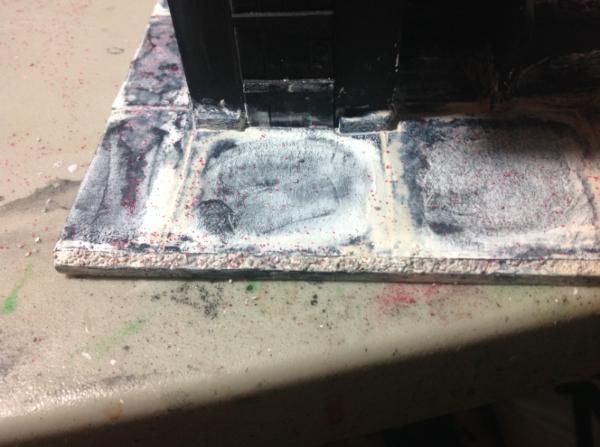
 . I've thought about using paper clips that are cut to length for legs as using paper clips for a powered folding chair worked out okay for my angry servo Skulls.