I am so jealous of all those Necromunda bulkheads.
Cheers,
CB
Yeah. I've been collecting since the mid-80s and I've got hoarding tendencies. In the past, I would buy and accumulate with the intention of ONE DAY I'll get around to building something with this. And now, 25 years later, is finally that day. I have so much stuff. At least I'm finally using it well.
Thanks, Yorkright. Yeah, me too. I love dynamic, detailed terrain. This is just one piece of a set of 20 or so interchangeable modular vignettes I've set about making. I can only concentrate on one at a time or the project easily gets overwhelming.
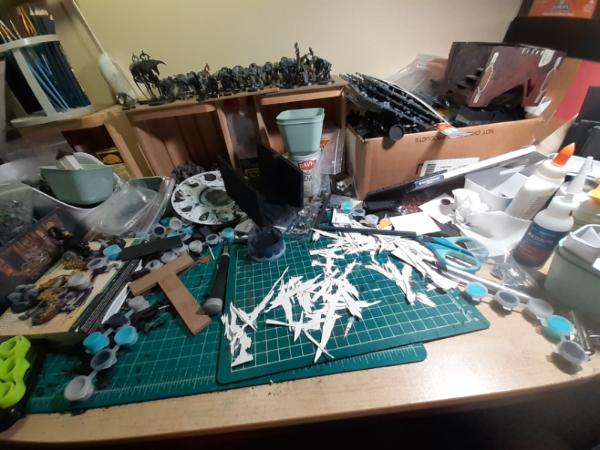
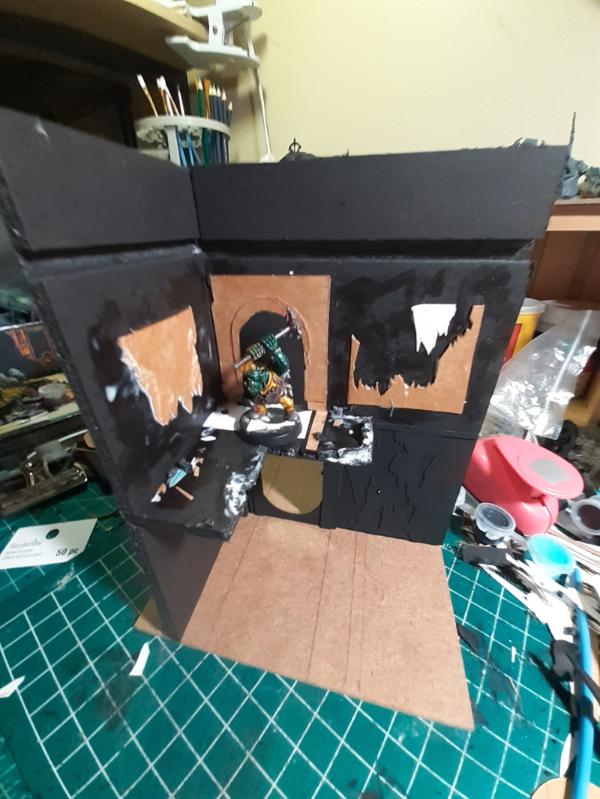
Automatically Appended Next Post: I made a bulkhead wall.
Here it will live as an entry to some sort of control room.
Here's another Mock up to give me an idea how the low wall of computer terminals that will go along the outer edge might look. Bulkhead wall is in the place its meant to be, but not glued down, pending tweaks, but the right most balcony is glued on, along with the legs of the superstructure.
Building is looking great. Last count I had like 200+ of the bulkheads in totes waiting for the Necromunda reboot. I need to get off my sorry butt and do something with those .
Spoiler:
sorry to hear about the leg problems. I’ve been pretty absent the last few weeks with dulldrums in modeling, holidays and stuff from work happening. Will be praying for relief for you .
Theophony wrote: Building is looking great. Last count I had like 200+ of the bulkheads in totes waiting for the Necromunda reboot. I need to get off my sorry butt and do something with those .
Spoiler:
sorry to hear about the leg problems. I’ve been pretty absent the last few weeks with dulldrums in modeling, holidays and stuff from work happening. Will be praying for relief for you .
Thanks, Theo. I really appreciate that. I can use all the help I can get.
As for bulkheads, I don't think I ever counted them , but I know I have a lot of 'em. This project will likely see me use them all.
Automatically Appended Next Post: Strip styrene so the supports lay flat.
Yeah, I meant to mention about using strip styrene like that. I also used tubular (for "wires") and H beam plastic in various places for the same reason.
Yeah, graven. This is actually the very first time I've decided to try using styrene to manufacture stuff. I've had oodles of it for years, but barely ever touched it for fear of "doing it wrong". This time around I decided to throw that notion out the window and go for it. I kinda like the way it turned out, for the most part. It's imperfect, but I don't care. I went a little berserk with the detailing, though.
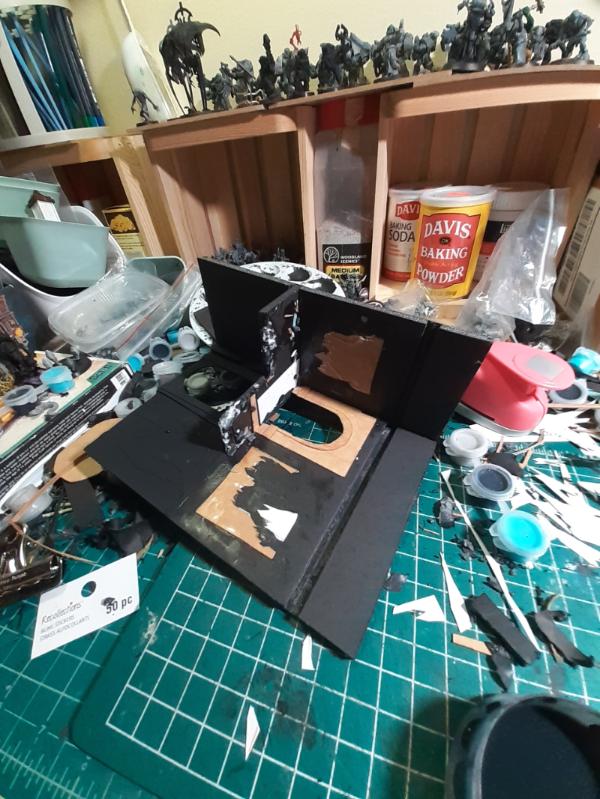
Here's the table/shelf glued on.
And then various pictures of it loaded with "cogitators" occassionally inspected by an armored Barry Ork.
An illustration of space (you know, for miniatures). With and without Barry.
Still not sure what I'm going to use to fill this gaping hole.
Yorkright wrote: That ork looks like he wants to smash all those "techy tings". Looks fantastic Warboss, when do we see some paint on all this architecture?
Friday through Tuesday nights I'm back to work in the Casino, so it won't be before then. I'm hoping to work on the opposite side of the tall wall this Wednesday and maybe get some paint on it then. I'm still a long way from done, but hope to get a bunch completed soon.
inmygravenimage wrote: Looking excellent, and hope the being-back-at-work is a good thing from a health perspective (as opposed to just a matter of necessity).
Unfortunately, graven, it's literally just a "I have no more money left to survive" thing. It's either work or starve. The pain is still excruciating and unending.
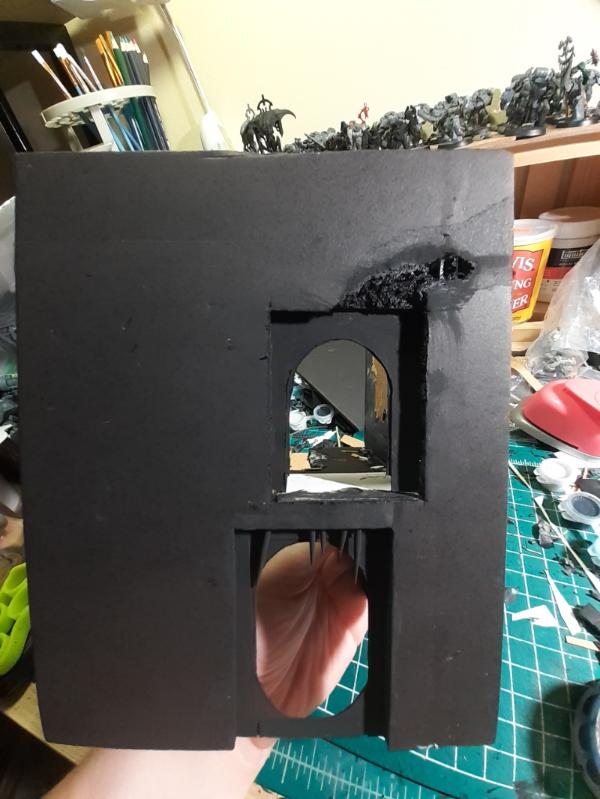
Added a whole buncha stuff to the elevated platform.
Squid face coming along.
Underside details a plenty.
Like a metal vine...
Topside is pretty much as detailed as its gunna git (except the stairs to the corridor):
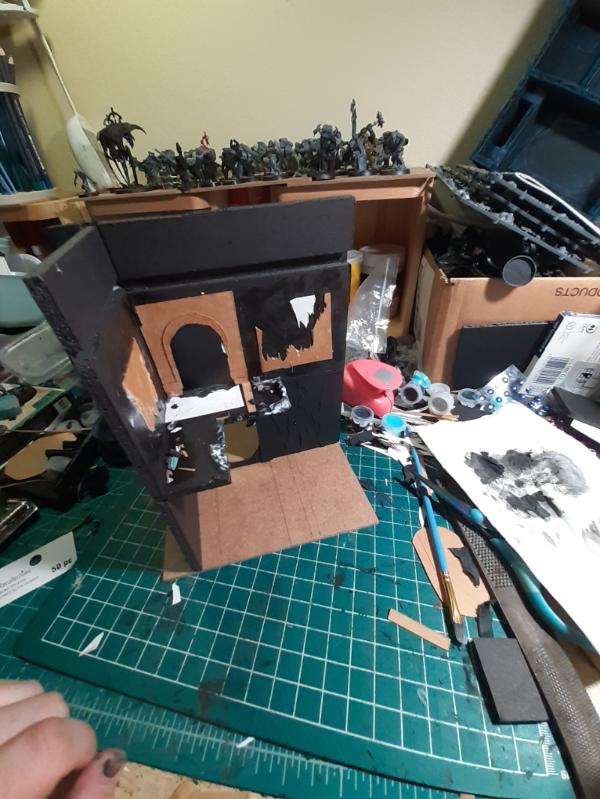
Somebody elsewhere pointed out this part's proximity to the corroded bit at the end of the corridor. Mentioned it should be corroded, too. So, you know me, I took their advice to heart.
And the stairs I'm working on for the otherside of the bulkhead wall.
Additionally, I was hospitalized for an infection in my leg. I've finally switched to a more local doctor. They had me on antibiotics and blood thinners and they've given me pain management drugs that actually work. My leg is finally on its way to recovery. Also, I got a $7 an hour raise at work. So 2020 is looking pretty good for me so far. My pain is manageable, I'm healing at a reasonable pace, and I have a lot more money. Hope everyone else is doing well. Have an awesome day!
Man- so much intricate detail! It's like watching an avalanche accrete, bit by bit, snow and boulders and trees, until the whole valley is filled with a rushing torrent of frigid DOOM! This is gonna be good!
Second what the Cap'n had to say- very good to hear you are mending.
@Captain Brown: believe it or not, the basecofvthis thing is just 9" by 12". It's maybe 9" tall. It's way complex, though, that's for sure, plenty of areas to move around in. That's what makes me happiest about it.
@Meer_Cat: thank you very kindly. It feels like I'm building the never-ending project, where every opportunity I have to add more detail I absolutely refuse to bypass. Oh, is there a spot that no one is ever going to see, except vaguely? Yeah, that detail needs to be there, because its absence will be more noticeable than its presence. And, at least in my head, it will look more visually pleasing than if I skipped it and left the area blank.
But also, it's time-consuming and makes me feel just a little crazy.
This is an incredible amount of work and detail in this one piece of terrain. You will have a unique piece when this is done with many interesting bits to catch the eye and enforce the sense of scale.
The Riddle of Steel wrote: This is an incredible amount of work and detail in this one piece of terrain. You will have a unique piece when this is done with many interesting bits to catch the eye and enforce the sense of scale.
Every time I see your name I want to call you Thulsa Doom. Thanks for the feedback! I'm looking forward to finishing this project almost as much as everyone else.
I wanted to add some corrosion damage detail to this piece, so I started with a small pile of 3mm texture medium and another of .5mm medium (this is essentially artificial sand). Here you can also see the black acrylic paint and the seltzer water I used to dilute the paint with (it was the only liquid nearby and my leg is killing me lately, so any excuse not to stand up and walk I use...as a side effect, the terrain now smells vaguely like raspberries).
Here's what I've done in that vein so far. To accomplish this, I paint the area I want to affect with the undiluted paint, then daub the area with a mix of 3 and.5 texture, and then spread/dilute it with raspberry seltzer. It's a little imprecise, but I'm essentially using the paint as glue. Later, I'll go back over these areas with more acrylic black before I begin drybrushing the areas with their first coats of paint.
I'm probably going to additionally hit parts of this model with crackle compound and maybe make some effluvient stalactites for the bottom of the most corroded sections.
C&C always welcome. Thanks for looking and have an awesome day.
_That_ sounds like a weathering technique I can manage! I see these guys using the salt and hairspray technique, or the chipping technique, or the sponge technique and some of them I swear just look at the piece and it's weathered; I'm still learning. I can't wait to try this method. Especially the raspberry seltzer part- that sounds like the critical component!
Thanks, 'Cat. Maybe some time in the future I'll post up a tutorial for the hairspray technique. Honestly, the trick with the hairspray technique is using an airbrush for your chipping layer of paint. Mostly I don't use it and apply weathering with inks, washes, and undercoat layers.
I thought my peice lacked details on the edges, so instead of going completely crazy, I just added some light details with scrap plastic to break up the monotony of the surface.
Then I want crazy and sand-weathered the rest of the piece. I'm not sure I like the larger sand bits, but I do like the smaller. I'm thinking of shaving some chalk pastels down to create a mud-like layer to add, but I might be overdoing this part, who knows.
This all should get a layer of thinned white/elmers glue to seal it on. That layer is going to have its own weathering effect as the white glue is a detail-obliterating sealer. Thanks for looking. More to come. Have an awesome day.
This project is huge and slow I had to switch gears and do something else. I'll get back to this piece shortly. (And honestly, this side project is for another part of the same modular set).
Anyway, got myself a $1 wooden birdhouse, broke off the perch, the base, and removed the hanging rope:
Then used the stiff cardstock that came with a mailed codex purchase to create covers tor the walls and one slope of the roof.
And then painted the inside and lip of the exposed base of the birdhouse with simple black acrylic craft paint.
More on this later, but suffice to say now that I am making this into a massive vent.
Ok so I nip away for a bit and you not only injure yourself ( or have I missed something!) You are into pain management. You also start quite an epic build. And as I read I kick myself for not being here when you needed me...
You can mix PVA in the paint wash you are putting on to add the "sand".
Try sprinkling with bicarbonate of soda on wet paint for a nice fine corrosion.
If you want heavy ish corrosion, use superglue and bicarb. I know that they are a great glue trick. But also running in the superglue where you want the corrosion, and then I use a old spice jar to sprinkle on bicarb. Add a nice textured fast drying effect.
I got an infection, Cam, in a series of small wounds in my lower left leg that ate away a lot the skin on the front, back and right side just above the ankle. The wound has shrunk over the course of 7 months of treatment from 21.2cm x 40cm, with a depth of 4mm to 6.6cm x 5.5cm, with a depth of 2mm.
What is bicarbonate? Liquid? Powder? I mean, I'm going to google it. (Oh! It's called Baking soda in the States)
Bud, sorry I have been out of it. Best wishes for a good recovery. You are going in the right direction it would appear. I do know that these things can take a long time. Got to be painful. Please be careful, I understand that you have a situation where you have to return to work, I wish wholeheartedly it were possible to change that, I will say I know from experience that your health should really take priority. Please take care.
And the build is looking fantastic. Yes we have a baking powder here, it is essentially bicarb with some other bits thrown in. You may have some different names for the products. If you have bicarbonate of soda and sprinkle it on superglue it reacts, causing the glue to set instantly. However it does have a side effect of heat. Also it "crystallizes" so is great as a gap filler, can be sanded. For some reason it also has the effect of gluing stuff that would not normally work. Many plastics that are difficult to glue can be roughed up and this method will securely glue them. Worth experimenting. Just be careful of getting it on your skin.
Thanks, Cam. That's sound advice. I'll do some experimenting.
As to my leg, I've got short term disability till March 8th, where after I have to apply for long term disability. And failing everything else, I qualify for FMLA (family medical leave act) which at least guarantees my job will still be there no matter how long I may be out (within reason).
I come and see all these great builds going on here and dont post much as my skill set for this part of the hobby is lacking. Hope your leg gets better Warboss.
For the weathering effect Cam is describing, you can use baking powder or baking soda- like Arm & Hammer boxes for sticking in your fridge for controlling orders. It's cheap and works really well. Cam gave me that bit of advice when I was scratch/customizing my Athena build (based on a Hanomag kit, but I like to think I stretched the design parameters). You lay your superglue down first (cyanoacrylate) and the sprinkle the baking soda on and presto! instant weld.
I left mine as they were, as they made great looking 'metal' weld seams, but Cam is also right that it sands down really nicely and makes a good filler.
Glad to hear your leg is making some progress, sad to hear that it isn't faster. My family will pray for your swift and complete recovery.
Just a quick update. I've sprayed this side down with an 80:20 mix of water to white glue to seal the first layer of weathering down. After this dries I'll add the baking soda/cyanoacrylate and pastel powder layers of corrosion on. I'm also thinking of using ultrathin layers of greenstuff to create limestone deposits and stalactites, but I'll havevto experiment with that first.
Also, an update on my "Squirrel!" Project. I added some details to the body of the vent and a screen mesh for the actual vent bit.
Thanks for looking. C&C always welcome. I hope y'all have an awesome day!
Interesting builds going on! I like the idea of using greenstuff for lime build up/stalactites, looking forward to seeing how that comes out (I may or may not have a potential 'nother terrain project that might or might not impede my getting back to vehicle or infantry builds in the potential near future).
I bought some plastic party cups and some electrical gear just to see if I could build something out of them. The first cup shattered so easily, I wonder how long this cup will last. I tried to reinforce the interior surface with duct tape. We'll see if that actually works.
Details come from evergreen sheet styrene, embroidery squares cut to shape, various plastic strips and rods, random miscast hirst blocks, hair curlers, construction paper, hexagon platformer set, electrical caps, and a random part from a Star Trek Voyager model - I think it's a Kurzon manned torpedo booster.
I am curious at what you are going to do with the "Squirrel!" Project.
Cheers,
CB
Hey Captain Brown, thanks for the feedback. The "Squirrel" Project, and likely anything else industrial I work on in the next few months, are all part of a massive modular Spacehulk board I'm building in anticipation of running my friends through the Deathwatch Campaign I have been writing for the past few years (as found here). I originally intended to make sixty 6"x6" vignette terrain pieces, but my ambition grew larger than my origin. Thus the reason I started with the ridiculously large piece I've been posting up progress shots of. In an essence, the big piece is the true "squirrel". Whenever I'm done I hope to have enough pieces to create a contiguous derelict interior to cover two 6'x4' tables with, just so I have enough variety to never play on the same configuration twice.
The "Squirrel" vent is meant to be a stand alone piece that can be placed as scatter terrain and will likely get many friends of similar manufacture, considering the base piece costs less than a dollar and most of the details on it are made from garbage cardstock and coffee stirrer sticks. I'm cobbling a prototype so I can make a more comprehensive tutorial for this blog.
As far as that campaign is concerned, it is large, ever evolving, and just the beginning of my insane ambition to write what will likely become a dozen or more equally detailed campaigns for a variety of armies. If anyone has any requests (for instance I have two acquaintances who play Astra Militarum and Deathguard respectively and whose shared narrative is that they've been fighting for control of an abandoned mining world of blue sand and Brutalist Hablocks. I intend to surprise them with a custom Campaign along the lines of "Life and Death of Calumet" or some such title. So, if anyone has any requests, but understands it will be some time before I get to your suggestion, feel free to throw me some ideas. I'd love to hear from you all.
I tried my hand at super glue and baking soda weathering and was mildly impressed. I think I still prefer sand and white glue, but In combo with the other stuff. Didn't know what to expect so I used both techniques on the cup terrain tile first. The so-far results.
And then, after sealing the above, I went on to apply the same techniques to the larger piece. Details of the bulkheads:
Here I created the beginning of some stalactites (instead of using green stuff).
And the far side of the wall.
C&C always welcome. Thanks for looking. Have an awesome day.
For the upper deck I added sand. I wanted to create a heavily corroded look. Pretty sure I was successful with at least that. Baking sida is like the finest of fine sands. Microscopically small.
Then I went bonkers with the lower bulkheads.
This morning, I Woke up to a dried piece (I sprayed the whole thing down last night with a 30:70 mix of white glue:water to try to seal the baking soda and sand on) and discovered just how batsh!t crazy I went with the corrosion detailing. Hopefully paint will cure some of this madness.
C&C always welcome. Thanks for looking and have an awesome day.
Excellent progress! And don't sweat the current appearance- once you get a lick of paint on I'm willing to bet you'll be very impressed. In addition to the irregular surface, the areas will absorb/take paint differently, depending on what all crud is built p there- natural shades and tones, as well as textures. Great stuff!
Well, it took forever, but I finally started putting paint on this monster. I used a brand of super inexpensive acrylic paints called My Studio, mostly because they're like $.28 USD a bottle and have a good, smooth, consistent mix. My base coat is Feather grey, which is a nice dark blue-grey with minor green notes. It's impossible to duplicate a lot of these cheaper colors and an enormous waste of money to do so with your regular GW or Vallejo paints. For terrain, always go with the cheap stuff.
I'll get back to the big build eventually folks, I lromise. I'm just on a model-building bender and wanted to post up some progress shots. The ruins I have no idea what I'm going to do with, the orky mek junk pile got heavily sanded to add texture and wear to the otherwise unrealistically smooth surfaces. And lastly, I assembled a bunch of urban decoration that will likely get a coat of paint and some weathering before I use it.
The hardest piece to build was the park benche because the slates were soooo thin.
Theophony wrote: The benches look like a PITA to assemble. I remember doing similar items from Lasercutcard.?? My fat hands were no match for the tiny bits.
Yep, every slat was a separate piece. There's two in each box and I bought 3 boxes, but I'm unlikely to make anymore than just the one I've already done. Just removing them from the lasercut mdf was an immeasurable pain.
Glad my 3D printer is humming along. I don’t have to fiddle with tiny bits....just all the intricate labor of setting everything up nice and adjustments all the time . Progress .
Yes, Theo. Progress. There's fiddling to be done, no matter what. I guess we measure progress by way of output? Speaking of which, how much did that 3D printer and set-up cost you, including spools of material and programs to make it work?
Speaking of progress, I did a tiny amount of work on my Space Hulk piece in that I drybrushed the walls and floor with a slightly lighter grey than was already on there.
Evidence:
so, here is a terrible picture of the original grey layered wall for reference
and here's that same wall with a layer of slightly lighter grey on it
here are three pictures of the other side showing how a combination of my weathering technique and my heavy drybrushing has contributed to the obliteration of details
and this is upper floor details
This is essentially color experiement 2, as experiment 1 was red and rusty, shown here:
I'm still not sure which I'm going to like more, but there's about a million more layers yet to do on this grey wall, so I'll keep us posted as I work on it. Thanks for looking C&C always appreciated. Have an awesome day!
The printer was just under $200 shipped. I’m using my chromebook that’s 4-5 years old to use free online software (astroprint.com) to do the slicing. I did buy a second memory micro SD card for $15 (totally optional as the Ender 3 came with the 8 Gb card. The first spool I used cost me $20 shipped from Walmart, though my latest buy was 3 spools for $50. But with the first spool I was able to produce
Spoiler:
Plus another building or two some plants (large Agave and a palm tree) and the other two sections of the paint rack are still in parts on the right side of that picture. I personally feel that I have easily made my money back off the first spool with all the terrain I have made.
Plus they have files for those type Bulkheads online. I’ve downloaded them for when I get back into SciFi.
The printer was just under $200 shipped. I’m using my chromebook that’s 4-5 years old to use free online software (astroprint.com) to do the slicing. I did buy a second memory micro SD card for $15 (totally optional as the Ender 3 came with the 8 Gb card. The first spool I used cost me $20 shipped from Walmart, though my latest buy was 3 spools for $50. I personally feel that I have easily made my money back off the first spool with all the terrain I have made.
Plus they have files for those type Bulkheads online. I’ve downloaded them for when I get back into SciFi.
So basically, you've spent roughly $300 and it's already paid for itself. How easy is it to design terrain pieces with no practical experience at all, do you reckon? Like I have a roughly 6-7 year old PC. Would that be compatible? And what is the make, brand, etc of your 3D printer. Did you buy it from a particular store or site? Anything you can recommend?
Not sure if designing, there’s thousands of files out there that I am just downloading and printing. My son has used tinkercad.com (freebie website) for school, he is 15. Not sure about your computer, I am not tech savvy (which should tell you how easy it is), I’m using about a 4-5 year old chromebook to do all my work.
I ordered from Creality.com, makers of the Ender series of FDM printers. They had great reviews on the Ender 3 (the basic model, which is what I got), and it is listed as the best printer for under $200 by a couple neutral websites. It shipped for free, took about 3 hours (only because the instructions are terrible drawings with no words to assemble, I played a YouTube assembly video, not the best, to watch and see him assemble it. Creality has videos on their site to help learn as well. Watch a few of those. I also started a new thread here in P&M for people to discuss the 3D printing, bot ph filament and resin styles, getting some good advice from folk about it. Feel free to ask questions in there.
Also I was referring to the grey . But the rusty Red is also nice.
Man, i've been on a hiatus for a few years and coming back to painting now, yours was among the first subbed threads that are still going strong.
Amazing job you've done - wonder how much space you gotta have to display all this when it'll be done, 20 interchangeable vignettes is not an easy feat!
Man, i've been on a hiatus for a few years and coming back to painting now, yours was among the first subbed threads that are still going strong.
Amazing job you've done - wonder how much space you gotta have to display all this when it'll be done, 20 interchangeable vignettes is not an easy feat!
keep it up man!
Thank You, ciuncky! That really means a lot to me. For me, I couldn't stop building stuff if somebody paid me to do just that. I'd go nuts. It's in my bones. I'm very happy to provide inspiration to the community and to you especially. Welcome back, glad you are here with us again.
You could always use the reddish to pick out elements/areas and break up a base of the grey. Different things rust at a different rate and some things may be replaced before others and some may have needed replacing for a long time.
I think if you bear in mind that I have no idea what I'm doing, this has all turned out great.
Here's the base component. From here forward I'm just testing weathering techniques (or as I like to call it, "messing up the test pieces forever").
So many reds.
I used literal masking tape for this next bit. I never realized the stuff was named for the thing it's supposed to do. I grew up using it instead of scotch tape. Pardon the quality, I was using a potato, in the dark.
Remember all those reds?
Look, fancy highlights!
And the great reveal. And on a pipe.
And details on an elbow.
Now with sepia ink wash.
I started detailing the cube.
This is a single facing Agrax Earthshade, just to see how it looked.
It's difficult to tell in these photos, but to my critical eye, these two more or less identical pipe elbows look very differently colored. The one on the left has been weathered and the right one has not been.
And here's the over-detailed, sorta detailed, and not detailed choochoo train.
Thanks for stopping by. Comments and Critiques always welcome. Have an awesome day!
inmygravenimage wrote: That's very neat. I like the pipe detailing, on the door it's a bit brash; maybe some chipping?
That's not a bad idea. These 3 pieces are all my experiment pieces. Even if they look terrible in the end, I've already written them off as ruined, so I'm not afraid to try all sorts of methods on 'em.
The weathering is definitely worth the time- visibly better with more layers as you progressed. Agree that chipping might be a nice addition,or rusting. I'm messing about with the 'salt' method at the moment, which might not work here with the washes applied.
All three pieces are also definitely not ruined- one ready to go, the other two available to continue to test!
Meer_Cat wrote: The weathering is definitely worth the time- visibly better with more layers as you progressed. Agree that chipping might be a nice addition,or rusting. I'm messing about with the 'salt' method at the moment, which might not work here with the washes applied.
All three pieces are also definitely not ruined- one ready to go, the other two available to continue to test!
Welcome back, hope all is improving.
Thanks, Meer_Cat. Yes, my leg is finally healed. It has the ugliest scar, but at least it's not trying to kill me every day anymore. Currently unemployed because global pandemic, but trying to make the best of my time. It's not always easy. Doing my best.
So, with my big piece - I'm thinking of masking and color-theming the different floors. But I have no idea what color should be for what layer. Or if I should even mess with a color coded system (especially if I want to make it interchangeable). I guess maybe I'll just stick to primary colors for these bands with red, blue and yellow. Any body have any strong opinions on the matter want to weigh in?
I would just keep it all the red. The hive sprawl would be so large that trying to do multiple colors, you’d run out of colors quickly. Barring that, Can you find stencils for numbers? Keep it all red sector, but you can number the walls or larger pieces with numbers for the zones of the sector. Then it wouldn’t matter how it was laid out really.
One option on the red striping between the masking tape, is apply it as a drybrush rather than a paint layer. Then you will have no bleeding and any area that the red does no reach, looking like weathering.
Changing gears briefly, the Pandemic has me more scatter brained than normal. I bought a mess of soft foam sheets about an age ago, specifically because I picked up a cactus-looking thing in a craft store and said to myself, "I build this!" And then I forgot what I was looking at and now I just have craft foam and floral wire. So, it's probably been 5 years since I bought this stuff (or, I don't know 8 months, the pandemic has made me bad with time) and I've finally gotten around to trying something with it.
So far I have learned that I should probably be using hotglue (which means I have to go to storage because that's where all 5 of mine are currently) and that I should have some leafy references nearby or my plants will look like a kindergarten project. And I should probably bend the wire before I glue on to the foam. It'll also get a few layers of drybrushing to make it look less like foam on stick and more like a giant alien succulent plant. I'll keep y'all posted as this (and my other terrain projects) progress.
I apologize for not posting anything more recently. I got my old job back and have been working nights and sleeping days. I joined a fellow creator's discord and they have been inspirational to me. This morning we had a craft-a-long chat and I finally started painting the piece I made out of hair curler parts, a plastic cup, and other various doodads. Here are the paint in progress shots.
Excellent terrain piece and scratchbuilding- the paint is a terrific weathered effect. I like that the piece is completely self-contained; often (in my case, anyway) the base for something I try to build is an artificial 'box' of necessity. This piece could be dropped onto/into any game board and look perfectly natural, defined by its own purpose. Well done.
Meer_Cat wrote: Excellent terrain piece and scratchbuilding- the paint is a terrific weathered effect. I like that the piece is completely self-contained; often (in my case, anyway) the base for something I try to build is an artificial 'box' of necessity. This piece could be dropped onto/into any game board and look perfectly natural, defined by its own purpose. Well done.
Yorkright wrote: That rusted effect is excellent, hard to believe it’s not finished. Glad to see you back at it.
Thanks, Yorkright! It feels good to be back.
Viterbi wrote: That's a really cool scratchbuild and I'm already excited for more weathering!
Me too! Thanks for the feedback, Viterbi!
I'll have more pictures up in a few days. Today I twitch cast my DnD game on Geekade around 12:36 to 17:00 (noonish to 5pm) EST. Then sleep, then back to work, so I won't have a chance to work on this again until Monday or Tuesday.
I had a little time yesterday and did some additional weathering work. This is a middle step. I'm probably going to apply more nuln oil to the channel on the edge and touch up the rust bits. But here's where I'm at right now. Any feedback is appreciated.
I love it! I think the scratch marks look great. If you were so minded you could add a dark grey line to each pale one as shadowing but that's an awful faff and probably unnecessary. I really like how crusty and textured your rust looks
inmygravenimage wrote: I love it! I think the scratch marks look great. If you were so minded you could add a dark grey line to each pale one as shadowing but that's an awful faff and probably unnecessary. I really like how crusty and textured your rust looks
Thanks, graven! I'll give the dark grey lining a try, see how I like it.
The white scratches are very bright, so they look very fresh, as if they were just made. If you want them to look older, another possibility is simply doing a wash of some kind to dull and tint the scratches slightly. That would age them, make them look like they were scratched some time in the past couple years, rather than the last week.
Oh, dang. I feel like I probably should've gone with that idea first.
Gwyn chan 'r Gwyll wrote: The white scratches are very bright, so they look very fresh, as if they were just made. If you want them to look older, another possibility is simply doing a wash of some kind to dull and tint the scratches slightly. That would age them, make them look like they were scratched some time in the past couple years, rather than the last week.
Hmm, that's a good idea, too.
Whelp, guess I still have more touch up and detailing to go on this before I finally do call this done. Thanks for the feedback, folks! And if anyone else has any ideas, please feel free to share them. Let us all be resources for each other.
Thanks for looking and have an awesome day, everyone!
Well, before finishing the last piece, I started working on 3 more. Here's the PIP of the first panel.
And compared to the mostly finished other piece.
And the other two.
Basically, a friend gave me a ton of unused Gundam platforms and accessories and I turned them into 6" square spacehulk panels. I combined all sorts of odds and ends - hirst blocks, scrap plastic, etc. And then I weathered it with Baking soda and sand. More updates soon. Feedback always welcome. Have an awesome day!
I really like where you're going with this project, feels like your stepping into a section of the Underhive or a Space Hulk. How do you incorporate baking soda onto the terrain? Is it superglue then add the soda too it?
Waaazag
That's a excellent way to make your jungle terrain. I've been drilling out individual holes for my shrubbery to go into. I'm definitely going to try it your way. Thanks!
Yorkright wrote: I really like where you're going with this project, feels like your stepping into a section of the Underhive or a Space Hulk. How do you incorporate baking soda onto the terrain? Is it superglue then add the soda too it?
Yes, Yorkright, that's exactly it. I also use a fine grit ballast (teensy weensy gravel). The glue goes down, I sprinkle the ballast on, and then add the baking soda. It creates an irregular texture that instantly hardens. I try to build layers so it looks like caked on and very old. Afterwards it's just a matter of painting to complete the effect.
Thanks, Stevefamine, and welcome to the blog! Feel free to peruse (and mine for ideas) all the pages in this monstrous thread.
Pointer5 wrote: Waaazag
That's a excellent way to make your jungle terrain. I've been drilling out individual holes for my shrubbery to go into. I'm definitely going to try it your way. Thanks!
You're very welcome, Pointer5. I hope you make use of all my terrain tips. Thanks for the feedback.
I'm trying to stay productive even while also working a full time, physically demanding job on the graveyard shift. It isn't easy, so don't expect regular updates, but I'll do my best. Thanks for all the feedback, folks! More is always welcome.
The Red Hobbit wrote: Wow, those weathered pieces made from Gundam terrain look really sharp! Well done
Thanks, Red Hobbit! My friend sent me a crate of random doodads. I've used a bunch already (obviously some here to create these), but I still have so many left. Initially, I built 15 of these squares, but I've only started painting these three.
The Red Hobbit wrote: These are great! Thanks for the before pictures, I've got some Gundam bits lying around but unfortunately no large flat pieces like that.
I'll keep an eye out next time we take a trip to Japan, it's amazing how cheap the Gundam kits and accessories are over there.
Started to add more weathering to these 3 pieces. This is an extra layer of lighter rust collar and weathering made with my dirty paint water dregs and that lighter tone - Spanish tile.
I love how lumpy it all is. I'm a big fan of dirty paint water weathering. I could stand to see a little more in the recesses, as if that's where it's run into.
inmygravenimage wrote: I love how lumpy it all is. I'm a big fan of dirty paint water weathering. I could stand to see a little more in the recesses, as if that's where it's run into.
Oh, certainly, graven. This is only like step 2 of 5 (or 10, depending on how crazy I get). It needs a rust wash in the panel lines, oil spills, earthshade wash, individual panels painted, a light rusty drybrush, and limestone deposits yet. I just wanted to keep the blog alive because I have a tendency to lose momentum lately.
Skinflint Games wrote: All caught up with this and MAN there are some amazing builds and inspiring stuff here.
It also sounds like you've been through the mill, Warboss. My sympathies to you and I hope you're in a much better place now.
Thanks, Skinflint Games. I am and I'm not. My leg is healed, but now I'm being pushed out of my living space with no savings and 18 months earlier than I had anticipated. So while I'm not in physical pain anymore, I am in mental and emotional distress. However, I am grateful and glad that you have found inspiration in my blog. With luck, there's plenty more to come!
Sorry to hear that man- I'd love to help (we both would) but I'm a continent away :-/ keeping everything crossed for you, you deserve a break. Hang in there, and thank you for everything on this blog
In unrelated news, I have a general question for the community. If you could have a thematic set of modular terrain of any variety, what would be your dream theme?
In unrelated news, I have a general question for the community. If you could have a thematic set of modular terrain of any variety, what would be your dream theme?
Hopefully your situation doesn't take any turns for the worse, that's pretty rough already.
On the terrain side, I would probably go for a partially ruined and overgrown cityscape. There's room for fully vegetation covered areas, wooden copses, living habitats, industrial sectors, ruins, pristine but abandoned buildings, storage facilities, office blocks and all sorts of interesting bits to play around with while having the split between urban and wild aesthetics. Very pleasing to the eye as well as plentiful in tactical considerations.
inmygravenimage wrote: I'd like modular fantasy tbh, I think there's a bit of a lack. There's so much urban/future that it's a bit of a buyer's market.
Do you mean like a whole village, graven? European forests and fields, or something else. If we're talking about fantasy terrain for a fantasy setting, are we talking about for big pitched battles or for skirmishers and d&d style games? Or, are you talking about how 40k has feudal planets? Fantasy is a very broad term, can you clarify?
In unrelated news, I have a general question for the community. If you could have a thematic set of modular terrain of any variety, what would be your dream theme?
Hopefully your situation doesn't take any turns for the worse, that's pretty rough already.
On the terrain side, I would probably go for a partially ruined and overgrown cityscape. There's room for fully vegetation covered areas, wooden copses, living habitats, industrial sectors, ruins, pristine but abandoned buildings, storage facilities, office blocks and all sorts of interesting bits to play around with while having the split between urban and wild aesthetics. Very pleasing to the eye as well as plentiful in tactical considerations.
Thanks, Sherrypie.
Terrain-wise, you mean like a war-ravaged city on a planet already lost and abandoned? So overgrown it implies no one has fought there for a few years?
Automatically Appended Next Post:
inmygravenimage wrote: I think skirmish DND but with the ability to expand. So modular village buildings that can be extended horizontally or vertically.
Kind of like the stuff for Mordheim, but intact I imagine? With whole floors so they can be stacked with extra levels and interchangeably thematic. Maybe some with flat enough walls that they can be sandwiched together to appear like larger/longer buildings?
@Warboss yeah, exactly. Modular ground floor shop fronts, stackable upper levels.
A good reference might be The Shambles, a street in York (which was the inspiration for Diagon Alley).
Okay, I had some progress on those tiles. I singled one out to lavish details onto by applying a wash of Agrax Earthshade - significantly right into the recessed details - highlighted with lighter orange all the rust (sorry about that weird syntax), drybrushed the panel edges with grey, and applied Nuln Oil to the vent lines on the detail bits. Here's a side by side with an unlavished tile.
And alone:
Then I masked off these two panels:
And sponged on Warlock Purple and Khorne Red, in that order. In hindsite, I wish my order was the other way around, because it came out looking like someone had spilled candy on the tile. I fixed it up a little with another direct Agrax wash. Here's what that looked like.
Anyway, I'm just happy to have made progress on these. I'm way behind my projected schedule of one million projects finished in one day, but I'm getting there. If you have any feedback on this or have another addition for your Dream Theme Terrain Set, I very much want to hear (read) it. Thanks for looking and have an awesome day!
As for generic table, I think forest table with hills and cliffs. Usable in most any game.....except maybe a desert game . It’s what I’m considering doing since I am thinking of getting really into AOS.
Absolutely adore the train mate, looks fantastic. I love doing terrain projects, not done any in years but your stuff is definitely giving me ideas. I think I might have to start creating some lovely corroded bits and bobs too.
Olthannon wrote: Absolutely adore the train mate, looks fantastic. I love doing terrain projects, not done any in years but your stuff is definitely giving me ideas. I think I might have to start creating some lovely corroded bits and bobs too.
Thanks for the feedback Olthannon! And welcome to the blog!
Do either of you have an idea for a thematic terrain set? One you've always wanted and/or wish you could have if money and space was no obstacle?
In unrelated news, I have a general question for the community. If you could have a thematic set of modular terrain of any variety, what would be your dream theme?
Hopefully your situation doesn't take any turns for the worse, that's pretty rough already.
On the terrain side, I would probably go for a partially ruined and overgrown cityscape. There's room for fully vegetation covered areas, wooden copses, living habitats, industrial sectors, ruins, pristine but abandoned buildings, storage facilities, office blocks and all sorts of interesting bits to play around with while having the split between urban and wild aesthetics. Very pleasing to the eye as well as plentiful in tactical considerations.
Thanks, Sherrypie.
Terrain-wise, you mean like a war-ravaged city on a planet already lost and abandoned? So overgrown it implies no one has fought there for a few years?
Something along those lines, yeah. A study in the tension between culture and nature, featuring both barren and burgeoning as well as intact and ruined pieces. What happens when nature is let to run its course, should the endless busywork of civilization's upkeep cease? The potential is as wide as one's imagination.
I recommend doing a google search for images of the ruined countryside of Bosnia, Croatia, and Serbia, Sherrypie. Thirty years ago a genocidal ethnic war broke out after the collapse of the USSR and its puppet states - Yugoslavia amongst them - disintegrated without Soviet control. The war lasted for the better part of the 90s until the UN intervened. Many of those countries' cities and villages were completely destroyed and have yet to be rebuilt. There, as well as in places like Pripyat and Grozny, nature has reclaimed the ruins.
Indeed, those are interesting case studies in these aesthetics when things are abandoned by war or catastrophes. For more peaceful scenarios, there are some hauntingly beautiful islands in Japan, that were built up for coal mining and left to rot after a few decades (like the Hashima island).
Hashima was abandoned in the 80s or 90s, right? There was a high school there and everything, but the island was barely a block long. The apartments are like a canyon. It's a beautiful abandoned place.
Most excellent work, Warboss! The weathering and rust are very realistic and reflect the effort you put into them. The red panels do not look like candy and really make the whole thing pop. Nicely done, indeed!
Personally, I wish I had a lot more space. I'm renting a single room and while it is large enough to sleep in and craft in, there's virtually no room to store stuff. Most of my stuff is in storage until I can find/afford a larger living space.
However, were space not a concern, I'd love to build a modular alien landscape - forests, swamps, etc. Also, a sprawling, multilevel cityscape. Also, a twisting complex necromunda basement (or 5). And a giant spaceport. Instead, I must content myself with 6" tiles and big dreams. Eh, life.
I want to say that I feel like most Necromunda terrain I see seems to lack a sense of scale and presence. I can never look at area terrain and think, "That had a purpose once," or "That's a room in the basement of a megacity." I don't know what's missing to grant that feeling of scale, of being buried beneath a hive city, of landscapes without skies. But it's definitely a terrain challenge I want to try to tackle.
Necromunda terrain is often fairly low, which would make sense in tunnels, but it at the same time lacks the claustrophobic feeling, as you can climb on top of the walls, and there is just nothing that hints at there being a ceiling above.
I think really tall walls, that give a sense of scale up to the "roof" above, or building some actual tunnels (with removable roof) might help. You could for example use something like your recent piece as a wall. Tall pillars holdling up an invisible ceiling might also help the immersion.
Another way is to add immense amount of detail, but that is also a road to madness if you build for full tables. I have seen some very impressive, generally smaller, necromunda pieces where a ton of life and realism is added in the detailing.
Yeah, Illumini, I have toyed with that idea before - pillars or walls that are super tall. What I was thinking was like an angled structural "foot". Like the bases of radio towers, except like 30" square on the base and towering over the battlefield. A gigantic block of concrete with an angled I-beam extending out of it and then the shanty town built around it and onto the platforms bolted onto it for inspections (that haven't happened for decades).
Another idea I had was building platforms on top of large foam blocks and having some of them be shorter, exposing compacted layers beneath. I guess part of the issue for folks might be storage space. Where do we put our over-the-top set pieces when we're not using them?
But I like where you're going with these ideas. Thanks for the feedback!
It looks like you are having a great time doing the weathering on these tiles. So many textures, colors and layers! The final effect is very interesting and realistic.
As for a way to get that "interior" underhive look, I think a lot of it comes down to the perspective of the viewer. The best photos of Necromunda tables are taken at model perspective so you can only see terrain in the background. That photo from graven is a great example. Lighting is another key. The light pattern coming through the floor adds so much.
Another way to create the claustrophobic interior effect is to use walls all the way around the playing area. I noticed this when setting up Zone Mortalis games in Horus Heresy. When we had a wall around the play area, it automatically felt very enclosed and the mind could much easier picture it being an interior. The wall does not have to be exceptionally high, even 6" was more than sufficient to create the effect. And we used walls of the same height at points throughout the interior to continue the feel of a uniform "ceiling" over the play area being supported by interior walls and columns.
Hey mate, some gorgeous and inspired stuff going on in here.
Love Riddle of Steel's idea about walls around the outside; we do something similar for Kill Team boards so that you can easily put yourself "into" the game space.
As well, I am a big fan of pieces that build "up", and having uneven heights across the board. If every building is a 6" L-shaped ruin, the sense of immersion just runs away. Irregular and jutting is where it's at!
Weathering looks fantastic, and I enjoy both red over purple and purple over red!
You have some really nice teal undertones coming through the ground colour in the tile and the orange rust is hitting the contrast just right.
I'm bookmarking this blog to come back to...I've only made it back to page 33 and I'm already chock full of inspiration.
Excellent oxidation and dirt as usual- lot of effort paying off with the end result.
Agree with RoS regarding camera height to help achieve the "help I'm buried in the underhive" feeling; if you look at some of Camkhieri's Necromunda pieces you see he used both high and low camera angles to convey different impressions. That Charles Kerault 'over the shoulder' camcorder thing.
I also prefer the red on top of the purple- the reverse is good, but my preference is for the obverse when replicating the Underverse.
The Riddle of Steel wrote: It looks like you are having a great time doing the weathering on these tiles. So many textures, colors and layers! The final effect is very interesting and realistic.
As for a way to get that "interior" underhive look, I think a lot of it comes down to the perspective of the viewer. The best photos of Necromunda tables are taken at model perspective so you can only see terrain in the background. That photo from graven is a great example. Lighting is another key. The light pattern coming through the floor adds so much.
Another way to create the claustrophobic interior effect is to use walls all the way around the playing area. I noticed this when setting up Zone Mortalis games in Horus Heresy. When we had a wall around the play area, it automatically felt very enclosed and the mind could much easier picture it being an interior. The wall does not have to be exceptionally high, even 6" was more than sufficient to create the effect. And we used walls of the same height at points throughout the interior to continue the feel of a uniform "ceiling" over the play area being supported by interior walls and columns.
Good luck. This project looks great so far.
Thank you very much for this feedback, Riddle of Steel! Walls, you say, huh? Hmmm, brain meats churning.
inmygravenimage wrote: ^ this.
Also, I really like the red over purple, I think the colour works better. Crud is excellent as always.
Thanks, graven!
tzurk wrote: Hey mate, some gorgeous and inspired stuff going on in here.
Love Riddle of Steel's idea about walls around the outside; we do something similar for Kill Team boards so that you can easily put yourself "into" the game space.
As well, I am a big fan of pieces that build "up", and having uneven heights across the board. If every building is a 6" L-shaped ruin, the sense of immersion just runs away. Irregular and jutting is where it's at!
Weathering looks fantastic, and I enjoy both red over purple and purple over red!
You have some really nice teal undertones coming through the ground colour in the tile and the orange rust is hitting the contrast just right.
I'm bookmarking this blog to come back to...I've only made it back to page 33 and I'm already chock full of inspiration.
Thank you for sharing!
You're welcome, tzurk! Thanks for looking! It's always been my goal to share what I've learned with the community. I'm glad you like what you're seeing. And yeah, I'm all about complexity of terrain. I live in a densely packed urban environment and there is absolutely no rhyme or reason to its design, layout, or height.
Meer_Cat wrote: Excellent oxidation and dirt as usual- lot of effort paying off with the end result.
Agree with RoS regarding camera height to help achieve the "help I'm buried in the underhive" feeling; if you look at some of Camkhieri's Necromunda pieces you see he used both high and low camera angles to convey different impressions. That Charles Kerault 'over the shoulder' camcorder thing.
I also prefer the red on top of the purple- the reverse is good, but my preference is for the obverse when replicating the Underverse.
Rock on.
Thanks, Meer_Cat! I'll check out Cam's stuff. They've always been an inspiration for me. I agree camera angle can have a lot to do with it and I'm trying to get this sense without the use of a camera. I guess I will be taking pictures in the end, so maybe I can be a little less stubborn with my definitions. This has all been superb advice.
So what I'm gathering is: use of exterior height along the periphery, interior height variation because cool and dynamic, lighting, camera angles, and tunnels. Thank you all for your suggestions and feedback, this has been incredibly inspiring for me.
As an aside, I also did minimal work on a third tile. Here's my evidence of that.
Thanks again for looking! C&C always welcome. If anyone else would like to chime in with ideas about Themed Terrain boards or How to Recreate the Claustrophia of Necromunda, please do not hesitate to share! Have an awesome day!
Wow, has it seriously been 11 days since I last posted? Sorry for the long delay, folks. I did some more work on that second tile. Basically, I drybrushed the rust crud with a lighter tone, painted and weathered the standing pipe and other doodad buried in the crud, applied watered down rust color into some of the recessed line details, added some limestone deposits here and there, and thought I was done.
And then I compared the other tile to this one and there's a decidedly different tone to the crud.
These tiles have an awesome built in feature where they interlock to create a flush, level surface. So, they look cool all clamped together, but I also want them to all look like they came from the same wreck. I guess it's back to the workbench to find the perfect balance of earthshade, crud color, and nuln oil!
C&C is aways welcome. Thank you for looking and have an awesome day!
I like the look of these two tiles together. The one on the left has that pipe dealio that looks like it has leaked and then something dragged in an arc that caused the look of excessive/deeper corrosion and rust on it. The piece on the right looks like it has been affected by the increased moisture/corrosive liquid in the air that has increased oxidation, but hasn't been affected as heavily as the other piece where the leak occurred.
I could see hitting the highest points with some of the colors/weathering/shadings similar to the lighter colored highlights on the new piece, but it wouldn't take much to bring them into alignment.
Lovely crud on those boards, those little highlights of blue and red give the board a whole lot more character. If you lived closer I would love a game on that board using my deathguard. Keep up the great work, looking forward to the next installment.
I'll have an update on my progress in a few days, but in n the meanwhile I would like the ask the community for recommendations for crackle effects. I tried acrylic crackle paste, but it doesn't crackle! It's more like thin goo paste that gets dry.
Plasticote crackle spray is good for large areas, I used it for a Realm of Battle board I did for a mate. Another option, though tricksy, is to deliberately induce primer shock; I've used this for nurgle in the past. For small areas, I still think the gw paint is ok.
inmygravenimage wrote: Plasticote crackle spray is good for large areas, I used it for a Realm of Battle board I did for a mate. Another option, though tricksy, is to deliberately induce primer shock; I've used this for nurgle in the past. For small areas, I still think the gw paint is ok.
Thanks for the feedback, graven! Is the GW stuff precolored? I need my crackle to be blue-gray when it dries.
GW crackle paint is precoloured - brown (Agrellan Earth), black (Mordant Earth) or red (Martian Ironearth). You might be able to mix in another colour to tint it - but those aren't great starting places for blue-gray - the brown might be light enough. I've had experience adding black on top of red (before I worked out they had a black...) - but it's fiddly and I wouldn't recommend it.
Arakasi wrote: GW crackle paint is precoloured - brown (Agrellan Earth), black (Mordant Earth) or red (Martian Ironearth). You might be able to mix in another colour to tint it - but those aren't great starting places for blue-gray - the brown might be light enough. I've had experience adding black on top of red (before I worked out they had a black...) - but it's fiddly and I wouldn't recommend it.
Thanks, Arakasi! That's good feedback. Yeah, none of those colors seem quite right as a starting point for blue-gray.
Okay, so I'm working on more Spacehulk open floorplan tiles and thought I'd show off my crud-in-progress shots. This is layers of superglue with baking powder, white glue with fine ballast and clay ballast, thinned white glue with baking soda, and a sealing layer of 40:50:10 of water/white glue/grey paint. In these shots the top most layer is still damp.
These will dry overnight and then I might add another layer of crud before I prime them.
Thanks for looking. C&C always welcome. Have an awesome day!
Automatically Appended Next Post: Are posts even showing up? I've been trying to post and edit my own stuff and it just isn't showing up on my browser, no matter what device I'm using. Anyone else having this issue?
What an excellent technique for showing thick layers of rust! And the pics here show it off well.
"Crud In Progress"- CIP- I'm stealing that! I mean, paying the highest compliment to your originality by using a phrase you pioneered without providing attribution...yeah, that's it!
I decided to focus in on these two tiles and work on them both until they are completed. I added a second layer of crud to what I'm dubbing the "Generator Tile". Here it is with a second layer of 10:40 mix of white glue/water still soaking.
And some glamour (detail) shots, too. Some of these larger red stones will get plucked off after the sealing layer dries to create irregular depressions in the crud.
I call this other tile, "the Organ". I added a lot more crud.
That's my progress for today. Thanks for looking. C&C always welcome. Have an awesome day!
That's a great idea adding stones to the drying glue solution to later remove and leave pits and depressions- almost a 'reverse salt' method of weathering! The tiles are really developing into something different than the usual run of reddish plastic simulating metal fatigue and decay.
Meer_Cat wrote: That's a great idea adding stones to the drying glue solution to later remove and leave pits and depressions- almost a 'reverse salt' method of weathering! The tiles are really developing into something different than the usual run of reddish plastic simulating metal fatigue and decay.
Rock on.
Thanks, Meer_Cat! I'm trying to develop a habit of making every day. Encouraging feedback like this really helps me stay focused. More pictures in a few hours.
Automatically Appended Next Post: I started detailing another tile with a crumpled up foil yogurt top. Behold:
That's all I had energy for. More tomorrow. Thanks for looking.
Yes, I see the effect with the bits of stone- very nice pockmarking and lends itself well to the painting phase. I've been so busy making sure that the rocks I put on my boards _don't_ fall off it never occurred to me the advantages of the look if they did- I'll rectify that!
With the foil lid- aluminum looks like new even when junked until it oxidizes- maybe leave invert the board at safe distance above a candle and add some soot black to the aluminum foil and call it wrecked?
Excellent work and a little progress each day makes for a lot of progress over time. I need to get myself moving again and post some progress too!
Sorry, folks, didn't make any progress today. I slept instead. But today is my Friday and, except for a drive down the coast in the evening to see the wild bunnies, I haven't much planned for my weekend. I should be able to get a few things done.
When I first saw your photos I thought you were doing a snow themed outpost - excited to see more paint on them, but now I have ideas for making a snow-covered series of industrialized tiles with your methods!
blockade23 wrote: When I first saw your photos I thought you were doing a snow themed outpost - excited to see more paint on them, but now I have ideas for making a snow-covered series of industrialized tiles with your methods!
Yep, experiments sometimes give us great results and sometimes some unexpected goodies as well. Nature always gives us a little bit of unexpected "fun". Kind of looks like a tarp under the debris.
Oh, that blue tarp looks great. The long building at the end reminds me of Mussolini's typewriter in Rome. Perhaps some broken decaying statuary atop it?
inmygravenimage wrote: Oh, that blue tarp looks great. The long building at the end reminds me of Mussolini's typewriter in Rome. Perhaps some broken decaying statuary atop it?
Do you mean the Victor Emmanuel II Monument? Mussolini's Typewriter is an actual typewriter.
Viterbi wrote: That orange/teal contrast on the one tile looks great. Really amazing seeing them develop!
Yeah, I'm loving how that's turning out, too.
I did some highlighting on that tile and wanted to showcase a mid way through point to detail how much layered drybrushing really brings a model to life. Here's the halfway:
And here is the drbrushing end point:
Thanks for looking and have an awesome day! C&C always welcome.
So, I've had to temporarily move to a less-than-ideal living situation where I am sleeping in a friend's attic and sharing the rest of their house's facilities - shower, kitchen, etc. It's meant that I had to leave my PC and TV behind at the apartment (we're getting the bathroom remodeled). Without these distractions I've become more focused on my hobby and have been able to get a lot more done. Here's the fruits of last night's labor.
All panels fully dry-brushed, plus I masked off and painted the red panels on each. I think I also distressed those panels with my midtone grey.
Then I added watered down argrax earthshade weathering, followed by random white squiggles of layered grey and then "suede" - which is a craft paint color that's basically a tiny touch of butterscotch in white. And then touched those spots with watered down Sepia wash.
Then a few touches with nuln oil, some line highlighting with my midtone grey, some rust washes, and wet blending on the older "generator" tile.
And I think I'm calling these 4 done.
Next I started on 2 more tiles. These I decided against crudding up as significantly. I got basic layers of paint on these so far.
Viterbi wrote: Finished tiles look amazing, can't wait to see a shot with them put together! Hope the bathroom remodeling runs smoothly.
Thanks, Viterbi! I'm sure the renovation will go smoothly once they finally get started. So far it's been postponed 3 times. Ugh. But, I am starting on wall sections for this terrain project next. So at least my temporary housing is devoid of most distractions.
Camkierhi wrote: That is some excellent looking grime and rust. Love it.
Thanks, Cam!
During my work week I don't have much energy to work on builds, so I've occupied my time with weathering small doodads I've previously made. I'll get some pix of those up in a day, when I'm awake during daylight hours again.
The Scatter terrain looks good! Although I feel sorry for the poor fella who came out to get his mail only to realize some joker stuffed an entire human skeleton in there...
brushcommando wrote: The Scatter terrain looks good! Although I feel sorry for the poor fella who came out to get his mail only to realize some joker stuffed an entire human skeleton in there...
lol. That's 40k for you. Even the mailboxes are grim dark.
As you all know, I am buidling tiles of terrain for a spacehulk/inq28/necromunda style campaign I've written. You've seen a lot of the pieces I've already put together. I had an idea recently, to run the whole game as if the lights inside the spacehulk are all out. That gave me the idea about how to represent that. And I thought about space marines' autosenses. So the whole interior would essentially be coded to what the marines could feasibly sense - heat, cold, sound, but not much visual details. So why not build a bunch of terrain that reflects that? Here's my first foray/experiment with that idea.
Primed black, one coat of drybrushed Macragge Blue:
Then a highlight drybrush of Teclis blue over that.
Vague side by side.
I'm thinking of going 1 shade brighter. Any comments, suggestions, praise?
This is a new and interesting idea!
Can I suggest little "sound echoes" highlighting things that move or make noise as a war to add some more interest?
For things such chains, creaky pipes, doors or even things scuttling in the darkness...
Guardling wrote: This is a new and interesting idea!
Can I suggest little "sound echoes" highlighting things that move or make noise as a war to add some more interest?
For things such chains, creaky pipes, doors or even things scuttling in the darkness...
That's a really cool idea I hadn't considered. Yeah, I'll definitely use that. I was also thinking of sculpting some formless figures - like a lump of shadow with a poorly conceptualized head or a tall figure with lots of spindly arms - for when players get only vague glimpses of the things that are waiting for them in the shadows.
So I've started on the walls, cutting out sections, drawing in lines to demarcate areas such as bulkhead locations and floor insert areas.
My intentions are to layer cardstock squares into peeling, disintegrating steel sections that can be removed by shooting or punching the section away. These are obviously unfinished.
And again this is just an experiment; a sort of detailed mock up. If I don't like it I can always start over.
Automatically Appended Next Post: Here are the first 2 tiles layered up.
Thanks for the feedback. I did the left one first, mostly as proof of concept, but I'm so much happier with how the right one came out. I might use thinner cardstock for the next one to add more depth. I realize what I'm trying to depict is almost total disintegration of materials so I'm probably going go even crazier with the cut outs on the next few until I find the right balance.
Automatically Appended Next Post:
gobert wrote: Wow, the layered card works really well, nice way to add some detail without being too complex for us mortals
I want to speak directly to the highlighted text. Because as far as I'm concerned, and for all the time I have been on these forums, everyone who posts here is my personal hero. There is not a human amongst you that I would ever insult by calling you a mere mortal. Levels of skill may vary, but having the courage and drive to make, post, and share your content is what makes this community great. Thank you all for being here and sharing it with me. I hope all your days are awesome.
It is a great place to learn and share. As long as you attempt to bring your ideas or visions to reality you can never fail. Enjoy the hobby however you see it.
And gobert, I don't mean any offense to you. I understand what you are saying. I just want you to know how highly I regard you all.
I've done 3 mockups so far and jammed them into the bare-bones-est wall mock up. I feel like I am making progress towards what I want, but I'm not quite there yet.
As always, comments and critiques are welcome and encouraged. Thanks for looking and have an awesome day!
Captain Brown wrote: I see the decaying look you are aiming for. A much more affordable solution than getting new bulkheads and cutting them up.
Thanks, Captain Brown!
I'm struggling with finding time to make stuff lately. My job shift eats up most of my evenings and the job is both mentally and physically taxing. I come home exhausted in the middle if the night, eat my dinner in the dark, sleep all day, and then wake up more or less just to get ready to go back to work. Even my days off are tough as I have only those two to do all my adult stuff and the first day I spend recovering from the past week.
Bleh.
I literally had to take a day off this week to make any progress on the only thing that makes me happy anymore: my hobby. This is the fruit of my labors.
I've had these MDF letters in various sizes for ages. I thought it would be cool to make my "minimalist Spacehulk" walls using them. I started with a simple design and the letter T. It has always been my intention to make this spacehulk multi-leveled, so I started with the idea of having 2 extra floors on this piece. So I made my measurements, did my cuts (with the idea that the 6" MDF pieces I'd already done would slot in) and test fit.
And then I realized my folly. First, the 6" squares were not going to stable enough to use. And second, the idea of having floors on both sides would not work with my current working mock up.
After some quick modifications and chopping up a whole lot of extra foamcore, I ended up with one tall slotted back wall and a whole bunch of floors and separate walls that I white glued together to form a whole. Here is floor one to illustrate and a second shot with a random Barry Ork for scale.
Then I went to town detailing the first floor minimally, and the second floor with a pattern of minimalist debris to match the bases on all the models I've been making lately. This is where I left it yesterday. Barry again showcases the scale.
And this is likely as it will stay for the next few weeks until I can find the time to finish it. Thanks for looking all. C&C always welcome. I hope you have an awesome day.
Right now this looks like one of those magnificent multi level dioramas in the making. I think that as a full Hulk to play in this going to be amazing, and it's great that you have a project to channel your energies into. Sorry to hear your work is giving you a bit of a kicking.
inmygravenimage wrote: Right now this looks like one of those magnificent multi level dioramas in the making. I think that as a full Hulk to play in this going to be amazing, and it's great that you have a project to channel your energies into. Sorry to hear your work is giving you a bit of a kicking.
Thanks, graven. I've been putting off building these walls for way too long and I'm so happy to have finally sat down and gotten some work done on it. I'm not very far off from a finished product on this either.
And if anyone is wondering, the materials I'm using to add details on this are all free scrap cardboard. The cardstock comes from a stiff sheet insert in an envelope. The regular shaped squares of various sizes are from the top layer of cardboard of an amazon delivery box. I pull off the packing tape and any cardboard that comes with it. Then I chop out the squares with a hole punch in the right shape. The packing tape that amazon uses is laced with thread that adds an interesting, but subtle texture to the squares. And then all the black stuff is foam cast offs from my trimmings. I work the tip of my craft knife through the foam to get texture that looks kinda like disintegrating metal. I used two sections of a plastic drinking straw for the pipes on the first floor tucked into the far corner. Some of the cardboard details also come from the thin cardboard boxes that redbulls come in. As often as I can, I try to use cardboard and plastic waste as my materials.
Really, as far as I'm concerned, a Maker should be investing in their tools first and their materials second.
Very nice start to your Spacehulk wall, looking forward to seeing more.
Great used of recovered materials though I am the opposite to you, all my tools are things I've recovered (mostly bilges) and I spend all my money on GW terrain...
That's said my best clippers are from the Imperium magazine..
Guardling wrote: Very nice start to your Spacehulk wall, looking forward to seeing more.
Great used of recovered materials though I am the opposite to you, all my tools are things I've recovered (mostly bilges) and I spend all my money on GW terrain...
That's said my best clippers are from the Imperium magazine..
To each their own, I guess. I know I've spent my fair fortunes on GW products. I've just always had a passion for building on a budget.
Warboss_Waaazag wrote: And gobert, I don't mean any offense to you. I understand what you are saying. I just want you to know how highly I regard you all.
No offence taken Warboss! I agree dakka P&M is an amazing community, all the interaction certainly keeps me motivated.
Graven is spot on about the new space hulk bits looking like a classic diorama piece, hopefully your shift pattern lets you get some good progress
The original Space Hulk rule book fluff described the hulks as 'huge, gloomy edifices with the property of movement, once." You've captured that well with the start of your entrance.
Thanks, Meer_Cat! Yeah, I caught Covid and had a "week off" from work. Managed to actually get some work done once I recovered. Not huge progress, but I painted up the debris.
And here's a mock up with the panel covering it.
Thanks for looking! It's good to be posting again.
Made some more progress on my space hulk corridor. Laid down the floor tiles and spruced up the walls. You'll notice I painted the base before lauing down the floor tiles. One less frustration for when it comes time to paint. Second photo shows a pair of tank bustas for scale.
I started the internal structural guides for the door. And built a step for the door to slide to (and to cover up some of the gap under the floor tiles.
Here we have the outer wall in place with the 2 ply spacers in between. This is heavy cardstock, roughly 1mm thick, so there is a space inside this wall about 2mm wide.
This is the inside view showing the door in place.
And here the door mid-slide upward.
And the barely perceptible slot from above.
Next comes paint. Thanks for looking! Feedback always welcome.
Also, I lied. The next step was more detail, because I thought the outer wall lacked detail and the floor needed more debris.
But THEN I added the paint. After a basecoat in black I applied a dark blue.
Then a layer of lighter blue. On the door I added a mix of grey and terracotta paint and a lot of dirty black water so it would stand out as different from the walls.
I am calling this piece done and moving on to the next one.
Thanks for looking! Feedback always welcome. Have an awesome day!
That is amazing! I was having some trouble visualizing it at first, but now you've added a few dabs of paint- this is truly first-rate scratch building!
Meer_Cat wrote: That is amazing! I was having some trouble visualizing it at first, but now you've added a few dabs of paint- this is truly first-rate scratch building!
Thanks, Meer_Cat!
Not Online!!! wrote: That is awesome terrain. You won't mind if i take some inspiration right ?
Of course I don't mind! That's literally the whole point of this blog. Thanks for the feedback, Not Online!!!
Camkierhi wrote: Epic stuff bud, looks amazing. Nice hint of an osl blue light hitting off all surfaces is well done. Let's the imagination run riot. Great work.
Thanks very much, Cam.
KernelTerror wrote: Wooow this is an awesome project ! Looking forward to following your progress !
Thanks, KernelTerror! I hope it doesn't disappoint.
Olthannon wrote: Brilliant looking terrain, the blue is a great touch. I love seeing projects like this, seeing everything come together is great. Good luck with it!
I really need to make more terrain, but first i will need to paint my pile of shame Solar auxilia and buid my even larger pile of shame of ALHH tanks and terminators.
Not Online!!! wrote: I really need to make more terrain, but first i will need to paint my pile of shame Solar auxilia and buid my even larger pile of shame of ALHH tanks and terminators.
Superb job as always Waaazag!
Oh, I get it, Not Online!!! I have hundreds of Orks and Chaos to paint myself.
Here are some "layout" pics with Tankbustas for scale to keep me motivated.
Here's 2 shots of the under floor debris painted up before the floor tiles go on.
I'm really proud of myself for all the progress I've been making with this project. I had been putting off doing this for more than a year for no good reason. More updates soon!
gobert wrote: Super cool terrain, looks a bit old school computer game to me!
Thanks for the feedback, gobert!
Camkierhi wrote: This is an outstanding project for me. Just brilliant. You have nailed the vibe. Got so much promise. Well done so far.
Thanks, Cam!
I really appreciate the feedback, friends! I've made more progress, but life has gotten in my way this past month. I'm searching for a new apartment which will hopefully include more space to hobby, but at the moment a lot of projects are on hold until I get settled. Rest assured, I will return.
Wow, Dr H, it's been a very long time indeed! Good to have you back.
As for me, it's been a rough 5 months. I had to move out of my old place and I've finally begun to settle into my current living arrangement. At work, I've changed my schedule recently and it's allotted me a 3 day "weekend", tomorrow through Thursday. I'm hoping to get some work done on my spacehulk project during this time.
Thanks everyone, for your patience with me, I know it has been a long while since I last posted, but rest assured, I am not done with this long blog yet. New updates forthcoming.
Yeah, I'm trying to make good on my repeated promises of "I will check in on your blogs soon" that I've made as I drop a finished project and go silent for months (on DDakka).
"Life" happens to us all from time to time.
Good to hear things are settling in for you,
Lo Meer'. *checks* yes I have visited you already. *waves*
The first stages of making more ruin is cutting out decay-shaped panels from whatever paper products you have laying around. I think this is the packaging from some foamcore or bulk paper product. Getting started after months away is difficult.
Sorry there's no starter pics, I didn't remember to start taking photos until this stage.
In the process of fiddling with the distress on the more finished side, I tore a hole through to the other side. Rather than scrapping the piece, Isimply worked the damage into the details.
Here's the so far sitting on the 6" square masonite for mock up. I won't glue it down until I've painted the parts that are otherwise difficult to reach.
And here with a Tankbusta Barry for scale.
Comments, critiques, and compliments are all welcome. I promise I will finish this one before moving on to the next project.
Thanks, graven. I'm trying a new idea with this one where I use toothpicks to mimic corrosion stalactites in the doorways. I imagine it might look better with paint.
gobert wrote: Good to see you back making stuff. The new piece looks nice and decayed already
Thanks gobert. I always go completely overboard with details to the point of annoying myself. It's nice when folks acknowledge all the work.
Really nice work. How well does the foamcore hold up to game play?
I have started building a few foamcore buildings but never seem to finished them.
Generally I work with polystyrene I buy in bulk from a commercial supplier.
I'm always looking for ideas.


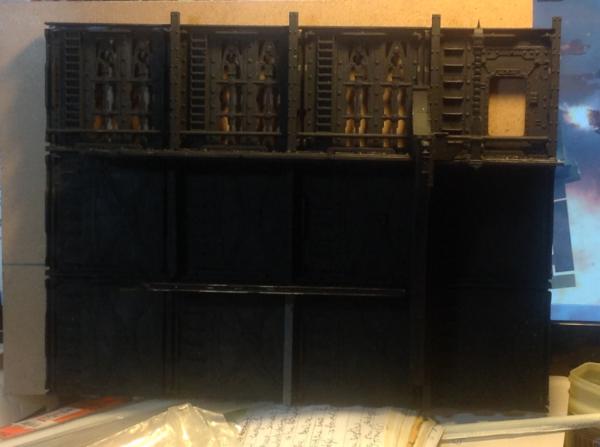
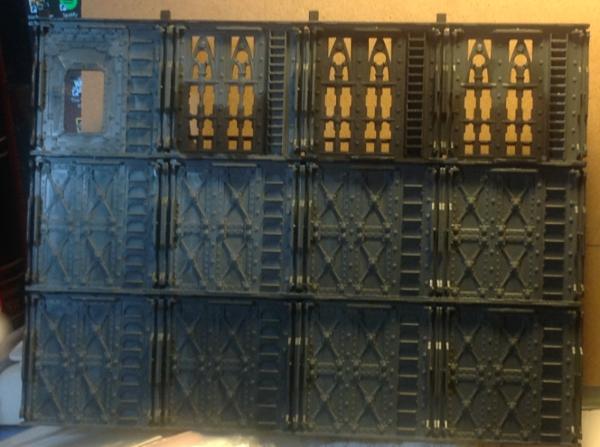
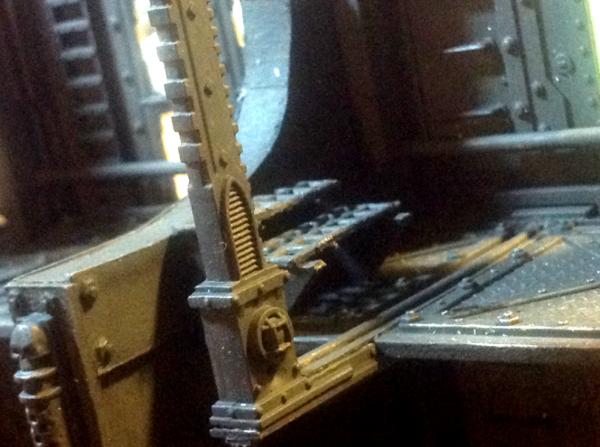

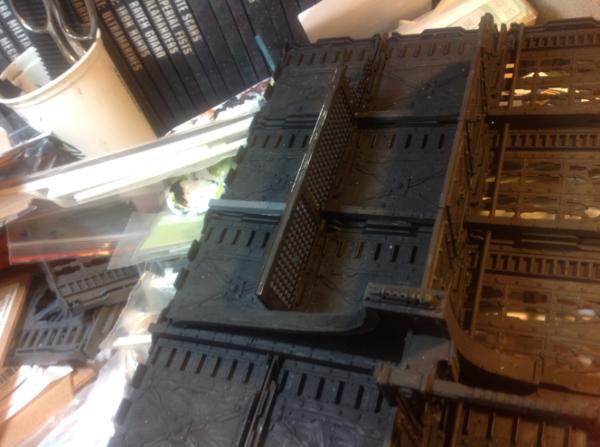
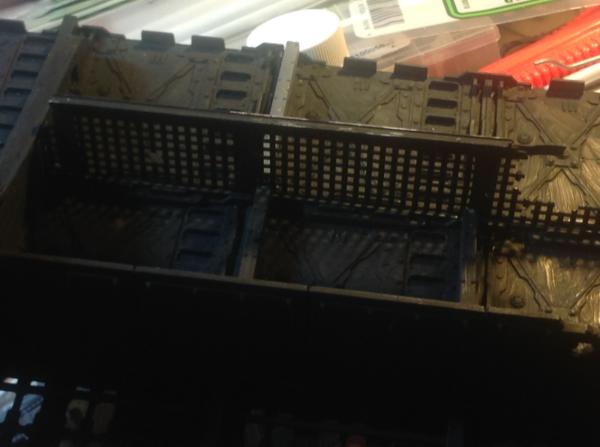
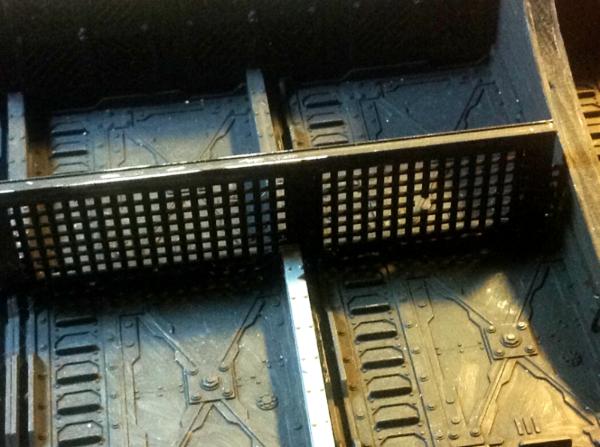
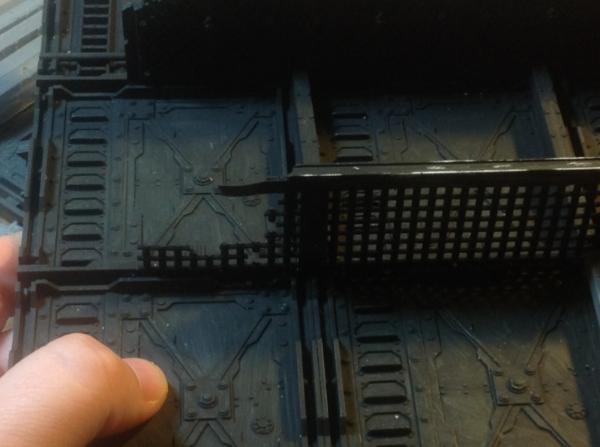
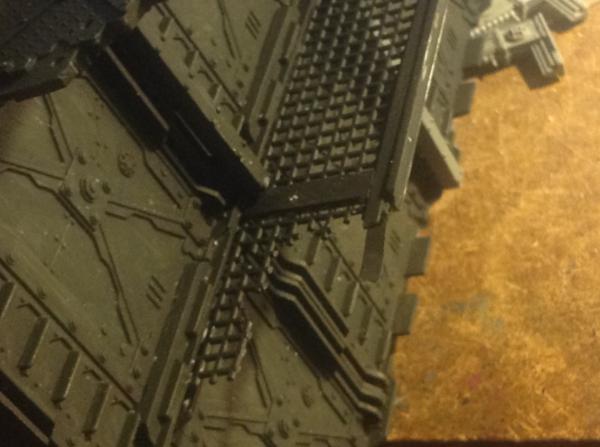
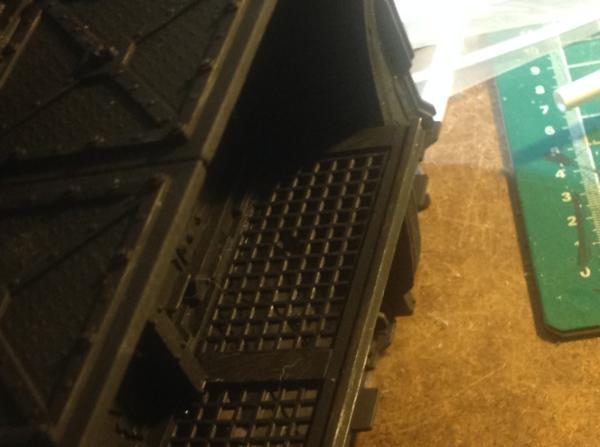
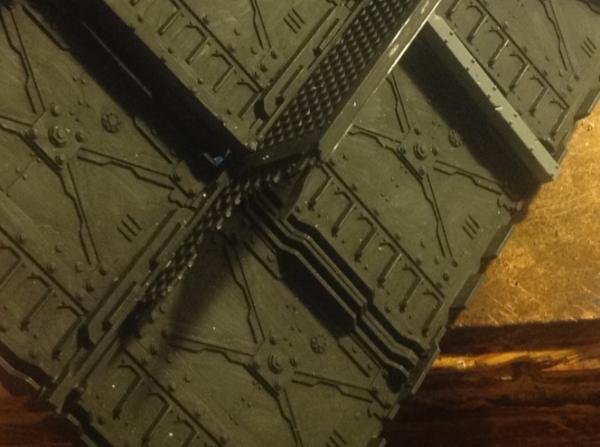
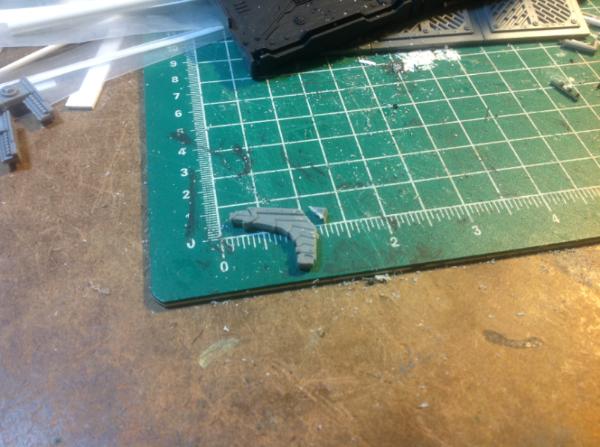
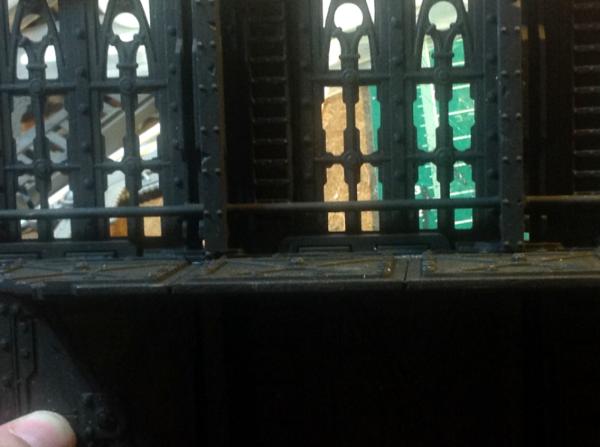


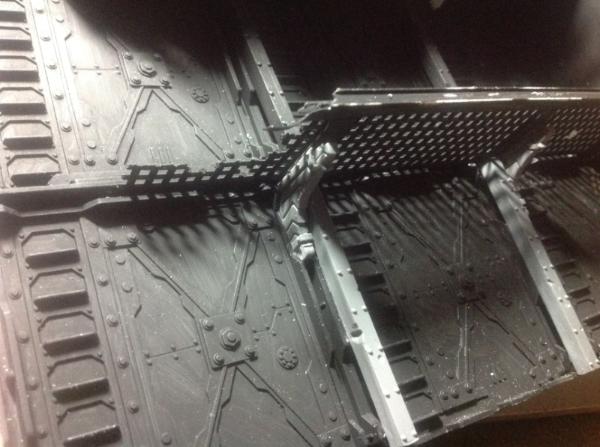
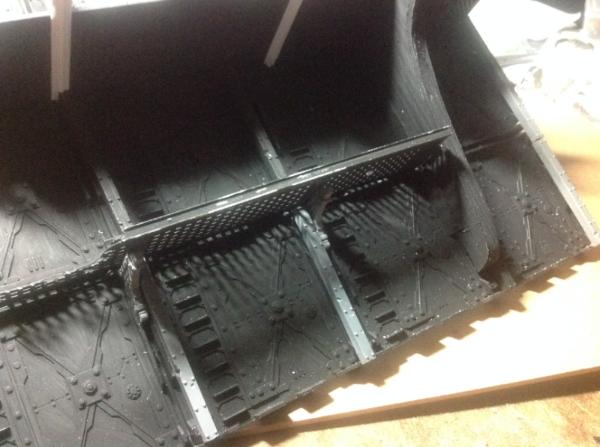
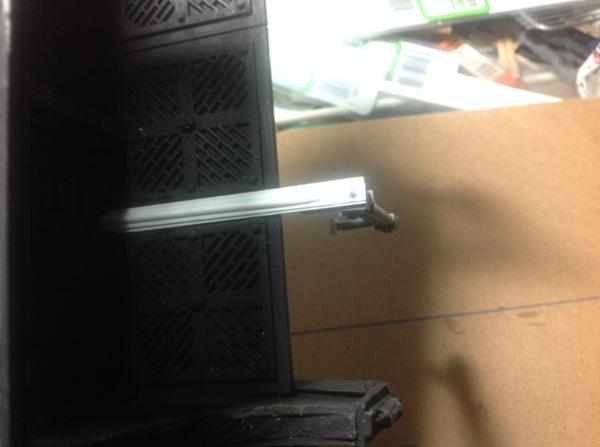
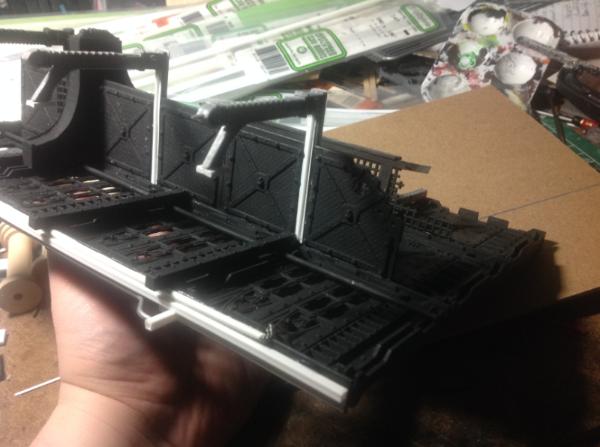
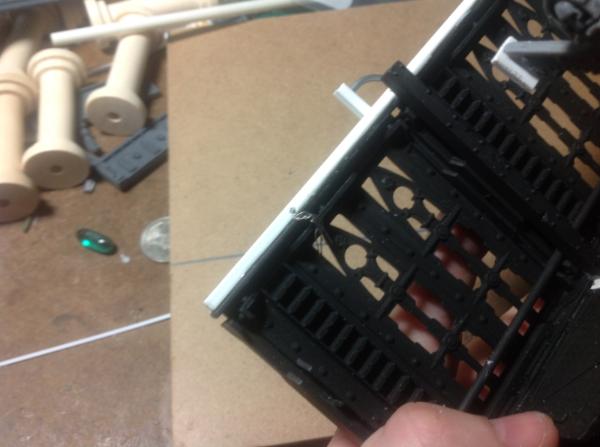
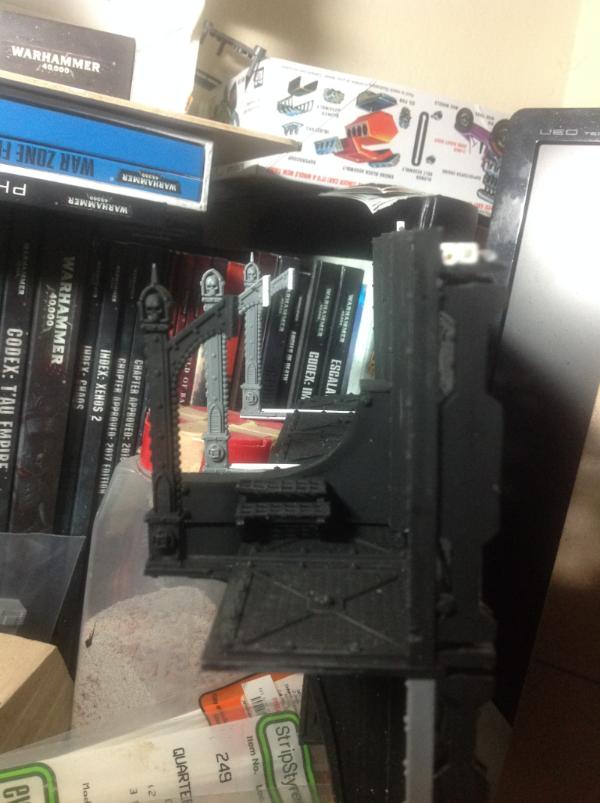
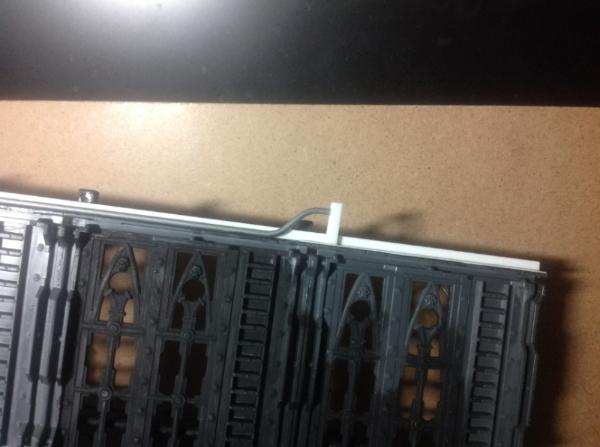
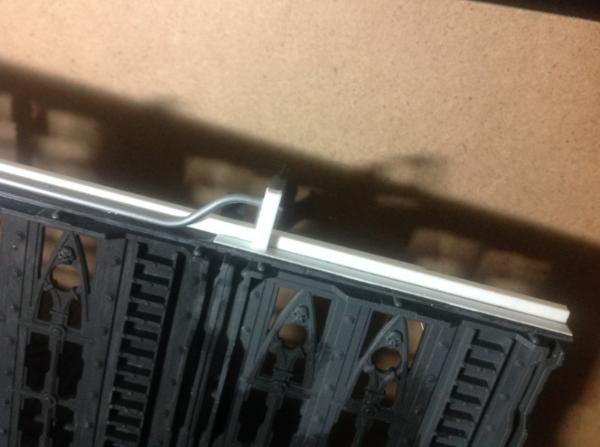
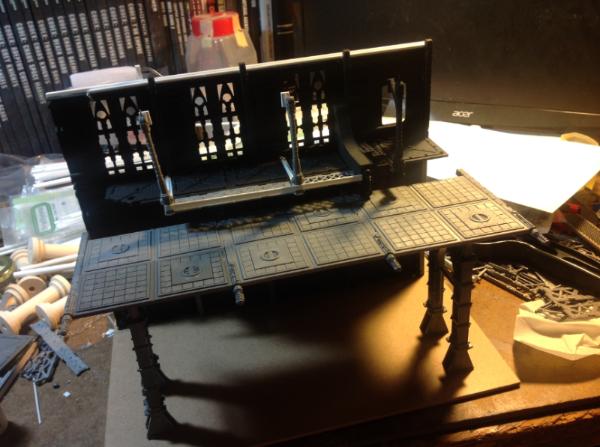
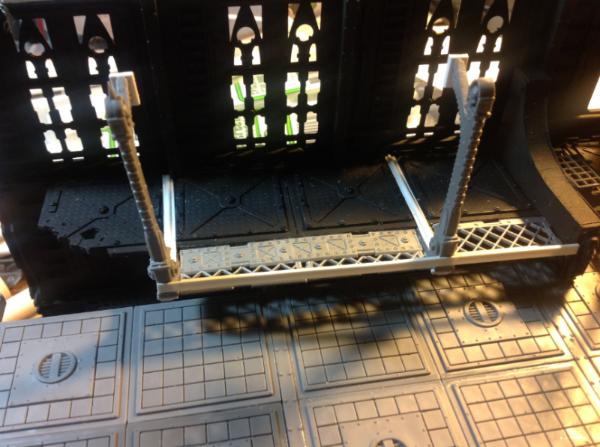

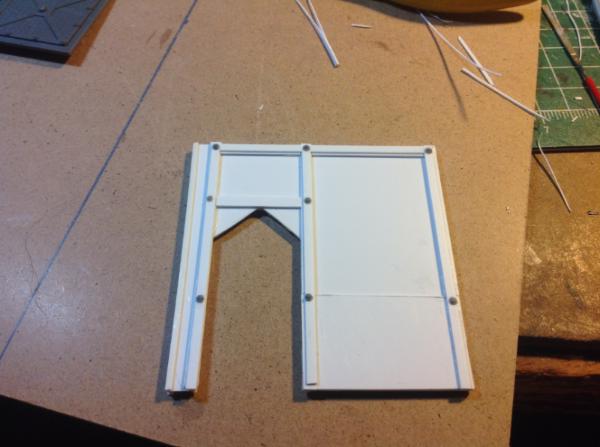
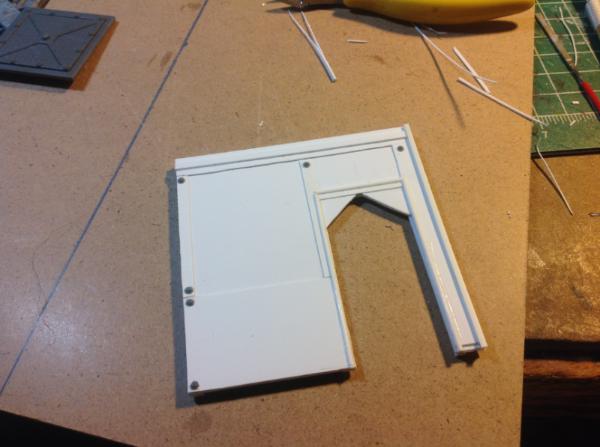

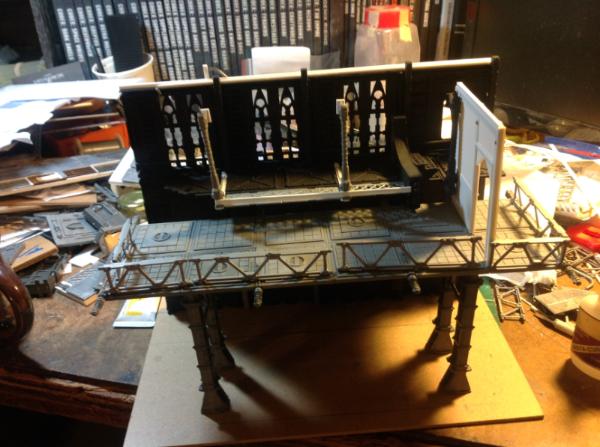
 .
.
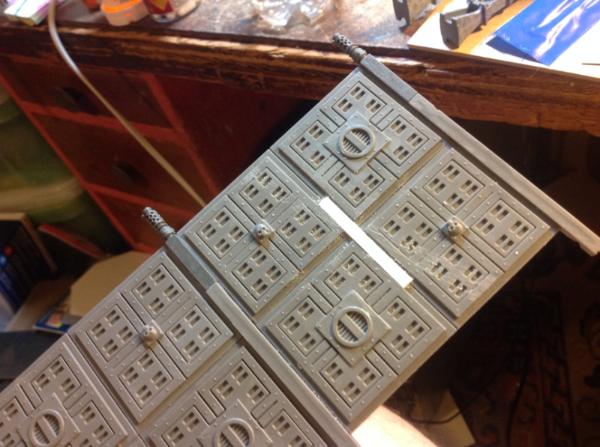
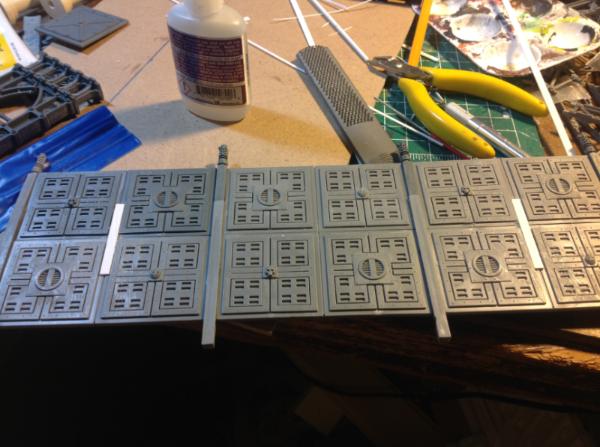
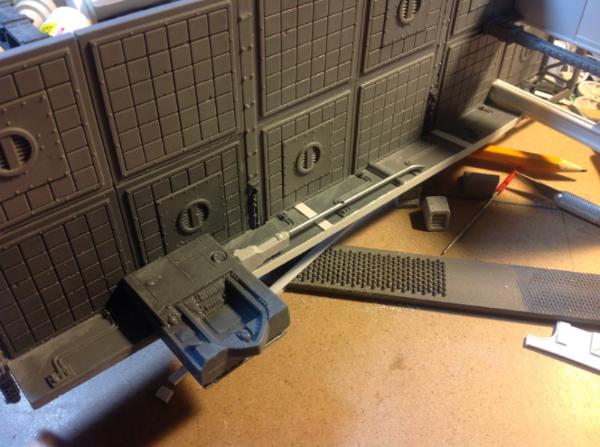
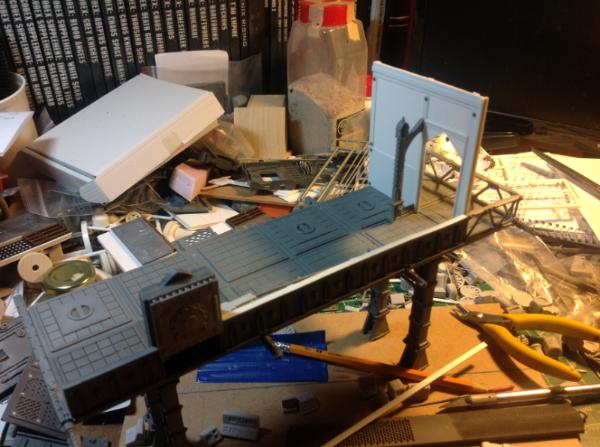
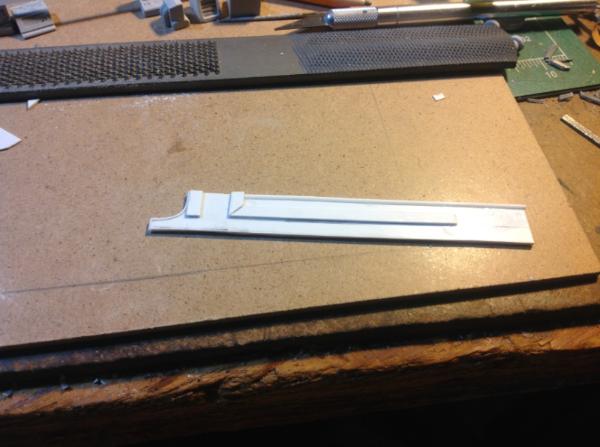
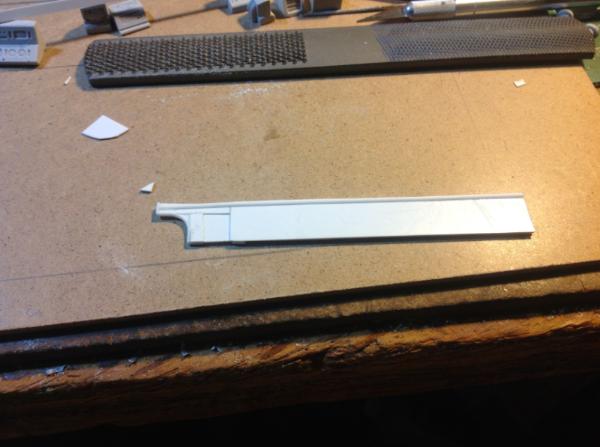
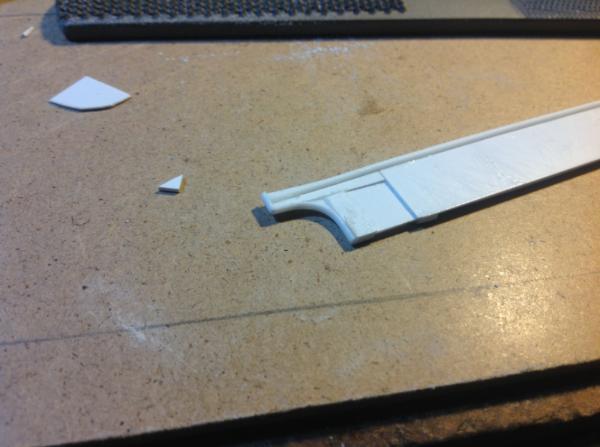
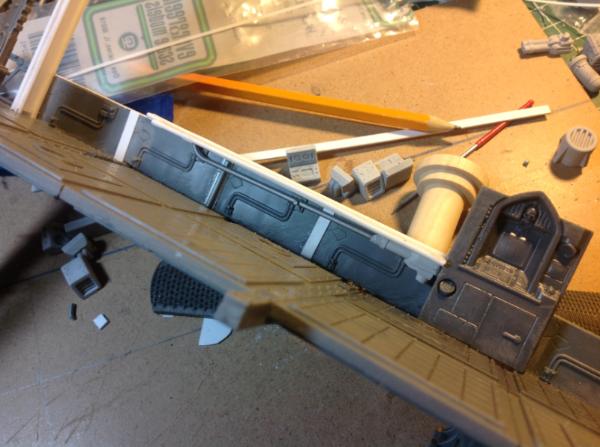
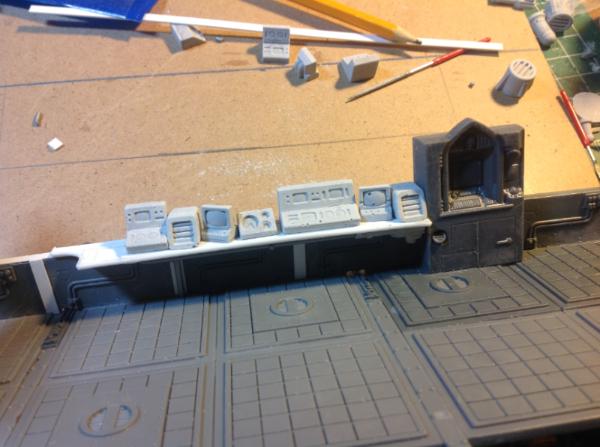
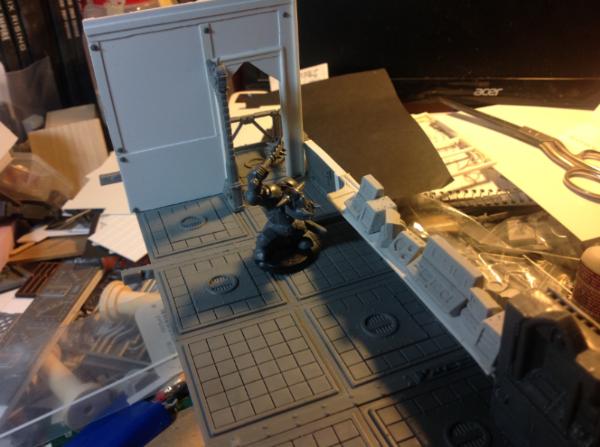

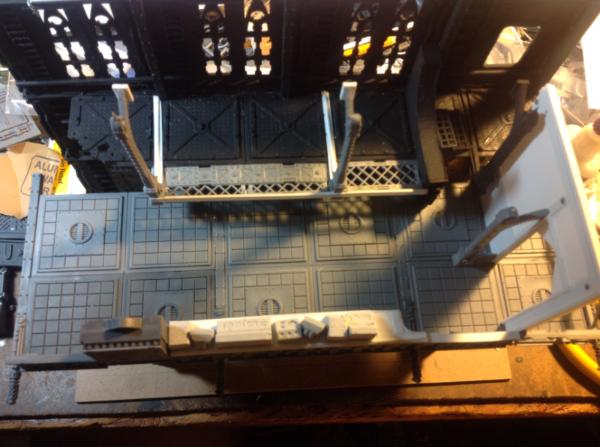

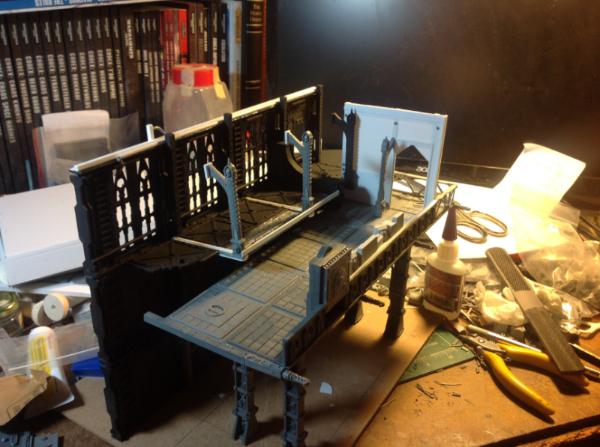
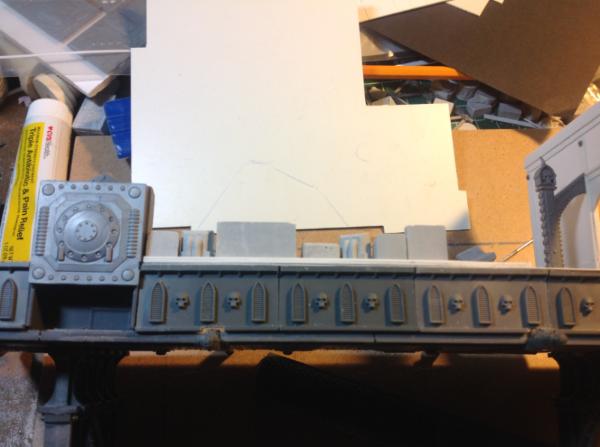

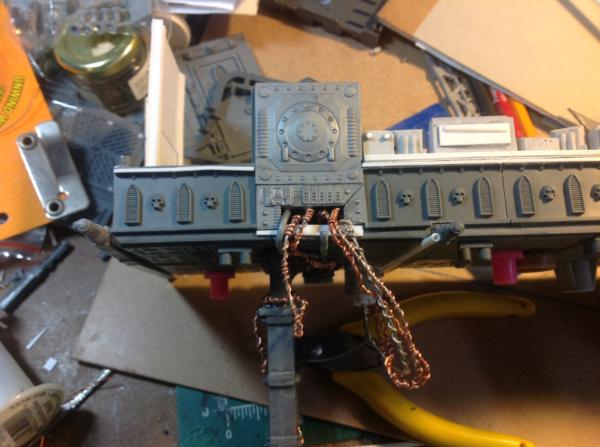
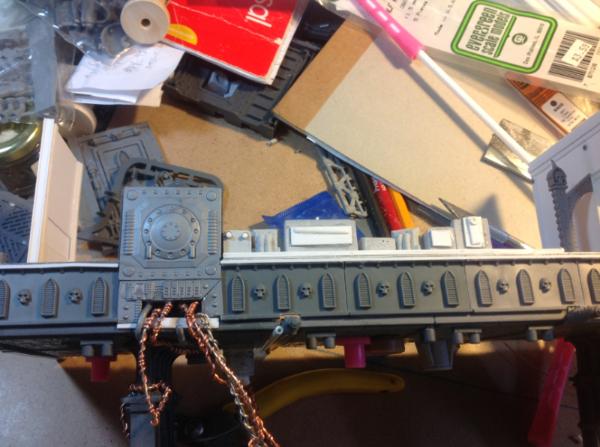
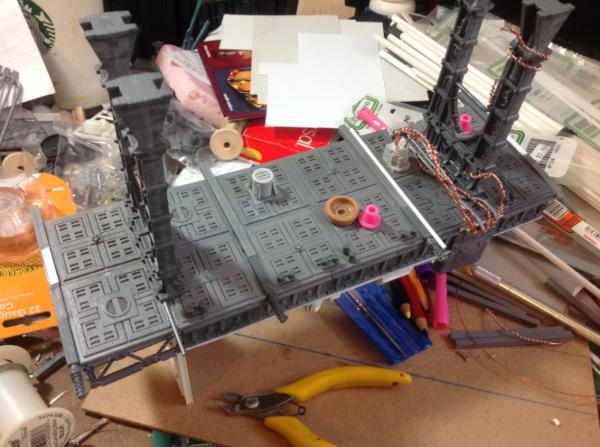
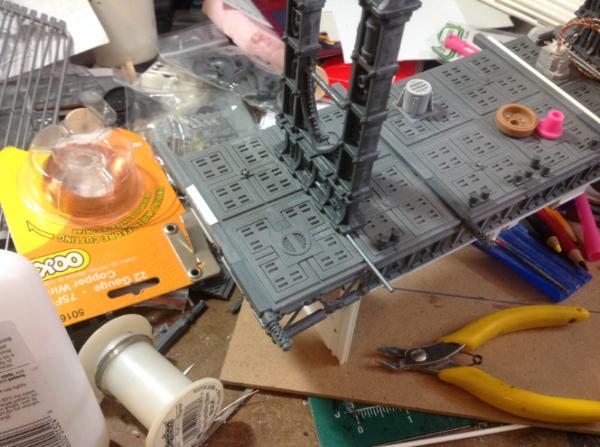
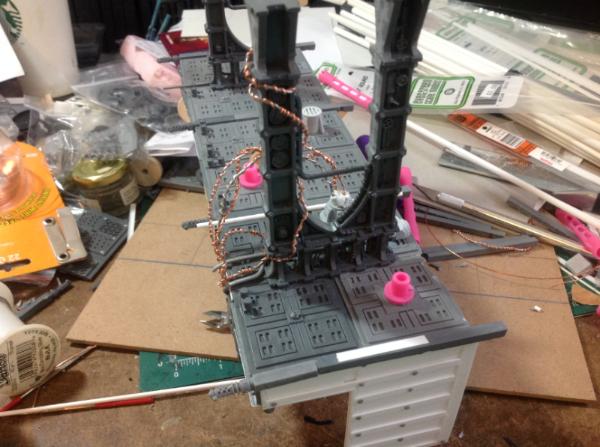
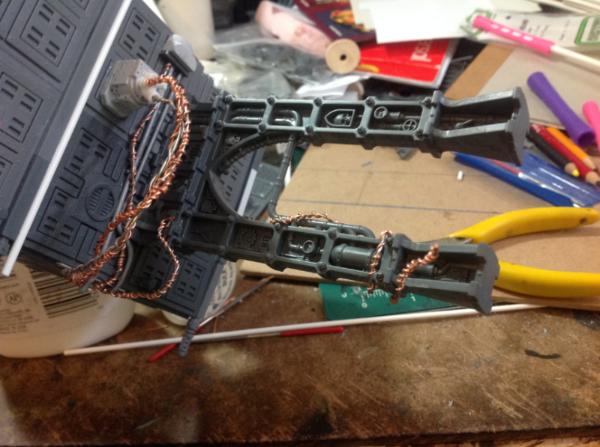
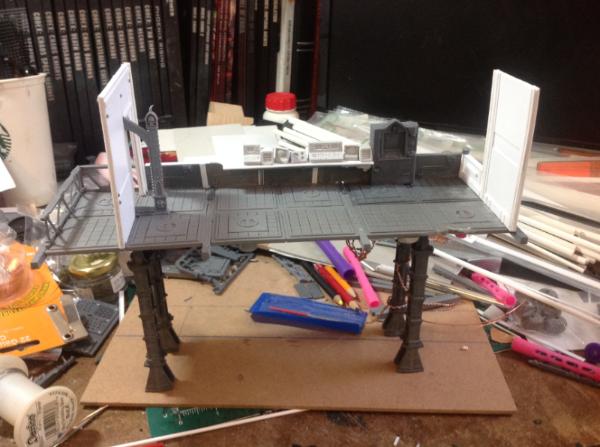

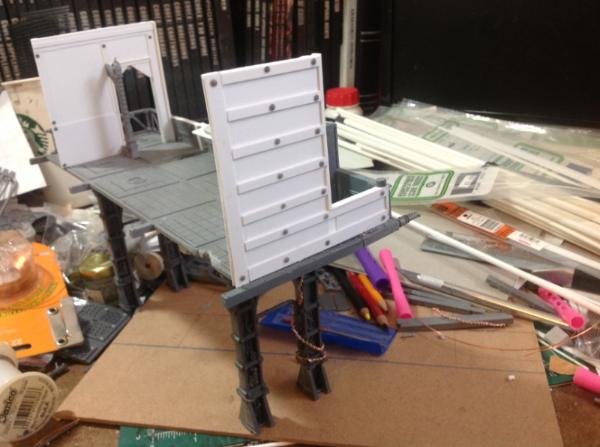

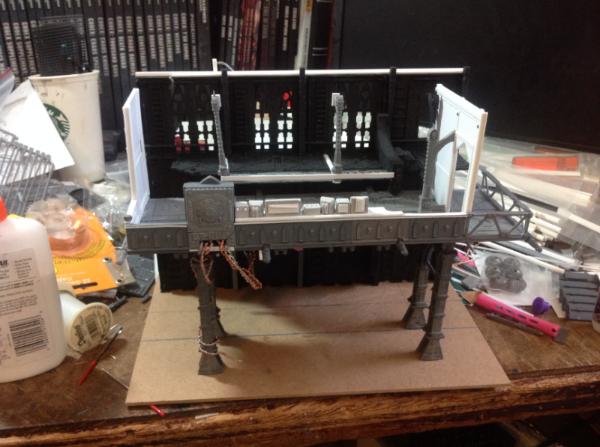
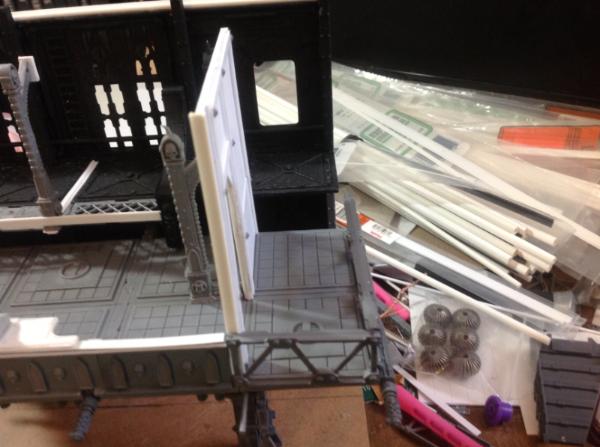
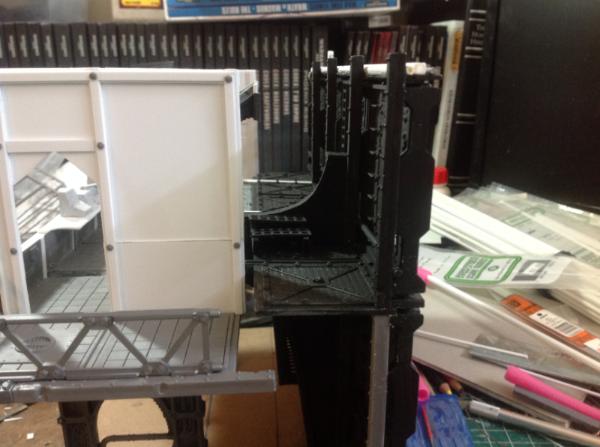
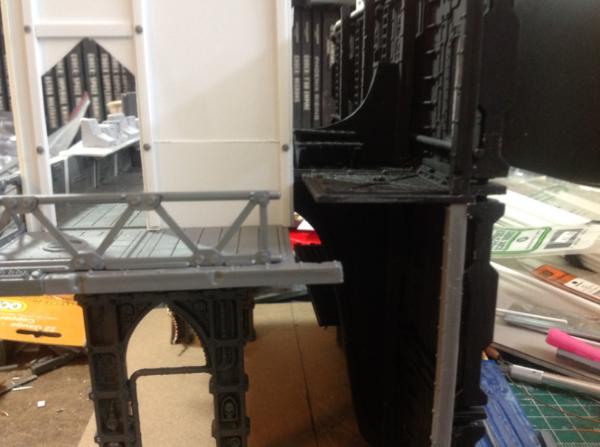

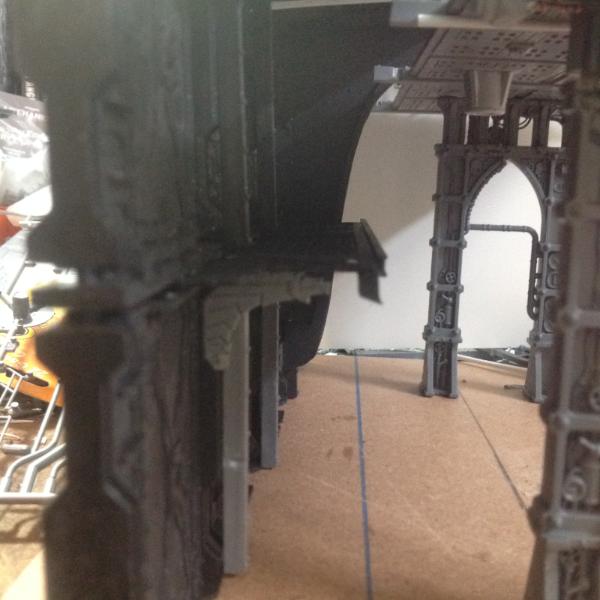
 , you’ve been a busy little beaver lately. Great work on the dangling power cords. All tidy work around here.
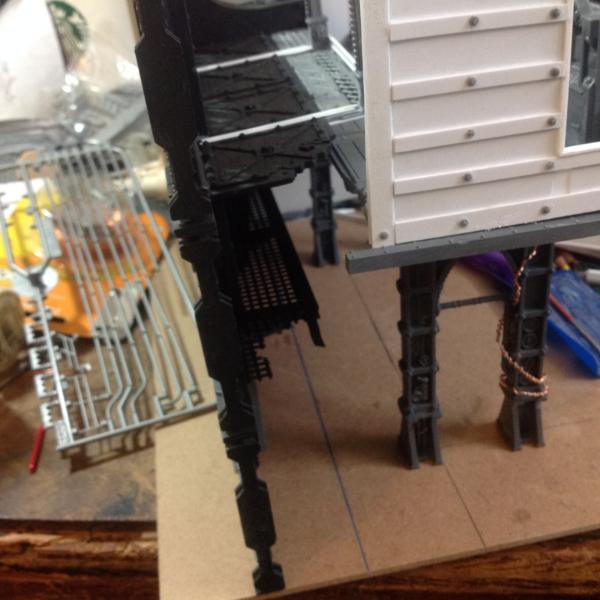
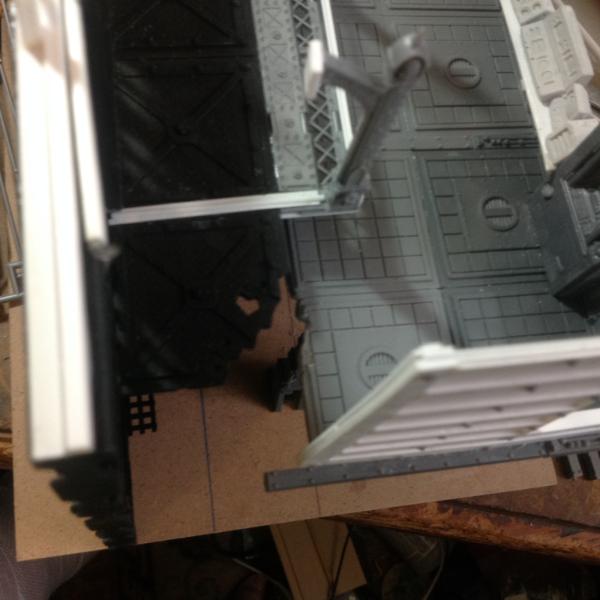
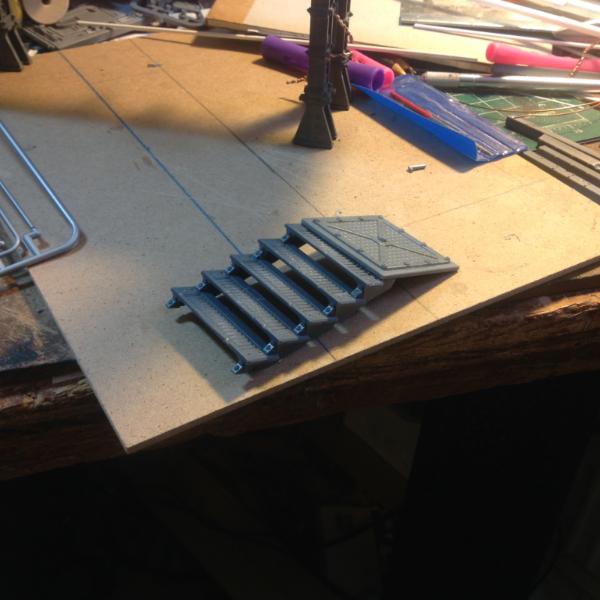
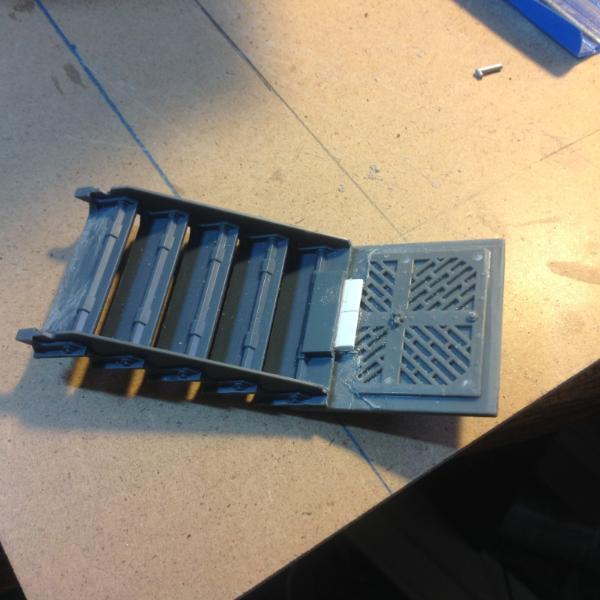

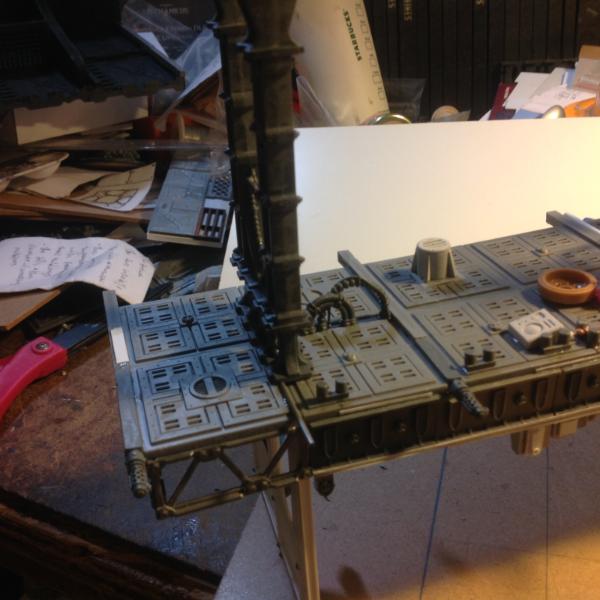

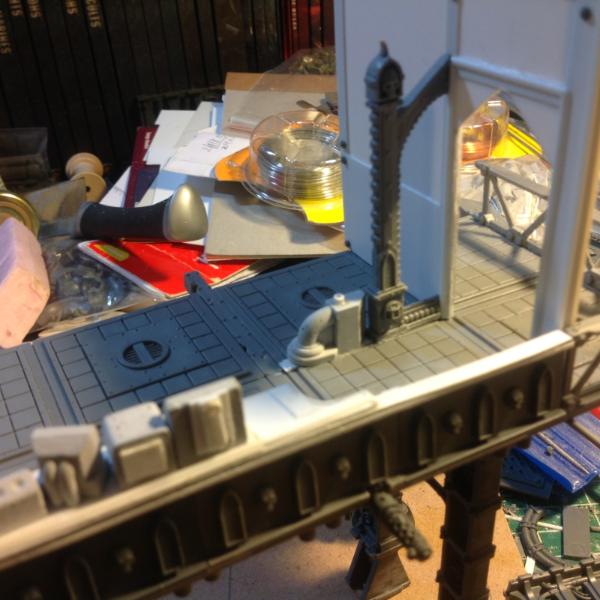
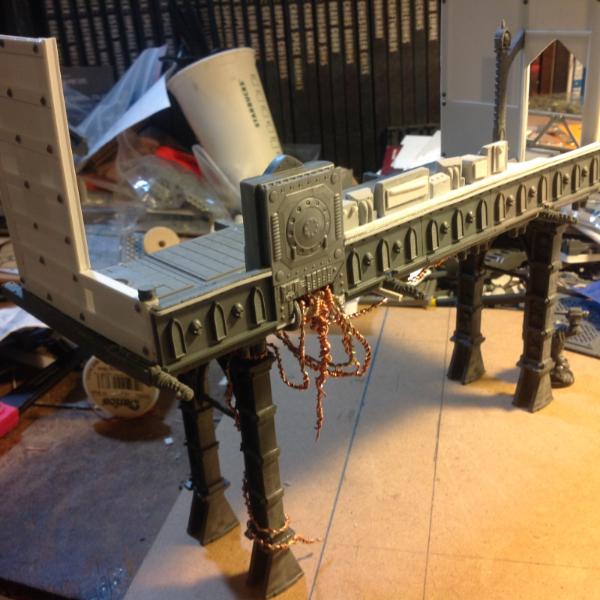

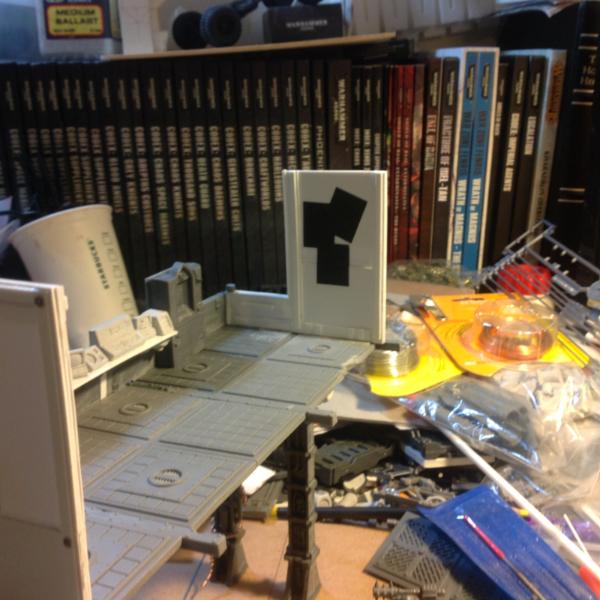
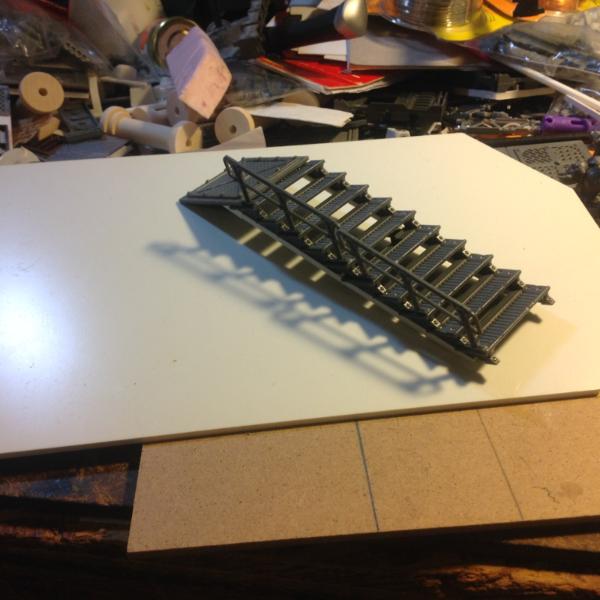
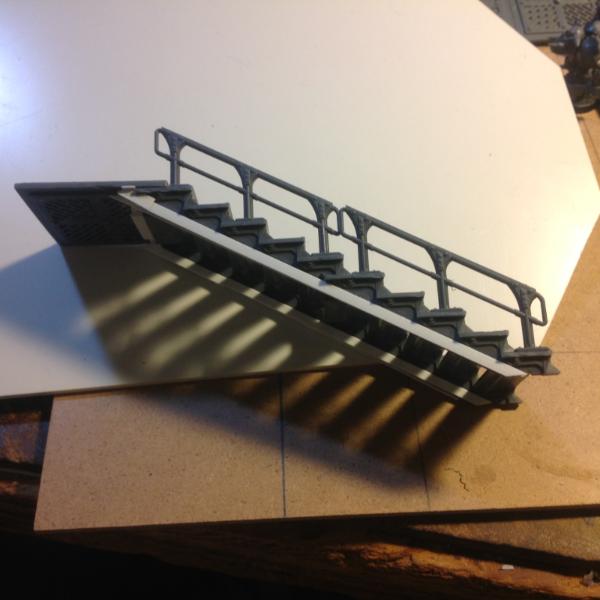
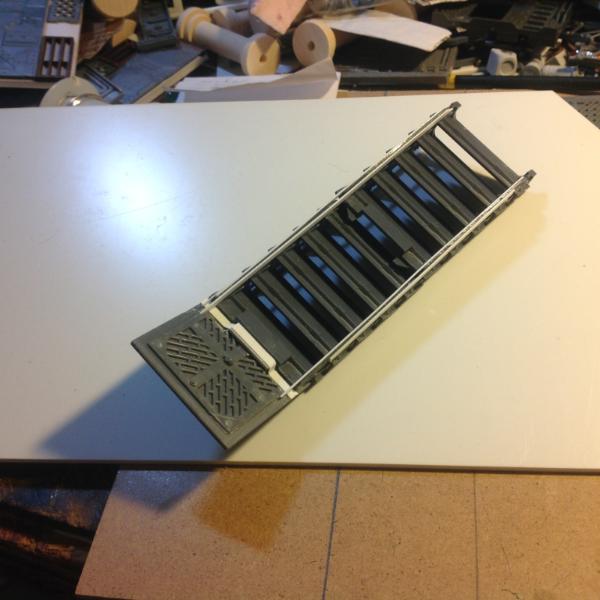


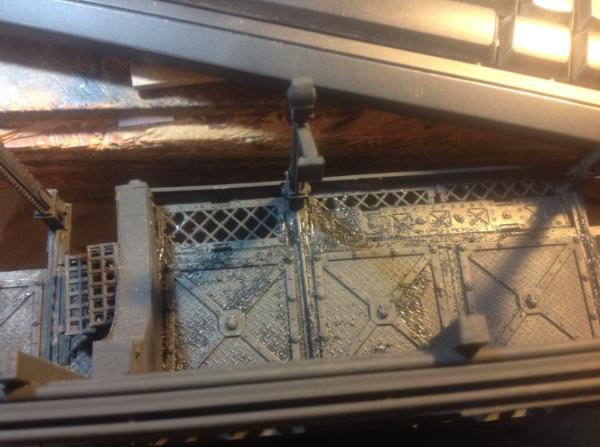
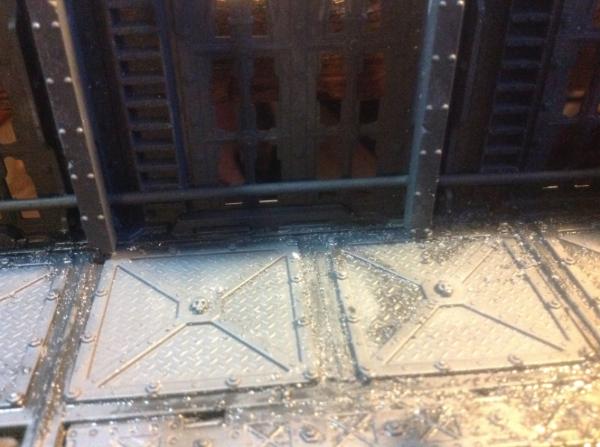
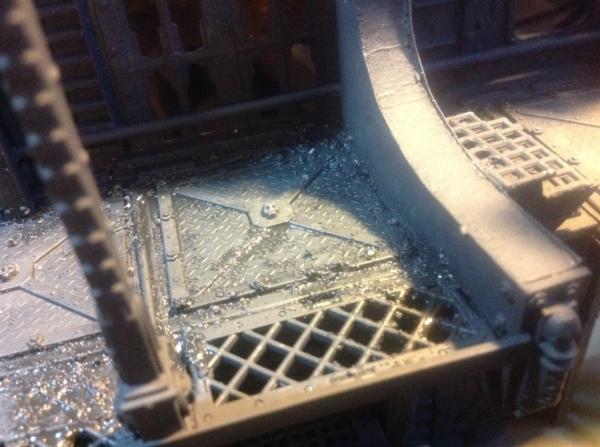
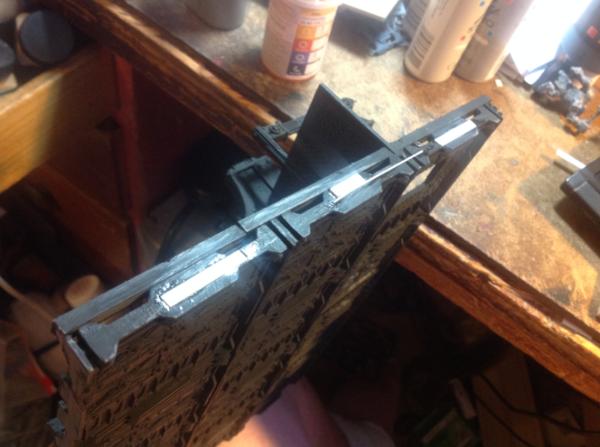
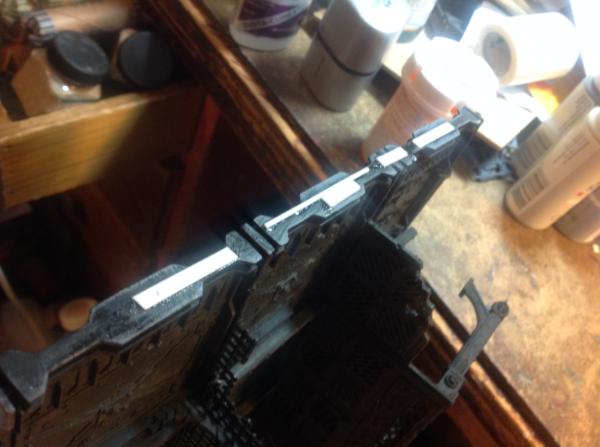
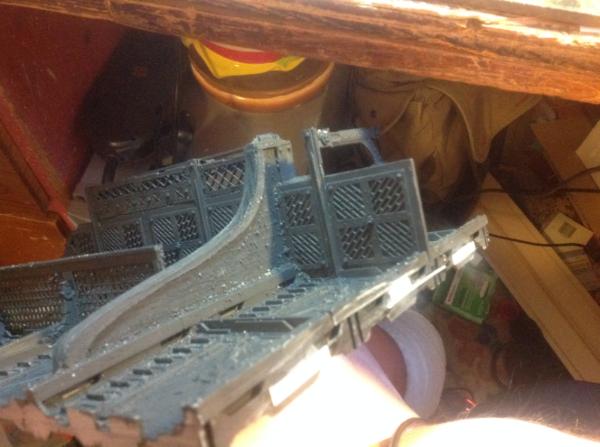
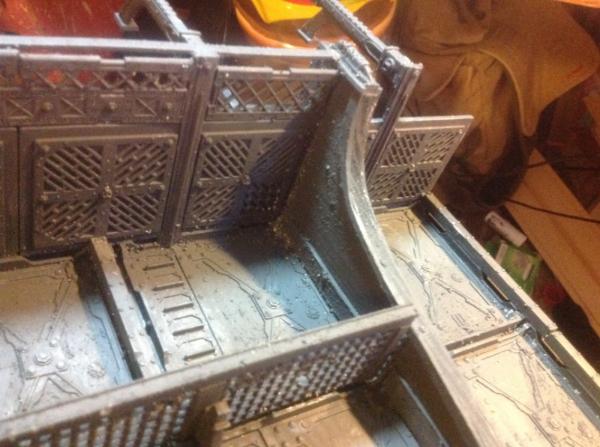
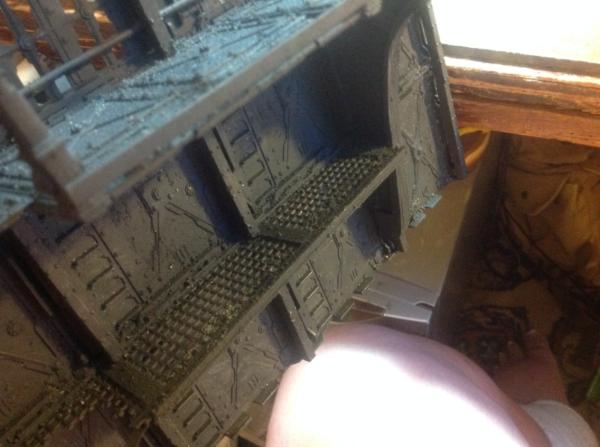
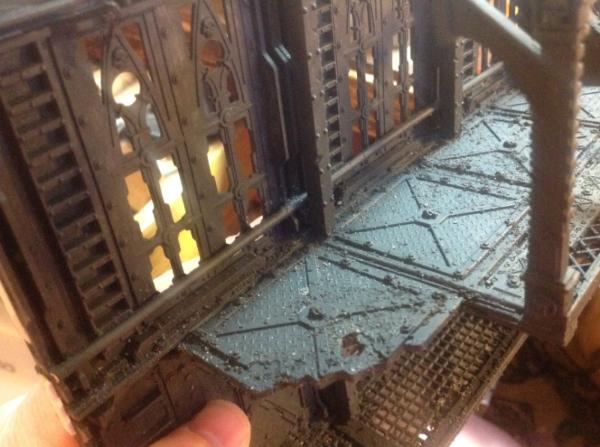
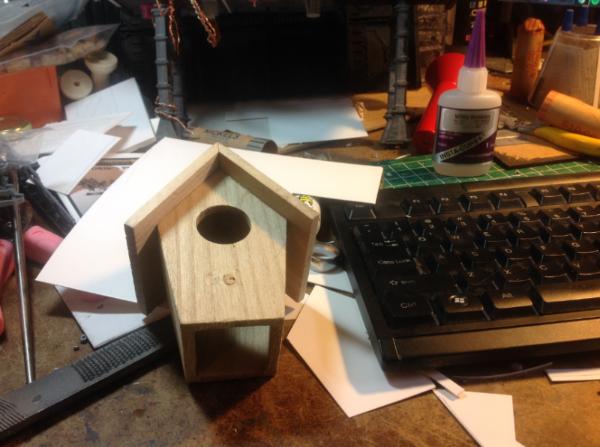
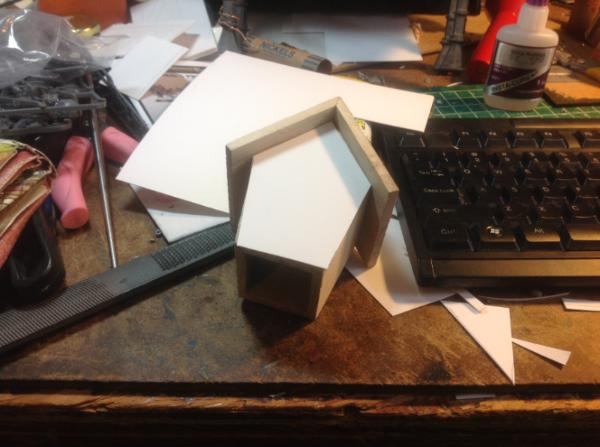

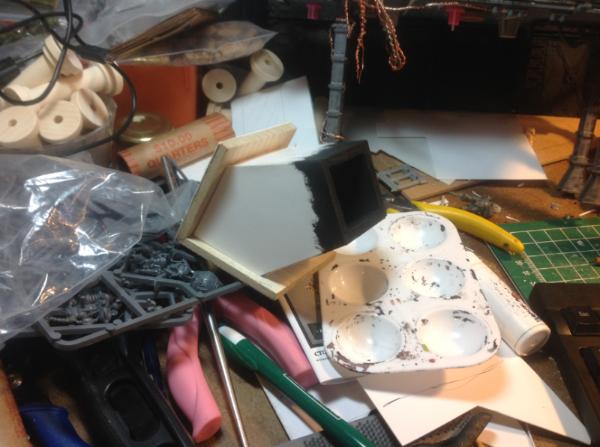

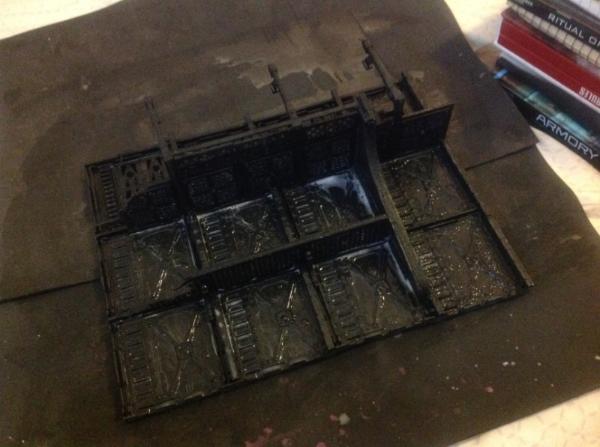
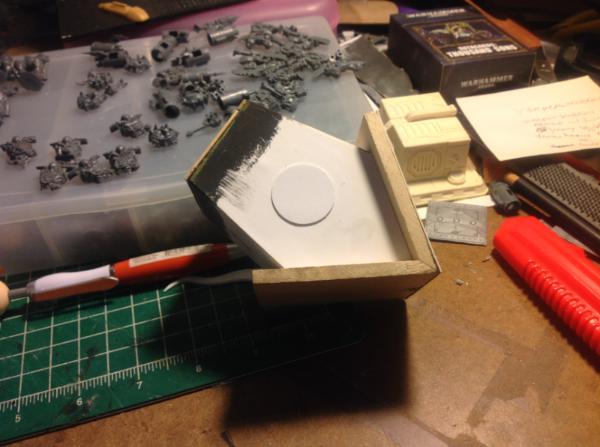
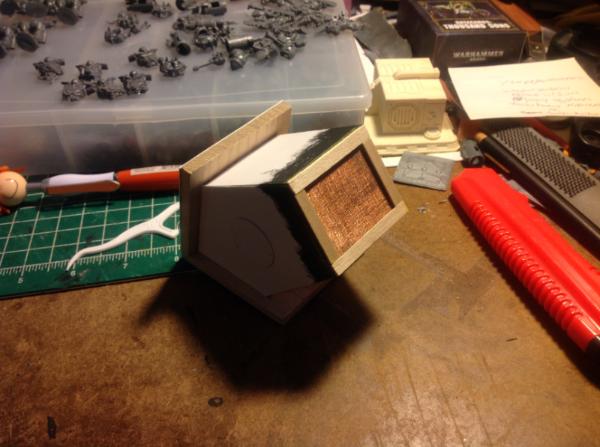
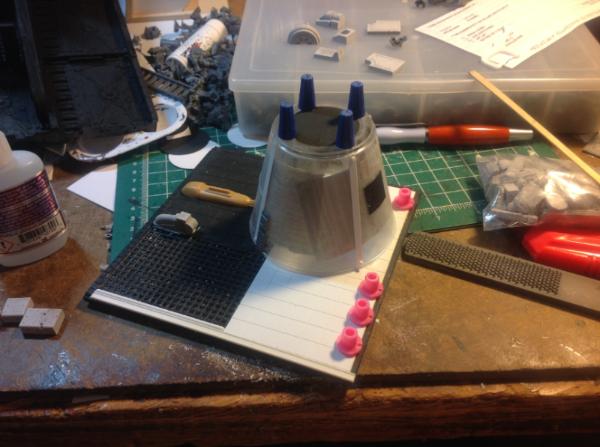
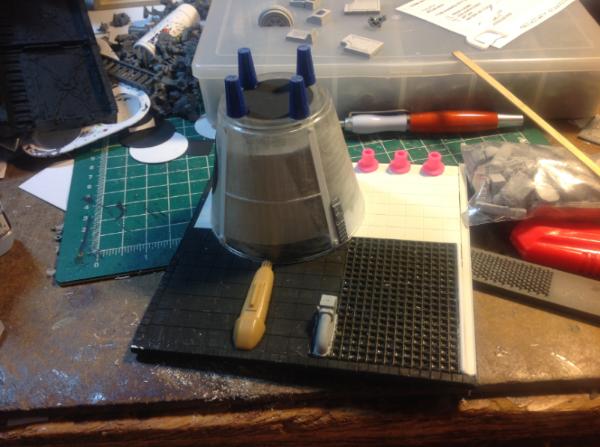
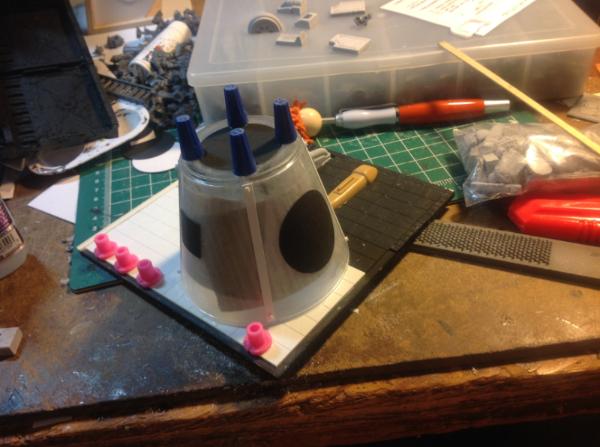

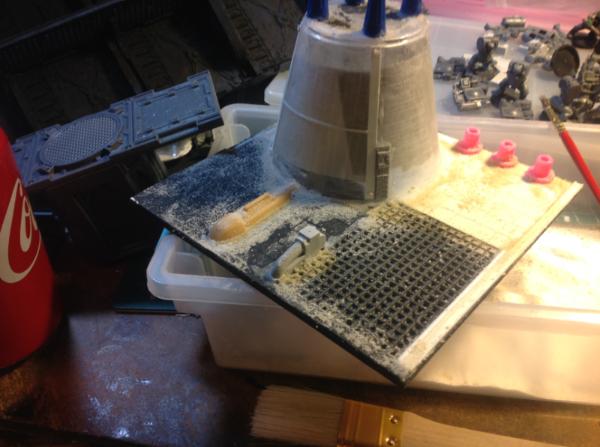
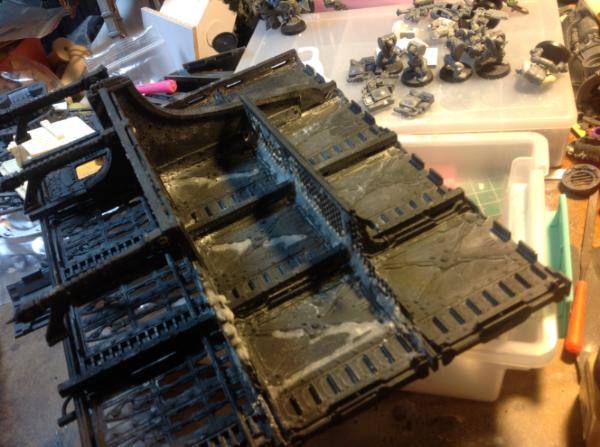
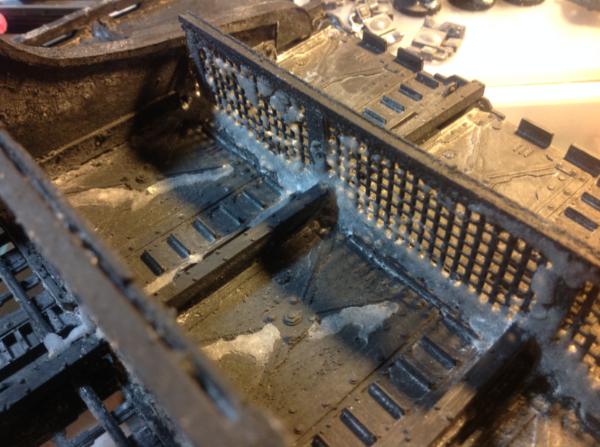
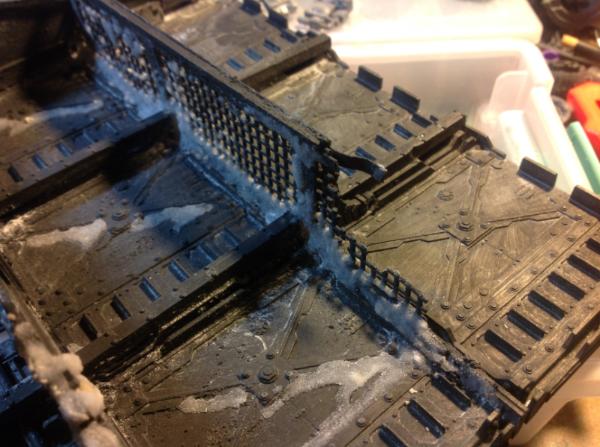

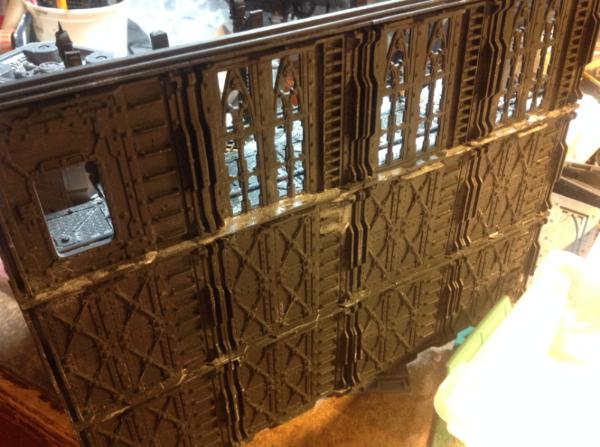
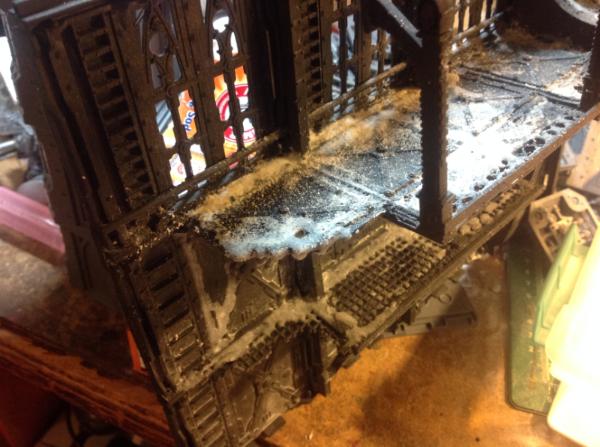
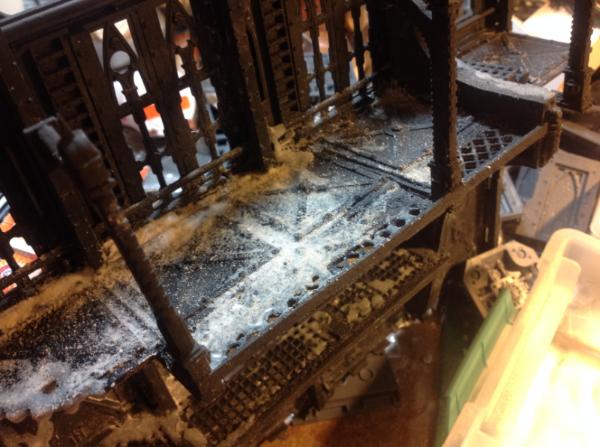
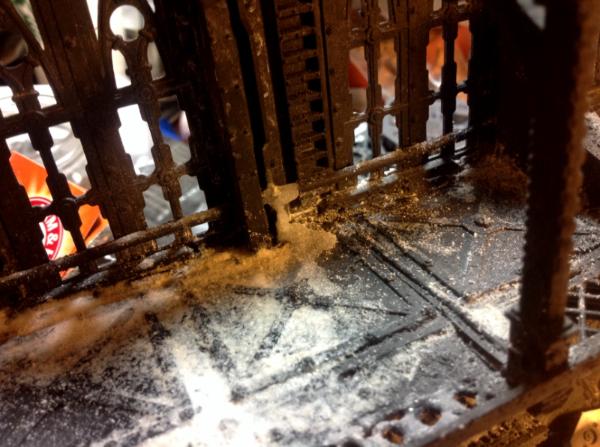

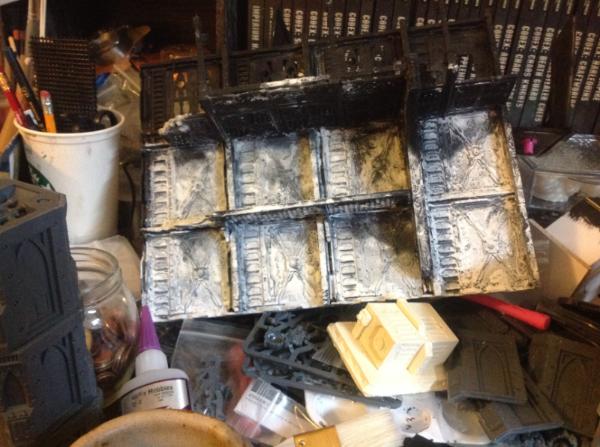
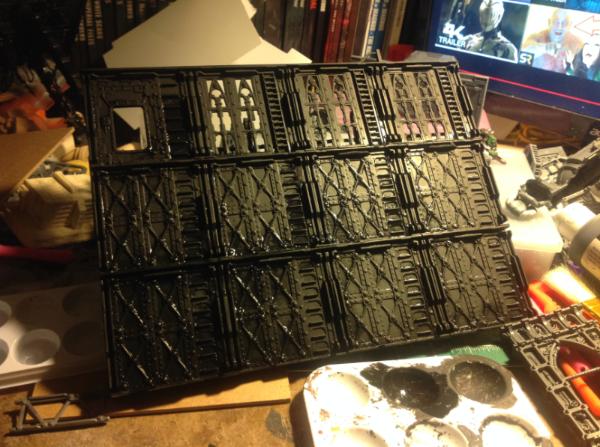
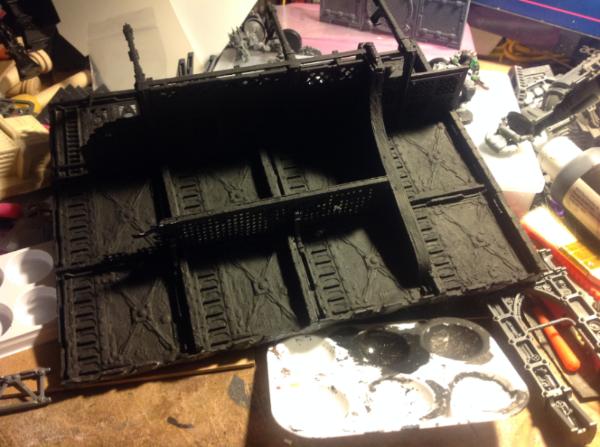
 seriously mate, looking great.

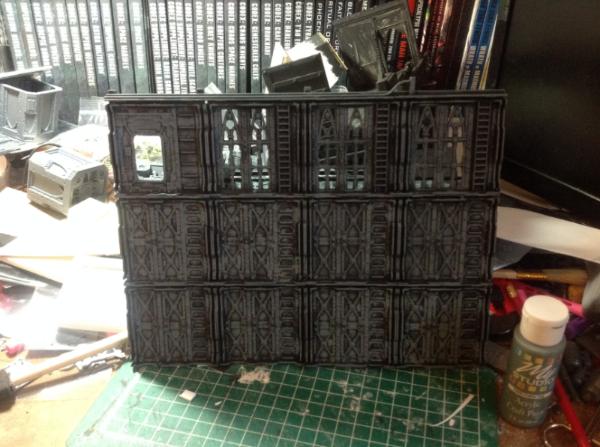
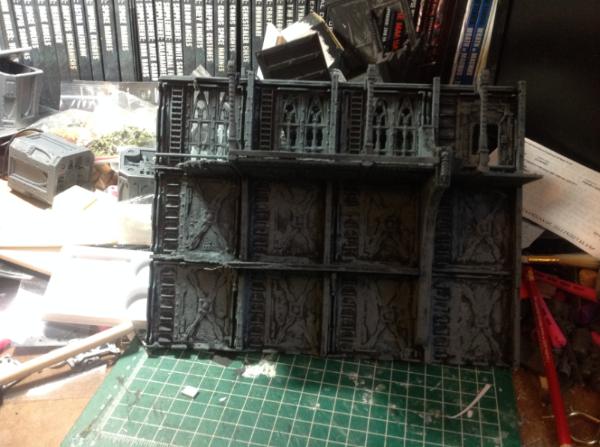
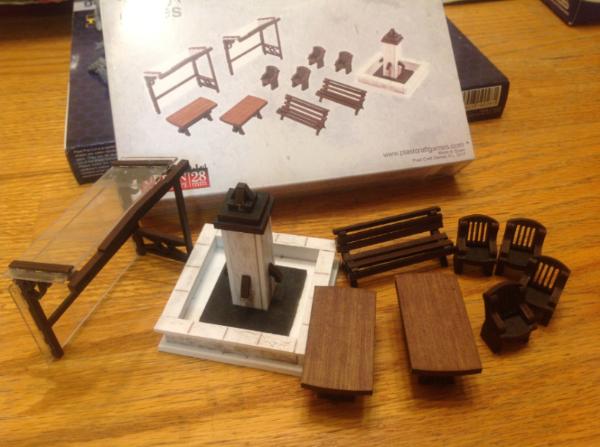
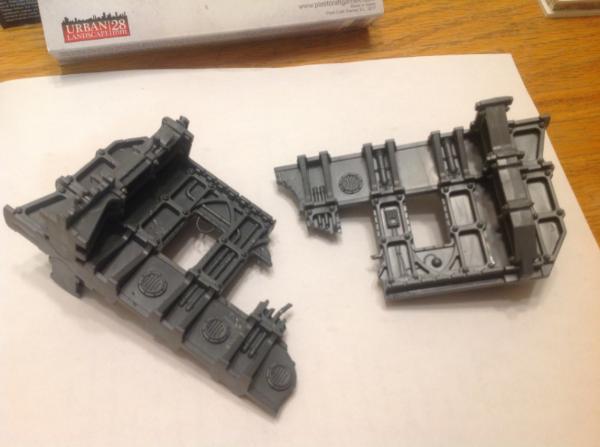
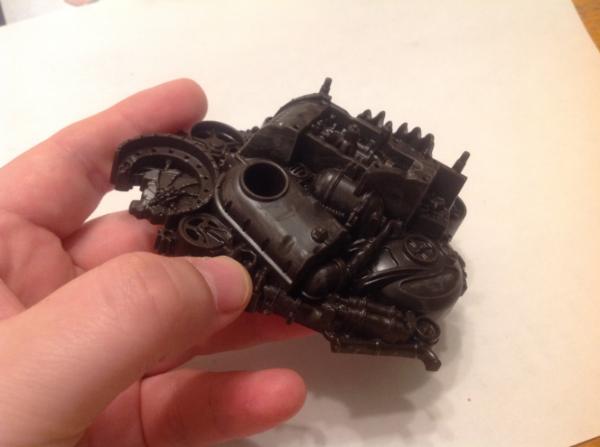
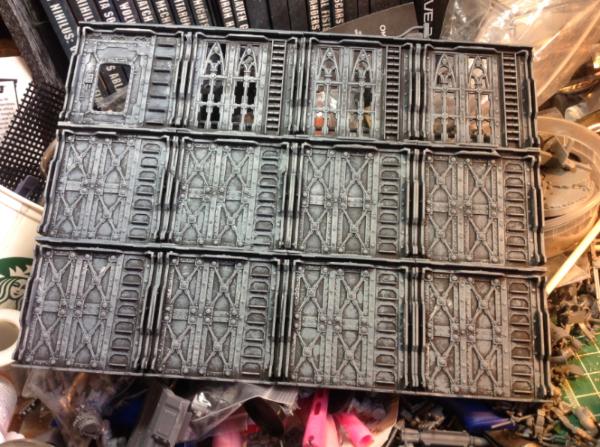
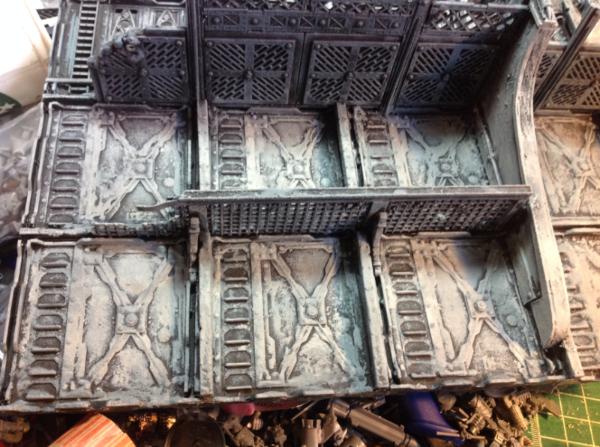
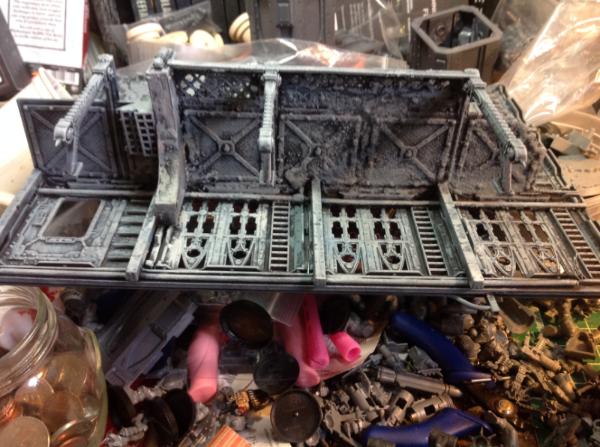

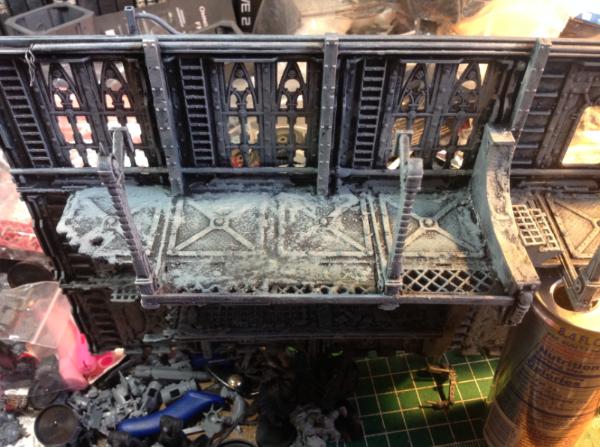
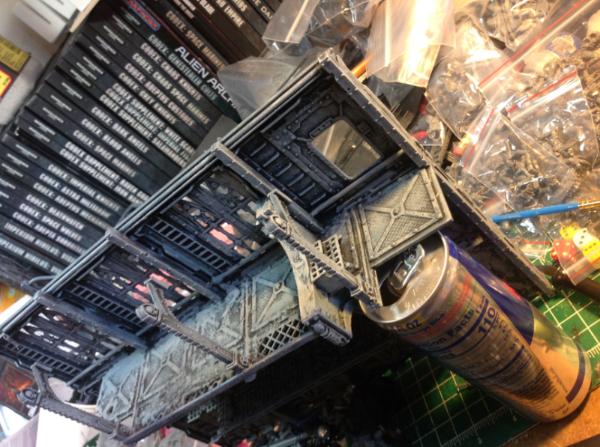

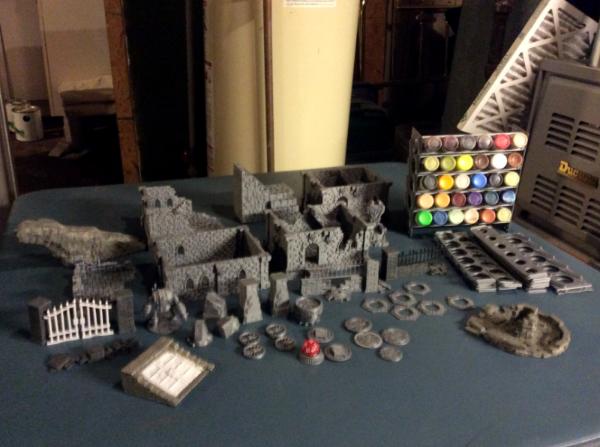

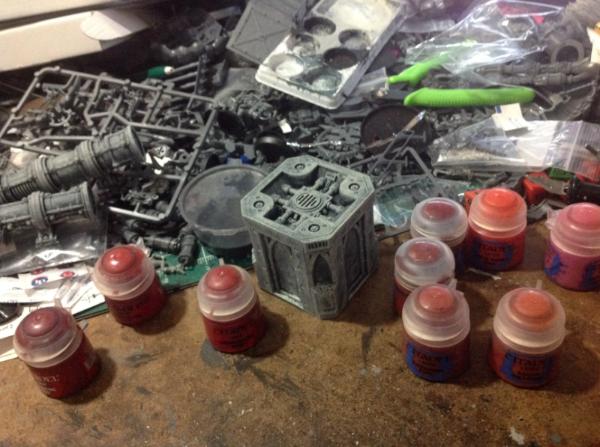
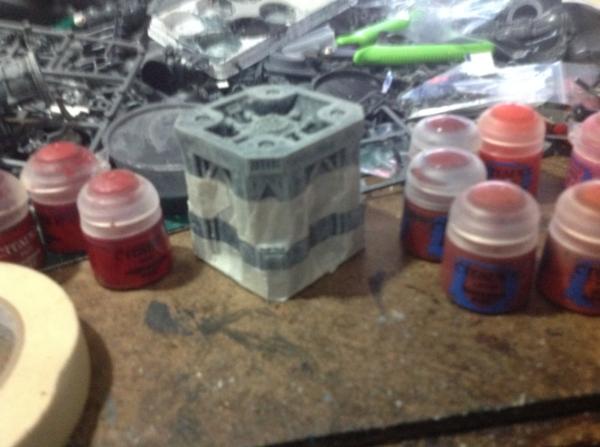
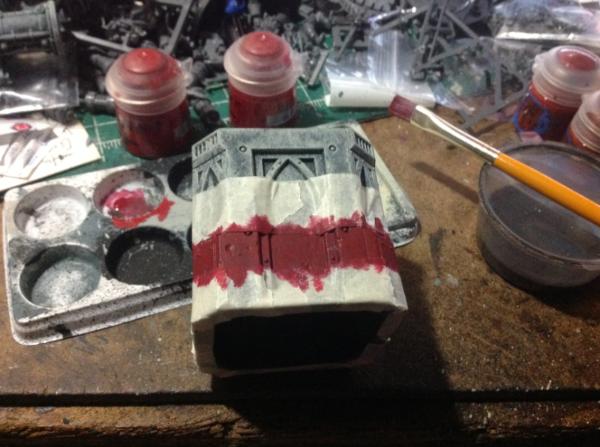
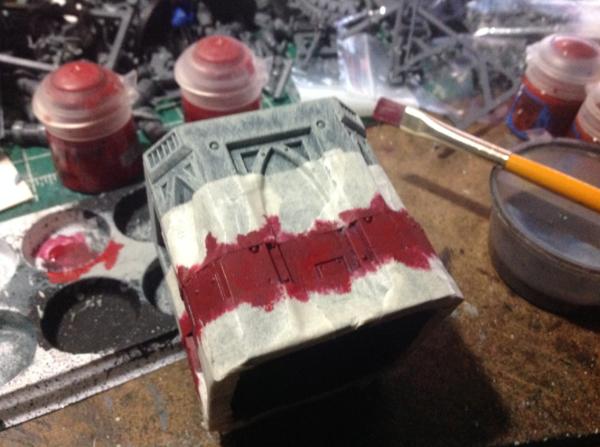
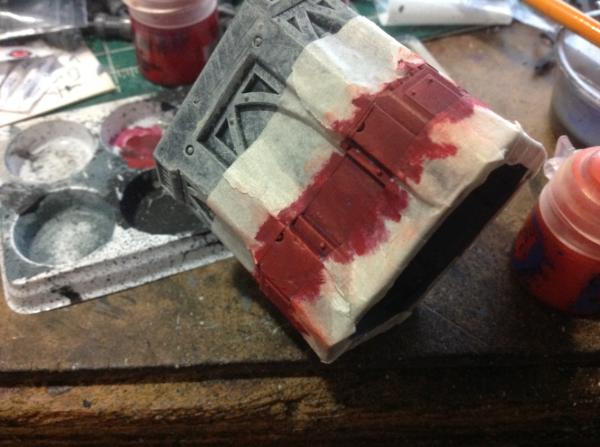
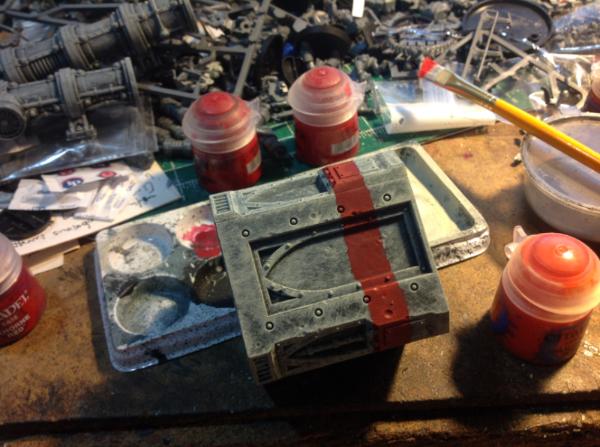
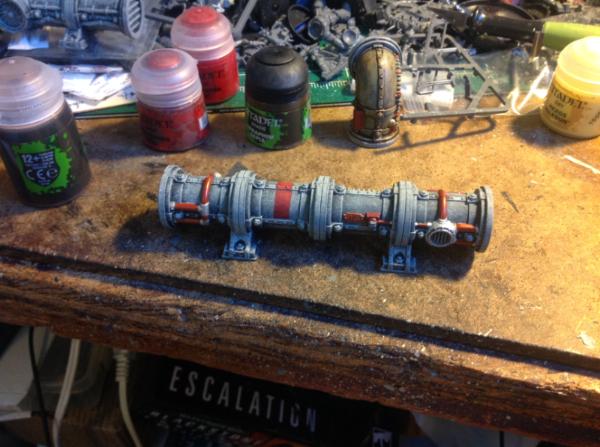
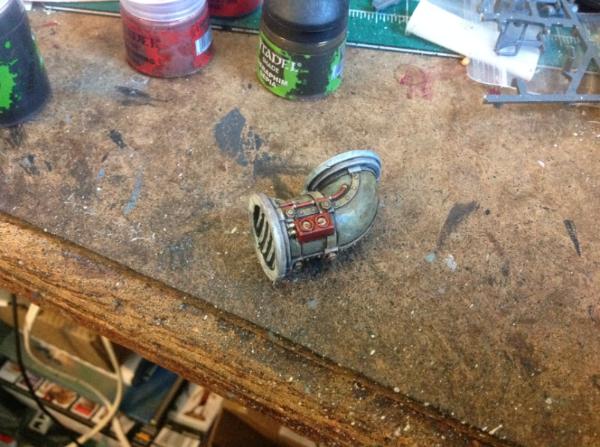
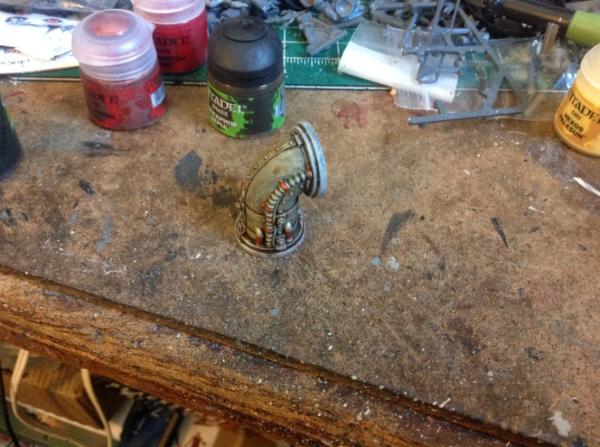
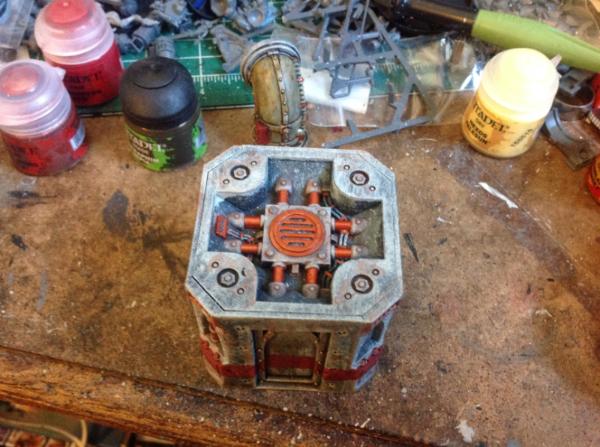
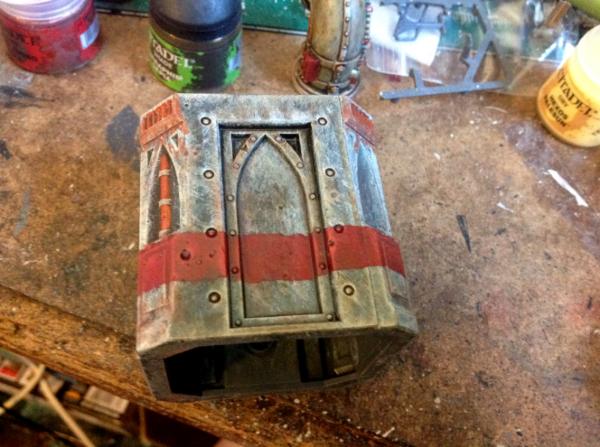
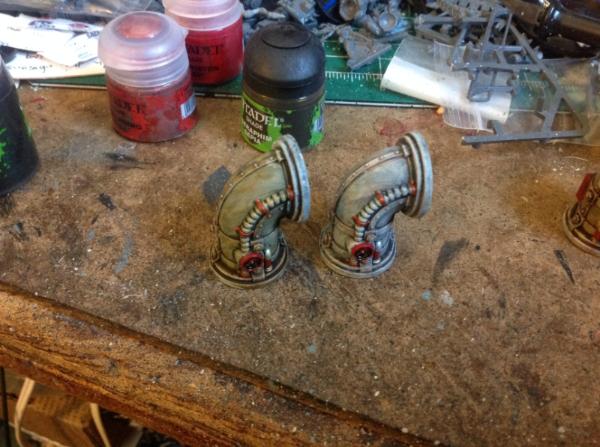
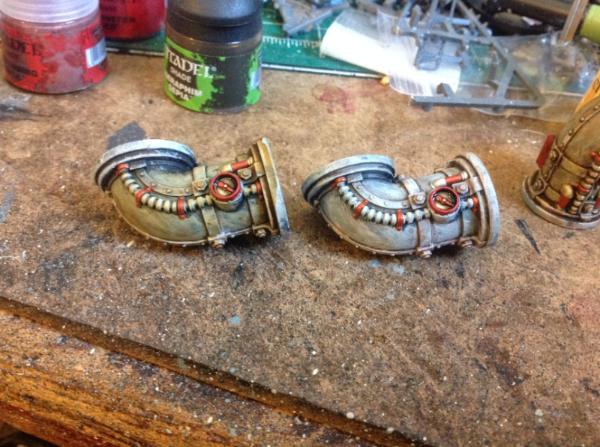
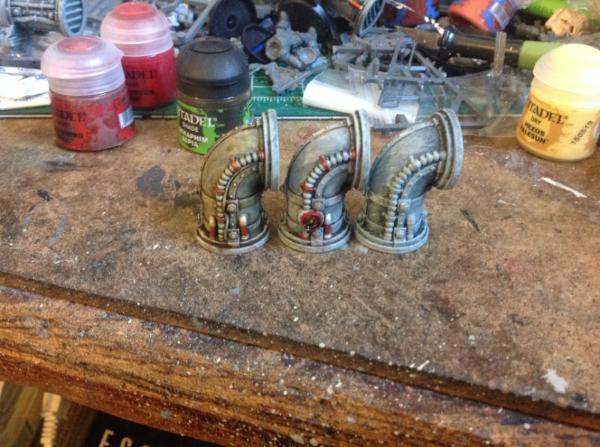

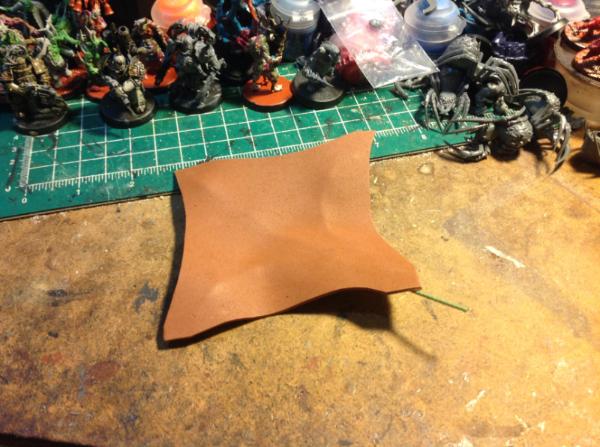
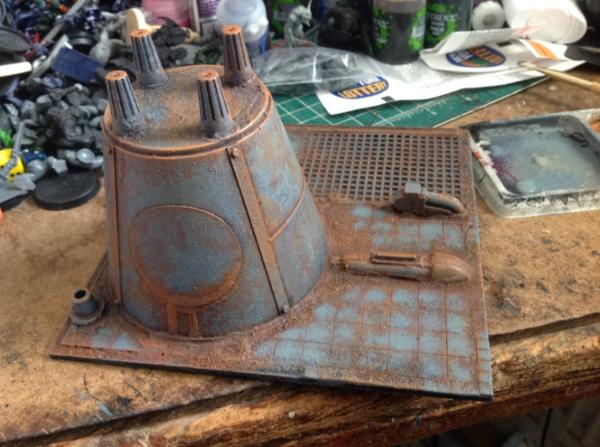

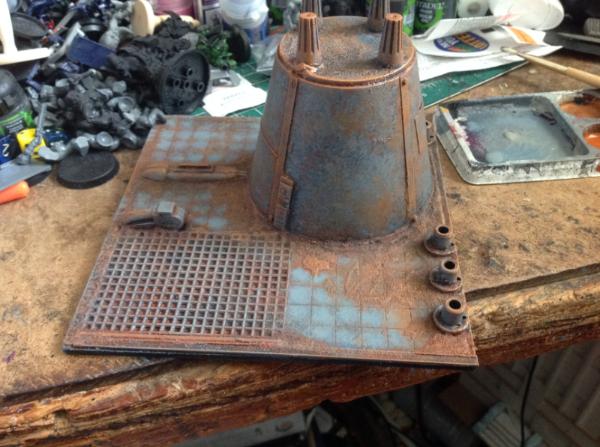
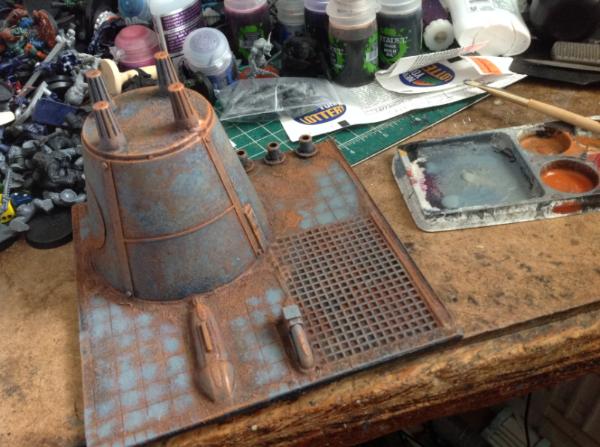
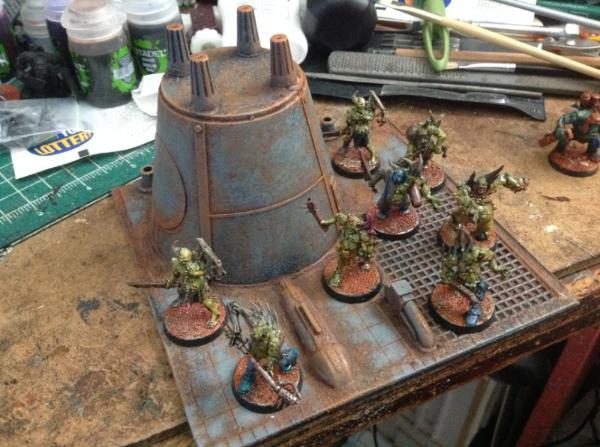
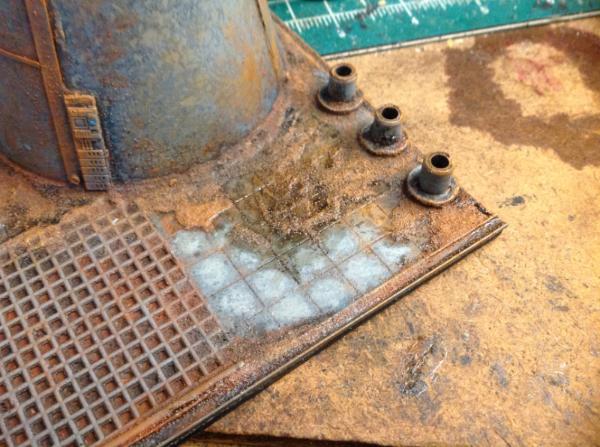

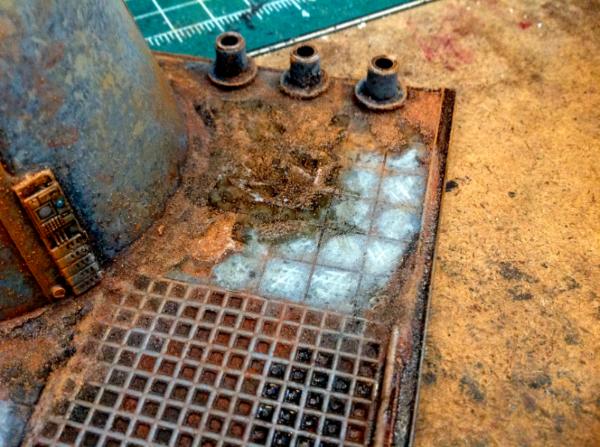
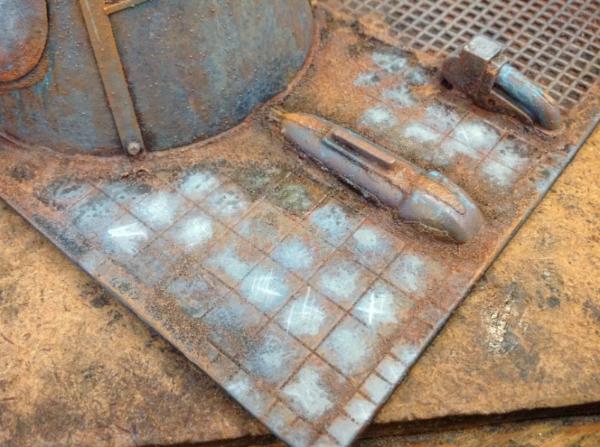
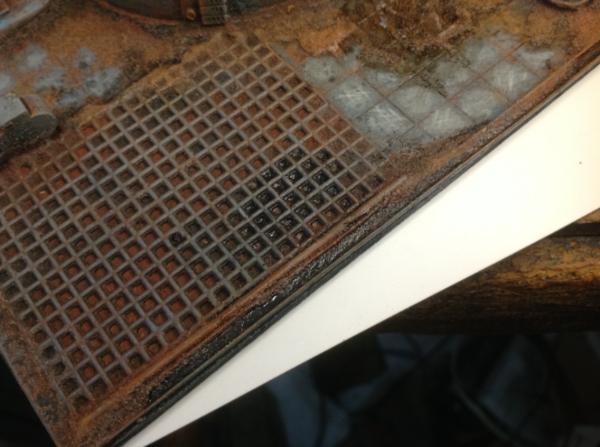

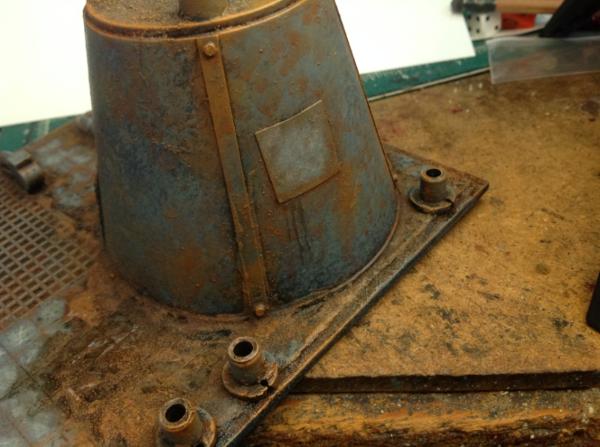
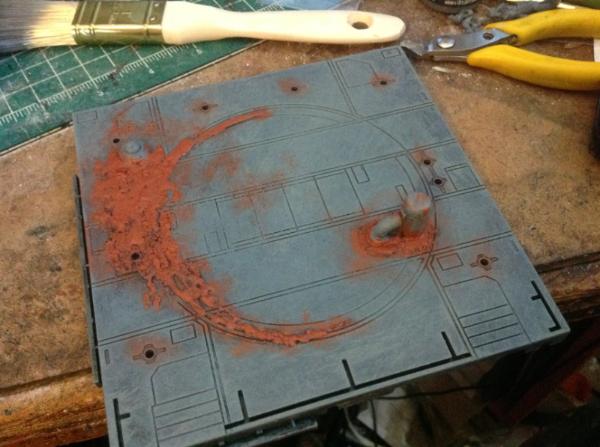
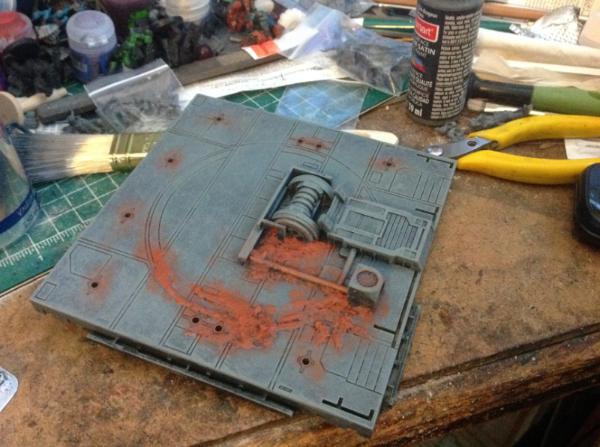

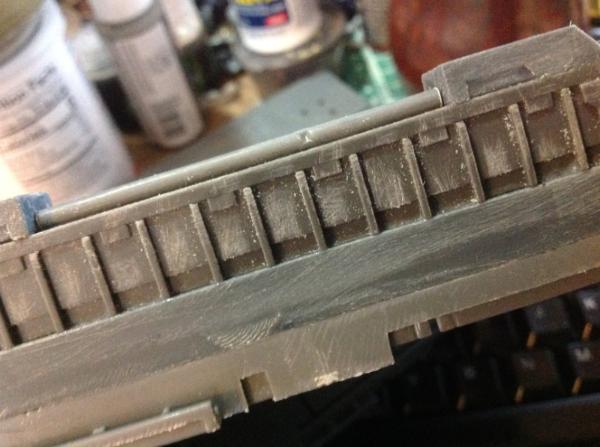


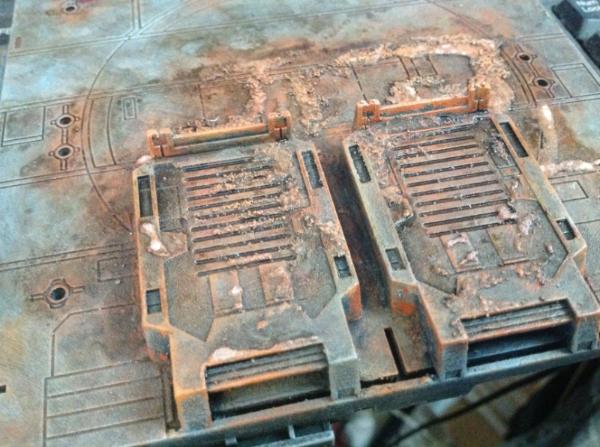
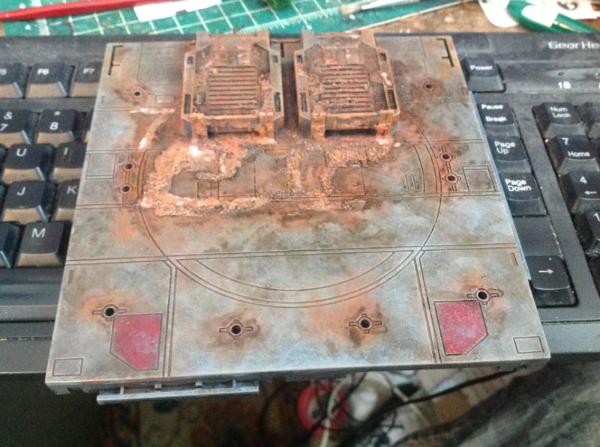

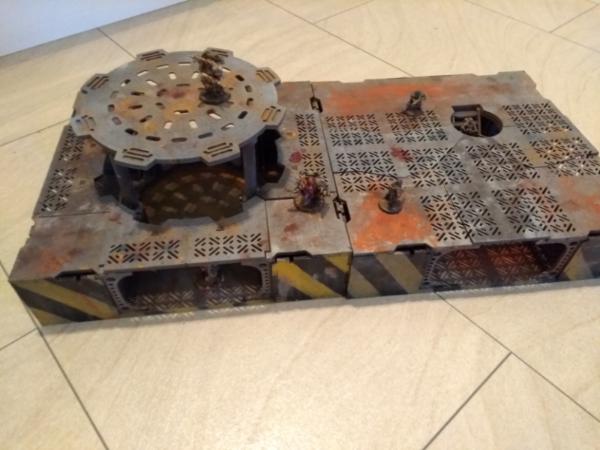


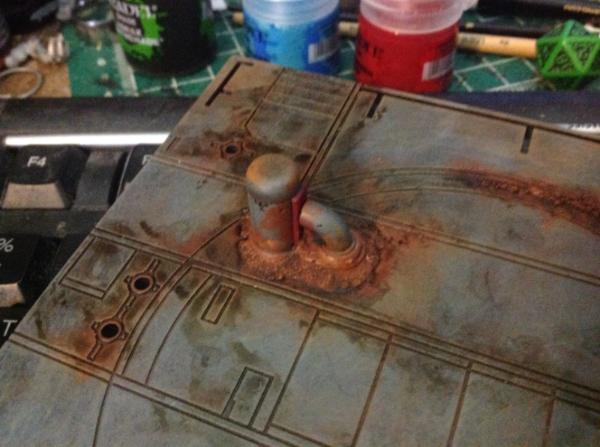

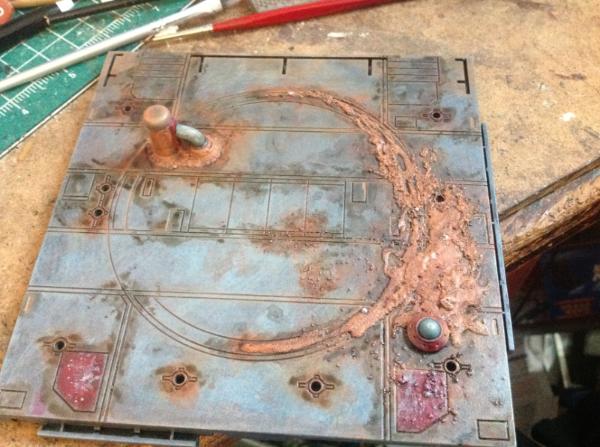

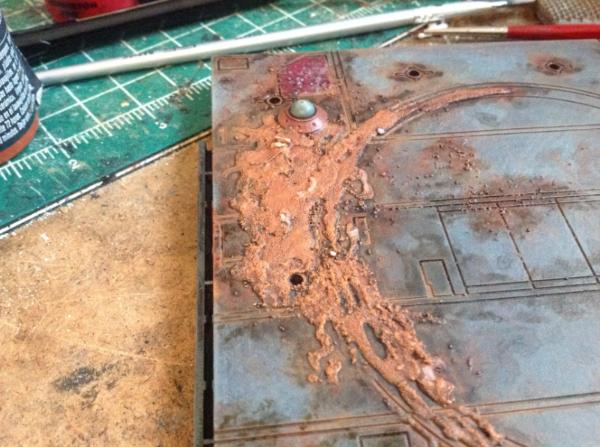
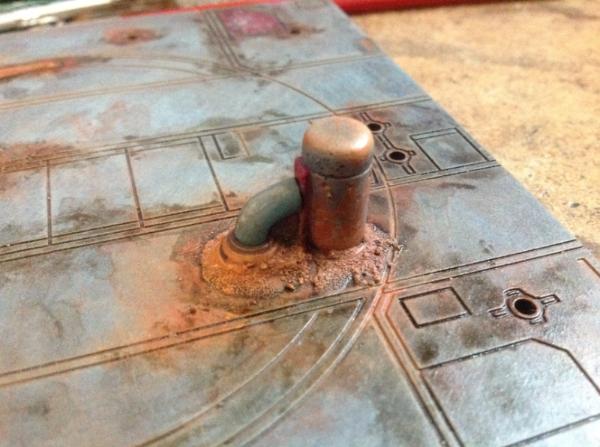


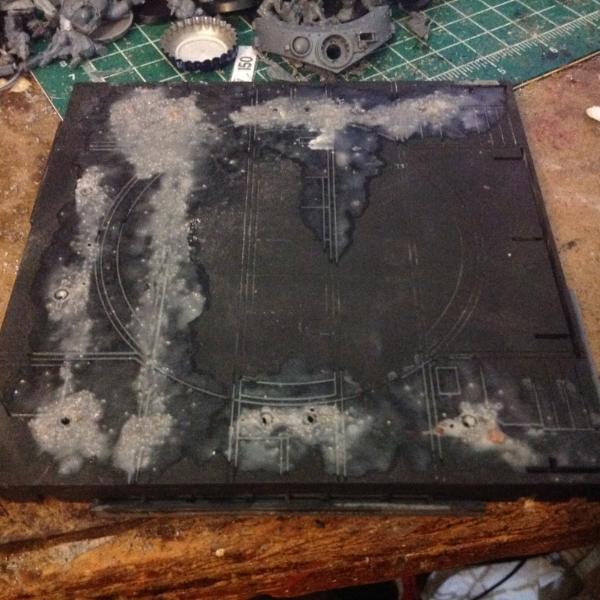
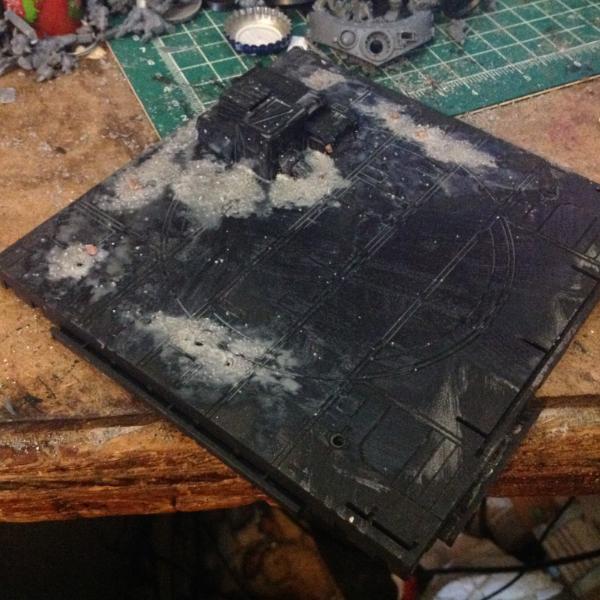
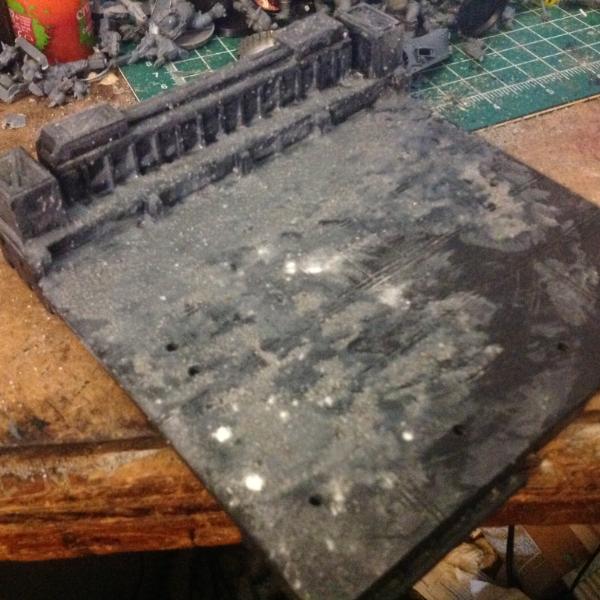
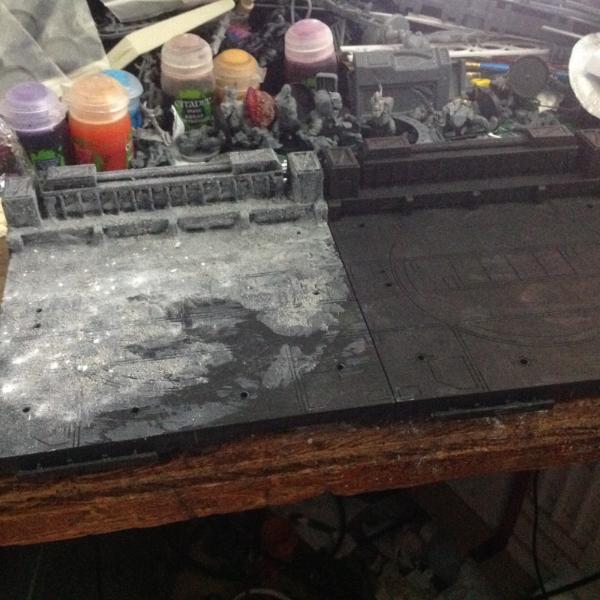
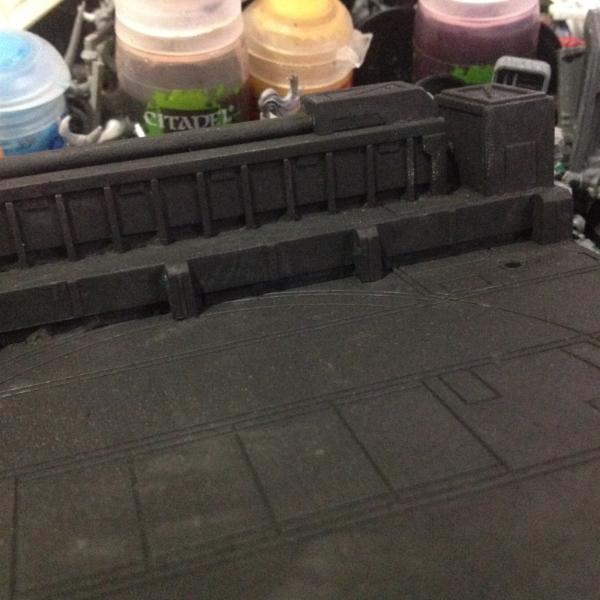

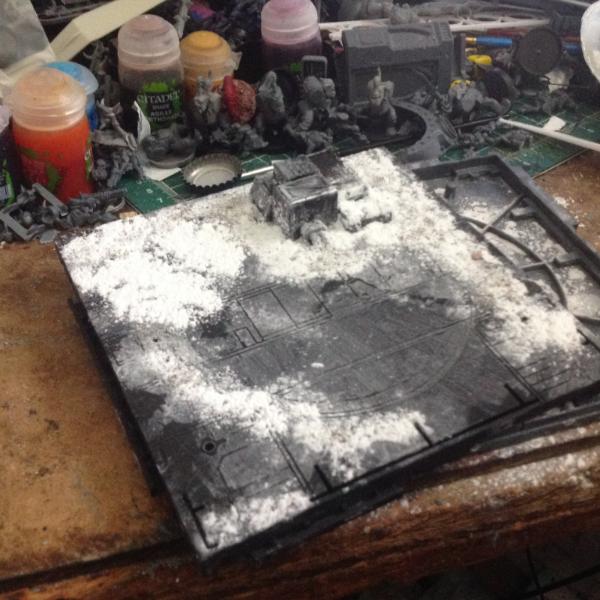


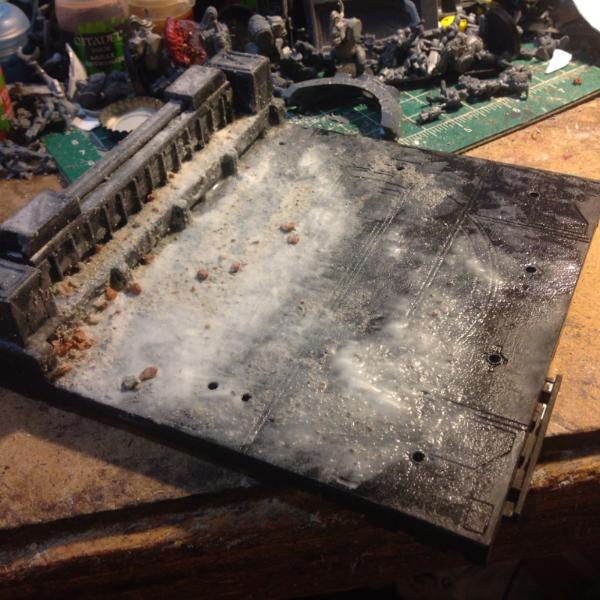
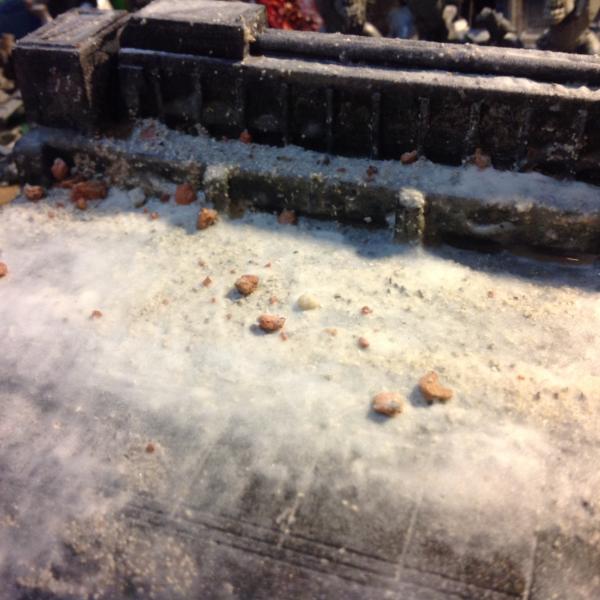


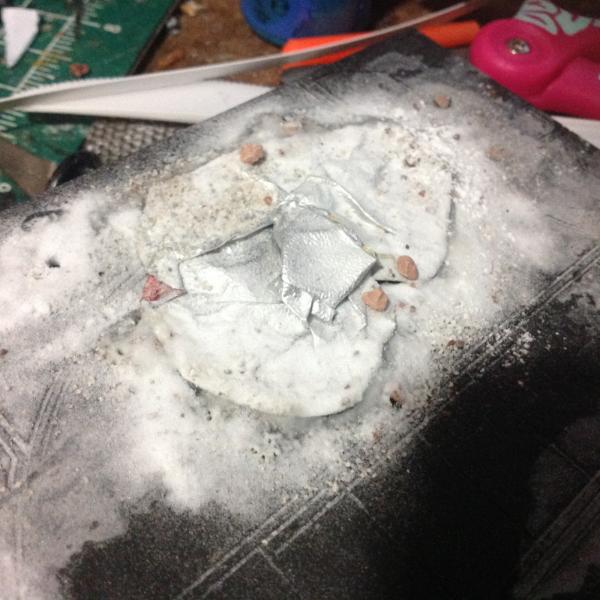


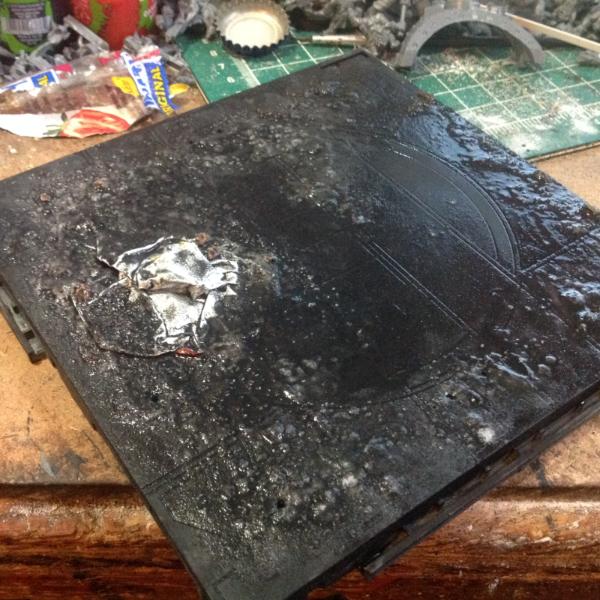


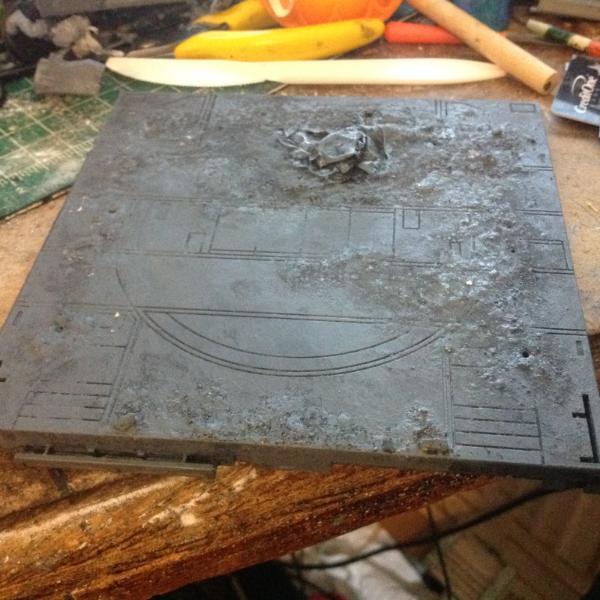

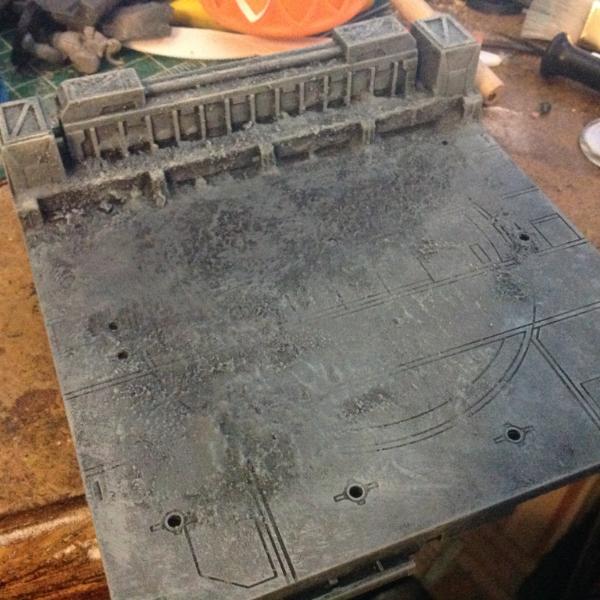


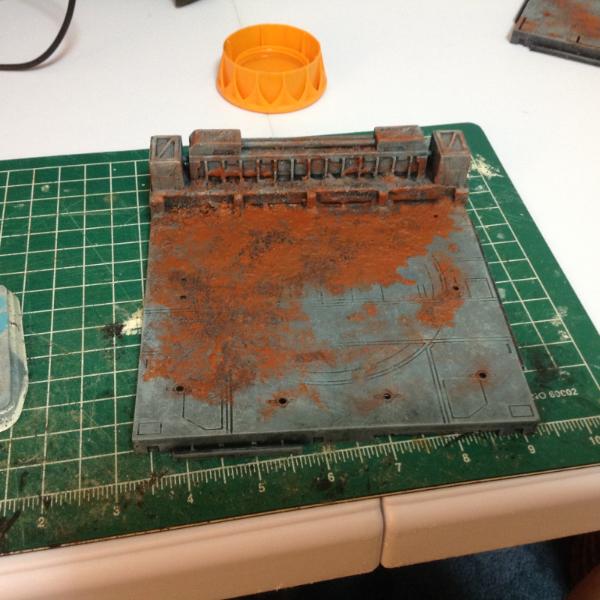
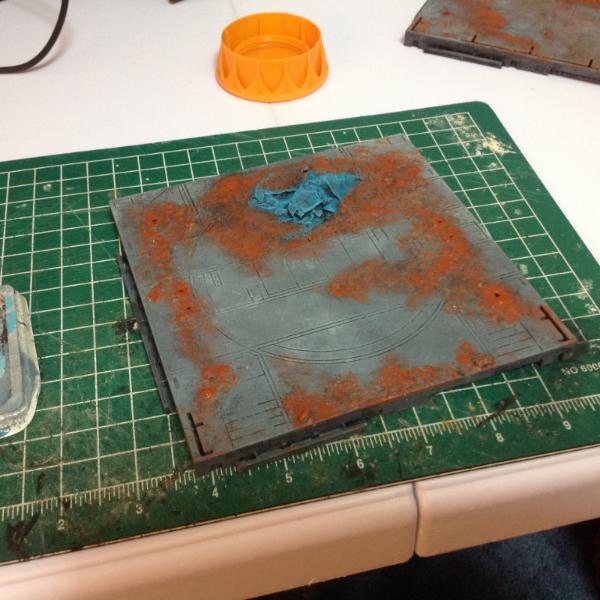
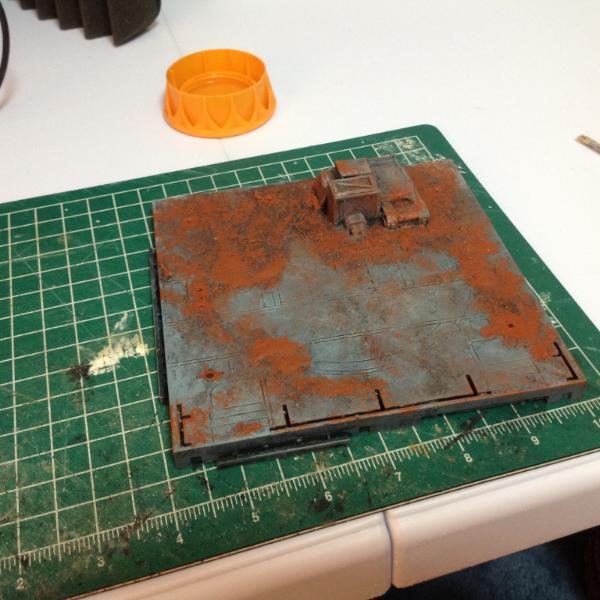
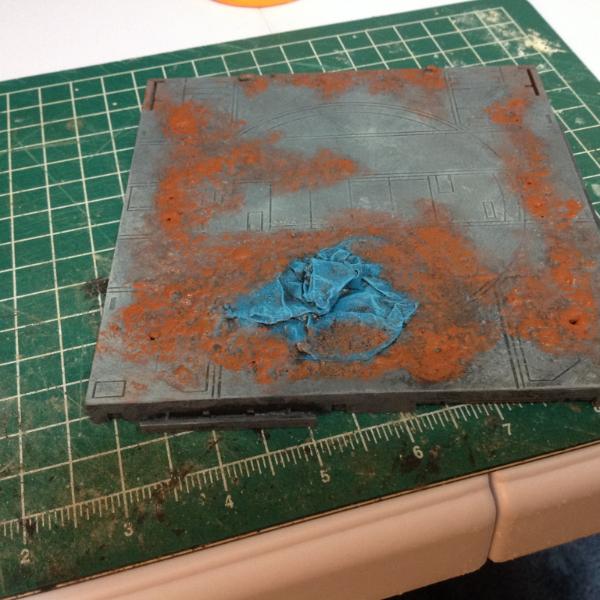
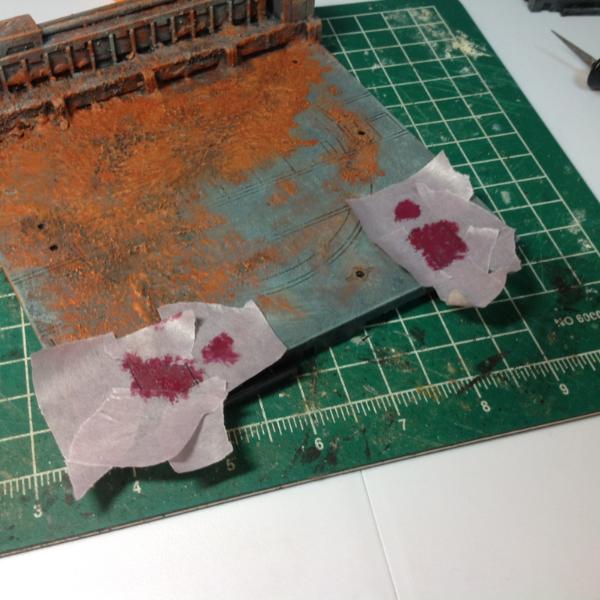
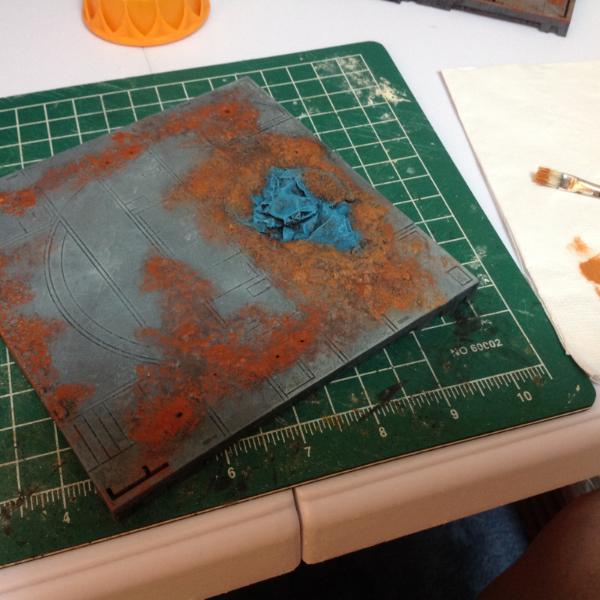
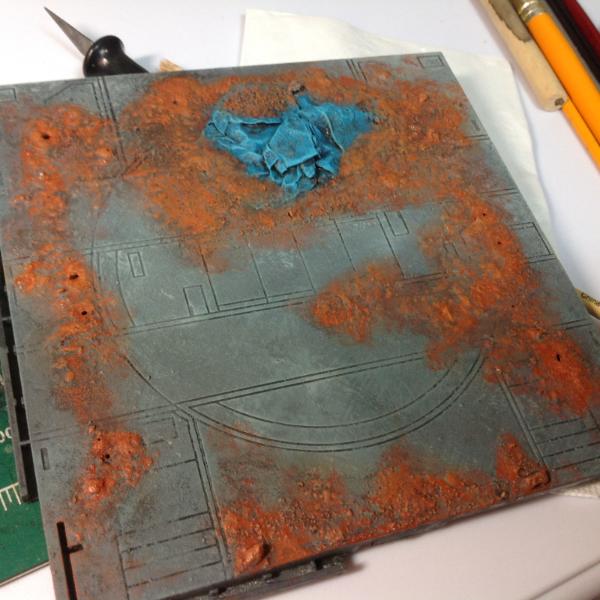
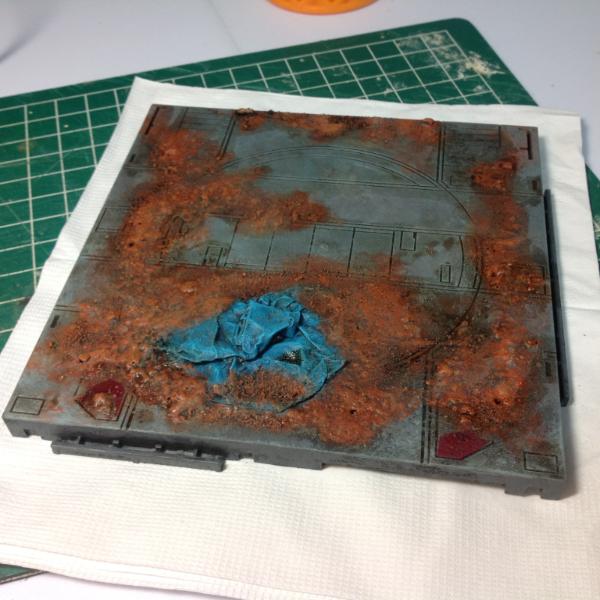
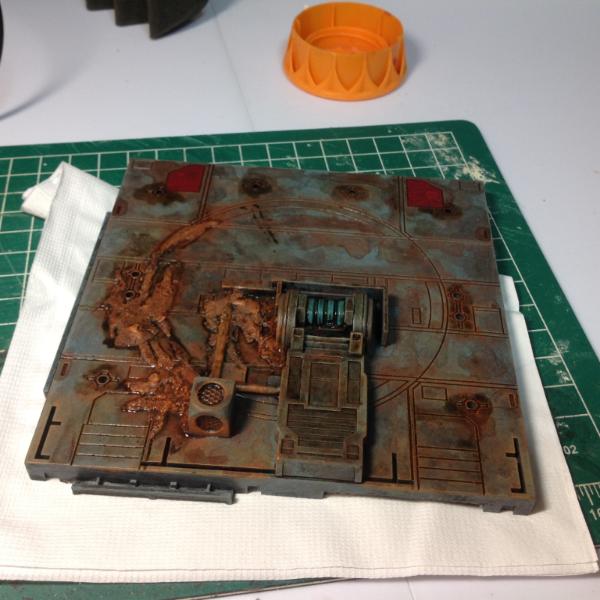
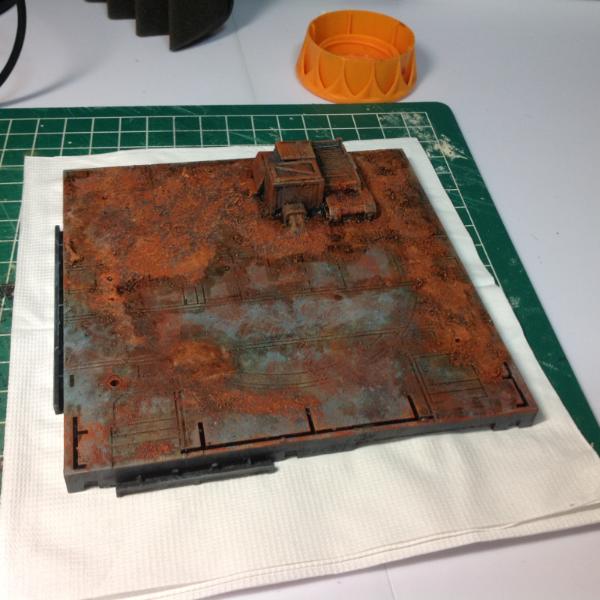
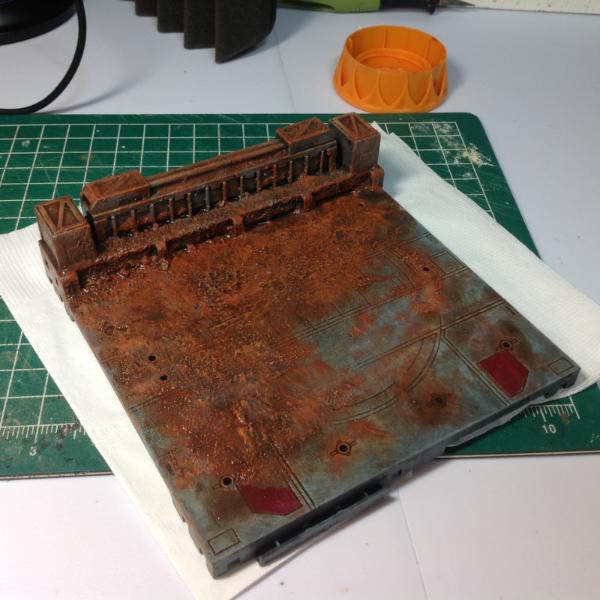

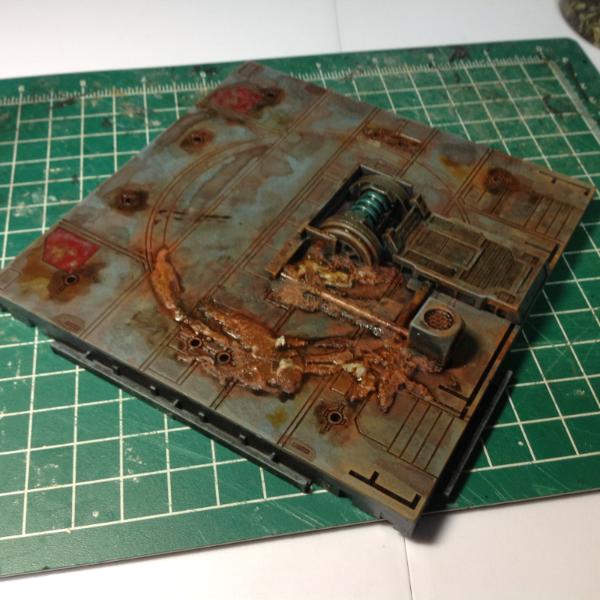
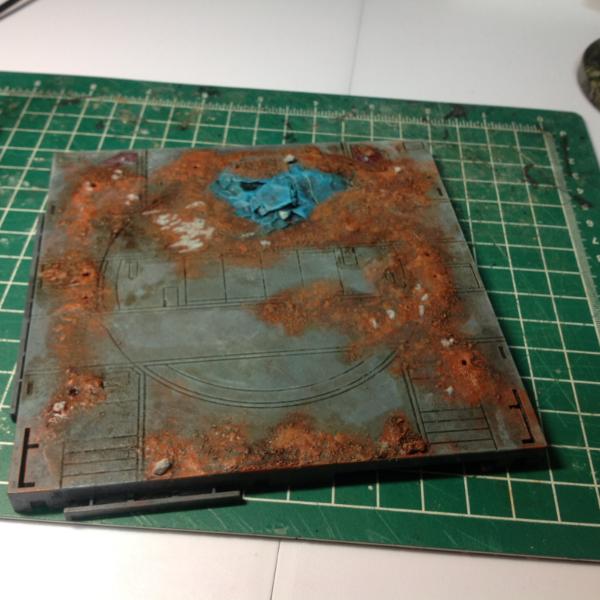

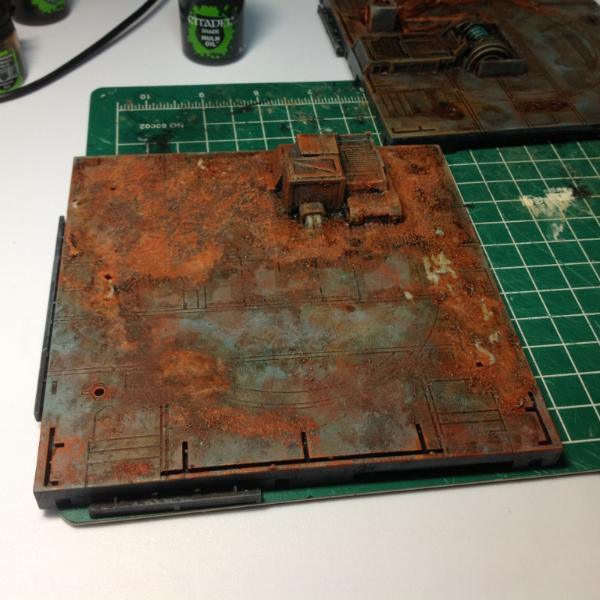
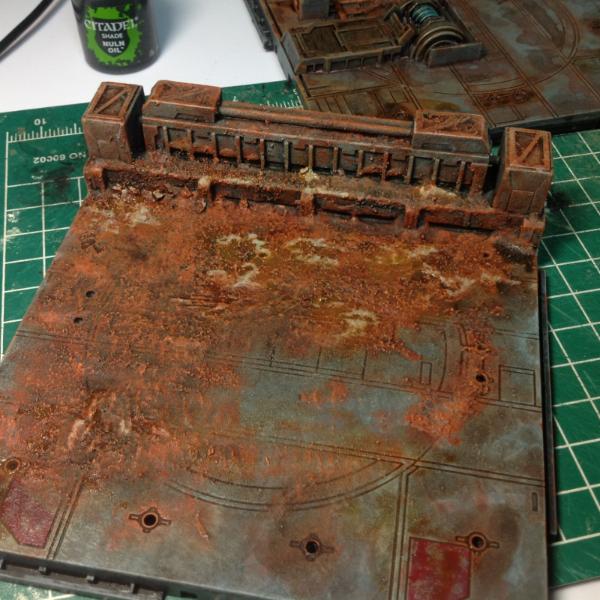
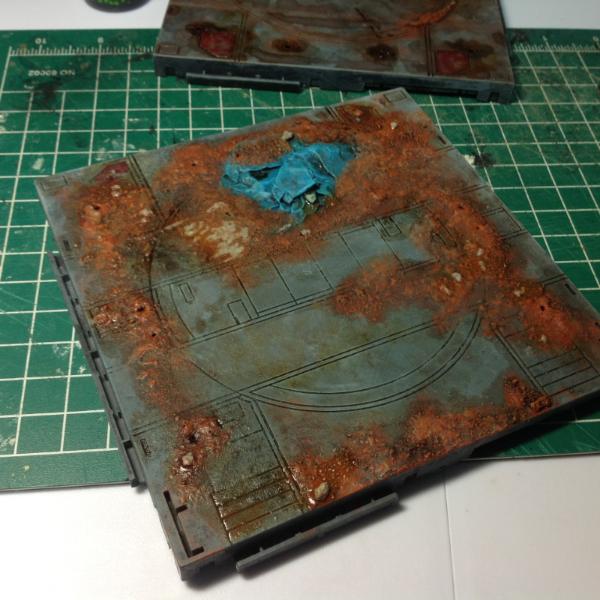
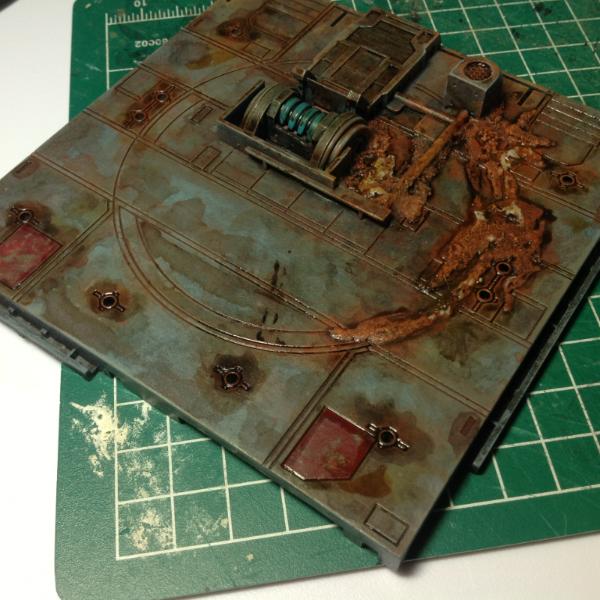
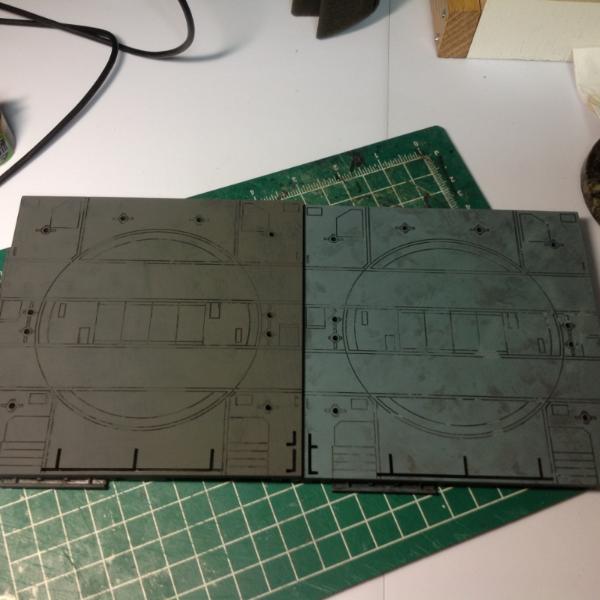
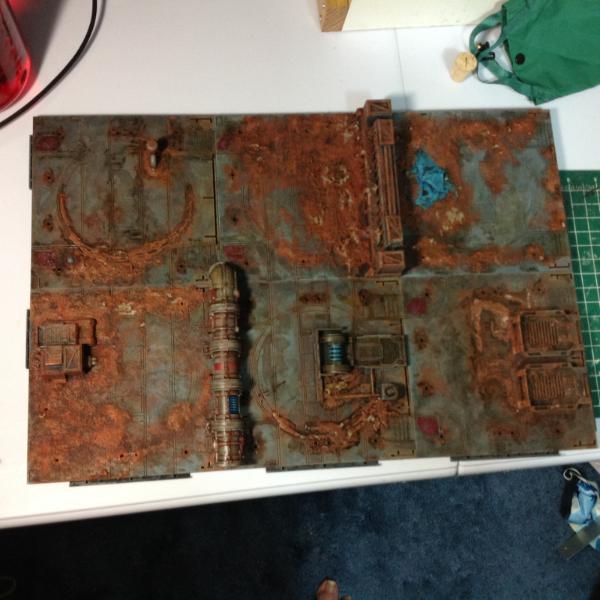
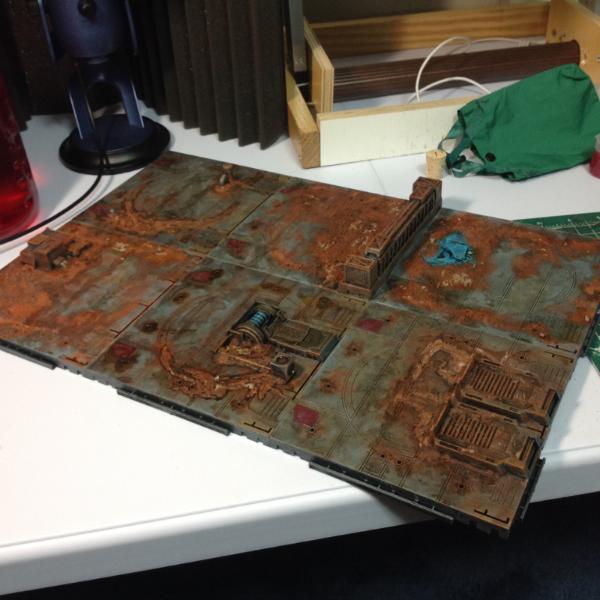
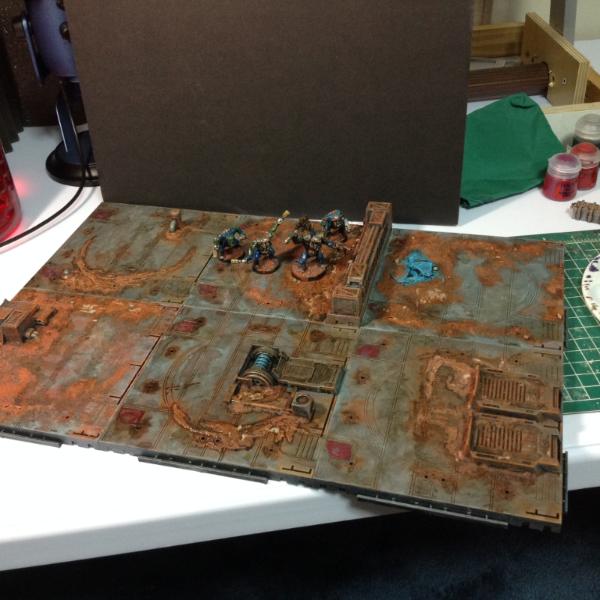
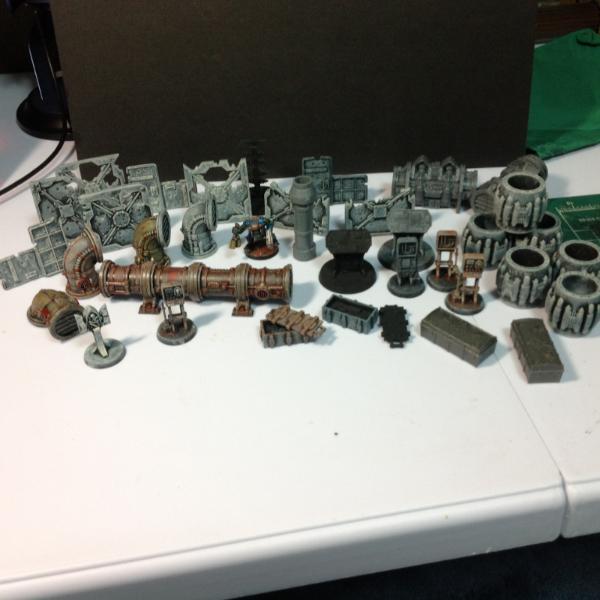
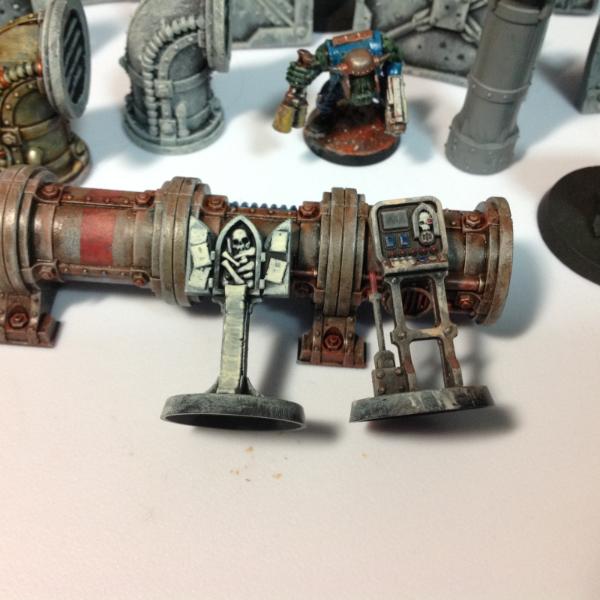

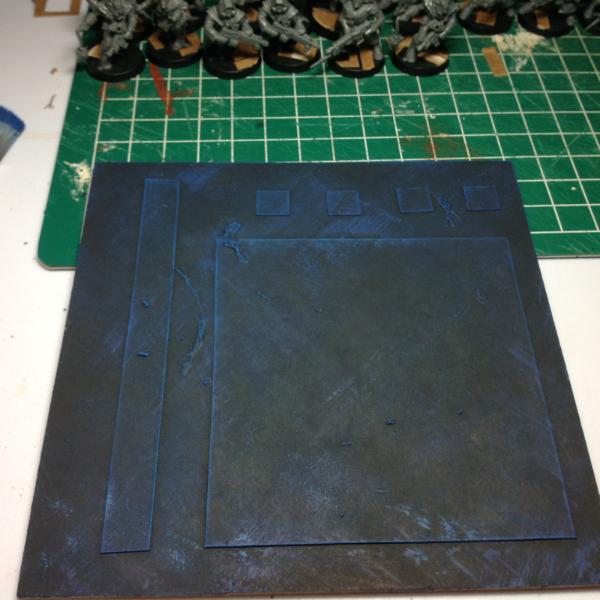
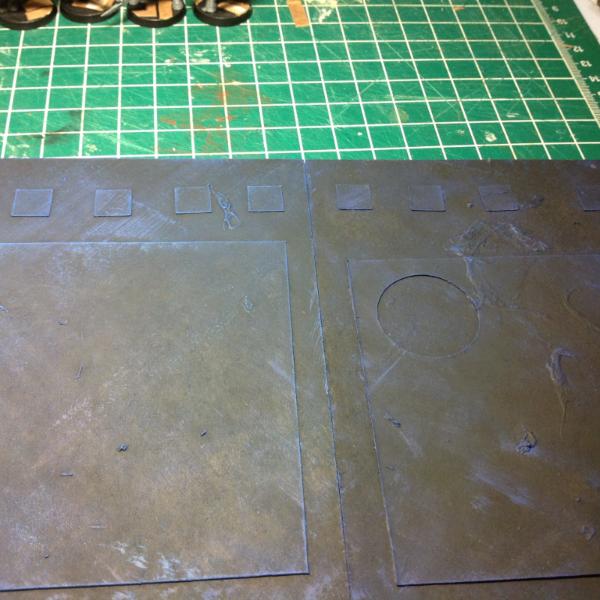
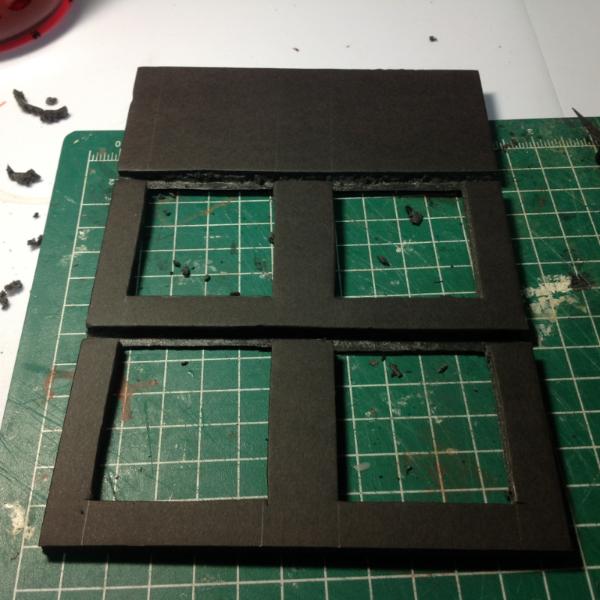
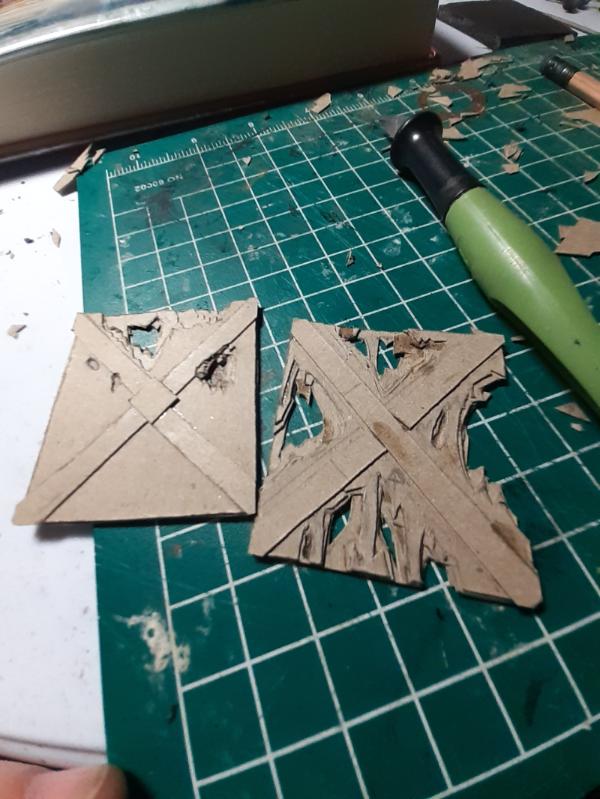
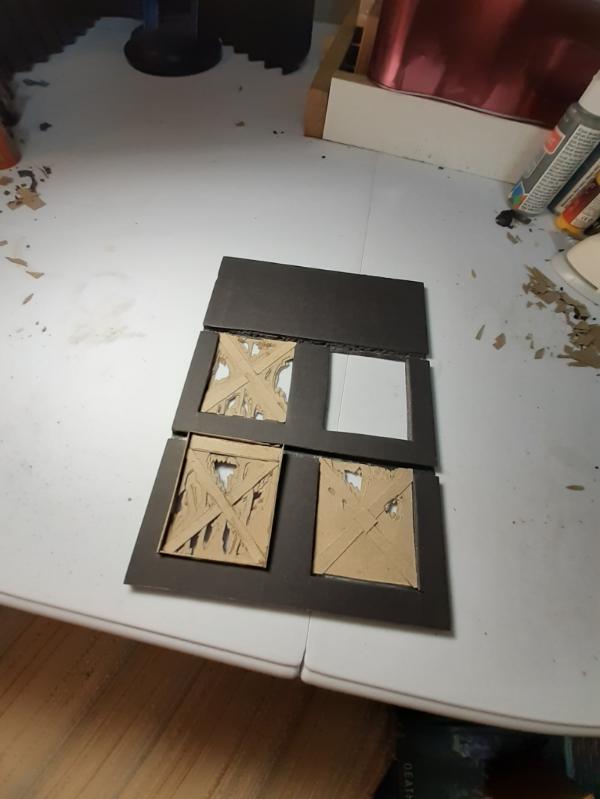

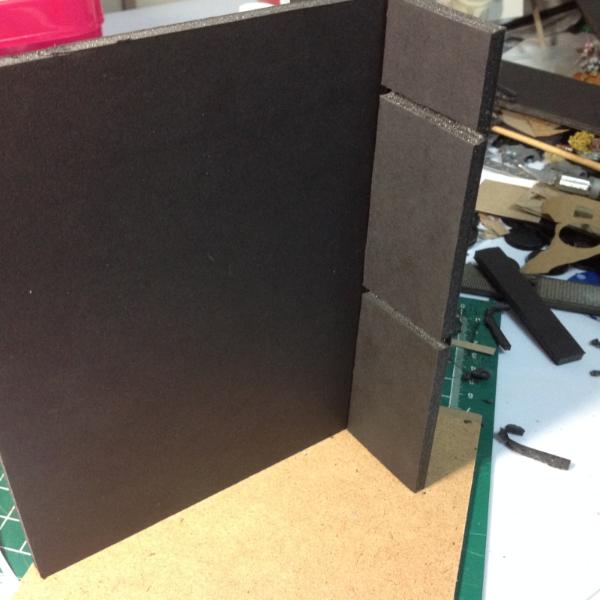


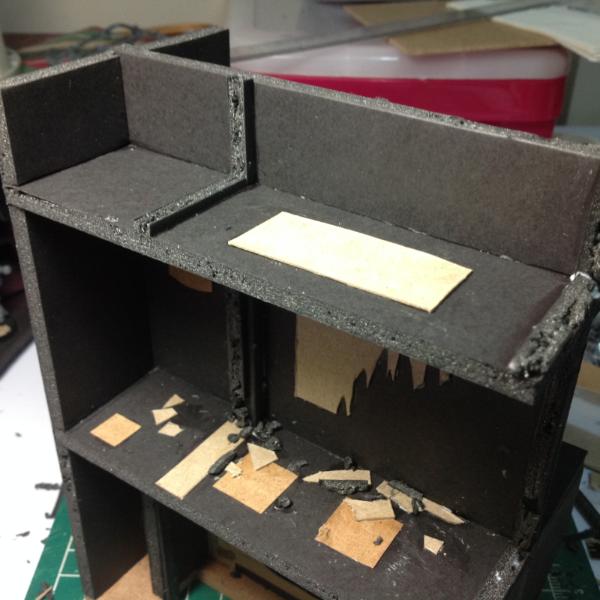

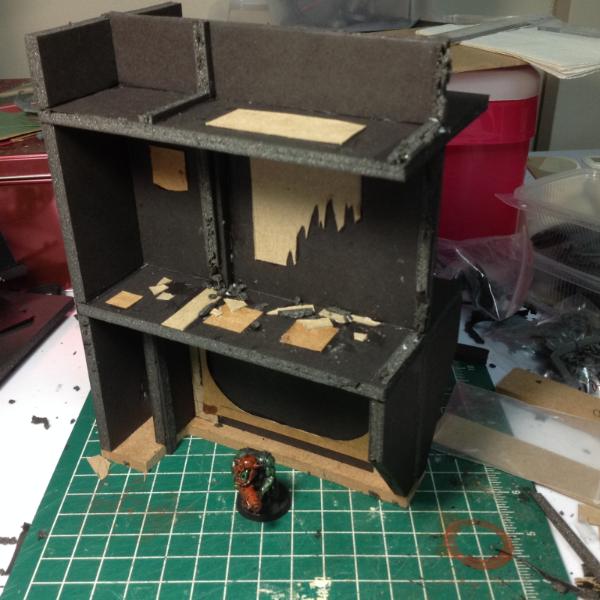
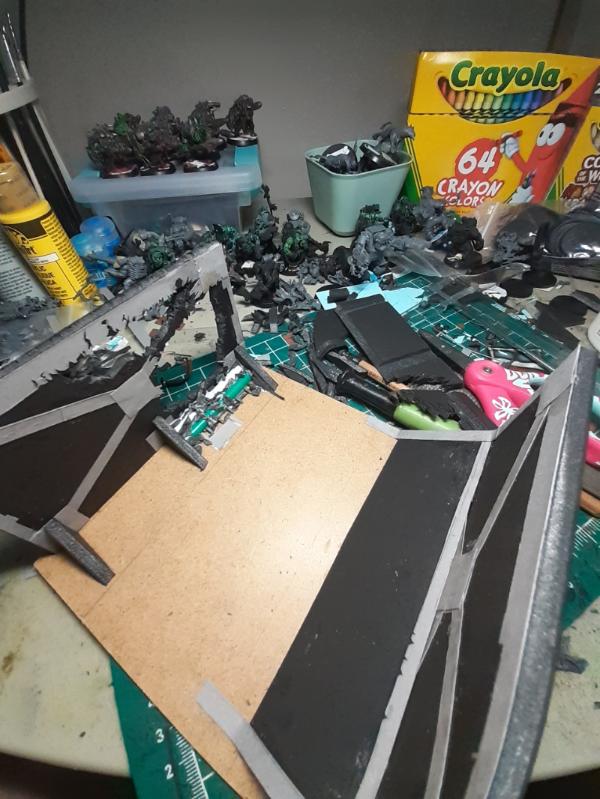

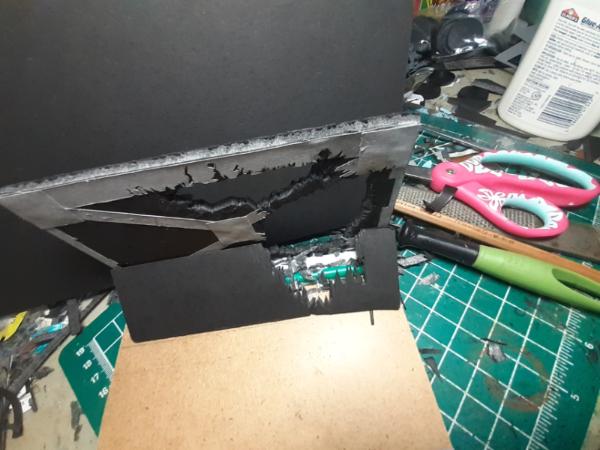


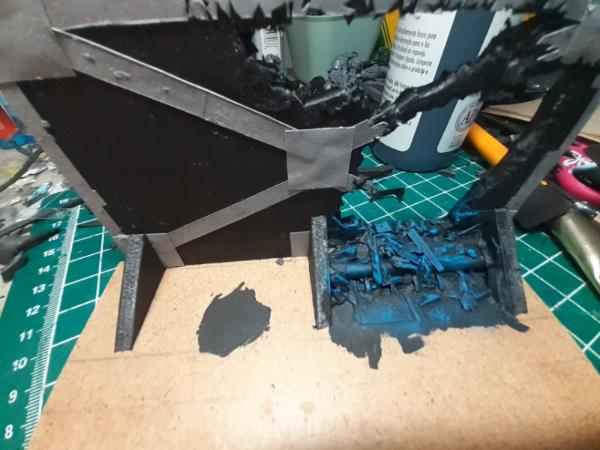
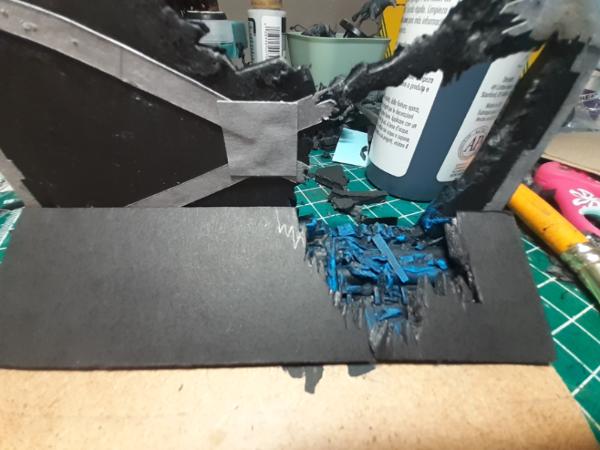
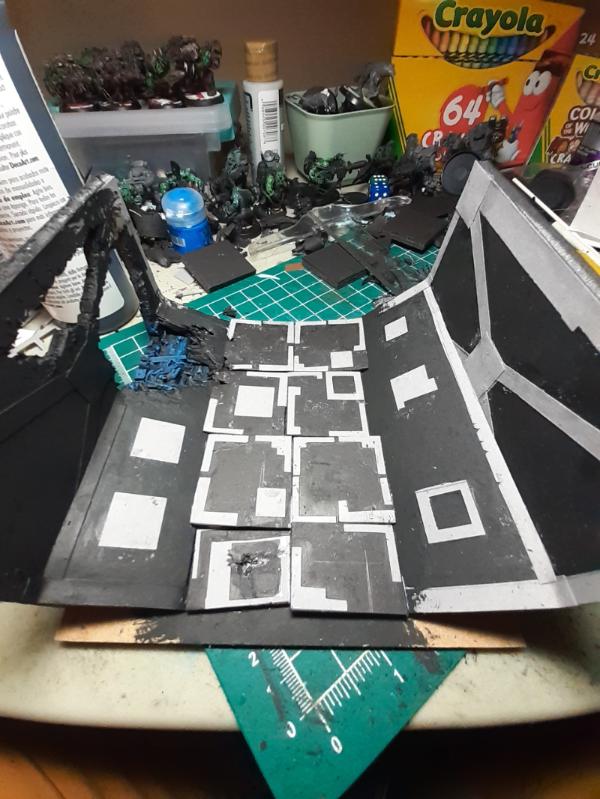
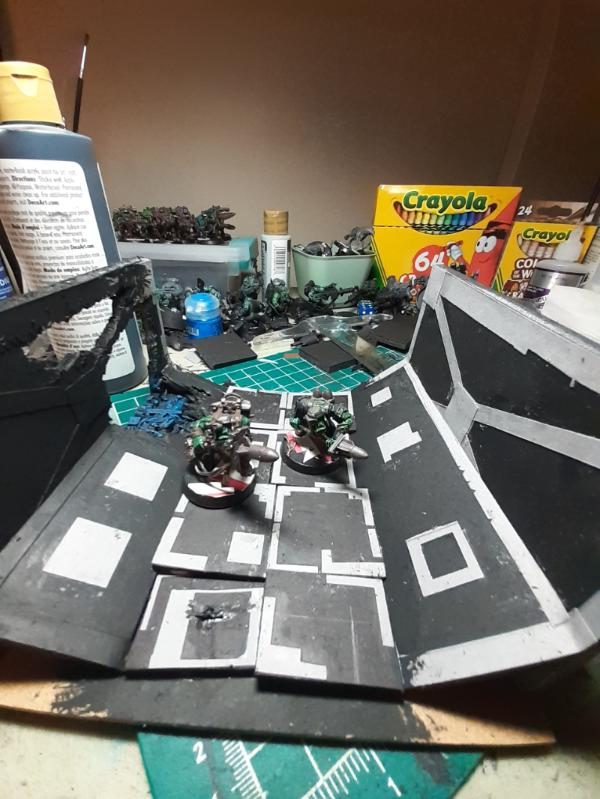

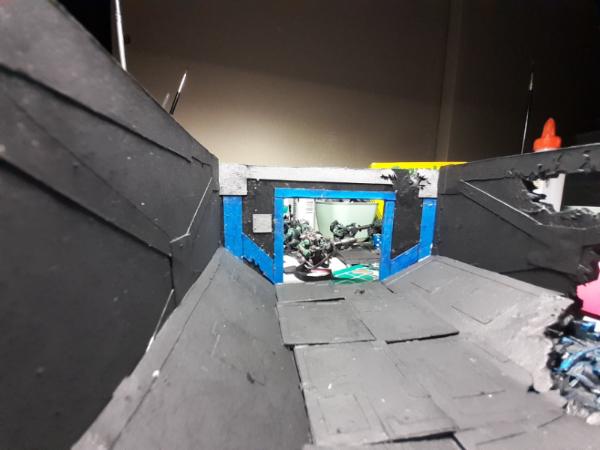
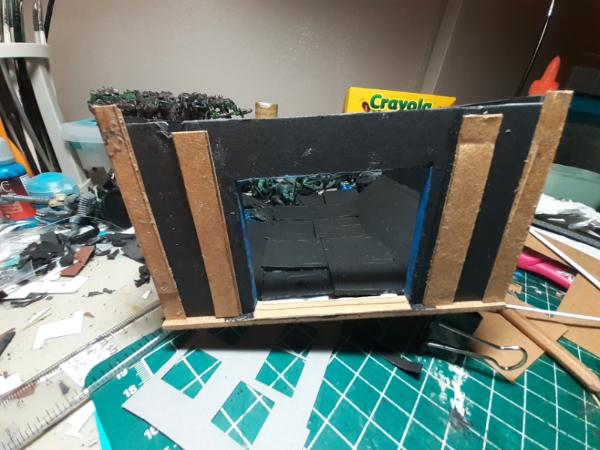
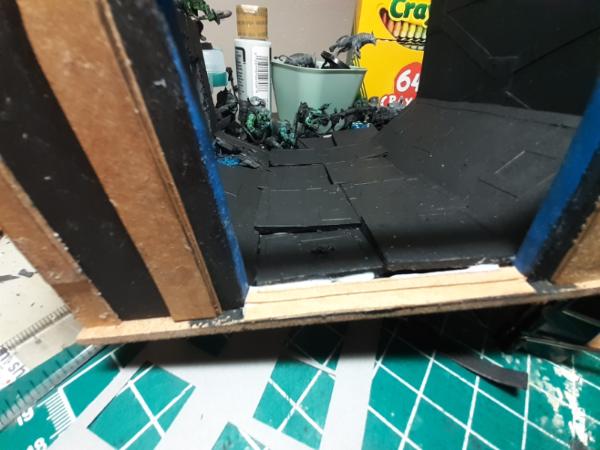
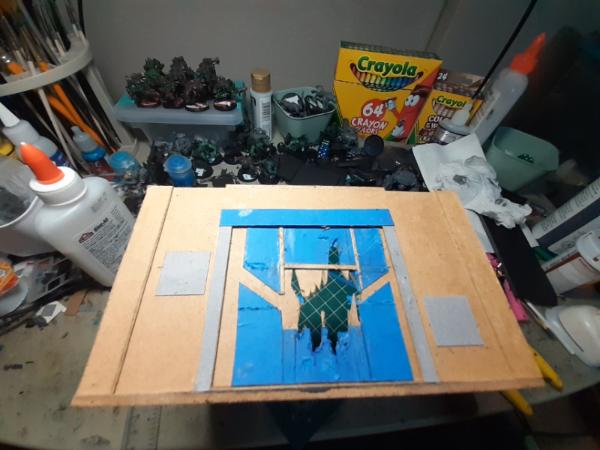
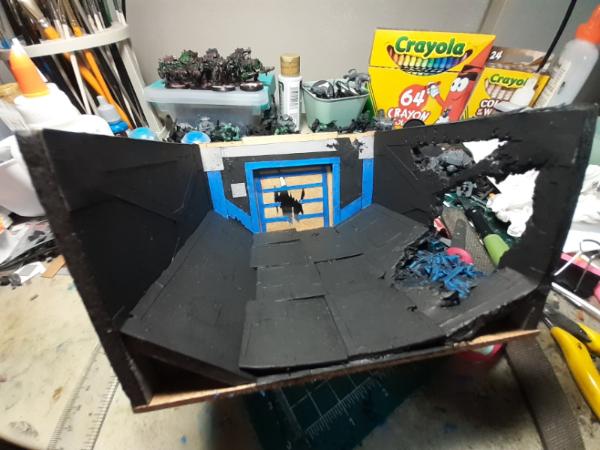

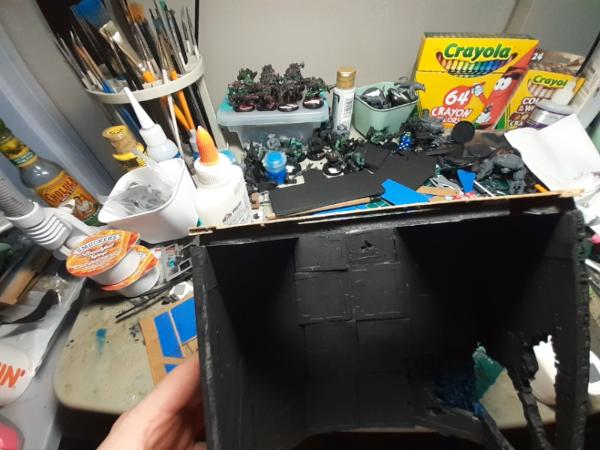
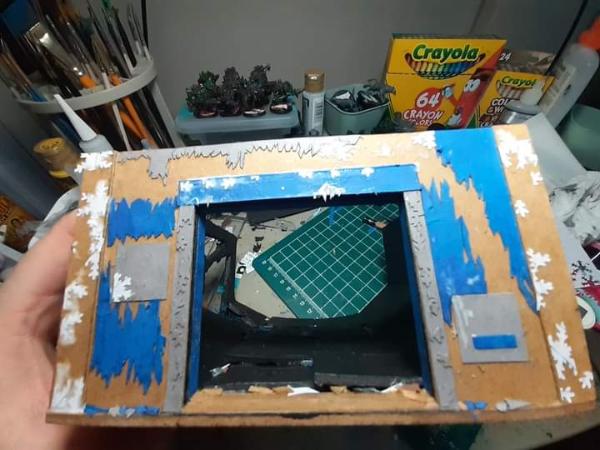
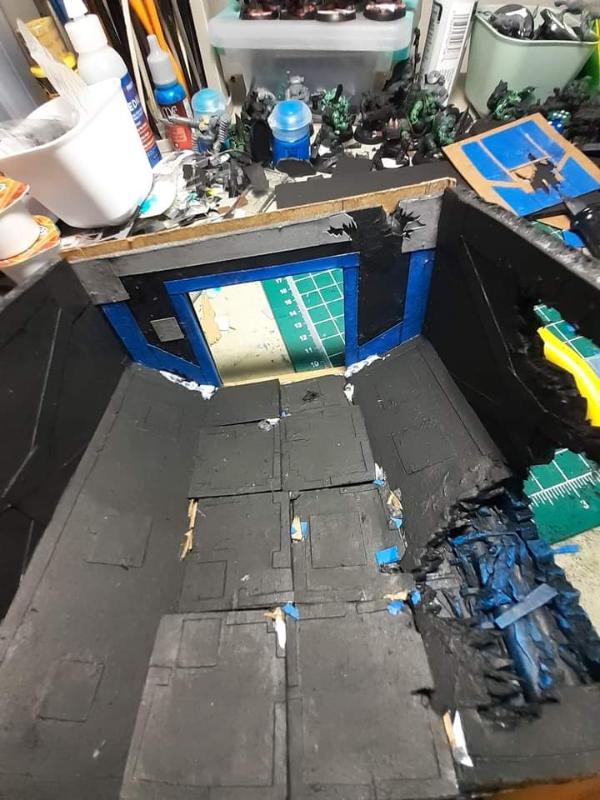
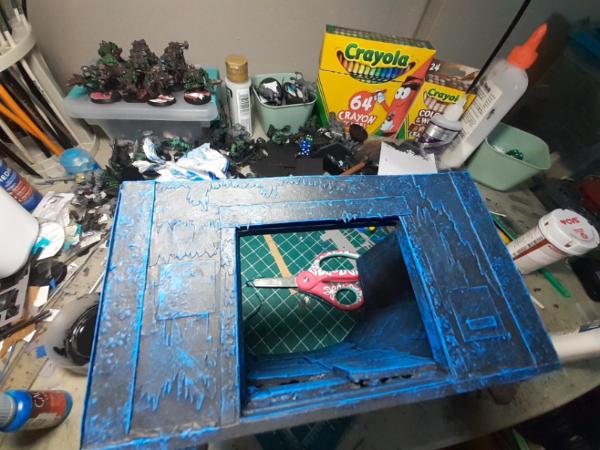
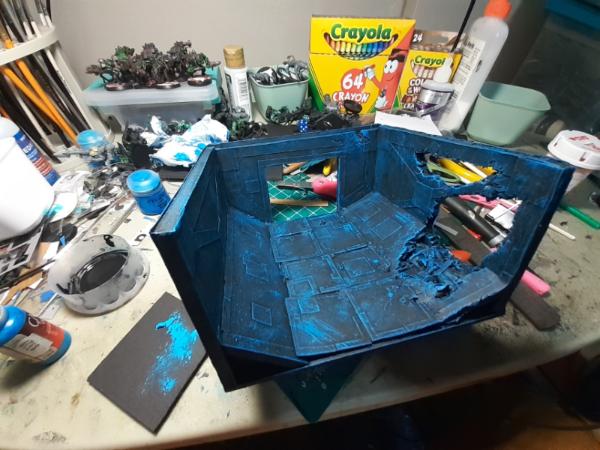

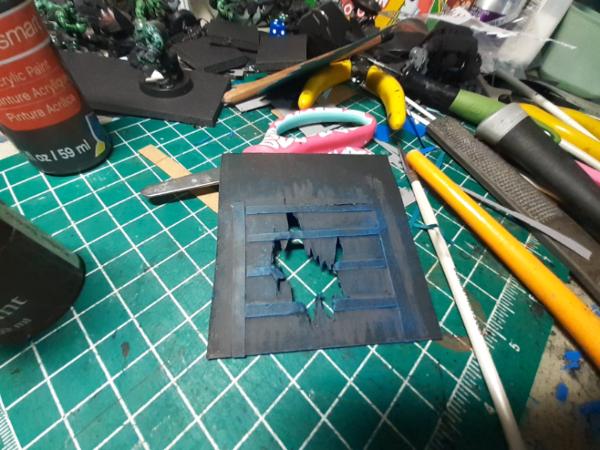
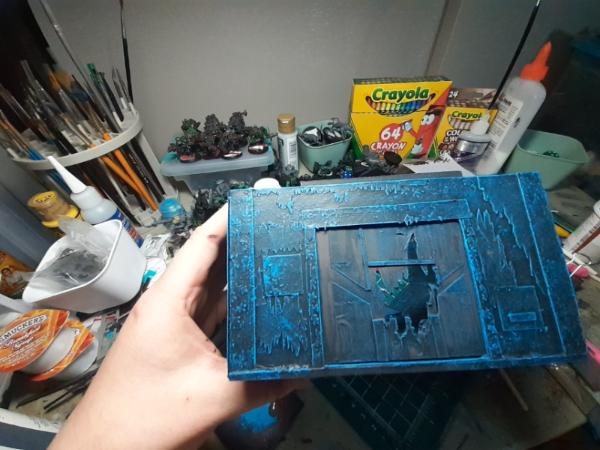
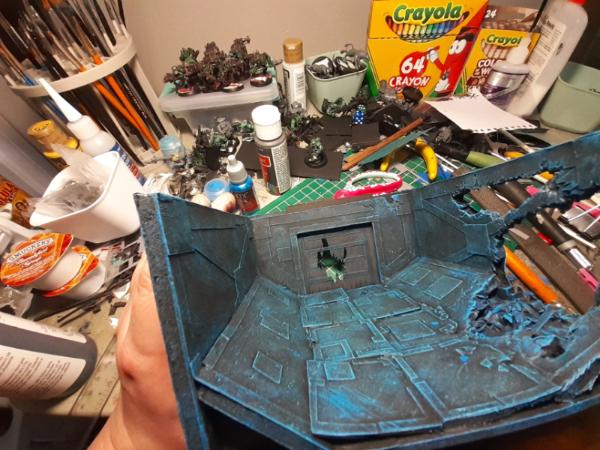
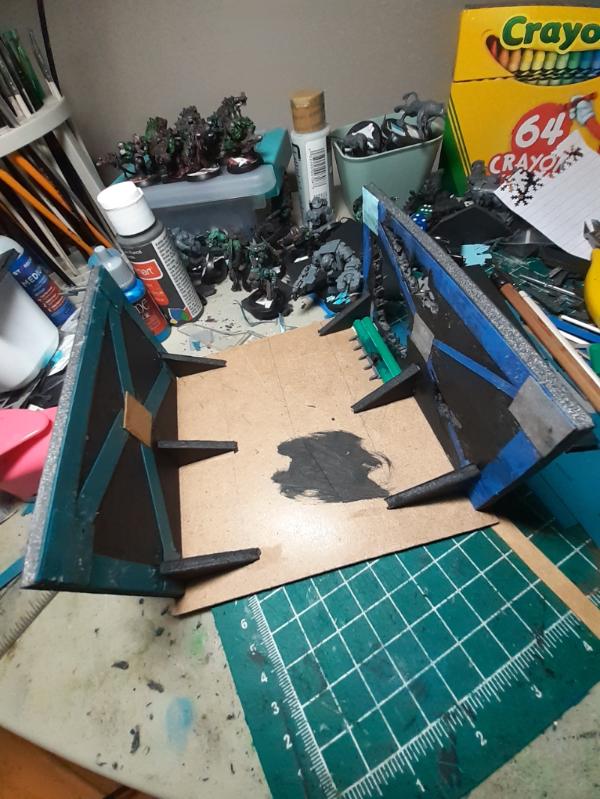
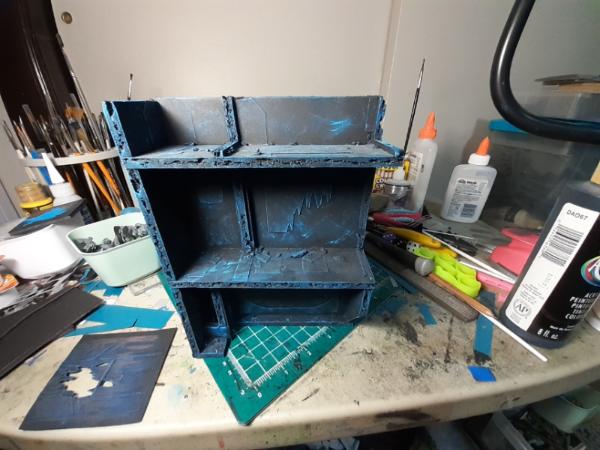
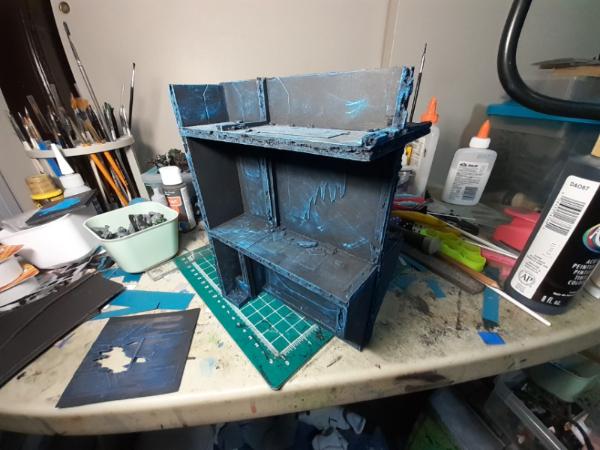


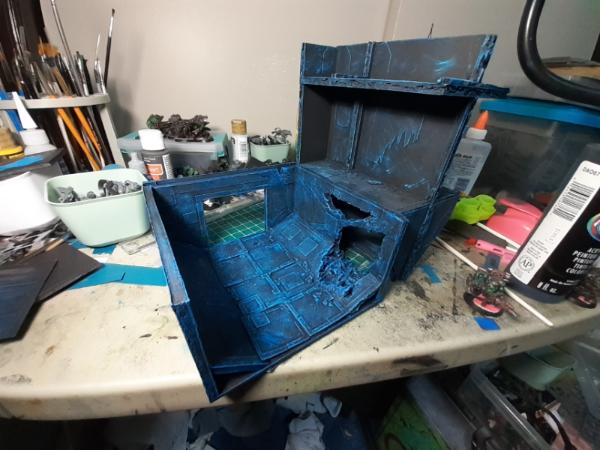

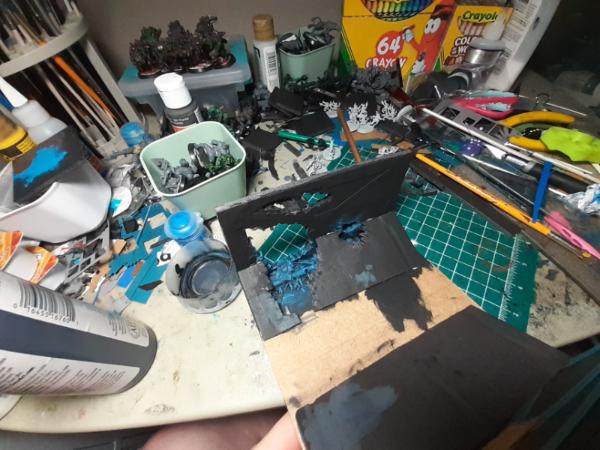
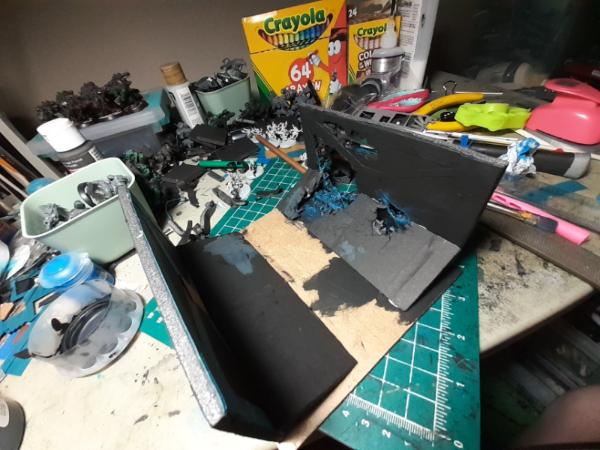
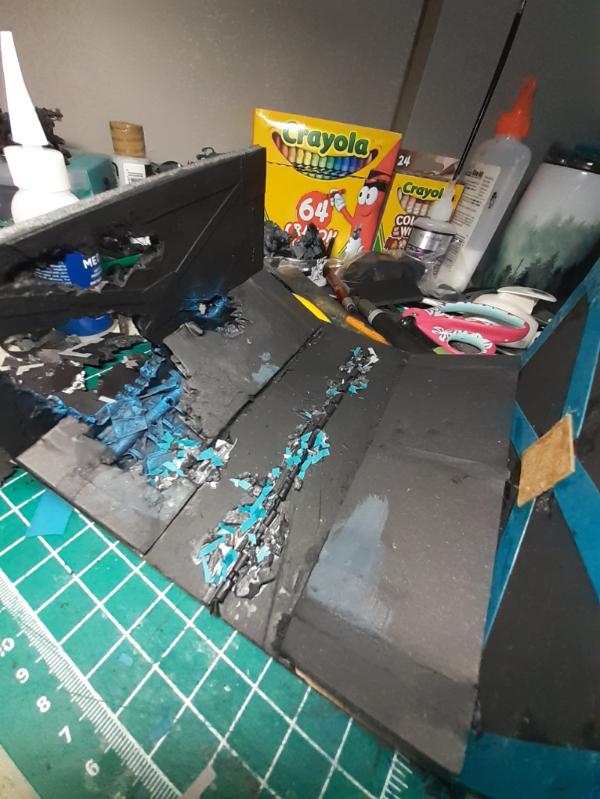
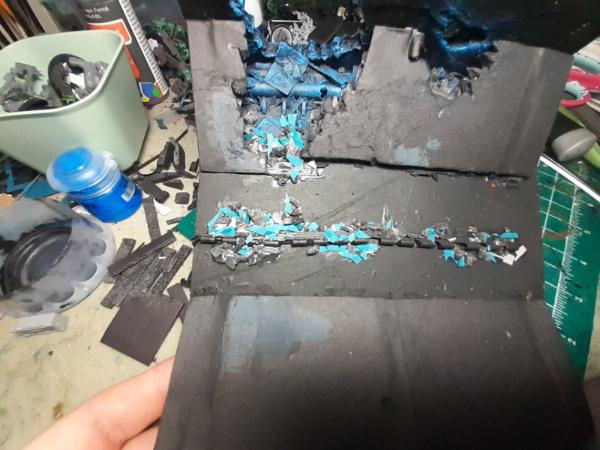

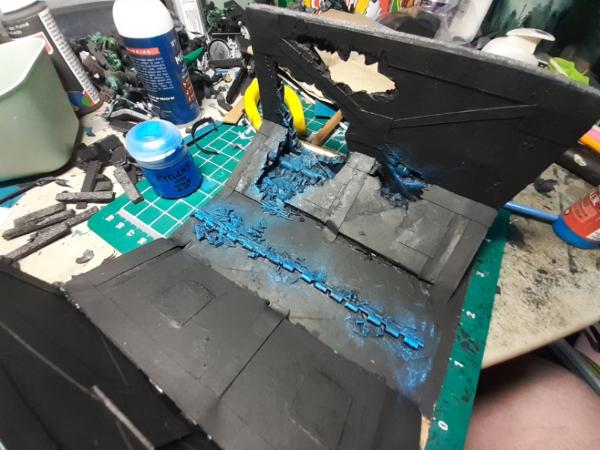
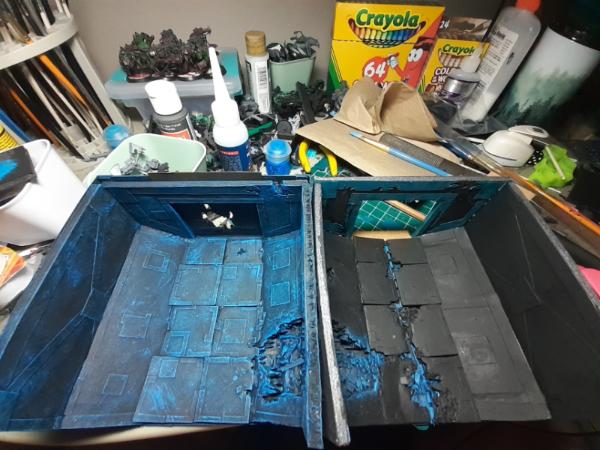

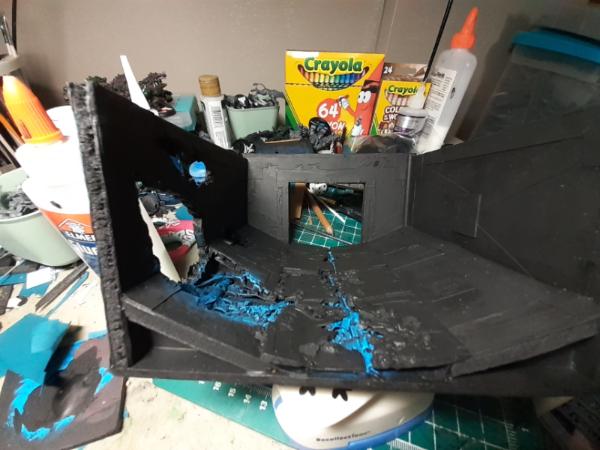
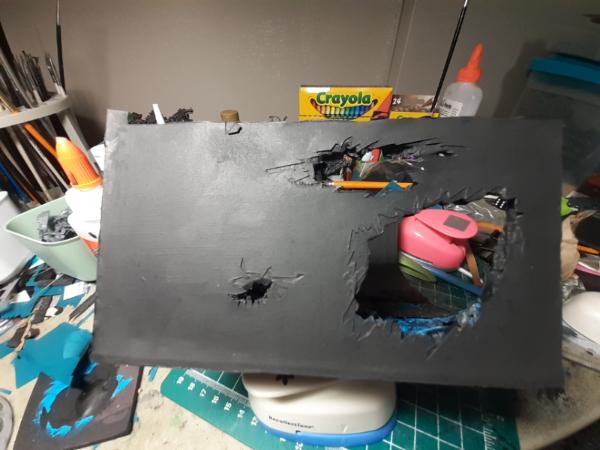
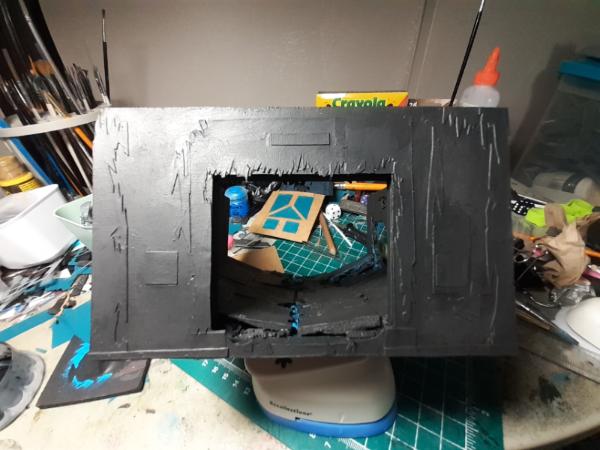

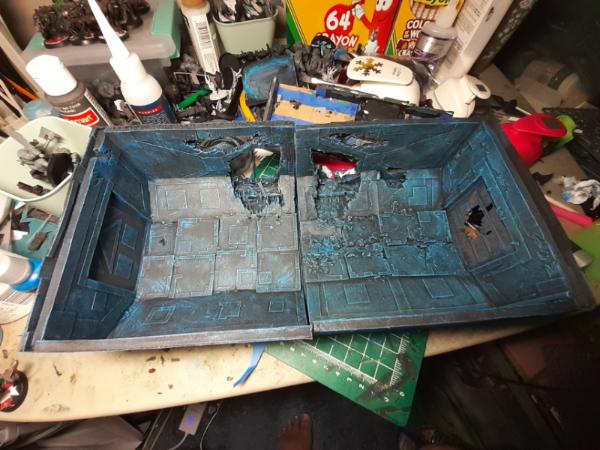
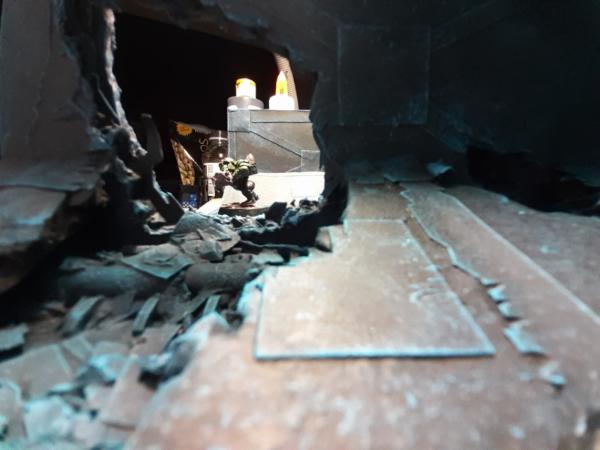
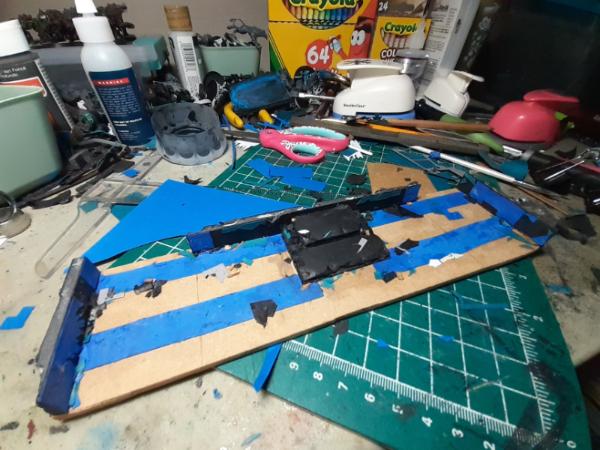
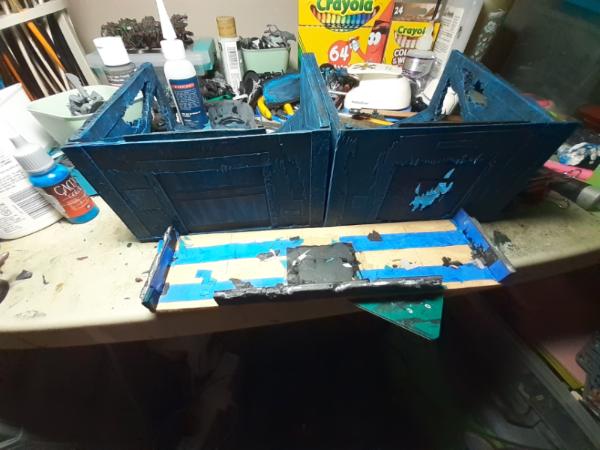
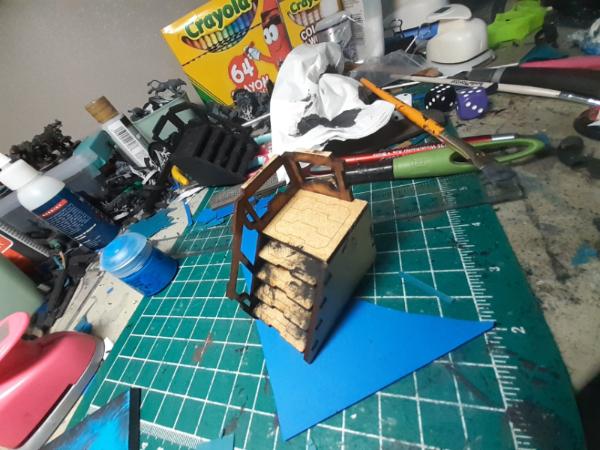
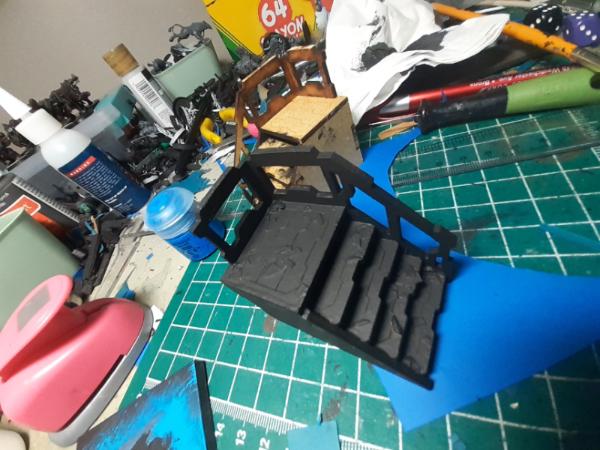

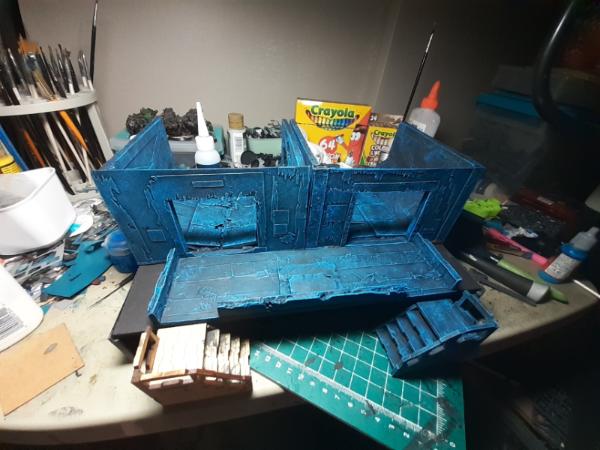
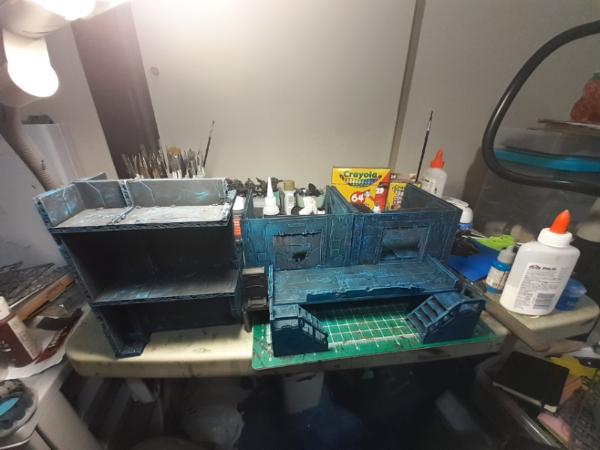
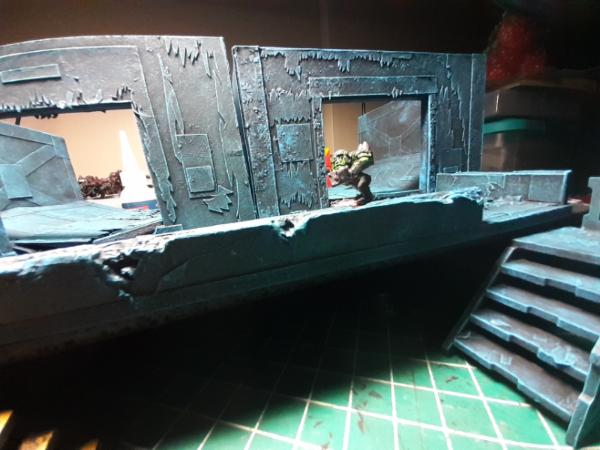

 Thank you kindly, Skinflint. Ego boosts are always welcome here.